
The Cricut Engraving Tool gives you the ability to engrave with your Cricut Maker machines! The Cricut Engraving Tip can engrave soft metals, acrylic, leather, paper, and plastic to add a variety of project options to your crafting arsenal!
This post may contain affiliate links. I will receive a small commission from these sales at no additional cost to you!
Meet the Cricut Engraving Tip
Learn all about the Cricut Engraving Tool (also known as the Engraving Tip) and how to use it! Since this post is extra long, we’ve added a handy table of contents to help you navigate through all of the information. Simply click on the question that you’re looking to have answered, and you’ll be taken directly to that info!
Can You Engrave with a Cricut Machine?
The answer is finally YES! With the Cricut Engraving Tool, engraving is now possible with your Cricut Maker machine!
All About the Cricut Engraving Tip
What is the Cricut Maker Engraving Tool?
It’s true! You can now engrave with your Cricut Maker! The Cricut Engraving Tool (also known as the Cricut Engraving Tip) is just one of Cricut’s recent addition to their ever-expanding lineup of specialty tools and that increase the capabilities of the Maker machine.
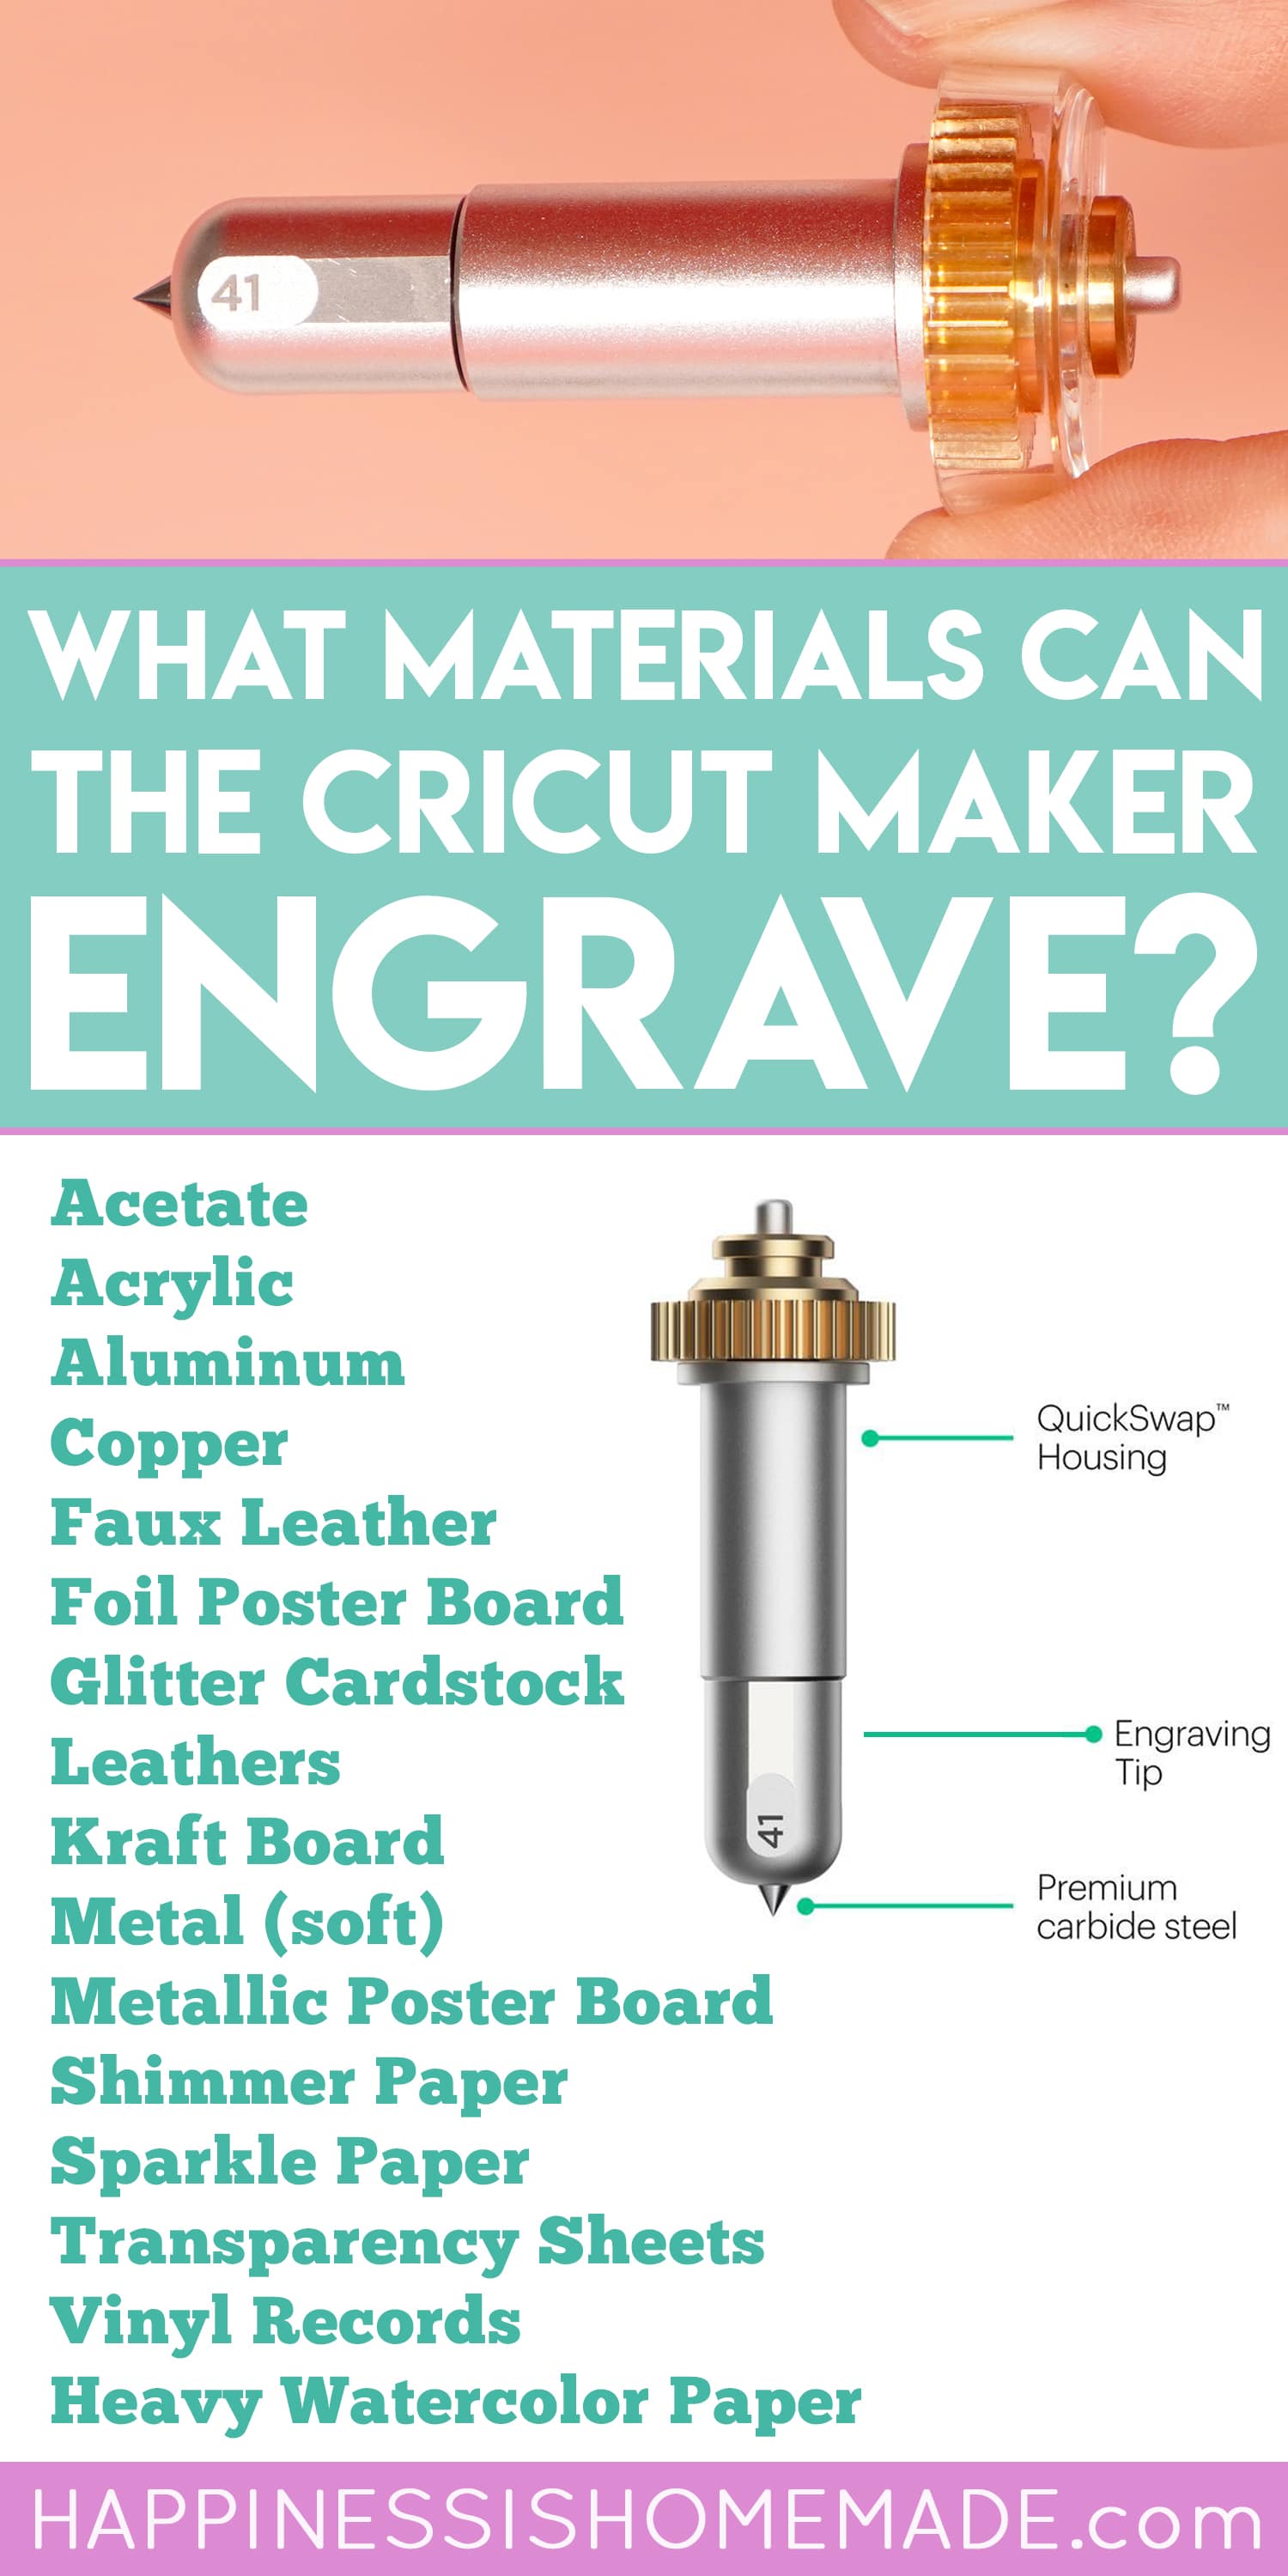
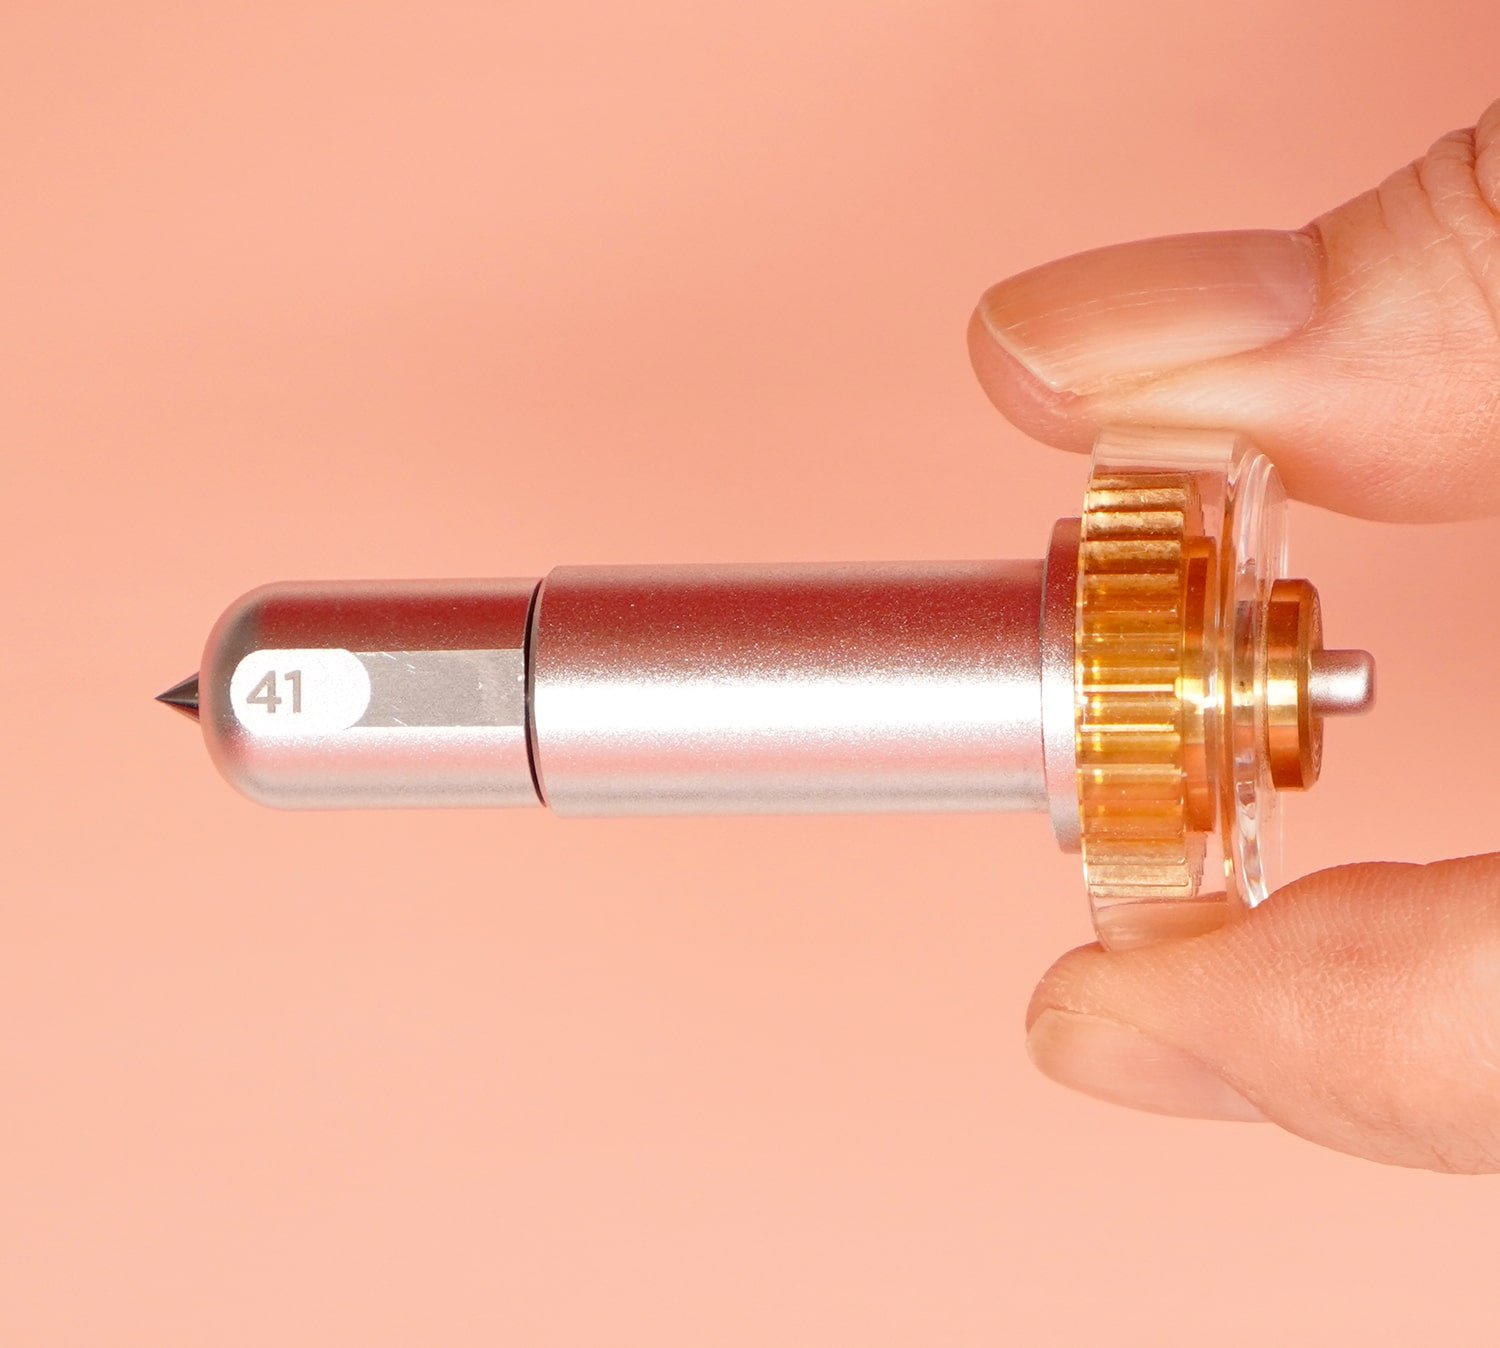
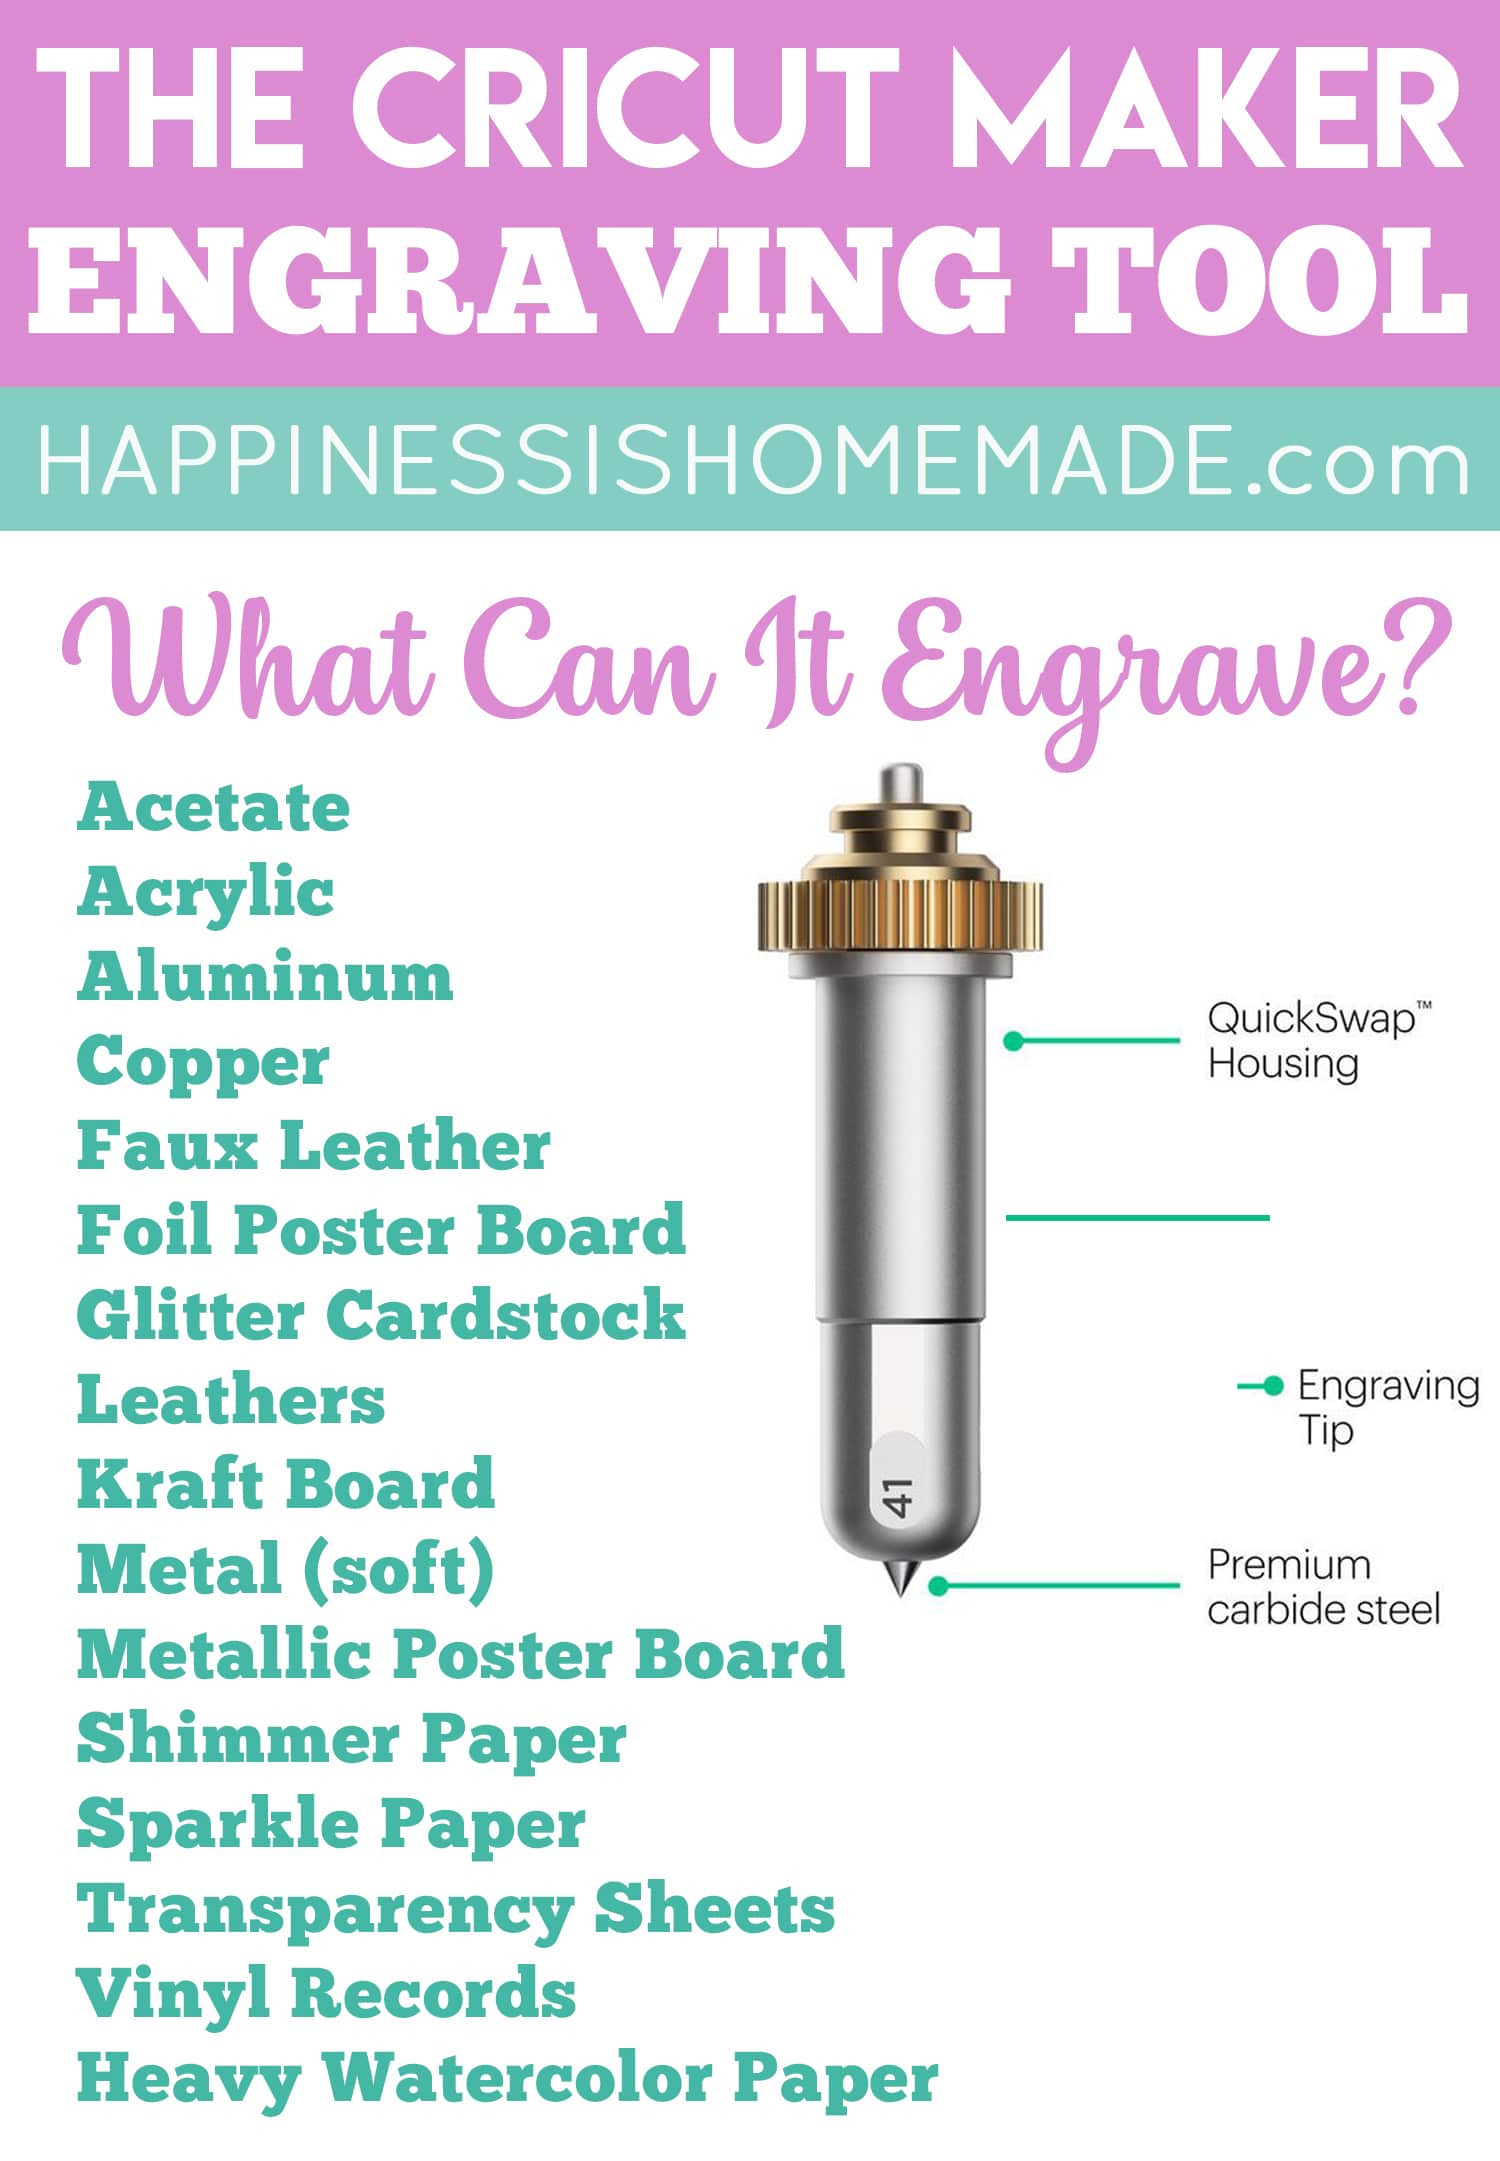
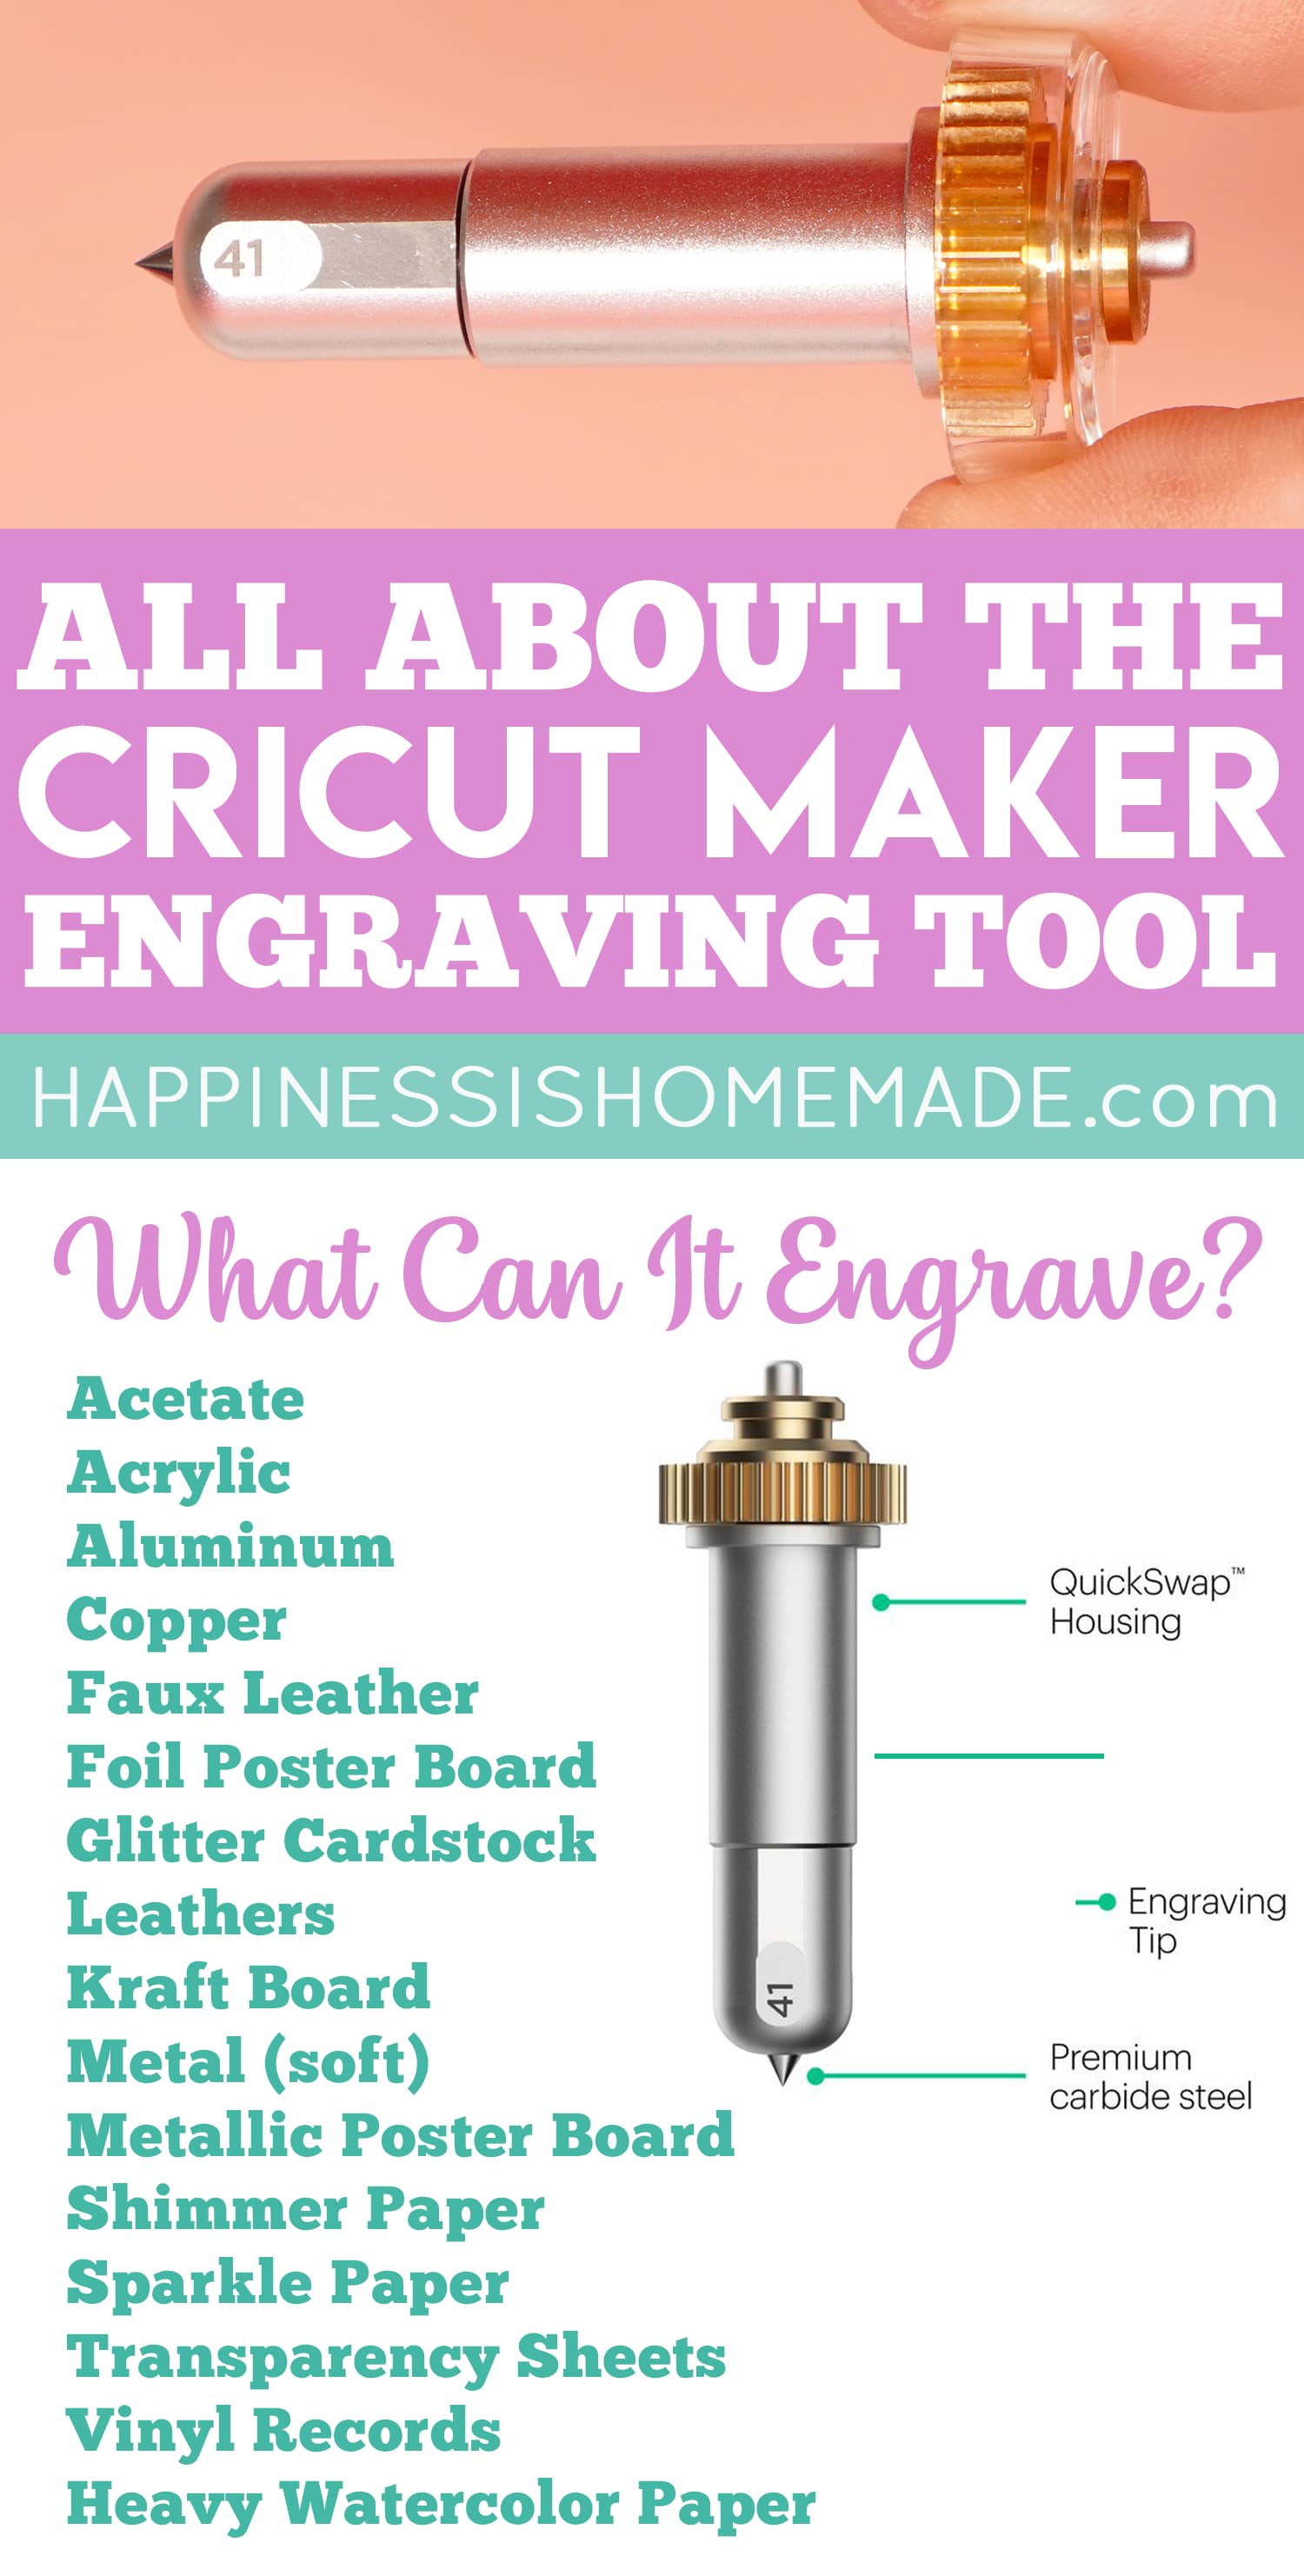
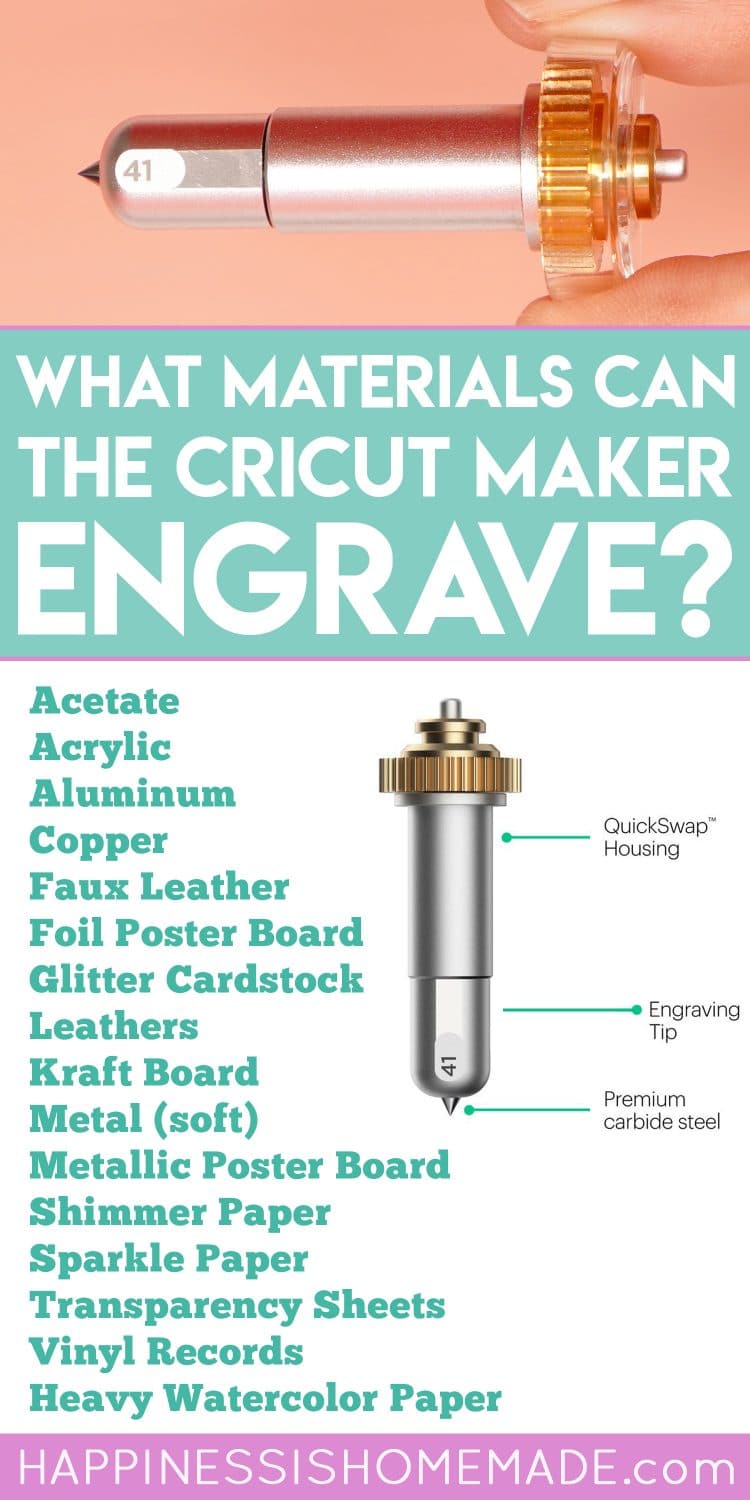
The Engraving Tip has a sharp metal point that is designed to use pressure to permanently inscribe text and images into assorted soft metals, acrylic, leather, paper, and plastics. There are SO many fun possibilities!
You can use the Engraving Tool to engrave a wide variety of materials up to 11″ wide. Cricut recommends engraving materials that are no more than 3/32″ thick (2.4 mm), however, we have had success with items up to 1/8″ thick provided that they are still able to fit under the roller bar of the Maker.
The Engraving Tip is part of the Cricut QuickSwap tool system, so you will notice that the engraving QuickSwap tip is marked with the number 41 to help you quickly differentiate it from the large variety of QuickSwap tips.
Which Cricut Machines are Compatible with the Engraving Tool?
The Cricut Engraving Tip is only compatible with the Cricut Maker machine because the Maker is the only machine that uses the Adaptive Tool System and can apply the amount of pressure necessary to engrave. The Engraving Tip will NOT work on any of the Explore family of machines or Cricut Joy.
How Do You Use the Cricut Maker Engraving Tool? What is the QuickSwap Housing?
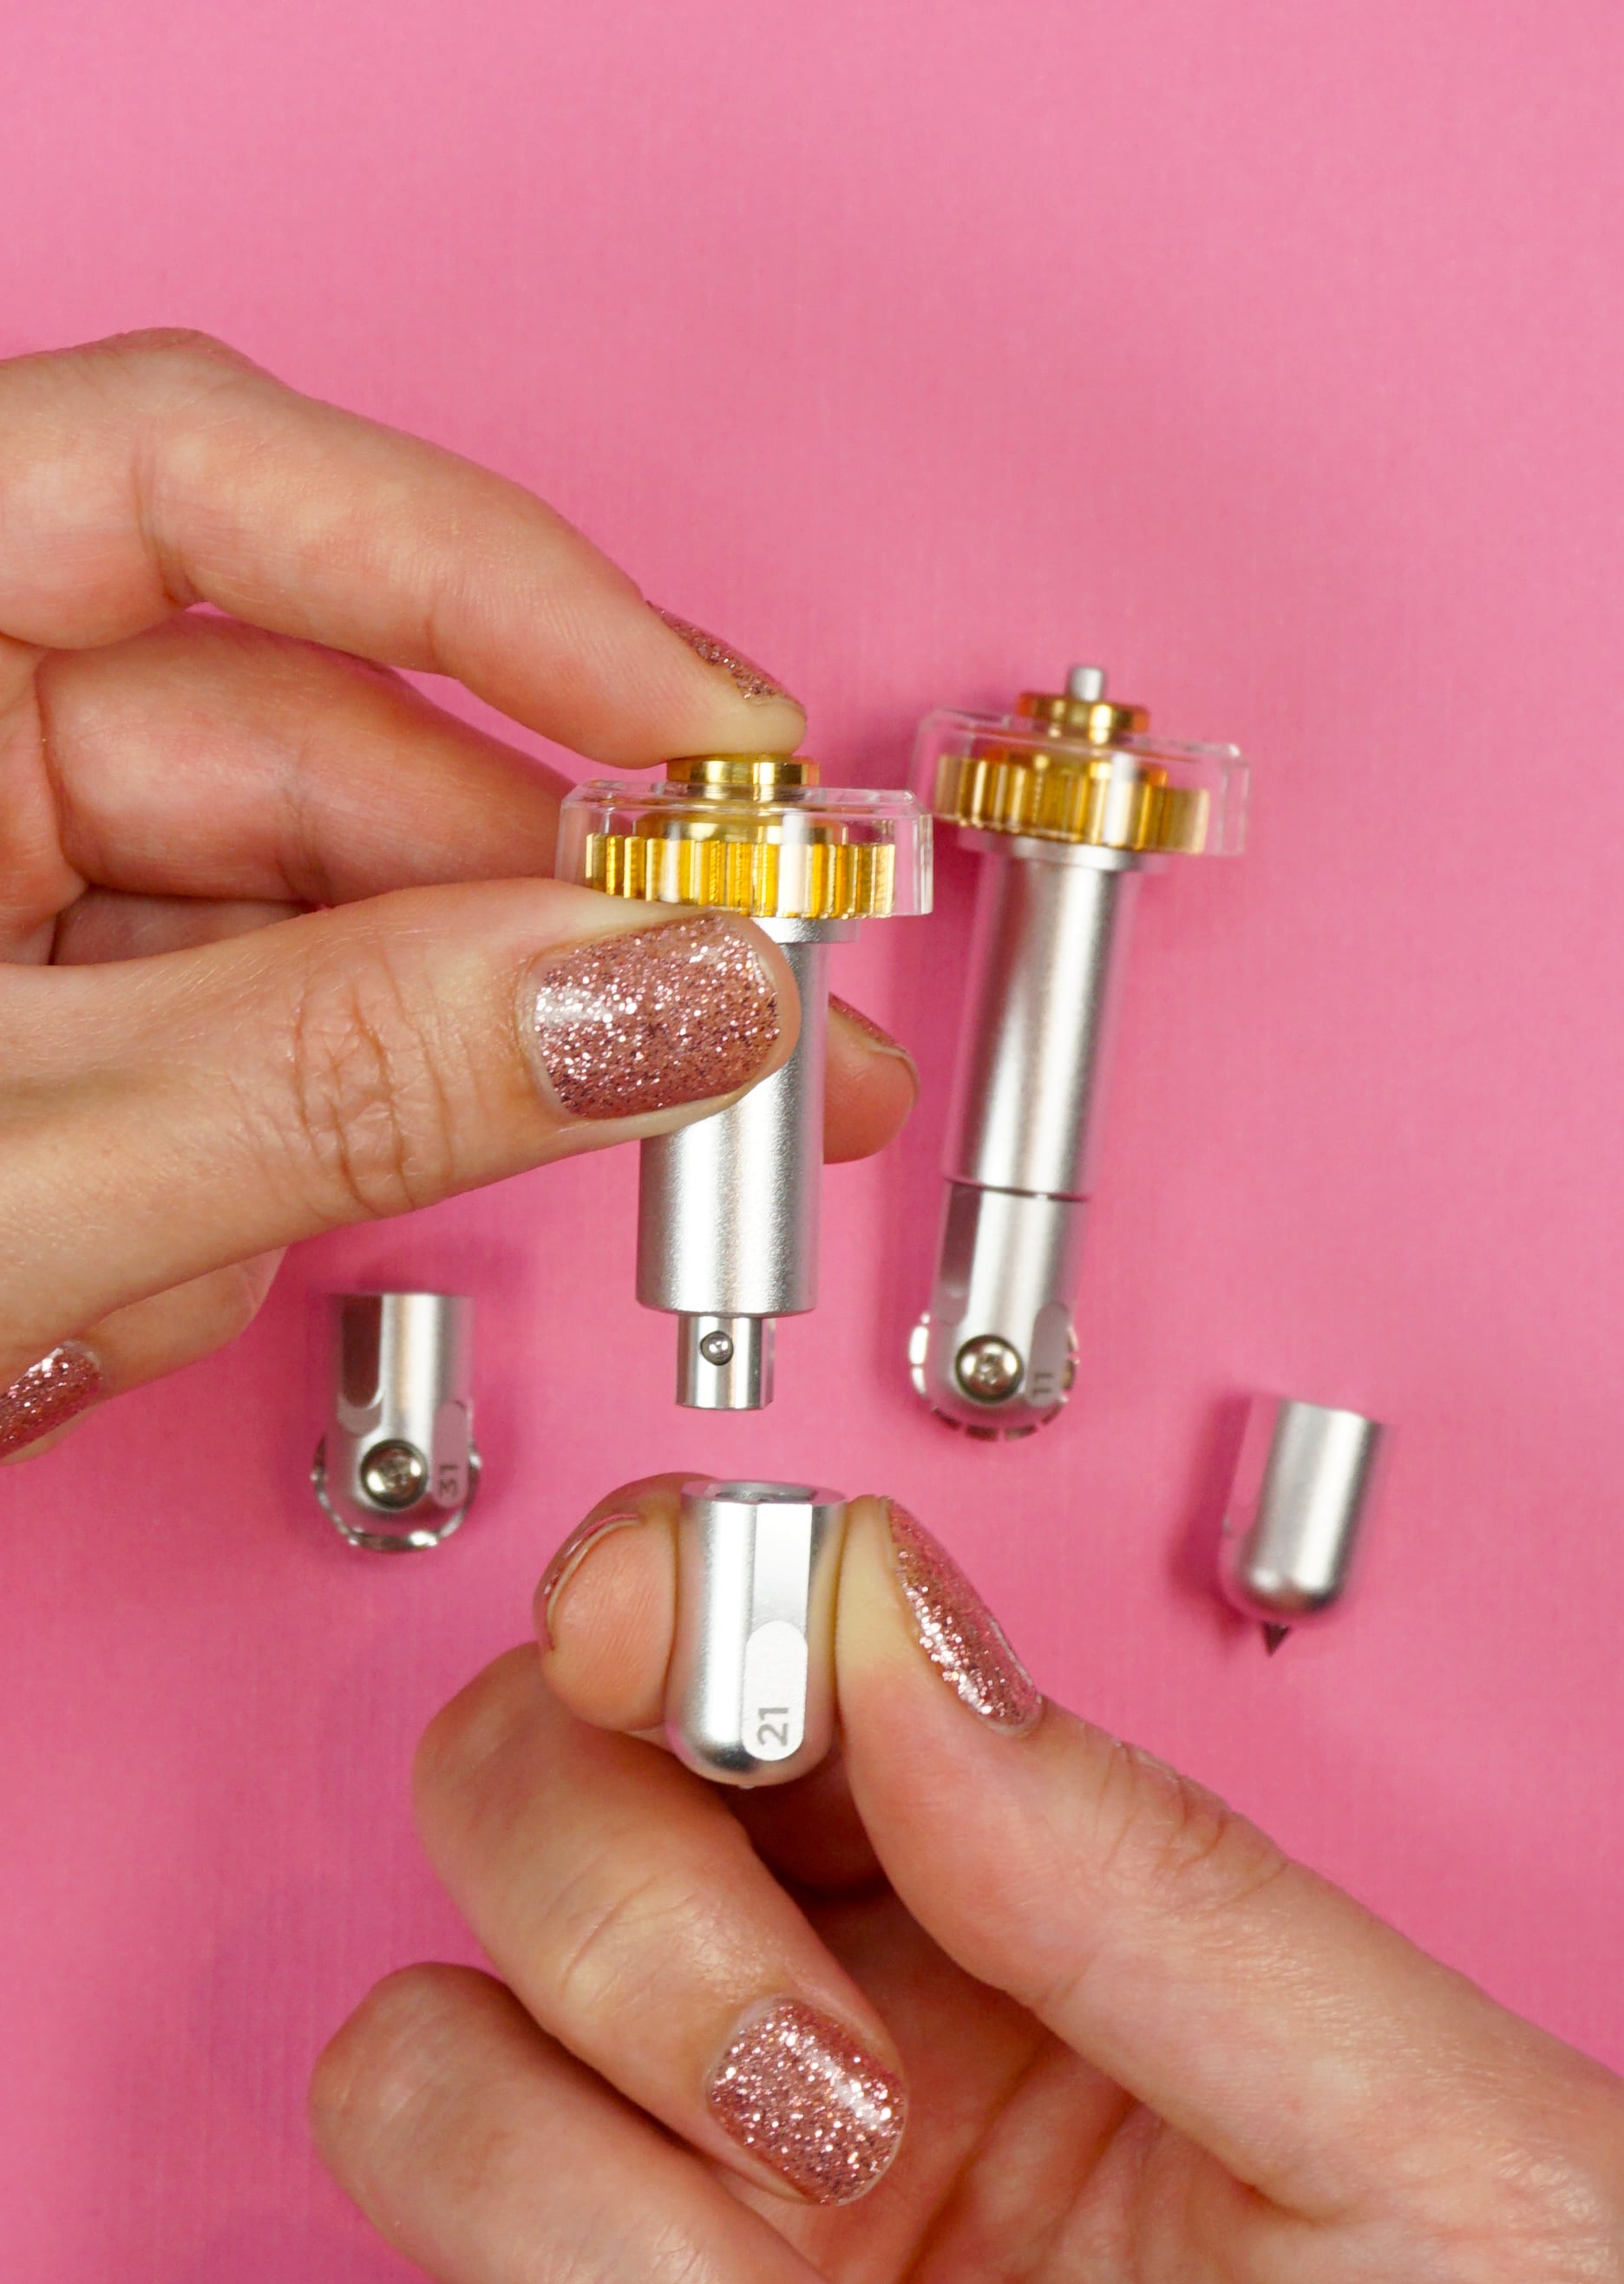
The Cricut Engraving Tip is part of the Cricut Maker Adaptive Tool System and it makes use of the QuickSwap Housing System. The QuickSwap housing allows you to quickly and easily change Cricut Maker tool tips at the push of a button!
In addition to the Engraving Tip, the Single and Double Scoring Wheels, Perforation Blade, Debossing Tip, and Wavy Blade all use the QuickSwap Housing – this means that you can purchase just one housing and purchase all the tips individually (at a less expensive price!) to save some of your crafty cash! We recommend purchasing one blade + housing combo and then buying the rest of the QuickSwap tips individually or in a bundle set.
Note: you can NOT use the housing from your Rotary Blade or Knife Blade with the Engraving Tip as their housings are NOT QuickSwap housings.
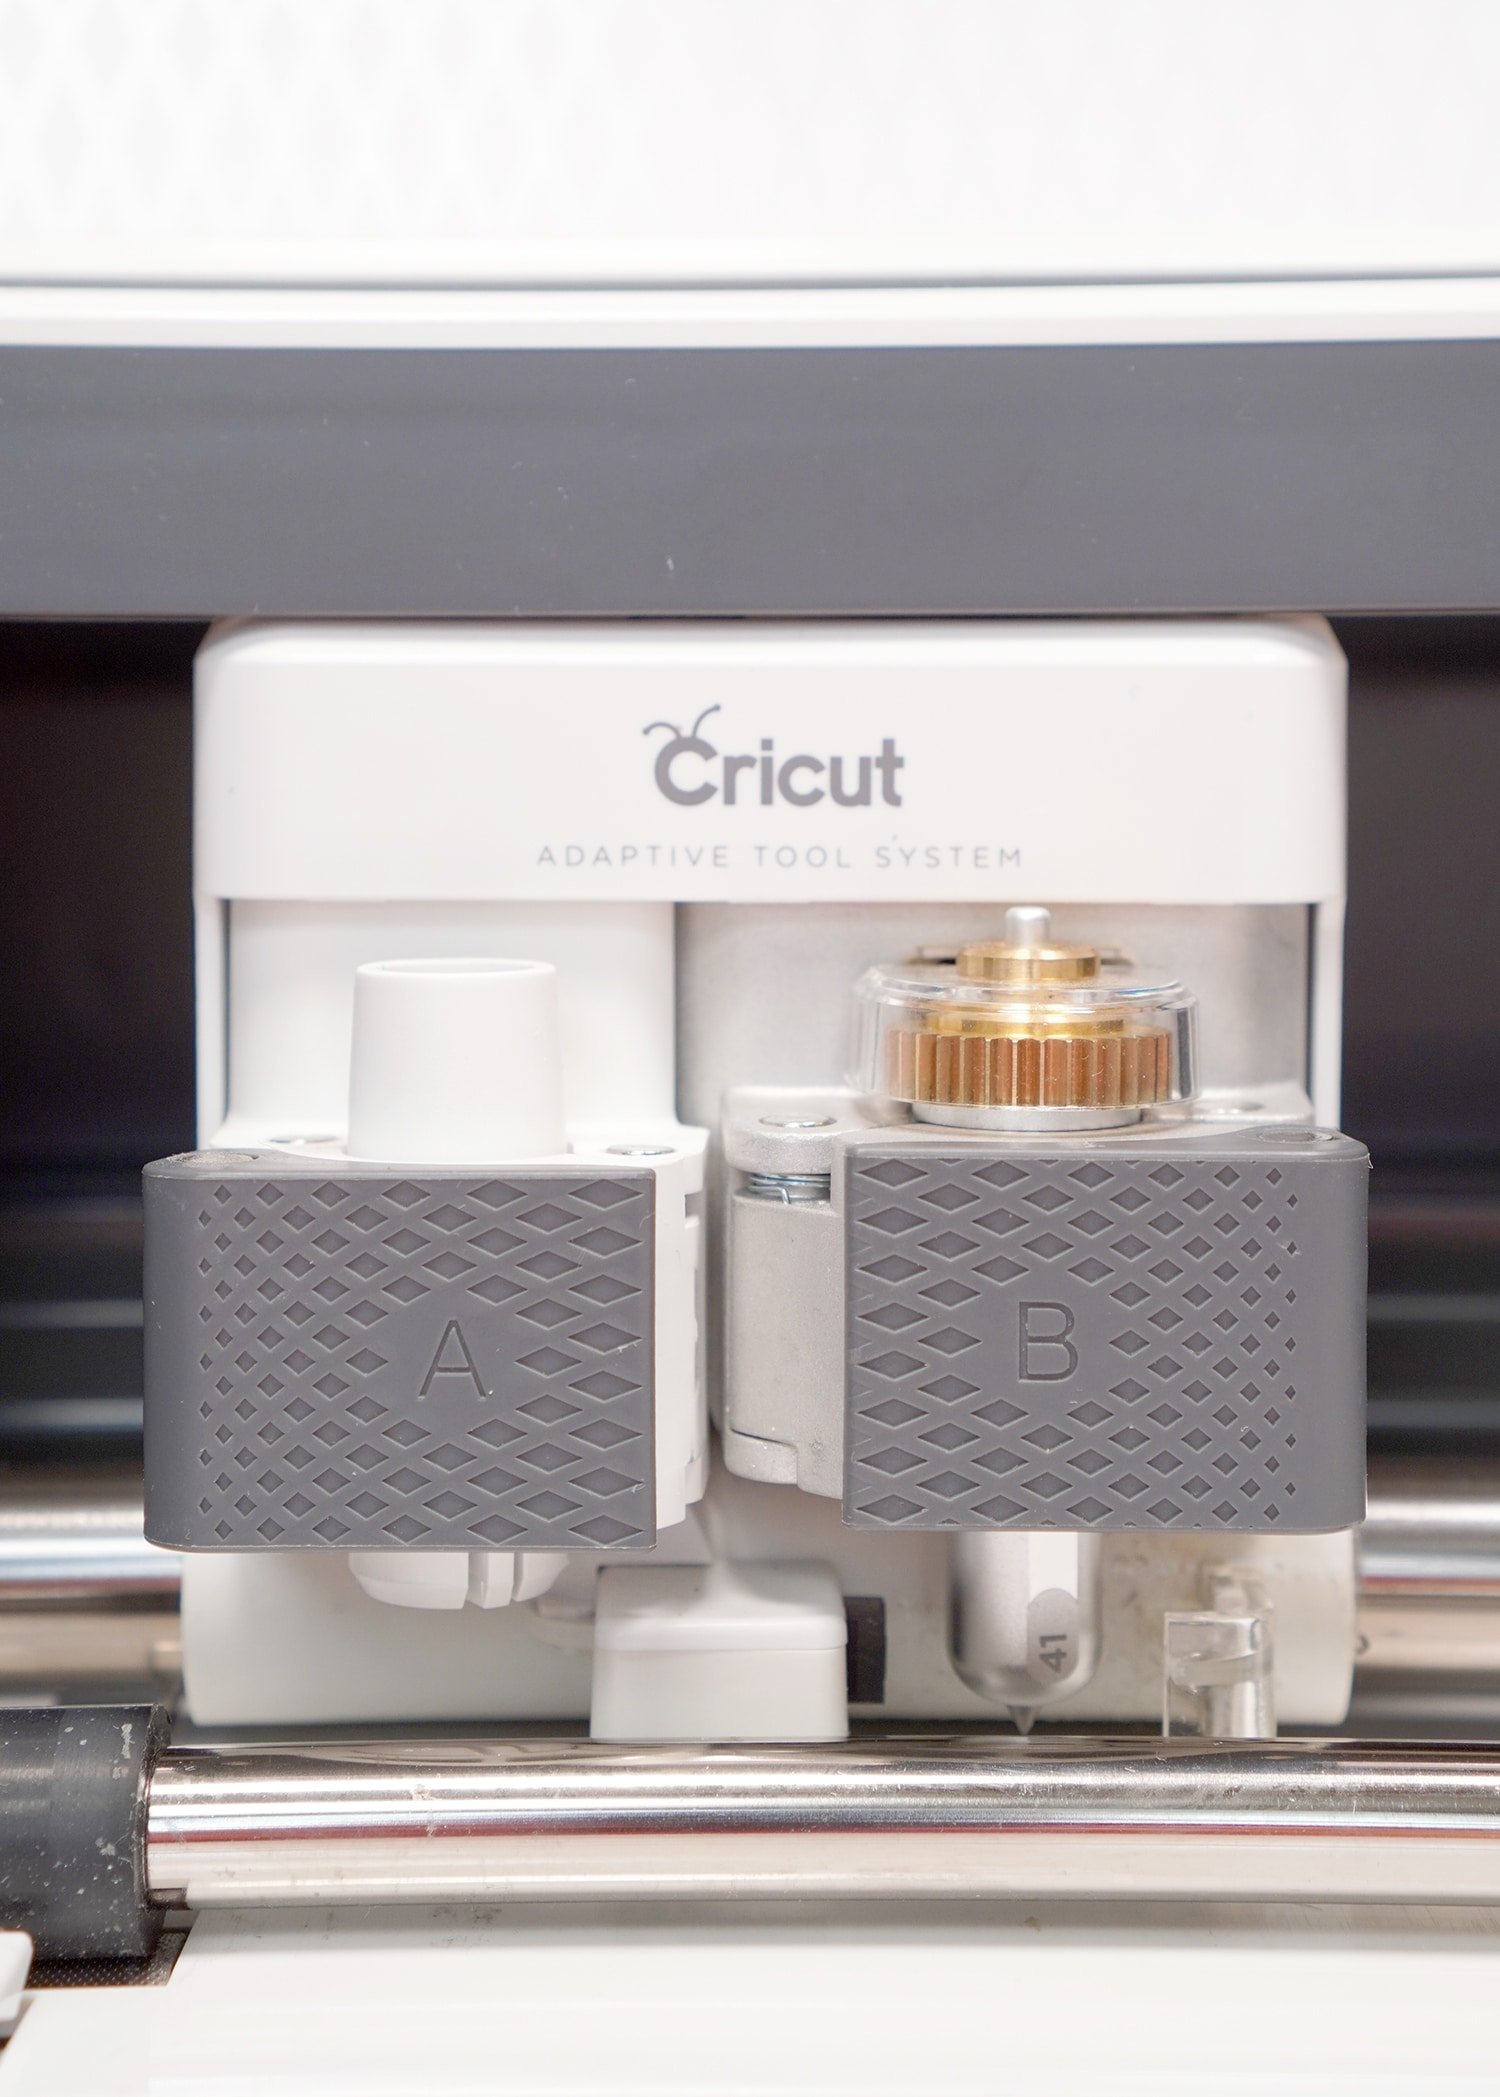
To use the Engraving Tip, pair it with the QuickSwap Housing and insert the tool into the “B” carrier of your Maker machine.
(Keep reading for a full step-by-step How to Use the Cricut Engraving Tip tutorial below!)
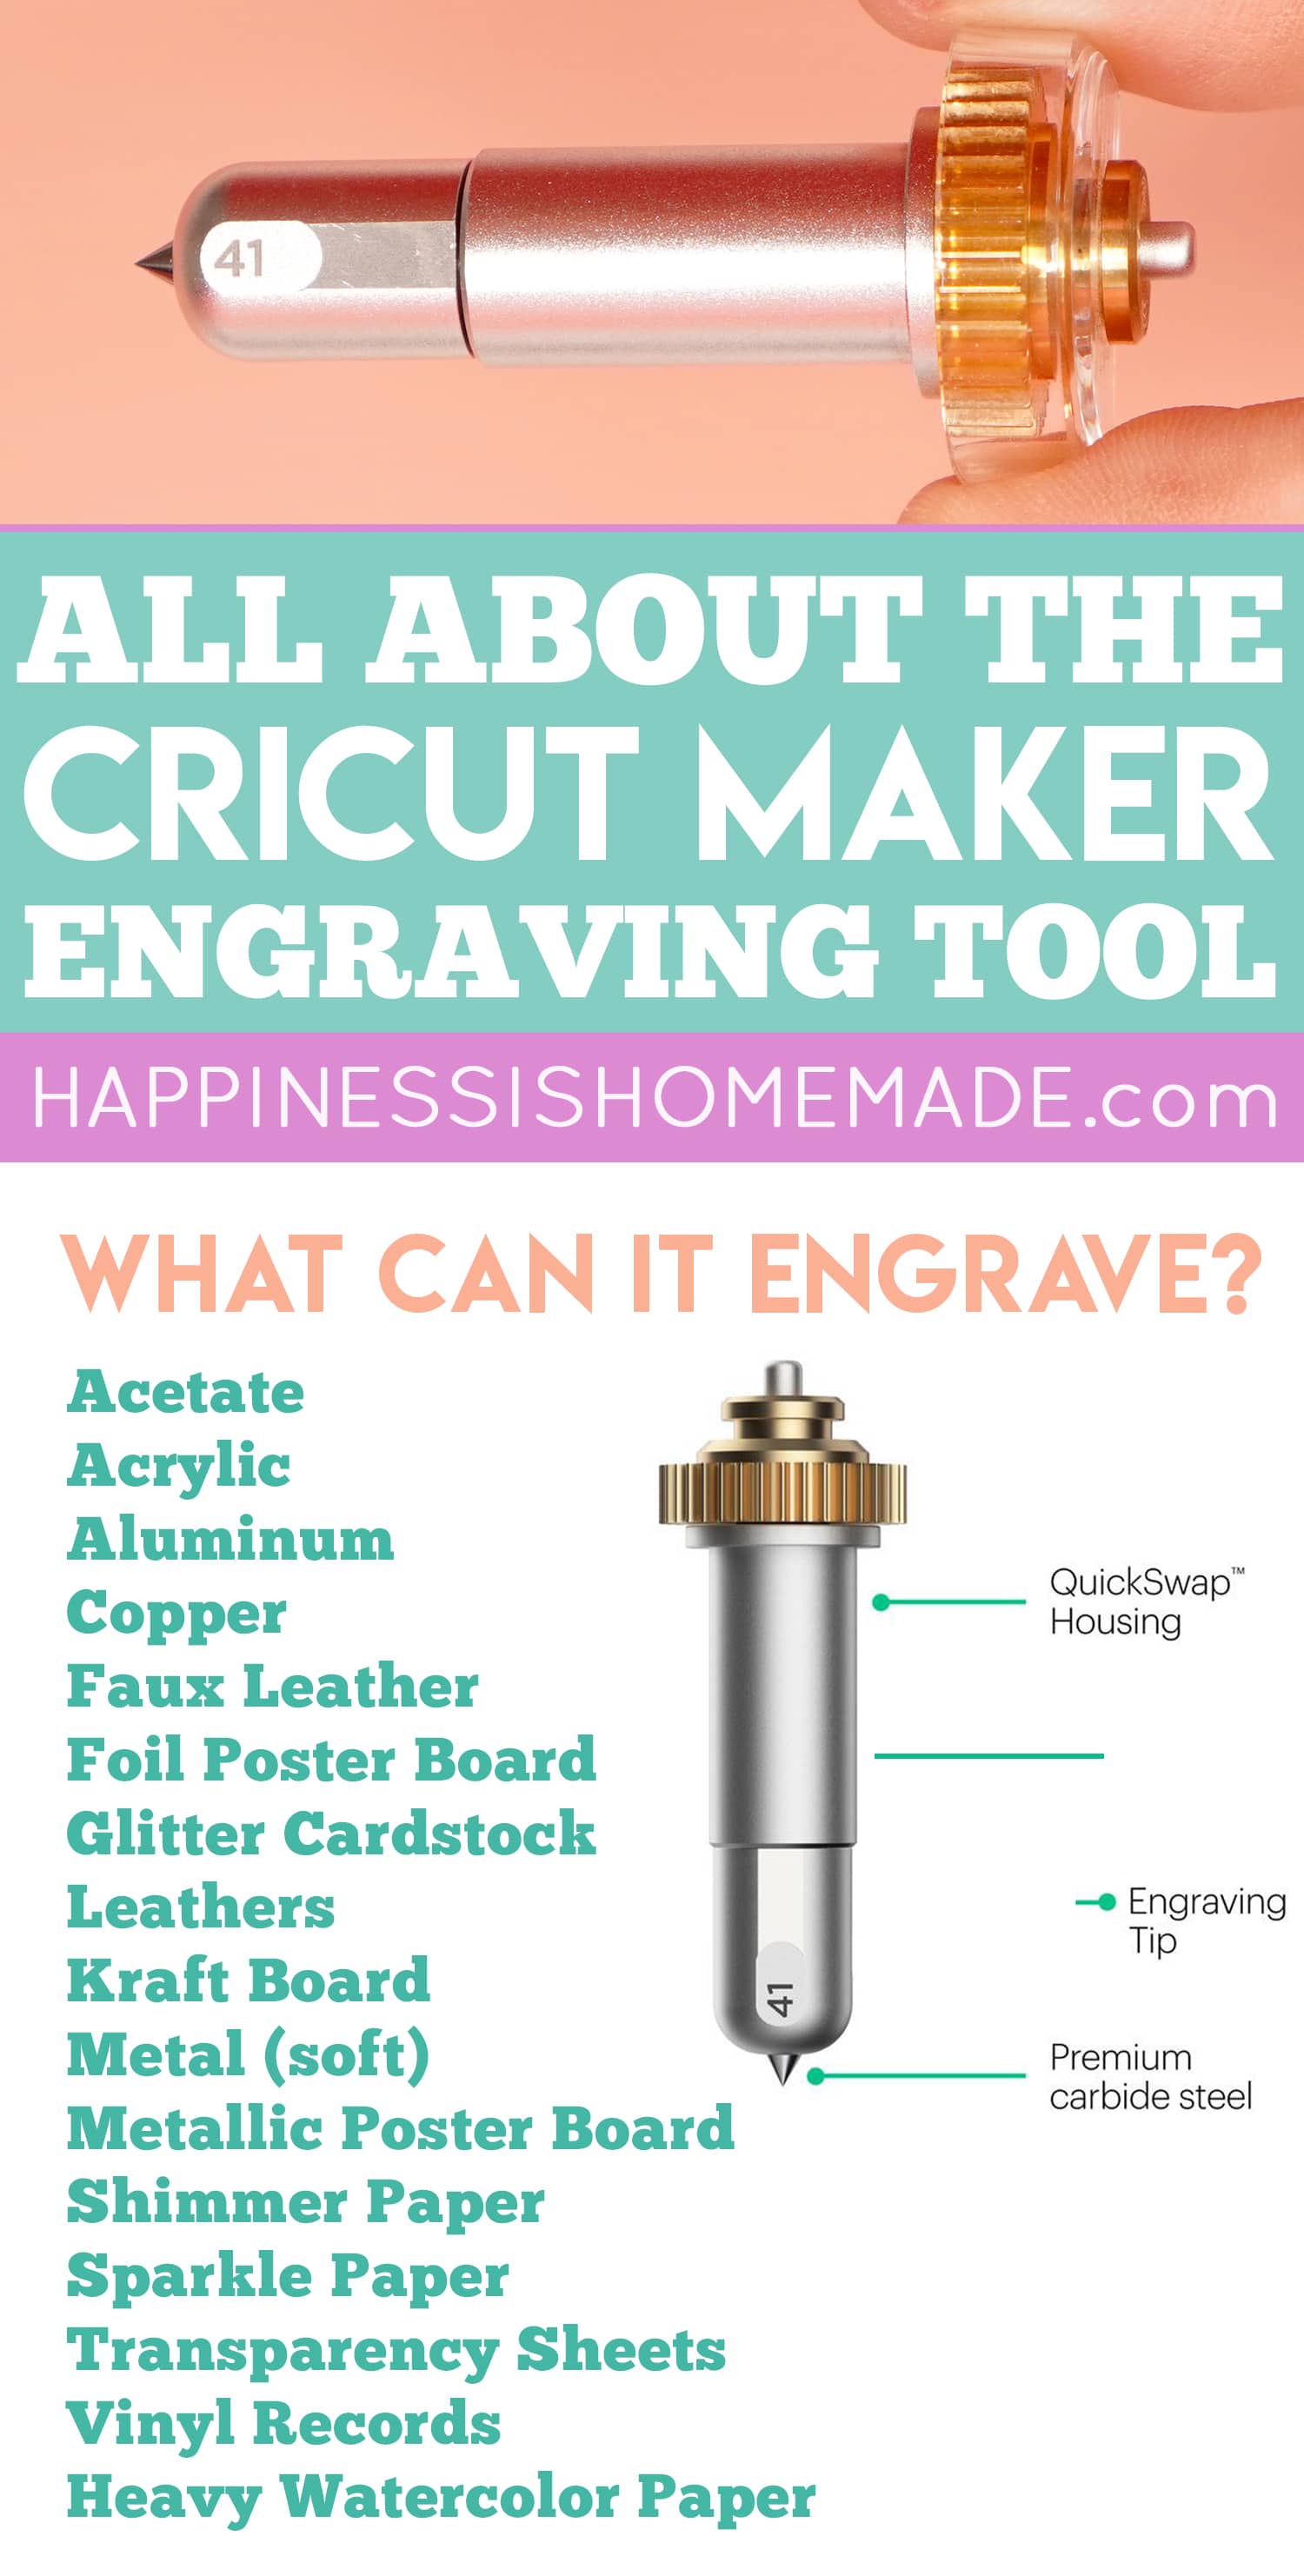
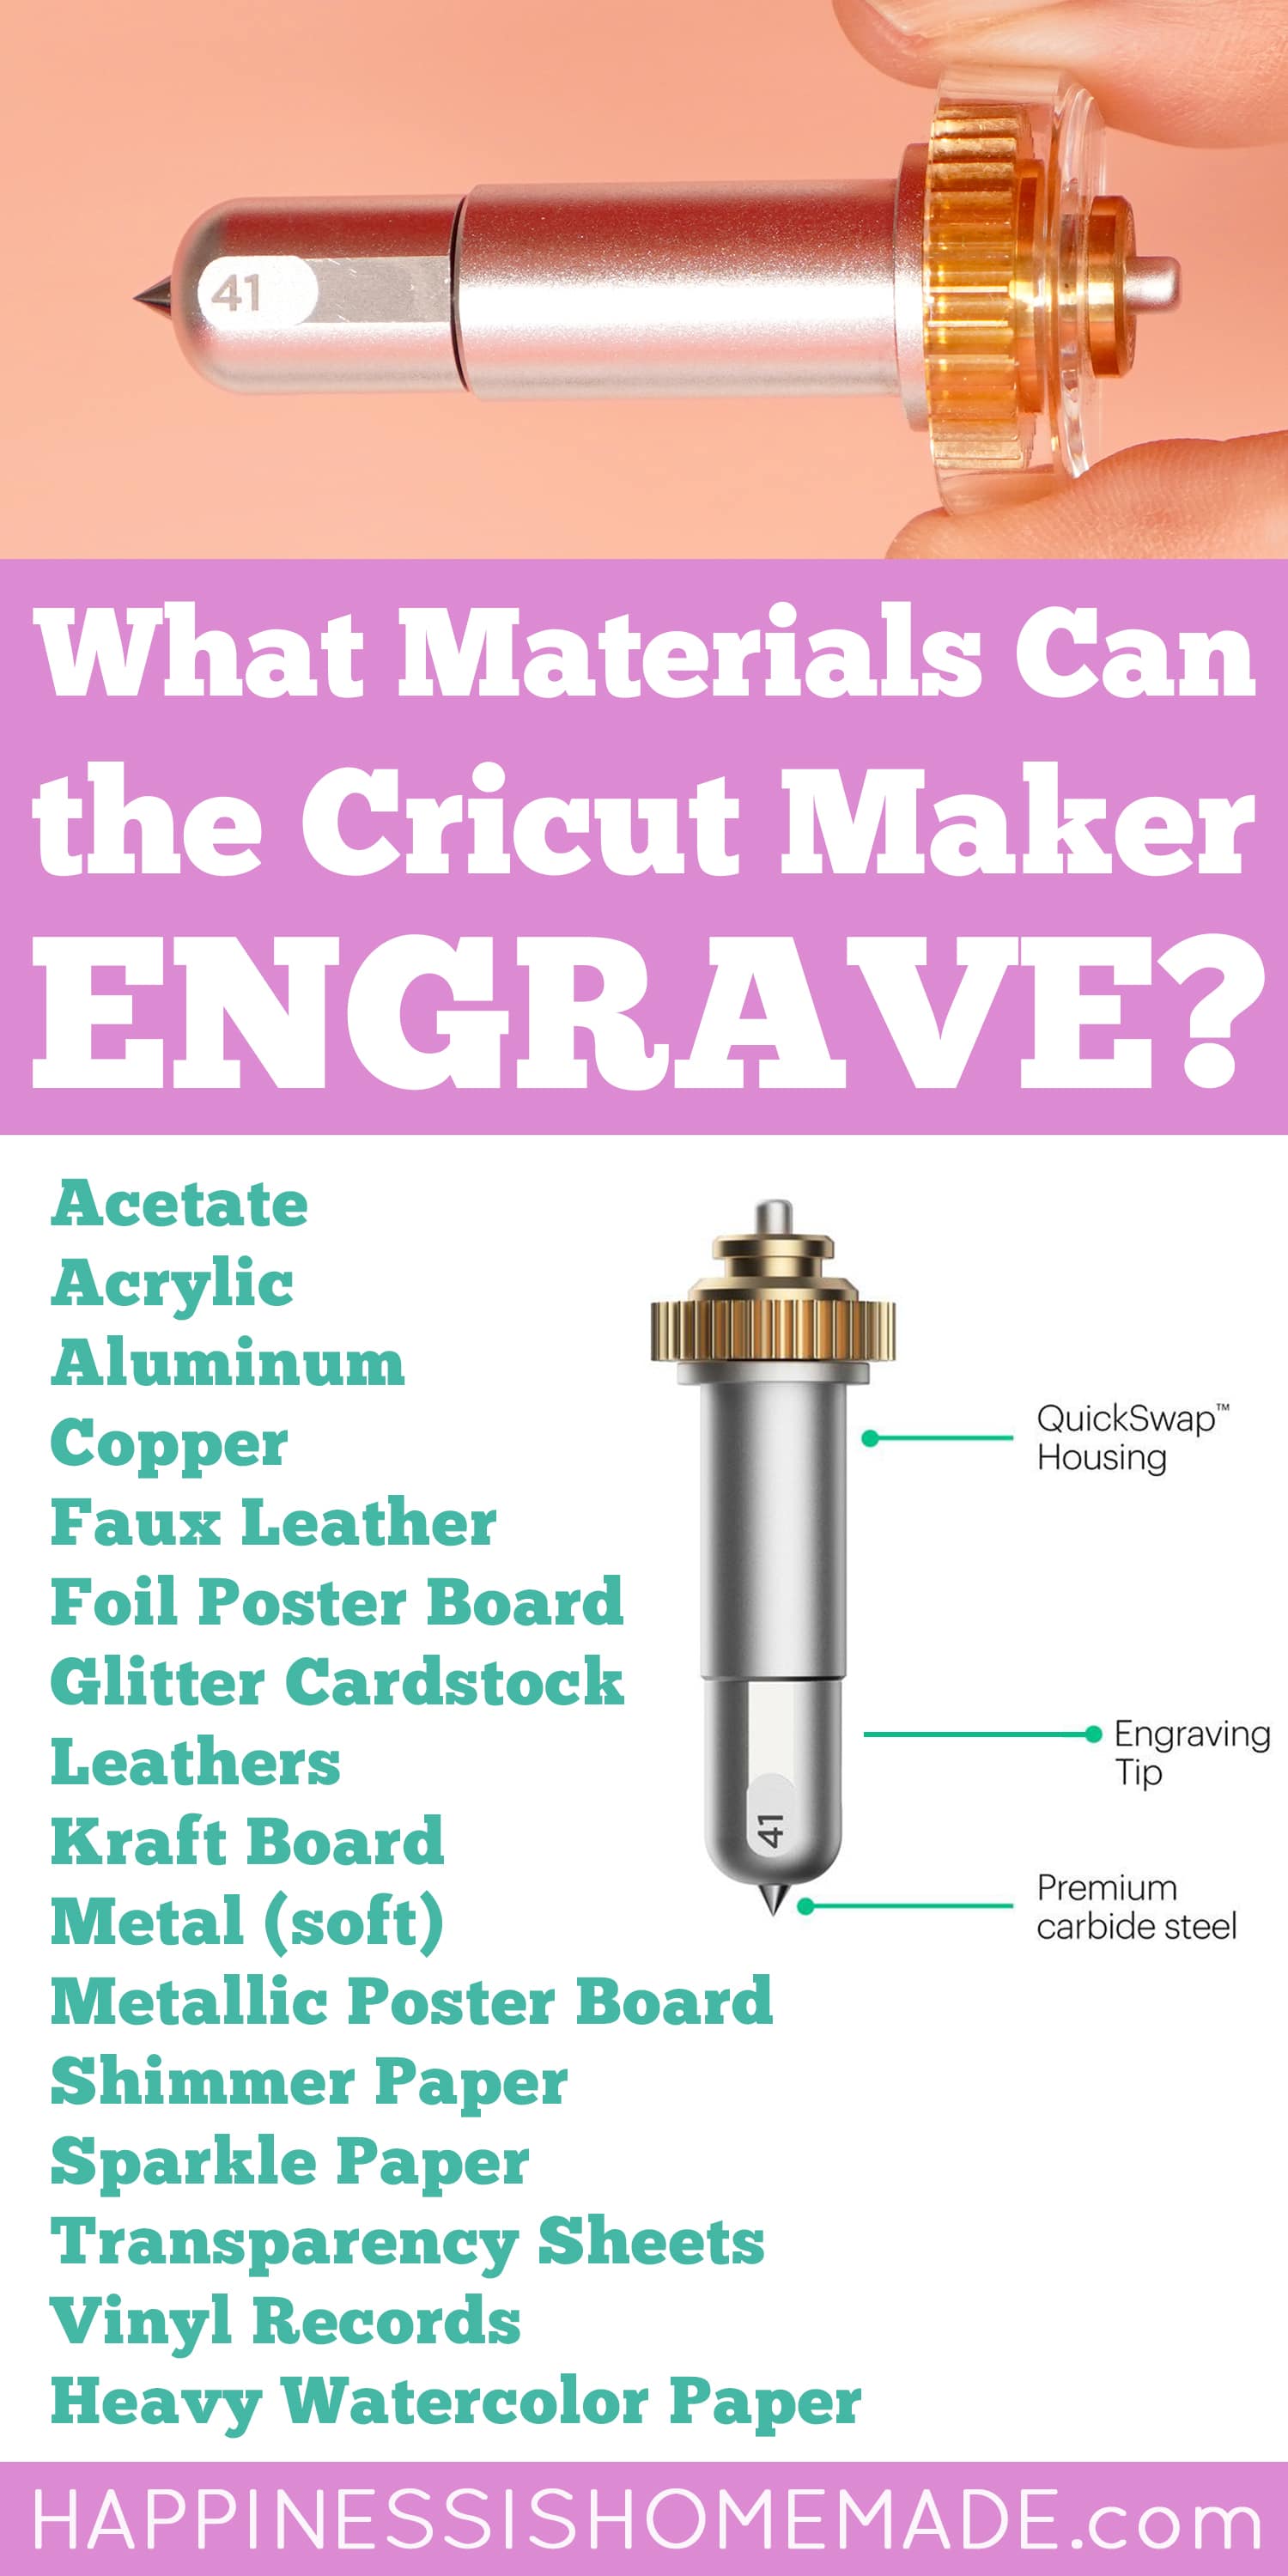
What Materials Can the Cricut Engraving Tool Engrave?
What materials can the Cricut Engraving Tip engrave? LOTS!
The following list of materials is a combination of Cricut’s official list of Engraving Tip Compatible Materials as well as additional materials that we have had repeated success with. These additional materials will be denoted with an asterisk.
We will continue top update this list as we test more materials!
- Acetate and Foil Acetate
- Acrylic (under 1/8″ thick)*
- Aluminum Pet Tags*
- Aluminum Sheets (.5mm)
- Anodized Aluminum
- Copper (40 gauge)
- Faux Leather
- Foil Poster Board
- Garment Leather 2-3 oz (.8mm)
- Genuine Leather
- Glitter Cardstock
- Heavy Watercolor Paper – 140 lb (300 gsm)
- Kraft Board including Foil and Holographic
- Metal – Soft Metals (40 gauge)
- Metal – Soft Metals up to 14 gauge (including Metal Stamping Blanks)*
- Metallic Leather
- Metallic Poster Board
- Shimmer Paper
- Tooling Leather 2-3 oz (.8mm), 4-5 oz (1.6 mm), and 6-7 oz (2.4 mm)
- Transparency
- Vinyl Records
Can Cricut Engrave Acrylic?
YES! Although acrylic isn’t currently on Cricut’s official list of Engraving Tip Compatible Materials, we have successfully engraved 1/8″ thick acrylic on many occasions with the Cricut Maker Engraving Tip. It works like a charm! (Keep reading for a full tutorial on how to engrave acrylic with the Cricut Maker!)
Can the Cricut Maker Engrave Glass?
No. At this time, the Cricut Maker Engraving Tip is not designed to be used with glass. You can, however, use your Cricut machine to create a stencil and etch the glass using glass etching cream.
Does the Engraving Tip Need to be Calibrated?
No. The Engraving Tip does not need to be calibrated.
Do I Need to Use My Computer with the Engraving Tool?
No! The Engraving Tip will also work with the iOS and Android versions of the Cricut Design Space app, so you can engrave from your phone or tablet in addition to your computer!
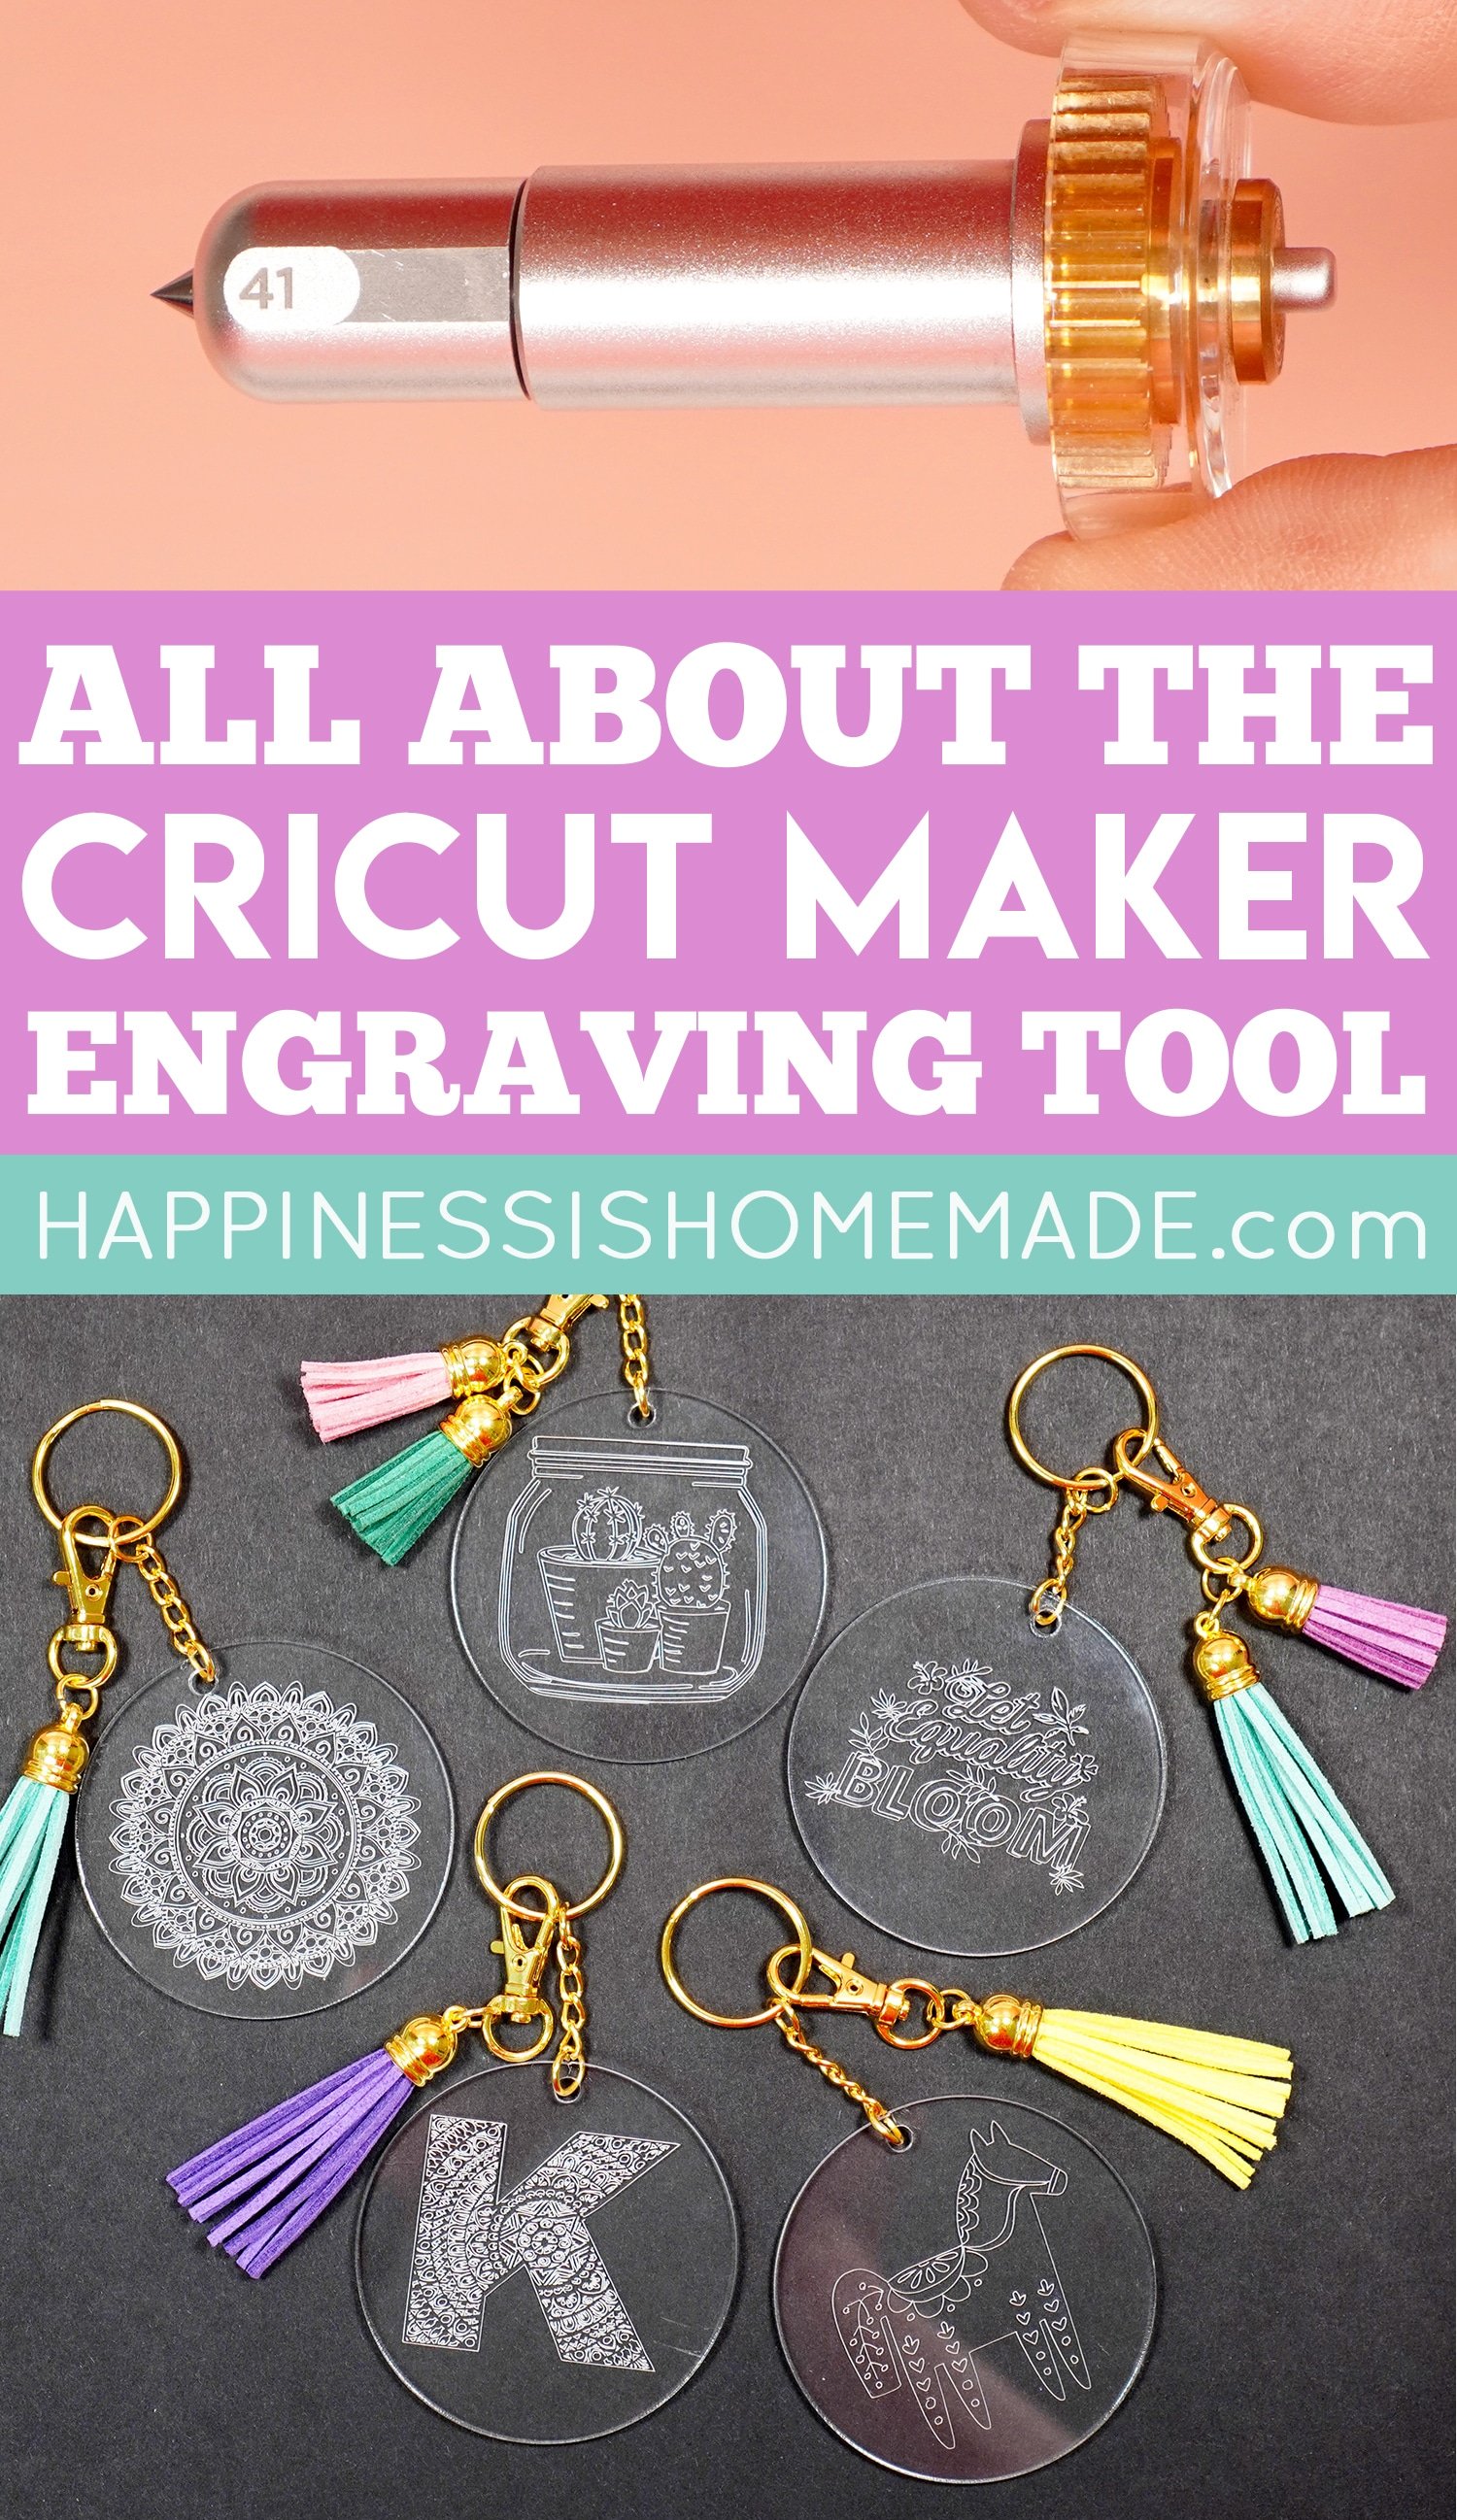
How to Use the Cricut Engraving Tool
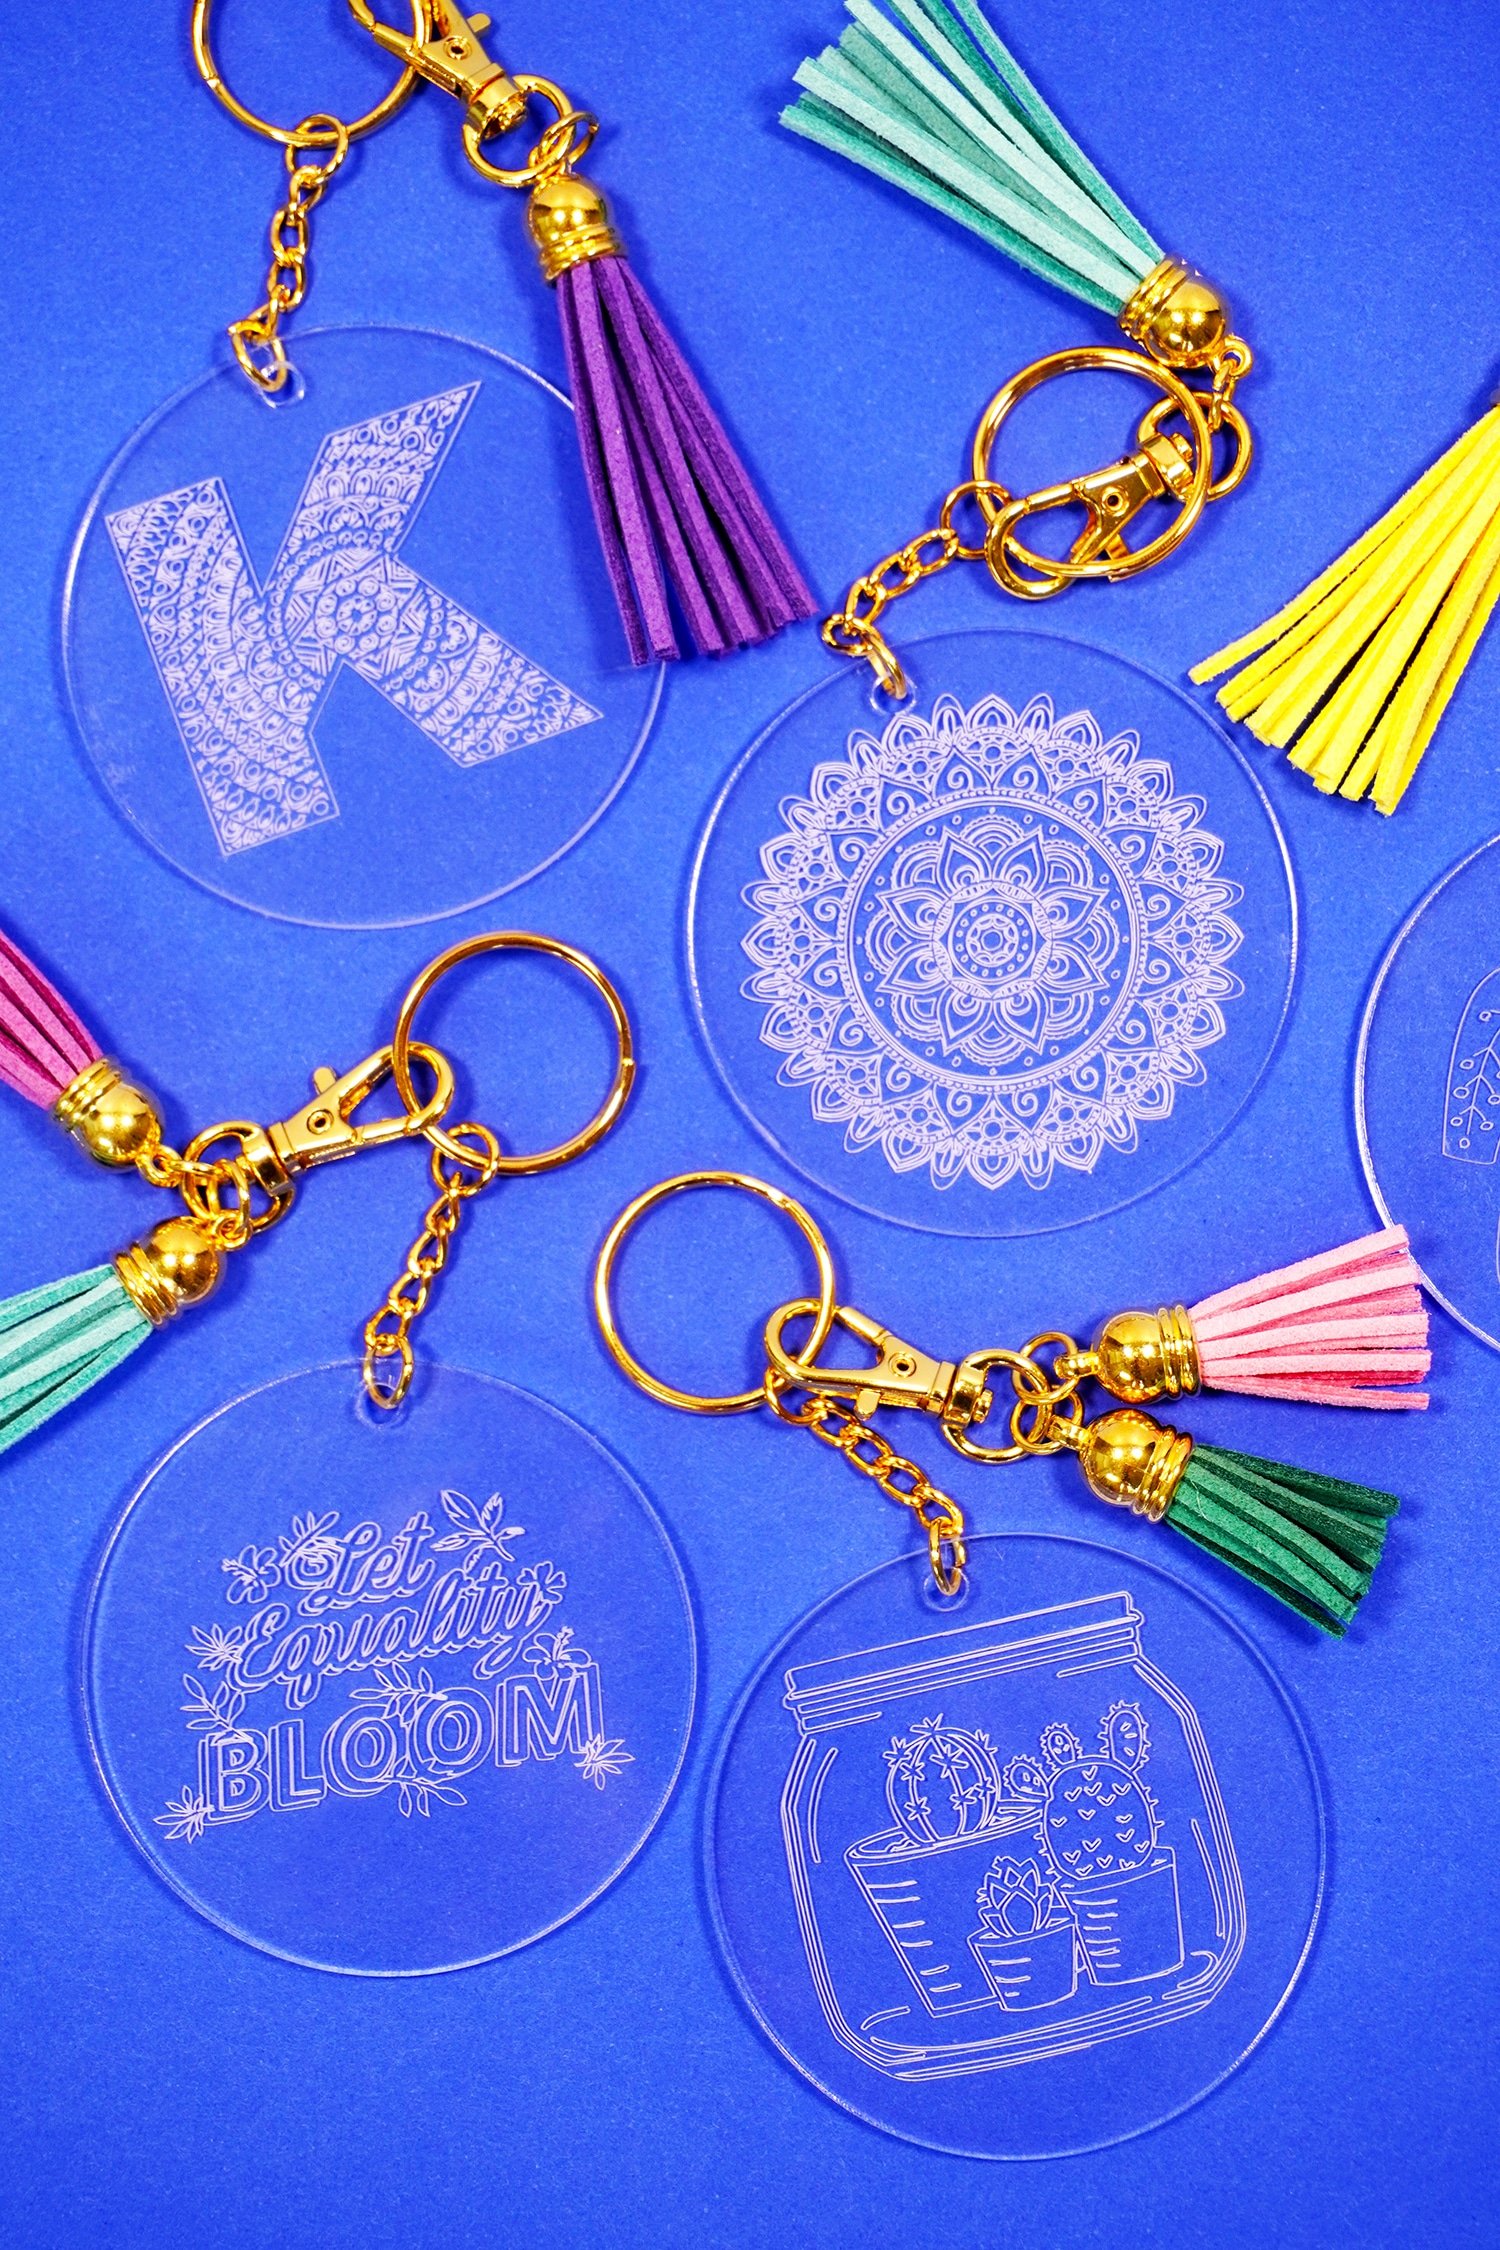
For this demonstration, I am going to show you how to use your Cricut Maker to engrave an acrylic keychain using the Cricut Engraving Tool.
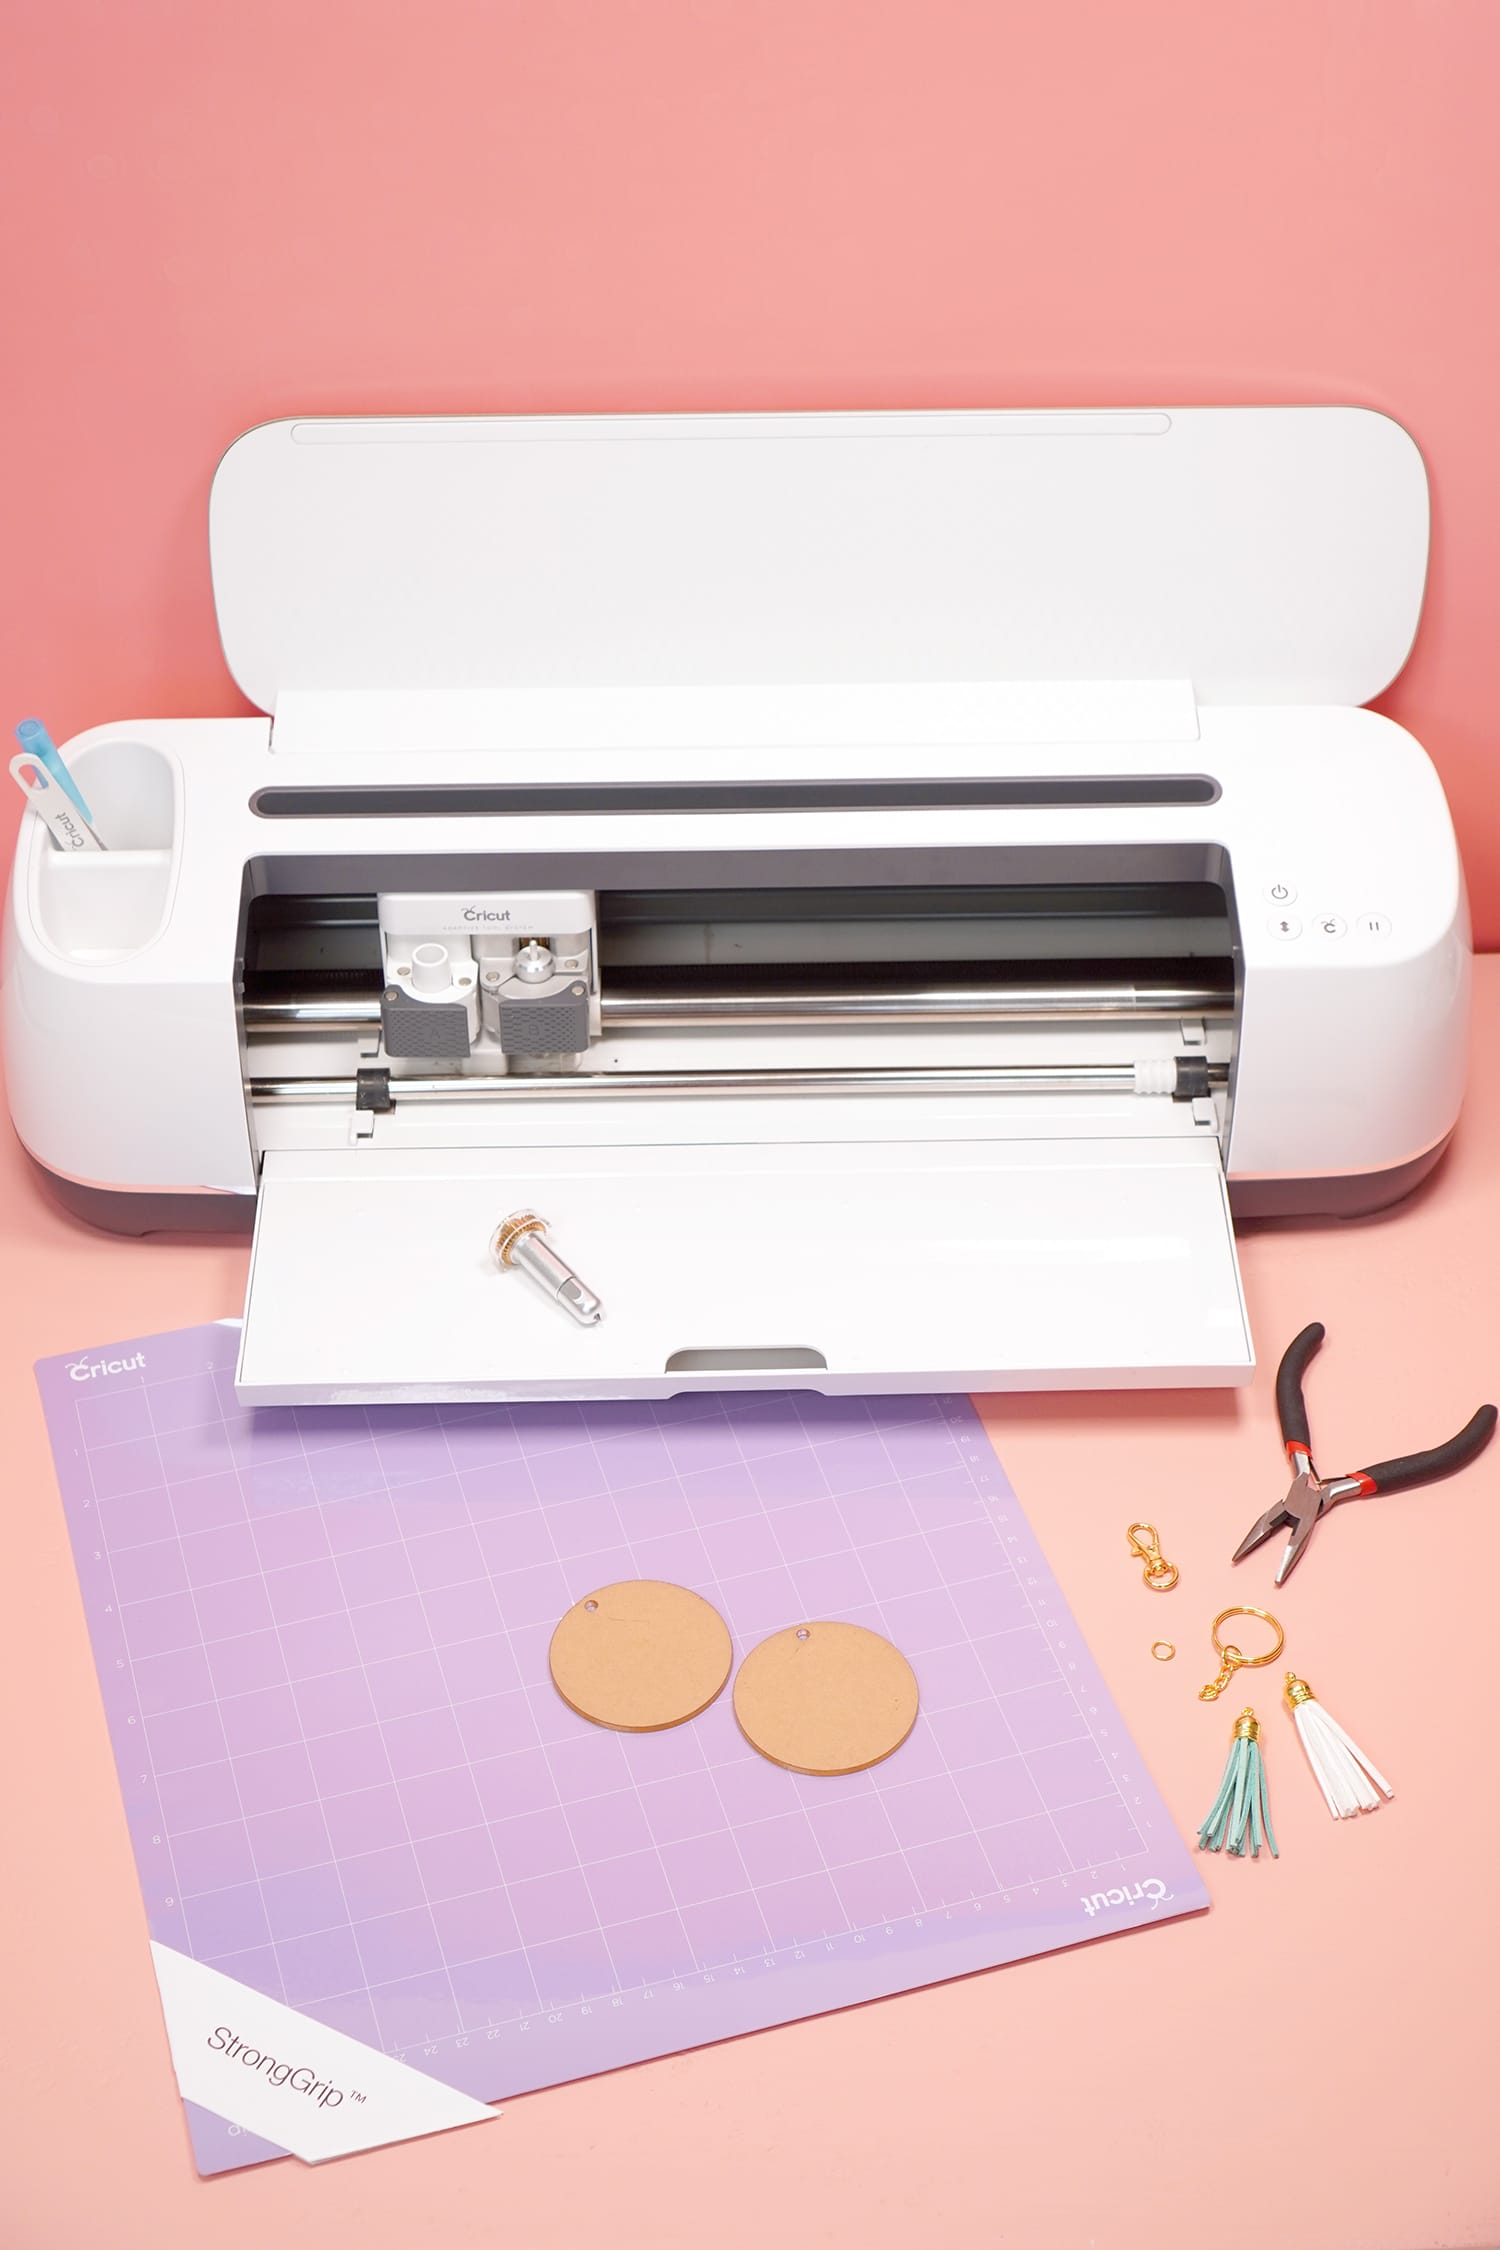
Cricut Engraved Acrylic Keychain Materials:
- Cricut Maker Machine (Cricut | Amazon)
- Engraving Tip and QuickSwap Housing (Cricut | Amazon)
- Cricut StrongGrip Mat (Cricut | Amazon)
- 1/8″ Thick Acrylic Engraving Blank (we used 2.5″ keychain rounds)
- Keychain Findings (we used Split Rings with Chains and Lobster Swivel Clasps)
- Jewelry Pliers
- Faux Leather Tassels
- Lint Roller
- Painter’s Tape (optional)
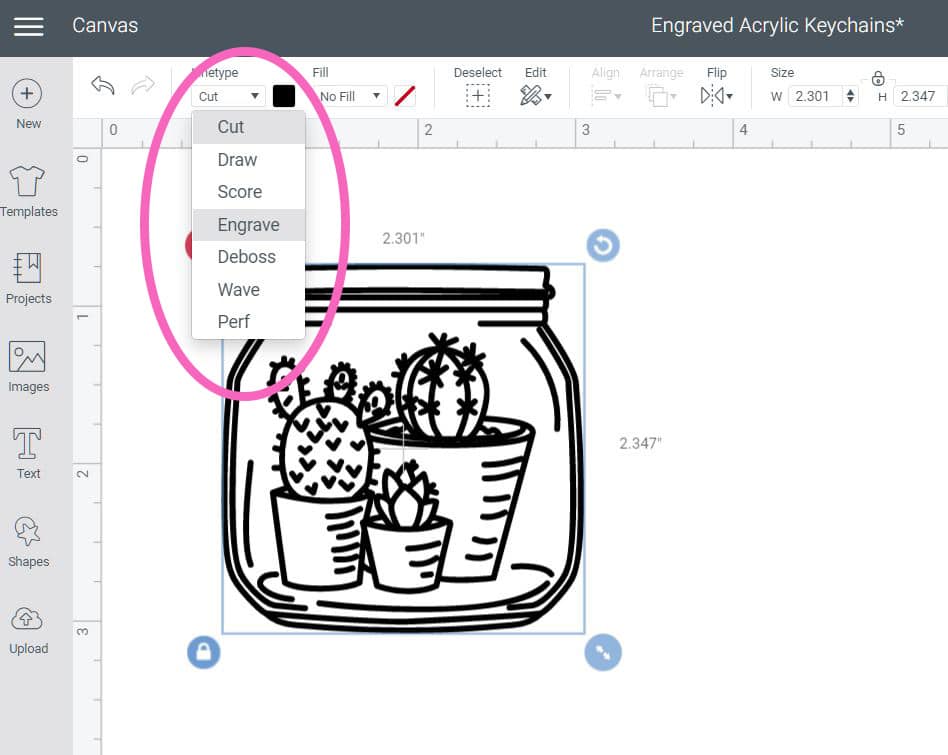
To begin making your engraved acrylic keychain, open up a new canvas in Cricut Design Space, and insert/upload your favorite image. I prefer designs that have thin lines and more detail for my engraving projects. To change the lines from cut lines to engrave lines, select the image, and then change the linetype in the drop-down menu as shown.
Note: If you would like to use the same designs that we used here, you can find the Cricut Design Space project here! If you are planning on using an SVG file that you have downloaded, learn How to Upload an SVG File to Cricut Design Space here.
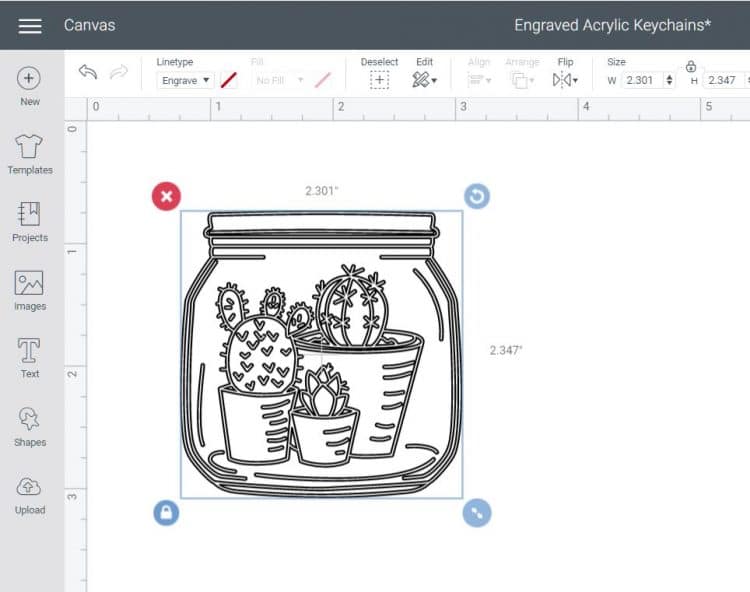
After changing the linetype to engraving, you will notice that the engraving lines show up as the outline of each stroke instead of a solid filled-in line. The Engraving Tip does not fill in wide strokes or spaces, but you can mimic the effect of thicker lines with multiple close-together lines.
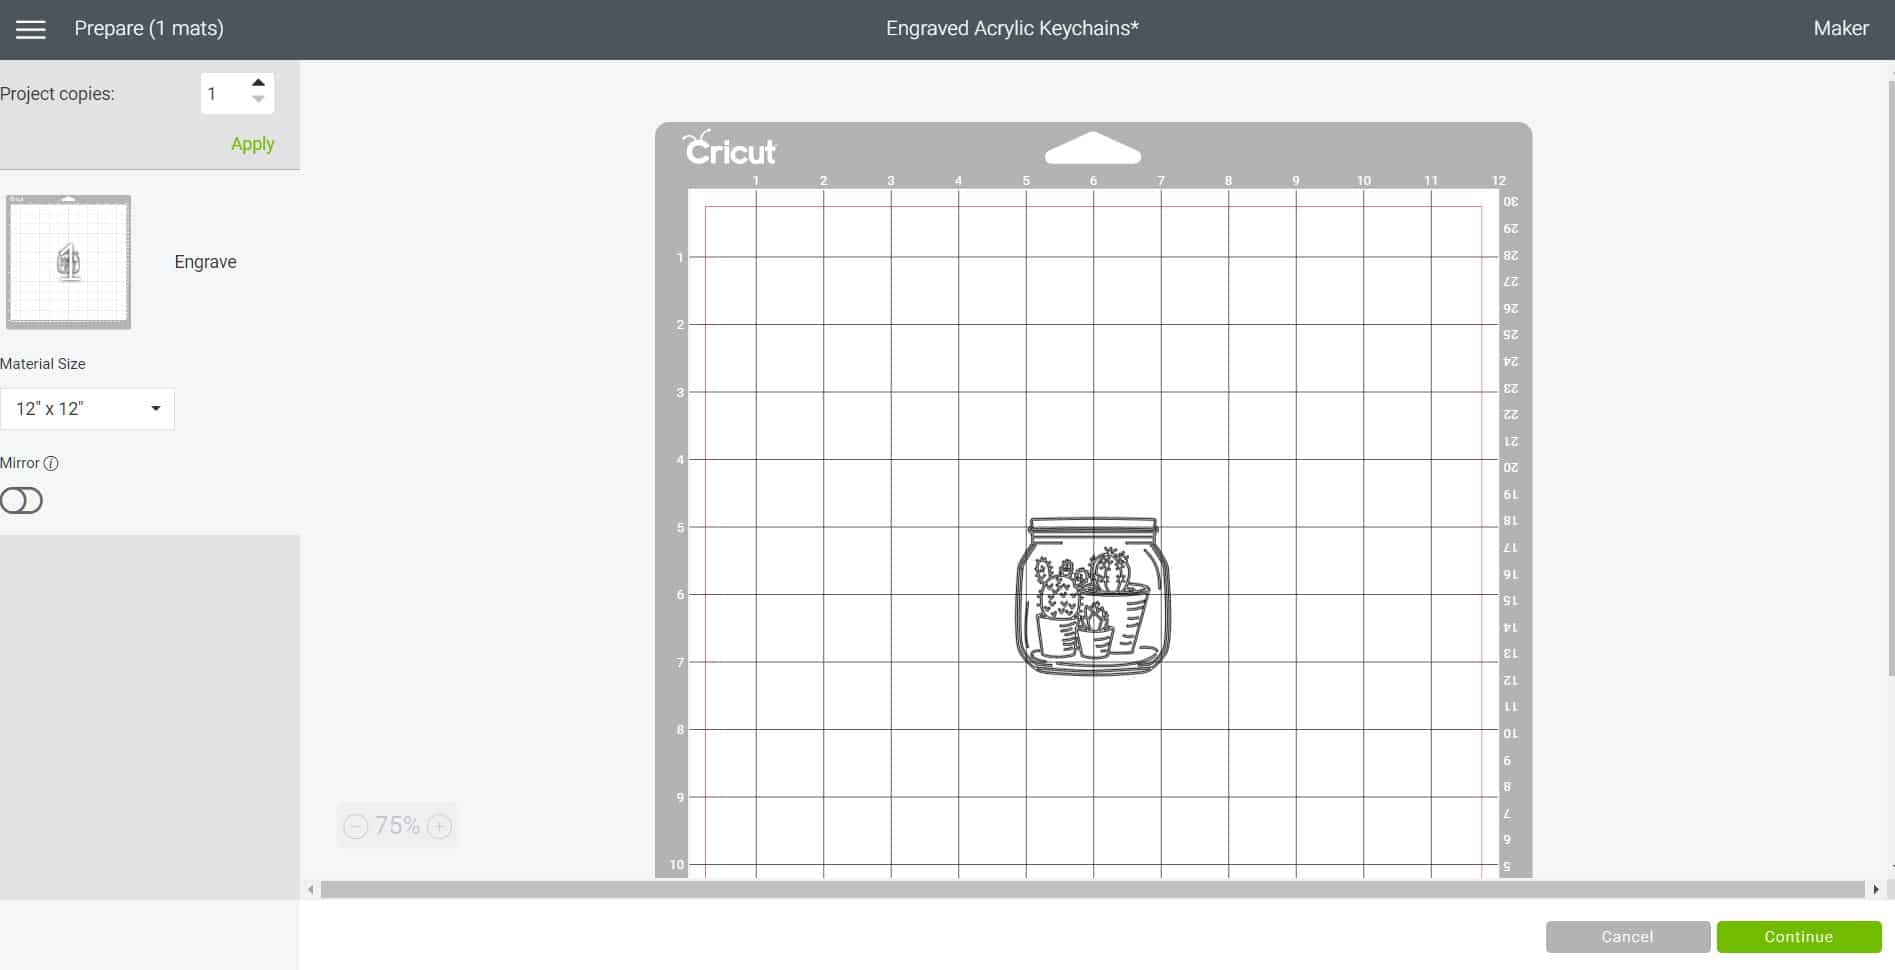
Size your design to fit your material, and click the green “Make It” button in the upper right hand corner of the screen. On the next screen, click to edit the mat, and move the image to the center of the mat.
Note: If your design has text, you may wish to mirror the design at this point. This will allow the design to be engraved into the back side of the keychain and show clearly through the smooth surface on top.
Place the Engraving Tip into the “B” carrier of the Maker, and move the white star wheels all the way to the far right of the roller bar.
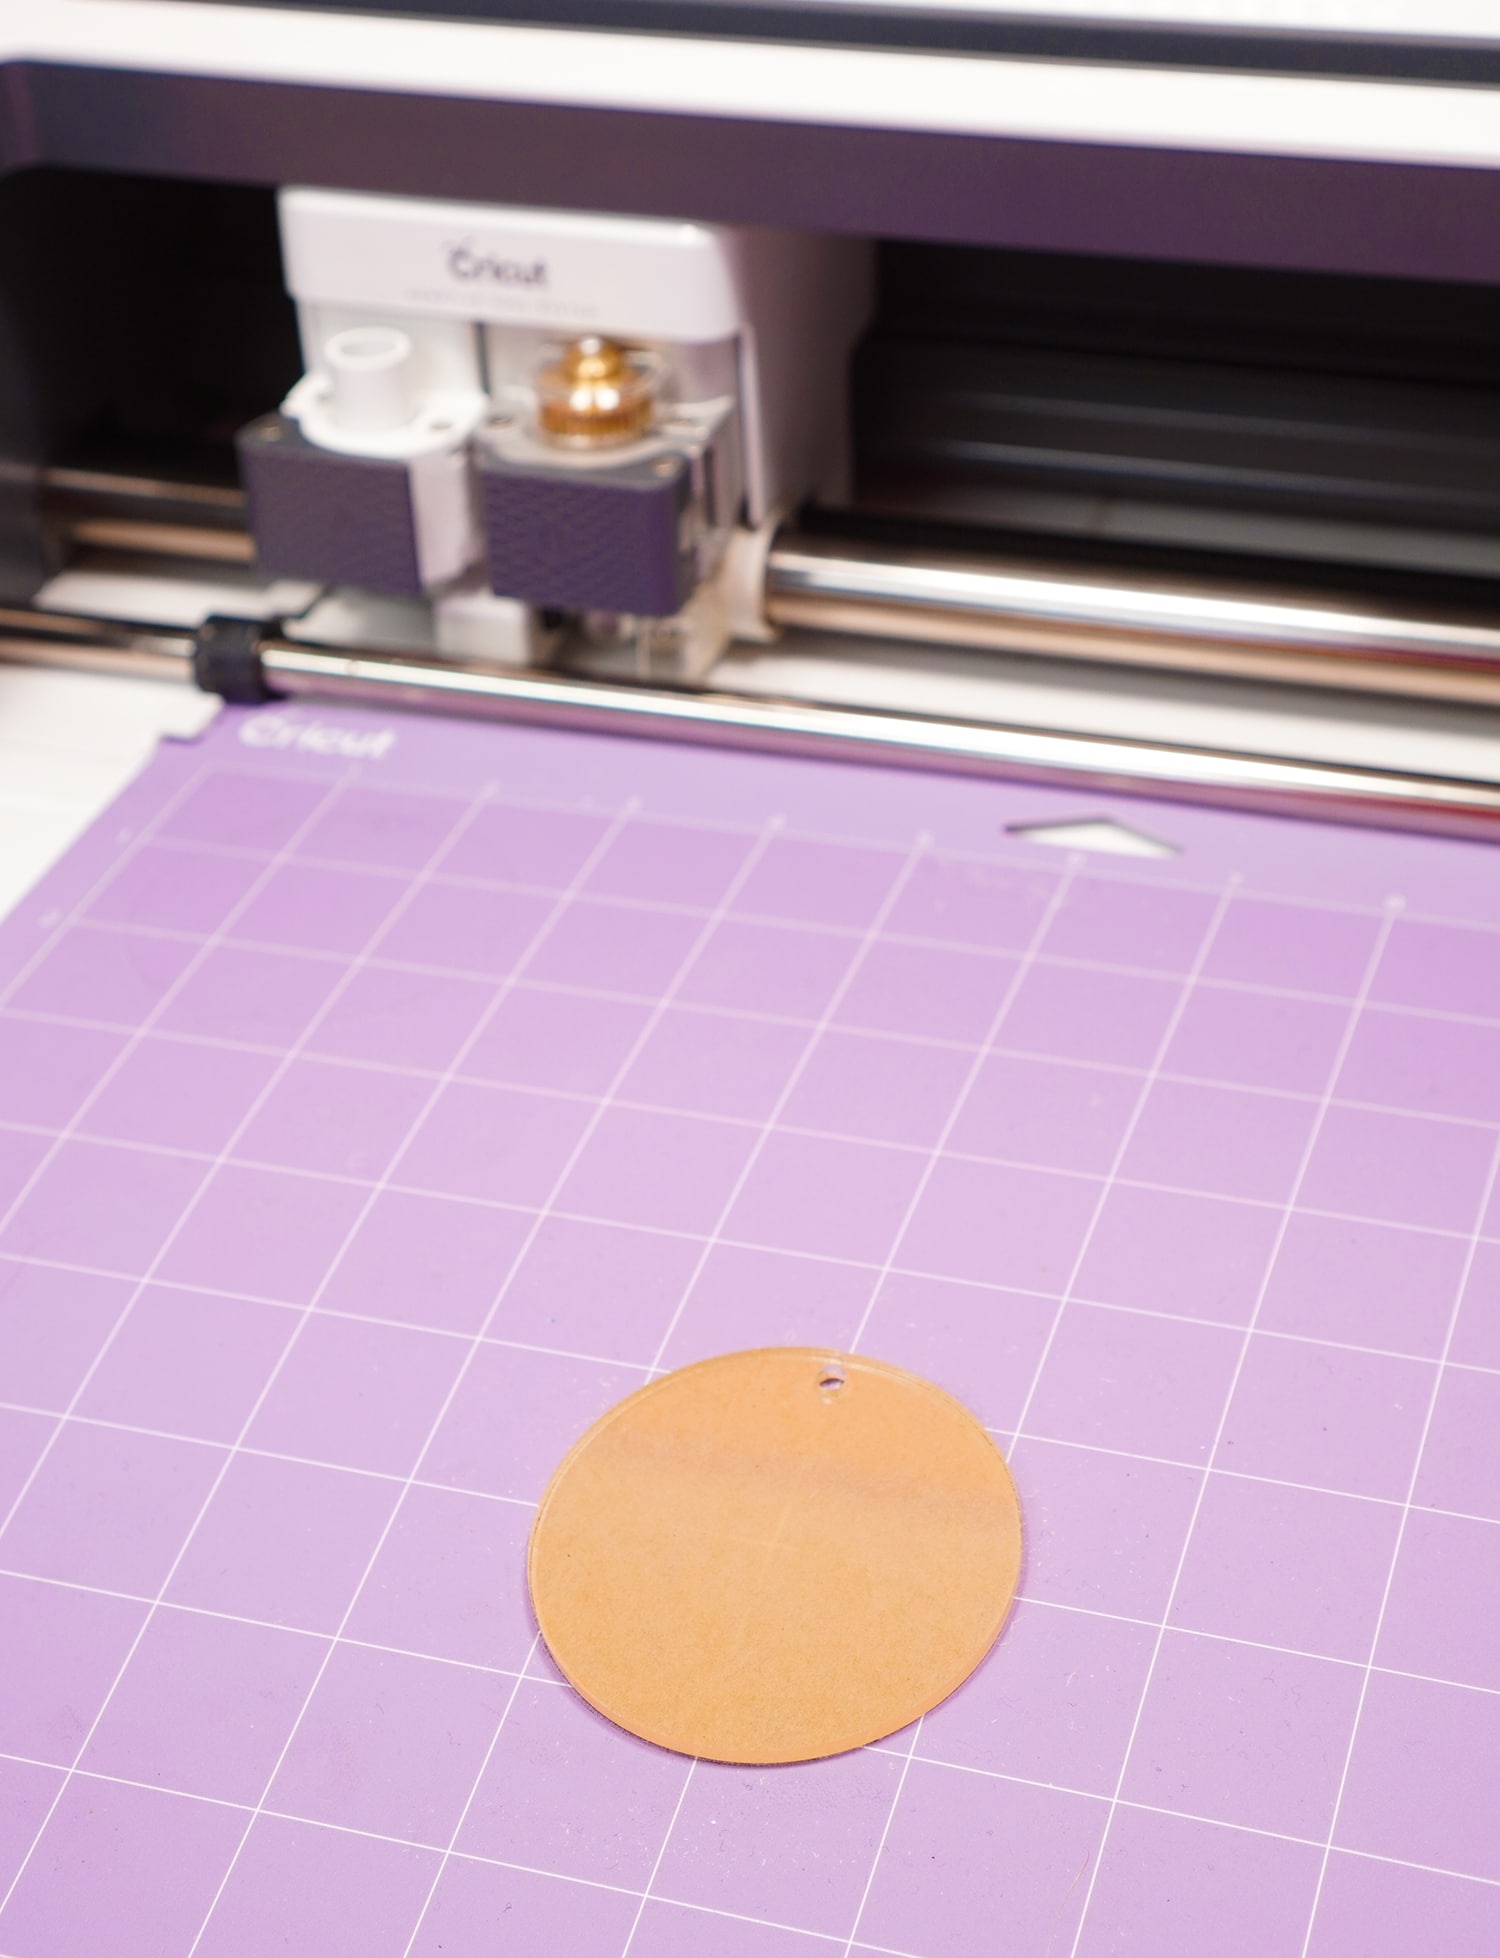
Peel the protective paper coating off of one side of the acrylic blank. Place the blank, paper side down, in the center of the StrongGrip mat (in the same spot that you placed the image in Design Space). If desired, use painter’s tape along the edges of the acrylic to help secure it to the mat.
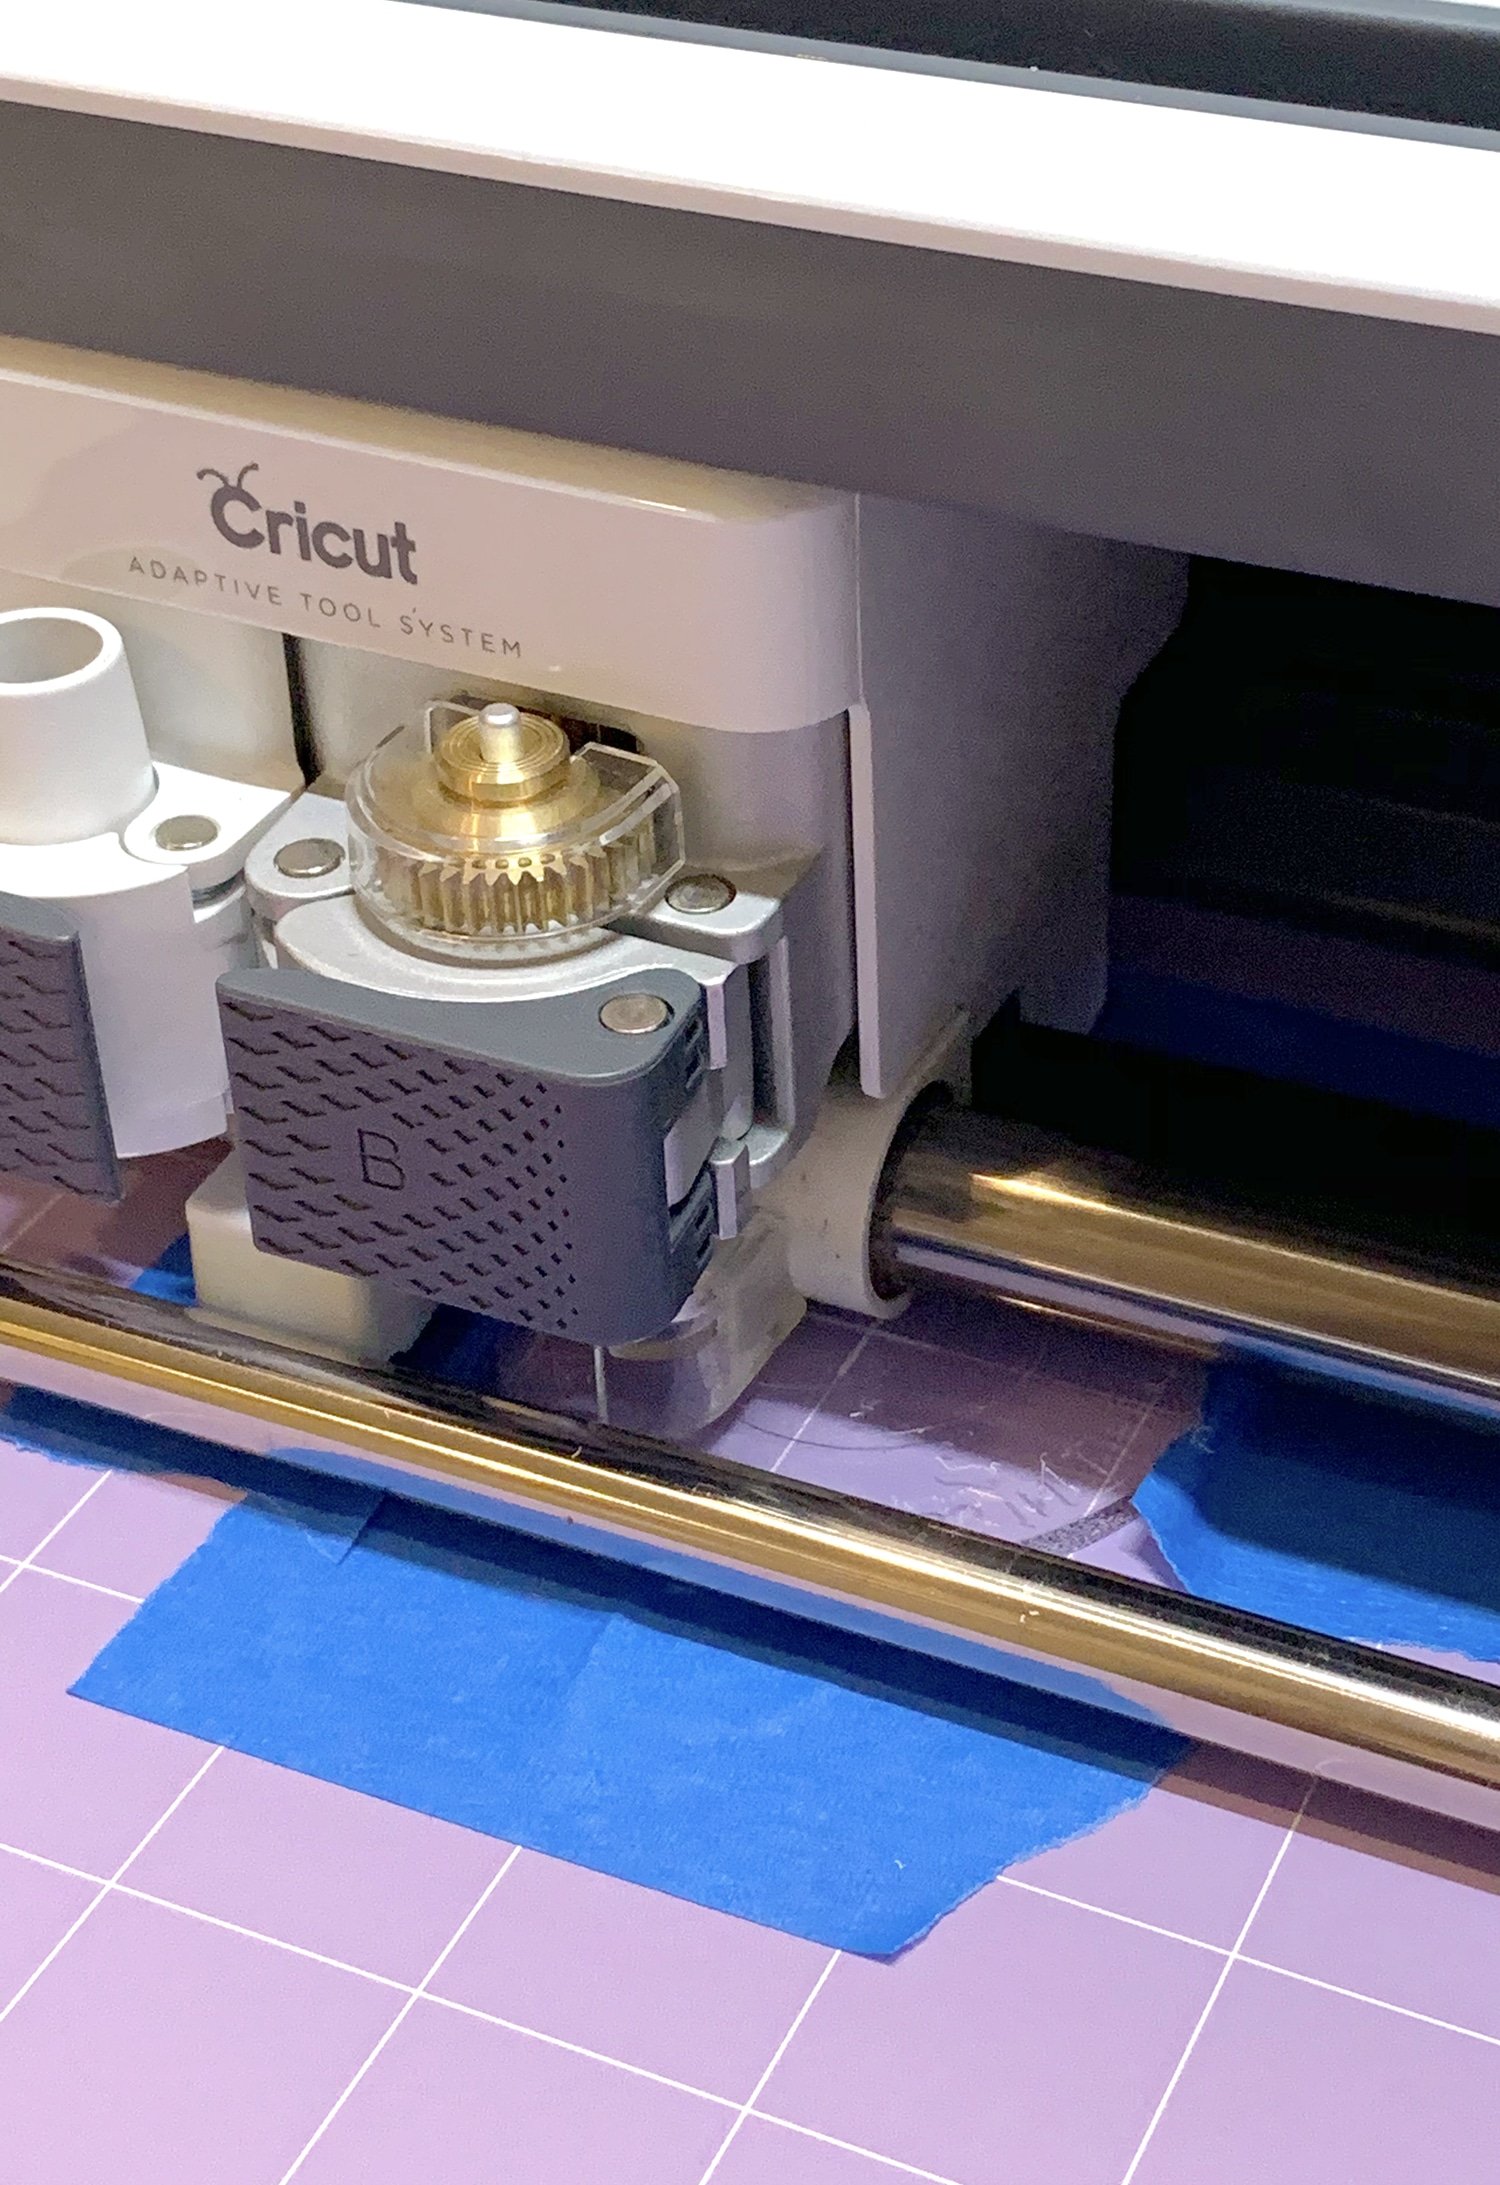
Select “Acrylic, Thick (2 mm)” from the material settings in Design Space, and start engraving.
Note: your tool may lift and spin several times during the process. This is normal and is done at regular intervals to prevent the tool from overheating and to mitigate wear.
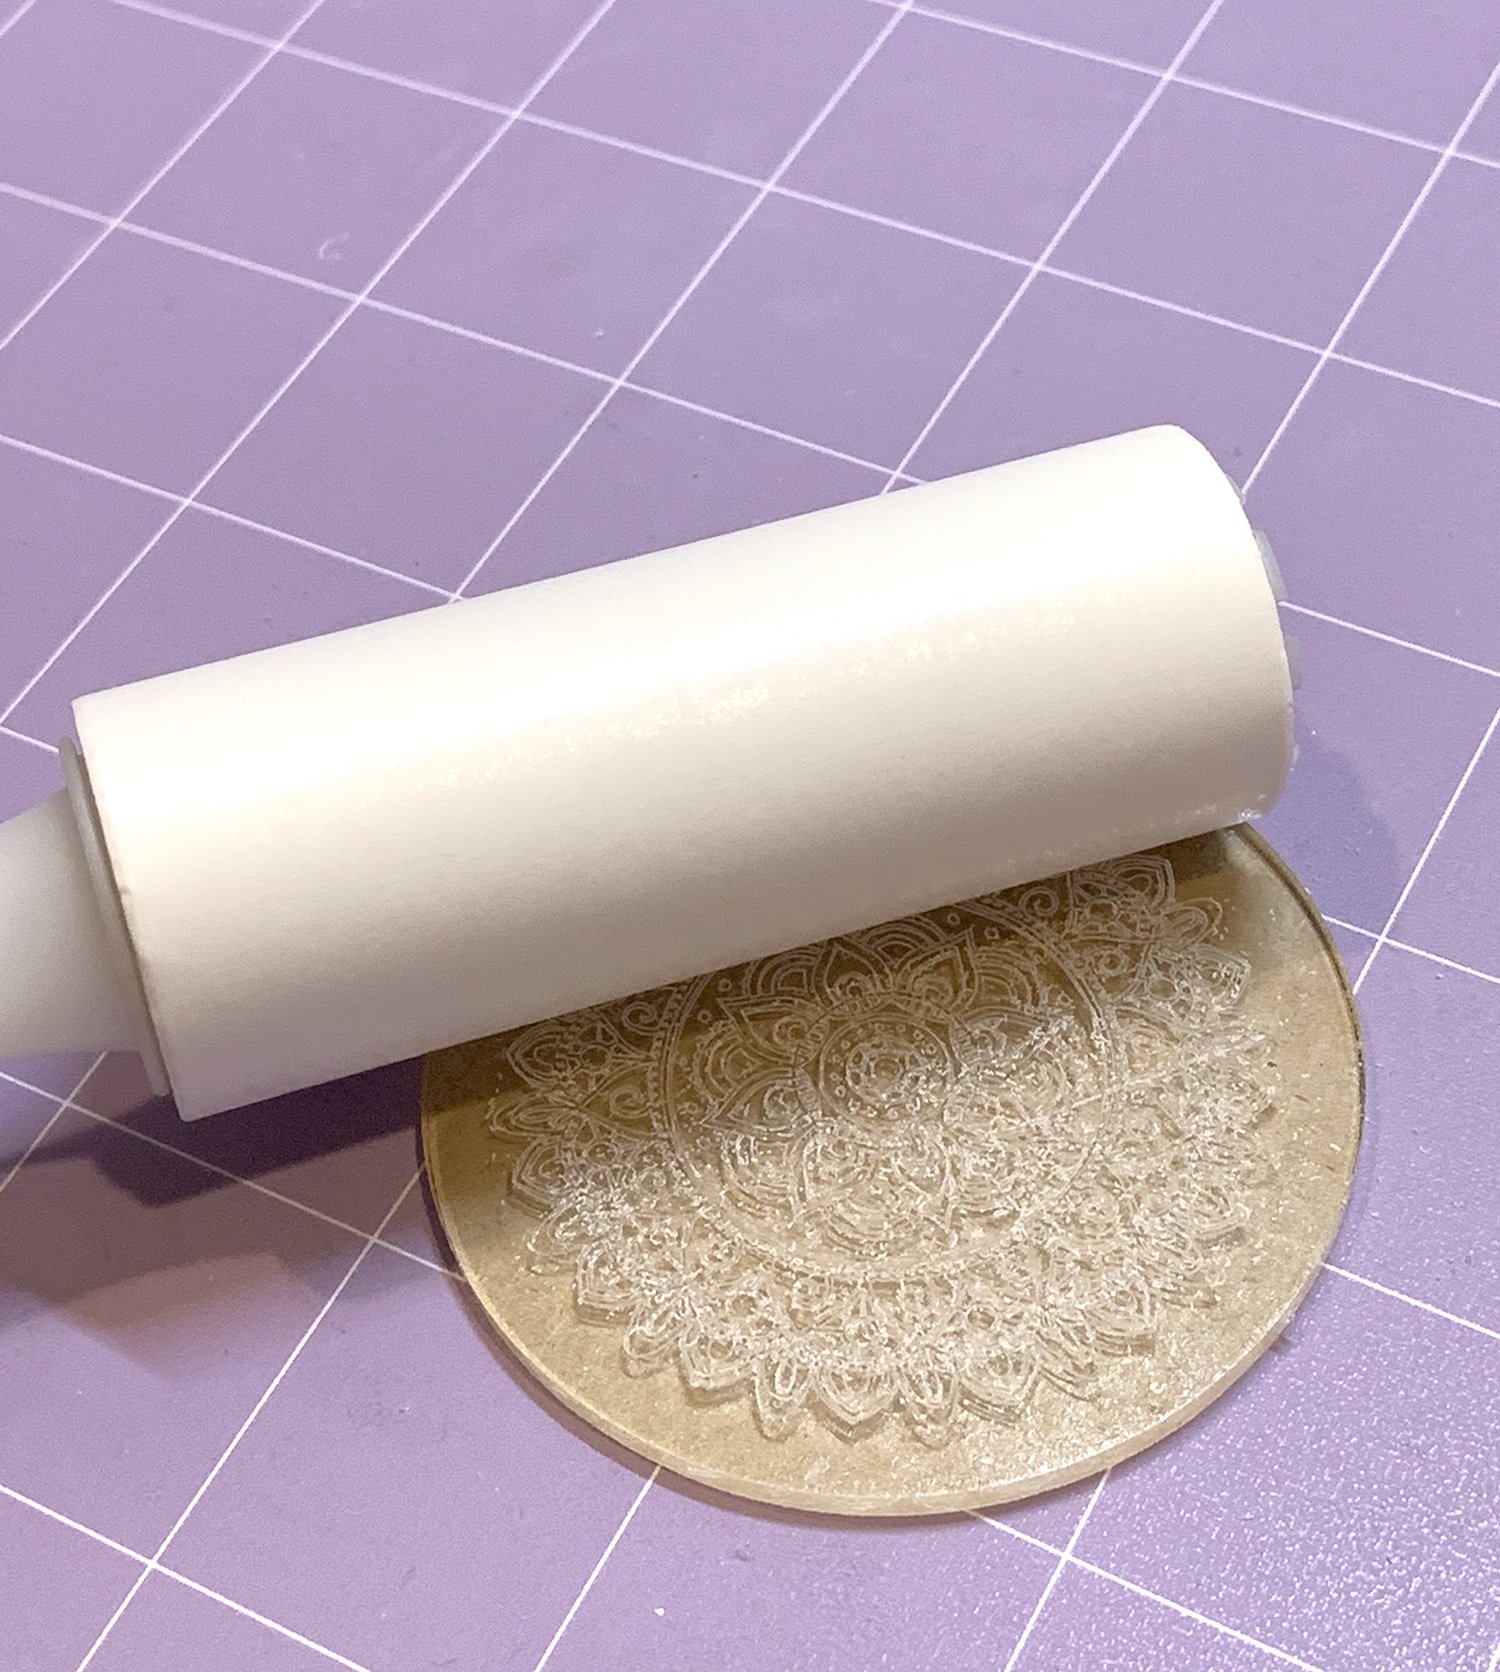
Use a lint roller to remove the excess acrylic dust and debris from the engraved design, and remove the protective paper from the other side of the acrylic blank. Make sure to clean off any remaining dust in and around your Maker as well using compressed air or a soft cloth. Always dust toward the outside of the machine rather than into/through the machine.
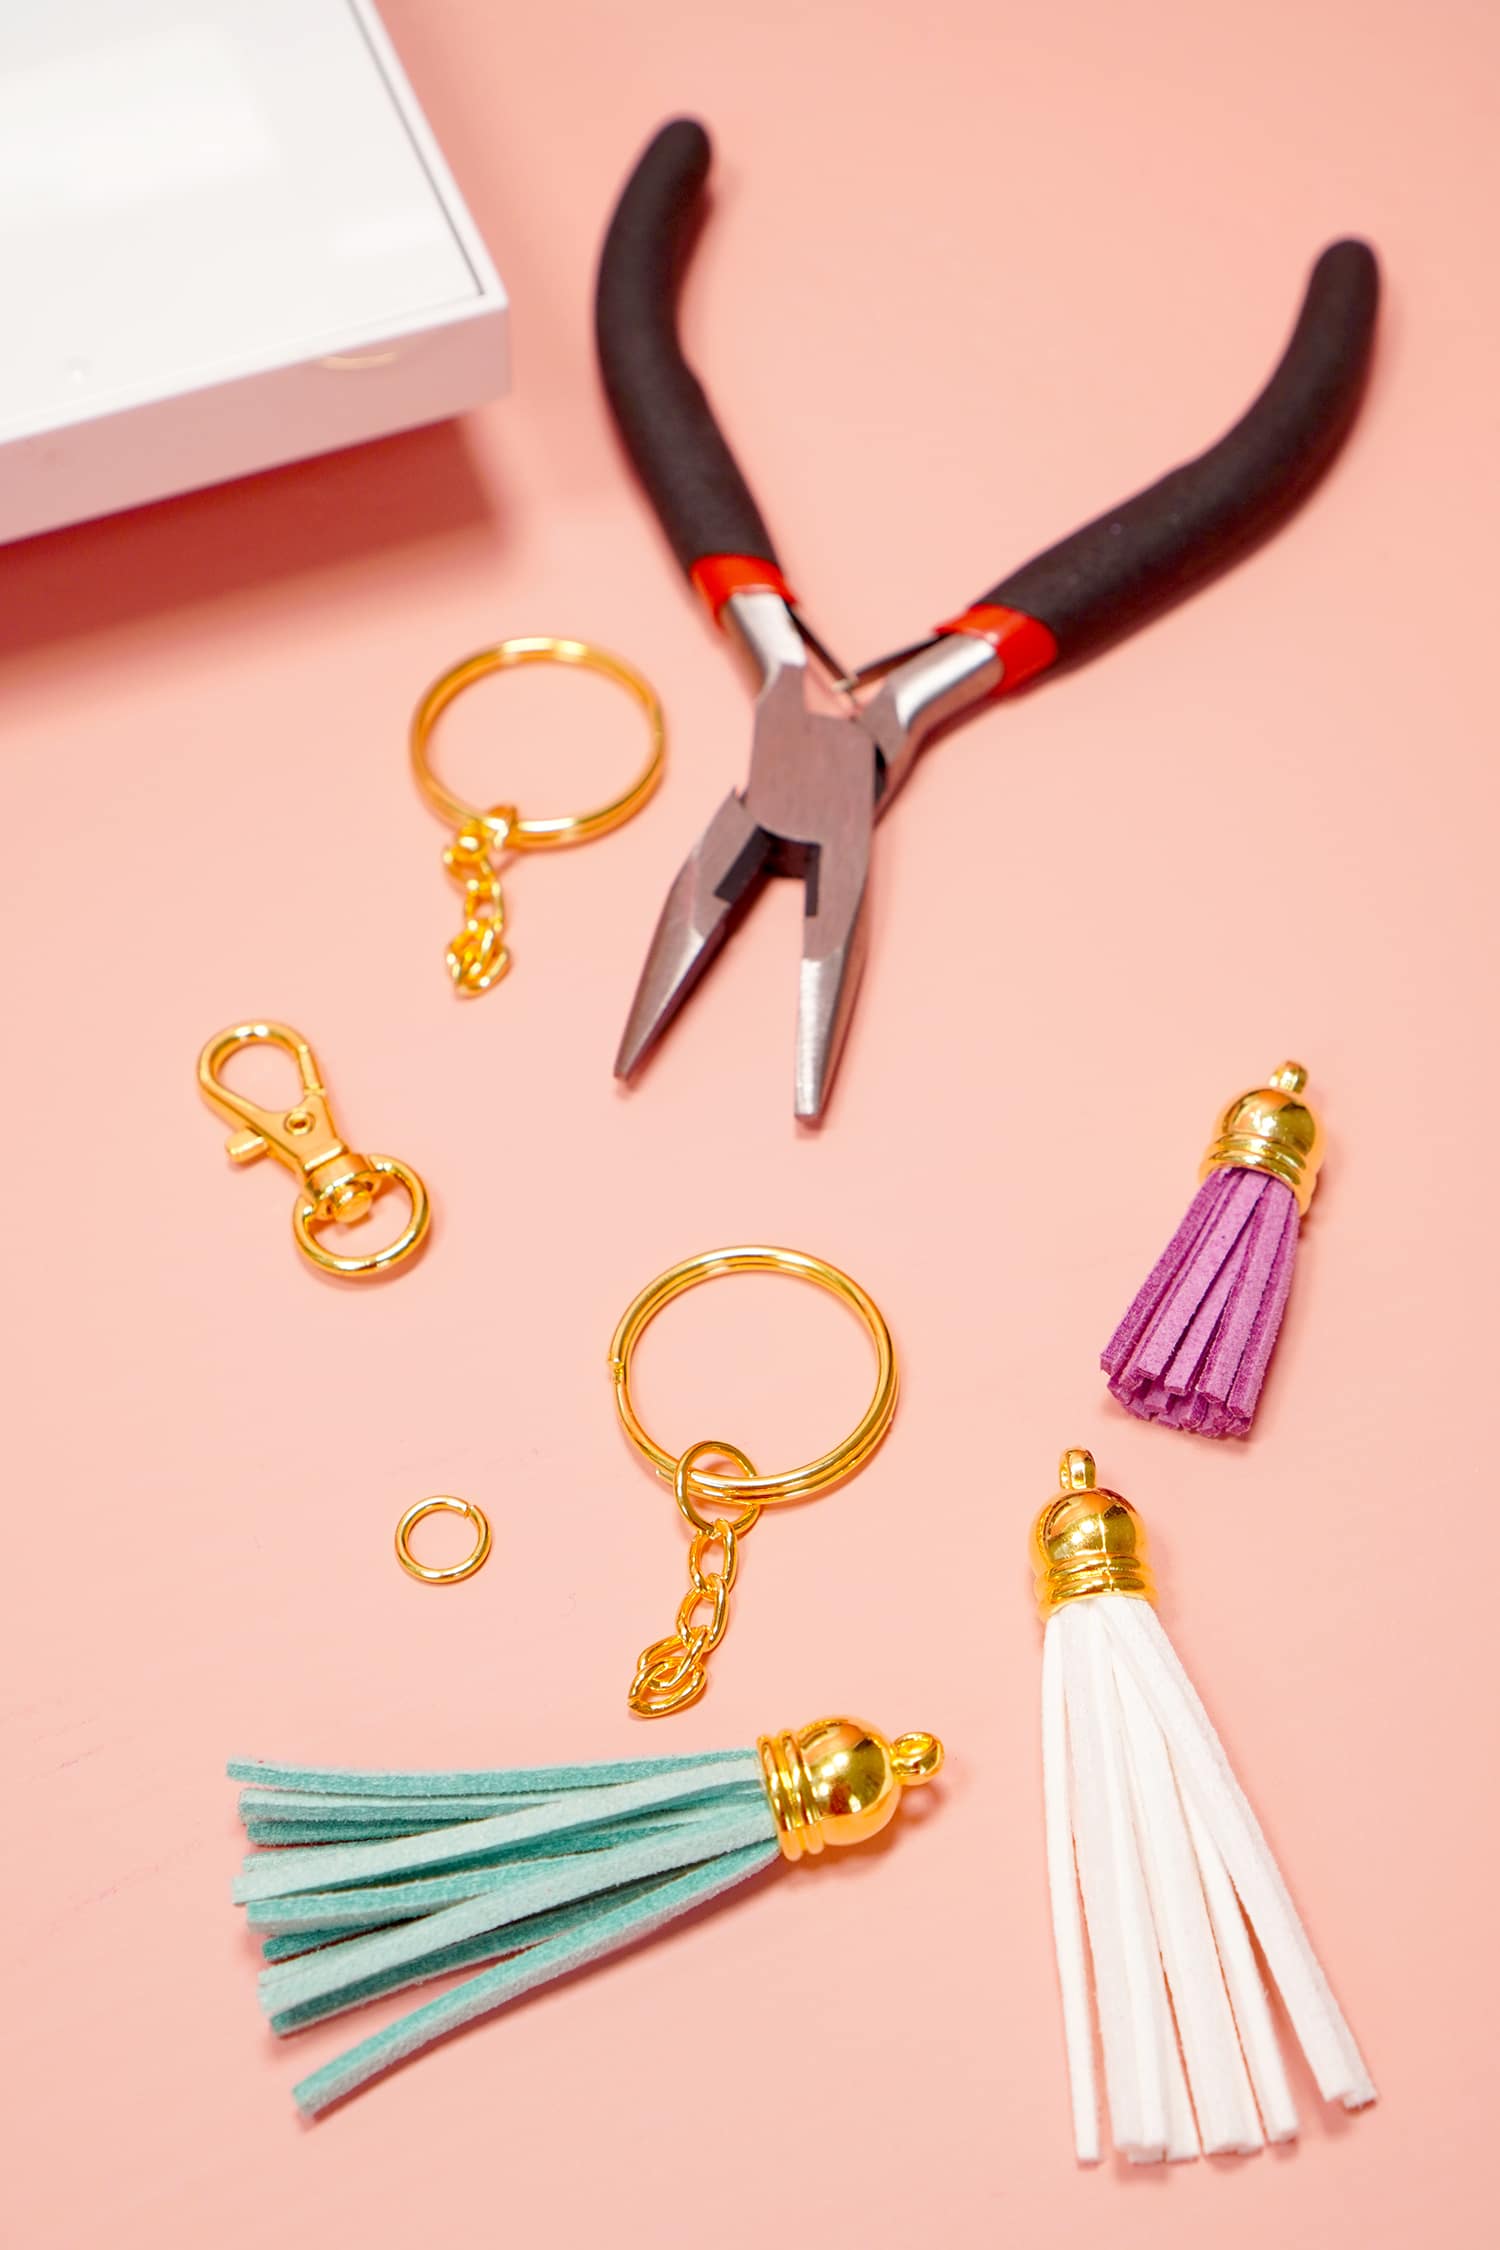
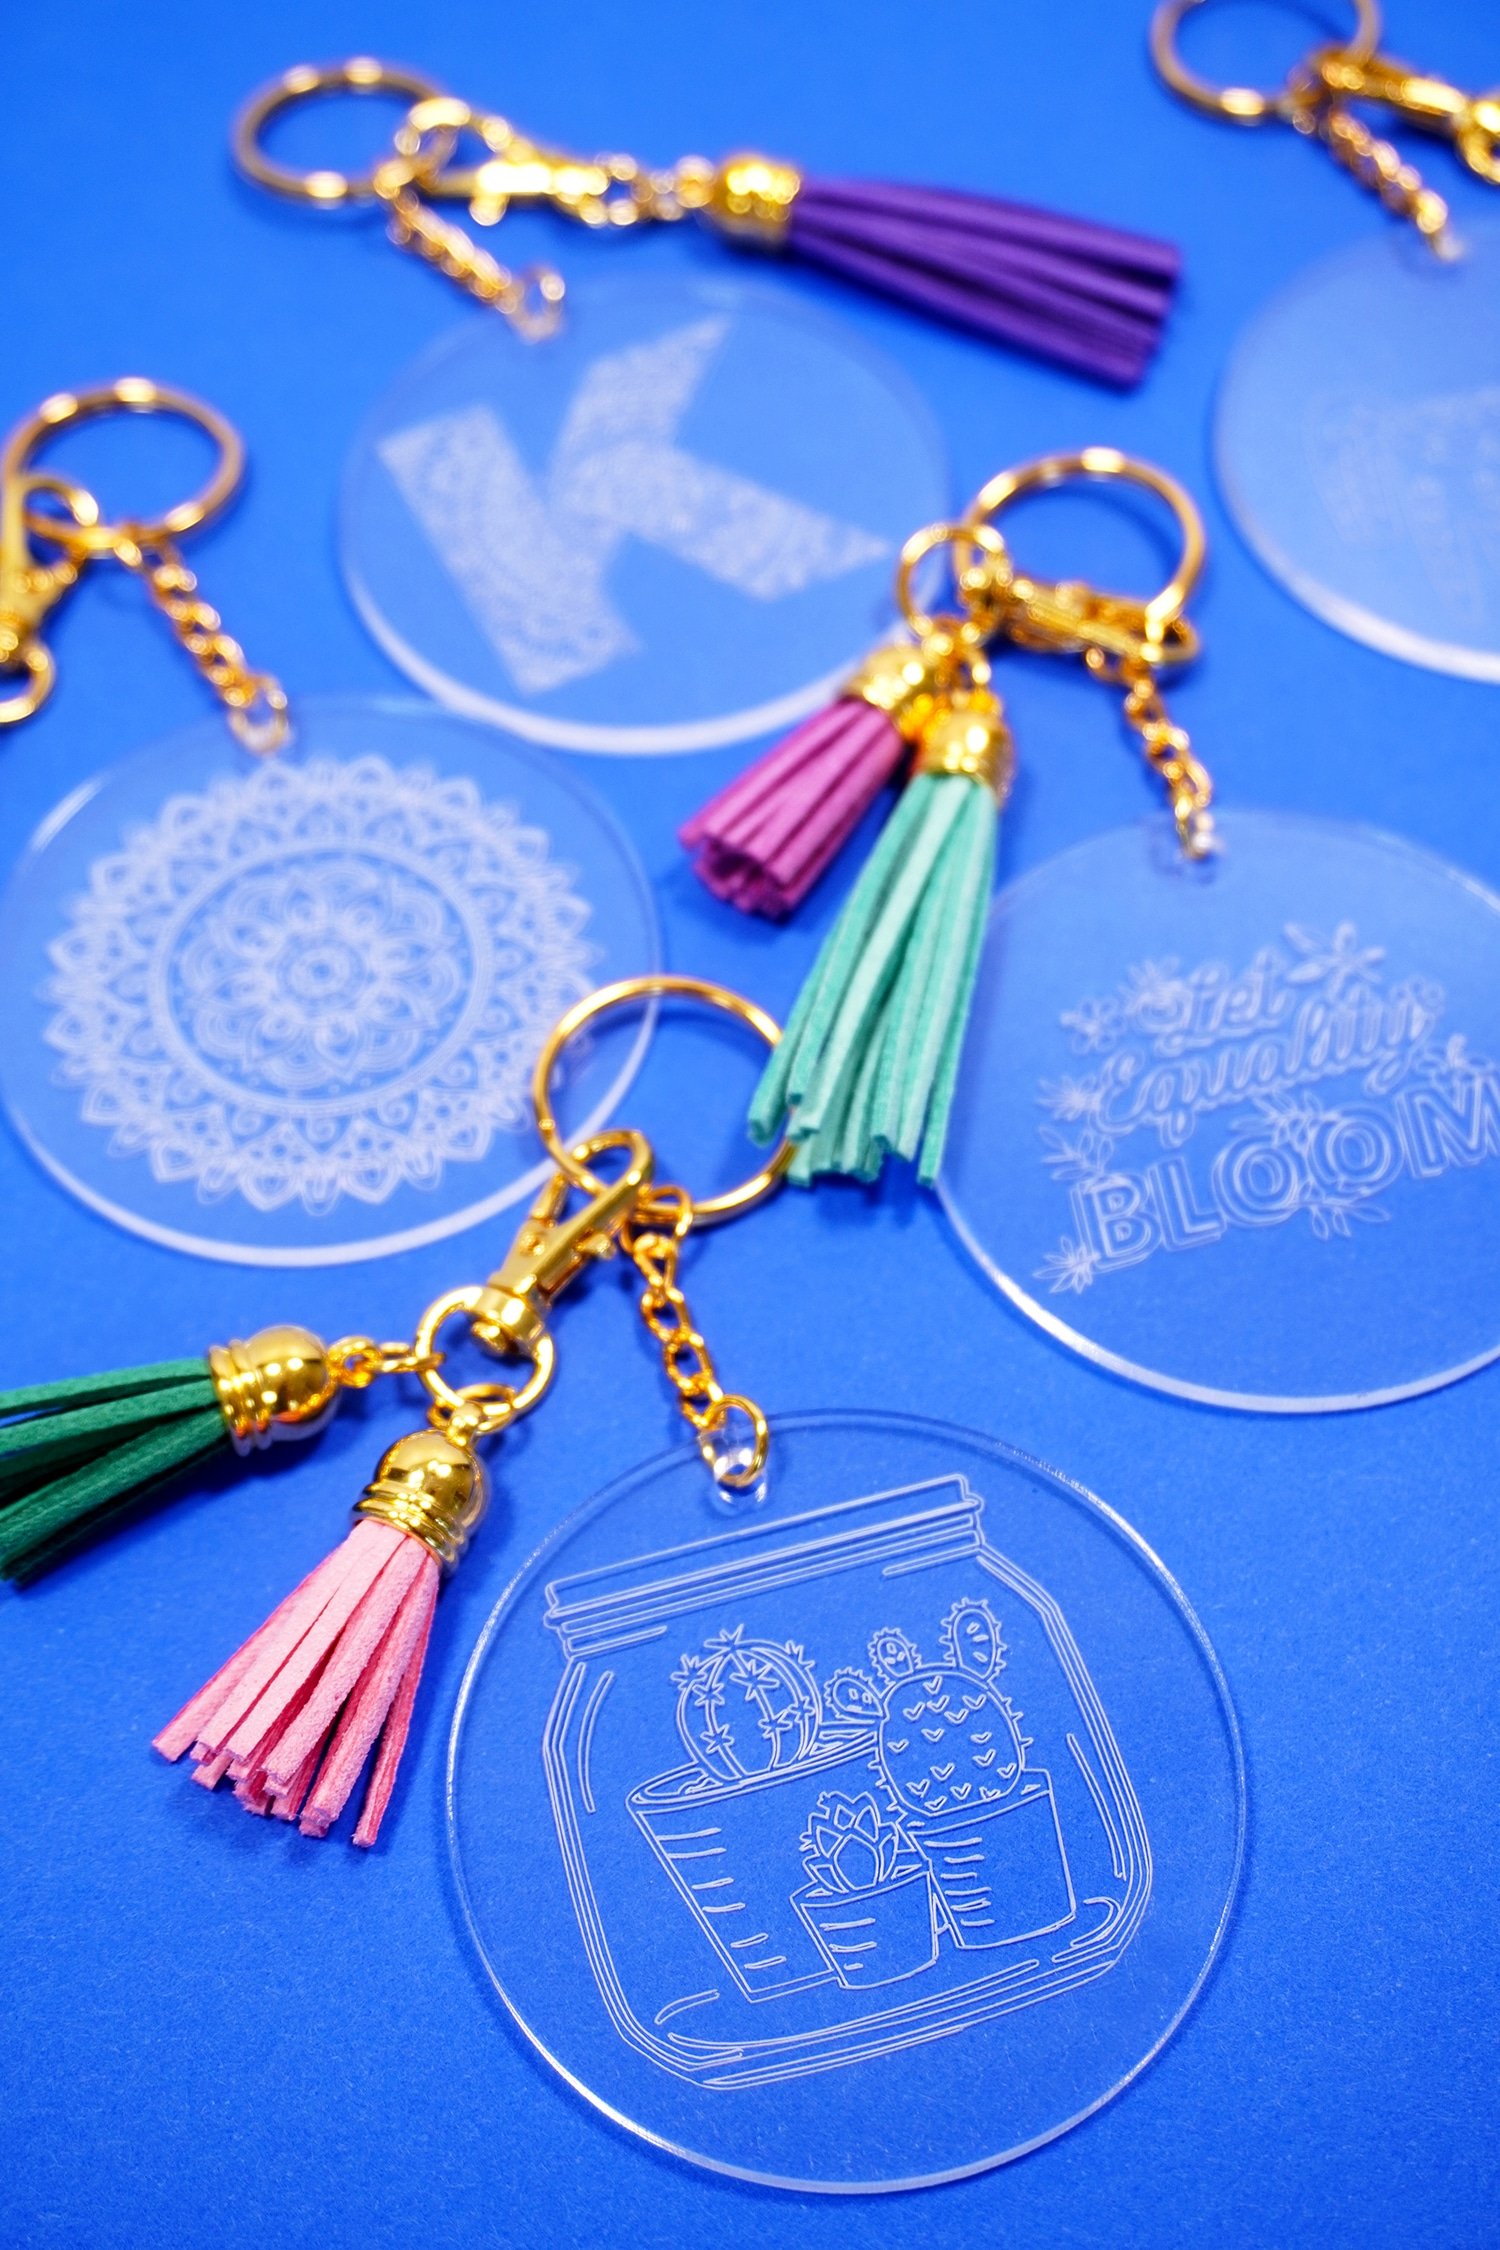
To turn your engraved acrylic blank into a keychain, you’re going to need a pair of jewelry pliers, jump rings, and various keychain hardware (and tassels, too, if you’re so inclined!).
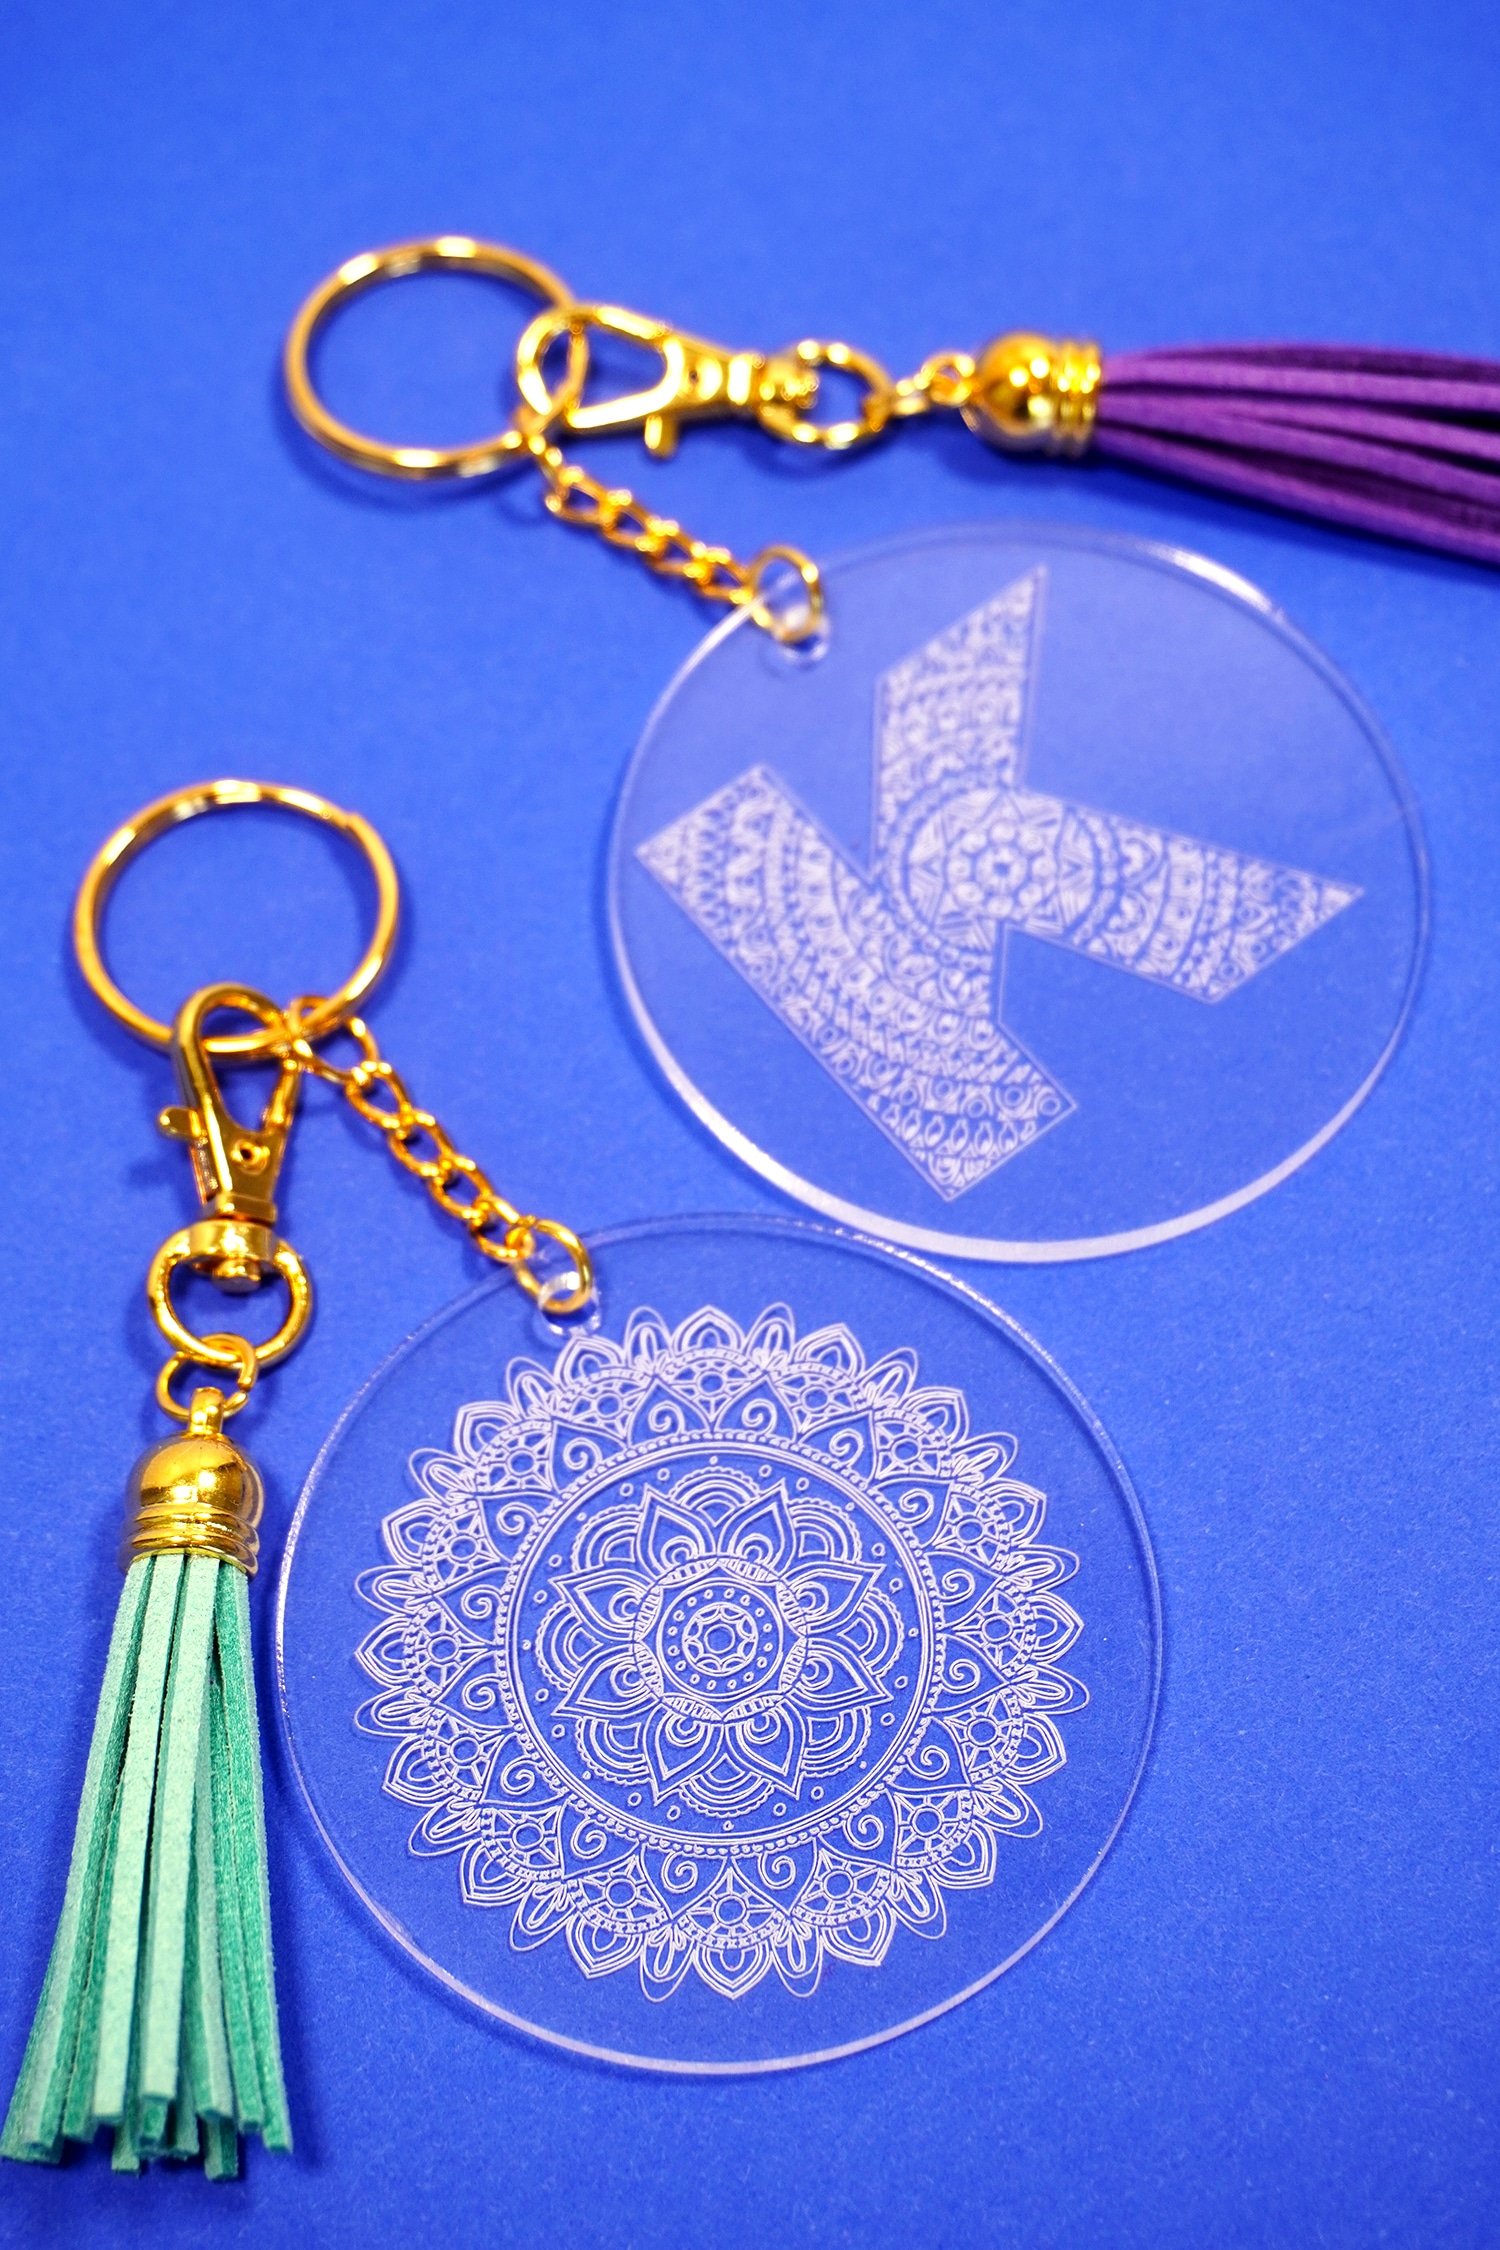
Use the pliers to attach the keychain hardware (and a tassel or two!), and your keychain is ready to go!
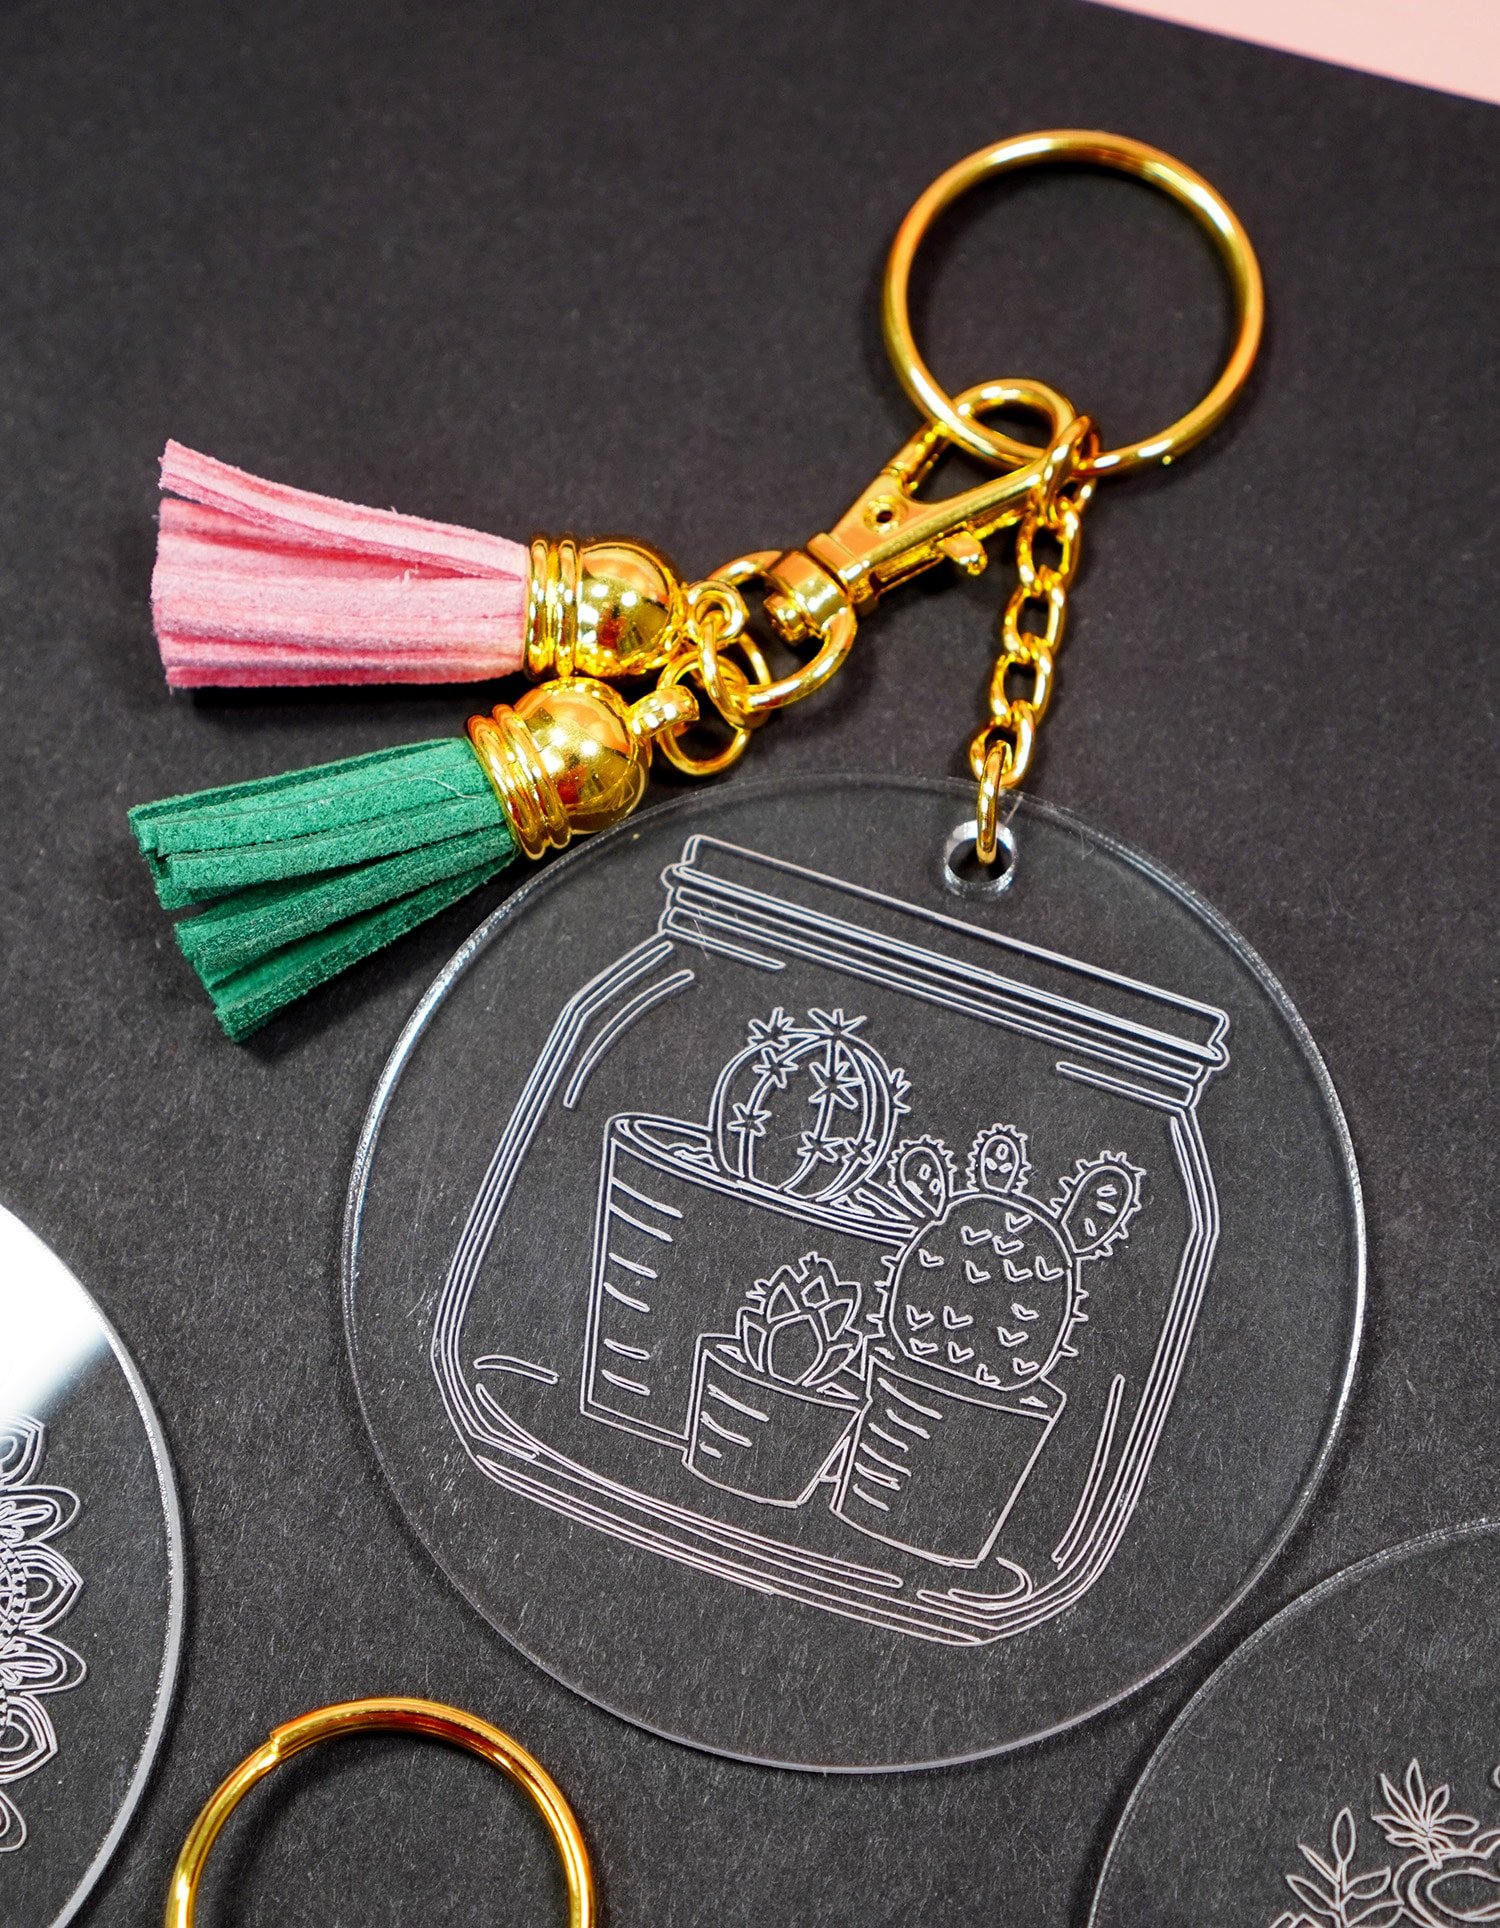
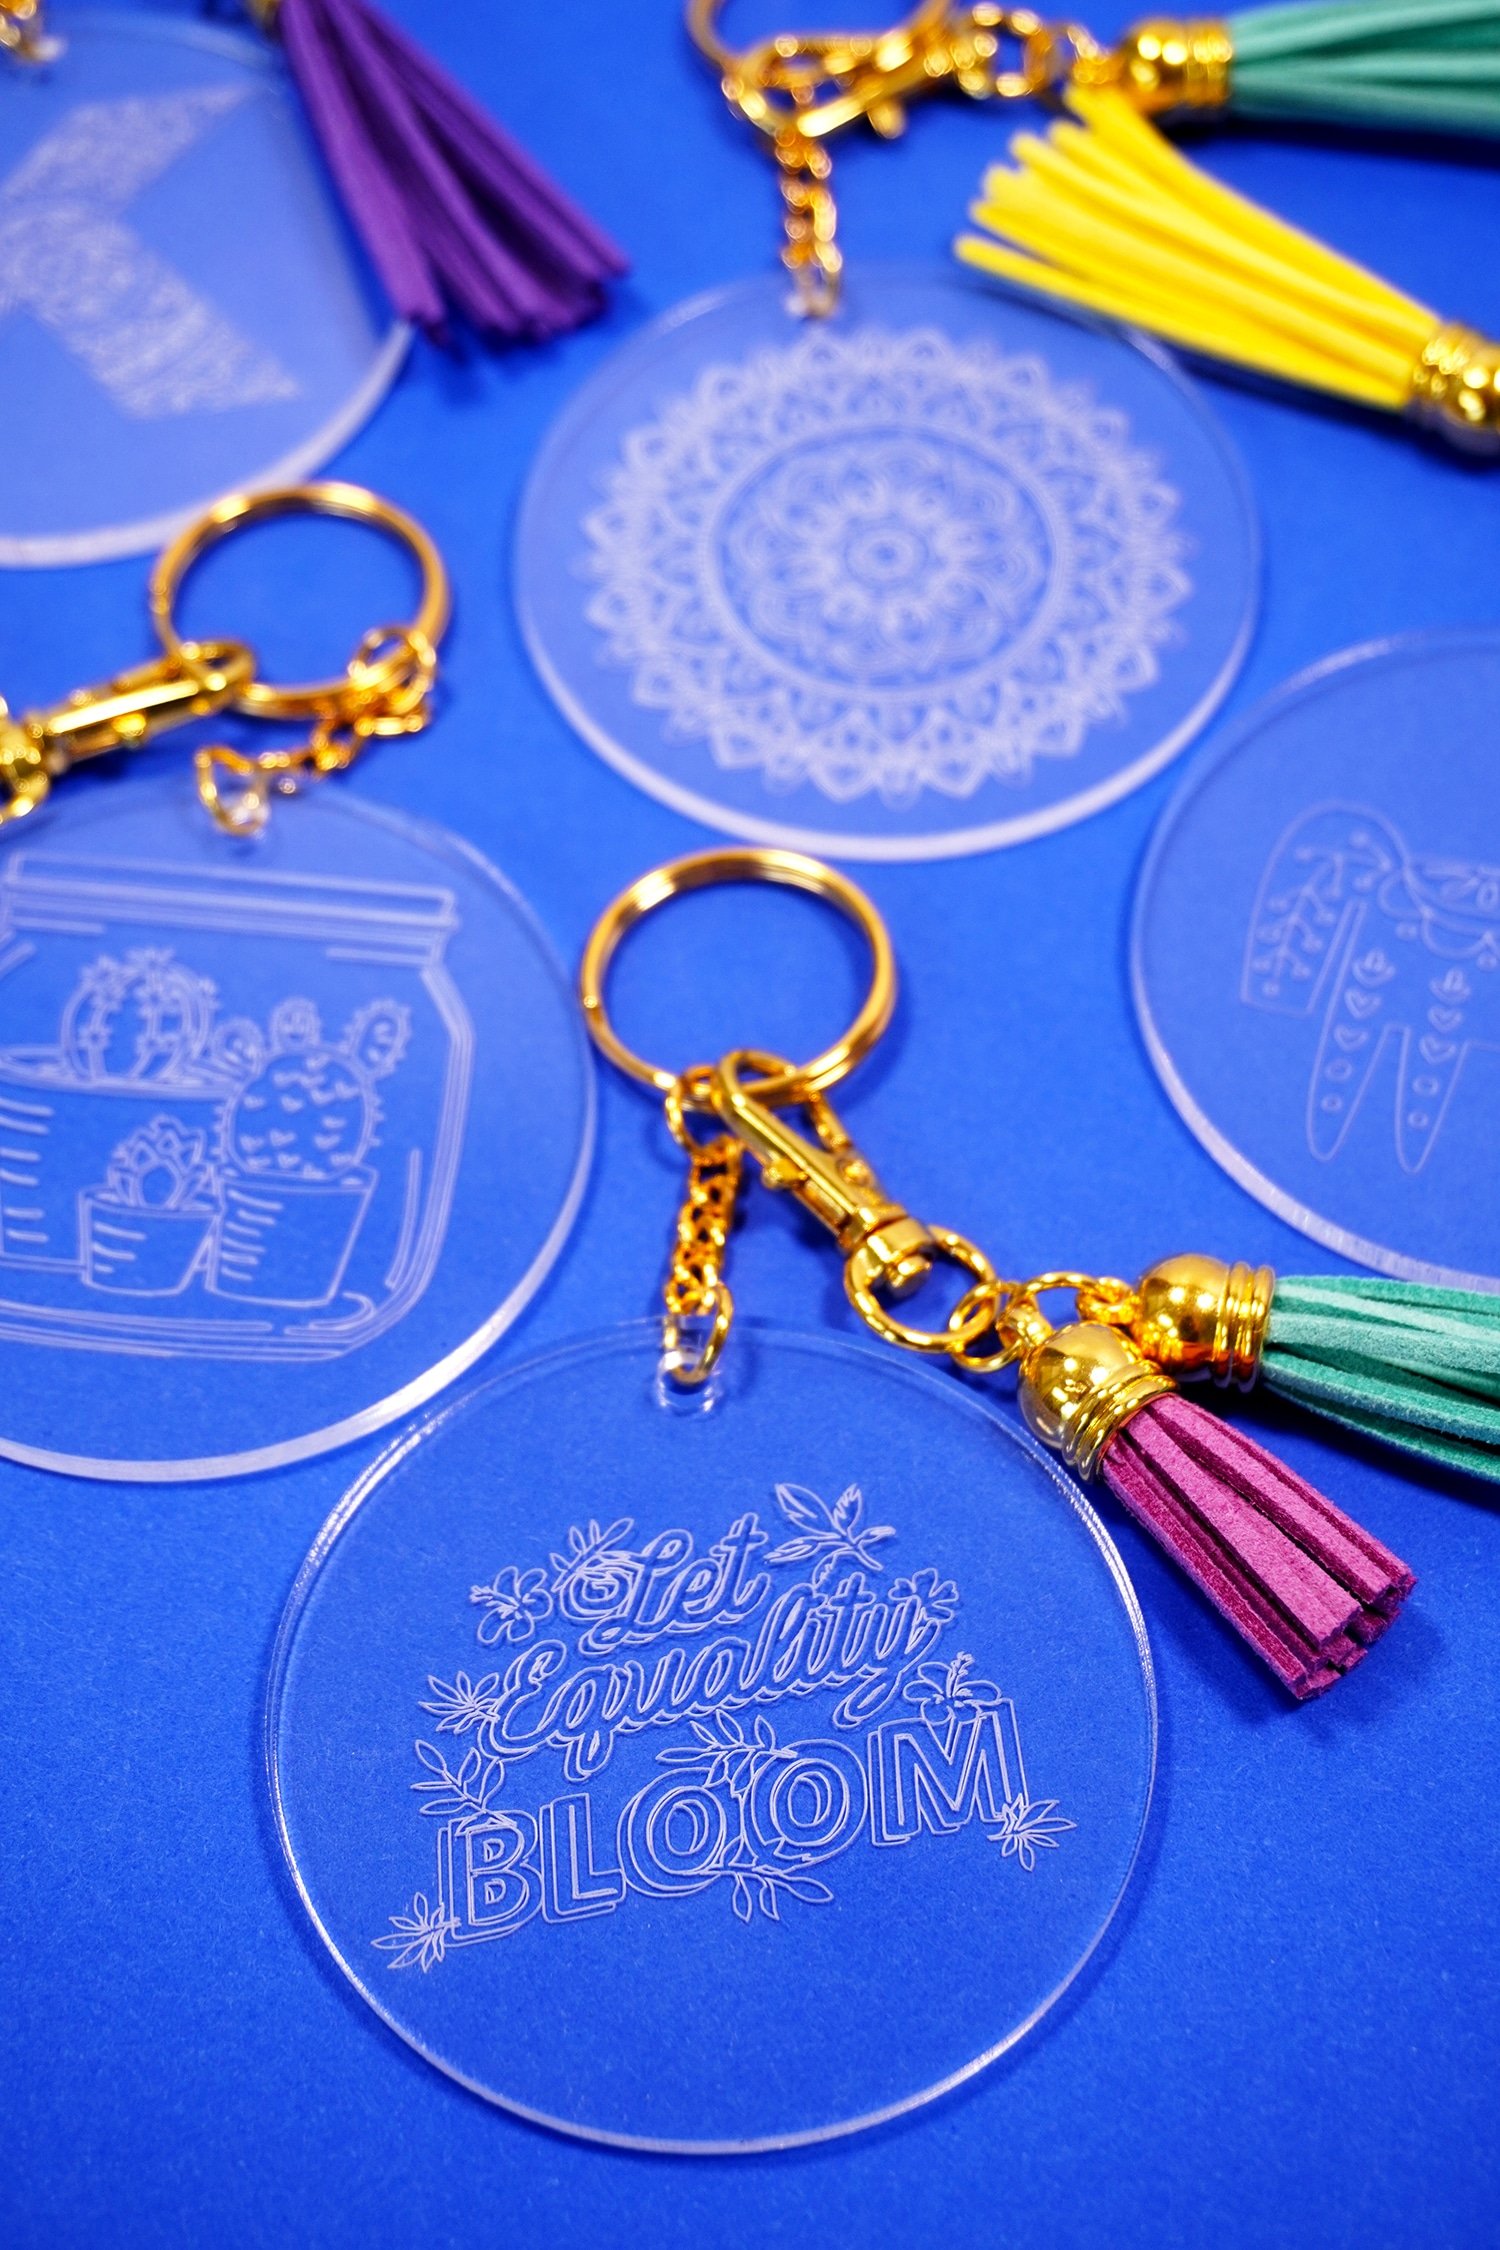
These Cricut-engraved acrylic keychains would make an awesome (and inexpensive!) DIY gift idea for any occasion!
Want More Cricut Engraving Tool Projects? Check These Out!
- Engraved Metal Jewelry Blank
- Engraved “Free Spirit” Metal Bracelet
- Engraved “Bushel & A Peck” Metal Bracelet
- Engraved Metal Dog Tags
There is SO much that you can do with the Cricut Engraving Tip tool, and we’ll be testing even more materials and making even more projects with it, so stay tuned! What would you make first?

You May Also Like:
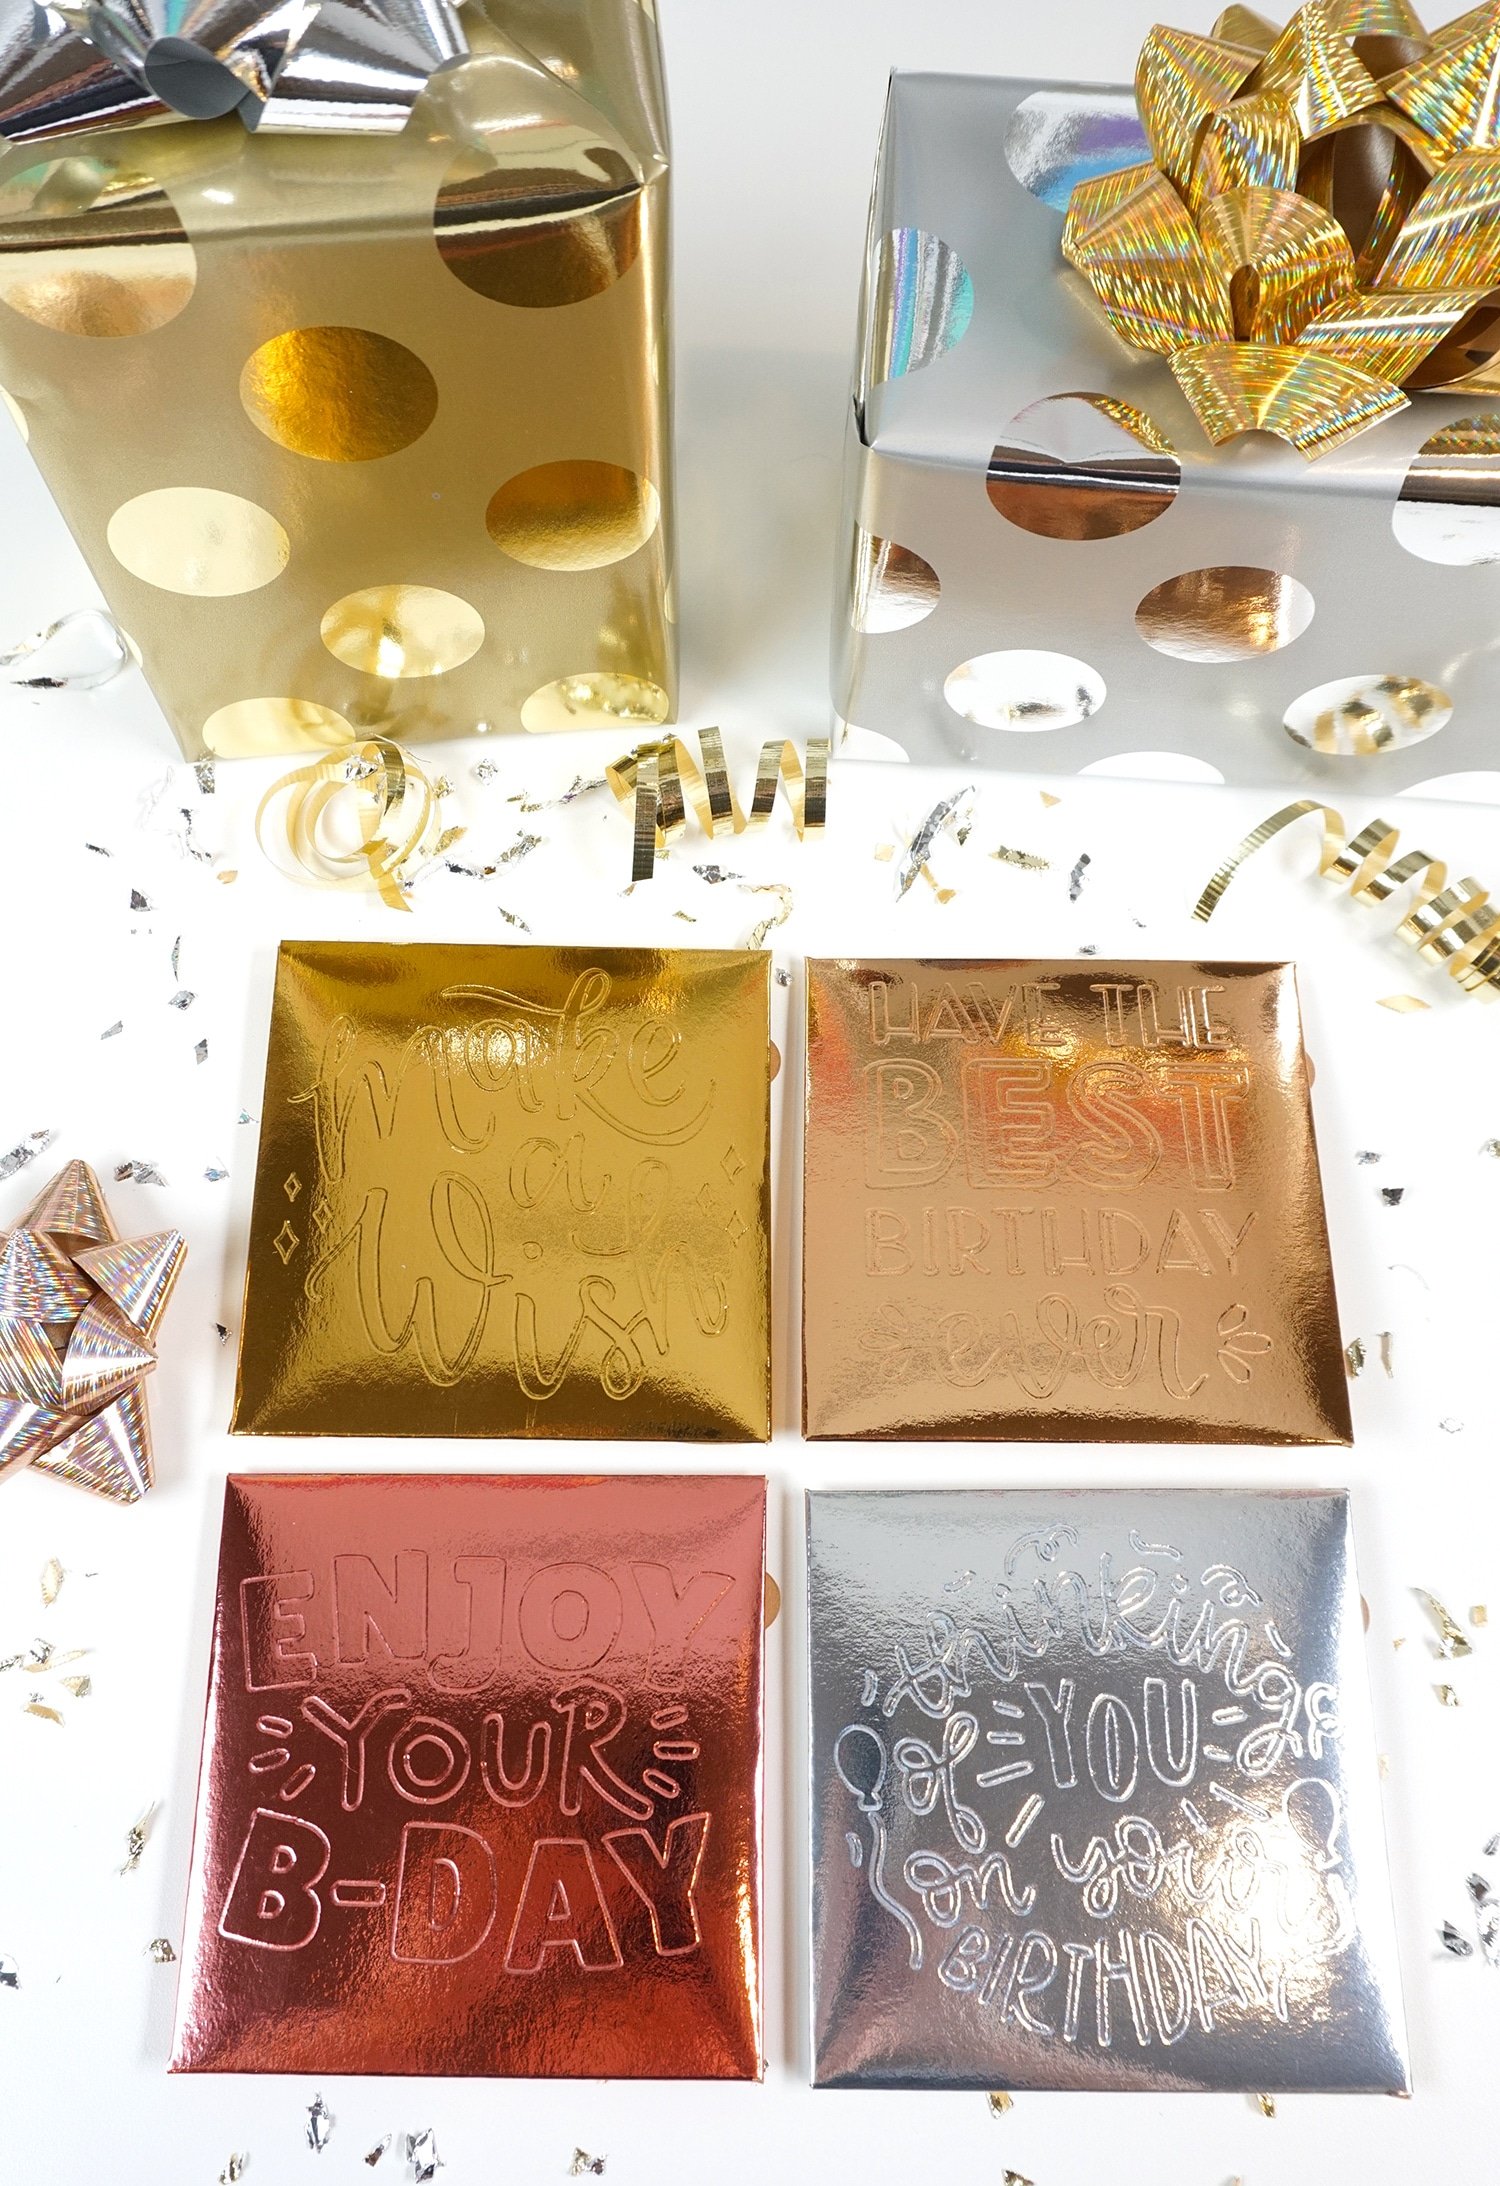
Debossed Gift Card Holders with the new Cricut Maker Tools
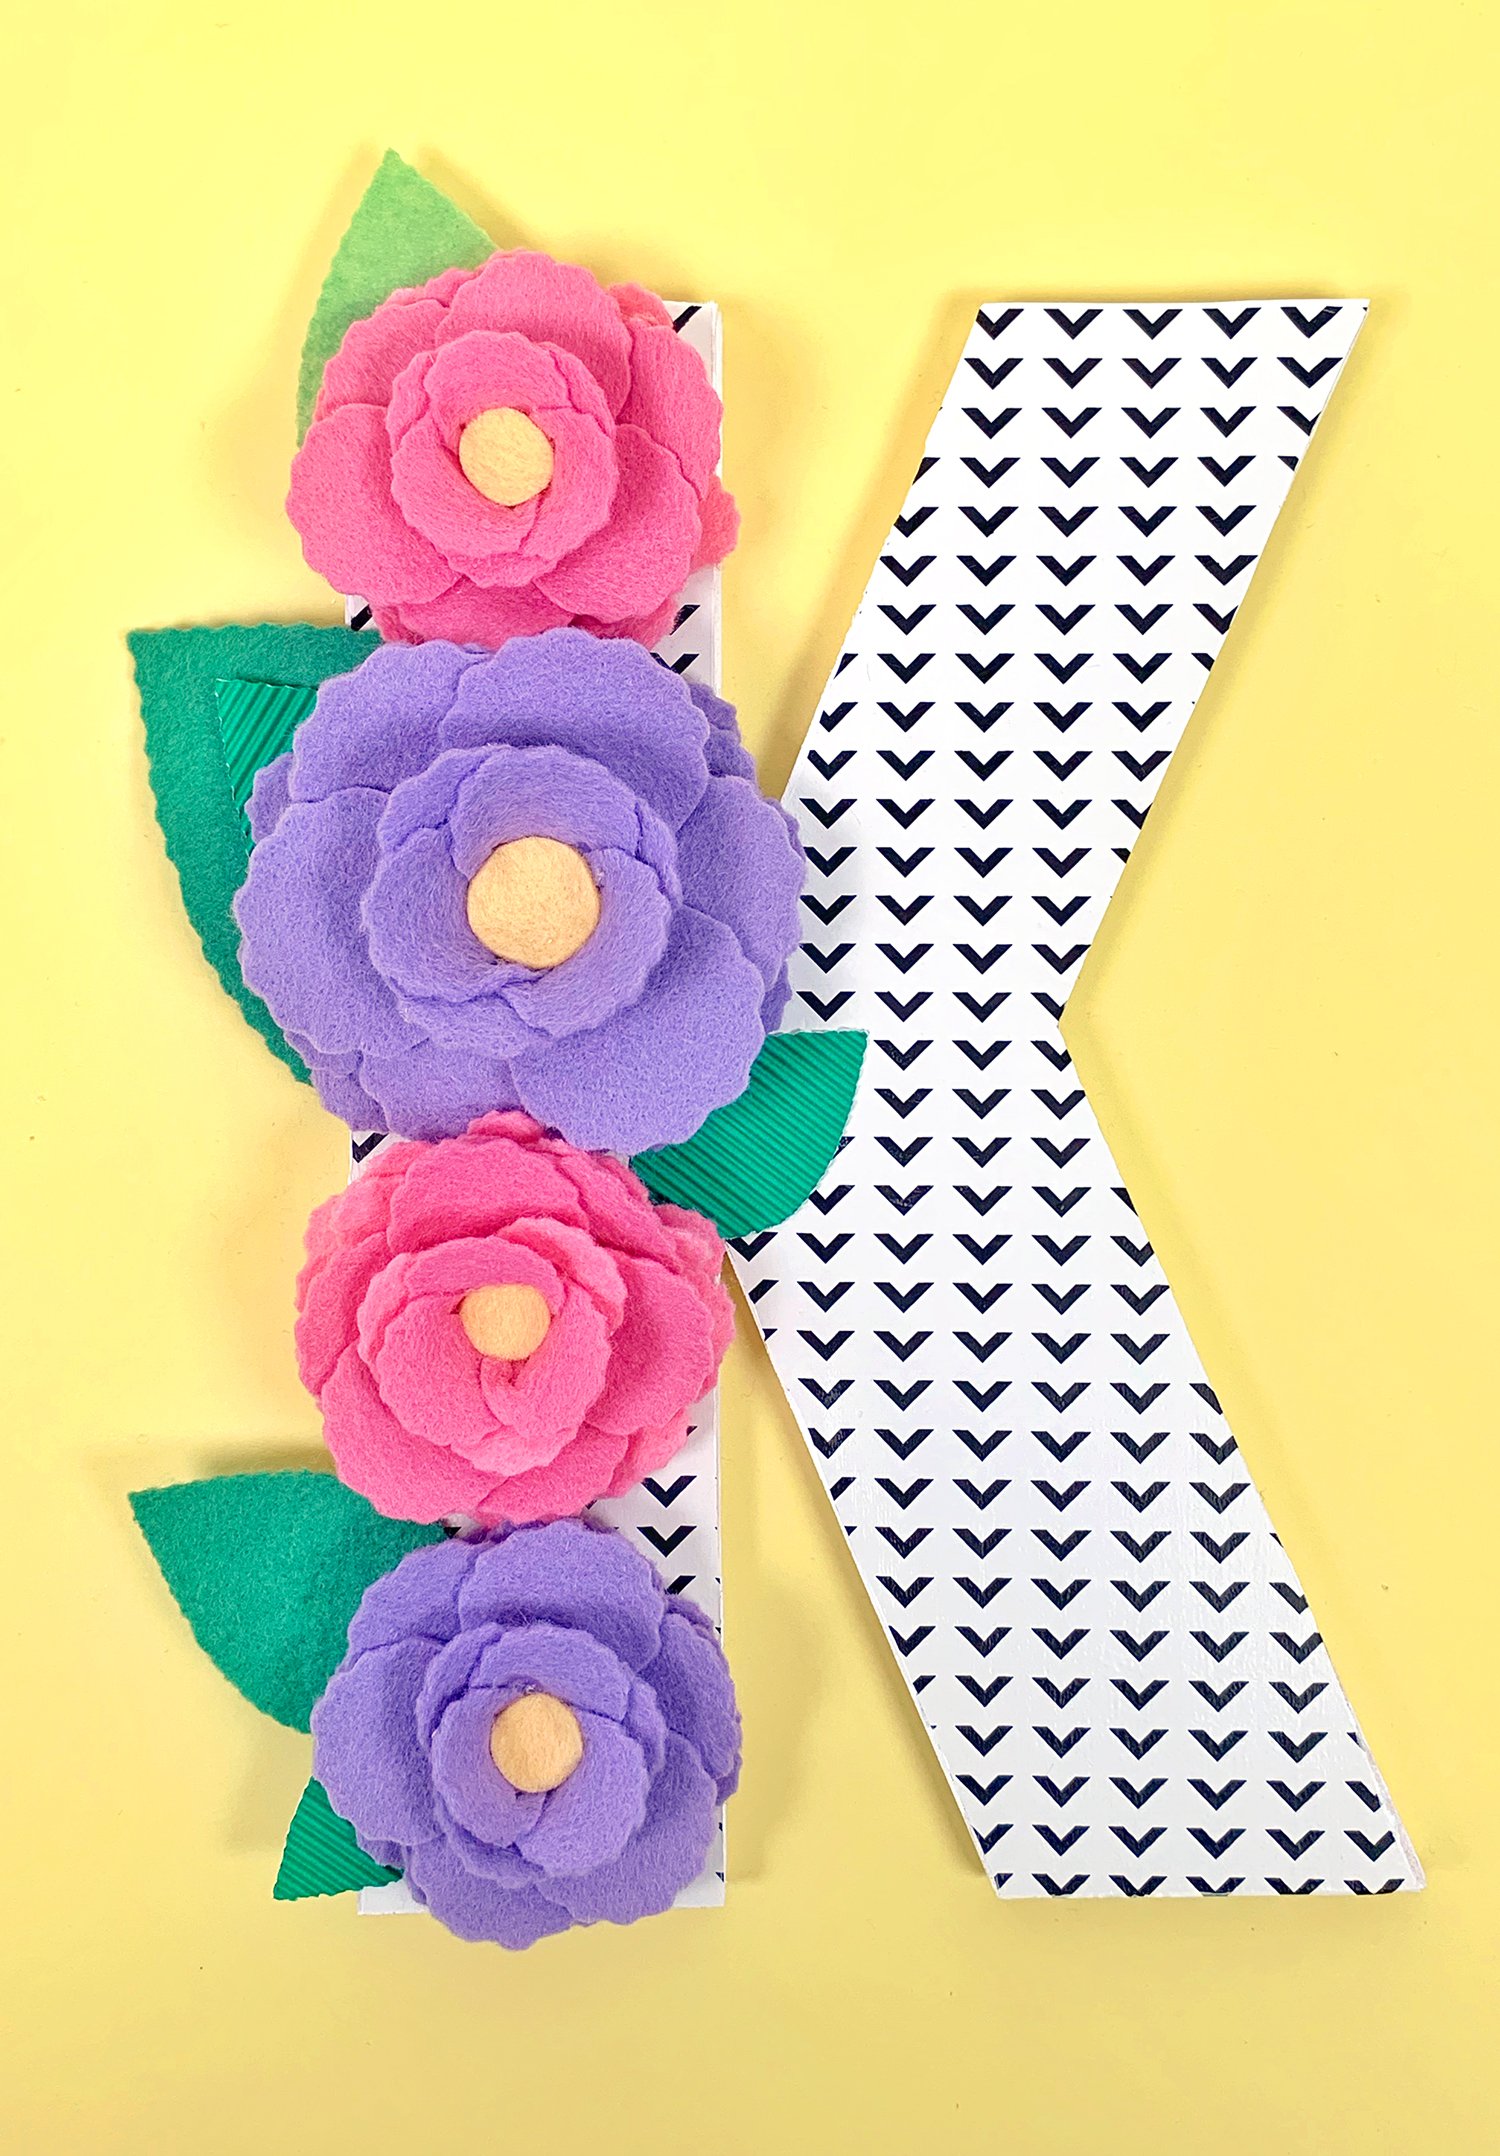
DIY Wood Floral Monogram Letters with the Cricut Knife Blade
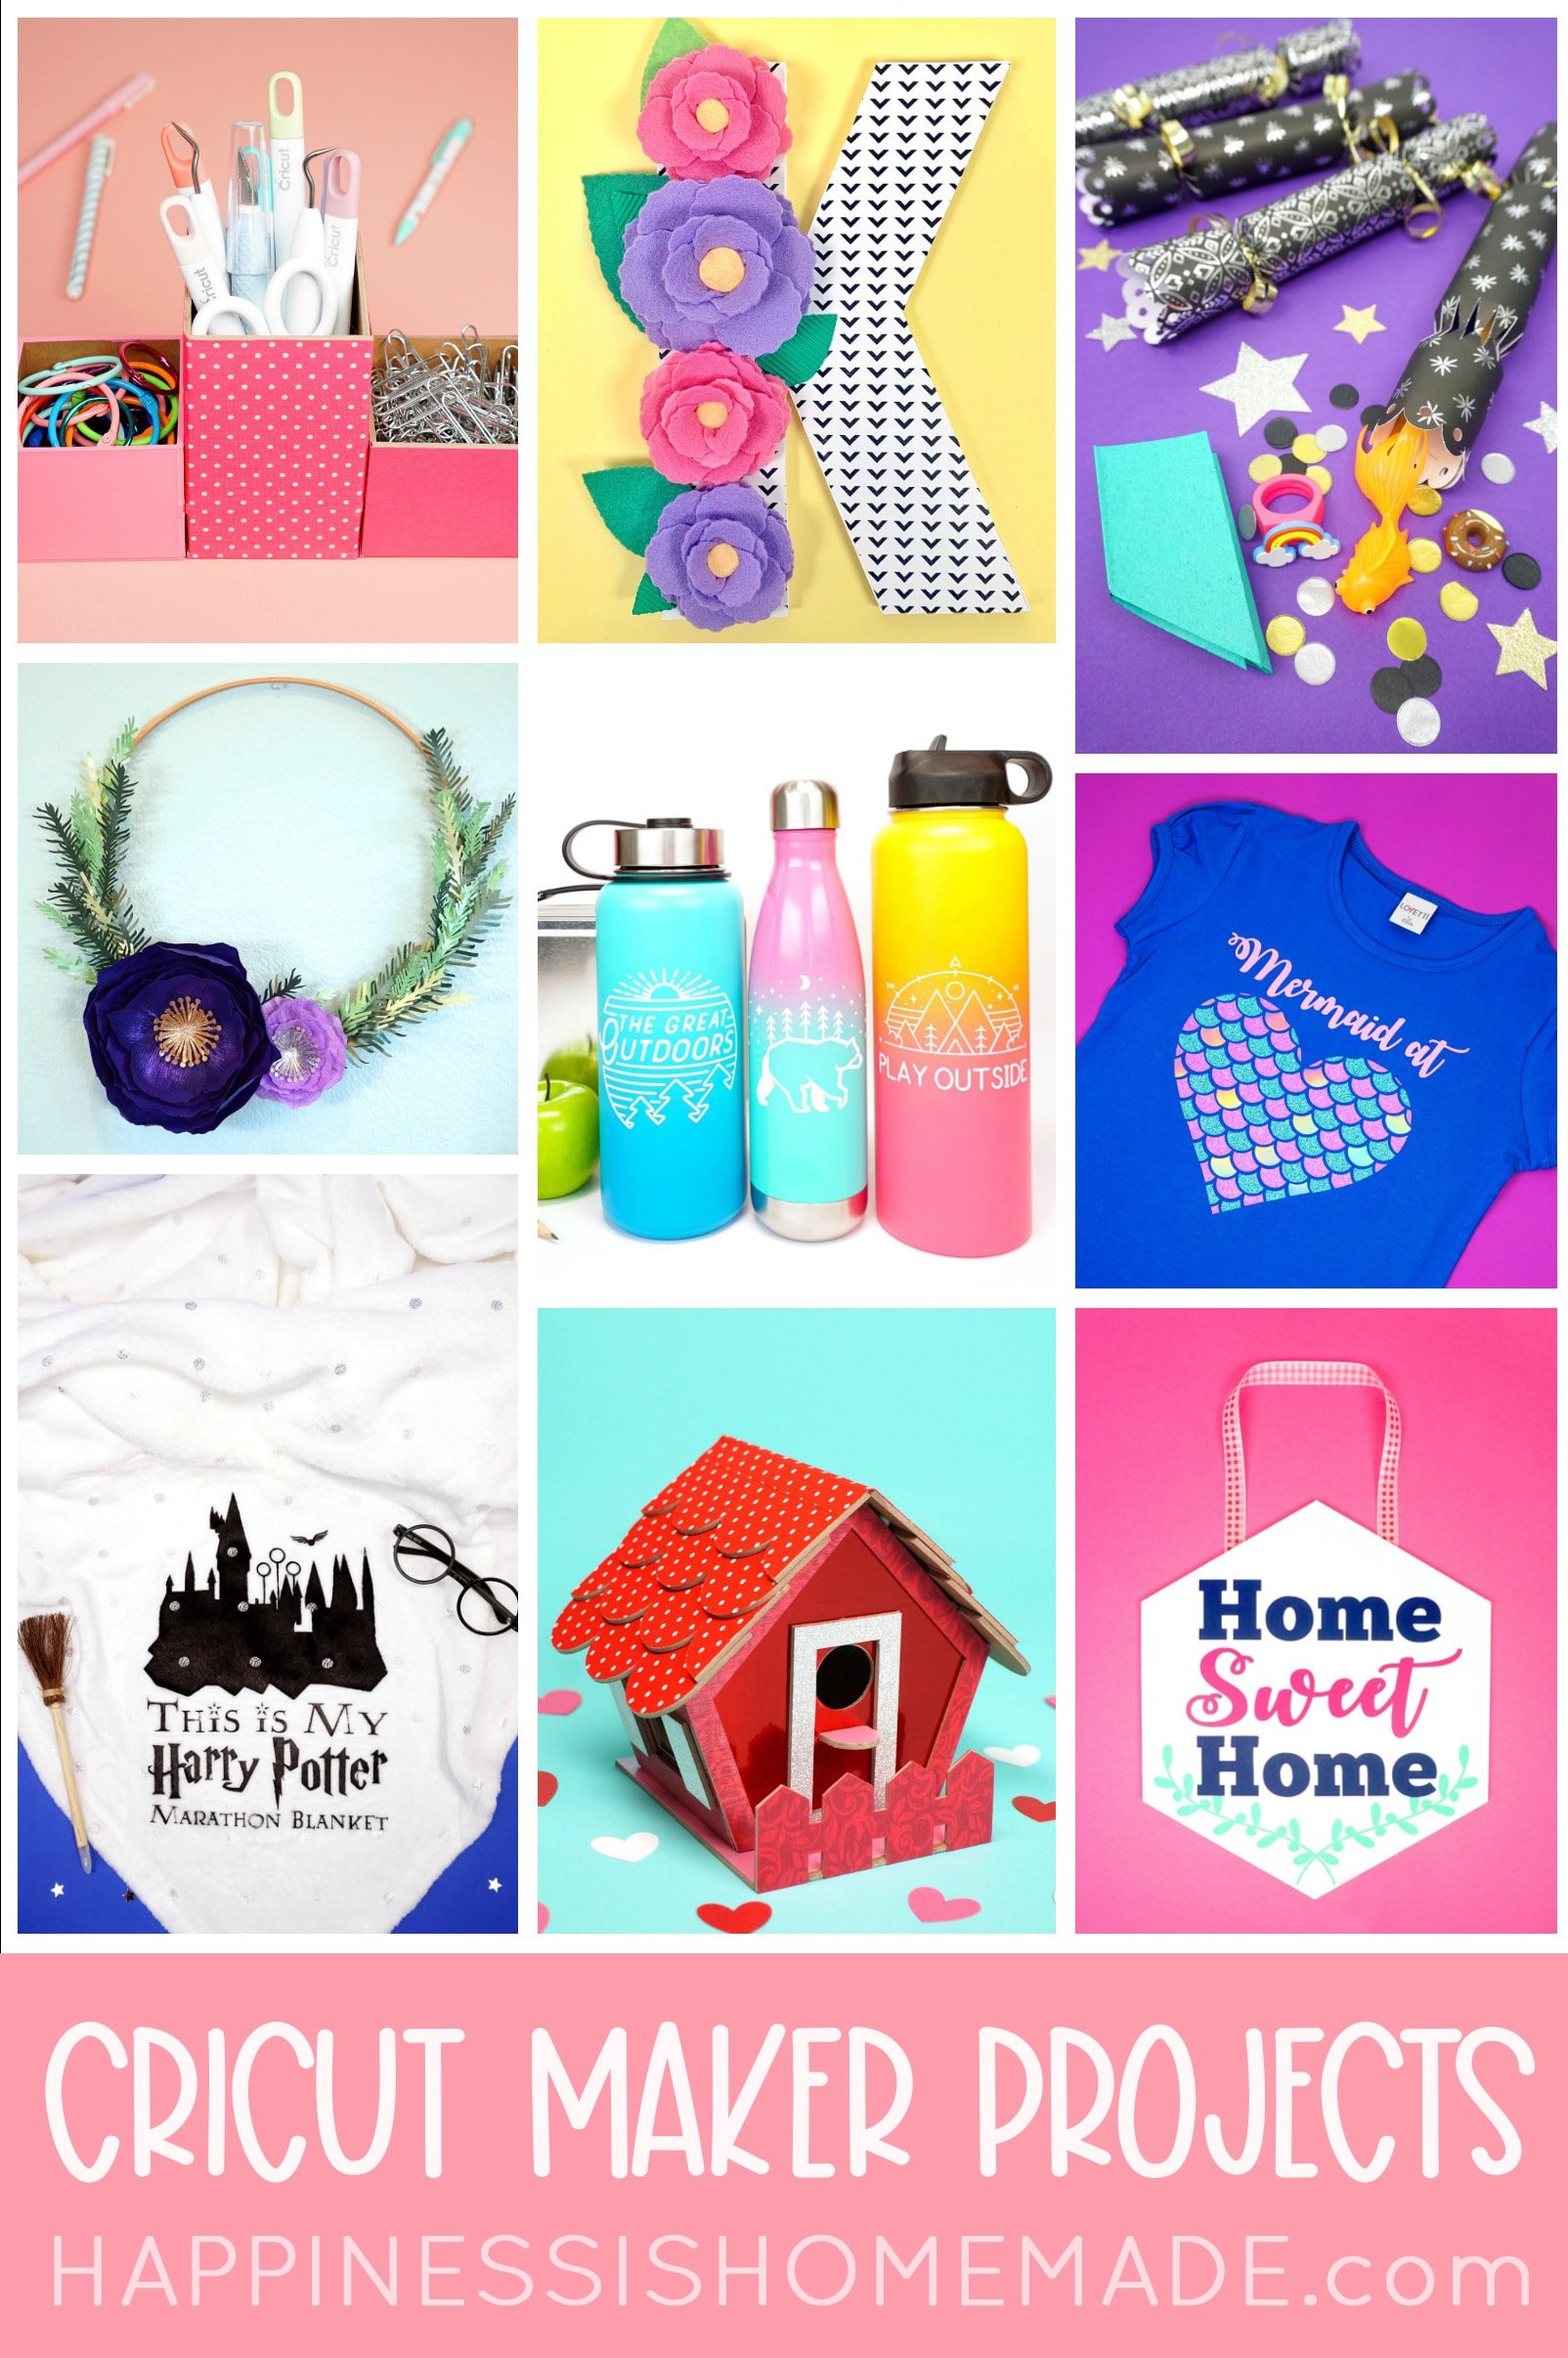
17 of the BEST & Most Inspiring Cricut Maker Projects
Don’t Forget to Pin This Engraving Tool Post for Later!

Heidi Kundin has captivated the hearts of millions with her colorful and inspiring approach to crafting, celebrations, and family fun. With over 15 years of experience, Happiness is Homemade has become a must-visit destination for those seeking quick and easy creative ideas and last-minute solutions. Heidi’s warm personality shines through her posts, inviting readers to join her on a creative journey that’s fun, rewarding, and achievable. Heidi is also the author of Homemade Bath Bombs & More and DIY Tie-Dye.