
Learn how to curve text for tumblers in Cricut Design Space so that it appears straight, and create these adorable mermaid tumblers! FIVE different mermaid tumbler designs to choose from!


Have you ever tried to create your own custom tumblers only to end up with funky crooked text and designs that look misplaced? Find out the secret for curving text in Cricut Design Space so that your text will look straight when applied to your tumbler – it’s easier than you might think!
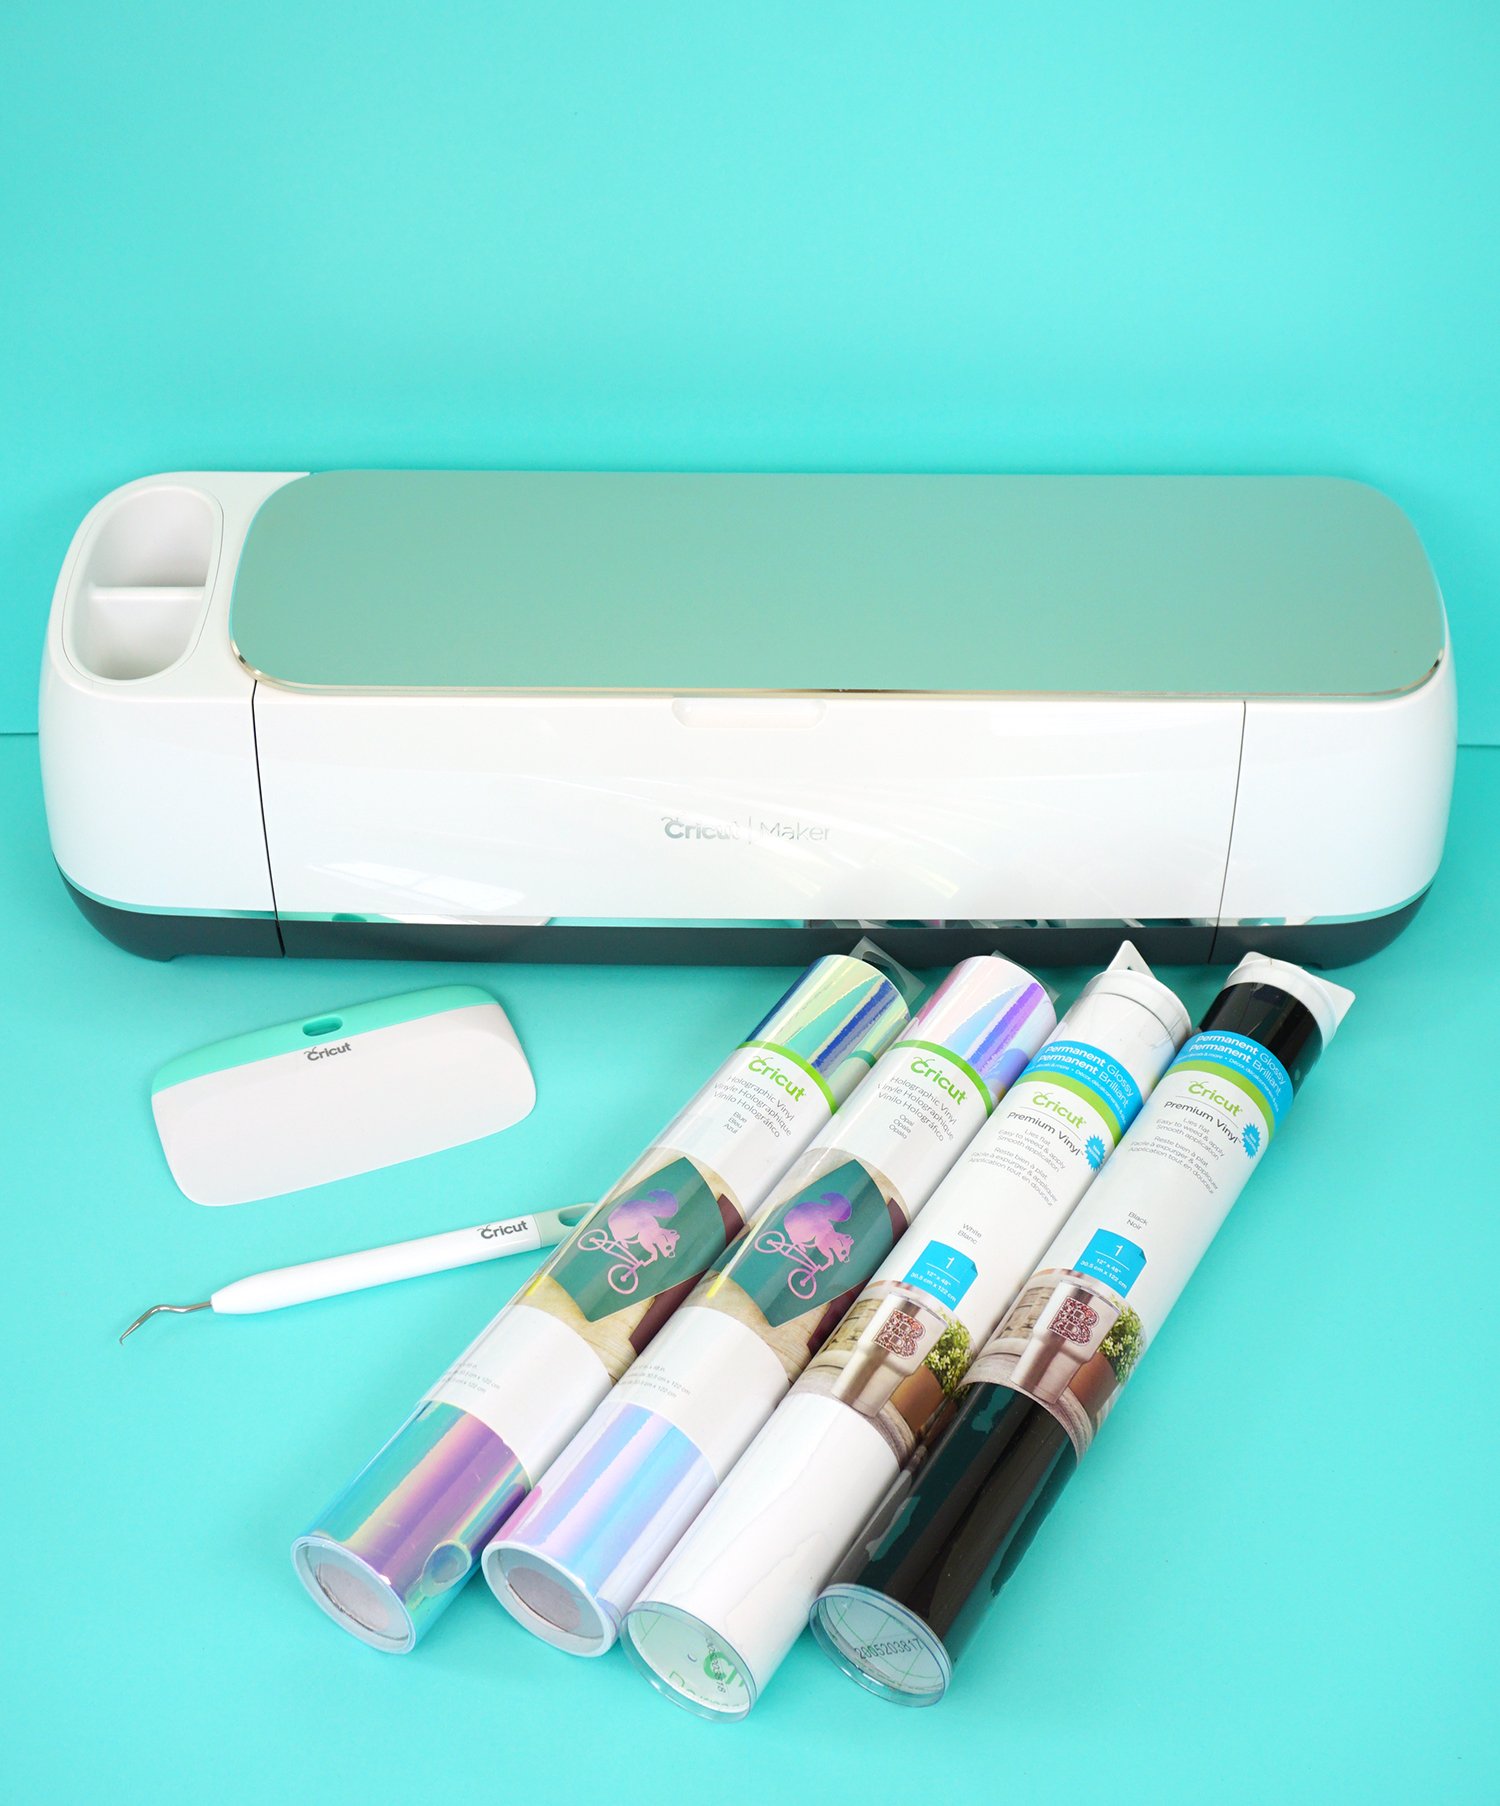
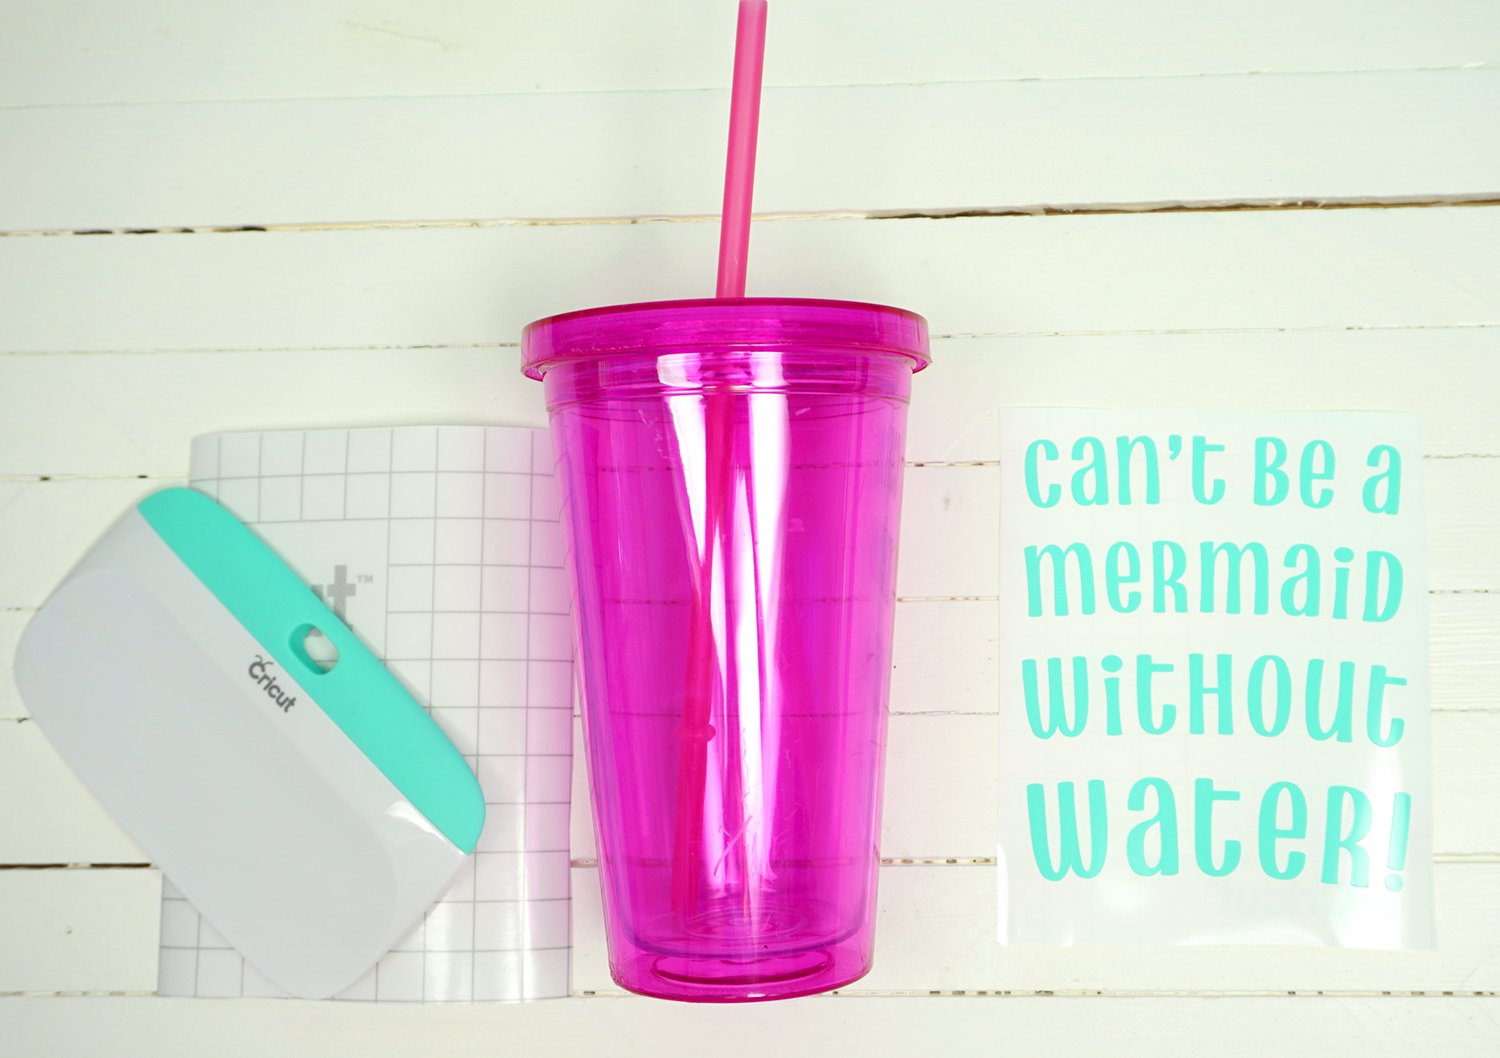
Supplies Used for Mermaid Tumblers:
- Cricut Maker
- Cricut Permanent Premium Vinyl
- Cricut Holographic Vinyl
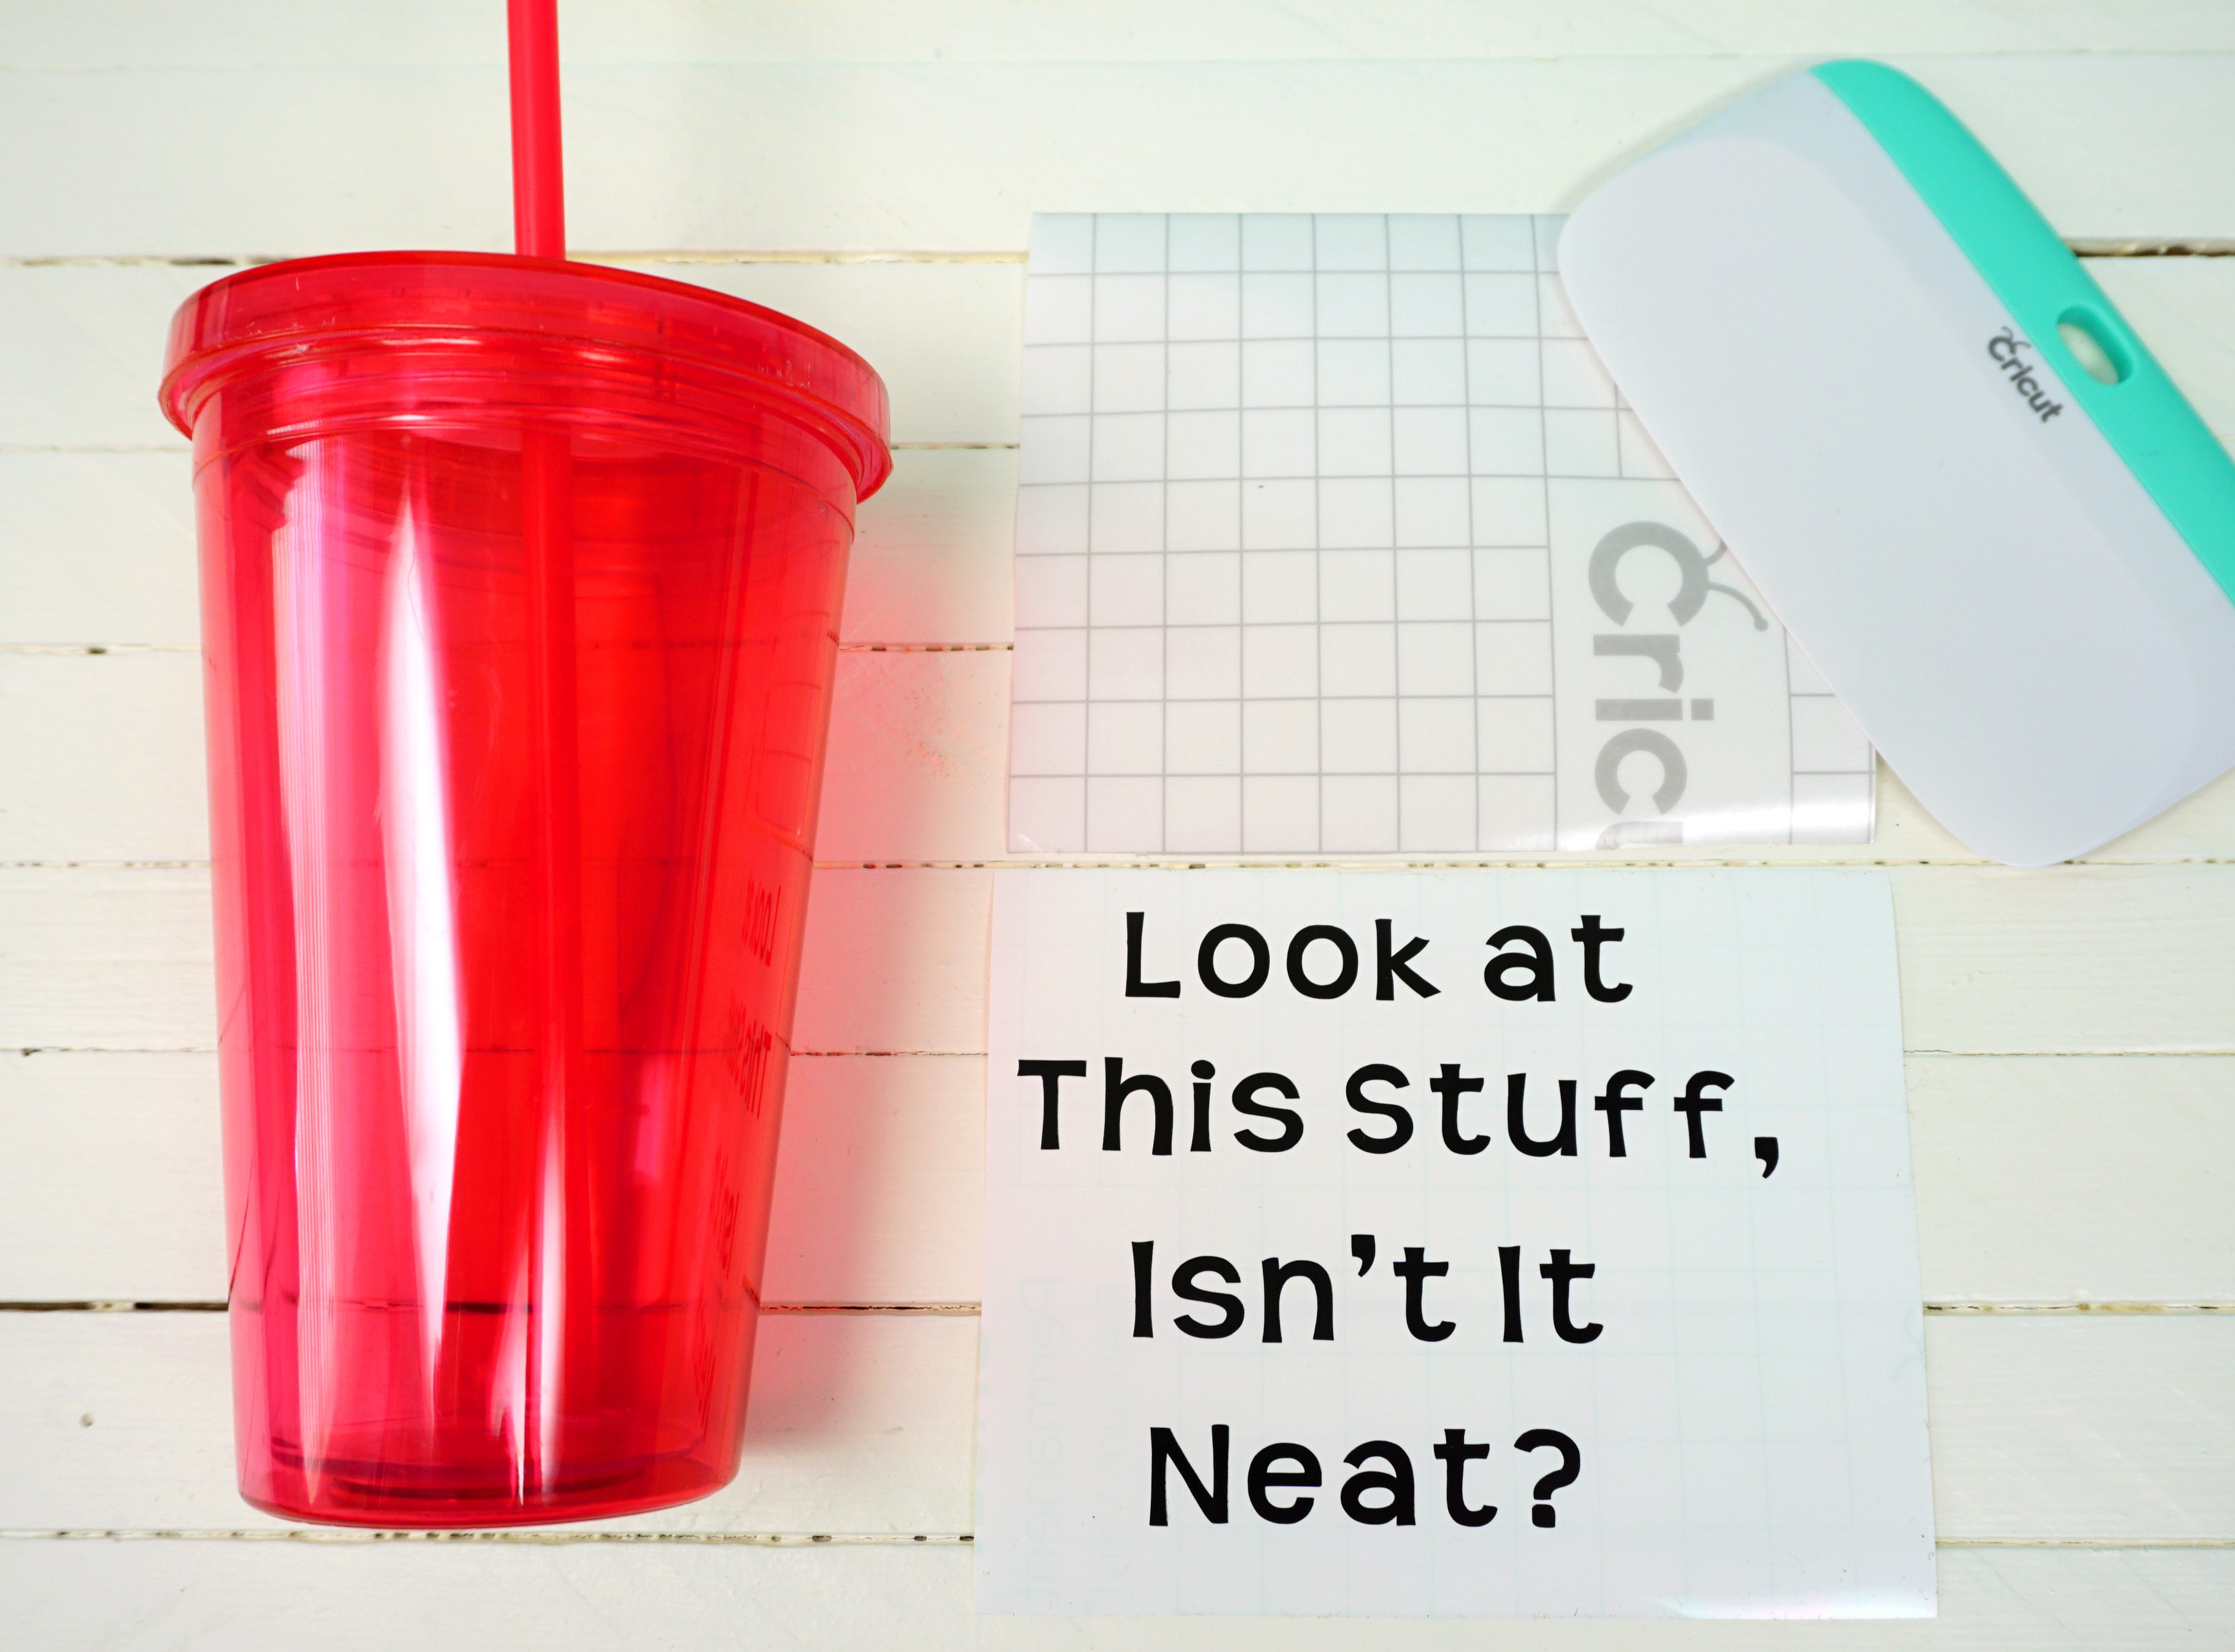
- Cricut Transfer Tape
- Cricut Scraper and Weeding Tools
- Blank 16-oz. Plastic Tumblers
As I was using my Cricut Maker to make these mermaid tumblers, I realized that today is my Cricut Maker-versary (woohoo!) – exactly one year since I got my hands on my very own Cricut Maker, and I haven’t touched another machine since! In the past year, I’ve talked a LOT about my love for the Maker, and I’ve made and shared more Cricut projects than I ever have before (and those are just the projects that were cute and blog-worthy enough to make it on to the website!). Honestly, I can’t even tell you how game-changing (and life-changing!) the Cricut Maker has been for me!
The Cricut Maker truly is the ultimate professional-grade machine, cutting everything from delicate tissue paper to silky fabrics to wood! The Adaptive Tool System allows you to quickly and easily switch between the different blades required for each material and is super awesome for future expandability – Cricut is always working on creating awesome new tools, so I can’t wait to see what they come up with next! They recently released two new Scoring Wheels for razor-sharp creases in cardstock, poster board, and more, and I’m super excited to play around with them and share some more new projects with you!
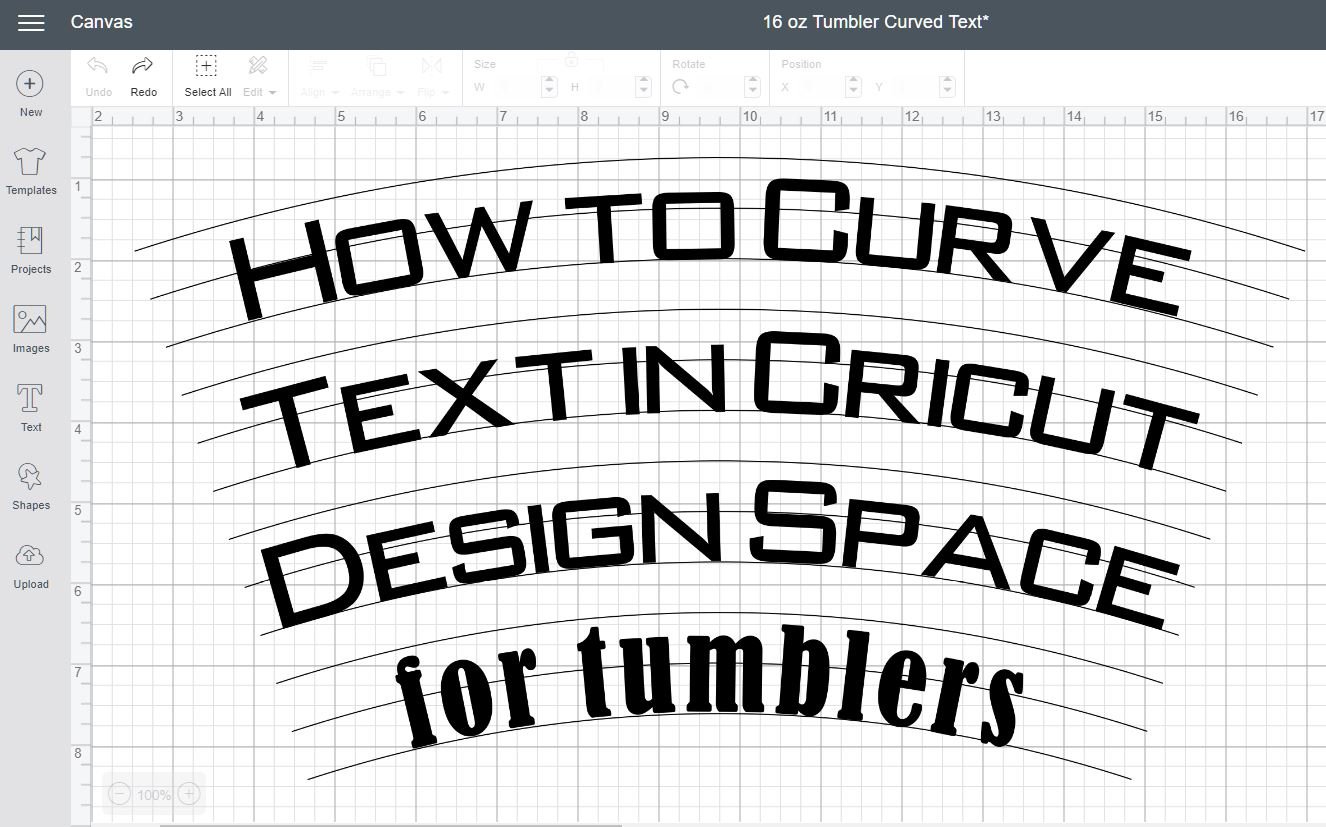
How to Curve Text for Tumblers in Cricut Design Space
 Why do you need to curve text for tumblers?
Because a tumbler has a conical curve to the surface, a line of straight text will not appear straight once you apply it to the tumbler.
Wanna see?
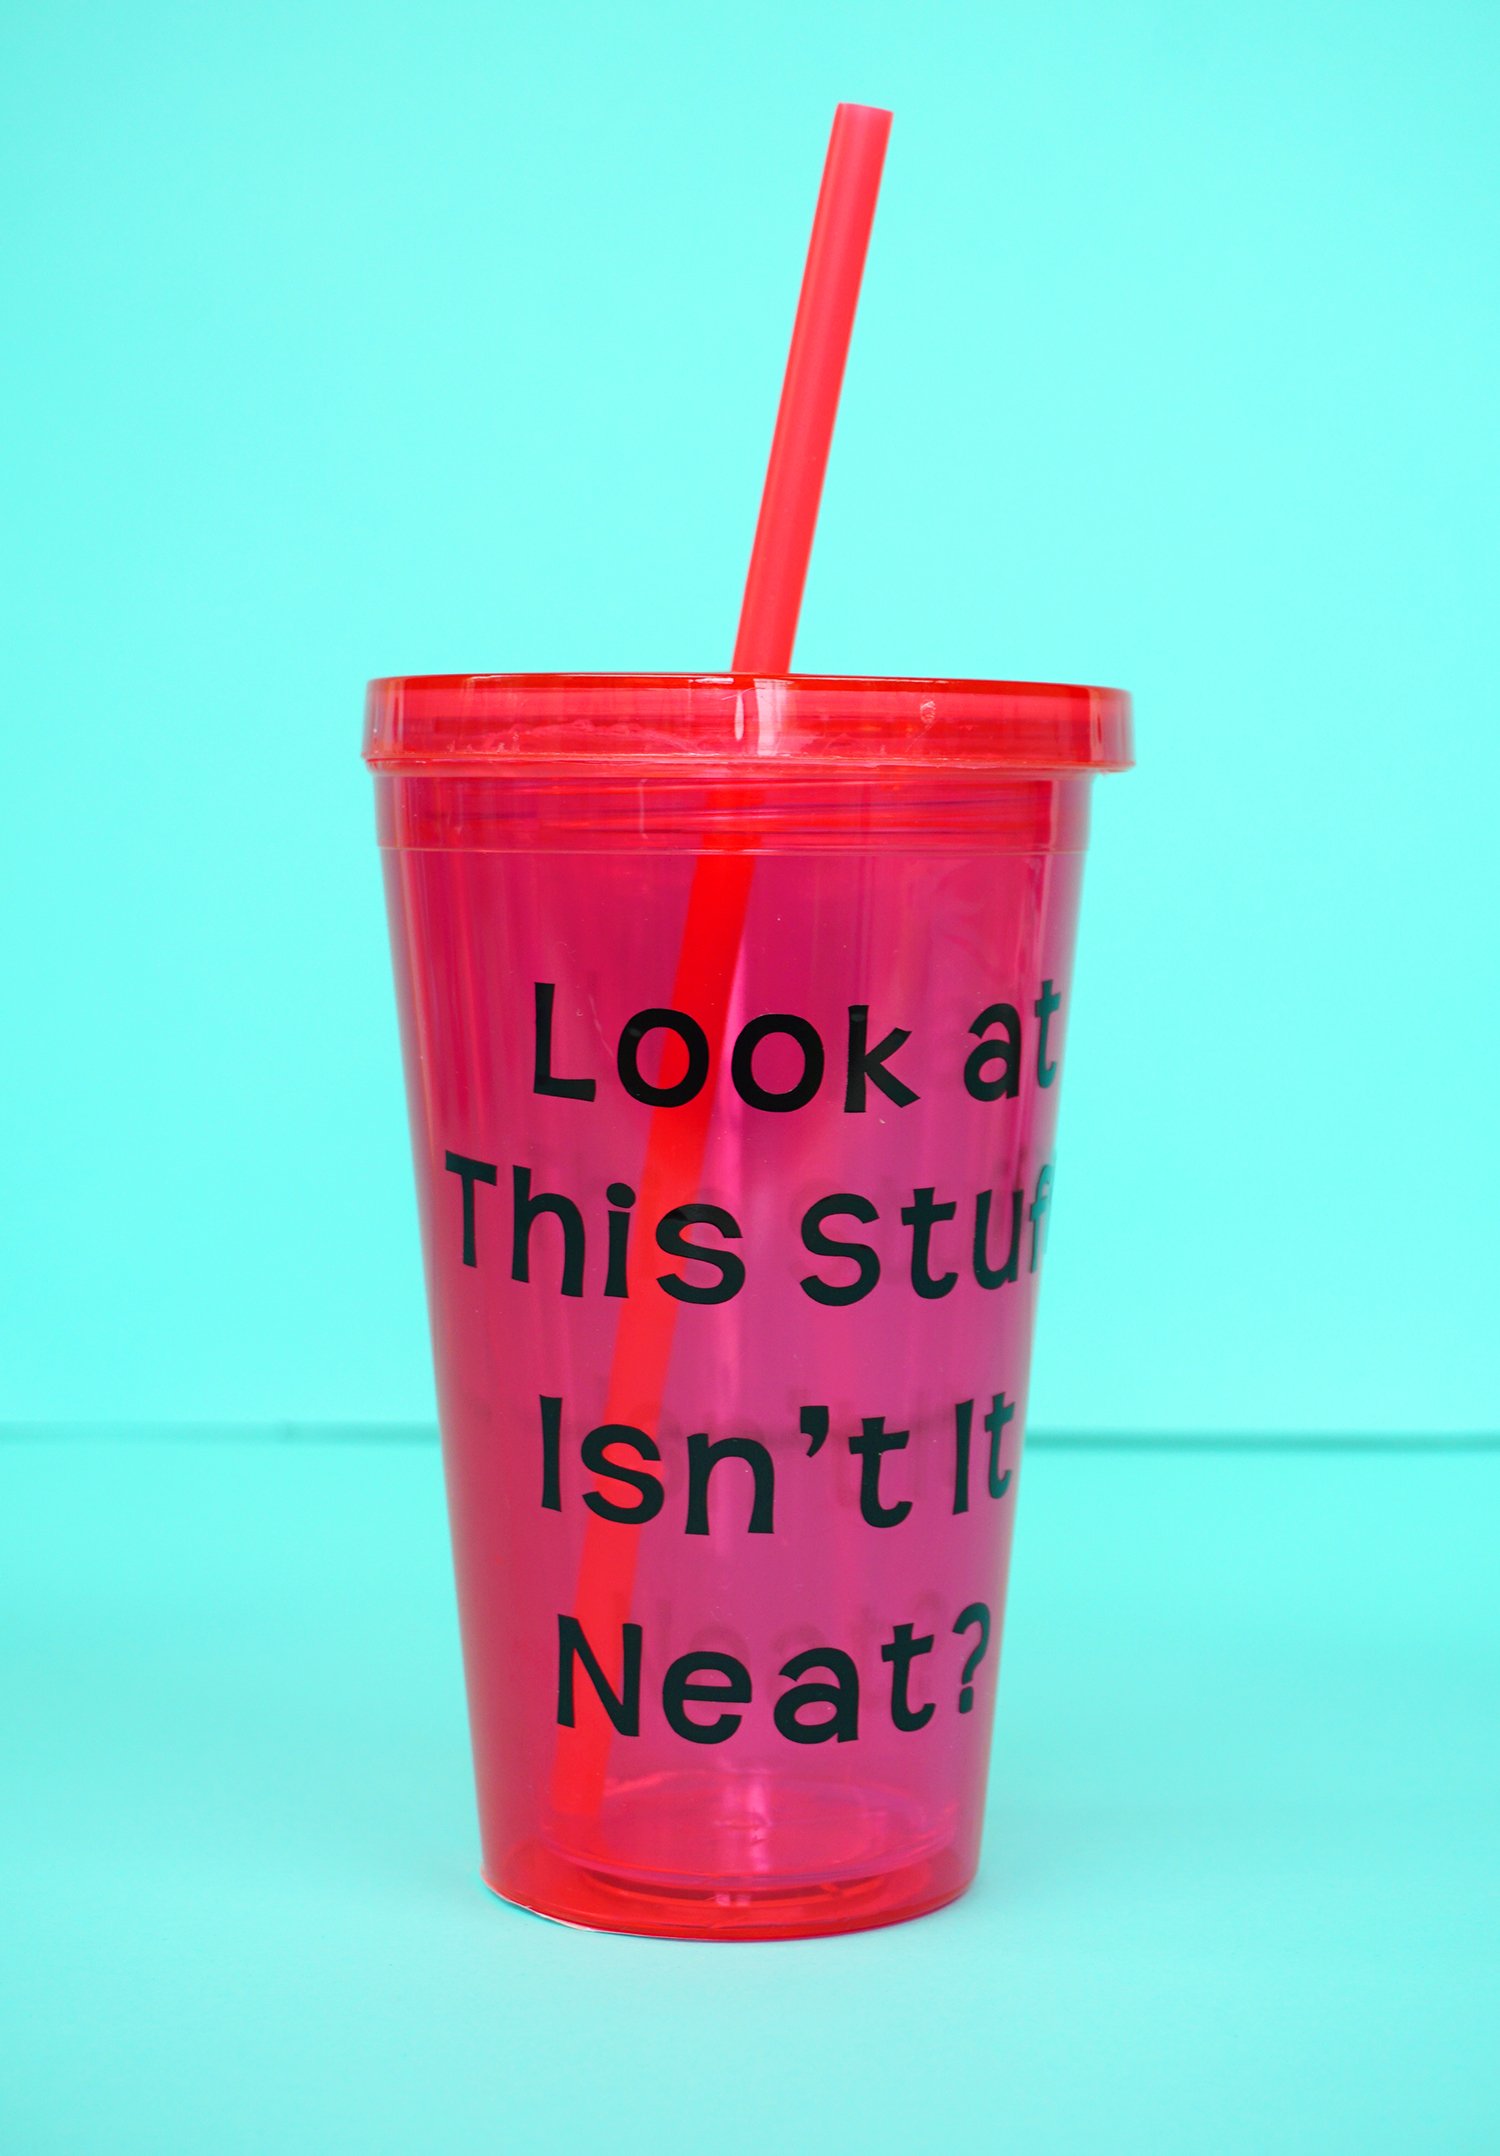
The center of the design looks okay, but the wider that your lines of text are, the more that the edges of the lines will curve up/down. Not exactly the look we’re going for!
(Note: On a tumbler, I normally would design lines of a text a little bit smaller and closely spaced than I show in these designs, but for the educational purpose of teaching about curved text, the larger/wider text shows off the changes best. If you would like to recreate these tumblers using the provided Cricut Design Space project links, the lines of text are fully editable if you wish to make them a bit smaller!)
So, how do you curve text for tumblers so that it looks straight?
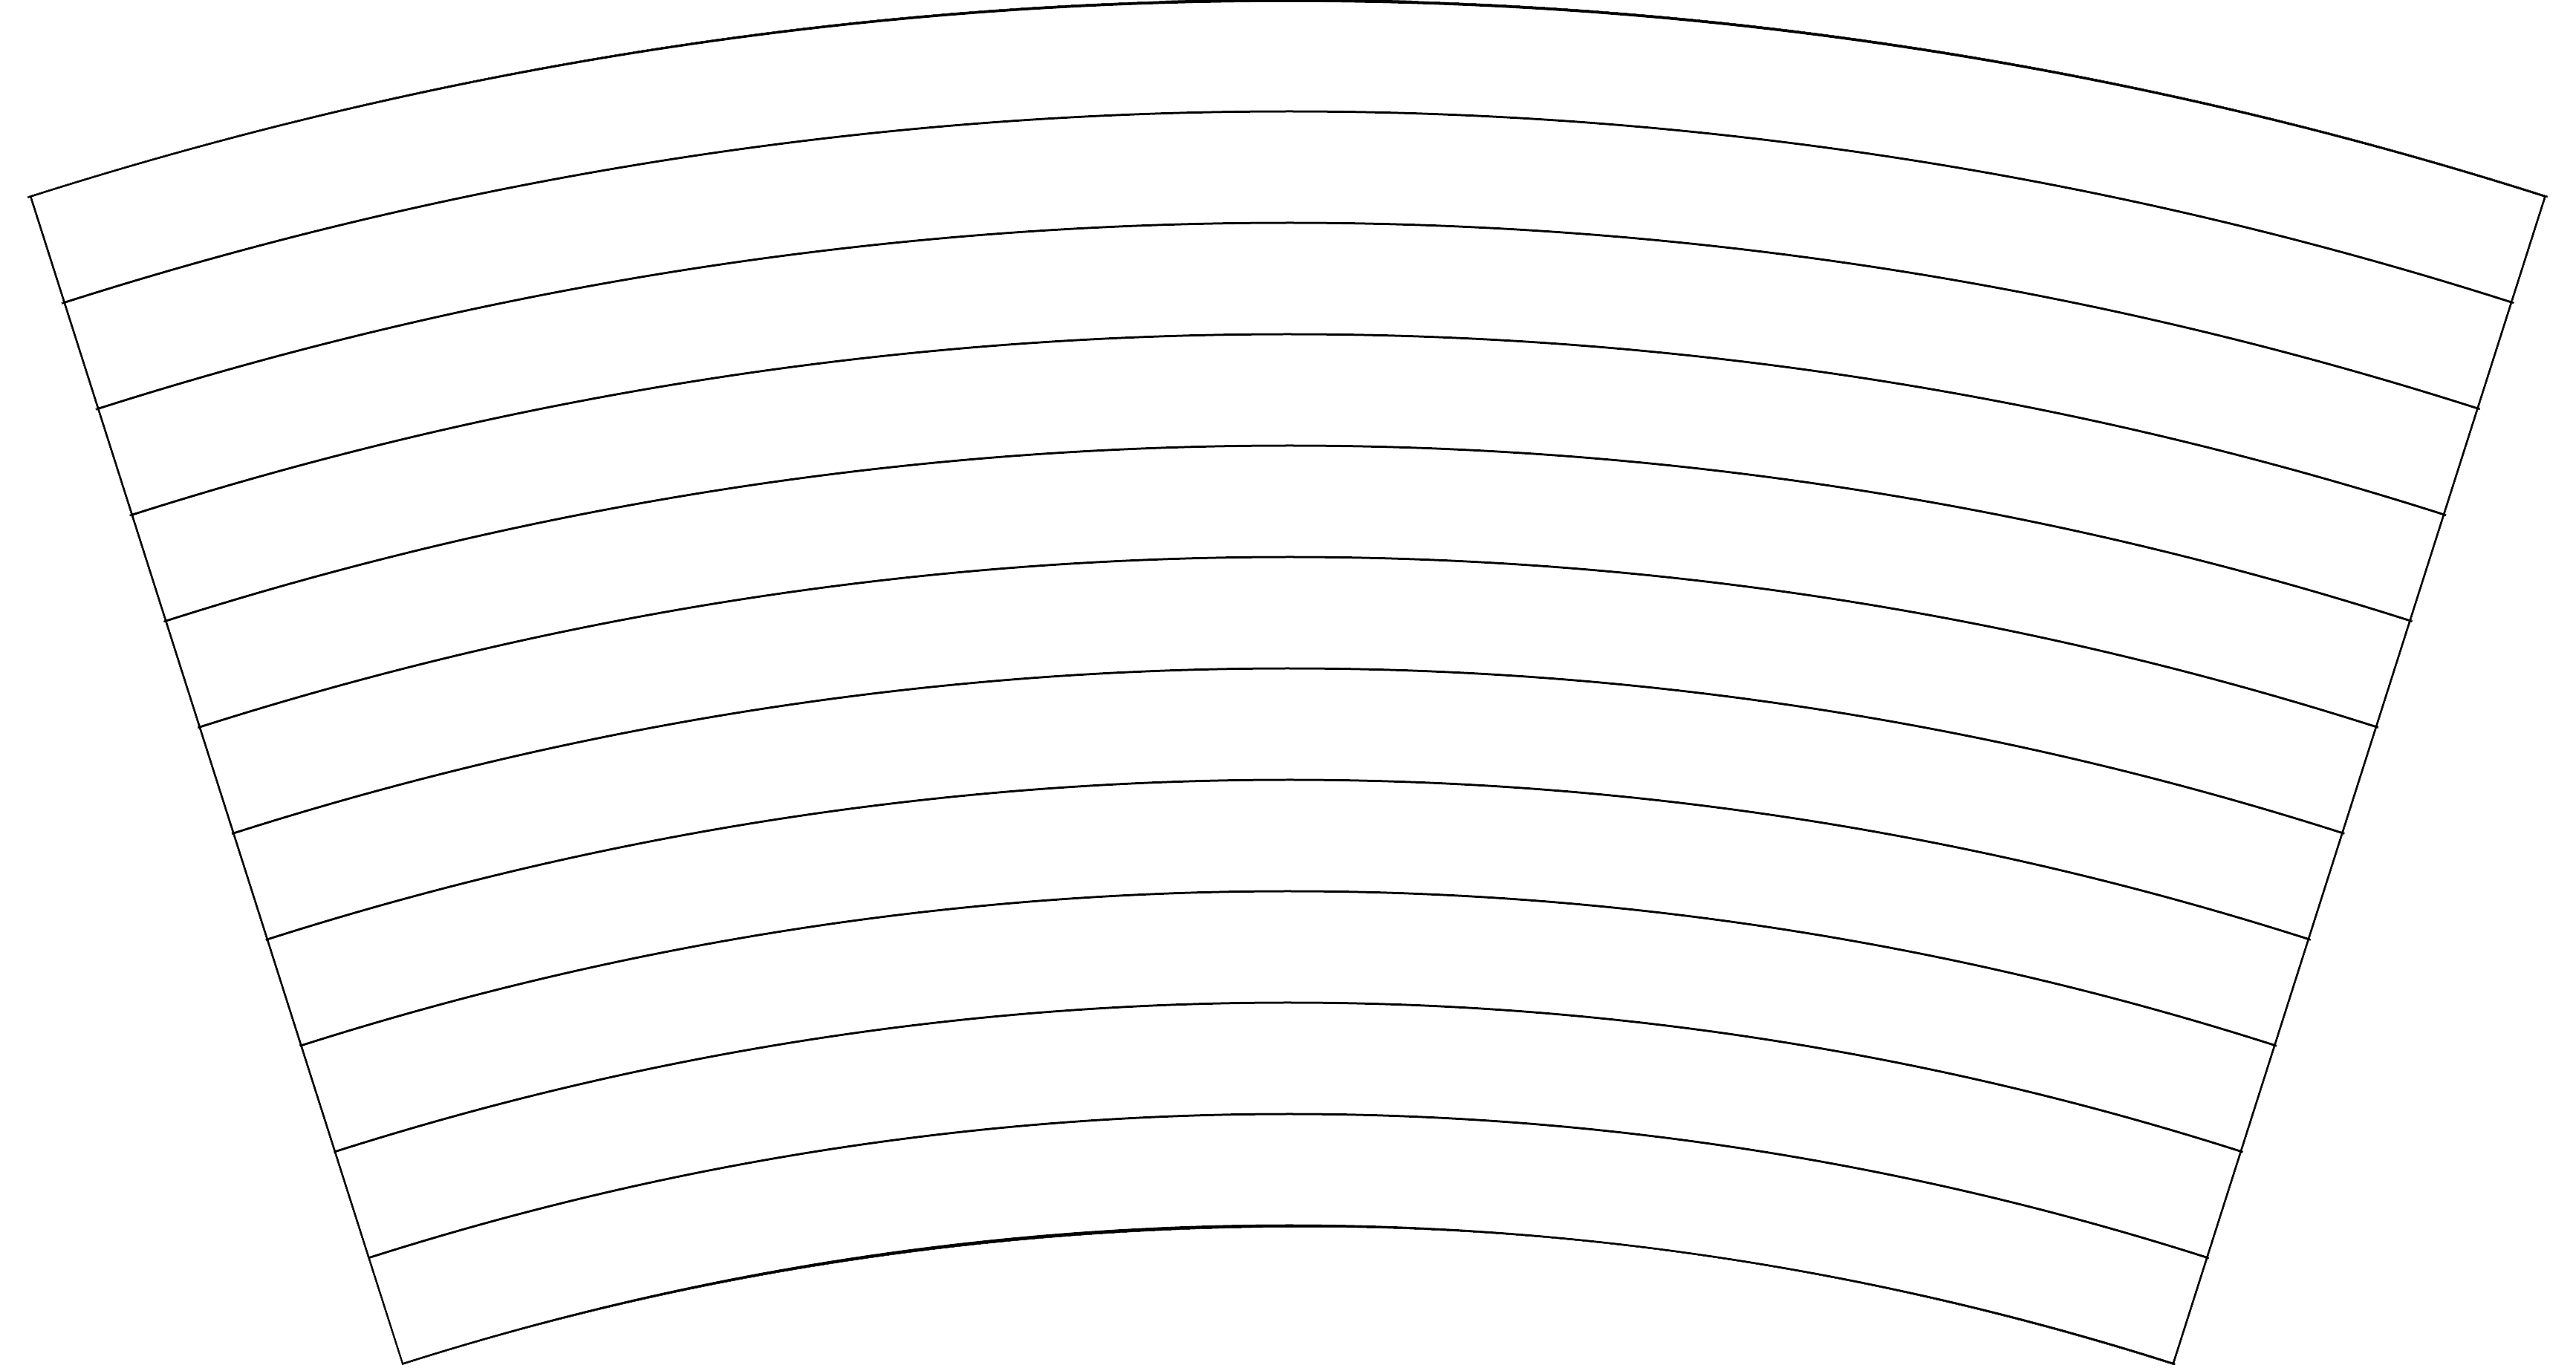
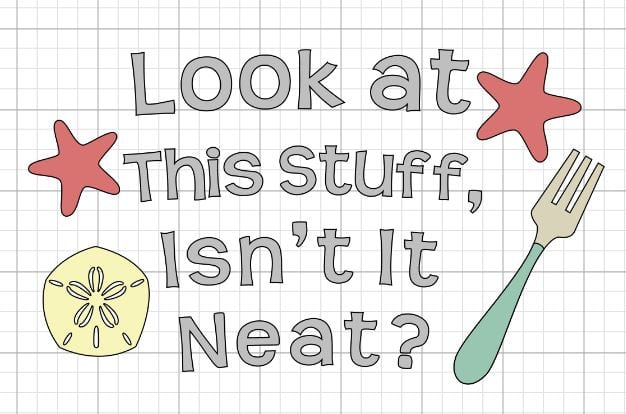
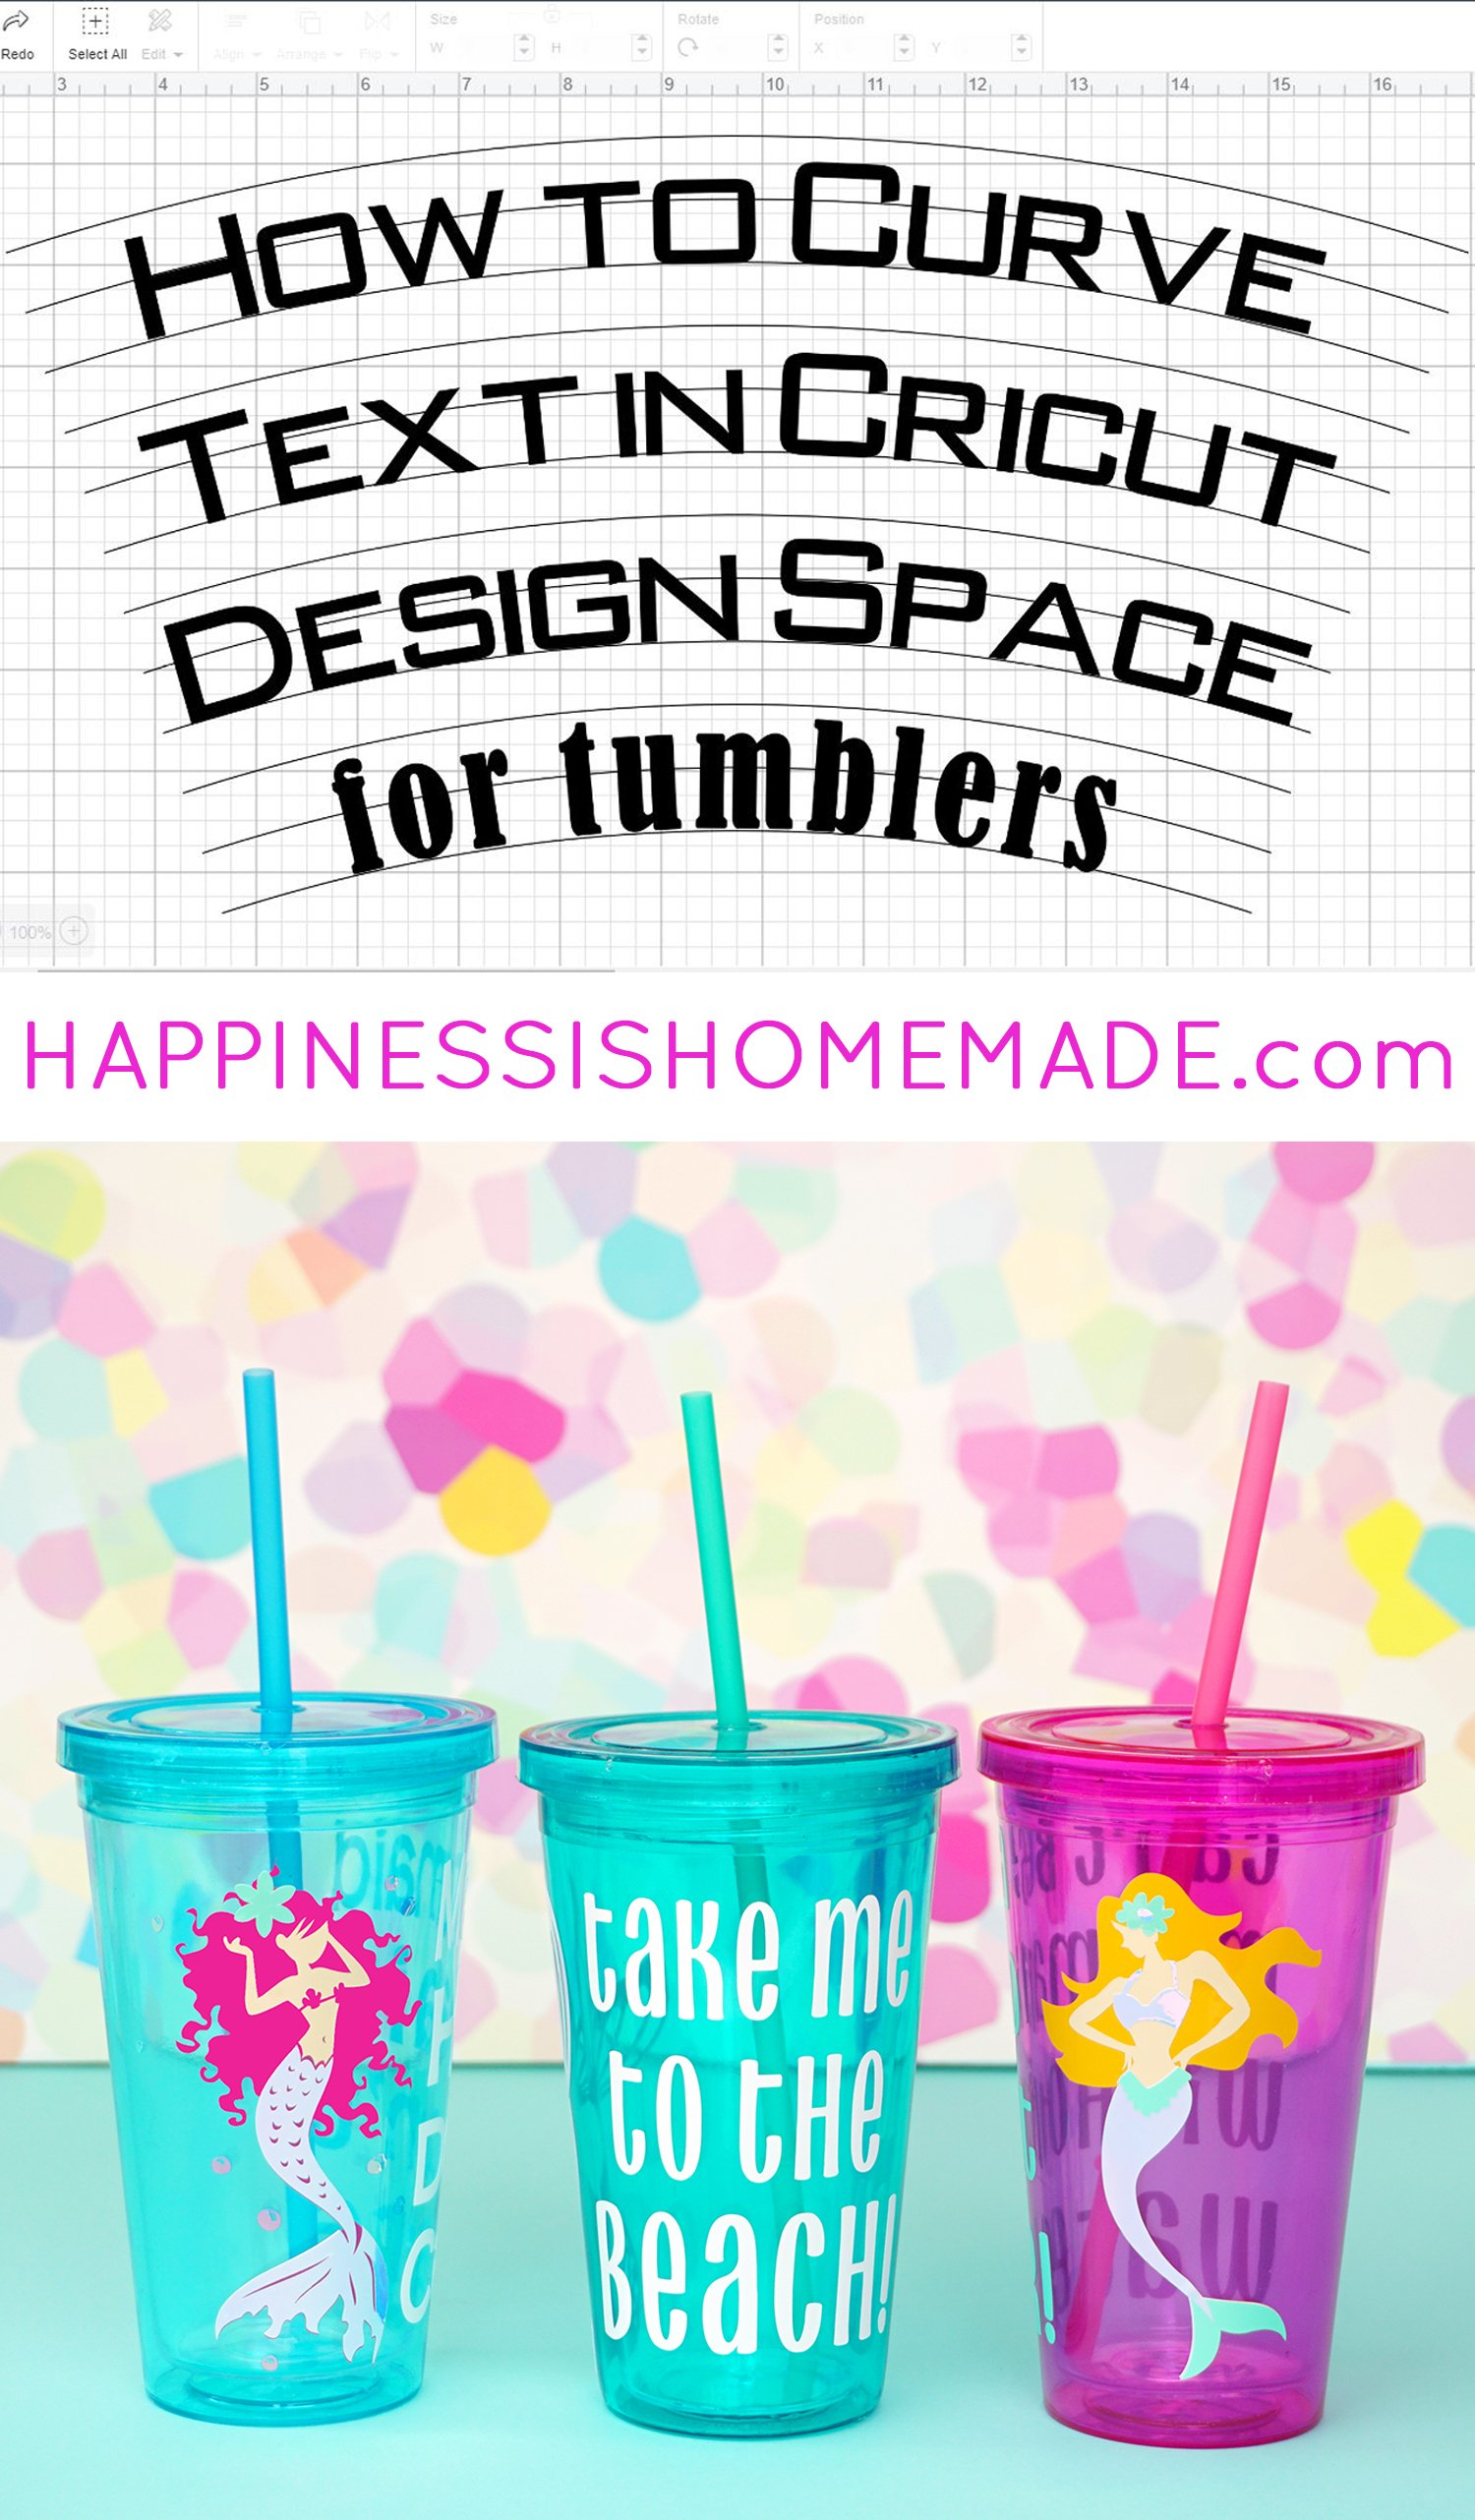
Take a peek at this basic tumbler template, and you’ll notice right away that the lines are curved, but not only are they curved, there are varying degrees of curvature as you move from top to bottom – text at the top of the tumbler will require less curvature than text at the bottom of the cup.
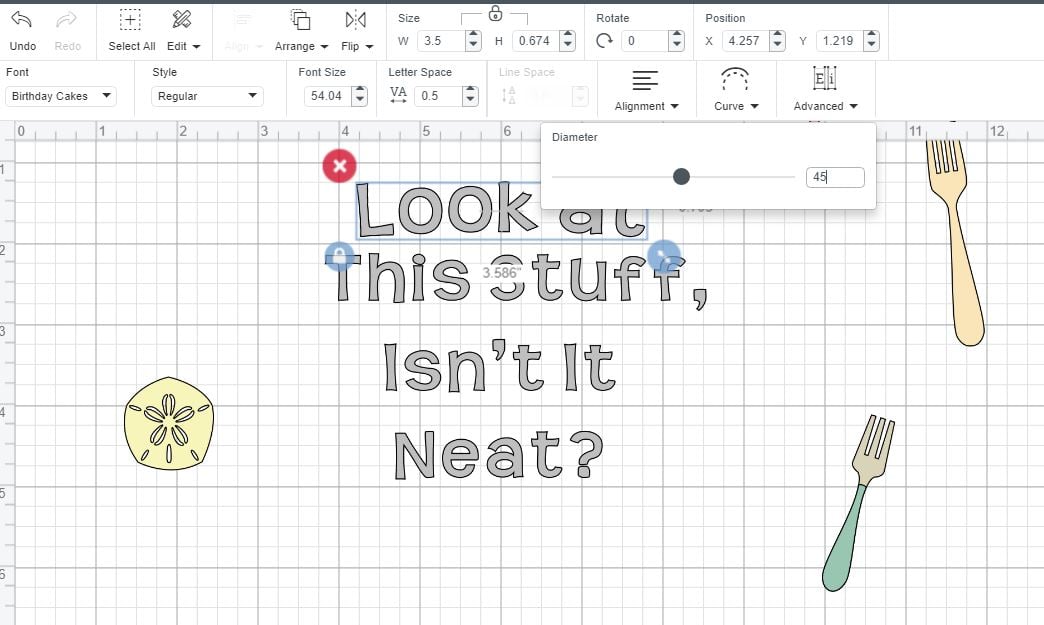
Cricut Design Space will only allow you to curve individual lines of text, so if your design has multiple lines of text, each one will need to be separated into its own text block. For this “Little Mermaid” inspired tumbler, first select the top line of text and use the curve tool to set the diameter to 45.
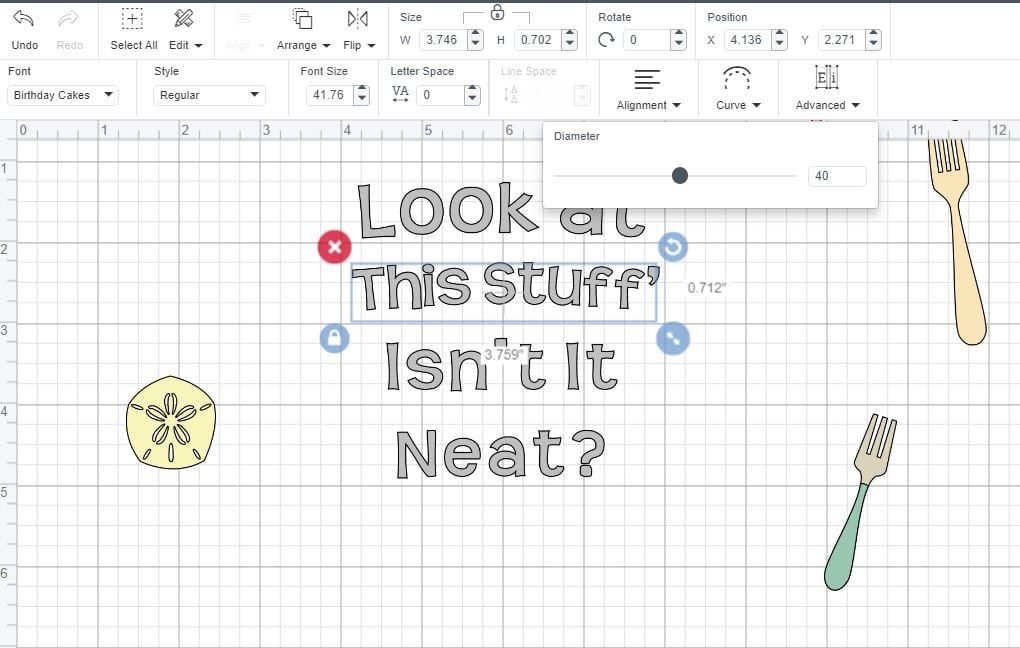
Line #2 should be curved at a diameter of 40.
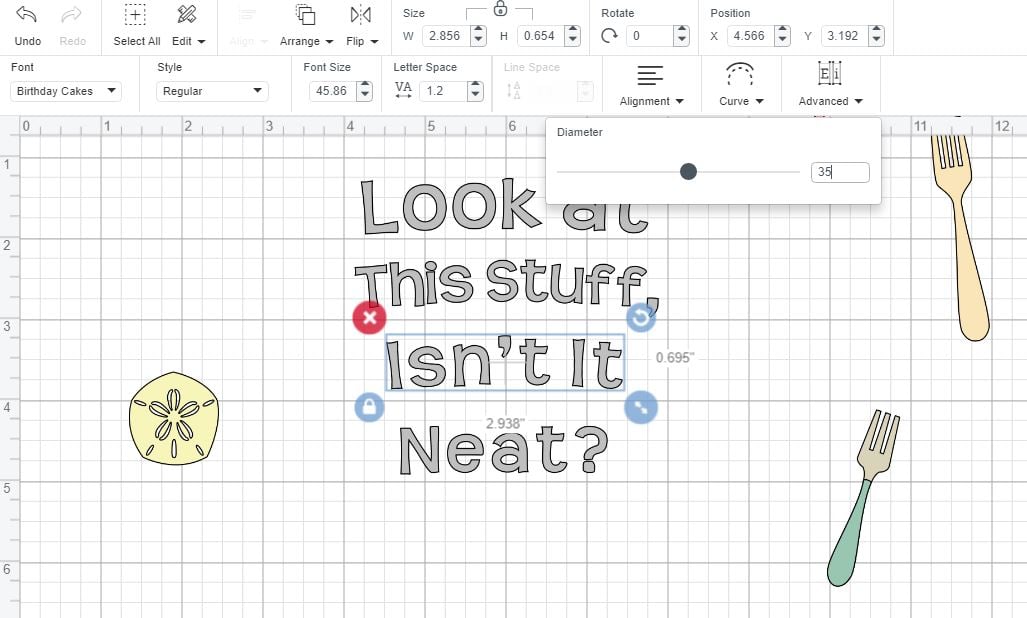
Curve Line #3 at a diameter of 35 and Line #4 at 30.
Note: depending on the height of your design, you may wish to go back and slightly adjust these numbers so that the fit is correct on your tumbler. Generally, text at the top of the tumbler should be curved with a diameter of 45 and text at the bottom should be curved at 30 with the lines in between adjusted accordingly.
(Click Here to Find This Pre-Designed Project in Cricut Design Space!)
See, the curvature of the text actually appears straight when applied to the curved surface!
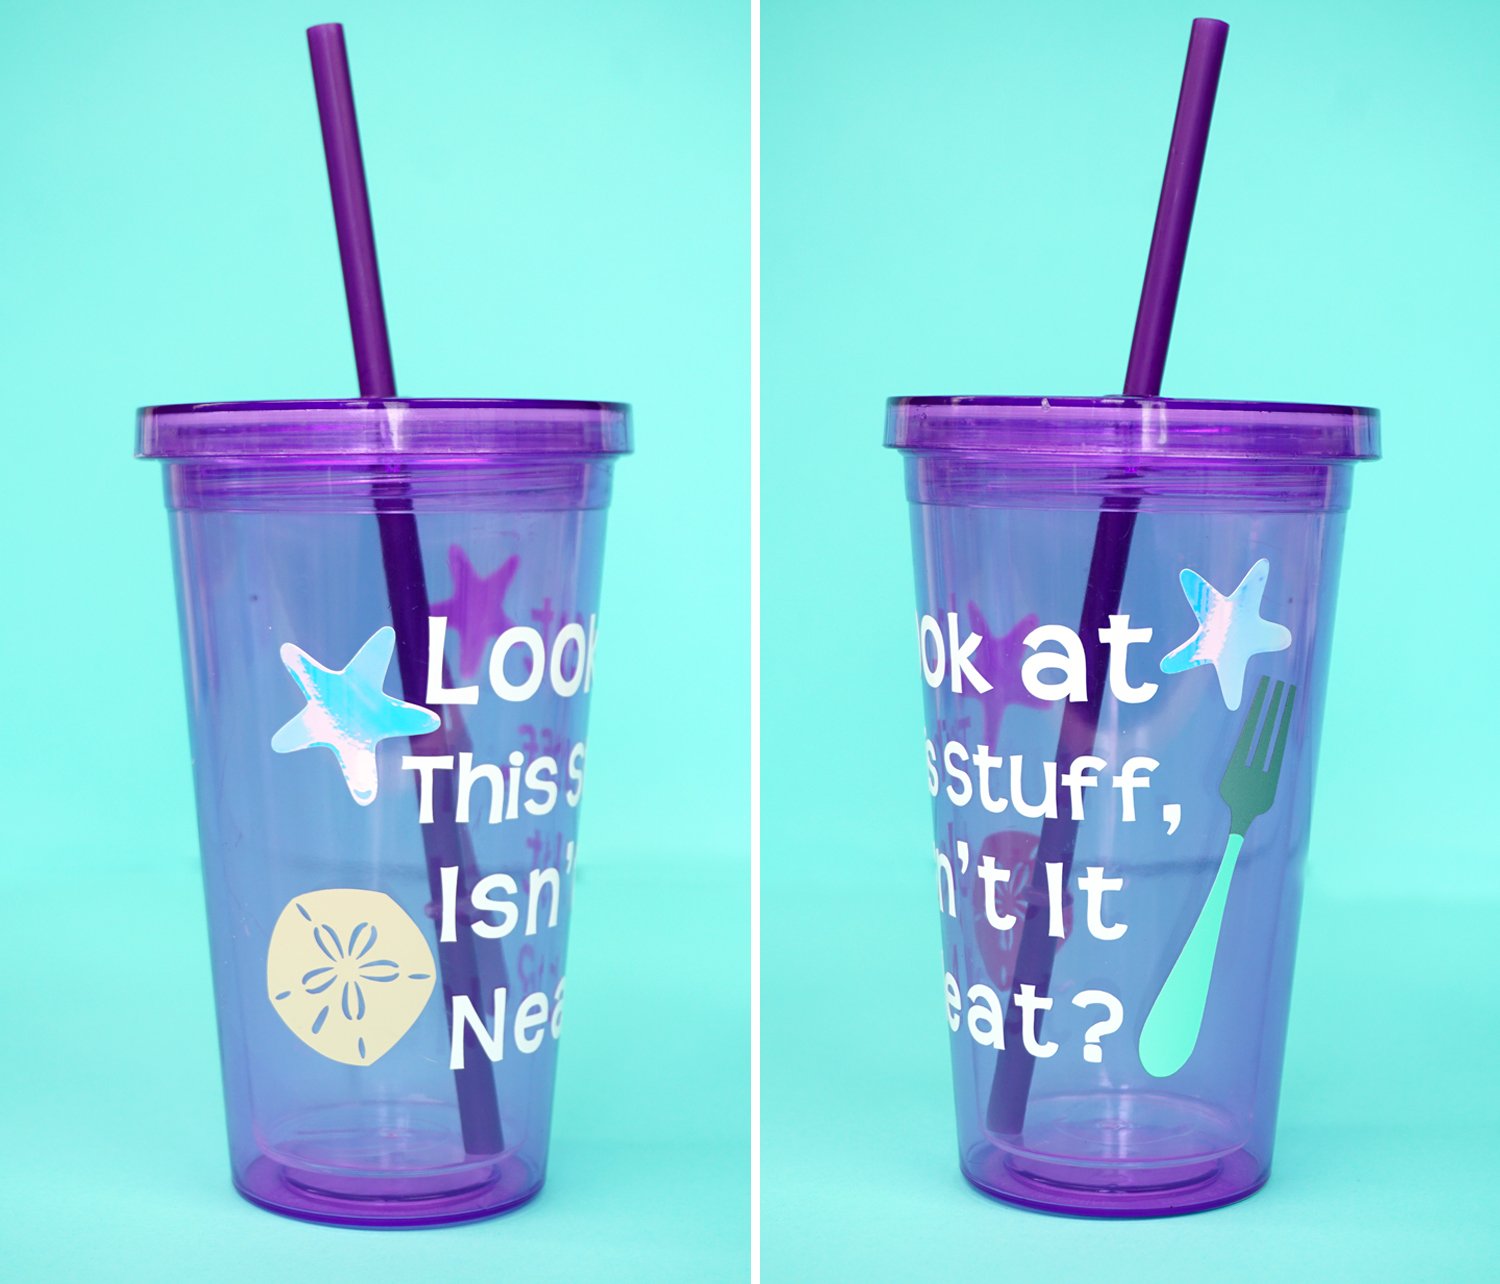
I added some fun Little Mermaid-ish embellishments to the tumbler with Permanent Premium Vinyl and Holographic Vinyl. The Permanent Premium Vinyl is dishwasher safe, but the Holographic Vinyl is recommended for hand-washing only. Since these tumblers were marked “Hand Wash Only,” I knew that it would be okay for me to use them both in combination. The Permanent Premium Vinyl comes in several shades with a “pearl” finish, and I seriously can’t get enough of it! The subtle shimmer is SO pretty and perfect for mermaids!
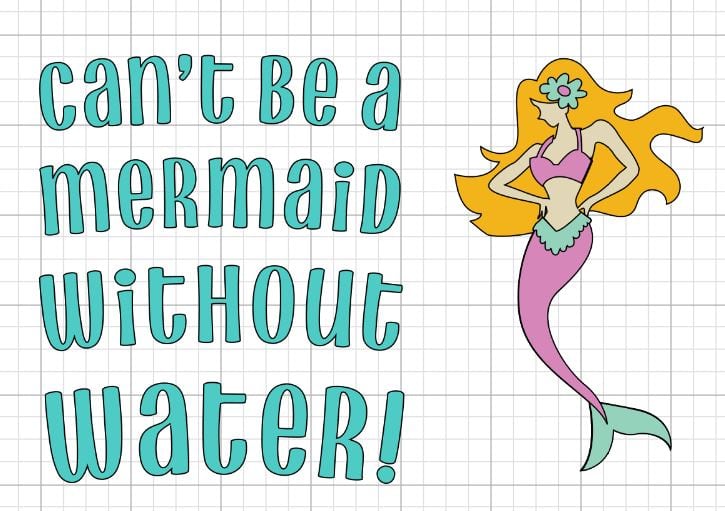
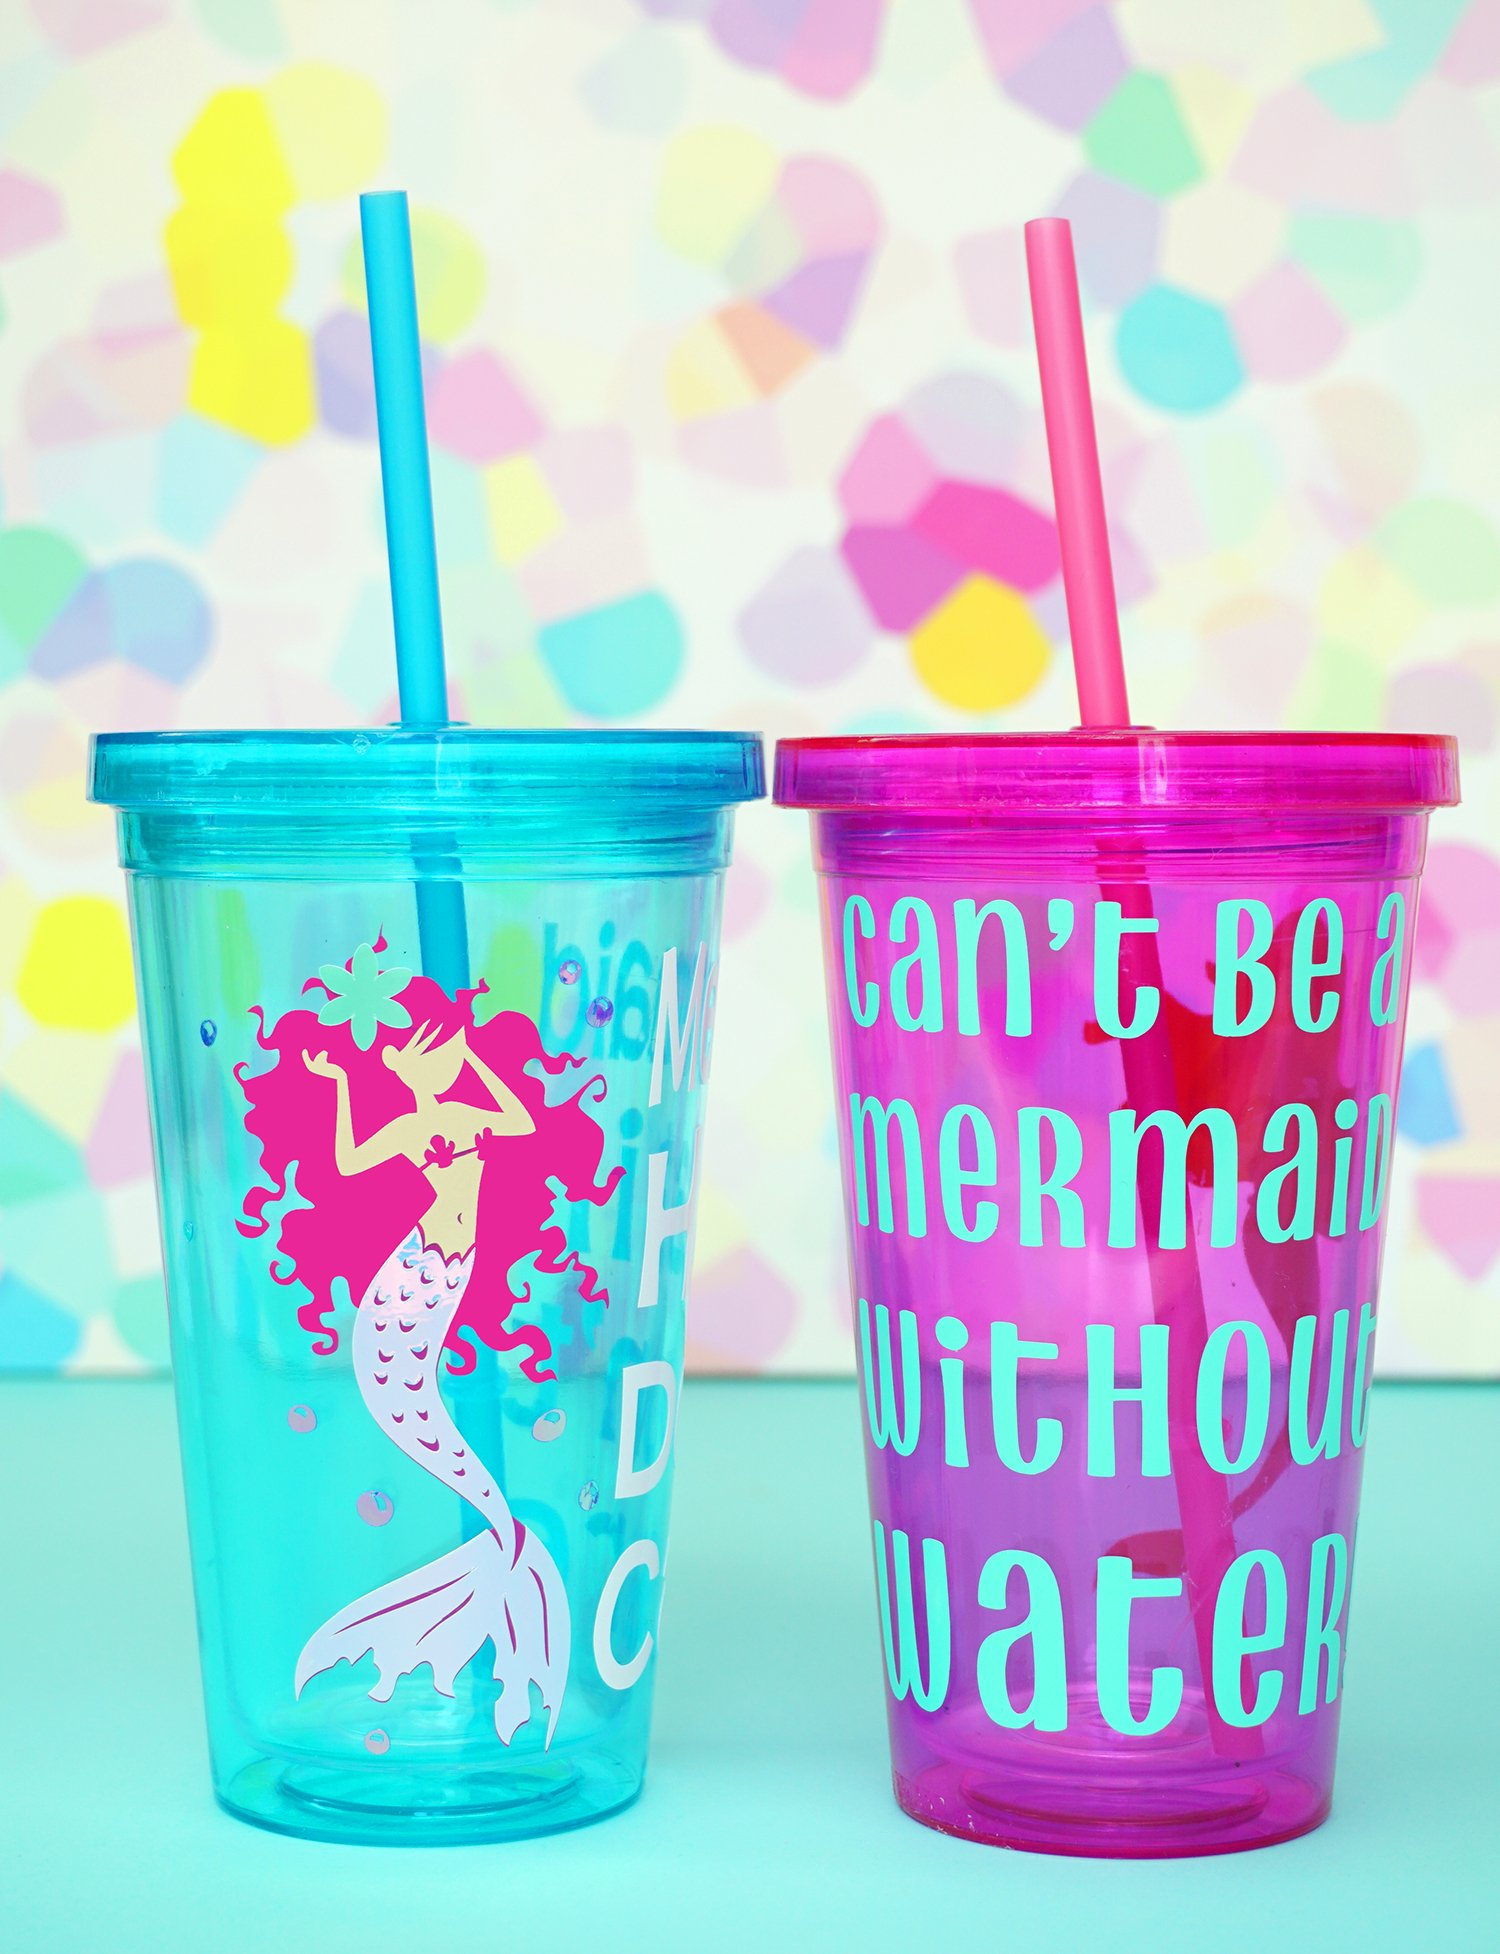
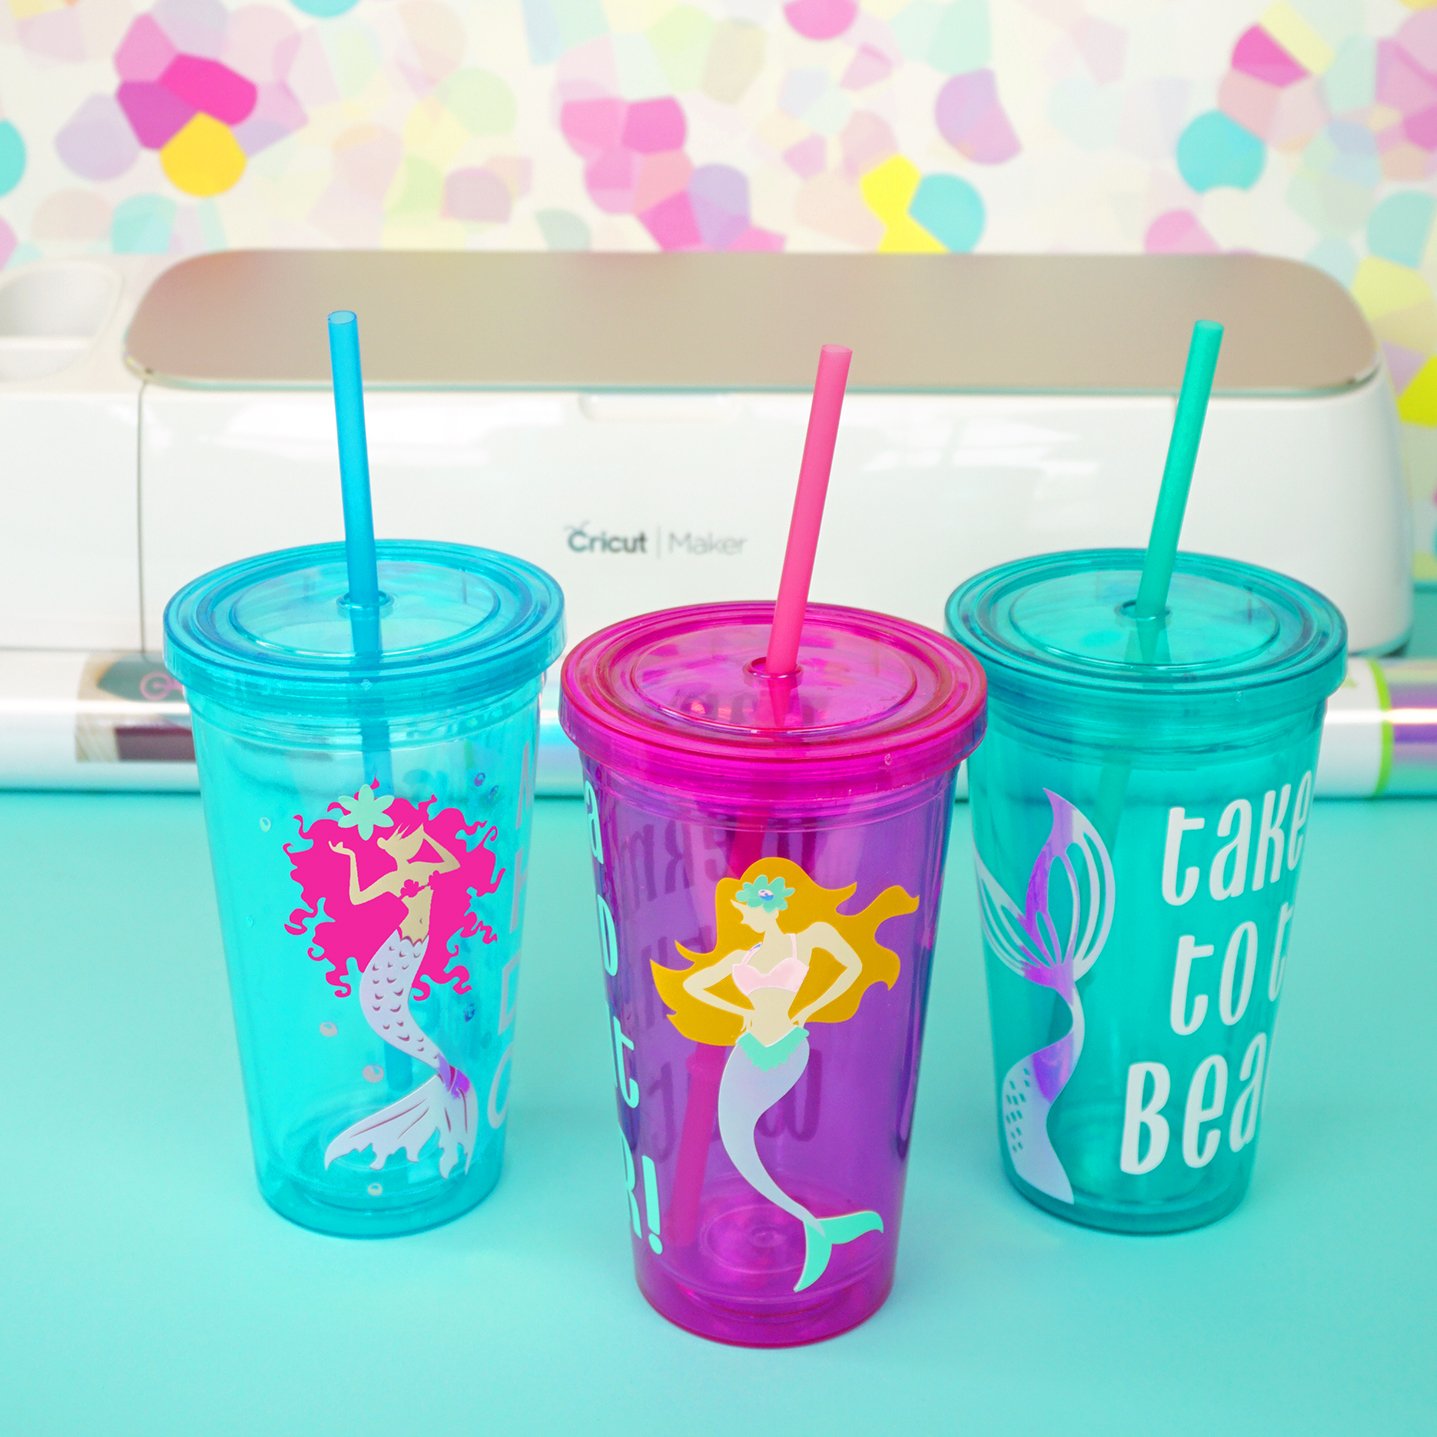
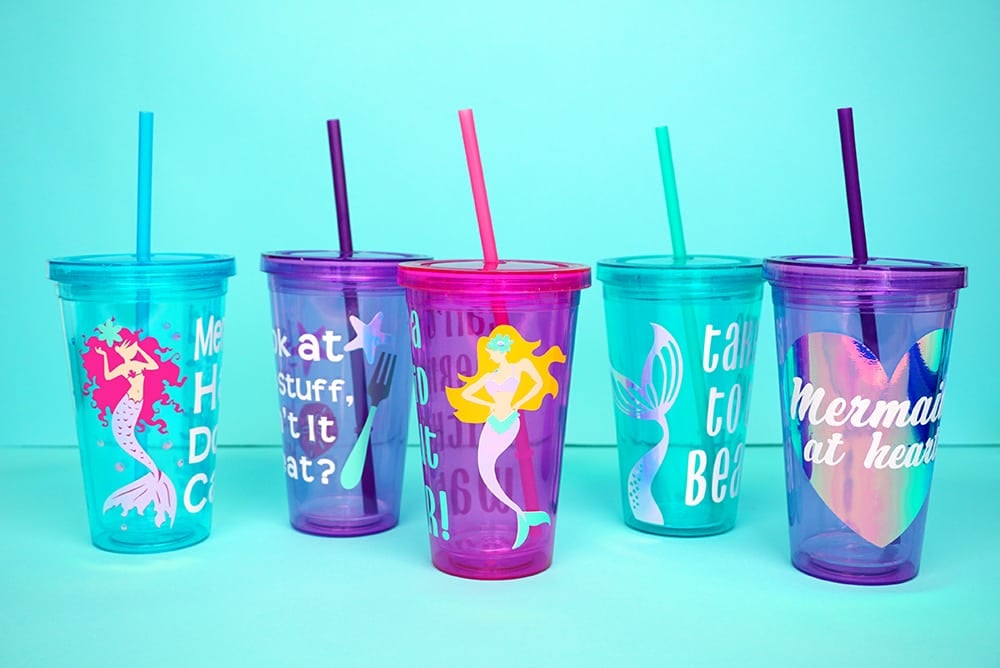
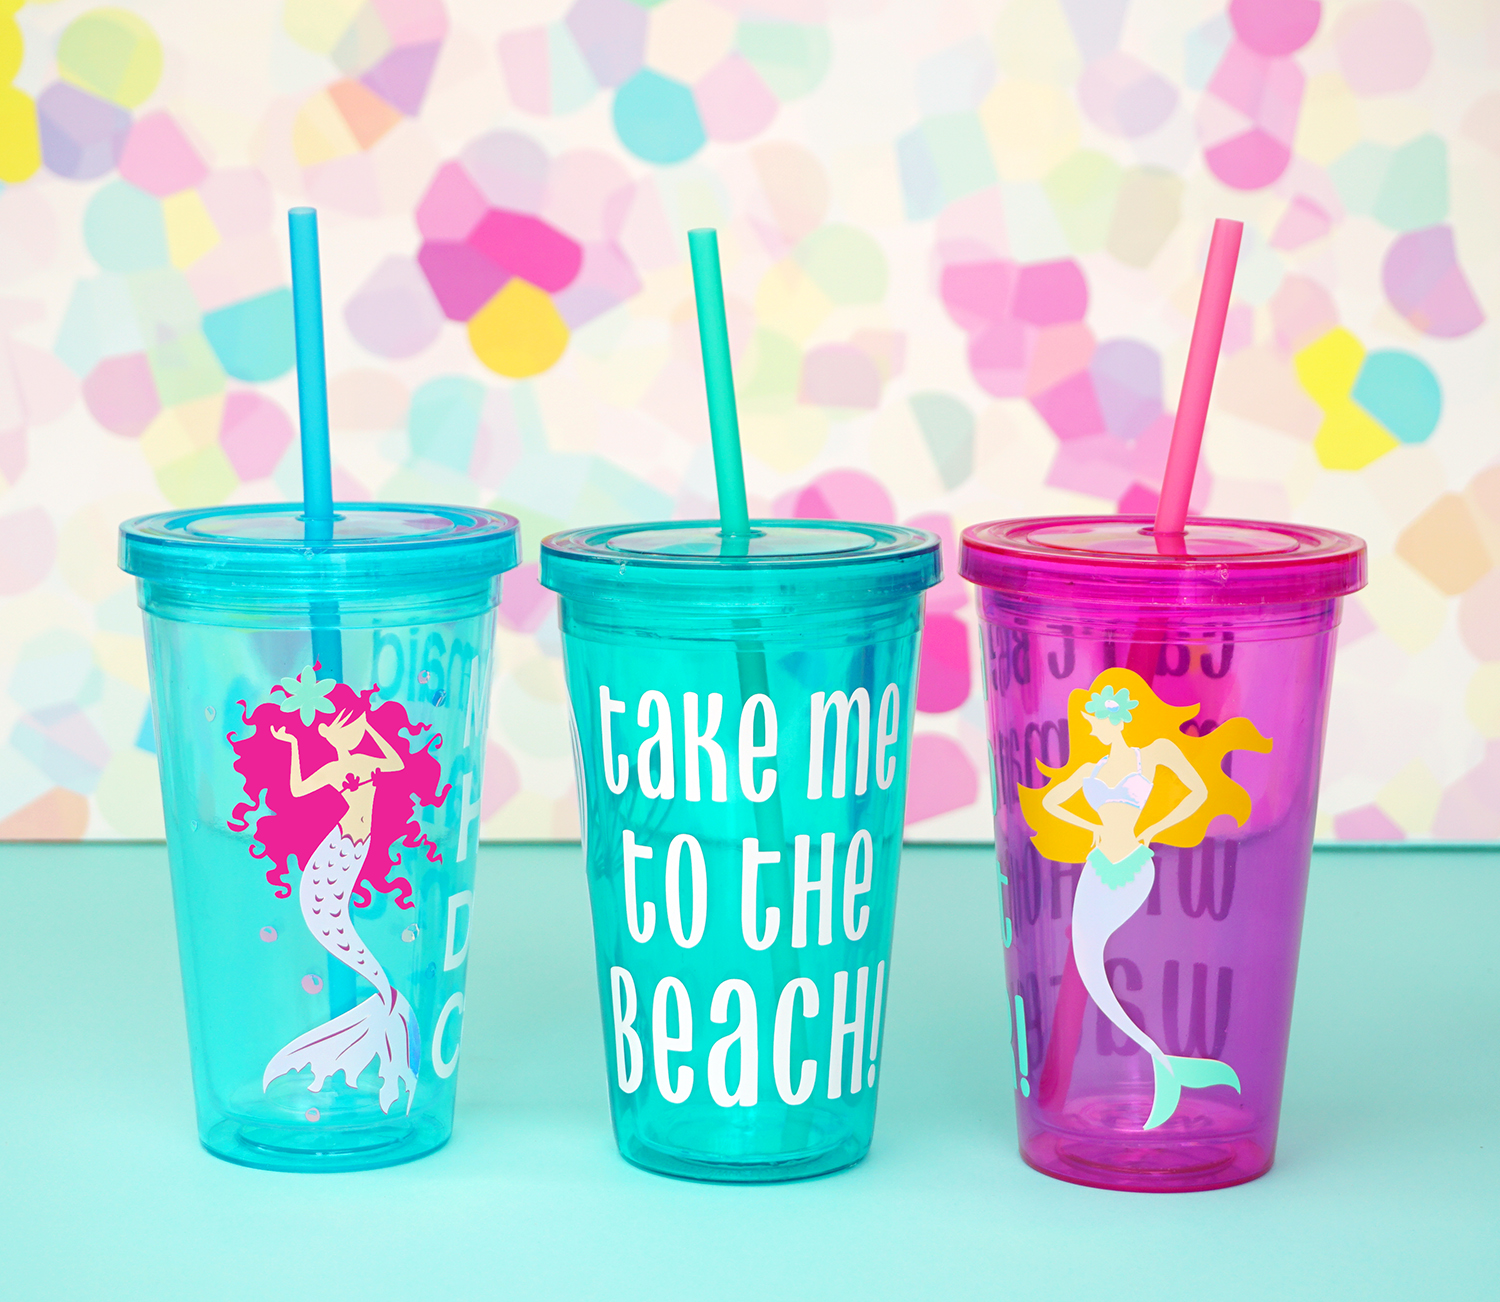
This next mermaid design is my favorite of the whole bunch! “You Can’t Be a Mermaid Without Water!” I am always struggling to increase my daily water intake, so this mermaid tumbler was definitely designed with myself in mind!
(Click Here to Find This Pre-Designed Project in Cricut Design Space!)
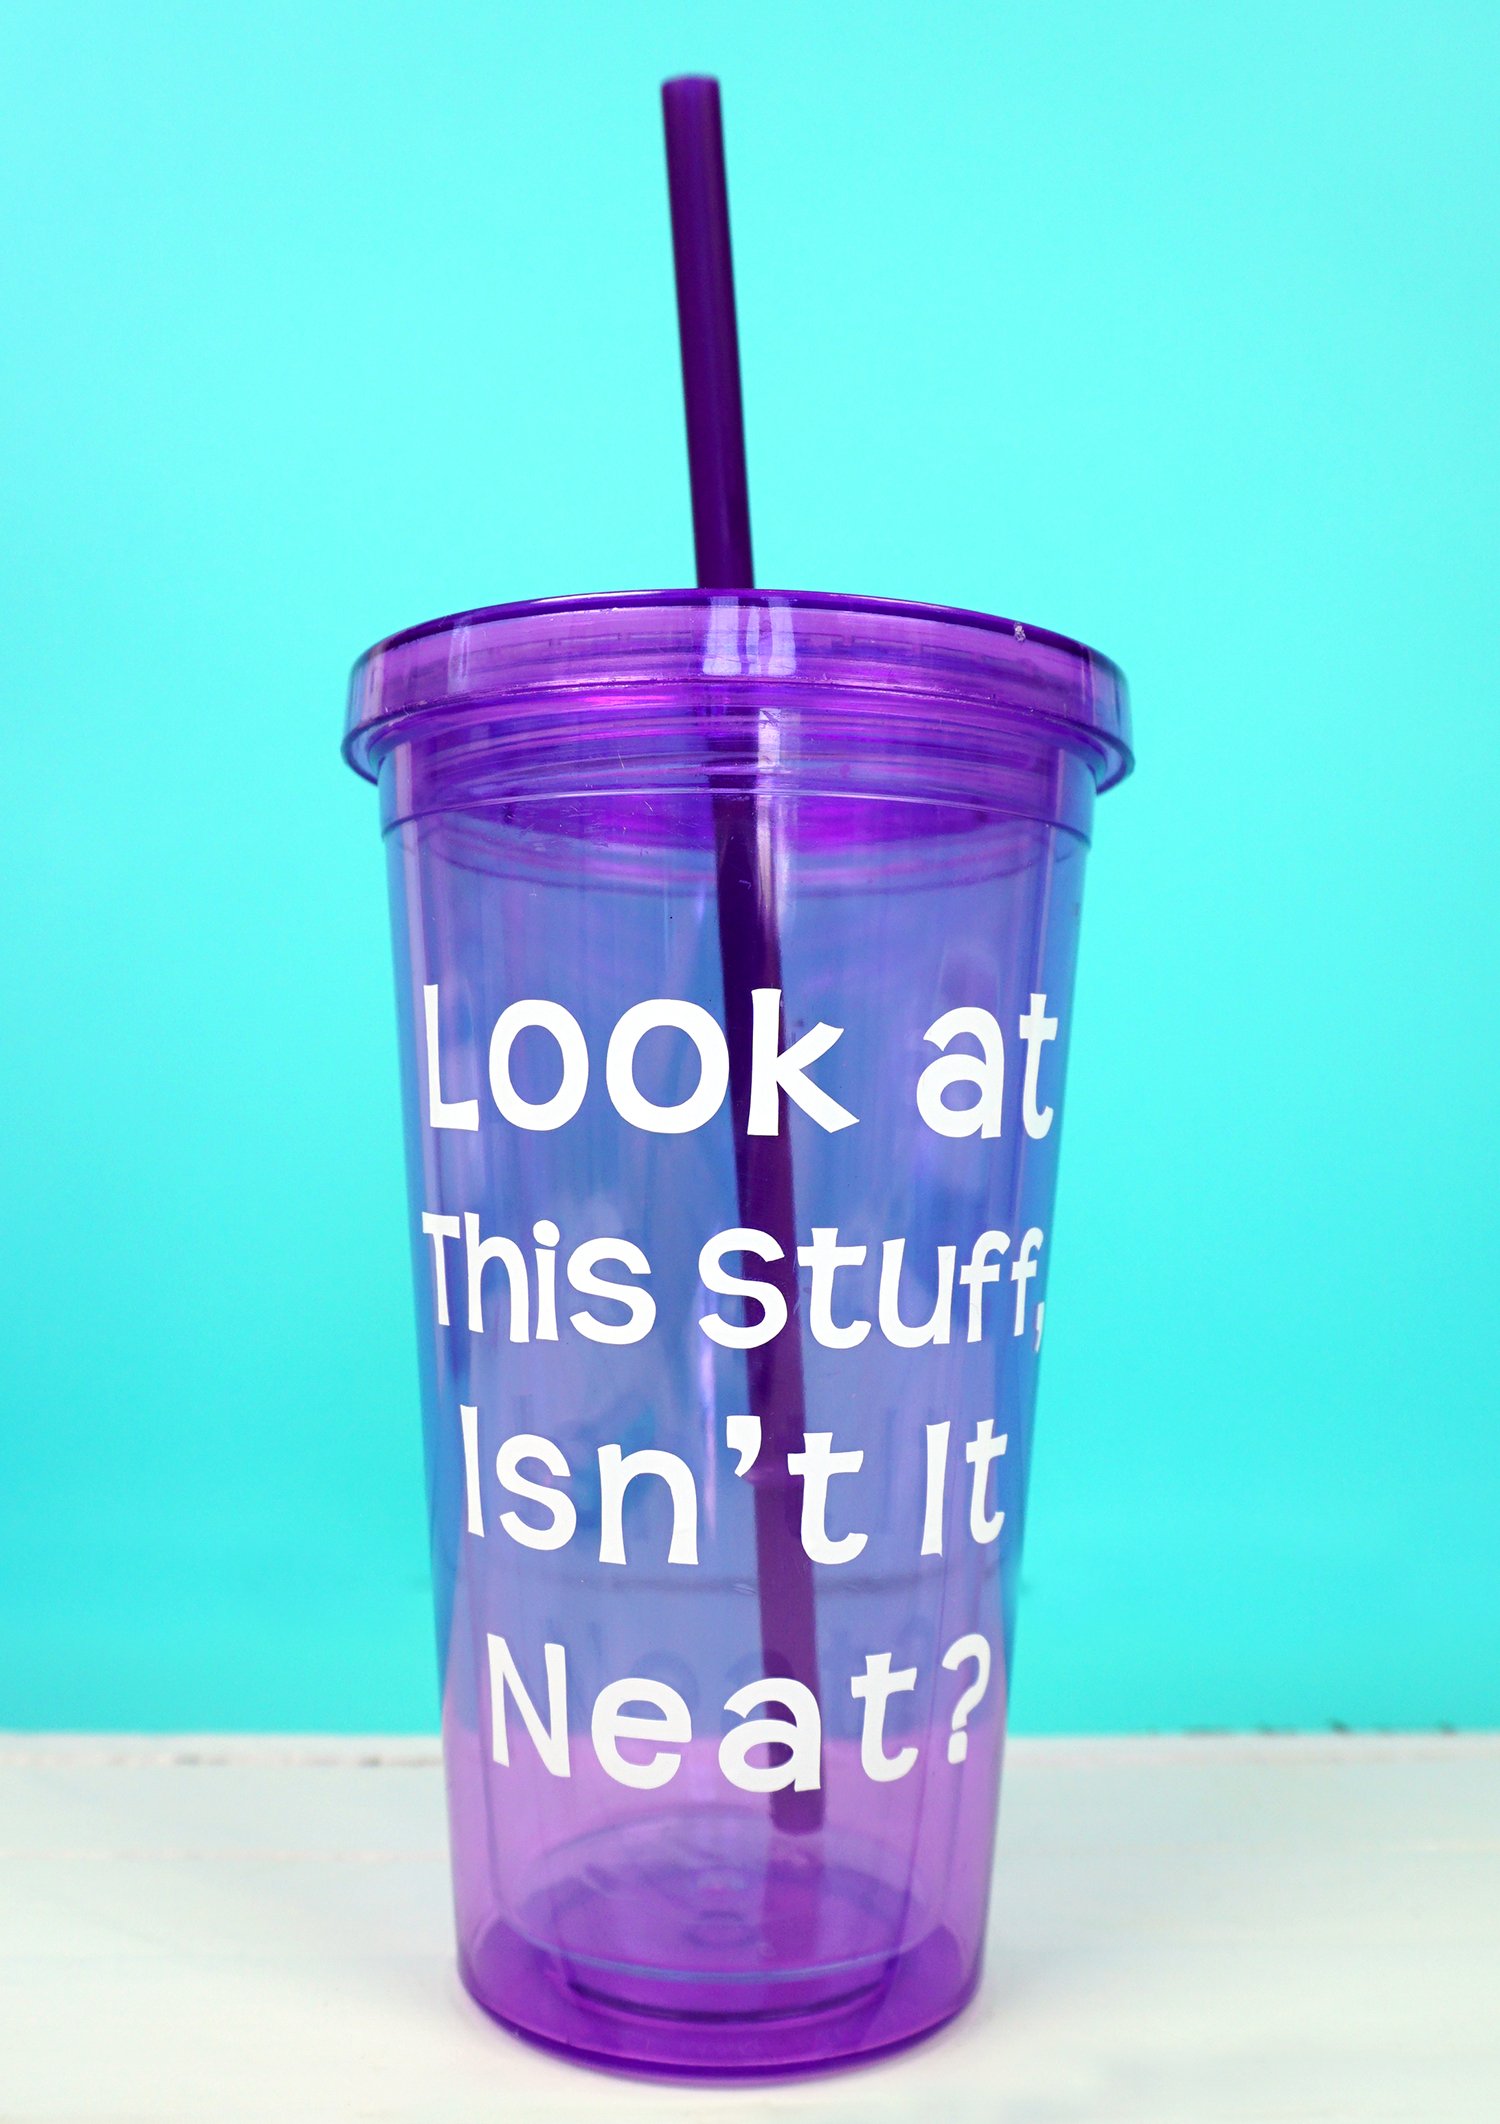
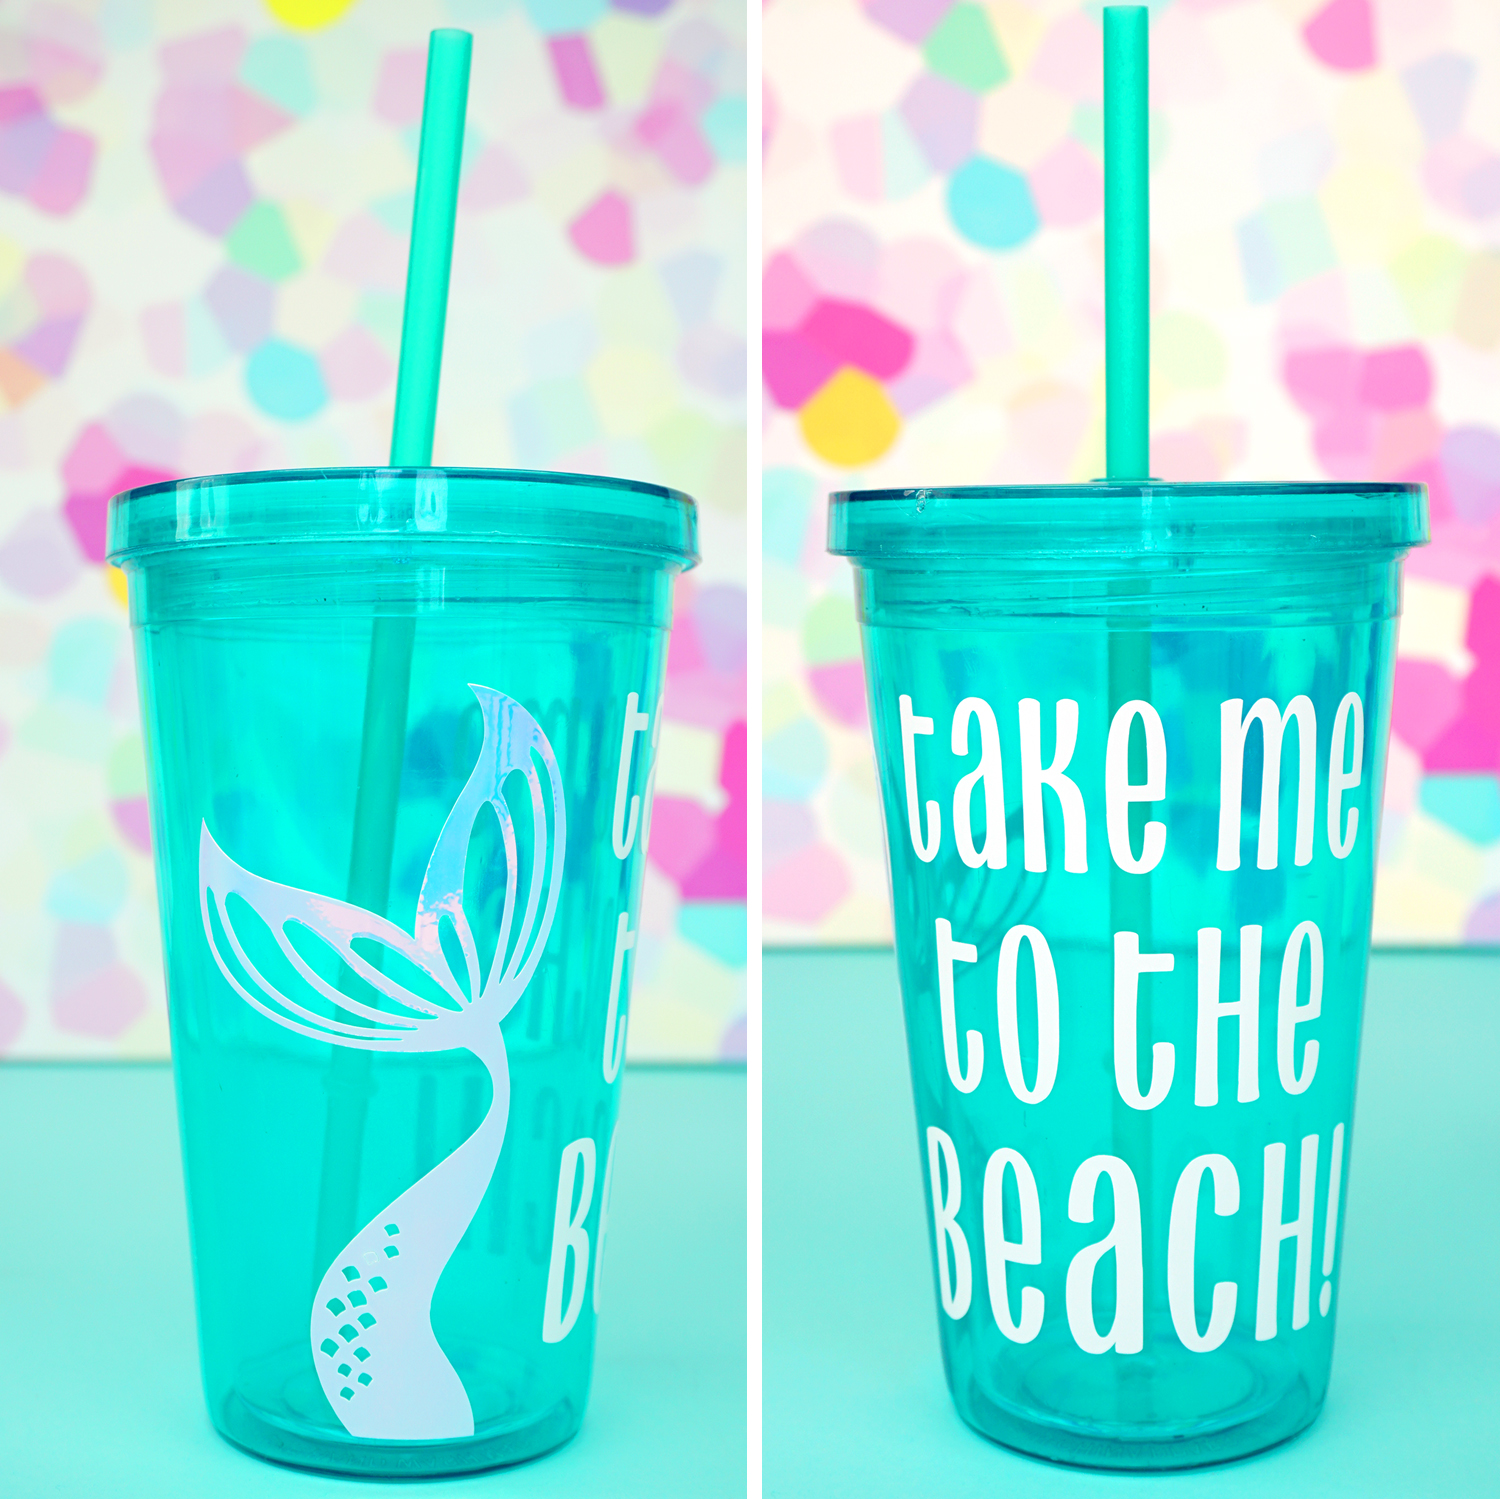
You can see that the text has a slight curve to it before applying it to the tumbler.
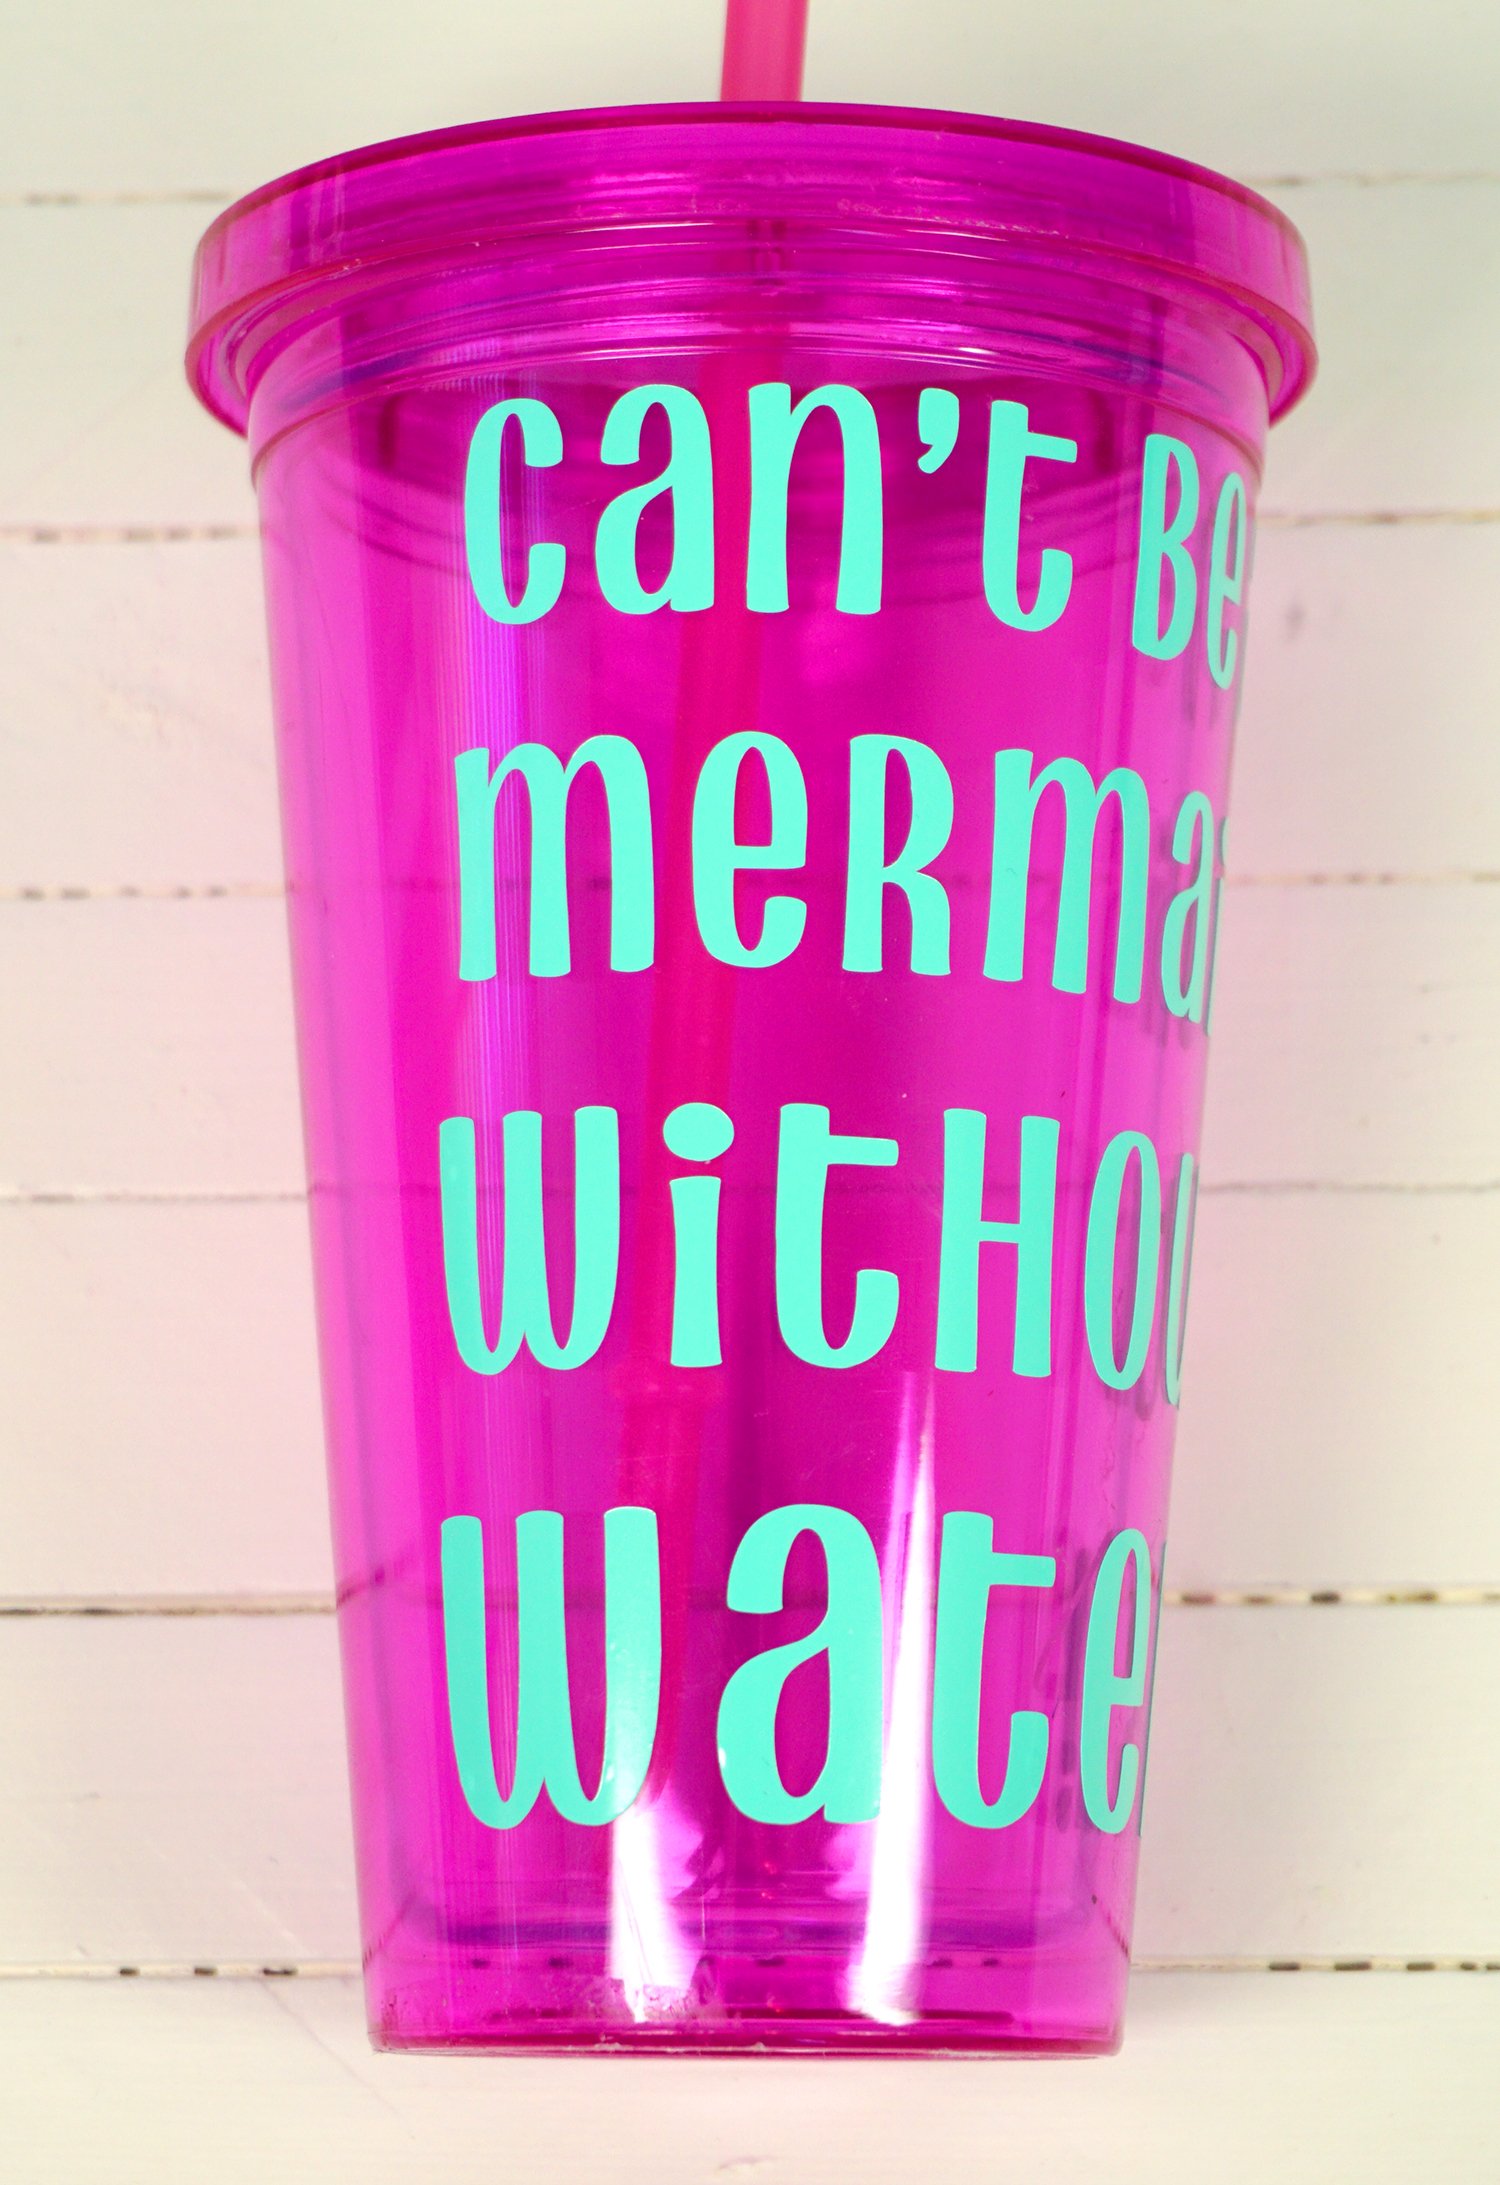
But it looks perfectly straight upon application – it’s like magic! 😉
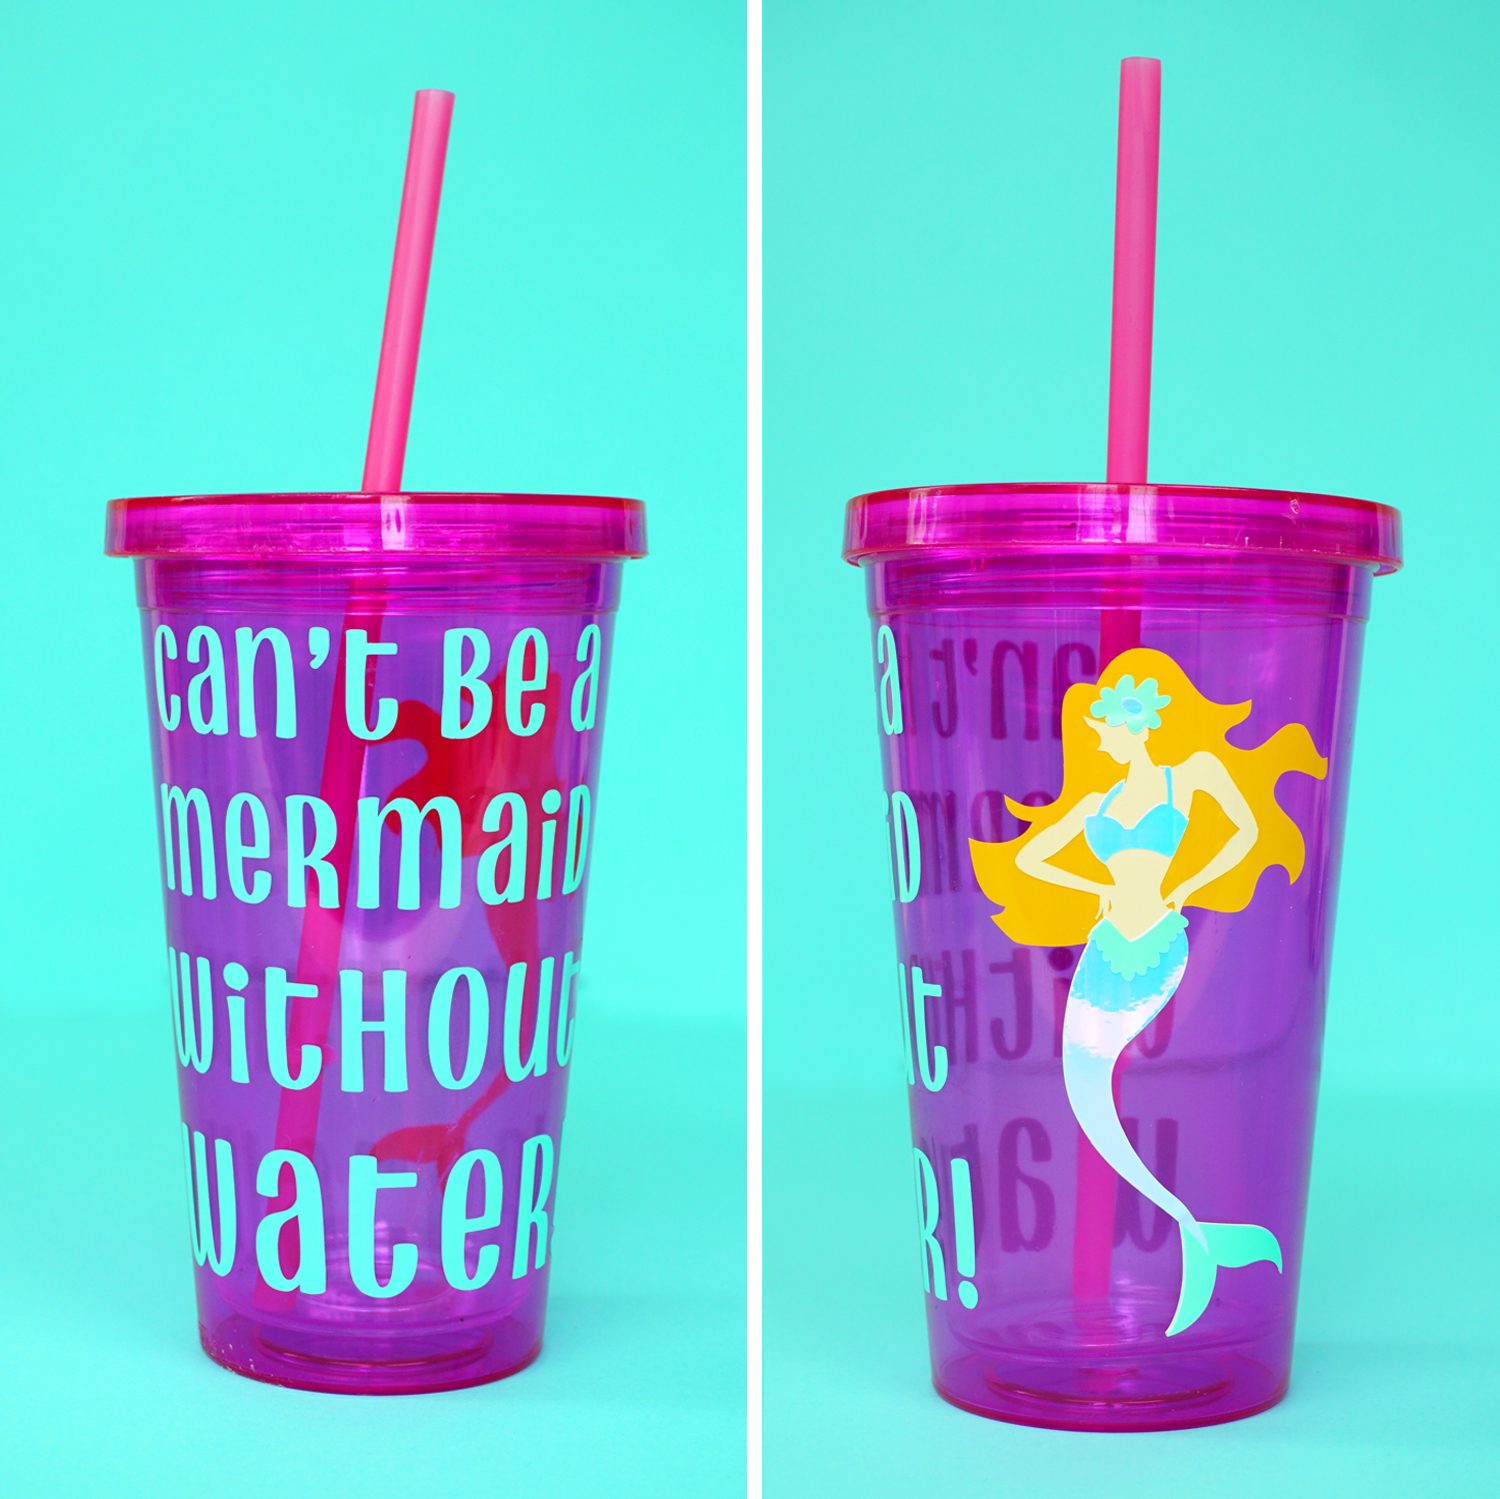
Super cute, right?! These tumblers would make a great homemade gift idea for your favorite mermaid fan!
(Click Here to Find This Pre-Designed Project in Cricut Design Space!)
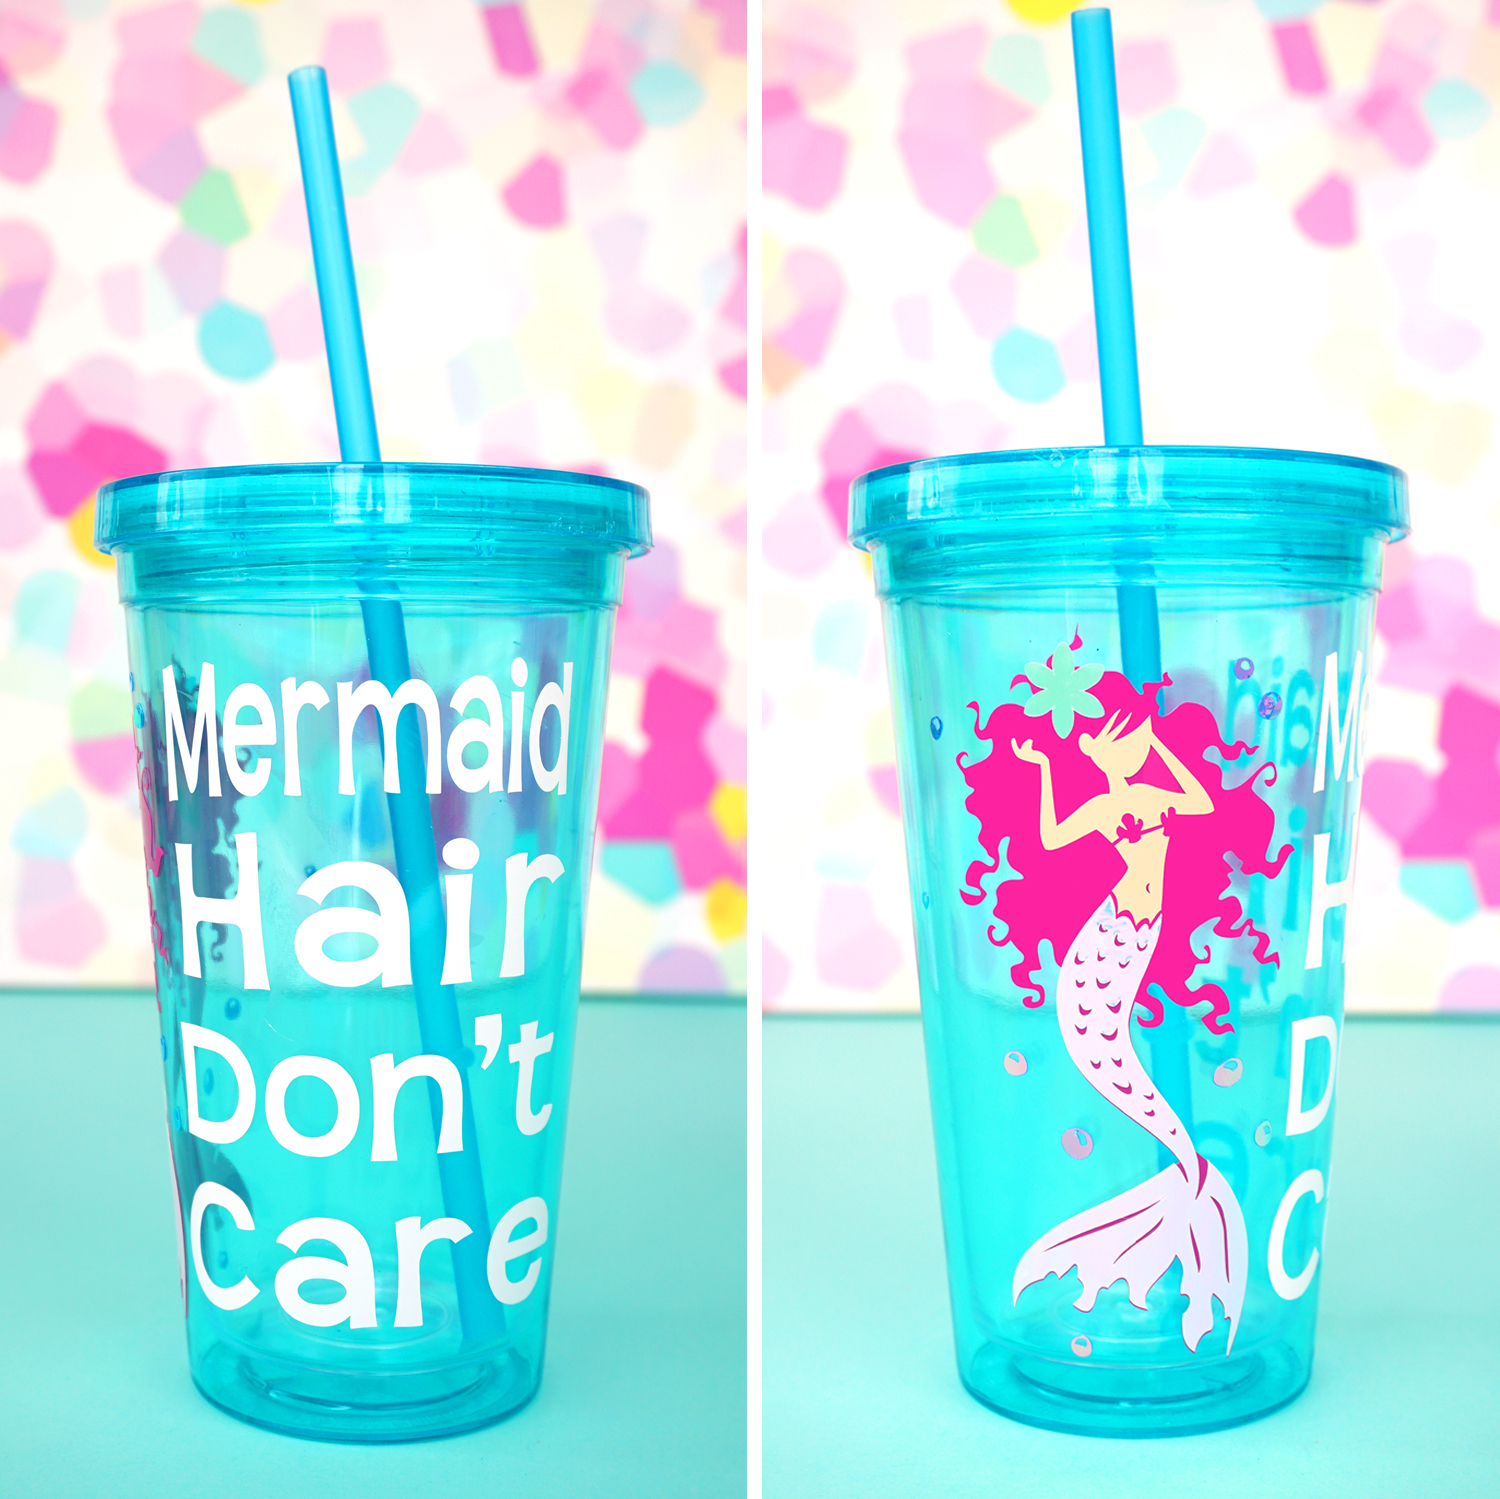
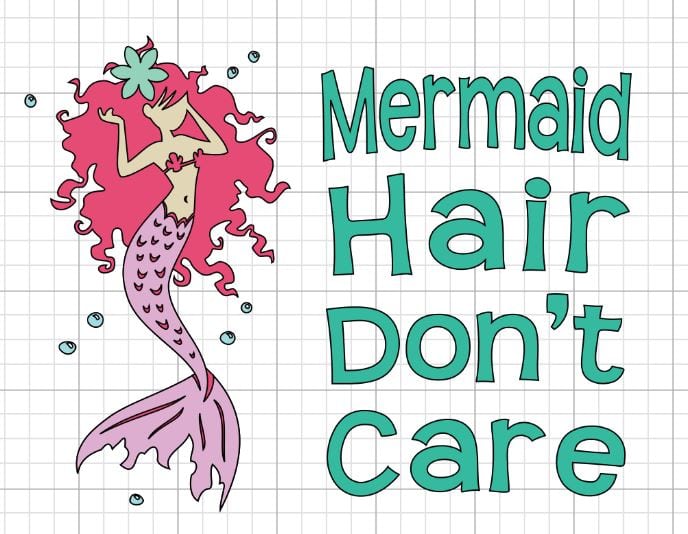
This one is so fun with all of that pink mermaid hair! It reminds me of my 5-year-old niece who has lots of super curly locks!
(Click Here to Find This Pre-Designed Project in Cricut Design Space!)
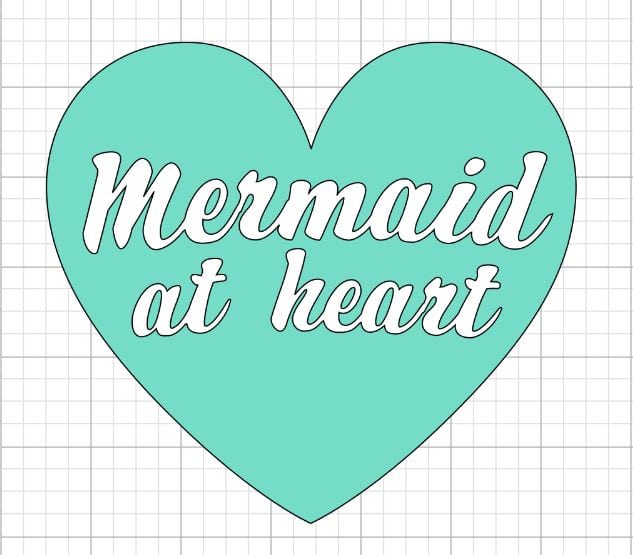
(7/25/20 Update: My apologies, but we are having issues getting the “Mermaid at Heart” project link to connect. We are working on a fix!)
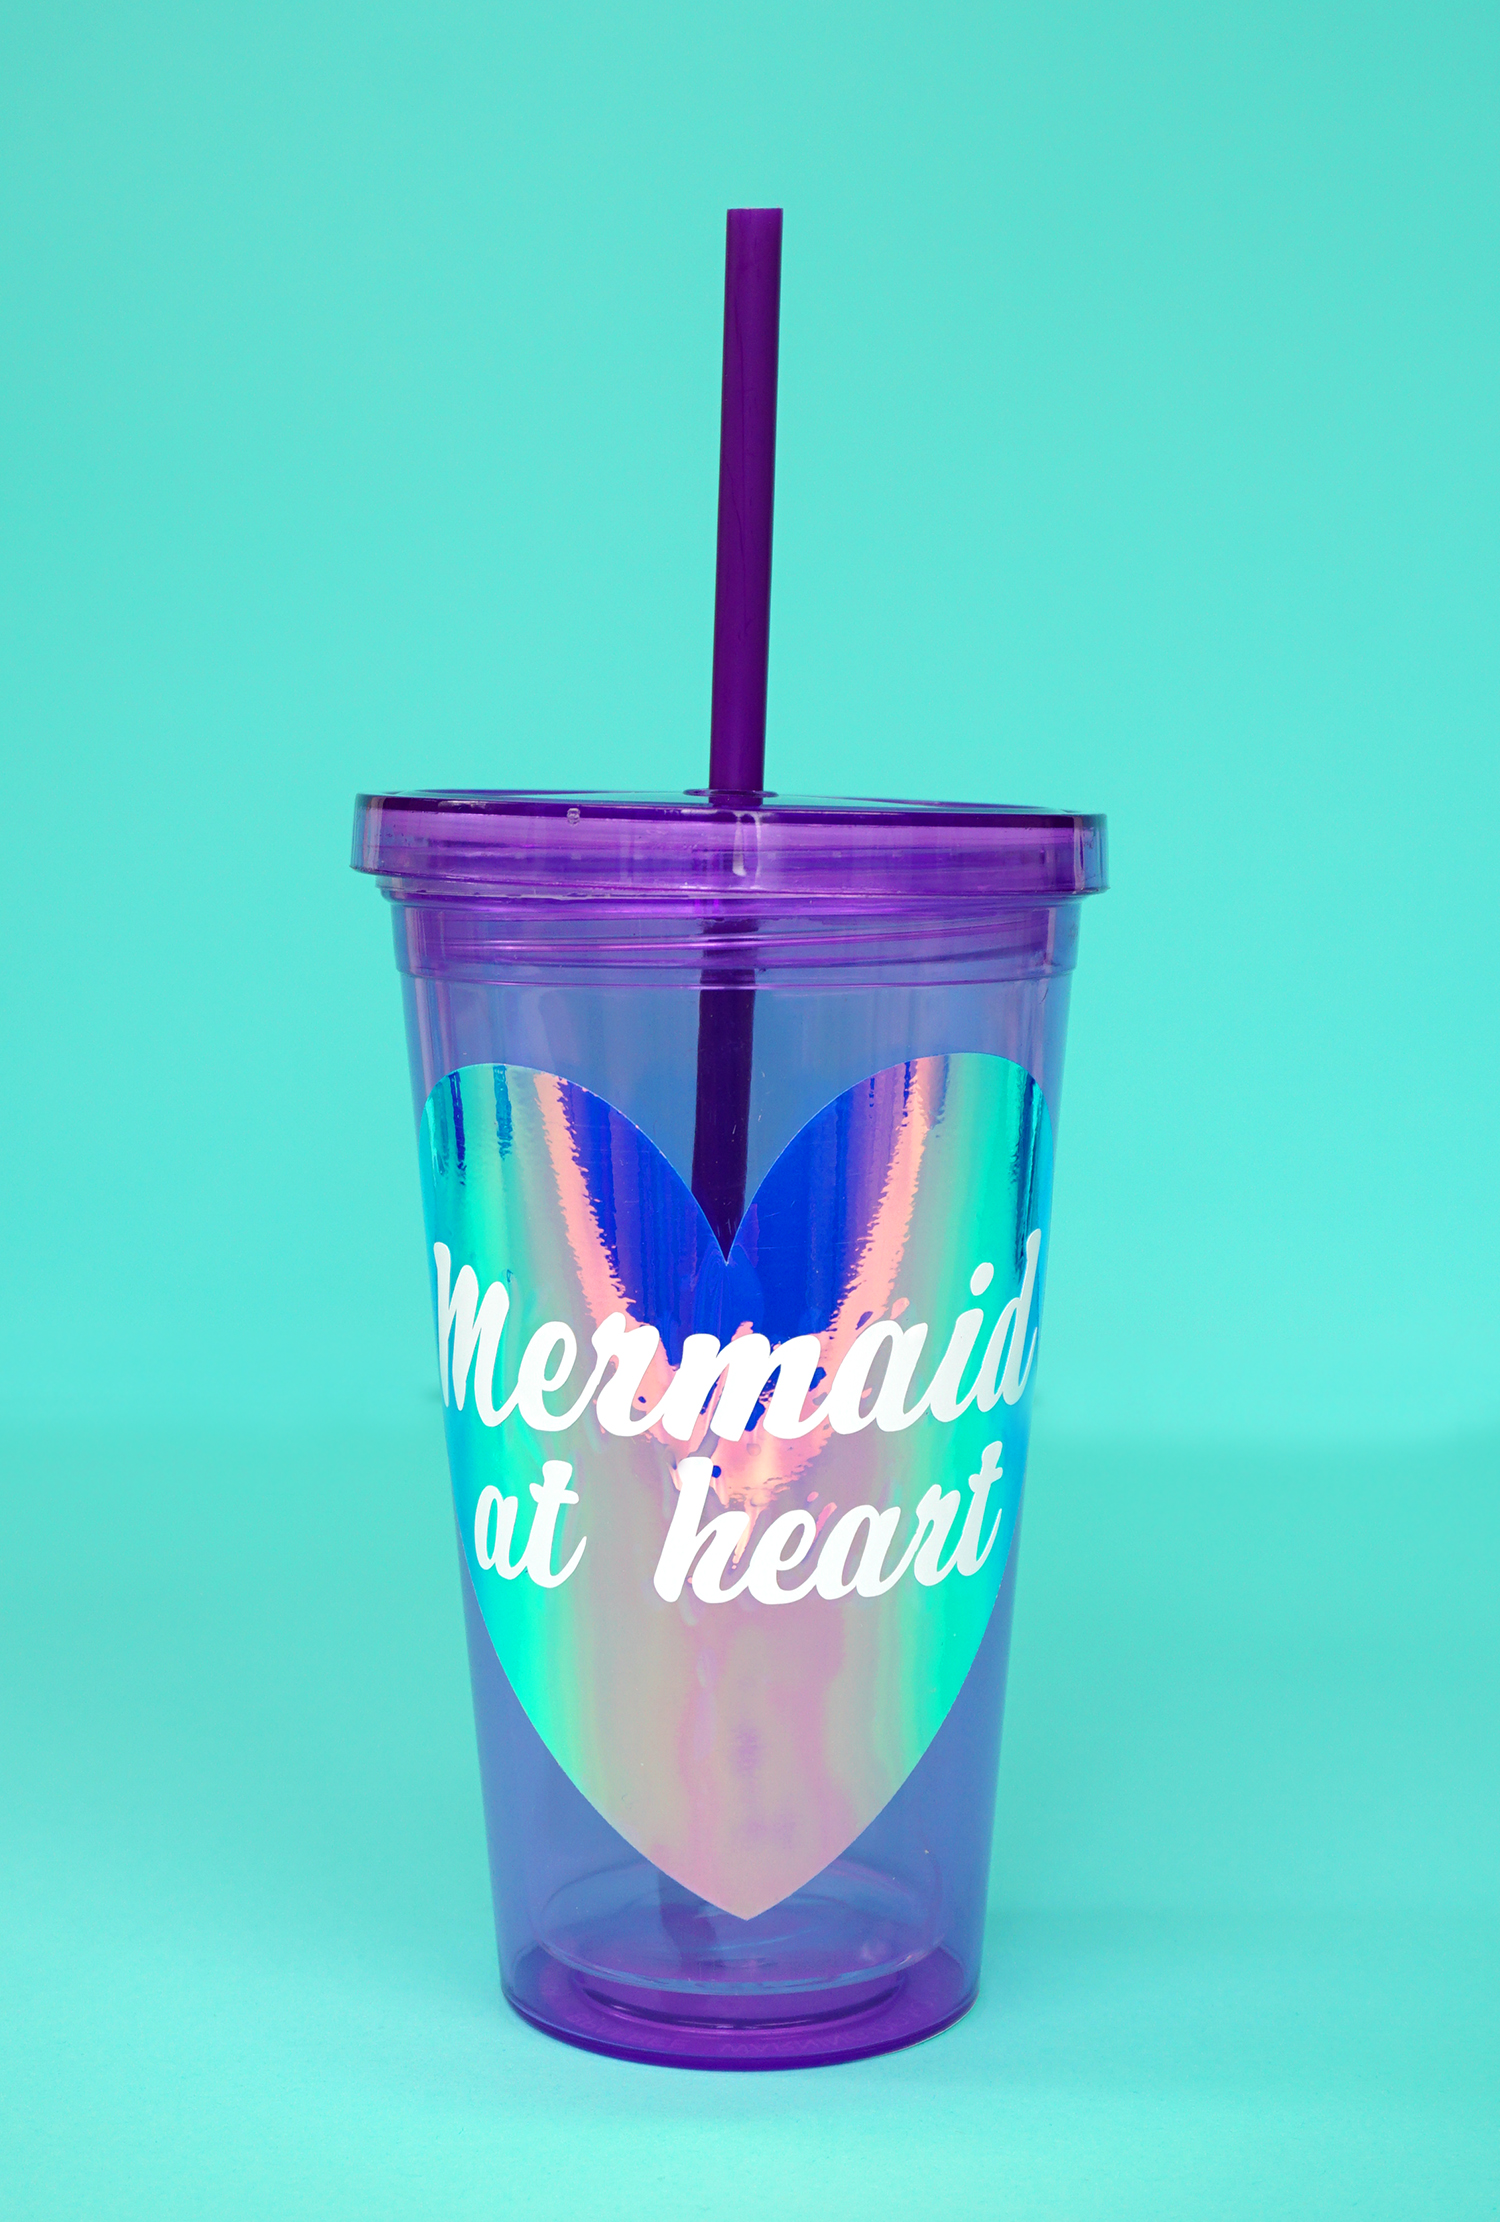
This “Mermaid at Heart” design is such a pretty way to show off a large piece of that shimmery holographic vinyl – I love it!
(Click Here to Find This Pre-Designed Project in Cricut Design Space!)
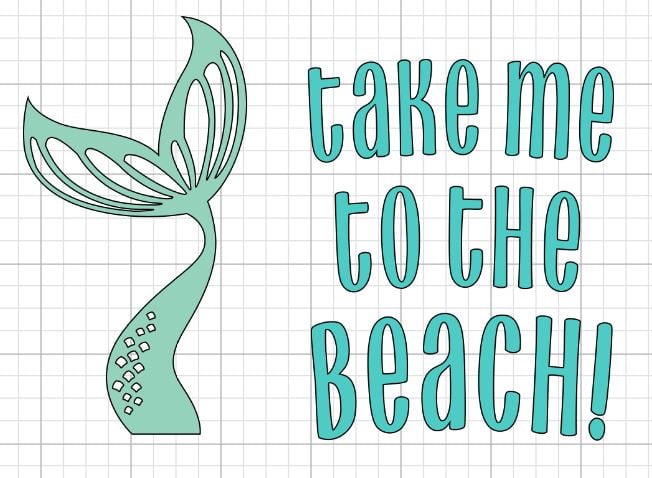
Yes, please! I could use a beach day, too!
Once again, my Cricut Maker made quick and easy work out of this project idea! I absolutely adore these sweet mermaid tumblers, and it’s so rewarding to see an idea go from a mere thought to a physical product in such a short time! The Maker even has a new “Fast Mode” that will cut popular materials including vinyl, iron-on, and cardstock up to 2x faster!
Now that you know how to curve text for tumblers in Cricut Design Space, the possibilities are endless! Sign up for Cricut Access and gain instant access to thousands of fonts and images to get your creative juices flowing!

This is a sponsored conversation written by me on behalf of Cricut. The opinions and text are all mine.
You May Also Like These Cricut Crafts:
 Cardboard Gingerbread Houses + SVG Files
 Thanksgiving Treats: Turkey Lollipops
 35+ Mother’s Day Cricut Craft Ideas
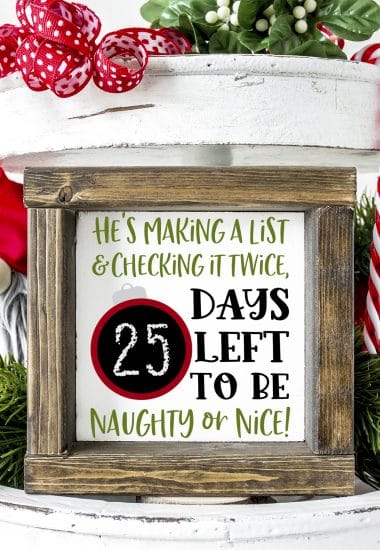
 Free Christmas Countdown SVG +16 Christmas Cut Files
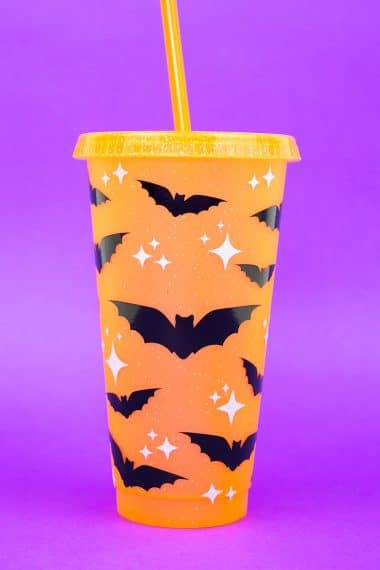
- 13 Free Bat SVG Files for Halloween
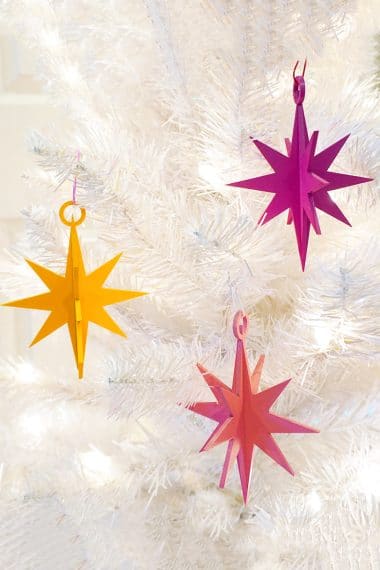
- 3D Stars + Christmas Ornament SVG Files
- Ouija Board Halloween Sign + SVG
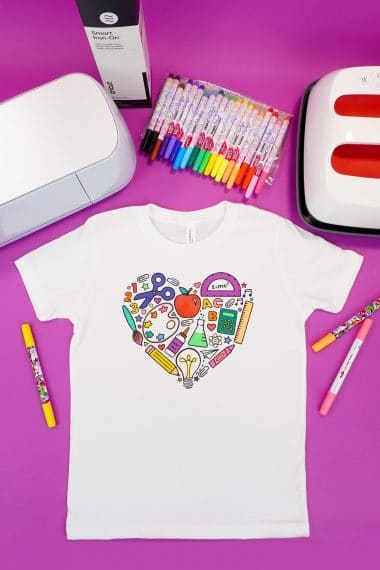
- Back to School SVG + Coloring Shirt

Pin These Tumbler Ideas for Later!


Heidi Kundin has captivated the hearts of millions with her colorful and inspiring approach to crafting, celebrations, and family fun. With over 15 years of experience, Happiness is Homemade has become a must-visit destination for those seeking quick and easy creative ideas and last-minute solutions. Heidi’s warm personality shines through her posts, inviting readers to join her on a creative journey that’s fun, rewarding, and achievable. Heidi is also the author of Homemade Bath Bombs & More and DIY Tie-Dye.