
![]()
It’s time to tie dye your summer! My boys are fanatical about tie dyeing, and each summer we spend time together creating several different kinds of tie dye projects. This year we started with these classic (and awesome!) tie dyed t-shirts, and I upcycled one of our old shirts into a colorful new garden flag.
 What You’ll Need:
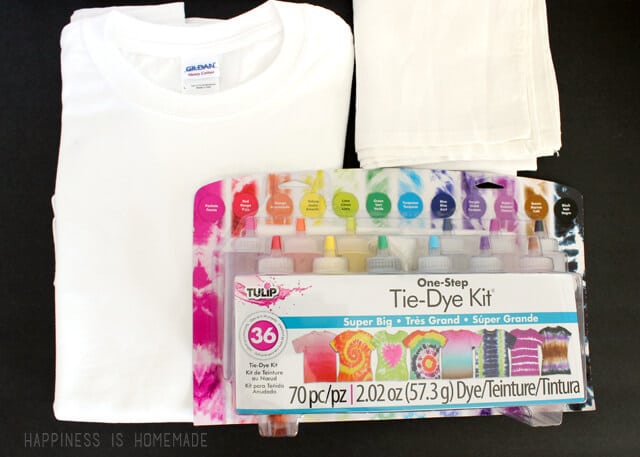
- Tulip One-Step Tie Dye Kit (America’s favorite tie dye!)
- White cotton fabric – t-shirts, tea towels, etc. – just make sure that it is 100% cotton for the most vibrant colors
- Rubber bands
- Gloves
- Plastic bags
- Wire rack (optional, but highly recommended)
To Make a Garden Flag You’ll Need:
- Scissors or rotary cutter
- Ruler or tape measure
- Iron-on double-sided interfacing (heavy weight)
- Heat transfer vinyl design (optional)
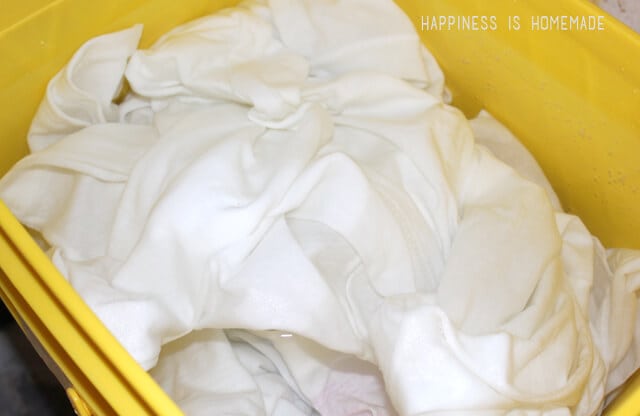 I always pre-soak all of my cotton in a mixture of washing soda (available near the laundry detergent), salt and warm water before dyeing. I use 1 cup of washing soda per gallon of water and add a few teaspoons of salt to the mixture. This step is optional as the Tulip One-Step dye already contains soda ash to fix the color, but I find that my pre-soaked shirts often stay brighter and more vibrant. After a 30-minute soak, remove the cotton and wring out the excess liquid. Note: washing soda has a high pH that may be irritating to the skin, so gloves are recommended for this step.
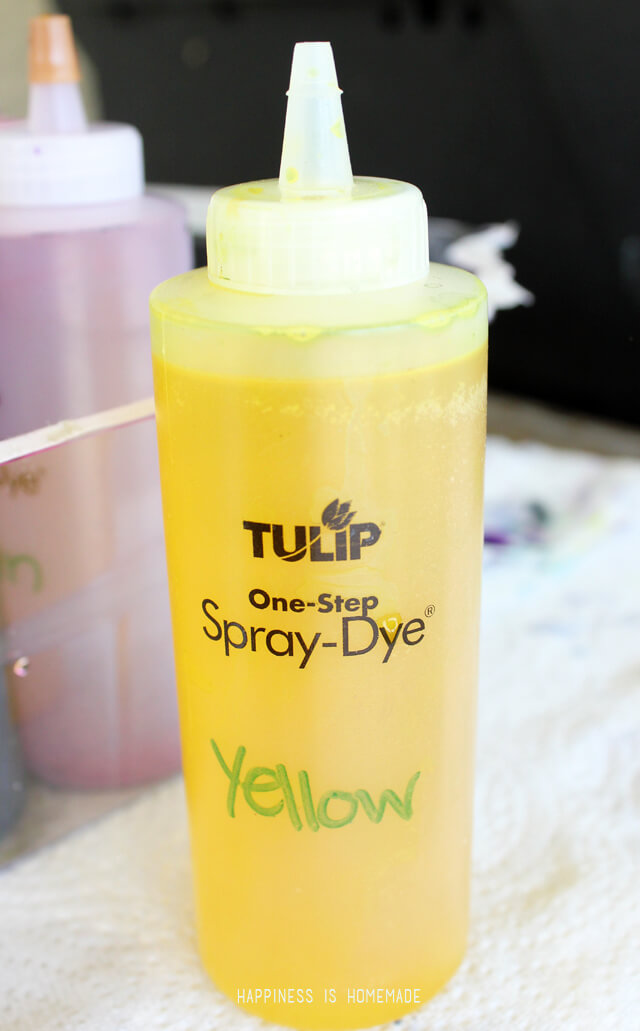 To mix up the dye, all you have to do is add water to the fill line, and shake until all of the dye powder has dissolved. I usually label our bottles with the name of the color so that in their tie dye excitement my boys don’t mix up the similar looking red and orange bottles (or Heaven forbid, the pink!). Purple, navy blue and black also look alike at quick glance, so taking a minute to label the bottles is always a good idea. Alternately, you could also keep the color coded caps on when the bottle is not in use, but we tend to fly through our tie dyeing sessions like a whirlwind, so our caps never make it back on our bottles.
While I’m busy mixing up the dye, I give my boys the task of folding and rubber banding the shirts. For more detailed instructions on how to tie the rubber bands to produce different patterns, check out this guest post that I wrote last summer for Simply Designing – it’s full of loads of info on tips and tricks for tie dyeing with kids!
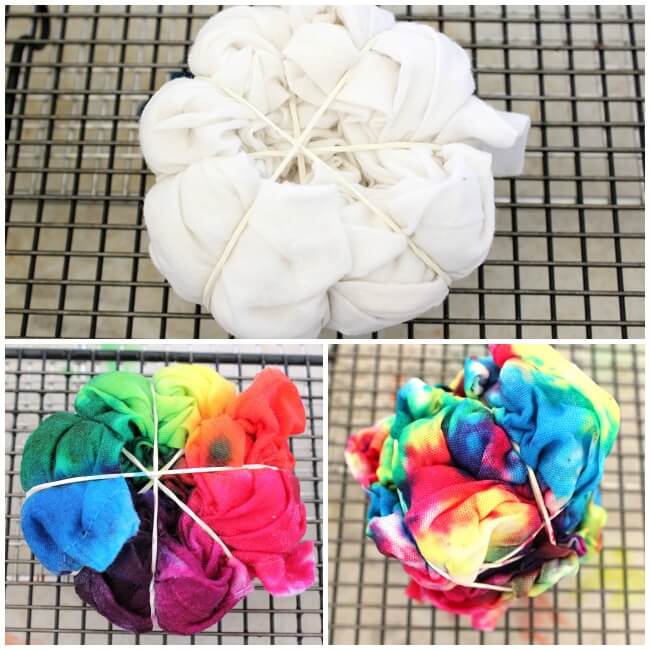 Prepare the dye area – we dye in an outdoor utility sink lined with wire baking racks. The racks keep the cotton out of the dye puddle that forms in the bottom of the sink and makes for crisper and less muddled colors. Dye only one item at a time, making sure to squirt the dye all the way into the center of the folded areas. After dyeing each item, give the sink and wire rack a quick rinse so that you don’t transfer any leftover dye to the next shirt.
Wrap each shirt tightly in a plastic bag (I highly recommend double and even triple bagging any shirts that are especially wet or drippy!) and place all of the bagged shirts into a larger bag. Let it sit undisturbed somewhere warm and sunny for 24 hours (if you can’t wait 24 hours, you can rinse the shirts after 6-8 hours, but I find that I get the best results when I allow the color to set for a full day).
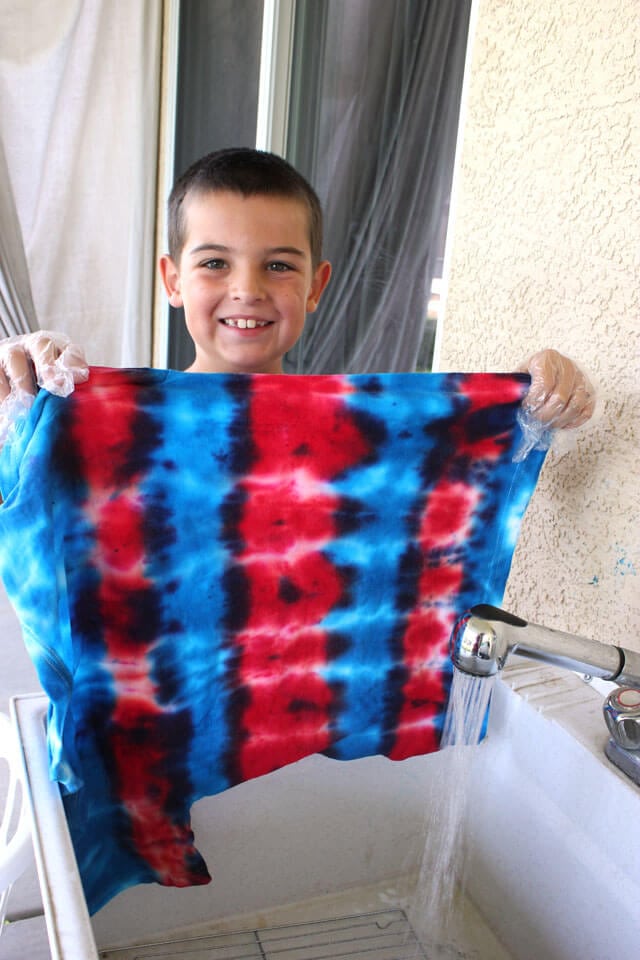 After 24 hours, remove the rubber bands and reveal the gorgeous patterns, colors and designs that you made! Rinse under cold water until the water runs clear.
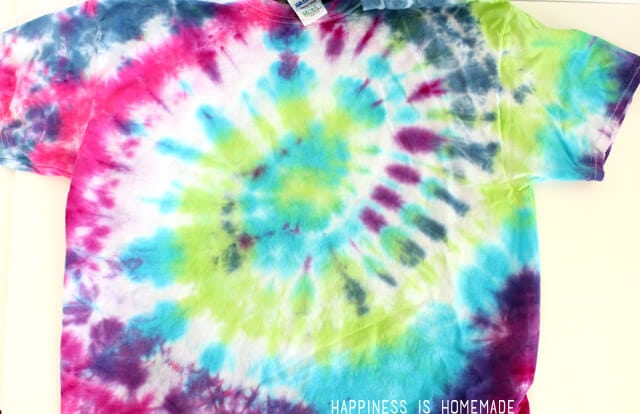
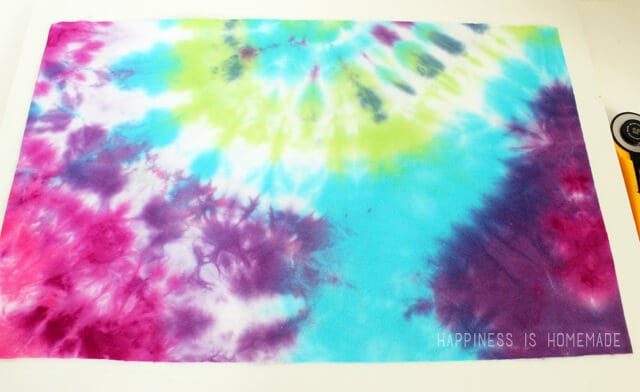
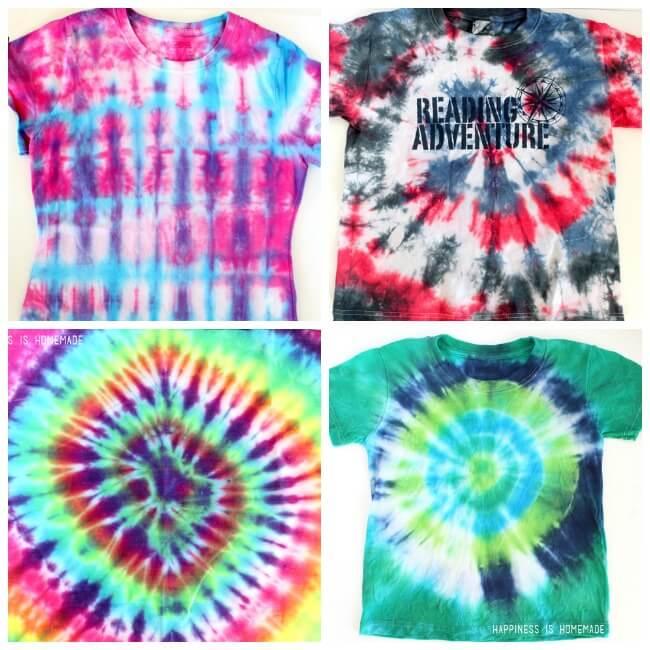 These are a few of my favorite tie dyed pieces from this session – three shirts and one rainbow swirled tea towel.
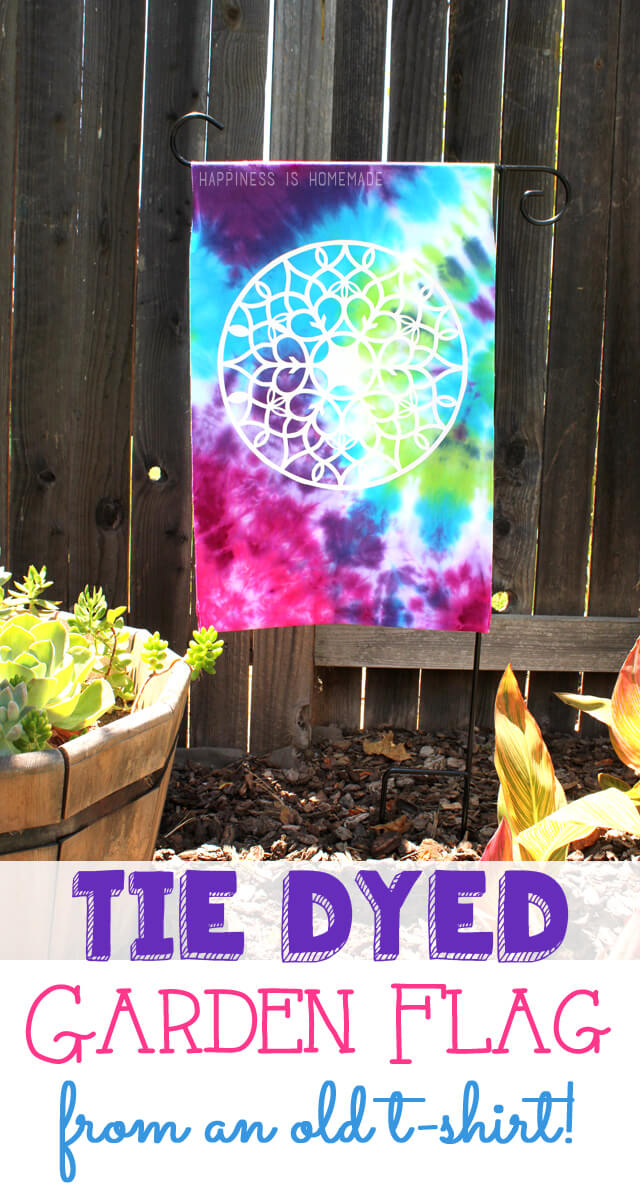
That bright tea towel is what gave me the idea to make a garden flag. I would have loved to display the tea towel as a flag, but in order to fit our garden flag stand I would have had to cut it down to size, and I didn’t dare lose any of that pretty rainbow swirl. Oh well, I’ll just save the tea towel for another project!
 I had planned on giving this oversized old shirt a new life as a brightly colored sleep shirt for myself, but I quickly realized that it would be perfect for my garden flag idea!
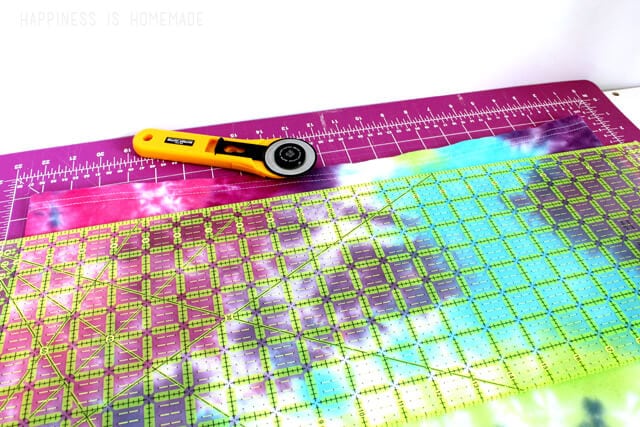 I trimmed both layers of the shirt to create a piece that was 13″ wide by 20″ long. My shirt was actually 20″ wide, so I used the width of the shirt as the length of the flag (still following me?).
 I ironed a piece of 13″ x 18″ double-sided fusible interfacing between the two layers to give it some stability and to keep the edges from curling. I left 2″ unfused along the folded edge to serve as a rod pocket for my garden flag stand.
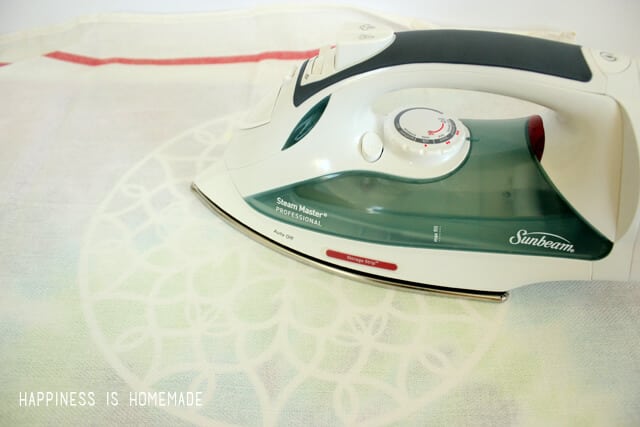 I cut a piece of heat transfer vinyl in a mandala/doily shape and ironed it on to the front of my flag.
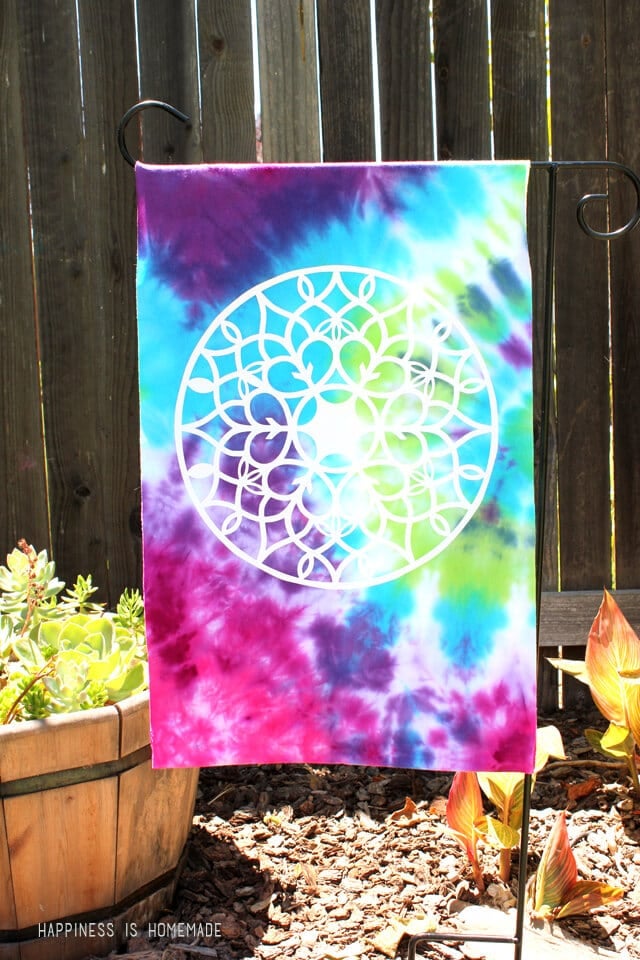 I was originally planning on adding a top-stitch around the edges of my flag, but the interfacing held the layers together really well! If the edges eventually end up getting a little tattered over time it’s a-okay with me anyway – like colorful Tibetan prayer flags after years of fluttering in the breeze! In fact, I might just need to make an entire banner of miniature colored flags just for that purpose!
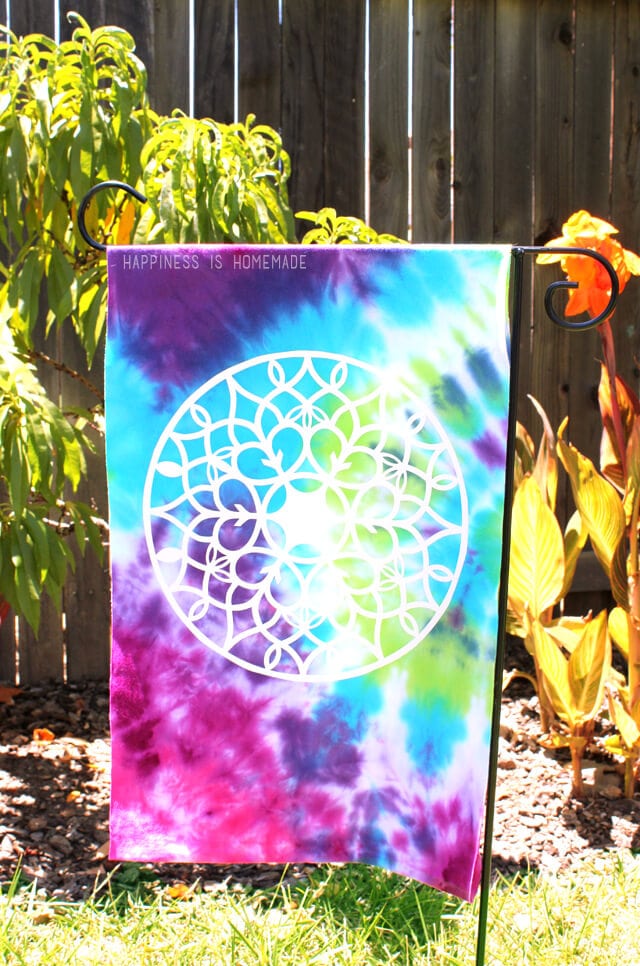 Right now the boys seem to think that our flag should live near the canna lillies and the miniature nectarine tree…
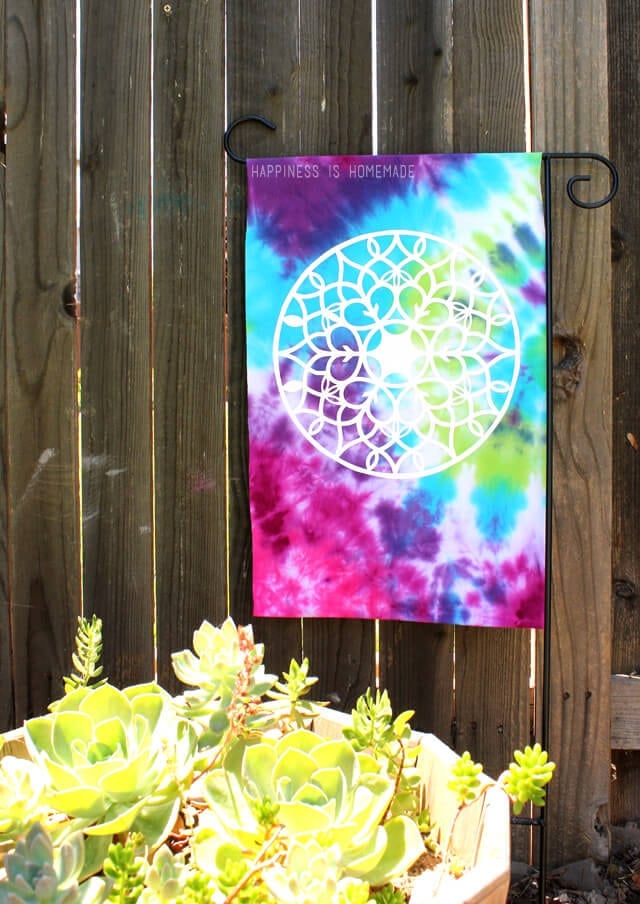 …but I kind of like it hanging out with my succulent barrel. What do you think?
For more inspiration and ways that you can tie dye your summer, check out these projects from some of my friends, and be sure to follow iLovetoCreate on Facebook, Twitter, Pinterest, and at the ILTC blog!


Heidi Kundin has captivated the hearts of millions with her colorful and inspiring approach to crafting, celebrations, and family fun. With over 15 years of experience, Happiness is Homemade has become a must-visit destination for those seeking quick and easy creative ideas and last-minute solutions. Heidi’s warm personality shines through her posts, inviting readers to join her on a creative journey that’s fun, rewarding, and achievable. Heidi is also the author of Homemade Bath Bombs & More and DIY Tie-Dye.