


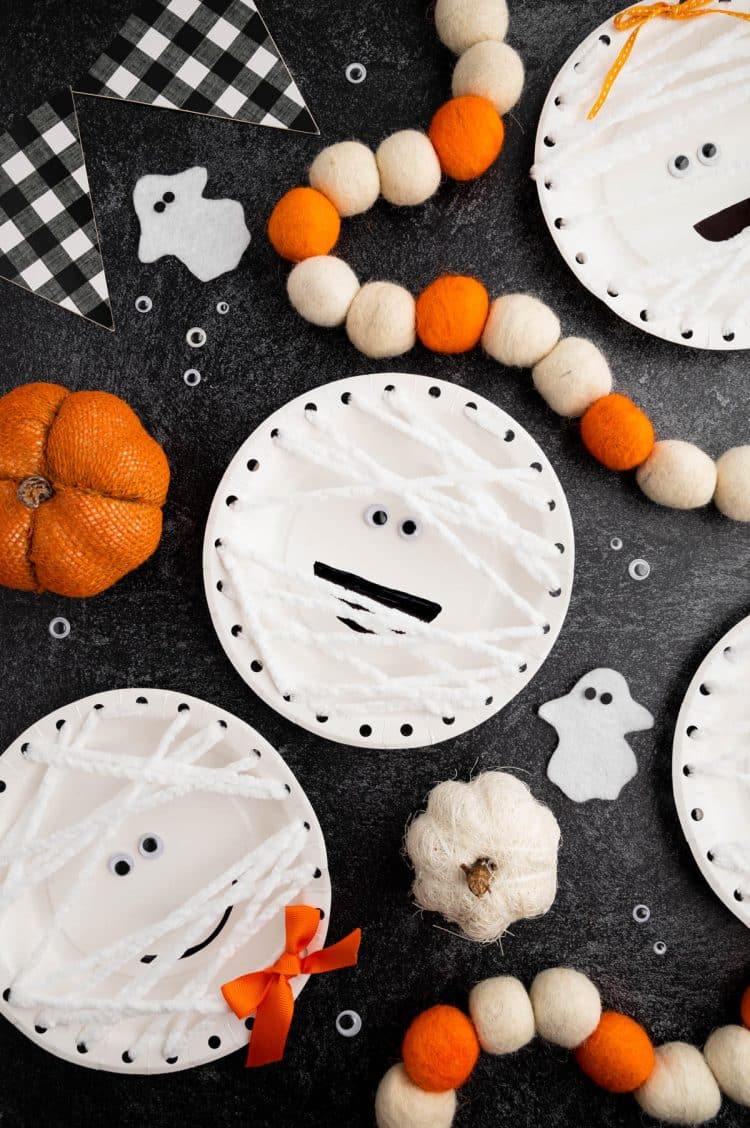
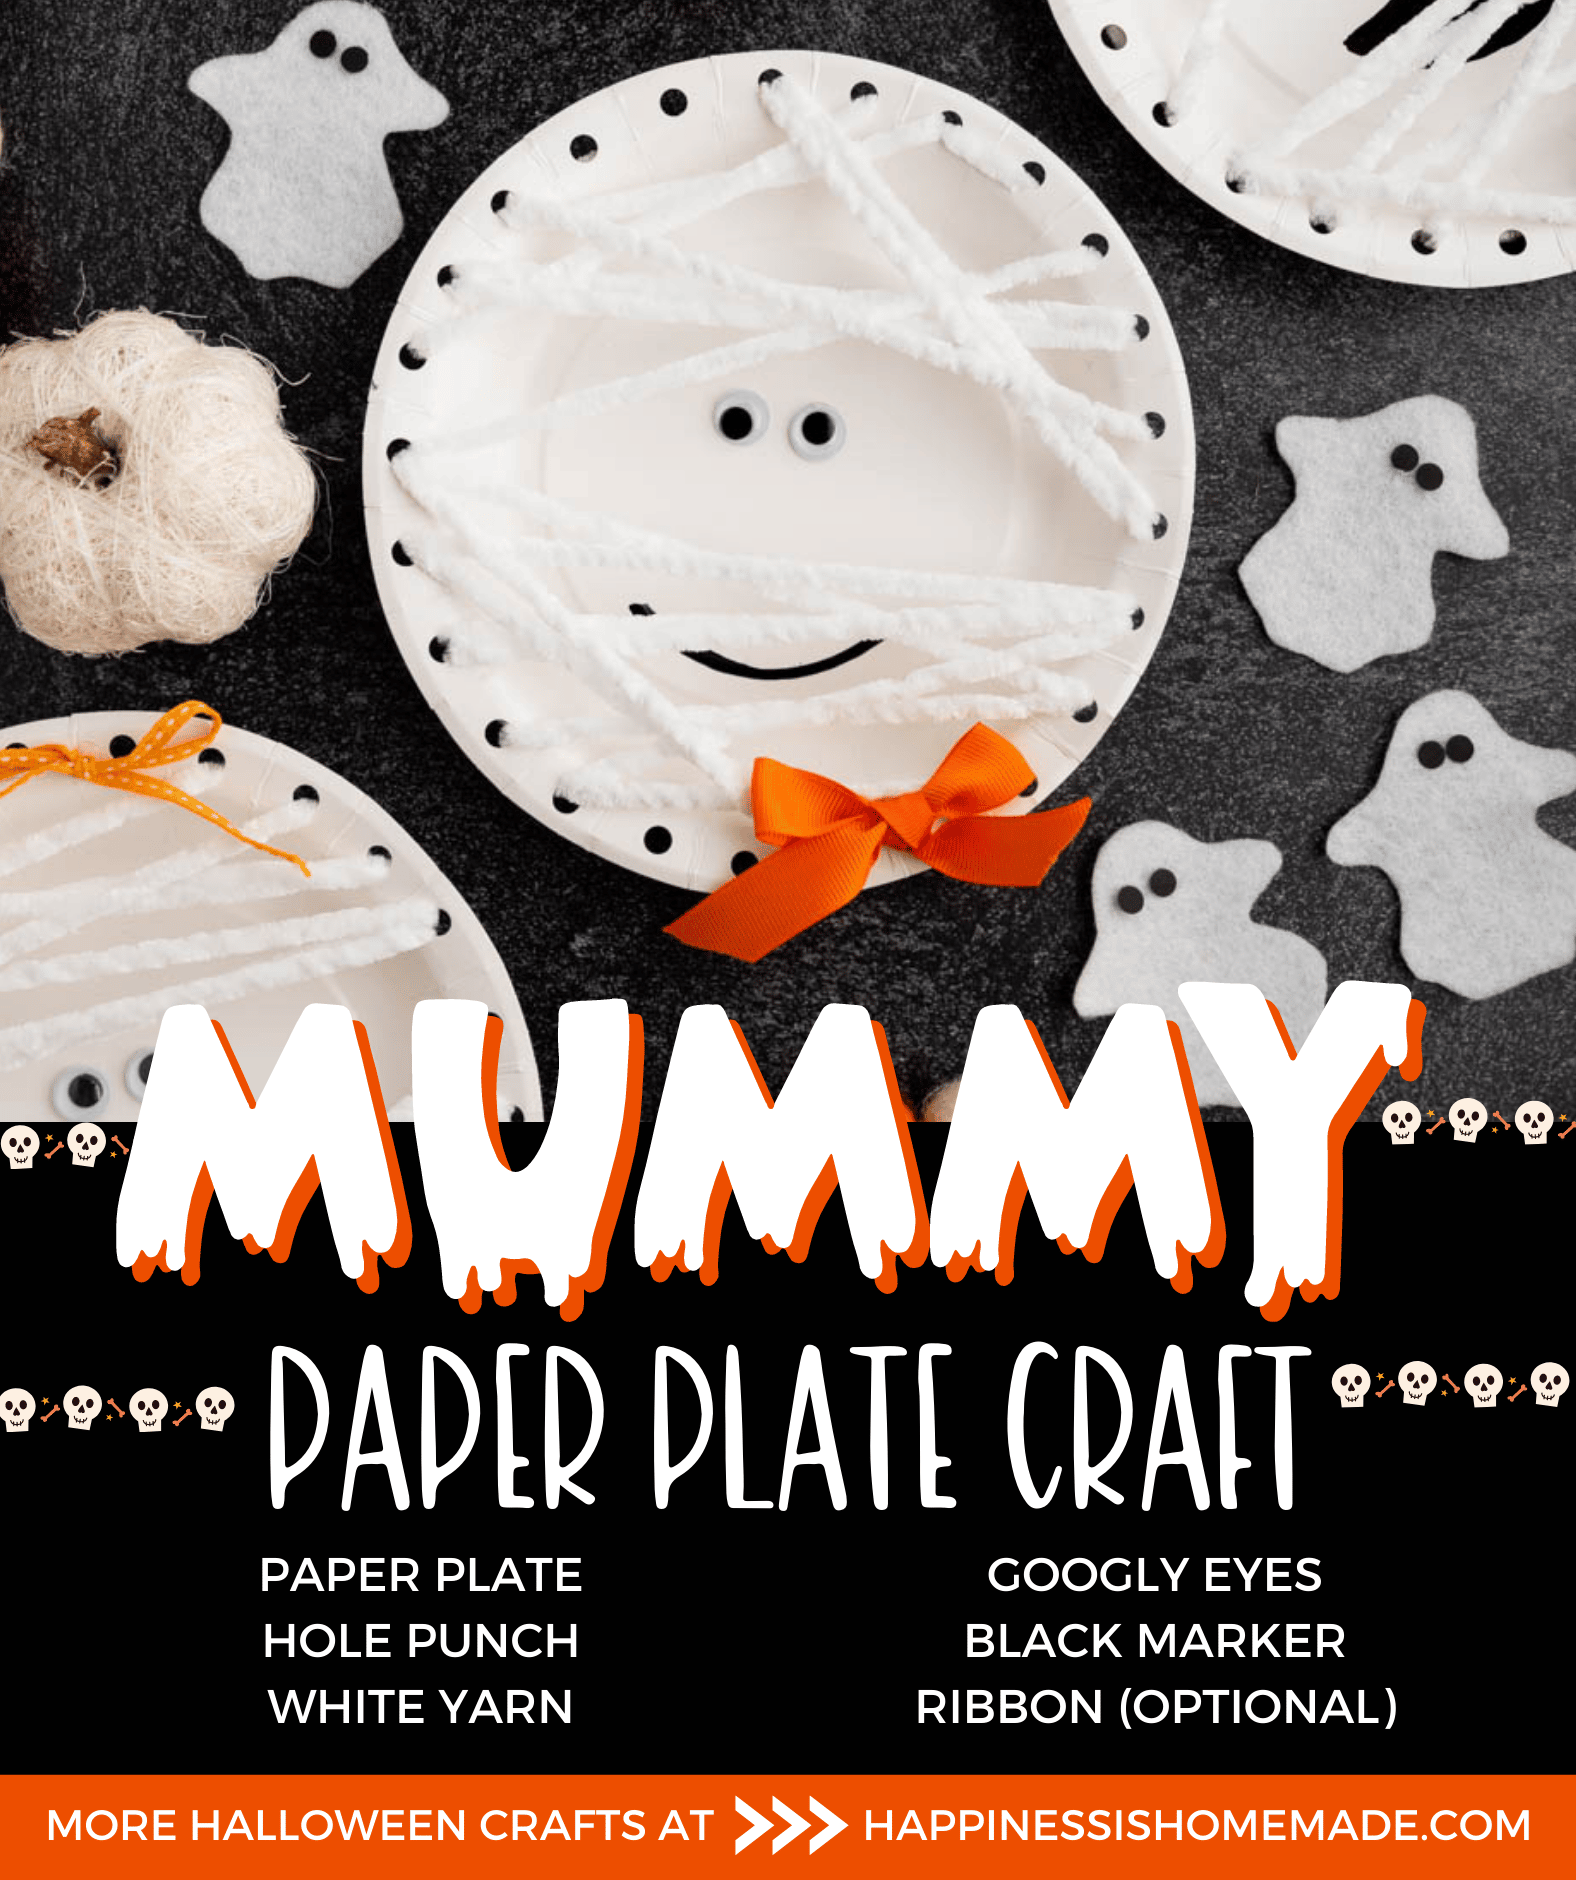
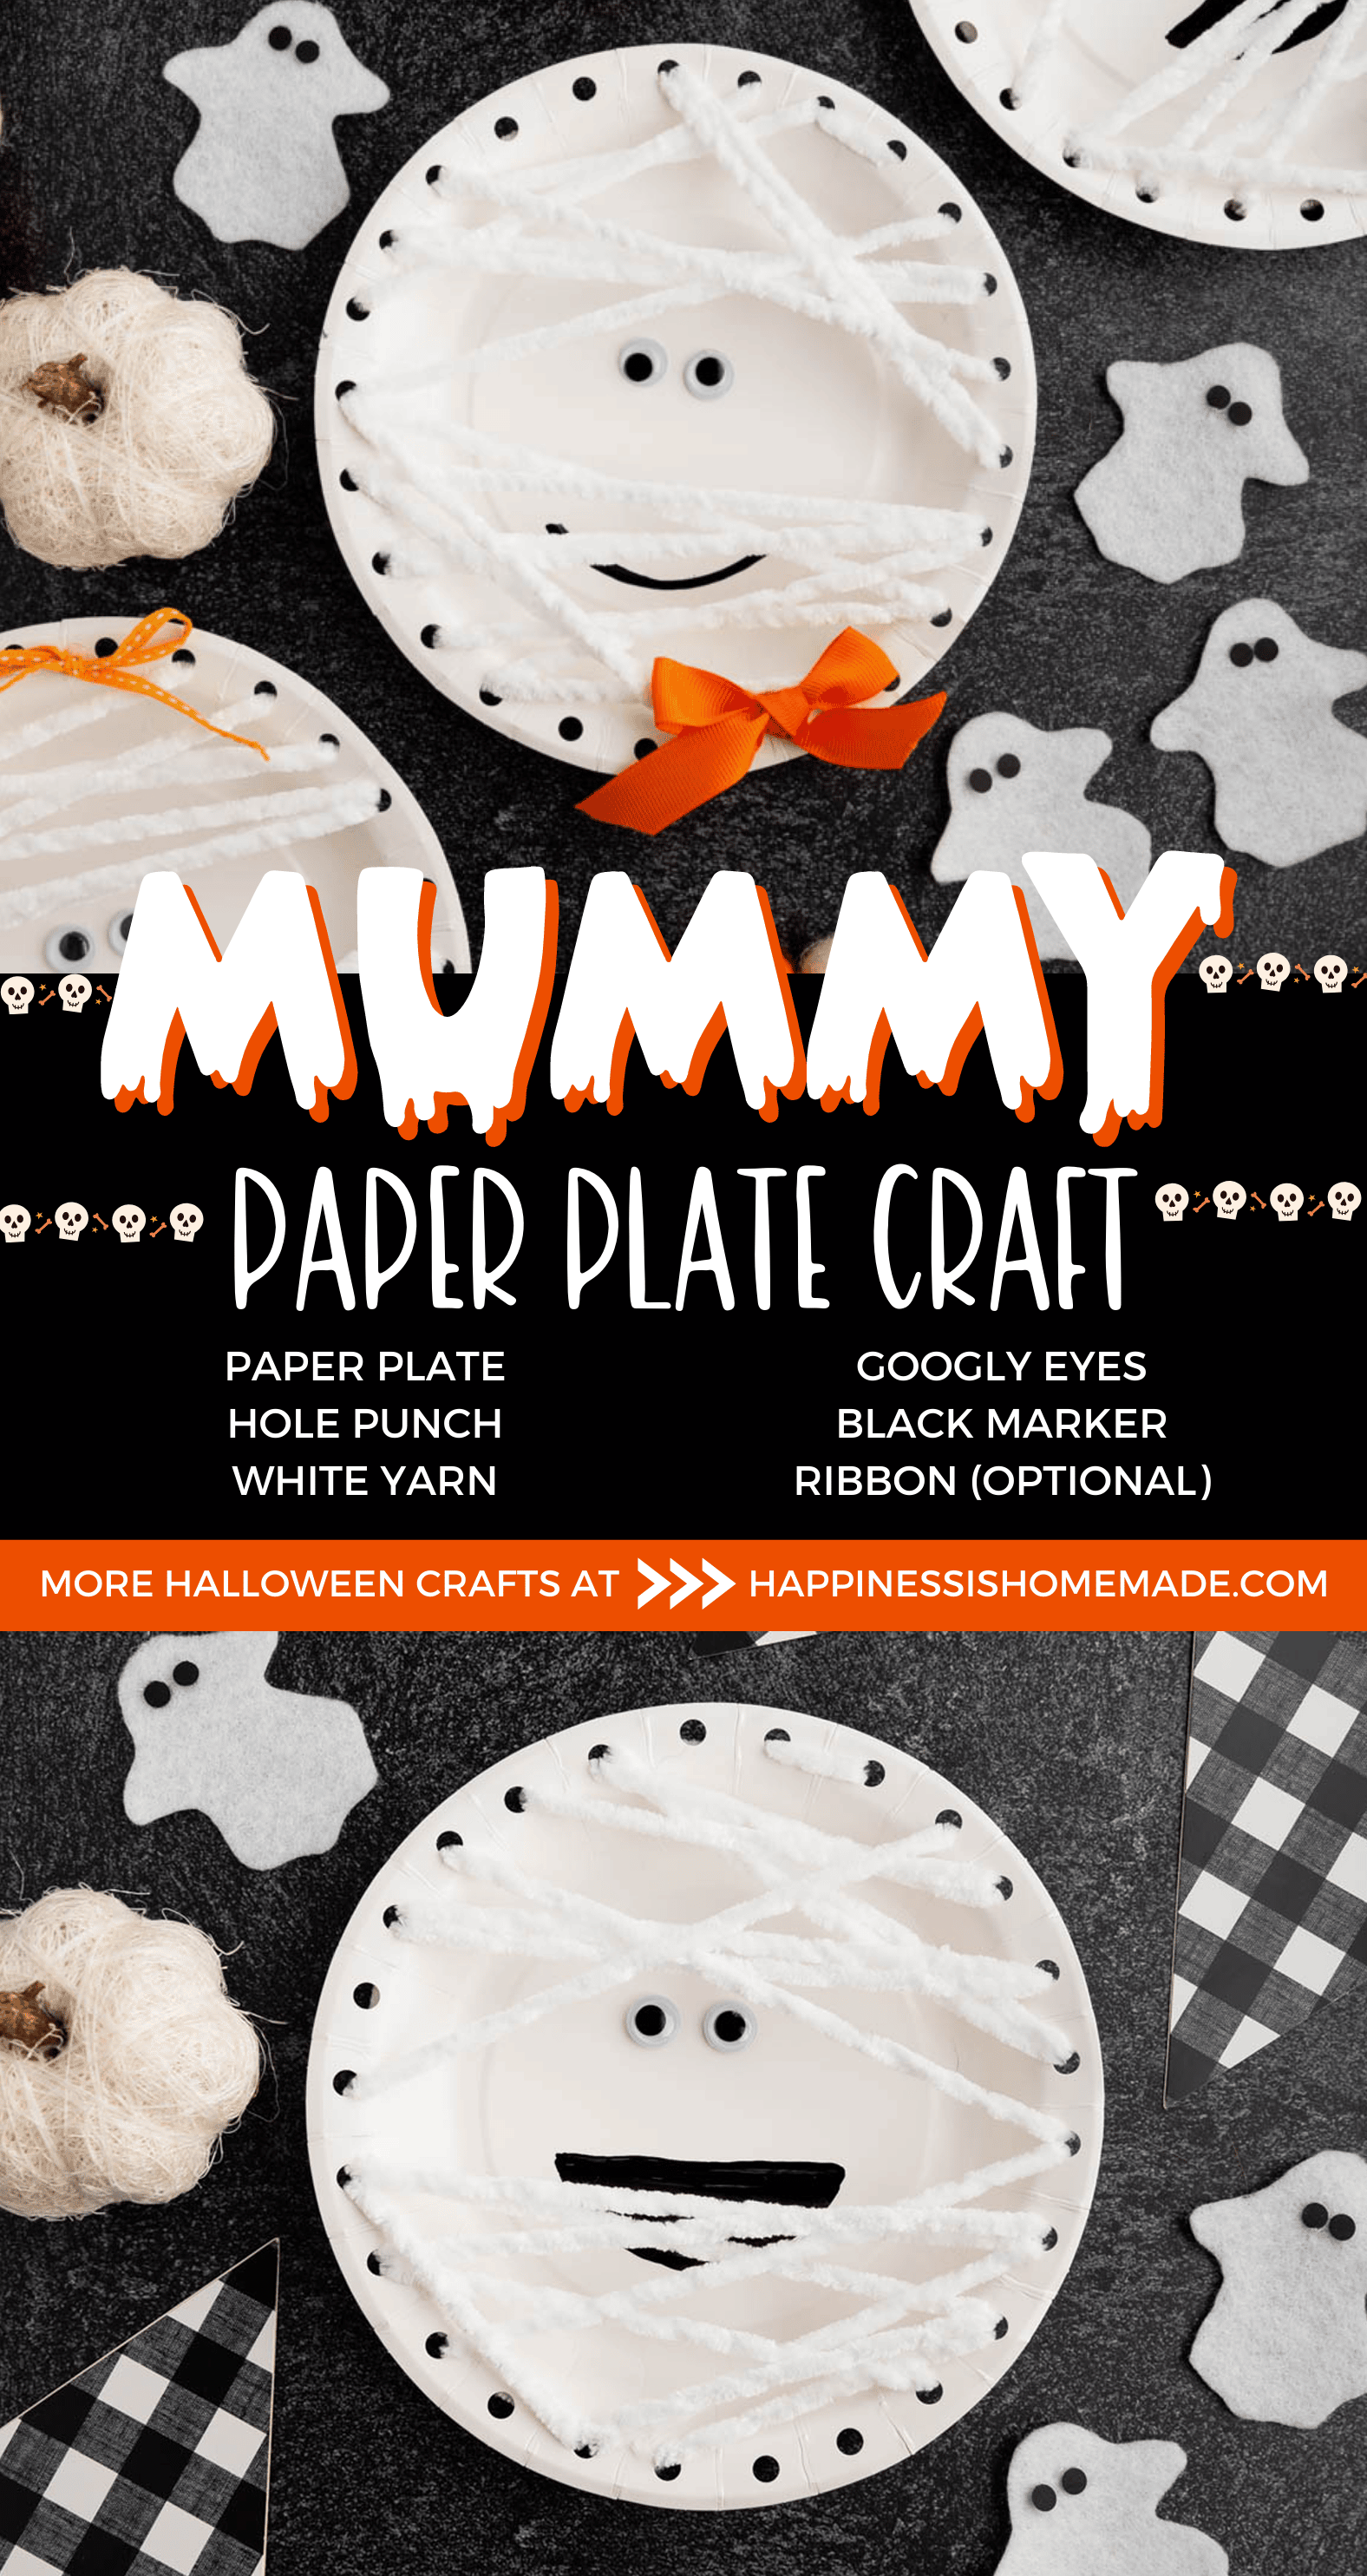
This easy and fun mummy paper plate Halloween craft is great for little kids! It’s fun, inexpensive, and would make a great group craft for a classroom, church, or daycare!
This post may contain affiliate links. I will receive a small commission from these sales at no additional cost to you!
Paper plates are one of my favorite materials to use for simple craft projects because they’re readily available and inexpensive…plus, there’s just SO much that you can make with them! (Check out these 40+ Fun Paper Plate Crafts for Kids!)
These Halloween Mummy Paper Plates are a great craft to entertain younger kids at a Halloween party, and it also makes a great classroom activity or church group activity. This easy craft doesn’t take long to make, and is relatively simple to create. The materials can be easily purchased inexpensively in large quantities making it the perfect craft for groups of all sizes and ages. Everyone will love this easy Halloween craft!
You’ll Also Want to Check These Out!
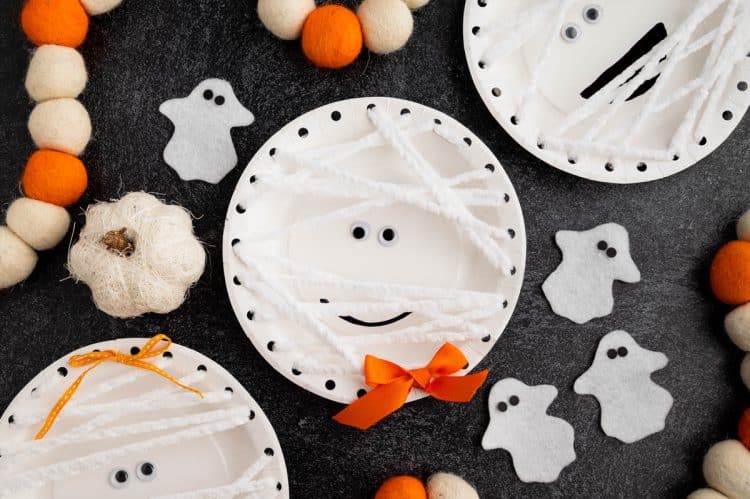
Halloween Paper Plate Mummy Craft
Age: Preschool, Kindergarten, and Elementary
Difficulty: Easy
Cost: ~ $0.50 per mummy
Time: 15 minutes
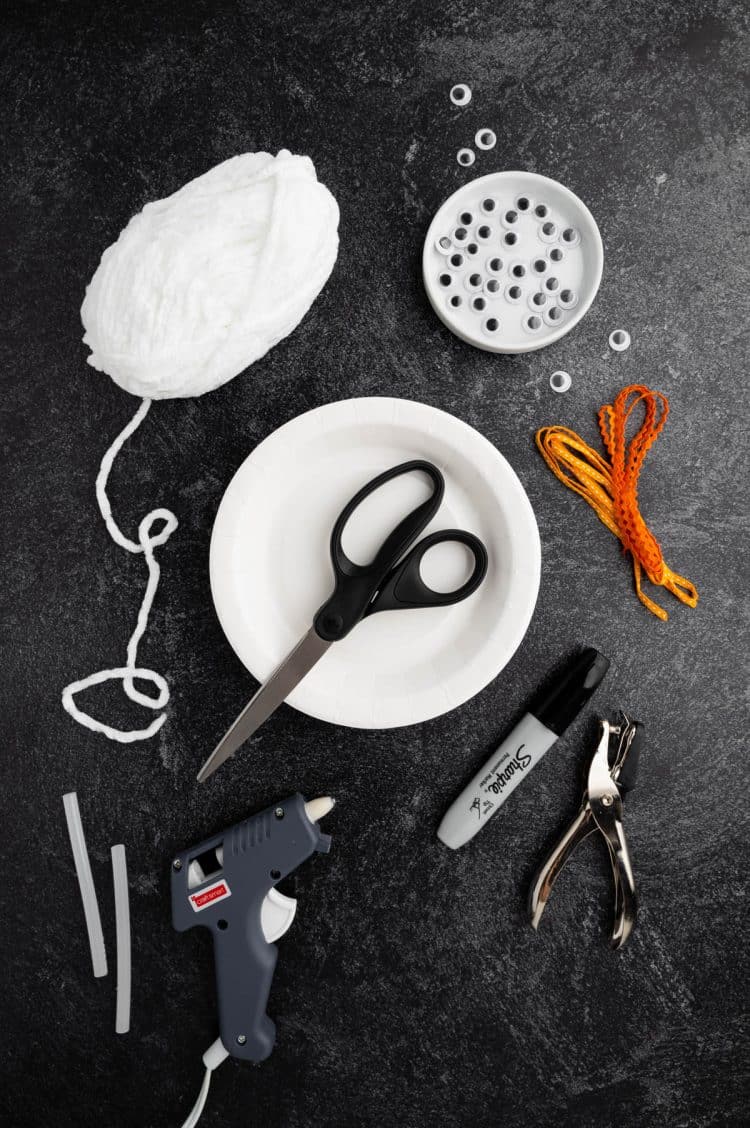
Supplies Needed to Make a Paper Plate Mummy:
- 7-inch White Party Plates
- White Yarn (approximately 8-10 yards per mummy)
- Permanent Black Marker
- Hot Glue Gun or Craft Glue
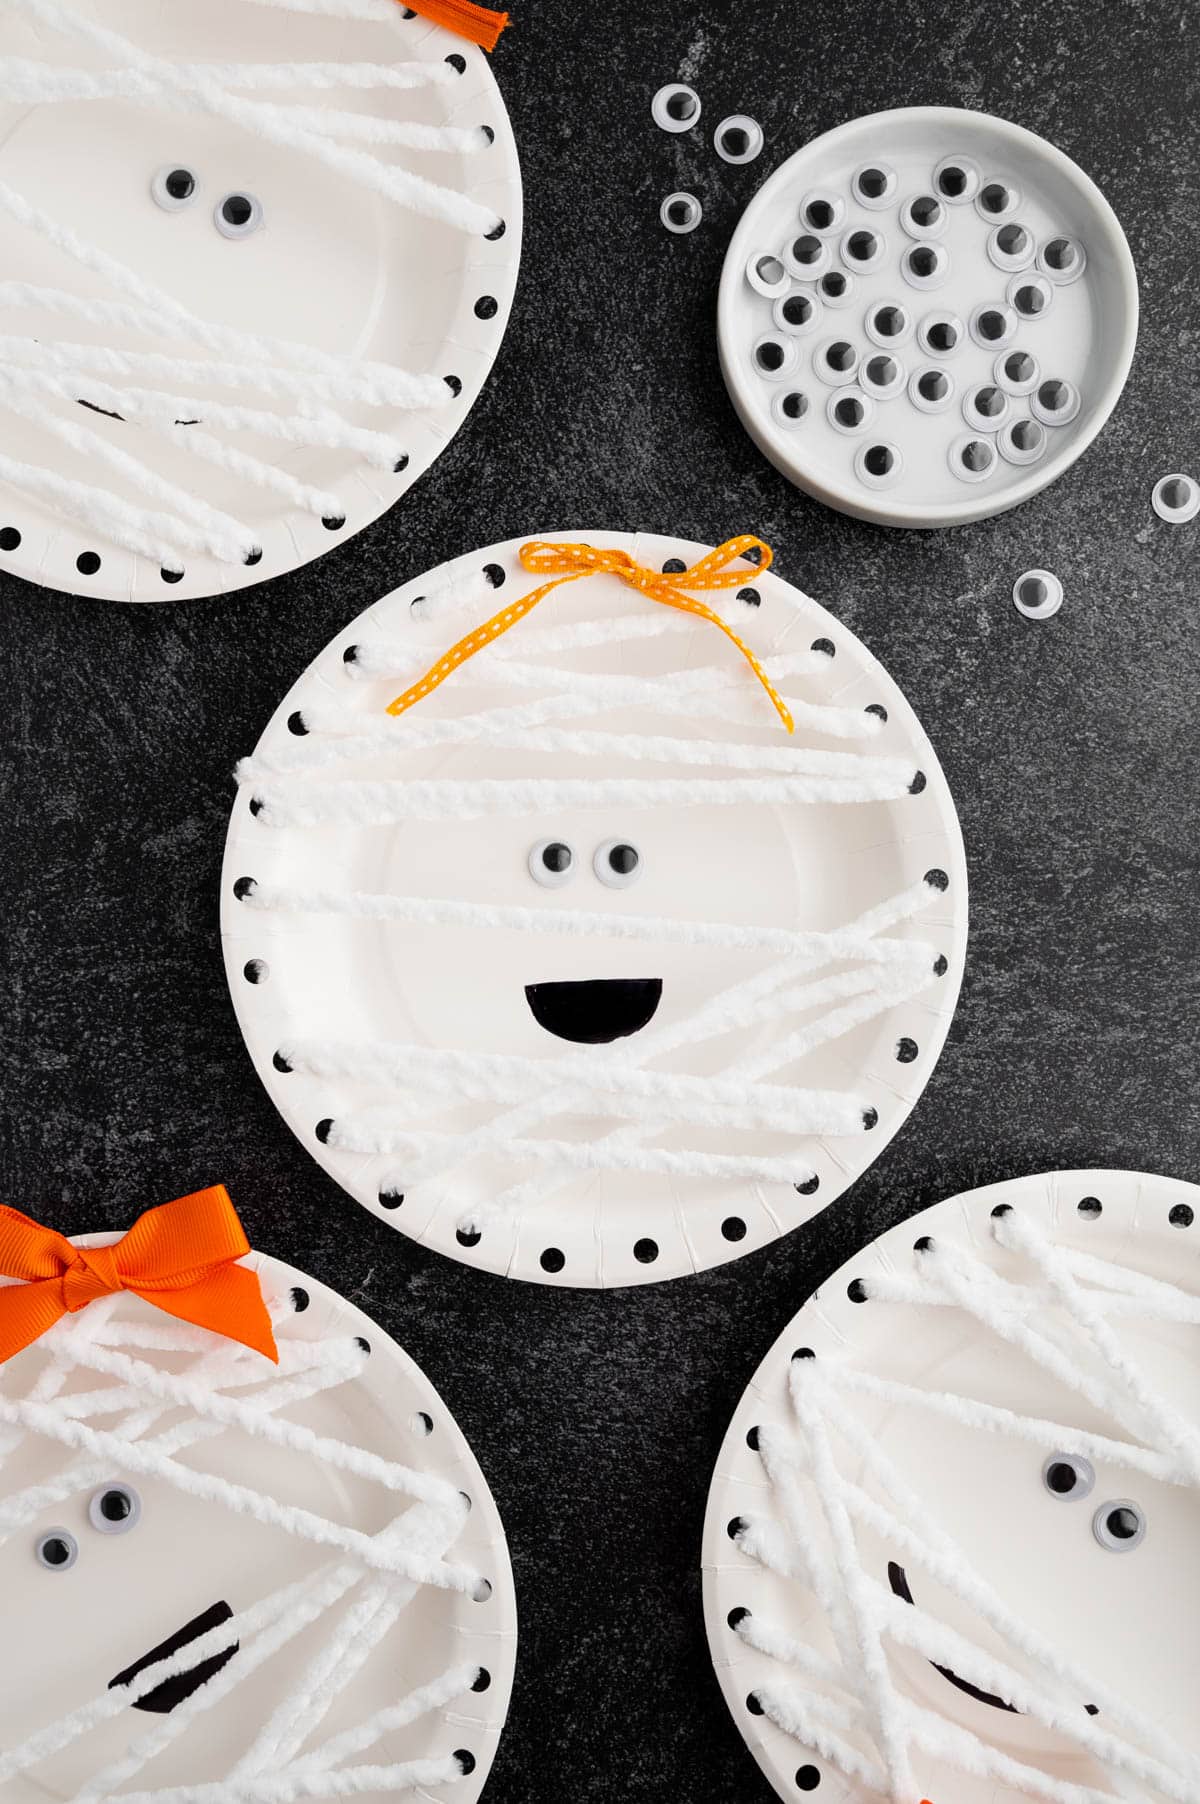
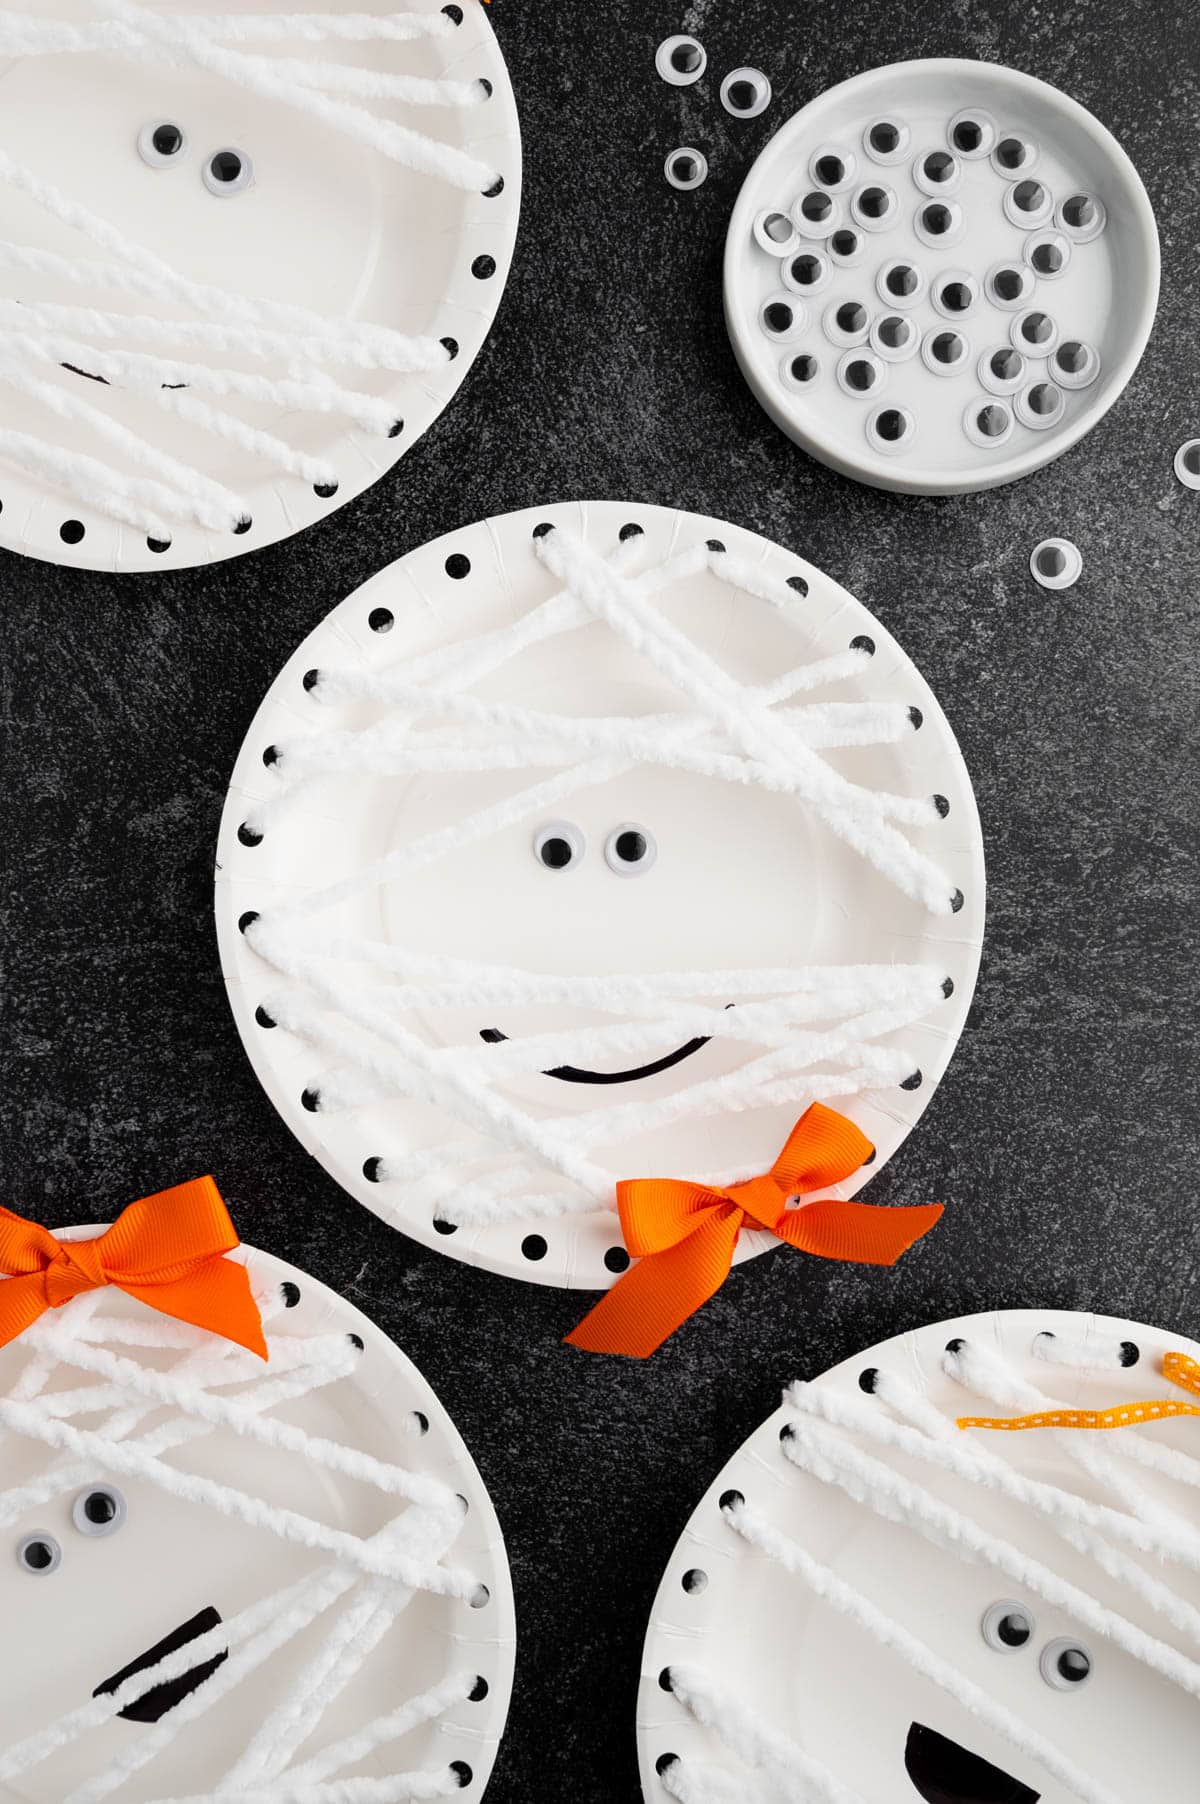
- Medium-Sized Googly Eyes
- Scissors
- Hole Punch
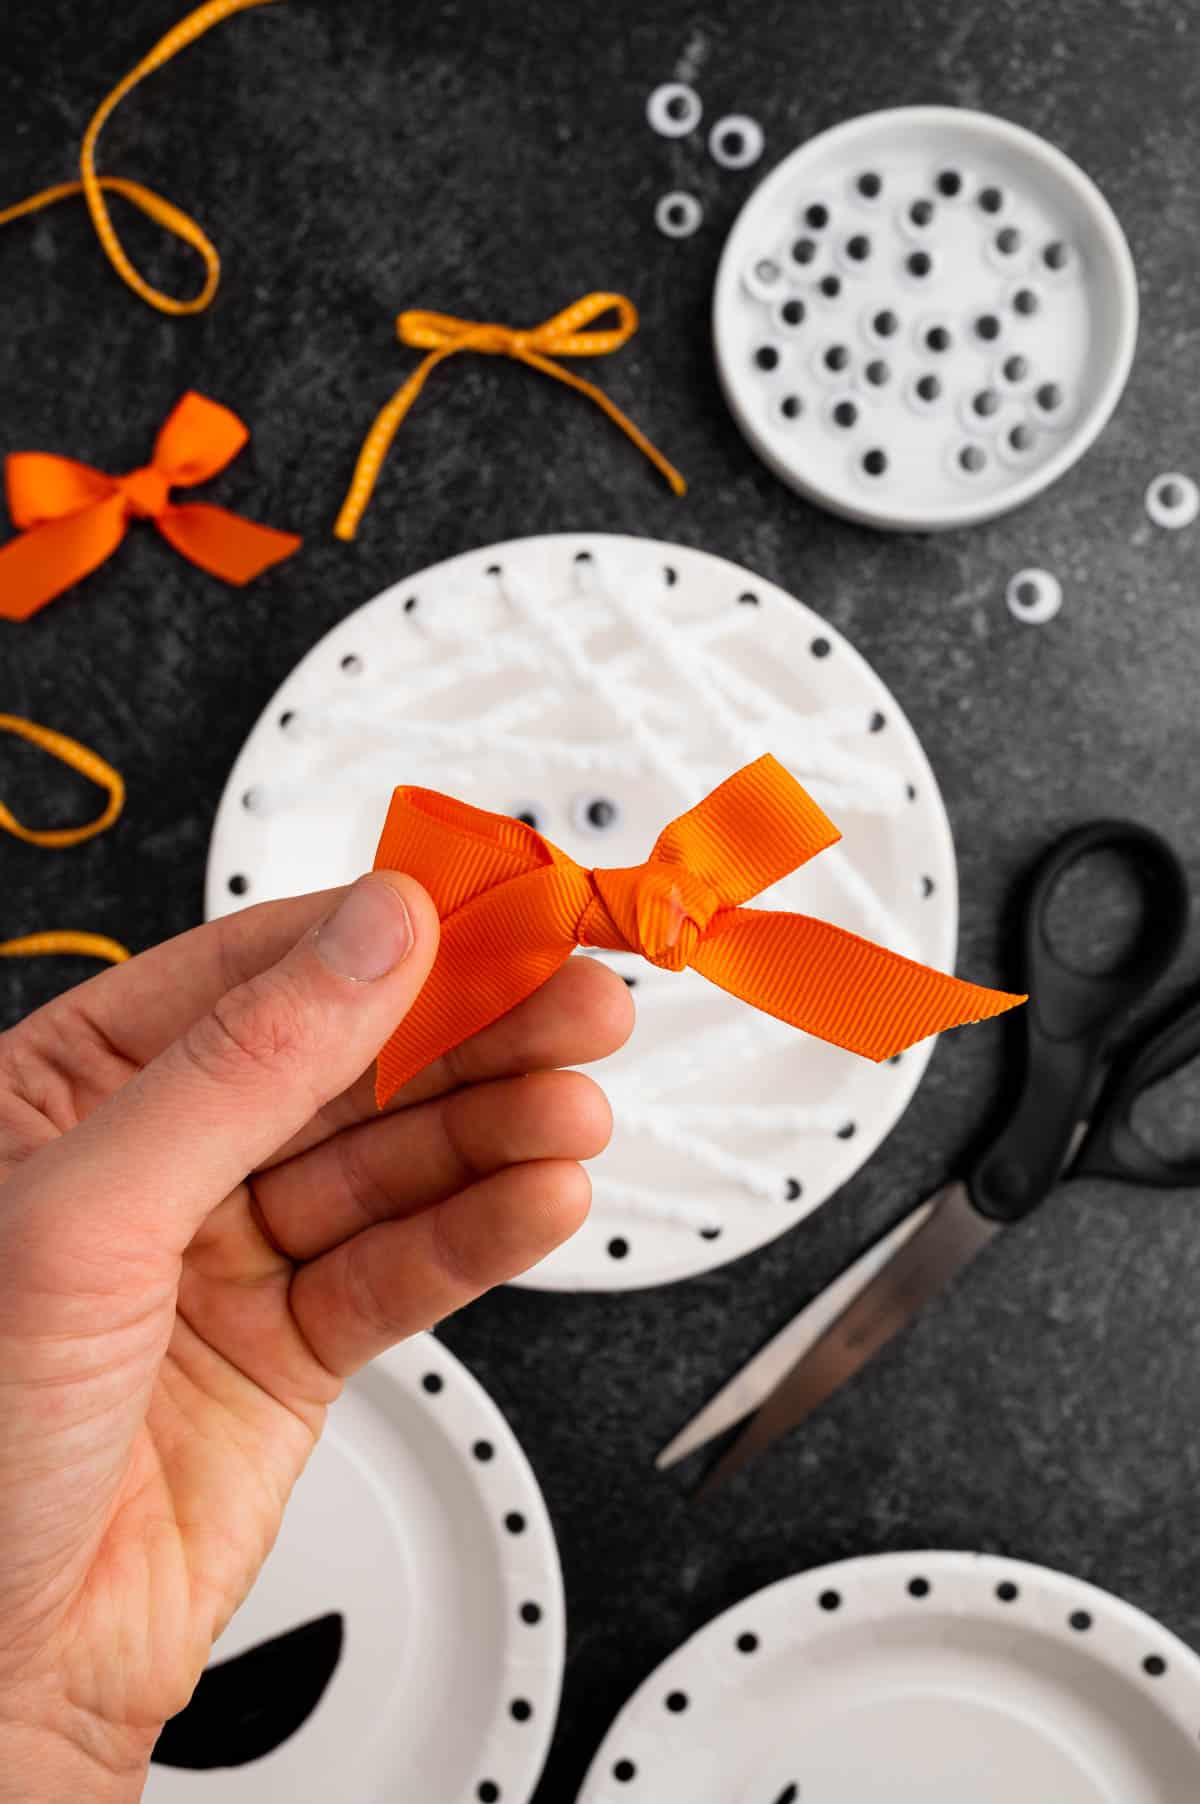
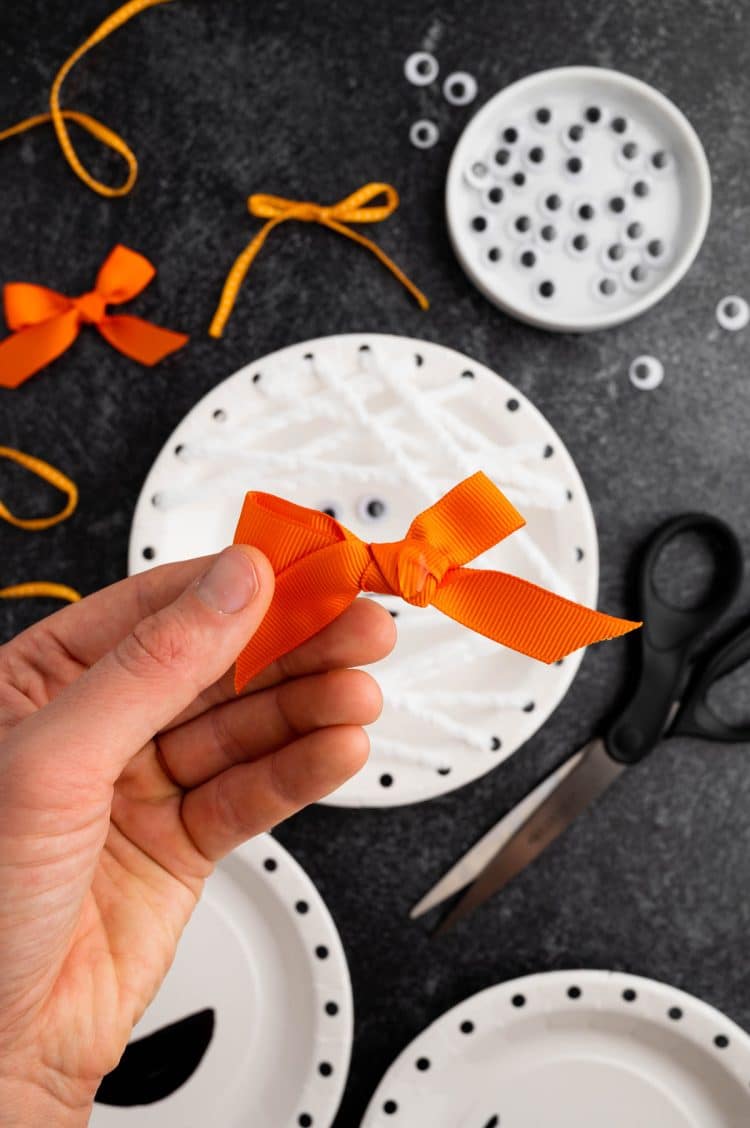
- Orange Ribbon – optional, for bows
- Clear Tape – optional
Instructions: How to Make a Paper Plate Mummy
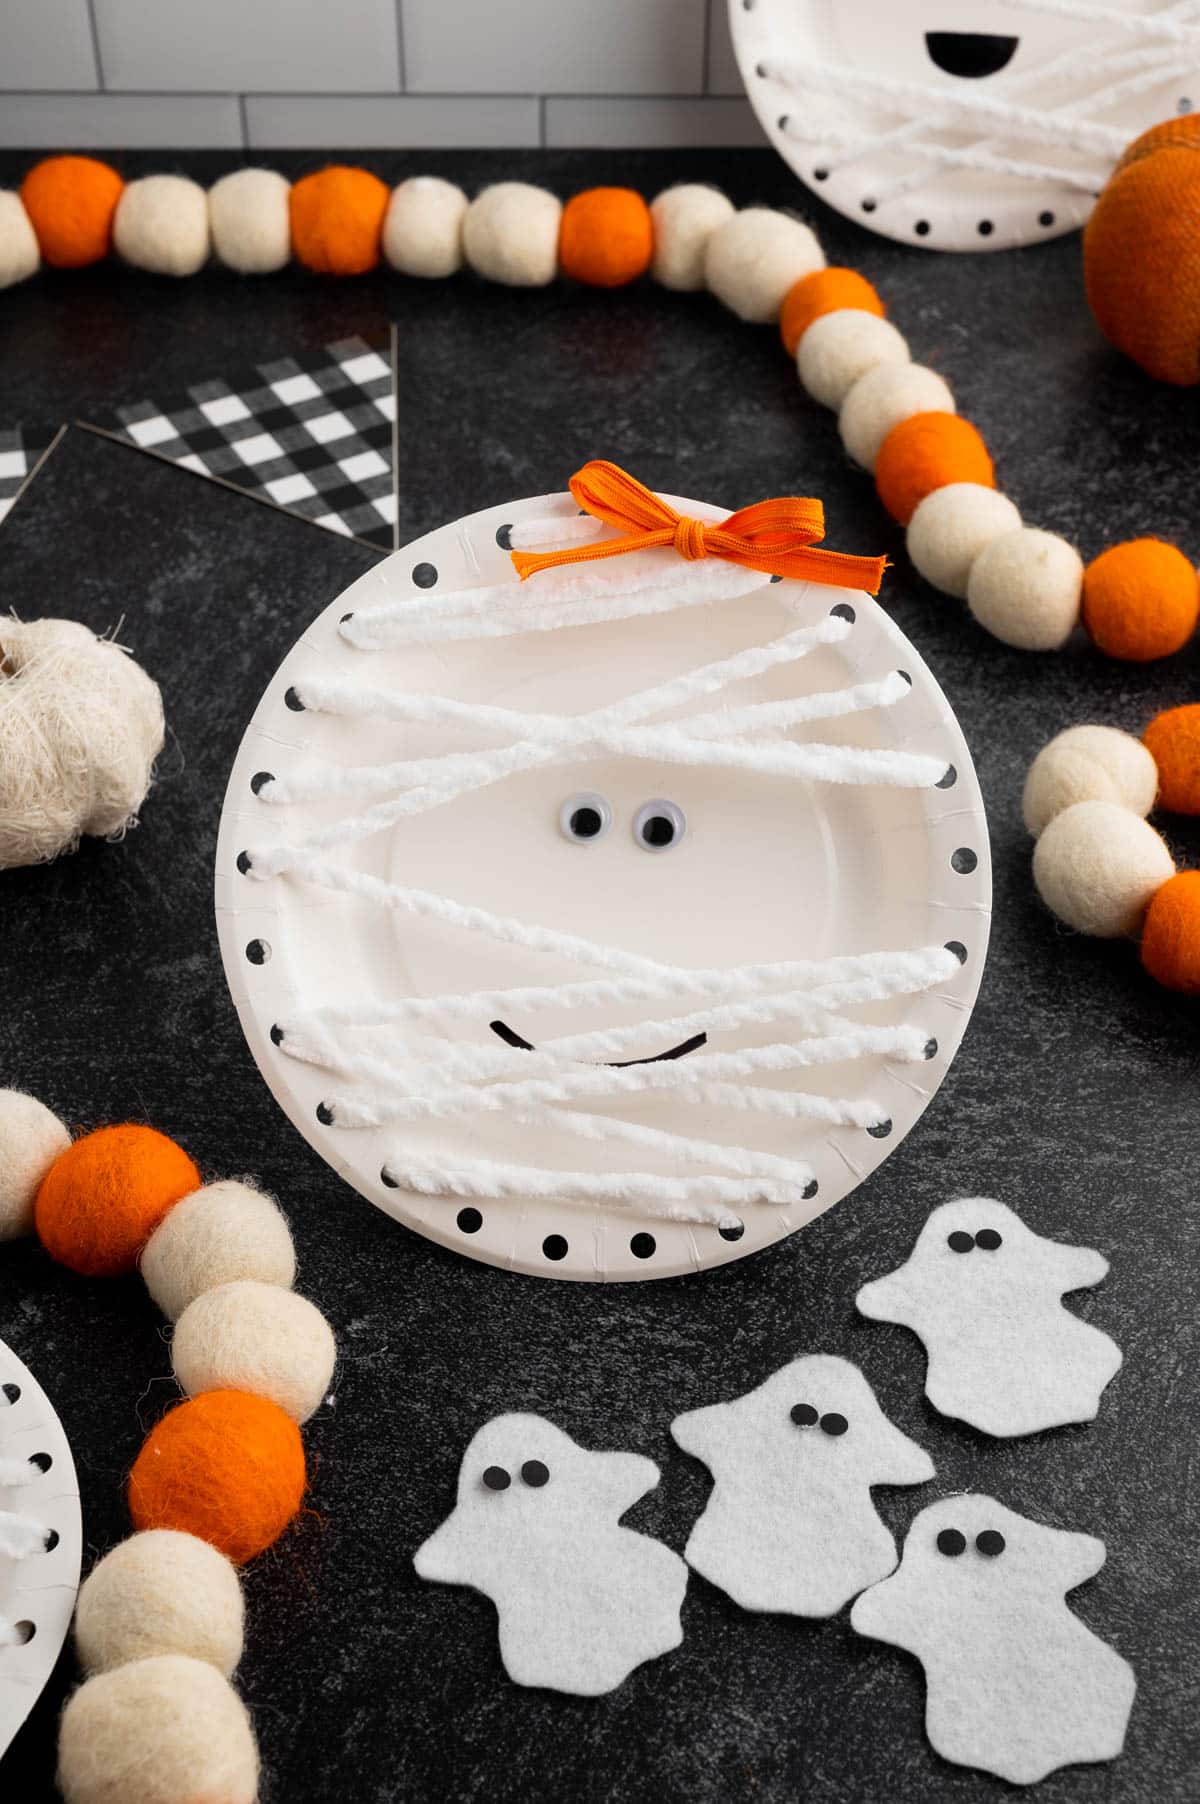
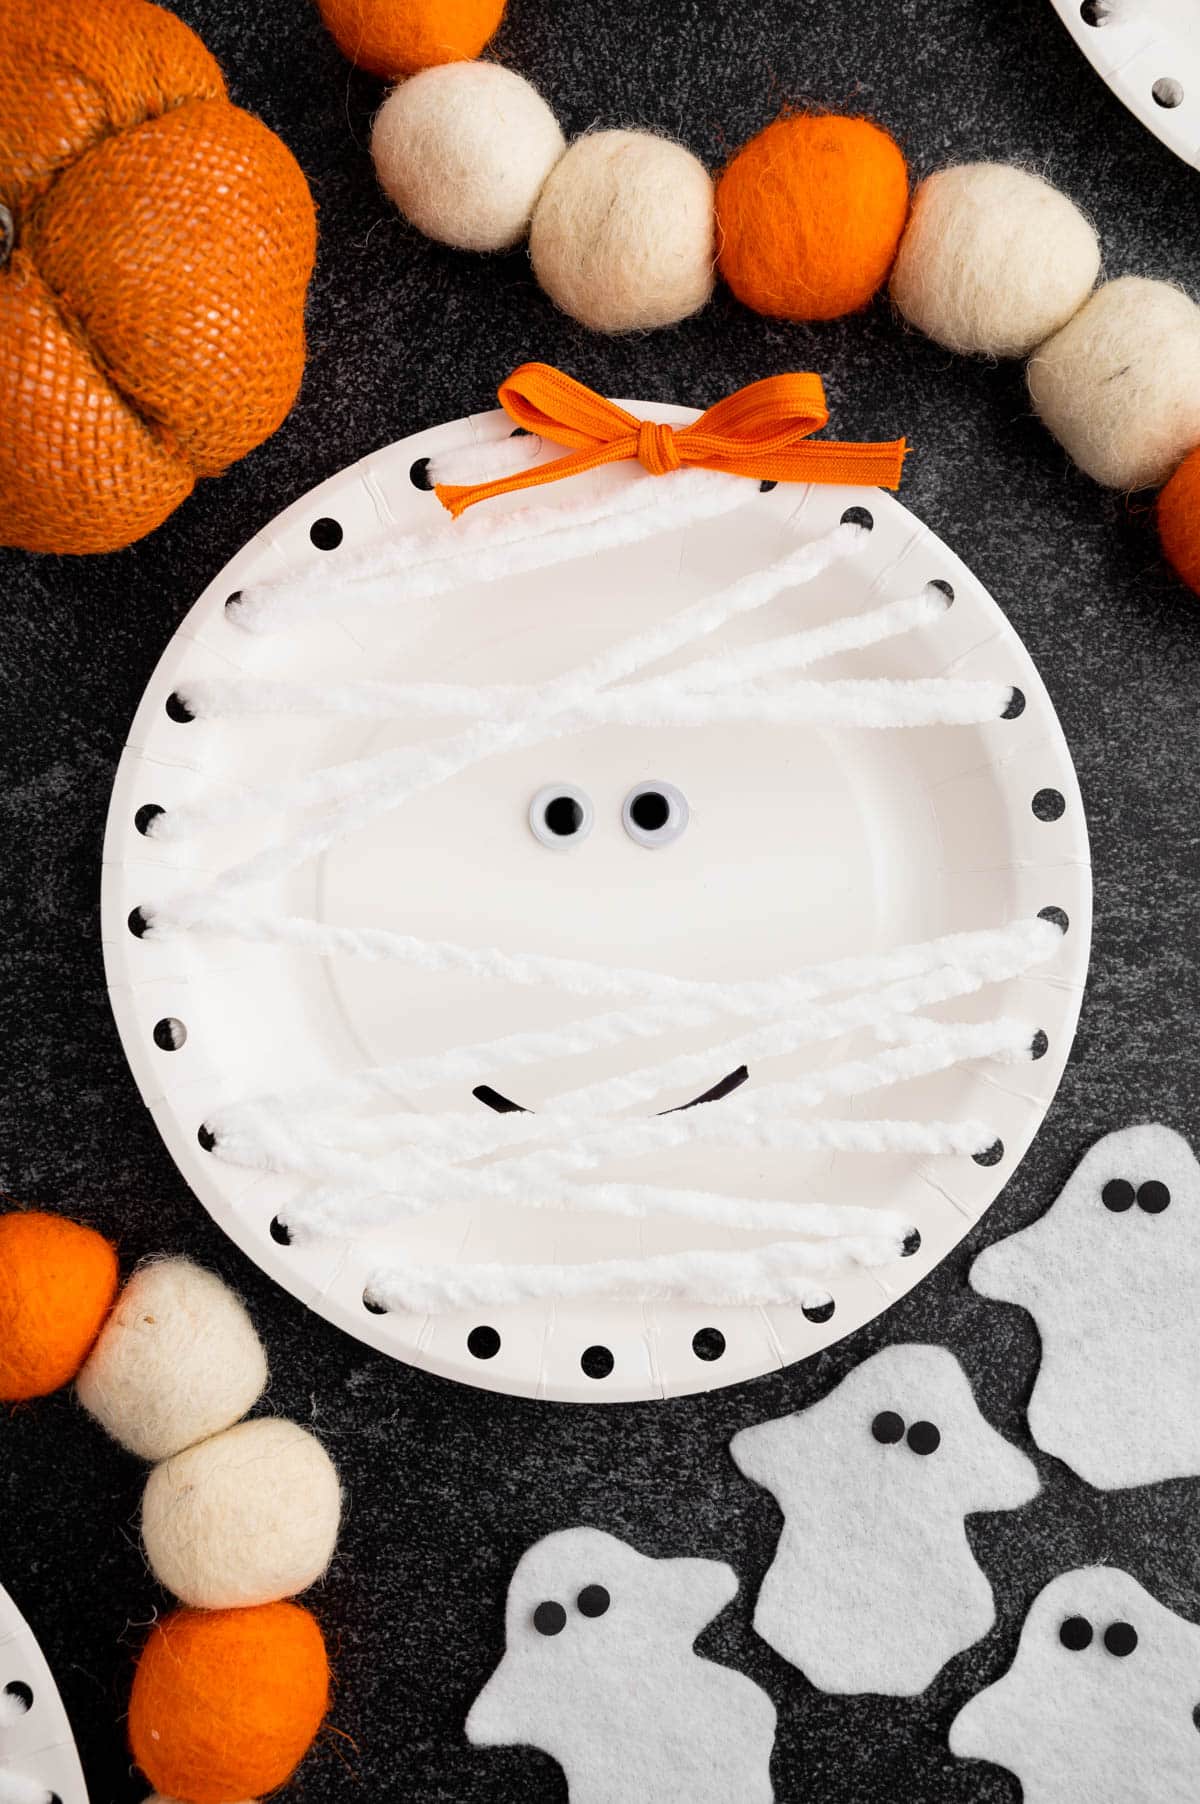
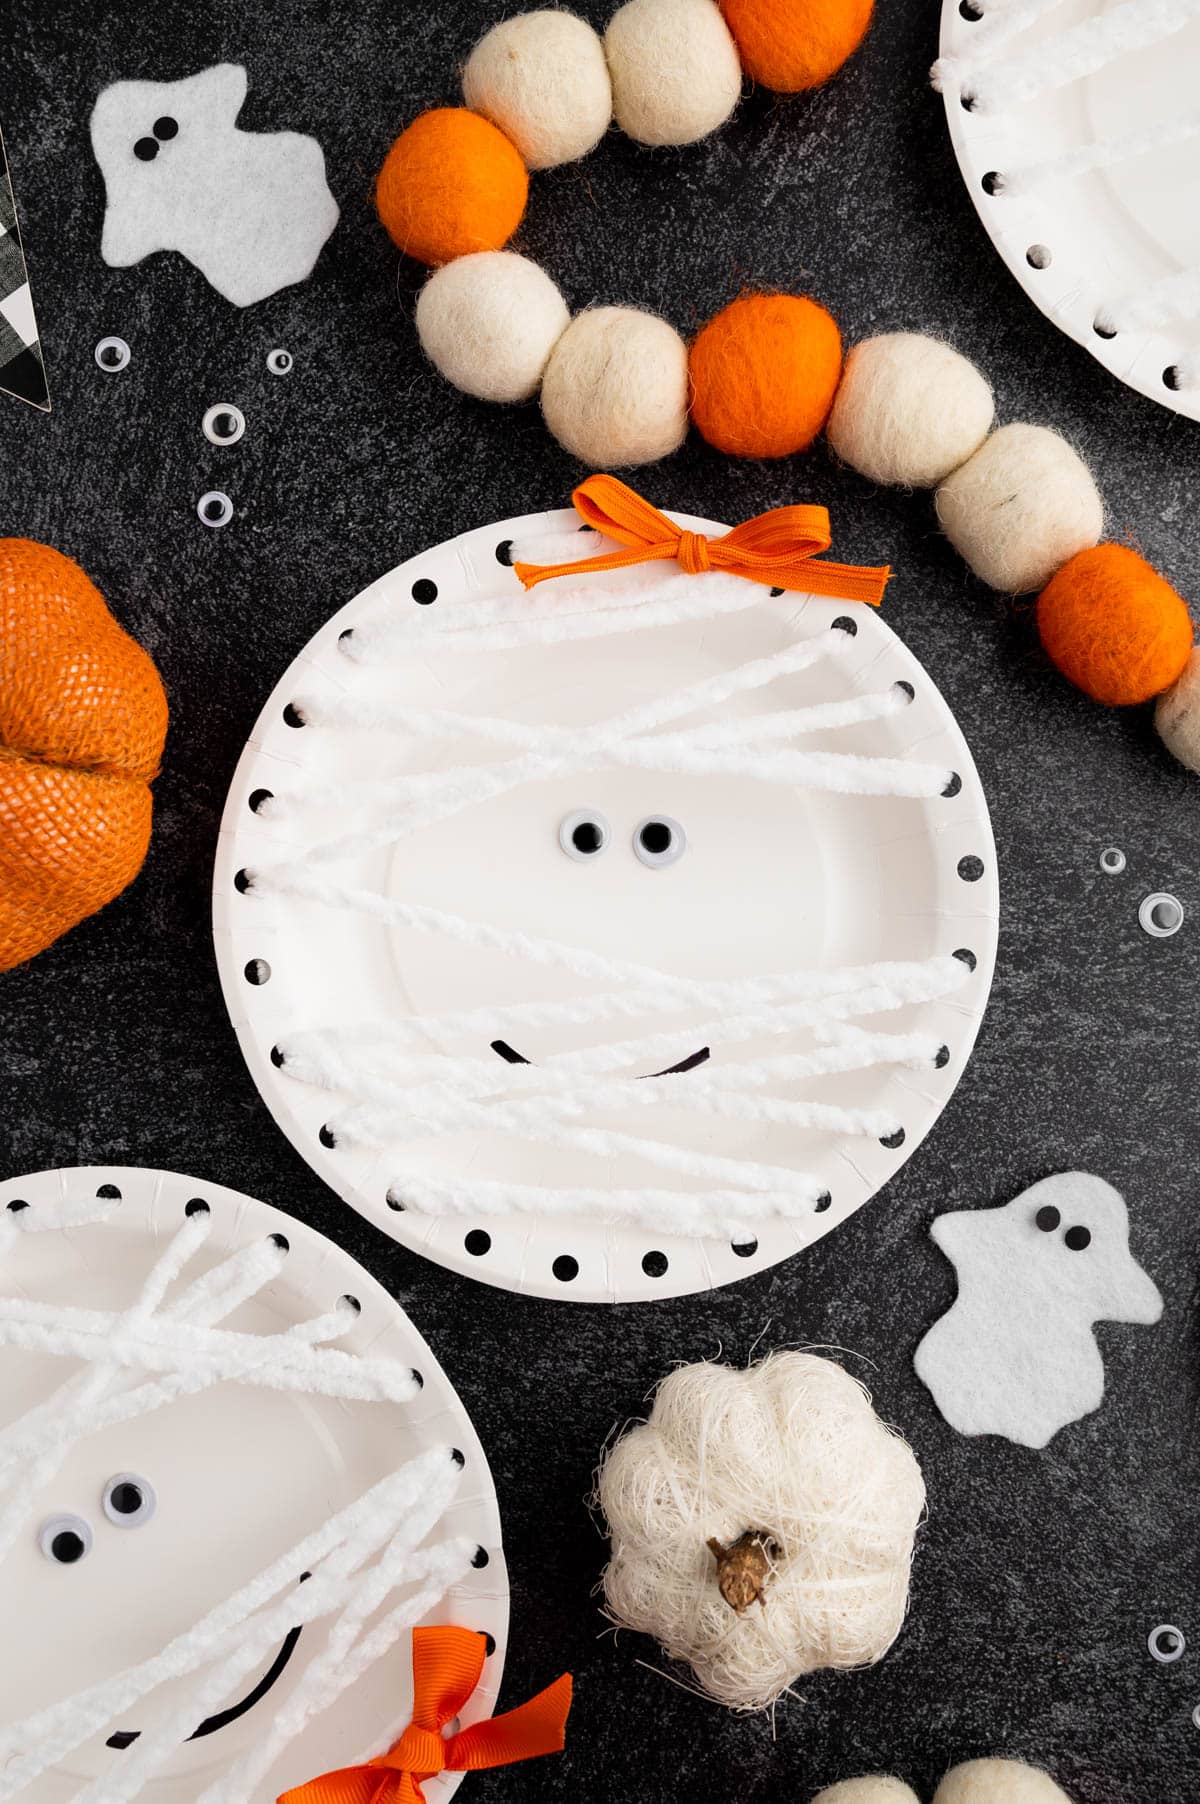
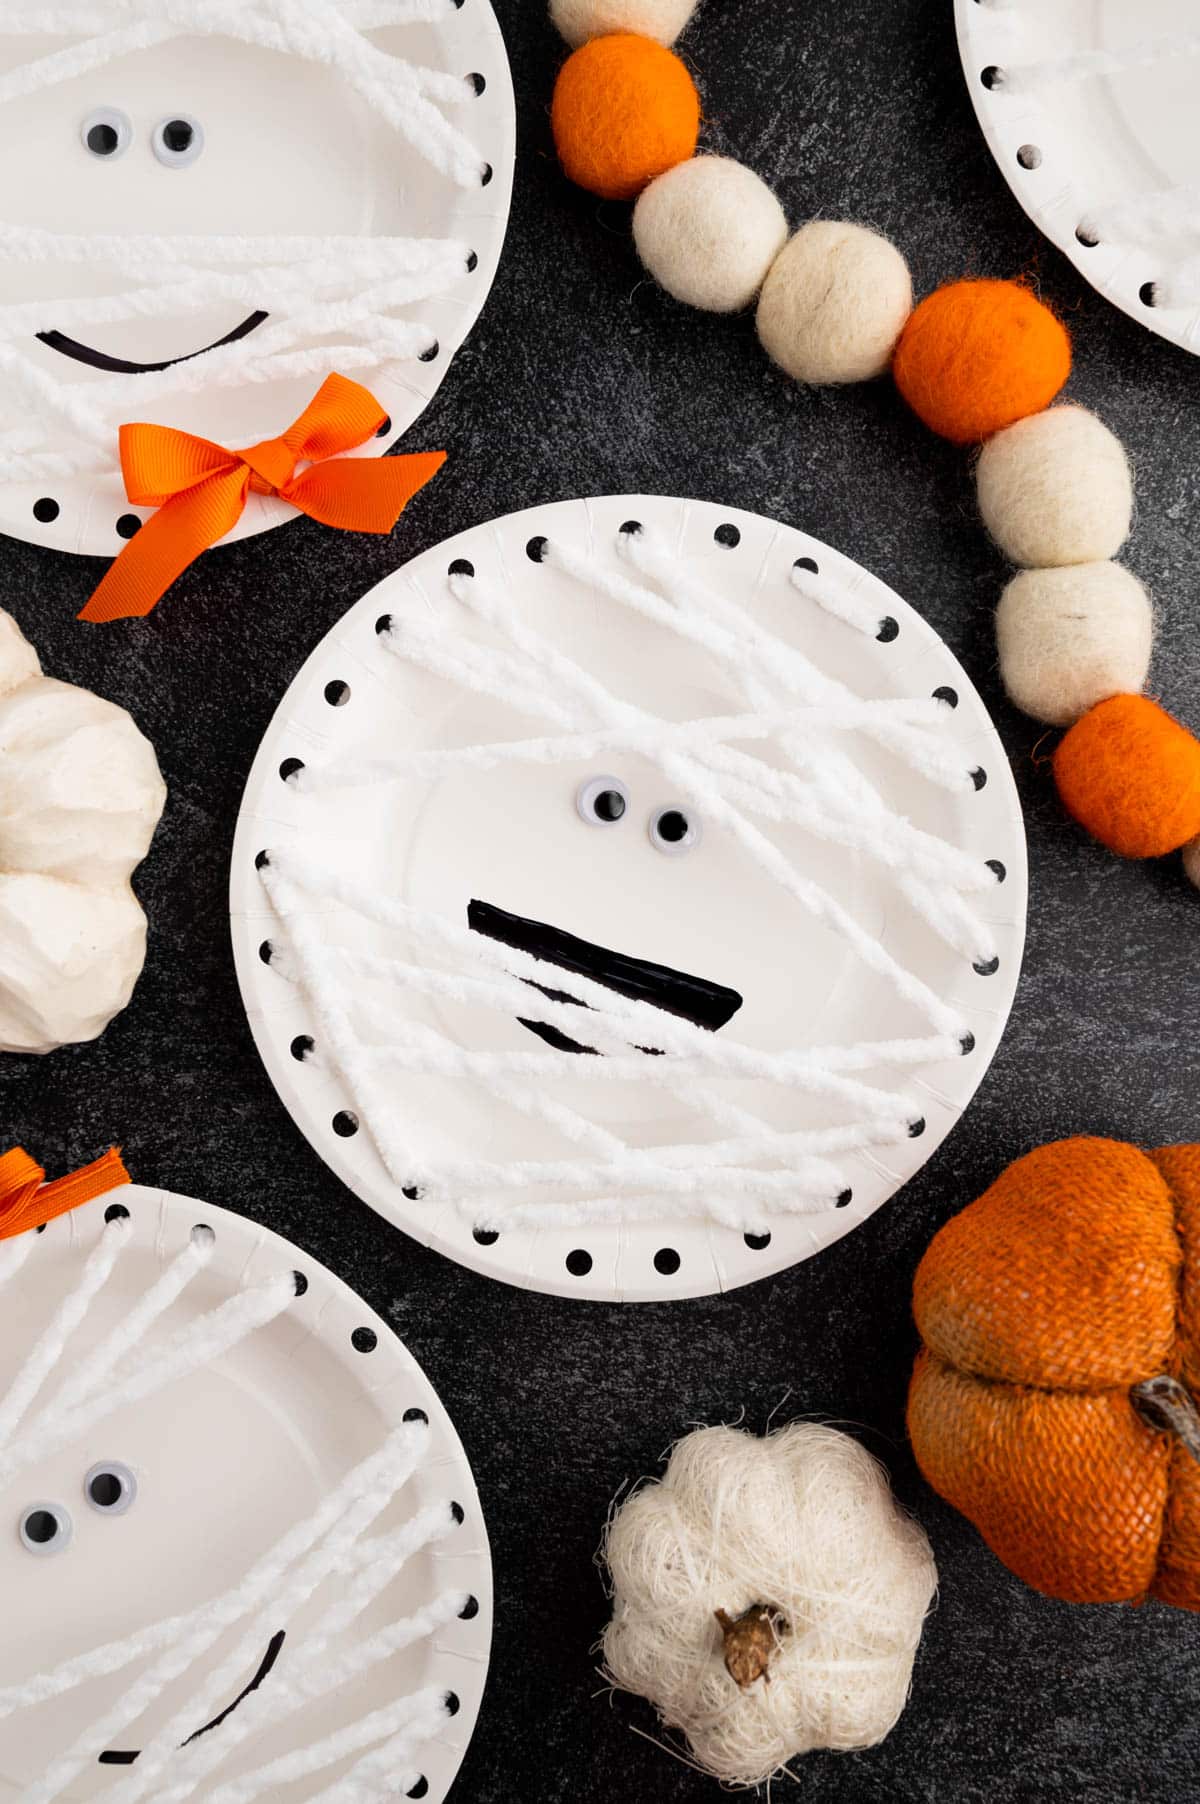
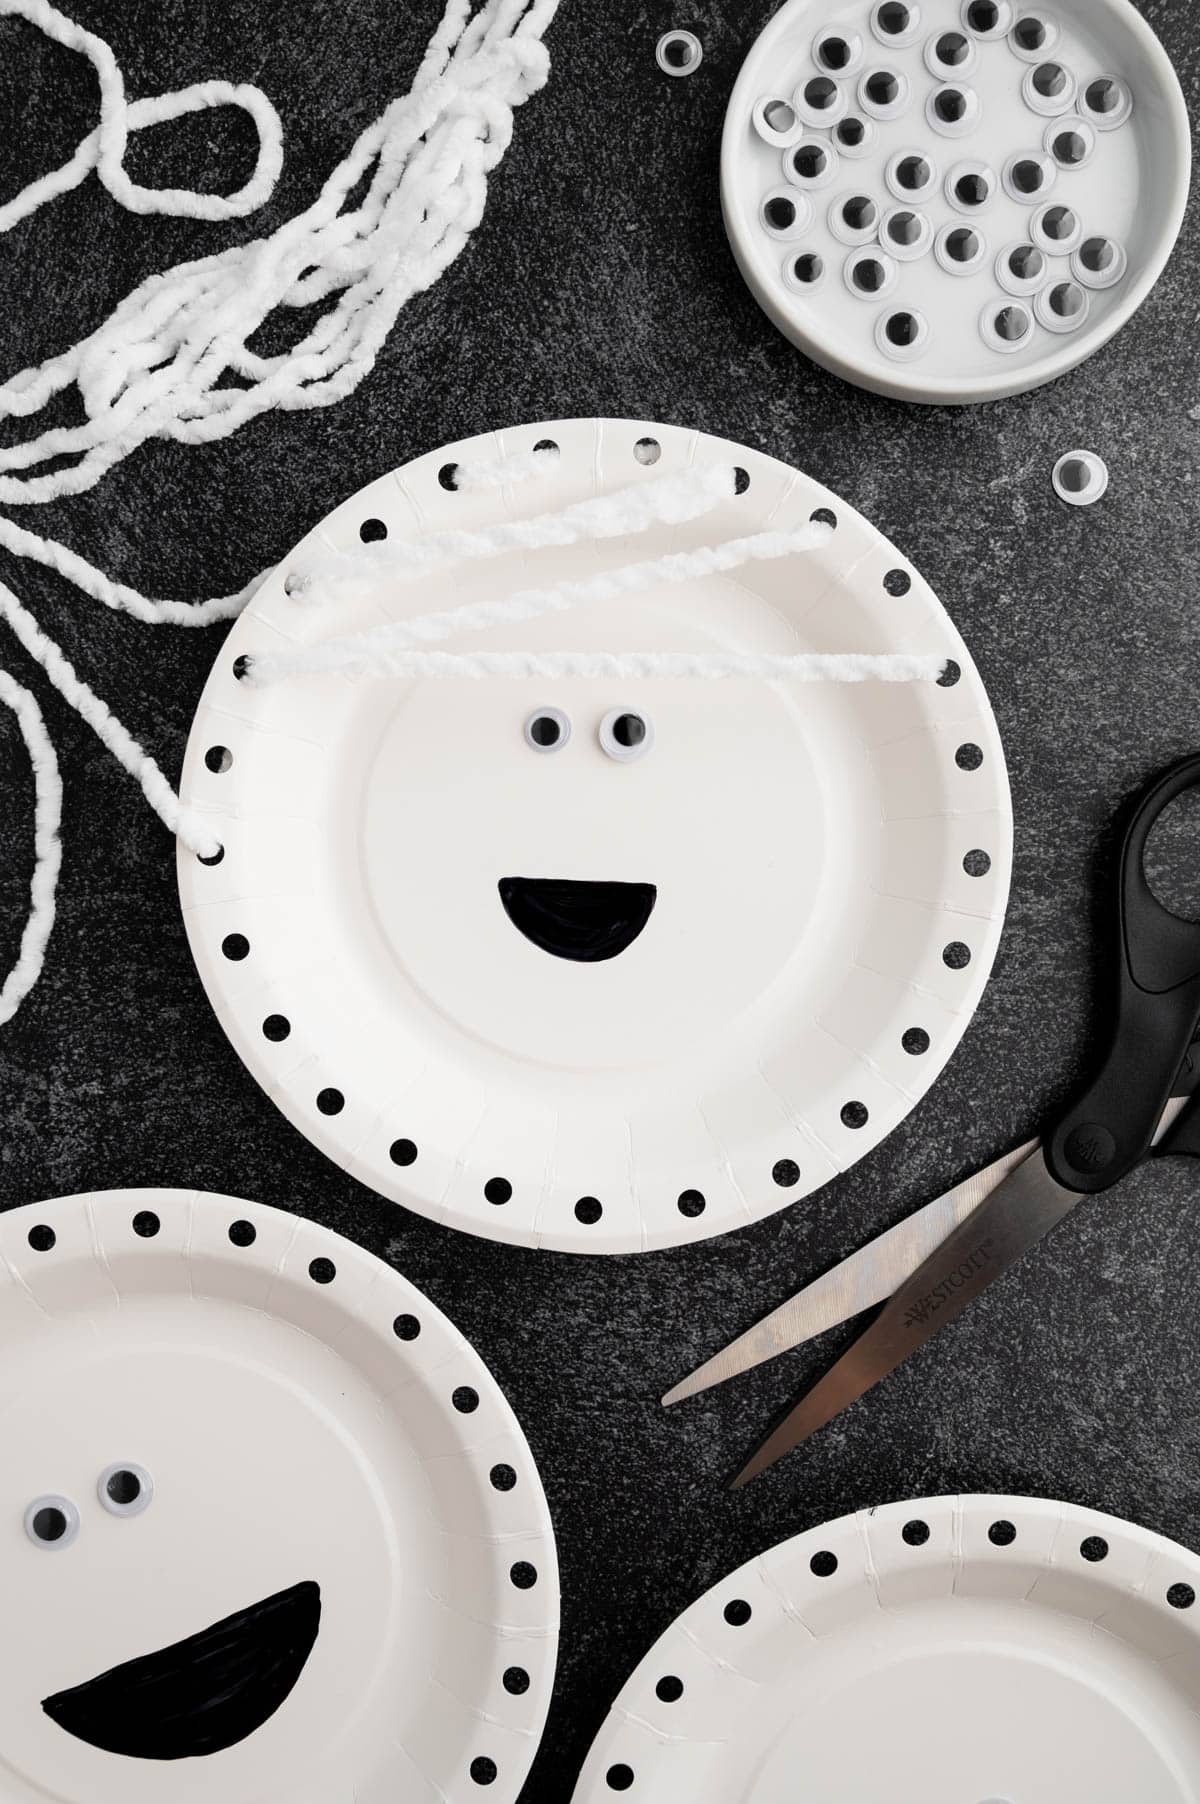
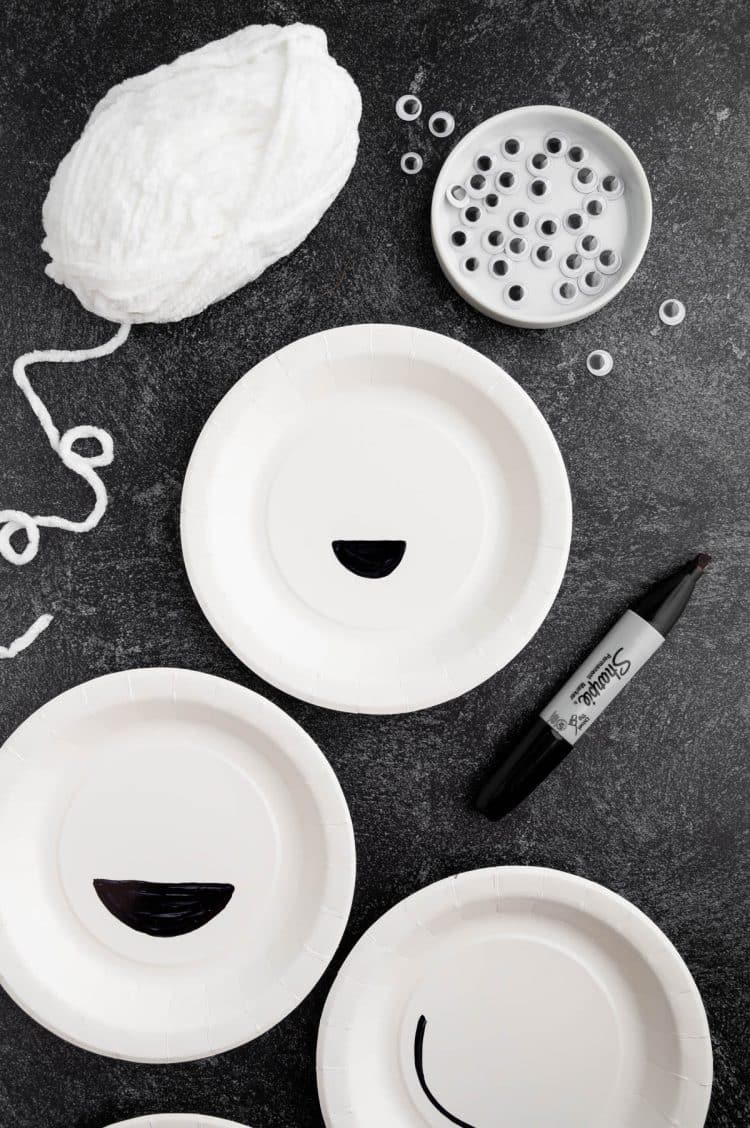
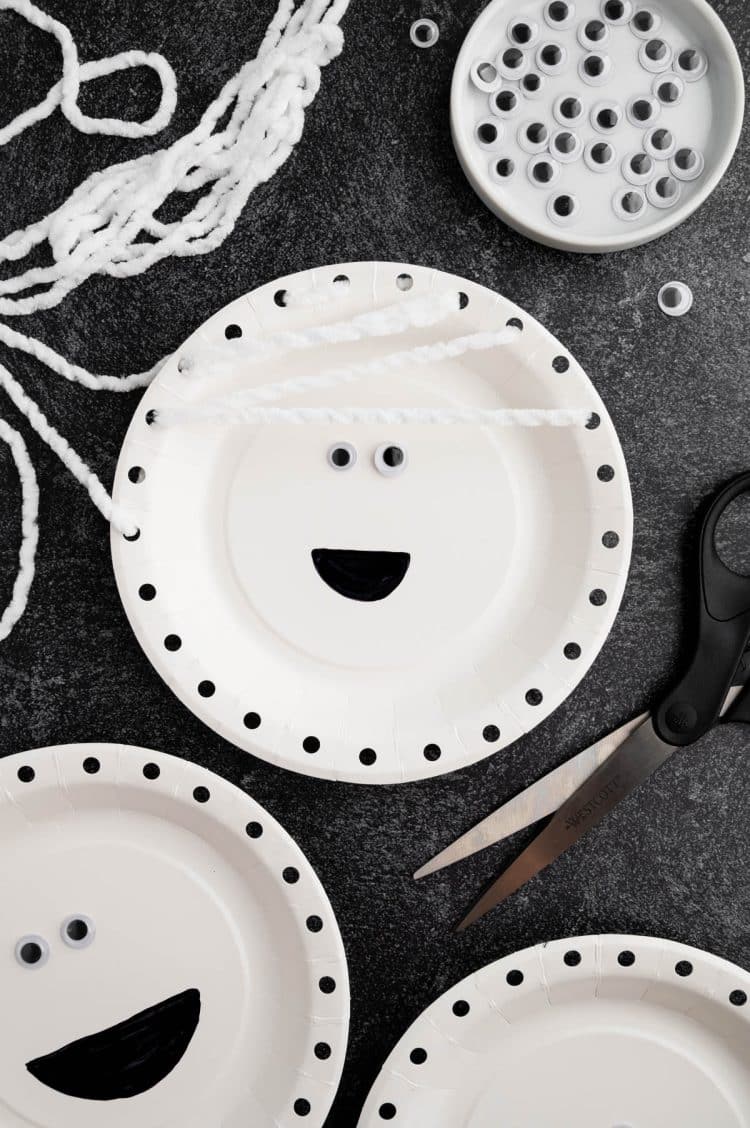
Place the plate face up and draw the mouth using a black permanent marker. These can be simple curved lines or half-moon shapes.
If you wanted to add some dimension to the craft, you could also opt to create the mouth out of black craft foam, black felt, or black construction paper. Cutting out the shapes is also a great way to practice those fine motor skills!
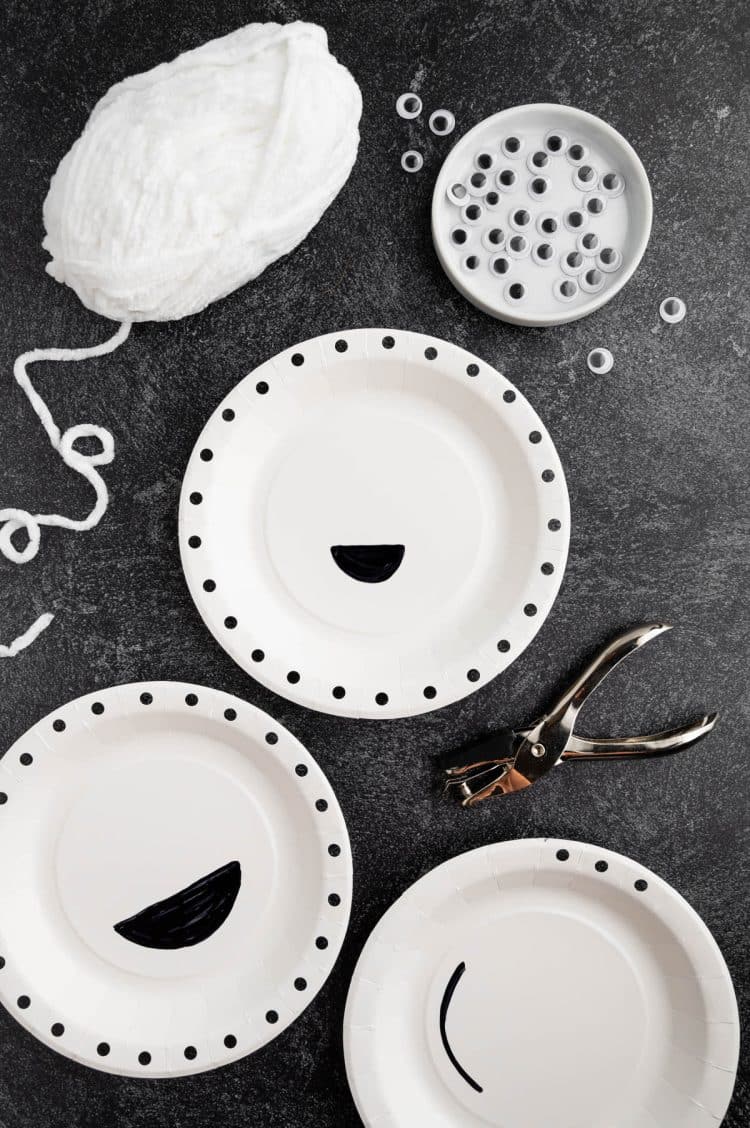
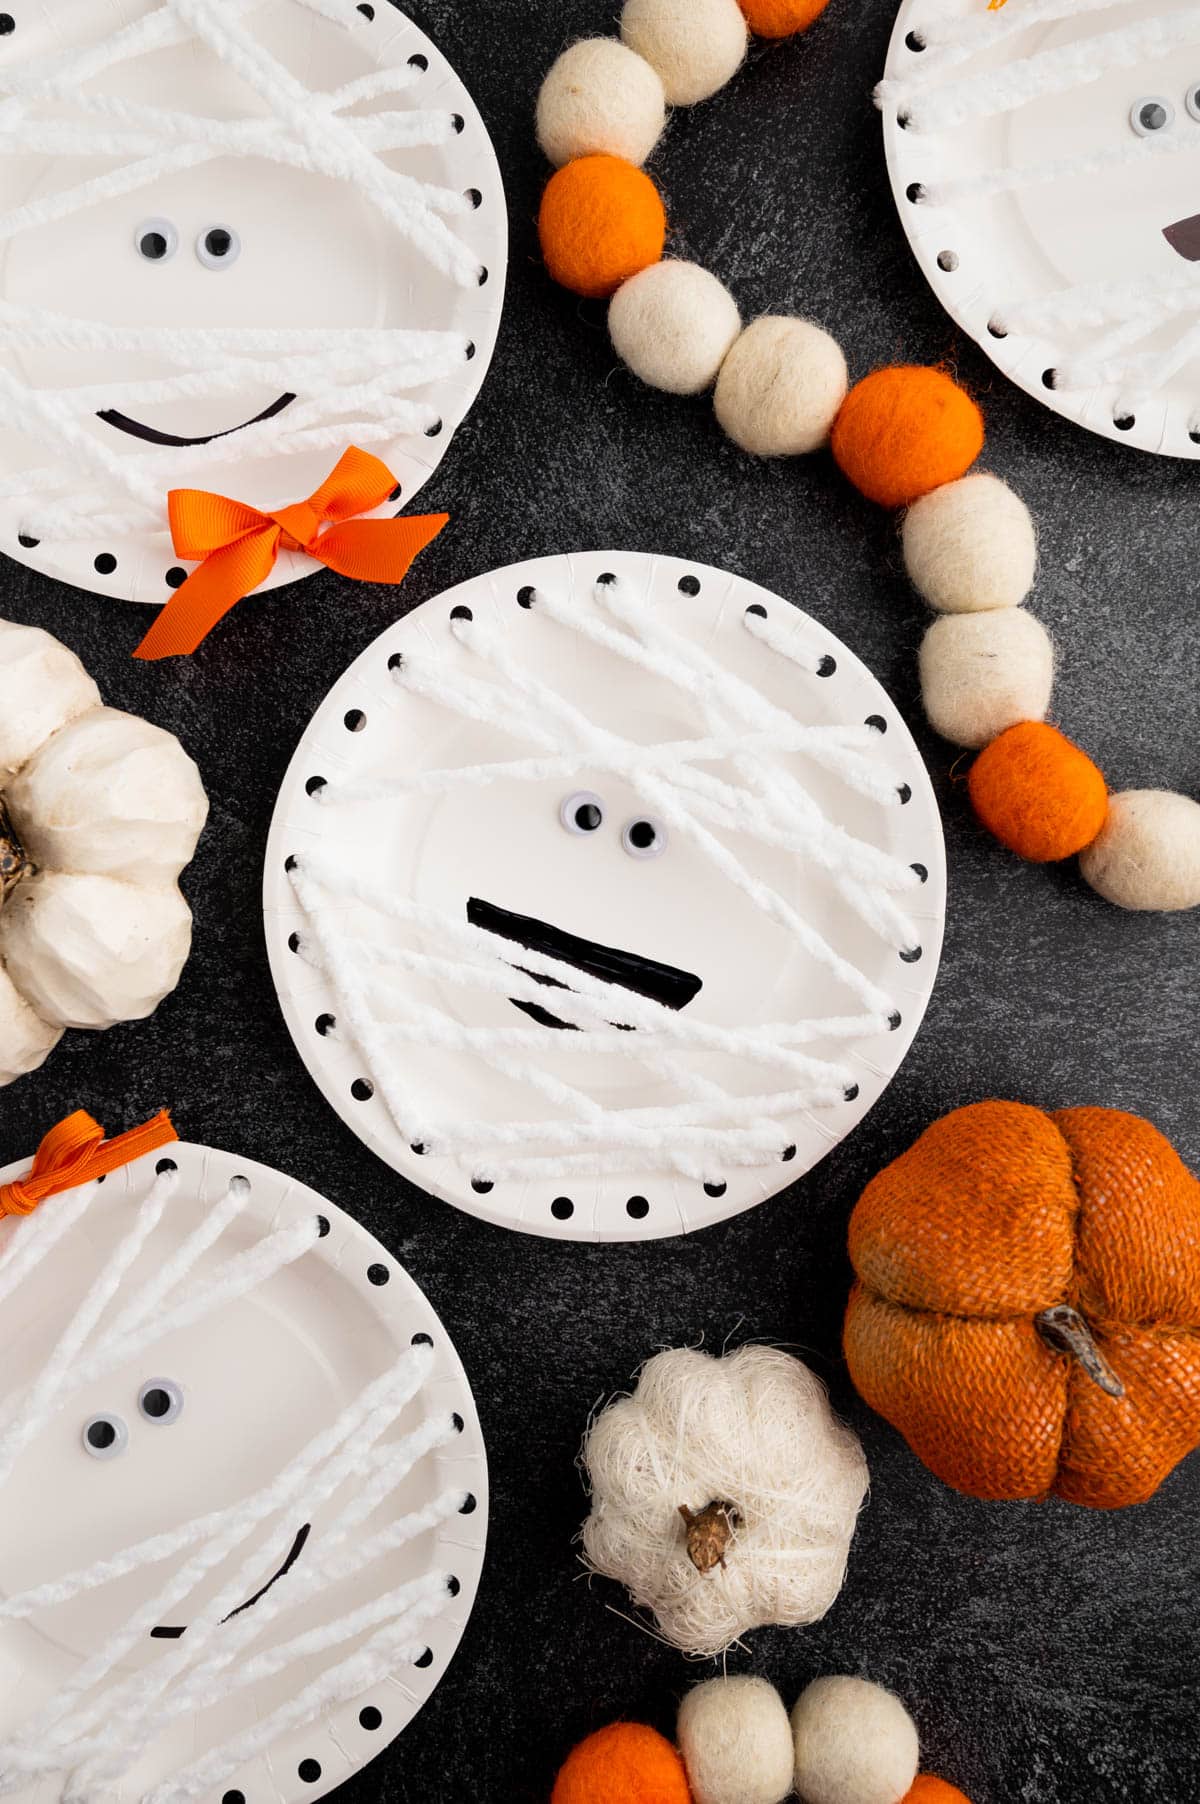
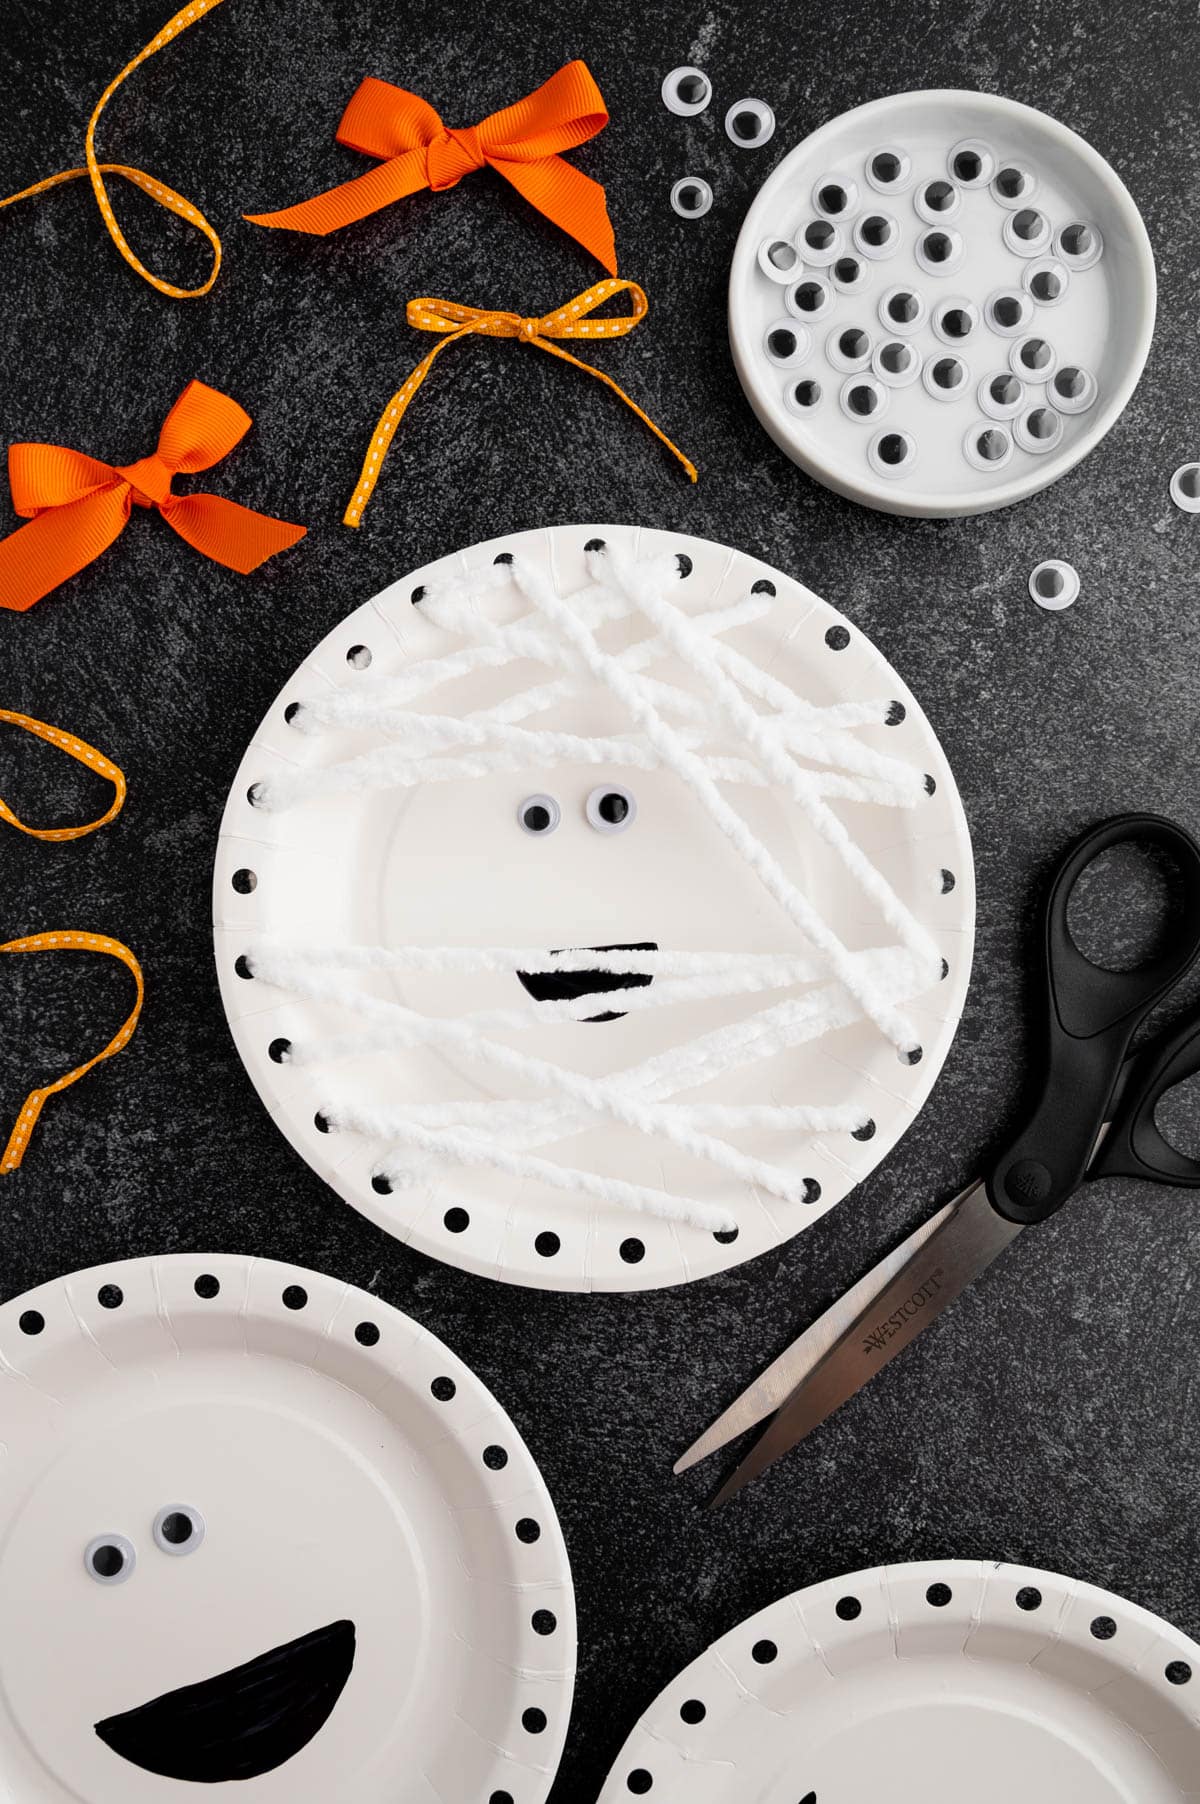
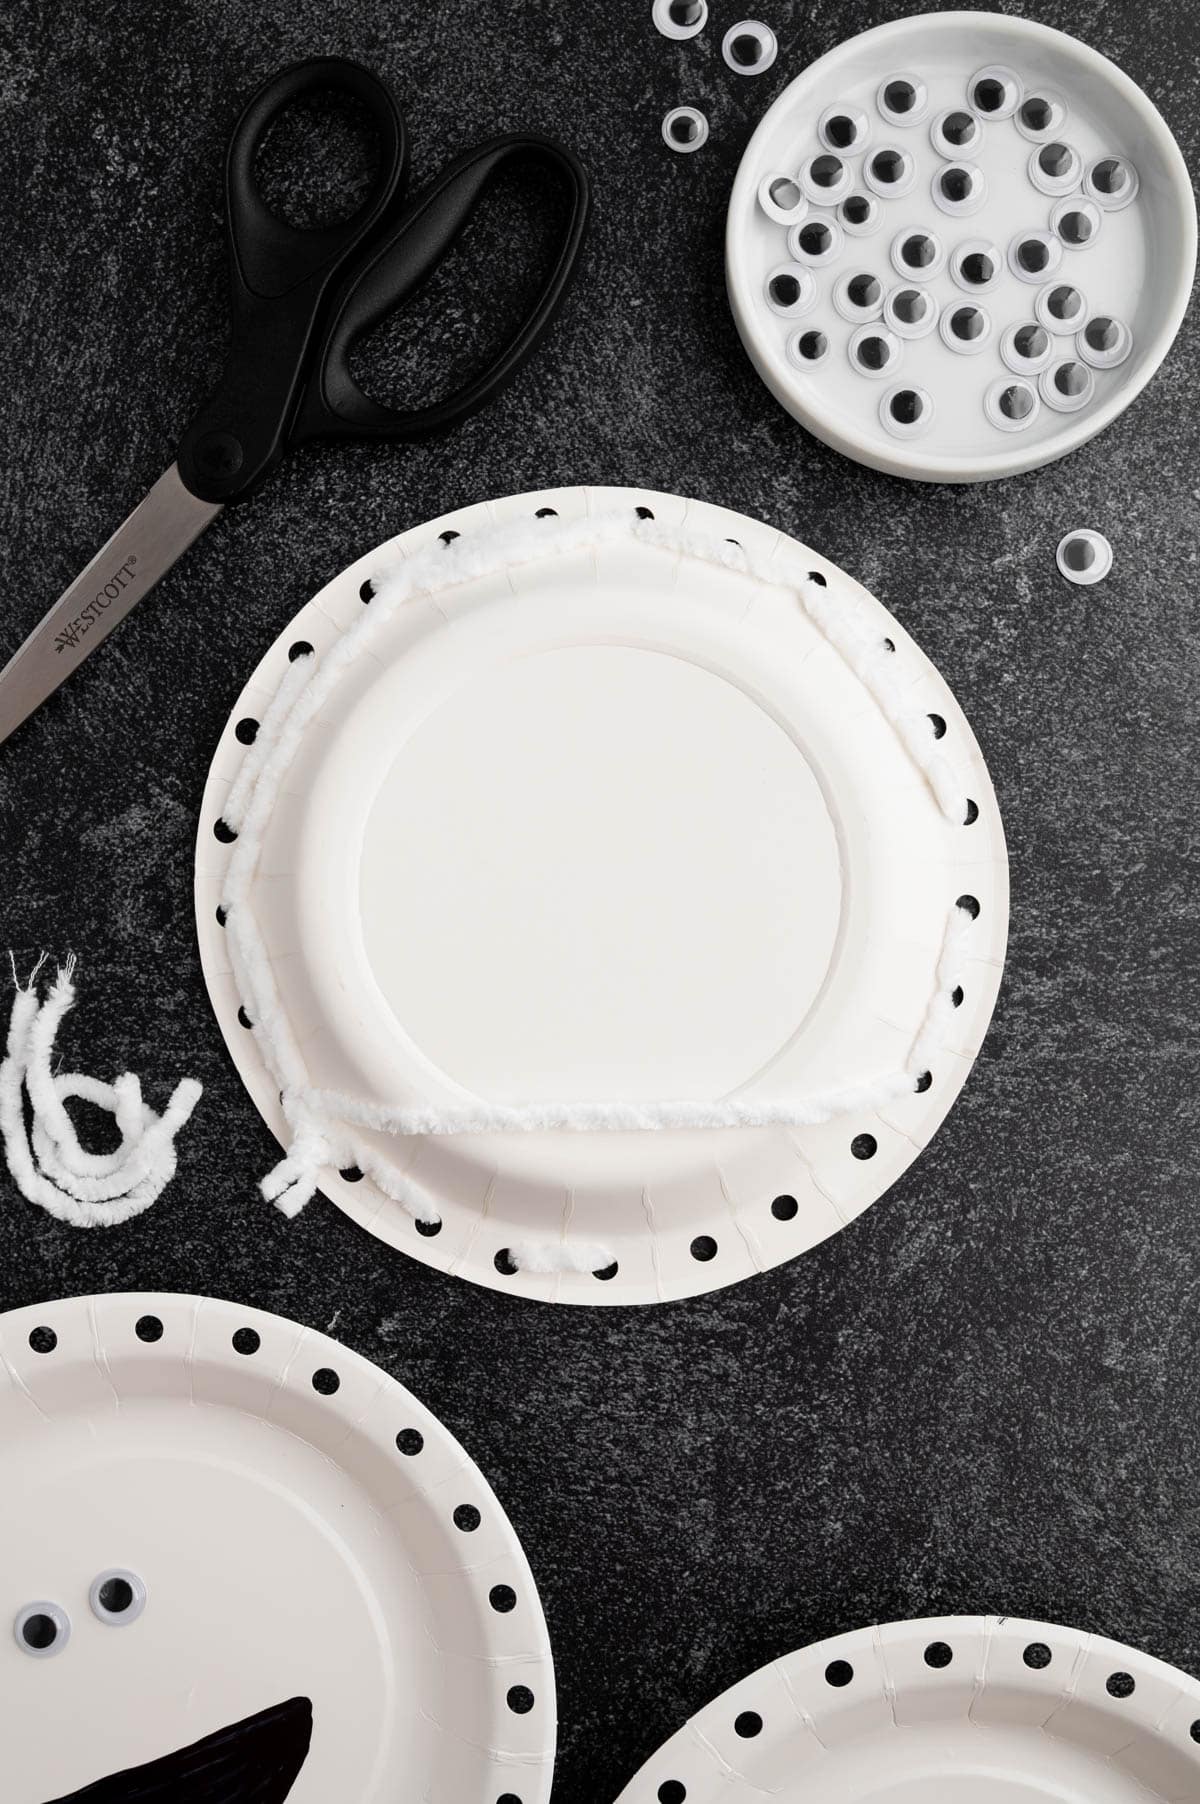
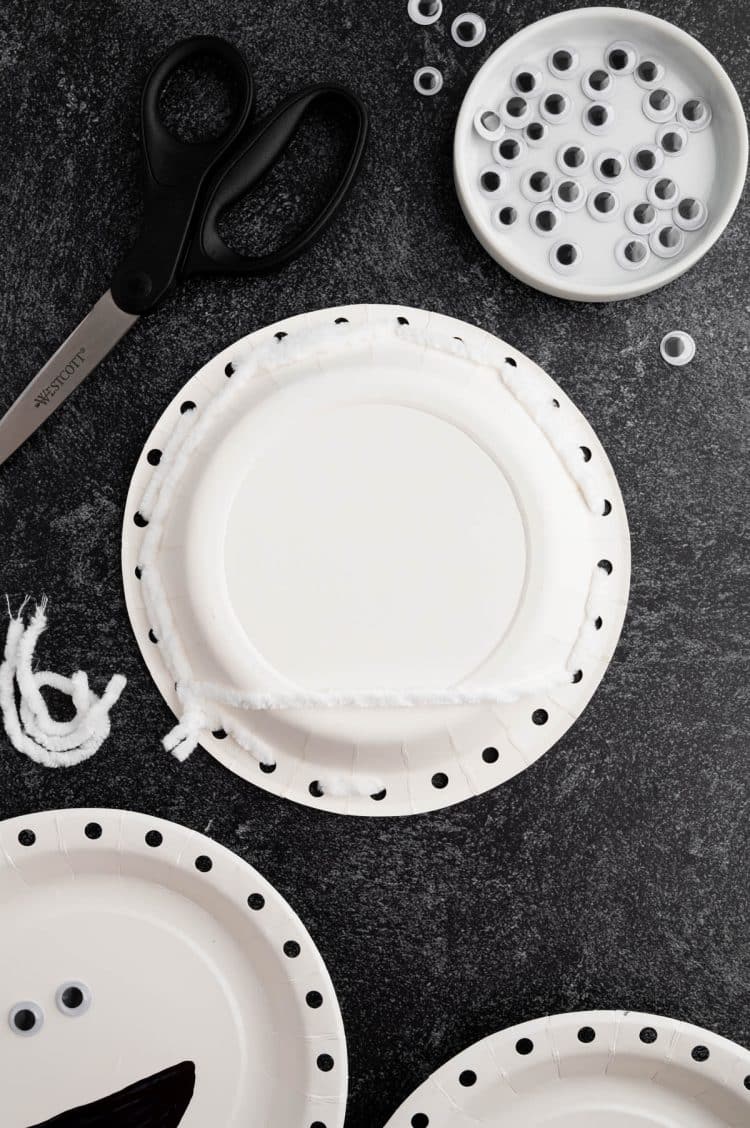
Use the hole punch to punch about 25 holes along the outer rim of the plate, approximately ½” away from the edge.
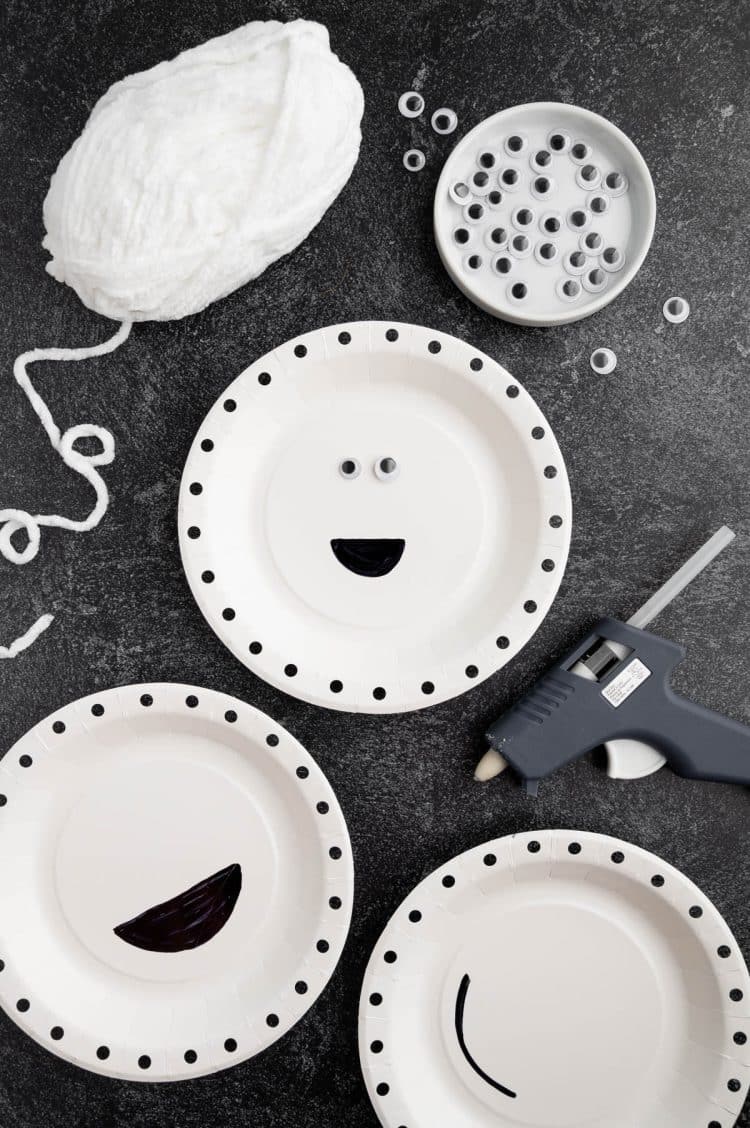
Glue the googly eyes onto the paper plate about 2-3 inches or so above the mouth. Depending on age and coordination, younger kids may need assistance.
We used a low temperature glue gun here, but I recommend using Elmer’s School Glue or Aleene’s Tacky Glue instead of hot glue with younger children (let’s keep those little hands safe!).
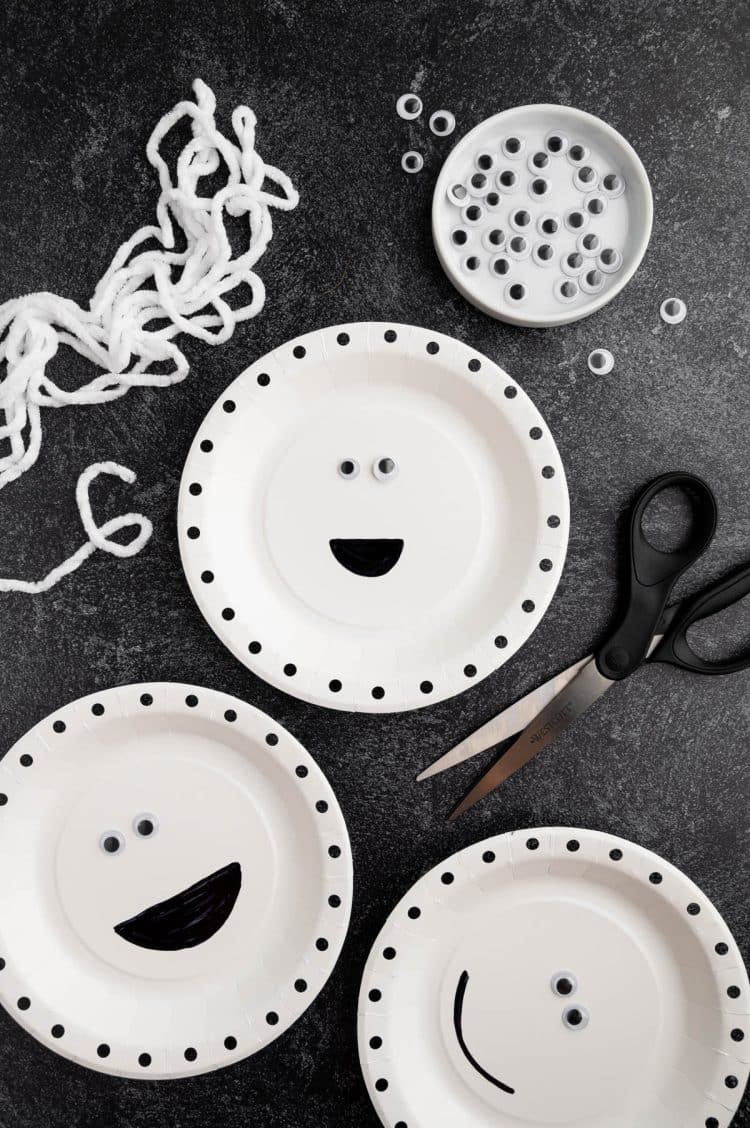
Cut 8-10 yards (24-30 feet) of white yarn for each mummy.
From the back of the paper plate, thread the yarn through one hole and pull it through the hole right next to it so that both ends are coming out the back side. Adjust the yarn by both ends so that both pieces are an even length to start.
Note: if necessary, tightly wrap the ends of the yarn with a piece of clear tape to keep the ends of the yarn from fraying and unraveling while lacing.
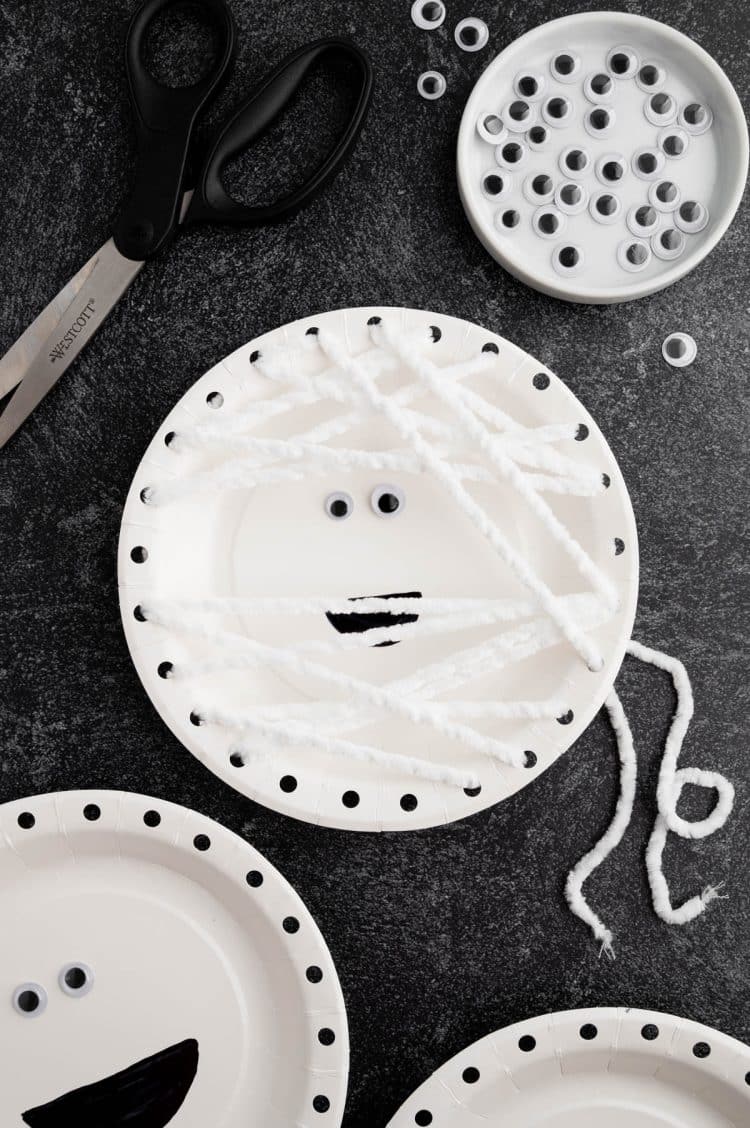
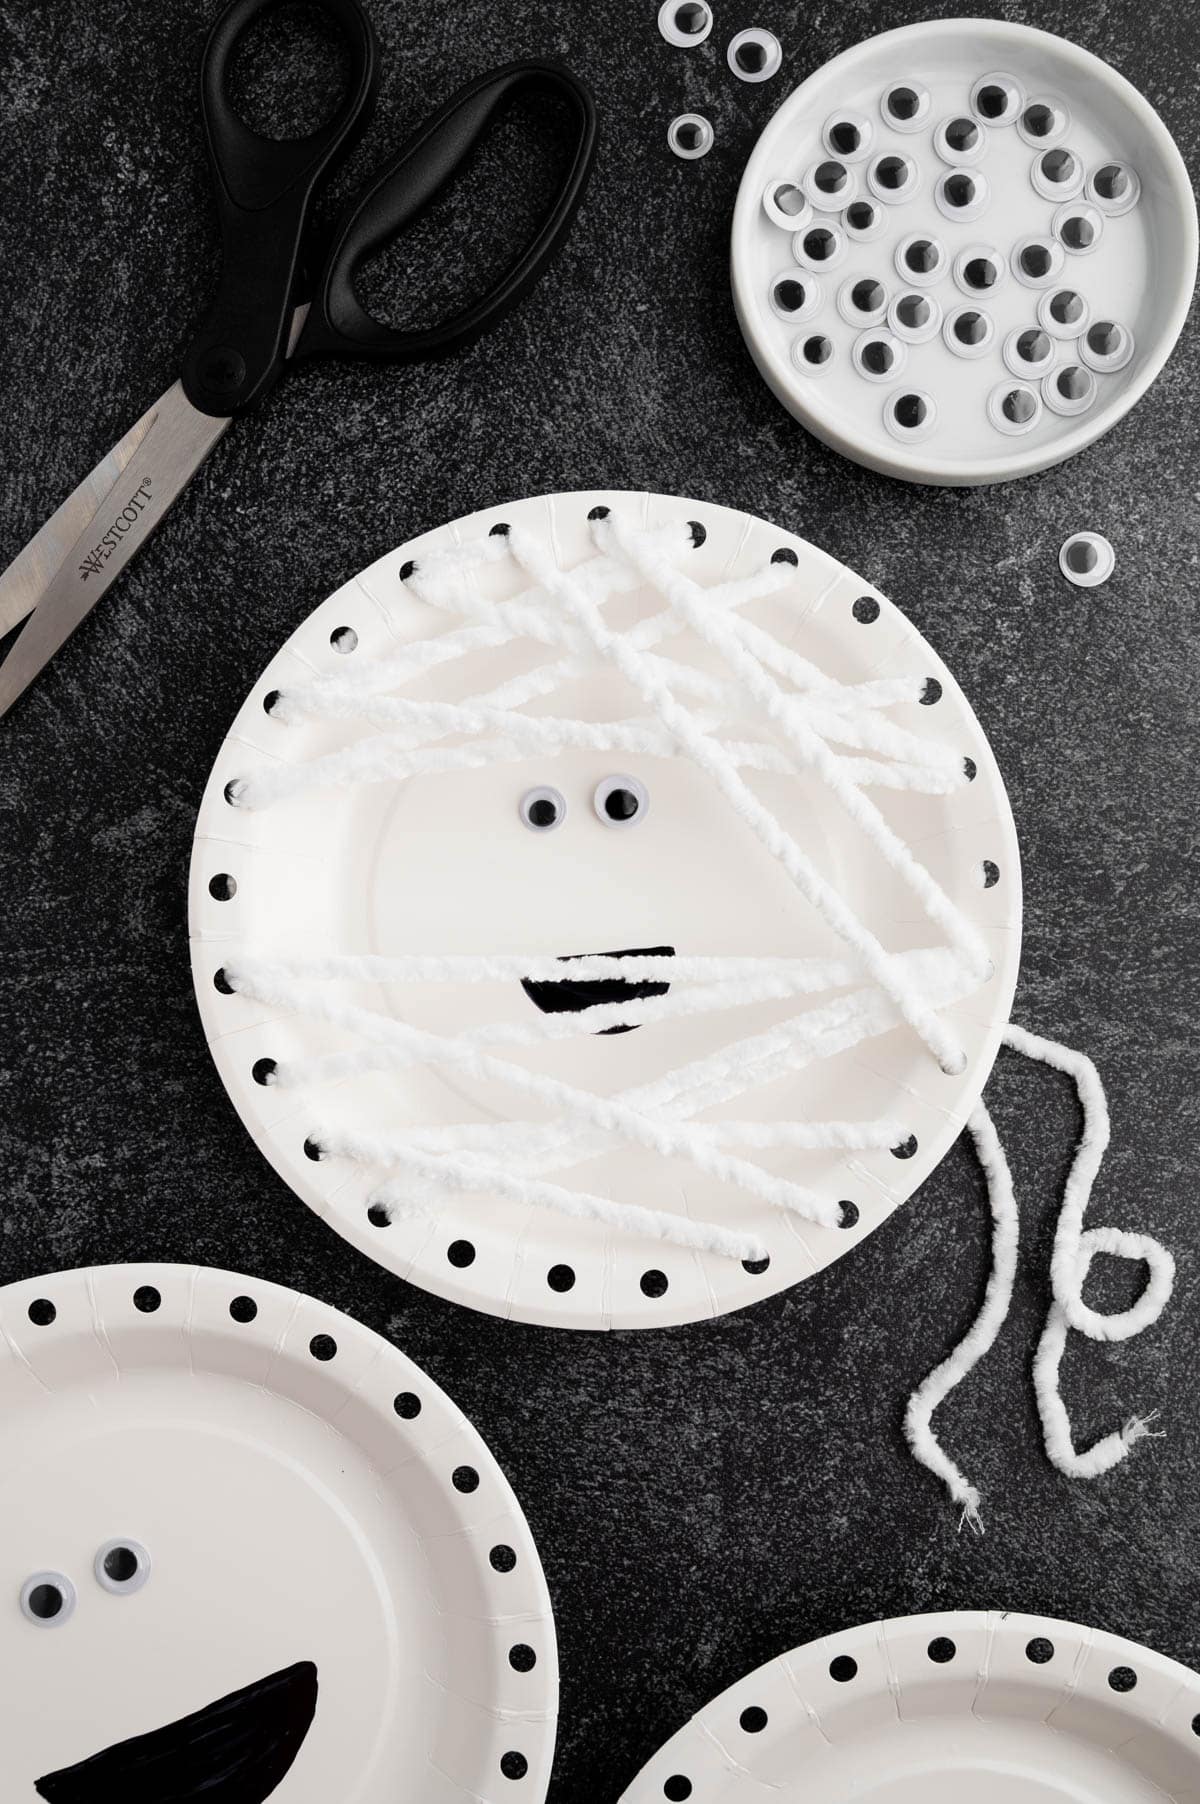
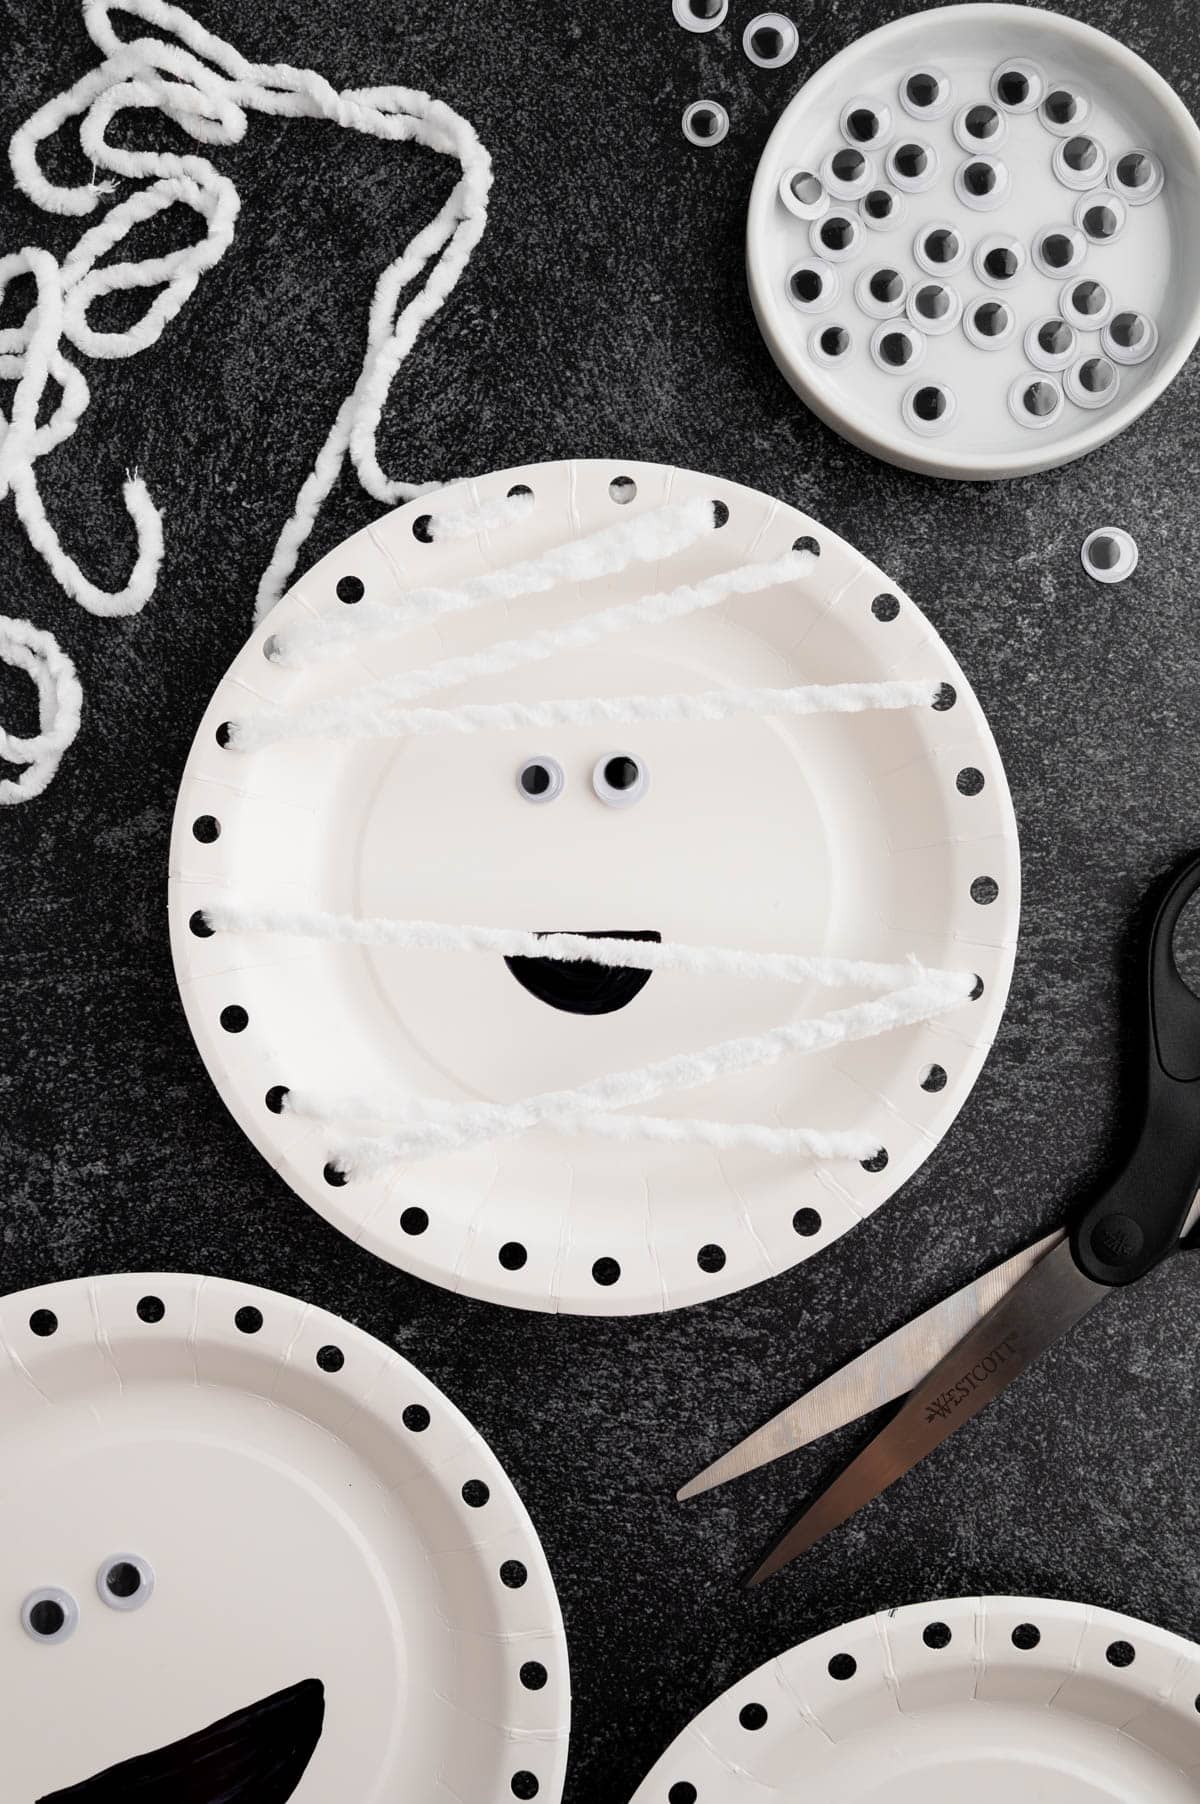
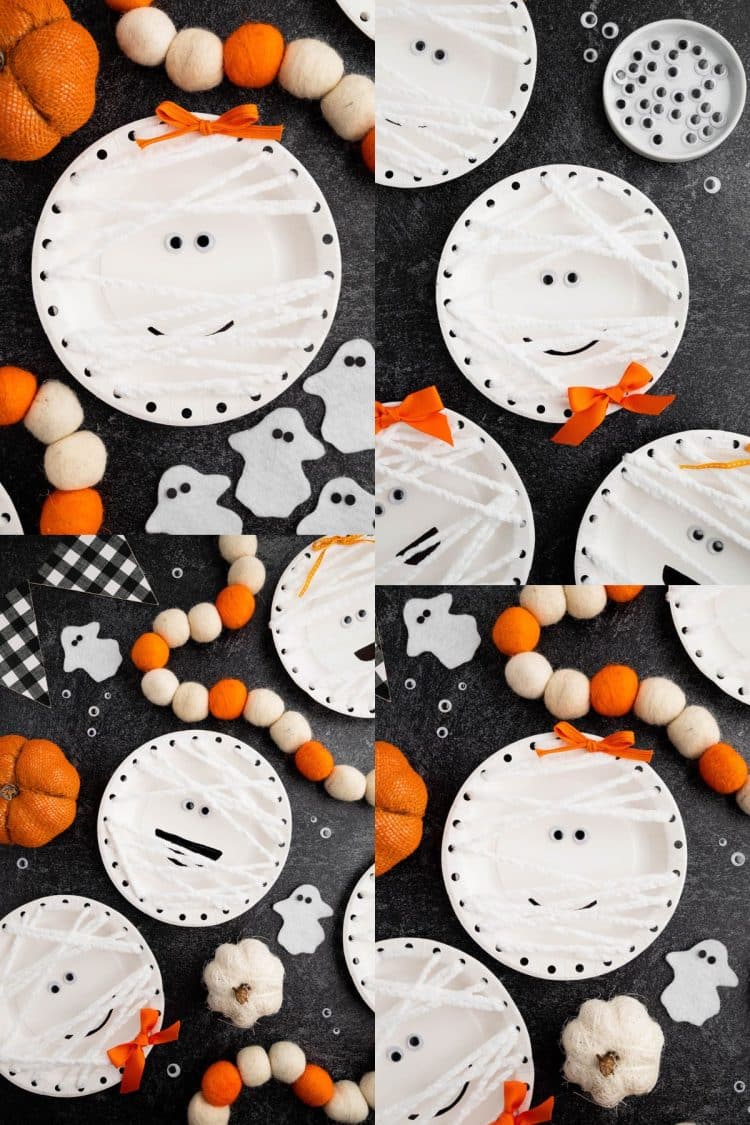
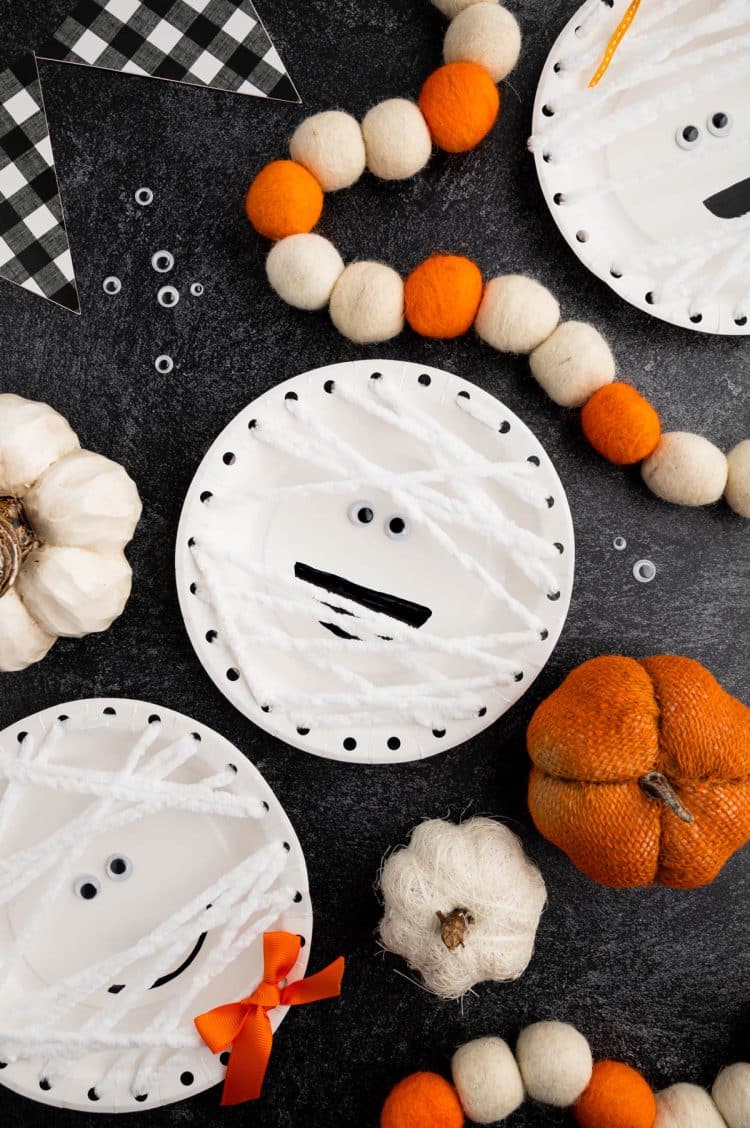
Thread each end of the yarn back through a hole so that the ends of the yarn are coming out of the front of the plate. Begin randomly lacing the yarn across the face of the mummy, starting with the top and working your way down. Be sure to skip around between the holes and allow the yarn to overlap in places to give it the look of a mummy that is unraveling. Do NOT thread the yarn directly over the eyes. The eyes should be left uncovered so that it looks like they are peaking through the bandages.
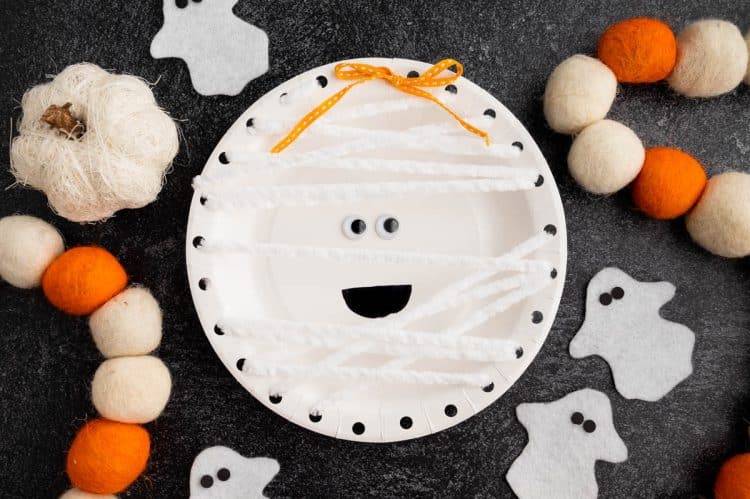
Once you are satisfied with your lacing and have worked your way down the plate, finish it by pulling the yarn through two holes that are close to each other so that both ends of the yarn are on the back of the plate. Tie the two ends together and cut off any excess yarn.

If desired, cut a length of ribbon, tie it into a bow, and then glue it to the bottom or top of the plate (at the neck or head of the mummy) to make a decorative bowtie or hair bow.

This easy Halloween craft is adorable for kids of all ages! SO much fun!
Frequently Asked Questions
Where can I find the supplies for this craft?
Materials for this craft are easily obtained at any craft store or Walmart. Most supplies can also be purchased at the dollar store or party supplies store as well. And, of course, there’s always Amazon!

Which Steps Might Kids Need Assistance With?
Depending on age and coordination, younger kids might need help with the hole punching and may need some additional guidance while threading the yarn to make it look like a mummy. They may also need assistance with attaching the eyes.
What can I do with this craft when finished?
This craft makes a cute decoration. It is perfect to decorate a classroom or hallway because each mummy will be unique. They can be pinned to doors or hung on desks to add a fun and spooky flare to any room.
How Can I Make This Craft My Own?
There are lots of ways you can change up this easy craft to make it your own! Swap the white plate for a black paper plate and add the facial features with a white paint marker! Or, exchange the white yarn for white ribbon or crepe paper for a different look!
Tips & Tricks
- Younger kids should use craft glue instead of hot glue to prevent them from getting burned.
- Demonstrating by example is an effective way to teach children the concept of lacing the plate to make it look like a mummy.
- Hole punch the plates ahead of time to save time if working with a large group of younger kids or if you have a limited number of hole punchers. The yarn can also be cut ahead of time to make things more efficient.
For even more fun Halloween paper plate crafts check out these Paper Plate Pumpkin (from Easy Peasy and Fun), Paper Plate Spider (from I Heart Crafty Things), Paper Plate Witch Hat (from Mommy Made That), Paper Plate Frankenstein (from FSPDT), and Paper Plate Vampire (from Artsy Momma) craft ideas!

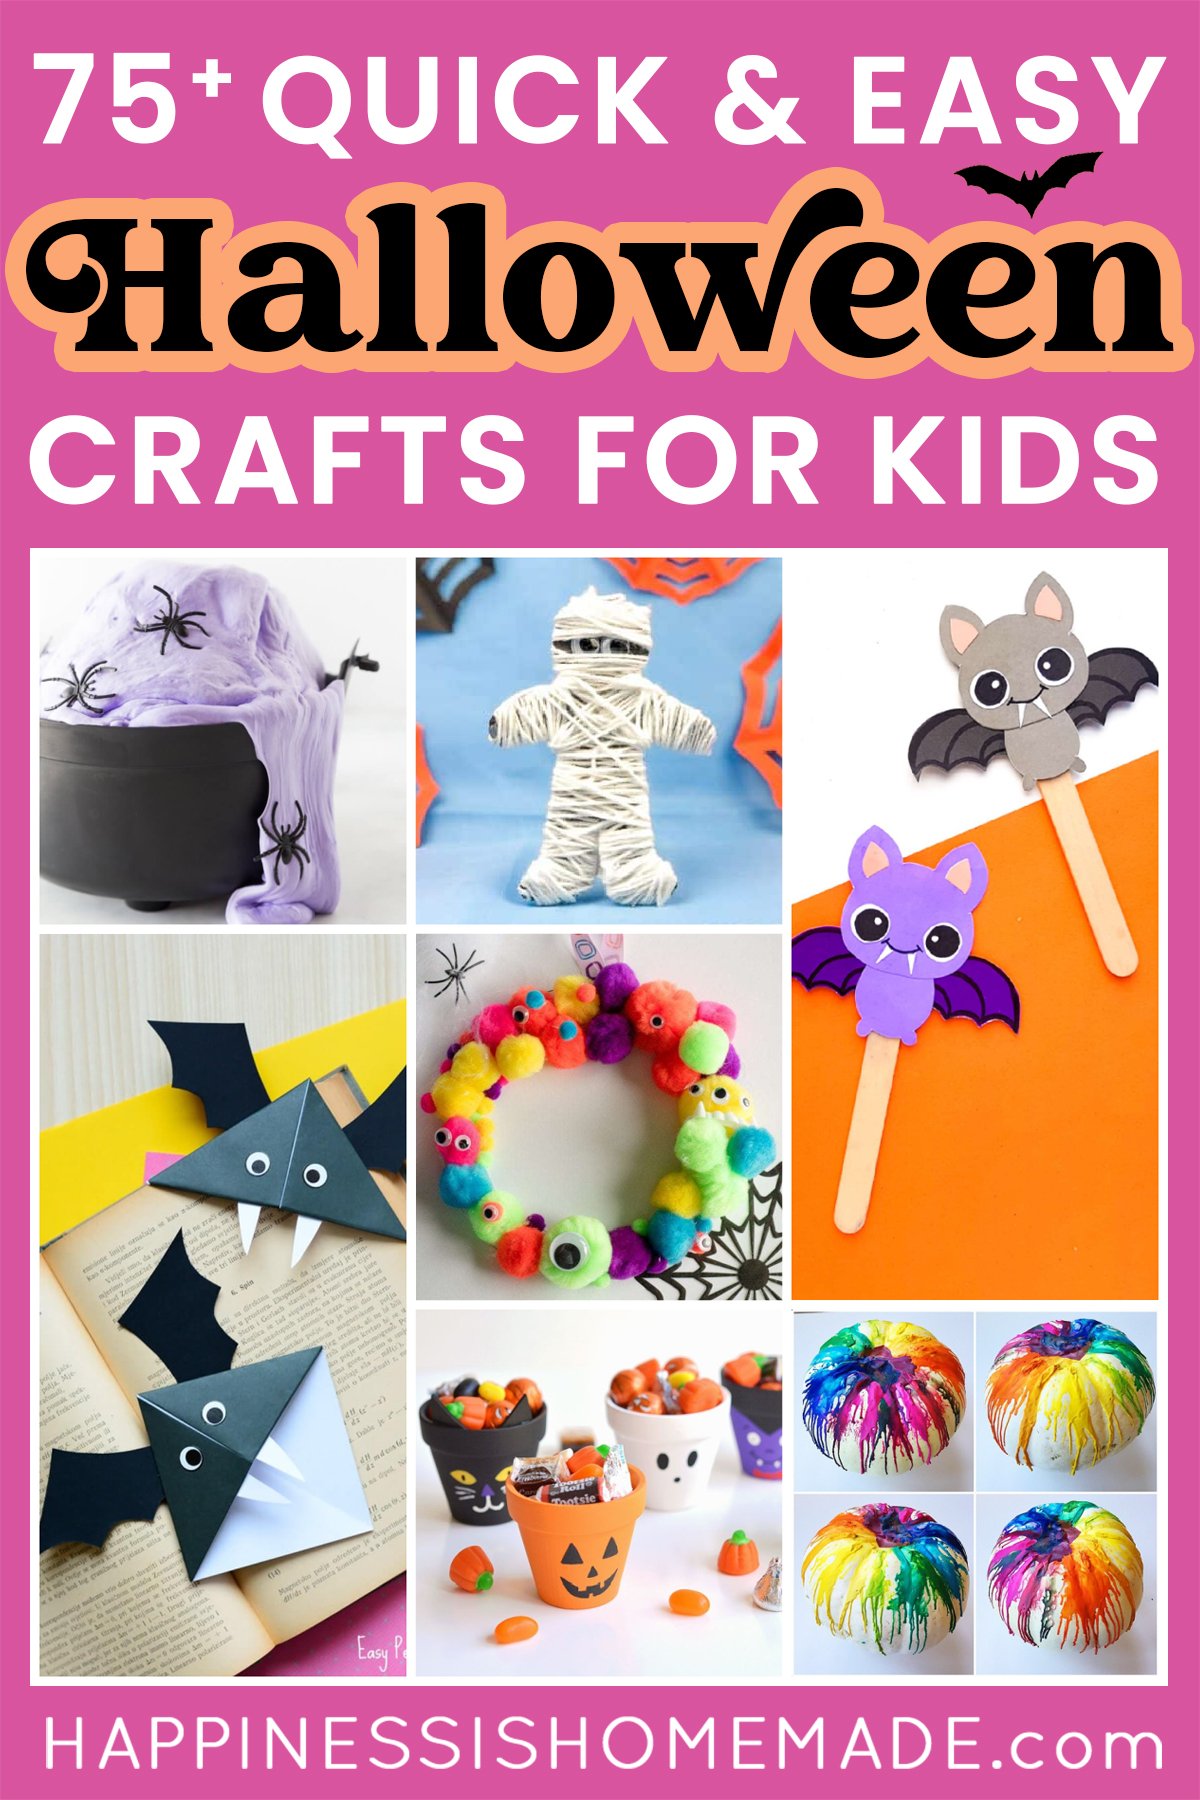
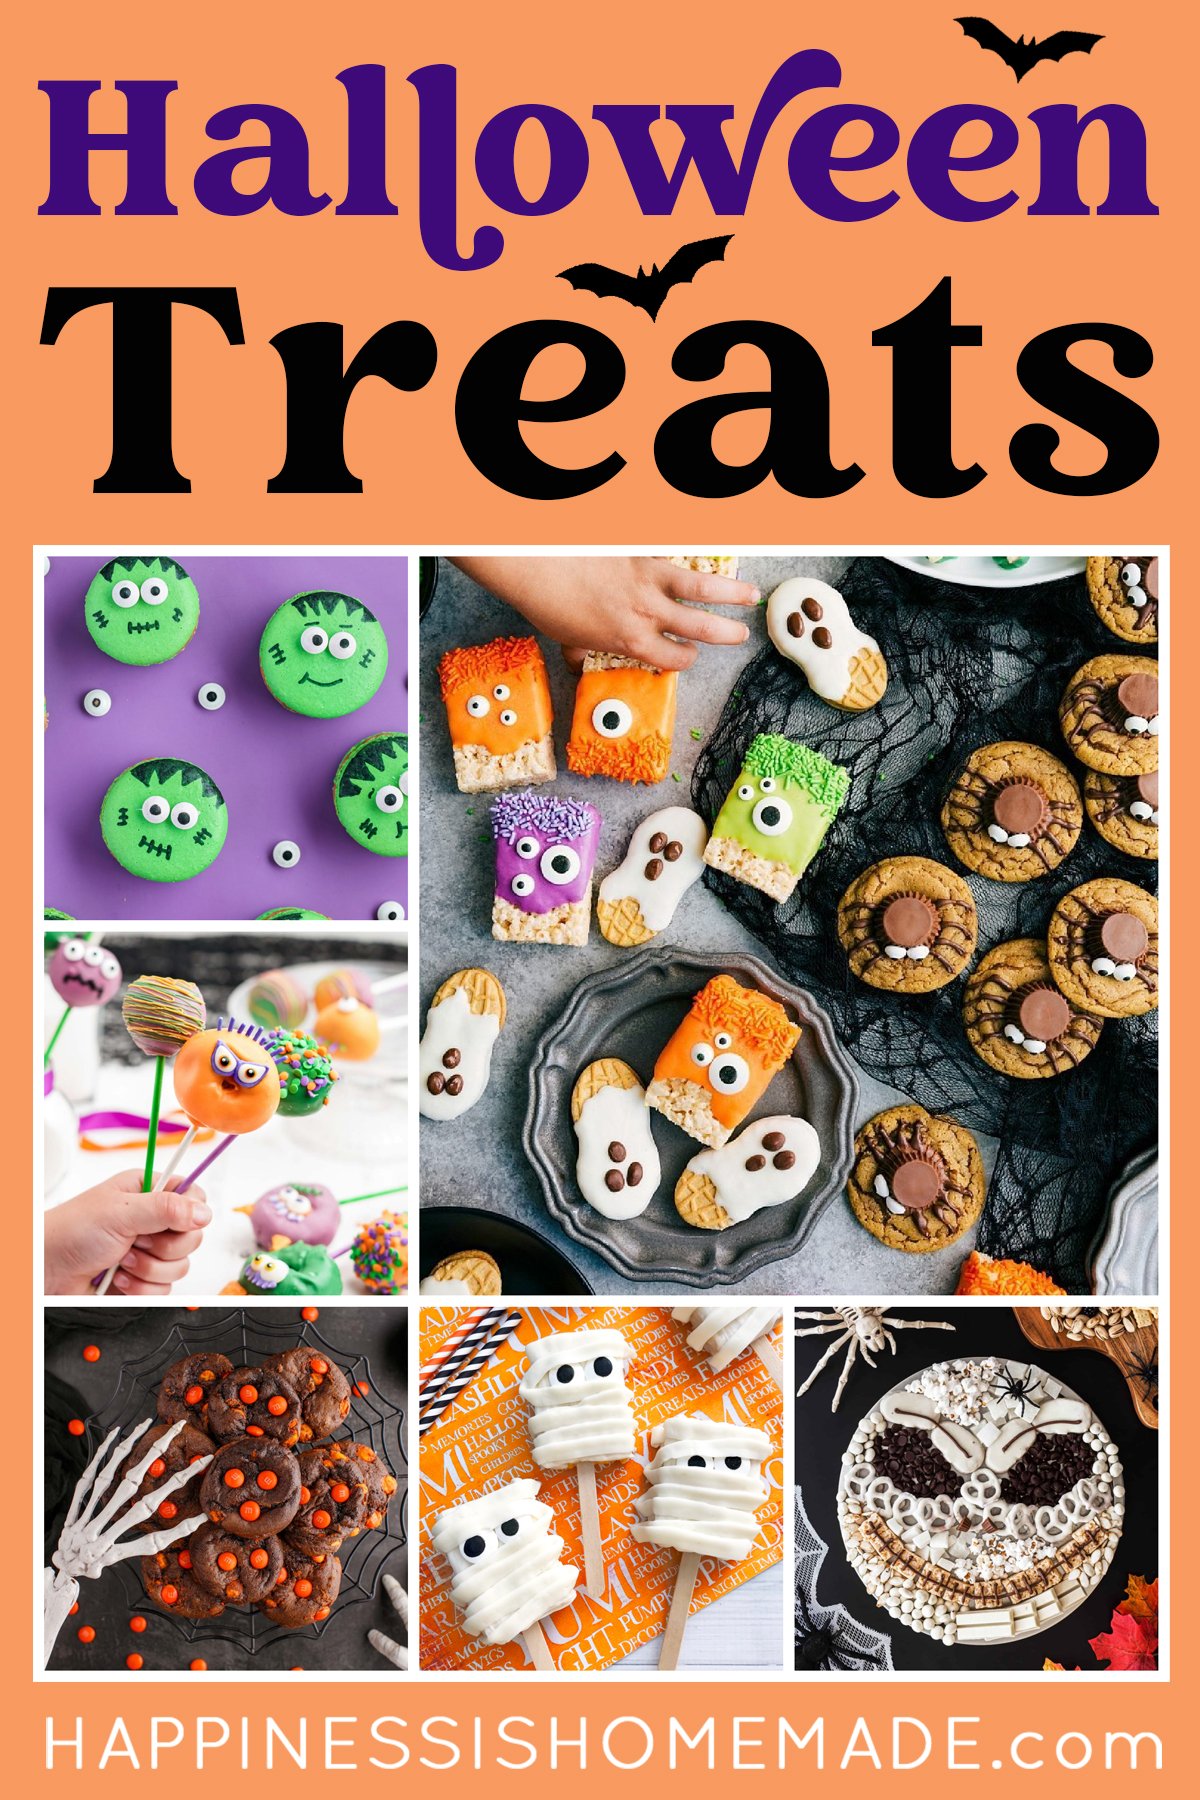
Check Out These Other Halloween Crafts & Activities!

Don’t Forget to Pin this Paper Plate Halloween Craft for Later!

Heidi Kundin has captivated the hearts of millions with her colorful and inspiring approach to crafting, celebrations, and family fun. With over 15 years of experience, Happiness is Homemade has become a must-visit destination for those seeking quick and easy creative ideas and last-minute solutions. Heidi’s warm personality shines through her posts, inviting readers to join her on a creative journey that’s fun, rewarding, and achievable. Heidi is also the author of Homemade Bath Bombs & More and DIY Tie-Dye.