
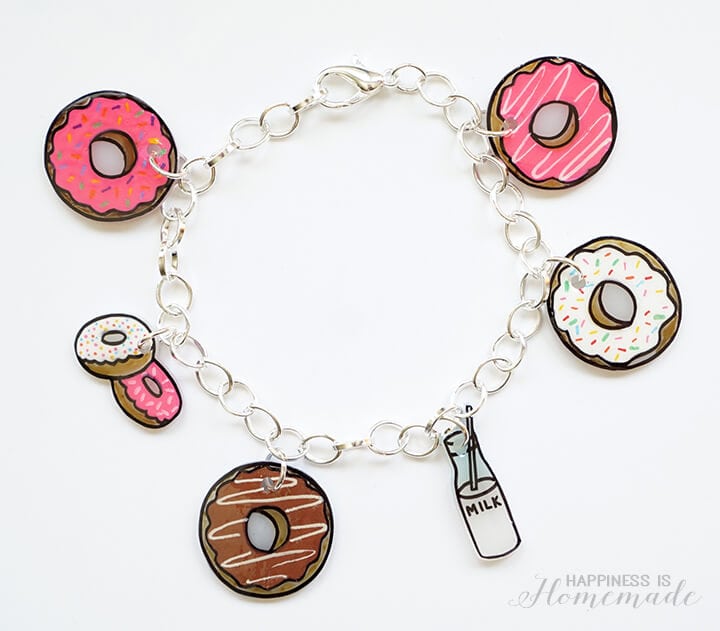
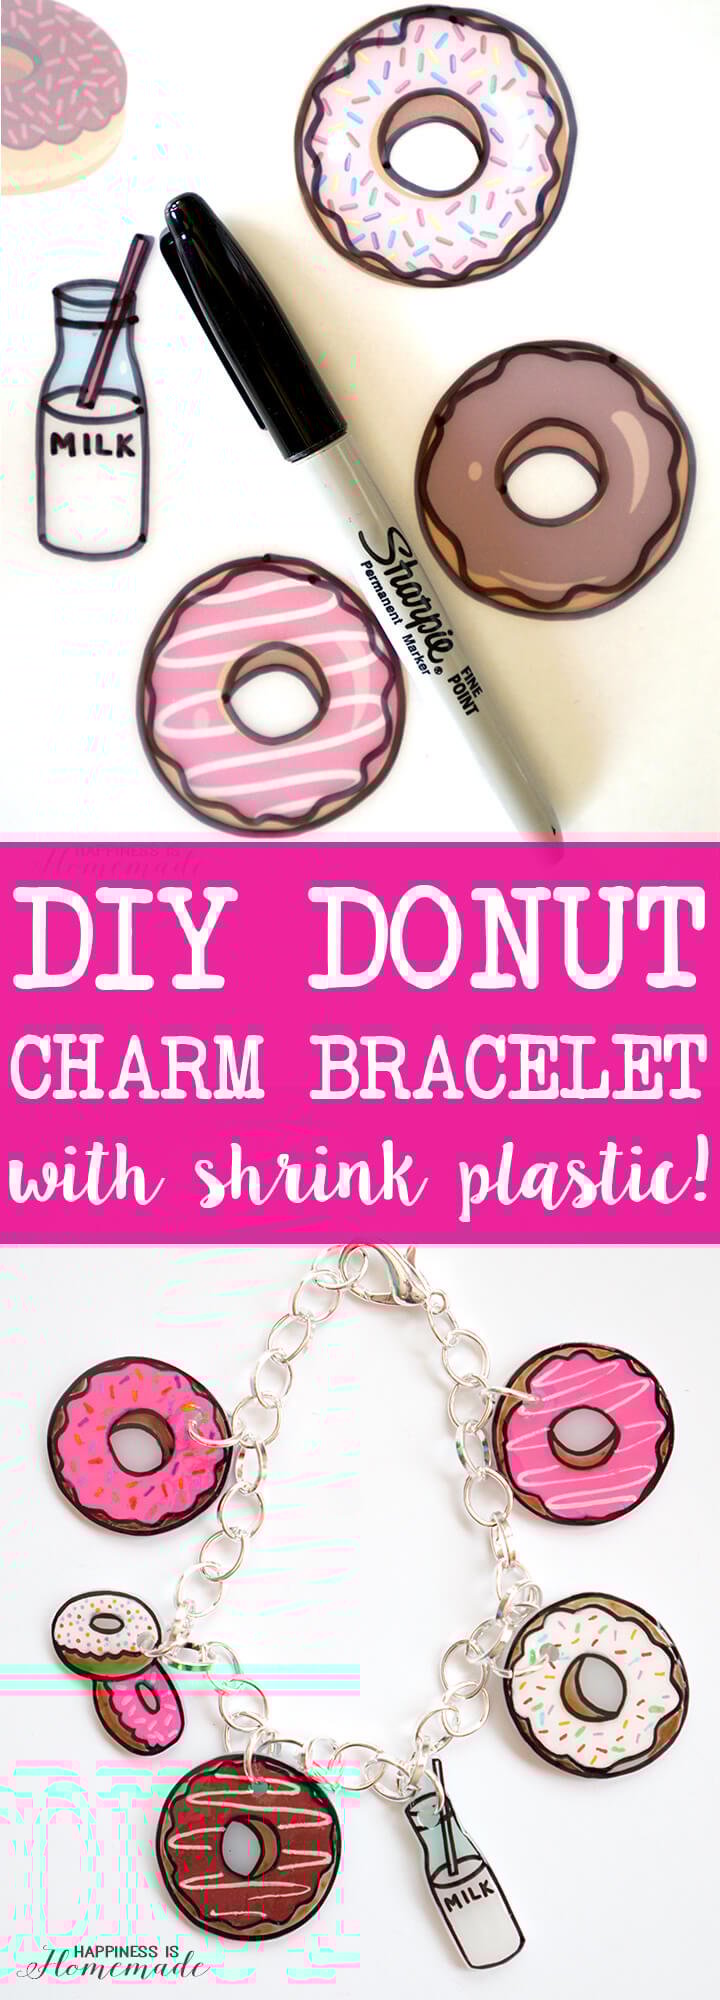
Make your own super cute donut charm bracelet with shrinky dink plastic! Makes a great quick & easy DIY gift idea – SO many fun possibilities!
![]()
Friday, June 3rd is National Donut Day, and we seize each and every possible opportunity to celebrate donuts here at Happiness is Homemade headquarters! I wanted to wear my donut-loving heart on my sleeve (literally!), so I created this adorable shrink plastic donut charm bracelet that’s as quick and easy to make as it is cute!
What You’ll Need:
- Shrink Plastic (available in several colors & finishes – I used matte)
- Sharpie Markers
- Posca Paint Pens
- Diamond Glaze or Lilly Glaze High Definition Glass Epoxy
- Chain Link Bracelet
- Jump Rings
- Jewelry Pliers
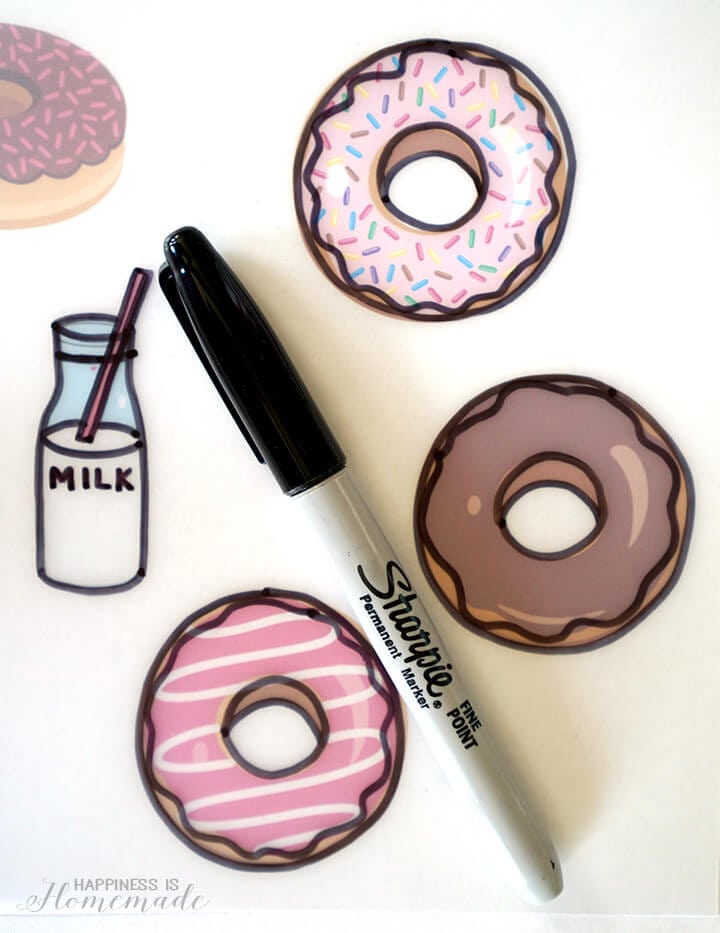
I’m awful at drawing and sketching, so I took the easy way out and printed out some cute donut clip art to trace with my Sharpie marker instead. The plastic shrinks by about 50%, so I printed out my donuts around 2″ in size. The matte shrink plastic is translucent before shrinking (so it’s super simple to trace through), but will turn near-opaque white once it’s been shrunk.
 Once I had my Sharpie outline completed, I filled in all of the details with Posca paint markers, allowing the paint to dry in between colors. Once the paint was completely dry, I used scissors to cut out my donuts, and I used a hole punch to create the holes for my jump rings. Note: make sure you use a full sized hole punch or else the hole will end up being too small for the rings!
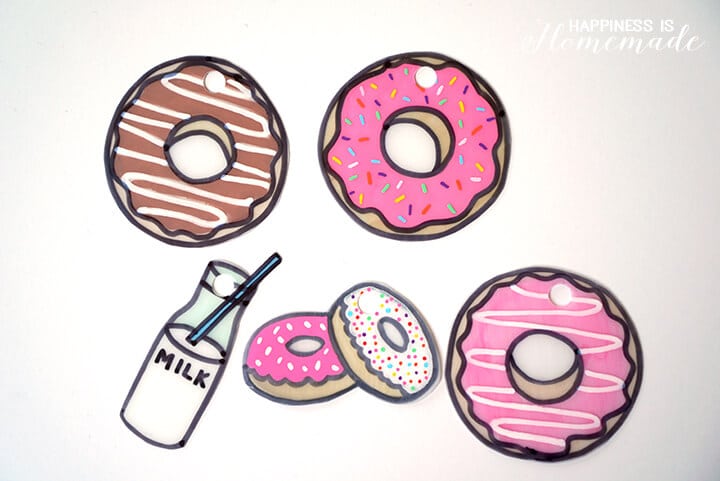
Preheat the oven to 325 degrees. Place the donuts on a parchment paper lined baking sheet, and bake for 3-4 minutes, watching the entire time. The plastic will begin to shrink, and it will start to curl up – don’t worry! This is normal! Once the piece has finished shrinking, it will flatten itself out again.
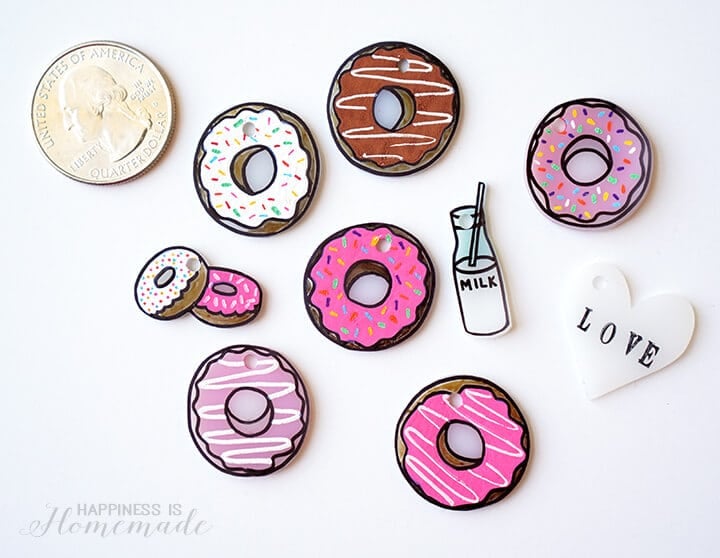 When the plastic has finished shrinking, remove from the oven and allow to cool. Any pieces that are still slightly curled or curved can be flattened by placing another sheet of parchment paper and a heavy book on top of them while they are still warm. You can see here that my 2″ donuts shrank down to smaller-than-a-quarter size!
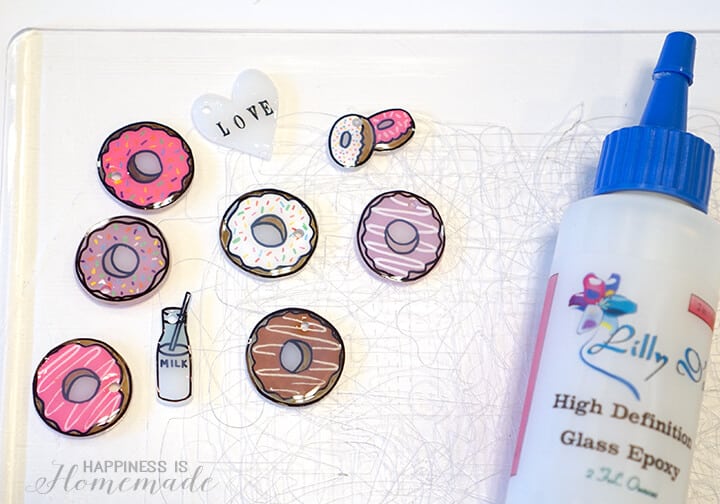 To ensure that the paint and Sharpie doesn’t wear off of the charms, I coated them with a thick layer of high definition glass epoxy glaze. This sealer takes several hours to dry, so I set it aside overnight to dry completely before moving on to the next step.
 The epoxy glaze leaves the charm with a shiny and durable high gloss finish, perfect for “high traffic” charms like these that might be subjected to ample wear and tear on my wrist all day long.
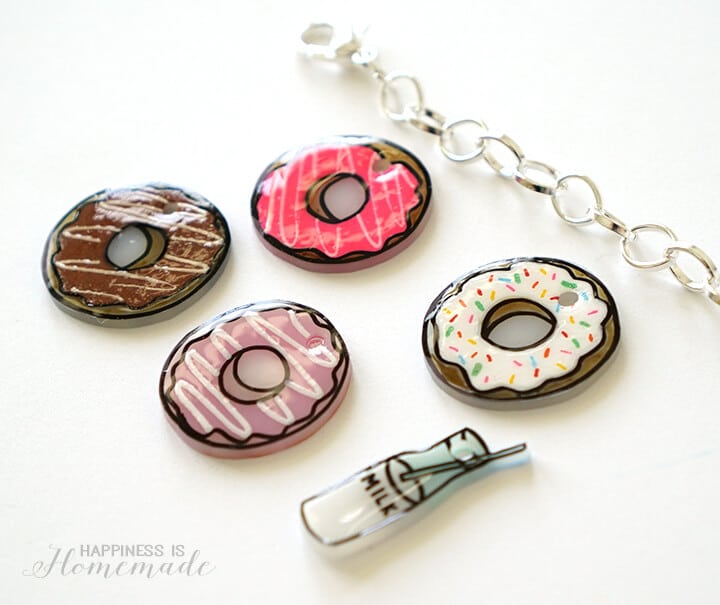
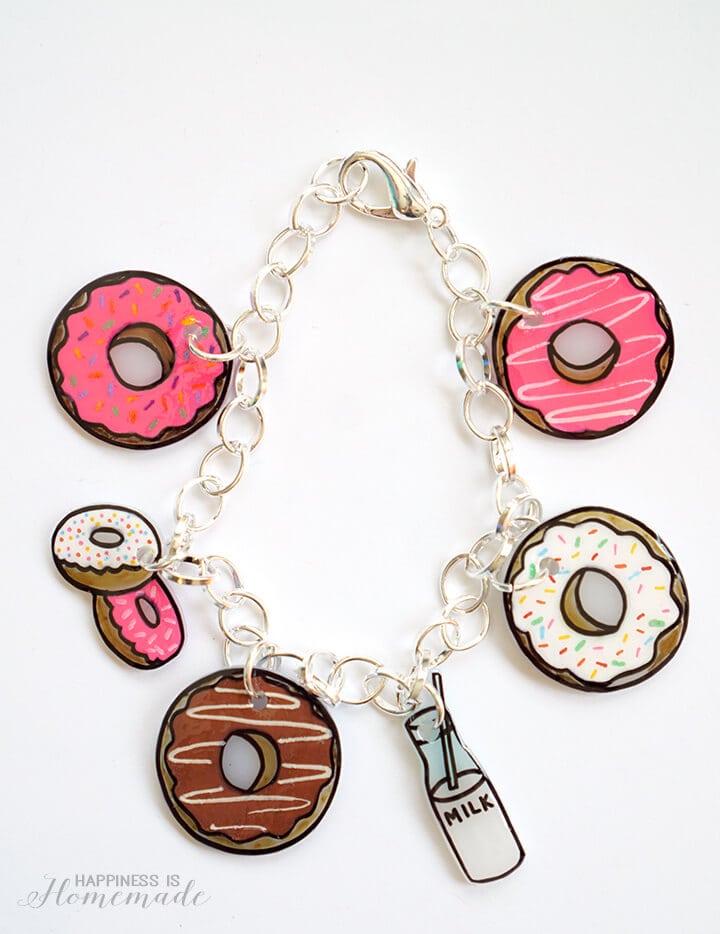
 I crafted more charms than would actually fit on my bracelet, so I opted to save the pastel versions (made with Prismacolor markers) for another project.
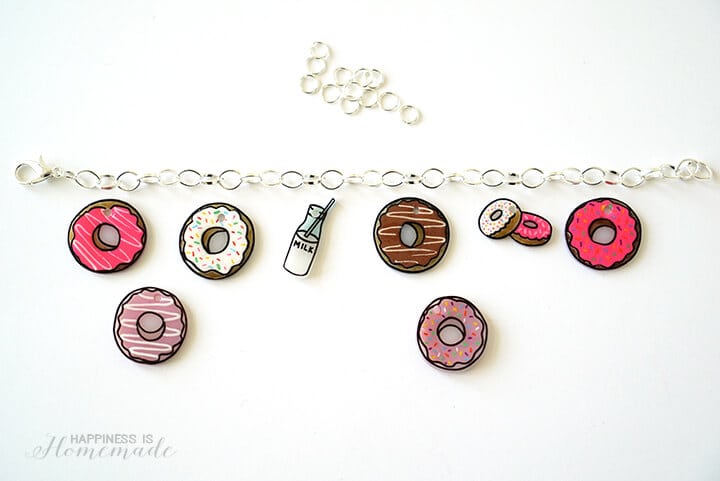
 The jump rings make quick work of attaching the charms to the bracelet – easy peasy!
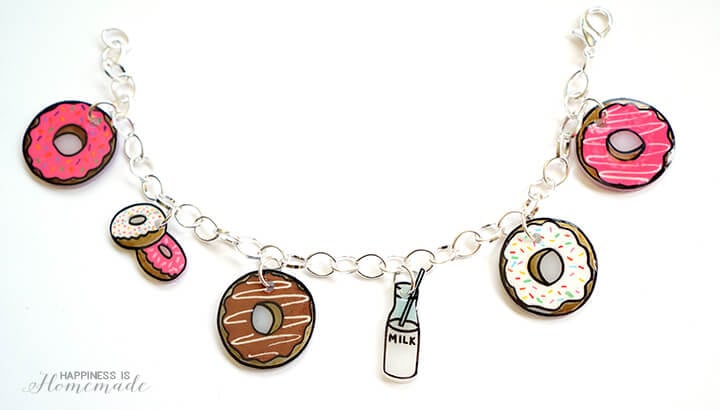
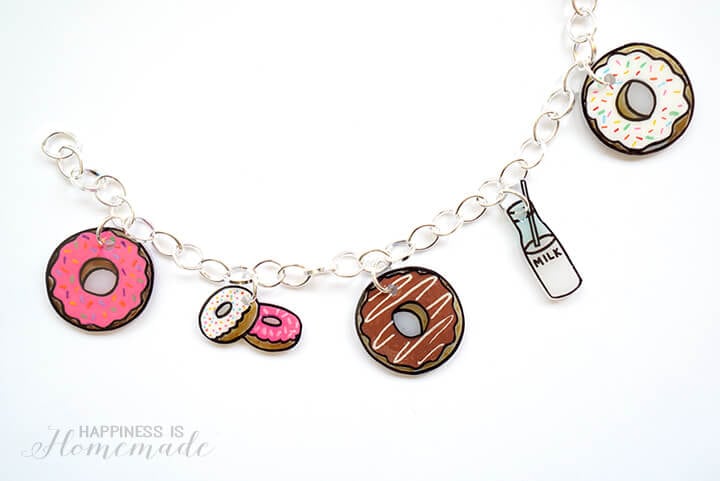 Seriously, how stinkin’ adorable are these donut charms? These bracelets would make a fantastic inexpensive homemade gift idea!
If you love this DIY donut charm bracelet, you might also love:
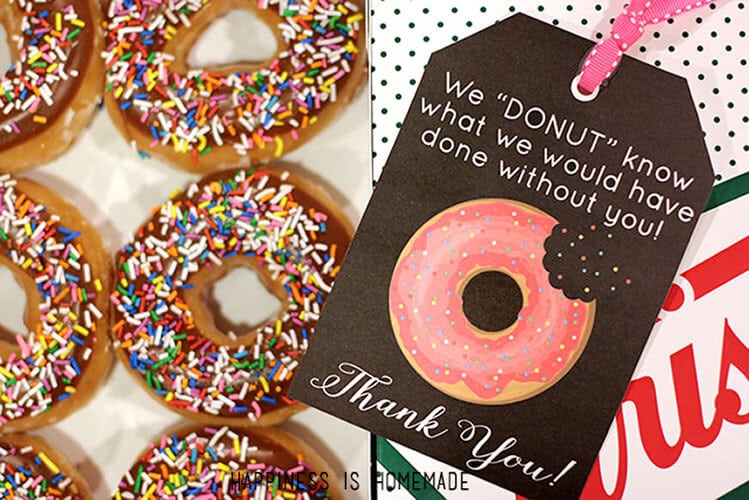
Printable Donut Thank You Notes


Heidi Kundin has captivated the hearts of millions with her colorful and inspiring approach to crafting, celebrations, and family fun. With over 15 years of experience, Happiness is Homemade has become a must-visit destination for those seeking quick and easy creative ideas and last-minute solutions. Heidi’s warm personality shines through her posts, inviting readers to join her on a creative journey that’s fun, rewarding, and achievable. Heidi is also the author of Homemade Bath Bombs & More and DIY Tie-Dye.