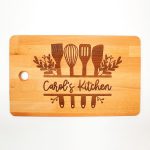
Custom Wood Cutting Boards with Glowforge
Learn how to create personalized cutting boards with Glowforge! Custom cutting boards make a great DIY gift idea – perfect for Christmas, housewarmings, Mother’s Day, and more!
Equipment
- Glowforge Machine (Basic, Plus, or Pro)
Ingredients
- Wood Cutting Board
- Paper Masking/Transfer Tape
- SVG File
- Mineral Oil
Instructions
- Use the masking/transfer tape to cover the engraving area on top of the cutting board.
- Remove the crumb tray from the Glowforge (if your cutting board is more than .5" thick), and turn on the machine. Place the cutting board into the bed of the Glowforge. You may need to stack a second cutting board or a piece of scrap wood to boost the surface of the cutting board into the laser's focus area.
- Open up the Glowforge App software on your computer. Upload the SVG file, set the focus on the cutting board, and resize/position the design on the cutting board.
- Set engraving settings as desired. For an Ikea PROPPMÄTT cutting board, we recommend using 1000/100/340 for a rich engraving.
- Click "Print," press the flashing button on your Glowforge machine, and watch the magic happen! When the cutting board is finished engraving, remove the masking, and add a coat of mineral oil to seal and condition the wood.
Notes
Care: We recommended that you apply additional coats of mineral oil to your cutting board on a regular basis, especially if it is used frequently.