How to Use Transfer Tape with Vinyl
Learn How to Use Transfer Tape with vinyl for your Cricut and Silhouette crafts! This easy beginner lesson will walk you step-by-step through the process!
Equipment
- Scissors
- Scraper Tool
- Weeding Tools
Ingredients
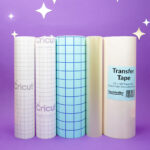
- Adhesive Vinyl Design
- Transfer Tape
Instructions
- Use your cutting machine to cut the design from adhesive vinyl, and use your weeding tools to remove the excess vinyl from the negative space.
- Use scissors to cut a piece of transfer tape that is slightly larger than your vinyl design. Remove the transfer tape from the paper backing (save the backing for later!).
- Place the transfer tape on top of the vinyl design, and use the scraper tool to gently burnish the surface.
- Peel the paper backing away, leaving the vinyl stuck to the transfer tape.
- Carefully position your vinyl design onto your crafting surface.
- Burnish the design lightly with your fingers, and then use the scraper tool to smooth out the design and ensure that it is firmly adhered to the surface.
- Carefully peel off the transfer tape. You can now place this piece of transfer tape back on the backing paper and save it for future use.
- Enjoy your finished vinyl project!
Notes
Note that the time to transfer your project will depend on the size and intricacy of your vinyl design.