
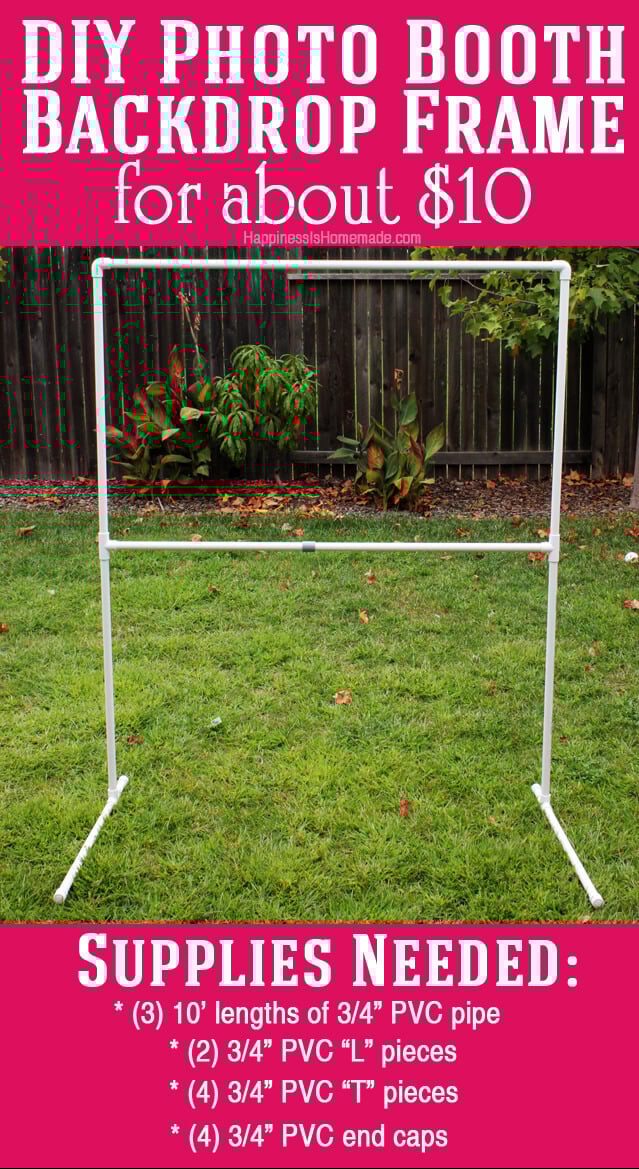
We whipped up this awesome diy photo booth background frame in about ten minutes for just around $10 using items available from your local hardware store.
The photos are pretty self-explanatory in terms of assembly, but I wanted to give you some measurements for cutting the PVC. Our booth is 4.5′ wide by 5.5′ tall, so we cut two of the 10′ pieces of PVC pipe nearly in half into 5.5′ and 4.5′ lengths. From the third 10′ piece, cut another 4.5′ length and then cut the bottom supporting “feet” from the remaining piece. If you want the photo booth to be free-standing, I’d suggest cutting four 12″ pieces for the feet. My photo booth will be set up right in front of a wall most of the time, so I choose to cut two longer front pieces and two shorter back pieces (16″ and 4″), but do whatever works best for your set-up. The lower cross bar helps lend support and also works well for setting up a shorter background for seated photos. I set ours at around 32″ high because that’s a few inches taller than my tallest kiddo when seated.
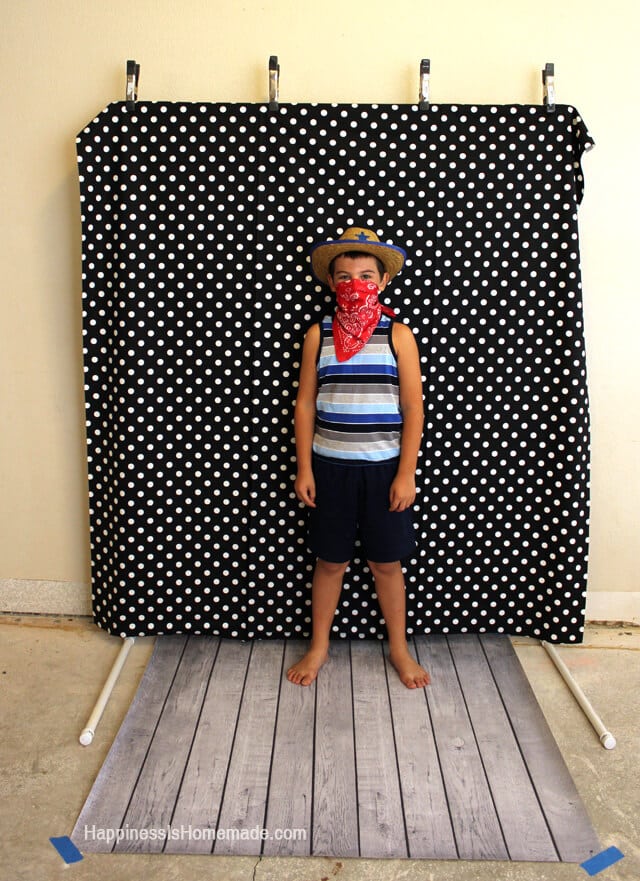 Drape some fabric across the top bar and clamp into place. If you don’t already have clamps, you can pick these up at the hardware store too for about $1 each. There are SO many different options for backgrounds, so get creative! Old sheets work great and so do rolls of paper – I think holiday decorated kraft paper would look awesome too!
 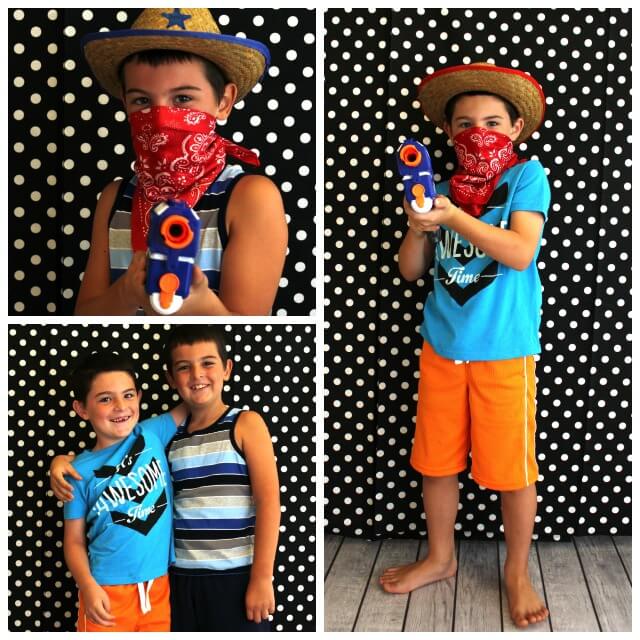 I can’t wait to see how awesome this looks when they’re actually in their Halloween costumes this year! No more boring garage door photos for us! I think I might even add a few orange paper bats and pumpkins to the background too.
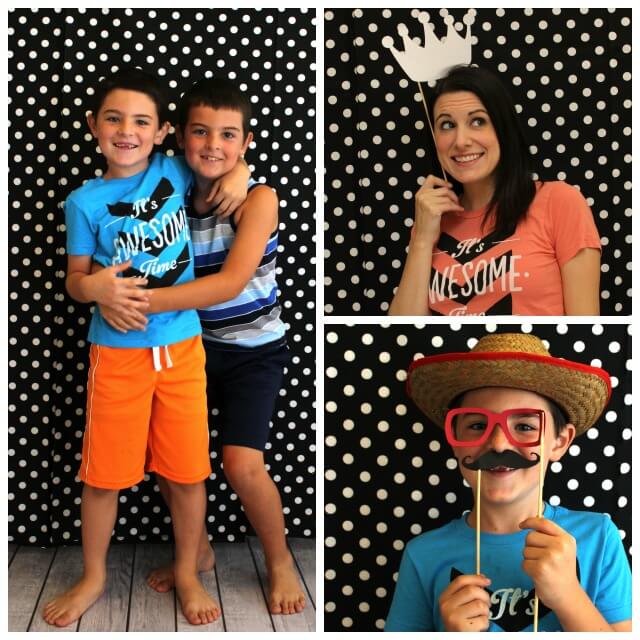 This will be SO much fun at birthday parties too! I just added a few photo props, and my boys went crazy for them! (Note to self: next time, don’t choose a photo prop that blends in with your background lol!)


Heidi Kundin has captivated the hearts of millions with her colorful and inspiring approach to crafting, celebrations, and family fun. With over 15 years of experience, Happiness is Homemade has become a must-visit destination for those seeking quick and easy creative ideas and last-minute solutions. Heidi’s warm personality shines through her posts, inviting readers to join her on a creative journey that’s fun, rewarding, and achievable. Heidi is also the author of Homemade Bath Bombs & More and DIY Tie-Dye.
To keep frame from falling over, fill base PVC pipes with sand.
Just made the backdrop and it was SO easy. I kept putting it off cuz I am not saw savvy. However it literally took me 20 minutes (had to keep stopping to throw the ball for the dog). This is going to be so handy. Love it. Thank you.
I just found this amazing diy but I would love to make it about 7′ tall, has anyone done so? I want to be sure I get the correct number of pieces for the taller version. I did read that you’ve made a XL version to watch movies, would you be willing to share the details?
Please post measurements for the larger version!
I love this idea!! I am planning on making one for some upcoming events. Just wondering if it is easy to take apart once it’s assembled? I will not be able to easily transport it once it’s assembled and would like to put it together on-site.
Yes, it is!
So you don’t have to glue the pipe together you can just stick them together so you can assemble and disassemble before and after?
Yes!
Yours kids look like they really enjoyed this! I love the little props too. Thanks for sharing!
How much fabric do I need for the backdrop?
I used two yards of fabric on mine 🙂
Great idea for a light-weight and easily-portable background hanger.
Hi Heidi,
I love your Diy photobooth frame. We are planning on making one for our daughter’s first birthday party. Since we have adults who would probably take photos what would you suggest on how we should cut the pipes for a taller frame? Possibly no more than 5’8″-6′?
Thanks!
Di
So I bought all the pieces and I had them cut into the measurements you said. I am assuming the 5.5ft ones should be cut in half so that you put them in both sides of the T joints right? I thought the T thing would just slide right down and it didn’t….
I had the same issue…I just cut them in half and it worked great 🙂
Hi, thank you for asking this. I just constructed mine and was confused lol
Hi Heidi! Does yours ever try to topple over? I made one, and am using a cloth tarp for the backdrop, and it keeps tipping to one side or the other, and sometimes toppling over completely! I don’t know what to do to fix this. Any suggestions would be greatly appreciated. Thank you for your great tutorial!
Oh no, Belinda! I’m so sorry to hear that you’re having tipping issues! I have not actually had any problems with mine, and we’ve even used a similarly built XL version as an outdoor movie screen on a windy night, too. To remedy the situation, perhaps you can make the “foot” pieces longer? Maybe with a little more length it will alleviate some of the tipping problems. Good luck!
Thank you Heidi! I’ll try that with the feet! I’m using it at our church picnic this Sunday….thanks again!
Hi – wondering if you have specs for the larger one that you use for a movie screen stand?
I’m looking to make one for my friends bridal shower, and would like it to be 7 feet (ish) tall. Any thoughts?
OMG I love this!! I make photo booth backdrops out of fabric scraps and have been looking for a creative way to hang them at events! Definitely a must build for my family! Thanks for posting.
I love your photo booth frame. Did you glue yours together — or does it stay together on its own? I need to make a larger one for a gym (and I sure could have used it at Christmastime for a Santa’s workshop). Thank you for the inspiration!!
Thanks, Liz! My frame stays together on its own. I keep it that way so that I can disassemble it and store it in a closet when it’s not in use. 🙂
Really great! Where did you get the floor pattern paper (fabric?) from?
Thanks, Kim! The floor pattern is a vinyl photo background from Ink & Elm (https://www.etsy.com/shop/InkAndElm). 🙂
What size backdrop did you use for the floor?
Hi Krystal, it is a 4’x 4′ backdrop on the floor 🙂
They do have rolls of paper like that at Michaels and Hobby Lobby. Its sold in a long roll. In the teacher area aswell at Staples and Office Depot????
Cute kids, cute mom, cute, idea and cute costumes. Thx for sharing Heidi.
This is so cute! I would love it for our Fall Festival! Where did you get the 3/4 joints? We were looking for them for a game we were making and Home Depot said they don’t make them. Must have gotten someone bad at the store!
We got ours at Home Depot! Both HD and Lowe’s should have them! 🙂
I love the Max one best too. Although the parrot is adorbs. We’re thinking pirate for Trip this year w/ a shoulder parrot 🙂
My son wore the astronaut one last year from PBK and wears it all the time still for pretend play. Great value and so well made.