

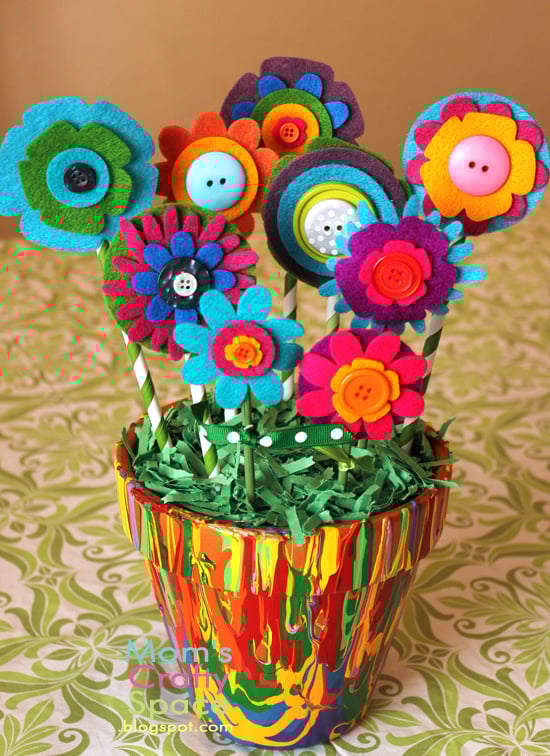
Look what I found, thank goodness! Bright and cheery felt flowers to go with our pour painted pots – yay! I was really worried for a minute there that we weren’t ever going to find them!
******************************************
The boys saw the idea for these pour painted pots on In Lieu of Preschool a few weeks ago, and they couldn’t wait to try it out to accompany their felt flower bouquets.
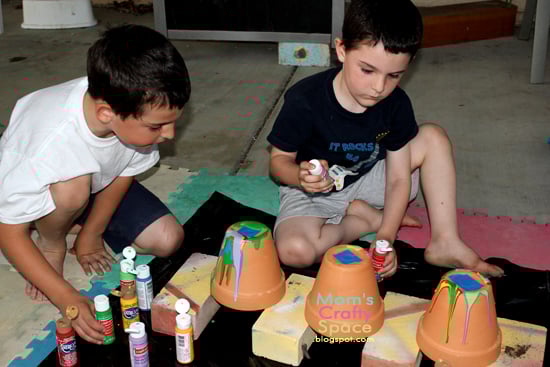
We taped up the holes on the bottom and they got to pouring the paint. Note: make sure your kid isn’t wearing parts of his school uniform when you turn him loose with acrylic paint. Aye aye aye.
It’s really simple to acheive this swirly and marbled effect – just pour a bit of paint, and then keep adding new colors on top of the old ones until they drip off the edges and run down the sides of the pot.
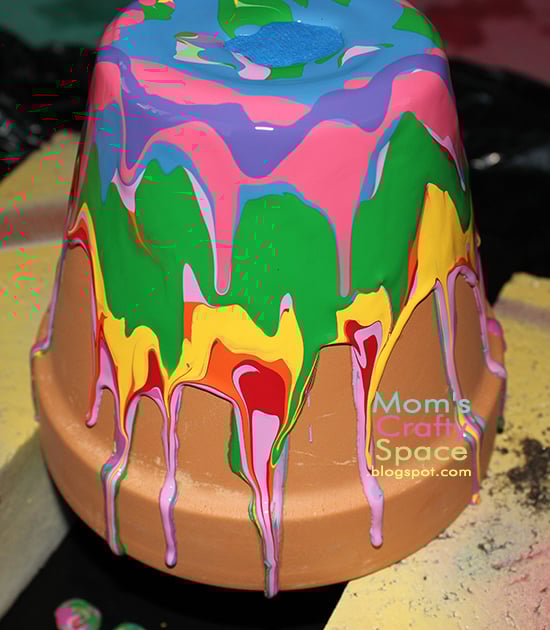
The colors were so pretty dripping and swirling down the sides of the pots. There are so many moments where I just wanted to freeze it and keep it that way, but you can’t fight gravity!
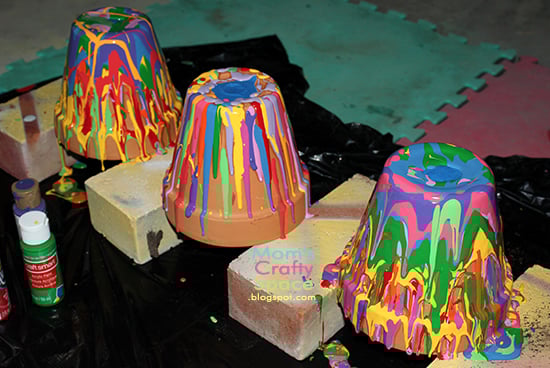
Sutton very deliberately chose to make striped paint drips on his pot (in the middle) instead of letting the colors mix and swirl. It was a really neat effect as well!
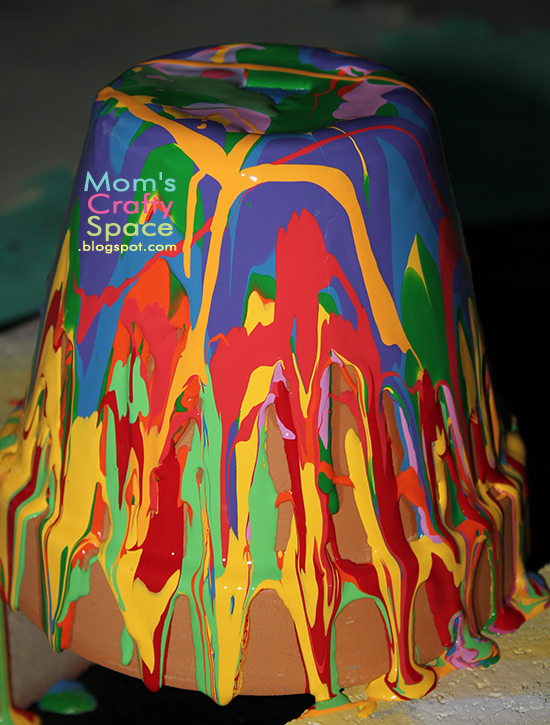
In the end we only covered about 90-95% of the pot with paint, (mostly because it was bedtime, and we were all tired of getting eaten alive by mosquitoes!), but I still think they came out great!
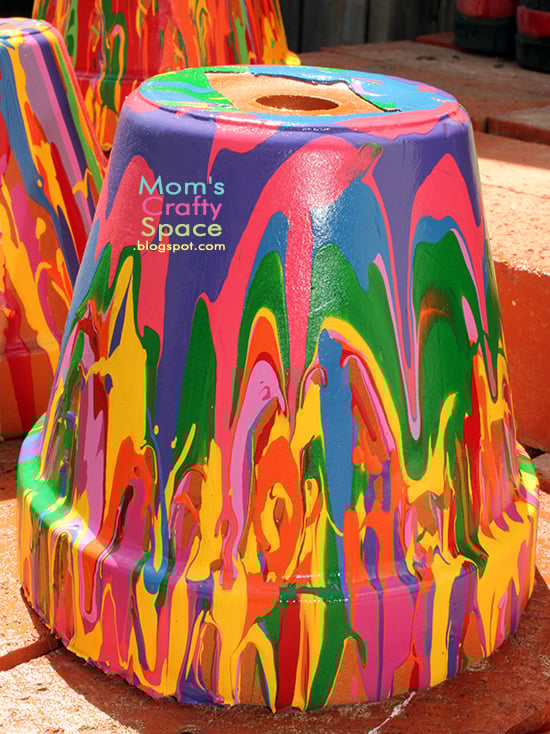
It took two full days for all of the paint to dry. We coated it with four layers of glossy spray varnish, and we were ready to add our felt flowers…well, after we found them 😉


Heidi Kundin has captivated the hearts of millions with her colorful and inspiring approach to crafting, celebrations, and family fun. With over 15 years of experience, Happiness is Homemade has become a must-visit destination for those seeking quick and easy creative ideas and last-minute solutions. Heidi’s warm personality shines through her posts, inviting readers to join her on a creative journey that’s fun, rewarding, and achievable. Heidi is also the author of Homemade Bath Bombs & More and DIY Tie-Dye.
I just having fun with the clay pots.so easy to pour the paint. I like the look.
Woow that’s soo cool, I’ve this art. They’re simple but magic out looks it looks great.
Do you think it would work with tempura paint?
As long as you’re using a permanent tempera paint and not a washable variety, it should work just fine! I would suggest adding a clear sealer over the paint as well. 🙂
what type of paints did you use?
We used acrylic paints! 🙂
Those colours are so cool. I love the idea, will do something similar one weekend with my youngest, she loves paint!
This is a super kids craft, I am using this idea for a upcoming Birthday cake, with icing though not paint.
How did you make the different shapes for the felt flowers? Is there a pattern to go by? Thank you very much!!
I purchased my flowers pre-cut from bbd supplies: https://www.etsy.com/shop/bbdsupplies
wondering if you have suggestion for a varnish that is not so stinky? Thx
These are beautiful! I think the idea originated from Dili Dali Art however. Hers were absolutely stunning!
You’re right, Anna! We first saw them on In Lieu of Preschool; however, she does mention in that post that I linked that she was inspired by the originals at Dili Dali Art. I agree, the ones at Dili Dali were gorgeous! I wish ours were as completely covered as theirs, but I still think they look pretty neat 🙂
Oops, I mean Dilly-Dali Art!
I think that your moms will love their gifts! So cool!
those are cool! love all the colors.