
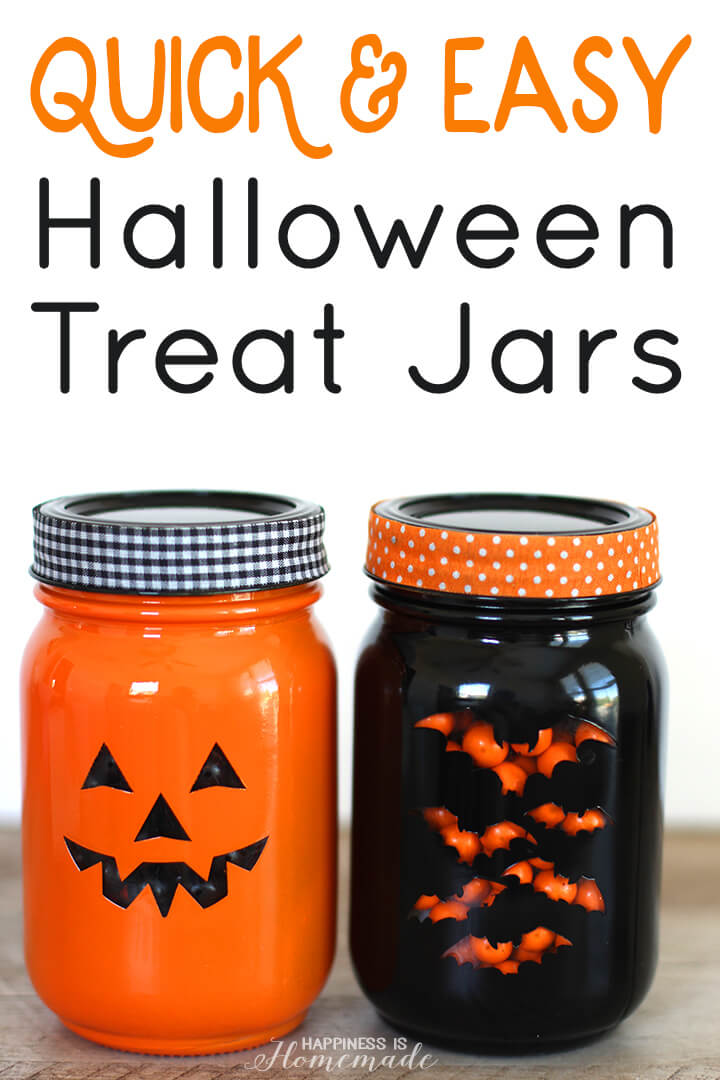
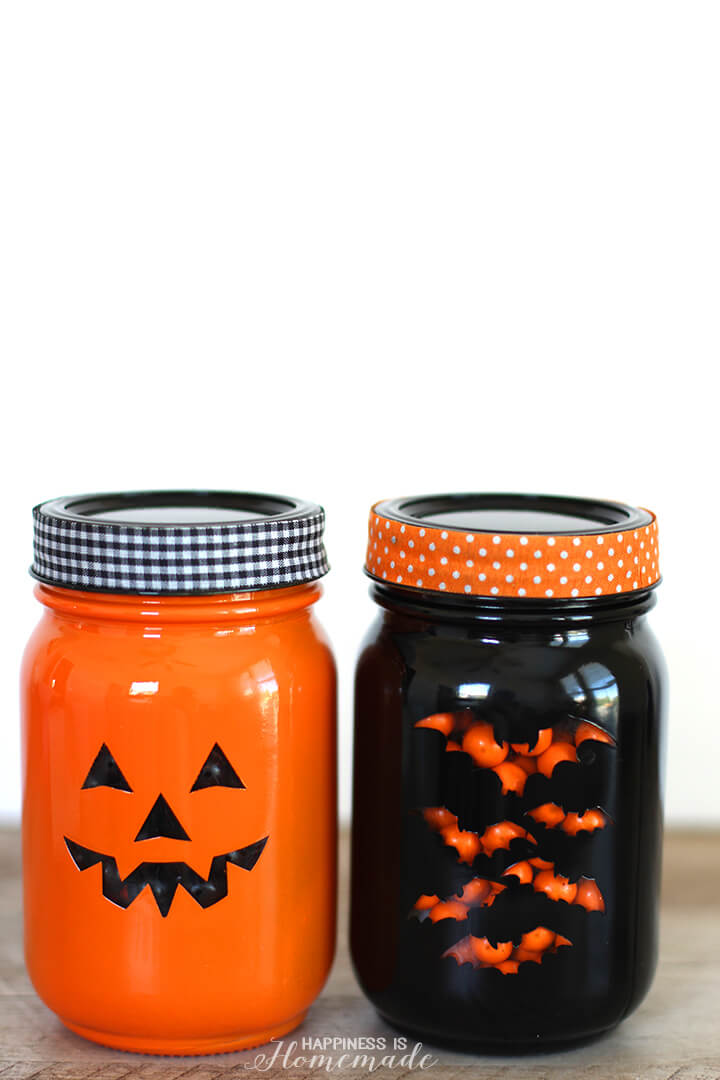
DIY Halloween treat jars are a super quick and easy Halloween craft that can be made in under 15 minutes! These cute treat jars would be a great addition to your “You’ve Been Booed” basket, and they also make a great teacher or hostess gift idea!
![]()

It’s time for another round of Craft Lightning (crafts that can be completed in 15 minutes or less), and I am super excited that this round is Halloween crafts – my favorite! I made these simple DIY treat jars in about 15 minutes (not including the drying time), and I’m really happy with how cute they turned out!
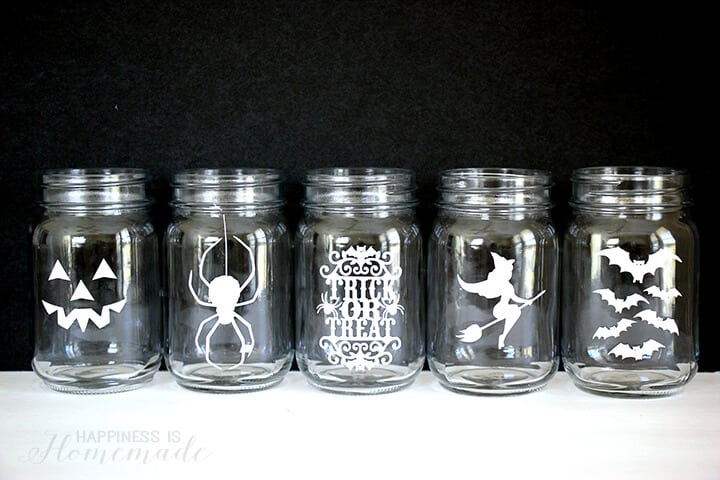
I started by adhering vinyl Halloween stickers to clean glass mason jars. I cut these stickers with my Silhouette Cameo, but you can use any stickers as long as they adhere completely to the glass.
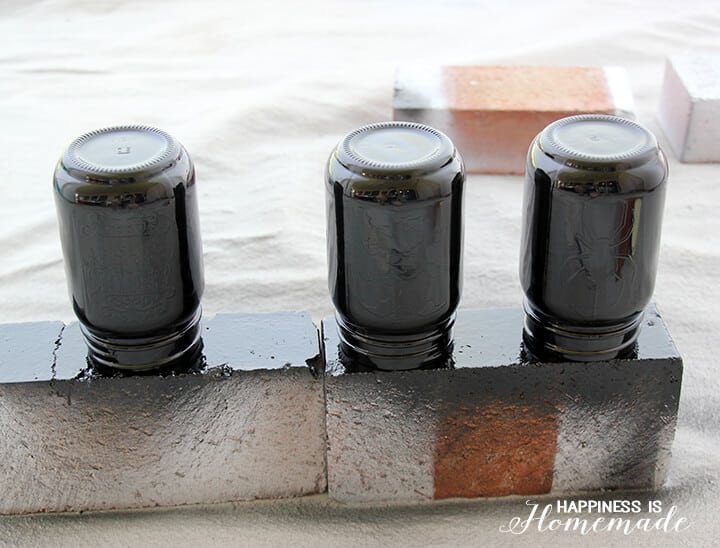 I placed a flat lid on top of the jars to keep paint out of the inside, and then I flipped them upside down and hit them with a coat of spray paint.
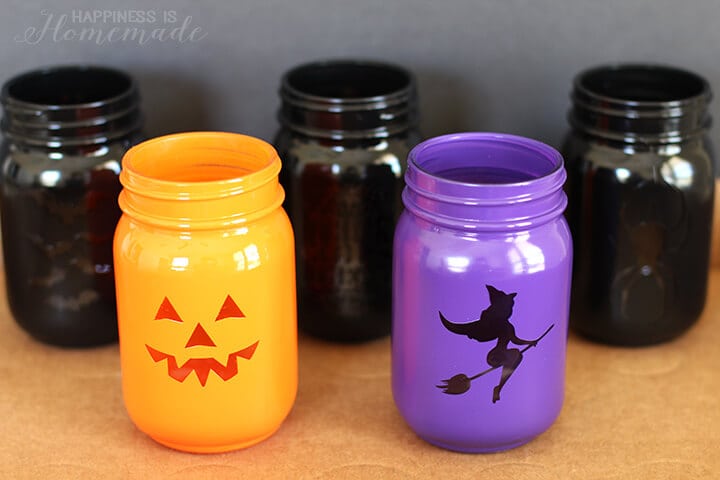 While the paint was still wet, I VERY carefully use a pair of tweezers to remove the vinyl stickers. This part is a little tricky, but once you get the hang of it, it’ll go quickly.
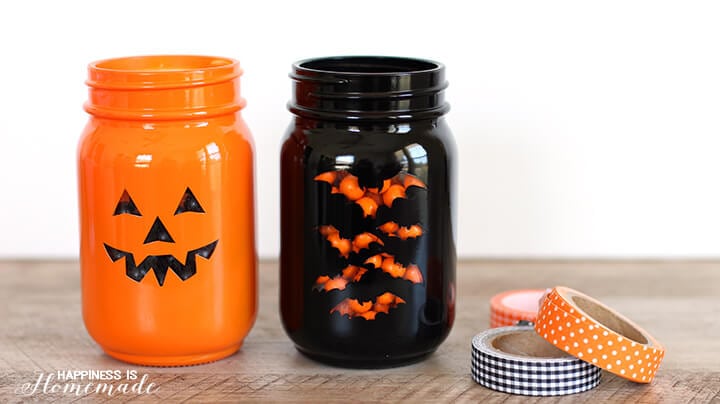 I filled the treat jars with Halloween colored Sixlets and added some fabric washi tape to the lids. Easy peasy!
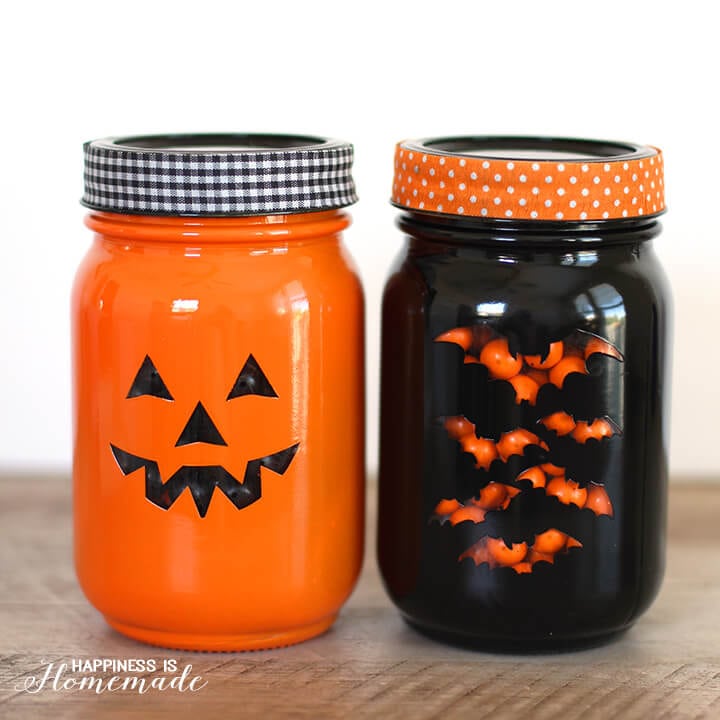 These Halloween treat jars would make a great hostess gift for all of your Halloween parties, and they’re perfect for friends, teachers and neighbors, too!


Heidi Kundin has captivated the hearts of millions with her colorful and inspiring approach to crafting, celebrations, and family fun. With over 15 years of experience, Happiness is Homemade has become a must-visit destination for those seeking quick and easy creative ideas and last-minute solutions. Heidi’s warm personality shines through her posts, inviting readers to join her on a creative journey that’s fun, rewarding, and achievable. Heidi is also the author of Homemade Bath Bombs & More and DIY Tie-Dye.
Nice project
I loveee these mason jars, I am looking to make them for my niece’s class, I attempted quickly last night and when I pulled up the vinyl it took the spray paint with it and it was thick and just didn’t work! How do you get your spray paint so solid, as in putting on a pretty good coat of paint without it being too thick? I could have also used too thin of a decal, any advice will be helpful. thanks!
Hi Brittany,
Did you allow the paint to dry before peeling up the decals? The decals should be peeled up while the spray paint is still wet for best results. It’s a little tricky, but tweezers usually help! I spray several very quick and light coats (one right after another so that they don’t have time to dry) from about 12″ away to build up the paint coverage.
These are super cute! Does the spray paint chip off the glass? I’ve seen other crafts use glass spray paint or frosting spray paint? Also pouring some paint in the jar and swirling it around to coat the inside. Have you tried any jars like with these ideas? Or what are your thoughts using on the techniques with candy jars or luminaries?
I just love your jars, they look very custom. I have to try this method. I don’t have a Cameo machine and I’ve checked the Dollar Tree stores but nothing worth buying. Where can I get stickers?
These look great! I’ve been stumbling with painting these dang jars and trying to make them turn out dark enough to see the color, but light enough to see a tea light. It’s been a little maddening. I also tried using vinyl cut outs and that’s been a disaster. I’m going to try the spray paint! Could you please let me know what kind of spray paint you used (gloss, satin?) Thanks!
Thanks, Laura! I used both glossy (the black and orange) and a satin (purple) spray paint to make these jars. 🙂
I am wondering why you had to peel the vinyl off while the paint was still wet. Did you have to do multiple coats of spray paint?
If you wait and peel the sticker off when the paint is dry, you run the risk of peeling up the paint as well. 🙂
So you know I love these! Thanks for joining!