
Lately Sawyer has been asking to tie dye another shirt (he’s done two previously), but I’ve been really hesitant because of the time and mess committment involved. These days it seems like every time we’re knee-deep in something super messy and complicated Simon decides to wake up from his nap after only 30 minutes. When I finally picked up some plain white t-shirts at Joann’s earlier this week it suddenly occurred to me that I had seen “tie-dye” with Sharpie markers done once in a long-forgotten blog post from last Summer. A quick internet search of the topic led me to Butterfly Jungle where they had made Sharpie tie dyed fireworks shirts for the 4th of July. Sounds perfect!
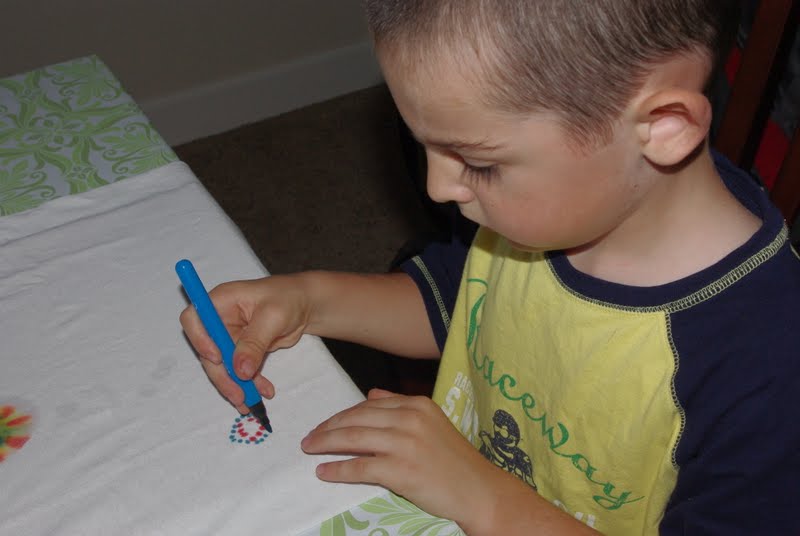
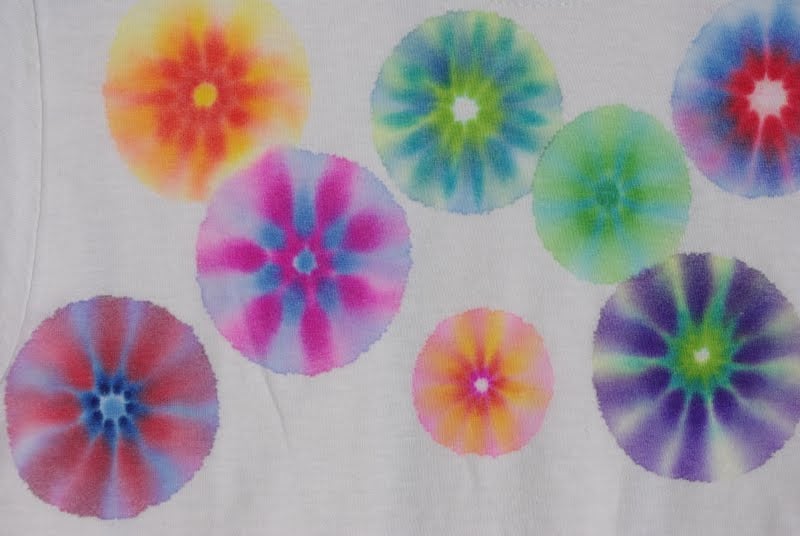
All you need are some permanent markers (we found that permanent markers from the Dollar Tree and Bic brand permanent markers worked a bit better than actual Sharpies), fabric/shirt and rubbing alcohol. We put a piece of cardboard inside of our shirts to prevent bleed through and then started by drawing a circular pattern of dots about the size of a quarter.
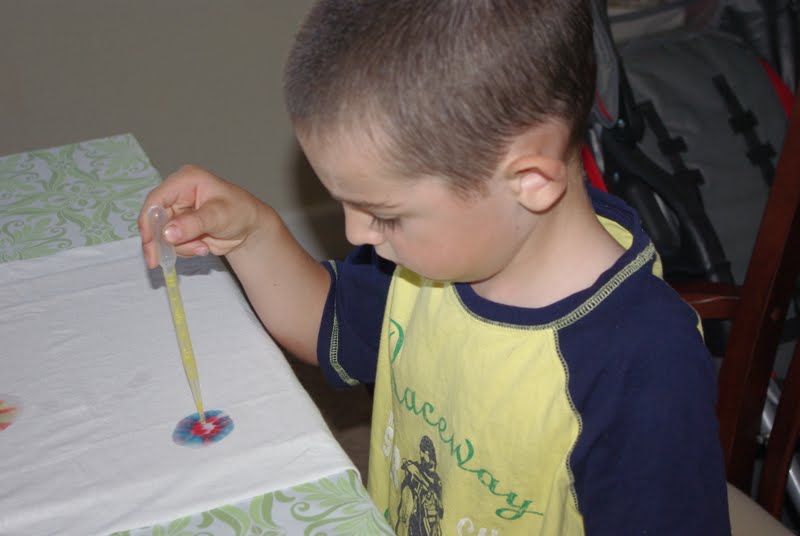
Using an eyedropper we dropped a bit of rubbing alcohol on to the center of our design and watched it spread out to create our “fireworks.”
The design will spread a bit slowly at first, but will eventually fan out as far as the alcohol has spread.

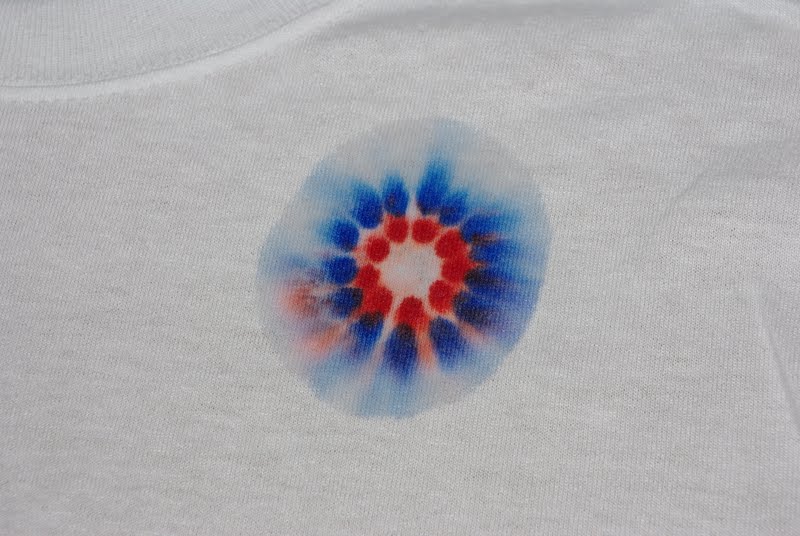
This one is mine 🙂 I’m going to do some alterations to make the cut a bit more feminine before I rock this bad boy at the fireworks display show. After the alcohol has dried completely, be sure to iron your shirt to heat set the marker.
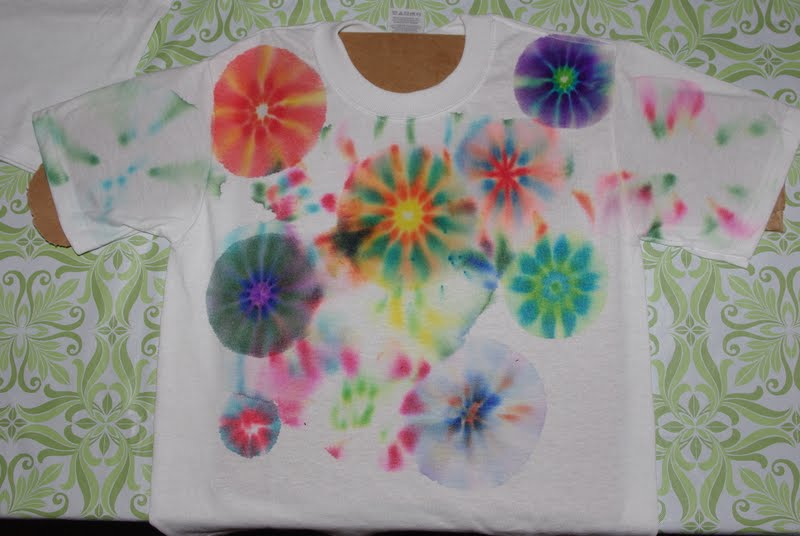
Sawyer added some circular fireworks and then decided to add some “fire bombs and sparklers” and stuff to it too. The Sharpie brand red marker ended up bleeding out a little more pink than he was expecting, but he still thinks his shirt is super cool.
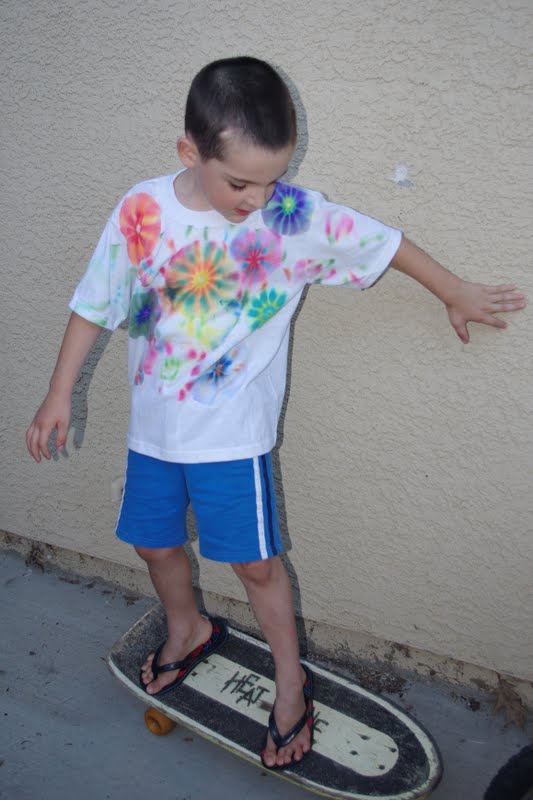
Showing off his new fireworks shirt…okay, okay so they could be mistaken for flowers too, possibly…
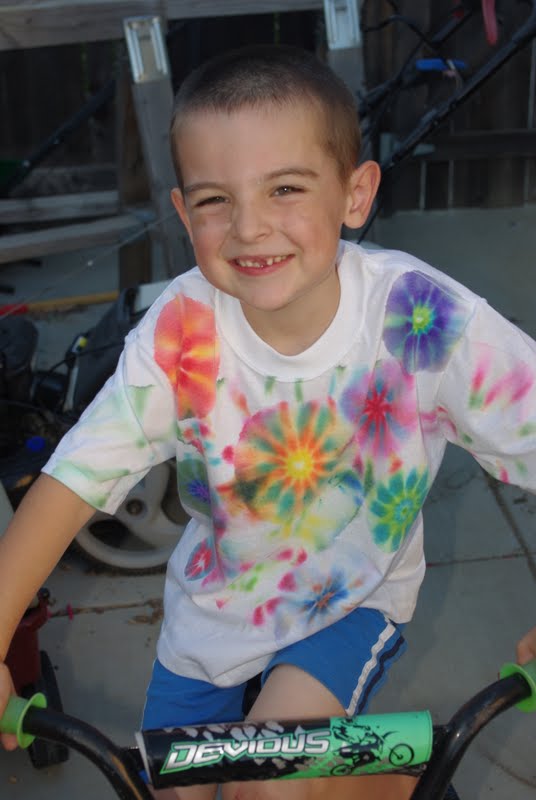
…just don’t tell him that!
This activity was a ton of fun, and it required minimal mess, direction or intervention on my part. Now that we know how easy it was and how well it worked, we’re going to pick up a few more white shirts and attempt a more traditional looking tie dye pattern next time!


Heidi Kundin has captivated the hearts of millions with her colorful and inspiring approach to crafting, celebrations, and family fun. With over 15 years of experience, Happiness is Homemade has become a must-visit destination for those seeking quick and easy creative ideas and last-minute solutions. Heidi’s warm personality shines through her posts, inviting readers to join her on a creative journey that’s fun, rewarding, and achievable. Heidi is also the author of Homemade Bath Bombs & More and DIY Tie-Dye.
This was great 🙂 Had so much fun with this activity!!!!!!!!!!!!!!!!!!!!! Can’t wait to try it again!
Can you use peroxide instead of rubbing alcohol….rubbing alcohol is in such large demand now cant fi d it anywhere
Unfortunately, peroxide doesn’t cause the same reaction. This is a really fun activity, but probably best saved for a time when rubbing alcohol is more readily available and abundant. 🙂
So I have a much easier way
1.get your colors of sharpie you want and color a paper towel piece only a small piece
2. Put the colored paper towel in water and stir
3.pour on shirt and put in plastic bag to dry
Good luck tie dying!
That sounds like a fun method, Fiona! We’ll have to try that next time!
I just did this project with my girls. Came out wonderfully! But we are having the same colorfastness issue. We started with %100 cotton bandanna to practice. Pre-washed in warm water with detergent. Heat set after with high iron. Just went through the wash on warm and most of it has faded. I watched the tutorial with the hand-dyed quilt fabric, but that mostly addresses too much dye running off onto other stuff. It doesn’t address the colors fading and washing out. Has anyone had any luck? We have %100 cotton pre-washed t-shirts that we decorated and love, but how to wash them? How to set the color? Funny how we think PERMANENT marker would actually be permanent LOL.
This is the most info helpful info I could find. “Once your shirts are completely dry its a good idea to throw them into the dryer (or run an iron over them) to help set the ink before washing. Note that Sharpie® ink is alcohol based (allowing it to react in such a neat way with the rubbing alcohol) but because of this, it is not archival and it will fade when you wash it. The Sharpie® manufacturers recommend that you hand wash Sharpie® dyed clothing for best results, but over time (some more quickly than others) your designs will fade. Also, fabric ink Sharpies are not alcohol based, and thus will not react with the rubbing alcohol in the same manner. But you can always try new designs if yours start to fade. This is still a fun summer project!”
Hello, could you please address the questions about colors fading? I made this shirt using a different tutorial, but I ironed and used the dryer and my colors washed through the back of the shirt ruining it. I would really like to try to save the front, because the colors are great and it took my daughter and I a long time to plan out how we wanted to arrange our colors. NOw I’m highly disappo0inted that this was all a big seeming waste of time.
I’m so sorry that it didn’t work for you. I’m not sure what the problem is since it seems to work for some people and not others. Our shirts have held up fairly well with only some minor fading, in fact, my son wore his that he made last year just yesterday. Perhaps it has something to do with the actual shirts that were used. Be sure to pre-wash all of your fabrics to remove any sizing or detergents present from manufacturing.
Perhaps pre-soaking the shirt (and then allowing it to dry) in vinegar, soda ash or washing soda might help set the dye (like they do when tie dyeing shirts the traditional way). I’ve never had to use these methods, but they’d probably be a good place to start. Good luck!
You may have better luck with the color if you use 100% cotton T-shirts. They seem to absorb the color and hold it better than a 50-50 fabic.
I know that some people have also washed the garmet in salt water to set the color.
Try it first on a sample/scrape piece of cotton and the salt water set.good luck….