
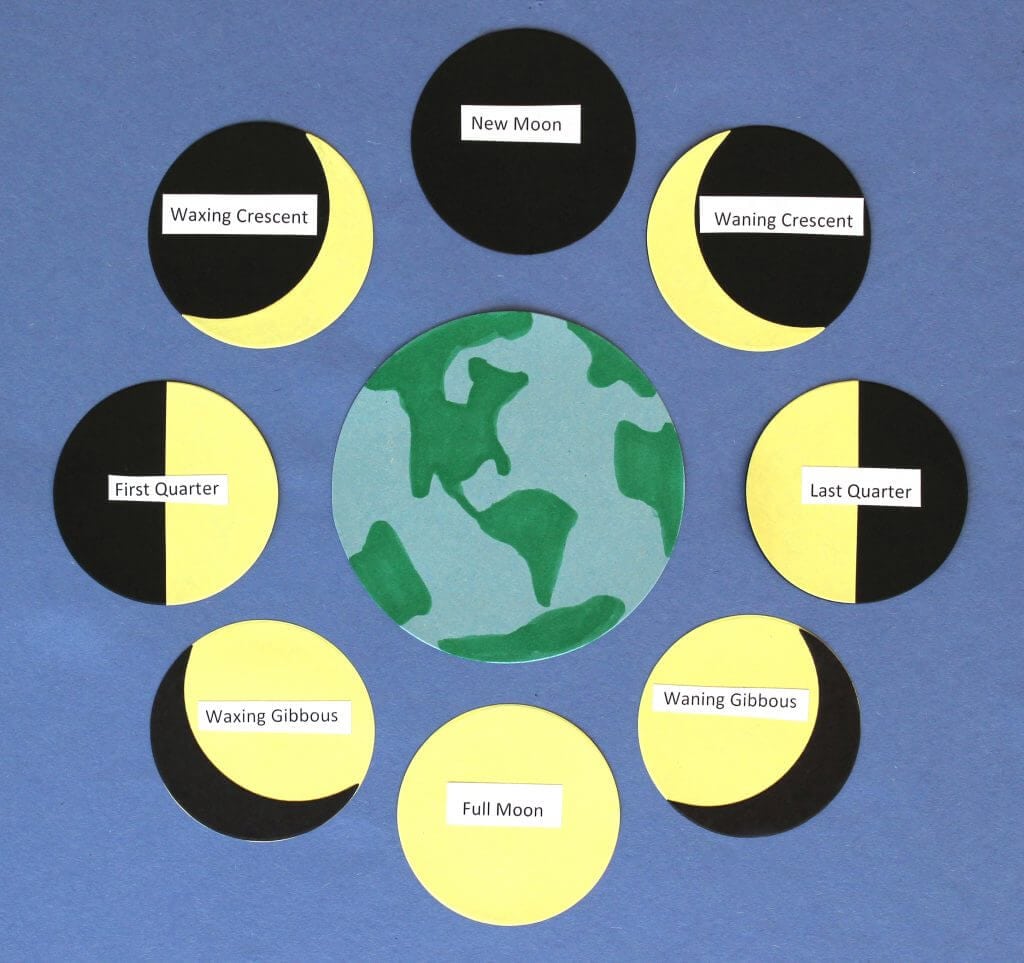
 The boys and I have been enjoying our homeschool science lessons a lot lately. We’ve been studying the solar system, and we all agree that it’s our favorite unit that we’ve done this year. To go along with our lessons, they each made one of these fun charts that illustrate the phases of the moon and the monthly lunar cycle.
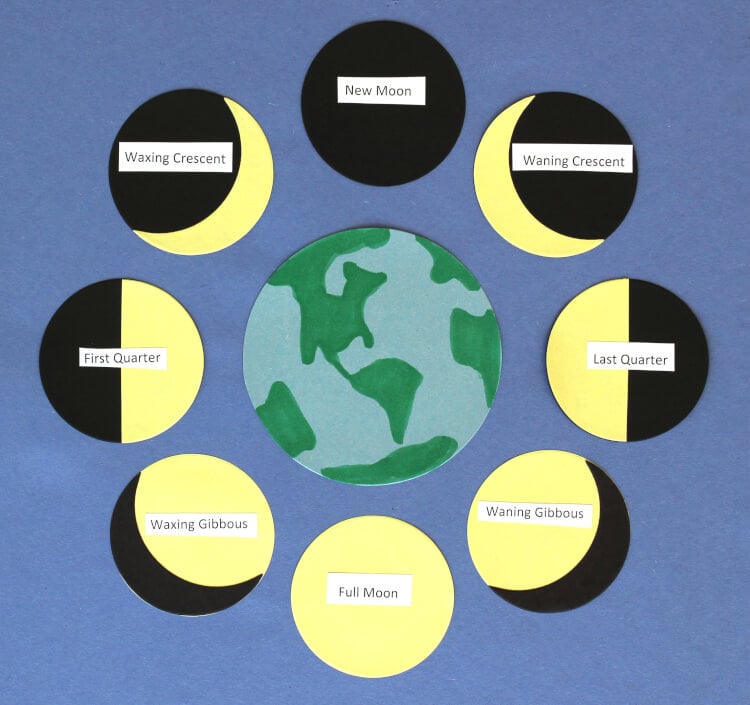
SUPPLIES USED:
Ellison SuperStar Machine (or Sizzix Big Shot)
Sizzix Bigz Die #A11009 – Moon Phases
Construction Paper
Glue Stick
Begin by using the SuperStar machine to cut moon phase die cuts from both black and yellow paper. Cut several of the yellow full moon circles in half to represent the half moon.
To set up a moon phases chart station, arrange the die cuts in a divided dish or individual containers along with a glue stick, and provide a 12″x18″ sheet of dark blue construction paper for the background.
Cut an Earth from light blue construction paper, and add landform details with markers or crayon. Arrange the moon phases in order around the Earth on the chart.
Label each phase – remember, the lunar cycle is read counterclockwise! When the lit area of the moon is getting bigger, it is waxing. When it is getting smaller, it is waning.
Encourage students to research facts about the lunar cycle, and add a short informational report underneath the moon phases chart.

Heidi Kundin has captivated the hearts of millions with her colorful and inspiring approach to crafting, celebrations, and family fun. With over 15 years of experience, Happiness is Homemade has become a must-visit destination for those seeking quick and easy creative ideas and last-minute solutions. Heidi’s warm personality shines through her posts, inviting readers to join her on a creative journey that’s fun, rewarding, and achievable. Heidi is also the author of Homemade Bath Bombs & More and DIY Tie-Dye.