
![]()
I recently ran across a recipe for homemade polymer clay, and since it only called for four common household ingredients, I decided to give it a try. My boys love clay, so I’ve tested dozens of different recipes, and I haven’t been very impressed with any of the air dry varieties that we had tried. They’ve always been too crumbly, too brittle, too soft, or too difficult to work with. We’ve used numerous combinations of ingredients, but we had yet to find a winning combination. This recipe promised to be hard drying, firm, and pure white in color, so it sounded promising. Plus, it used one intriguing key ingredient that I have never used in a clay recipe before – Elmer’s School Glue!
 What You’ll Need:
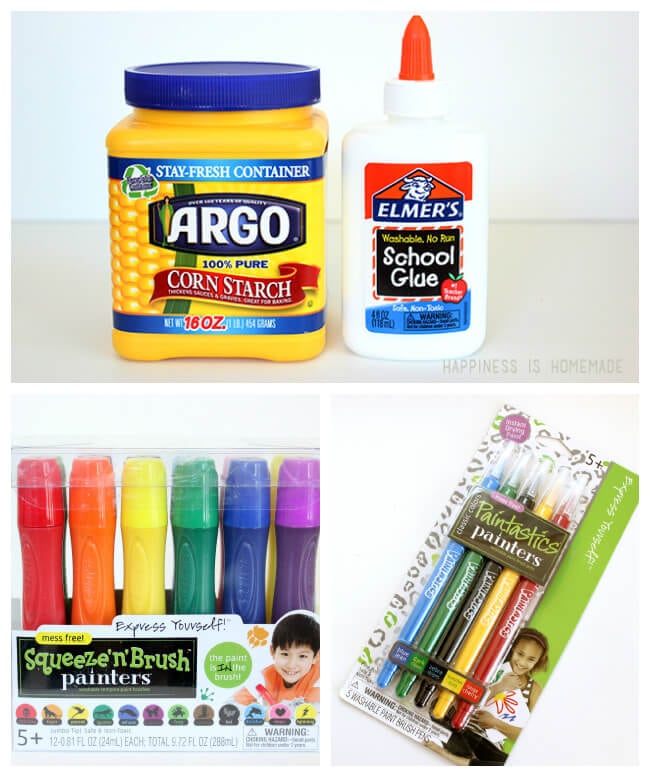
- 3/4 cup Elmer’s School Glue
- 1 cup cornstarch
- 2 tsp. baby oil
- 2 tsp. lemon juice
For decorating our finished pieces, we used Squeeze ‘n’ Brush Painters and Paintastics Painters from Elmer’s, and my boys loved them!
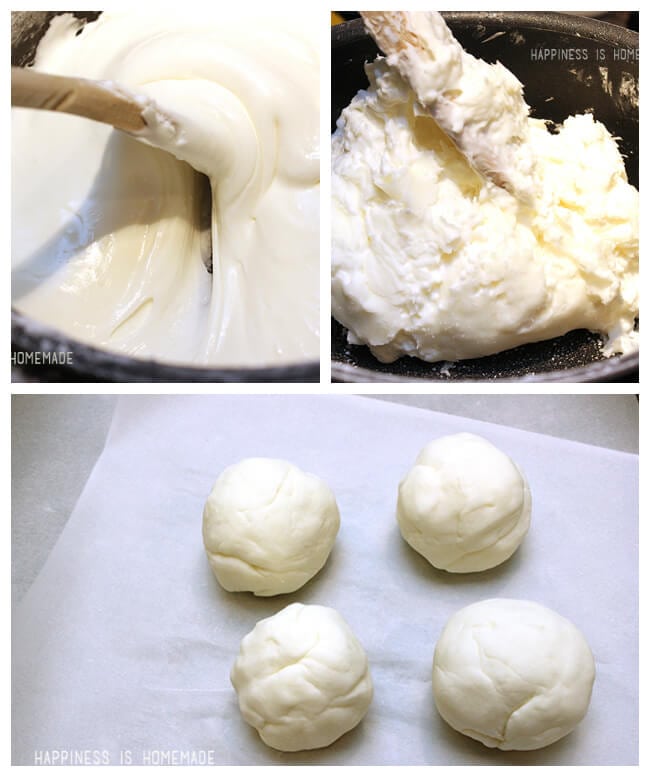 Combine all four ingredients into a saucepan, and heat over low-medium heat, stirring constantly. After about 5-10 minutes the consistency will change from a liquid to a semi-solid that resembles mashed potatoes. Remove from heat, and knead the clay for 2-3 minutes. It’s best to knead the clay when it’s still hot, but be careful not to burn yourself! Use immediately or store in a plastic bag in the refrigerator until needed.
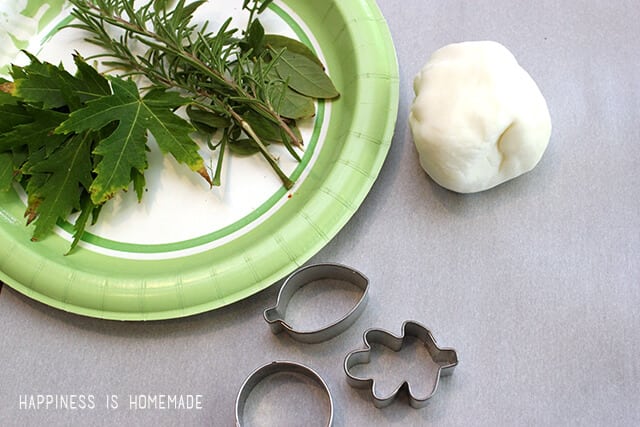 To make leaf impressions, gather some small leaves, a rolling pin and small cookie cutters.
 Roll out a slab of clay about 1/4 thick. Place the leaves on to the clay and roll again until the slab is about 1/8″ thick.
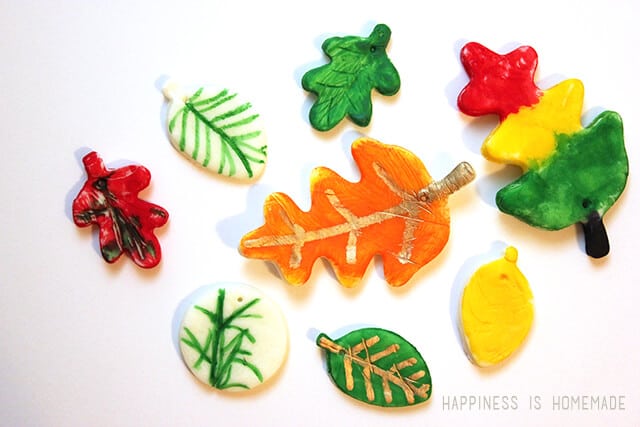
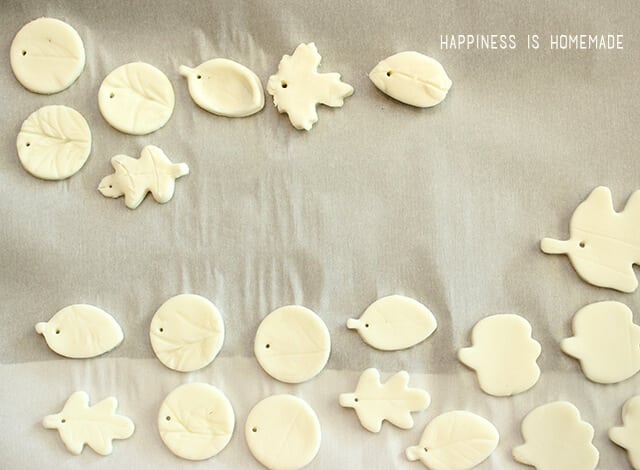 Use the cookie cutters to cut out small shapes, and use a toothpick to poke a small hole in the object if you’re planning on using it for jewelry or hanging. Allow to dry completely for 2-3 days. I test dried a small batch in our oven, and baked the pieces at 175 degrees for 2 hours before allowing them to continue drying at room temperature overnight. It worked like a charm! This clay recipe lived up to ALL of its promises – hard drying, solid, and sturdy. I’m seriously NEVER buying store bought air drying clay again. This stuff was incredible!
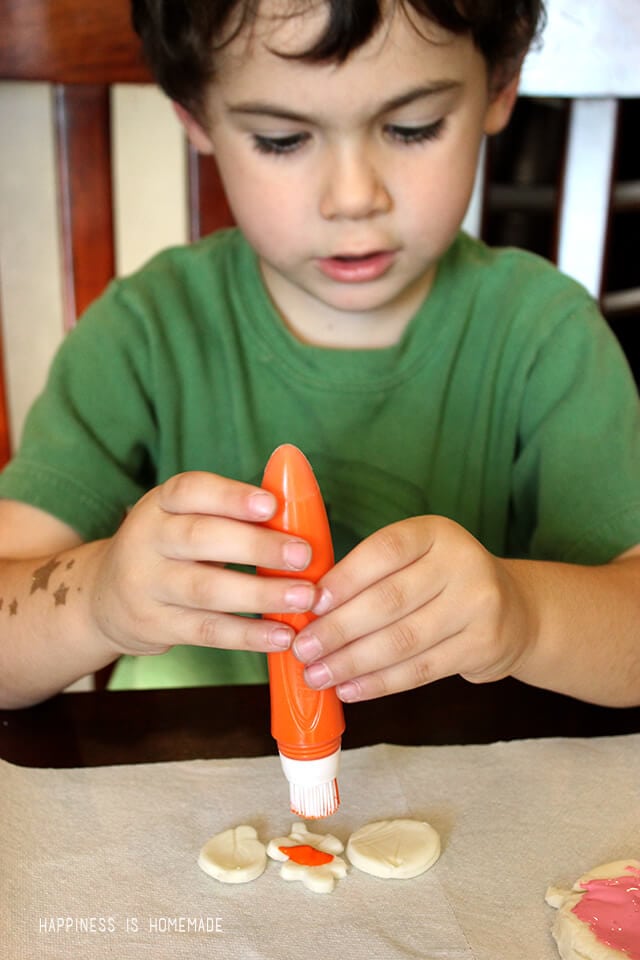 Once the pieces were dry, it was time to decorate them. Simon tested out these fun new Squeeze ‘n’ Brush painters, and he really liked them a lot. Simply squeeze a little bit of paint from the tube down into the plastic bristles, and start painting. Easy peasy!
 I was pleasantly surprised at how well these worked, and I love the fact that the tubes are refillable!
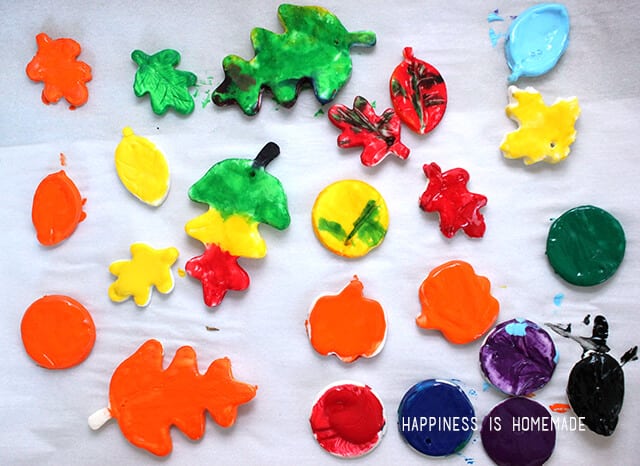 Simon was having such a great time with his Painters that we allowed him to paint the majority of the leaves. He was a little heavy handed with his paint, so quite a few of them ended up as bright and colorful fall shapes instead of delicate leaf impressions that we had started with.
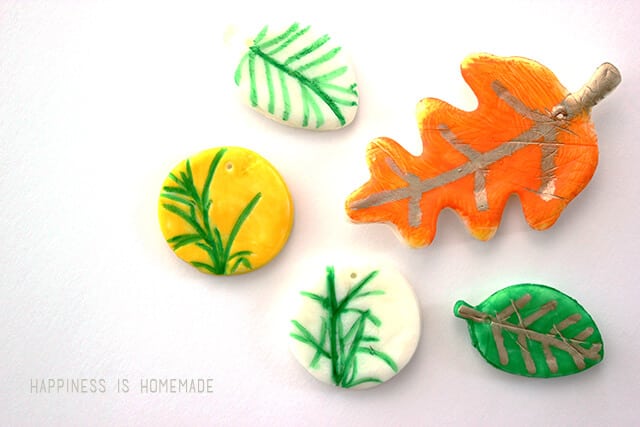 Sutton preferred to use the Paintastic Painters on his pieces, however, and the soft brush markers really brought out a lot of the leaf imprint details. As the finishing touch, a gold Painter added a little bit of extra detail and shimmer.
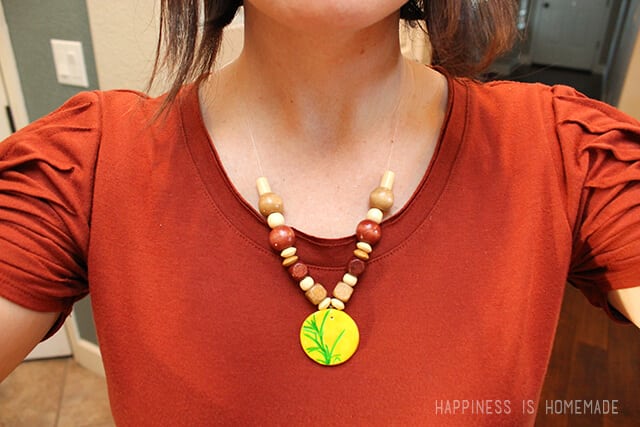 We turned some of our leaves into necklaces, and some will become magnets and seasonal decorations for our autumn nature table. The boys had a ton of fun with this homemade polymer clay recipe, and I can’t wait to make another batch to use for some of my own projects. I have about a dozen totally awesome holiday ideas floating around in my head that I’m dying to create now!
For more fun craft ideas, be sure to sign up for the Elmer’s Newsletter and check them out on Twitter, Facebook, Instagram & Pinterest! Happy crafting!

Heidi Kundin has captivated the hearts of millions with her colorful and inspiring approach to crafting, celebrations, and family fun. With over 15 years of experience, Happiness is Homemade has become a must-visit destination for those seeking quick and easy creative ideas and last-minute solutions. Heidi’s warm personality shines through her posts, inviting readers to join her on a creative journey that’s fun, rewarding, and achievable. Heidi is also the author of Homemade Bath Bombs & More and DIY Tie-Dye.
I want to make beads, not flat items.when I rolled the mixture into balls, as they dried they collapsed, so round flat thick shapes. Any ideas ? Thanks
Try making your beads around a toothpick or small straw. This works for other clays, too. Hope this helps.
tried your recipe it great. if your plan on selling your creation use poly urethane . and for the person that want to submerge them use 10 coats of poly than they will be protected. and if it dries out some use body lotion it help you complete your project.
Can this be used for small bowls, such as ring dishes? Some of the other homemade clays are too soft.
Absolutely!
Does this crack while drying? If so how do I stop it from cracking during the drying process??? I’ve tried several recipes and all of them seem to crack while drying!!!
I haven’t had any issues with cracking. 🙂
does your clay need to be used right away? how long can it be stored and still be usable?
How would this stuff react if, once completely dry, submursed im water? Thinking of aquarium decorations?
Thanks for asking, Irene. Unfortunately, the designs will not hold up if submerged in water. They become mushy if they are exposed to standing water for a length of time.
I can’t seem to get a reply about this no matter where I ask so I’m going to ask here as well…
I’ve tried this clay over and over again and I think its great but I have problems with it drying out before I can finish my creation can you help me please?
i tested this, I put it in an air tight container and put it in the refrigerator and it kept for a week at least.
I’d like to use this recipe to make Christmas ornaments with my kids. After its completely dry and painted, would you suggest a clear coat of sealant of some kind to protect them?
I usually spray mine with a quick coat of spray varnish. 🙂
I’m just wondering what you mean by “spray varnish”. What kind of varnish? Thanks muchly,
Jane, Quantum Universe of Brightonia
Hey! I love the recipe and I can’t wait to try it. About how much clay does this recipe make? And is it truly air-dry? I noticed in your post, you said you baked it. I would need something purely air dry for my purposes. Thanks!
Hi Jenny! The clay does air dry, but it takes 2-3 days to dry completely. Drying them in the oven just helps to speed up the process! 🙂 This recipe makes about 1.5 – 2 cups of clay.
I don’t have baby oil, would coconut oil be a good replacement?
I have never tried any substitutions, so I’m not sure how it would turn out. If you try, let me know! 🙂
alright! trying it now!
It worked out just fine! It was my first time making clay so I was only able to salvage a little, but it works just fine, also another good alternative would be cooking oil.
So glad it worked out! Thanks for letting me know! 🙂
Hello.
This is so cool. Can you die the clay with food coloring?
I have never actually tried to color the clay, Loretta, but I would imagine that it would work. If you try it, let me know how it works out! 🙂
How sturdy is it over time? Can it withstand getting wet? I am making saddle charms and I can’t find beads are charms in shapes I want so I am looking to make some. But it has to be a material that can withstand heat and most importantly being in the rain!
Hi Sam, the pieces are very firm and sturdy, but I do not recommend getting them wet as they are made from water soluble ingredients, so I suspect that they may break down with excessive water exposure.