
Last month I asked you this question on Facebook – Which DIY farmhouse table do you prefer, A or B?
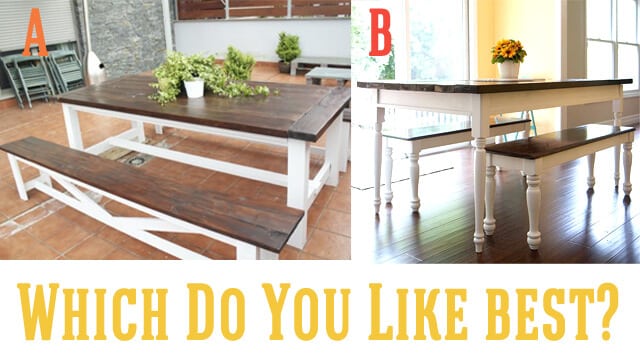 (A is from A Little Bite of Everything and B is from I Heart Nap Time.)
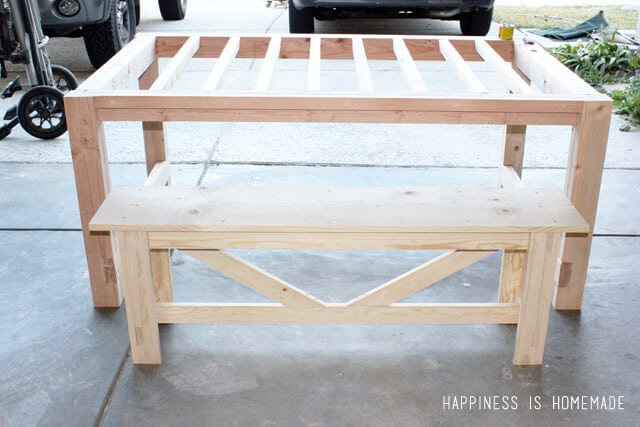
Turns out, y’all LOVE to share your opinions! Table A won by a landslide since we mentioned that it would be residing in our homeschool room. According to the responses, it appears to be much sturdier and kid friendly…BUT, as a few people pointed out, the benches in the original plans were too wide to slide underneath the table. Luckily that’s a quick and easy fix, so we modified both the table and bench dimensions to fit our space before we moved forward with building Table A, the Rustic Farmhouse Table and Rustic X Bench from Ana White.
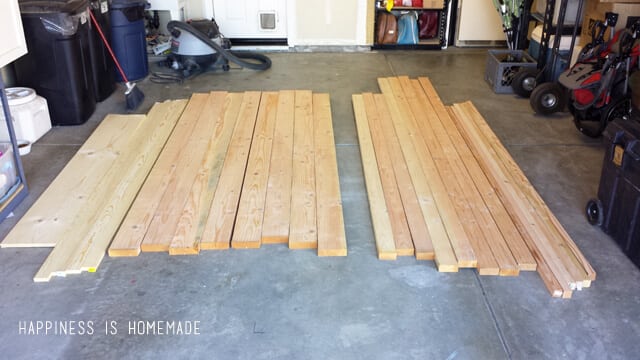 The supplies are really basic, so it isn’t expensive to build (around $100), but it does take some time. There’s a lot of precise notching that needs to happen where the leg pieces join together, but once you get over that part it comes together really quickly.
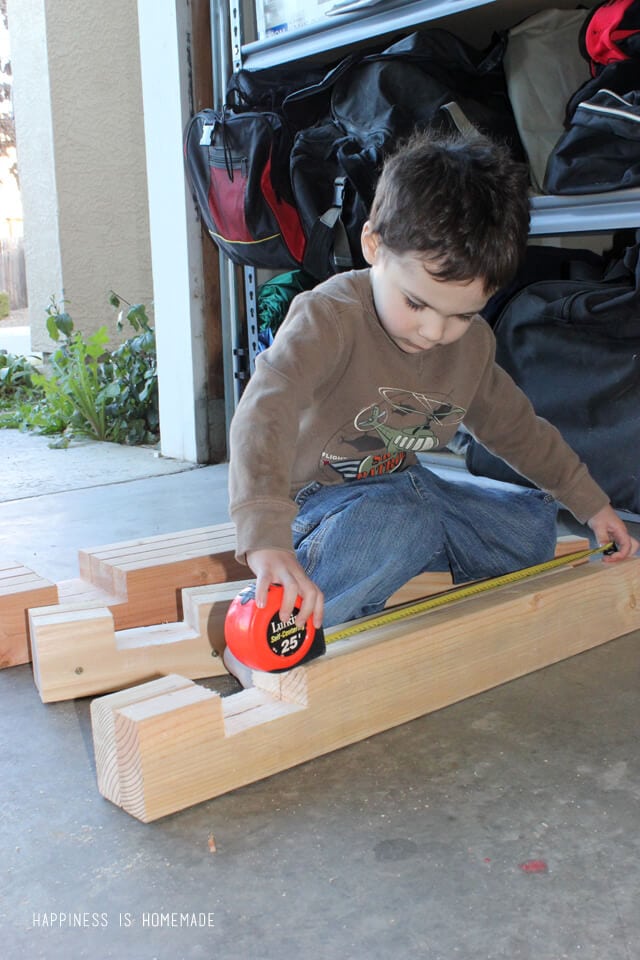 Luckily we had a notch expert on hand to help out 😉

 The entire table and bench construction took about six hours, but I should probably mention that there was playoff football on in the garage the entire time, so I’m not sure exactly how much time it normally takes if you’re giving the table your full attention.
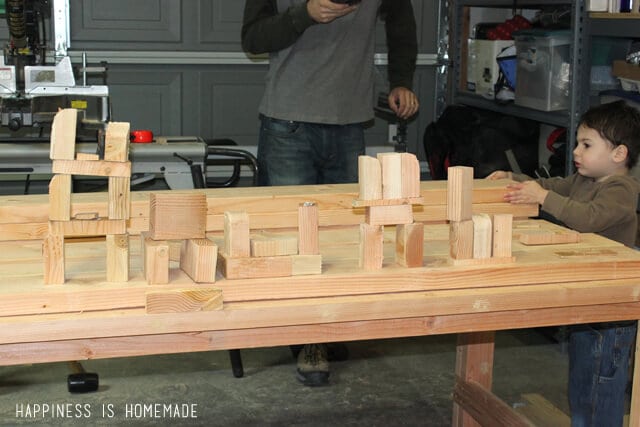 There was a lot of extra “help” too.
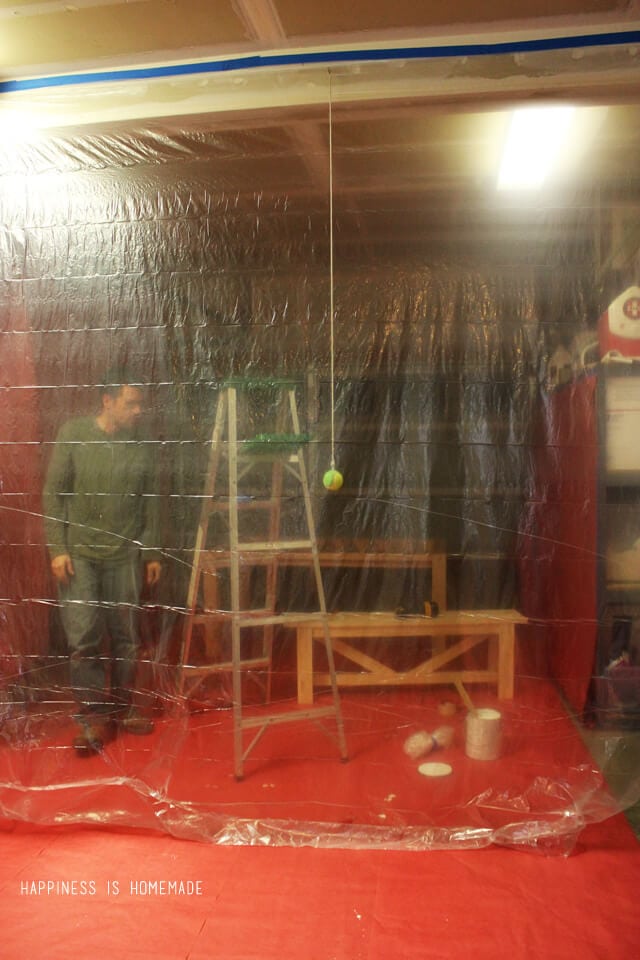 After the table frame and the bench were complete, we laid out some paper, hung some plastic, and built a makeshift paint booth in our garage so that I could use my newest toy – the HomeRight Finish Max Fine Finish Paint Sprayer.
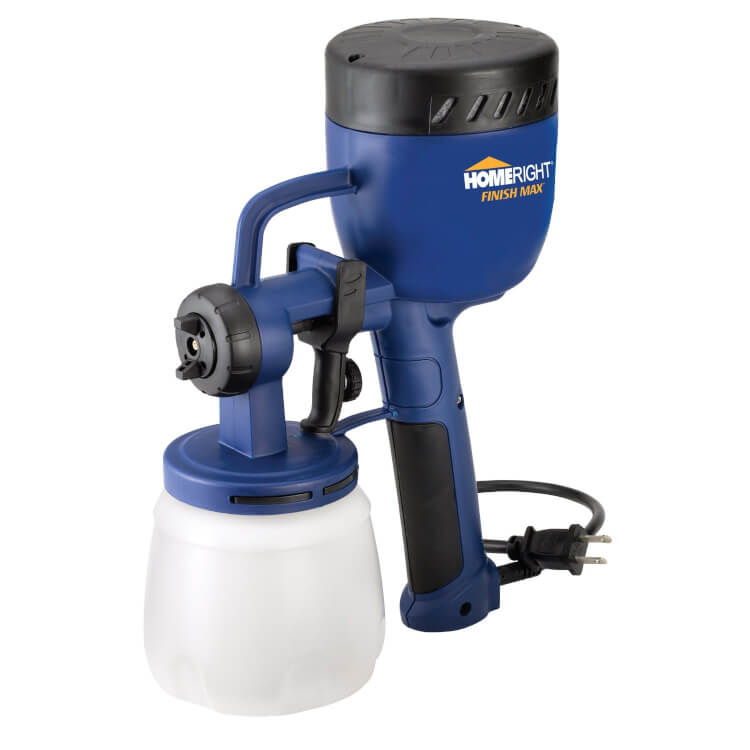 HomeRight sent me this little powerhouse to try out a couple of months ago, but we were so wrapped up in the hustle and bustle of the holidays that I just finally had the chance to use it! Let me tell you, it did NOT disappoint!
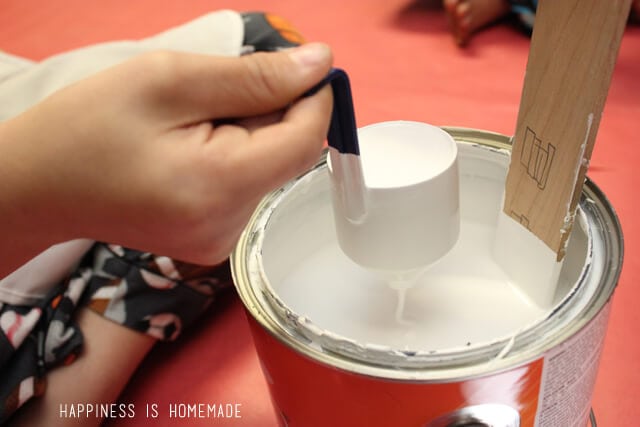 The first step was to thin the paint until it was the correct consistency for the sprayer. We used a water based paint, so I just added a small amount of water and stirred well before testing. Using the included flow cup and a timer, we were able to find the perfect balance with ease, and my older boys had a blast helping with this step.
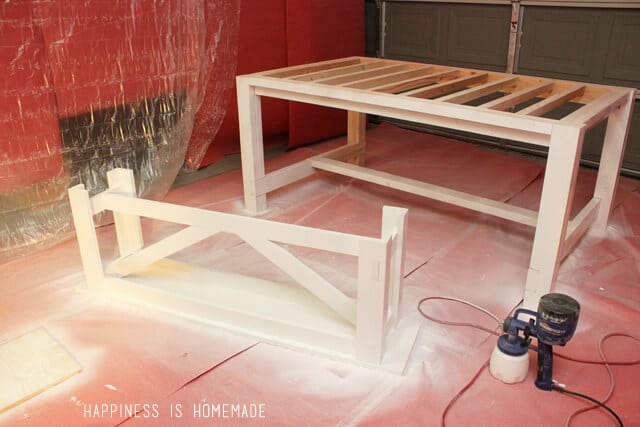 Normally I would have painted the table outdoors where I have proper ventilation and don’t have to worry about any messes, but it was a cold and rainy evening, and we were in a hurry to get our homeschool room set up. The plastic and paper that we hung worked great, but I highly suggest using a painting respirator mask if you go the paint booth route because there will definitely be lots of paint dust floating in the air. As you can see though, there’s really not a lot of overspray by the HomeRight Finish Max at all!
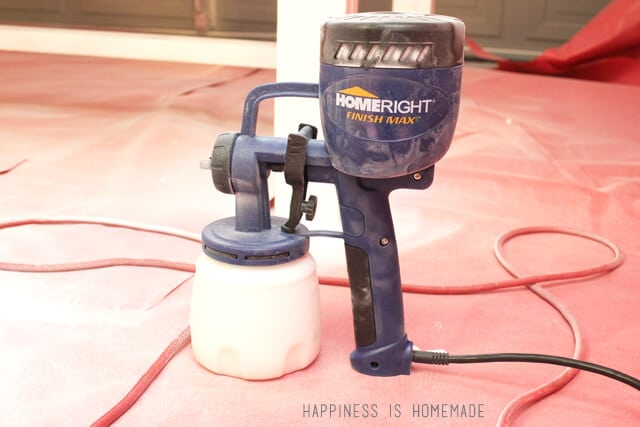 I am in LOVE with the Finish Max! I have used paint sprayers in the past, and they’ve always had to be hooked up to our small air compressor which is both loud and obnoxious when you run out of pressure mid-spray. The HomeRight Finish Max is electric, so there’s no need to start and stop in the middle of your project (love, love, LOVE!). The nozzle has 3 adjustable spray patterns and the pressure and paint flow is completely adjustable. I was able to paint the entire table and bench in about 15 minutes! Did I mention how much I love this tool? I have BIG plans to paint
 everything a few more furniture pieces soon too.
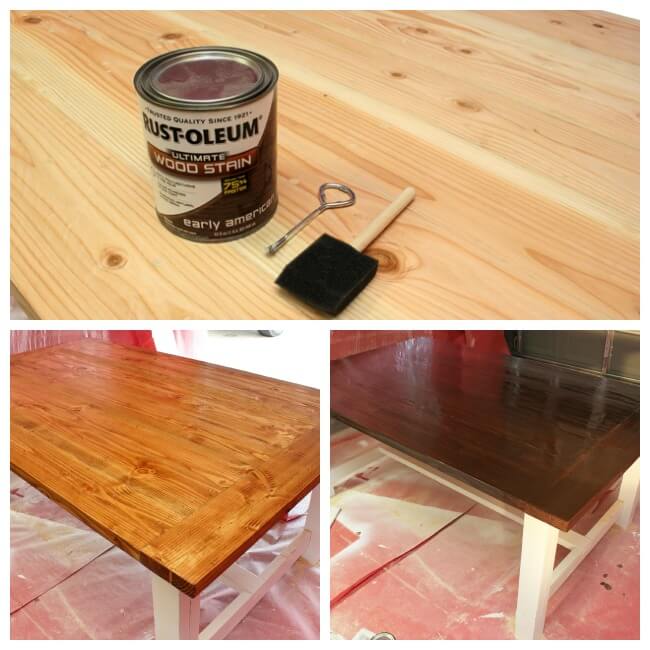 After the frame was dry, Mitch attached the top planks and used a planer to smooth everything down. He filled all of the screw holes and cracks and then sanded it with a belt sander until it was ultra smooth. I stained the top first with Rust-Oleum Ultimate Wood Stain in Early American, but it was way too light for my taste, so I topped it with a quick coat of Kona, and it came out exactly the way I was dreaming about. Seriously, the Rust-Oleum Ultimate Wood Stain is amazing. It dries in only an hour and only takes one coat (if you choose the right color, ha!), so it’s the most painless staining process ever.
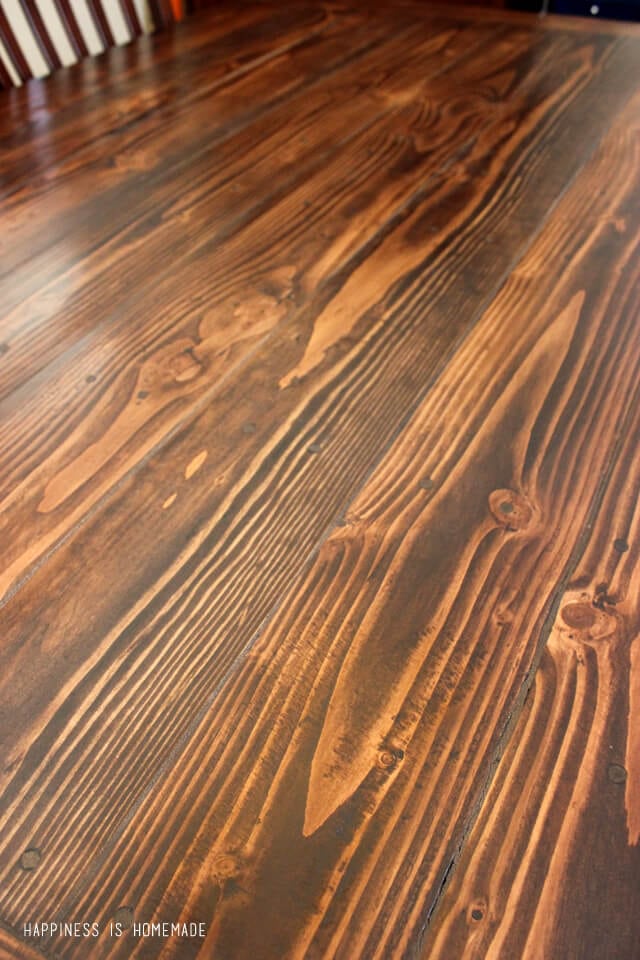 Isn’t that wood grain gorgeous? I gave the entire top a double coat of satin poly to finish it up, and then it was time to turn my attention to the bench seat.
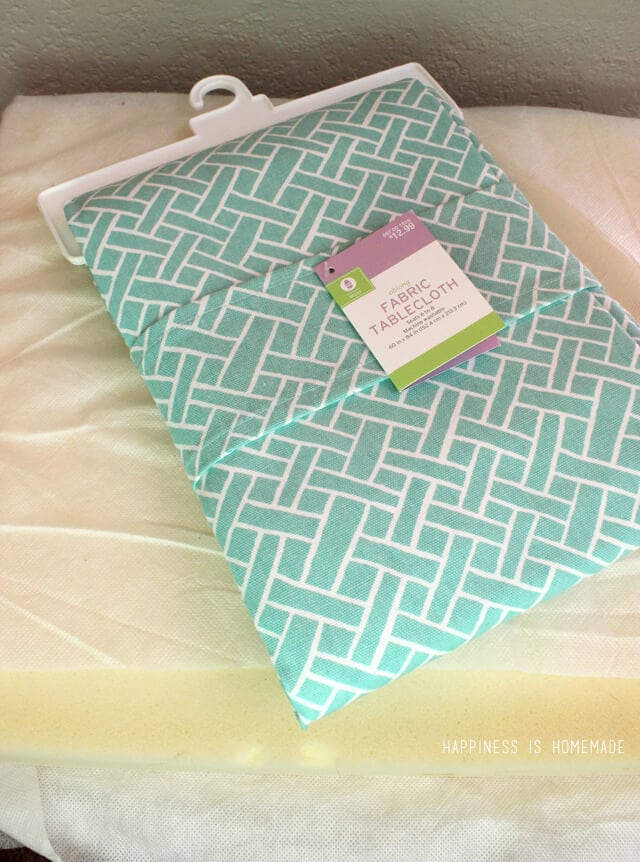 My boys will be sitting on the bench for extended lengths of time as we do our schoolwork at the table, so I knew that I wanted to pad and upholster the bench. I’m also really
 cheap thrifty, so after wasting an entire day shopping for foam and fabric (and finding nothing that I loved), I came home and decided to use some old foam chair pads and a tablecloth that I already had on hand.
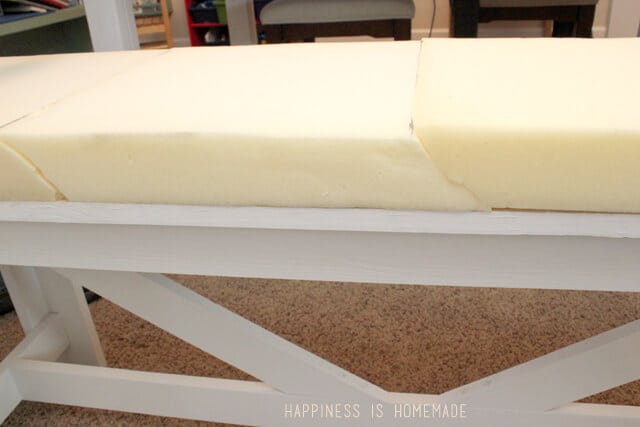 My husband suggested that we cut the foam pads on a 45 degree angle to minimize the appearance of individual foam pads underneath the fabric (so it doesn’t look bunchy, dimply or lumpy). He cut the pads for me, and then I sprayed adhesive on to the back sides and stuck them in place on the bench top. Wrap the fabric tightly, staple and voila!
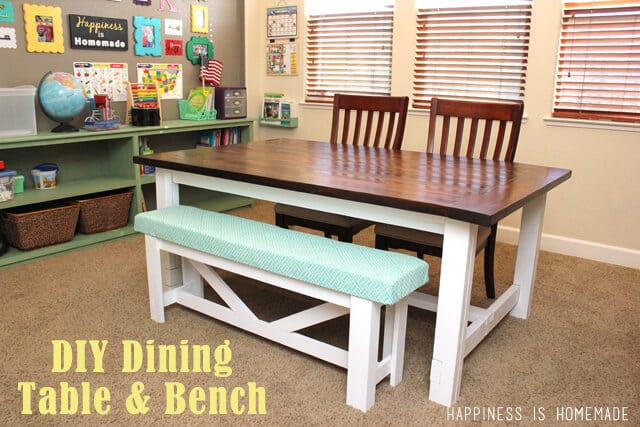
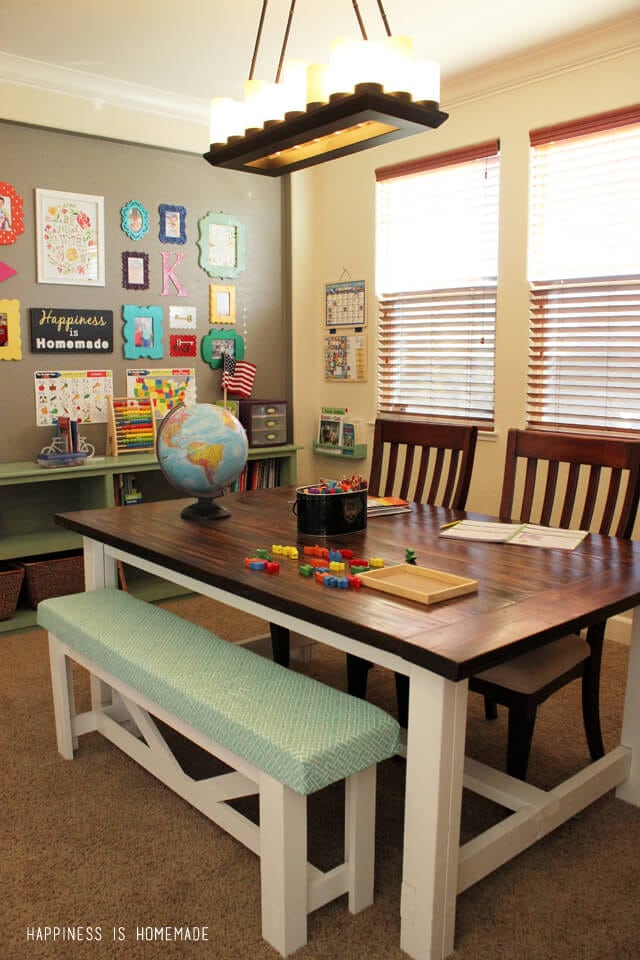
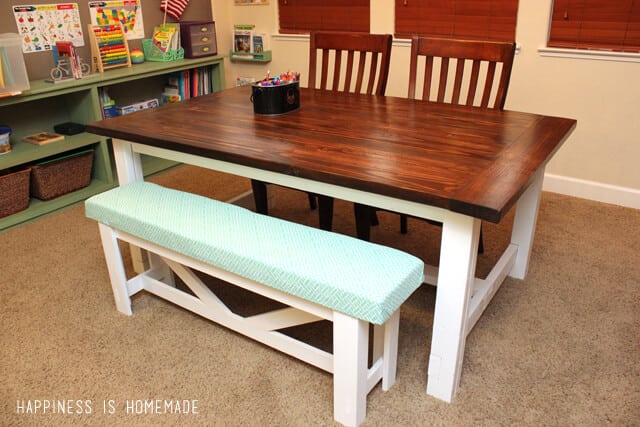 At home in the school room and ready for learning time! Those two chairs are from my dining room set, and they’re HUGE, so I’m hoping to find 2-3 smaller mismatched chairs that I can paint a fun color instead.
 If you want a really sleek look to the legs, you can always use wood putty to fill all of the notched areas where the pieces join, but I personally like the hand-crafted look with a bit of the construction detail showing. Besides, this is my homeschool table…it’s bound to get pretty beat up anyway as we spend a ton of time at it over the next few months (such is the nature of a rustic farmhouse table!).
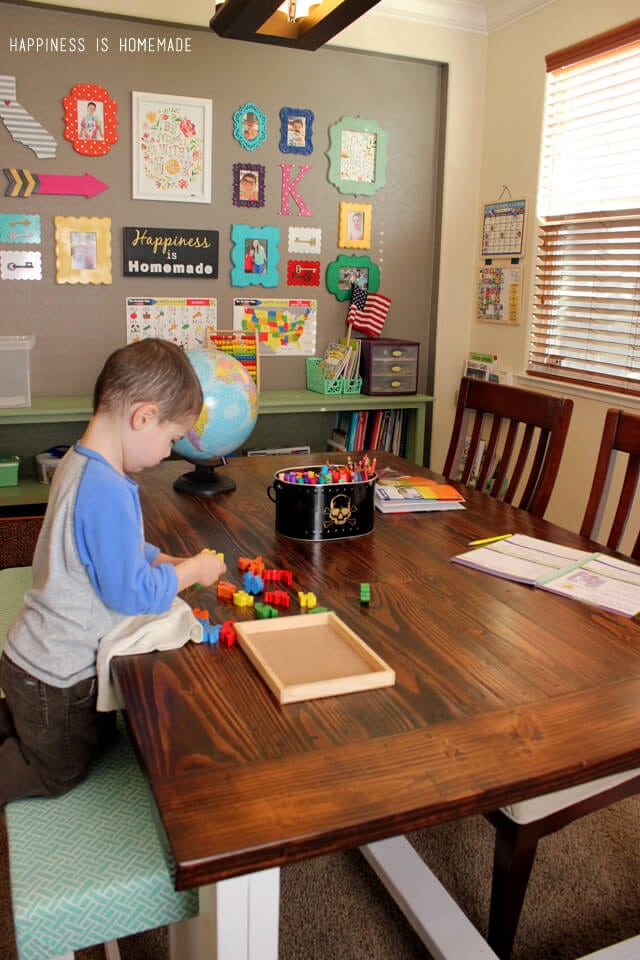 Most of the time it’s covered in books and puzzles anyway these days. The kids love it, and so far it’s been working really well for our schooling. I’m glad that we decided on using a bench on one side and chairs on the other because it’s working out perfectly for us. The chairs are great for one-on-one lessons, and the bench is fantastic when they’re all working on a project or assignment together.
 Next up, painting the living room (with another fun tool from HomeRight!) so that we can relocate the colorful gallery wall (*sniff, sniff!*) to make room for our maps, charts, and a large dry erase board. Stay tuned!


Heidi Kundin has captivated the hearts of millions with her colorful and inspiring approach to crafting, celebrations, and family fun. With over 15 years of experience, Happiness is Homemade has become a must-visit destination for those seeking quick and easy creative ideas and last-minute solutions. Heidi’s warm personality shines through her posts, inviting readers to join her on a creative journey that’s fun, rewarding, and achievable. Heidi is also the author of Homemade Bath Bombs & More and DIY Tie-Dye.
Is there somewhere that gives the measurements of wood and instructions for this project. Would love to have it. Thanks.
Hi Heidi, Just want to say thank you for this awesome DIY farmhouse table bench. I followed all the instructions and made my own farmhouse table bench. Can I send it to you via email? I’m so excited for you too see it. Thanks for the inspiration.
Great table! We’re looking to build a table to use for school. Were you able to get the table top completely smooth?
Thank you!
We did get the top completely smooth, Tracey! My husband has a planer, so we filled the cracks, planed it and then sanded it until it was completely smooth. 🙂
I LOVE your light fixture over the table, do you recall where you bought it?
We got it at Lowe’s! 🙂
Awesome, I’m feeling great to read your blog. Your blog is looking beautiful with the dnap shots of the table and bench. I like the table A, because it is looking great with the color and design compare to table B. And your shared making of table at home. That would be helpful for everyone to make it easily at home. I’d like to say thanks for sharing such a nice post through your blog.
The table and bench look great! Thanks for trying the Finish Max Sprayer on this project. We are glad that you liked using it.
Laura Clark
HomeRight