
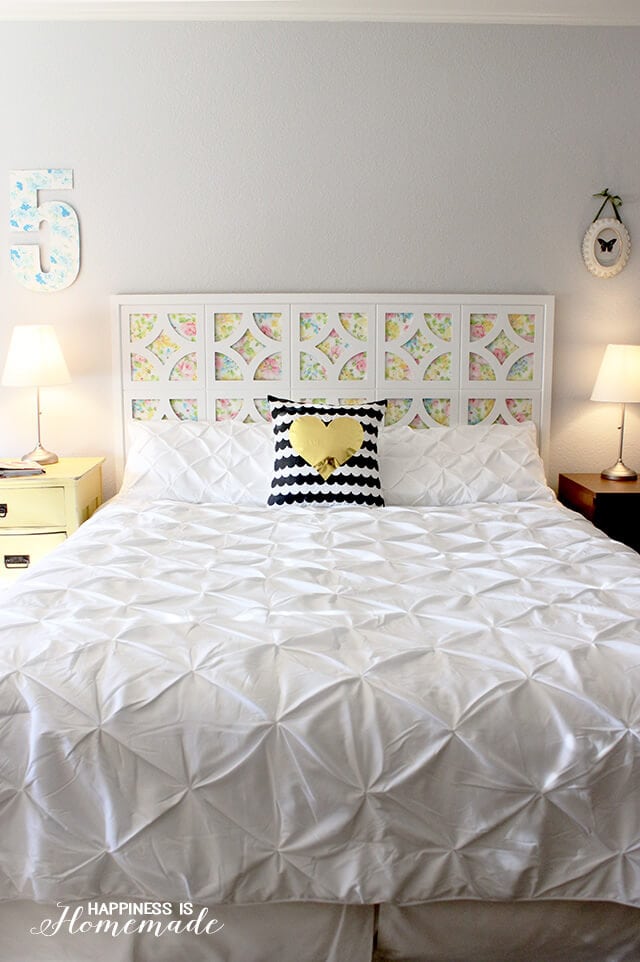
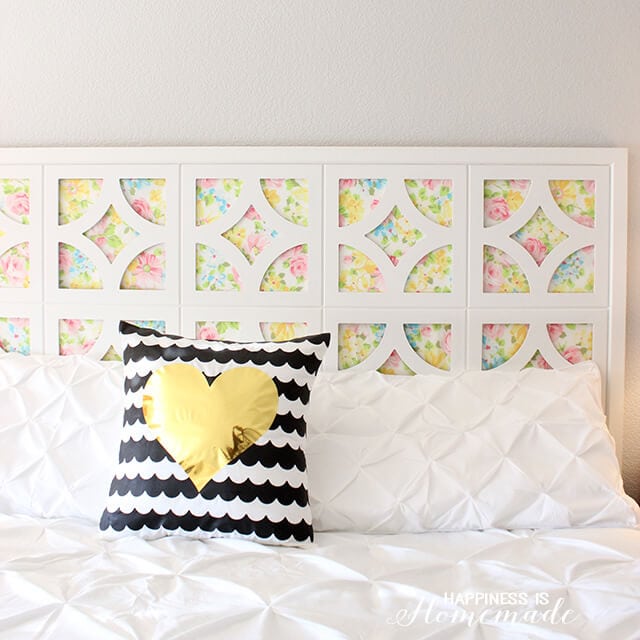
When I first saw these awesome 14″ square wall art pieces from Cut It Out, I couldn’t wait to get my hands on them! I think they’d look incredible as a large mirror or art piece, but I had even bigger plans for them – a headboard! A DIY vintage sheet headboard, to be specific.
 The face of the cut outs are smooth MDF, and the back side has an indentation that’s perfect for housing a 12″ x 12″ mirror/decorative paper/photos along with a keyhole for hanging.
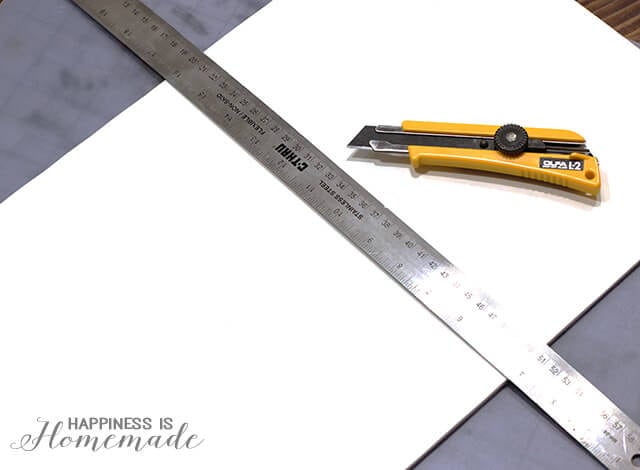
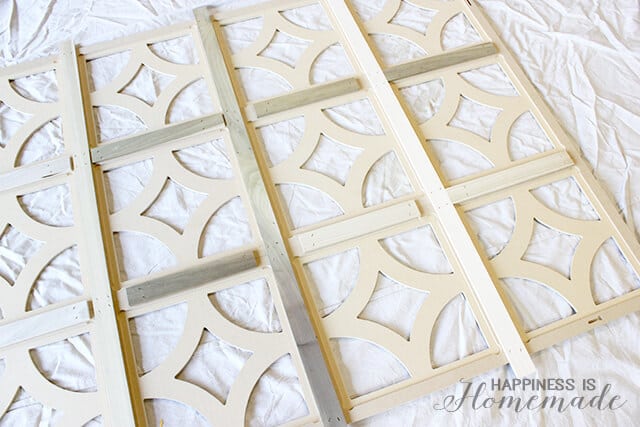 To make our headboard, I laid out 15 of the squares in a 3×5 pattern, and used .25″ x 1.5″ strips of wood to attach them all together. I could have made this project a zillion times easier by using my nail gun to attach the frames directly to our wall, but I know that we are the World’s Most Indecisive Couple (especially when it comes to bedroom decor!). By making the smaller frames into a single larger frame, we are able to easily change out the fabric/paper/etc. to switch up the look of our space as often as we like!
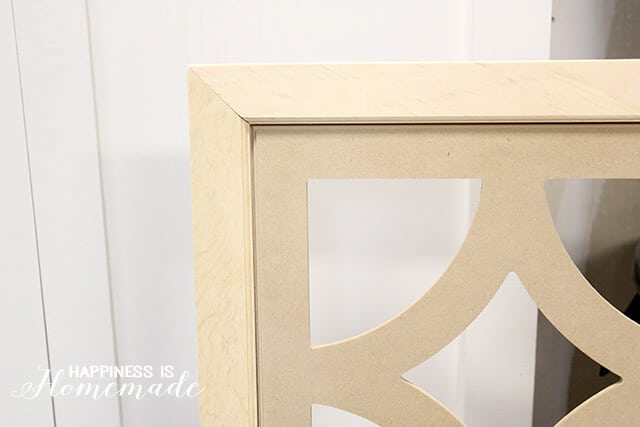 My husband routed the interior edge of some 1×2 wood pieces, and used them to frame out the entire headboard.
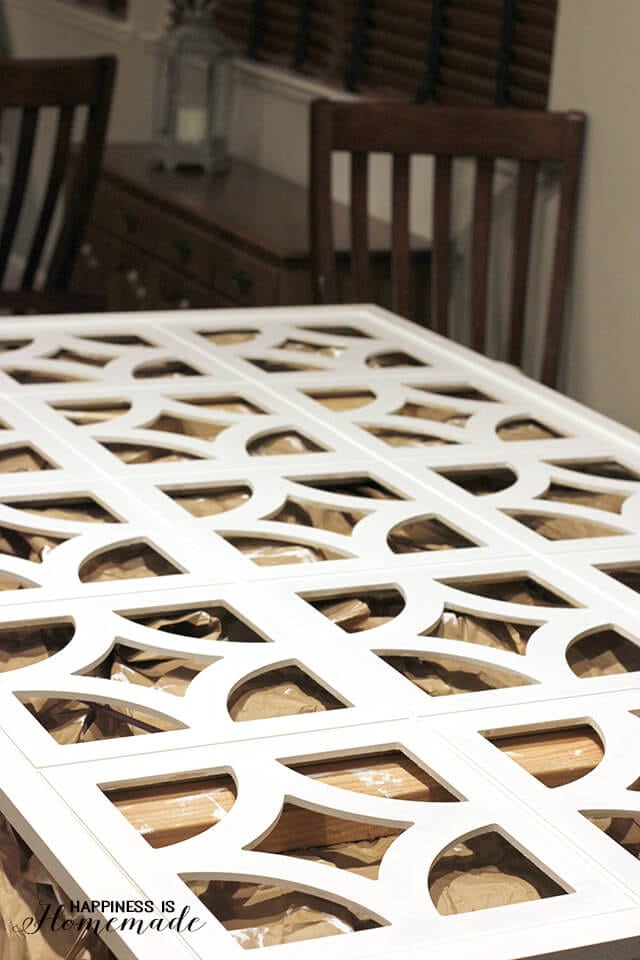 We painted the headboard with one coat of primer and three coats of white enamel cabinet paint. The MDF sucks up a lot of paint, so I highly recommend using a primer first!
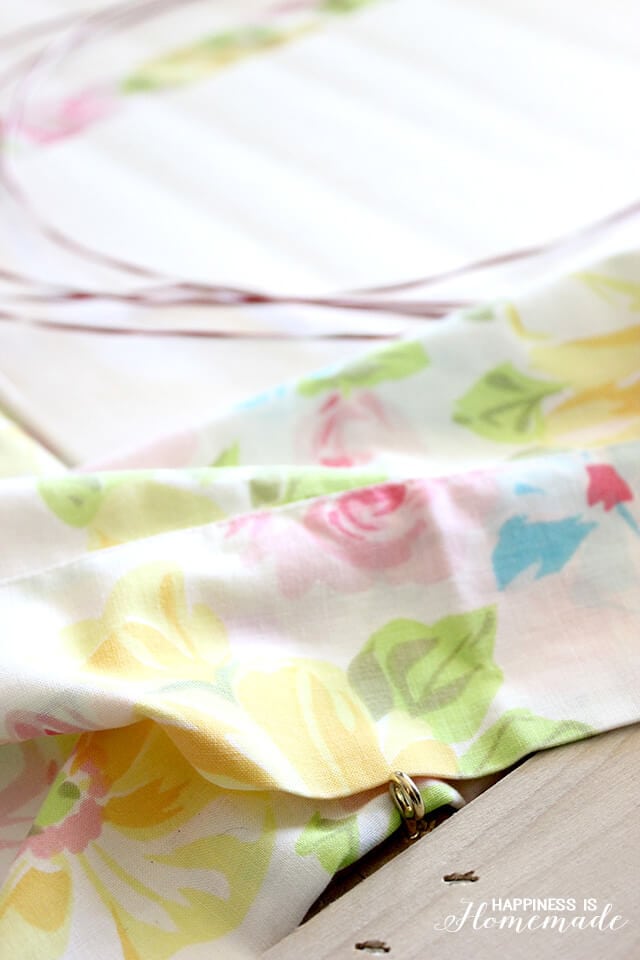
 I cut squares of white foam core to fit snugly inside of the openings in the back of the frames. I knew that I wanted to back my headboard with a vintage sheet, but I didn’t want to cut the sheet in case I want to use it for something else later.
 The foam squares hold the sheet in place against the front of each frame opening without having to cut the sheet. I laid the sheet across the back of the headboard, pressed the foam squares into place, and neatly folded the excess sheet around the edges, securing the folds with a few staples into the wood strips.
 Hanging the headboard with a couple of eye hooks and heavy picture wire (like a large art piece) allows for an easy quick-change if we ever decide to use something else inside of the frames.
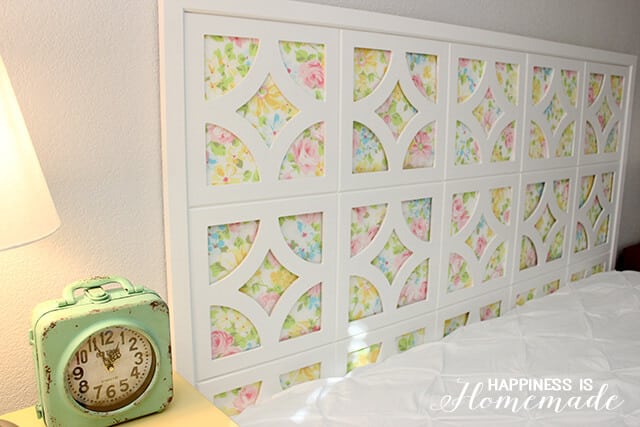 It looks even more awesome than I imagined it would!
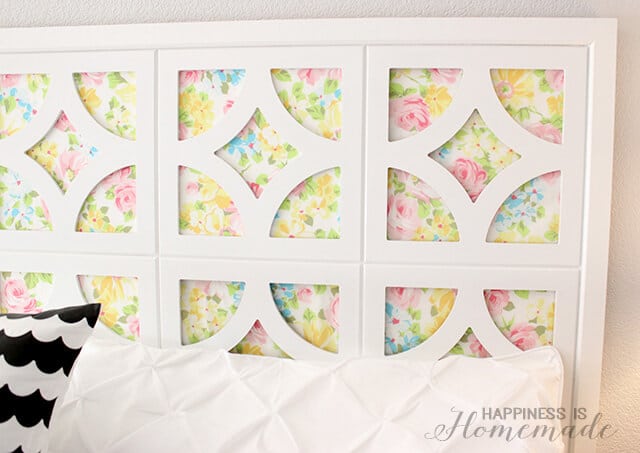 I’m in love! The vintage sheet headboard gives the space such a fresh and cheery new look!
 Our master bedroom is finally starting to come together! Next up, curtains and new artwork (oh, and try to find a new nightstand for my husband that better coordinates with my yellow one!).
Also in this room…
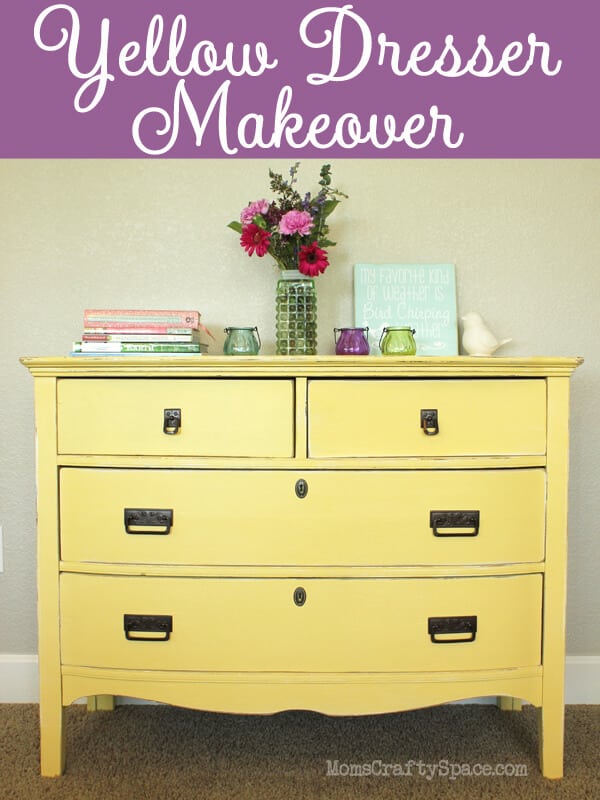 Yellow Vintage Dresser Makeover
A huge thank you to Cut It Out for providing me with the incredible wood cut out frames to make this headboard! ♥


Heidi Kundin has captivated the hearts of millions with her colorful and inspiring approach to crafting, celebrations, and family fun. With over 15 years of experience, Happiness is Homemade has become a must-visit destination for those seeking quick and easy creative ideas and last-minute solutions. Heidi’s warm personality shines through her posts, inviting readers to join her on a creative journey that’s fun, rewarding, and achievable. Heidi is also the author of Homemade Bath Bombs & More and DIY Tie-Dye.
Hello Heidi
Thanks for sharing your idea and your amazing creativity. You’re obviously a very generous person.
Well done!
Marie
Hi! Live this. I have been trying to find something I would like for a headboard. I cannot find where you purchase the wood cutouts.
Hi Paula, unfortunately, the company that made these cutouts is no longer in business. If you search “wood panel cutouts” on Etsy, however, there are several designs that are similar, and one of those sellers might be able to recreate this look for you! 🙂
Very gorgeous! Wish I could do myself but $13 X 15 = almost $200 and that’s just the cutouts! Still need nail gun, nails, framing & sheet! Not very price practical.
The cost can definitely add up, especially if you don’t already have the tools on hand; however, in comparison to some of the headboards sold in stores, this is still a great deal! The headboard that originally inspired this idea (seen here) is $600, and doesn’t even come in a king or Cal king size like we needed! 🙂
I LOVE this but did these cutouts actually cost you $13 a piece? Or am I looking at the wrong product?
Yes, the panels sell for $12.99 each. 🙂
Heidi what size is your bed I have been searching for a diy headboard for 2 1/2 yes and I love yours so I’m doing it my bed is a queen
Hi Krystal, our bed is a California King. 🙂
This is so cute!! <3
What a unique idea!! And so gorgeous. Love love love!!
(Also, your comforter is gorgeous, too. Where did you get it?)
Thanks so much, Veleska! I ordered the bedding from Amazon (Click here!). 🙂
Steph is right Heidi – This was brilliant. It is very pretty and cheery!
This is brilliant Heidi, and so pretty!
I’ve never seen anything like this before. It turned out just gorgeous! I love that you didn’t cut the sheet, so it could even be changed out when you want something new. Genius idea!
this is so beyond FABulous that I have no words! I love it & you did an amazing job! xoxo
I can’t believe you even thought of that headboard! I would never have – I LOVE it!
Such a cute and clever idea for a headboard! Would be so sweet in a little girl’s room!