
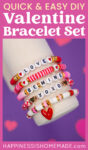


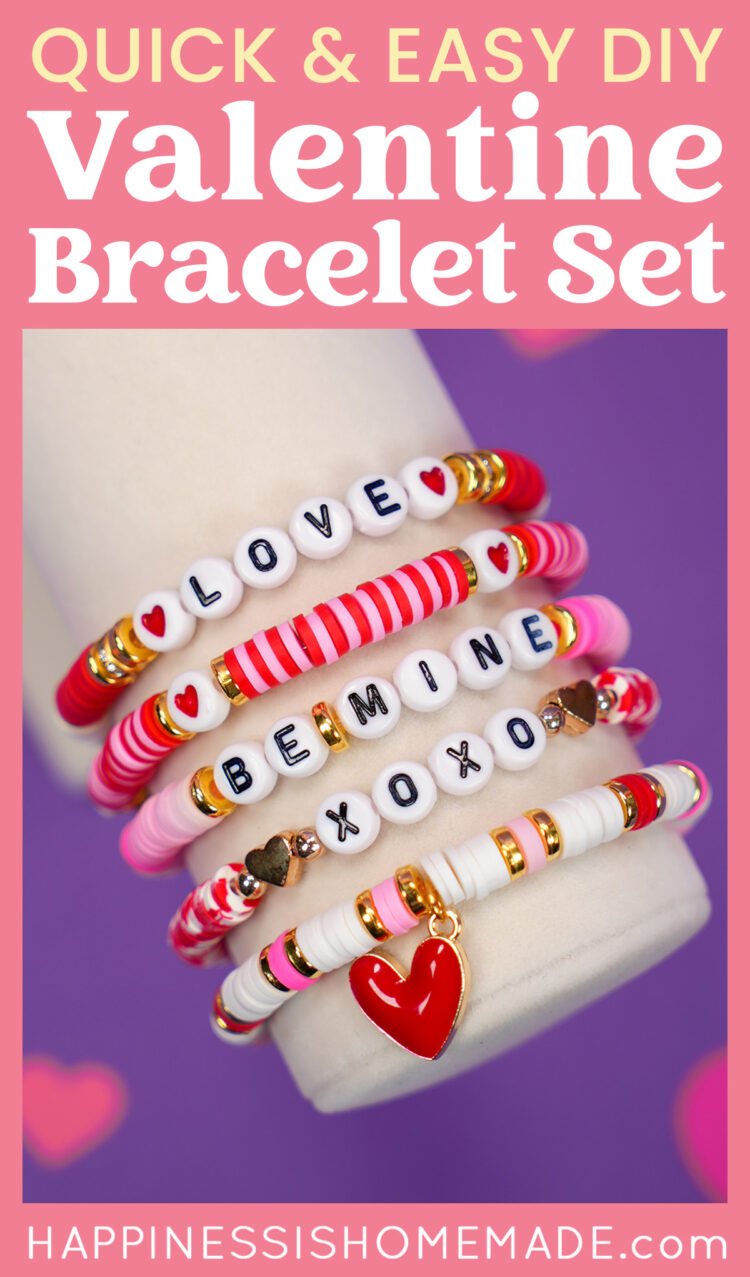
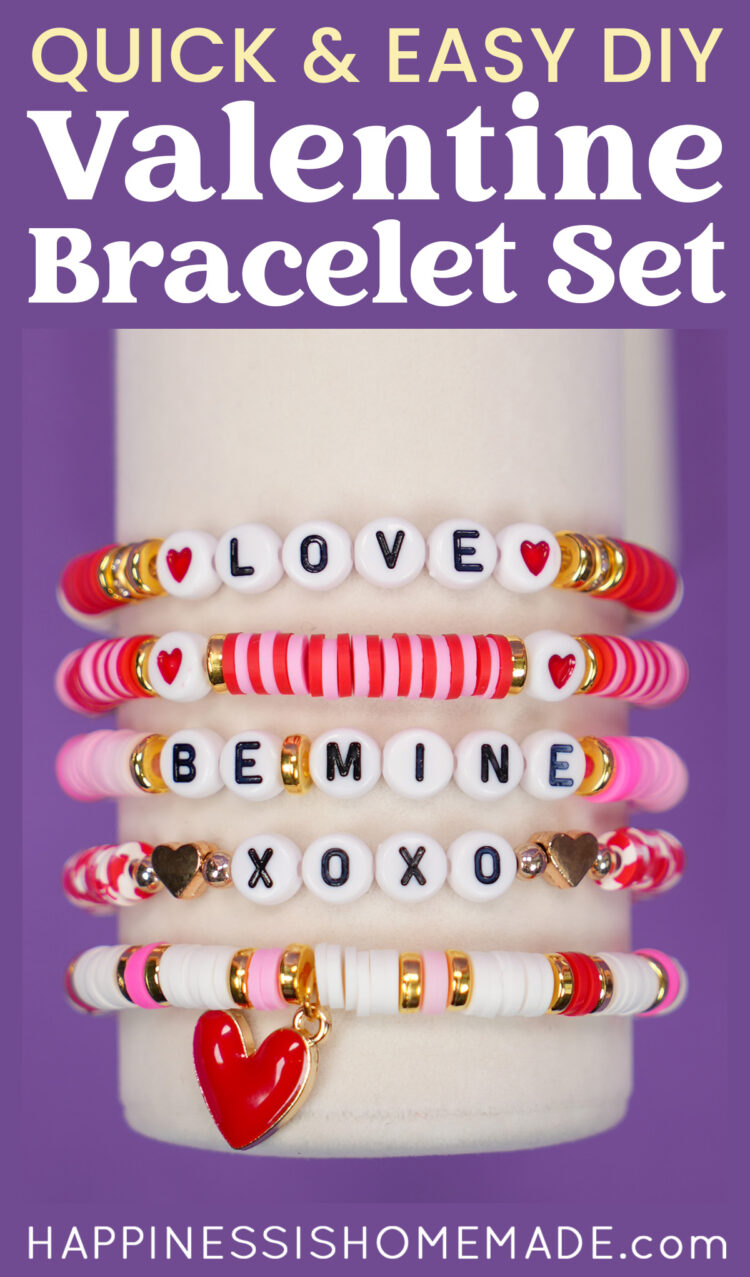
Craft these Easy DIY Valentine’s Day bracelets with our simple step-by-step guide! Learn how to make unique, DIY clay bead bracelets that are the perfect gift for your loved one this Valentine’s Day!
This post may contain affiliate links. I will receive a small commission from these sales at no additional cost to you!
Valentine’s Day is just around the corner, and what better way to show your love and affection than with a handcrafted gift? These clay bead DIY Valentine’s Day bracelets are the perfect gift idea! Not only do they make a fabulous gift, but they also add a special personal touch that commercial jewelry just can’t match.
Whether you’re gifting these Valentine bracelets to your family or friends or simply keeping a set for yourself, this cute jewelry set is sure to be a HUGE hit!
You May Also Like/Learn More Here:
DIY Valentine’s Day Bracelets
These clay bead Valentine’s Day bracelets don’t require many supplies, and they don’t take long to make! You will certainly end up wanting to make the whole set – it’s SO much fun, and no one can resist a wrist full of “arm candy!”

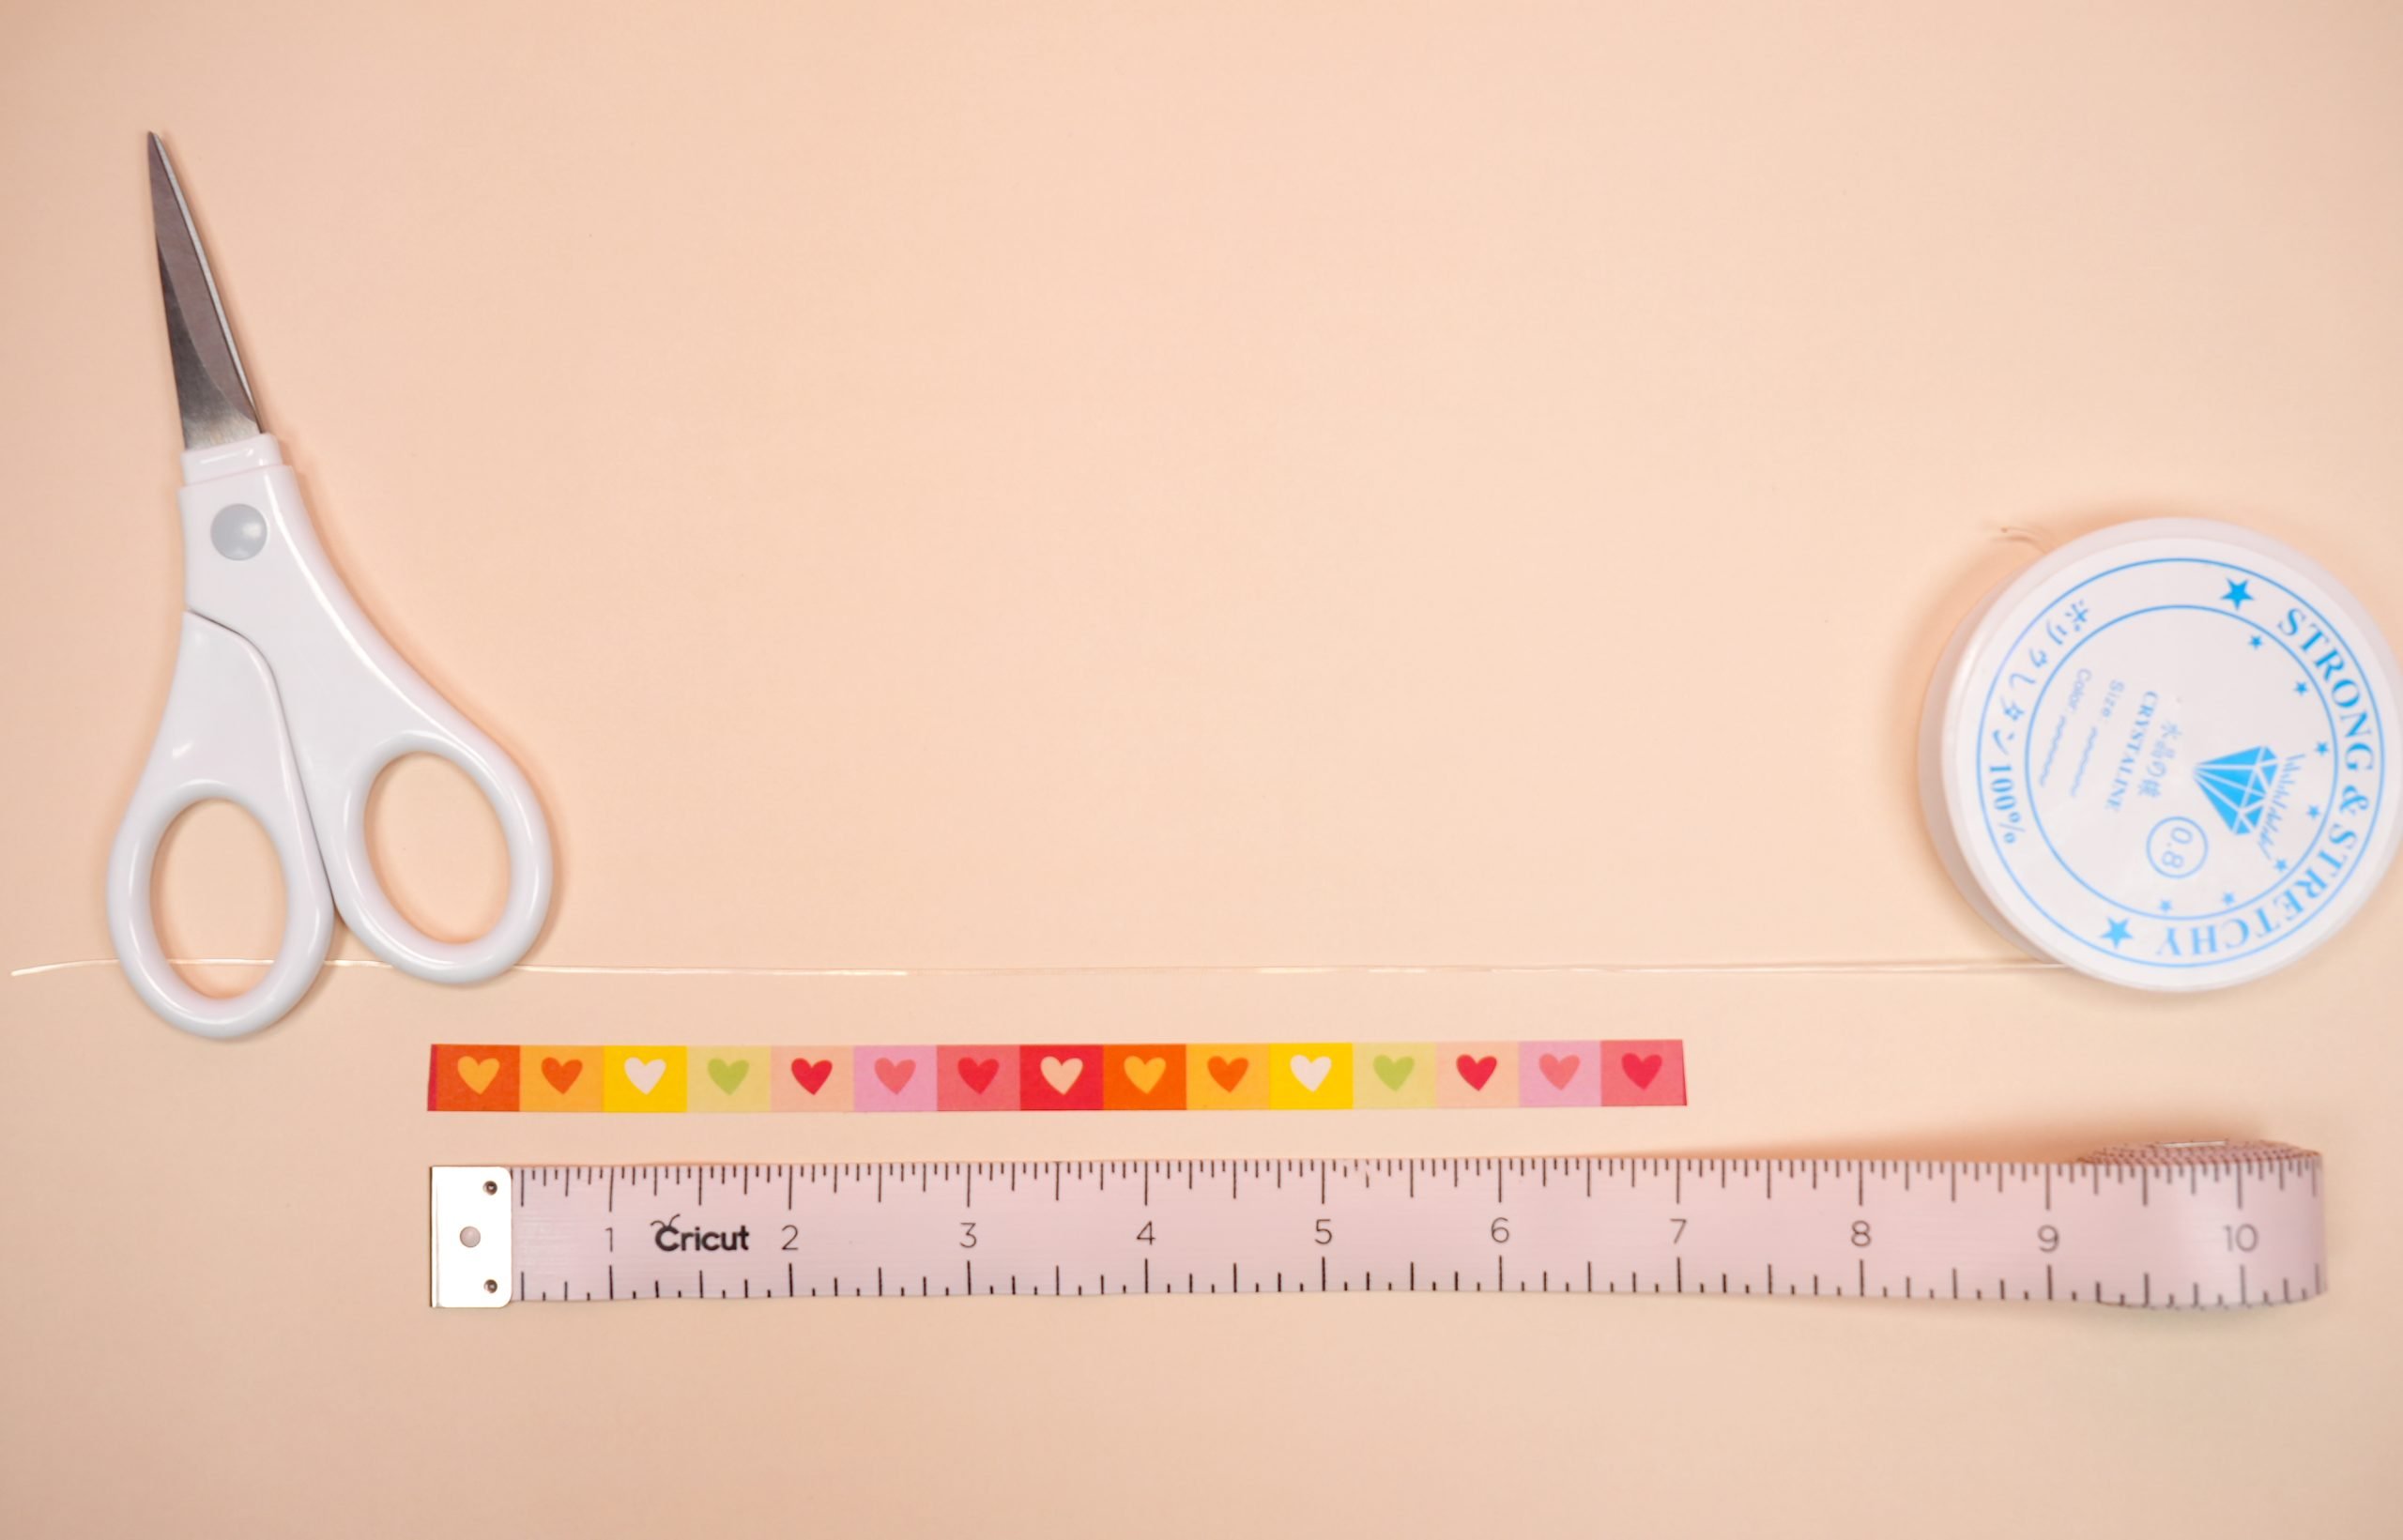
Craft Supplies Needed for Valentine Bracelets:
- Clay Beads (6mm) in assorted shades of red, pink, and white
- Elastic Beading Cord
- Washi Tape (Scotch Magic Tape also works well!)
- Assorted Gold Spacer Beads (you could also opt to use white gold, rose gold, or sterling silver if you prefer)
- Alphabet Letter Beads
- Heart Beads
- Enamel Heart Charms
- Super Glue Gel or GS Hypo Cement
How to Make Valentine’s Day Bracelets
1. Starting the Bracelet
To begin, cut a length of stretchy cord that is approximately 10″ long.
Heidi’s Handy Tip:
To make quick work of measuring, I like to add a piece of washi tape to my desk that is 7″ long, which is the length that I will make all of my beading. Simply extend the cord about 1.5″ from each end of the washi tape and then cut.
Grip the ends of the cord and pull to stretch. Pre-stretching the cord will allow you to tie tighter knots at the end!
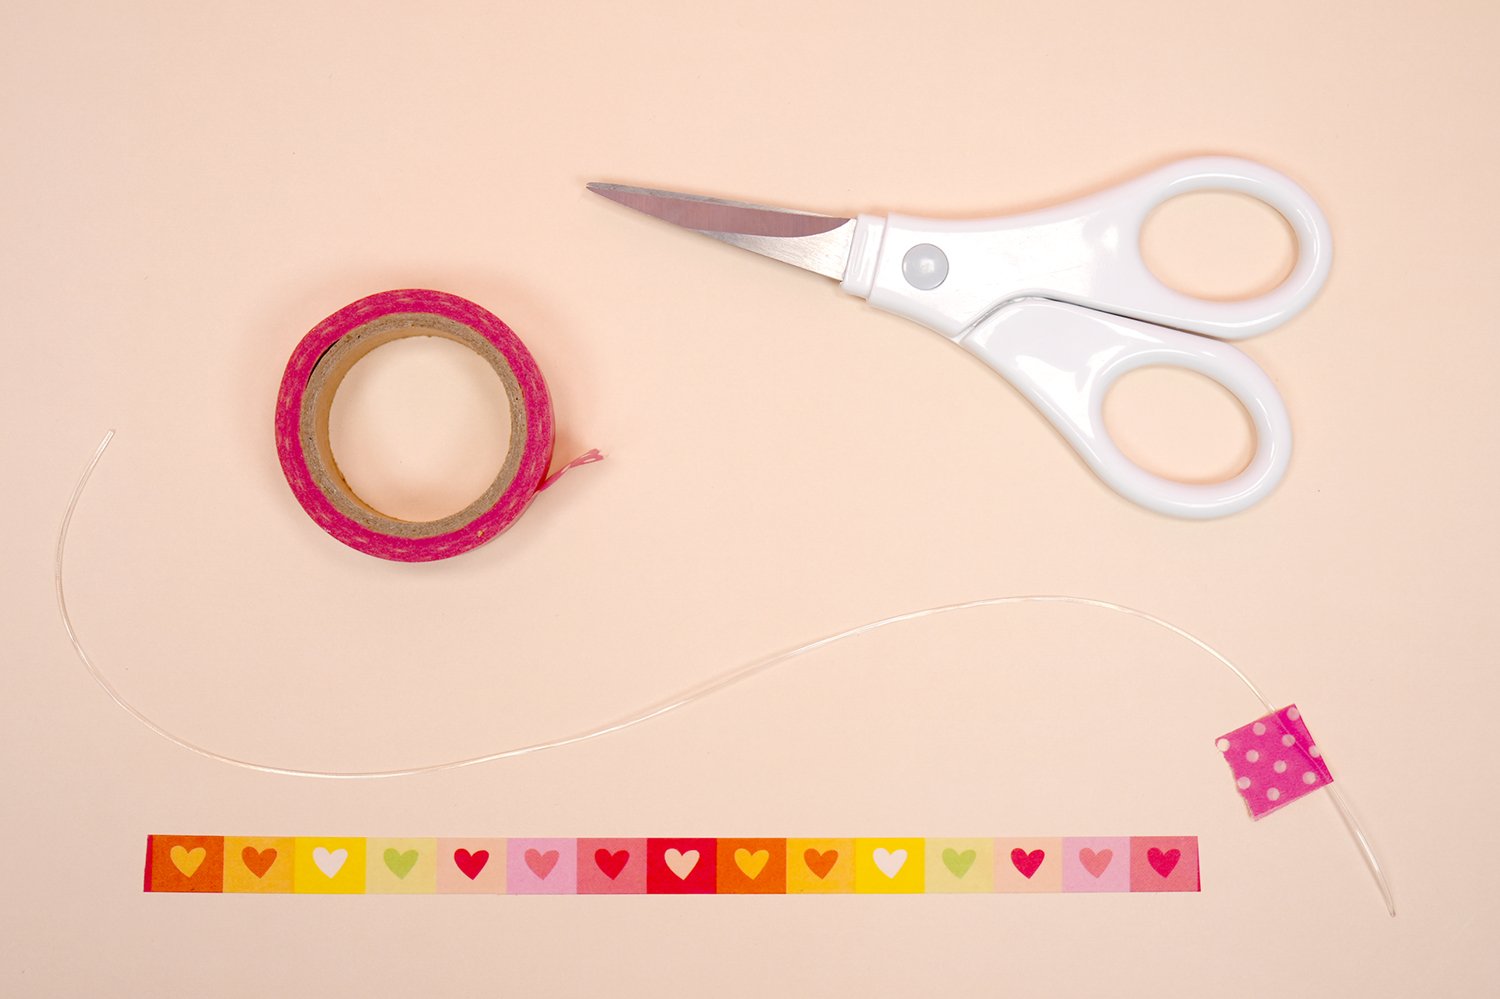
Add a small piece of washi tape to the end of the elastic cording, and fold the tape back on itself. This will create a barrier so that your beads don’t slip off the end of the cord.
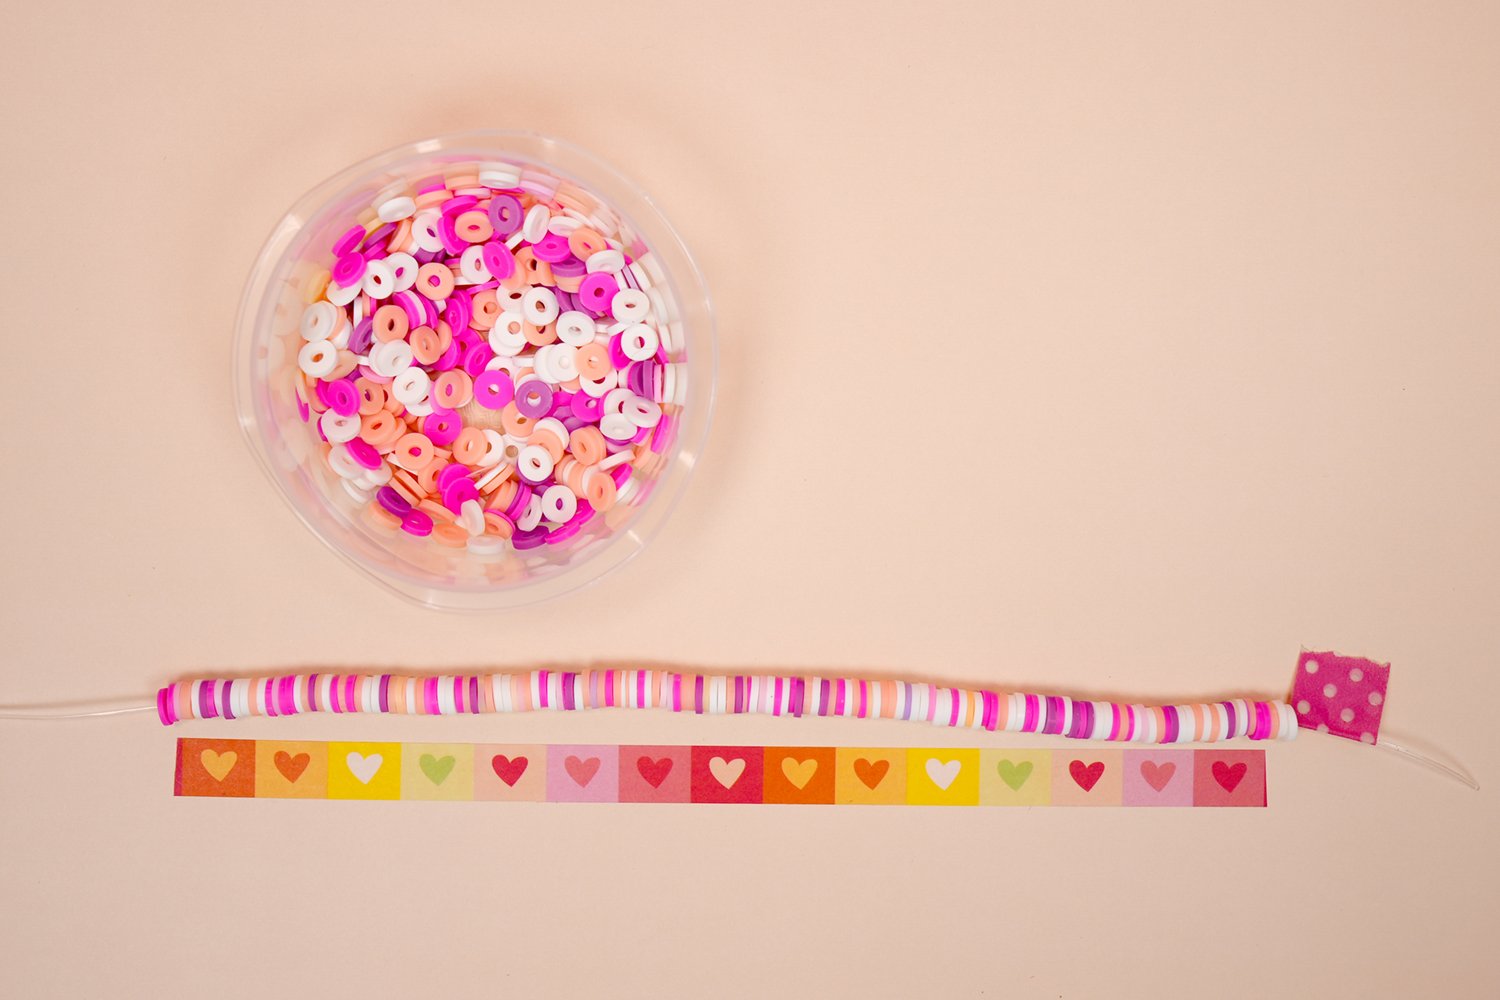
2. Beading the Bracelet
Following the patterns below, add beads to the bracelet string until it reaches the desired length.
Again, you can use that handy strip of washi tape to easily measure the length at a glance!

3. How to Tie a Clay Bead Bracelet
My favorite way to tie clay bead bracelets is with a surgeon’s knot. It’s quite simple to do, and it holds better than a typical square knot.
Follow the video above: tie a half-knot, then another half-knot (do NOT pull the second half-knot tight yet!). Loop each tail through one more time, and then pull tightly. Adjust the knot until it is secure, and then add a dab of beading glue to the knot to create a stronger bond.
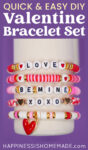
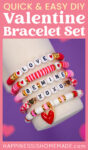
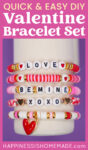
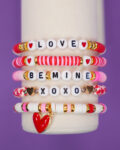
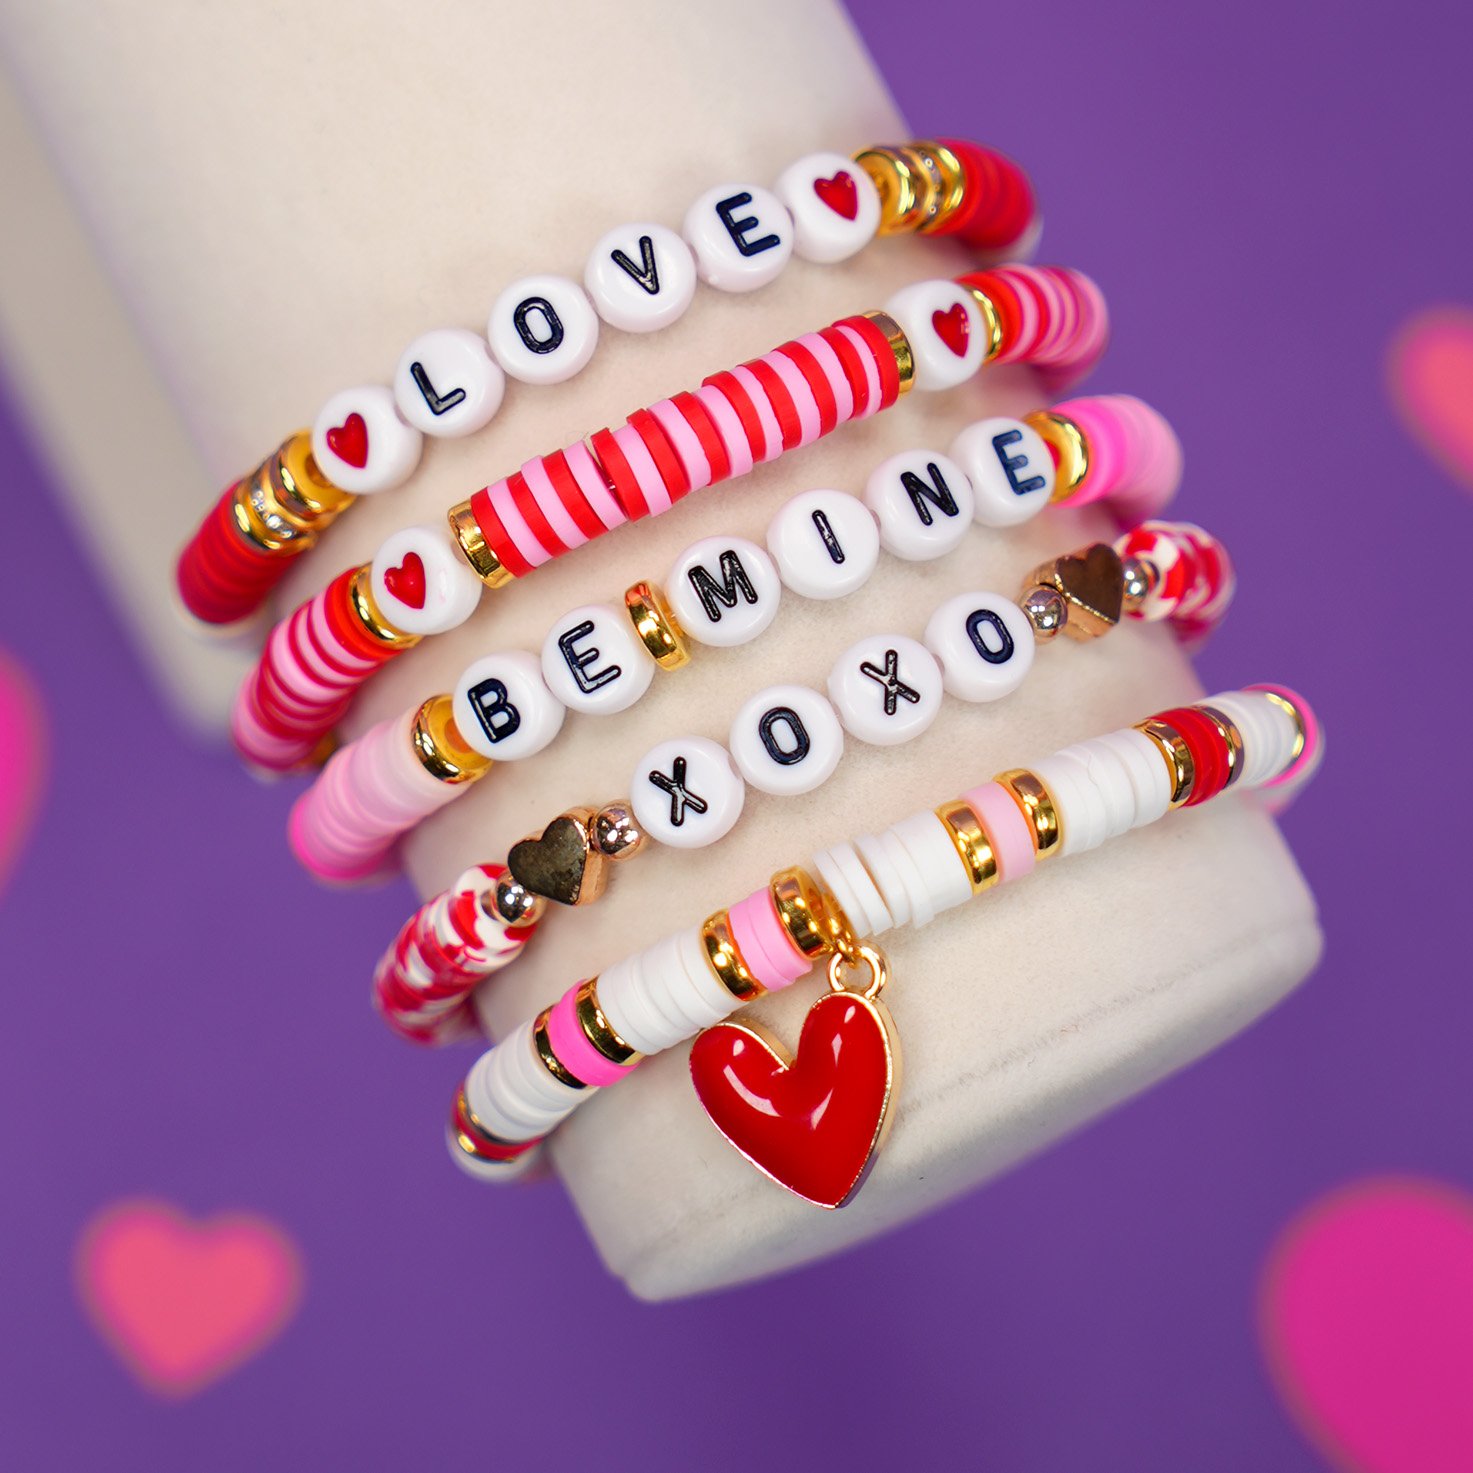
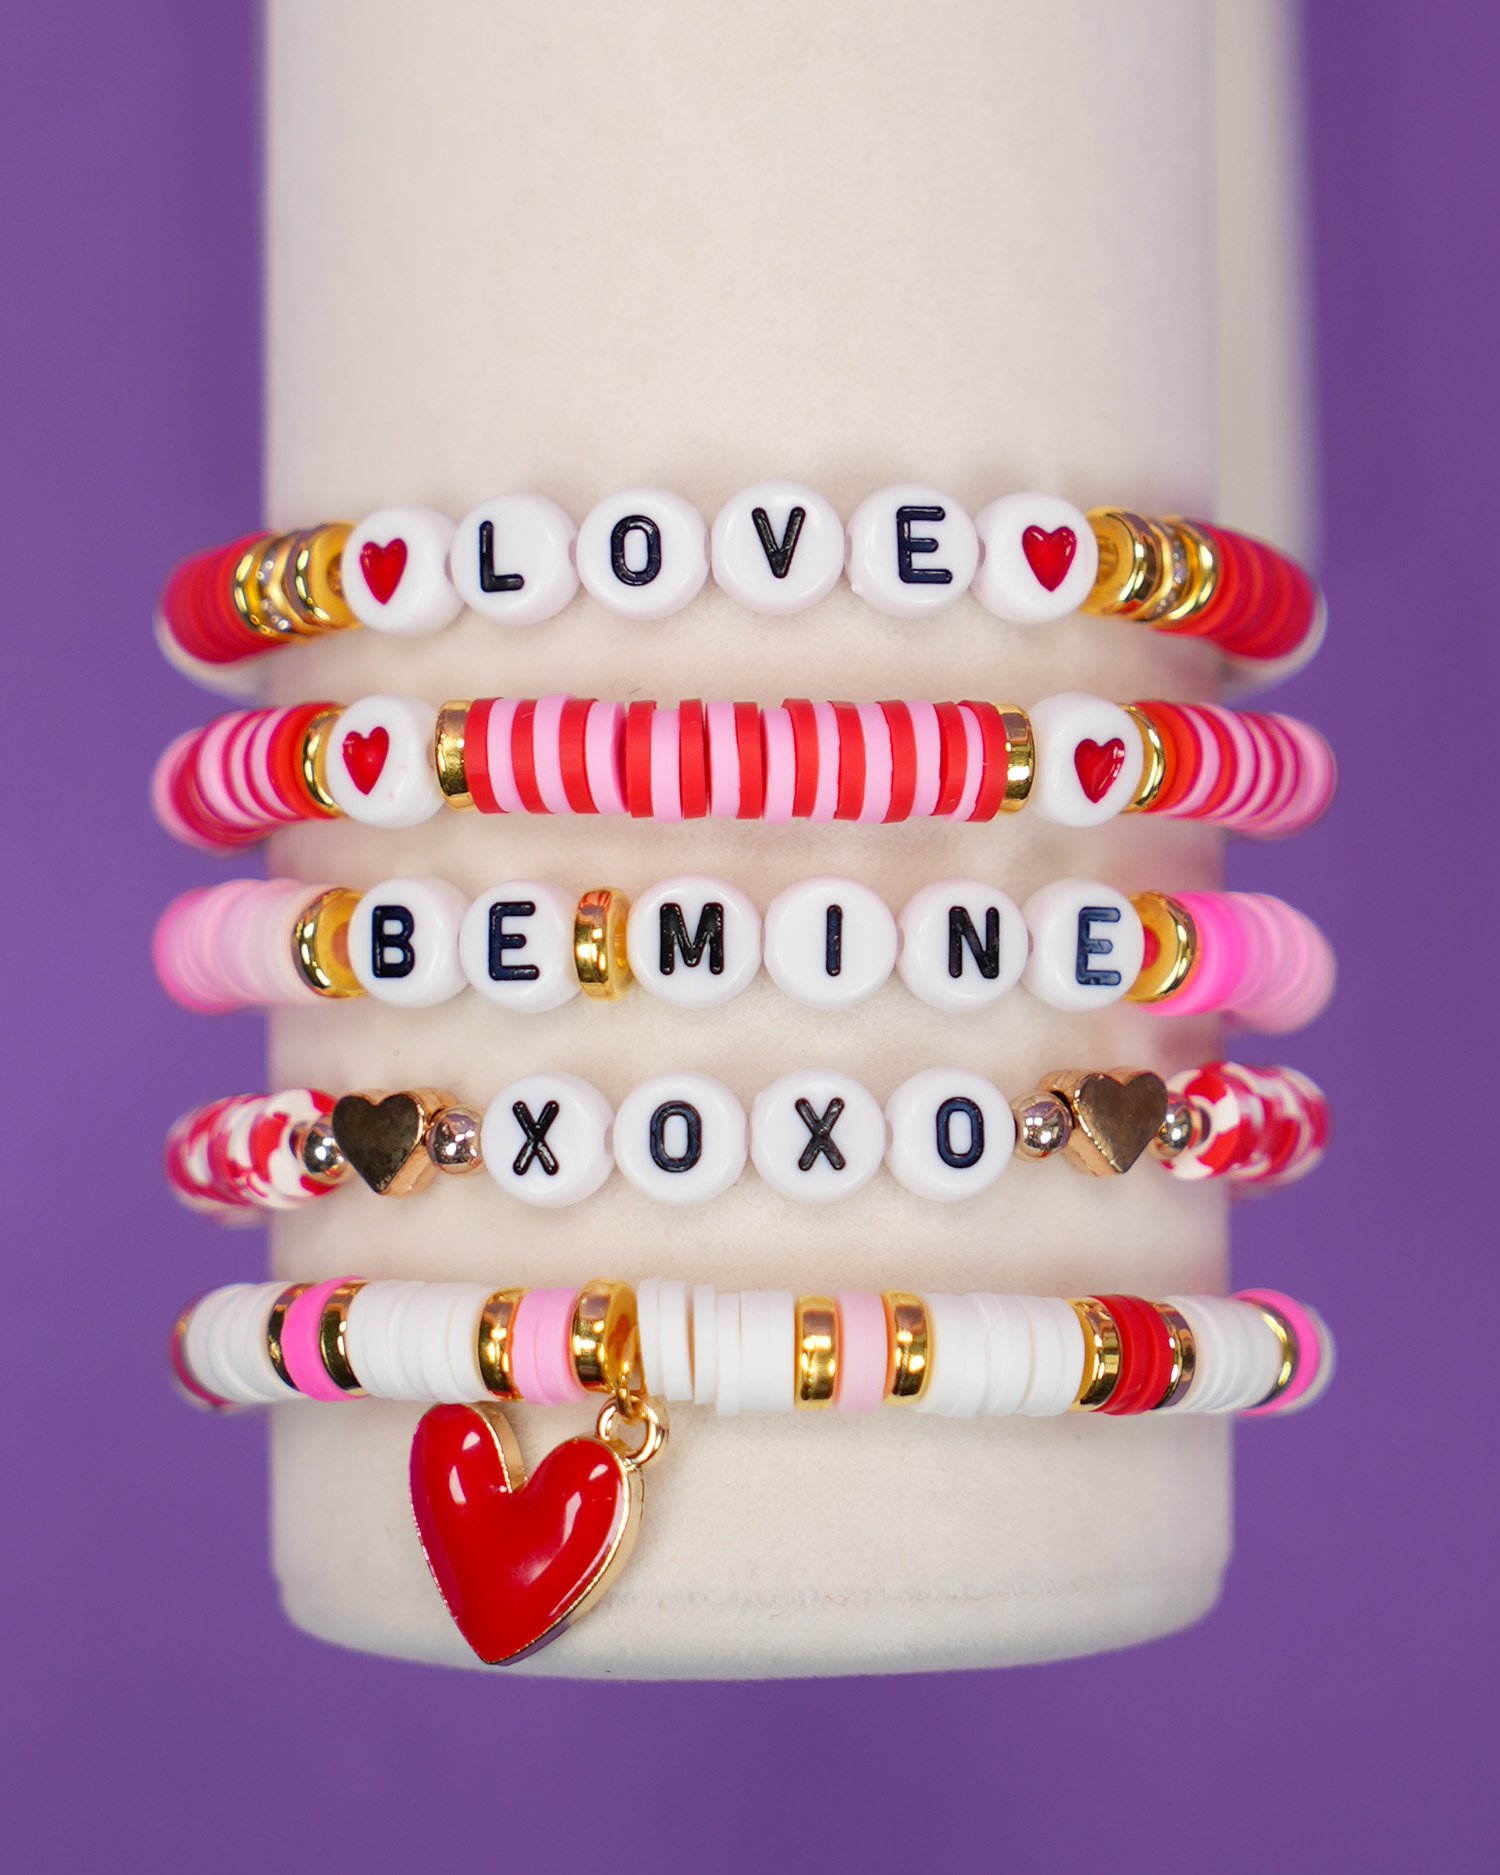
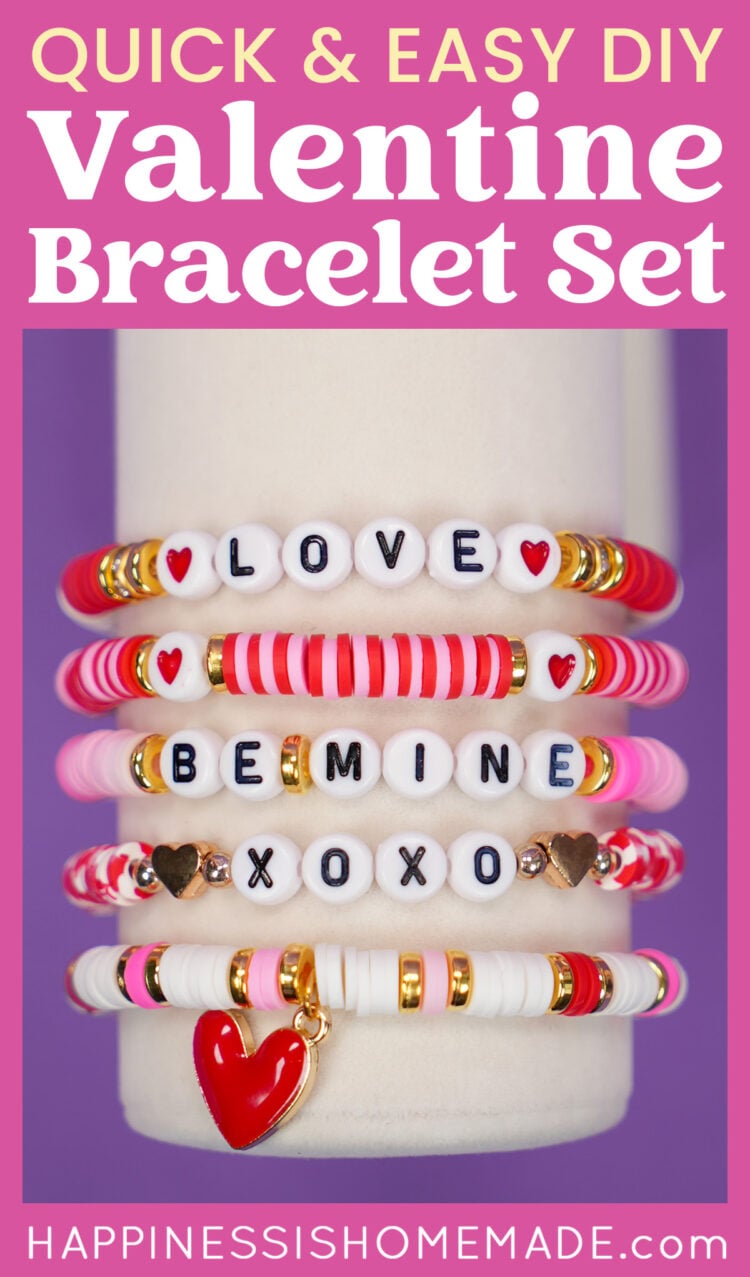
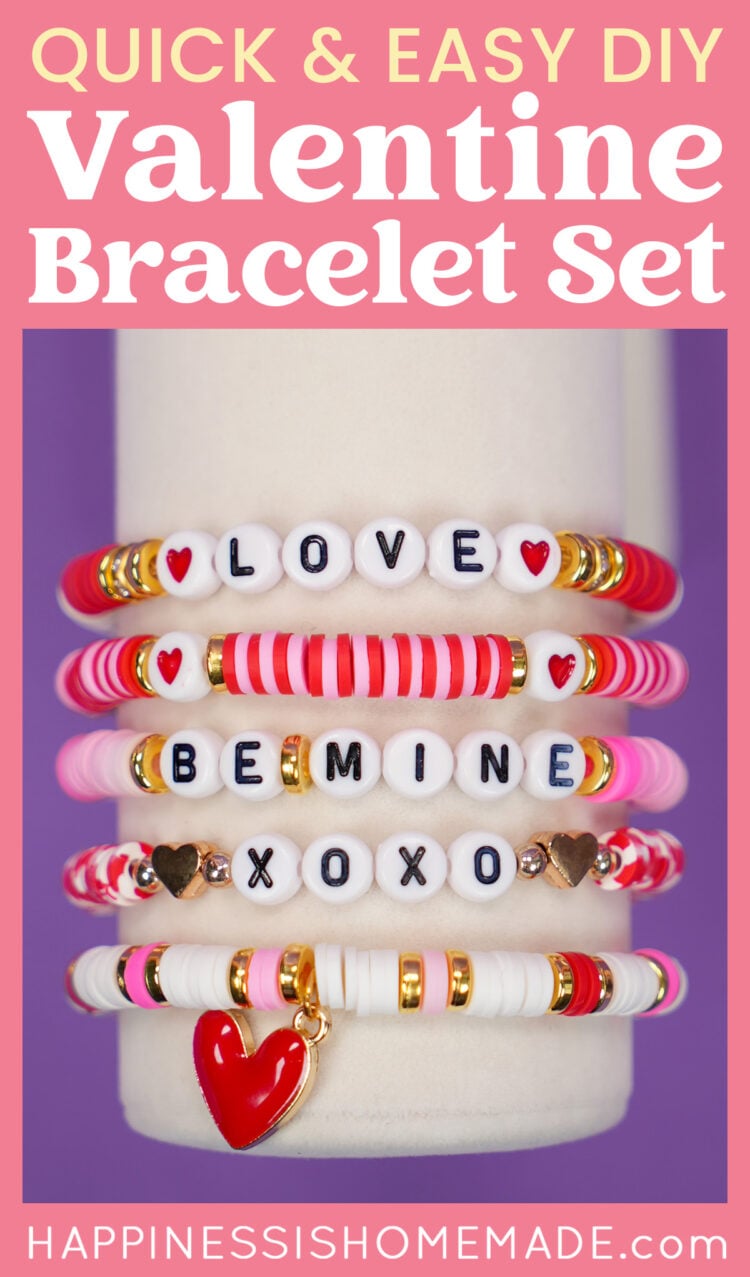
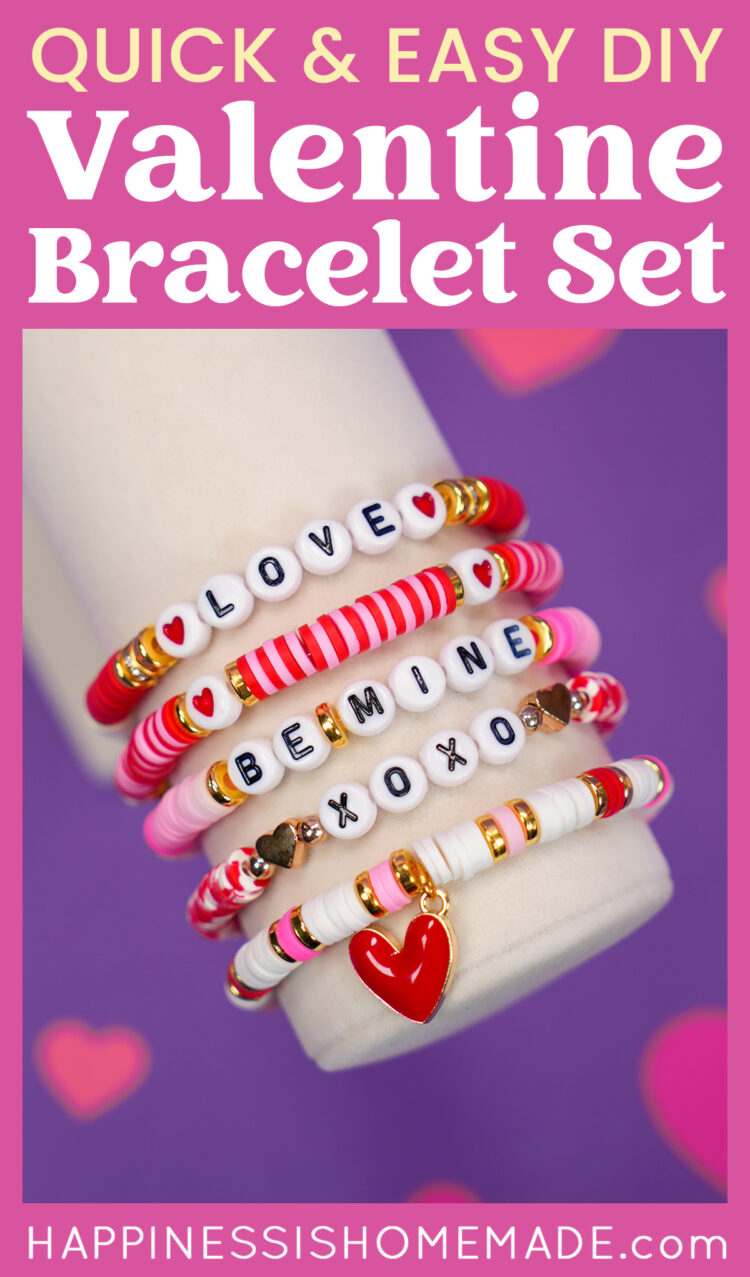
Valentine’s Day Bracelet Patterns
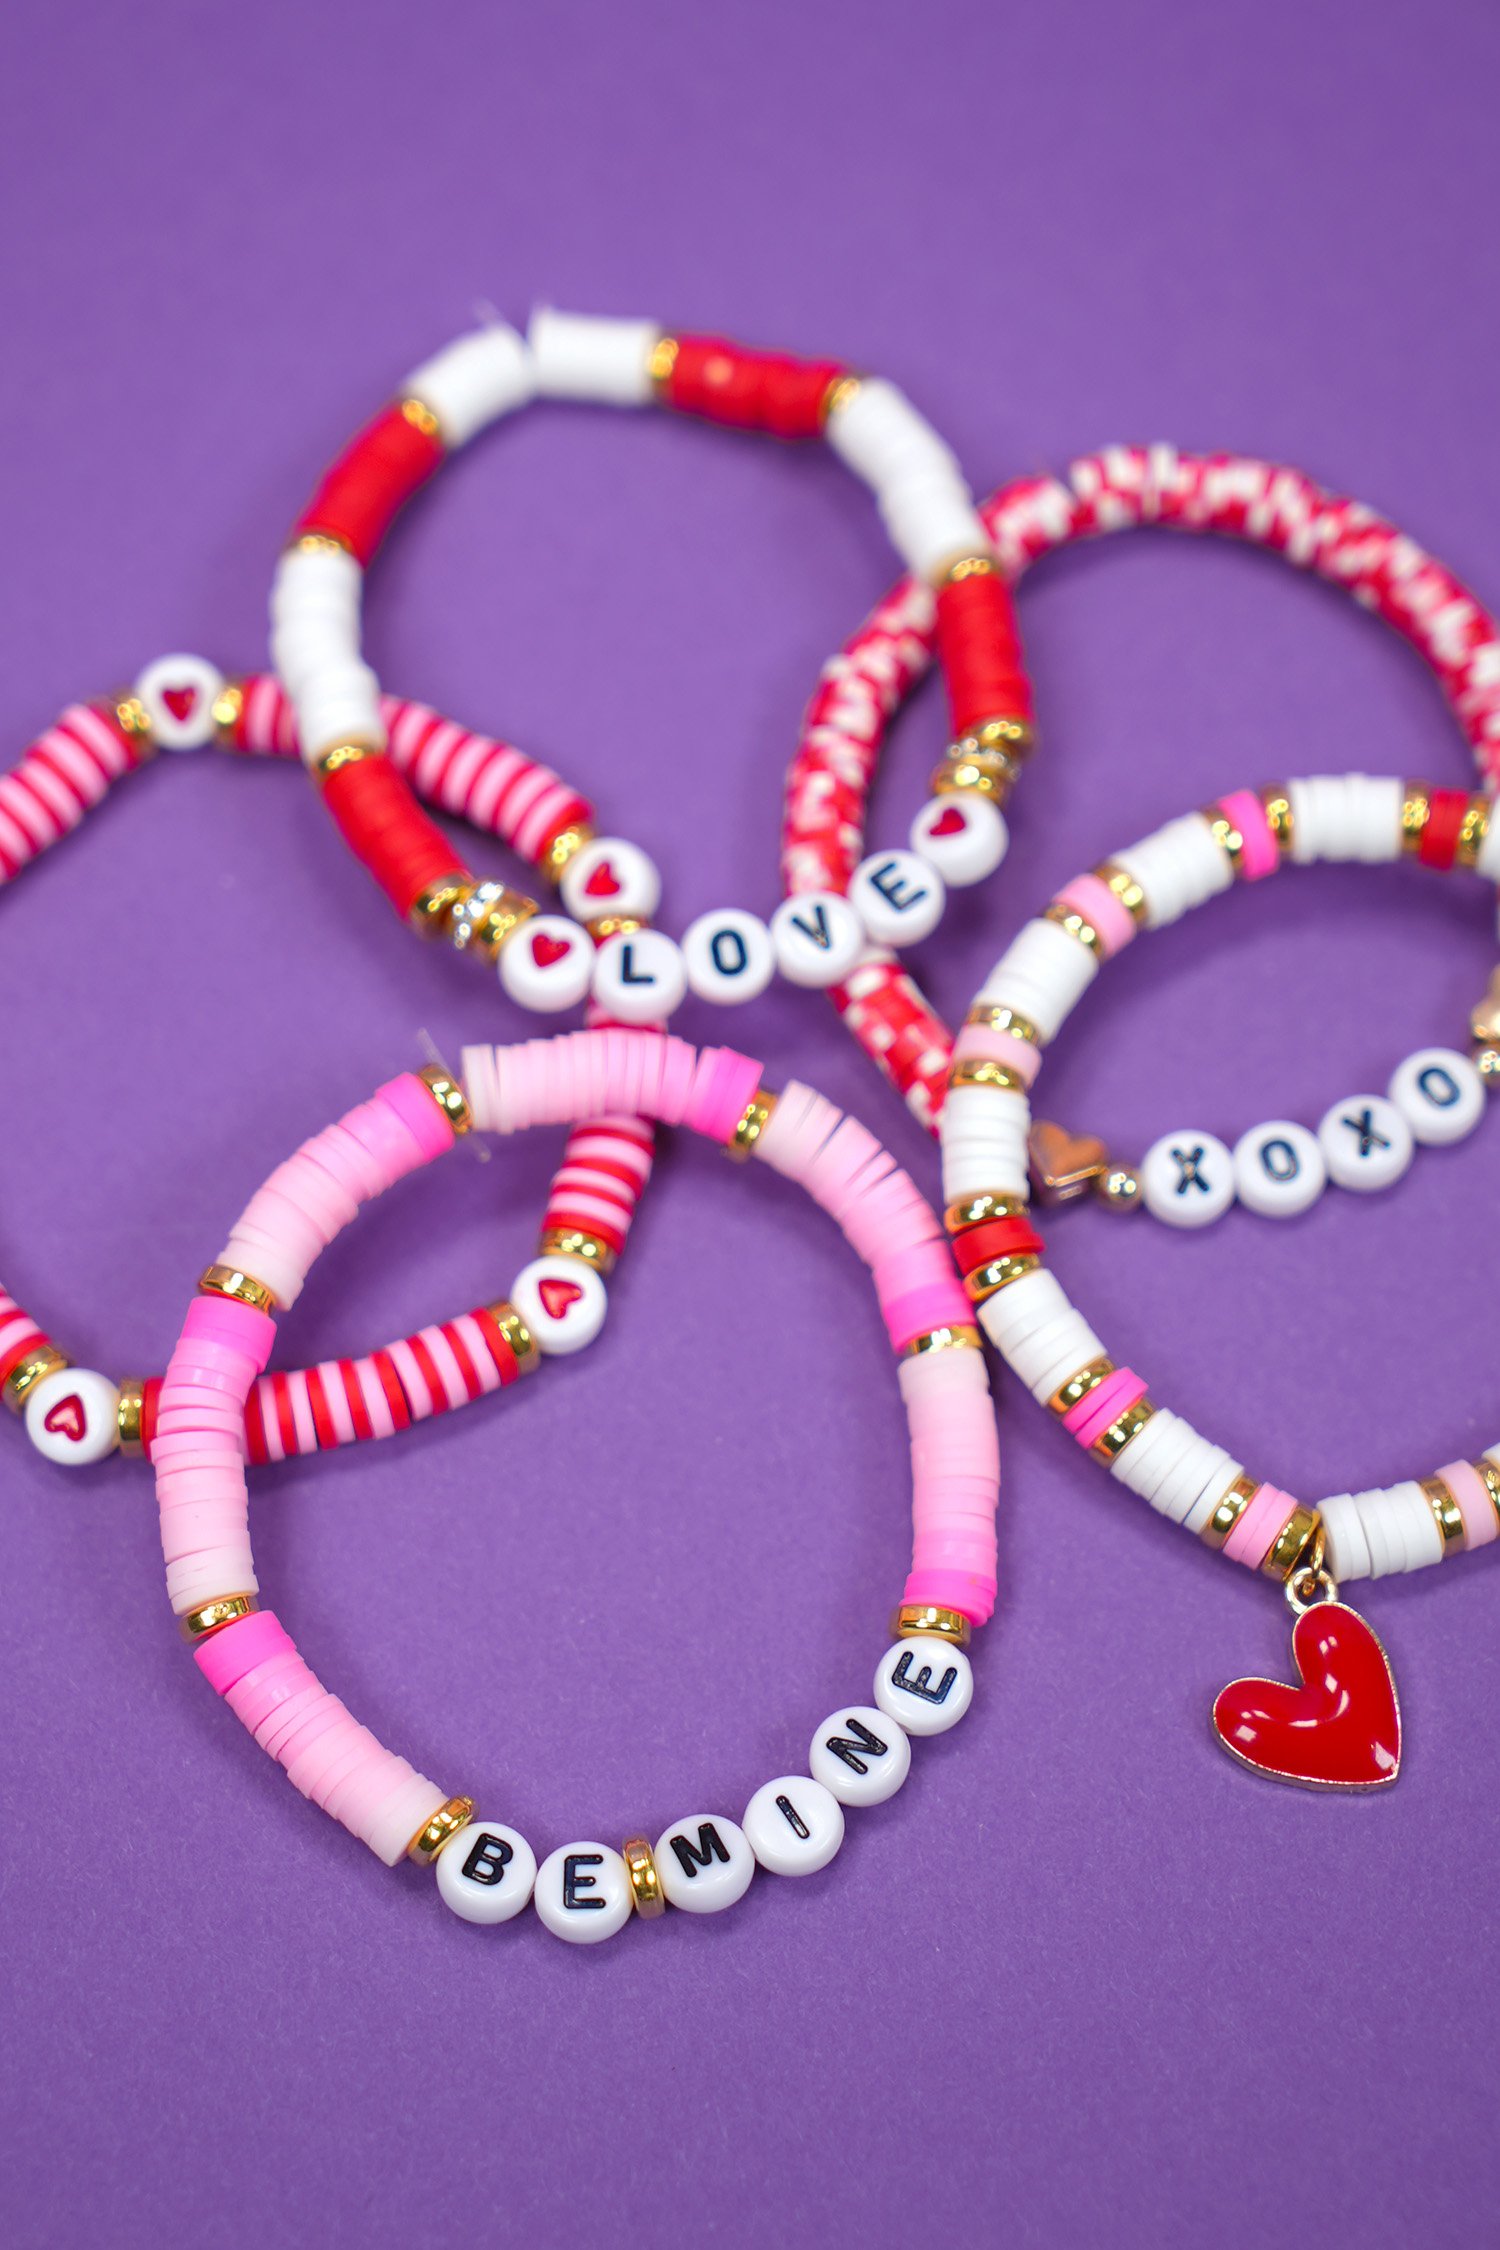
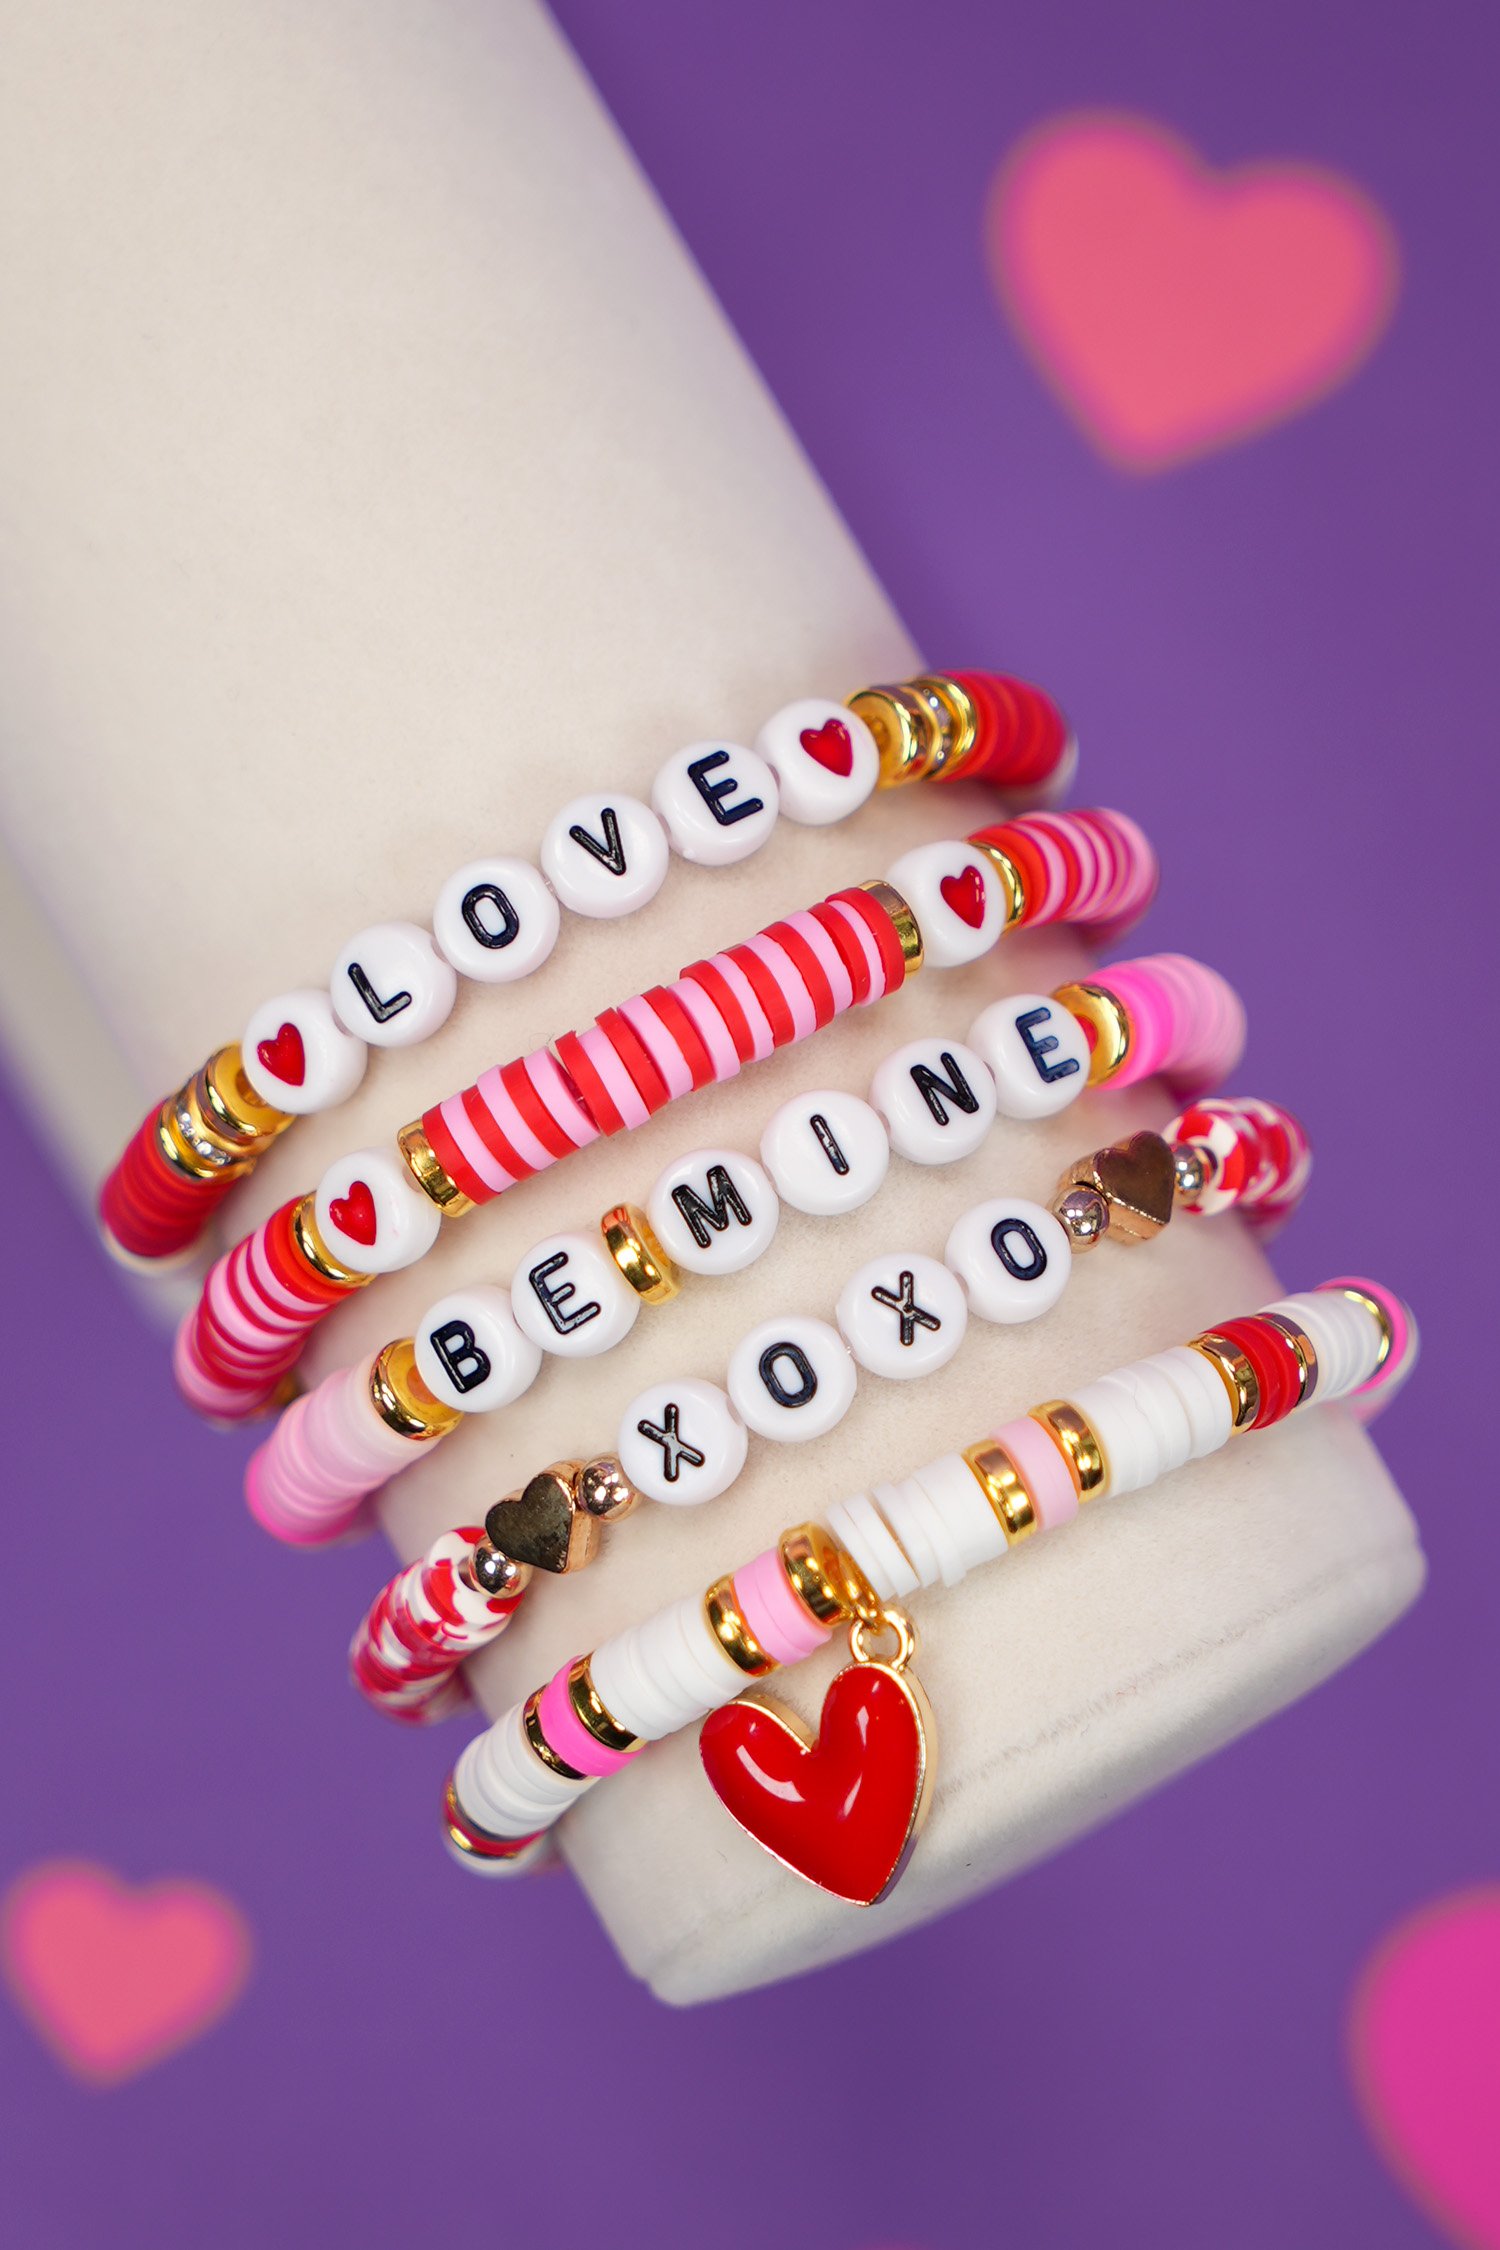
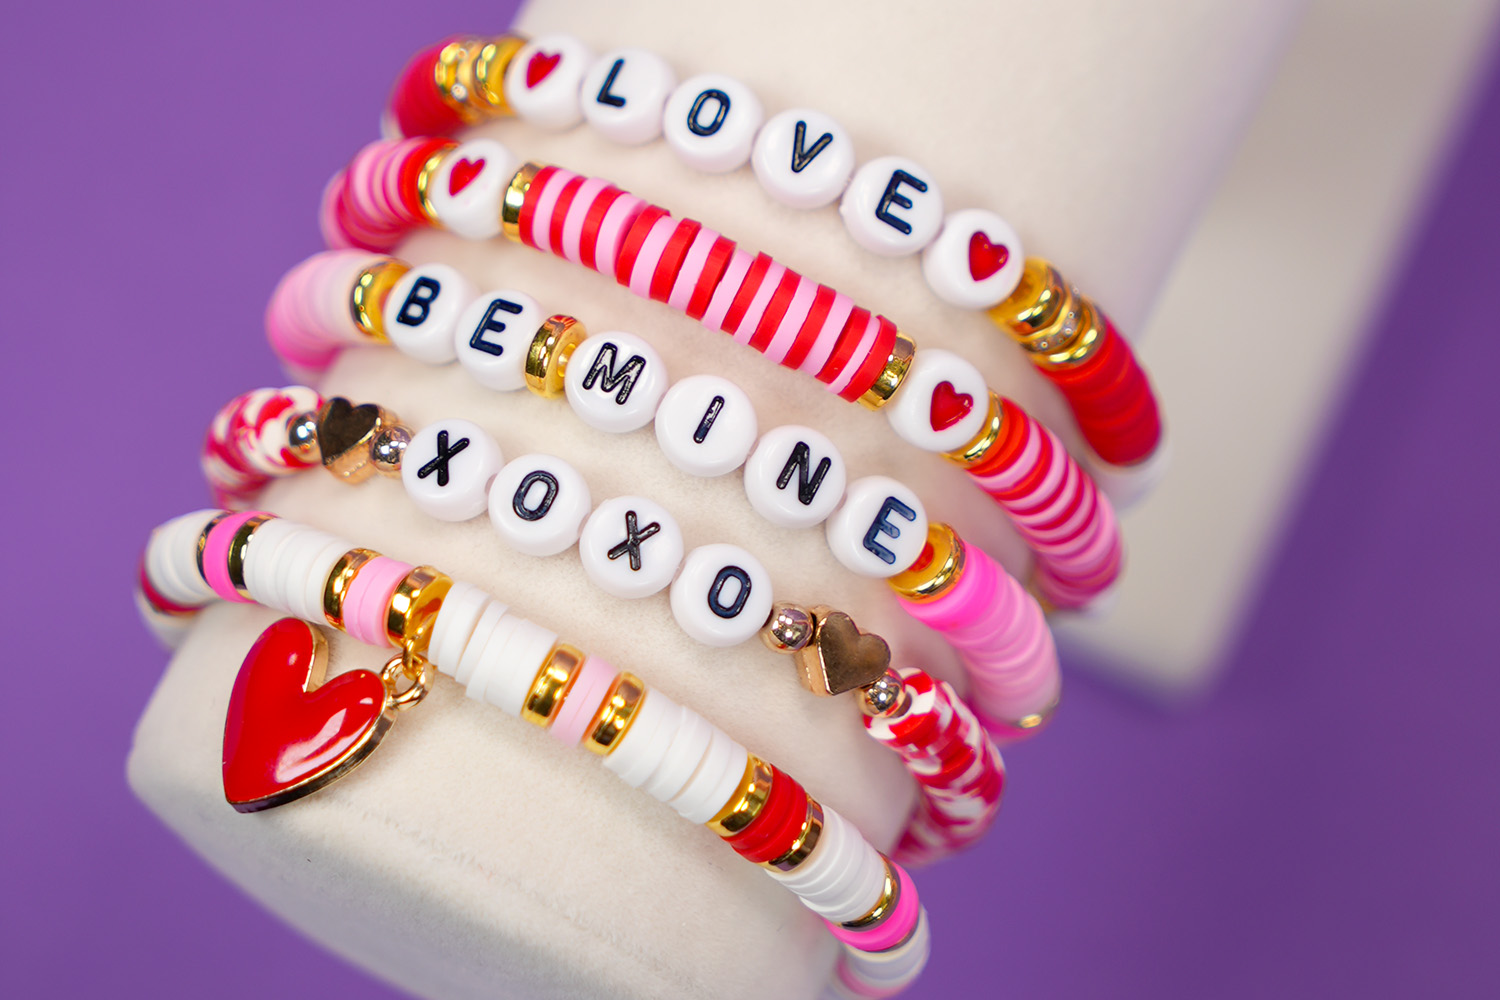
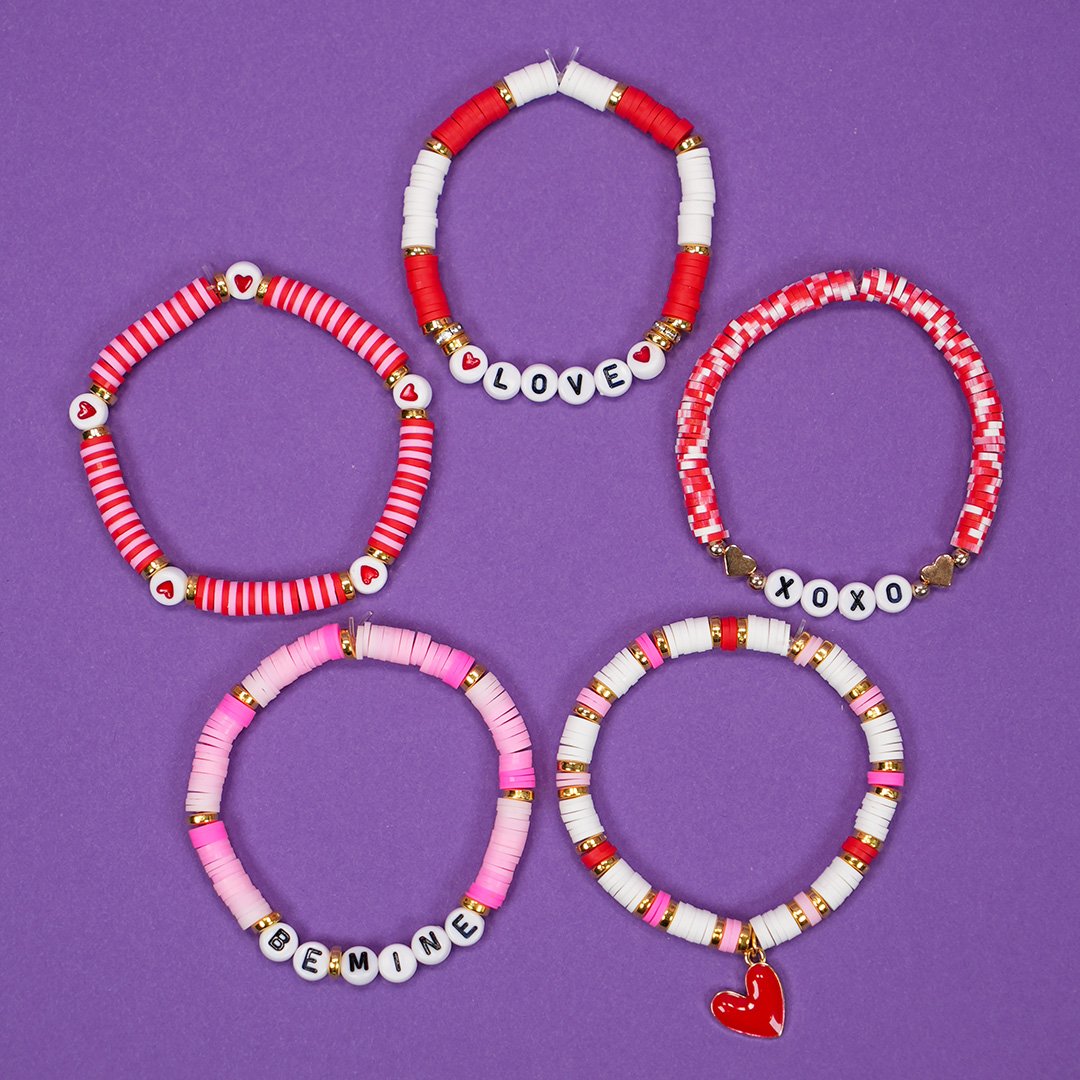
This set of Valentine’s Day bracelets contains five different patterns, all made using the same basic color palette of red, white, and various shades of pink. Each of these bracelets measures approximately 7″ in length when finished, however, you may need to adjust the amount of beads depending on the measurement of your wrist and the brand of beads used.
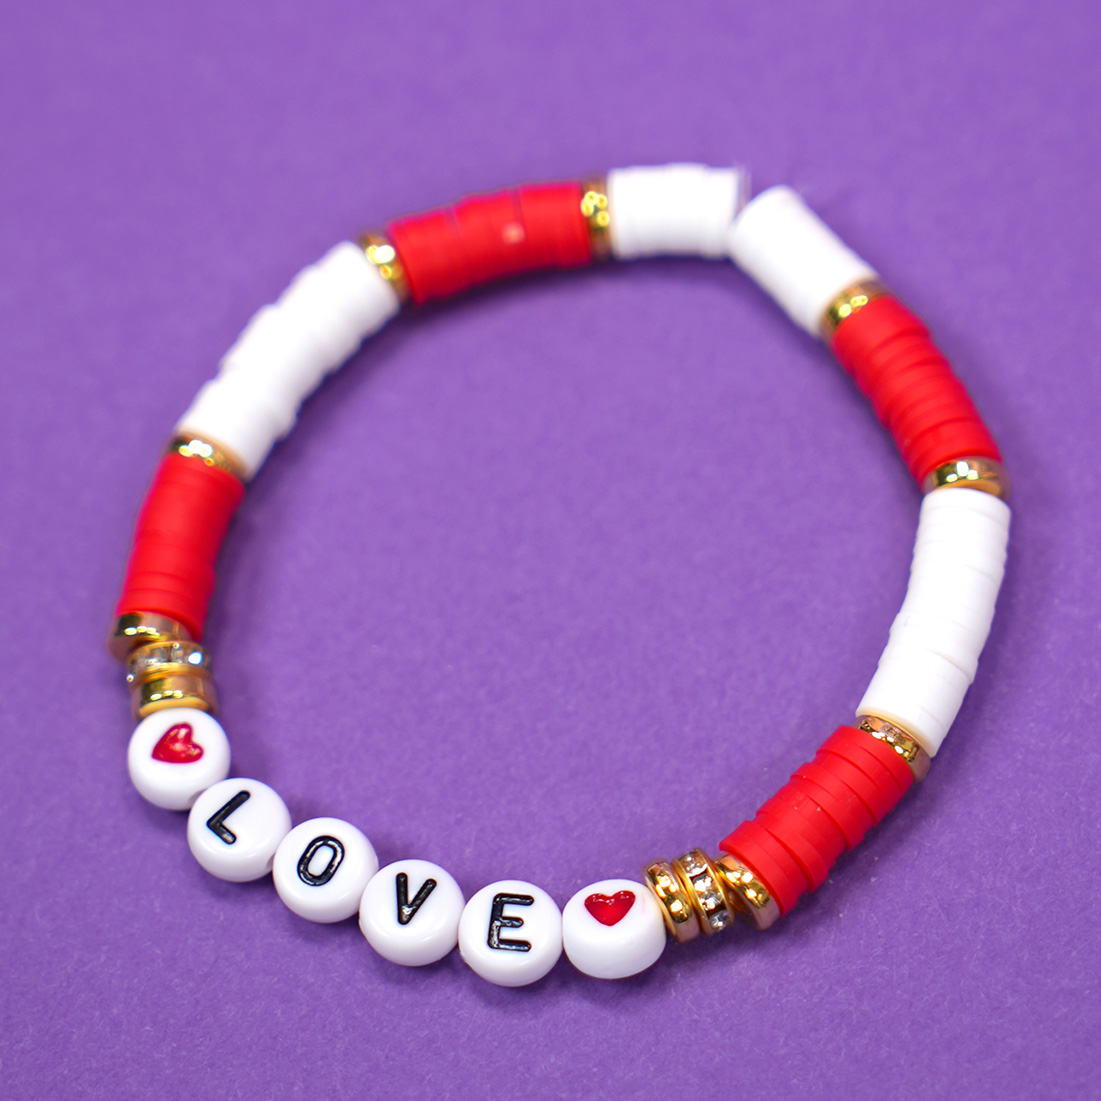
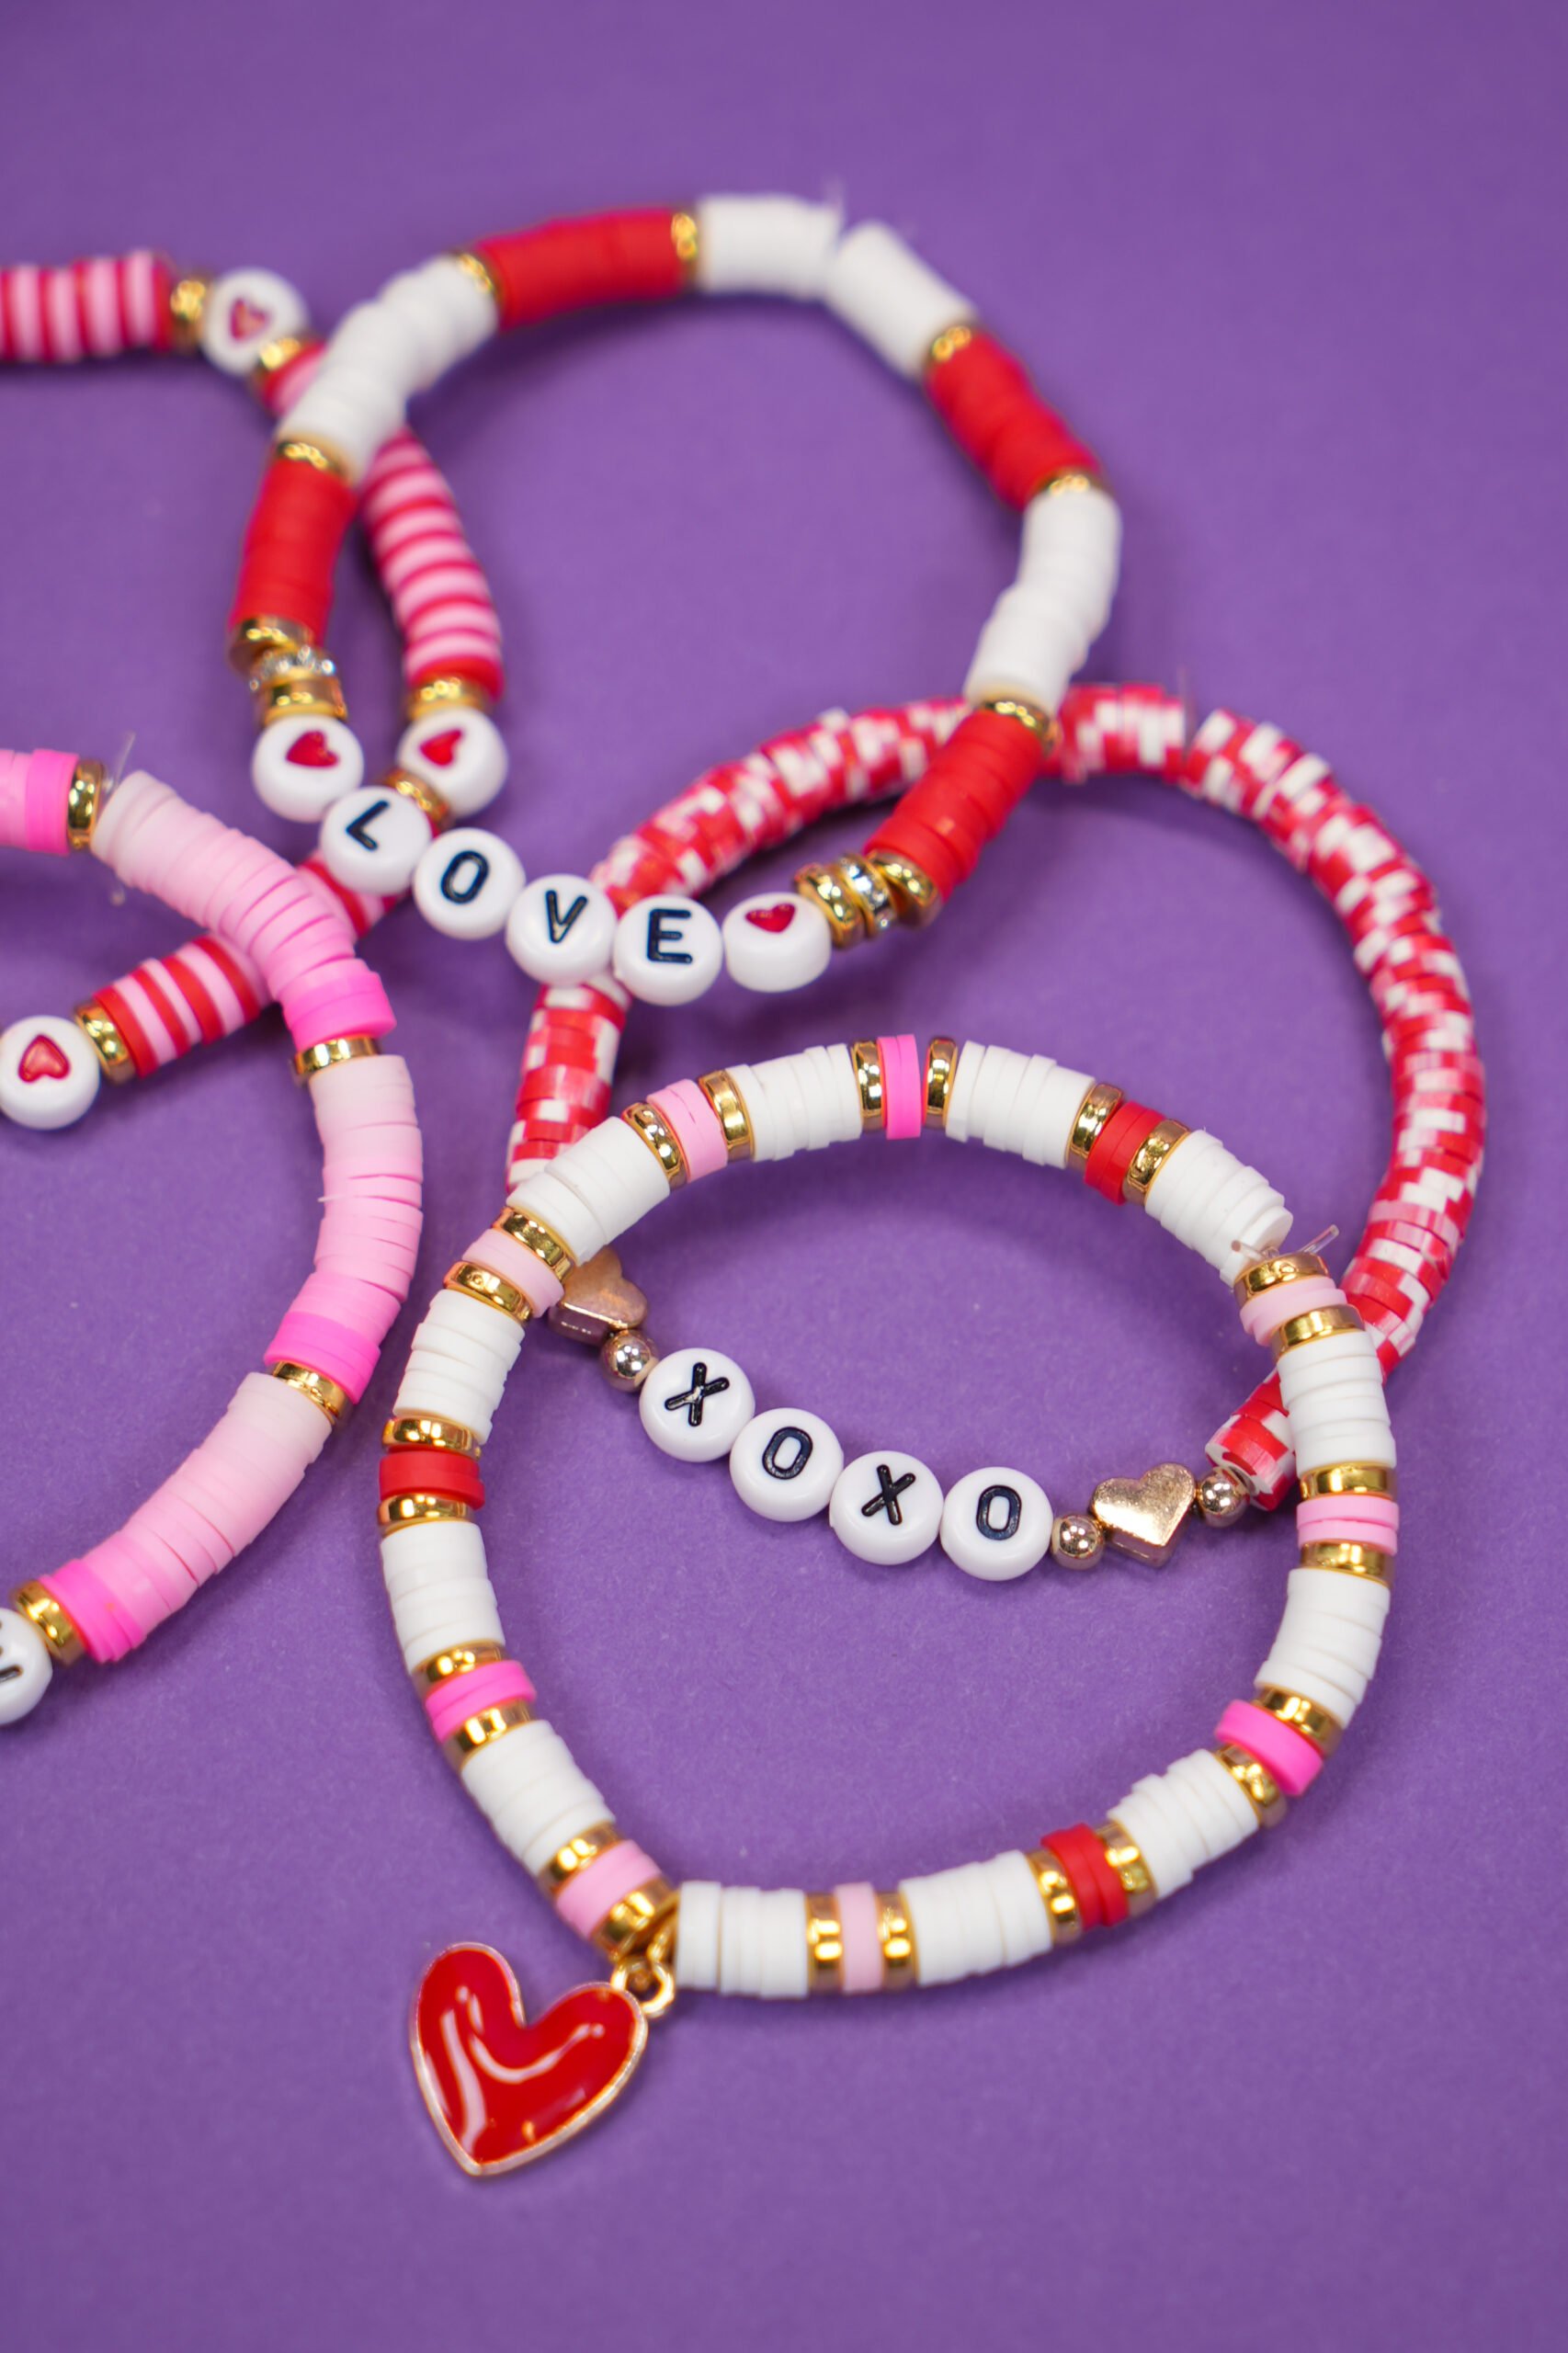
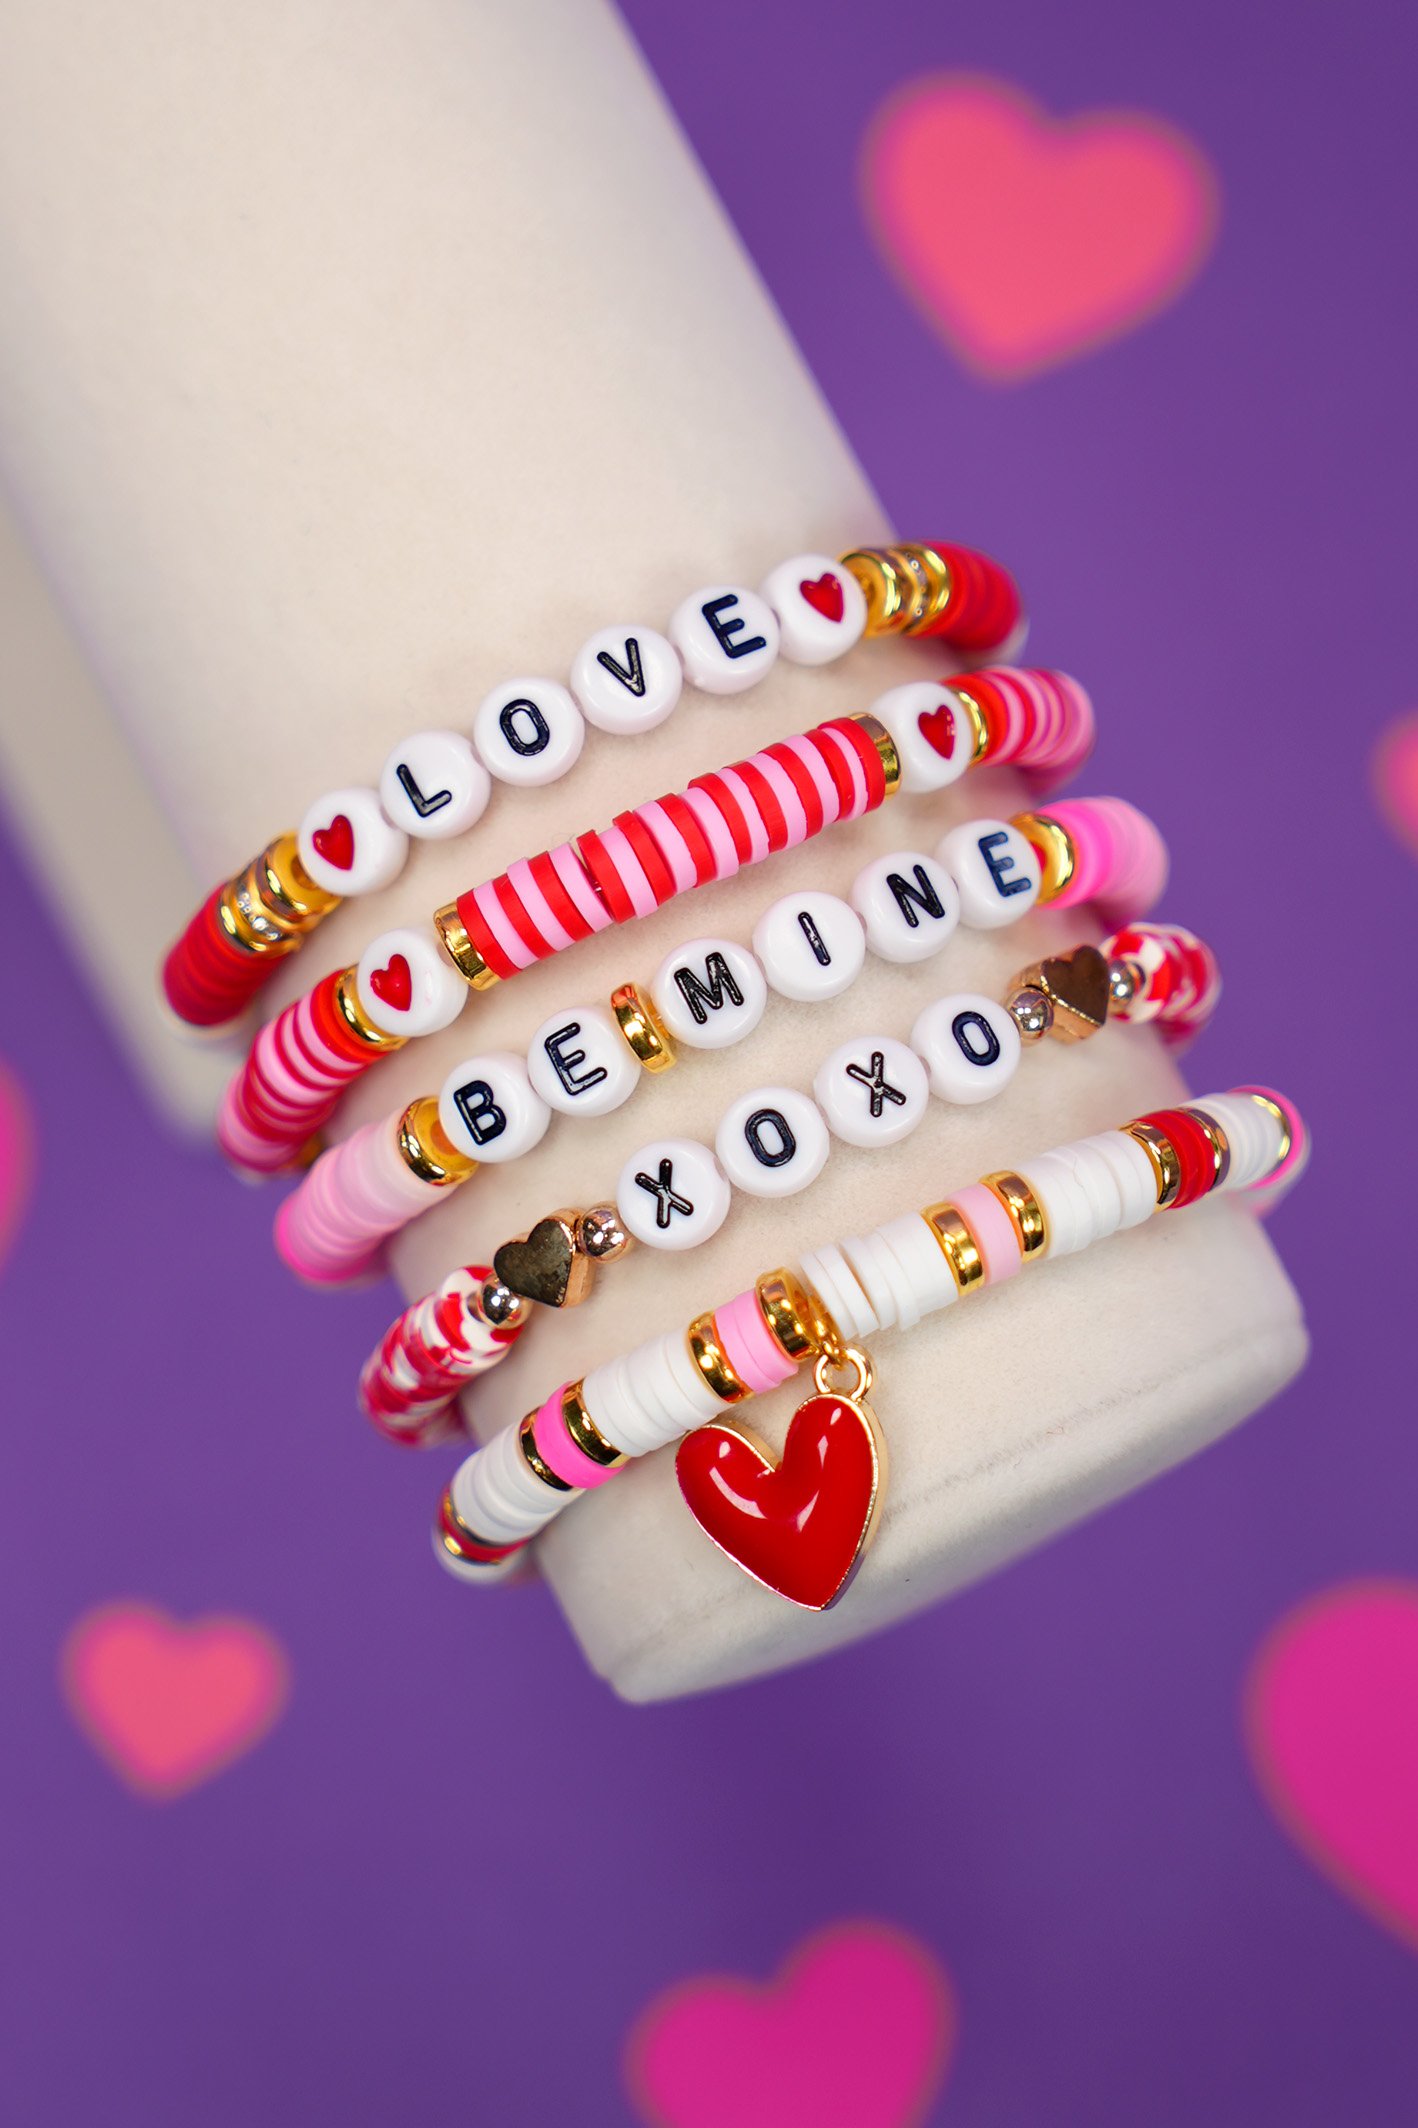
Bracelet 1 – “LOVE”
For this bracelet, I used 46 white clay beads, 40 red clay beads, 10 gold spacer beads, 2 jeweled gold spacer beads, two heart beads, and “L-O-V-E” alphabet letter beads.
String the beads as follows:
- 8 White Clay Beads
- Gold Spacer Bead
- 10 Red Clay Beads
- Gold Spacer Bead
- 15 White Clay Beads
- Gold Spacer Bead
- 10 Red Clay Beads
- Gold Spacer Bead, Jeweled Gold Spacer, Gold Spacer Bead
- Heart Bead, “LOVE” Alphabet Beads, Heart Bead
Then, repeat the pattern in reverse for the opposite half of the bracelet.
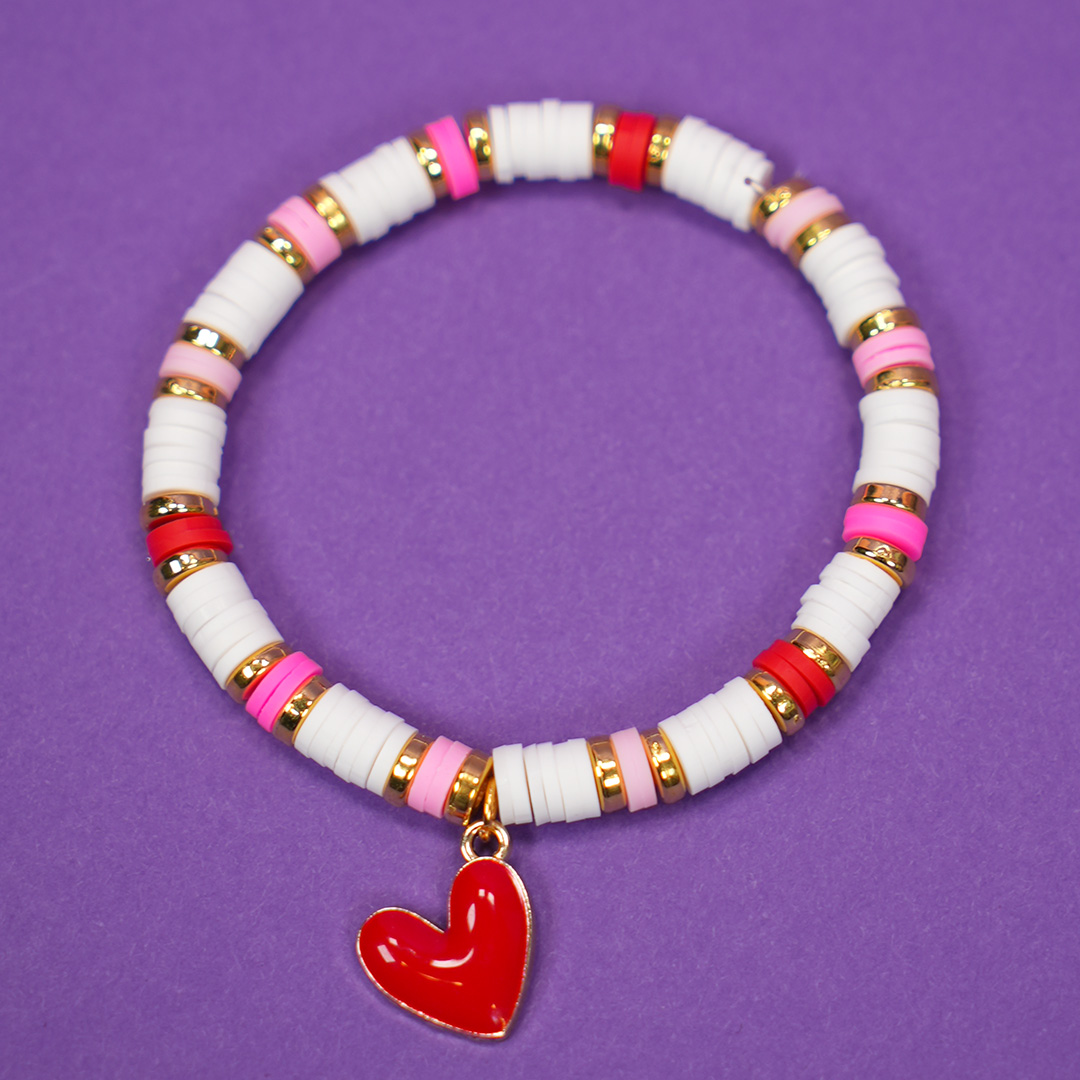
Bracelet 2 – Heart Charm
For this heart bracelet, I used 72 white clay beads, 24 colored clay beads in shades of pink and red, 24 gold spacers, and an enamel heart charm with a jump ring.
String the beads as follows:
- Gold Spacer Bead
- 2 Colored Clay Beads (I worked in a light pink, medium pink, dark pink, red pattern around the bracelet)
- Gold Spacer Bead
- 6 White Clay Beads
- Repeat the colored/white pattern 12 times
- After tying the bracelet, add the jump ring to the heart charm and add it to your bracelet in the desired location.

Bracelet 3 – “XOXO”
For this bracelet, I used 92 speckled red and white clay beads, 4 gold round beads, 2 gold heart beads, and “XOXO” alphabet letter beads.
String the beads as follows:
- 46 Red/White Clay Beads
- Gold Round Bead, Heart Bead, Gold Round Bead
- XOXO Letter Beads
- Repeat the pattern for the opposite side of the bracelet.
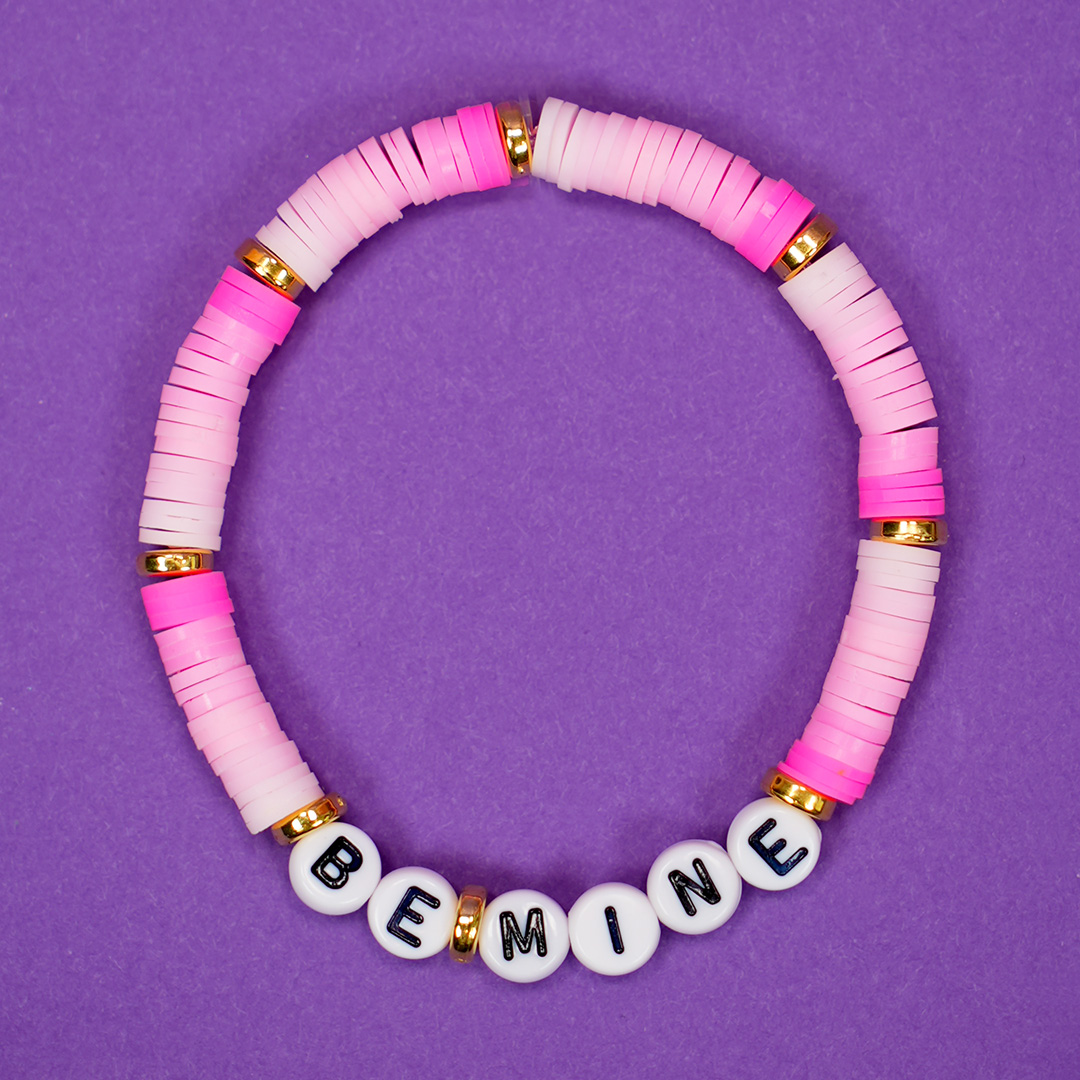
Bracelet 4 – “BE MINE”
For this pretty gradient-color bracelet, I used 18 clay beads each in six different shades of pink, 8 gold spacers, and “BE MINE” alphabet beads.
String the beads as follows:
- 3 Clay Beads of Each Color, arranged light to dark
- Gold Spacer Bead
- Repeat two more times
- “BE MINE” Letter Beads with a Flat Gold Spacer in between the words
- Gold Spacer Bead
- Repeat the gradient-color pattern three more times
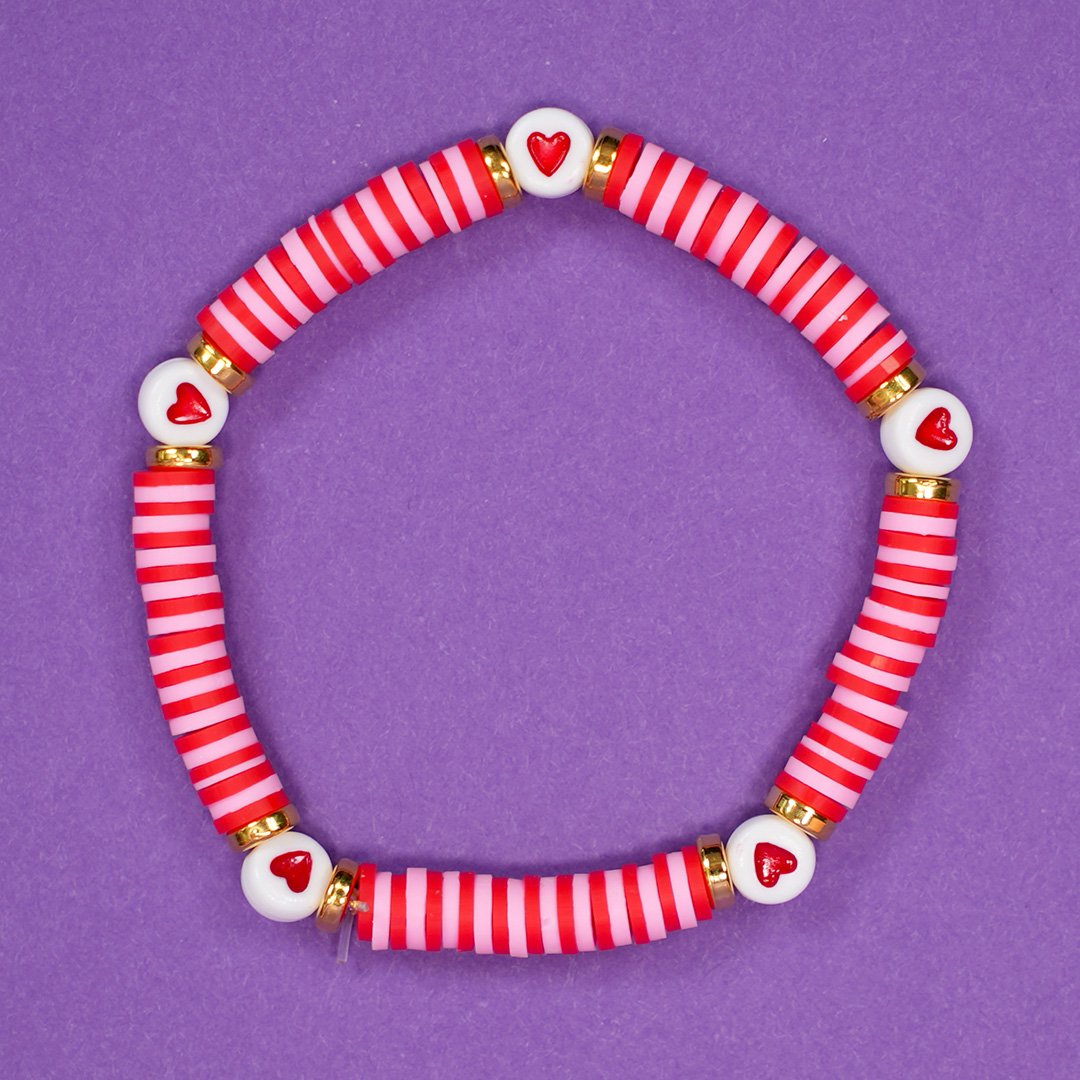
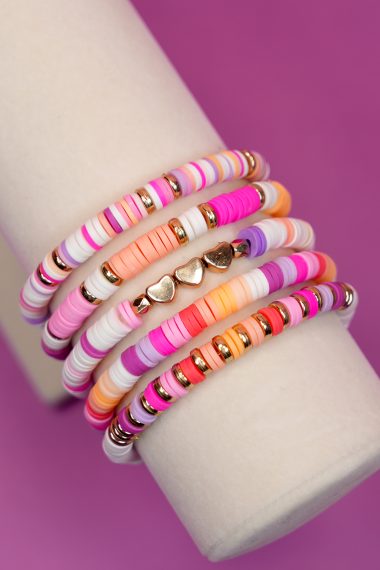
Bracelet 5 – Stripes & Hearts
To make this Valentine’s Day bracelet, I used 50 pink clay beads, 50 red clay beads, 10 flat gold spacer beads, and 5 heart beads.
String the beads as follows:
- Alternate 10 pink beads and 10 red beads
- Gold Spacer Bead
- Heart Bead
- Gold Spacer Bead
- Repeat the pattern four more times or until the desired length is reached
Now that you’ve created this gorgeous set of Valentine’s Day jewelry, it’s time to show it off! These bracelets are perfect for a romantic dinner or a casual day out – they can easily be dressed up or down! They also make fantastic jewelry gifts for friends and family!
Frequently Asked Questions About Clay Bead Bracelets
How long should my clay beaded bracelet be?
The most common women’s bracelet length is 7 inches long, however, the standard range is anywhere from 6 to 8.5 inches. For best results, use a soft tape measure to measure your wrist, and then add 1/4 inch to the length.
Children’s bracelets typically range from 5 to 6.5 inches; men’s range from 7.5 inches to 10.5 inches.
How many clay beads do I need to make a bracelet?
For crafting a typical 7-inch bracelet suitable for adults, you will need to use approximately 100 to 140 flat clay beads. This quantity varies based on the thickness of the beads, as some are sliced thinner than others. In terms of weight, about 5 grams of these clay beads are needed for each bracelet.
Should you decide to incorporate any extra elements like letter beads, spacers, or decorative beads, the number of clay beads required will decrease accordingly.
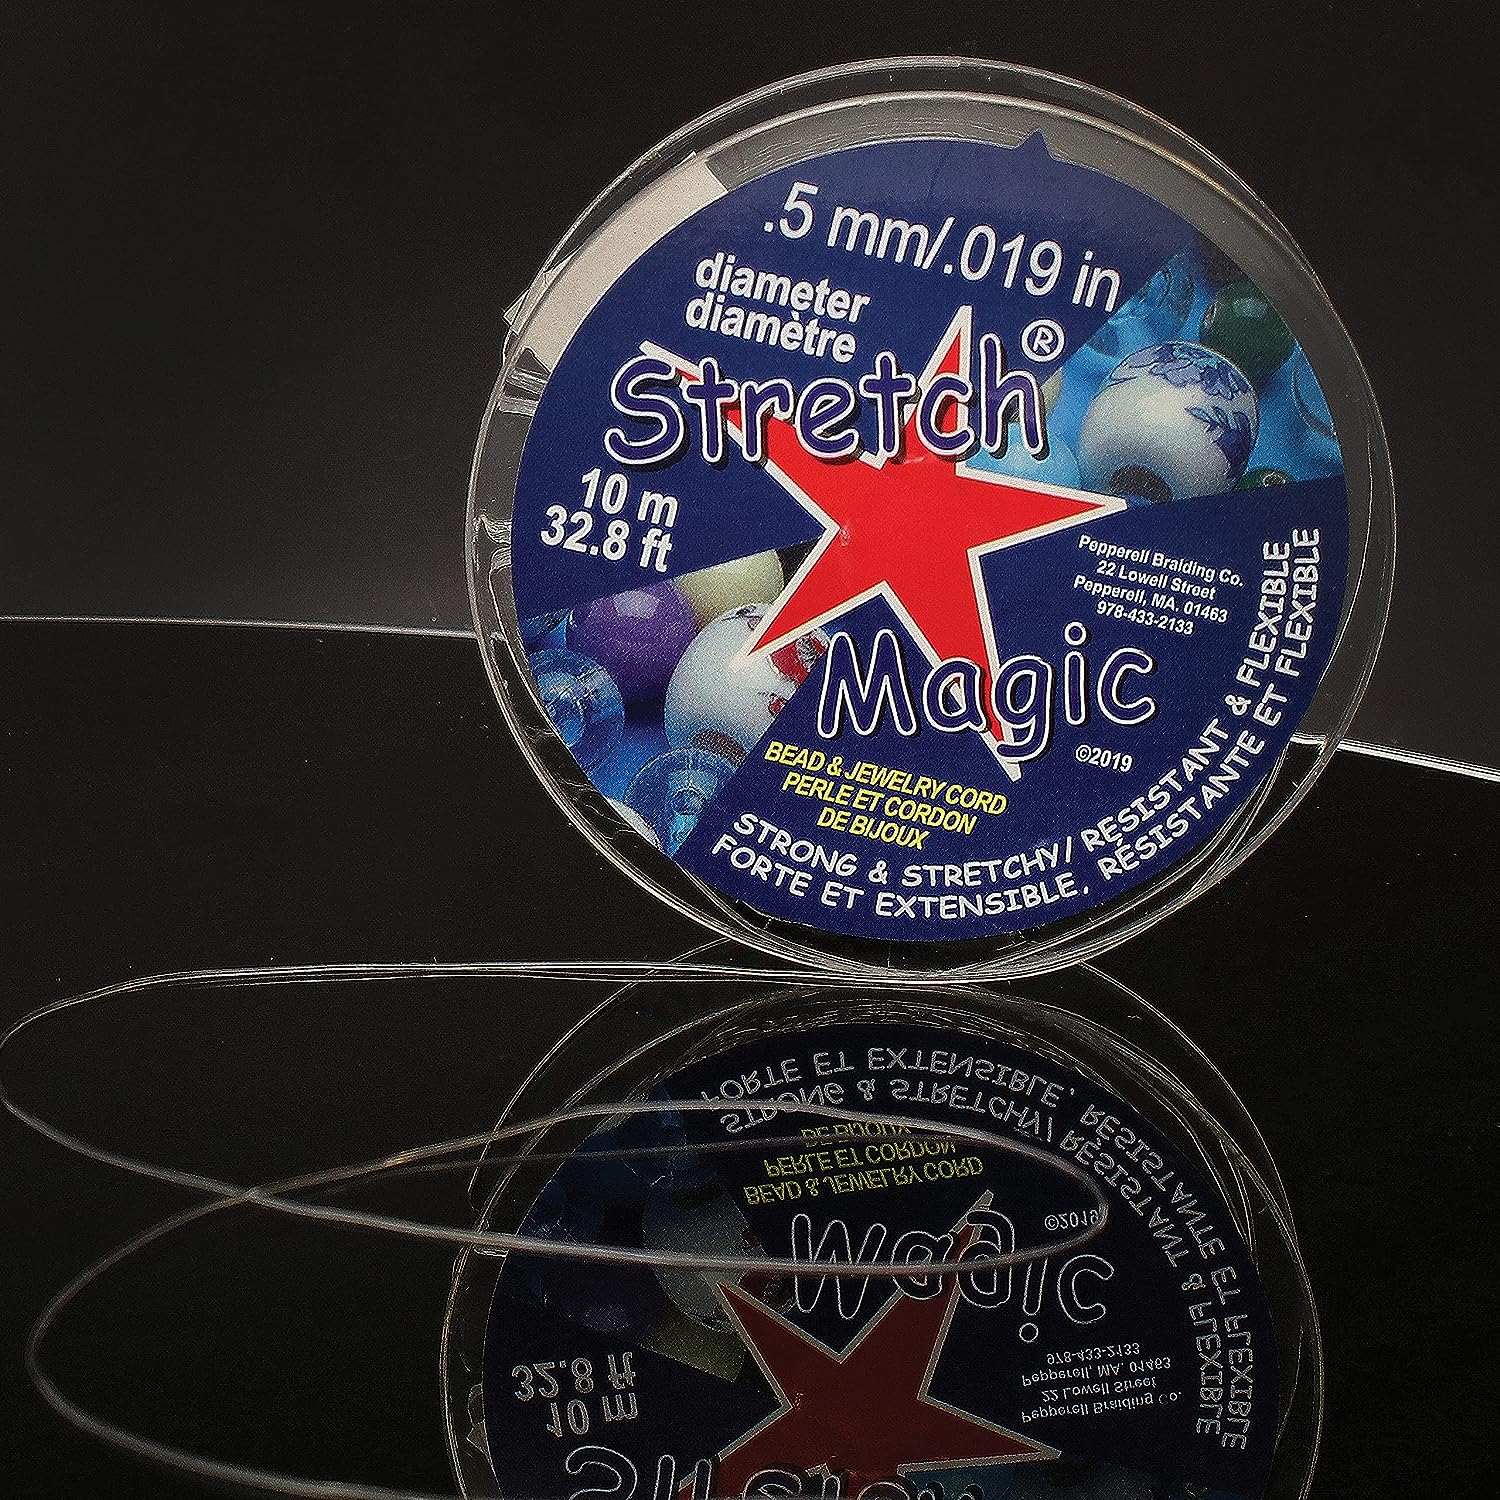
What is the best string to use for clay bead bracelets?
We recommend using a clear stretchy beading cord that is between .4mm and 1mm thick. Stretch Magic is a popular brand of jewelry cord that we use frequently.

Which clay beads are the best for bracelets?
You can find all of my favorite clay beads and bracelet supplies in my Amazon Shop!
How do I keep my clay beaded bracelet from untying or breaking?
Follow the step-by-step video demonstration above to tie your bracelets using a surgeon’s knot. This technique is known for producing one of the most secure and firm knots, especially effective with stretchy jewelry cords. For added durability, consider applying a small amount of glue to the knot.
Be cautious when tightening the knot; it’s important to do so gently to avoid overstretching the cord. Overstretching can weaken the cord and increase the risk of it breaking.
Are clay bead bracelets waterproof?
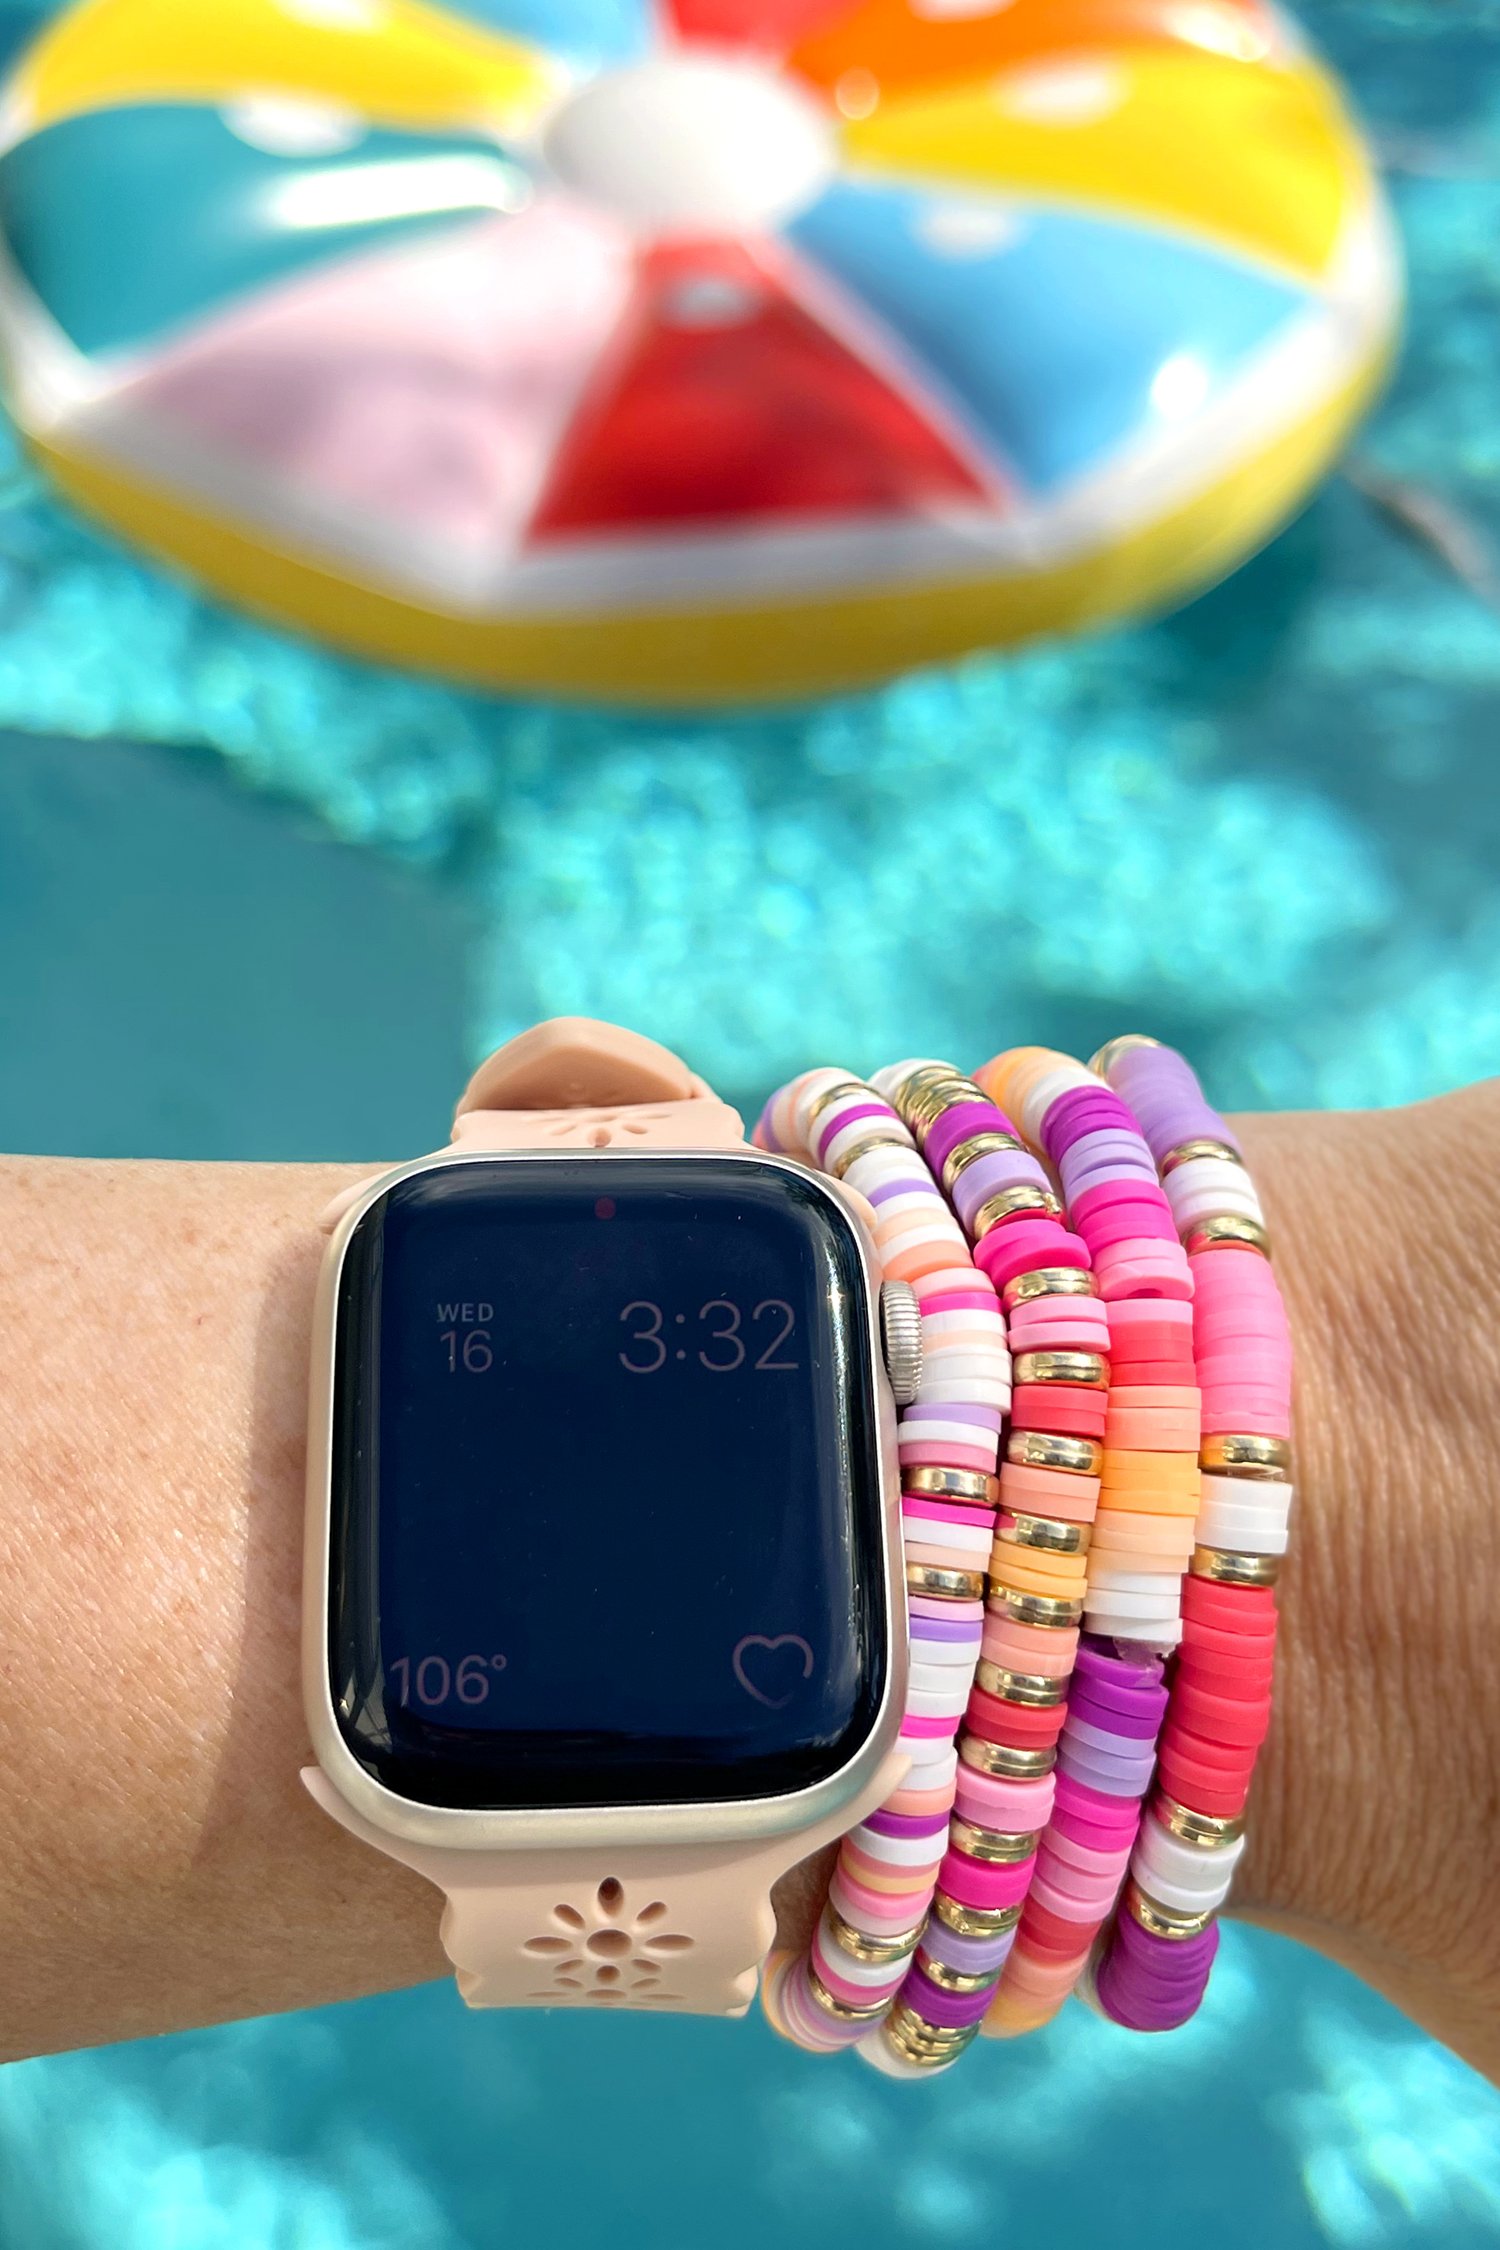
Yes! Clay bead bracelets are made from materials like polymer clay or vinyl, which are durable and can resist water. However, keep in mind that pools and other bodies of water often contain chemicals that might affect your bracelets. So, to keep your bracelets in top shape and extend their lifespan, it’s a good idea to take them off before you go swimming or take a bath.
So, now that you have all the how-to details, it’s time for you to start making your own set of clay bead bracelets! Why stop at bracelets, though? Use your newfound skills to create a matching Valentines necklace or even a pair of earrings for a full Valentine’s Day jewelry gifts set!
I can’t wait to see what you make, so don’t forget to tag me on Instagram @HeidiKundin or use the hashtag #HIHMakersClub to show off your work!

Valentine’s Day Bracelets: Printable Instructions

How to Make Valentine’s Day Beaded Bracelets
What You’ll Need:
- Clay Beads (6mm) in assorted colors
- Assorted Spacer Beads
- Alphabet Letter Beads
- Heart Beads & Enamel Heart Charms
- Elastic Beading Cord
- Washi Tape
- Super Glue Gel or GS Hypo Cement
Instructions:
- To begin, cut a length of stretchy cord that is approximately 10" long. Tip: to make quick work of measuring, I like to add a piece of washi tape to my desk that is 7" long, which is the length that I will make all of my beading. Simply extend the cord about 1.5" from each end of the washi tape and then cut.
- Grip the ends of the cord and pull to stretch. Pre-stretching the cord will allow you to tie tighter knots at the end!
- Add a small piece of washi tape to the end of the elastic cording, and fold the tape back on itself. This will create a barrier so that your beads don't slip off the end of the cord.
- Following the patterns as shown in the blog post, add beads to the bracelet string until it reaches the desired length.
- To finish the bracelet, tie a surgeon's knot as demonstrated in the video. Tie a half-knot, then another half-knot (do NOT pull the second half-knot tight yet!). Loop each tail through one more time, and then pull tightly.
- Add a small dab of glue to help secure the knot, and then allow the glue to dry completely before trimming off the ends of the cord.
Check Out These Other DIY Jewelry Ideas!
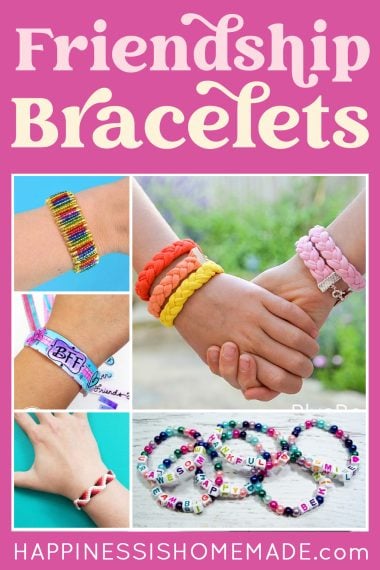
 DIY Gryffindor Bracelet Set
 How to Make Beaded Friendship Bracelets
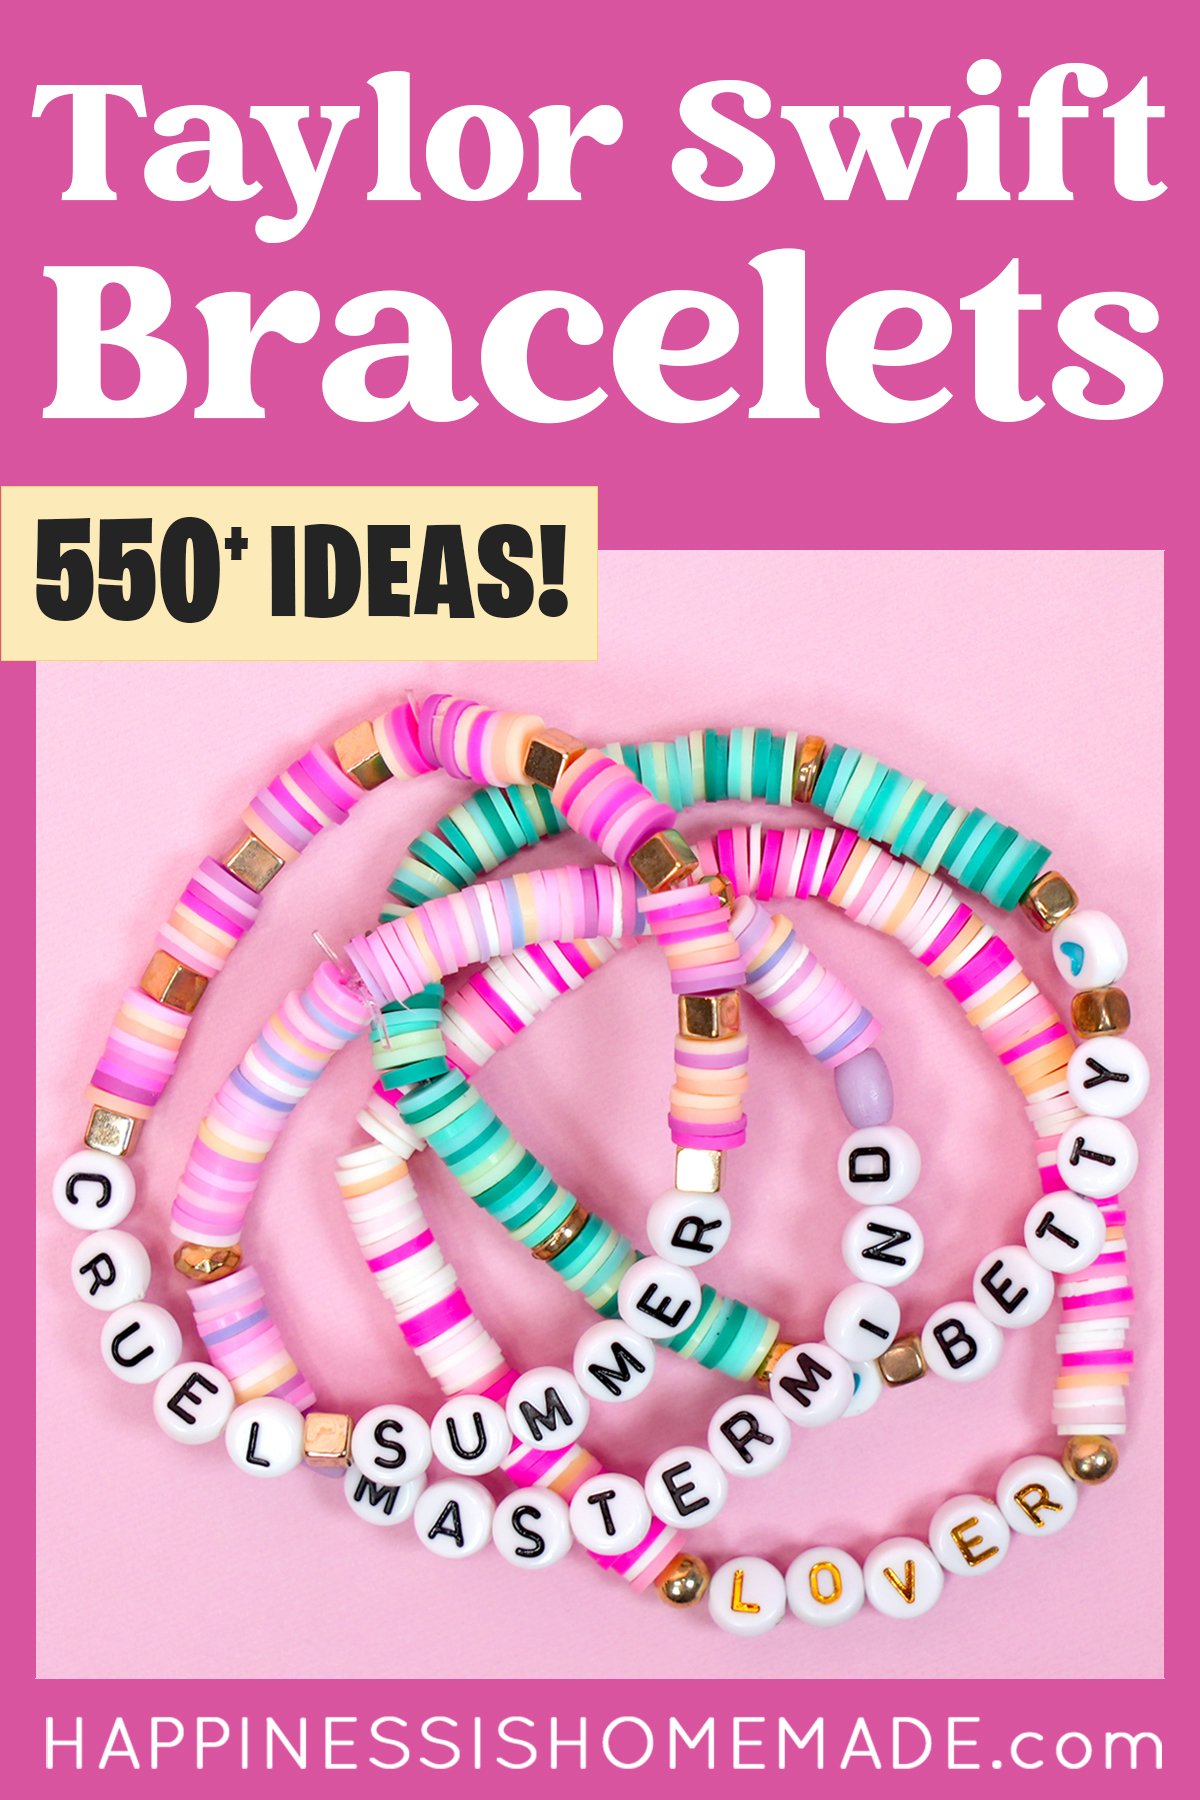
- 550+ Taylor Swift Friendship Bracelet Ideas
 Easy DIY Valentine’s Day Bracelets
 Easy DIY Teacher Bracelet Set
- Preppy Clay Bead Bracelet Ideas & How-to Tutorial
- 25+ DIY Friendship Bracelet Ideas
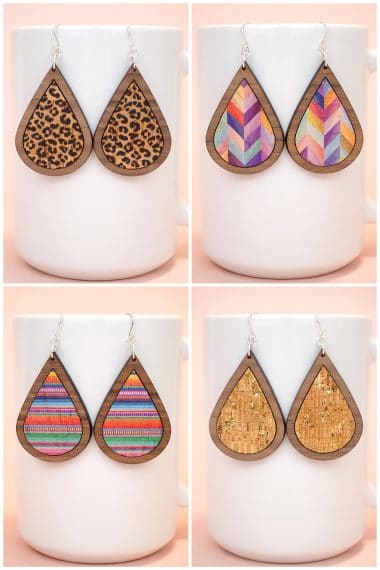
- Laser Cut Wood Earrings with Cork Inlay
Pin These Valentine’s Day Bracelets for Later!


Heidi Kundin has captivated the hearts of millions with her colorful and inspiring approach to crafting, celebrations, and family fun. With over 15 years of experience, Happiness is Homemade has become a must-visit destination for those seeking quick and easy creative ideas and last-minute solutions. Heidi’s warm personality shines through her posts, inviting readers to join her on a creative journey that’s fun, rewarding, and achievable. Heidi is also the author of Homemade Bath Bombs & More and DIY Tie-Dye.
These are SO cute! I’ve been waiting for Valentine’s Day content since Christmas was over, and it is *not* disappointing 😍 My favourite is probably the “Be Mine” bracelet, but they’re all gorgeous! I’m also loving that everyone is into friendship/charm bracelets again, as I’ve been making myself ones for ages 🥰
I’m so glad you like them! I’ve been having WAY too much fun making them! 😂