

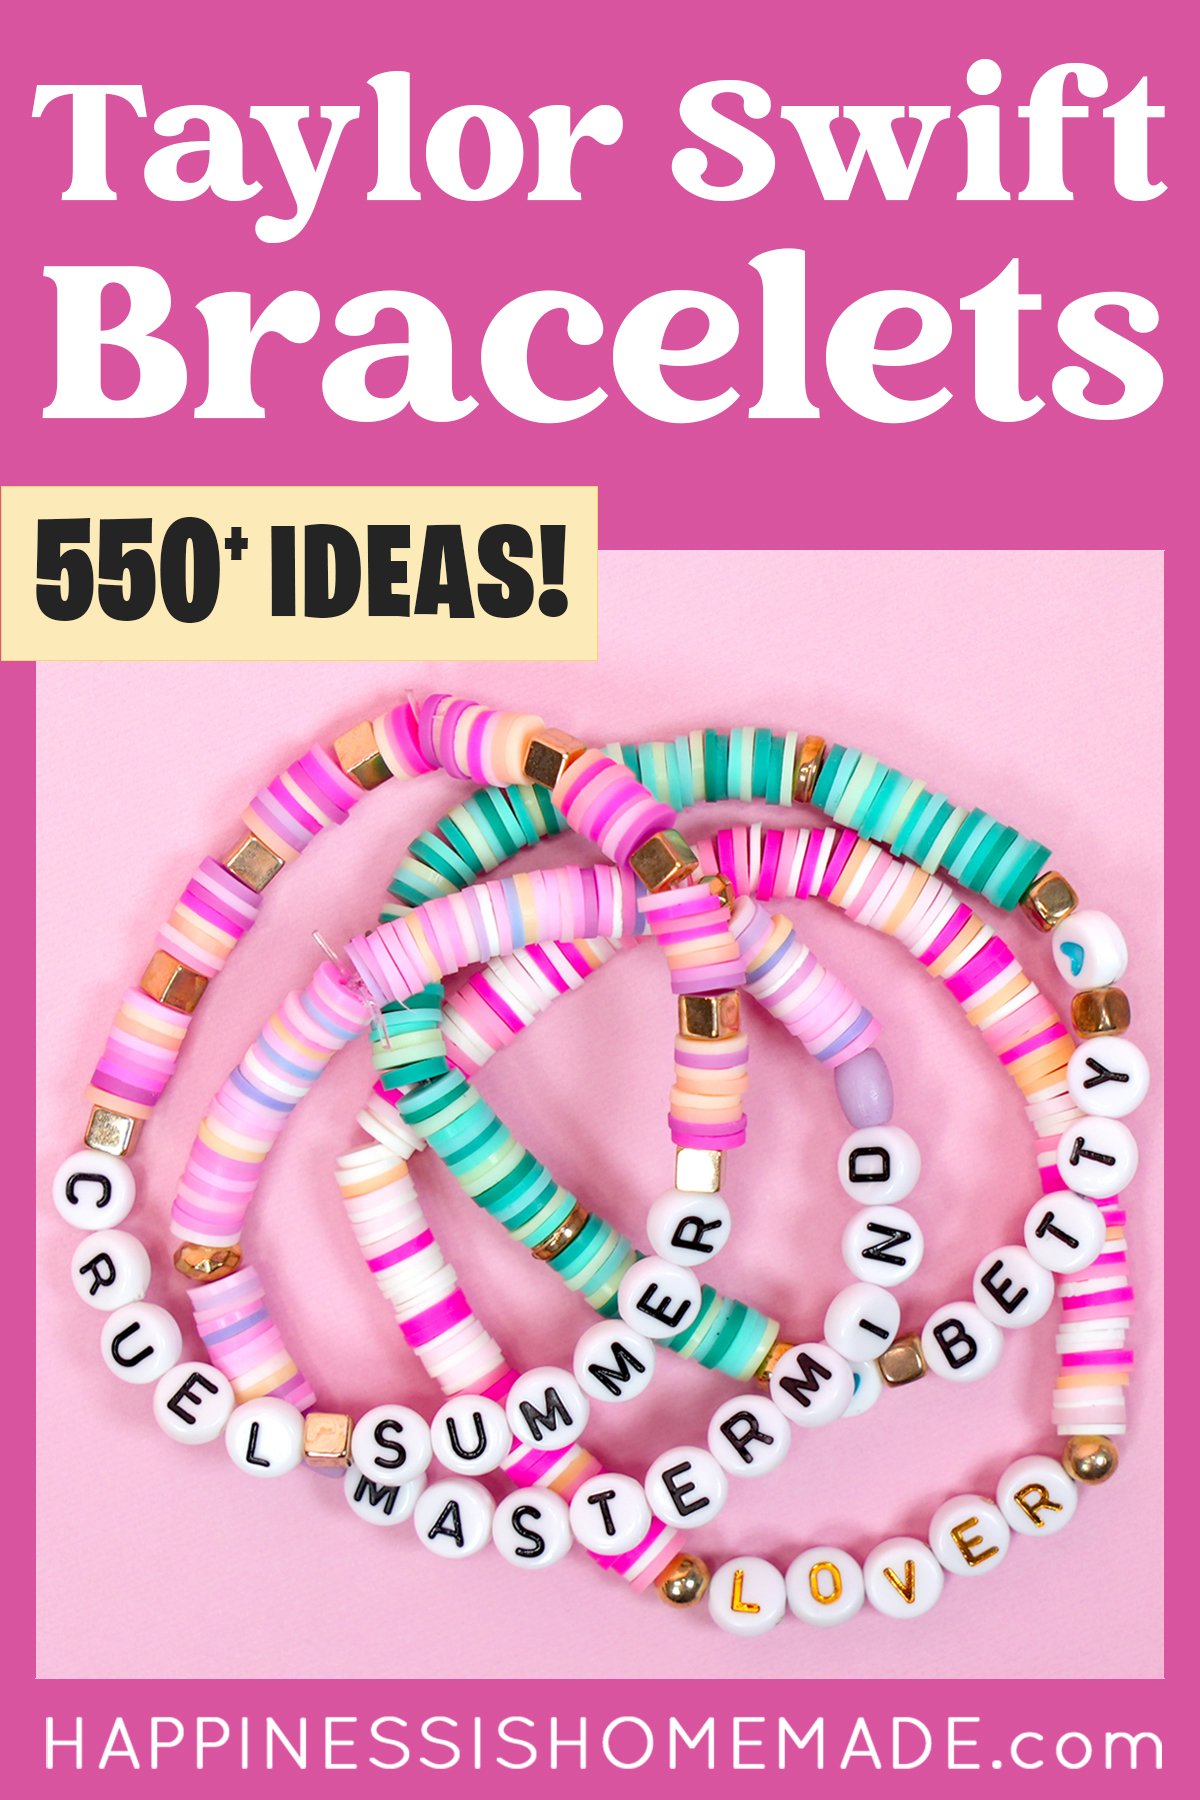
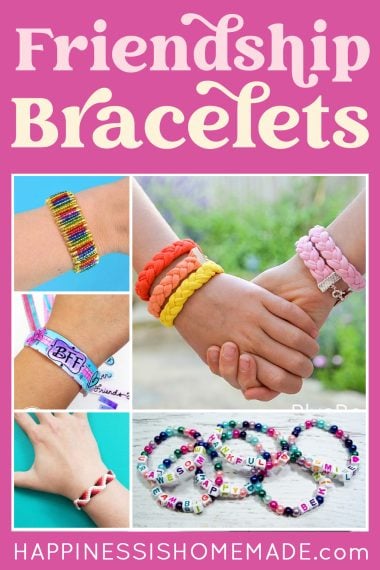
Learn how to make beaded friendship bracelets for your friends (or to trade with fellow Swifties at The Eras Tour!)! This easy beaded bracelet tutorial can be adapted to suit lots of different styles!
Skill Level: Beginner – these easy beaded friendship bracelets are a simple project for people ages 6+ through adults. Younger children may need adult assistance with tying secure knots.
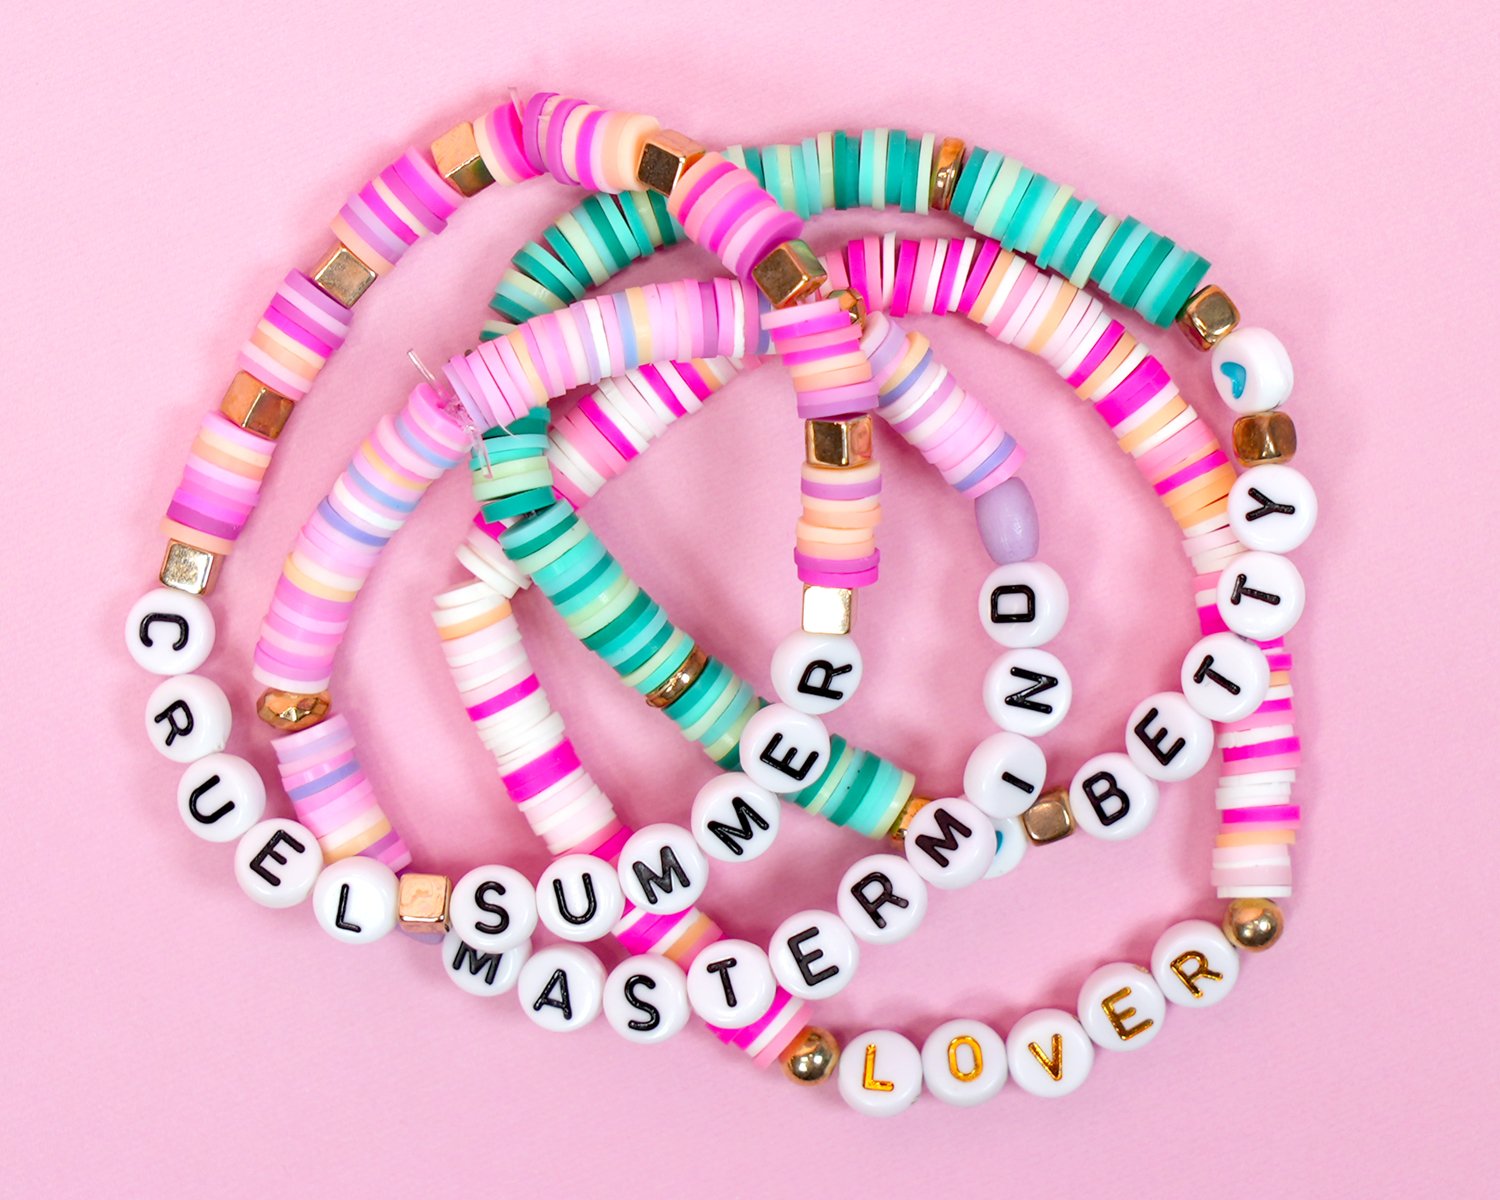
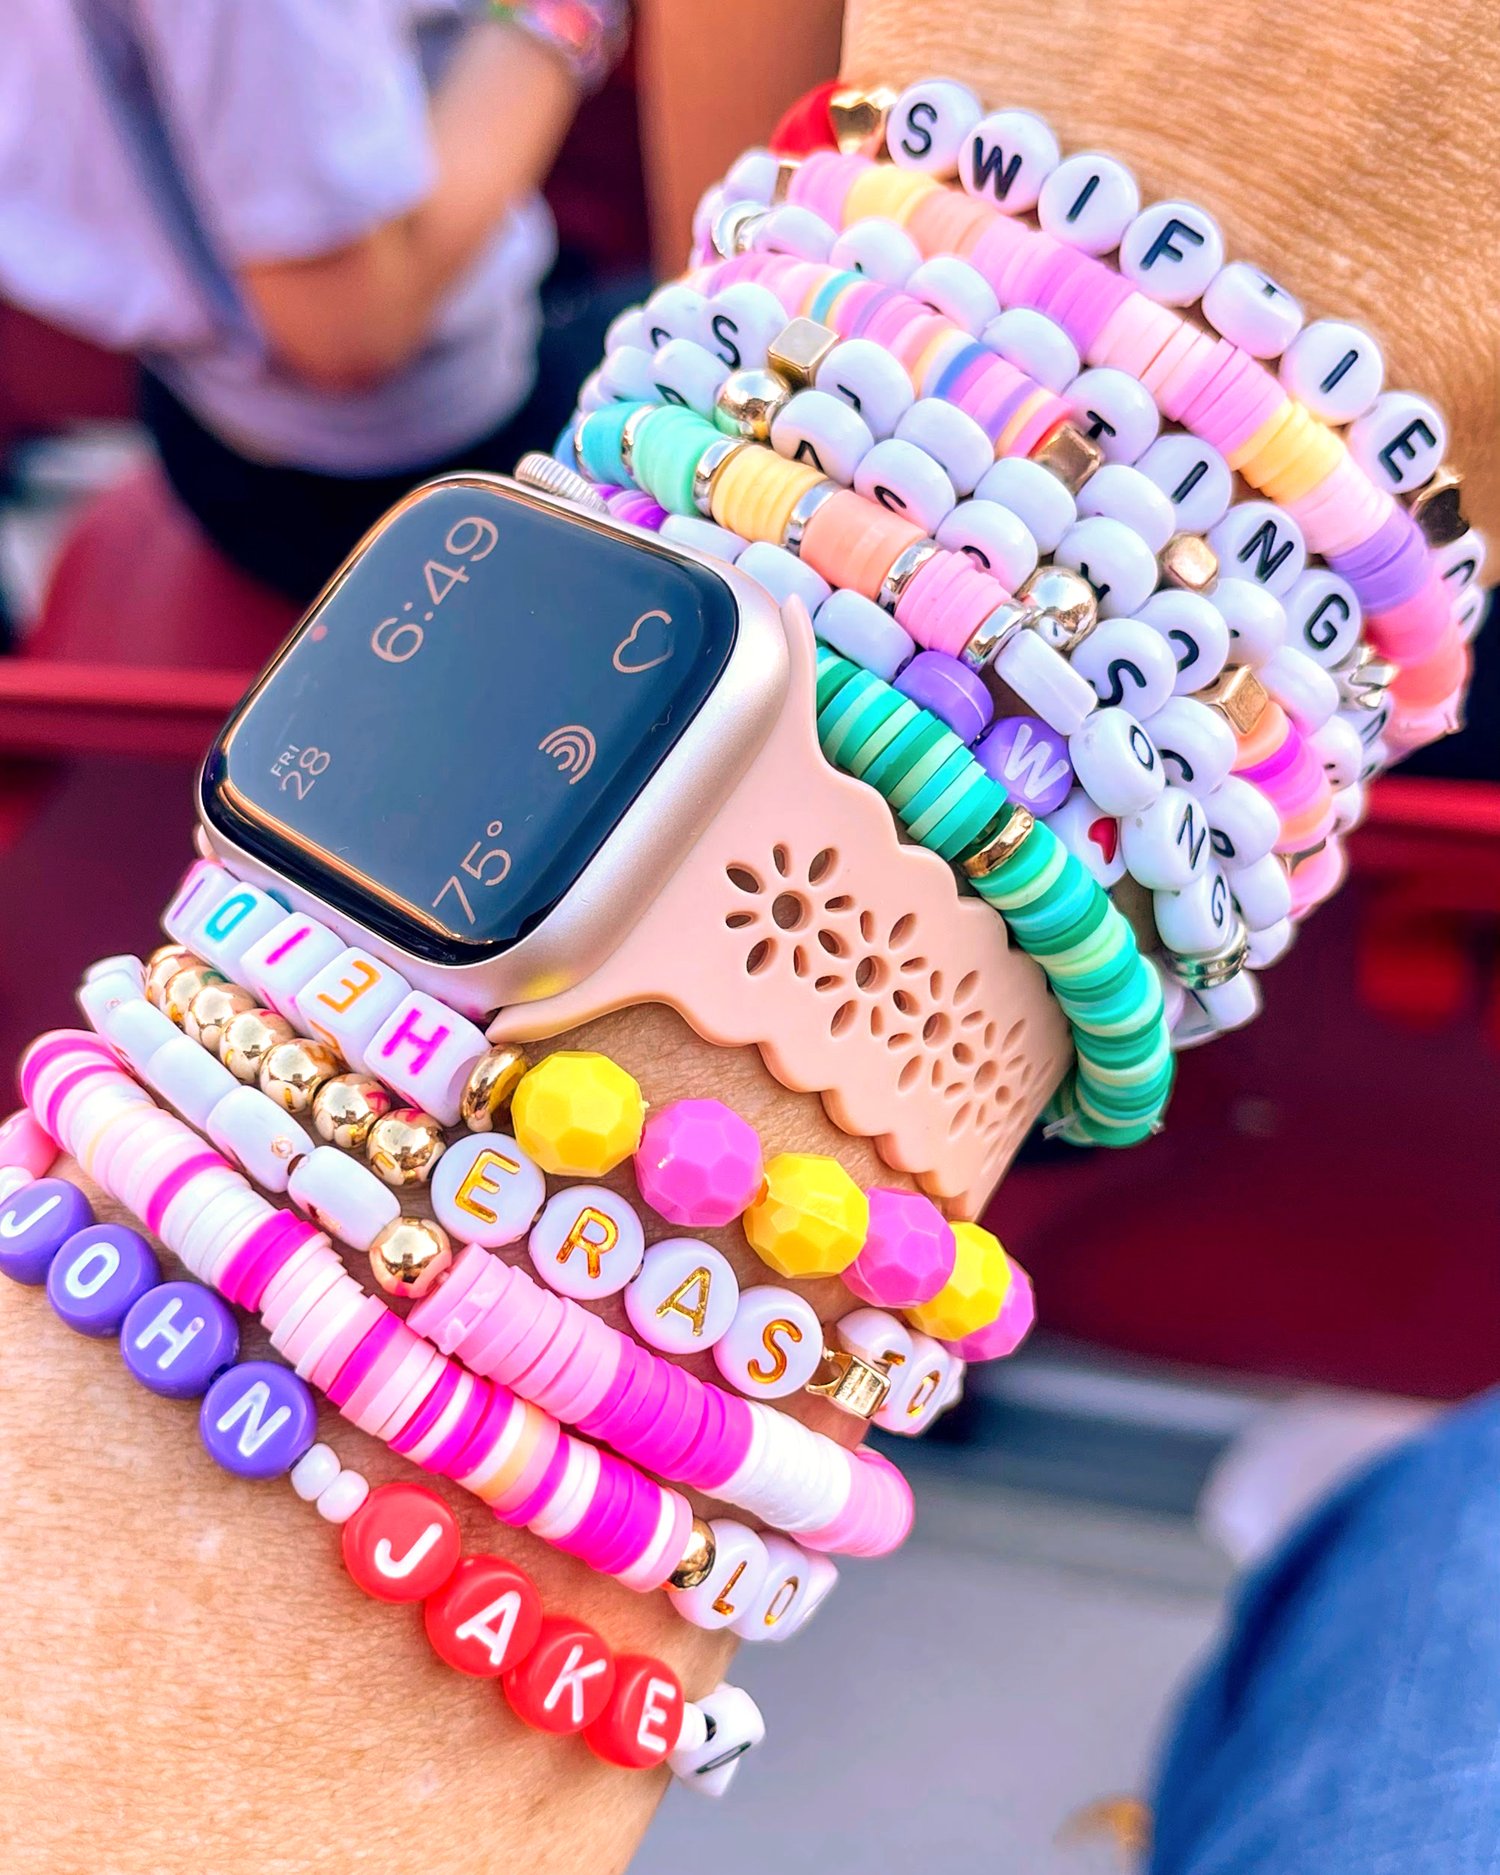
Friendship bracelets have always been a great activity for friends to make one another, and now, with the Taylor Swift Friendship Bracelet craze surrounding The Eras Tour, they’re hotter than ever!
Today, I’m sharing a simple DIY beaded friendship bracelet tutorial with you that can be used to create all kinds of stretch bracelets in lots of different color combinations and styles. These DIY bracelets make great gifts for your favorite friends, and they’re sure to be a huge hit!
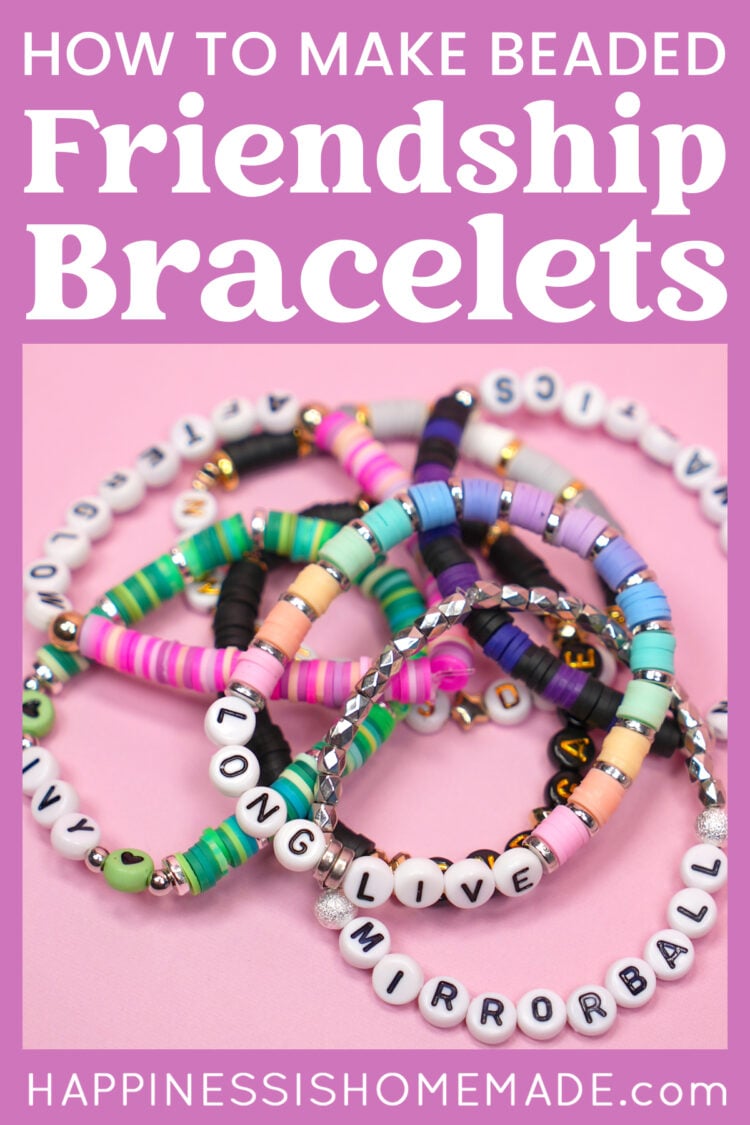
DIY Bead Friendship Bracelets
Making these DIY friendship bracelets is both quick and simple, needing only a few supplies. You’ll probably find yourself wanting to create a whole bunch – it’s SO much fun! Just follow my easy tutorial below:
This post may contain affiliate links. I will receive a small commission from these sales at no additional cost to you!
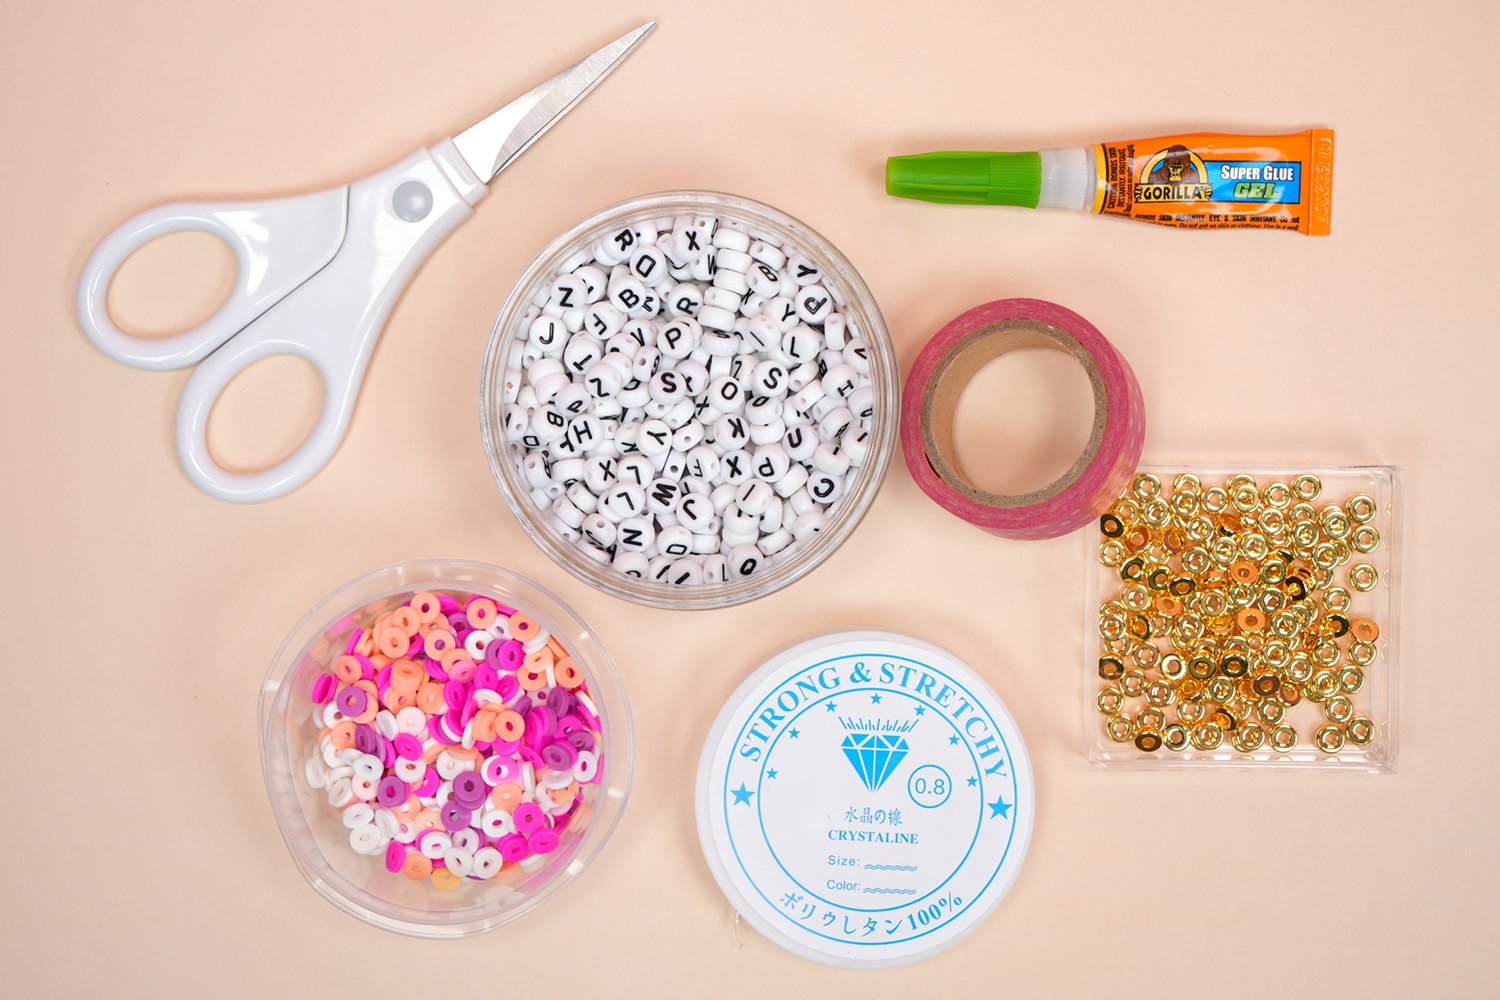
Beaded Friendship Bracelet Supplies
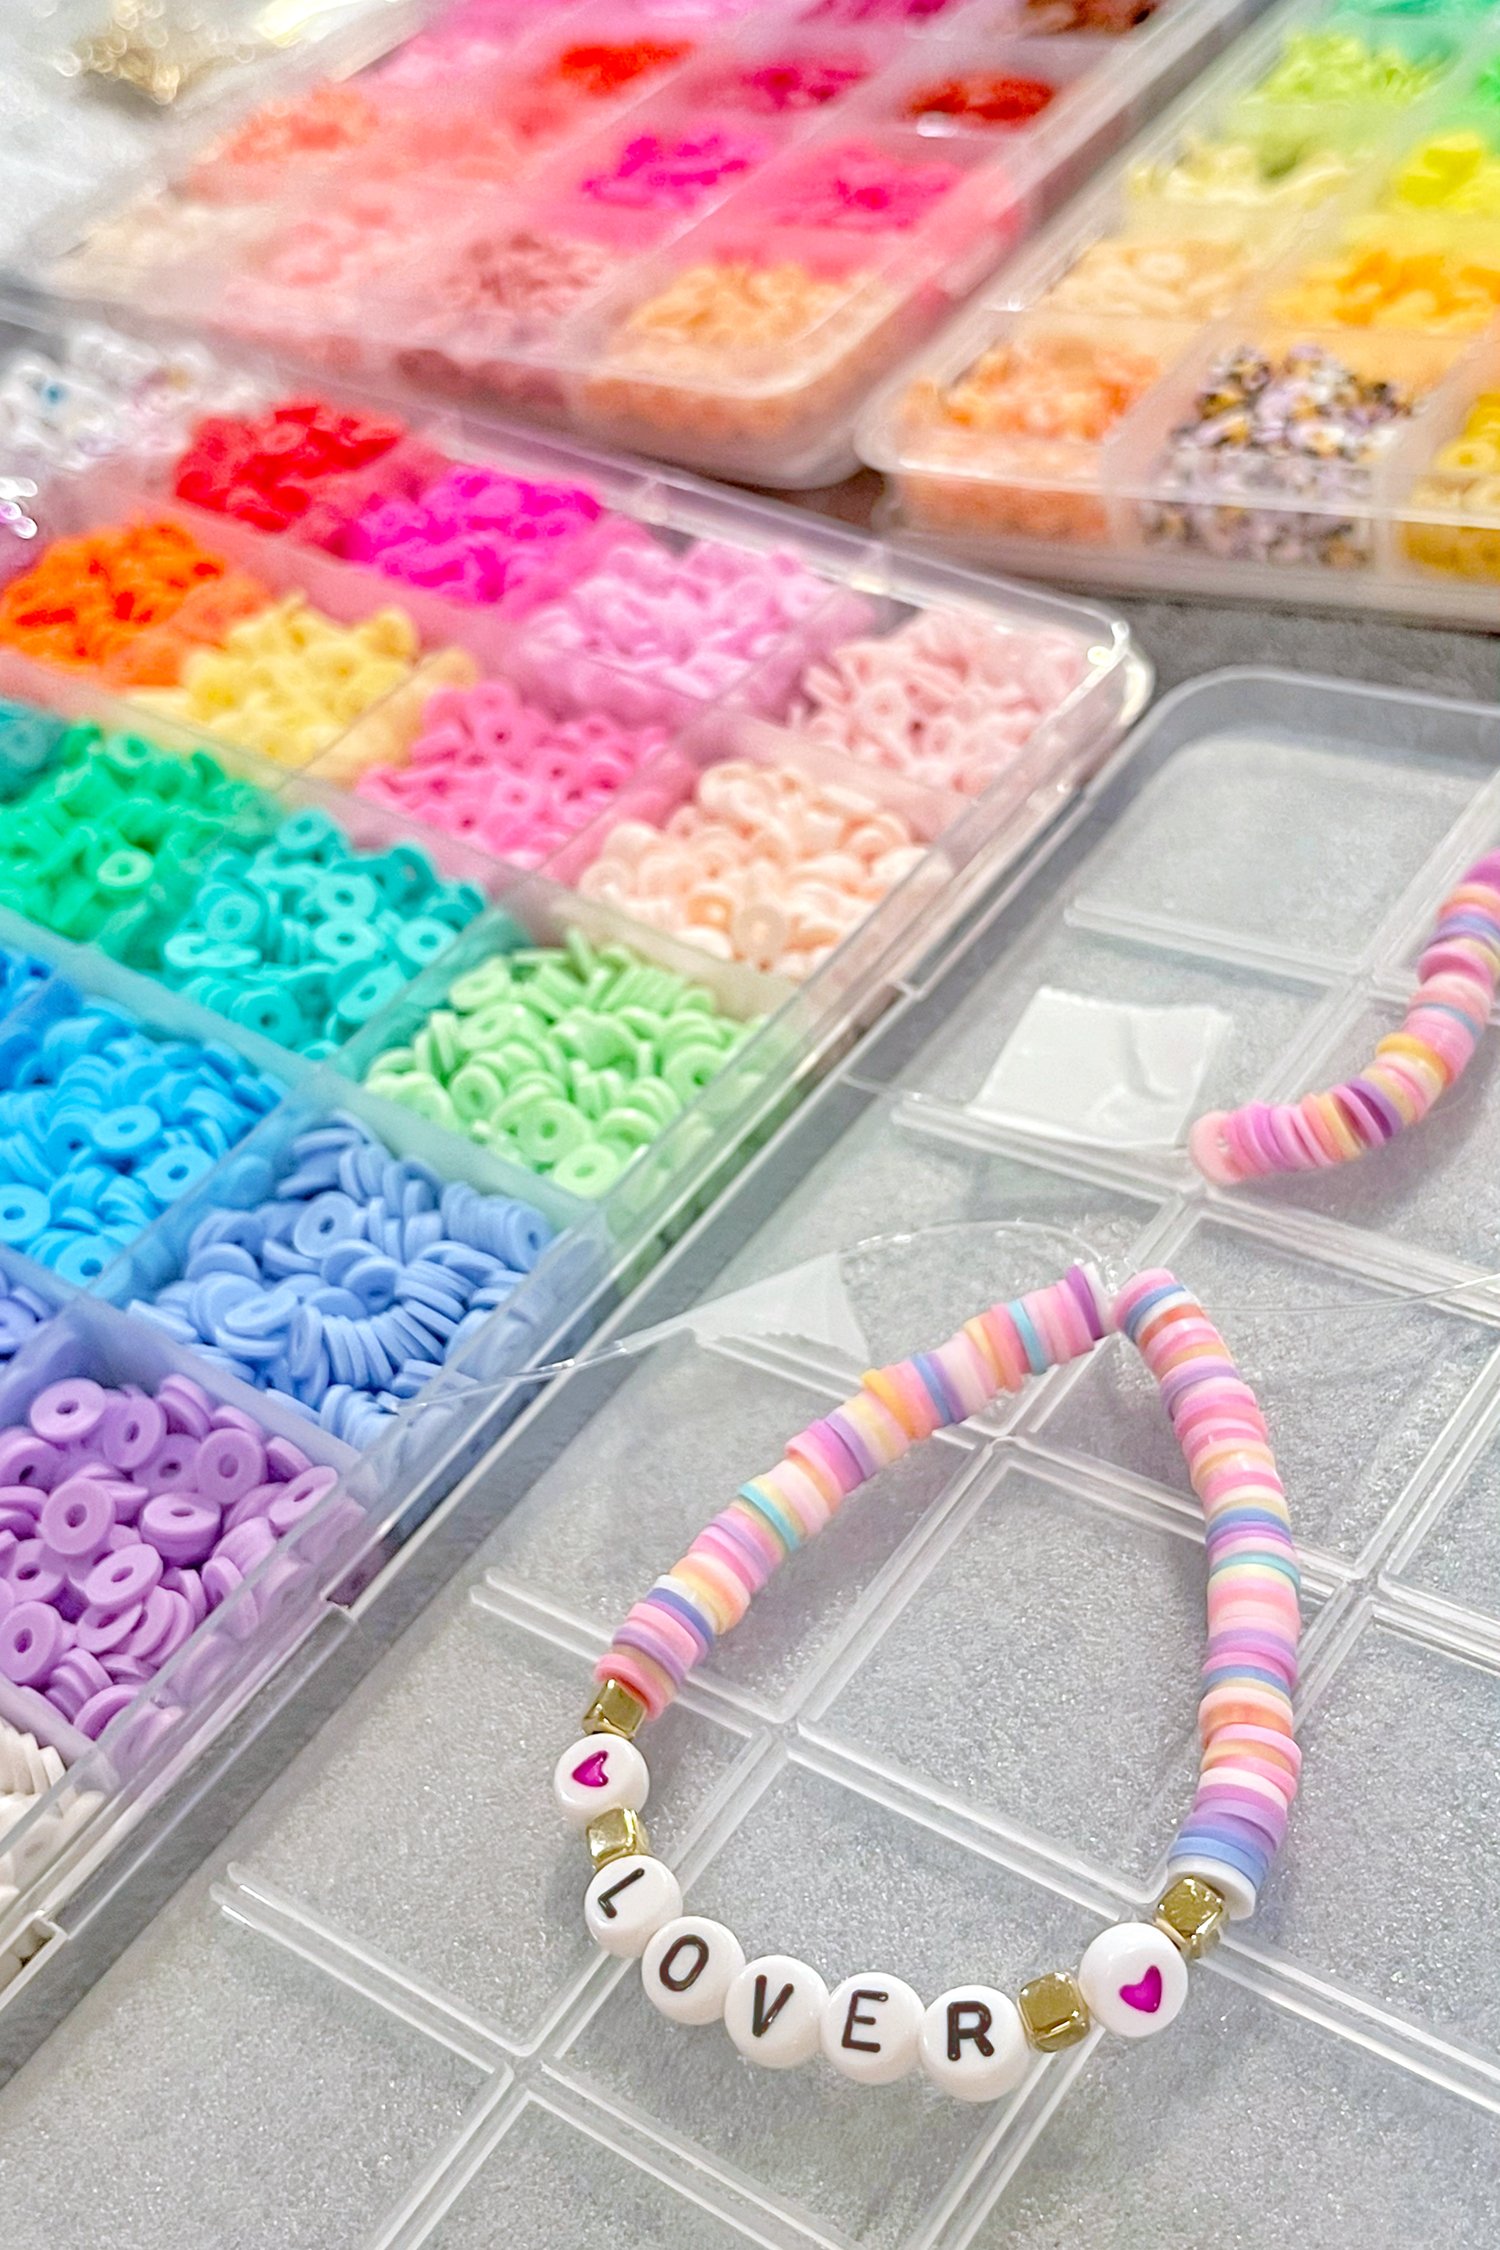
There are many different beads that you can use to make beaded bracelets, so the list below includes just a few of the most popular types of beads. Personally, I am a huge fan of clay bead bracelets because they look a little more sophisticated and are perfect for everyday wear.
Main Bead Options:
Accent Beads & Other Supplies:
Or, save time by buying an all-inclusive friendship bracelet kit instead!
How to Make Beaded Friendship Bracelets
Step 1. Starting the Bracelet
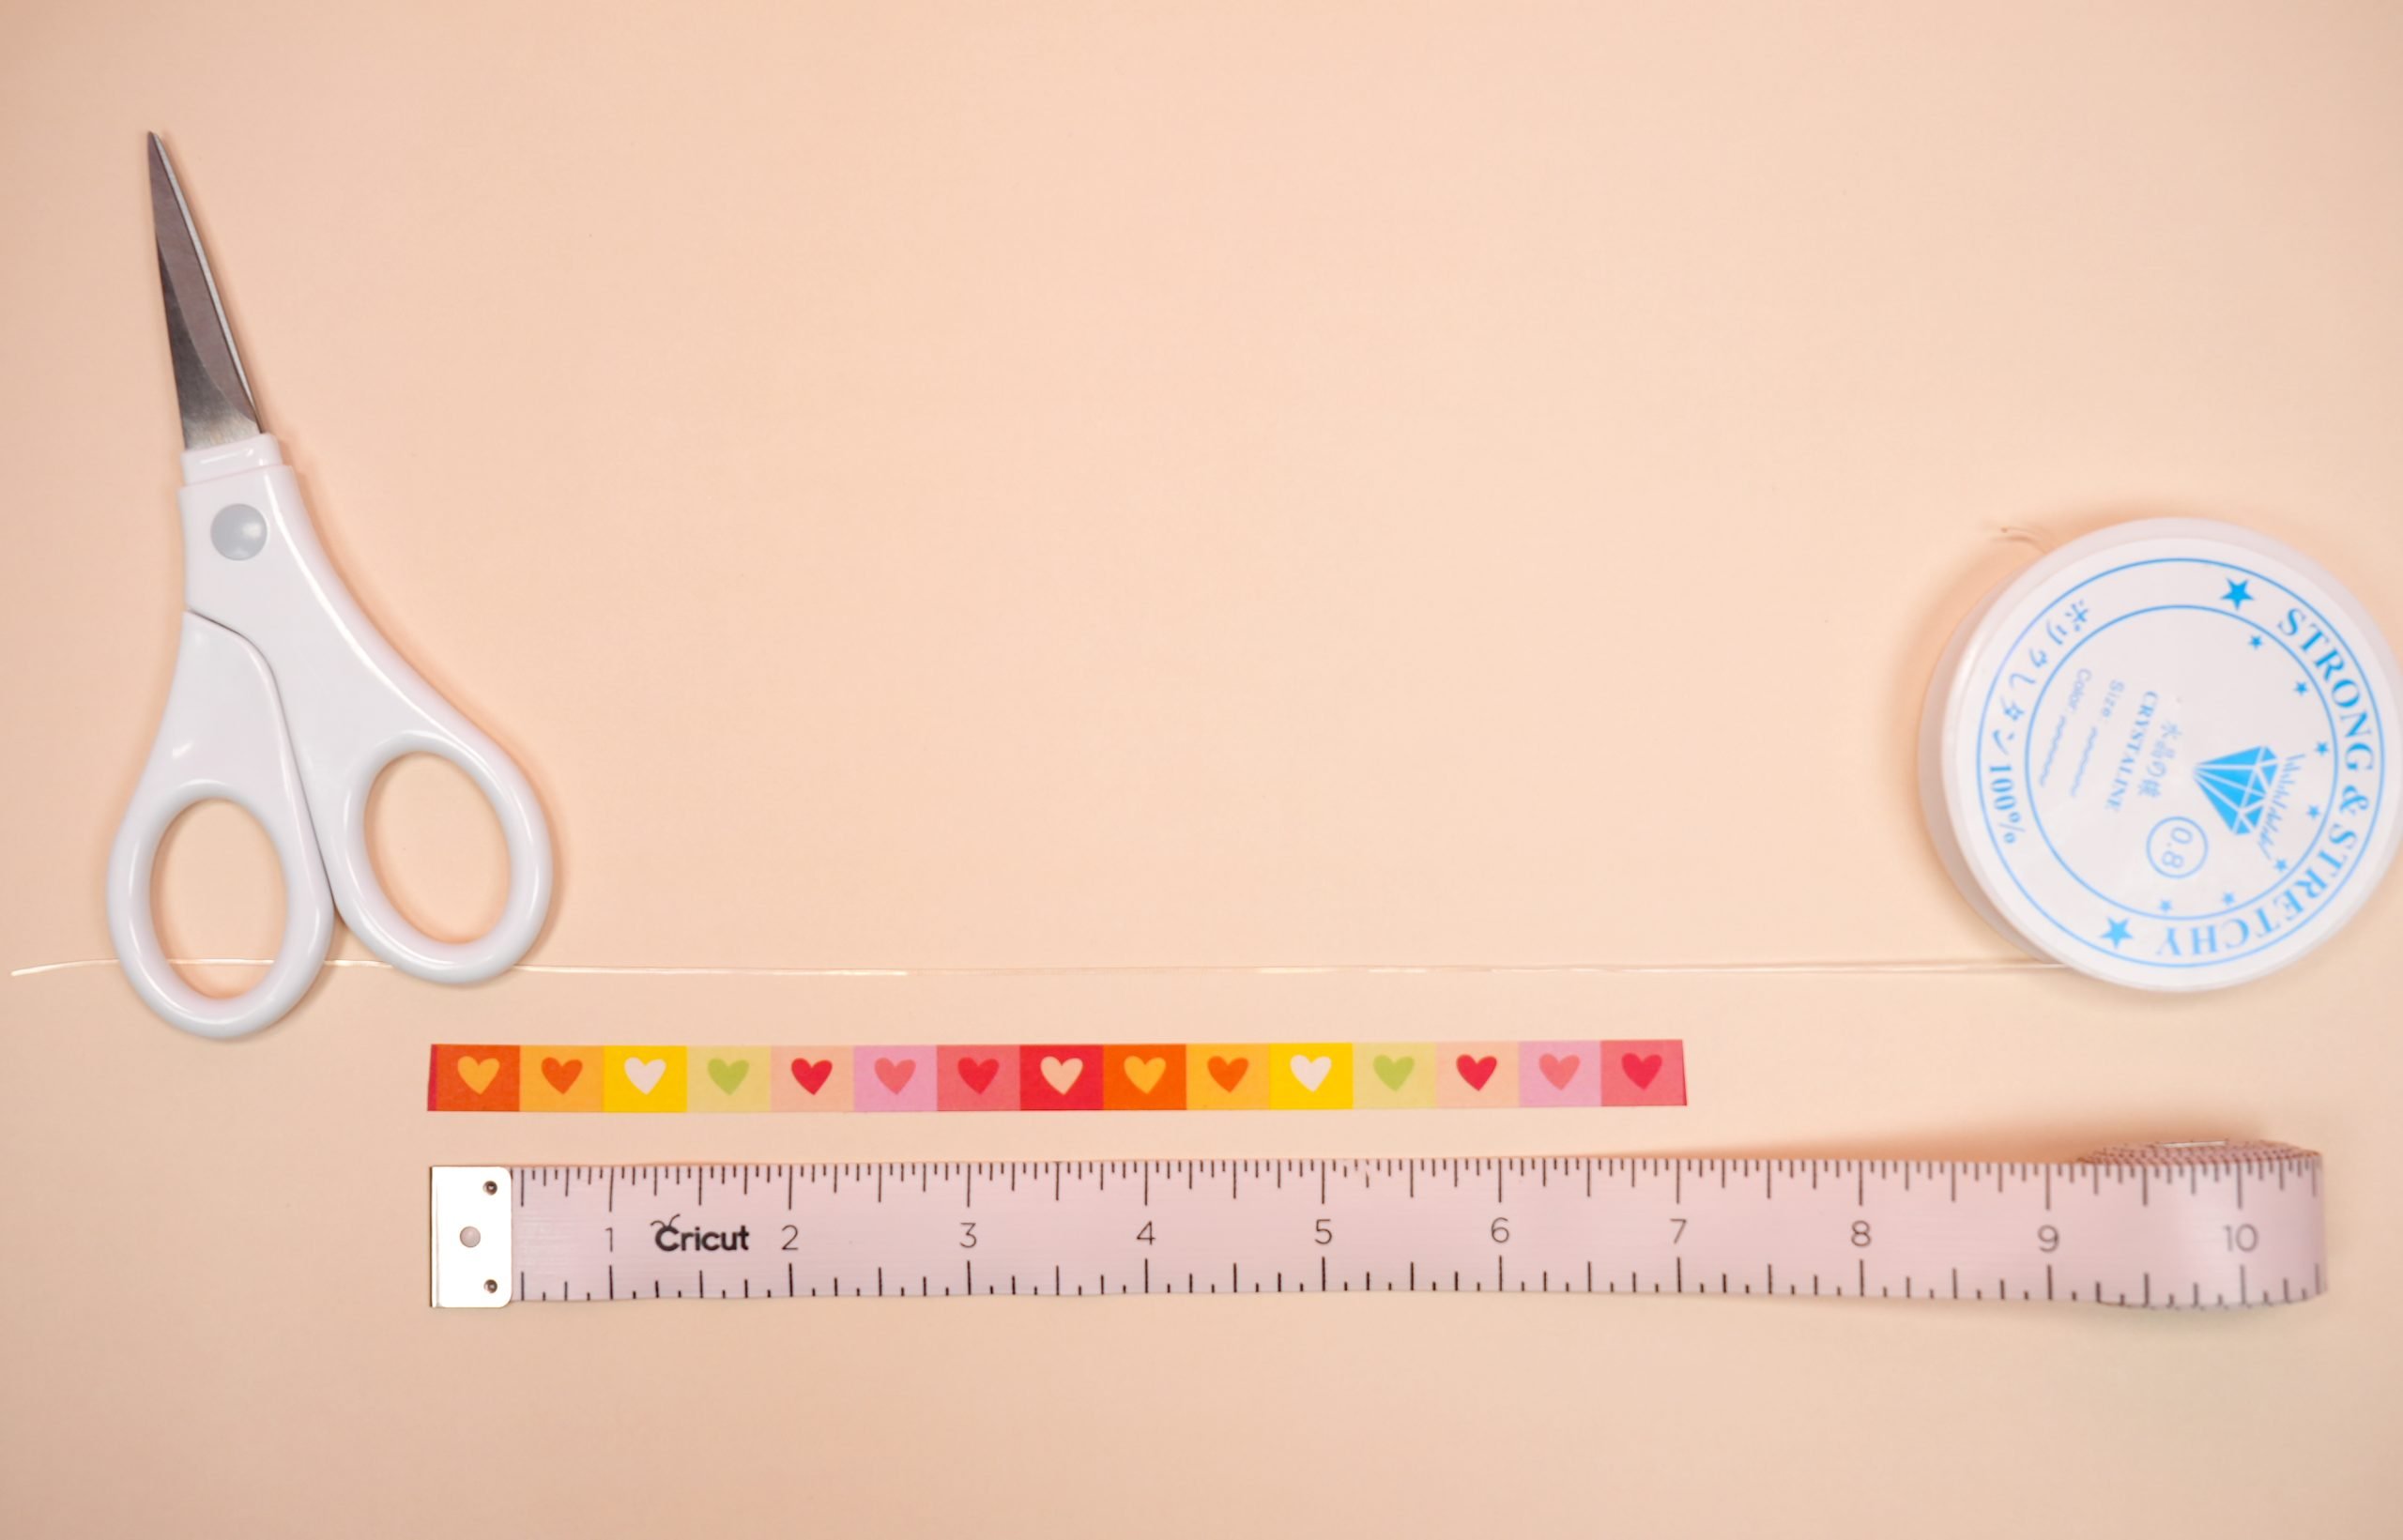
To begin, cut a length of stretchy cord that is approximately 10-12″ long.
Grip the ends of the cord and pull to stretch. Pre-stretching the piece of cord will allow you to tie tighter knots at the end!
Heidi’s Pro Tip:
To make quick work of measuring the cord, add a piece of washi tape to your desk that is 7″ long (or whichever wrist size that you prefer). This measurement should be the equivalent of how many inches of beads you need for your bracelet. To cut the stretchy cords, simply extend the cord 1.5″ or so from each end of the washi tape and then cut to length.
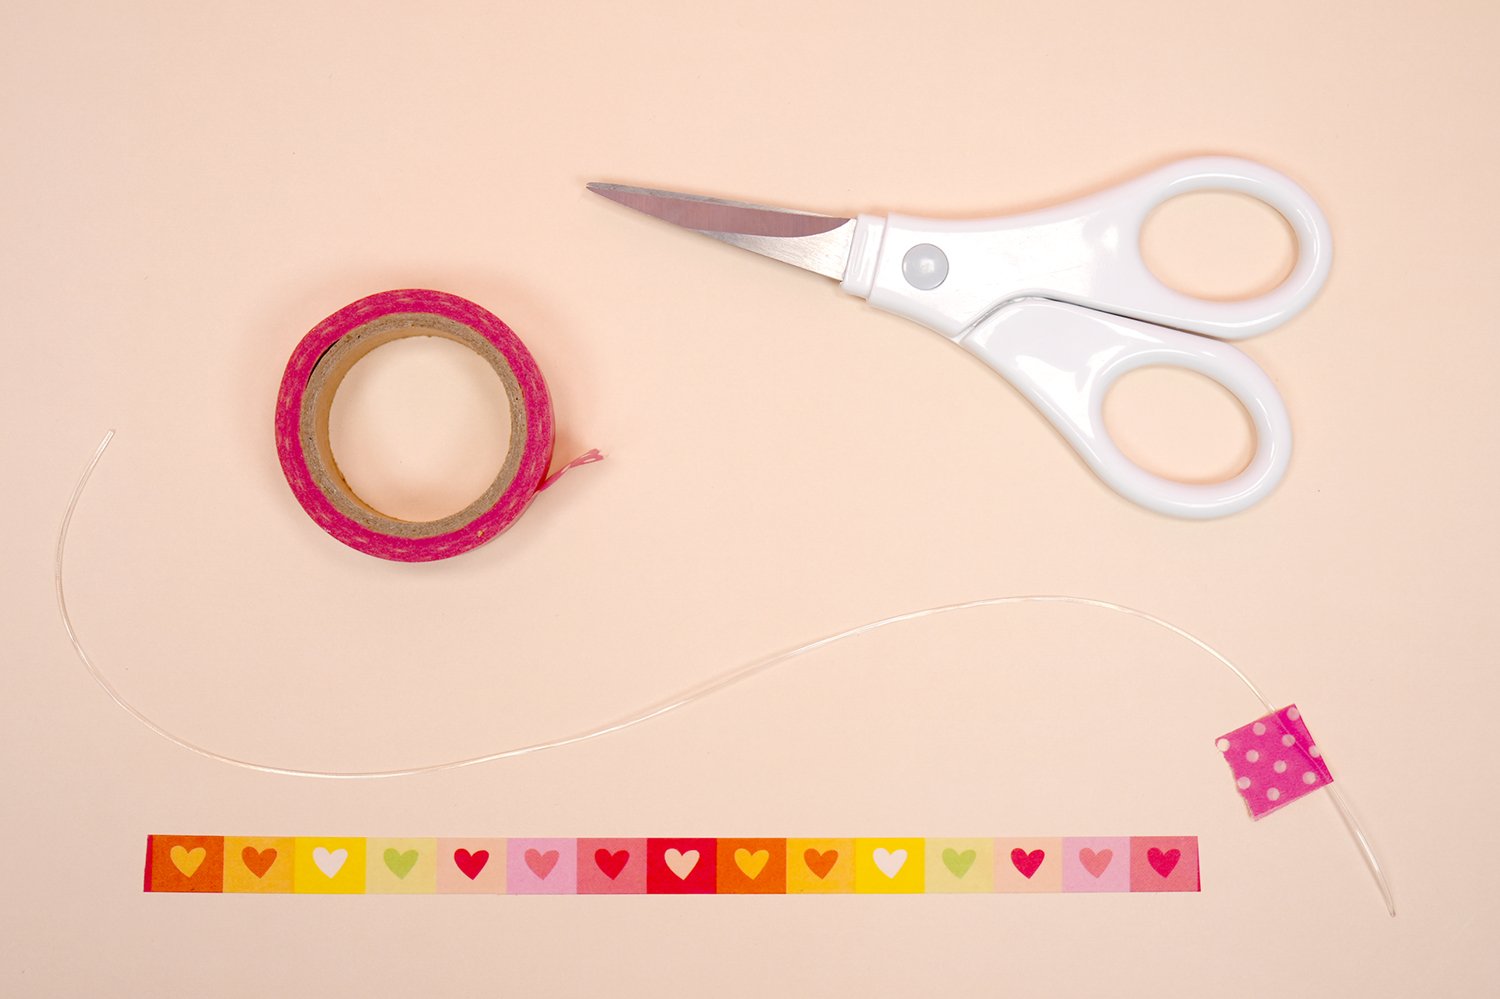
Add a small piece of washi tape or a piece of scotch tape to the end of the elastic cording, and fold the tape back on itself. This will create a barrier so that your beads don’t slip off the end of the cord.
Alternatively, you could forego the tape and instead attach a mini binder clip to the end of the string (but I personally prefer to use the tape method).
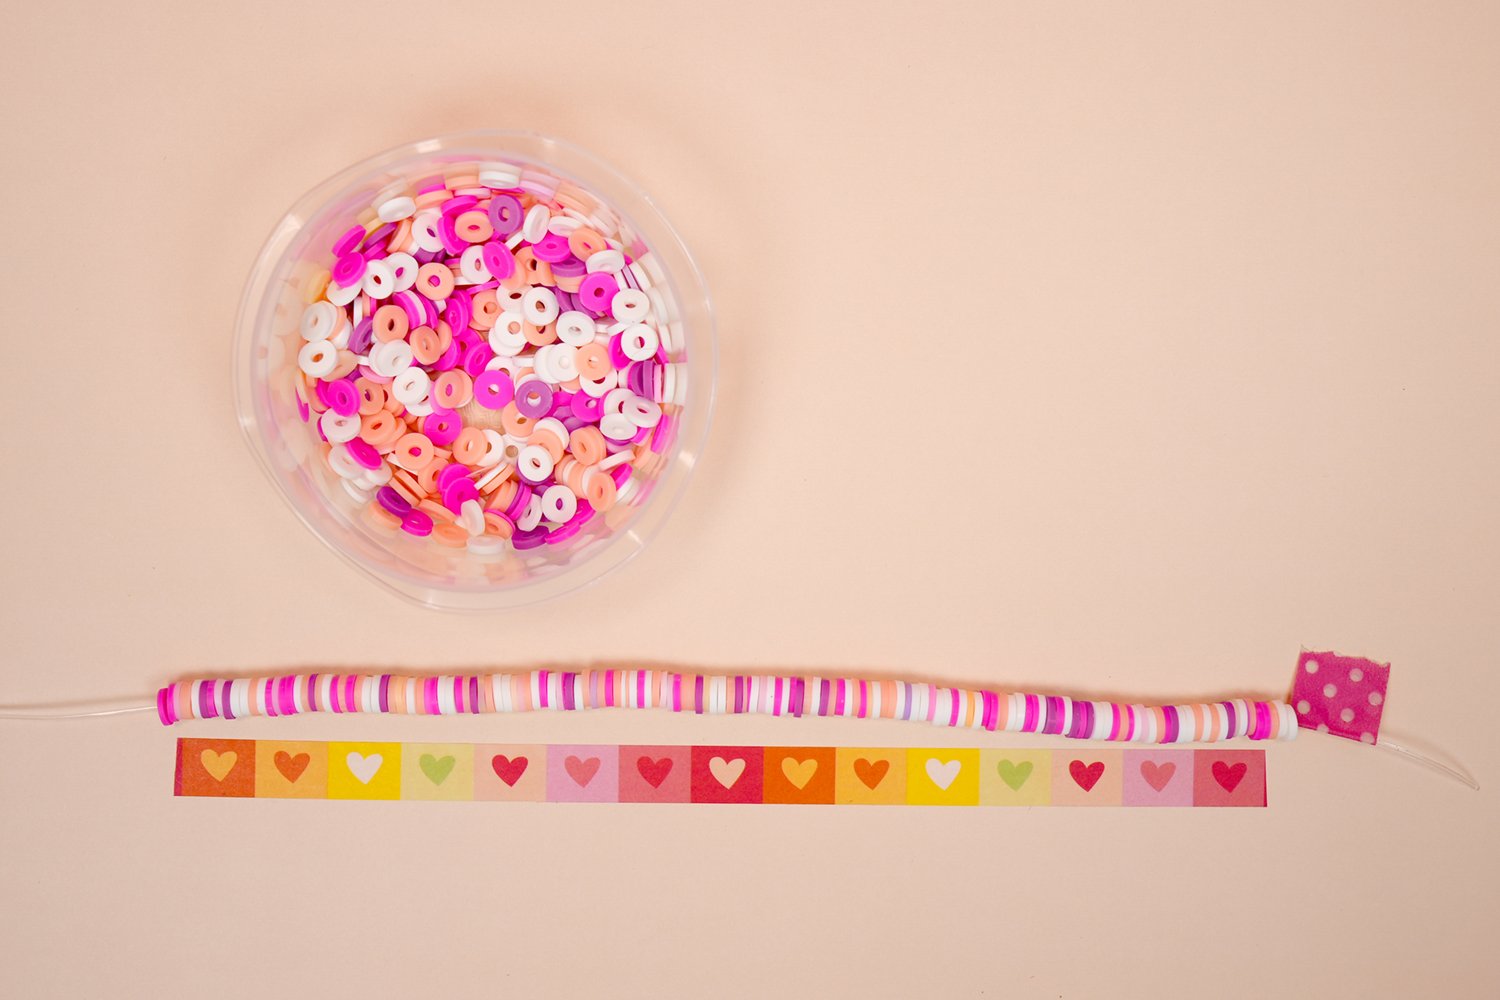
Step 2. Beading the Bracelet
Add beads to the bracelet string until it reaches the desired length.
Again, you can use that handy strip of washi tape to easily measure the length at a glance!

Step 3. How to Tie a Beaded Bracelet
My favorite way to tie clay bead bracelets is with a surgeon’s knot. It’s quite simple to do, and it holds better than a typical square knot.
Follow the video above: tie a half-knot, then another half-knot (do NOT pull the second half-knot tight yet!). Loop each tail through one more time, and then pull tightly.
Add a small dot of gel glue to the knot and allow to dry completely before trimming the strings.

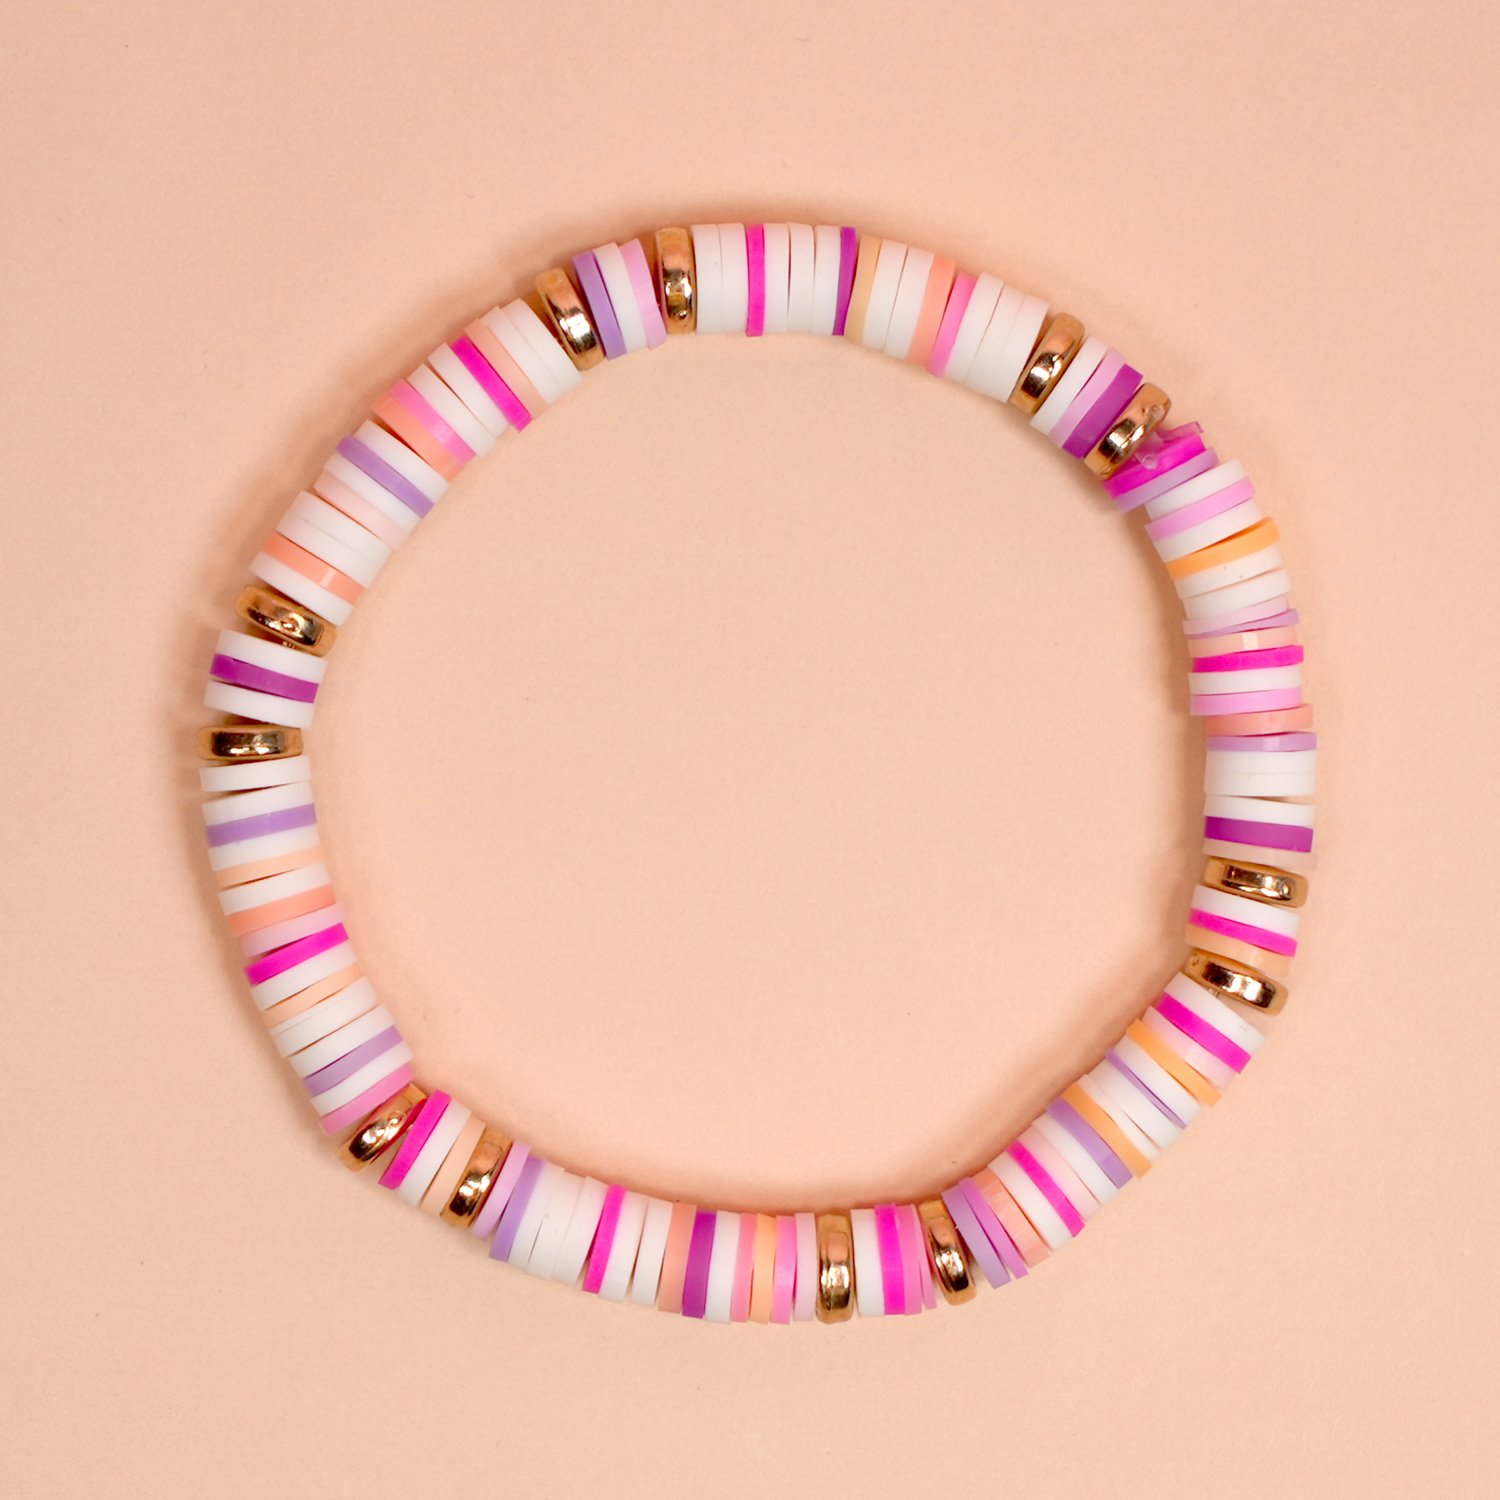
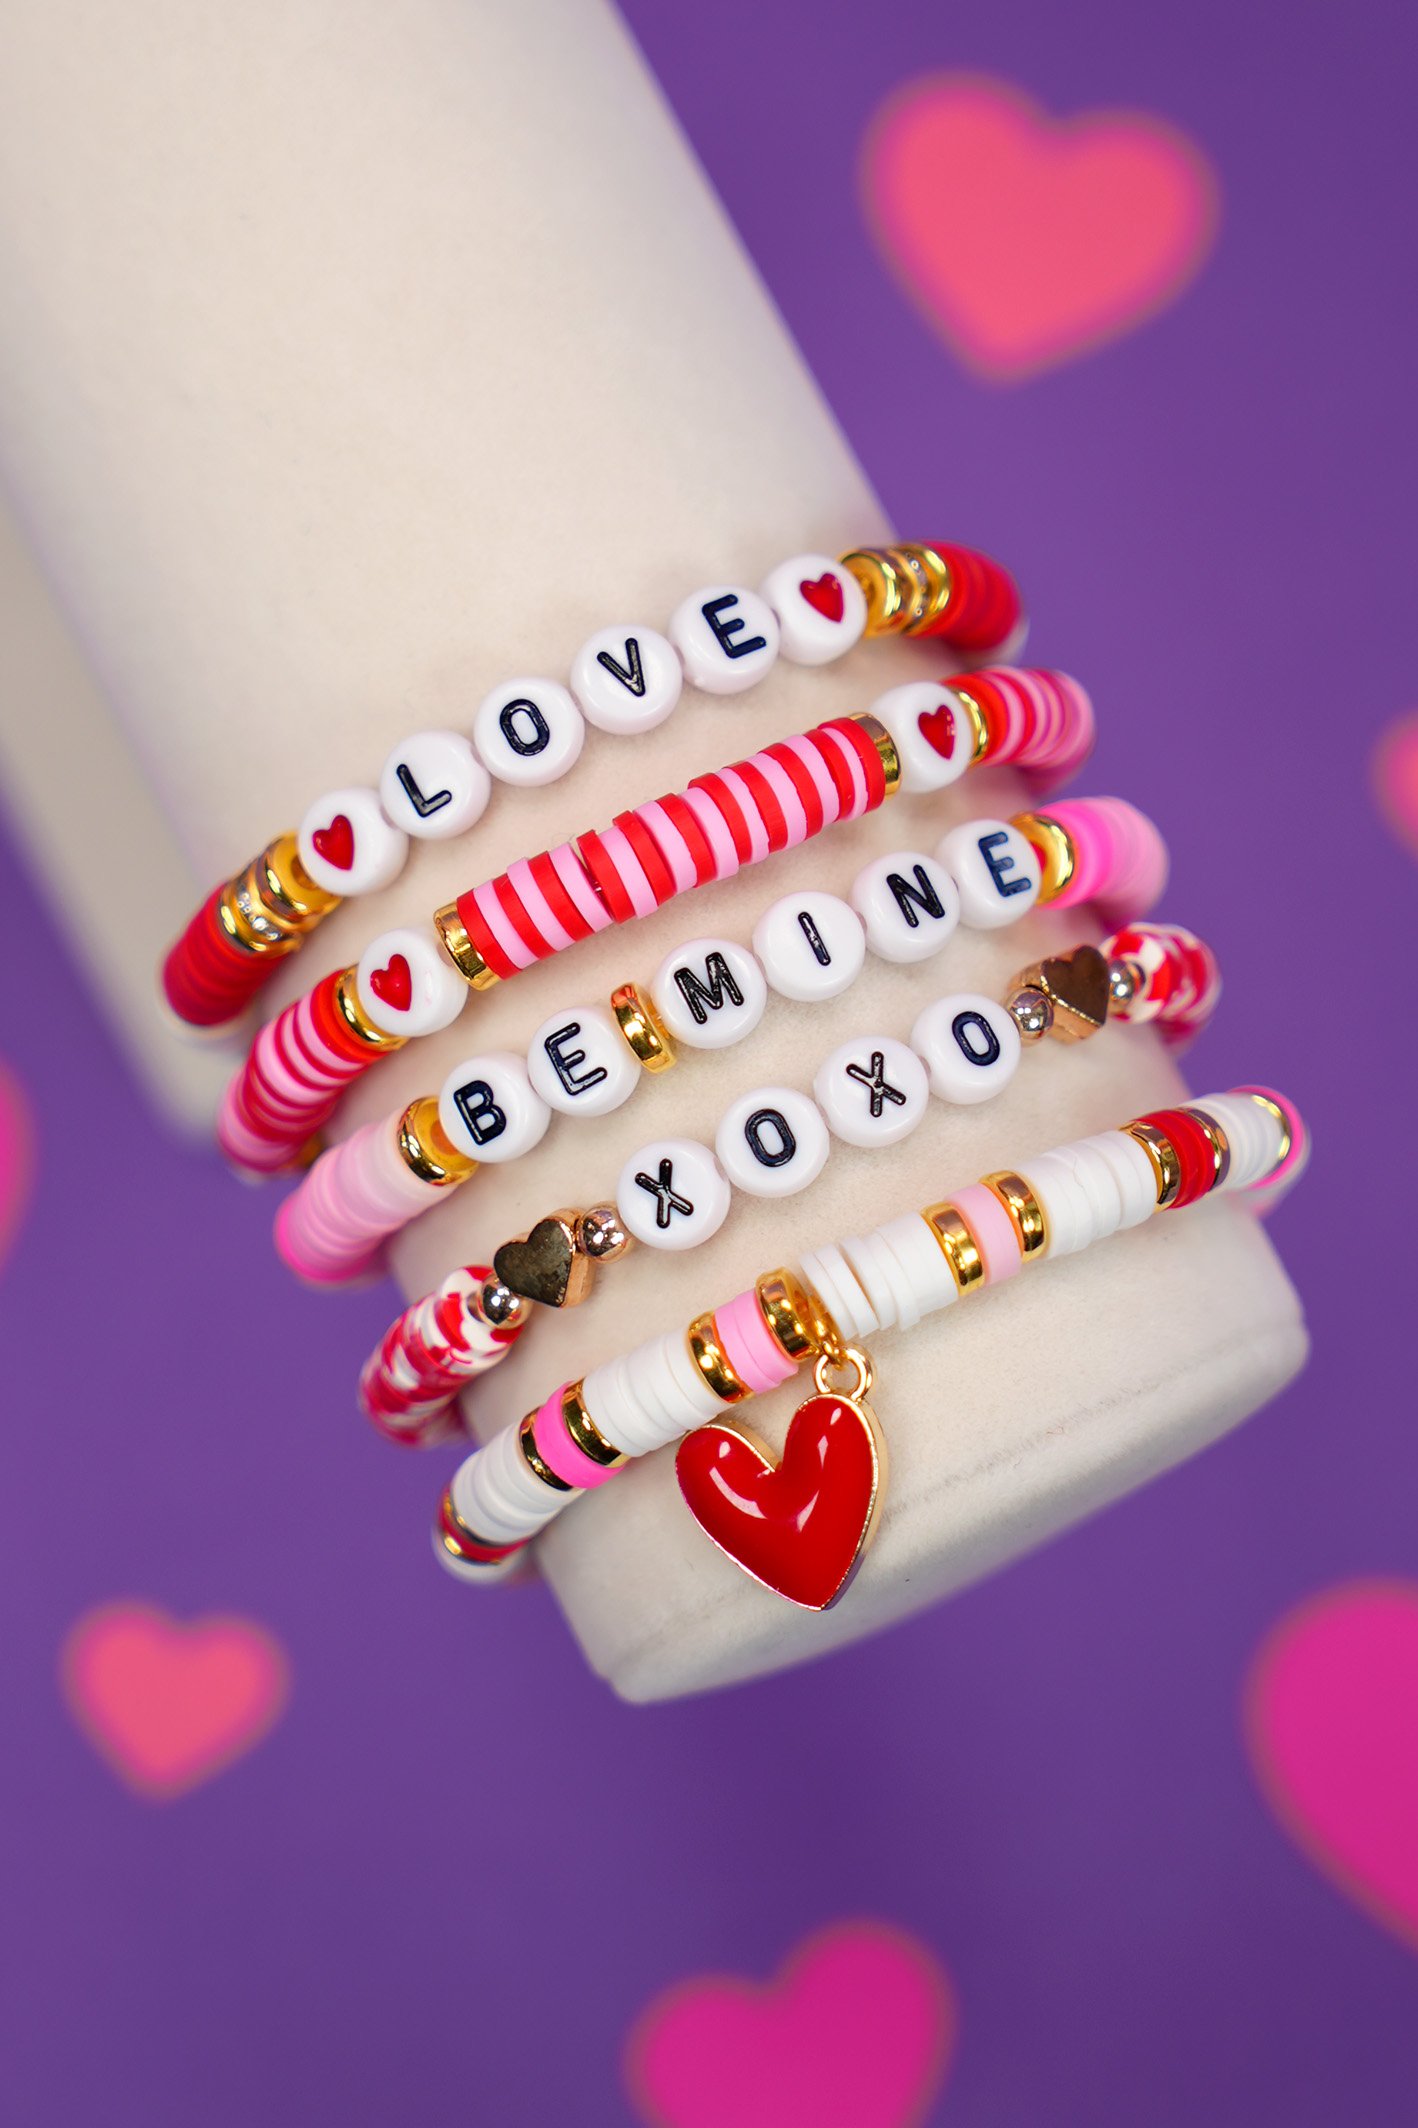
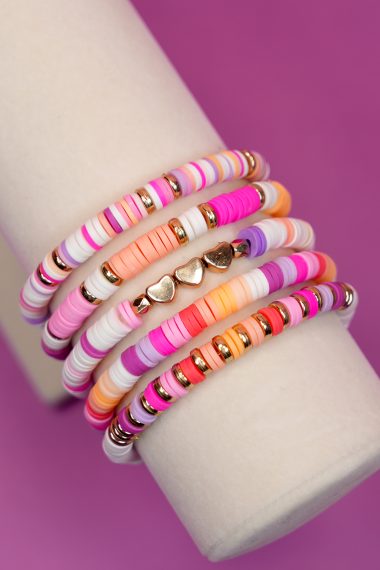
Beaded Bracelet Variations
Use different color combinations, patterns, and bead groupings to create friendship bracelets in lots of different styles. Experiment with adding decorative spacer beads and alphabet beads that spell out your favorite words, phrases, or song lyrics.
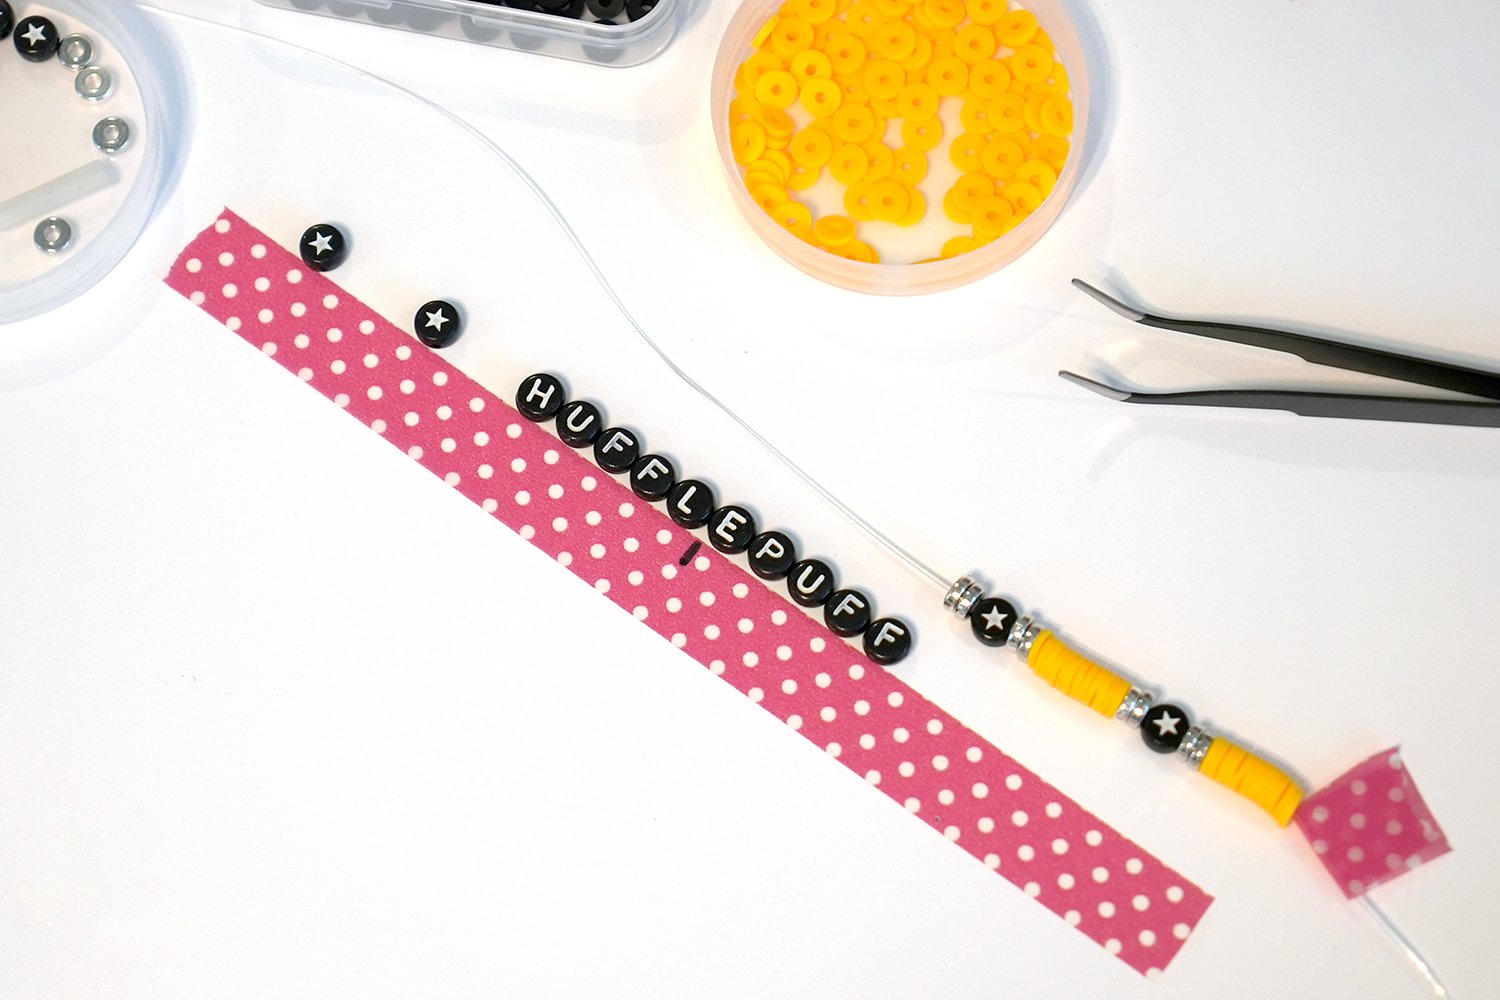
When using words and phrases, it is helpful to place the letter beads along your 7″ length of washi tape to gauge the spacing required for your remaining beads.
Beaded Friendship Bracelet FAQs
Now that you know how to make them, I hope you have a ton of fun making your own stretchy bracelets in all kinds of themes and styles!

What You’ll Need:
- Assorted Beads
- Stretchy Elastic Cord
- Washi Tape or Scotch Tape
- Super Glue Gel or GS Hypo Cement
Instructions:
- Cut a length of stretchy cord 10-12″ long. Grip the ends of the cord and pull to stretch.
- Add a small piece of washi tape or a piece of scotch tape to the end of the elastic cording, and fold the tape back on itself. This will create a barrier so that your beads don’t slip off the end of the cord.
- Add beads to the bracelet string until it reaches the desired length.
- Tie the ends into a surgeon's knot (see video linked below). Add a small dot of gel glue to the knot and allow to dry completely before trimming the strings.
Notes:
More Fun DIY Bracelet ideas
- 25+ Friendship Bracelets – lots of fun ideas for making unique friendship bracelets!
- Preppy Clay Bead Bracelets – learn how to make your own set of preppy bracelets!
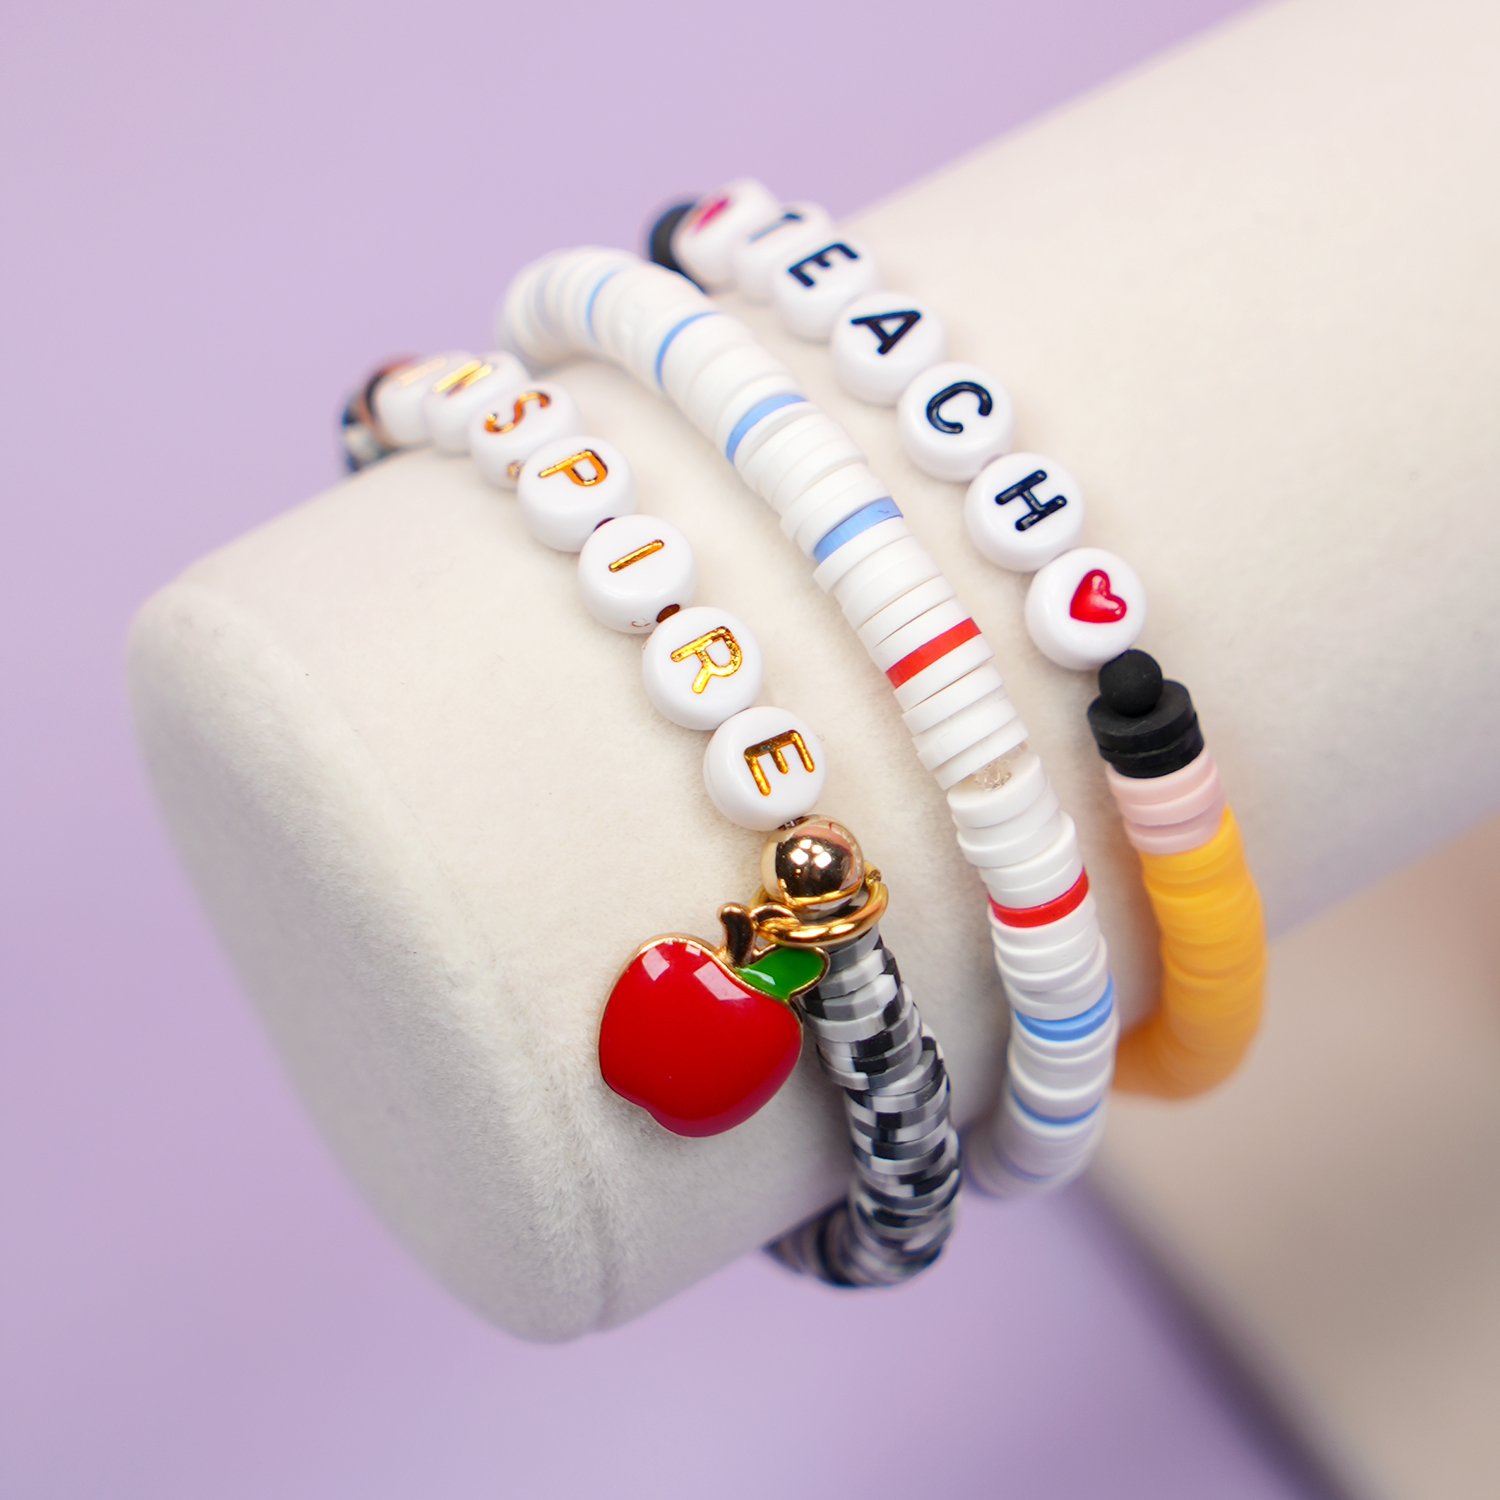
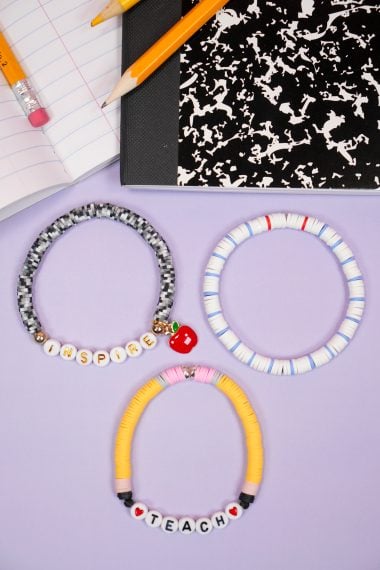
- DIY Teacher Bracelet Set – easy DIY teacher bracelets that look like pencils, notebook paper, and a composition book!
- Shrinky Dink Charm Bracelet – make a super cute donut charm bracelet using shrink plastic!
Check Out These Other DIY Jewelry Ideas!
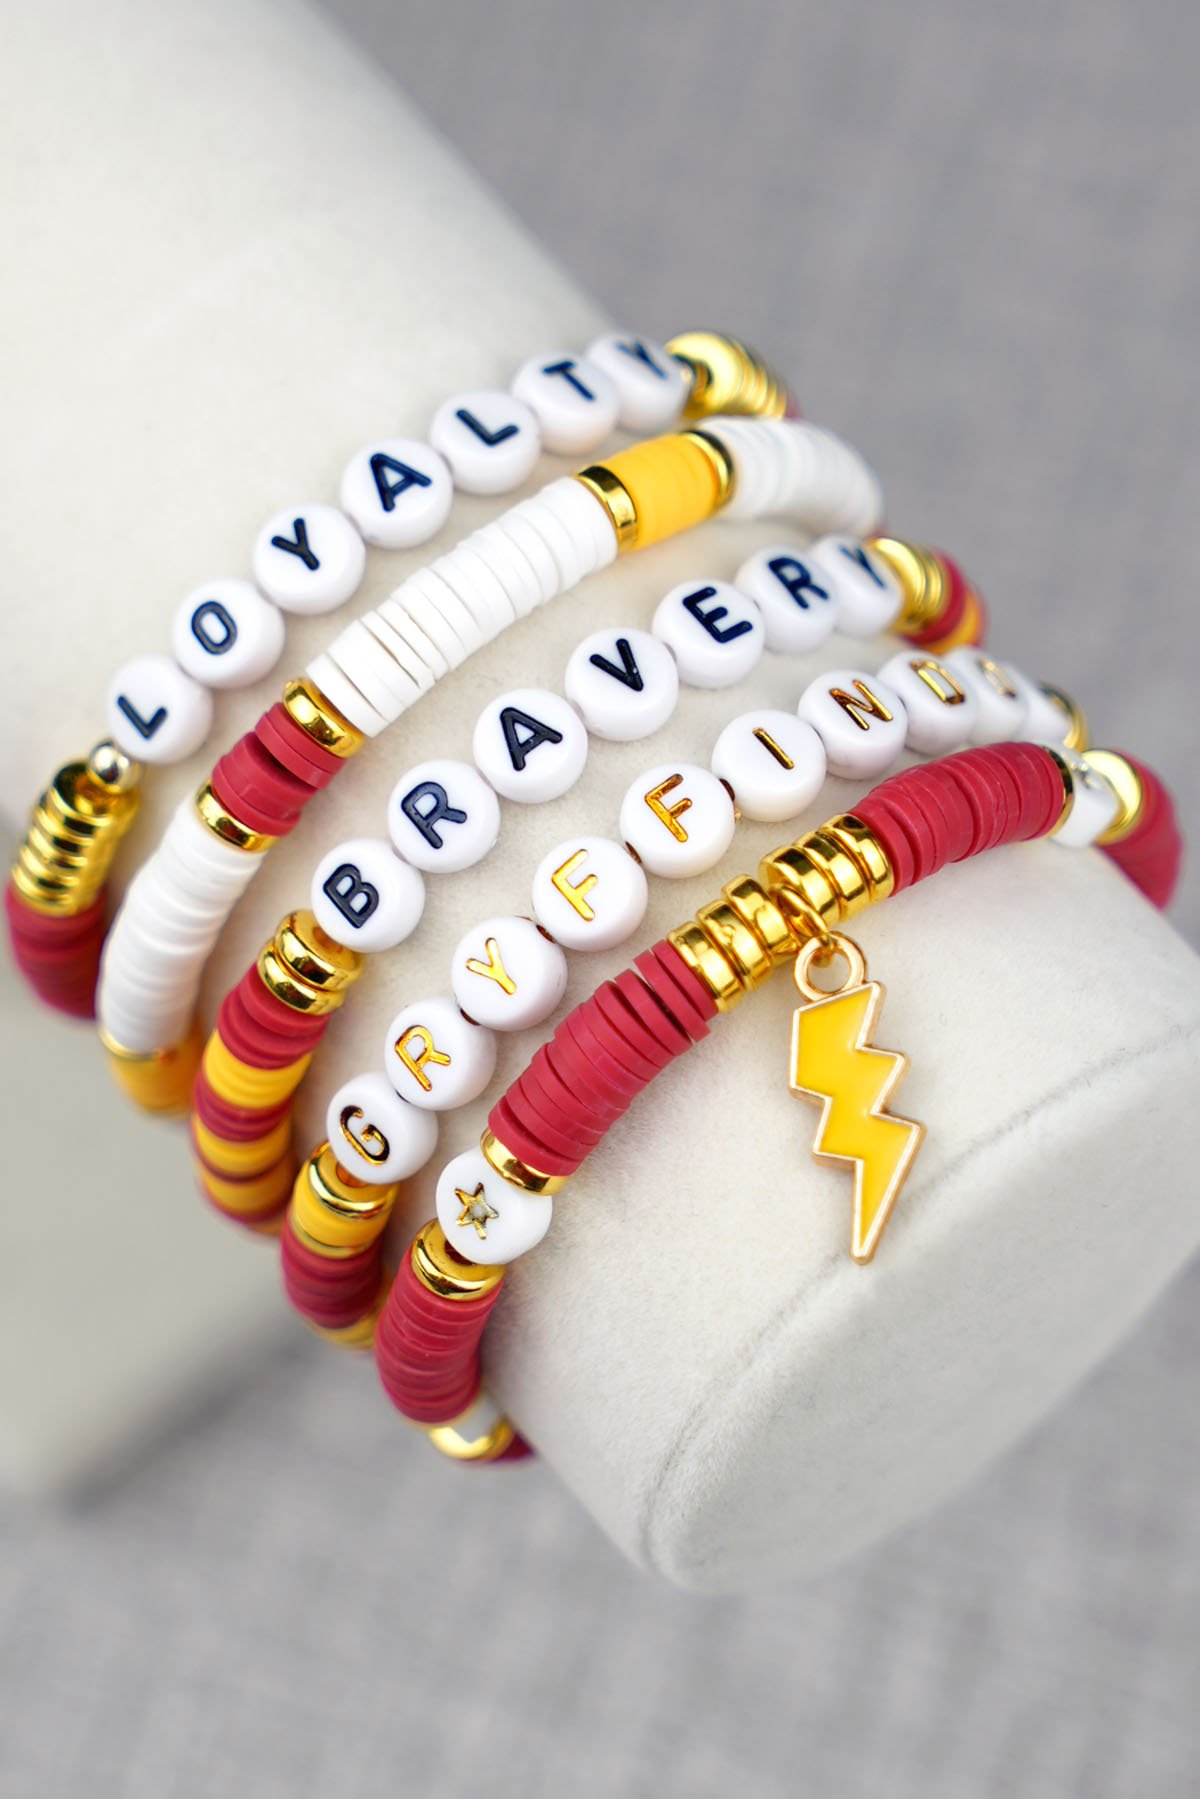
 DIY Gryffindor Bracelet Set
 How to Make Beaded Friendship Bracelets
- 550+ Taylor Swift Friendship Bracelet Ideas
 Easy DIY Valentine’s Day Bracelets
 Easy DIY Teacher Bracelet Set
- Preppy Clay Bead Bracelet Ideas & How-to Tutorial
- 25+ DIY Friendship Bracelet Ideas
- Laser Cut Wood Earrings with Cork Inlay


Heidi Kundin has captivated the hearts of millions with her colorful and inspiring approach to crafting, celebrations, and family fun. With over 15 years of experience, Happiness is Homemade has become a must-visit destination for those seeking quick and easy creative ideas and last-minute solutions. Heidi’s warm personality shines through her posts, inviting readers to join her on a creative journey that’s fun, rewarding, and achievable. Heidi is also the author of Homemade Bath Bombs & More and DIY Tie-Dye.