
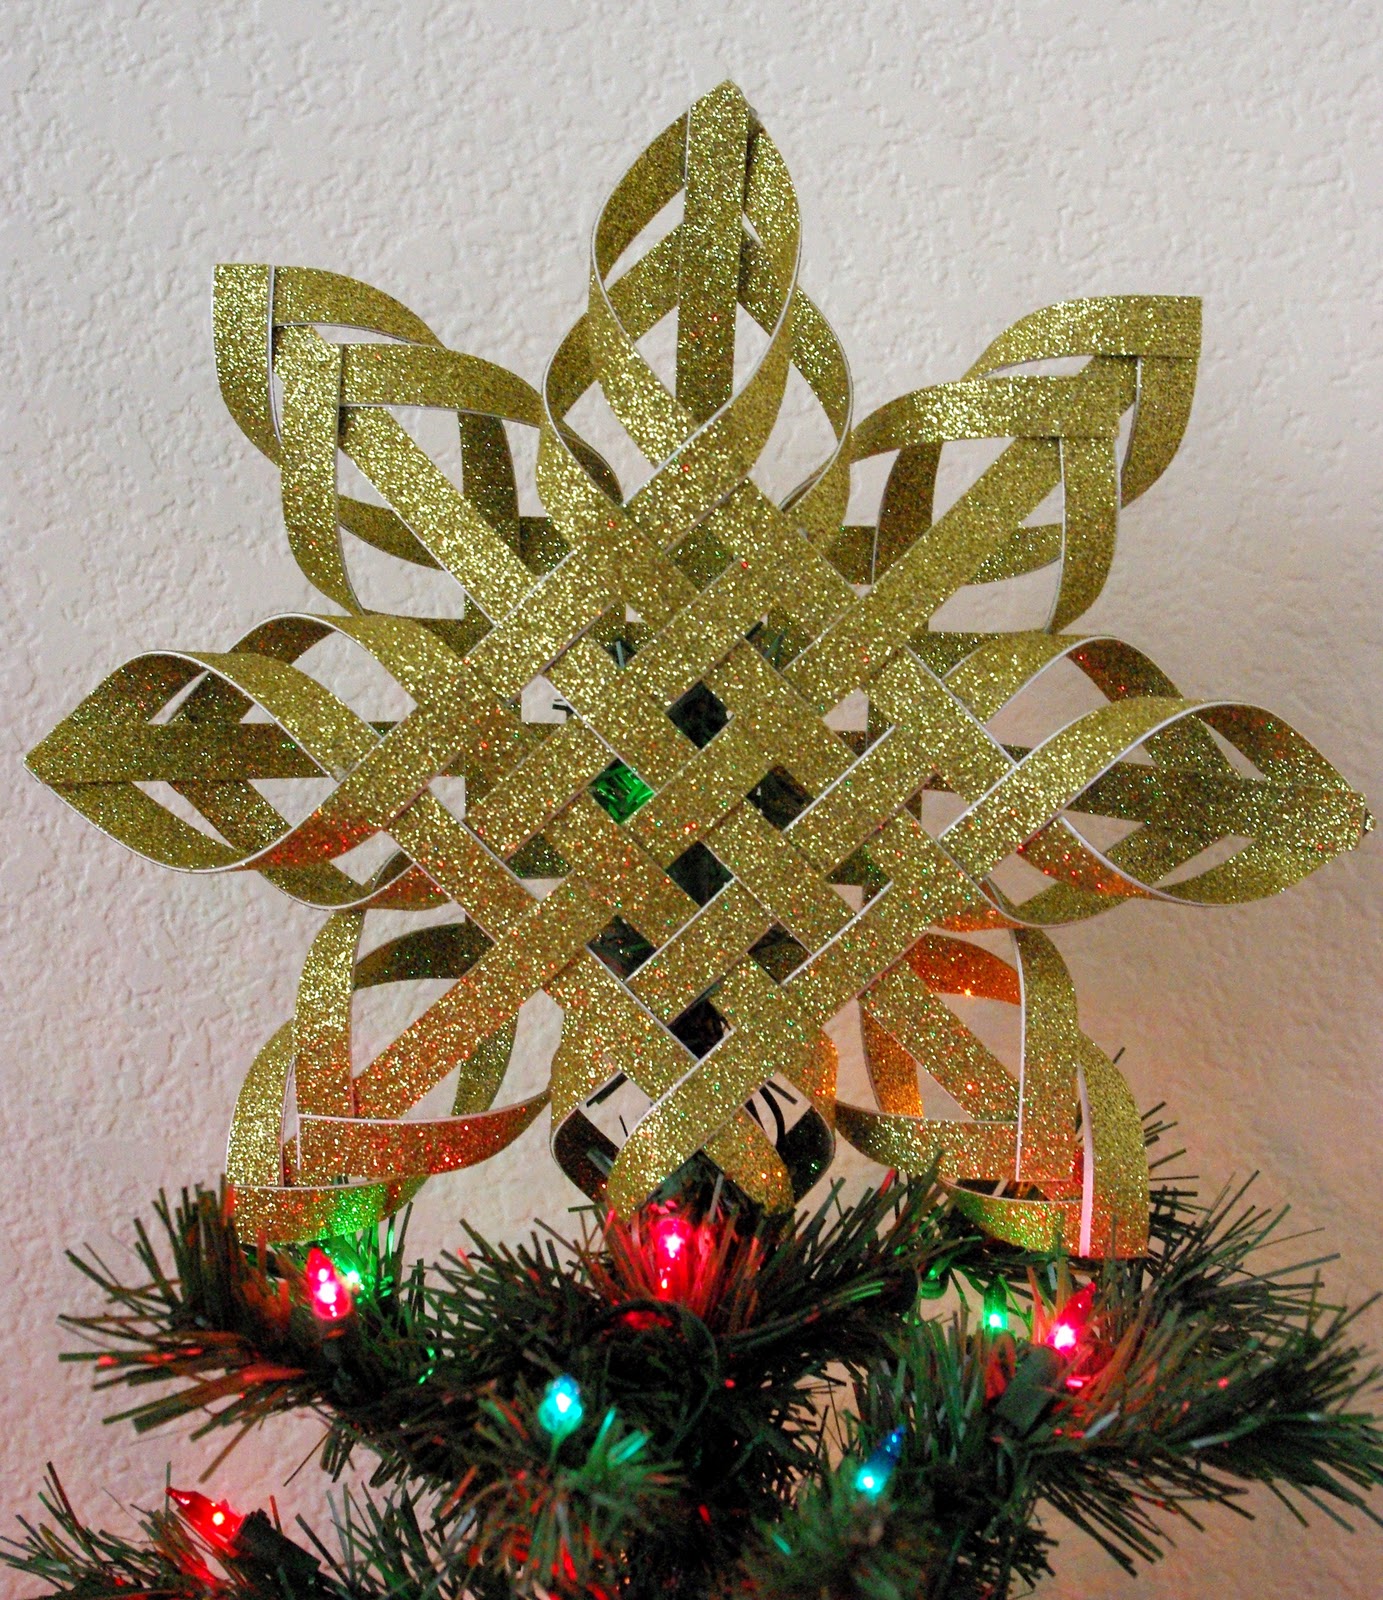
Learn how to make a super cool tree topper out of nothing but paper and glue!
All you’ll need to make this gorgeous star is a sheet of 12″ x 12″ glittered cardstock, scissors and glue (hot glue works best). If you have single sided glitter paper you will need to glue two sheets back-to-back to create a double sided sheet.
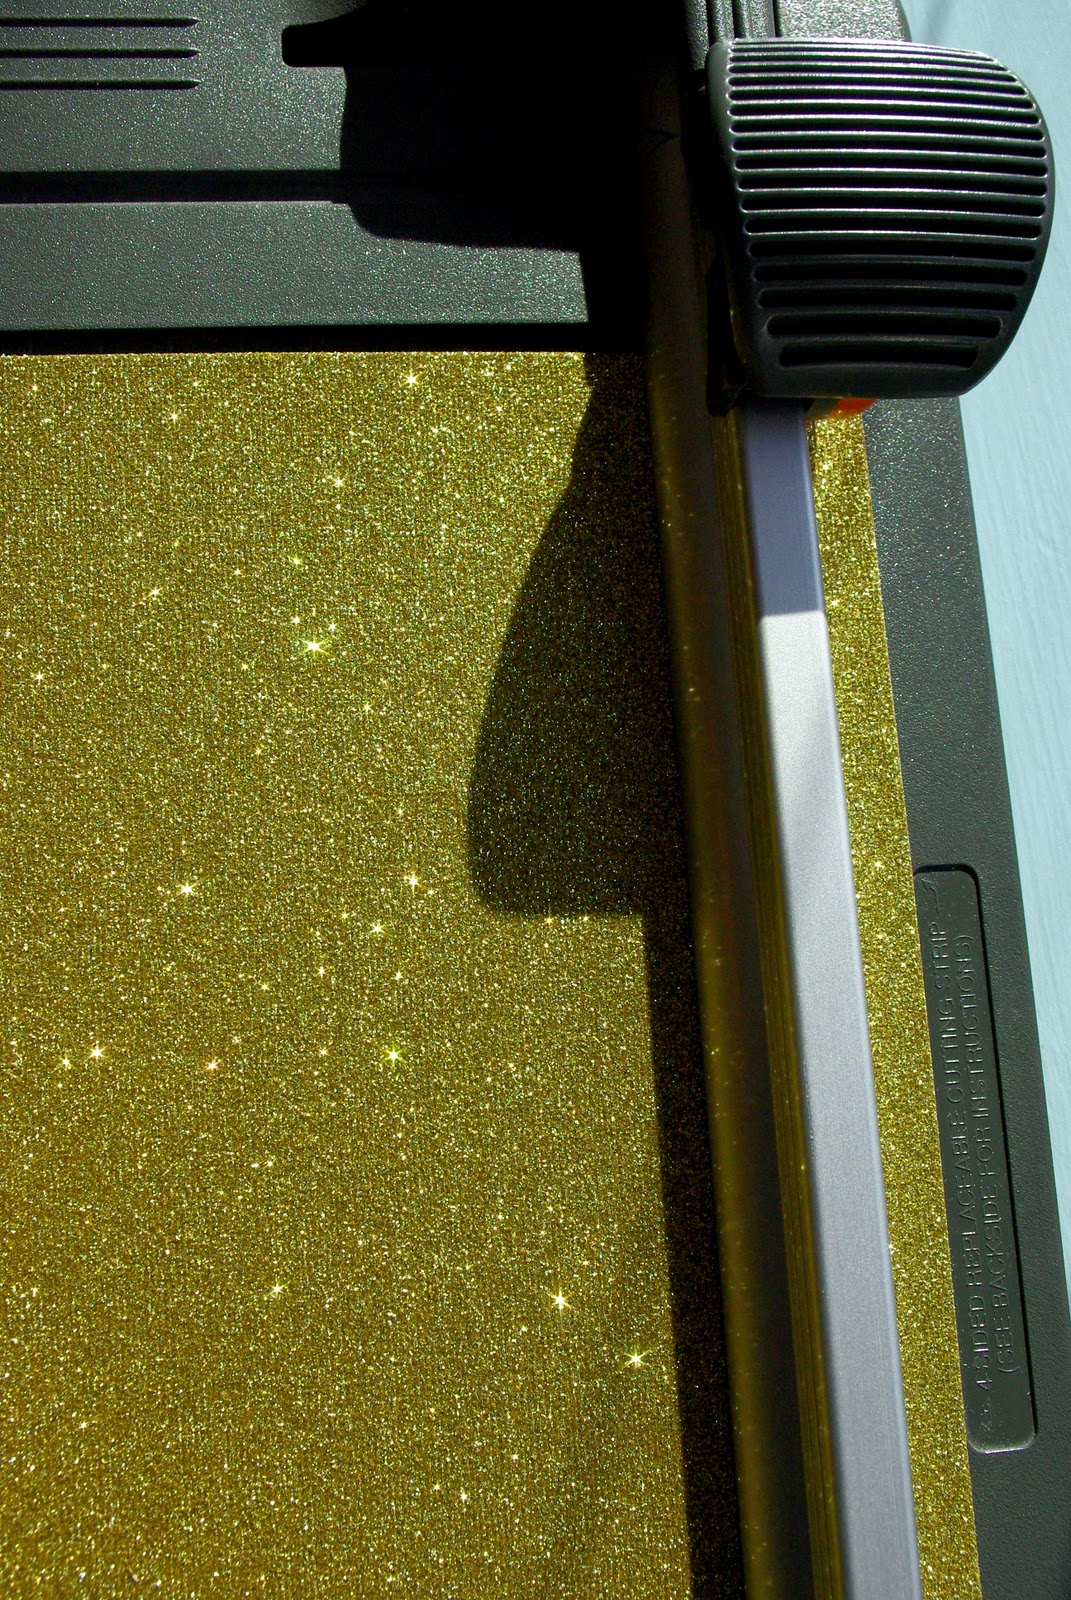
First, take your paper and cut it into (20) 1/2″ wide strips.
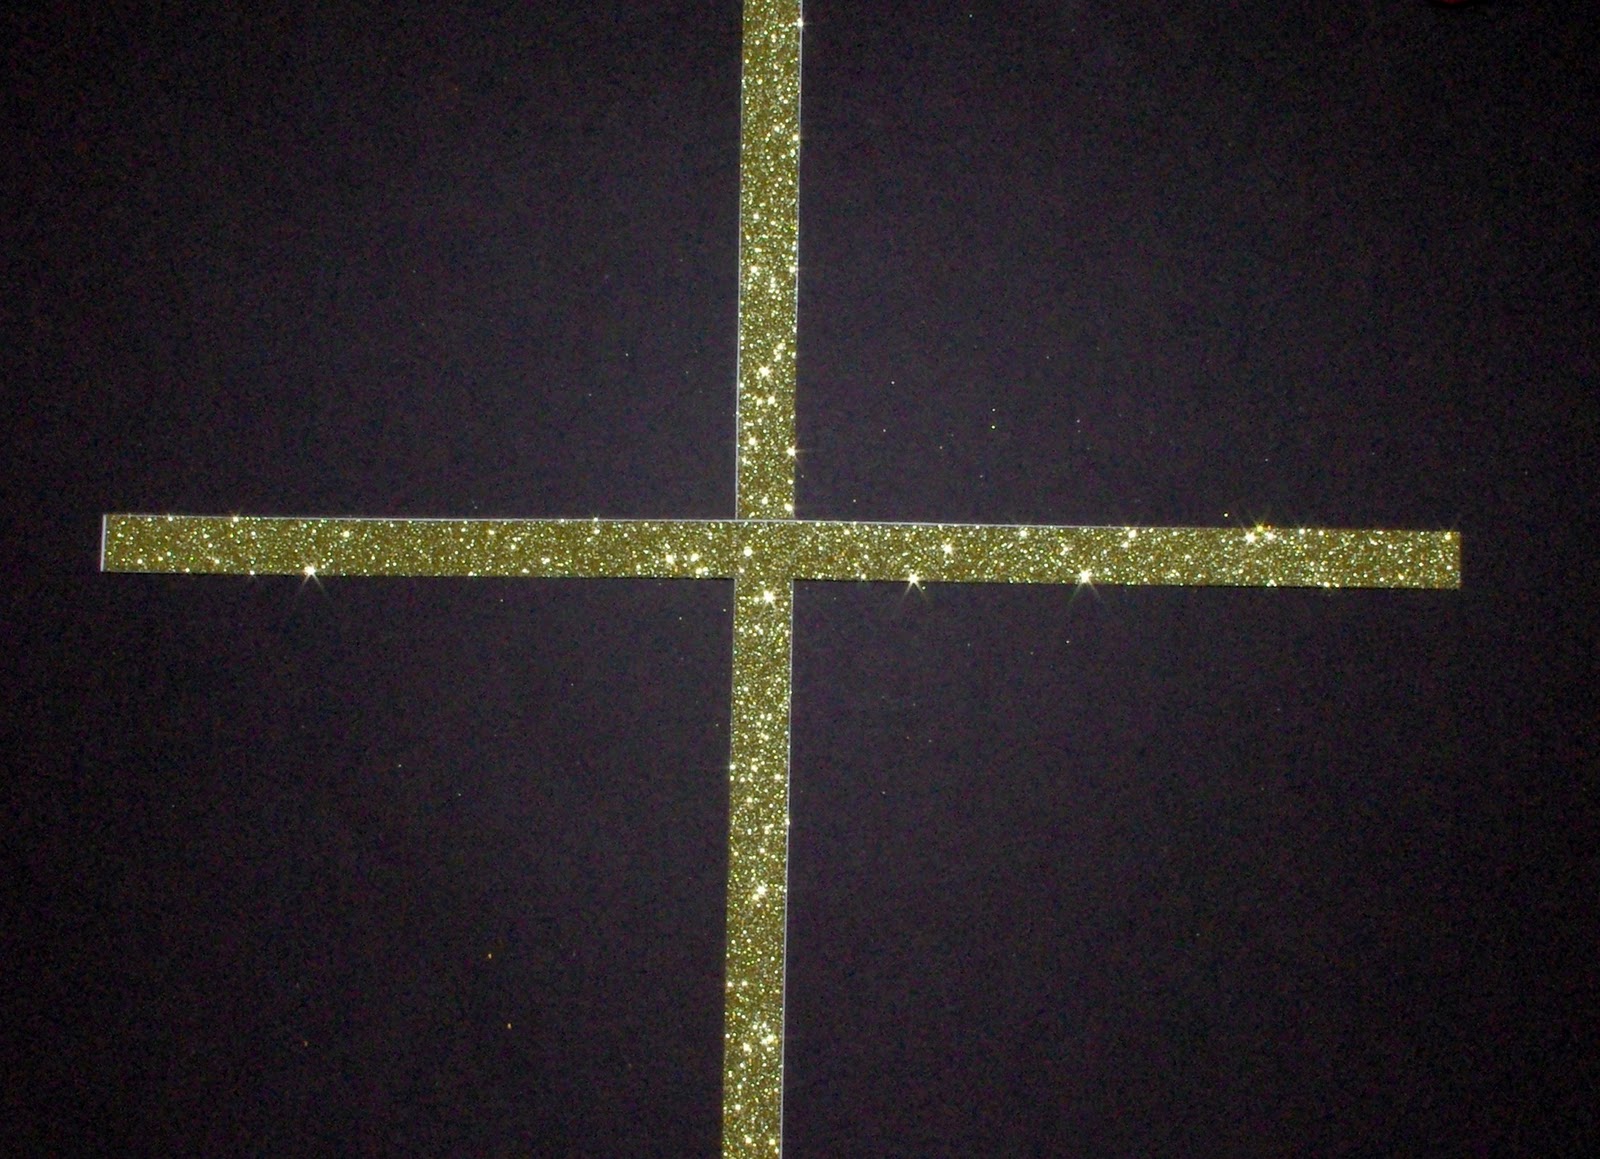
Fold two strips in half and crease to mark the center. Line up the center marks and glue the two strips to form 90 degree angles.

Add four more vertical strips (two on either side of your original + shape), weaving the horizontal piece through the vertical strips. Glue at all places where the paper intersects.
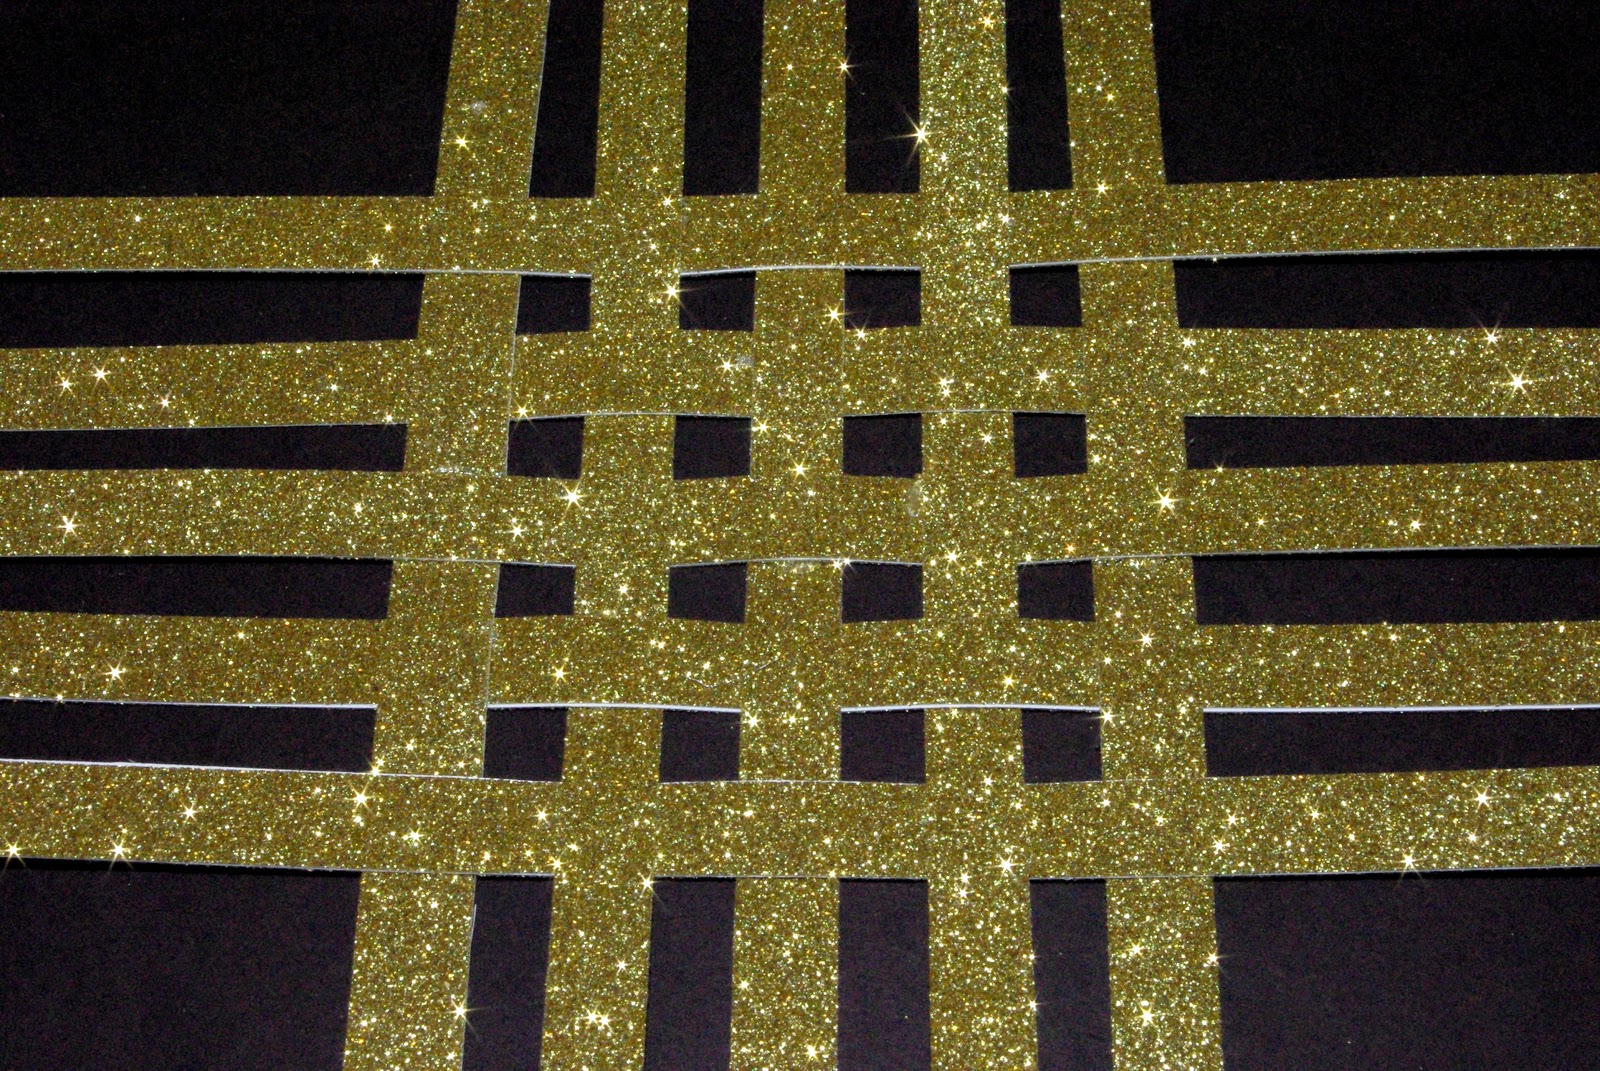
Continue weaving until you have a grid of 5×5 woven strips (the tails should be around 4″ long).

This step is the trickiest to explain, so hopefully the photos will help! In each corner, take the two inner corner strips and join the tips, making a twist in each strip before gluing them together. Do this with the next interior set of corner strips as well, so that you end up with two twisted points on each corner.
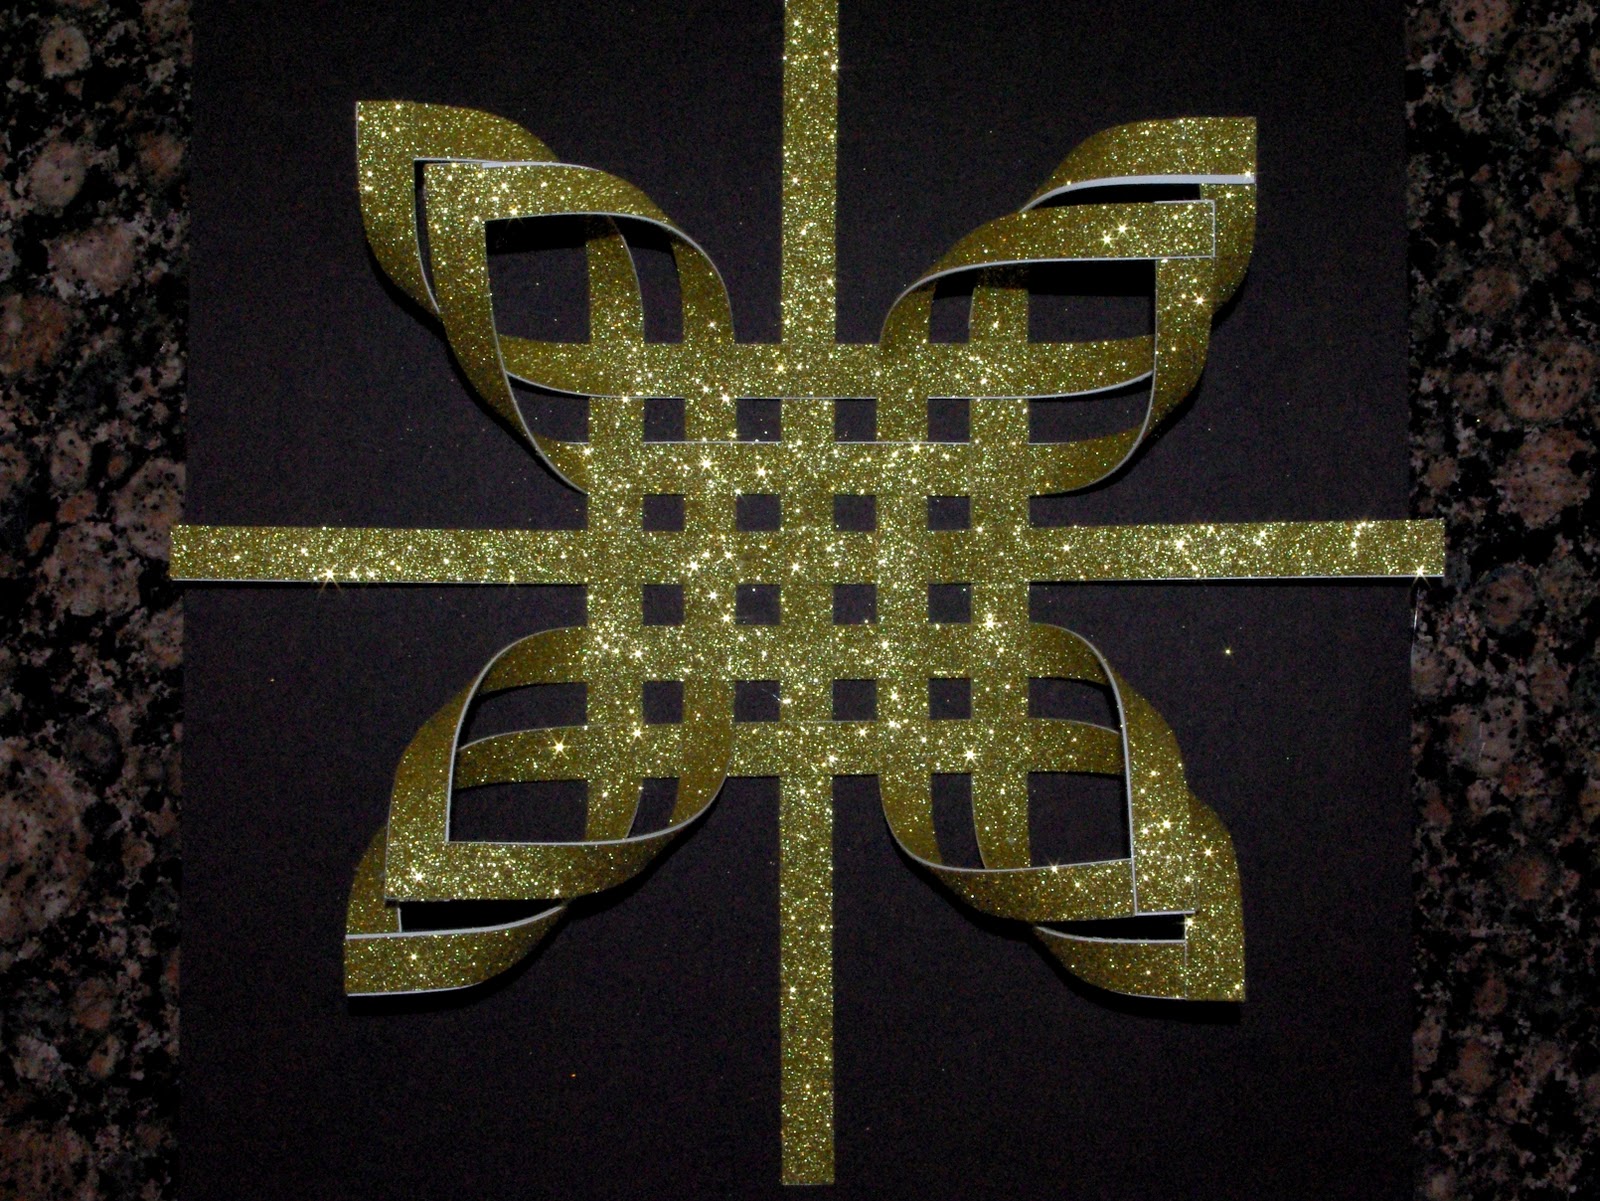
When all your corners are twisted and joined, it should look like this.

Now make another!

Turn one of your pieces upside down and rotate it so that the tips form an 8-pointed star when placed on top of the first piece.

Weave the remaining tails into the points, glue down and trim the ends.

Voila, an easy peasy and super cheap way to add a lot of sparkle and shine to your holiday season! These also look incredible when hung in small groups from the ceiling – use white or silver paper to create a flurry of shimmery snowflakes that’s sure to impress!
 Happy Holidays!

Don’t Forget to Pin the Paper Tree Topper for Later!


Heidi Kundin has captivated the hearts of millions with her colorful and inspiring approach to crafting, celebrations, and family fun. With over 15 years of experience, Happiness is Homemade has become a must-visit destination for those seeking quick and easy creative ideas and last-minute solutions. Heidi’s warm personality shines through her posts, inviting readers to join her on a creative journey that’s fun, rewarding, and achievable. Heidi is also the author of Homemade Bath Bombs & More and DIY Tie-Dye.
I just made a silver one and it turned out great thanks to your easy to follow directions! I love how it reflects the colors of the lights on our tree!
My kids and I made this yesterday. It is very simple to create, not to mention inexpensive, and the instructions are easy enough to follow. Once it’s on the tree, you can’t really tell that it’s just paper and glue. I enjoy having something we made ourselves topping our family’s Christmas tree.
Really nice tutorial. The photos did help a lot. I made my star in gold, similar to yours, and I LOVE IT. I’m going to make smaller ones to decorate a work space and surprise my coworkers. Happy holidays!
Thank you for the tutorial. Mine turned out really pretty.
Thanks! Glad you liked it!
This is really helpful!!
Thank you so much for this. Love it. Used glue dots and they were perfect.
Hi! This star is beautiful! Maybe i missed this, but how did you attach it to the top of your tree? Does the top vertical branch go on the inside or did you somehow tie it on?
Thanks!
We just slip it over the top vertical branch of the tree!
Would it work with 11″ strips?
Yes, it will!
Gasp! This is just gorgeous! We need a new tree topper, so I am going to attempt to find glitter cardstock to try this out! Thanks for the tutorial! 🙂 Lisa
Loved making these, although 14 got to be a bit tedious! LOL. Granddaughters loved using the glue gun. I even had help from 3 year old grandson. We want to try some with double sided paper that is a different color on each side.
Have you tried glue dots on these? I wonder if they would work to hold it together instead of hot glue? Great job! I love this! I’m trying to make it easily printable…any suggestions?
This is so cool! I can’t wait to try it. Have you ever tried doing it with a smaller number of strips to make a smaller-sized star? Just wondering if that would work and if anyone had tried it…
I tried this, gluing two sheets together, and they kept coming apart, unfortunately. However, I can see the lovely potential in the finished product with paper that is dual sided. I can’t wait to get proper paper and try again!
I’m so sorry to hear that you were having issues with your glue. For a project like this one, I highly recommend using a spray adhesive because it will dry securely while still giving you the flexibility needed to bend the strips of paper. Hopefully you’ll have much better luck with the double sided paper! 🙂
Where do I find double sided glitter paper? Al I find is glitter on one side and matte or foil on the other. Thanks?.
I picked mine up at a local craft store at holiday time, but you can easily make your own by gluing two single-sided sheets together – just use a heavy duty craft gluestick! 🙂
I made this today in a two tone color. I will be posting it on my blog at http://www.happy2bestampin.net and will give you full credit. Thanks for sharing.
Kate
Just letting you know that I featured this today on my Christmas in July blog celebration
http://passionateandcreativehomemaking.blogspot.com/2012/07/day-20-christmas-in-july.html
The whole project took me about an hour from start to finish 🙂
these are amazing – wow. I’m sooo in love with this woven gold star (reminds me of the celtic scroll patterns.) Does it take a long time? I found your blog via top mommy bloggers, and joined up. I’d love for you to help me get to 50 followers (LOL!) and visit my crafty blog; http://www.partycraftsecrets.blogspot.com