
Learn How to Make Foil Art Prints with the NEW Cricut Foil Transfer System Tools! It’s SO easy to make stunning DIY foil artwork and home decor!
This is a sponsored post written by me on behalf of Cricut. All opinions are 100% mine.
This post may contain affiliate links. I will receive a small commission from these sales at no additional cost to you!
Have you heard the news? Cricut just announced the BRAND NEW Cricut Foil Transfer System, and it’s totally amazing! Now, you can add stunning foil accents and embellishments to your craft projects with ease! We had the opportunity to test drive the Cricut Foil Transfer Tool early, and today we’re talking all about how it works and how you can use it to create gorgeous foil art prints (and MUCH more!)!
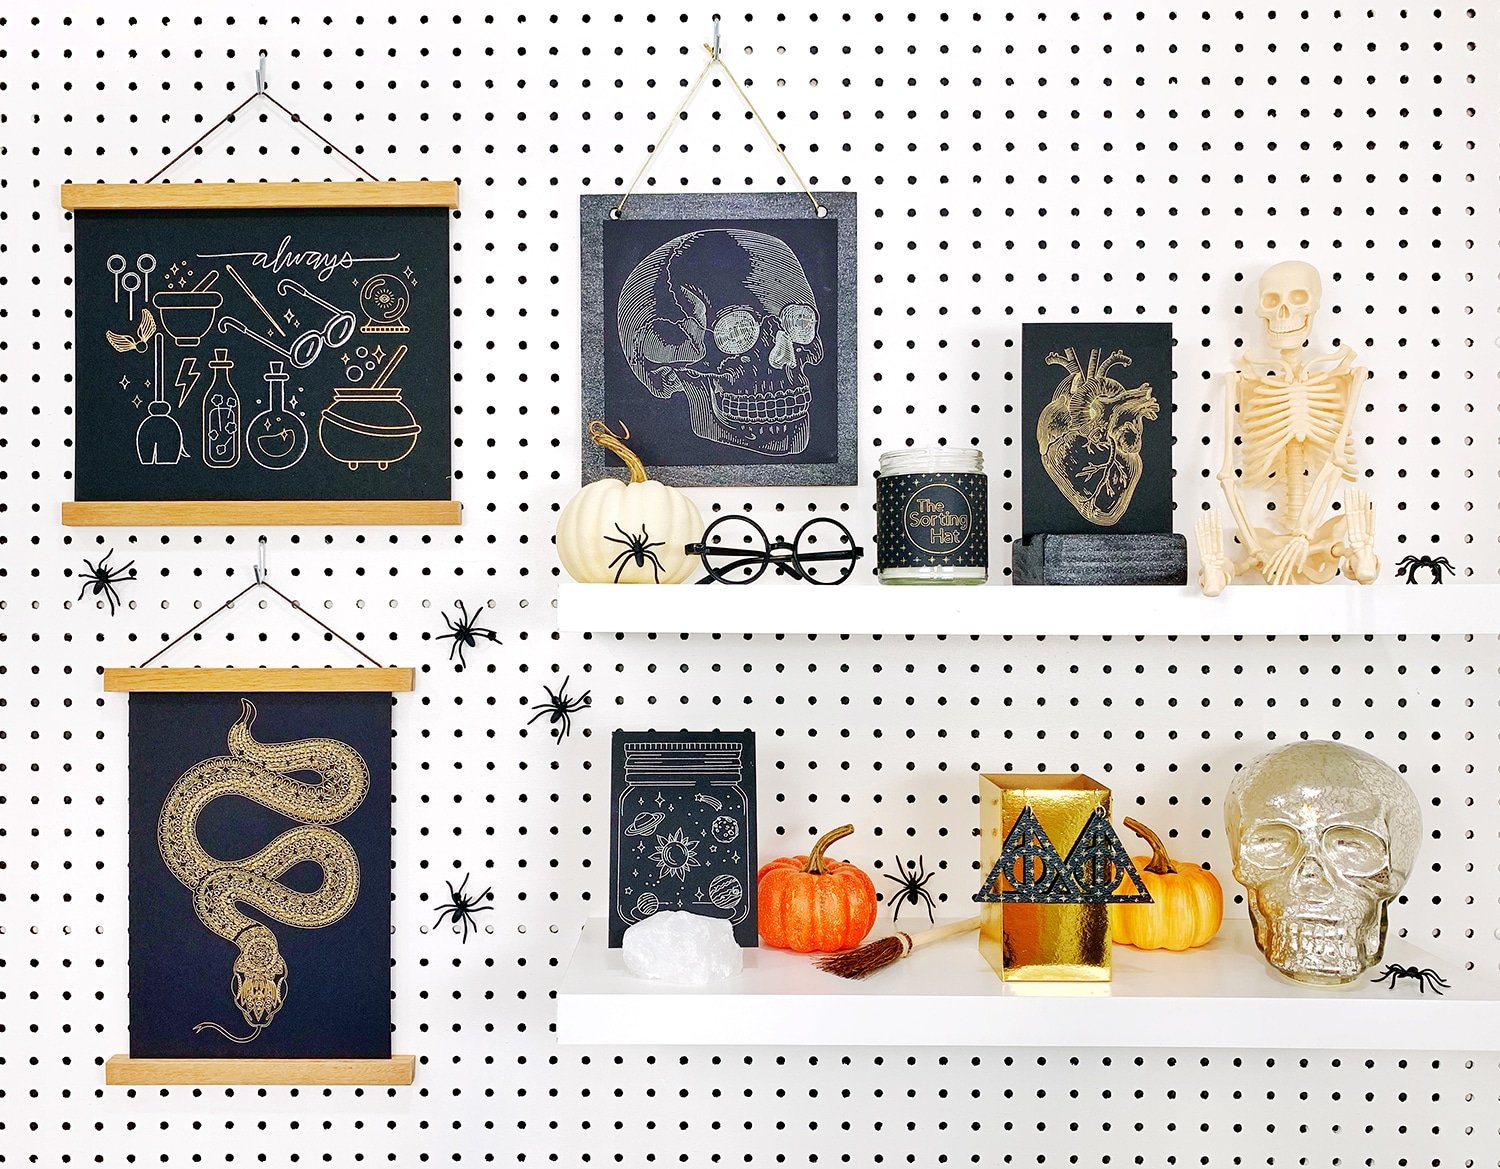
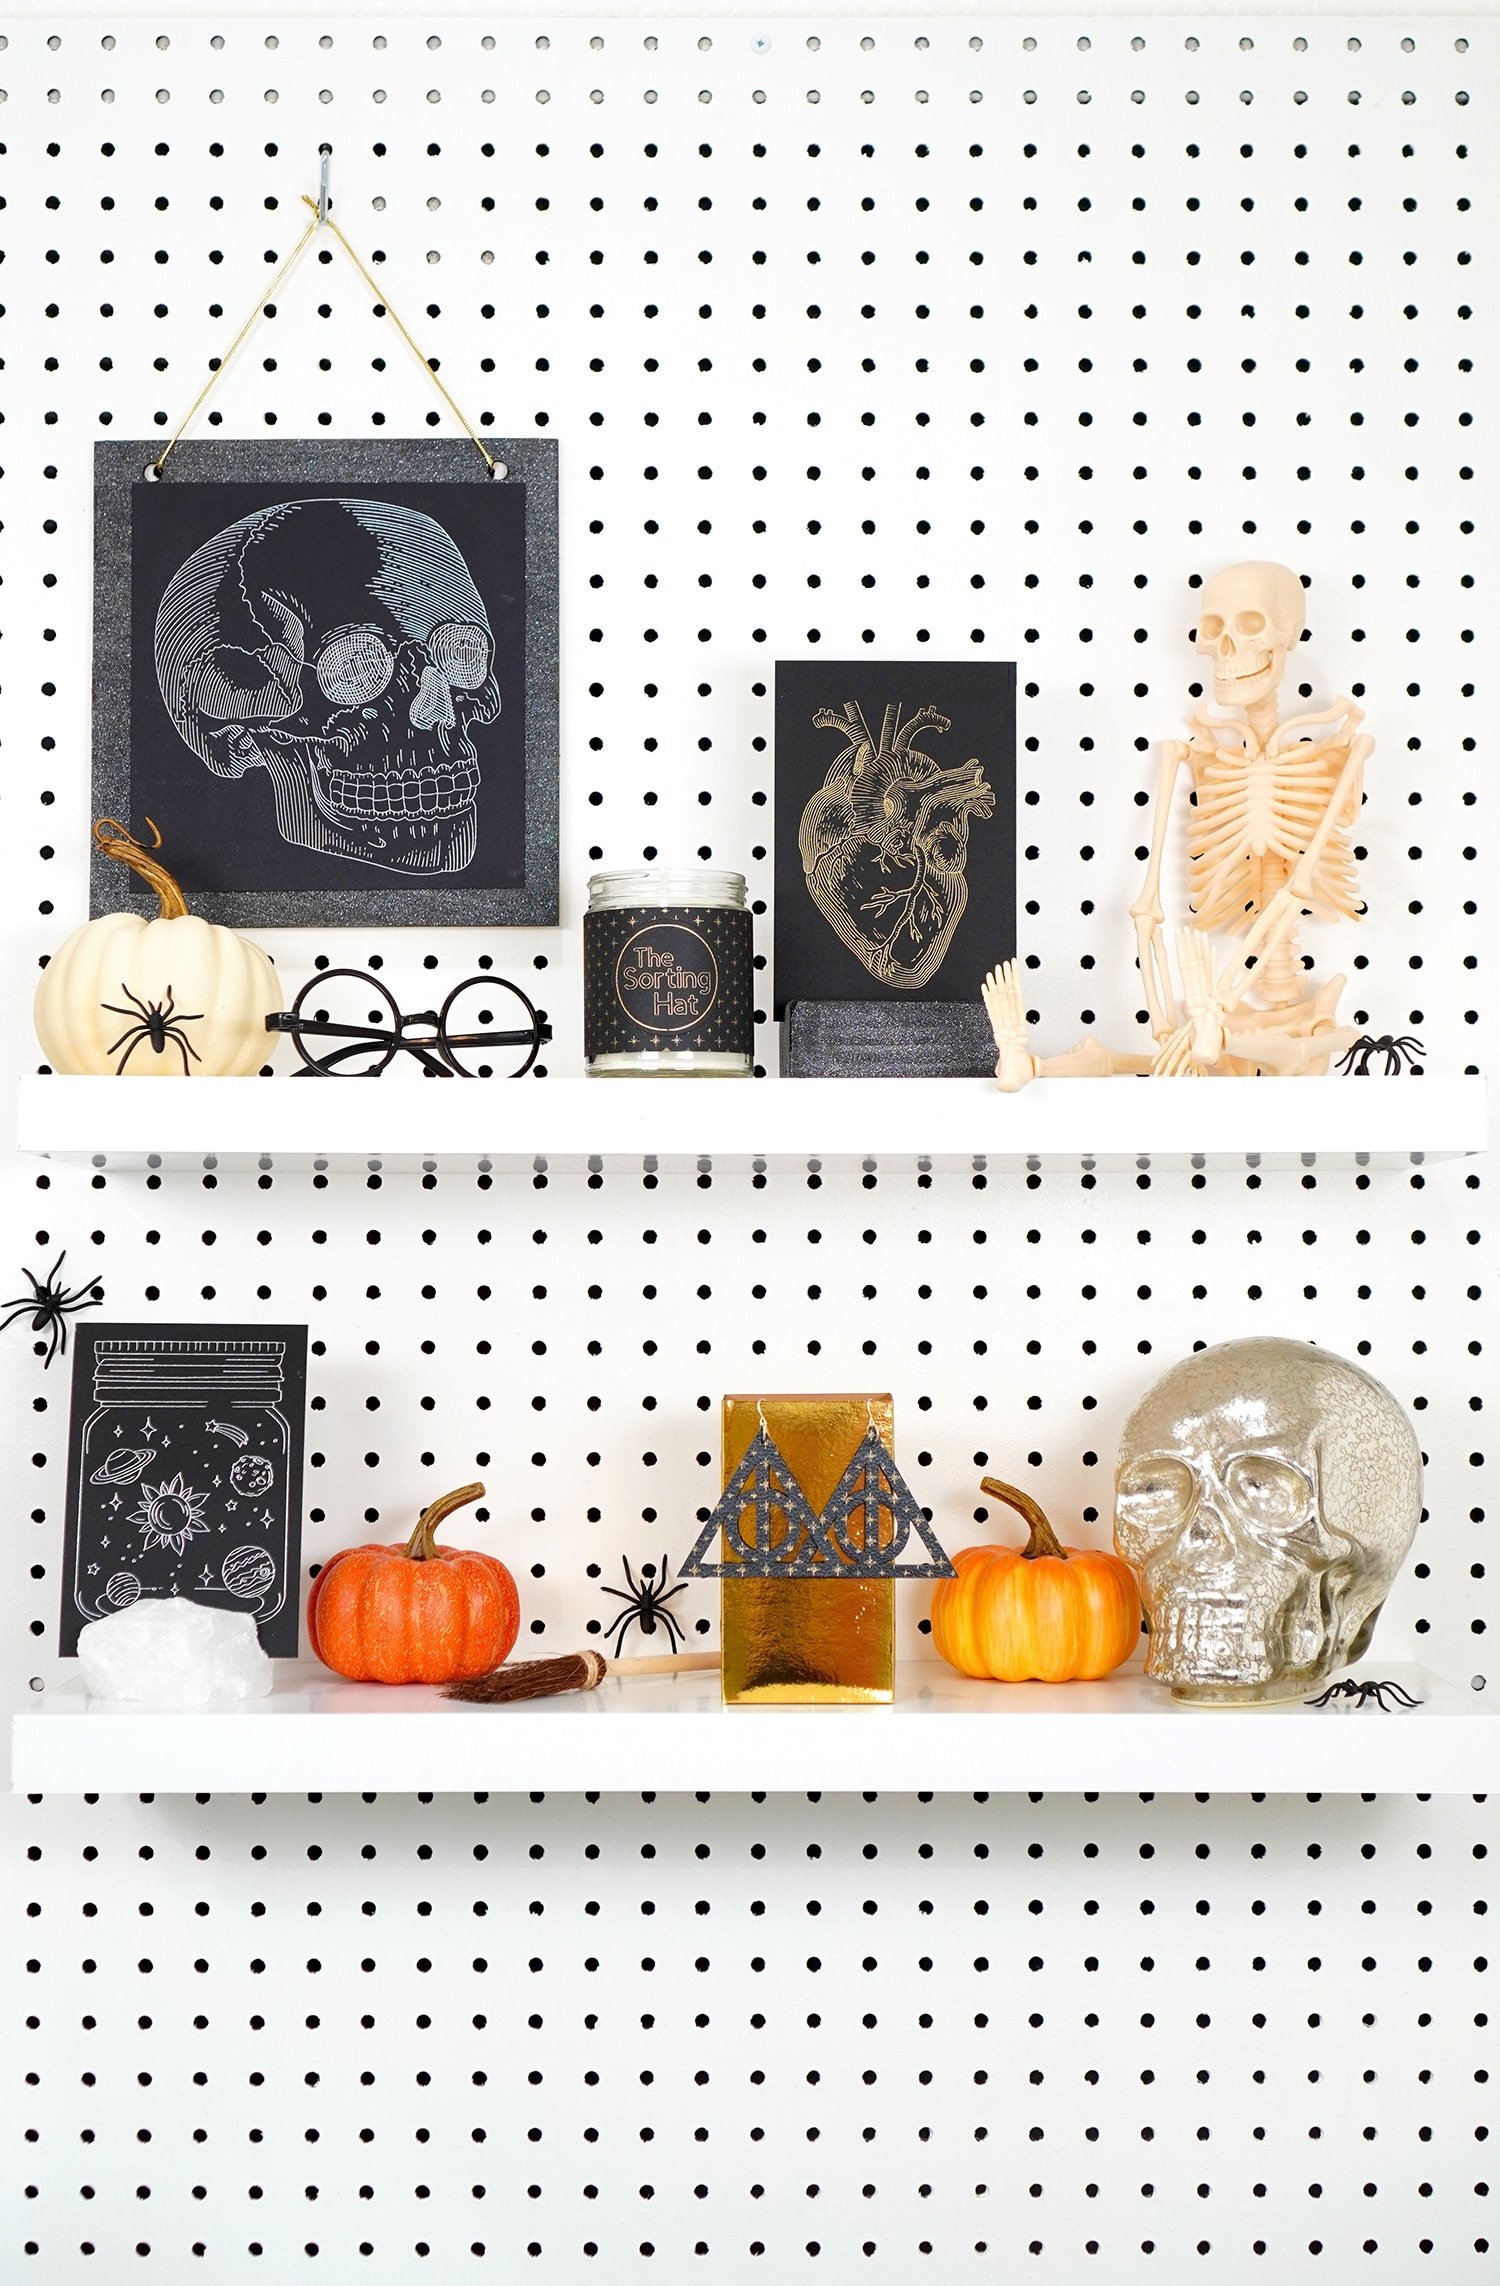
I made some awesome Halloween foil art prints since Halloween is just around the corner, but you can use these same techniques to create all kinds of different DIY foil artwork! Our Halloween decor tends to be a mix of mad scientist + wizardry, so I think a couple of these art pieces may find their way into our regular decor as well (my son already called dibs on the Harry Potter inspired piece!)!
What is the Cricut Foil Transfer System?
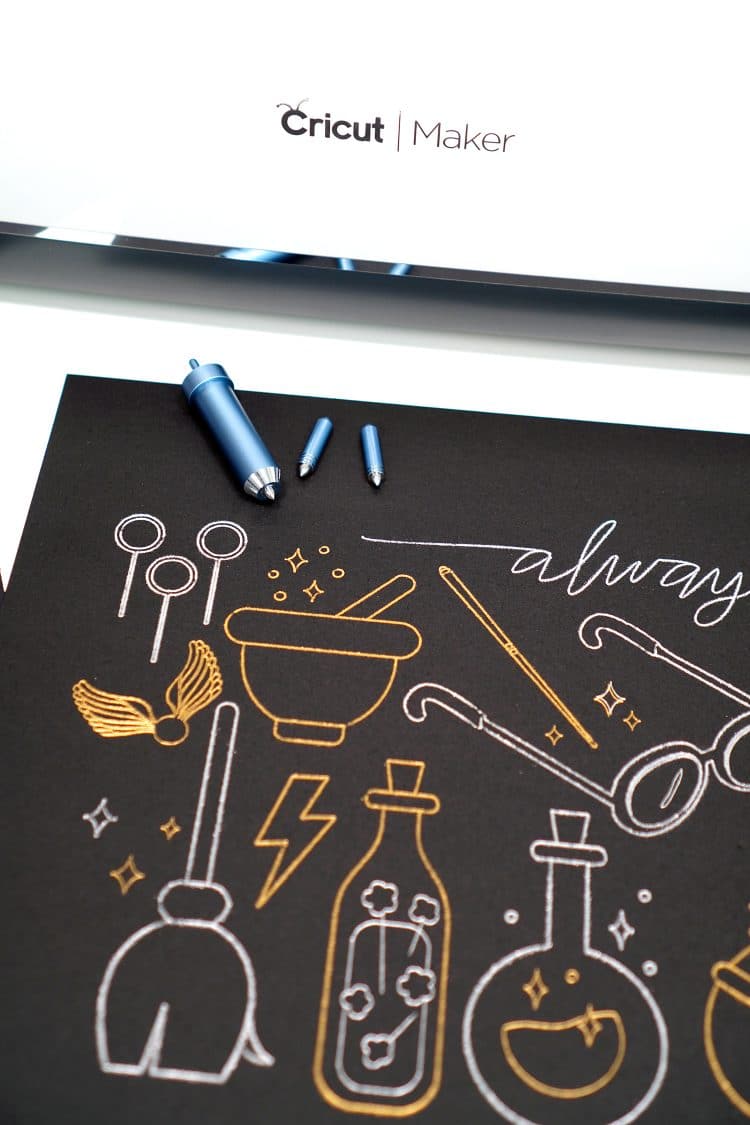
The Cricut Foil Transfer System is comprised of two main components – the Cricut Foil Transfer Tool and Foil Transfer Sheets which are used to add shiny foil accents to your projects. The Cricut Foil Transfer Tool is a 3-in-1 tool with interchangeable fine, medium, and bold point tips that deliver an assortment of line weights on a wide variety of materials.
Cricut Foil Transfer Sheets are available in large 12×12 sheets of gold and silver and in smaller 4×6 sheets of gold, silver, green, aqua, and purple (more colors will be available in both sizes soon!). The Foil Transfer Tool uses a unique pressure-activated system to transfer the foil to your crafting material – it’s super cool!
Even better, the Cricut Foil Transfer System is backwards compatible – that means that it works on ALL of the machines in the Cricut Explore family and Maker lines! Even if you have an older Explore machine, you can get in on the glitz and glam of this new tool! For even more information and FAQs about the Cricut Foil Transfer System, make sure to check out our Introduction to the Cricut Foil Transfer Tool!
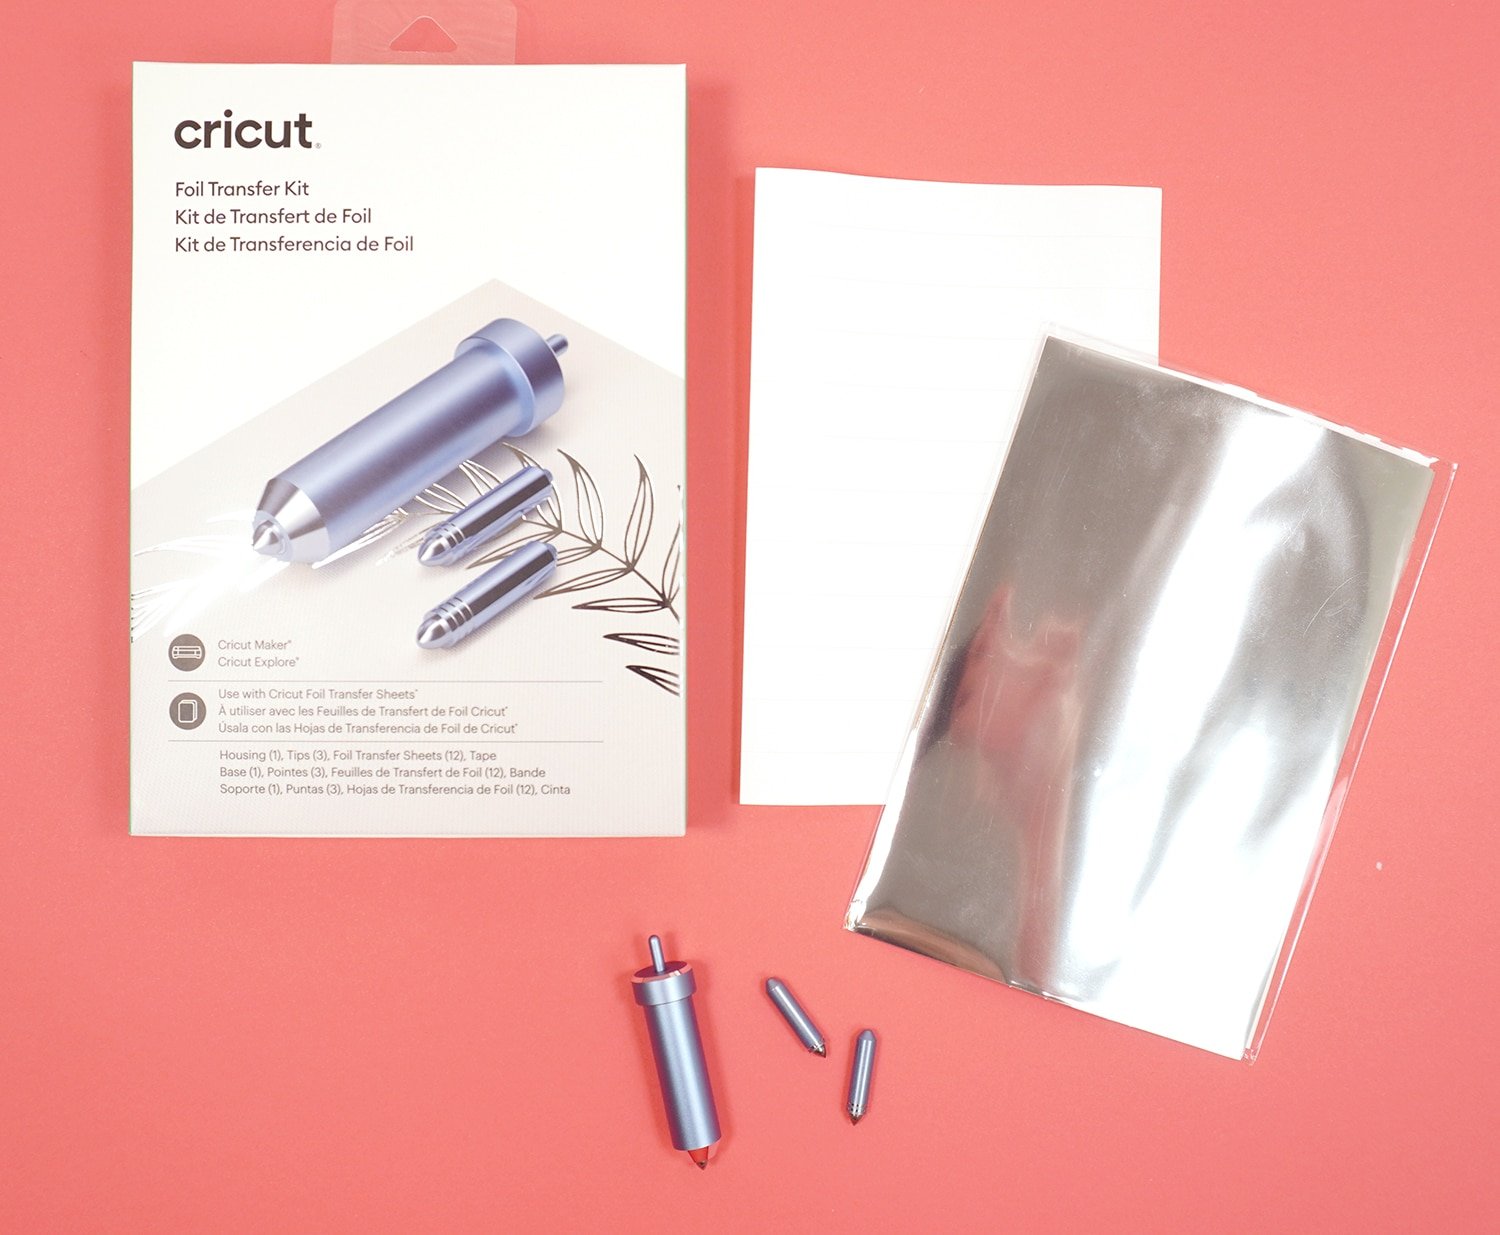
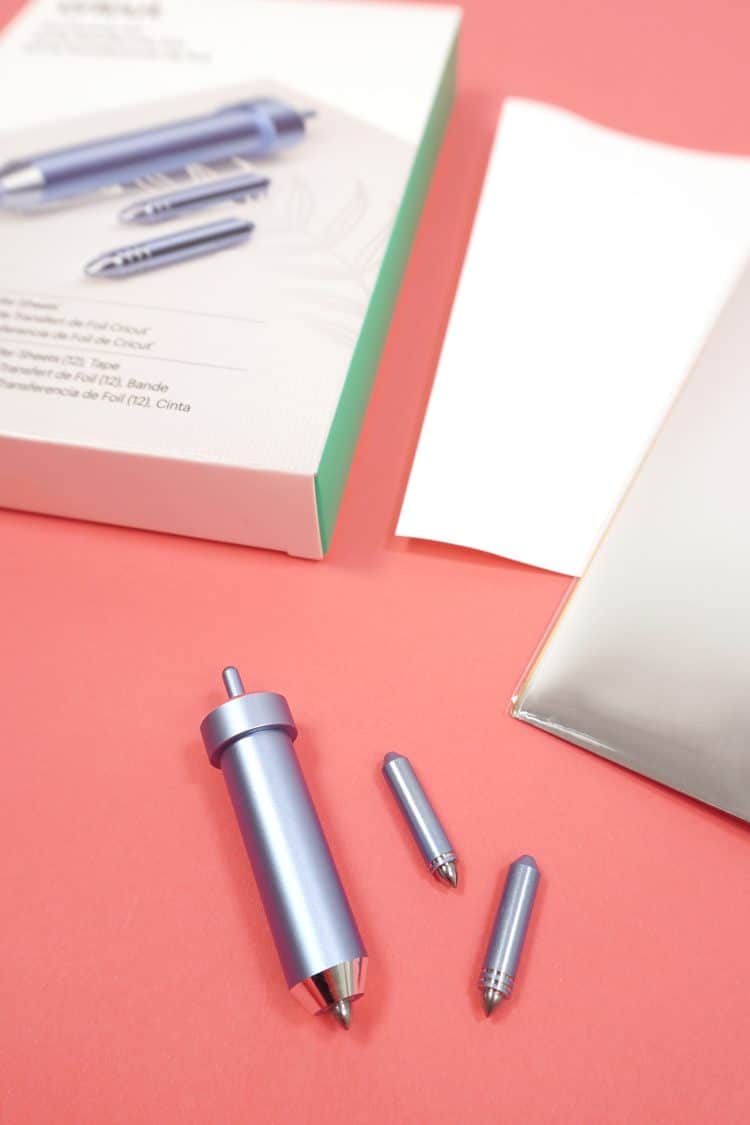
Inside the Cricut Foil Transfer Kit, you’ll find the Cricut Foil Transfer Tool with three assorted tips, twelve sheets of foil (colors may vary), and strips of specially formulated tape that are designed to hold the foil securely in place.
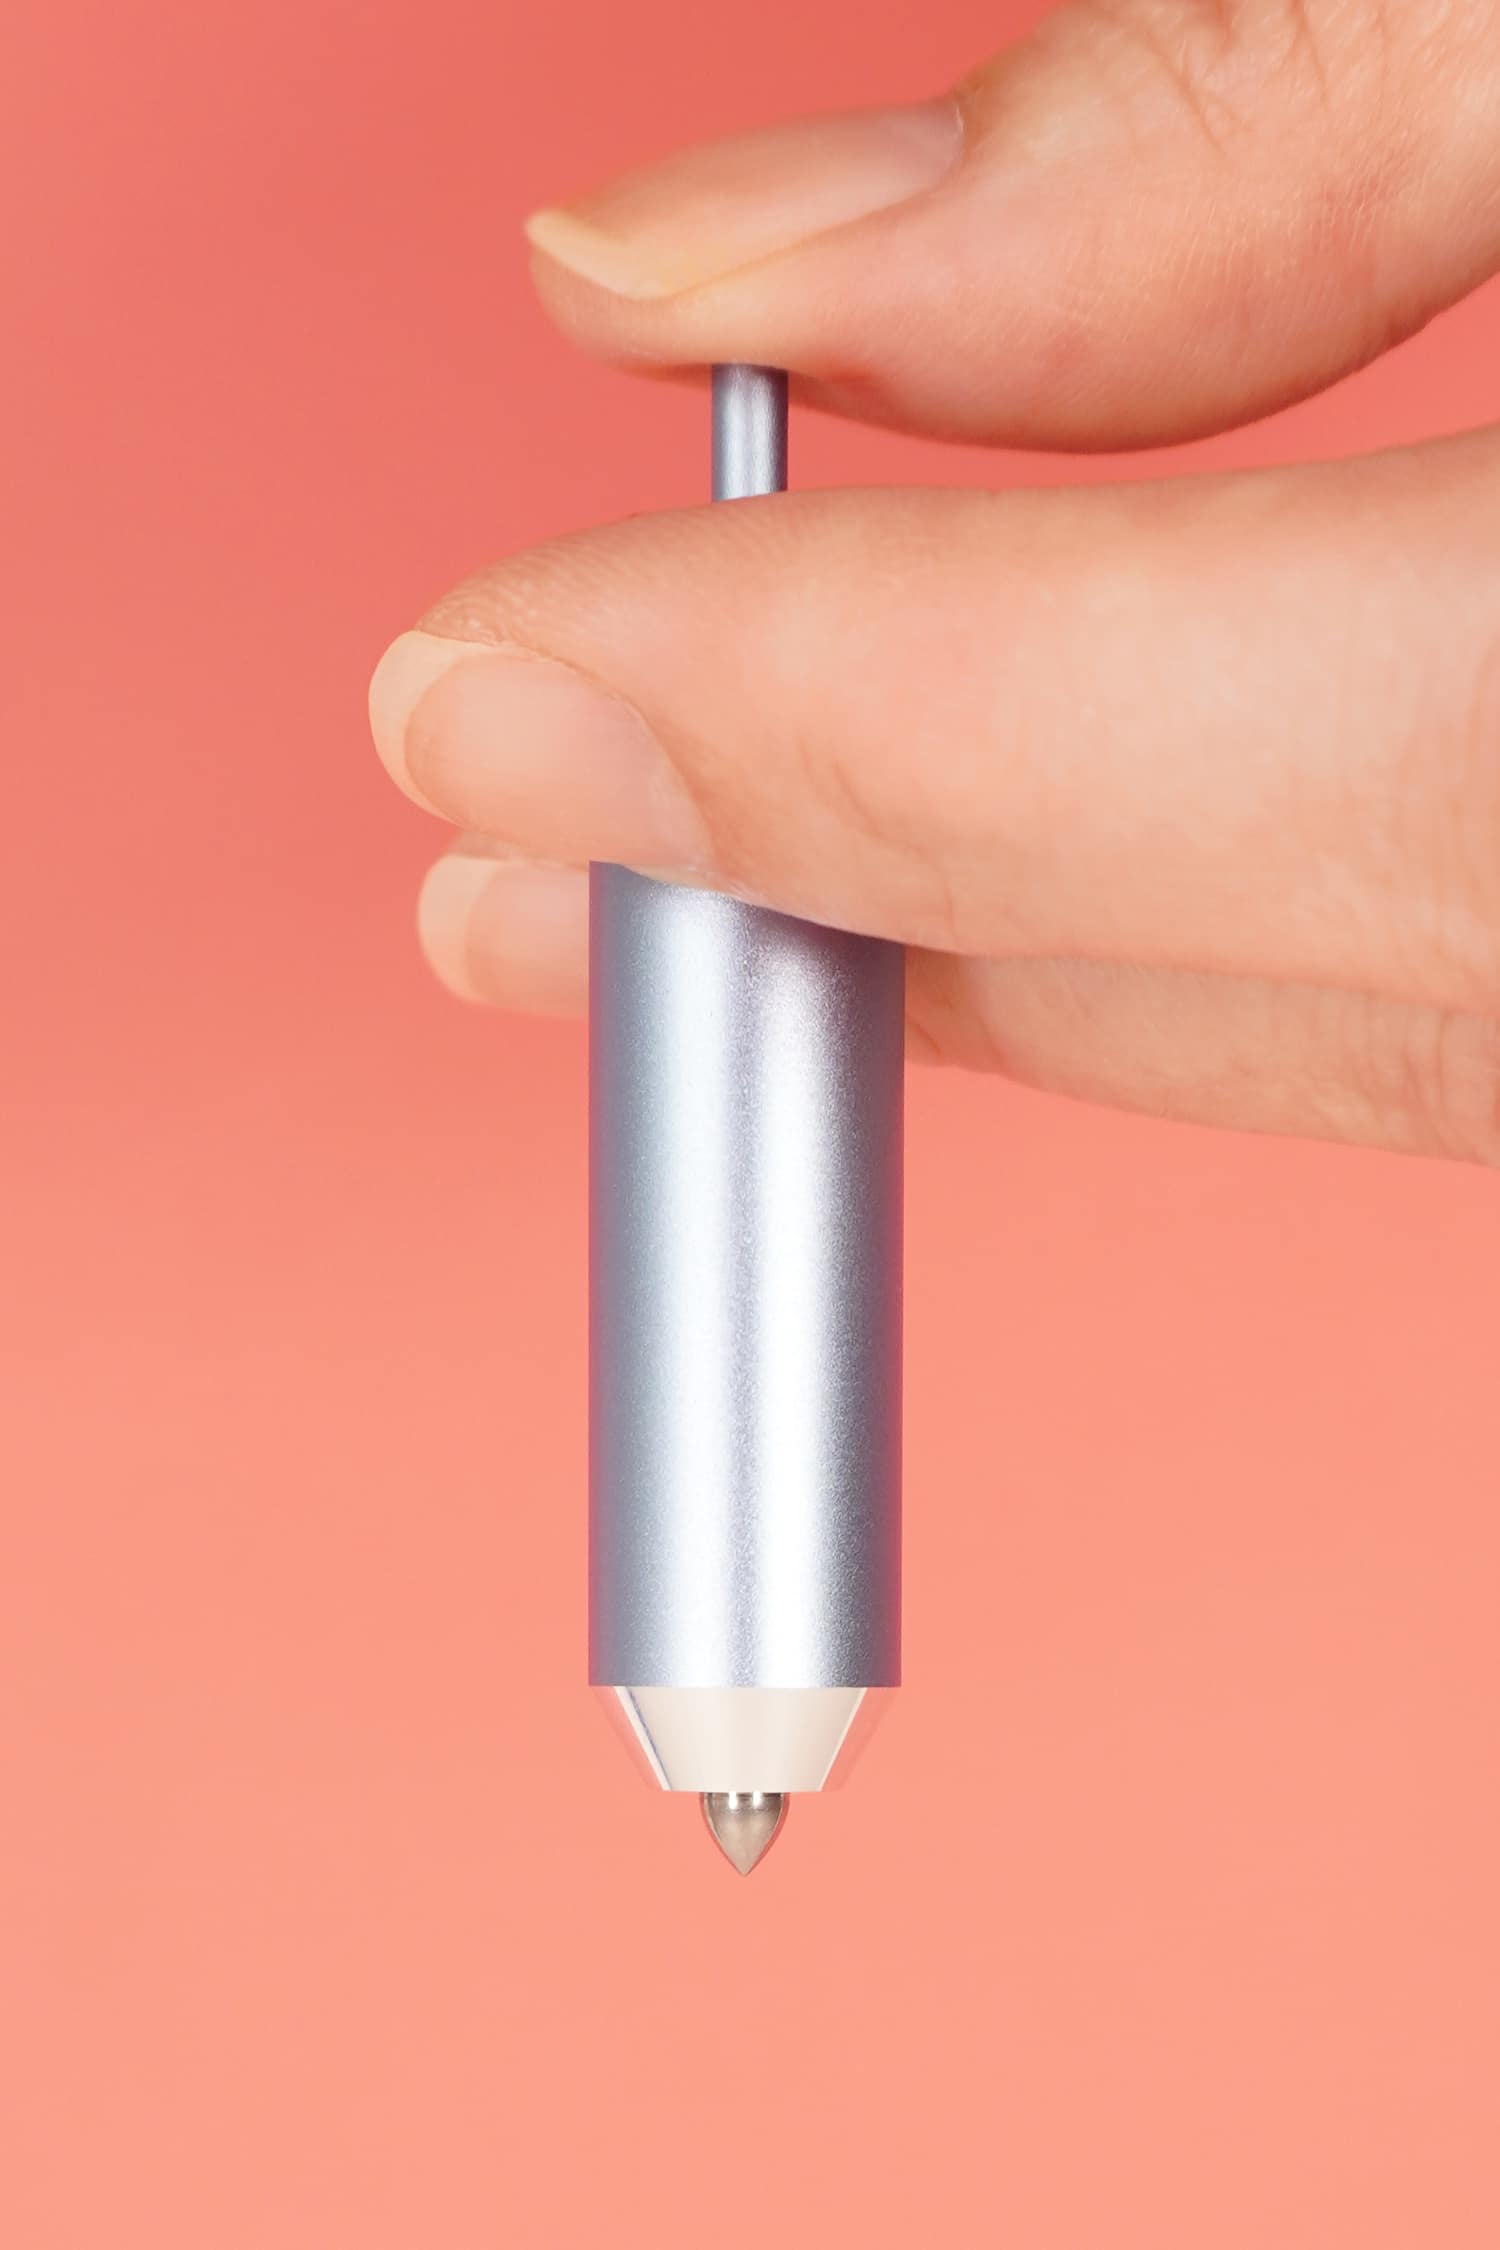
The Cricut Foil Transfer Tool has a plunger button on the top which allows you to quickly and easily swap out the different tips. Each tip attaches to the interior of the tool casing magnetically, so it’s a breeze to remove and replace as needed.
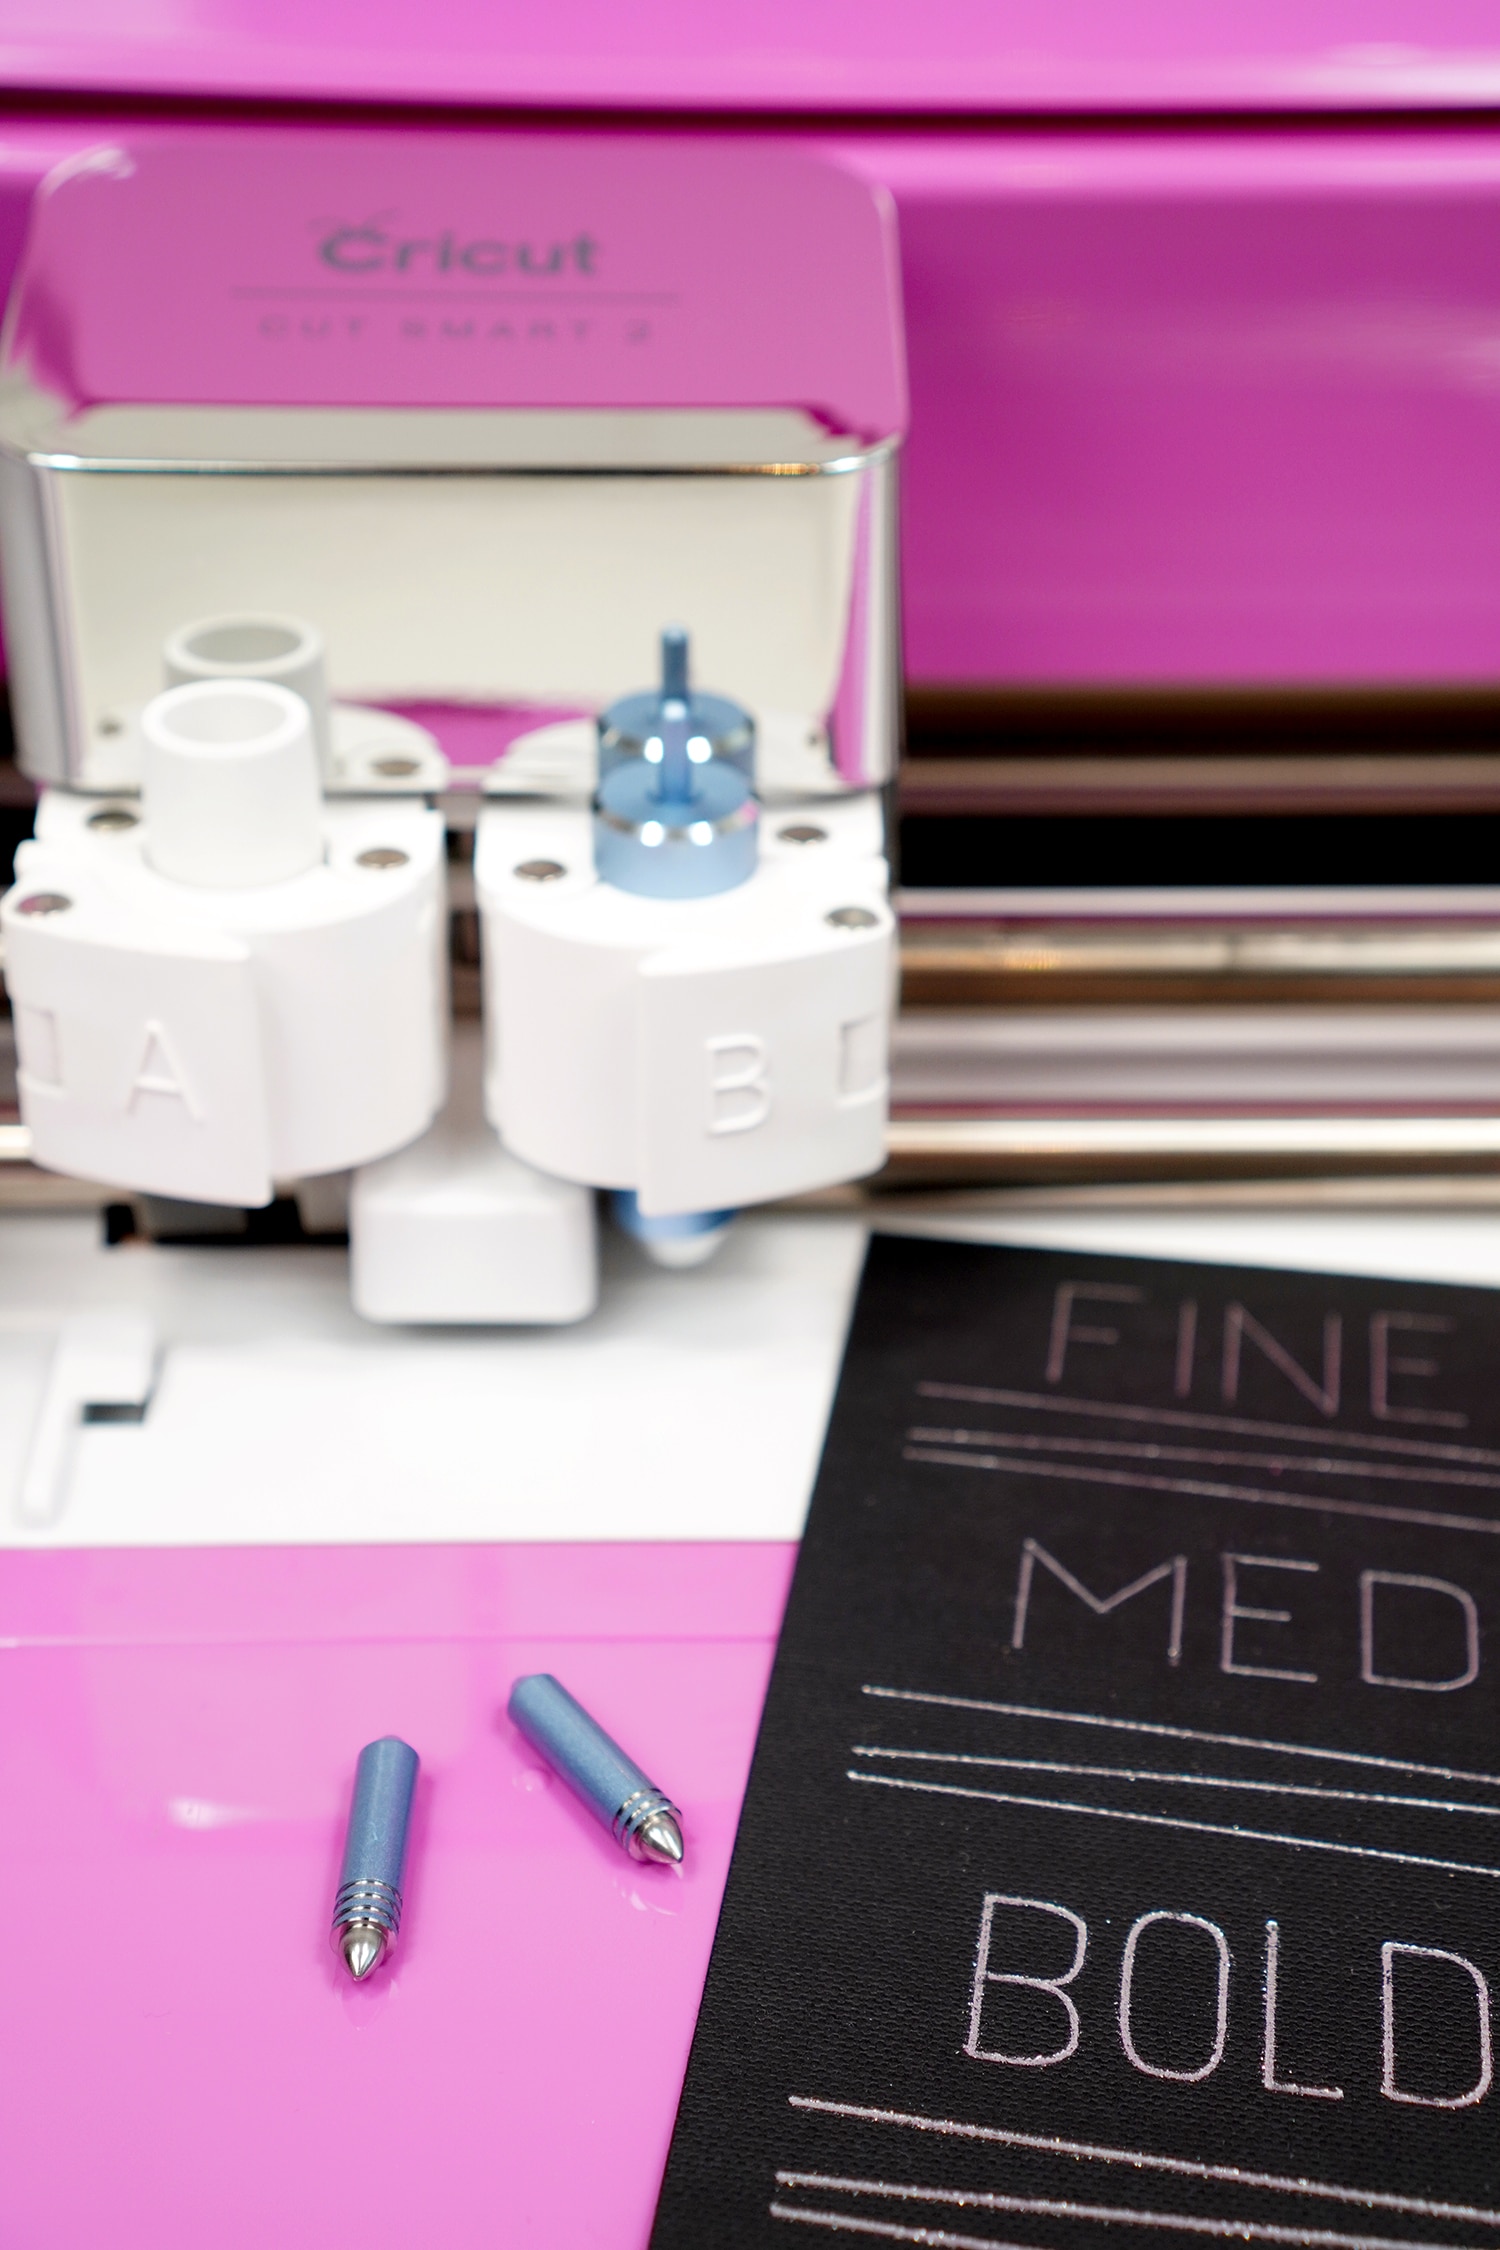
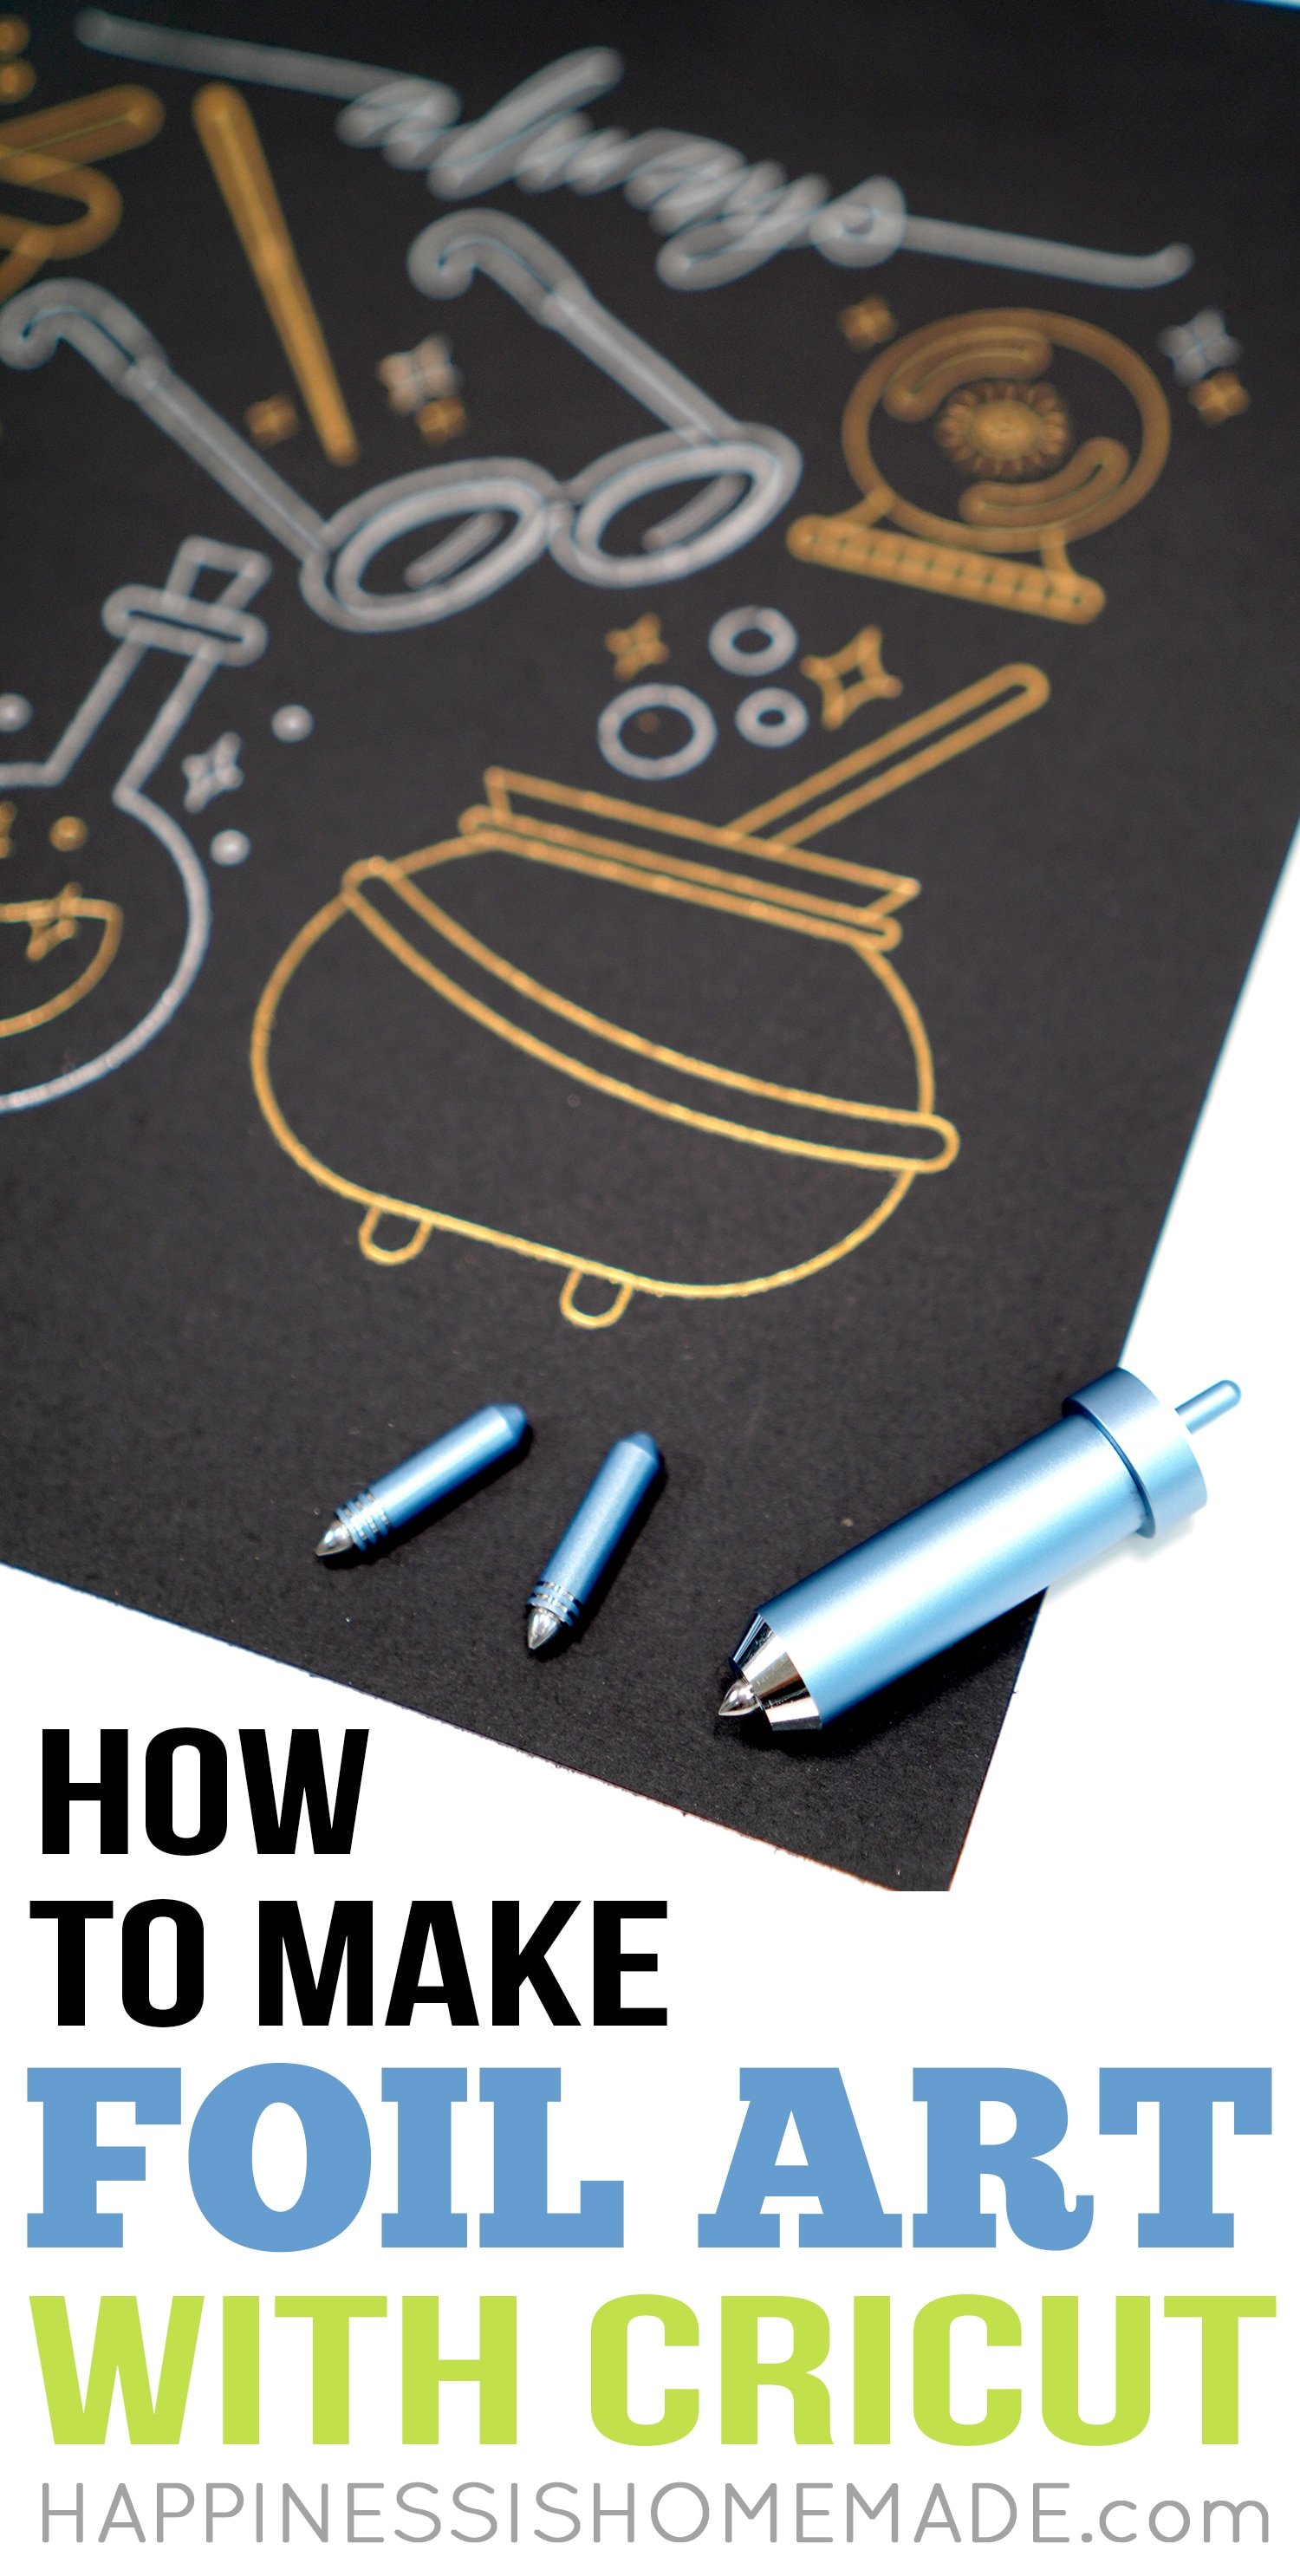
The three different tips are marked with lines near the bottom of the shaft to differentiate between them – one line for fine point, two for medium point, and three for bold. The Cricut Foil Transfer Tool goes into the “B” tool carrier of your machine.
Note: You may notice that I used different Cricut machines throughout this post. I tested out the Cricut Foil Transfer System with my Cricut Maker and two different Explore Air 2 machines, and it worked consistently across all three machines.
How to Make Foil Art Prints
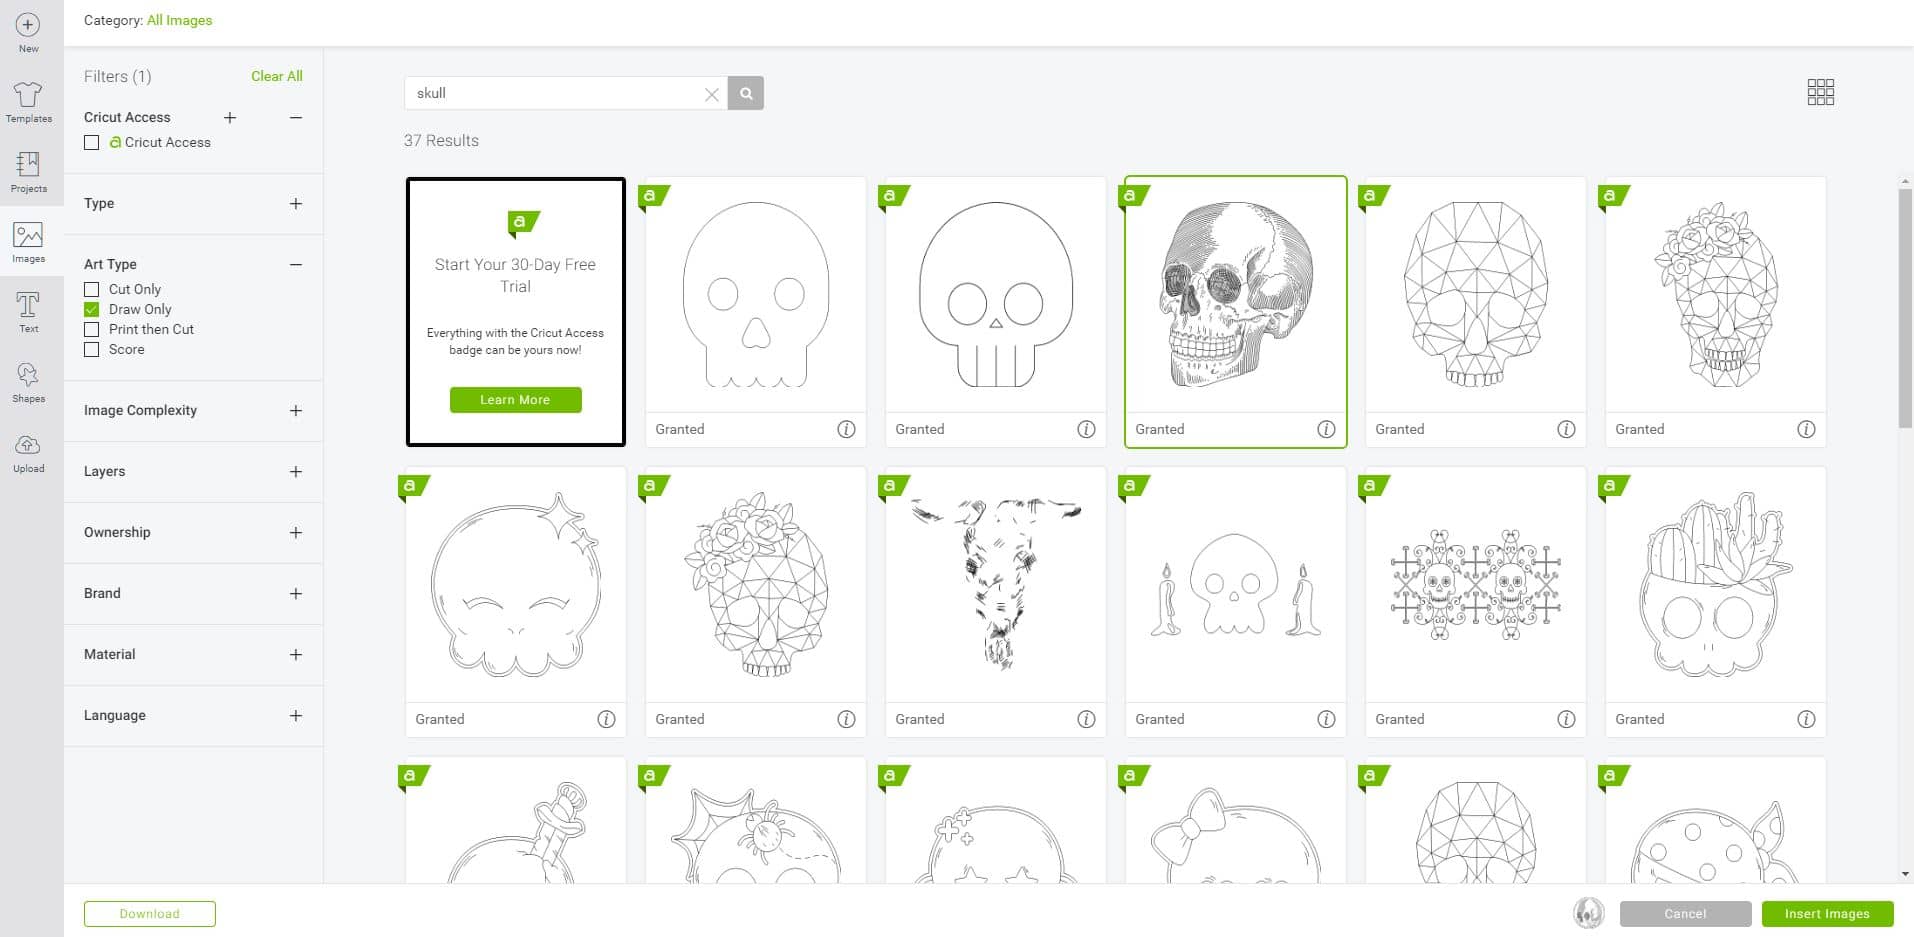
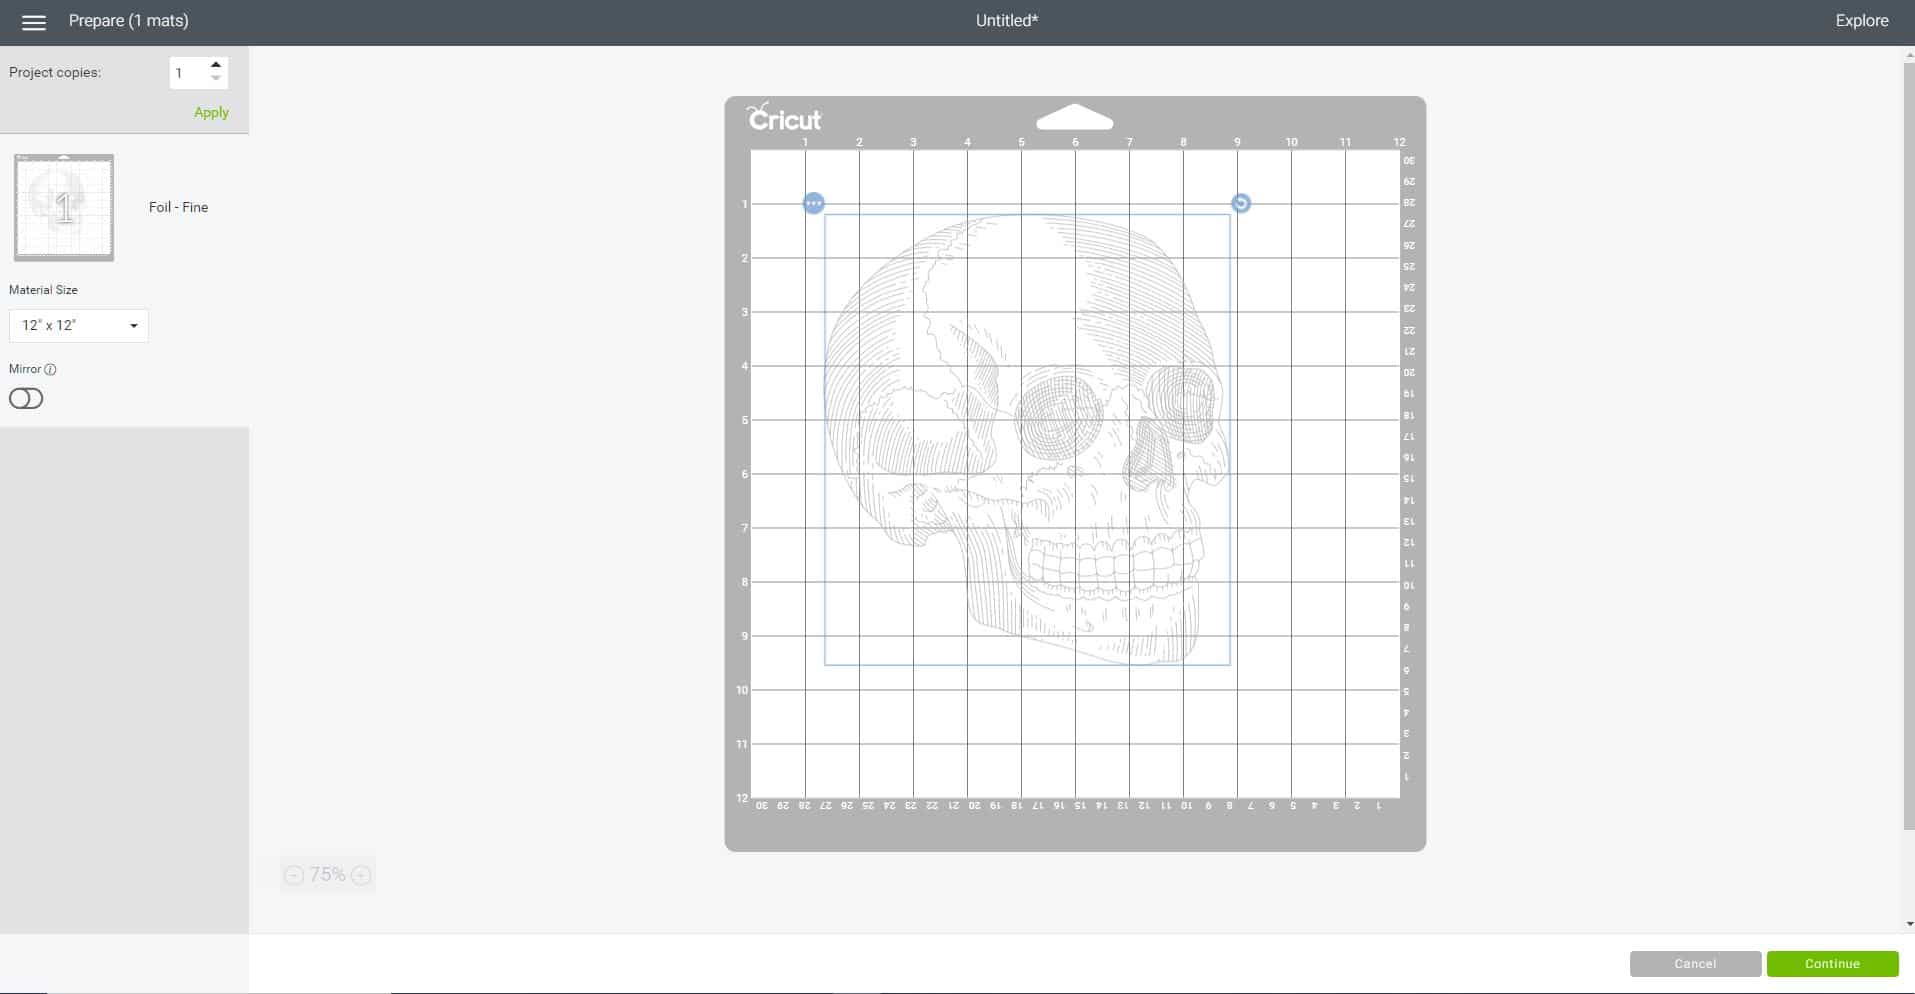
To begin creating your foil artwork, open up the Cricut Design Space Software and begin a new project. You can choose to add images from the Design Space Library or you can import and upload your own artwork. For this example, I am inserting a detailed skull image (#M17F8D593) from the Design Space Library for my Halloween foil art print.
Tip: In the Design Space Library, select “Draw Only” from the Art Type menu in the left sidebar to display only single-line drawings. Single-line drawings translate best into foil artwork as standard cut files may convert with double lines as each stroke is outlined.
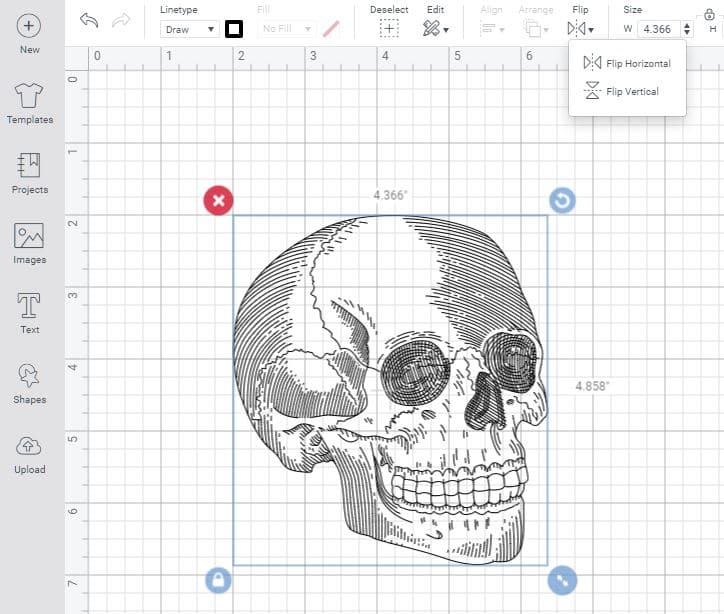
I wanted my skull to be facing right, so I selected the image and flipped it horizontally from the top tool bar. Then, resize the image appropriately for your artwork.
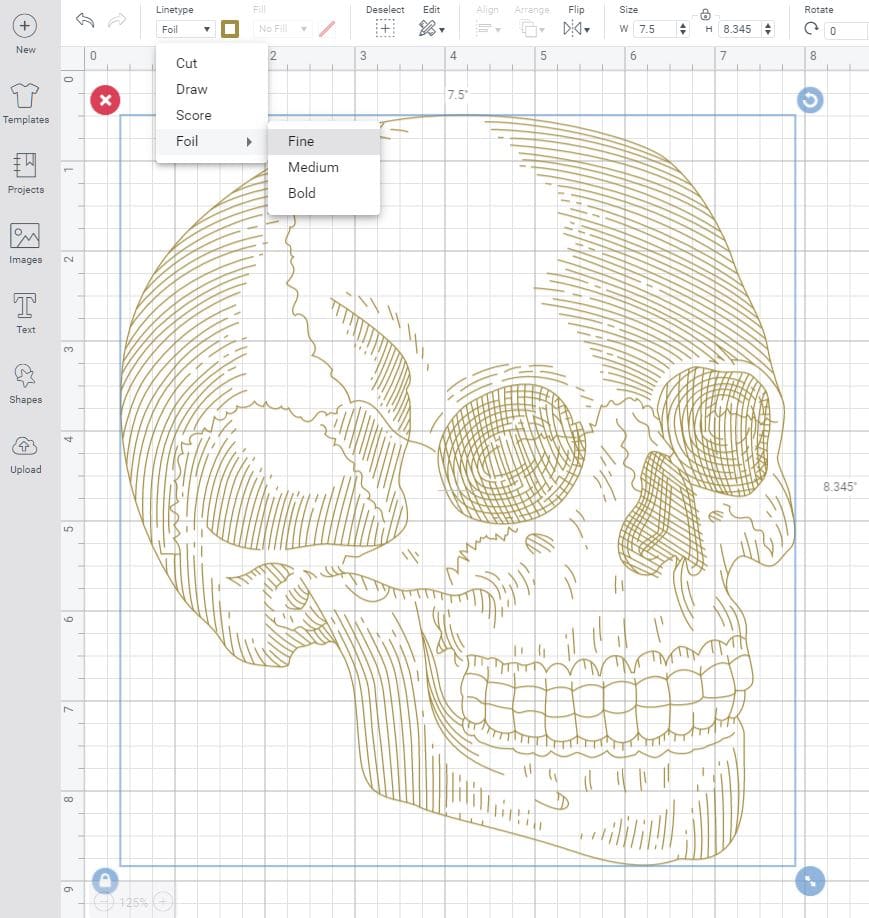
Next, change the line type from the drop-down menu to “Foil” and select the line width you wish to use. The foil lines will automatically display in gold, so change and update the foil color if desired. When your image is sized and colored appropriately, click the green “Make It” button in the upper right hand corner of the Design Space screen.
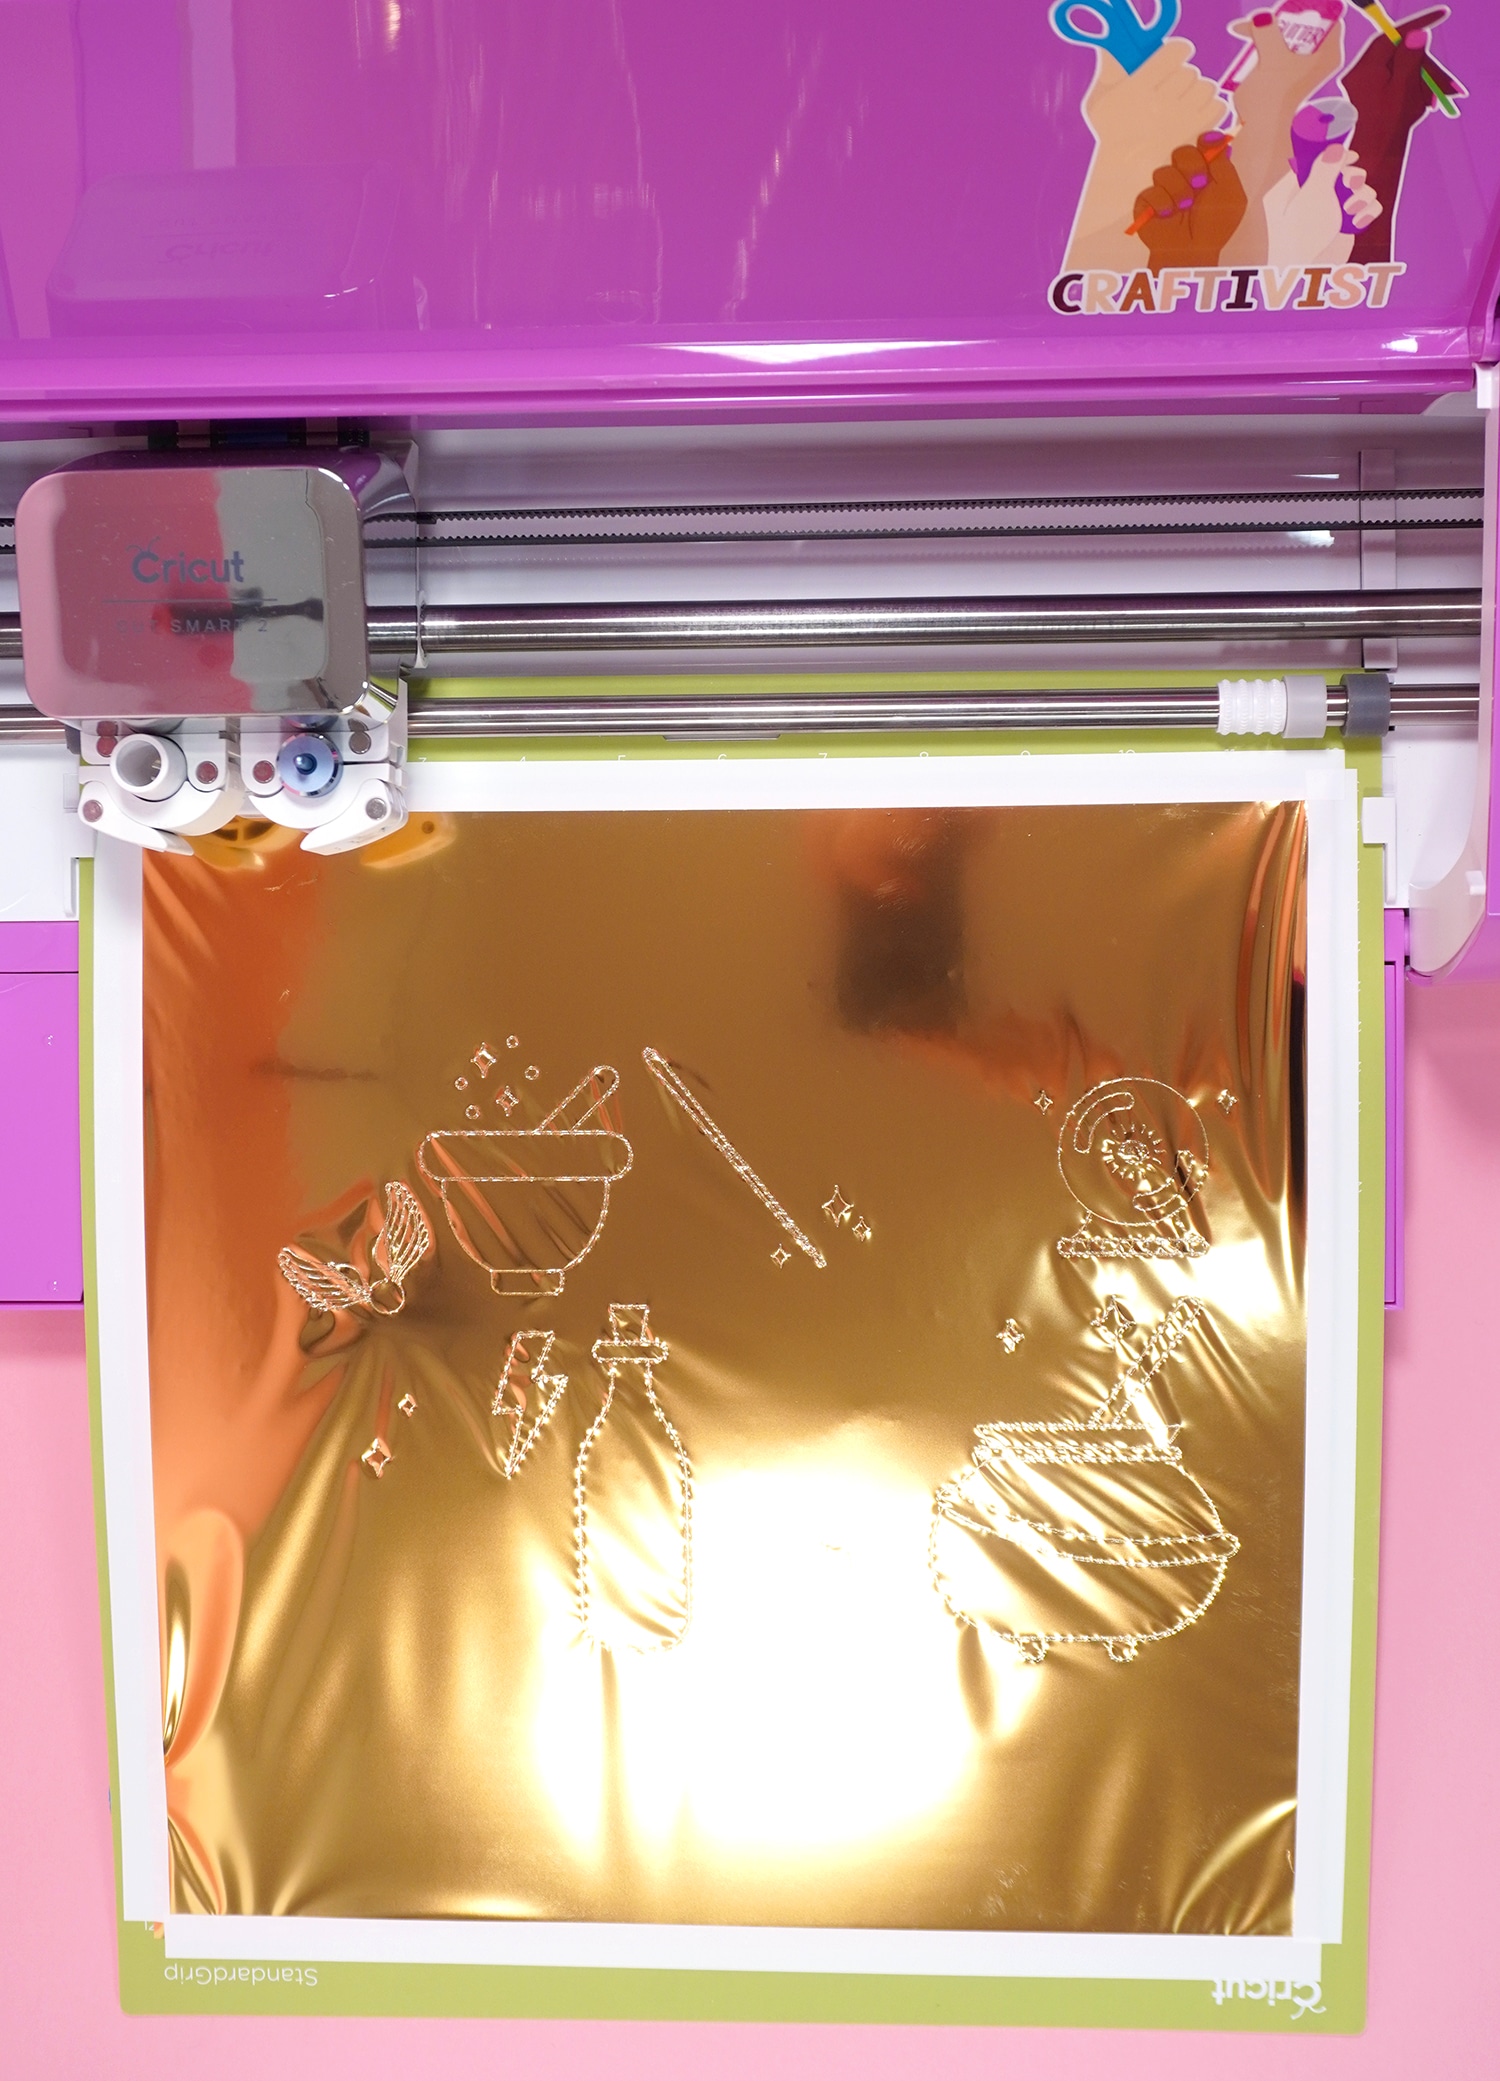
Position your design on the mat so that it is away from the edges. The Foil Transfer Sheets work best when you leave at least a 1/4″ margin between the edges of the foil and the edges of your design, and you also need a little space to tape the foil to your material. If any portion of your design is covered by tape, the foil in those areas will not transfer properly.
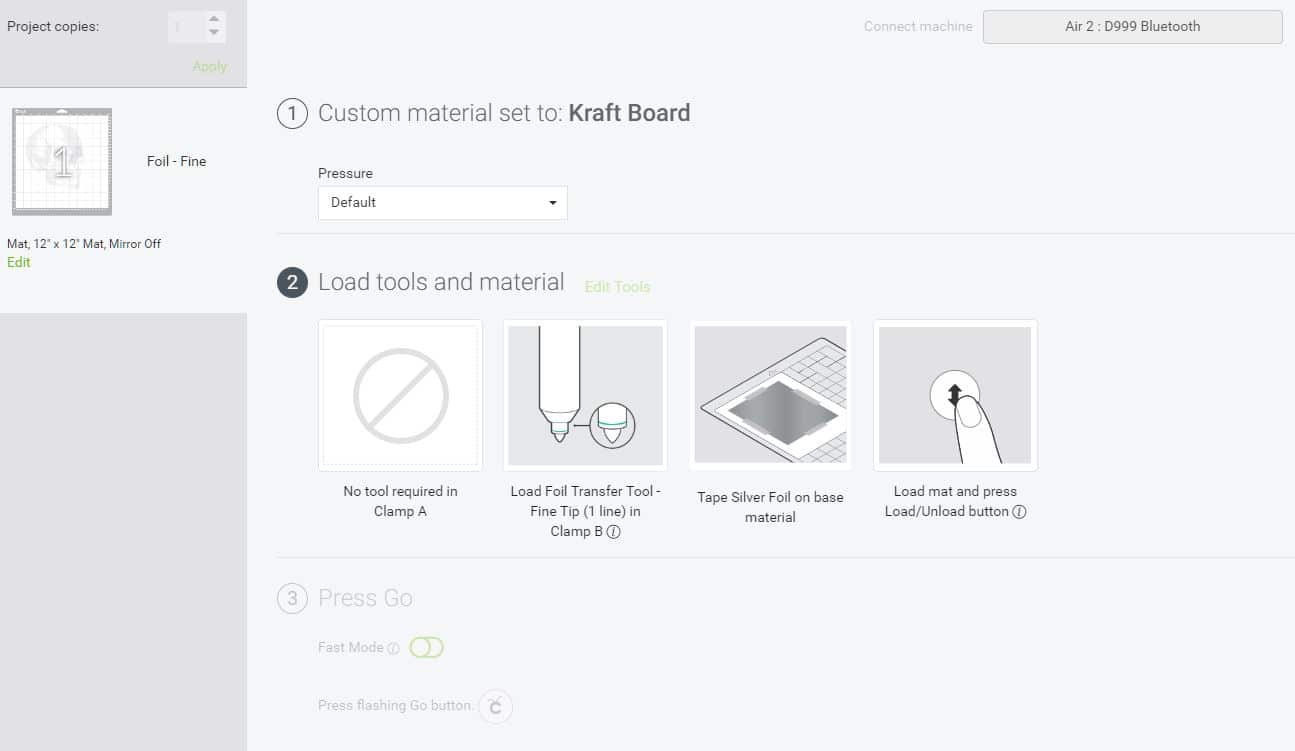
Select your base material from the list, trim your Foil Transfer Sheet to size (slightly larger than your design, but smaller than the base material), and tape the foil (shiny colored side up) to the base using the provided tape strips. Make sure that the foil is smooth, taught, and secured on all four sides.
Note: Do NOT place the Foil Transfer Sheet directly on to your cutting mat! The foil will stick to your mat and leave foil particles embedded in the adhesive that may transfer to subsequent projects using the same mat.
If you are using a full sheet of 12×12 material as your base, you may use a full large sheet of foil without trimming it to size since the mat adhesive will be entirely covered by your base material.
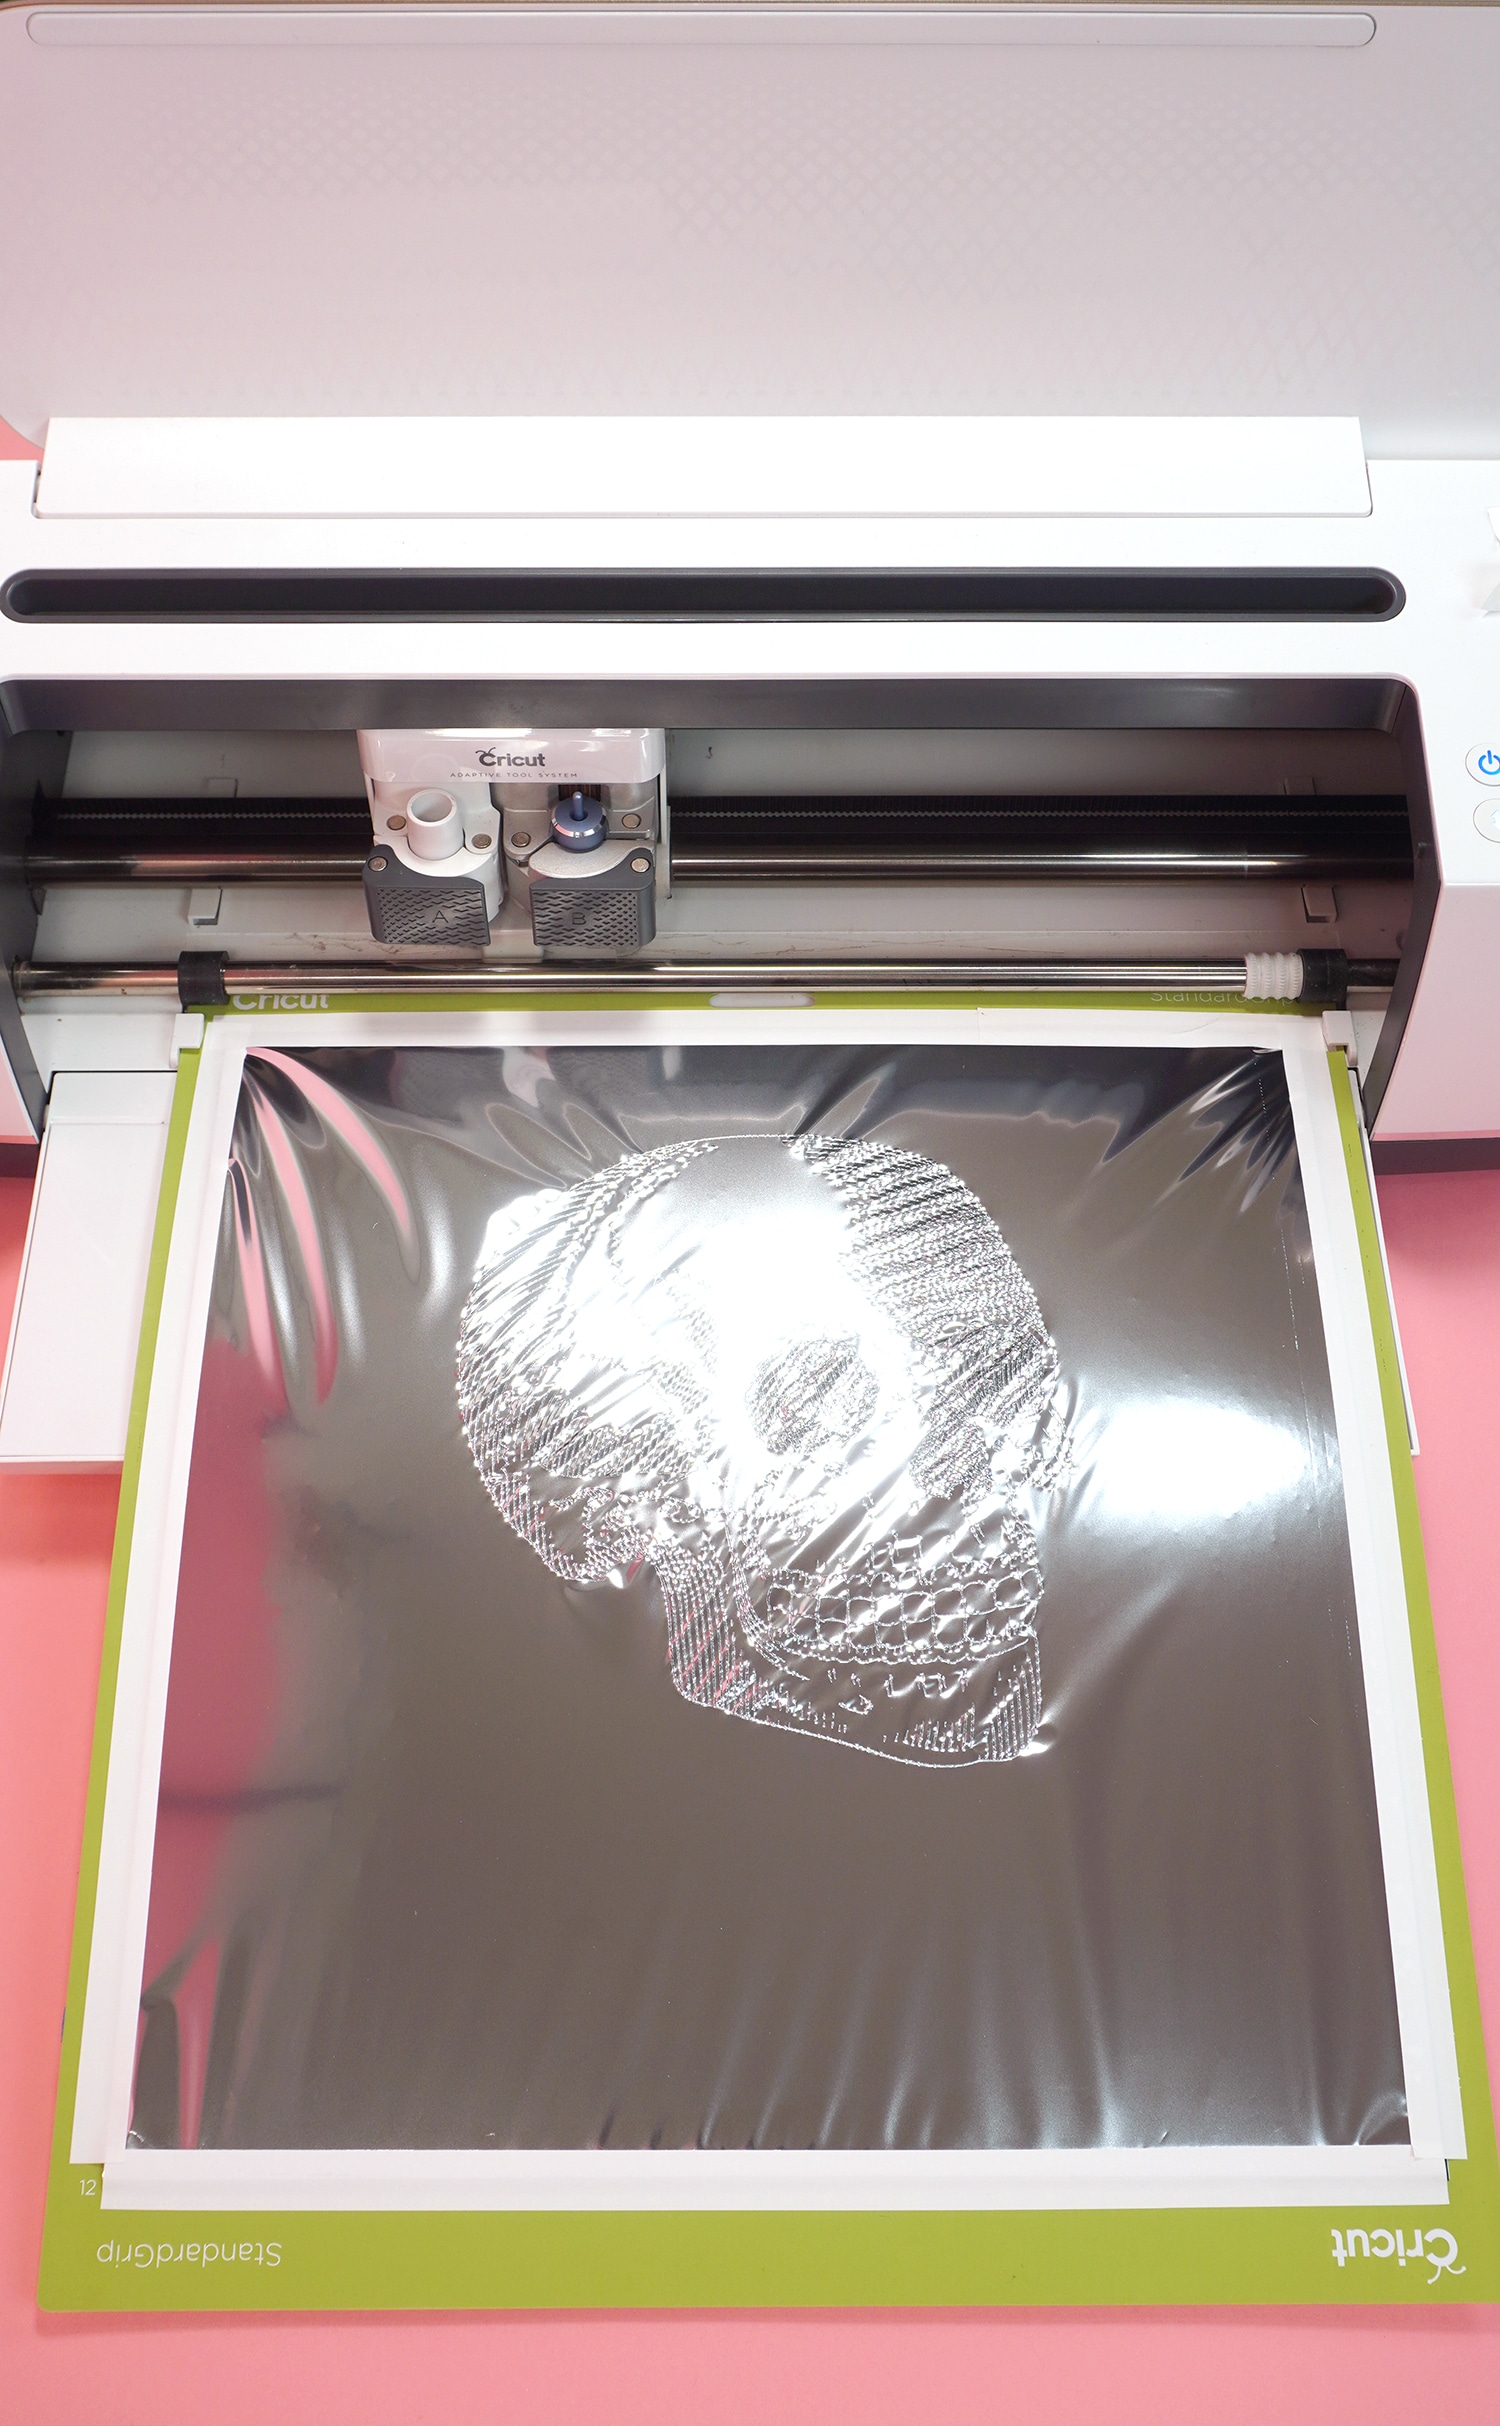
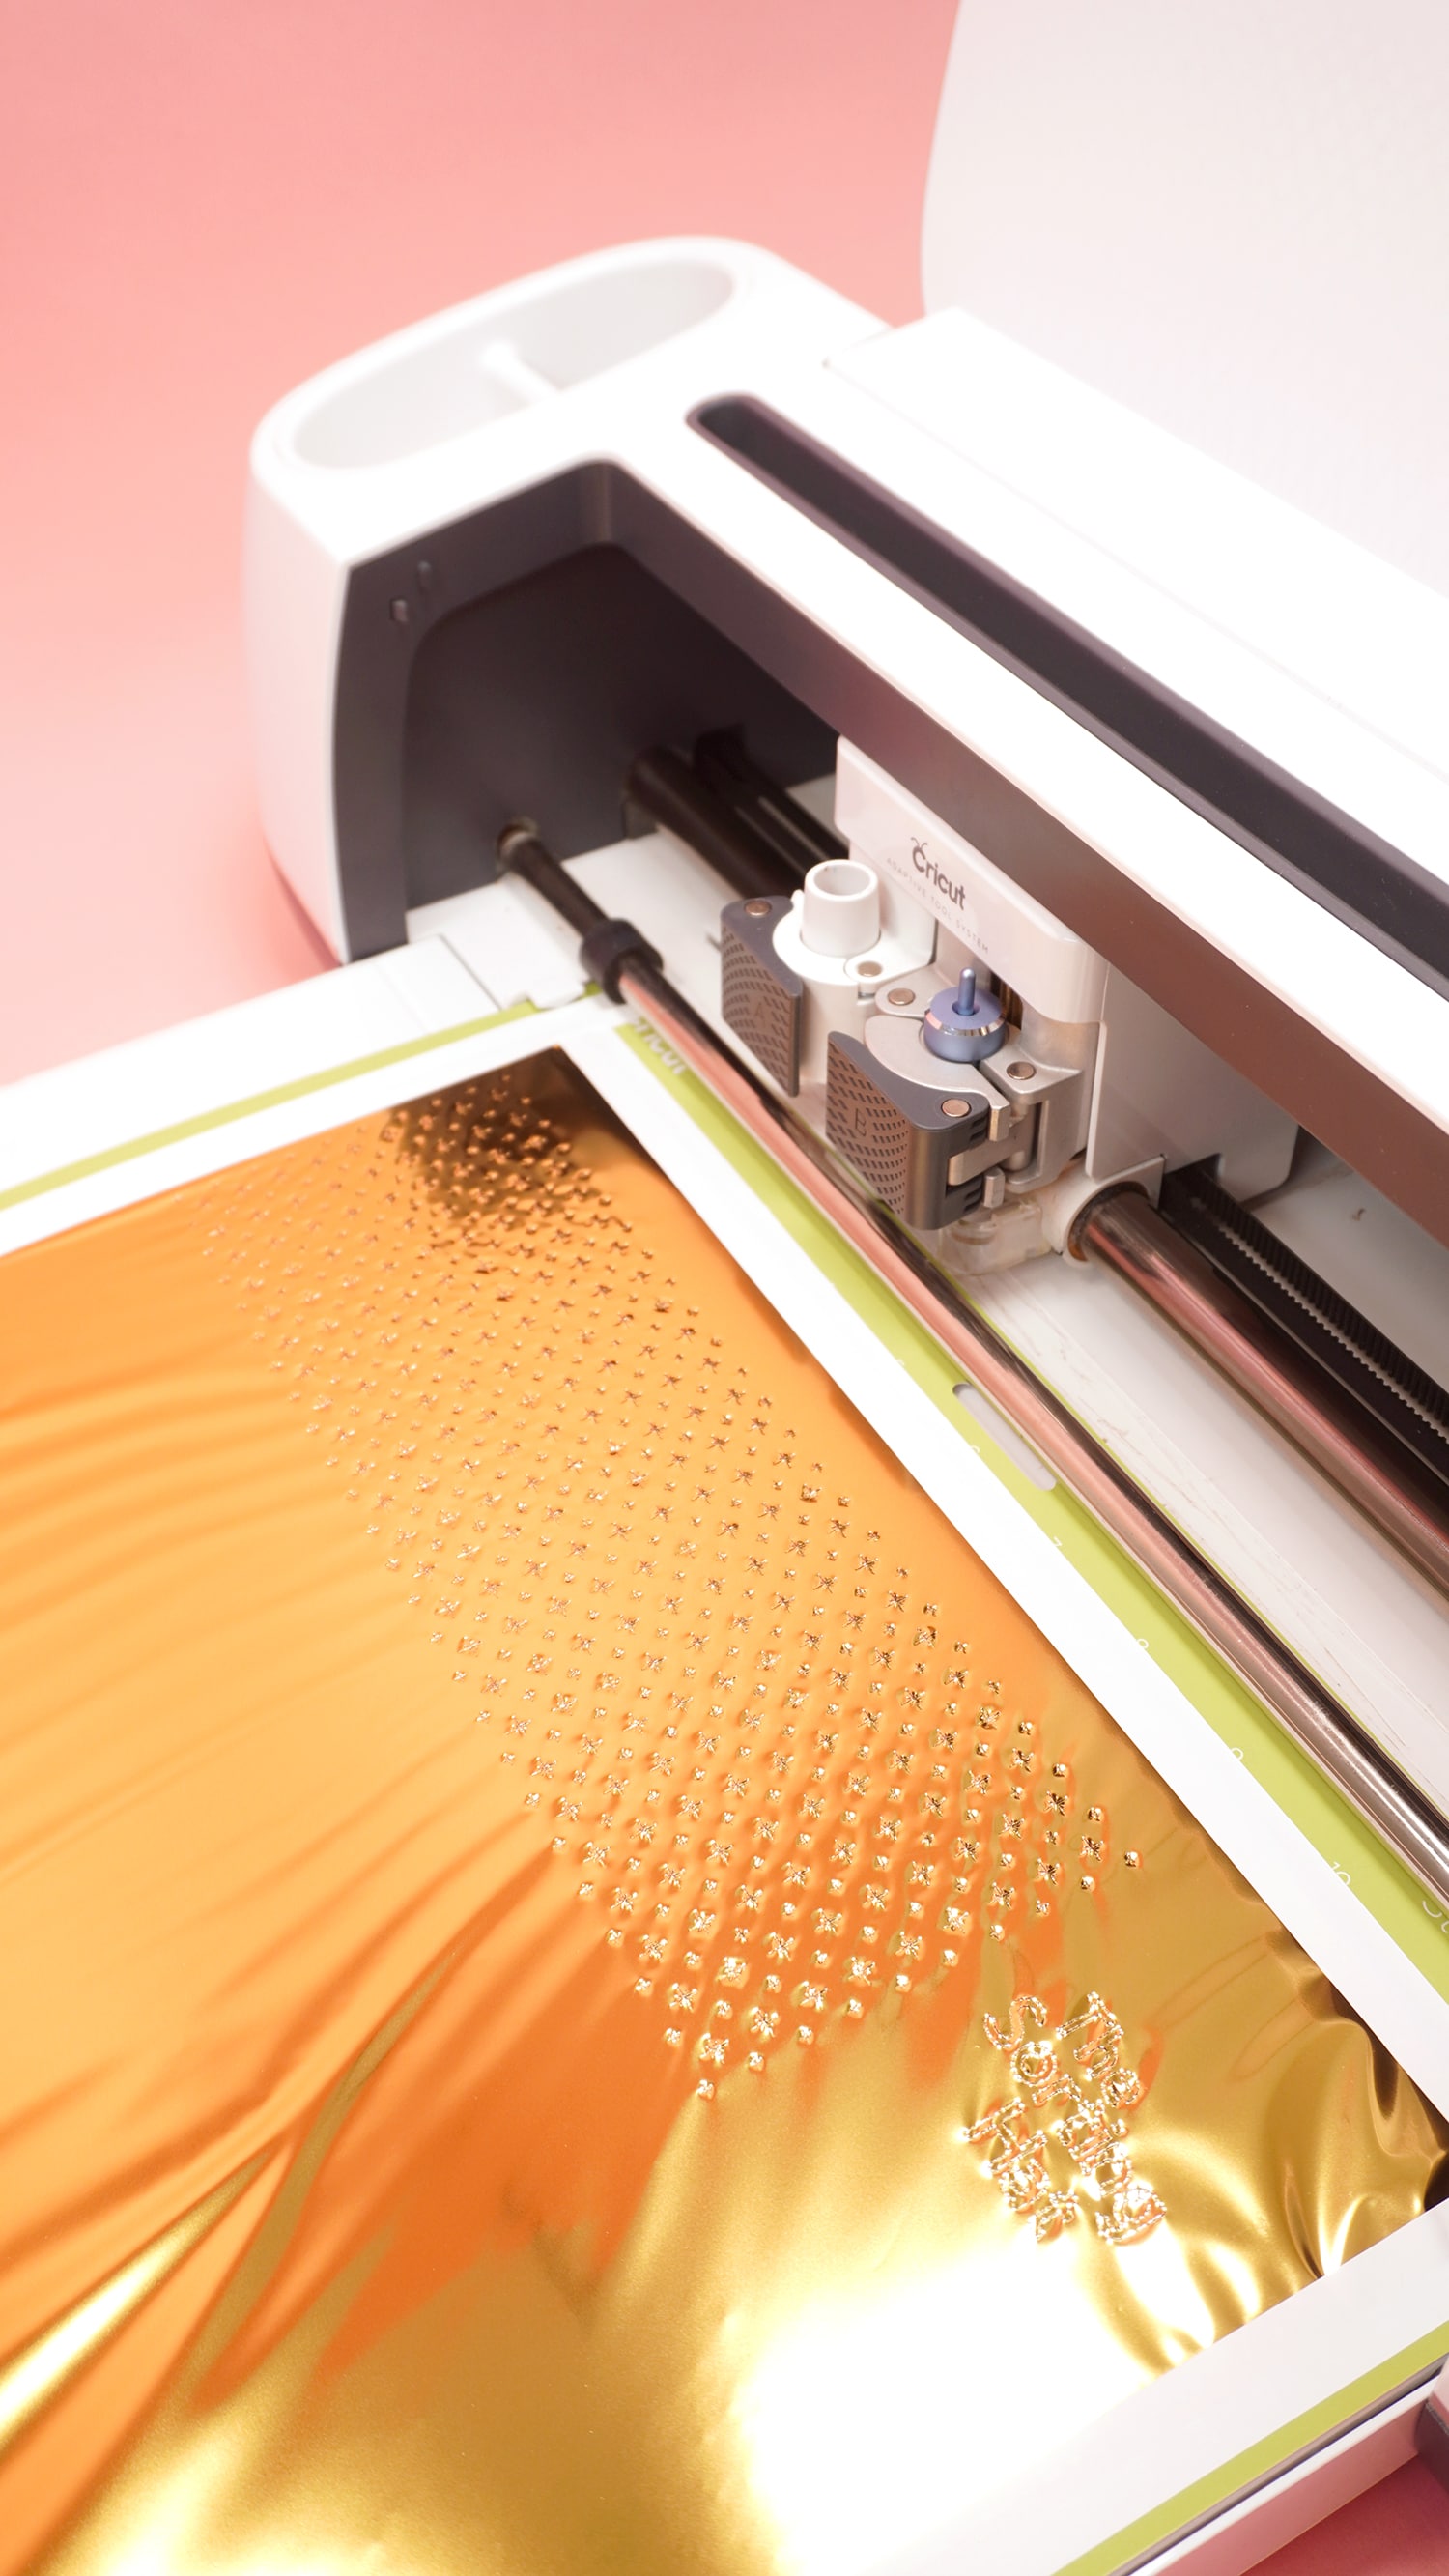
Load your mat into the machine, and press the flashing Cricut button to begin foiling.
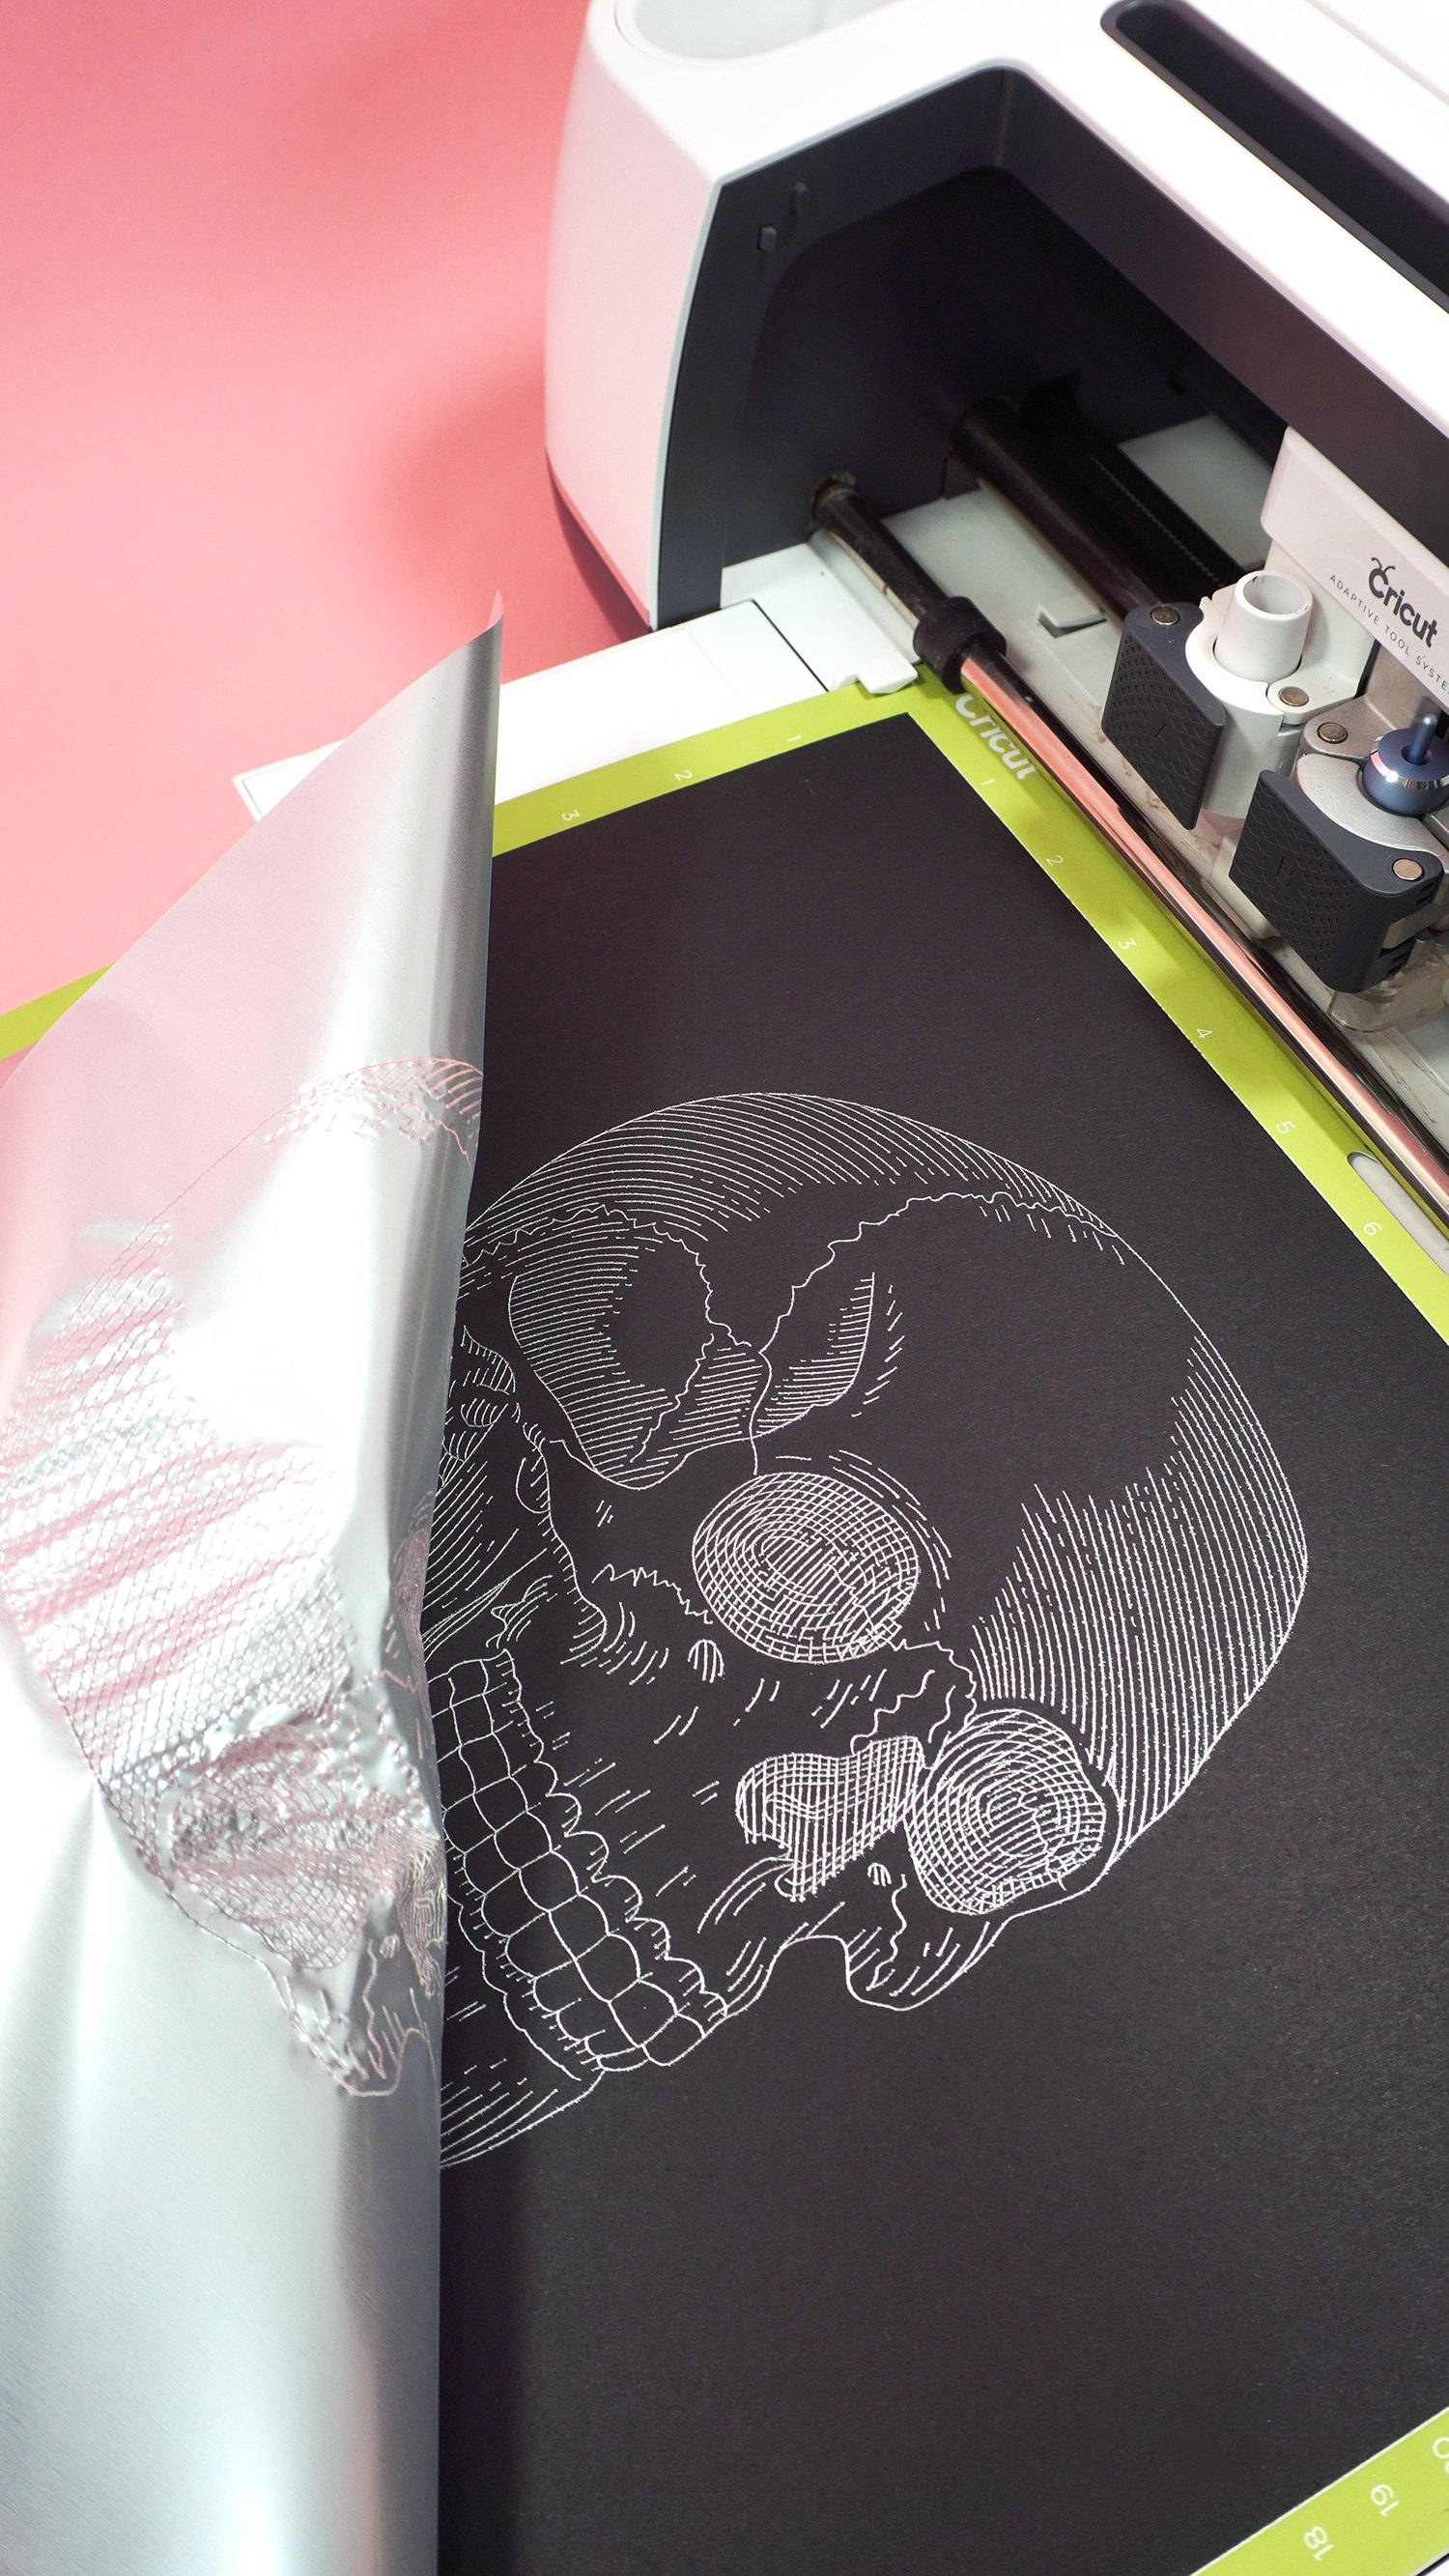
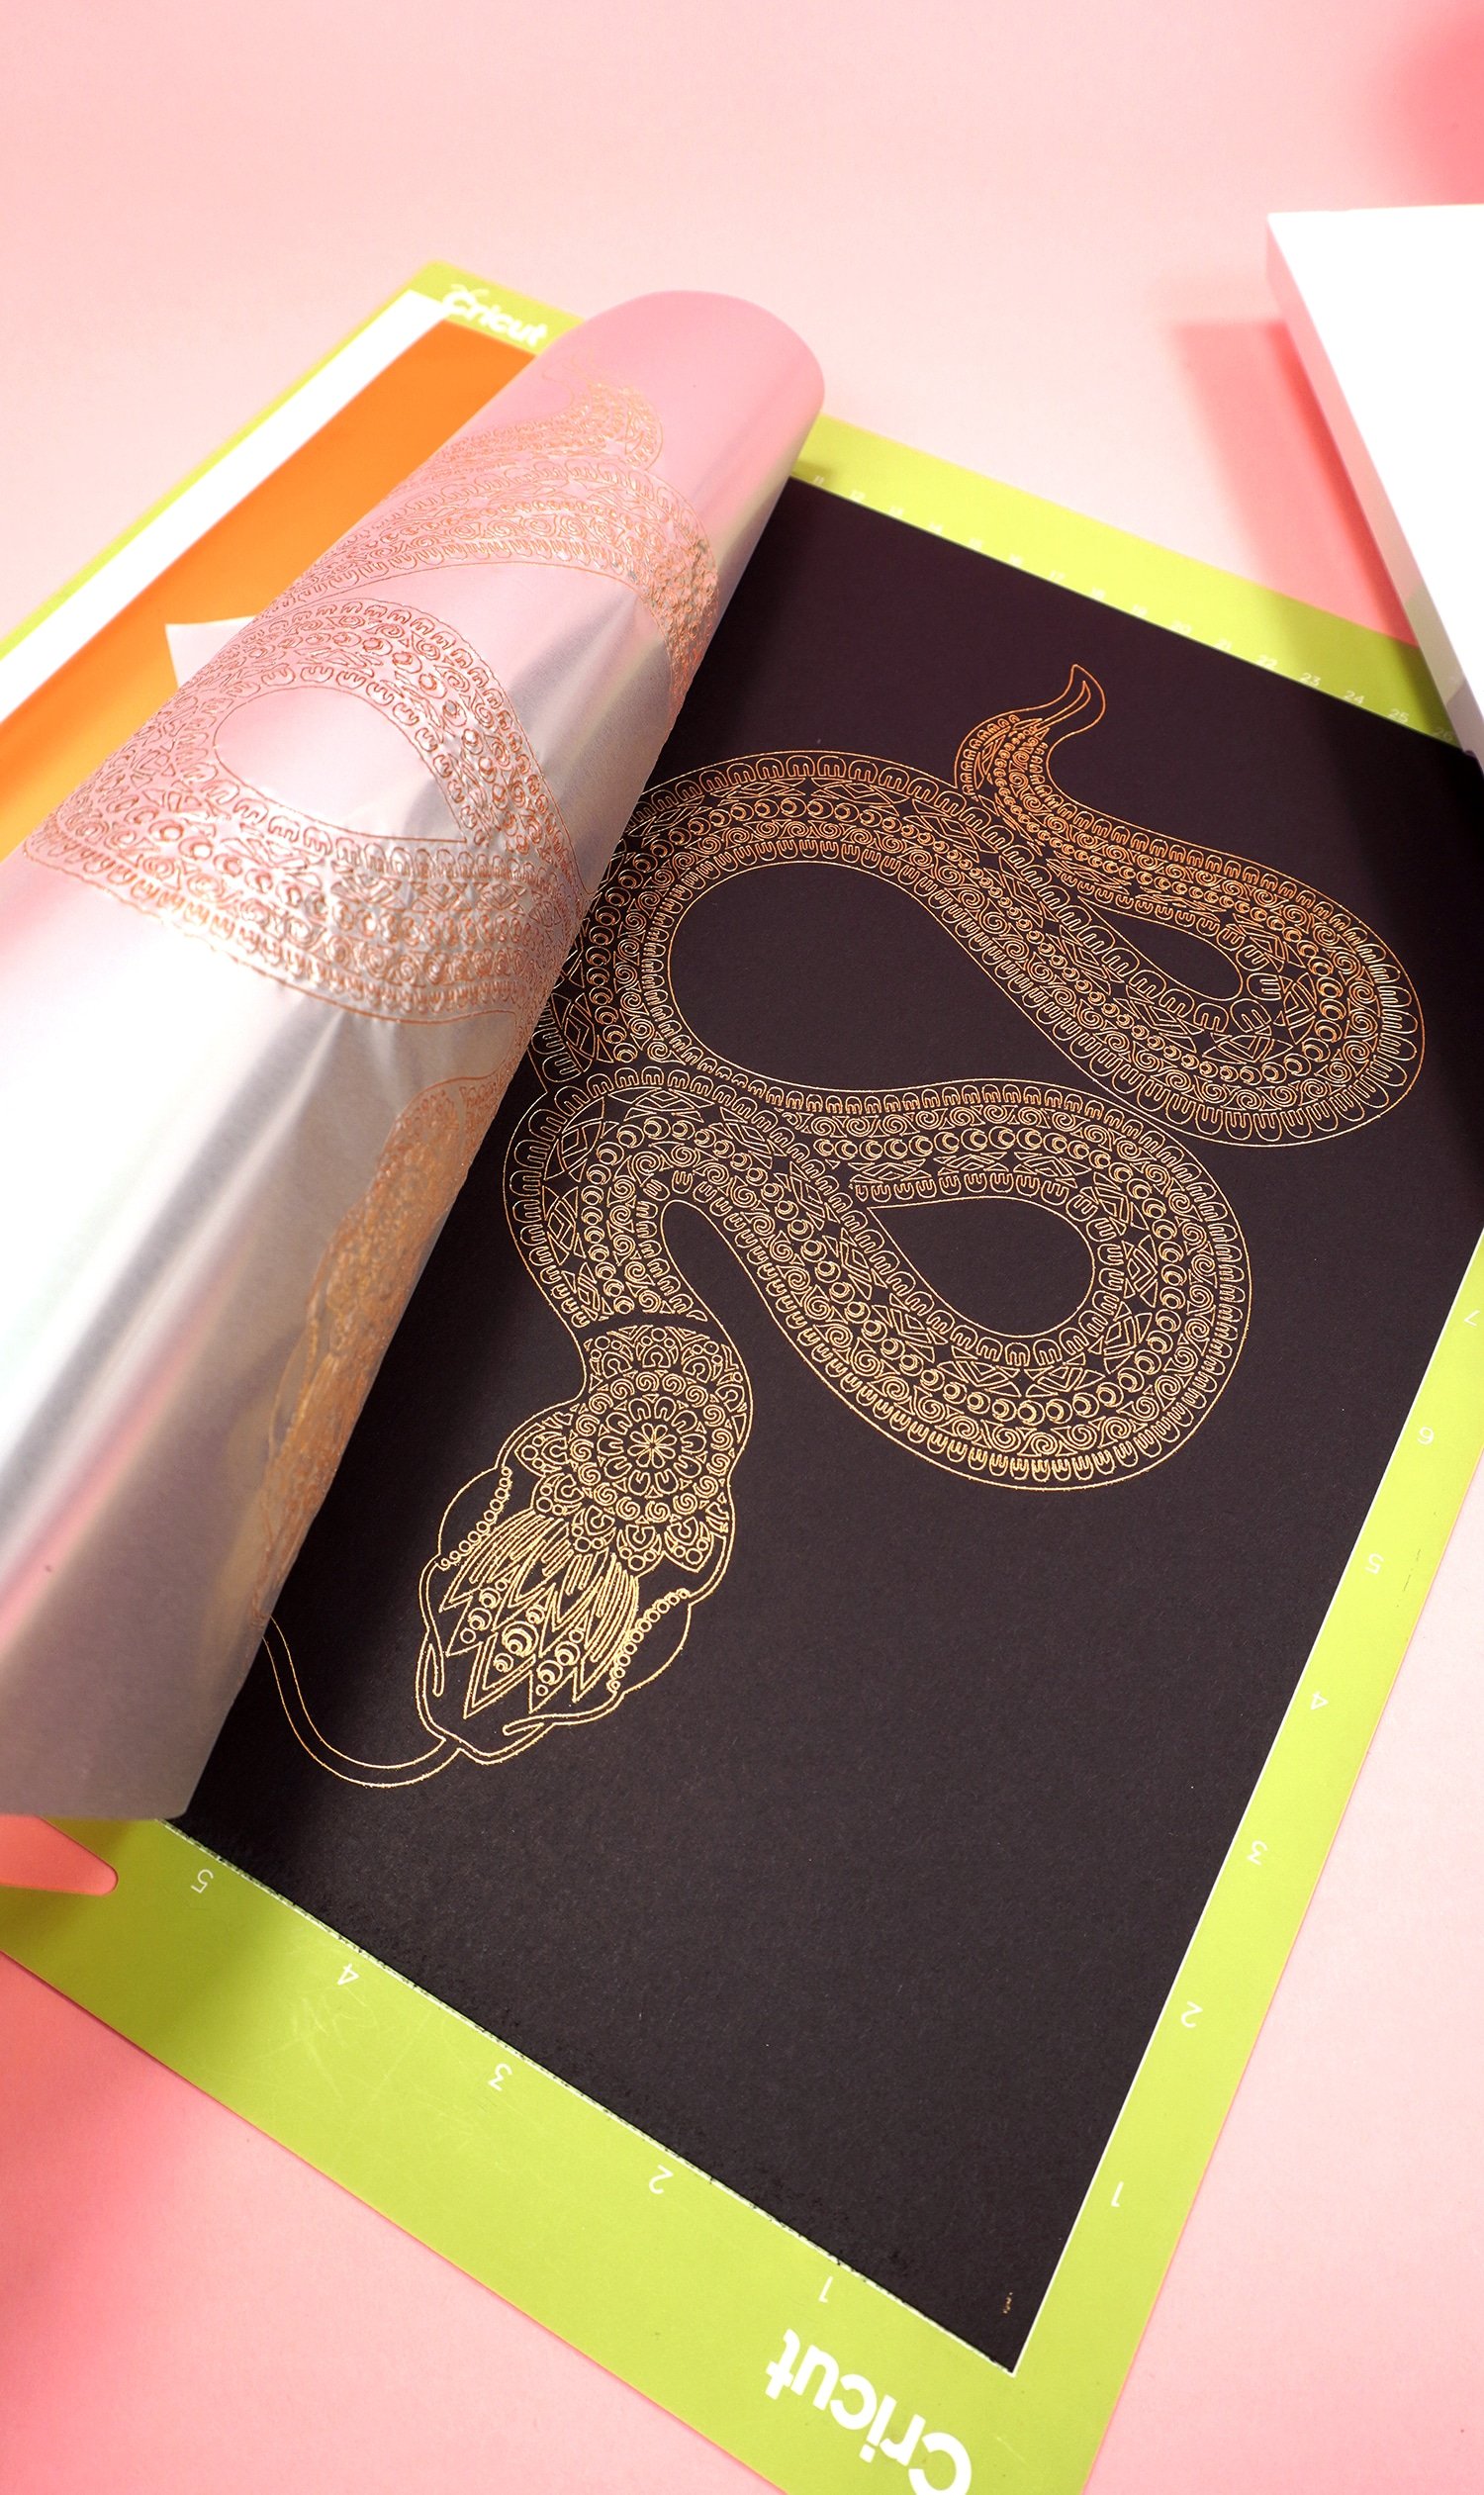
When the foiling process is complete, gently remove the tape and peel back the Cricut Foil Transfer Sheet to reveal your amazing new foil artwork! Isn’t that amazing?!
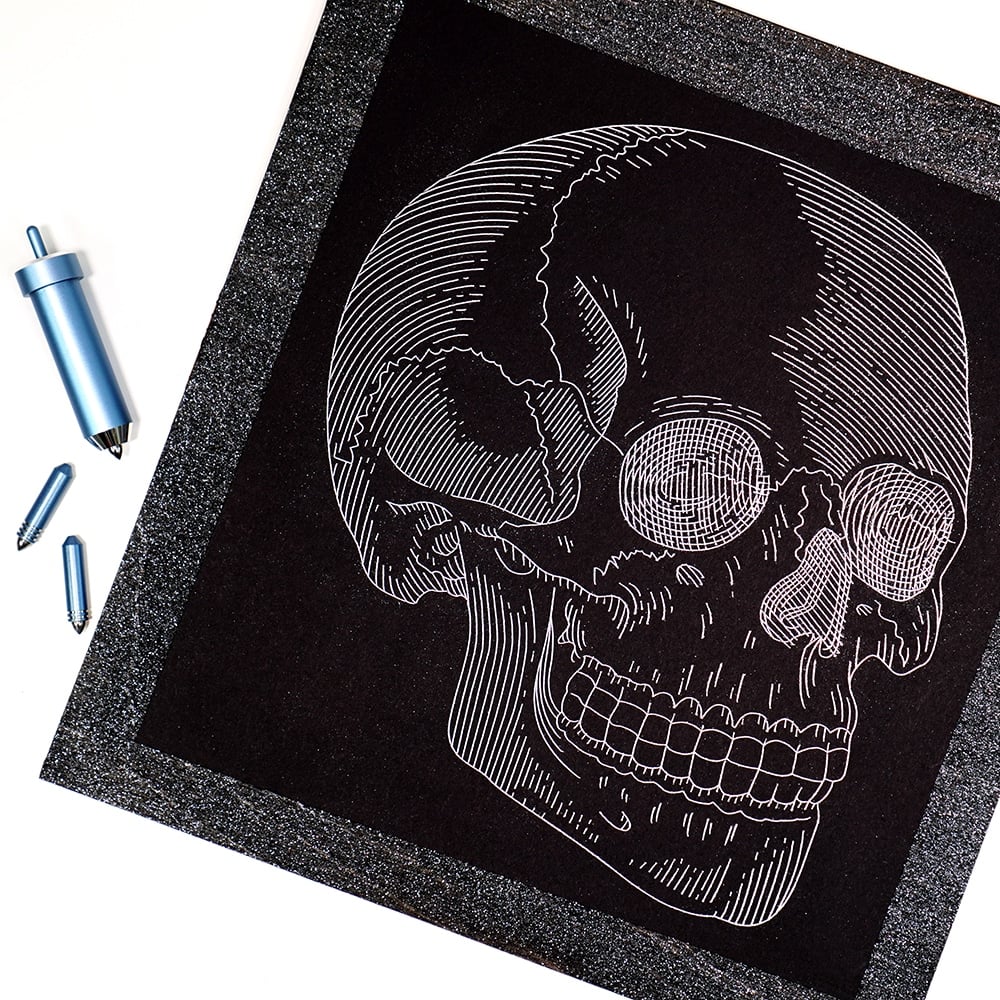
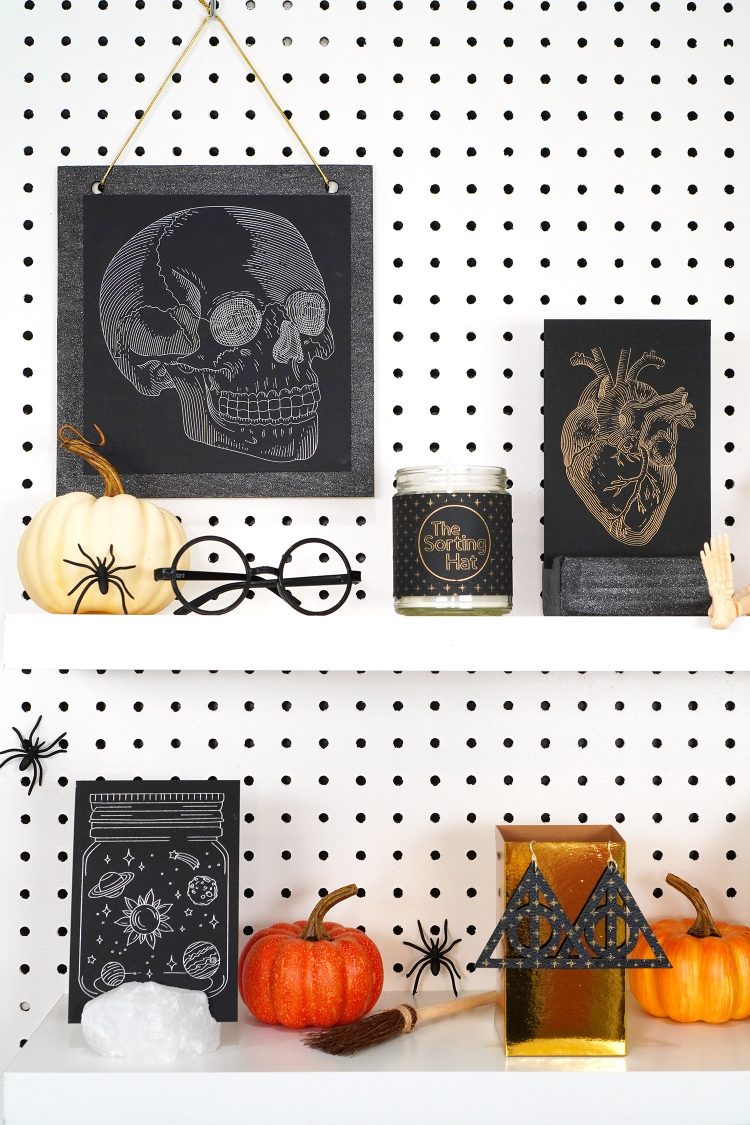
How awesome is this sparkly skull foil art print?! I trimmed my original 12×12 sheet to size and added a thin wood backing piece in gunmetal glitter – perfect for Halloween!
Repeat the process for additional foil art pieces! One of my favorite things about the Cricut Foil Transfer System vs other foiling methods is that the Foil Transfer Tool lends itself incredibly well to making projects with both multiple line widths AND multiple colors in one piece!
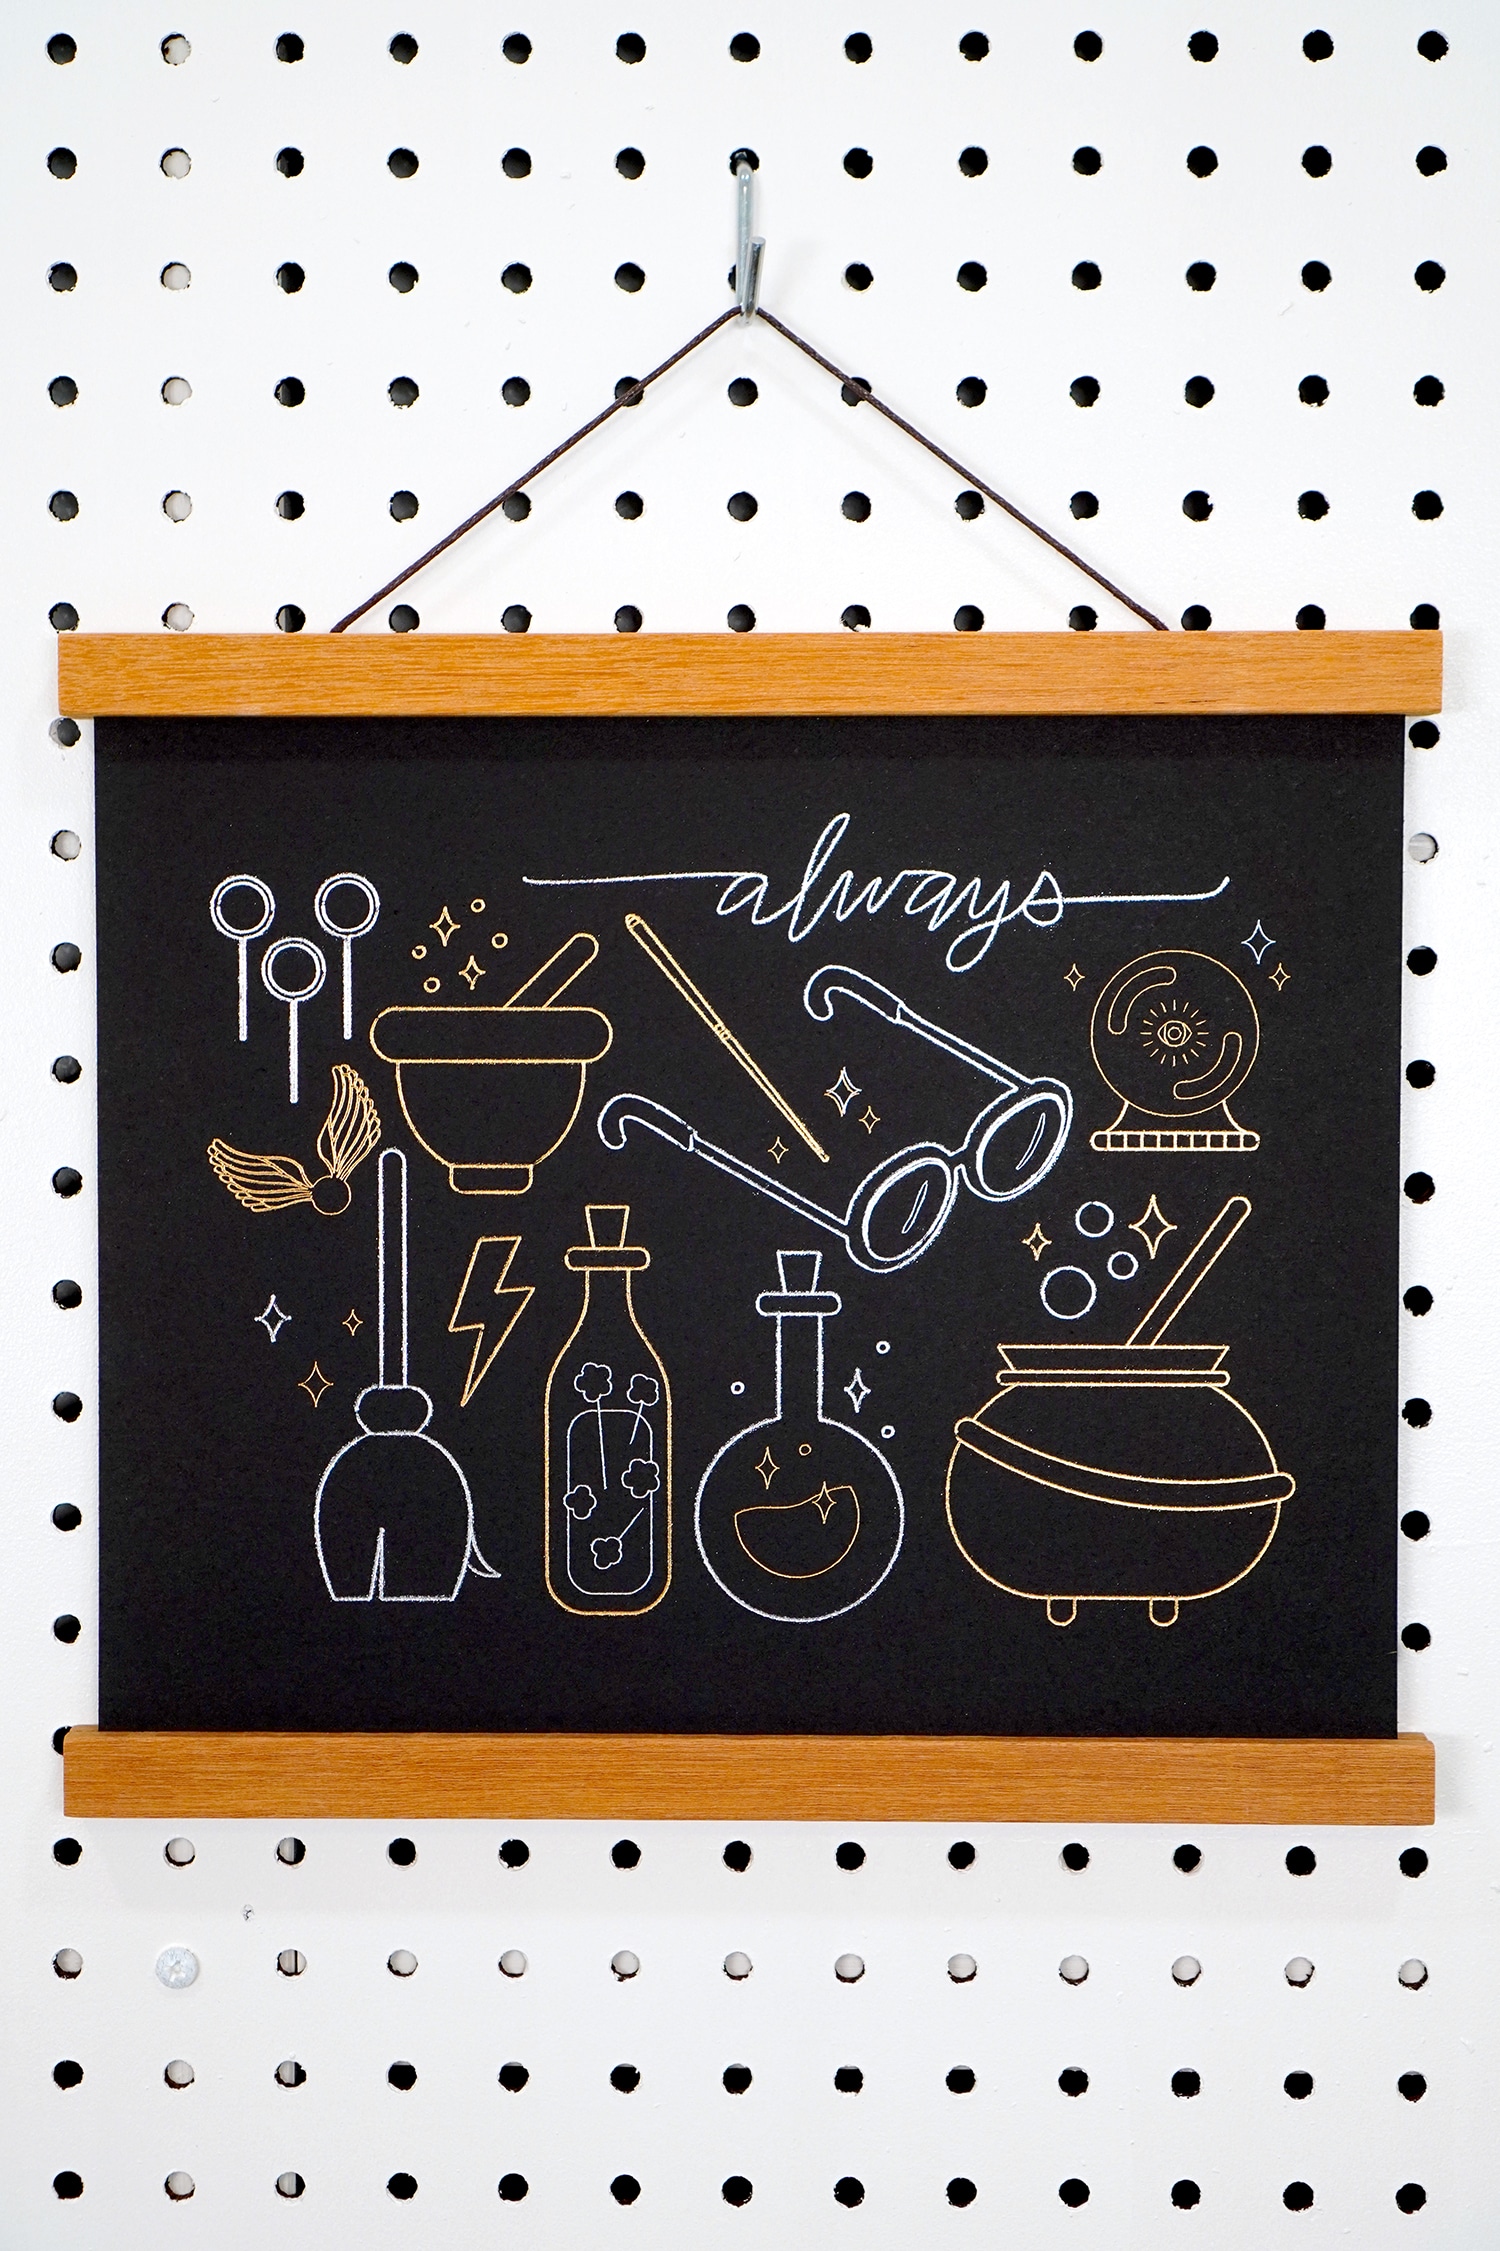
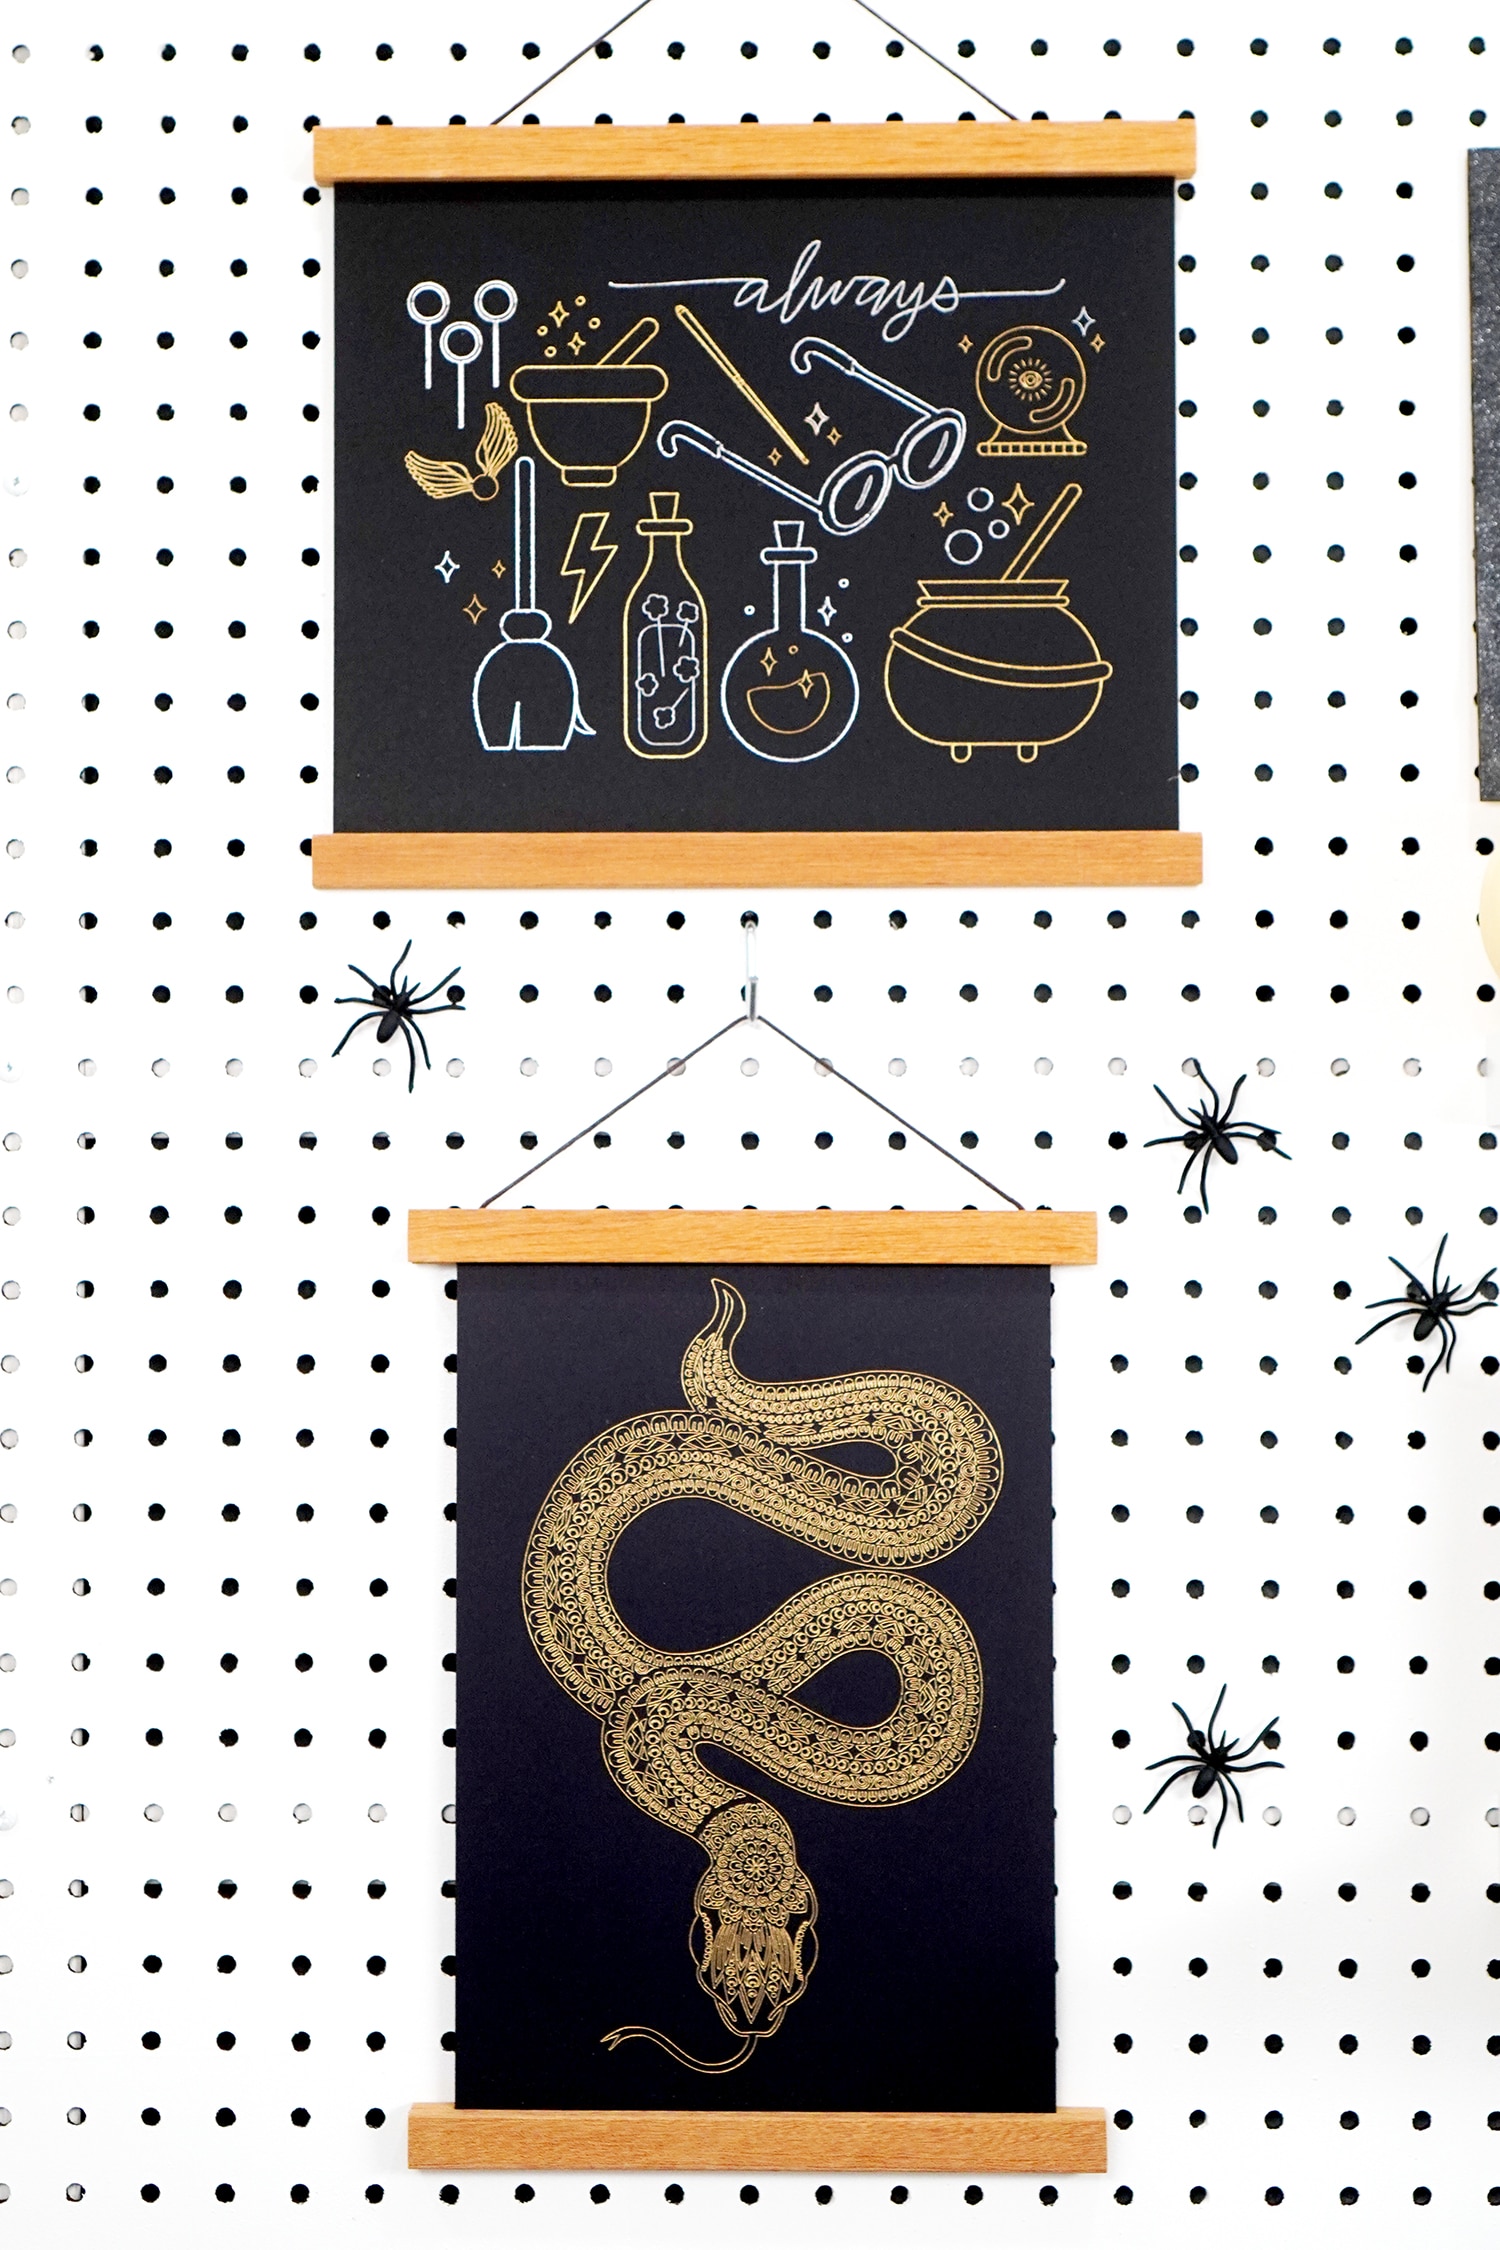
For this whimsical Harry Potter inspired foil art print, I started with a sheet of black kraft board and a gold Foil Transfer Sheet.
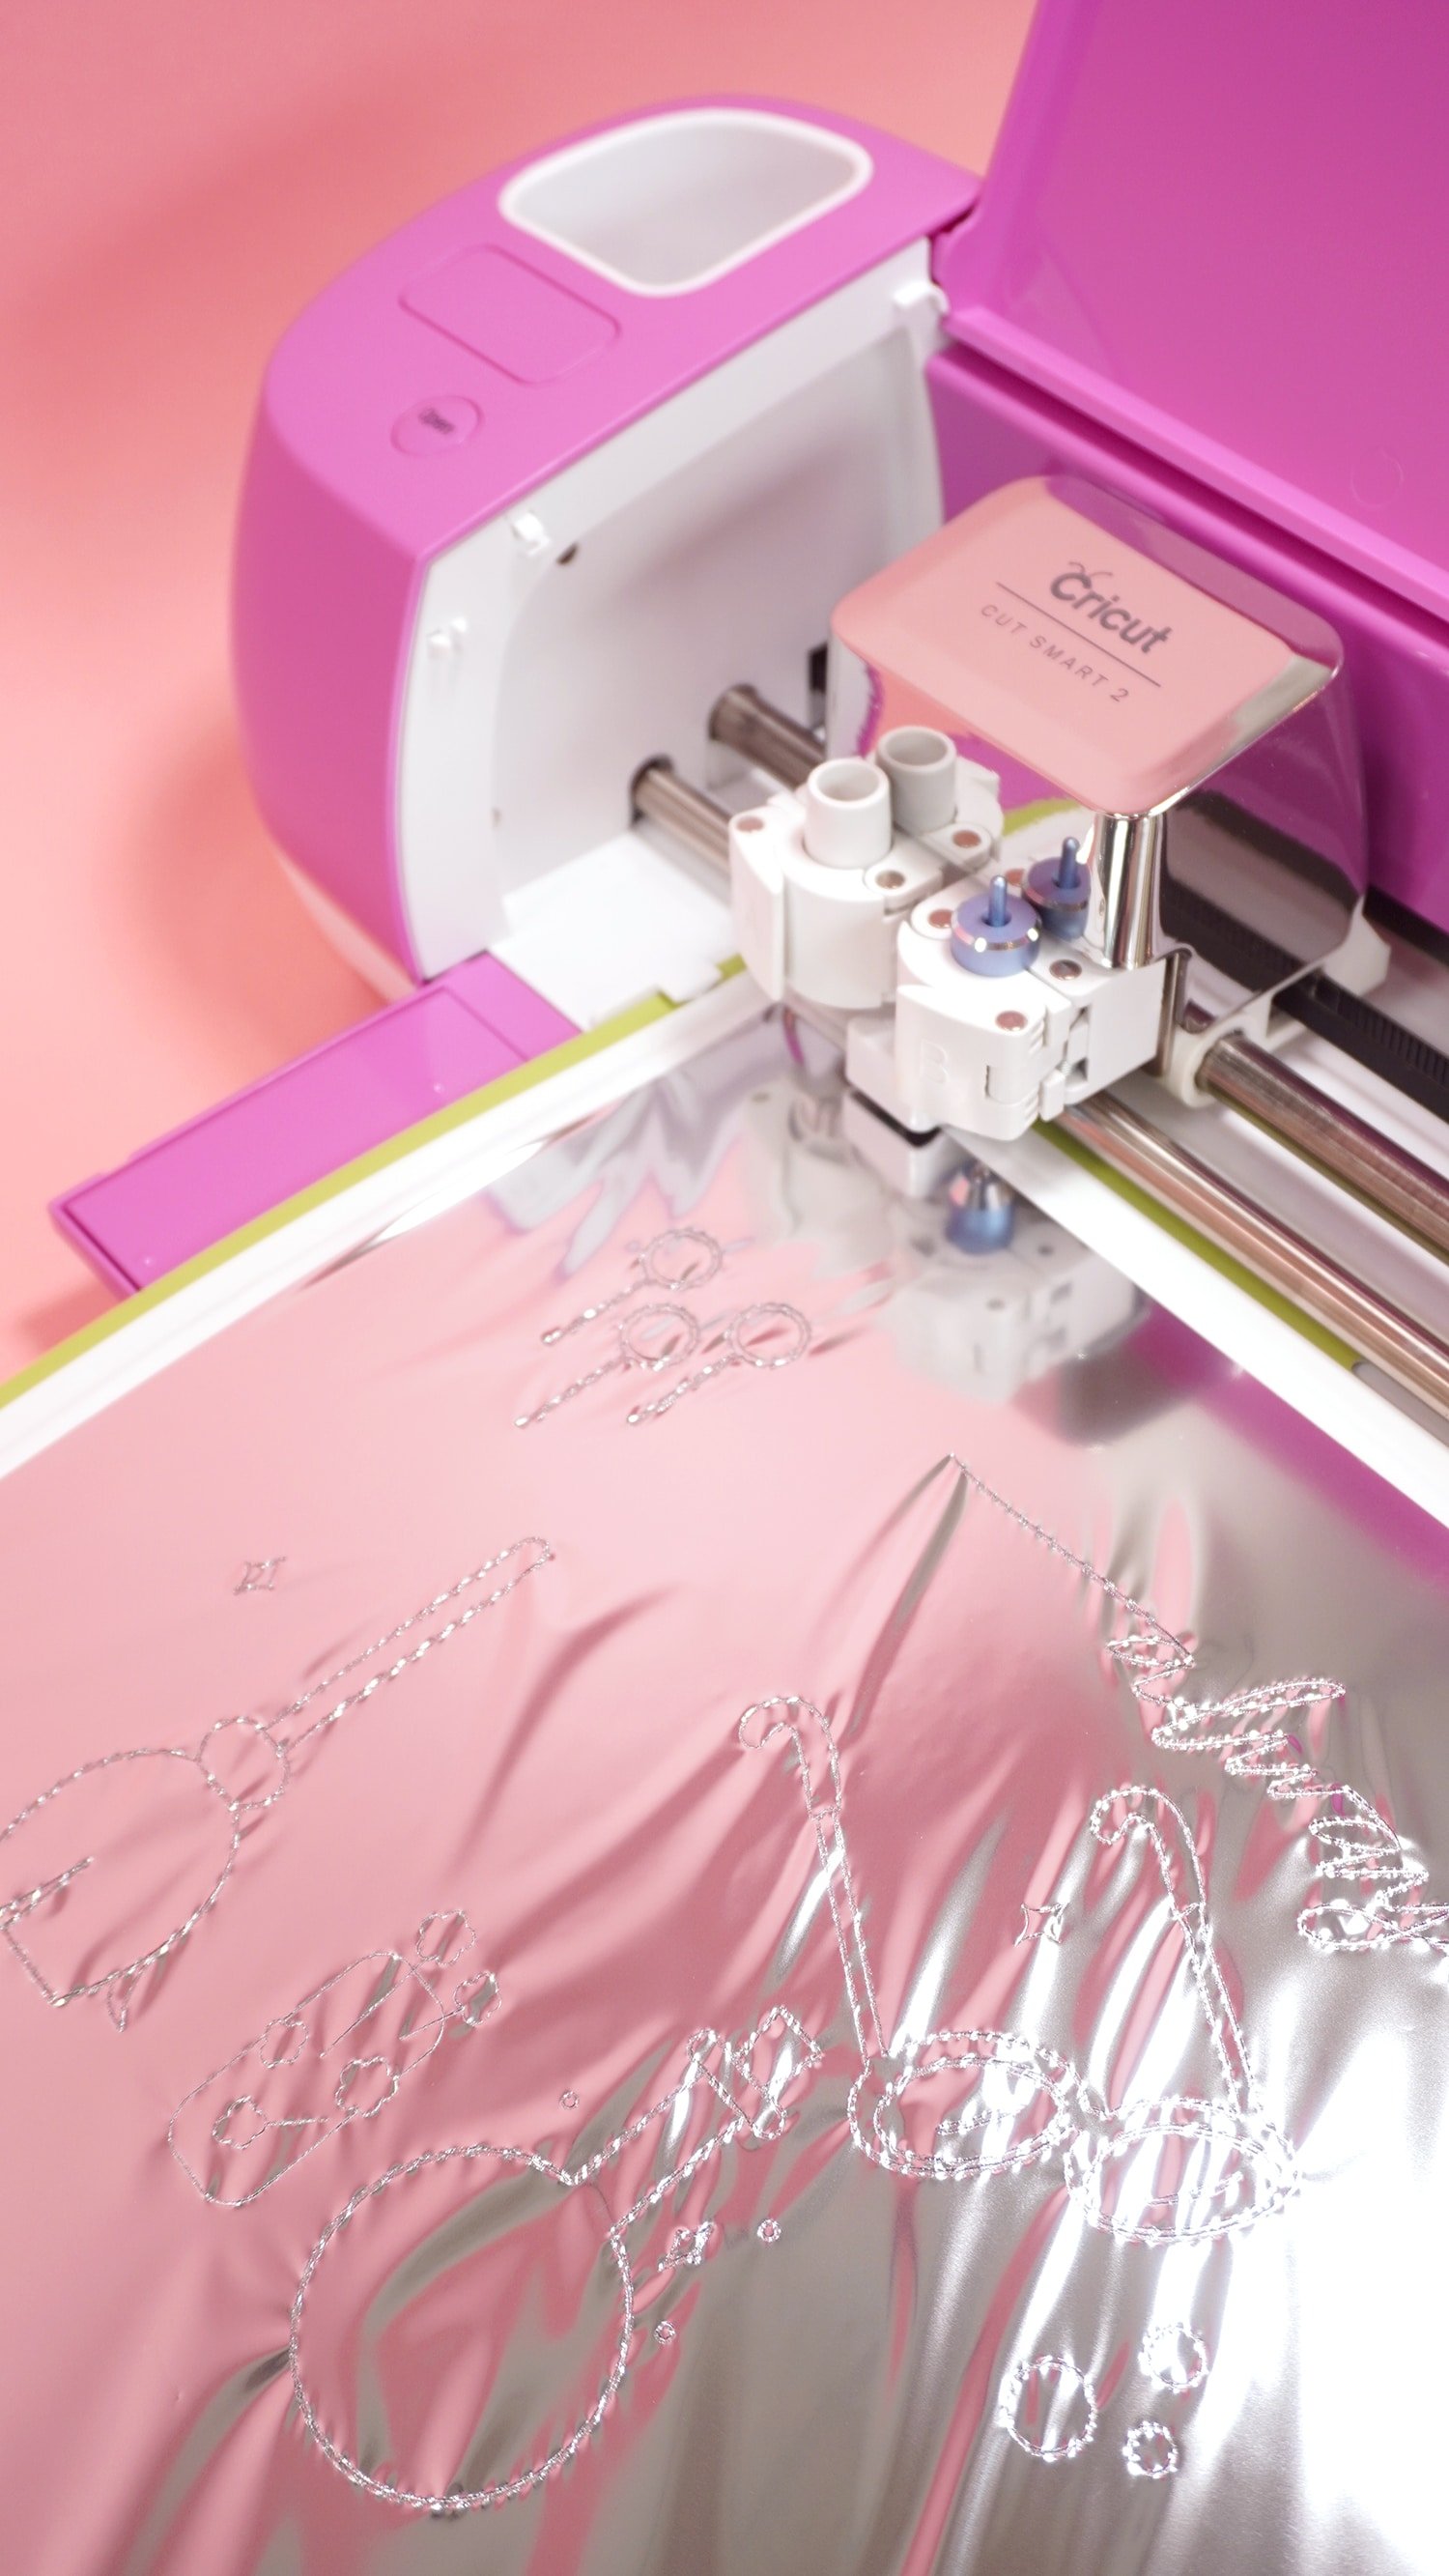
Then, I followed the gold with a sheet of silver foil to complete the full design.
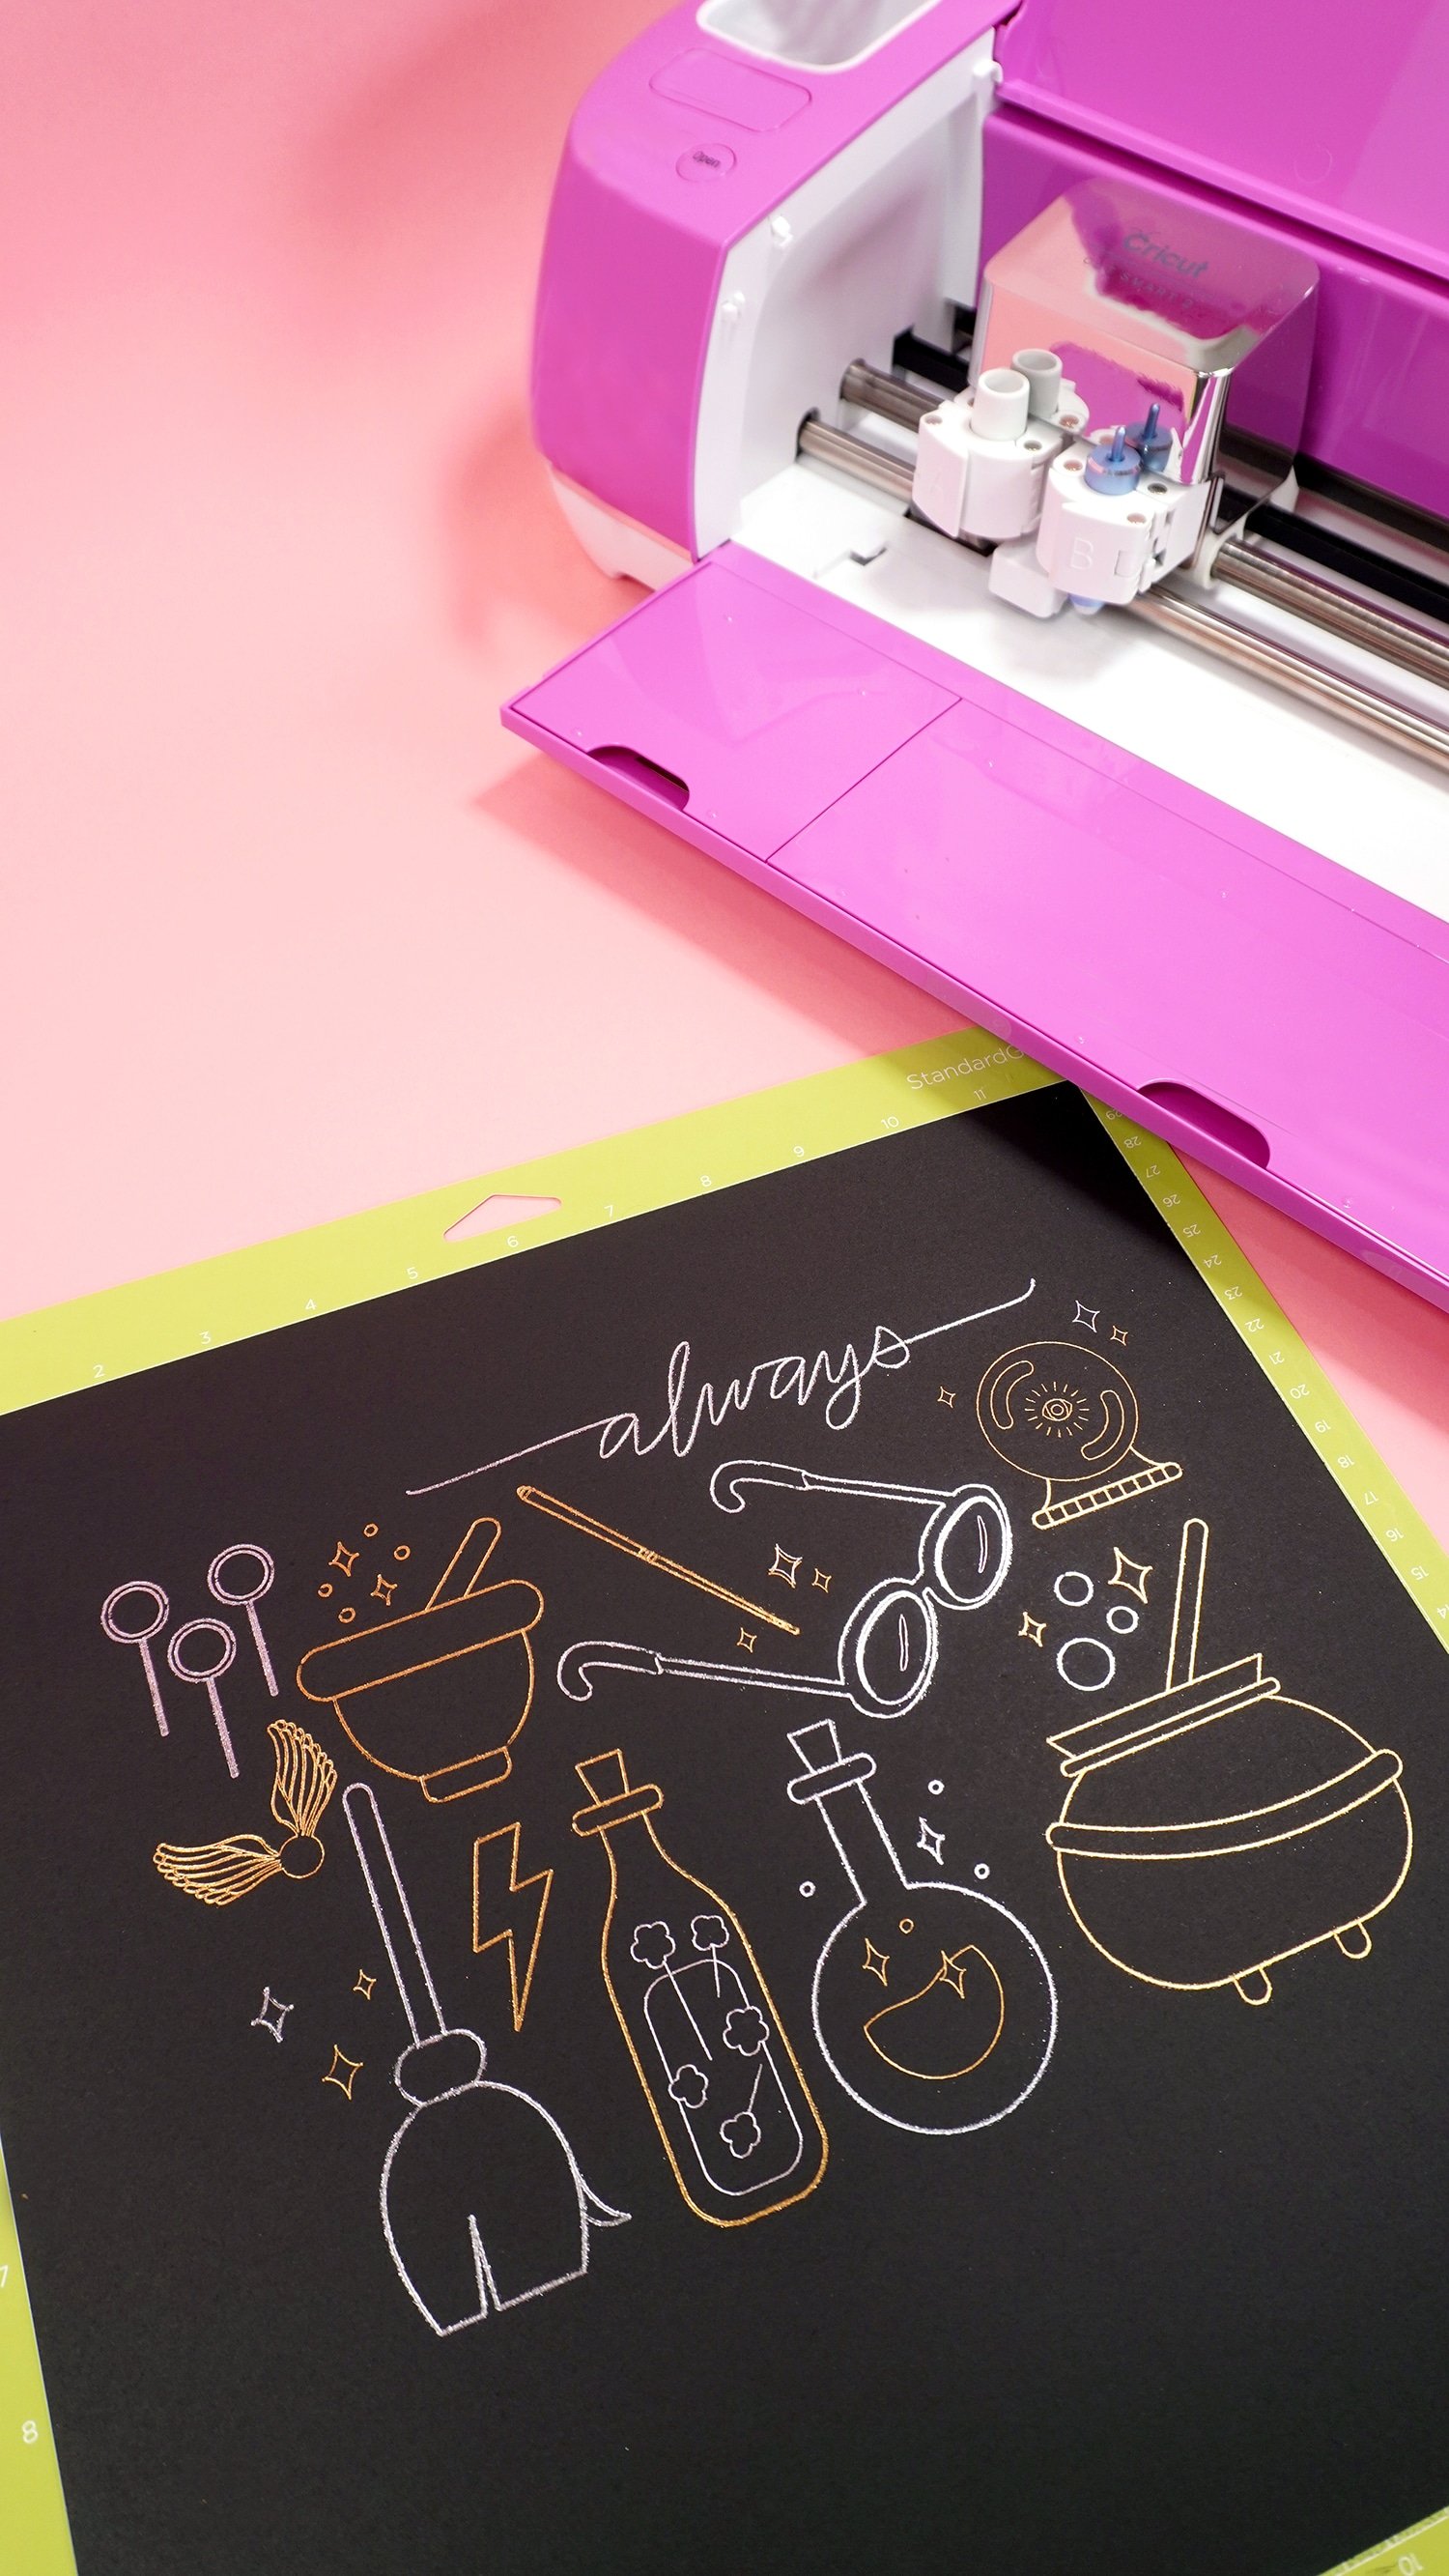
I REALLY love how this one turned out! 😍⚡
It’s difficult to capture just how sparkly the foil is on camera, but both the gold and silver foils have a rich depth of shine that is almost glittery in its intensity. It’s GORGEOUS!
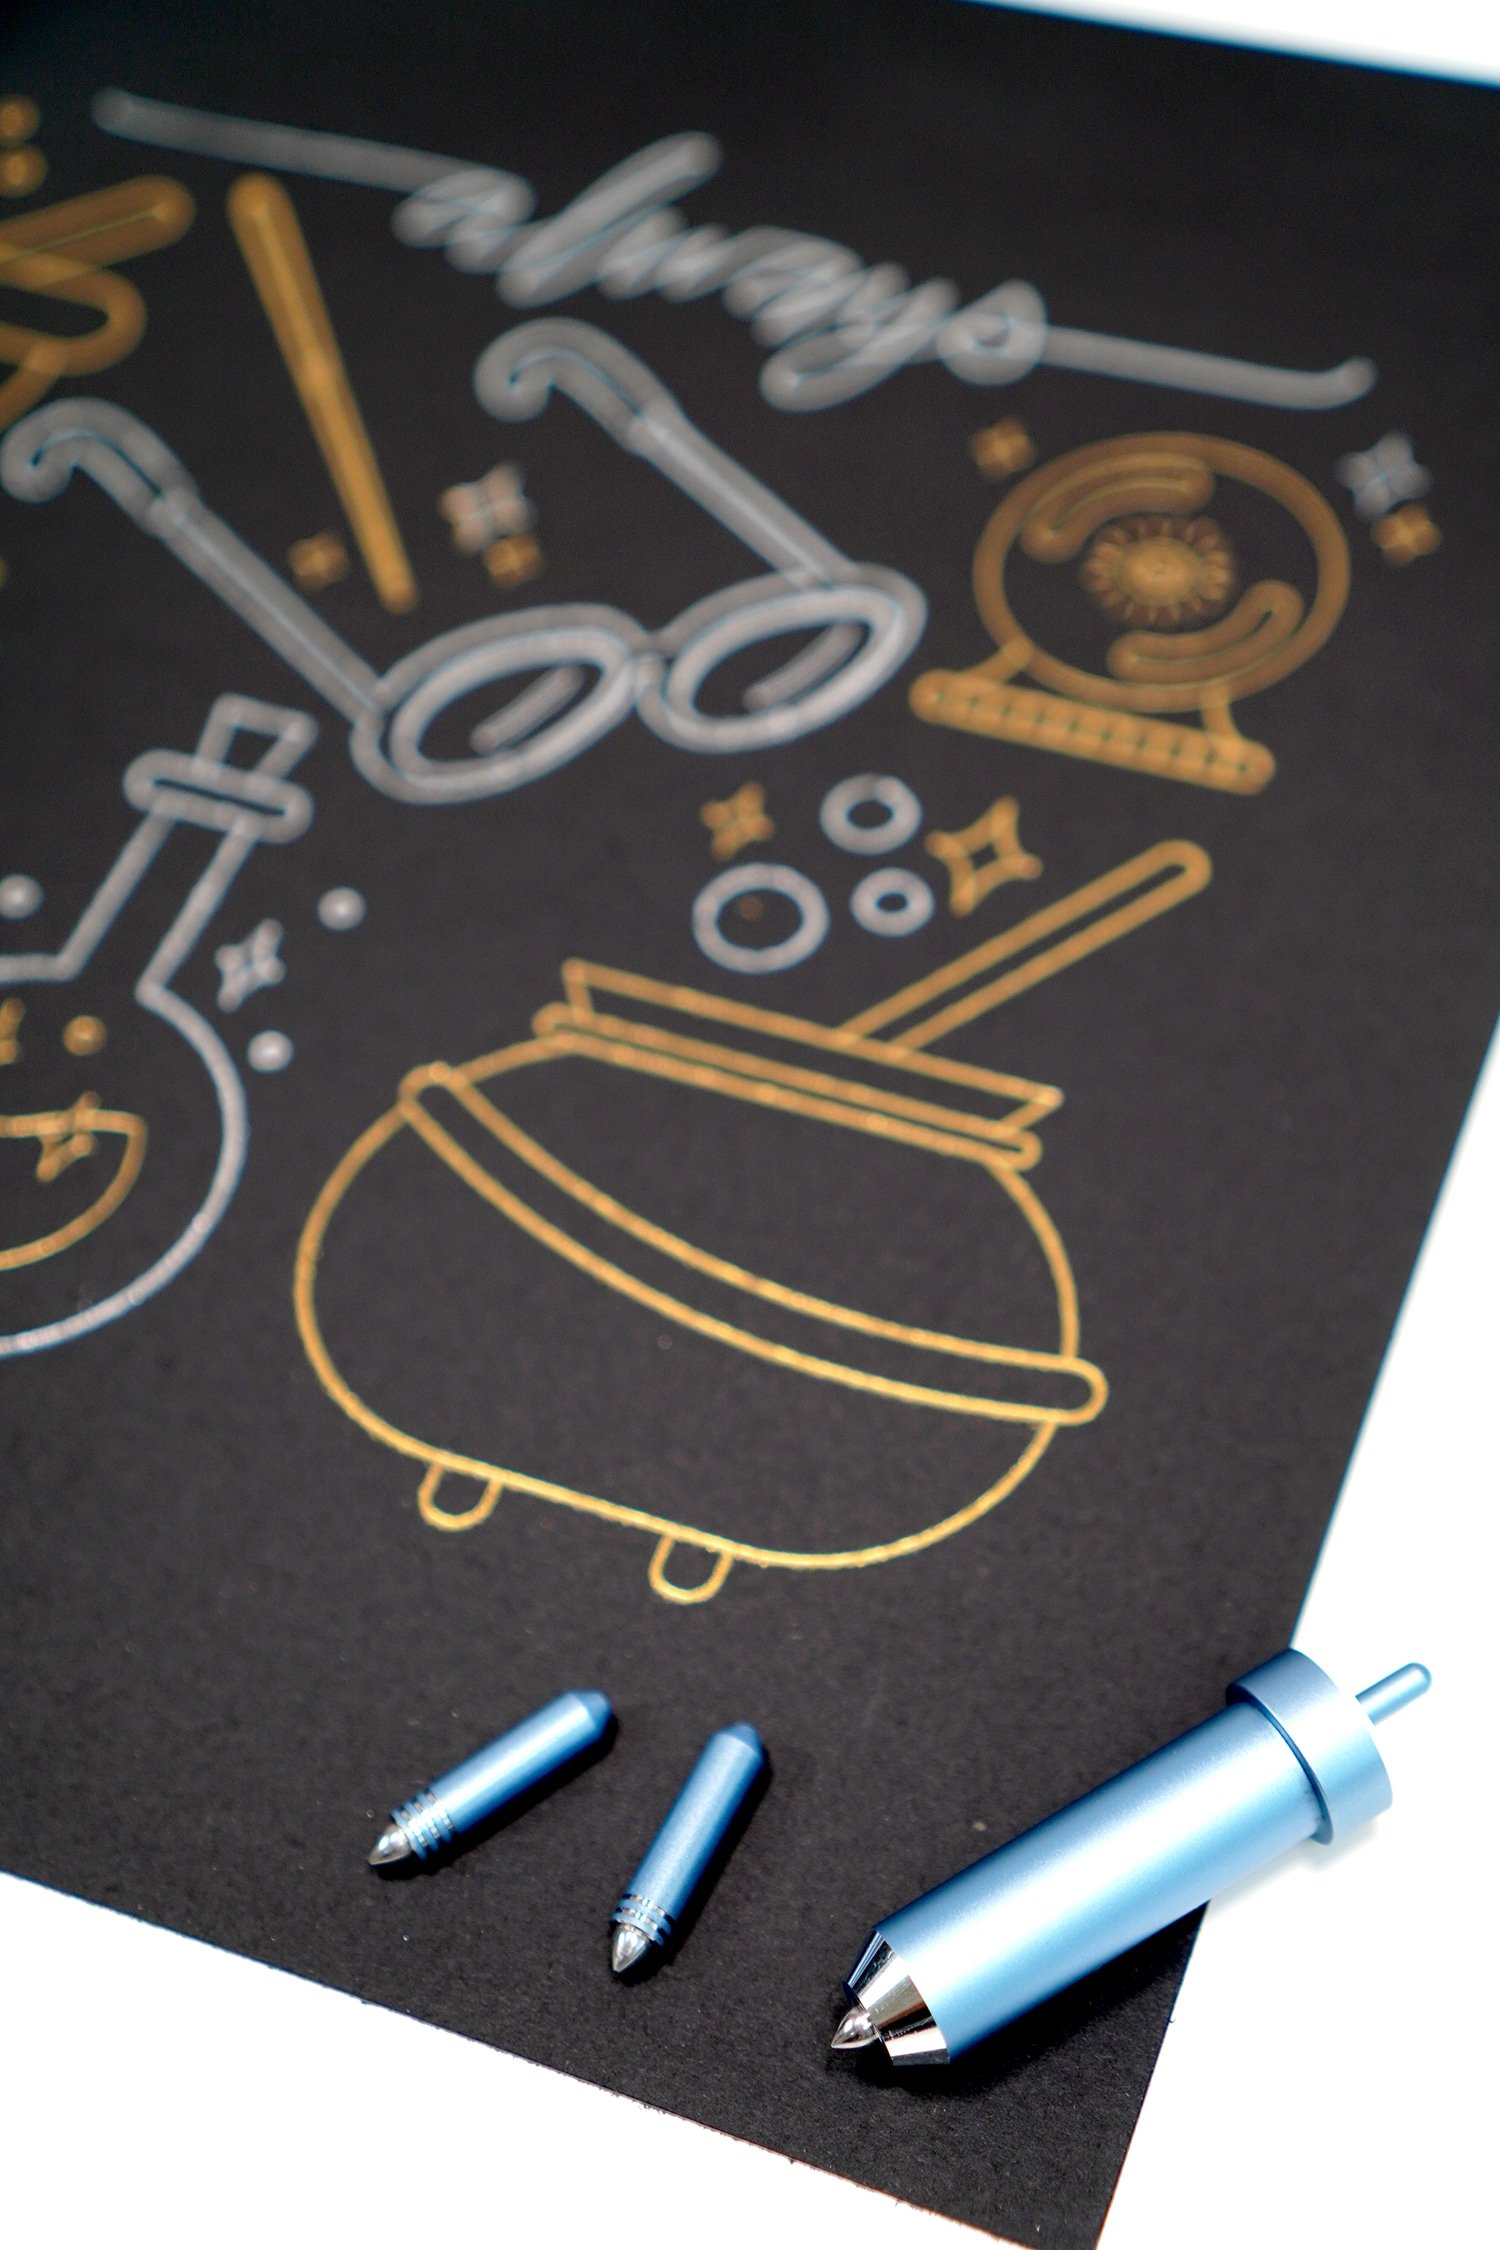
Being able to include all three different line weights in one art piece is super awesome, too!
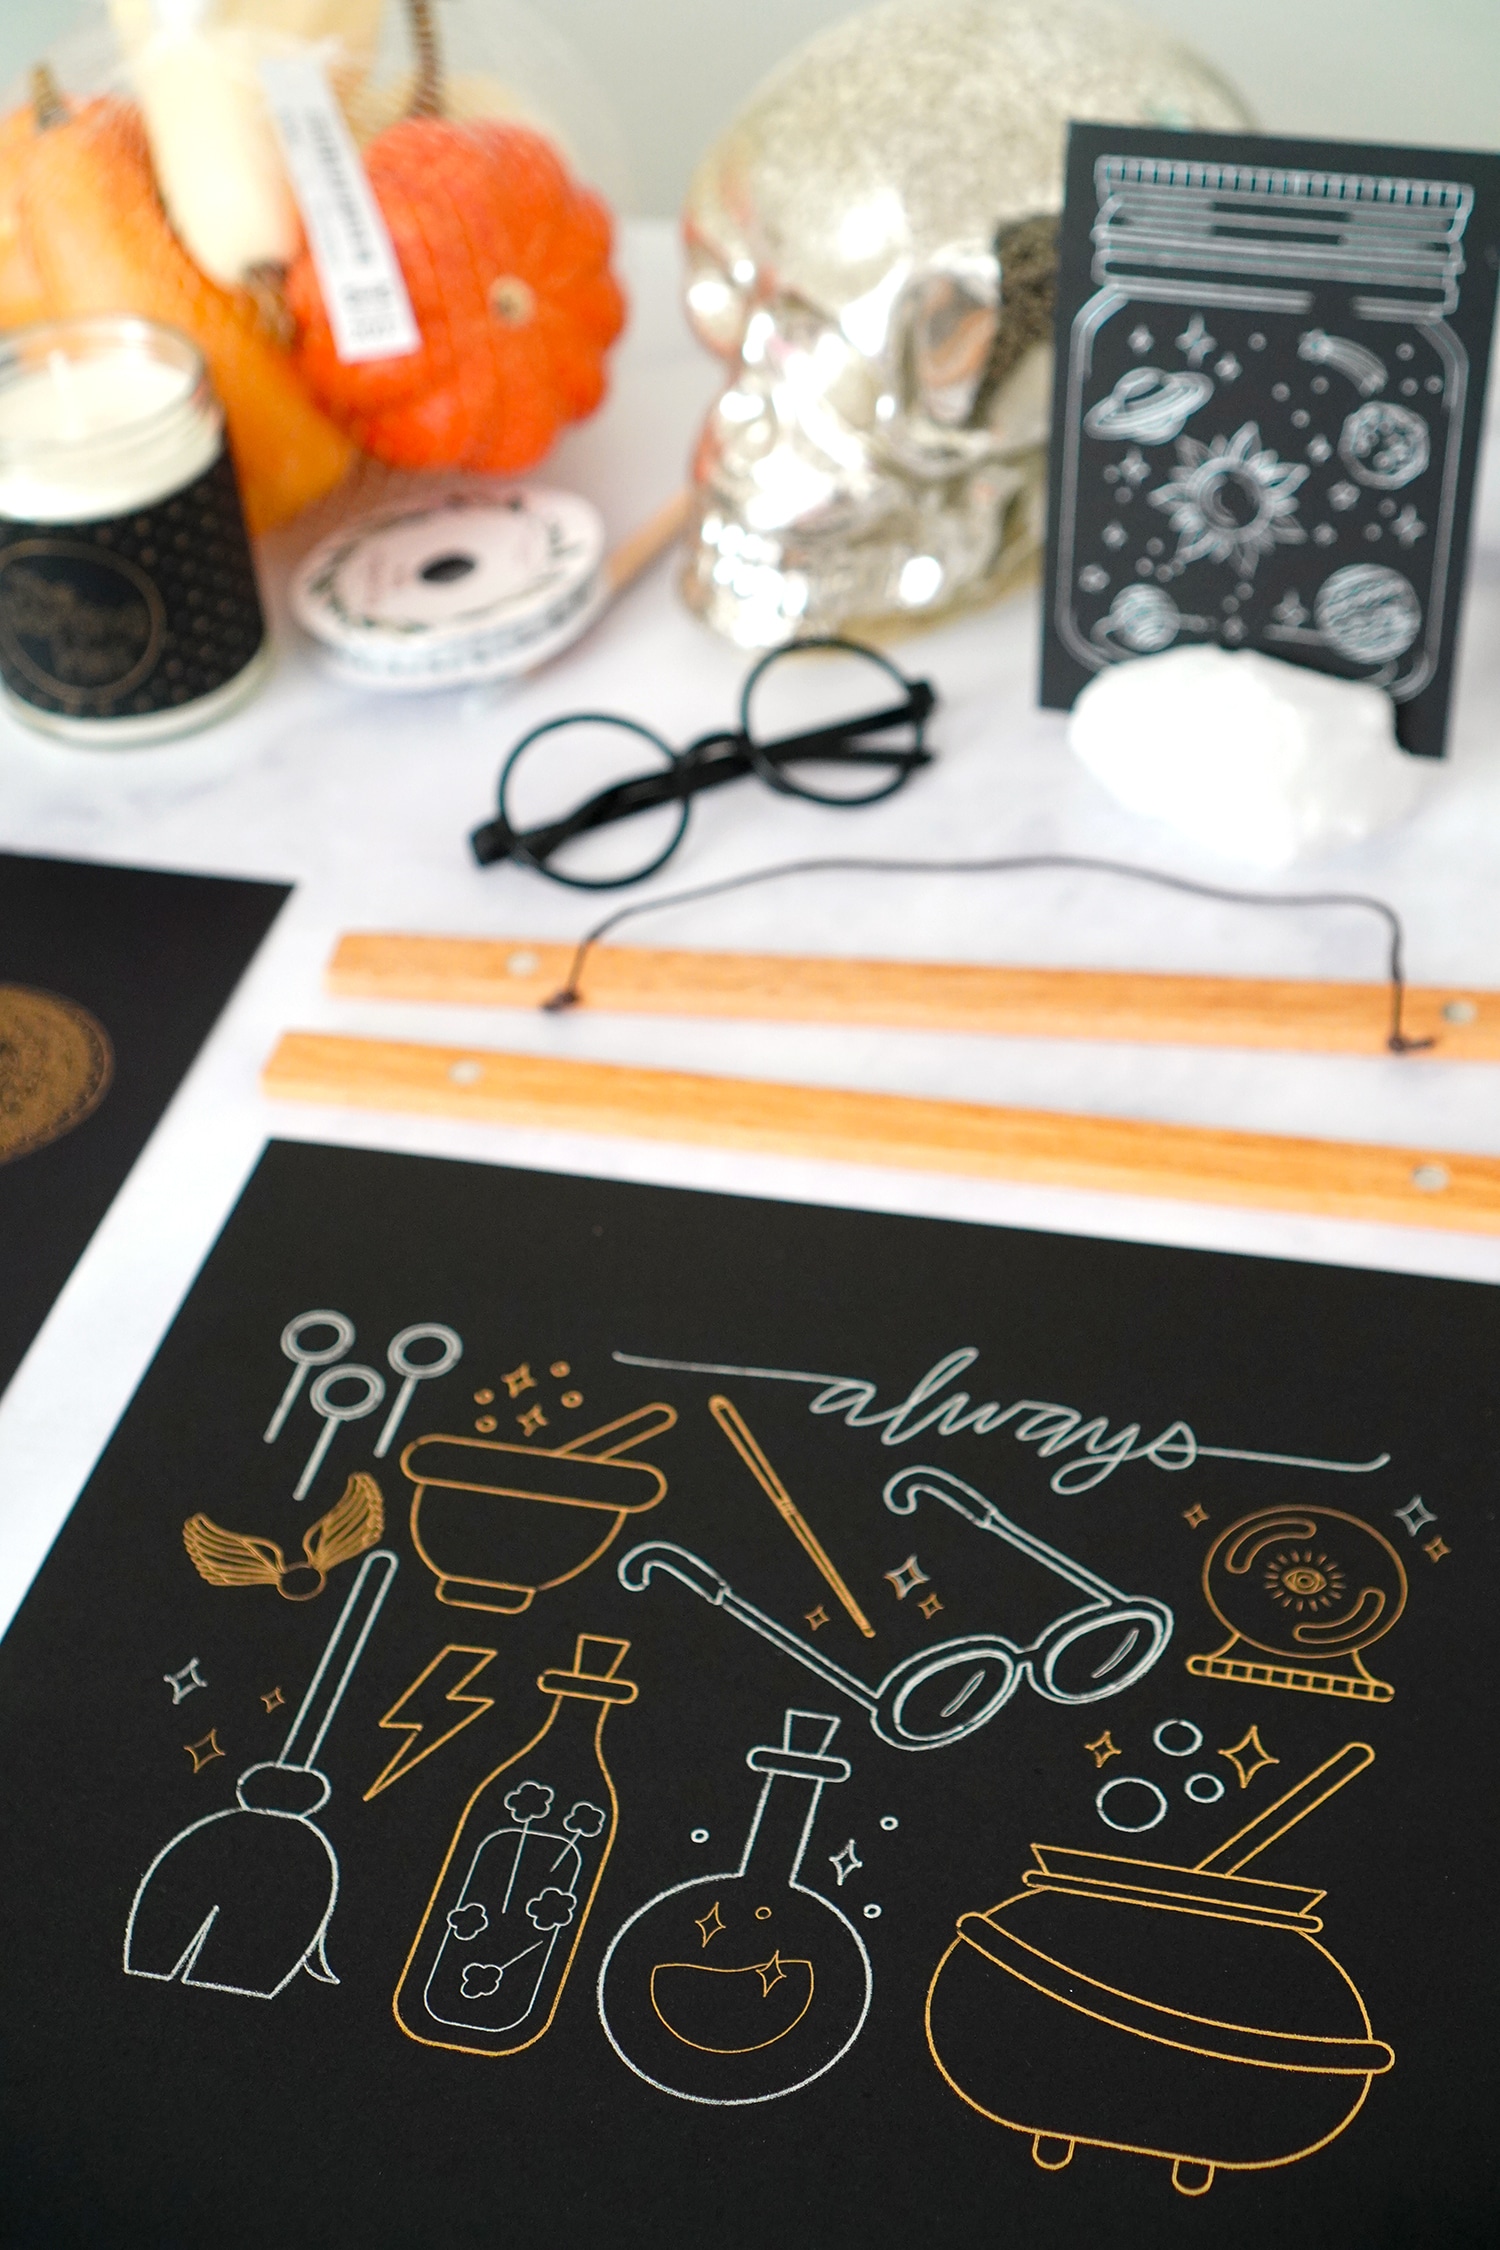
For my Halloween display, I purchased inexpensive magnetic art hangers to easily hang the foil art prints (and I can easily swap the prints out later for something else!).
LOVE it! I have to say, though…making foil art prints is kind of addictive, and once I got started, I wanted to make ALL the spooky and wizard-like artwork for my display!
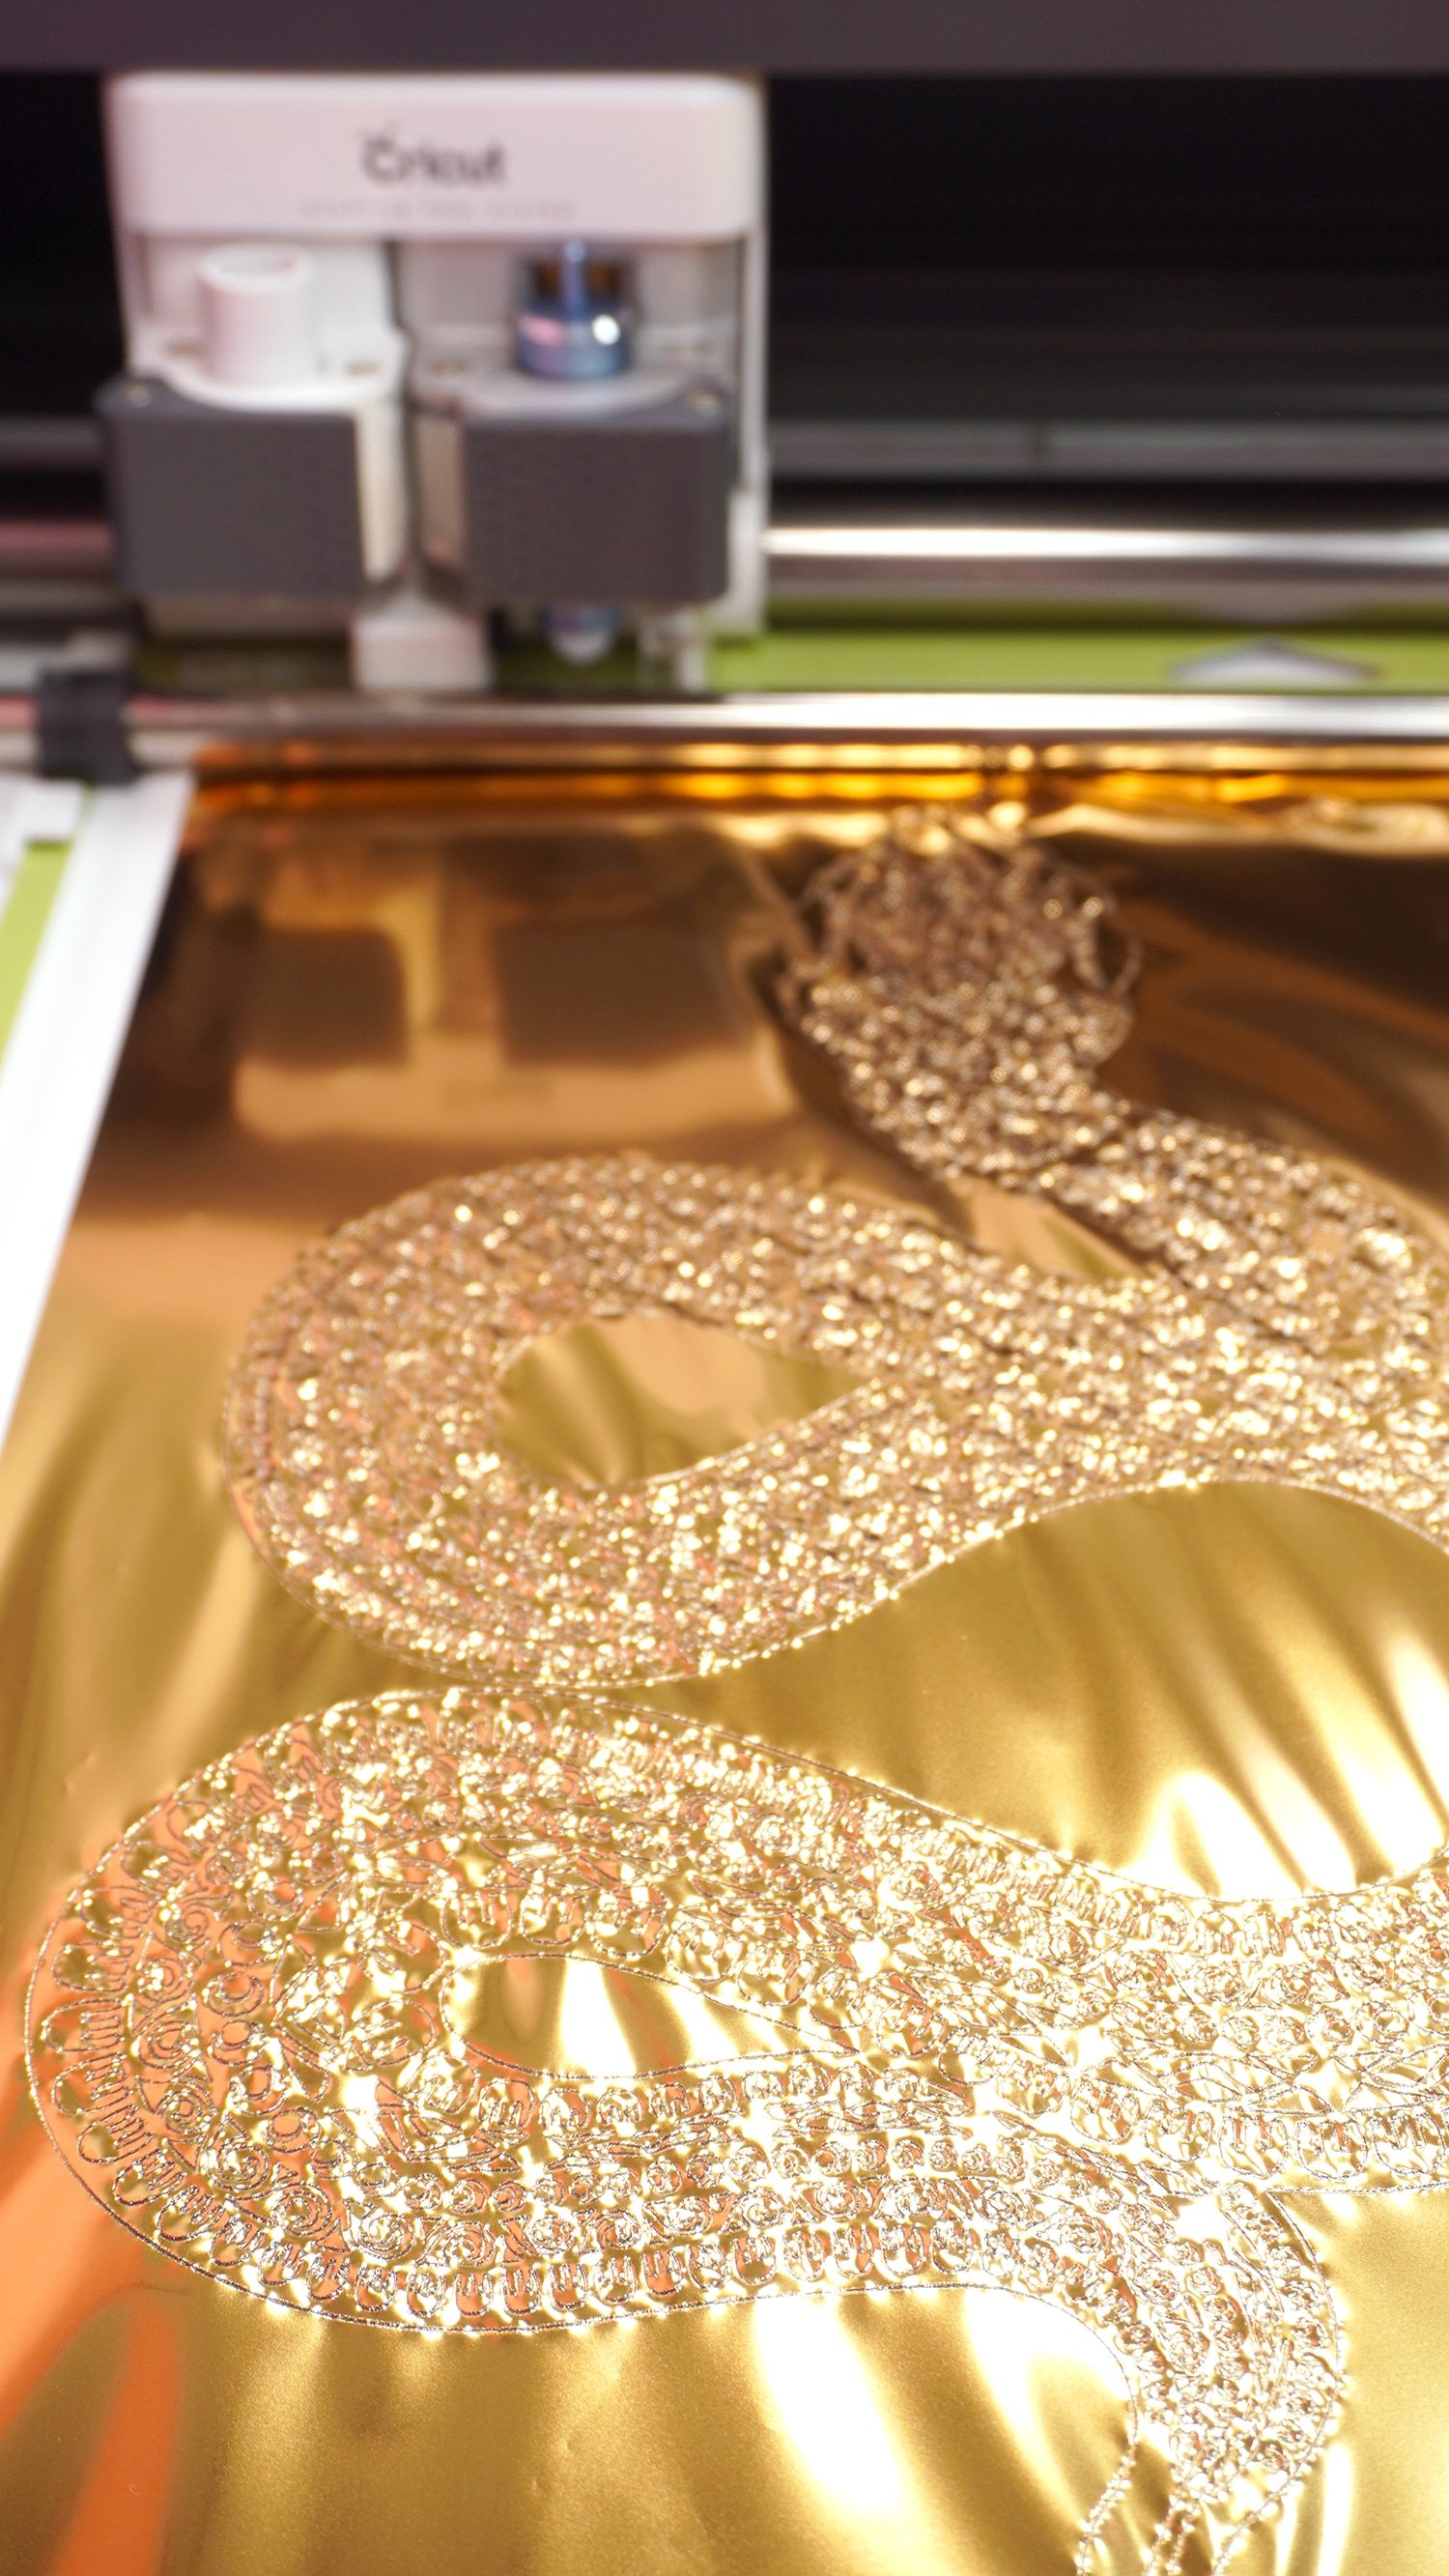
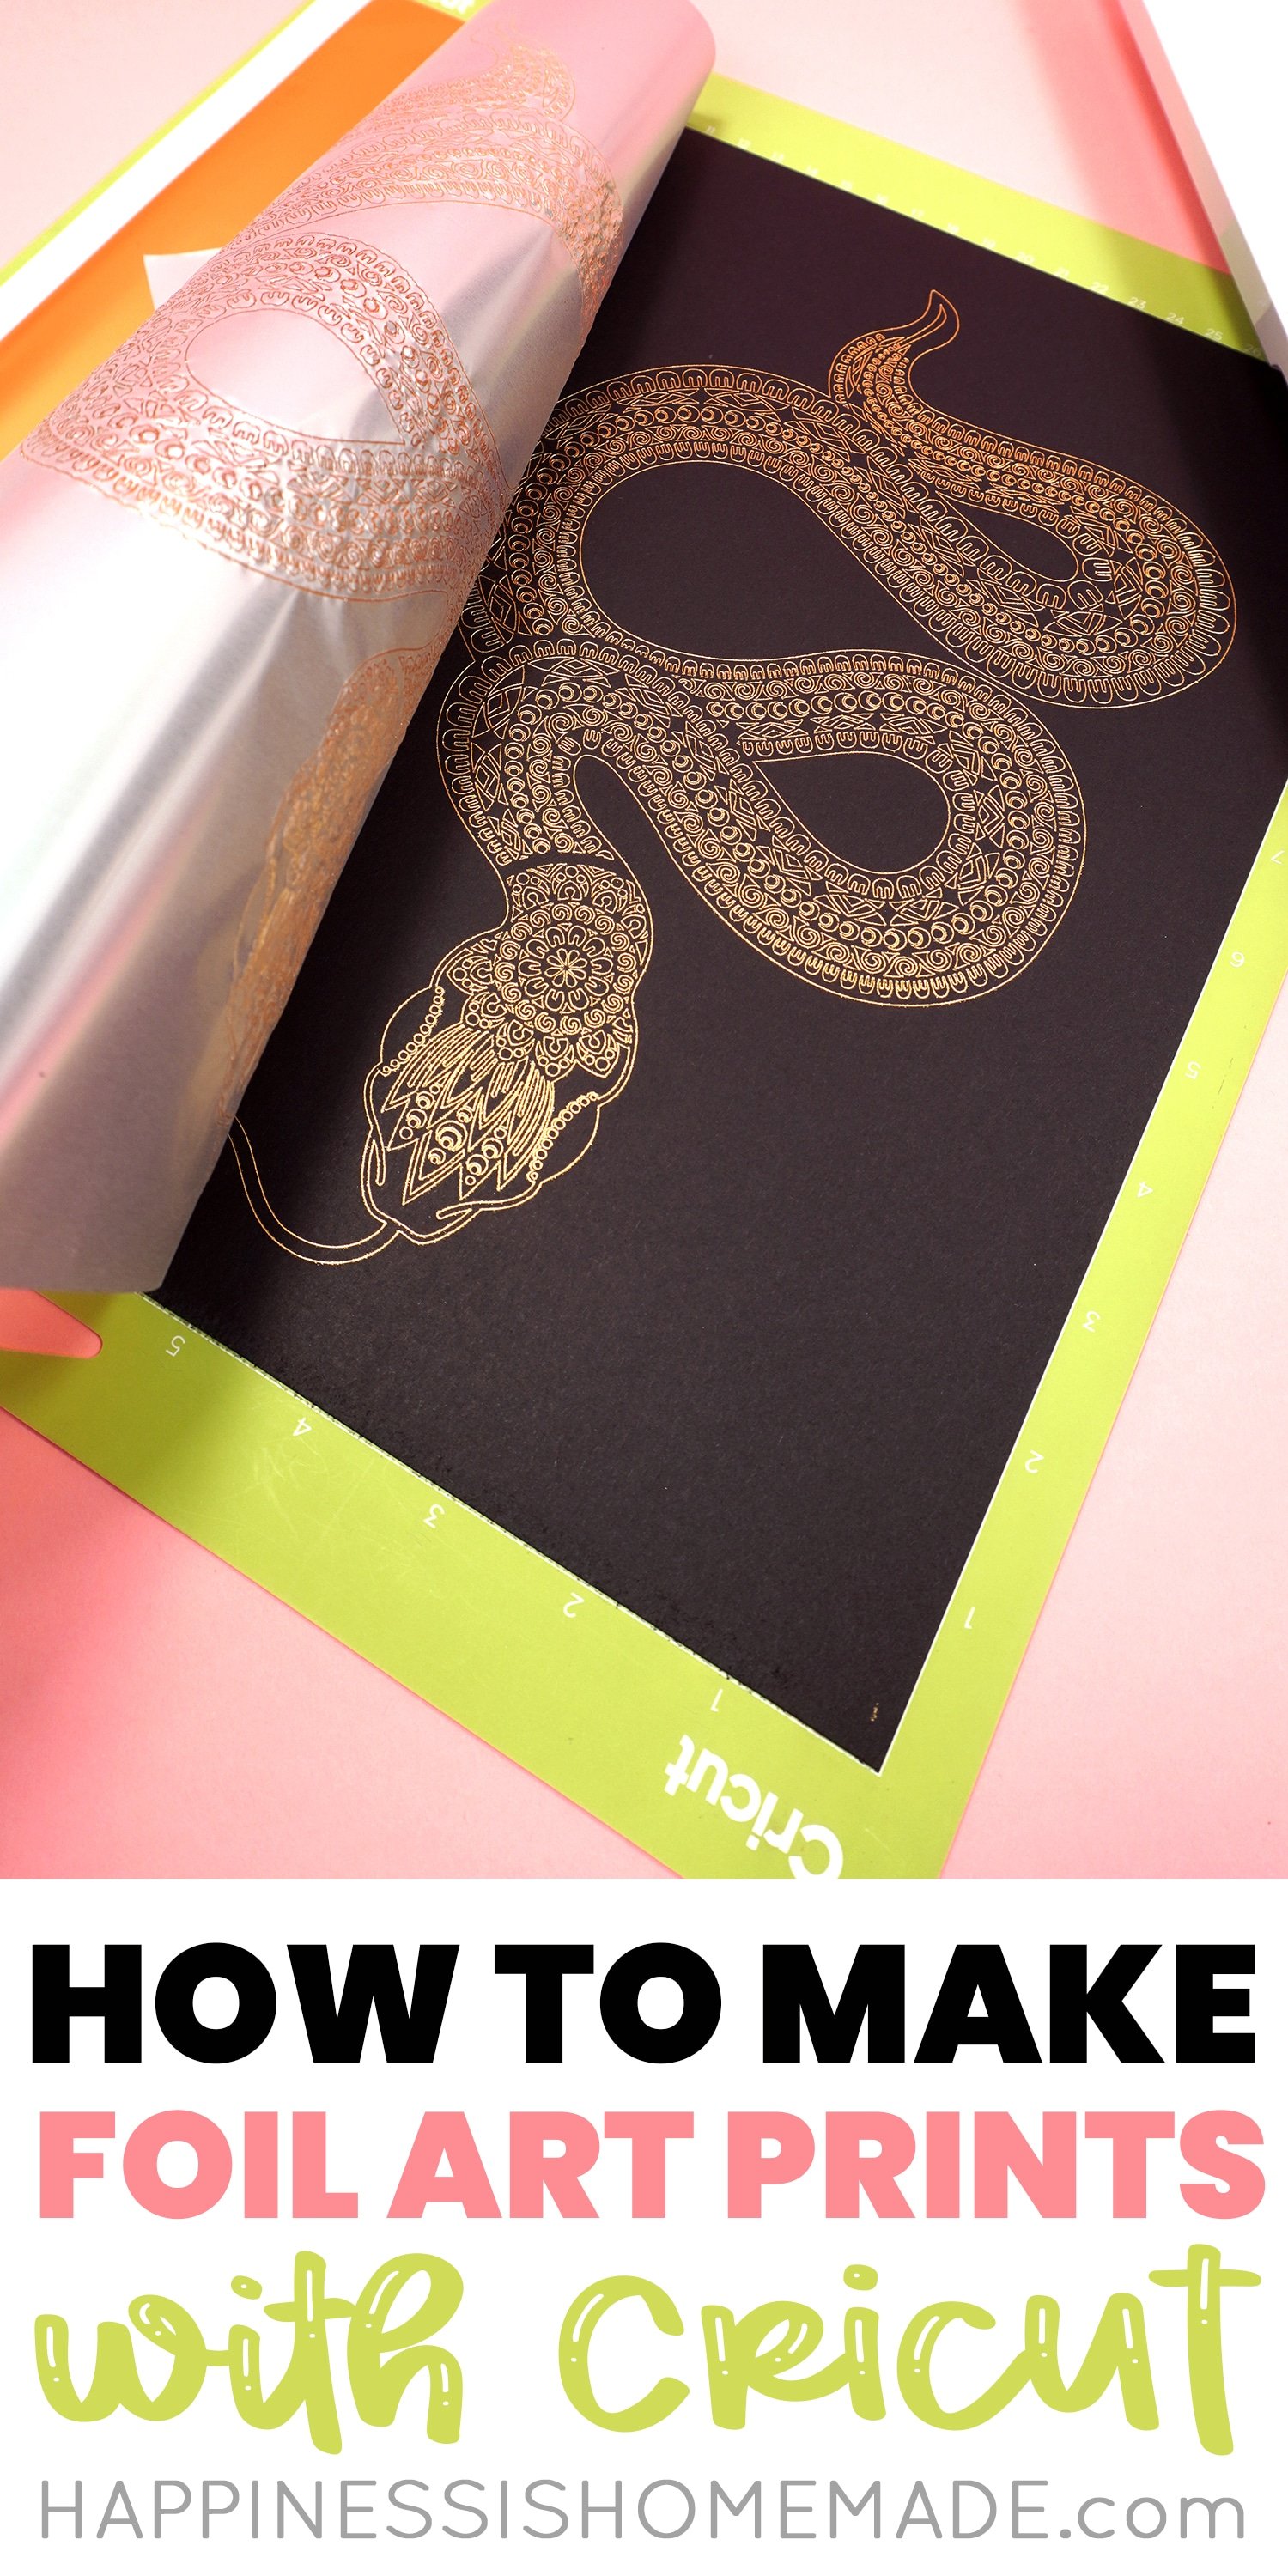
Next, I thought it would be fun to add a foil snake print to the collection since I had both Harry Potter AND Halloween on my brain! (You can find the snake project here!)
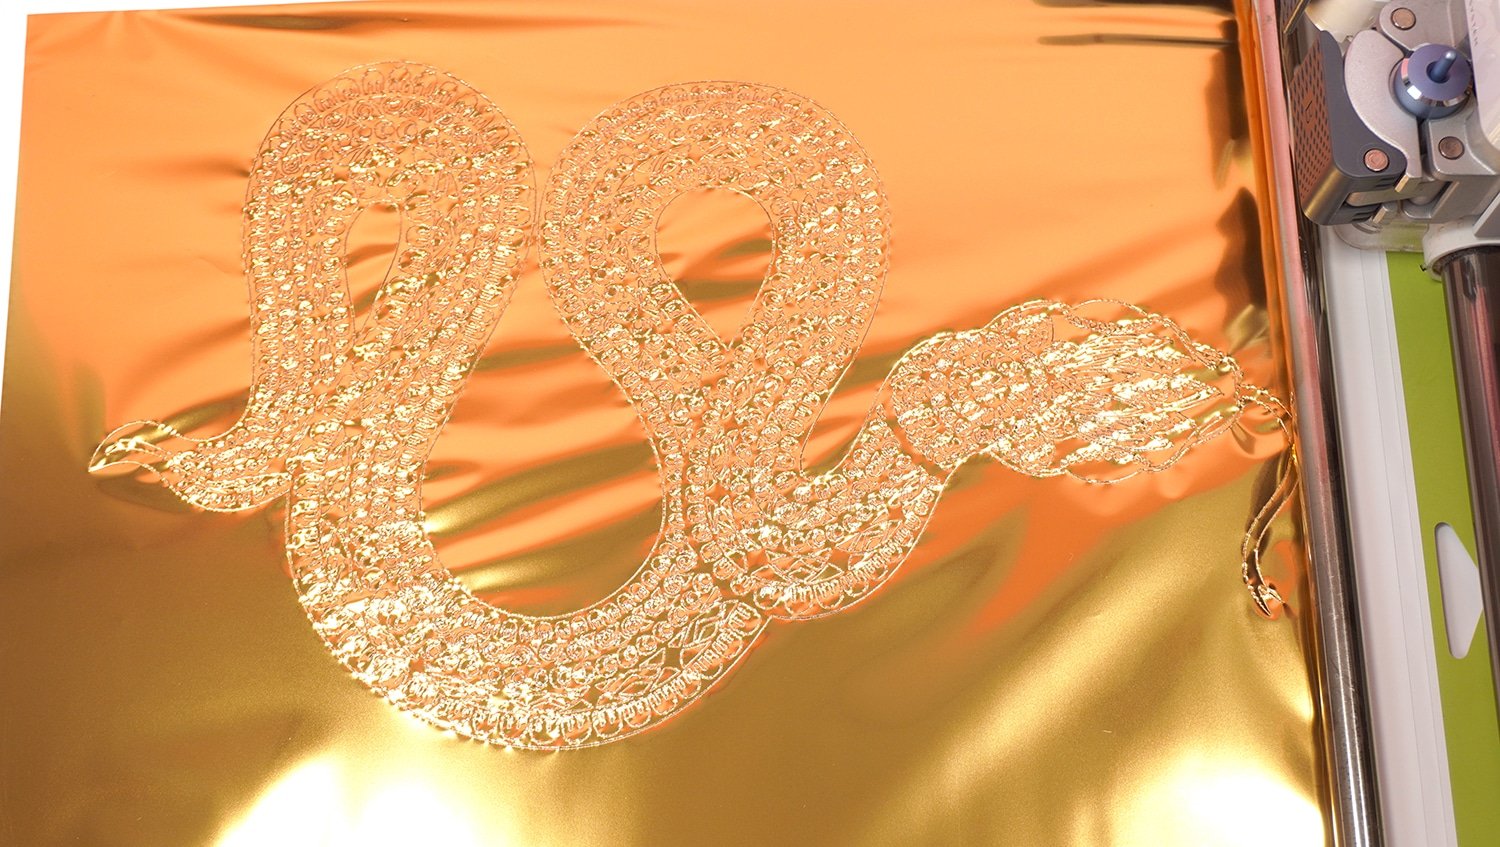
The gold Cricut Foil Transfer Sheet looked SO cool once the Foil Transfer Tool was done! I used the fine tip for this intricate design, and I was REALLY impressed at how well it handled the delicate details!
Isn’t that incredible!?
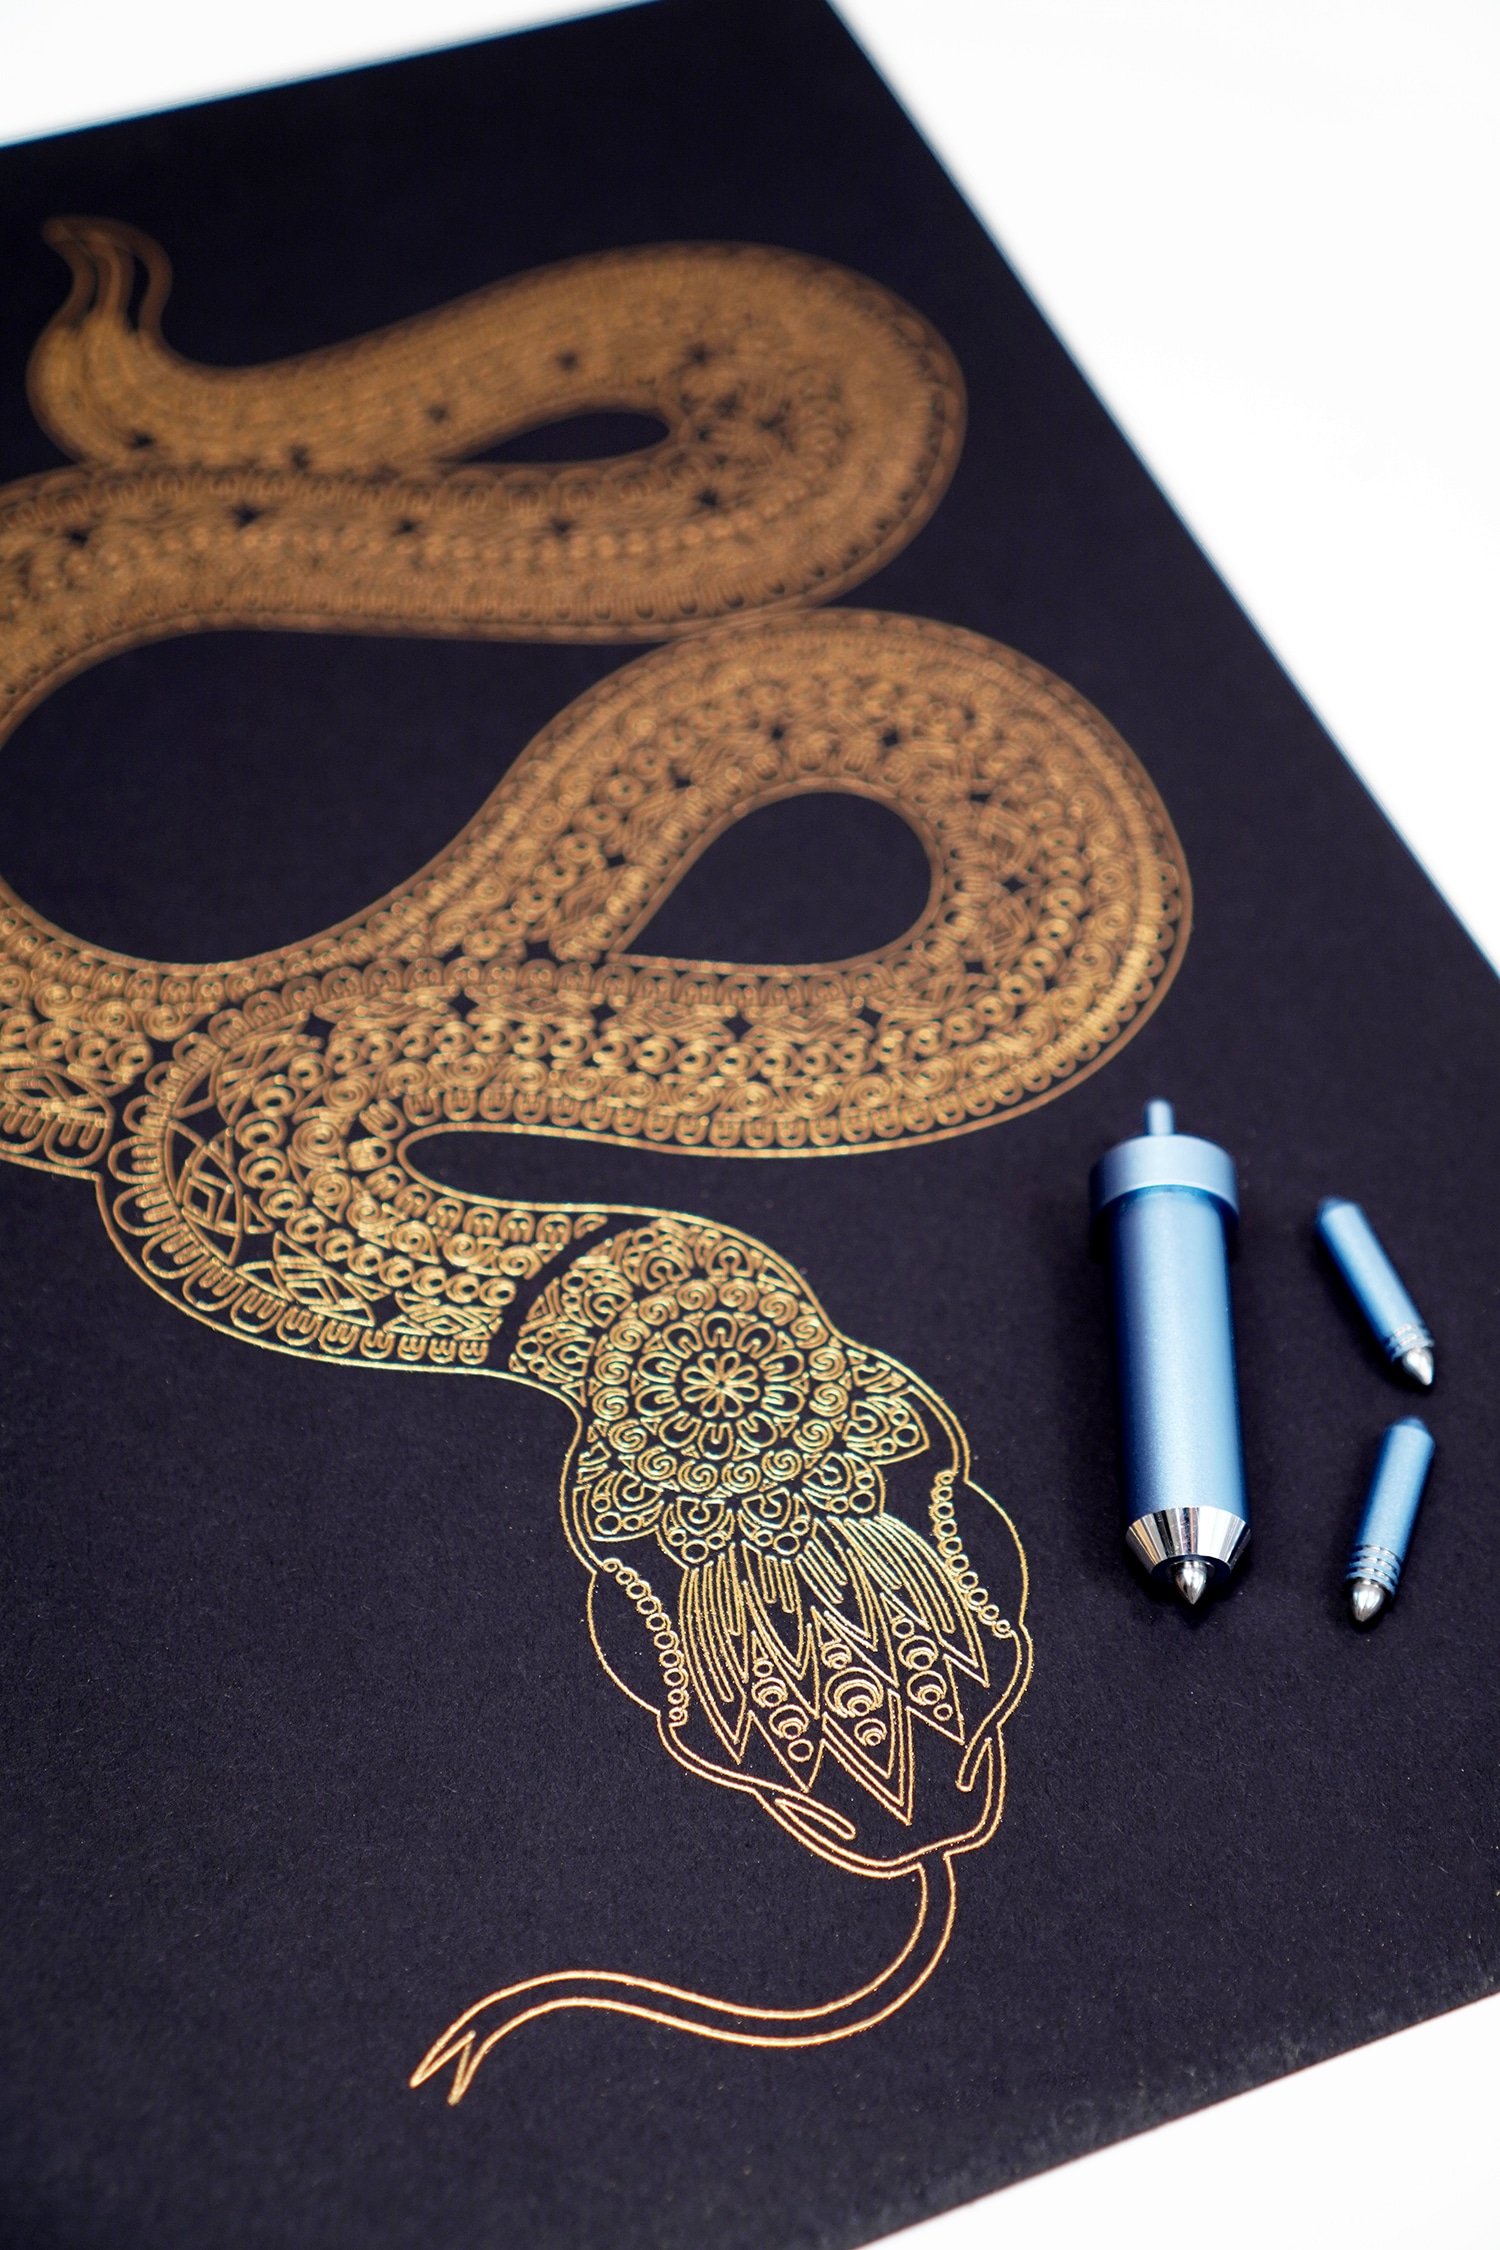
I’m absolutely terrified of actual snakes, but I’m head over heels for this gold one! Who would have thought that the Cricut Foil Transfer System would have me falling in love with a snake!

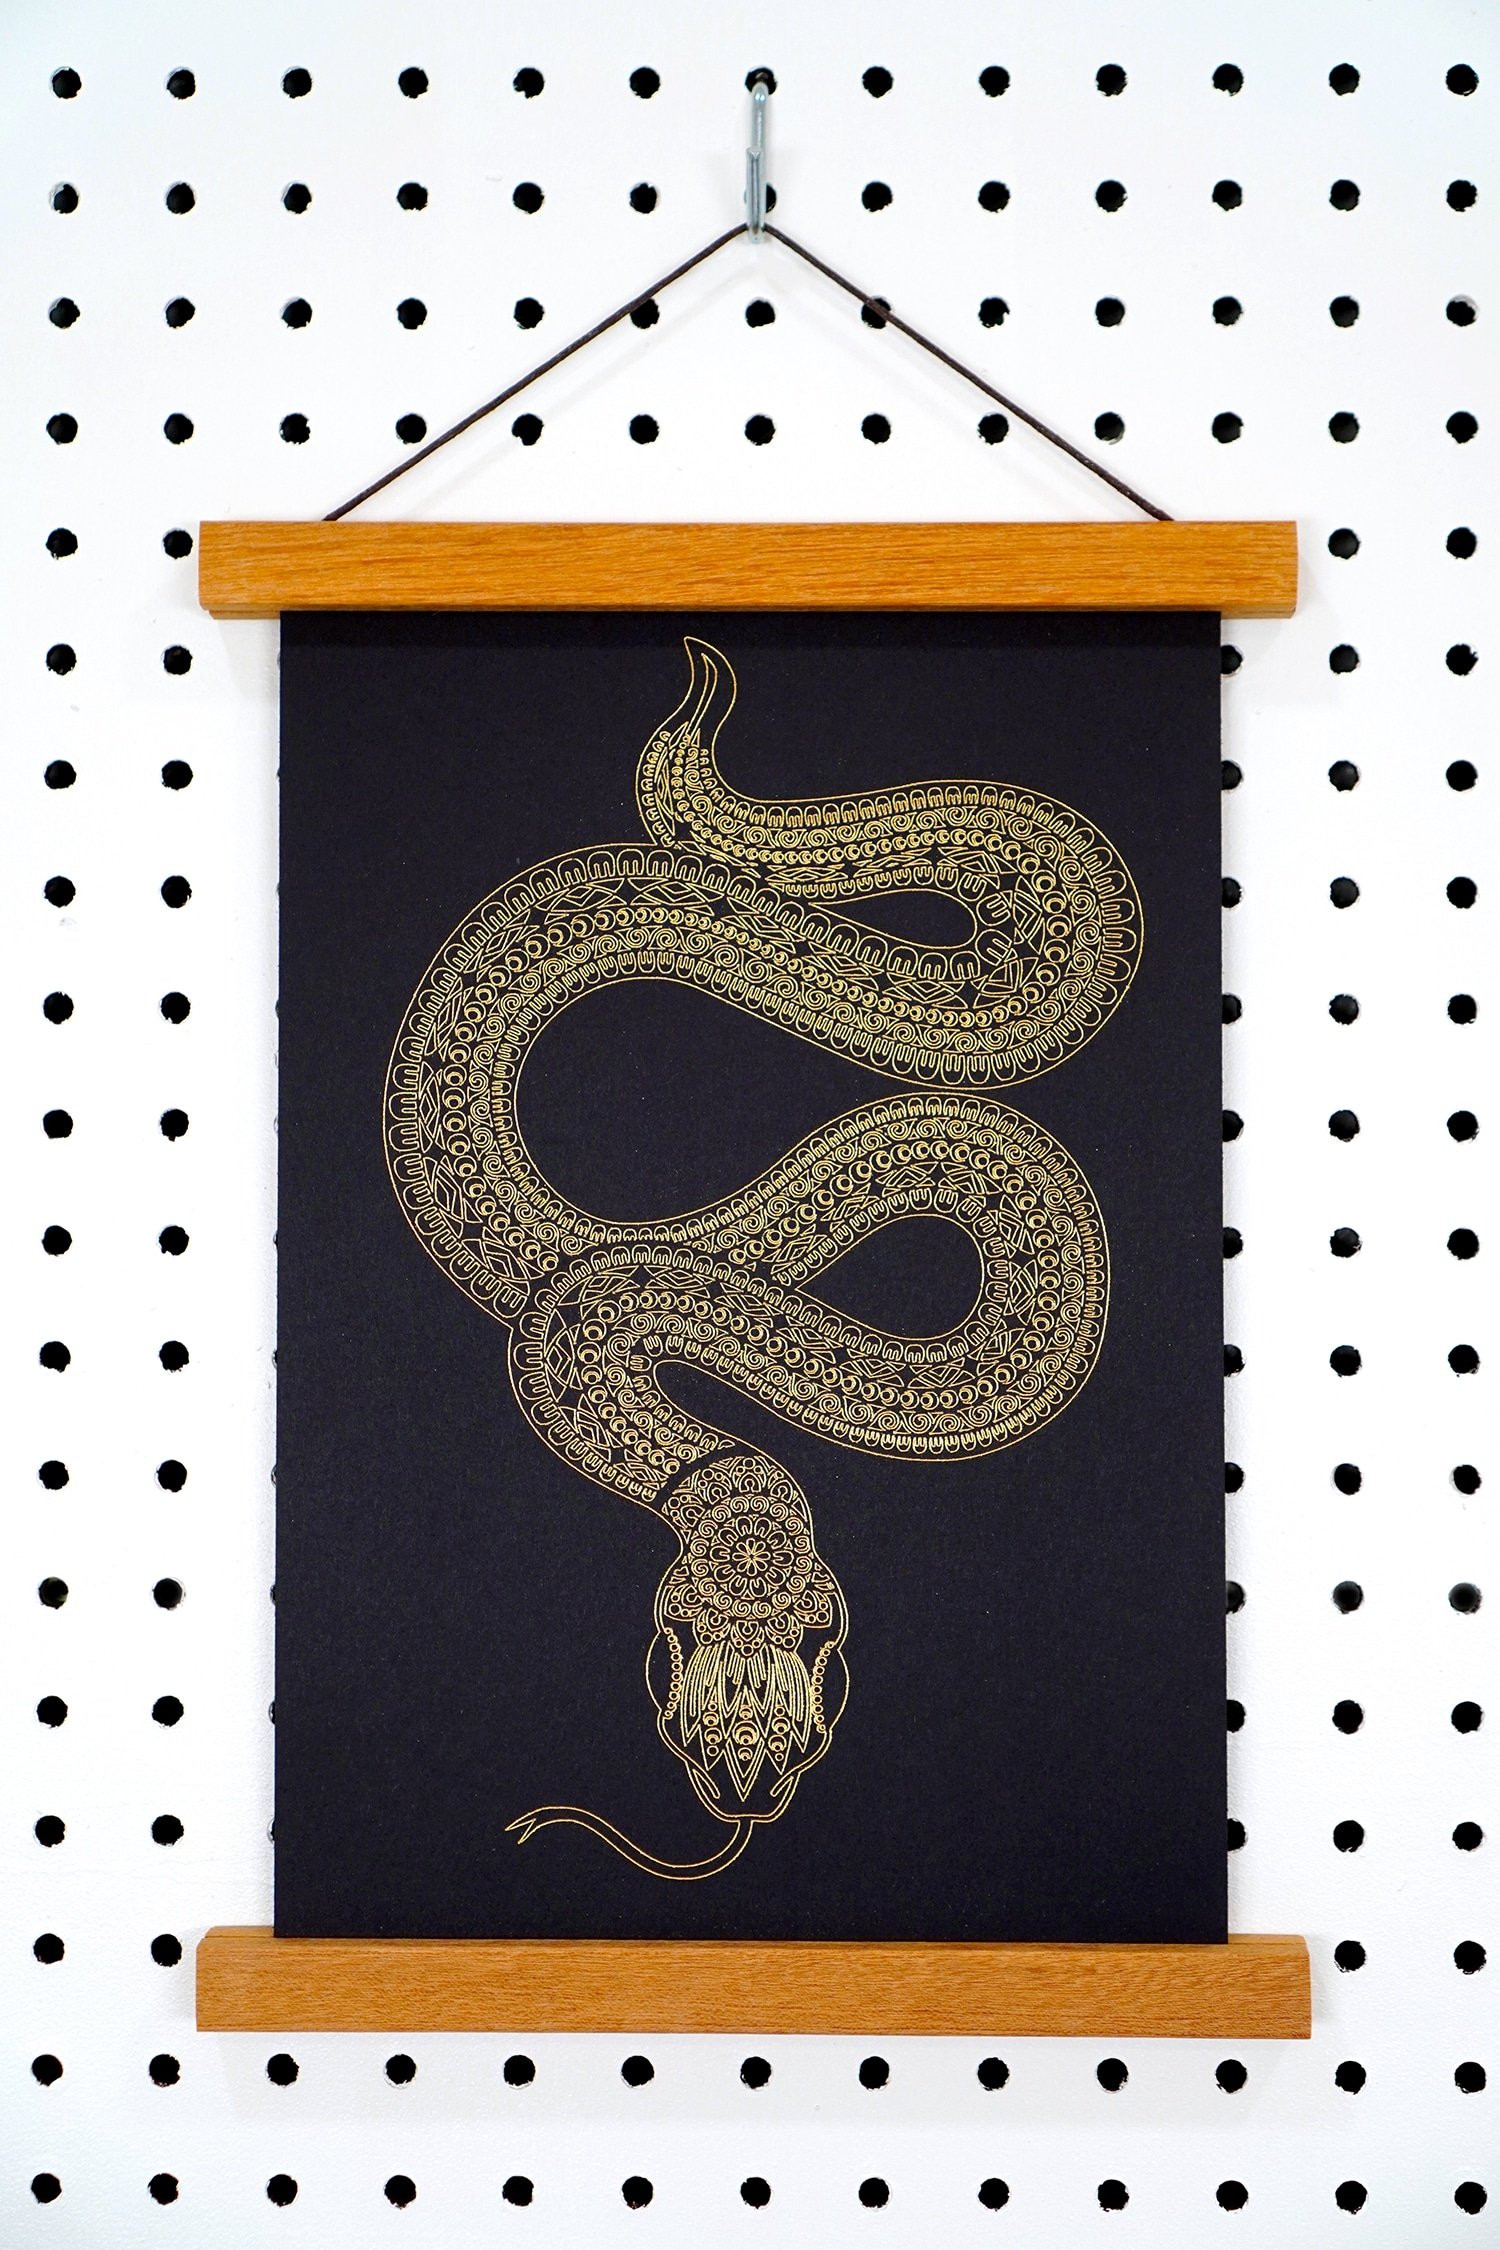
This is another foil art print that might have to make its way into our permanent display after Halloween is over! I can’t stop looking at all of the elaborate ornate detail in it!

After making several foil art prints, I wanted to make a few additional items to complete my Halloween display (and to be honest, I was having so much fun with the Cricut Foil Transfer System that I wanted to make ALL the foil things!) .
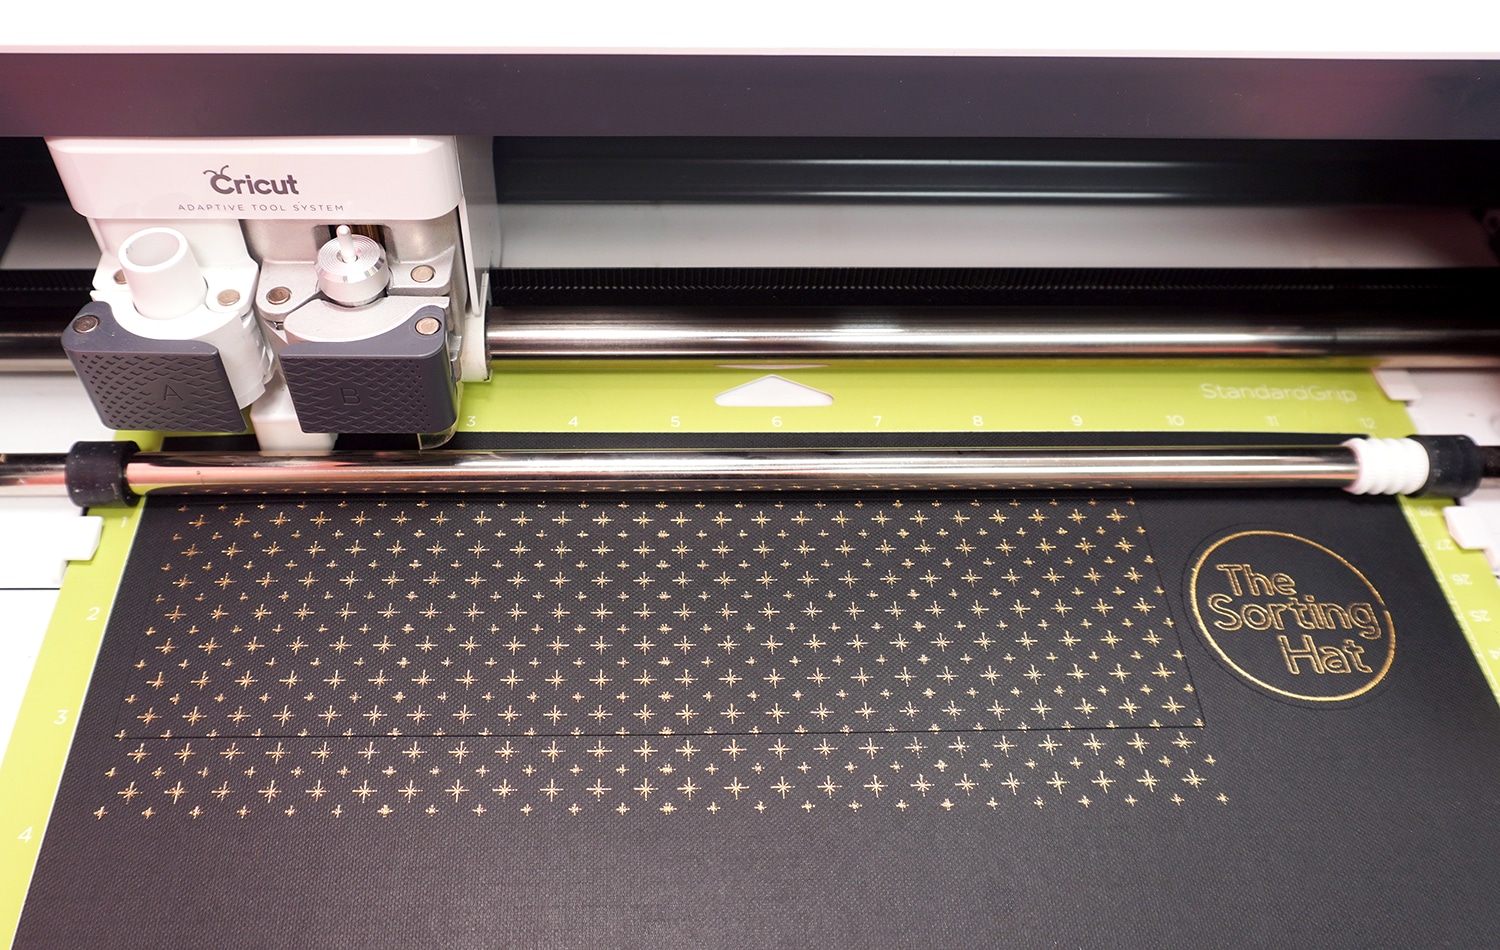
I transferred a gold foil star pattern to a sheet of black cardstock and used it to create a label for another project I’ve been working on.
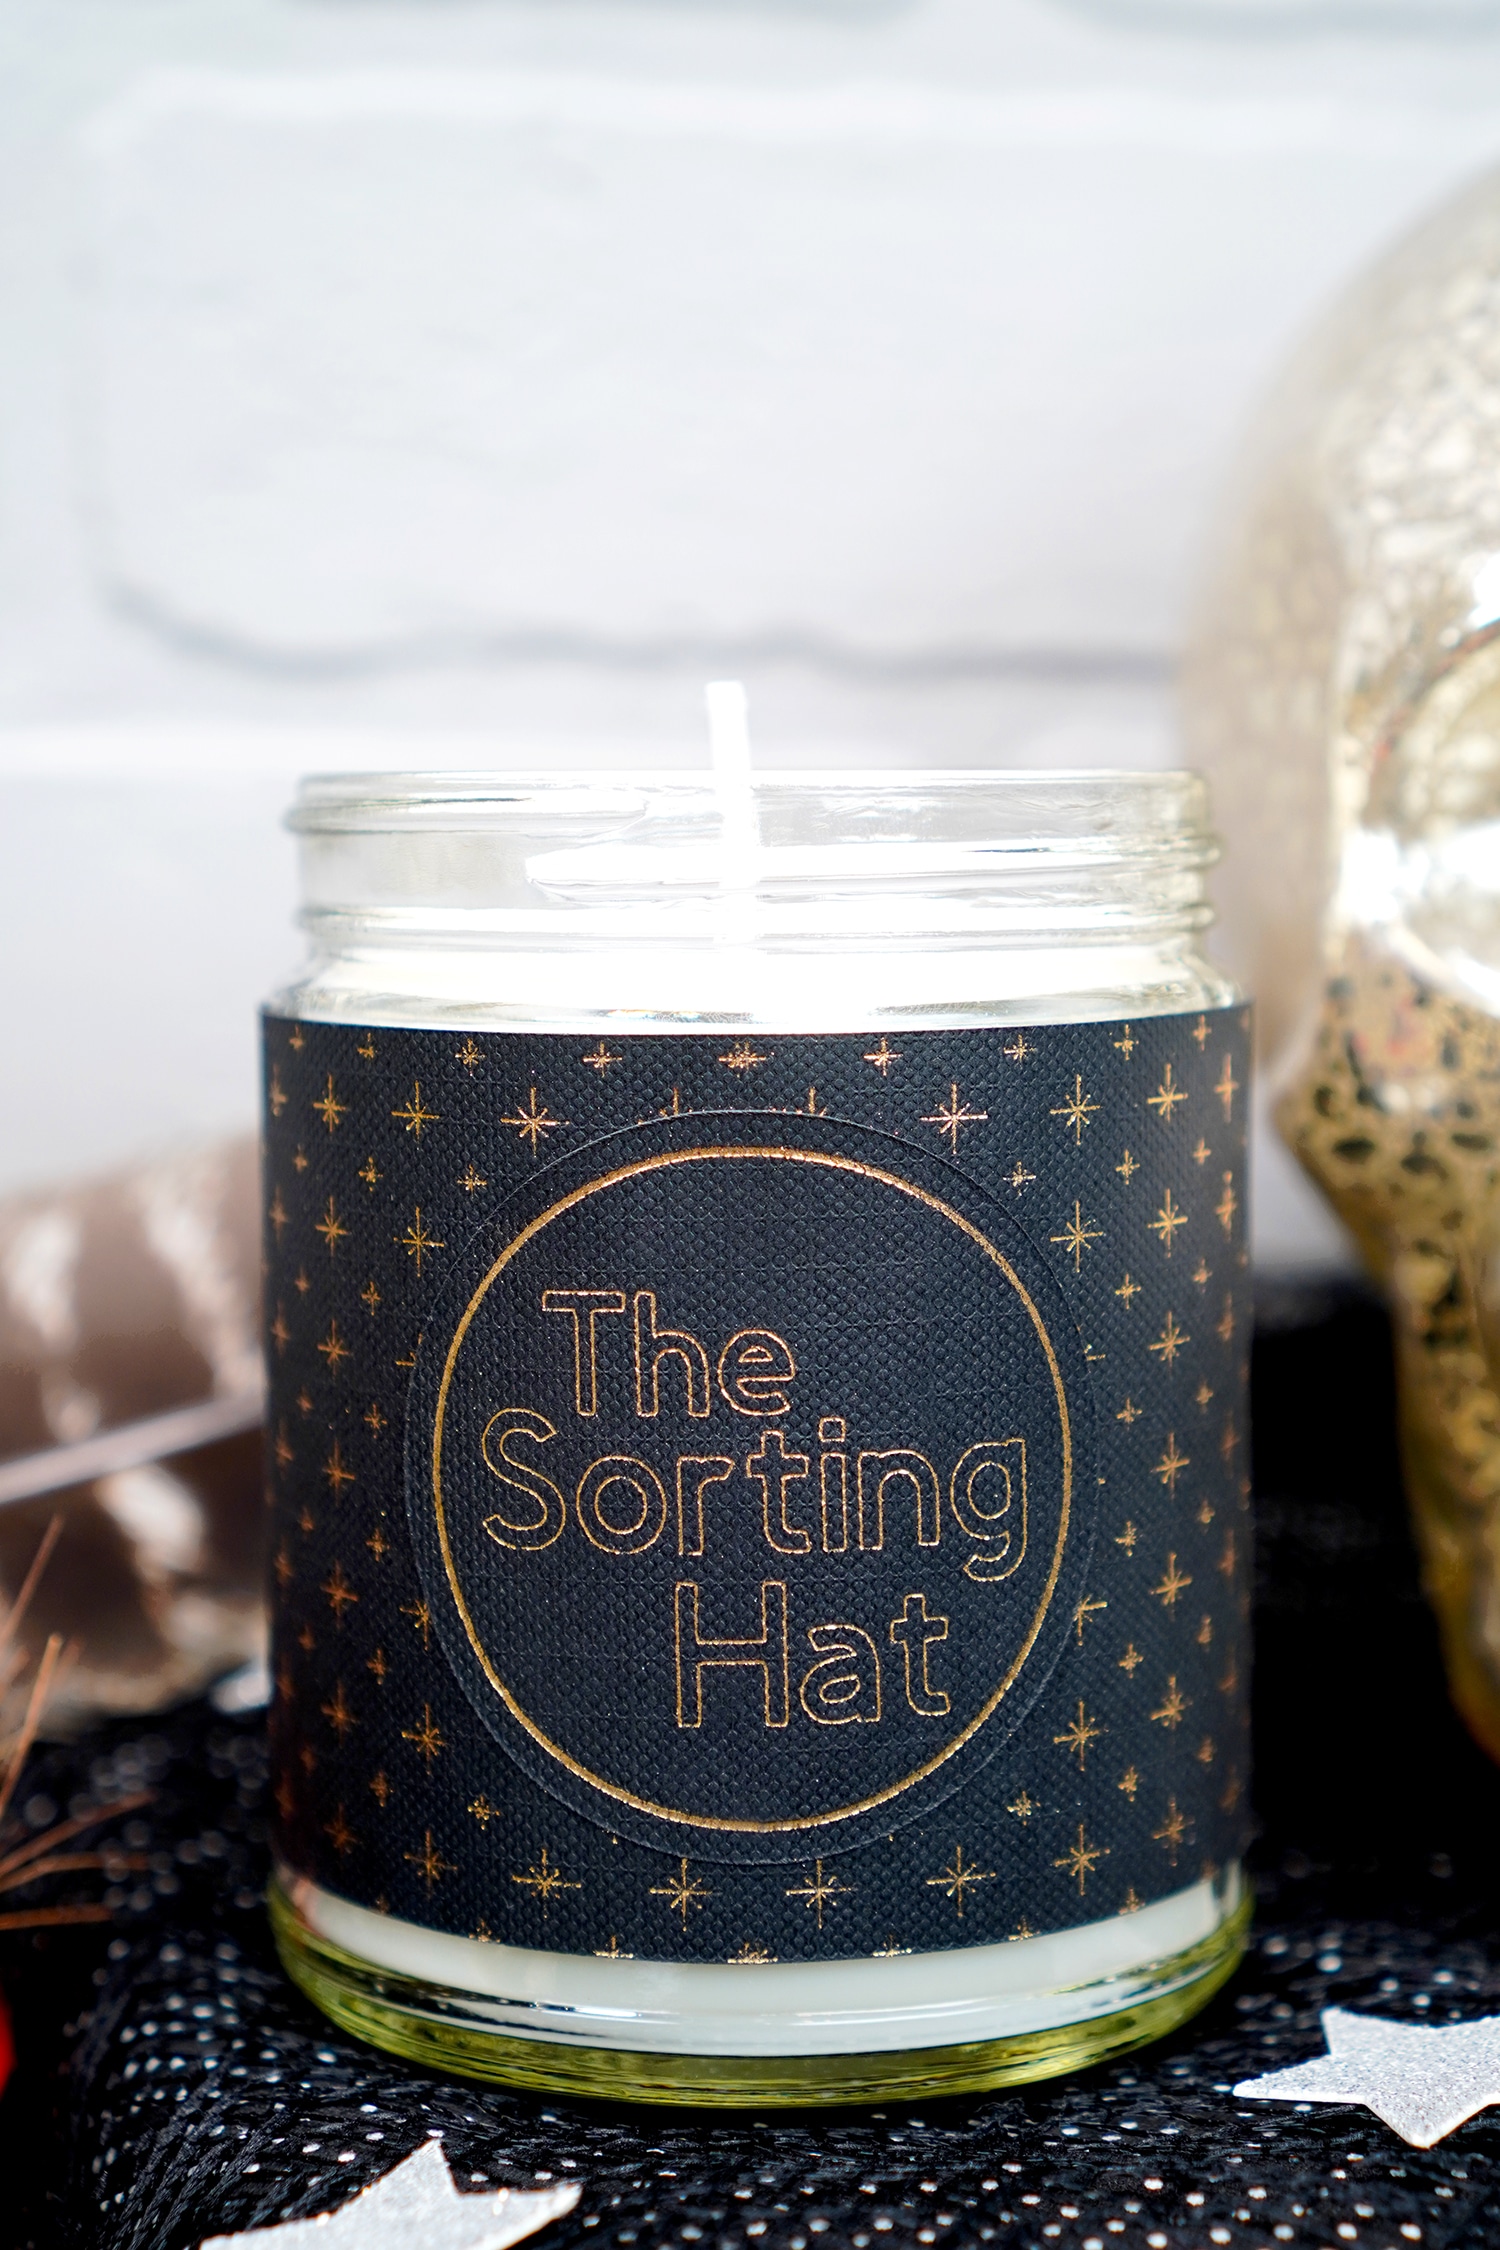
It made the perfect finishing touch for these Sorting Hat candles!
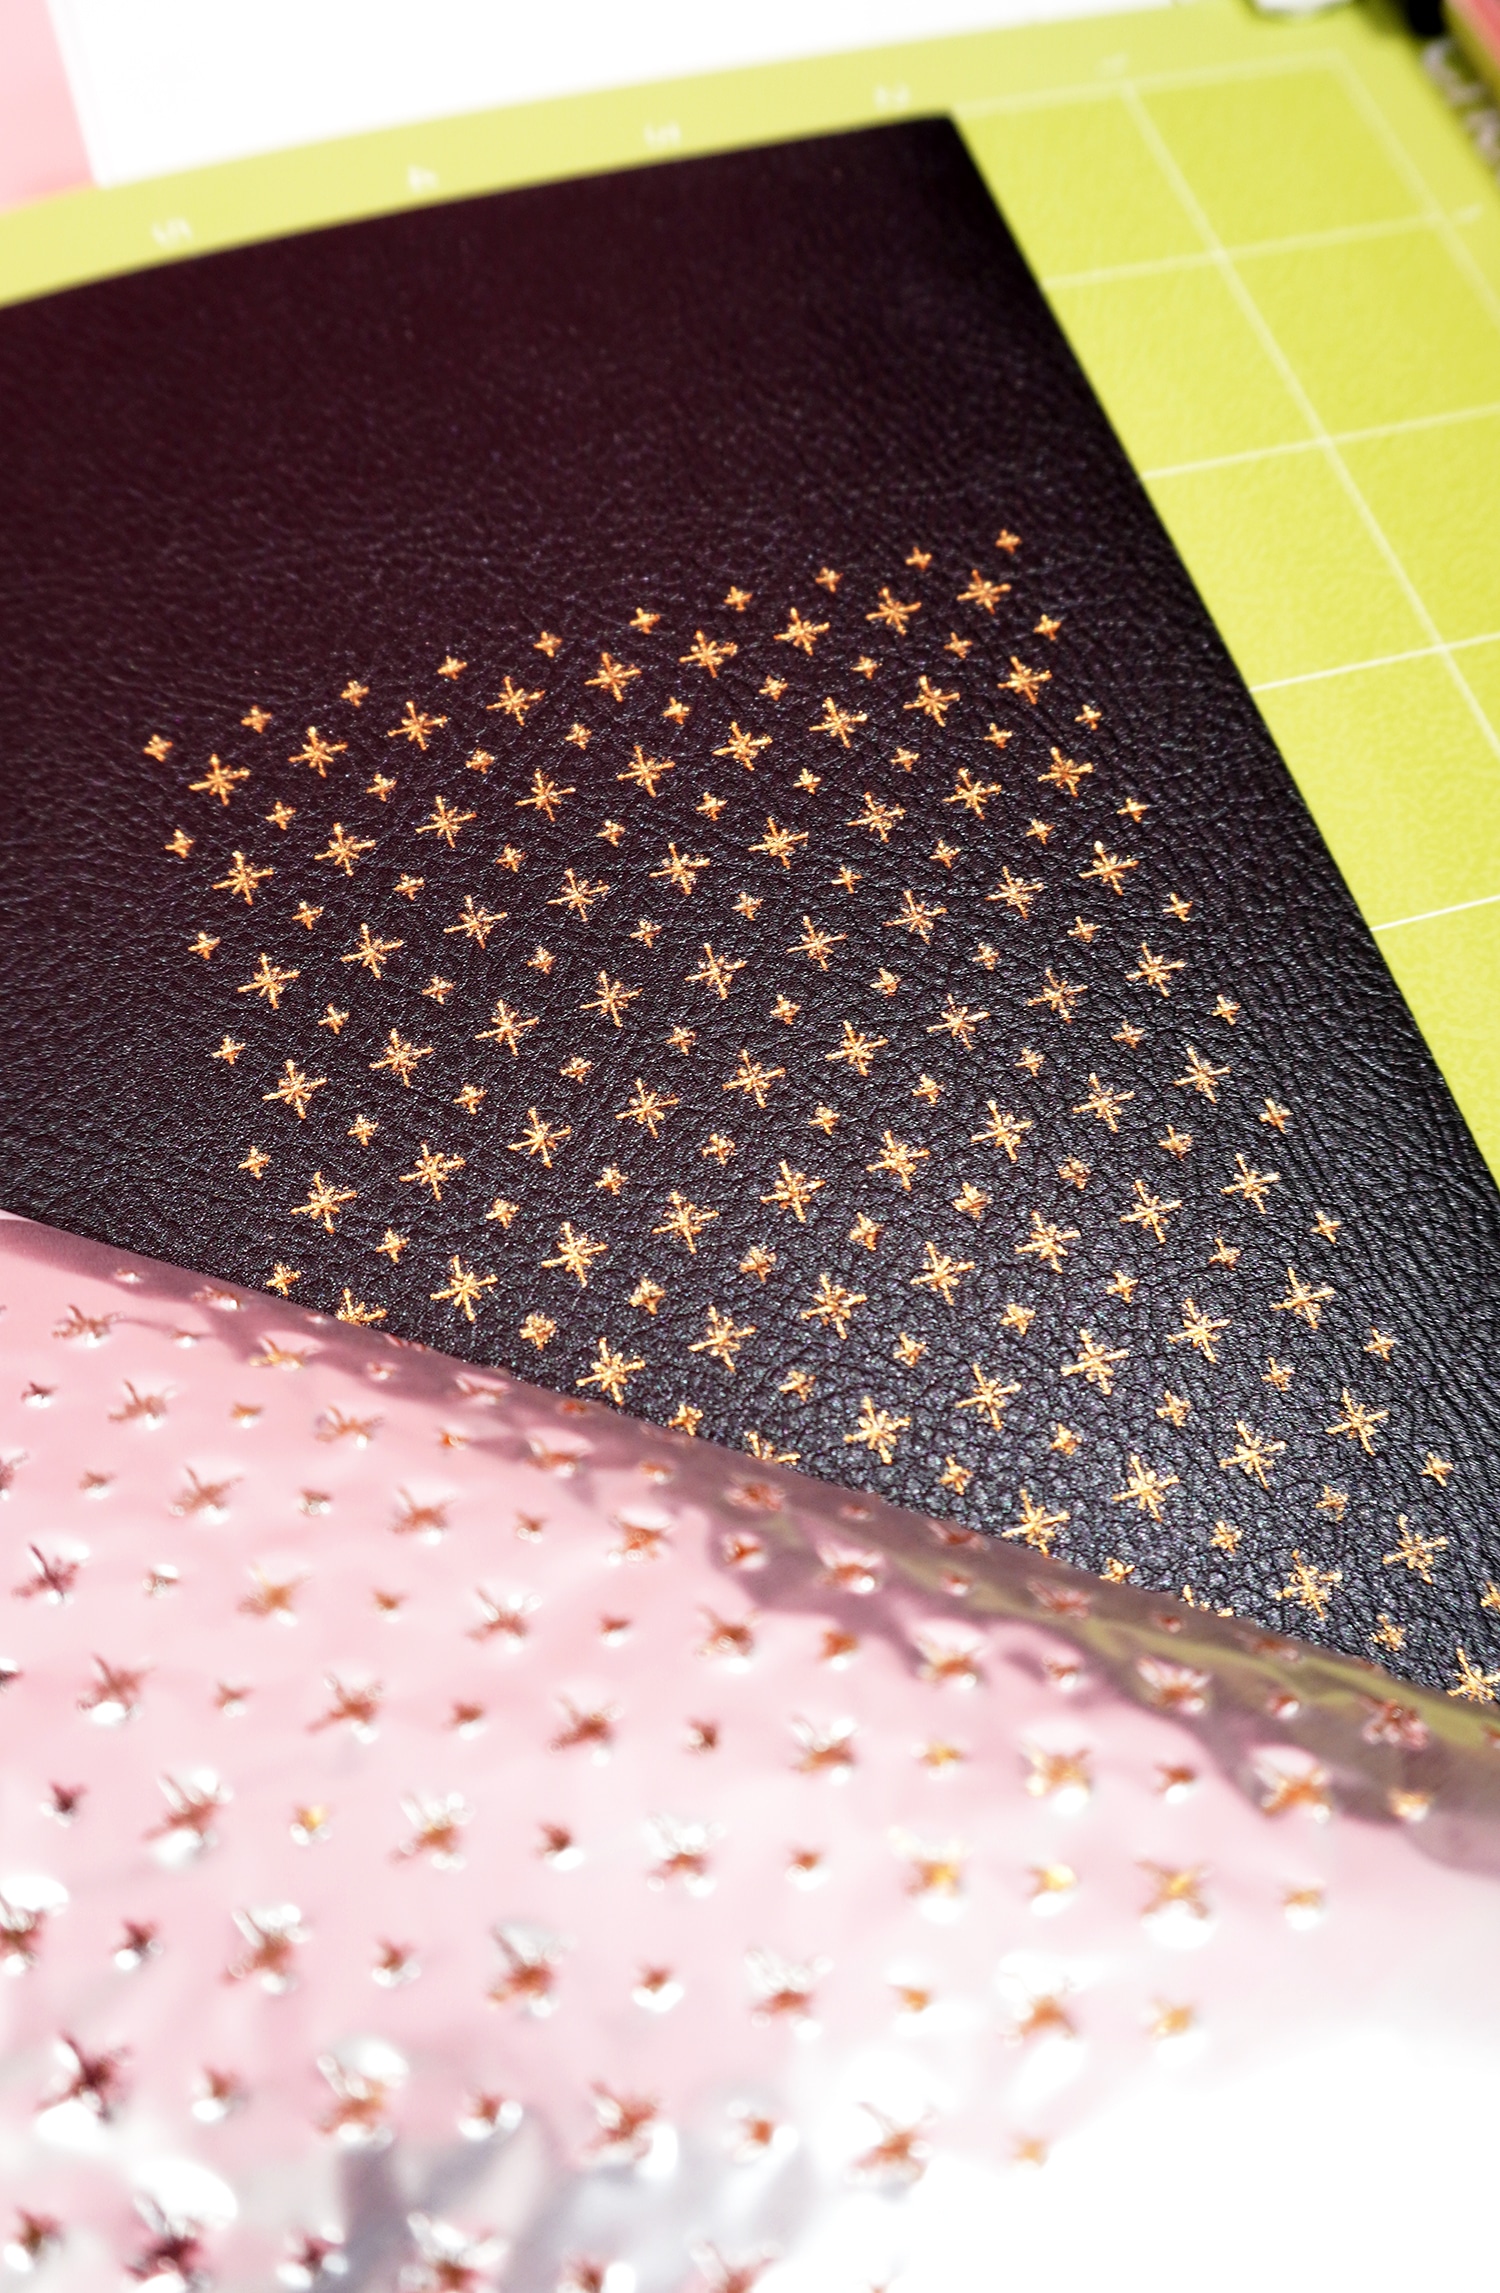
I loved the star pattern so much that I wanted to see if it would work as well on faux leather as it did on the cardstock…and it did! in fact, I think it came out even BETTER on the leather!
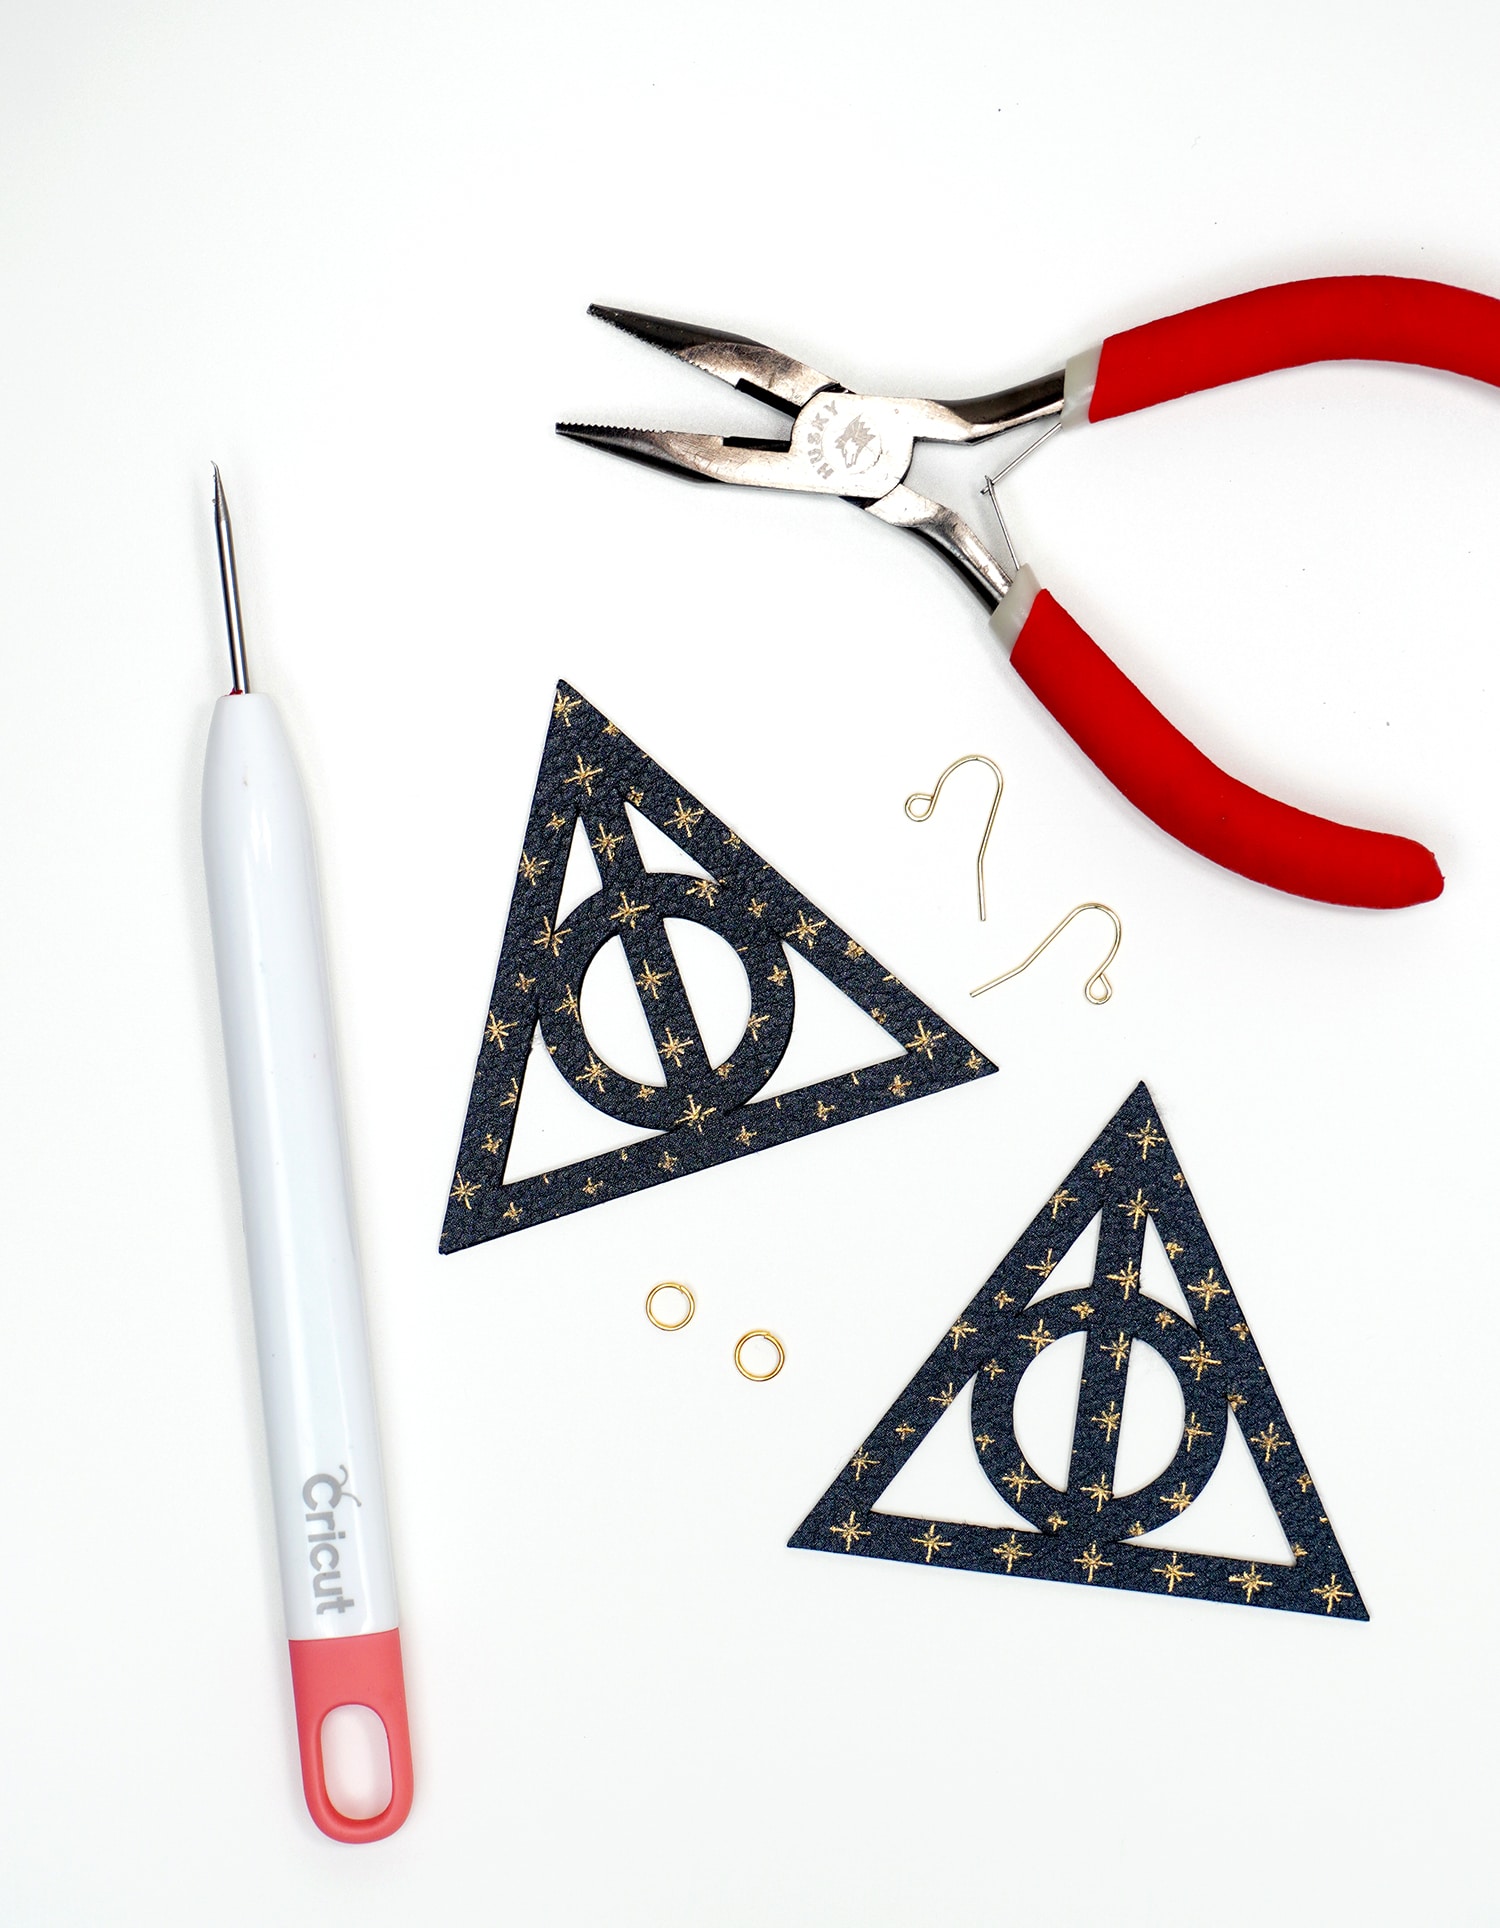
I backed the faux leather with a layer of kraft board to give it more stability, and then I turned it into a pair of earrings to wear on Halloween!
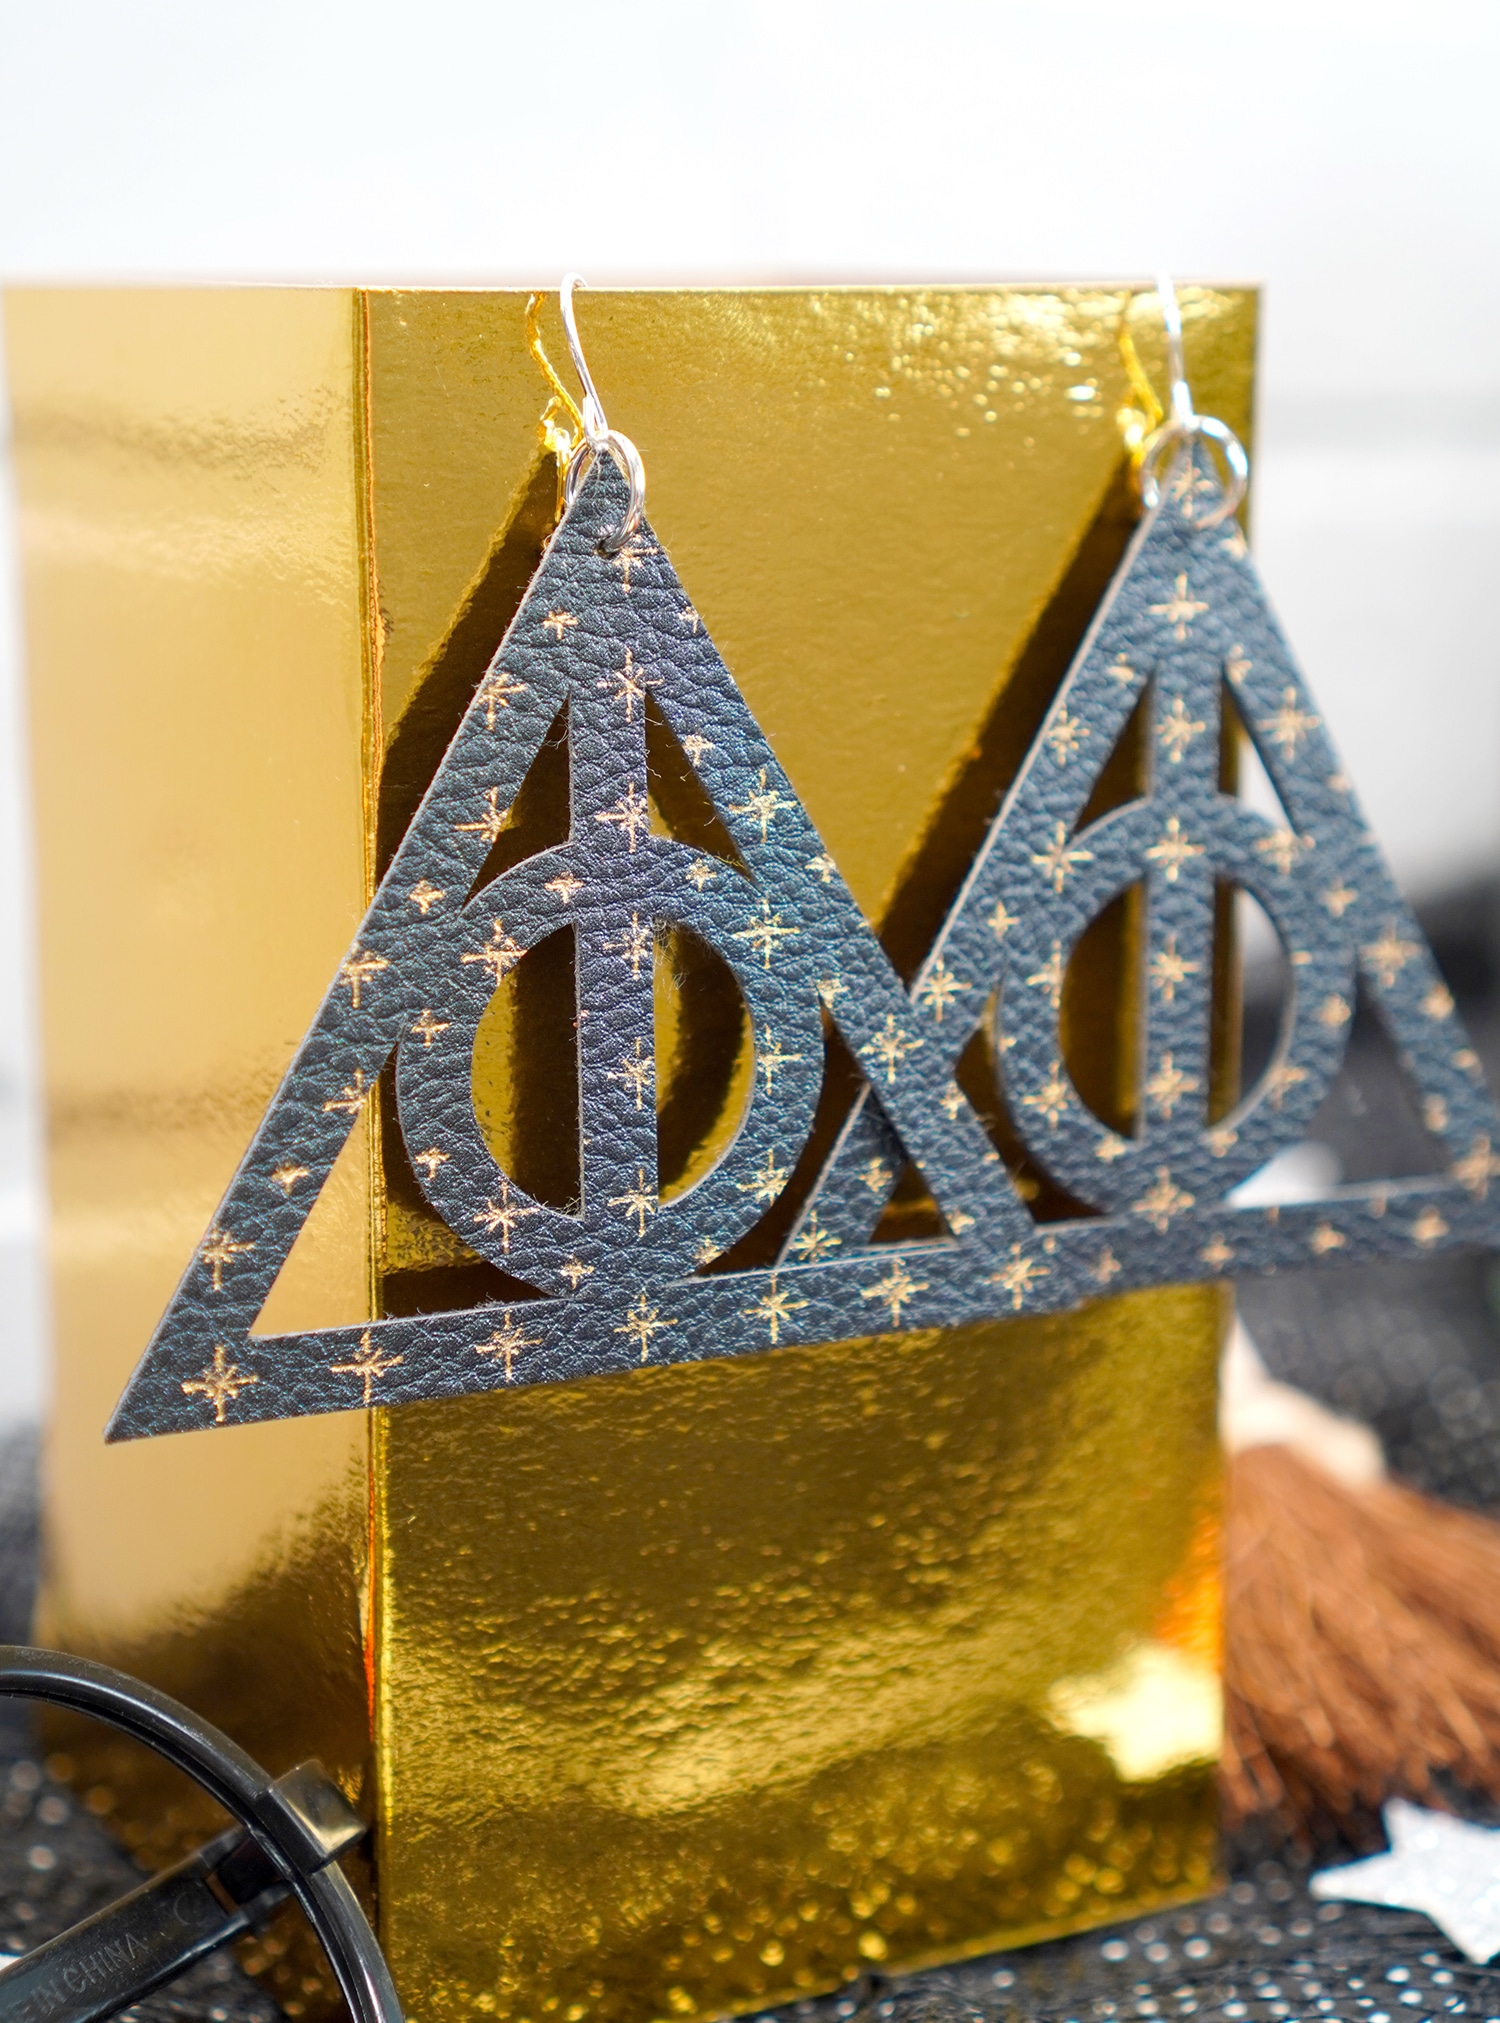
Super cute! I might need to make a pair of foil + leather earrings for every holiday from now on!

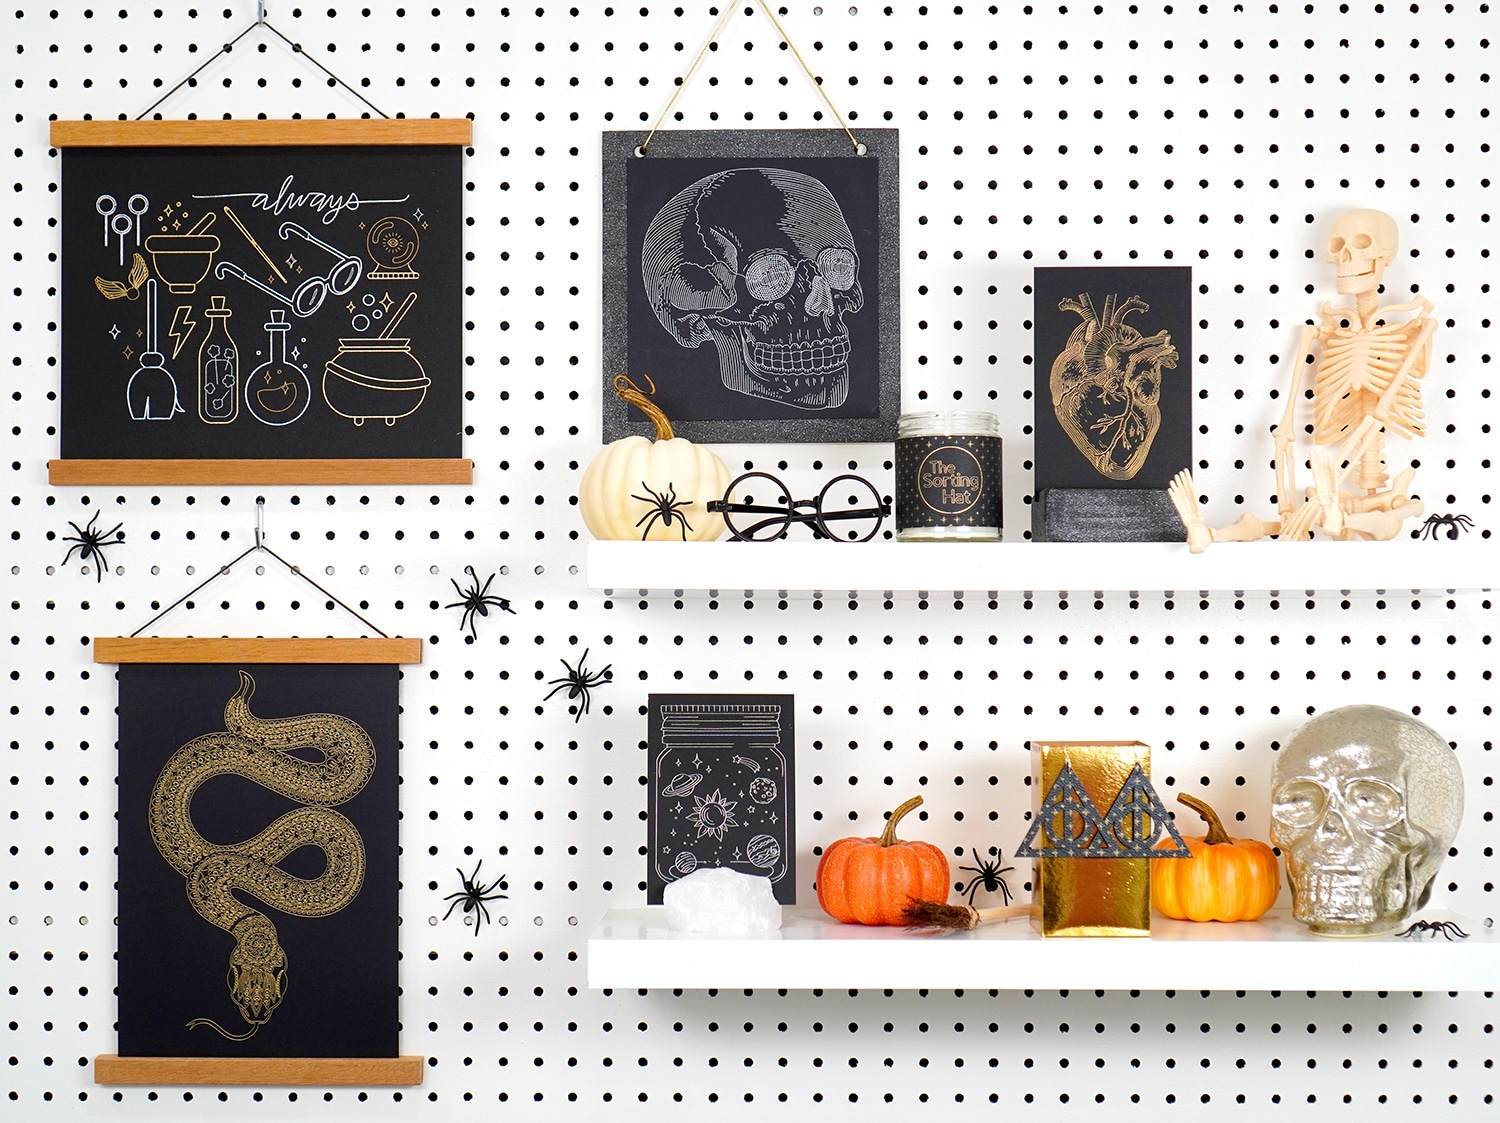
I added all of the new foil art prints and pieces to the display shelves in our studio, and I can’t get over how incredible it all looks! The foil really POPS against the black materials, and it lends such a richness and sophistication to our Halloween decor.

Would it be weird if I just left this up year round? 😂🎃
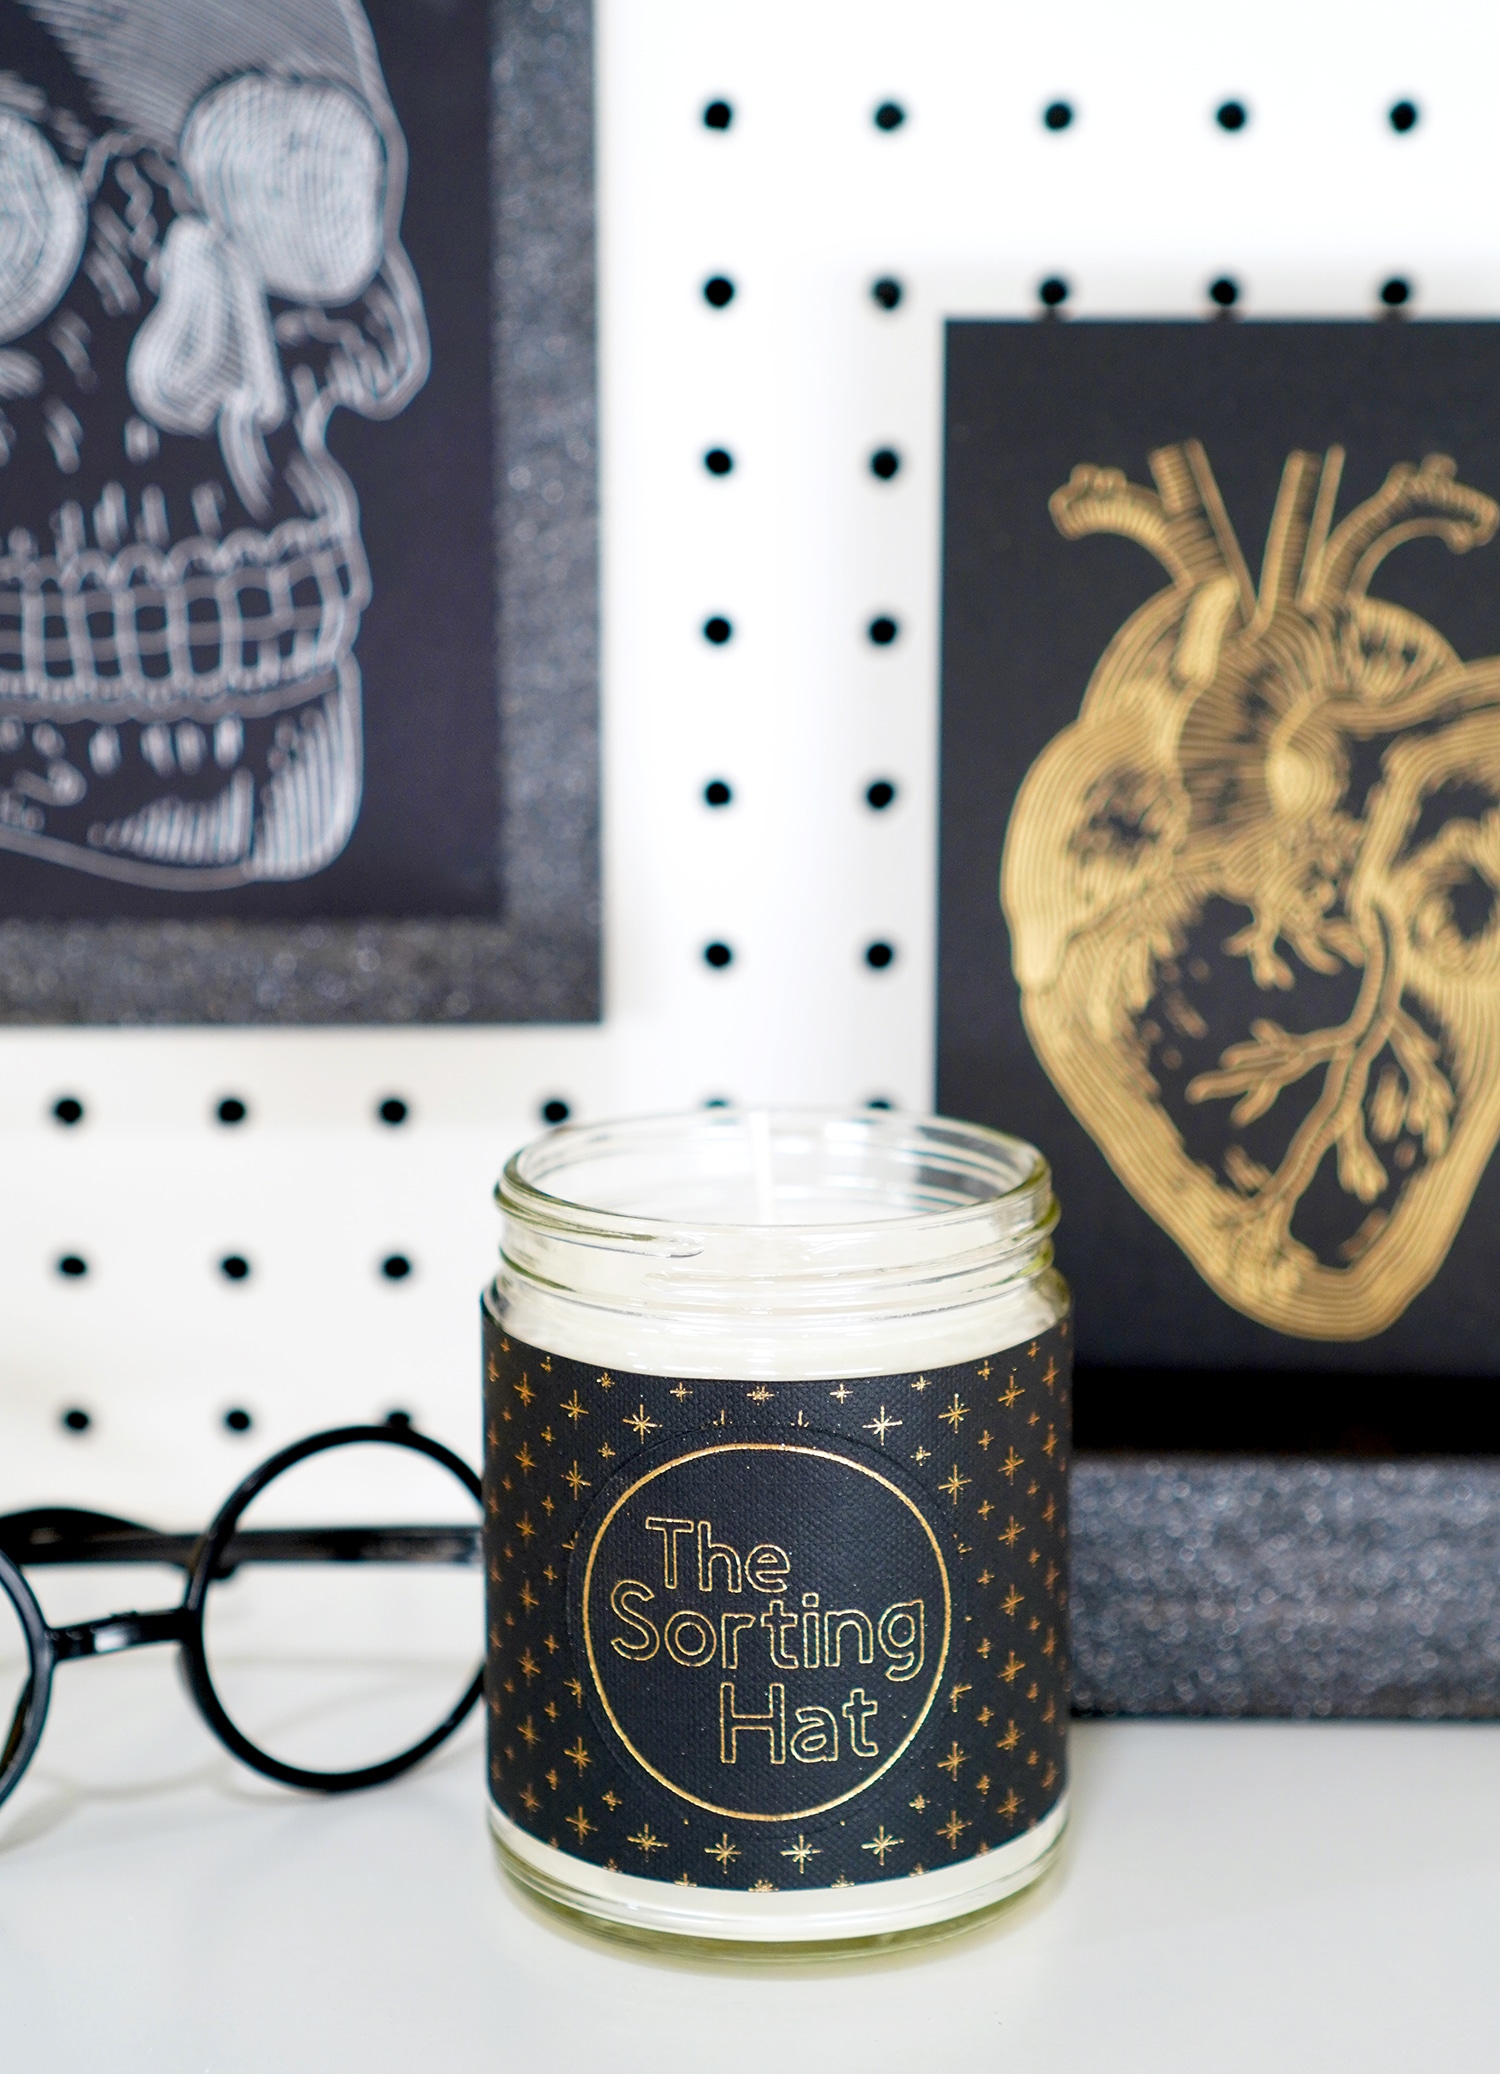
I can’t wait to share the DIY tutorial for these fun candles with you very soon! You’re going to love them (and they’re SO easy!)!
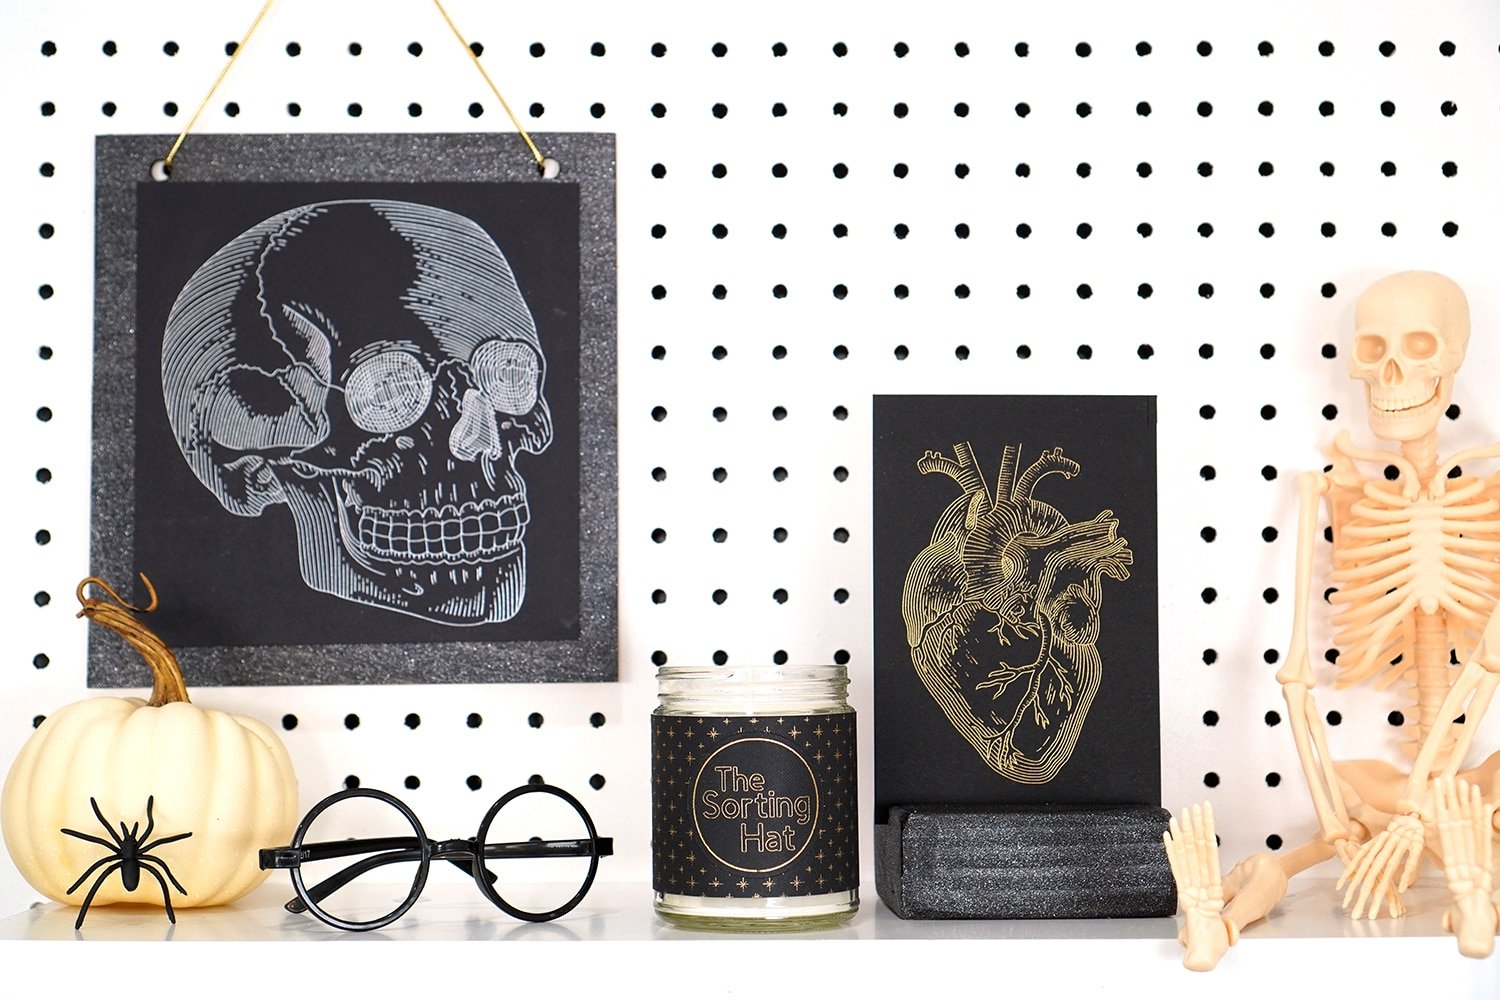
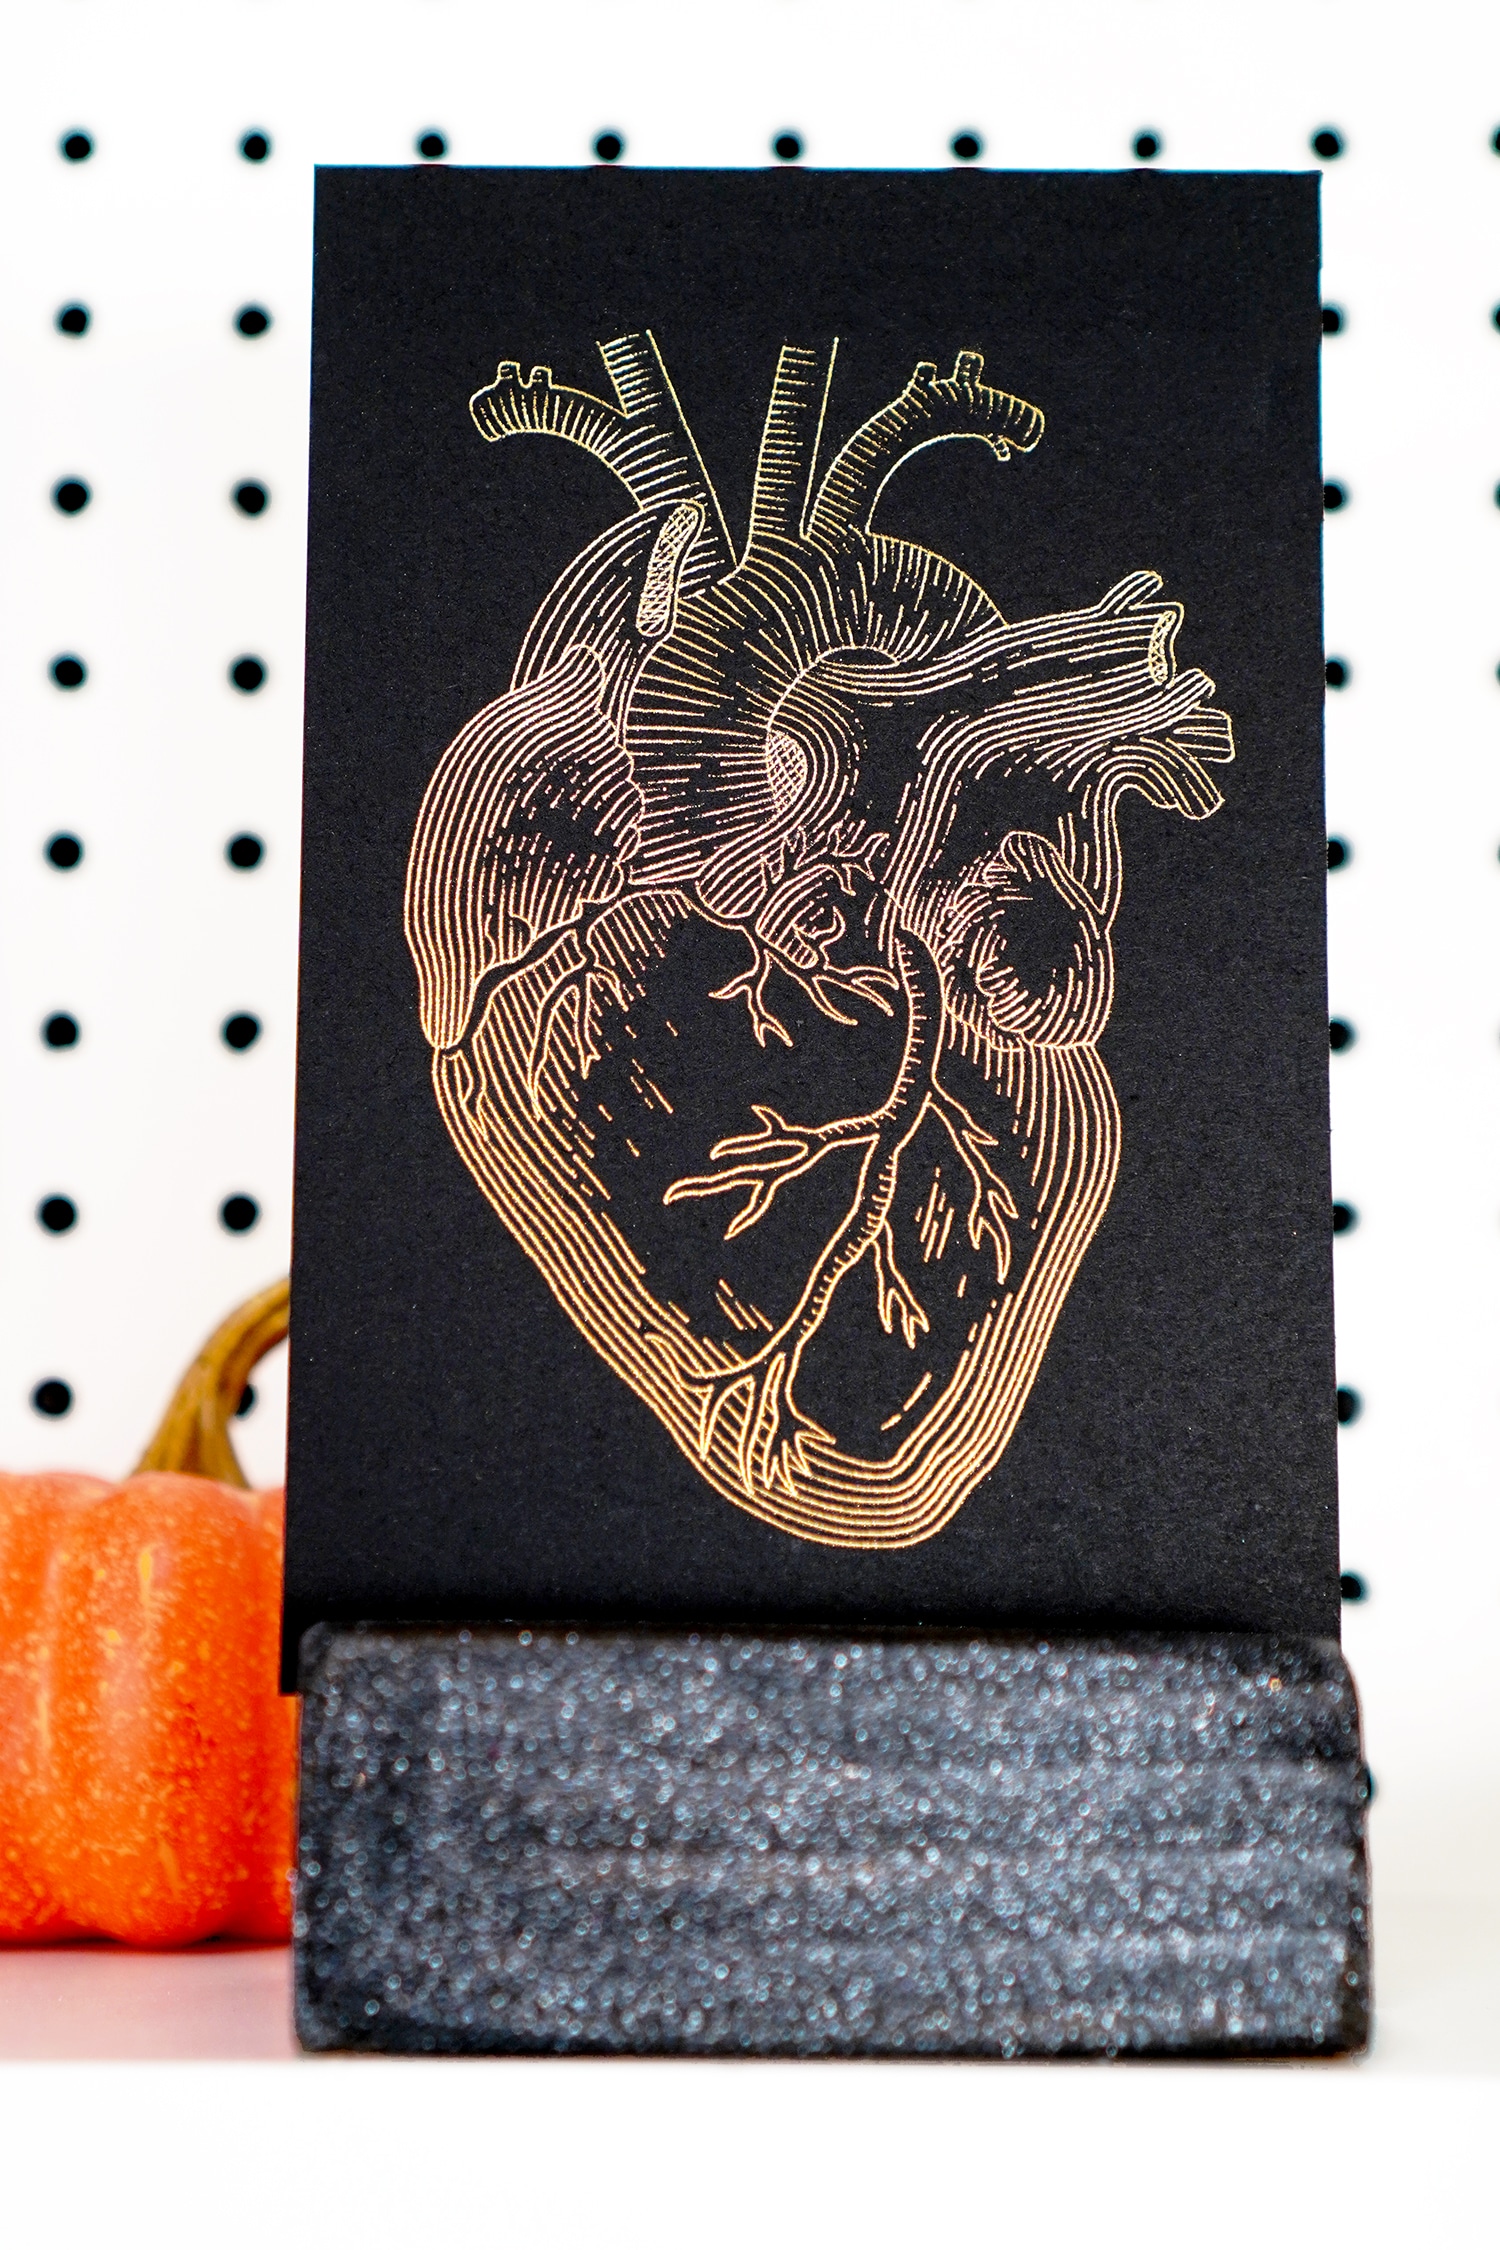
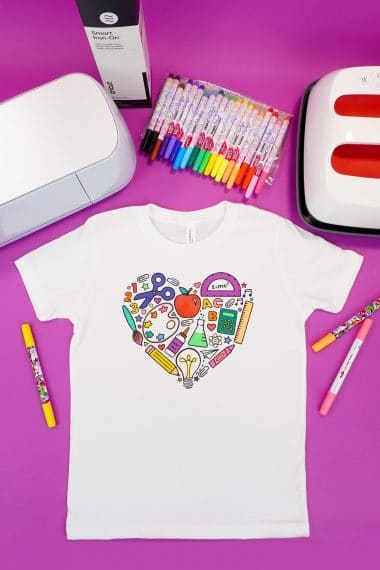
As soon as I saw this anatomical heart design in the Cricut Design Space Library (#M17F8D564), I knew it would be perfect for the mad scientist vibe I was going for! (And everyone loves a heart of gold, right?!)
ALL the heart eyes! 😍😍😍😍😍
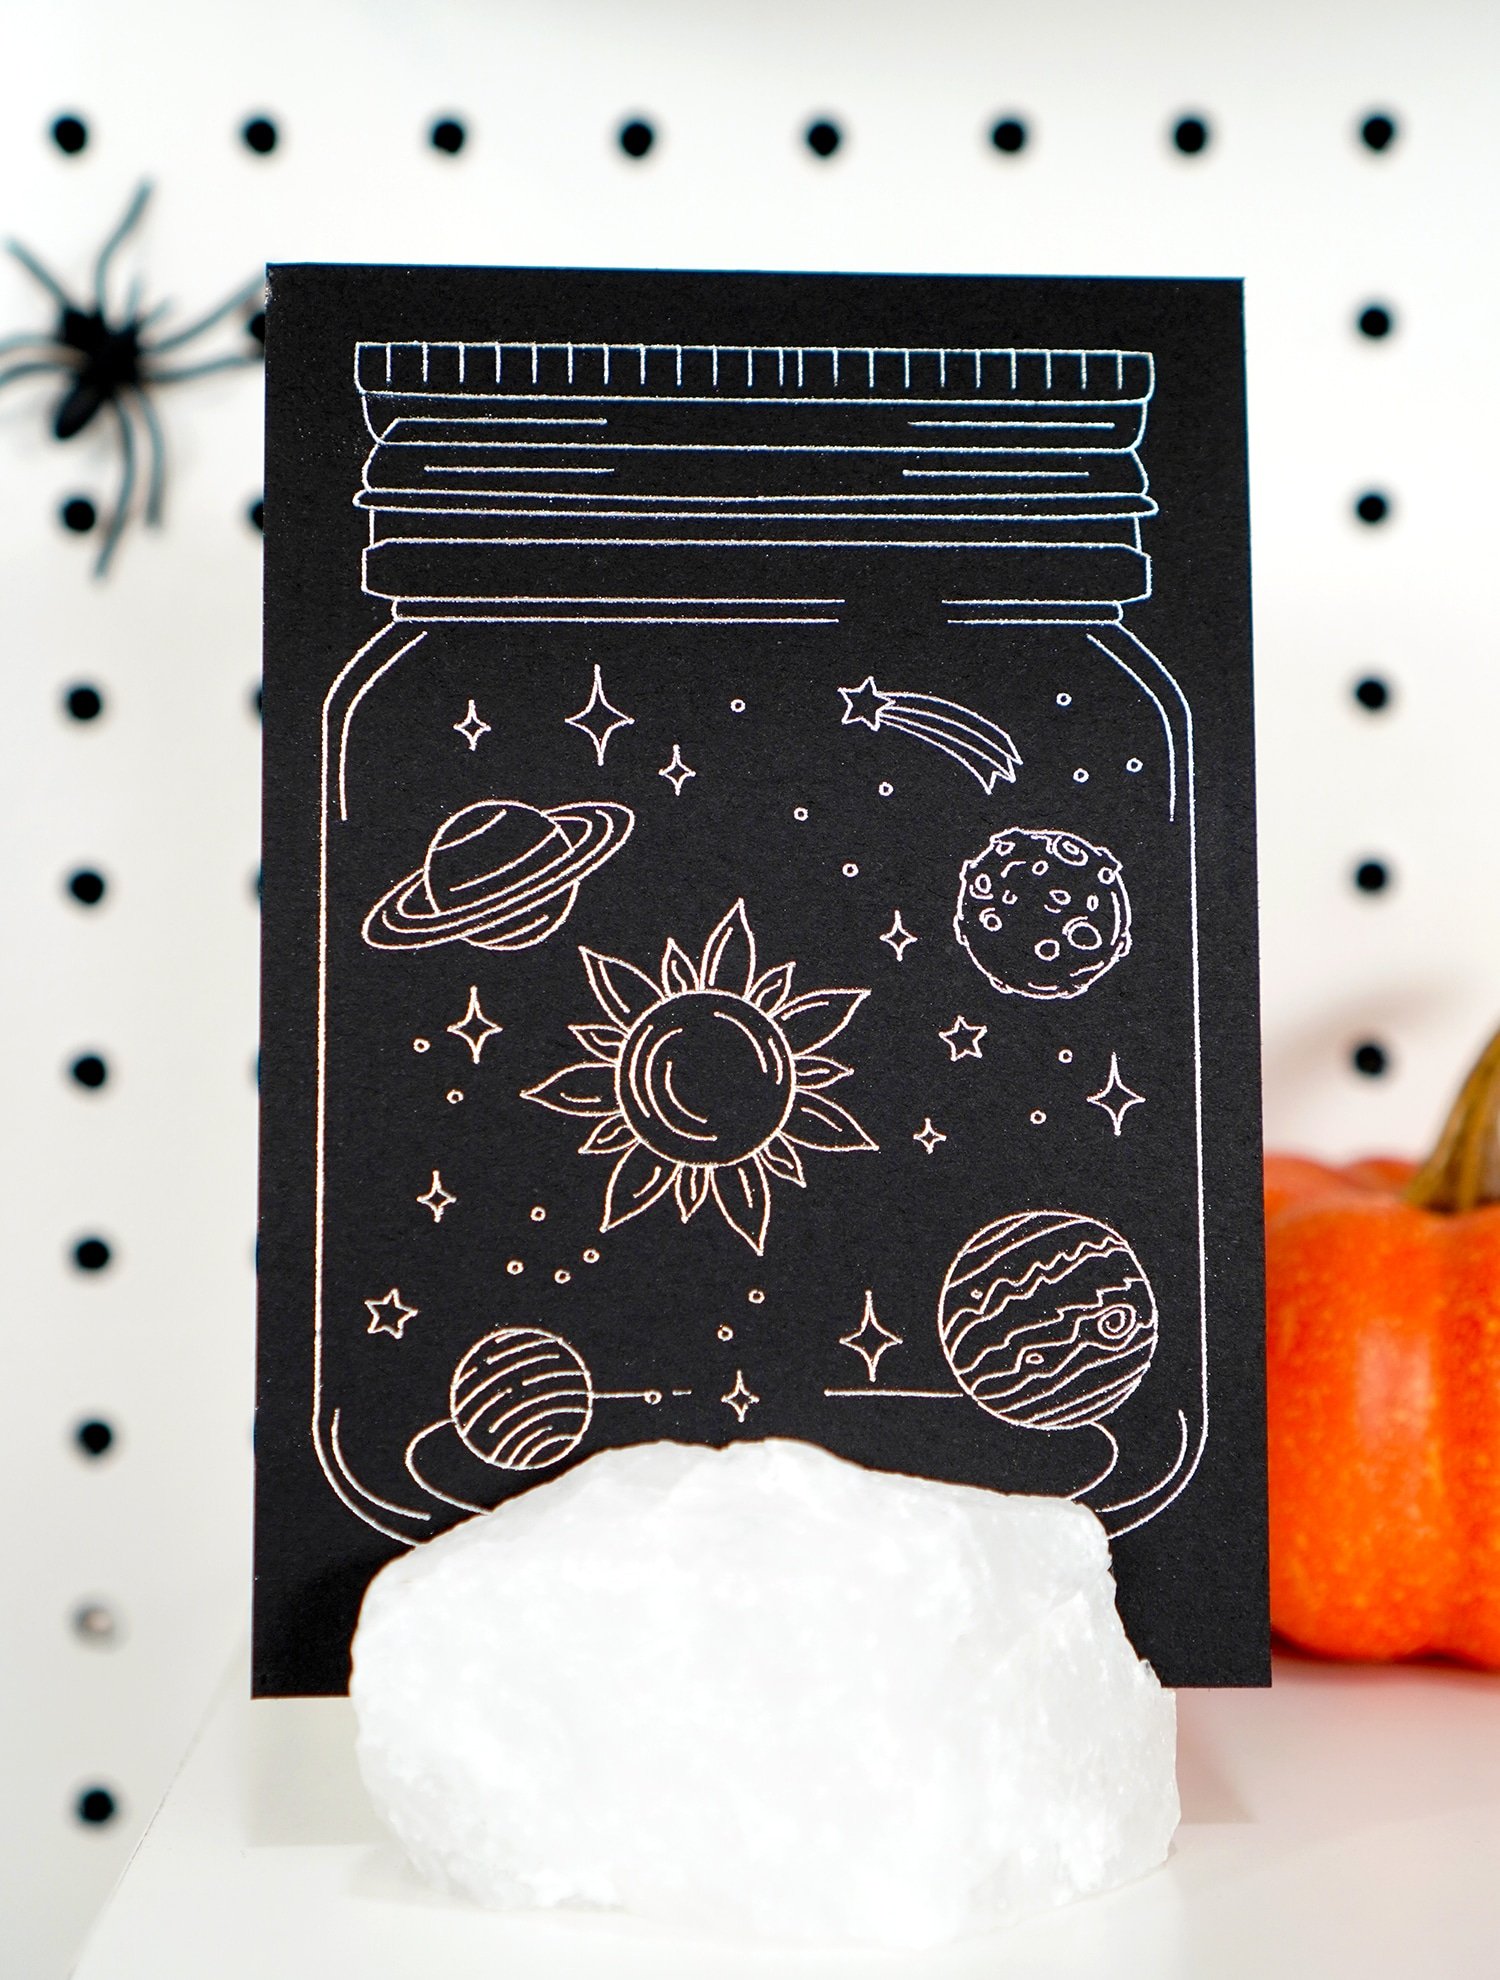
I imagine that every wizard keeps a spare solar system galaxy in a jar at all times, right? You never know when that will come in handy for a spell, potion, or charm!
I am SO thrilled with how my foil art prints and my Halloween display turned out, and I am super impressed with the new Cricut Foil Transfer System tools. They made it incredibly easy to elevate my holiday decor to a whole new level, and I can’t wait to make more foil art prints for everyday display as well.
What are you the most excited to make with the Cricut Foil Transfer Tool? Let me know in the comments!

You May Also Like:
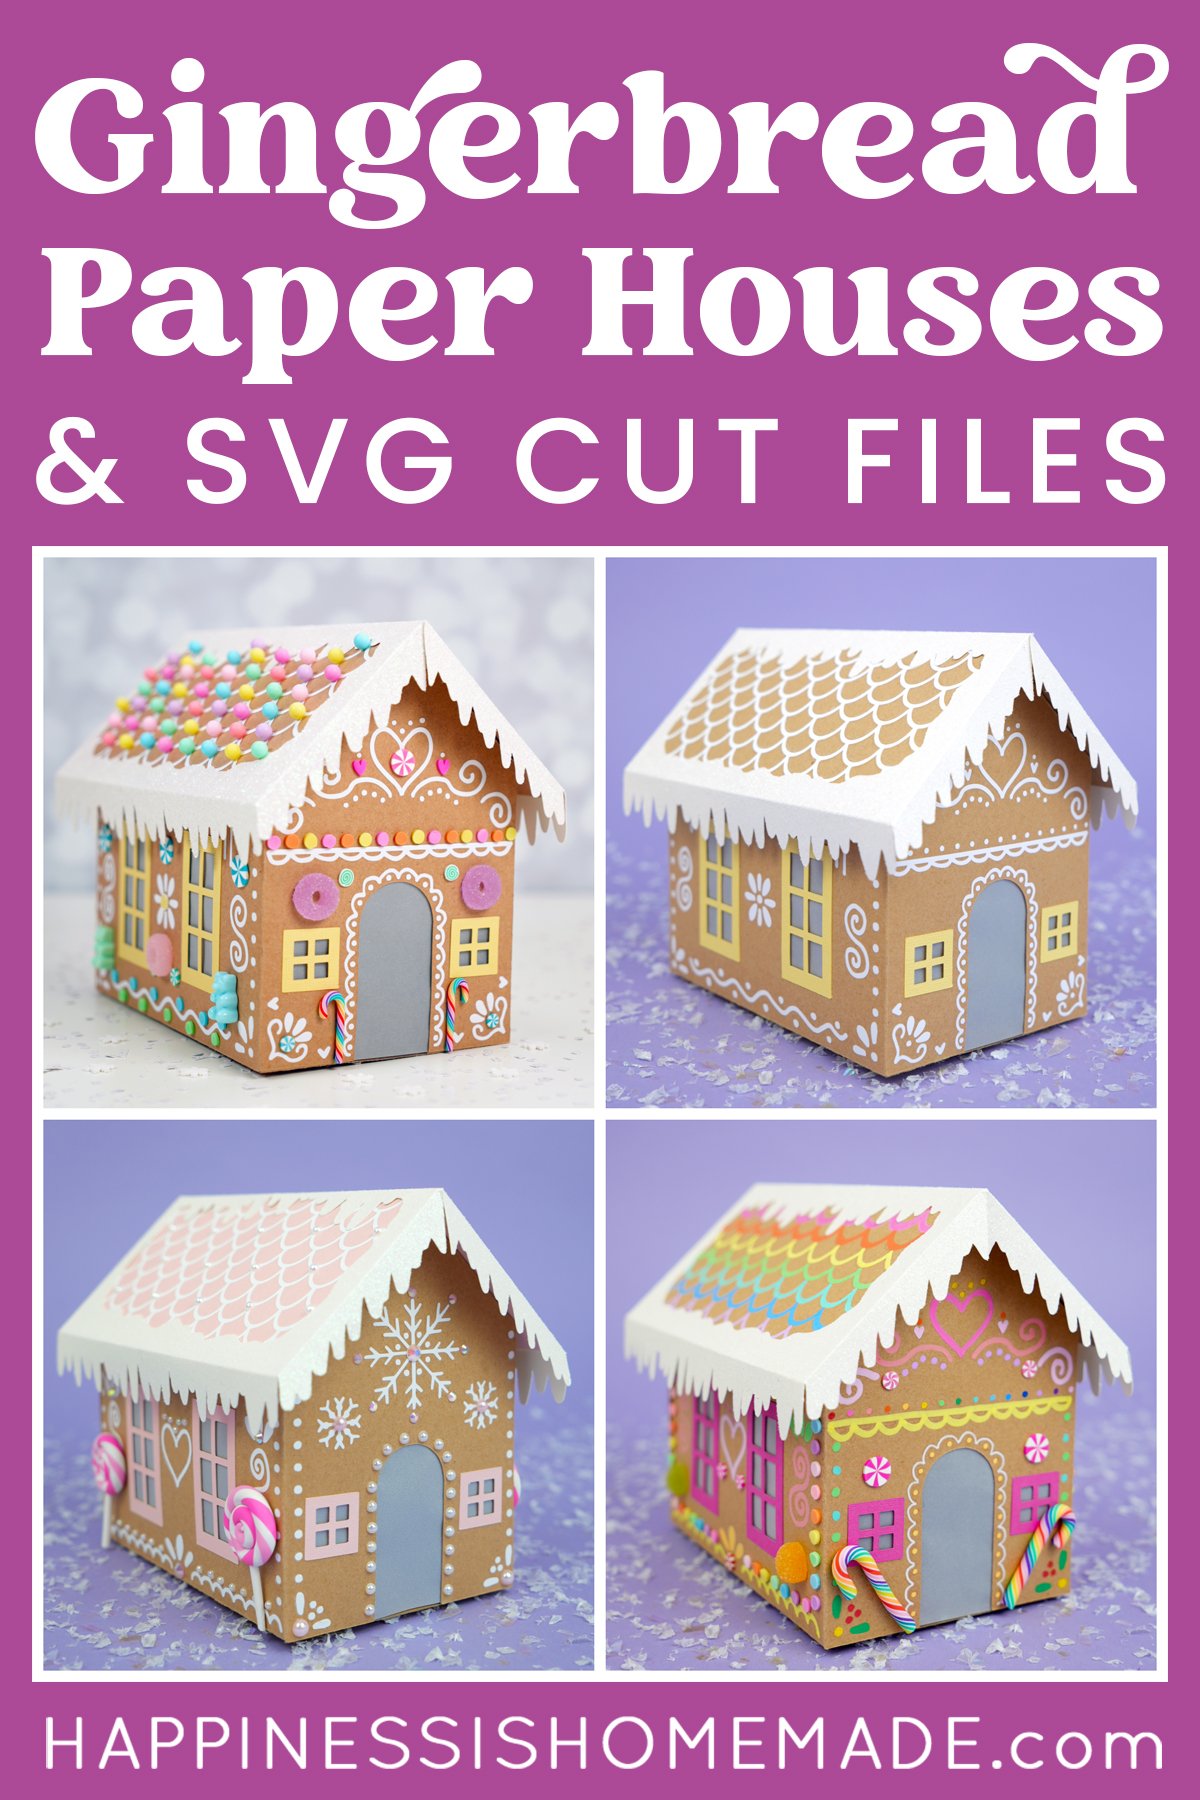
 Cardboard Gingerbread Houses + SVG Files
 Thanksgiving Treats: Turkey Lollipops
 35+ Mother’s Day Cricut Craft Ideas
 Free Christmas Countdown SVG +16 Christmas Cut Files
- 13 Free Bat SVG Files for Halloween
- 3D Stars + Christmas Ornament SVG Files
- Ouija Board Halloween Sign + SVG
- Back to School SVG + Coloring Shirt


Don’t Forget to Pin This for Later!

Heidi Kundin has captivated the hearts of millions with her colorful and inspiring approach to crafting, celebrations, and family fun. With over 15 years of experience, Happiness is Homemade has become a must-visit destination for those seeking quick and easy creative ideas and last-minute solutions. Heidi’s warm personality shines through her posts, inviting readers to join her on a creative journey that’s fun, rewarding, and achievable. Heidi is also the author of Homemade Bath Bombs & More and DIY Tie-Dye.
I love this so much!! When I’m foiling, my images are bubbling so they aren’t then filling in completely. Do you have any tips for preventing that?
Hi Ruby, to avoid any bubbling up of the foil, make sure to tape down ALL of the edges (the entire edge on each side) of the foil sheet to ensure that it stays firmly in place during the process. 🙂
I LOVE the snake. It would make a perfect gift for my son. Where can I get the SVG?
Hi Loring, I apologize that I am just now seeing these comments, but I did respond to your email that asked this same question a couple of weeks ago. The snake design is a Cricut Design Space image. You can search for it by using #MB5C218A or “snake mandala” and it will come right up! 🙂
Love the Harry Potter one! are you going to sell or share that file? I would love to purchase it!
Great job! I am excited to try it mine out now!
Yes! You can find the Harry Potter file here: https://design.cricut.com/landing/project-detail/5f600451c2afa10ba4685614 Enjoy! 🙂
Where do you find the large sheets? I’ve only been able to find 4×6 from Cricut! Or is there other brands that work with this as well?
You can find the larger sheets of gold and silver here in Cricut’s shop! 🙂
Love your blog! Brings out the kid in me haha Thanks for sharing!