

Meet the NEW Cricut Foil Transfer Tool! What does it do? How does it work? Come learn how to use the Cricut Foil Transfer System to add stunning foil effects to your craft projects!
This post may contain affiliate links. I will receive a small commission from these sales at no additional cost to you!
Have you heard the news? Cricut just released a BRAND NEW tool – the Cricut Foil Transfer System – and it’s SUPER cool!
The majority of recently introduced new Cricut tools have been designed exclusively for the Cricut Maker machine, so Cricut Explore owners will be delighted to know that the Cricut Foil Transfer Tool works on ALL of the machines in the Cricut Explore family and Maker lines! Even if you have an older Explore machine, you can get in on the glitz and glam of this new tool!
We had the chance to test out and play with the Cricut Foil Transfer Tool for a few weeks before it was announced to the public, and we’re sharing all of the inside scoop with you today!
So, what IS the Cricut Foil Transfer System? What does it do? How does it work? And how does it compare to other foil tools? We’re covering all of that here today for you, plus, we’re showing you some inspiration for fun projects that you can make with it!
What is the Cricut Foil Transfer System?
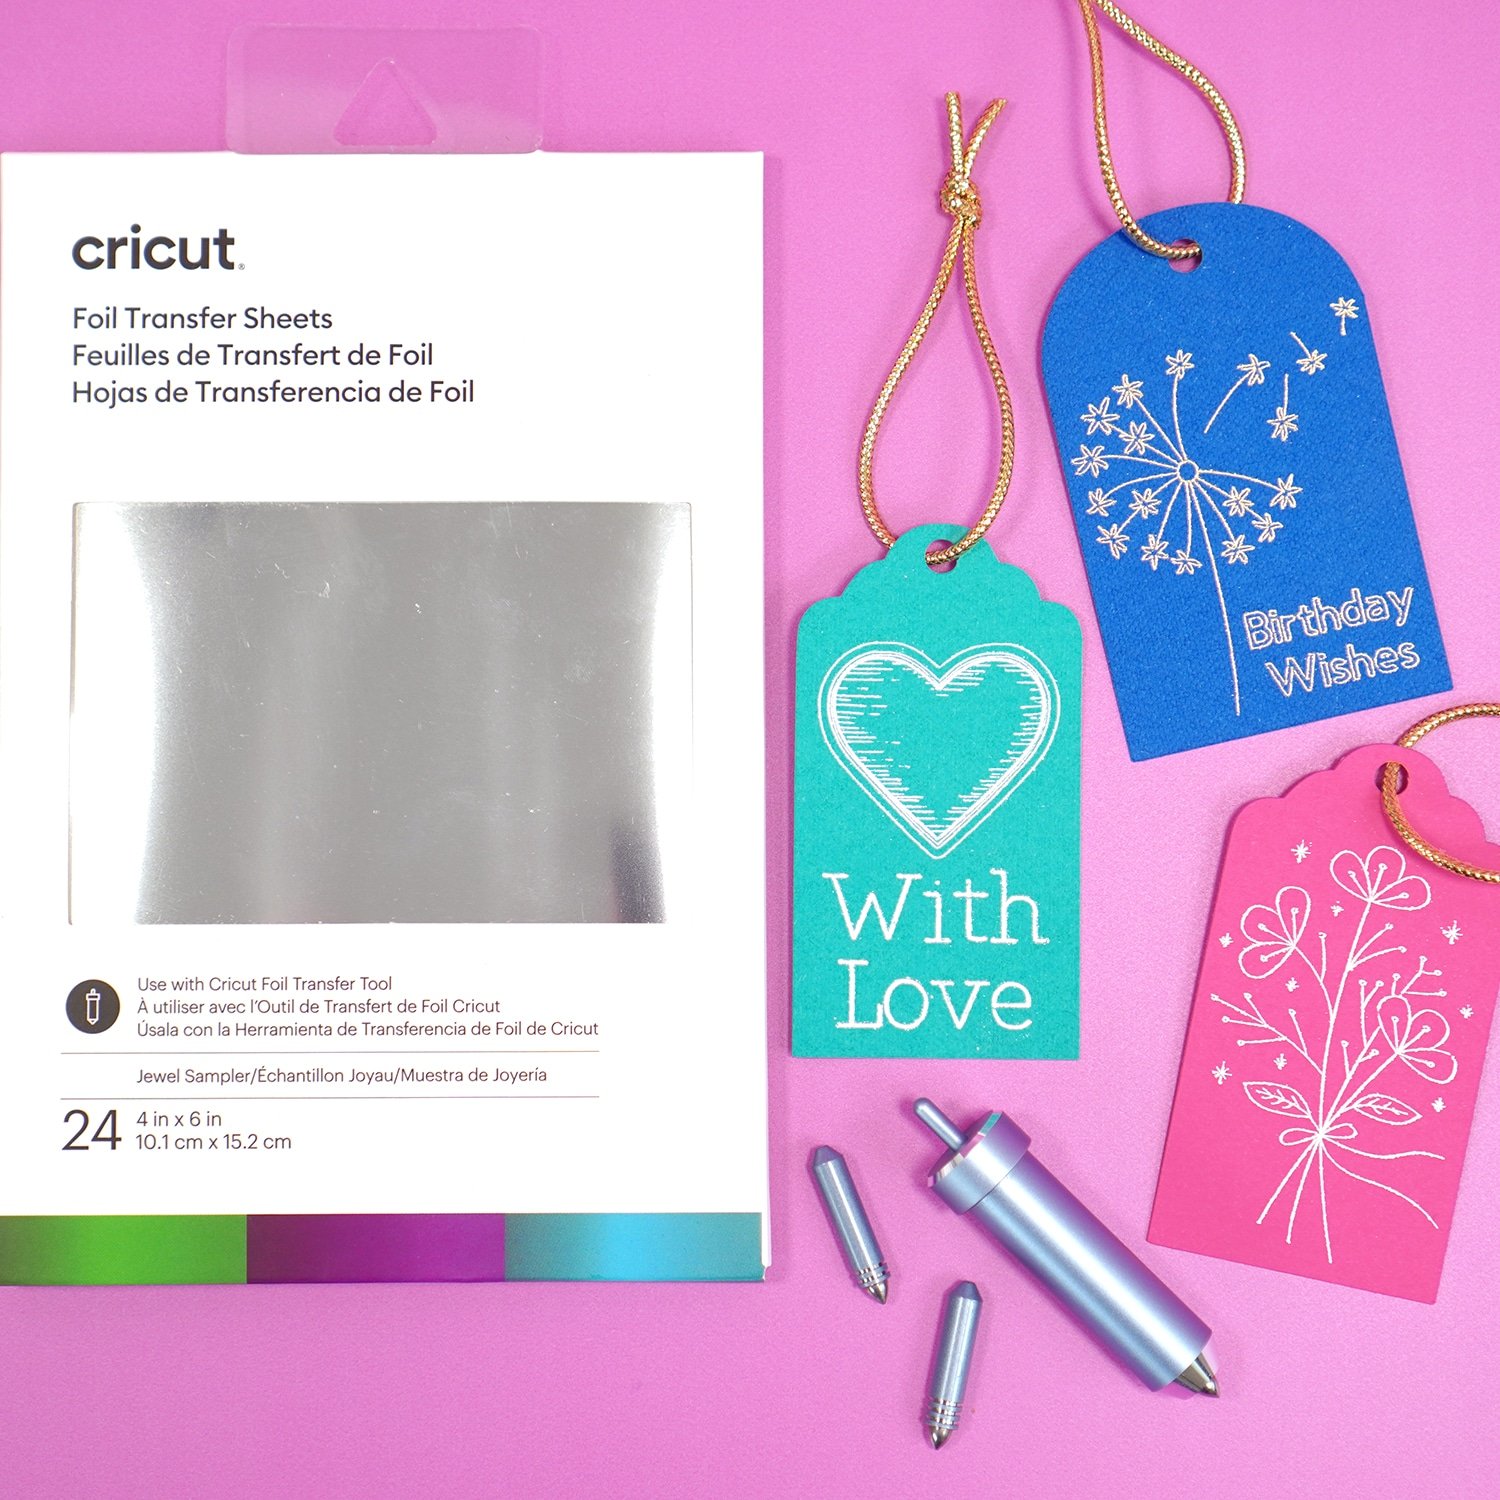
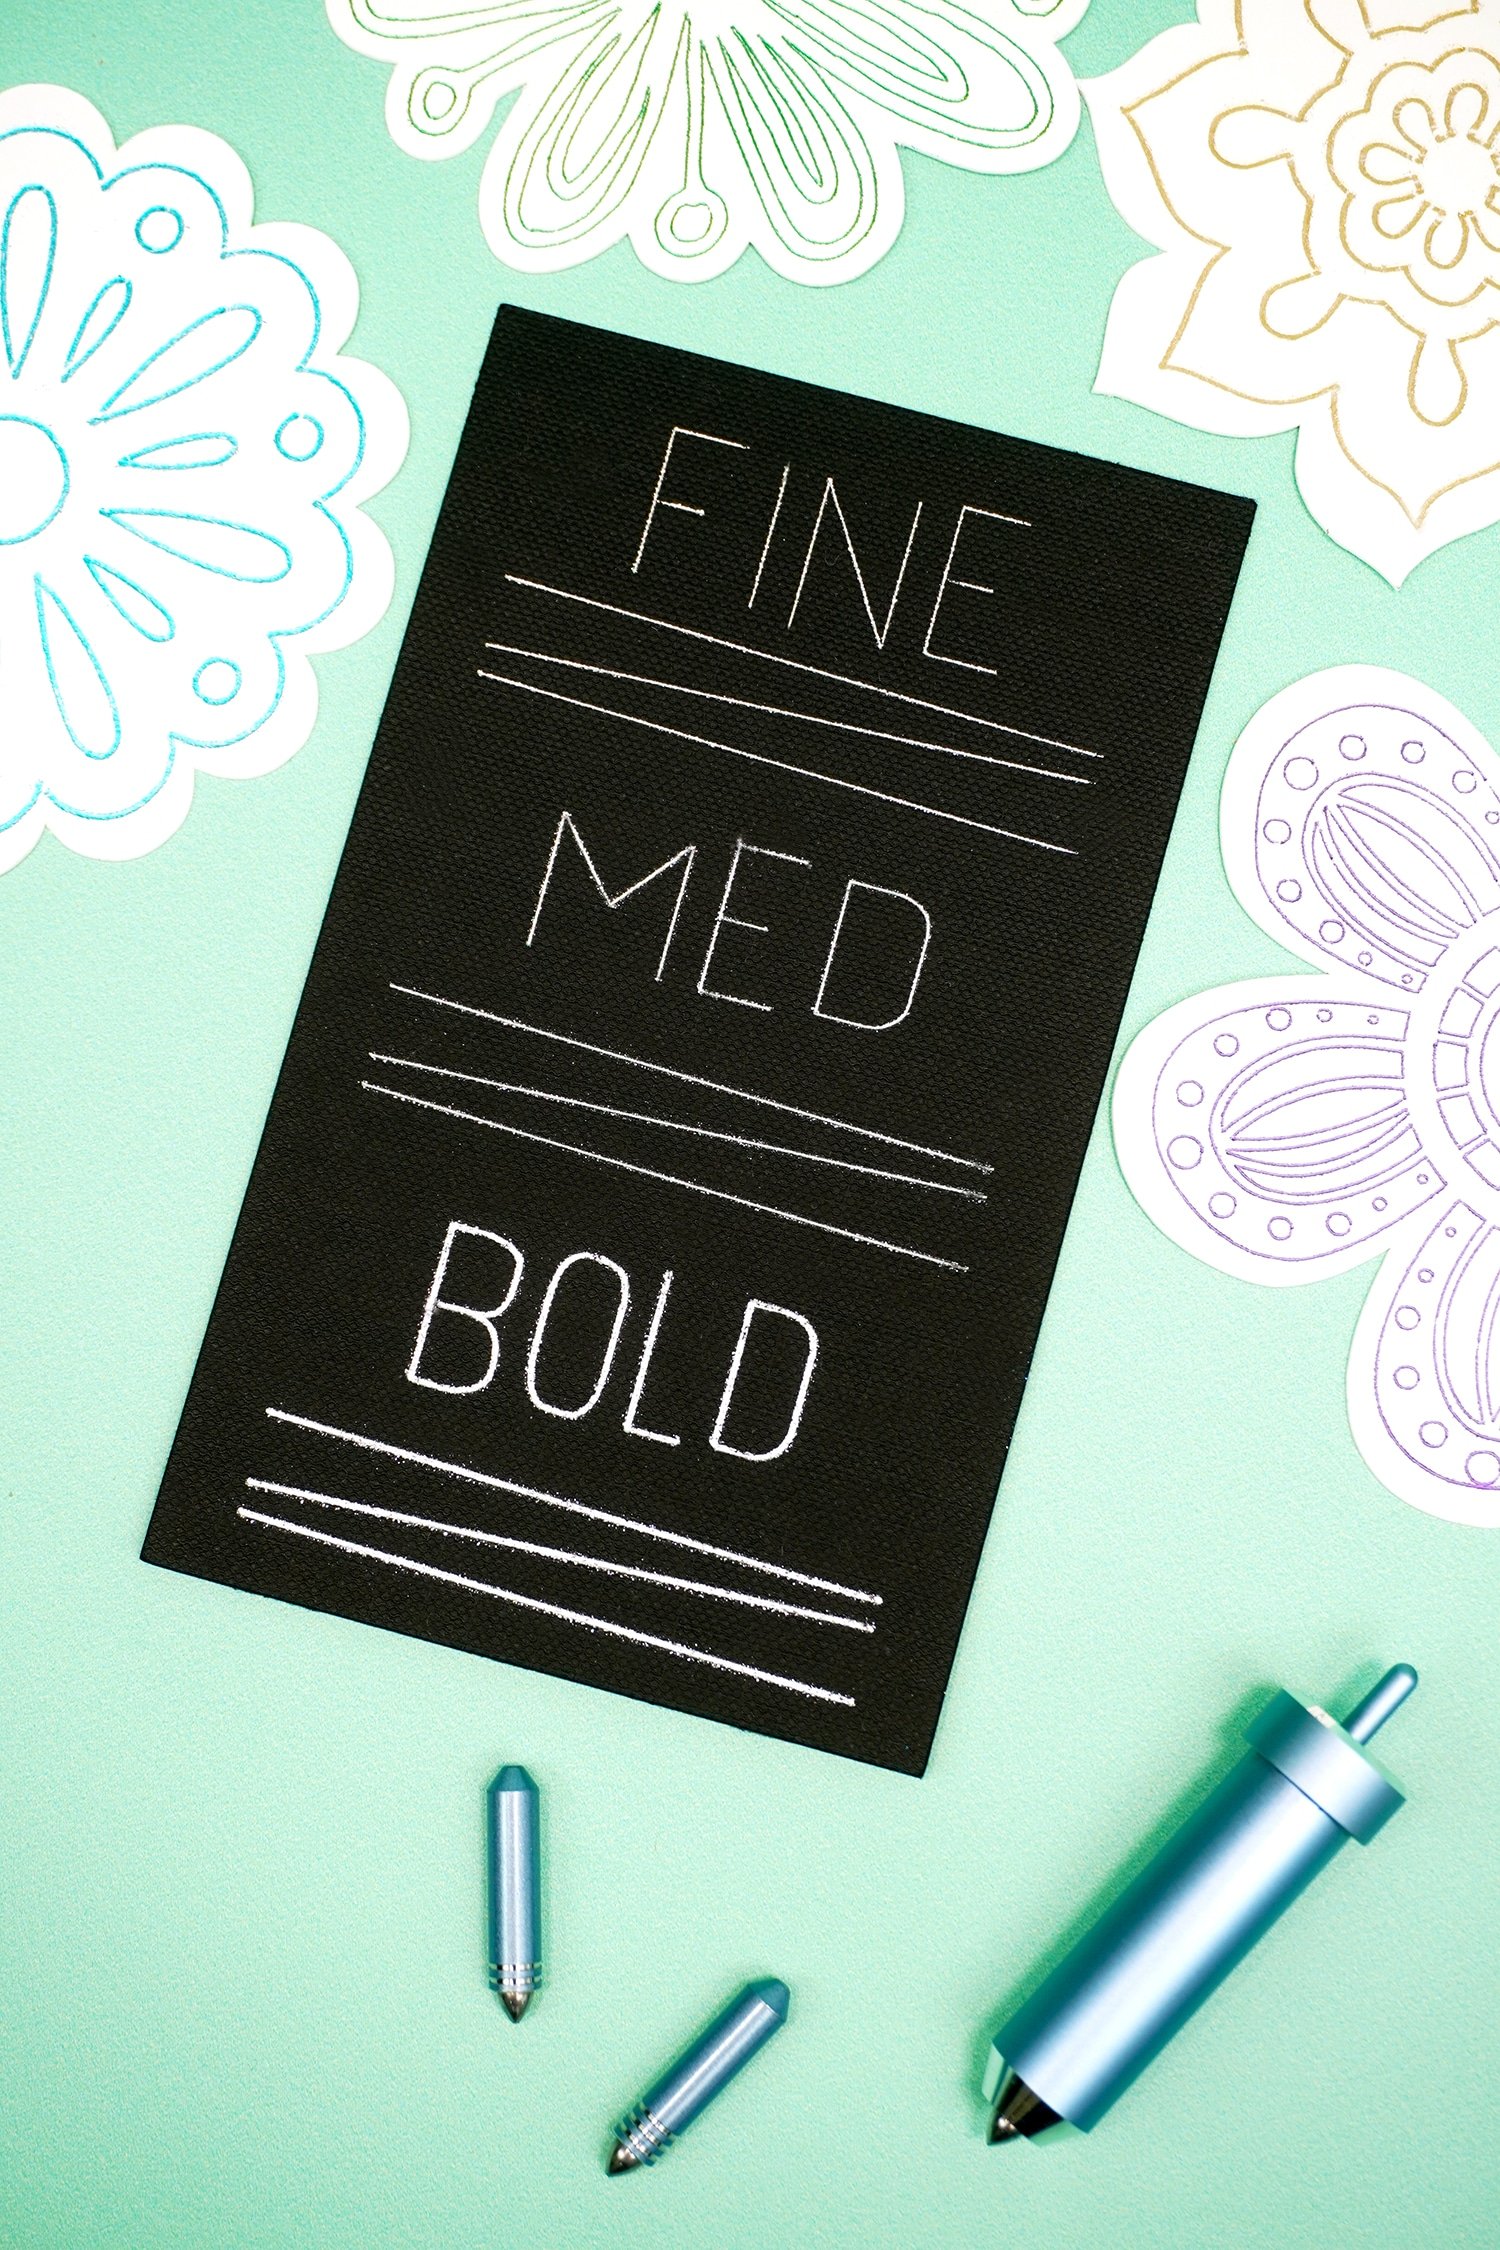
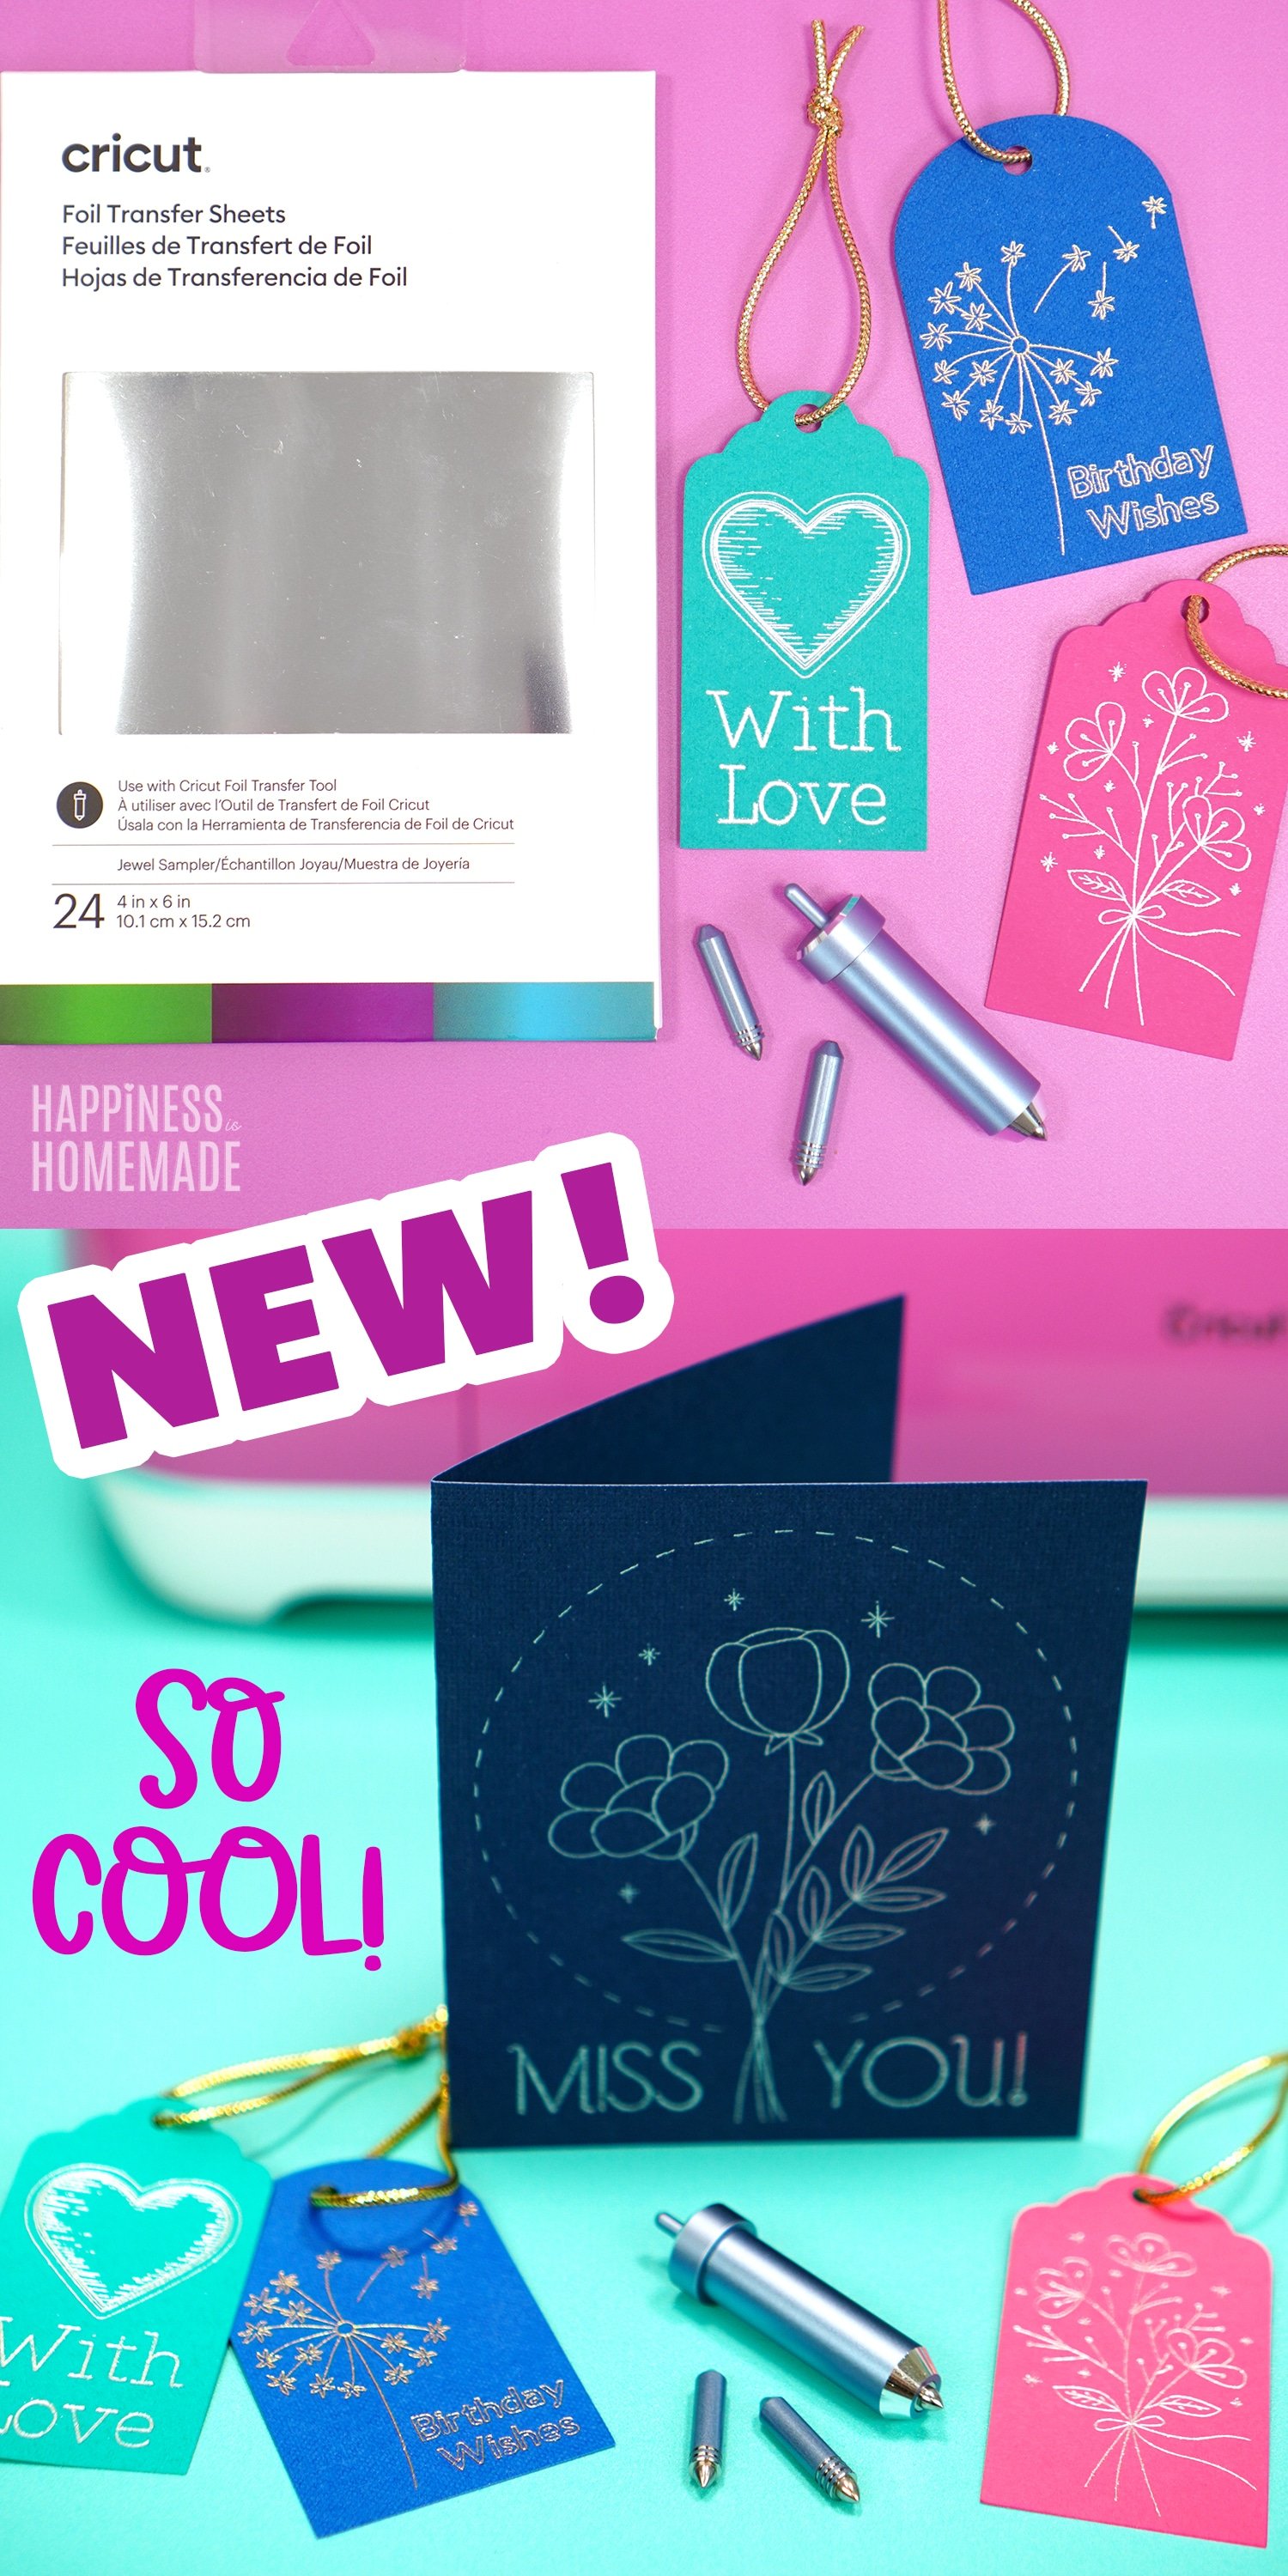
The Cricut Foil Transfer System is made up of two main components – the Cricut Foil Transfer Tool and Foil Transfer Sheets which are used to add shiny foil accents to your projects. The Cricut Foil Transfer Tool has three interchangeable tips (fine, medium, and bold) that deliver a variety of line weights on a wide assortment of materials.
The Cricut Foil Transfer Sheets are currently available in two sizes – large 12×12 sheets of gold and silver and smaller 4×6 sheets of gold, silver, emerald, aqua, and purple (more colors will be available in both sizes soon!). The Foil Transfer Tool uses a unique pressure system to activate the foil and transfer it to your crafting material.
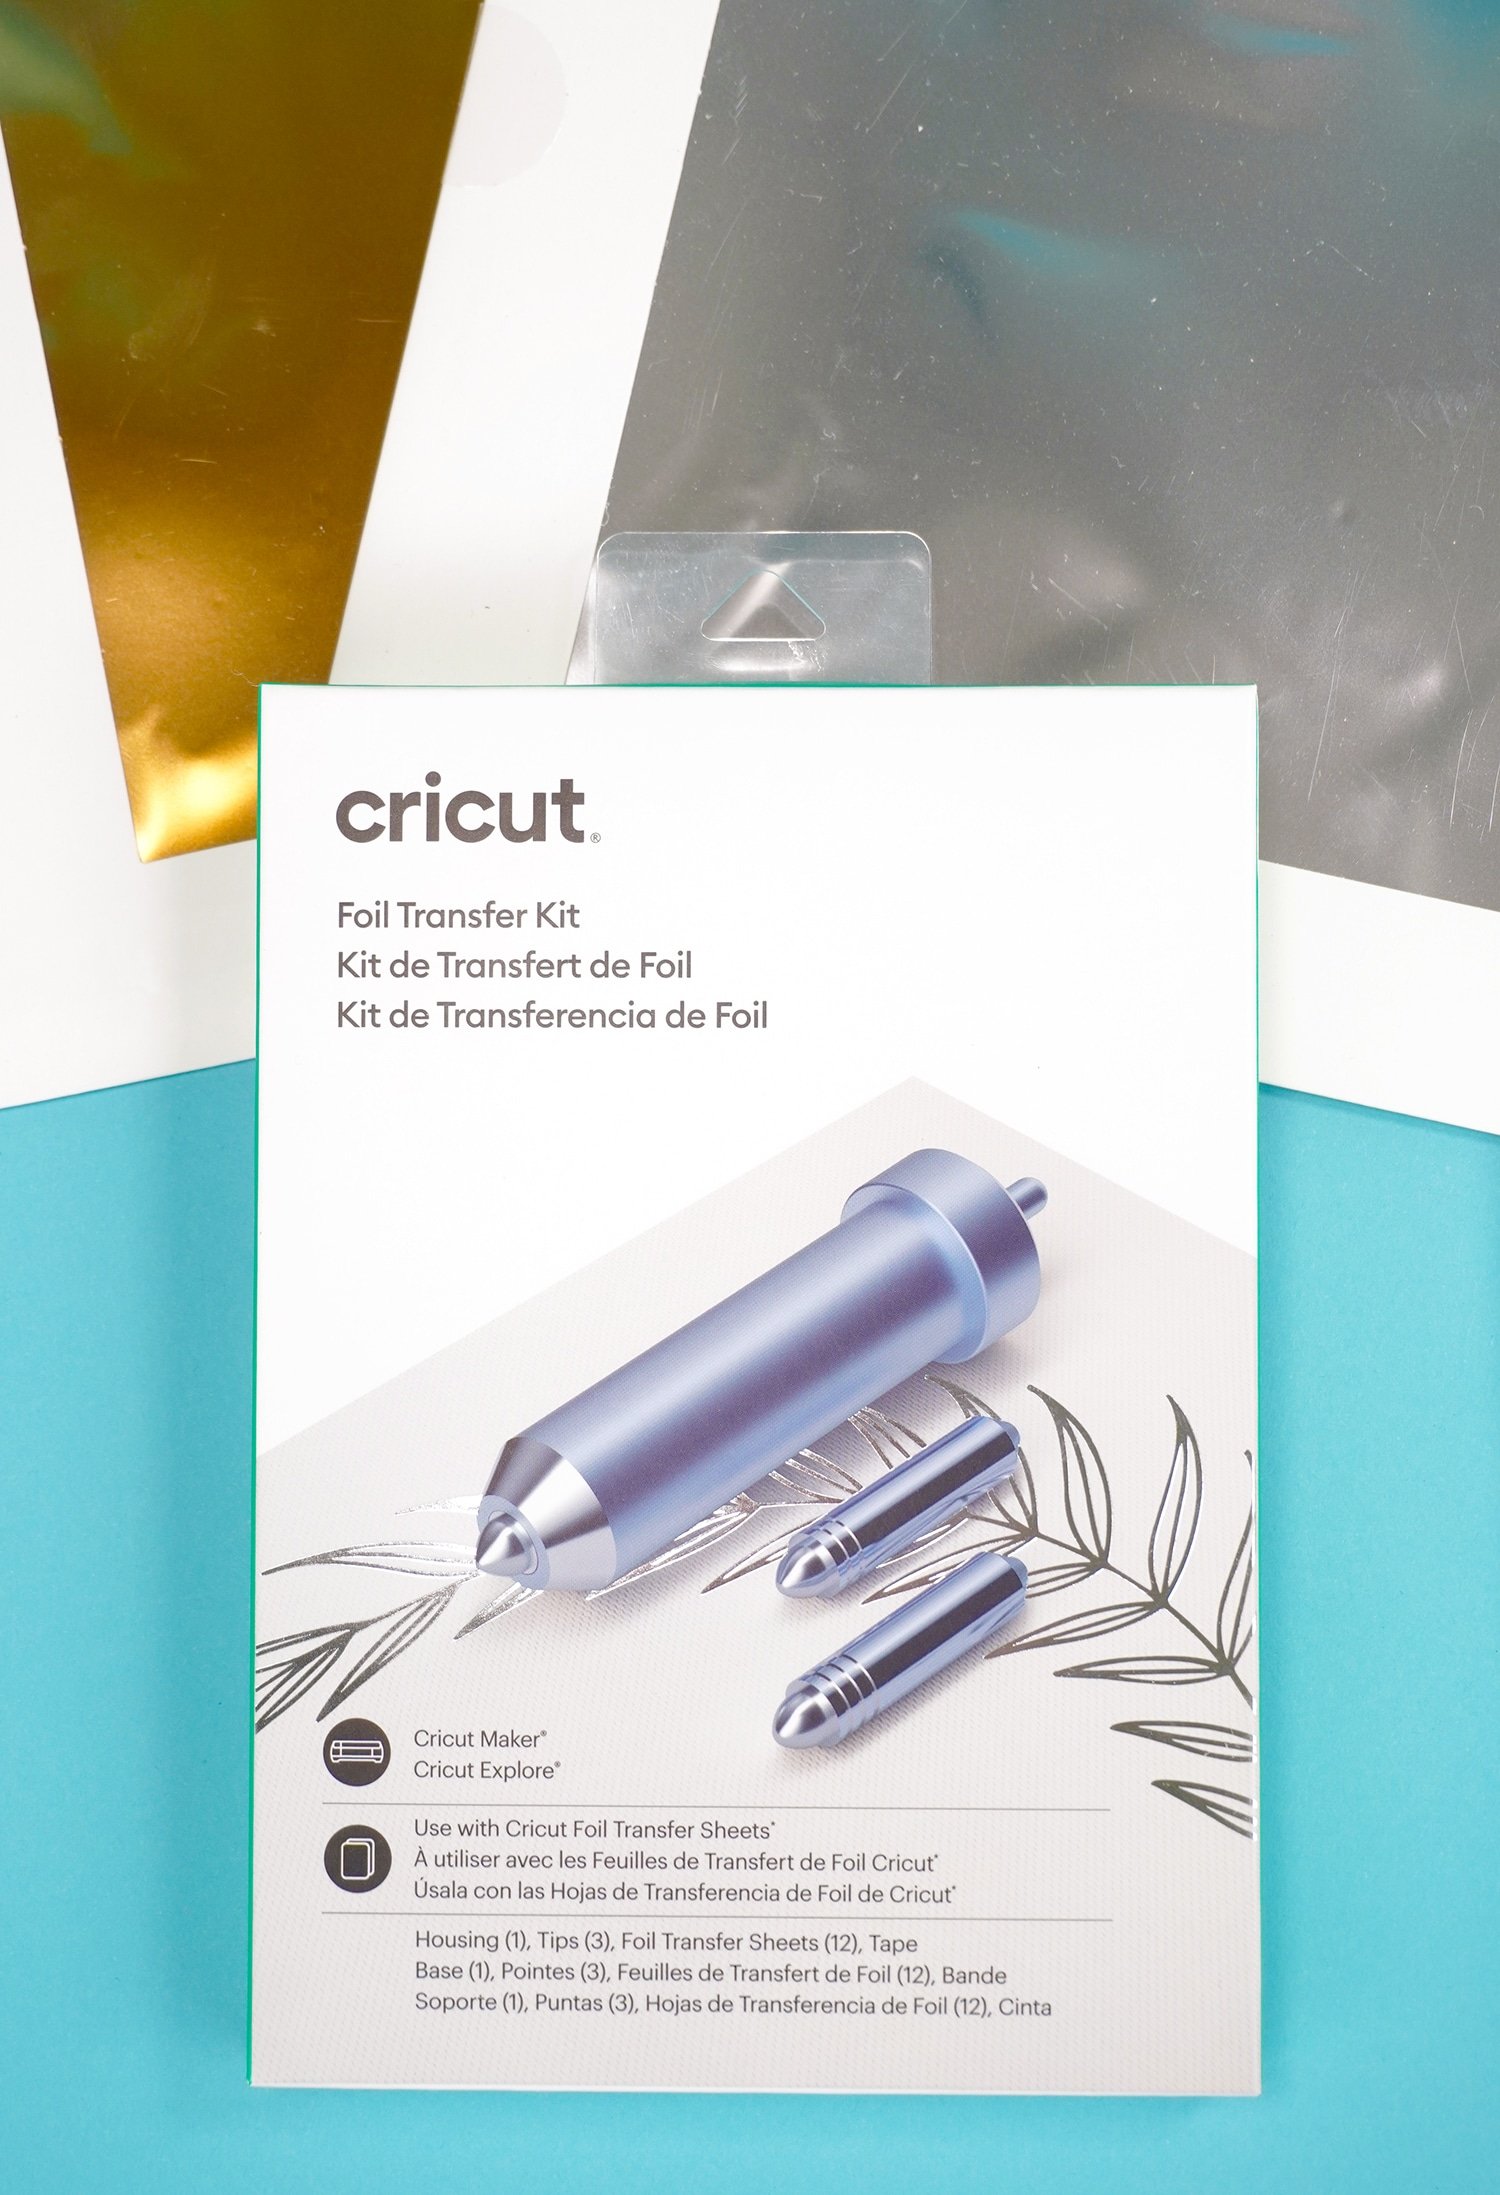
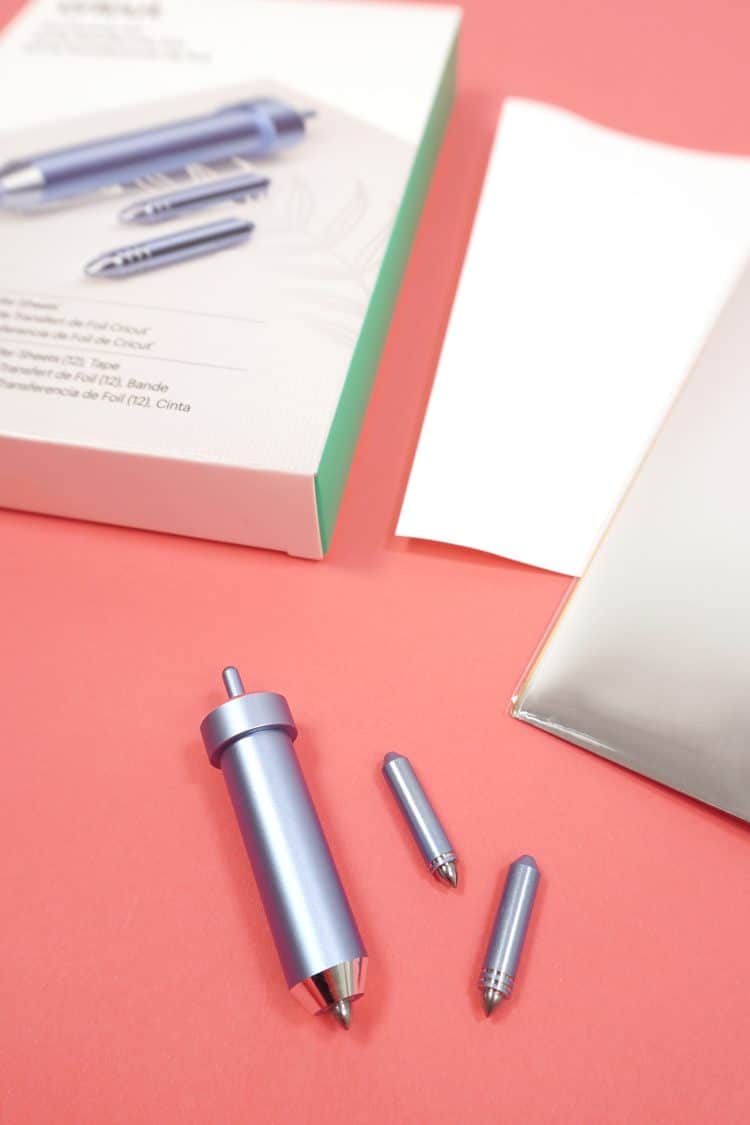
Inside the Cricut Foil Transfer Kit, you’ll find the Cricut Foil Transfer Tool with three assorted tips, twelve 4×6 sheets of foil (colors may vary), and strips of specially formulated tape that are designed to hold the foil securely in place.
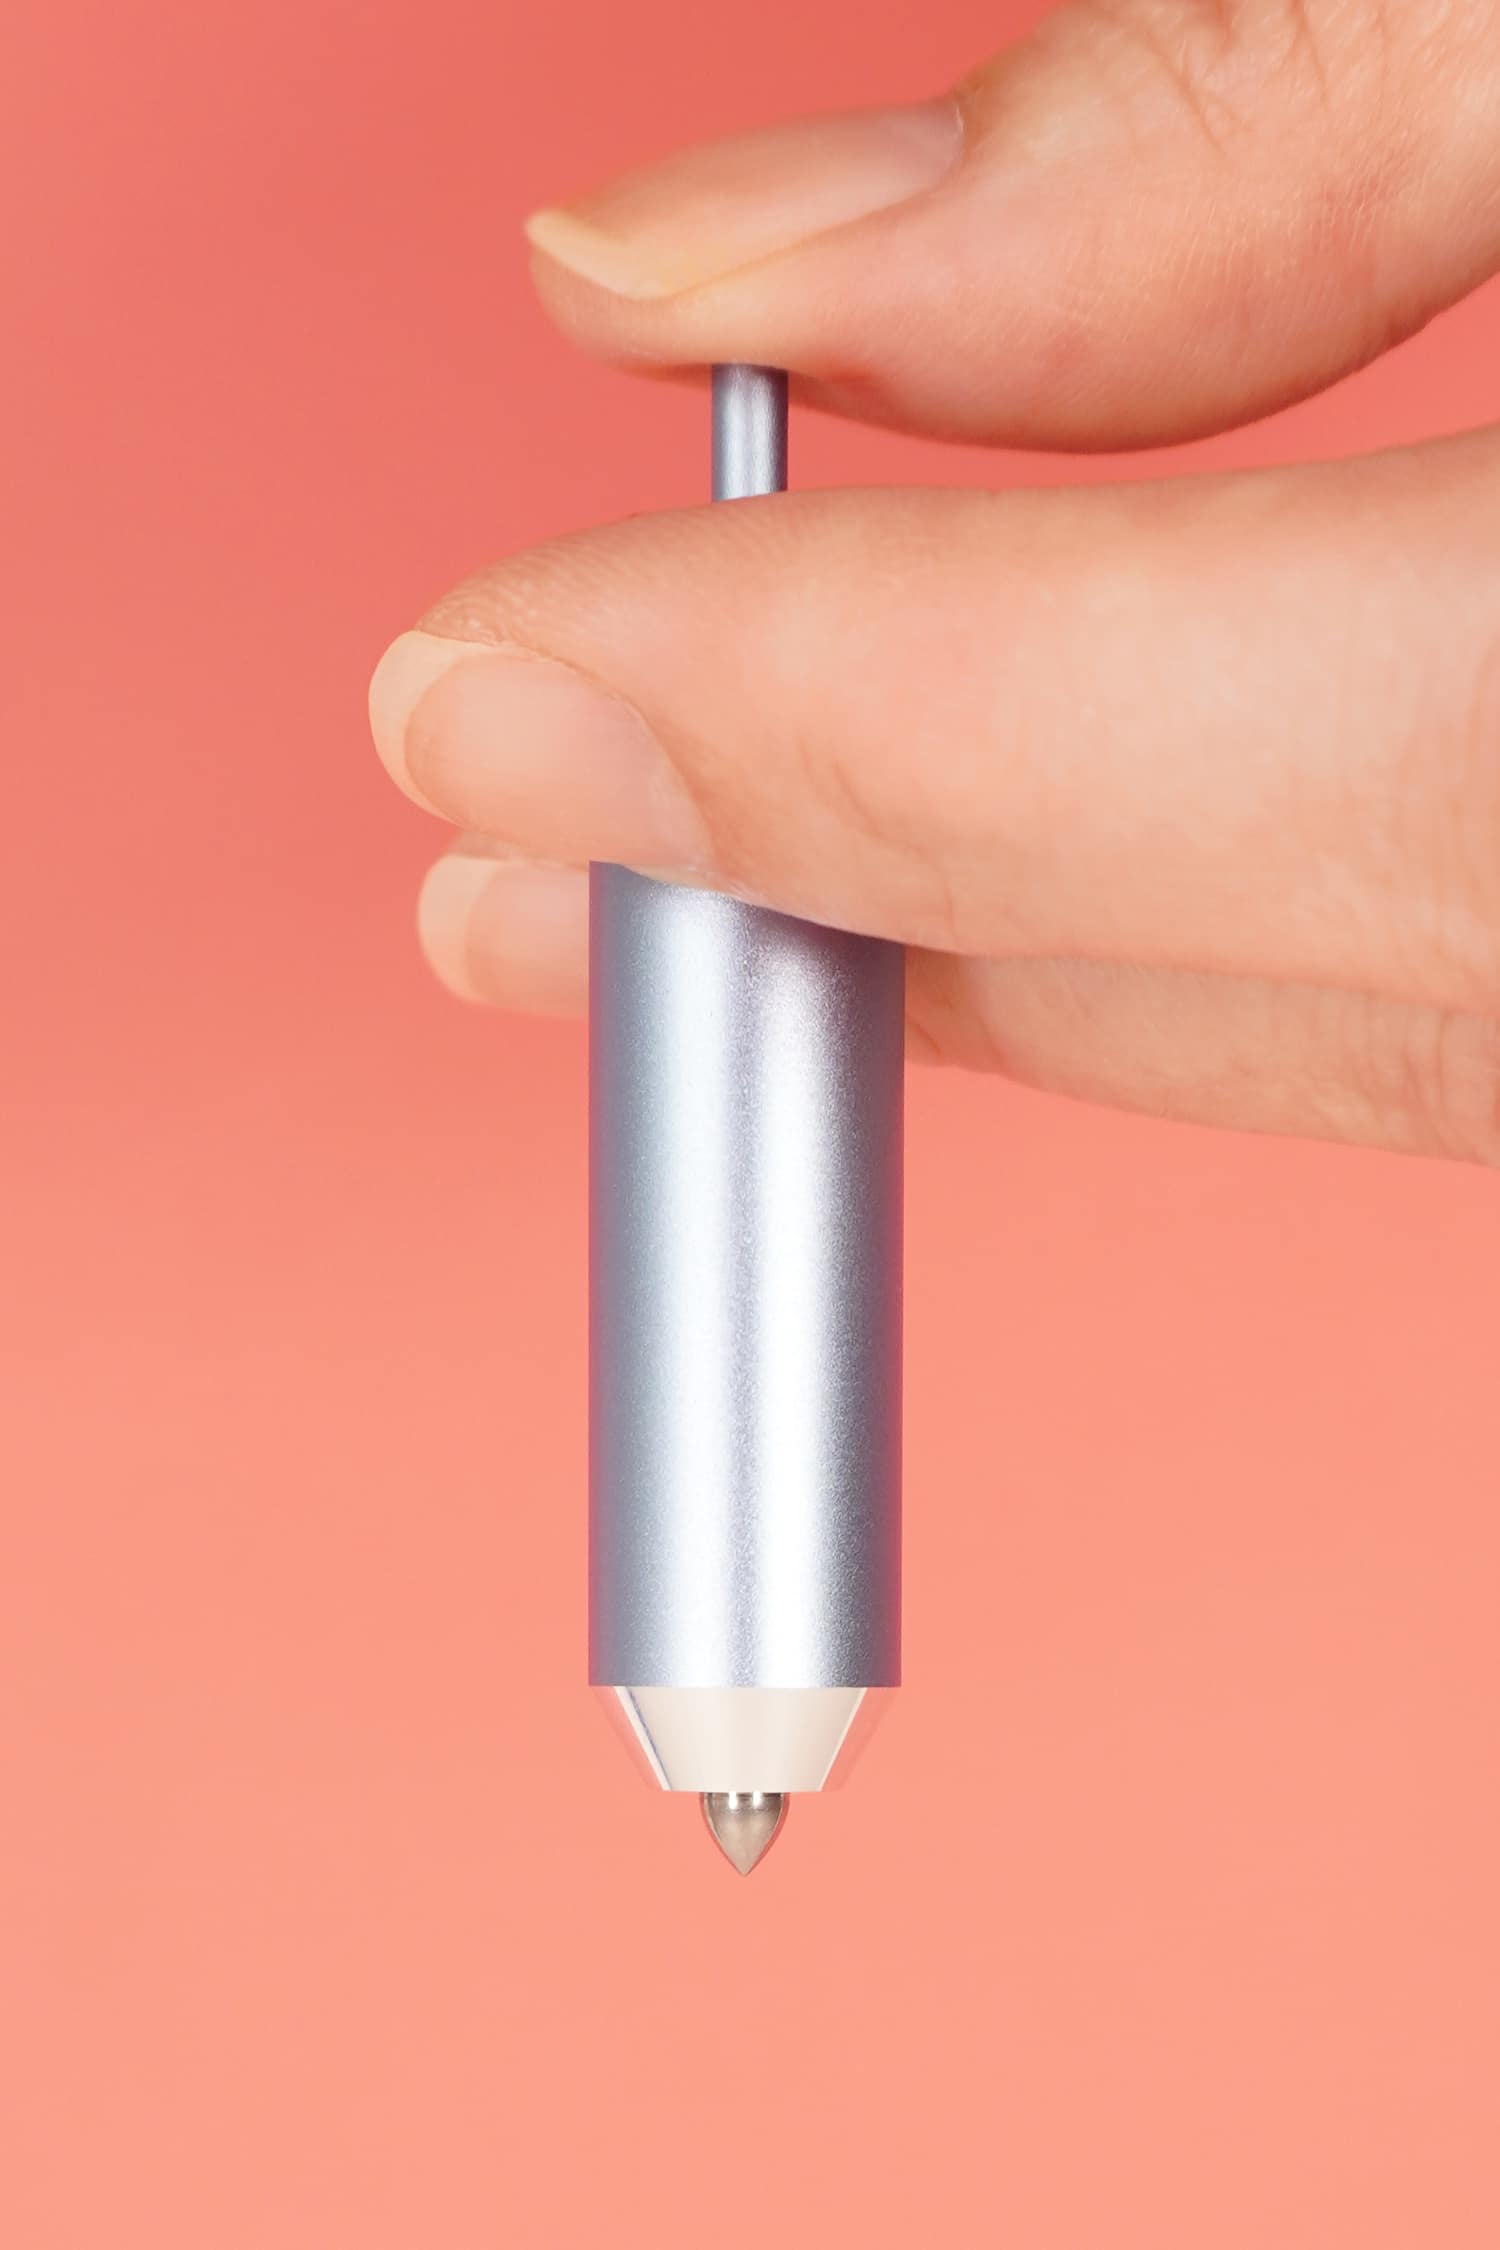
The Cricut Foil Transfer Tool has a plunger button on the top which allows you to quickly and easily swap out the different tips. Each tip attaches to the interior of the tool casing magnetically, so it’s simple to remove and replace as needed.
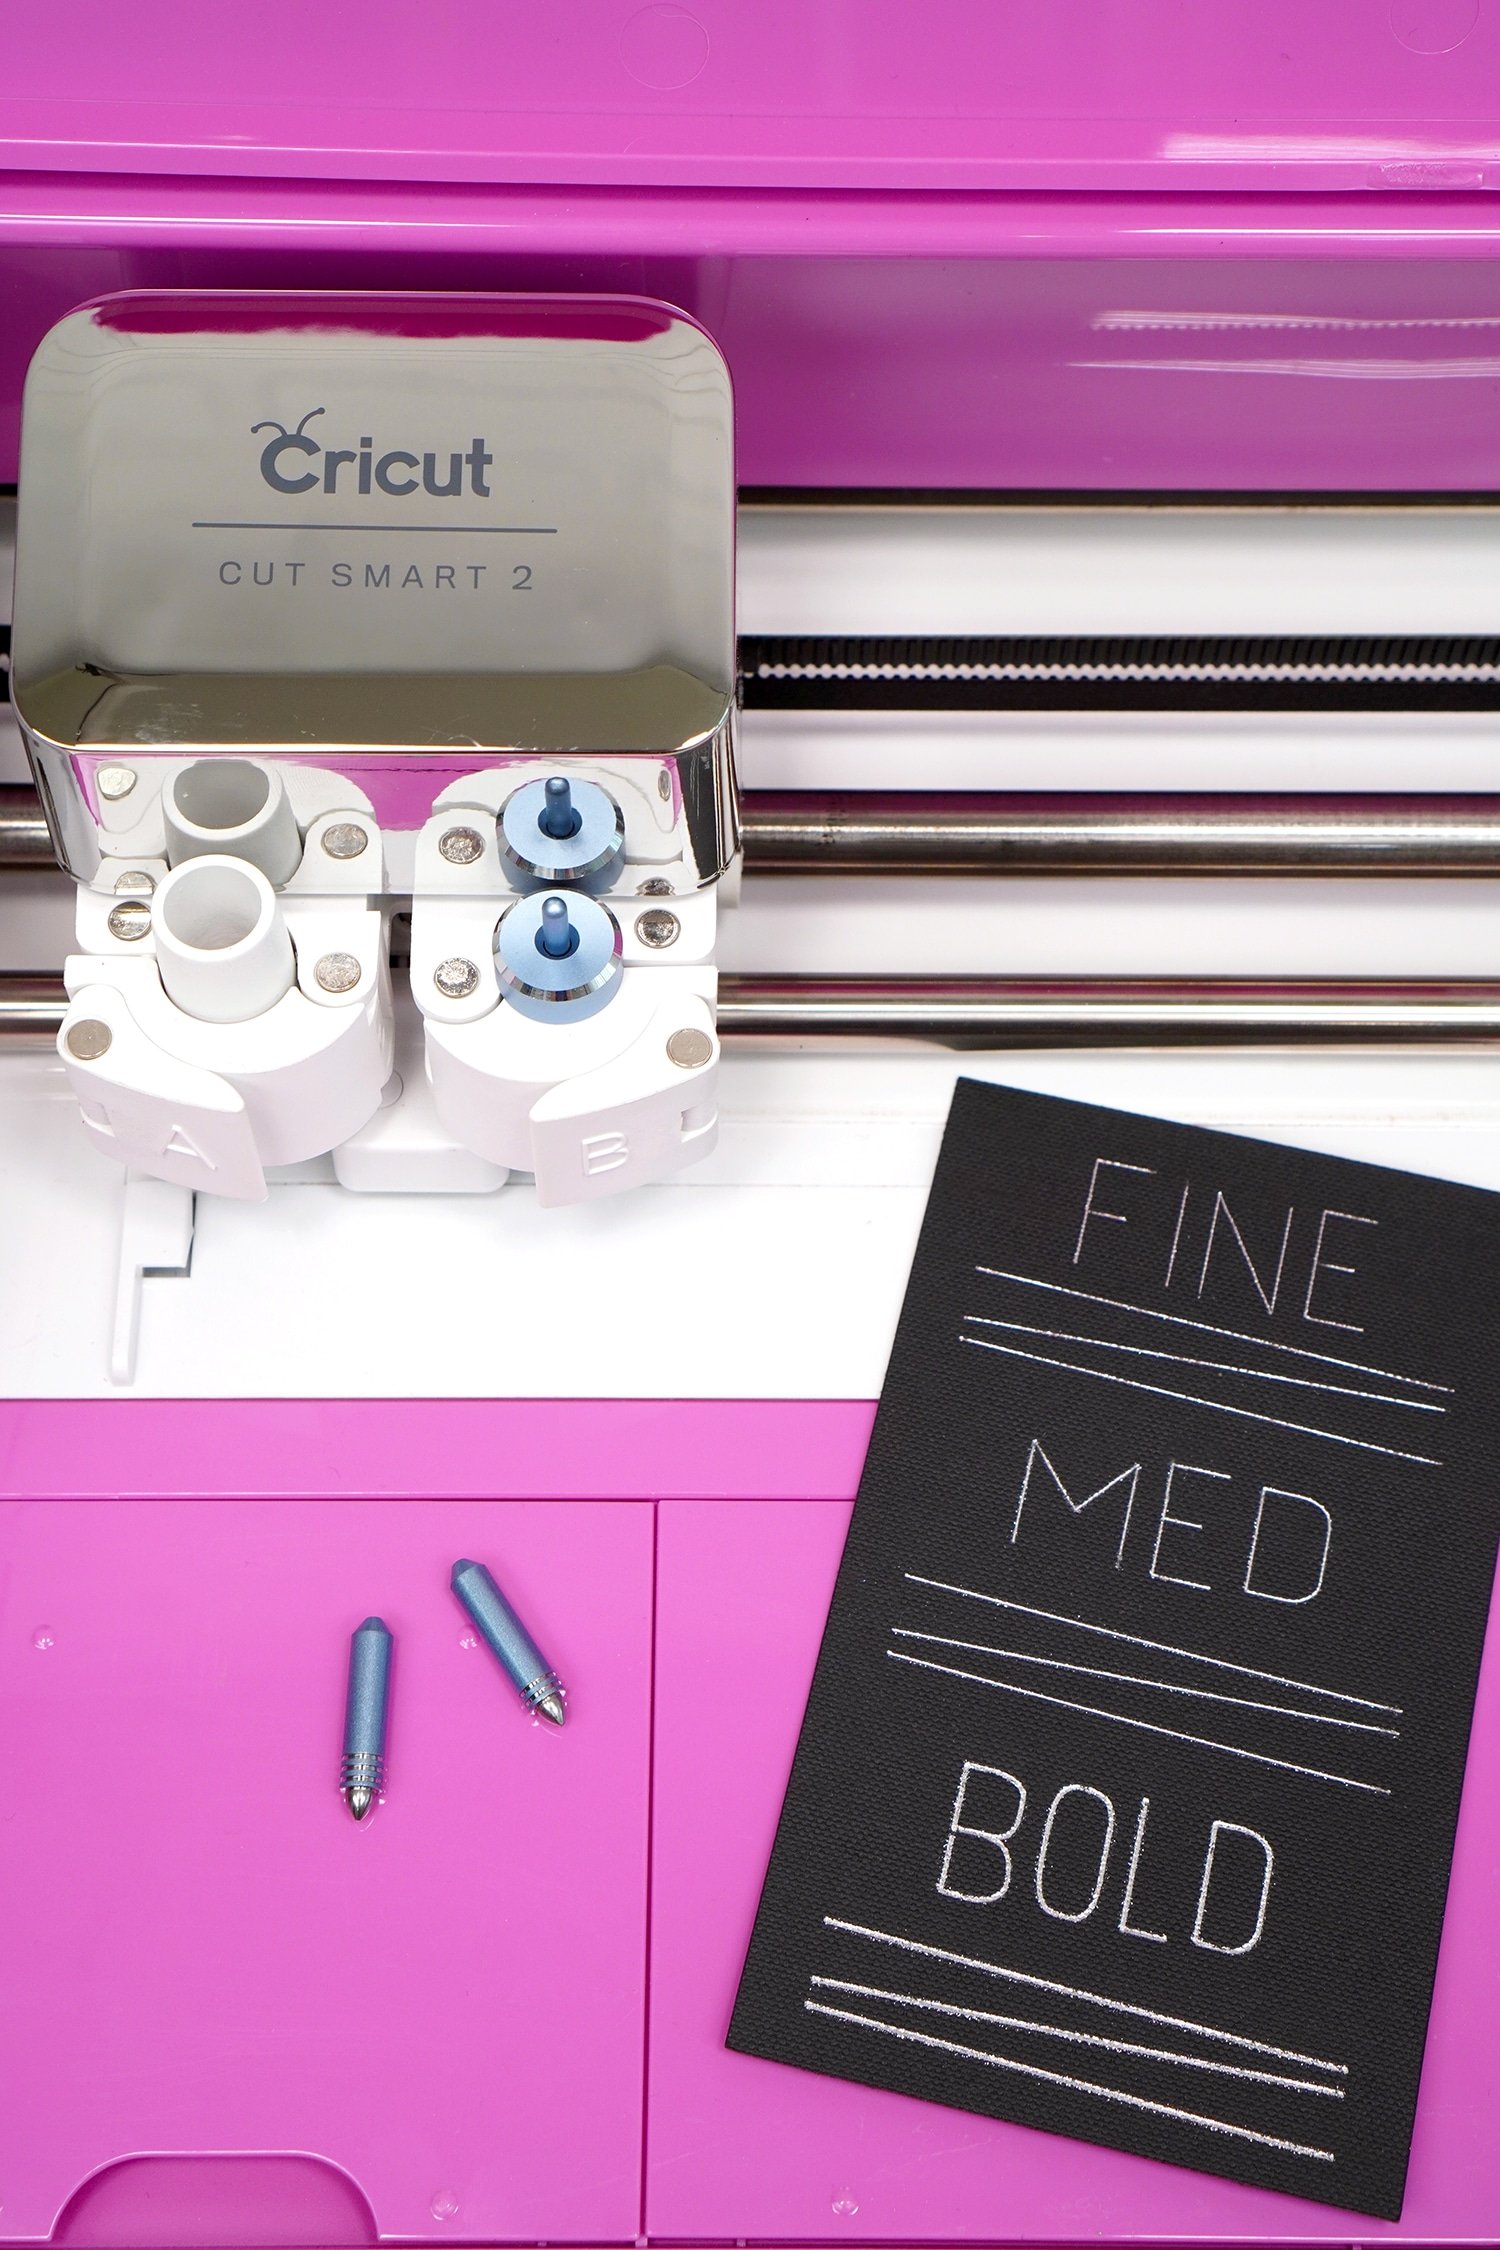
The three different tips are marked with lines near the bottom of the shaft to differentiate them – one line for fine point, two for medium point, and three for bold.
How to Use the Cricut Foil Transfer Tool
Using the Cricut Foil Transfer System is as easy as 1-2-3!
- Design your project in Cricut Design Space.
- Place the Cricut Foil Transfer Tool and appropriate tip into your Cricut machine.
- Adhere a Foil Transfer Sheet to your base material, click the button, and watch the machine perform its magic!
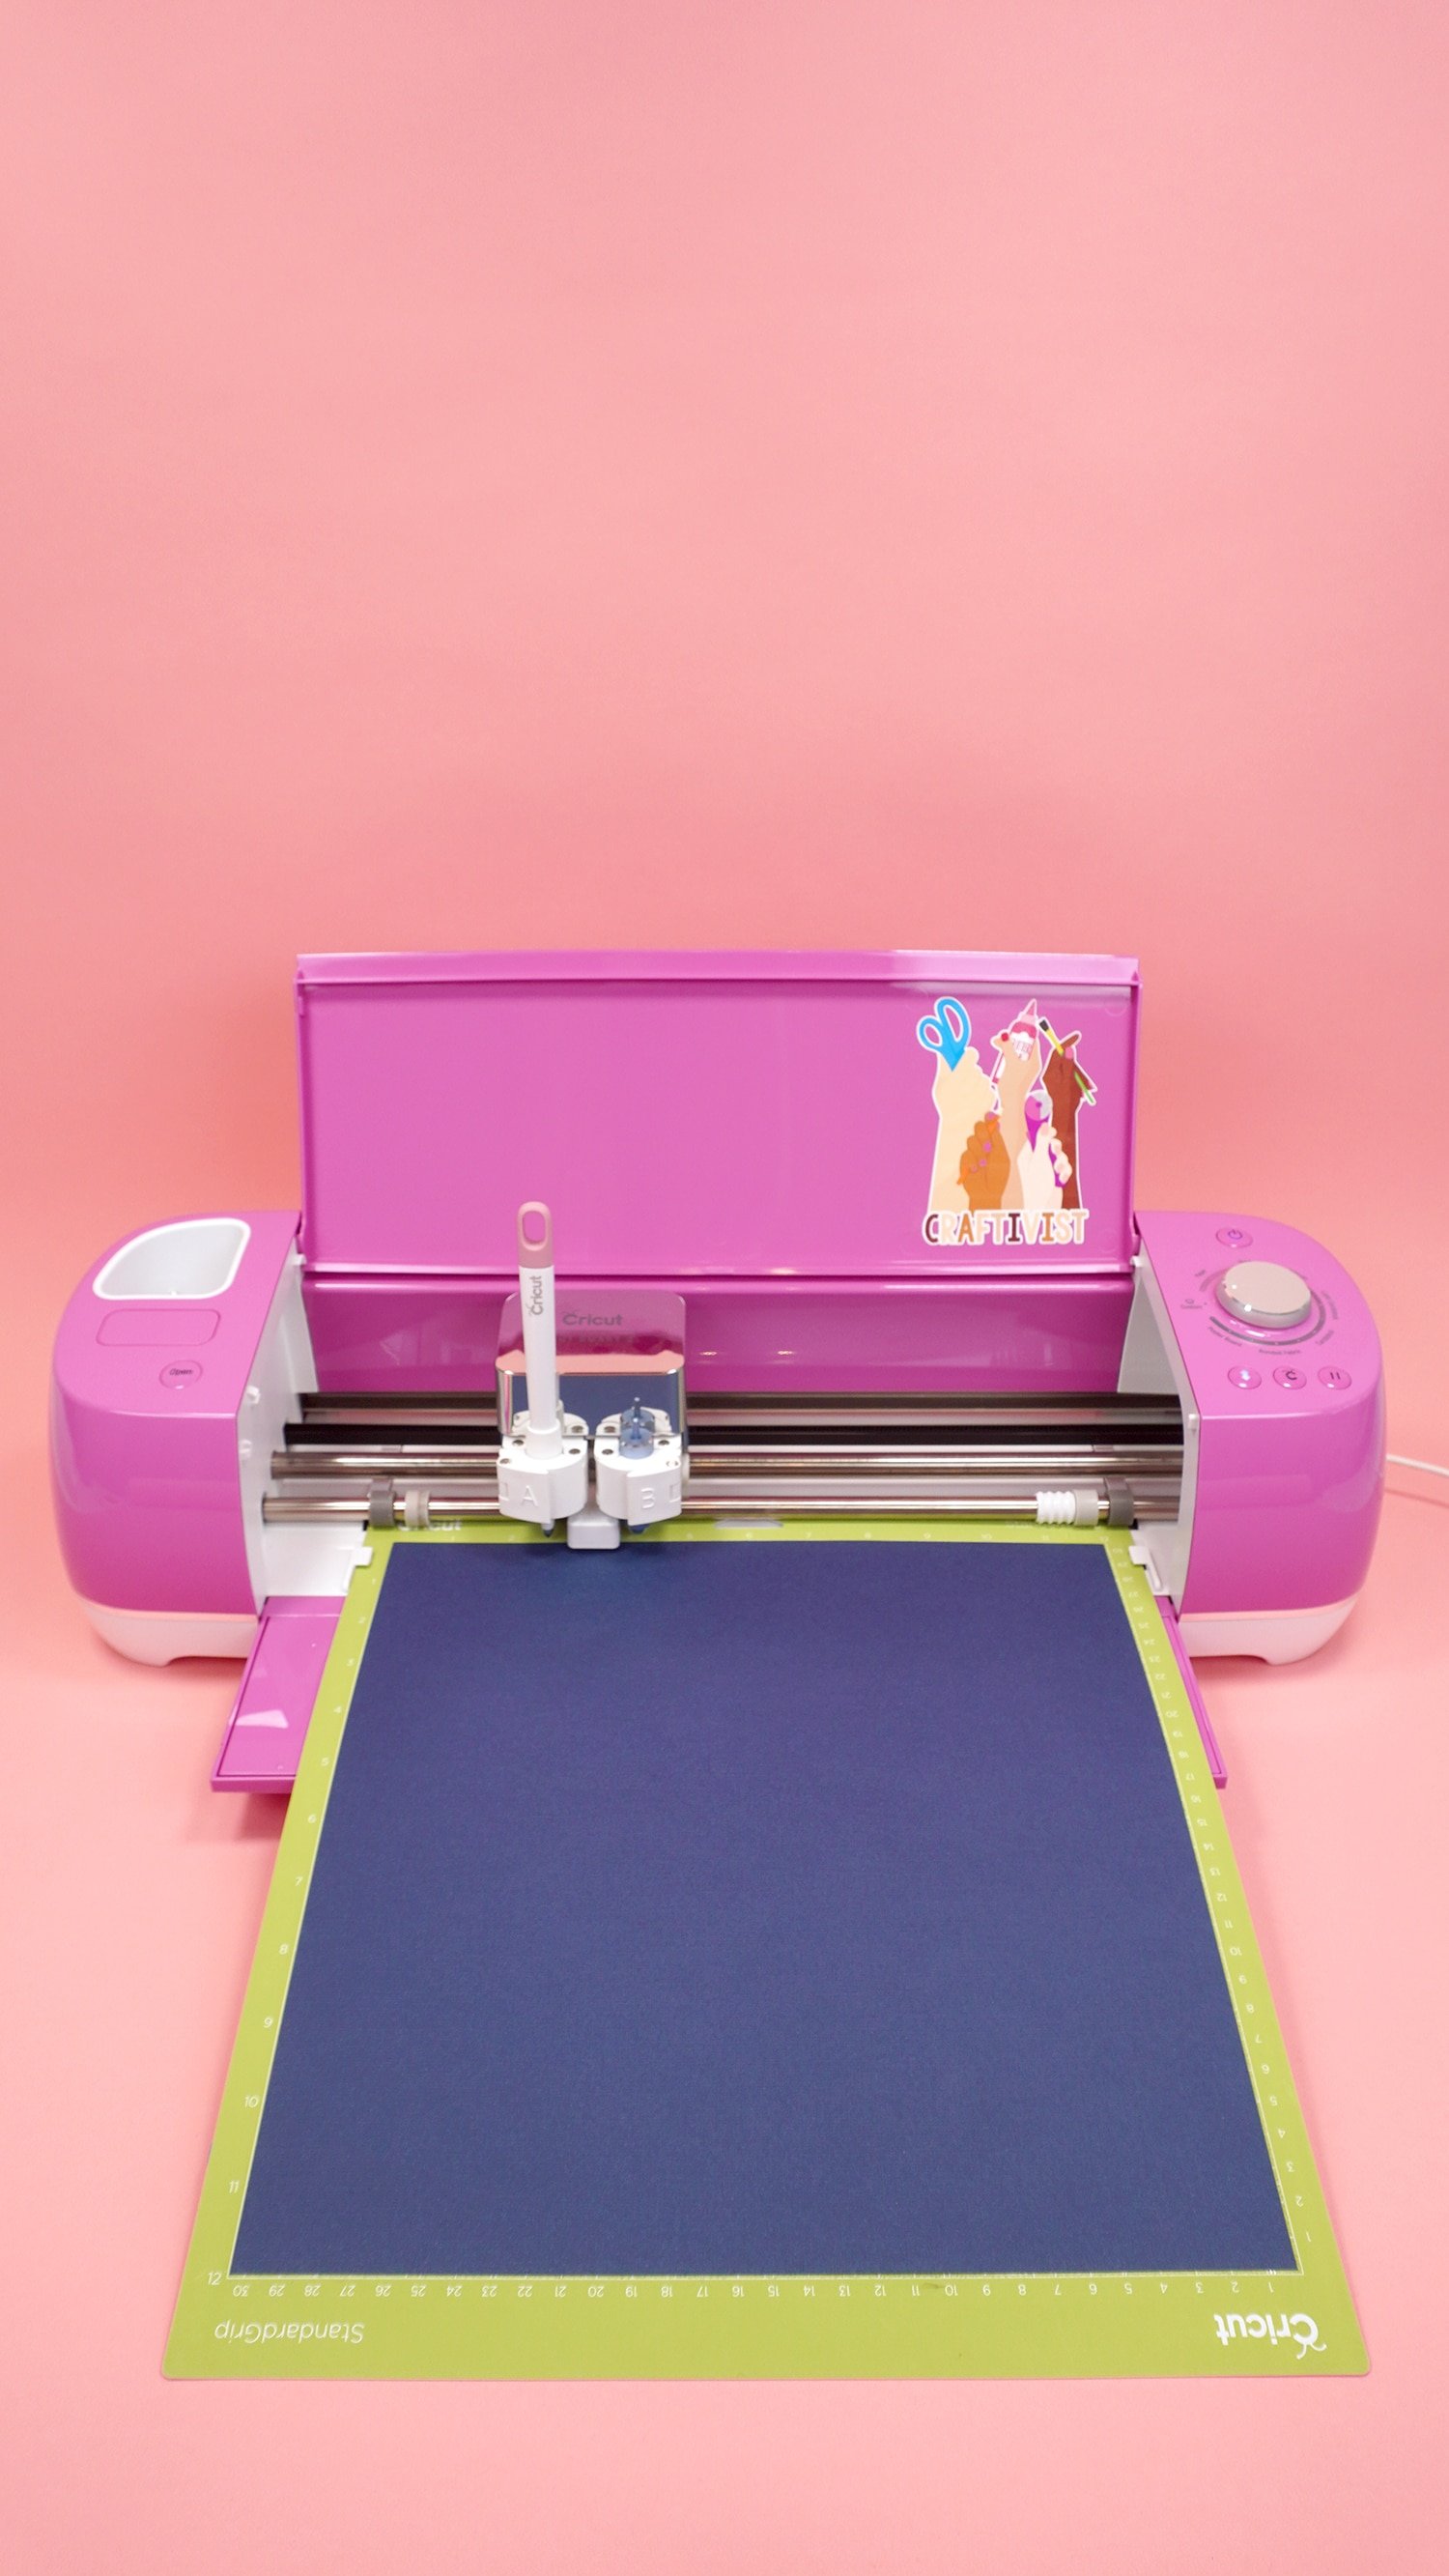
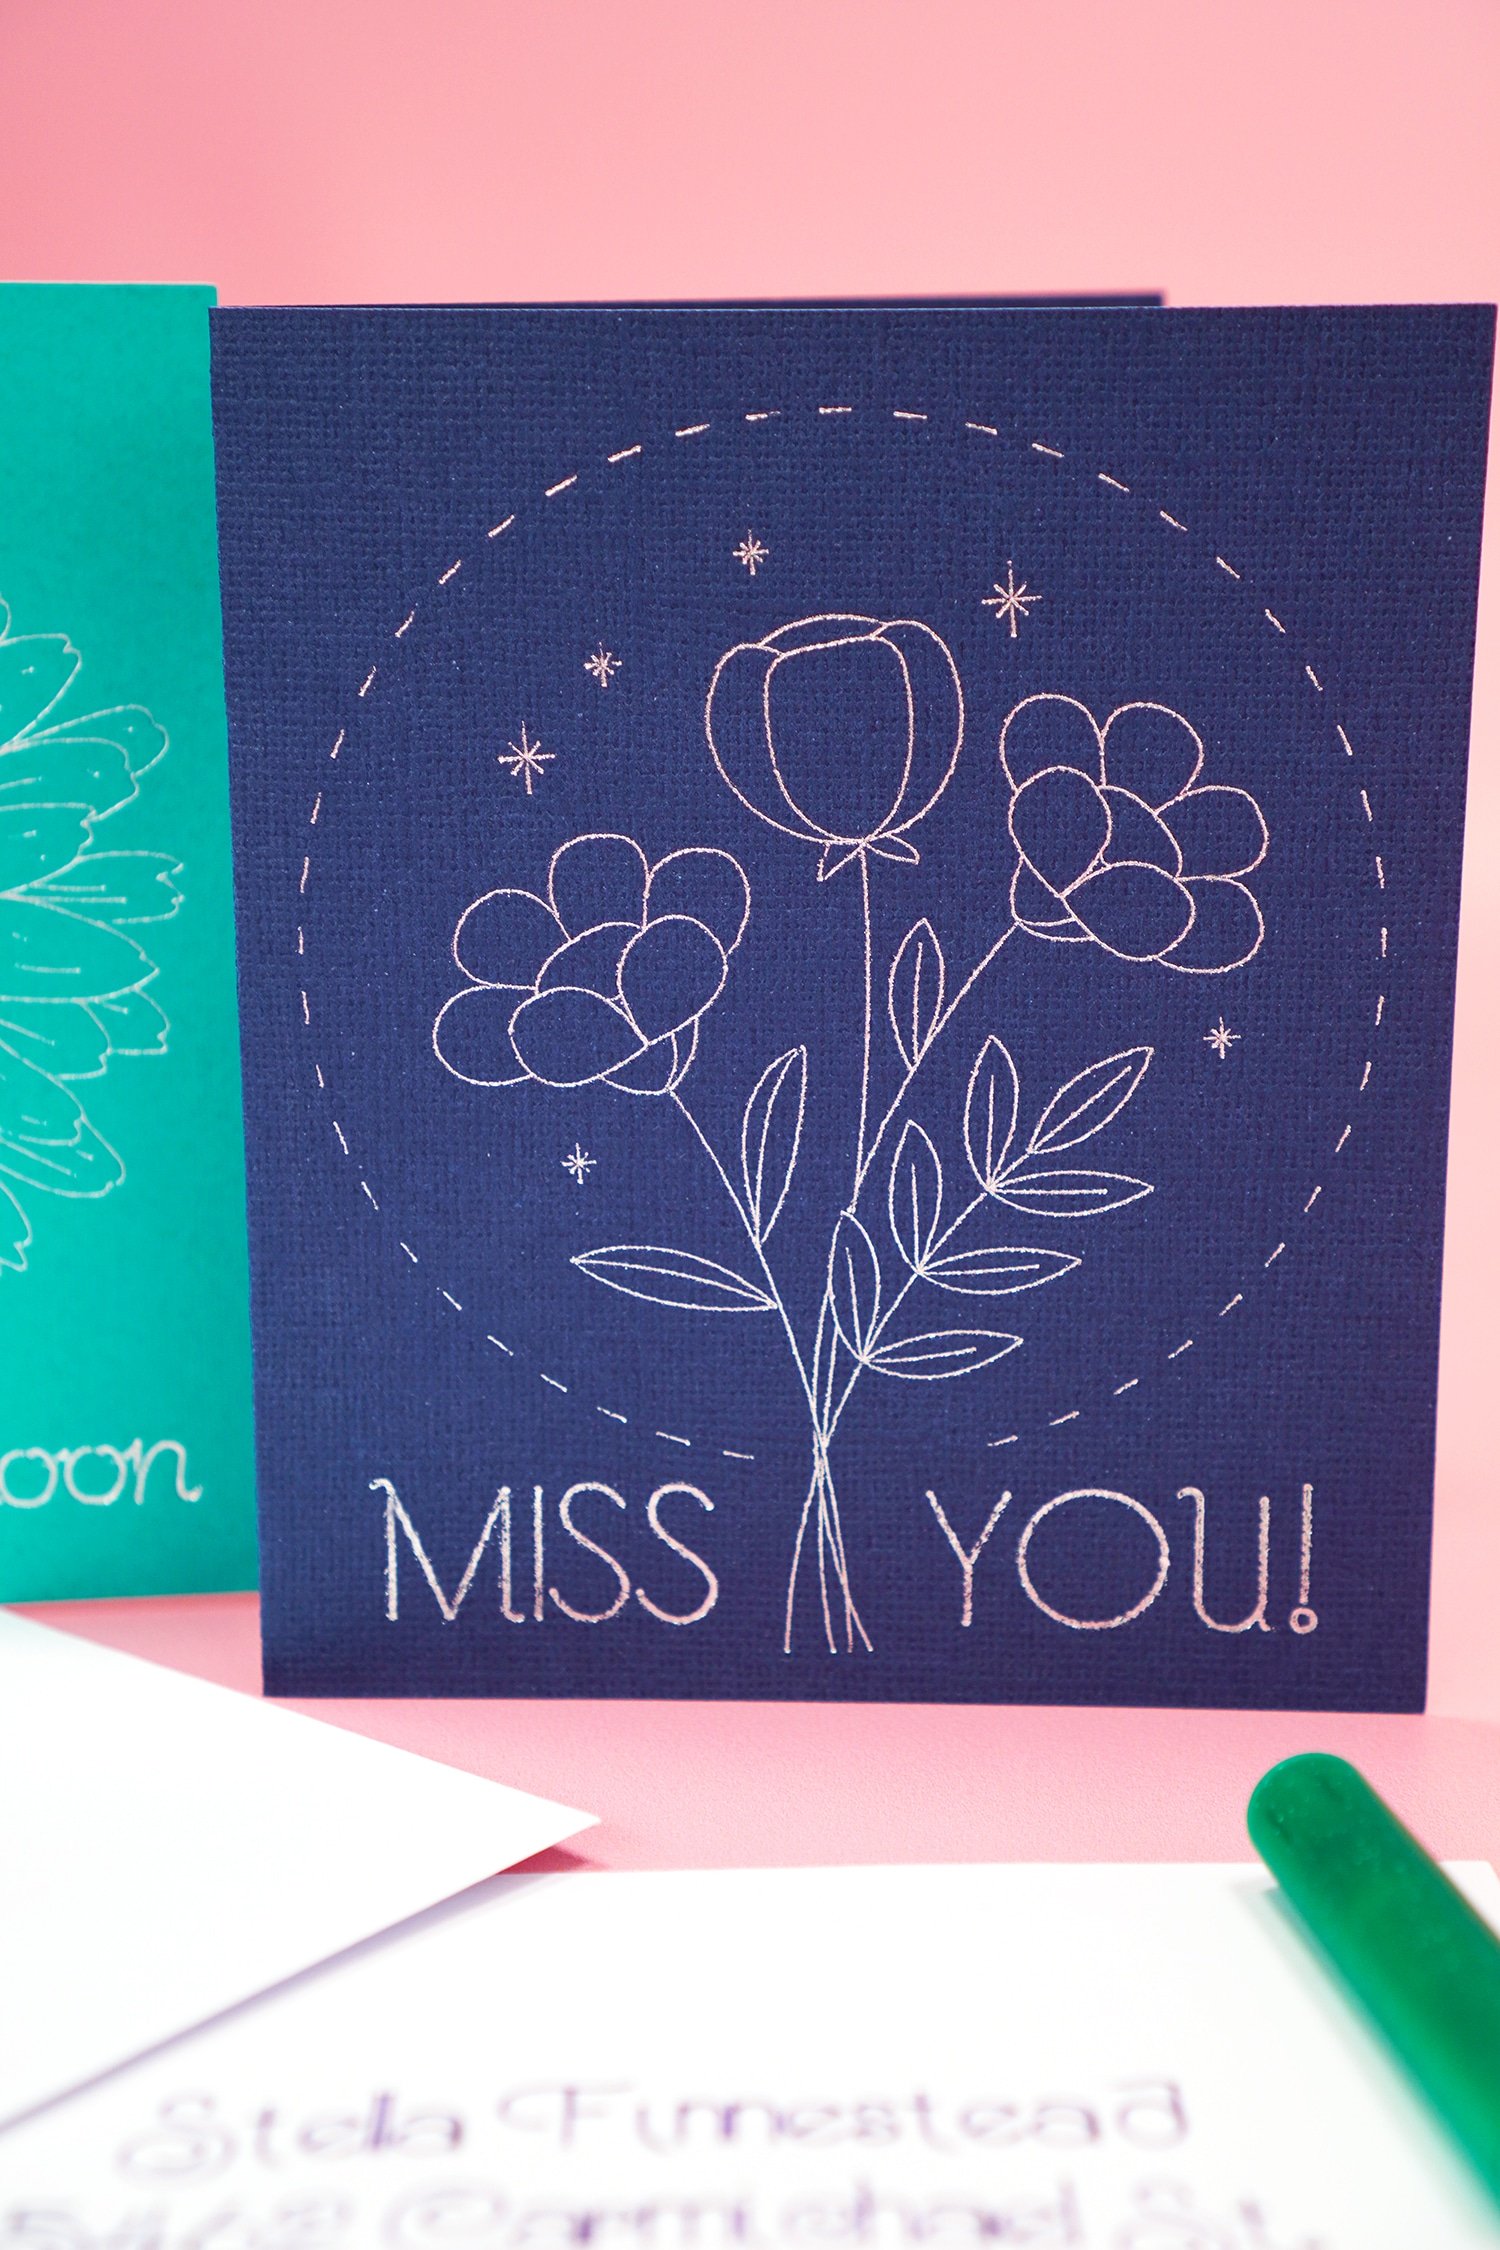
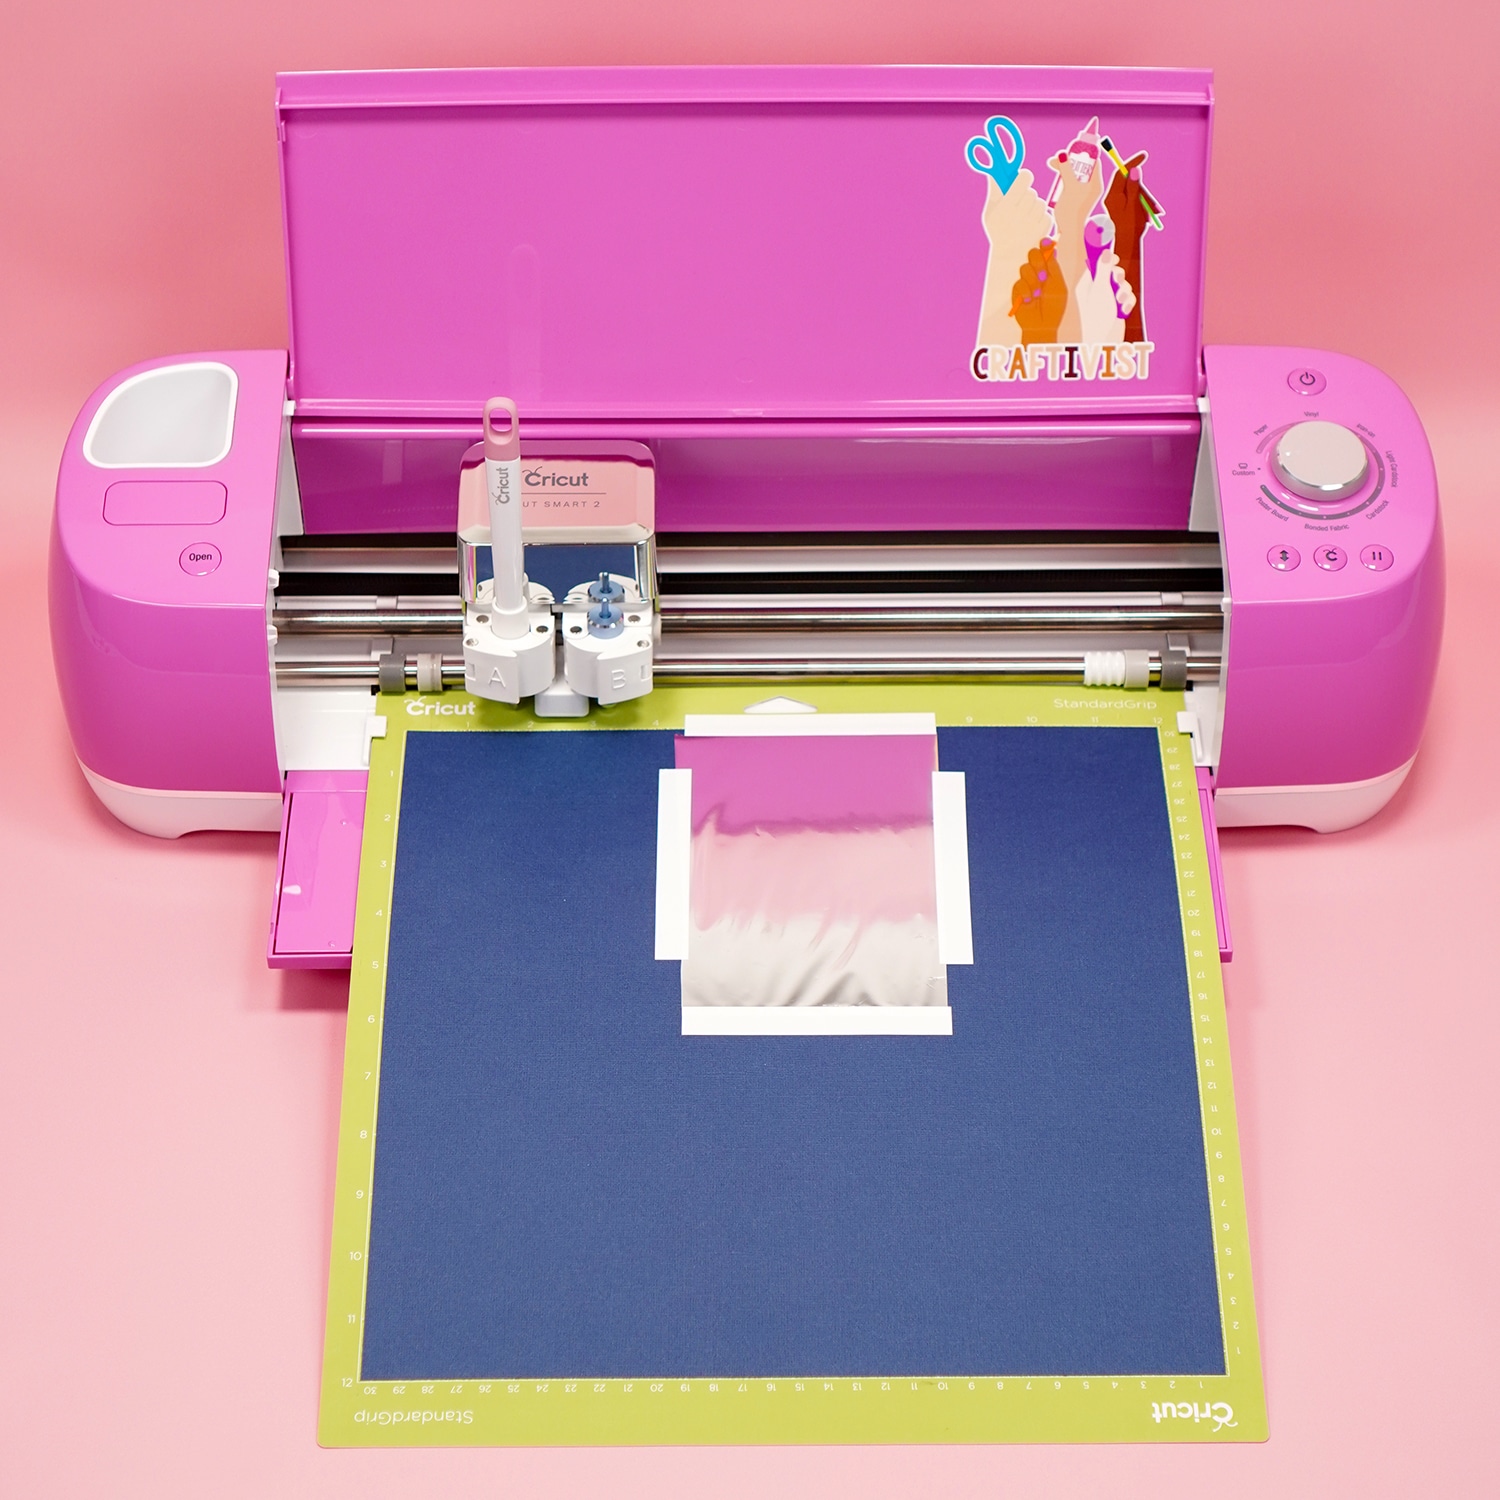
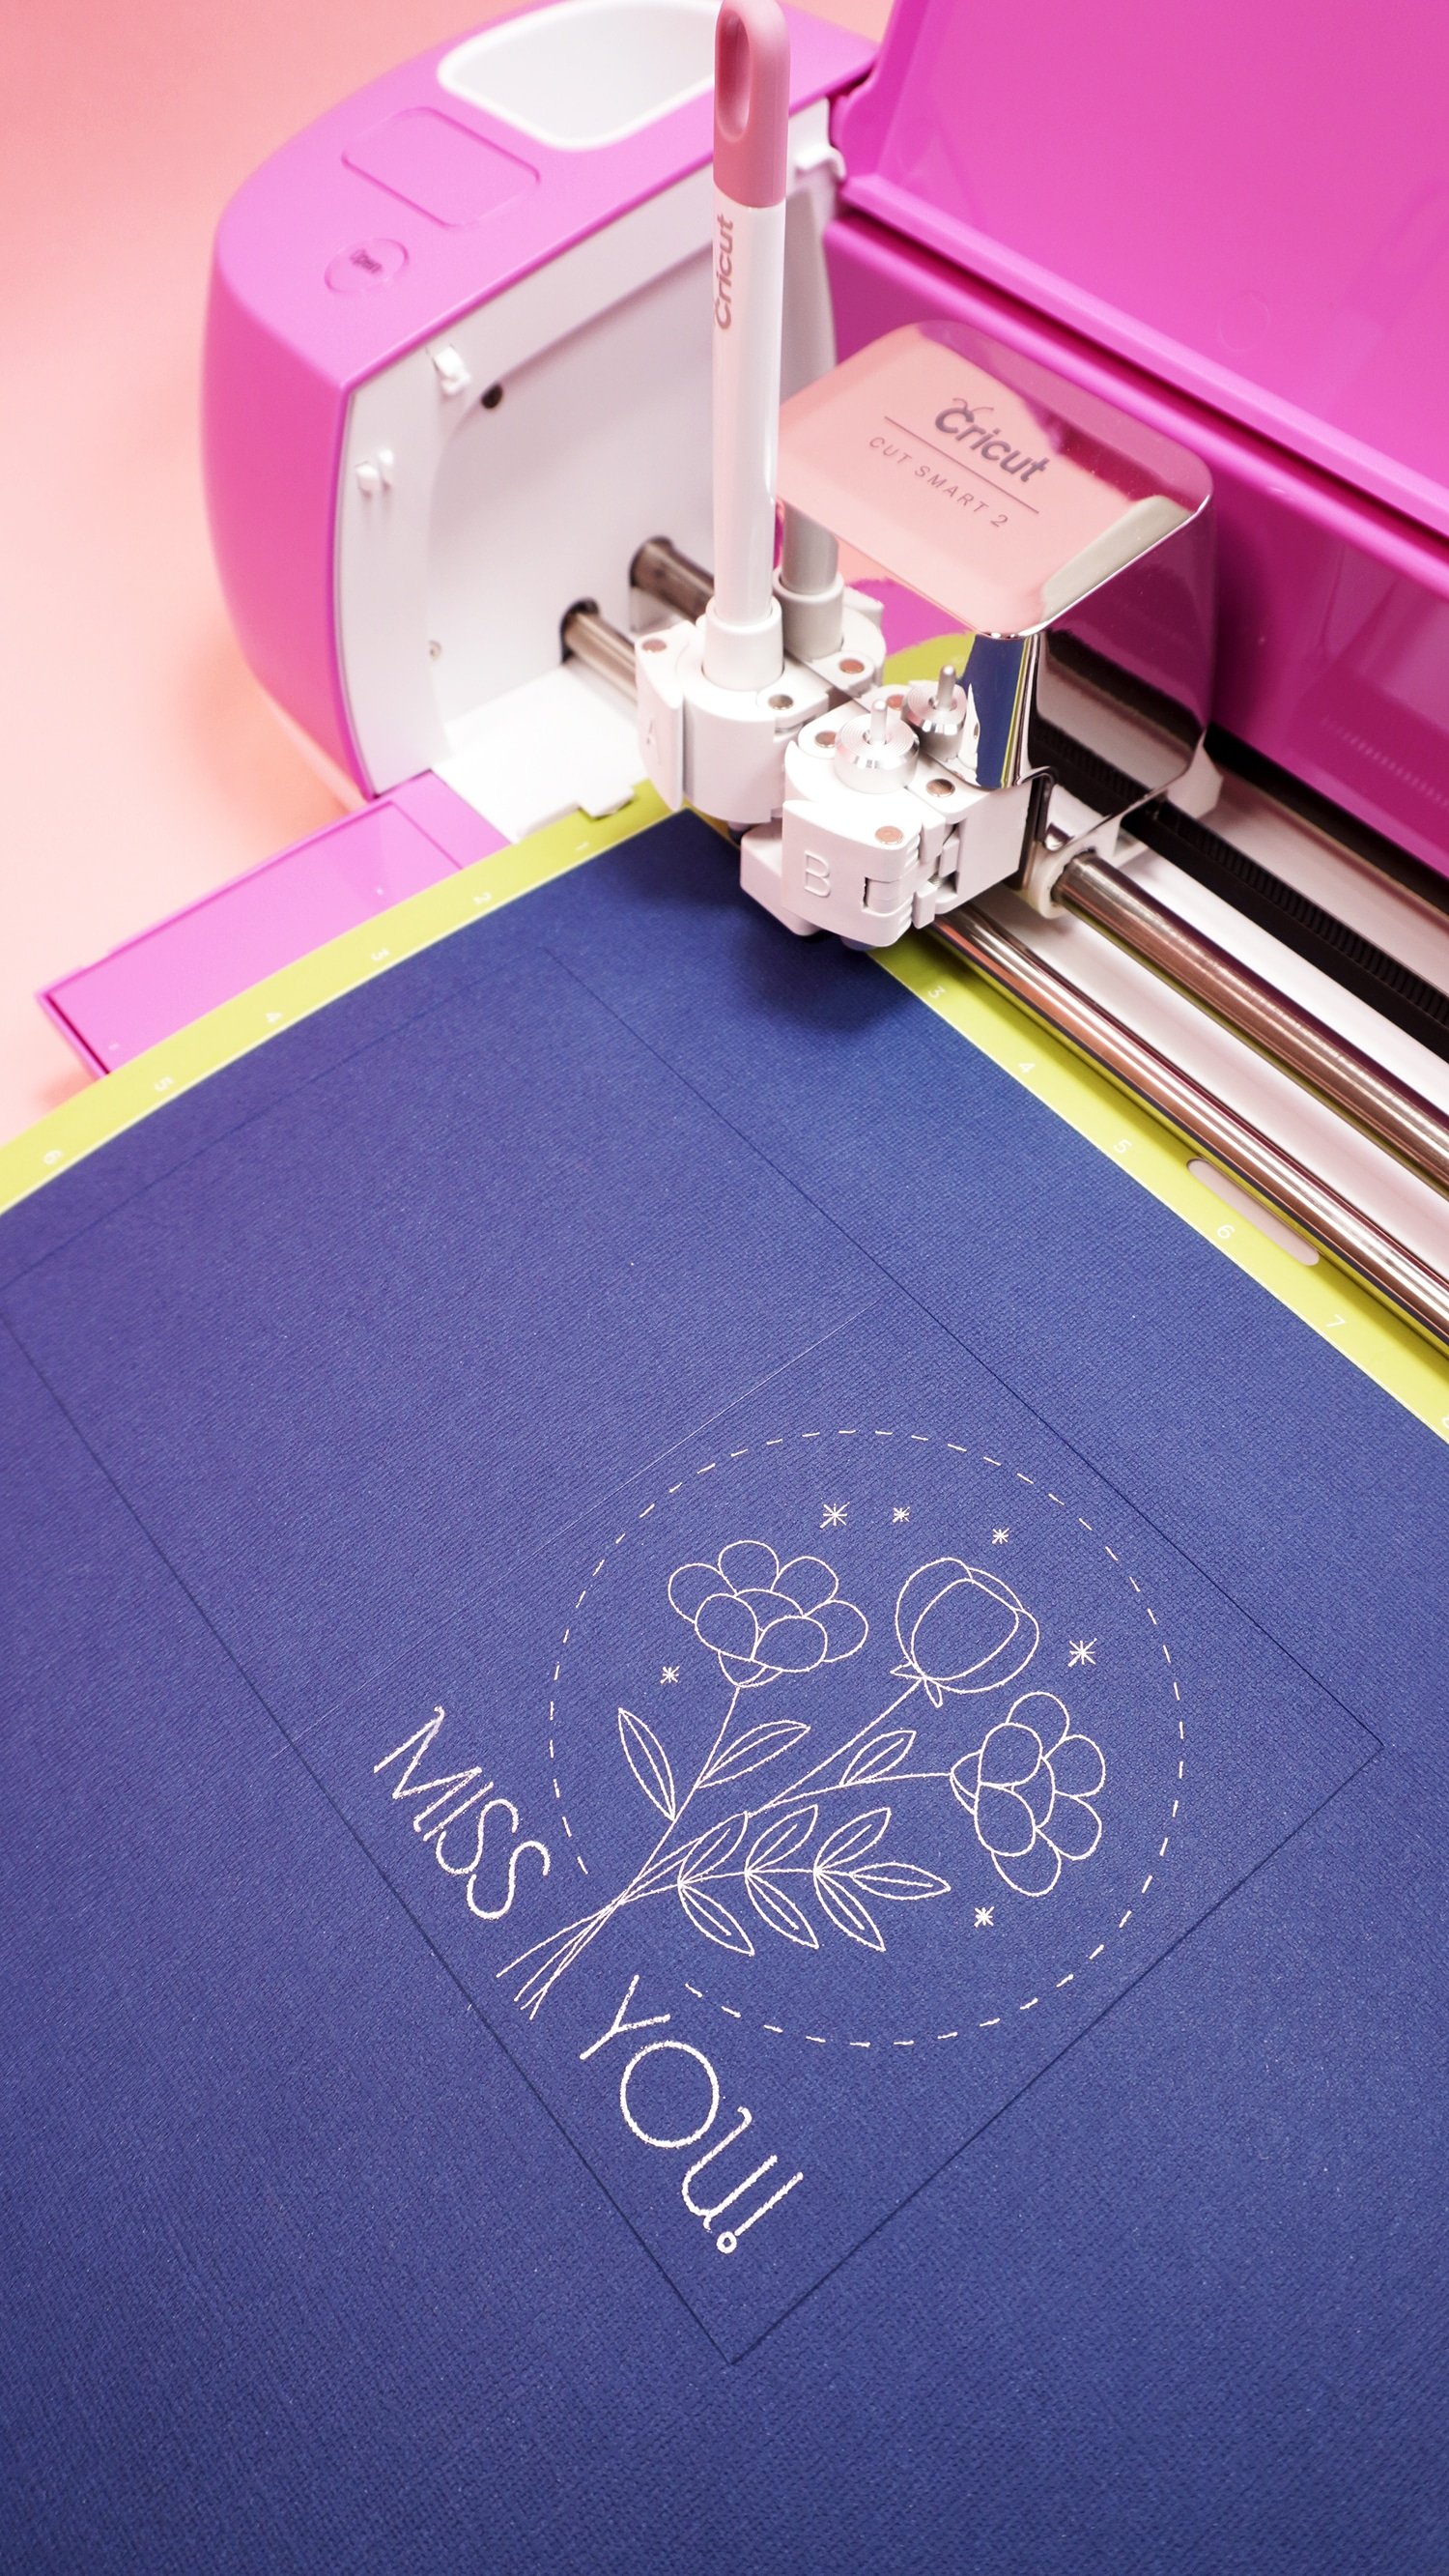
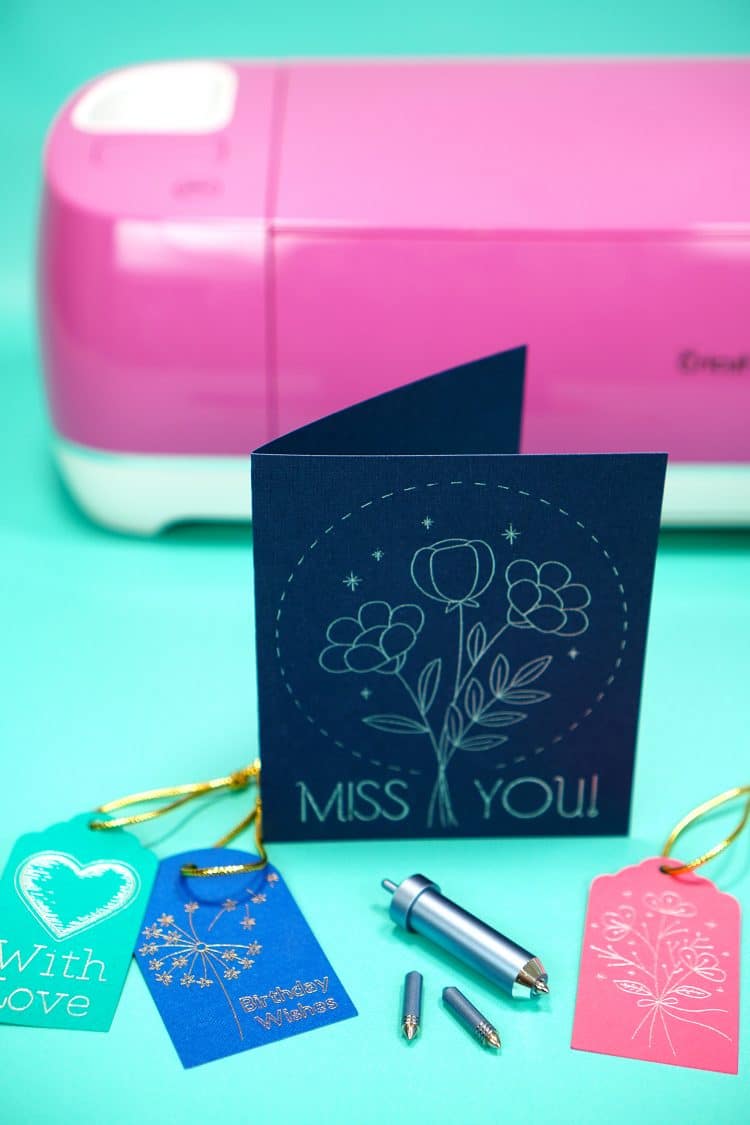
Let’s walk through an example of how to use the Cricut Foil Transfer System to make a foil greeting card. Begin with a sheet of cardstock on the Cricut mat.
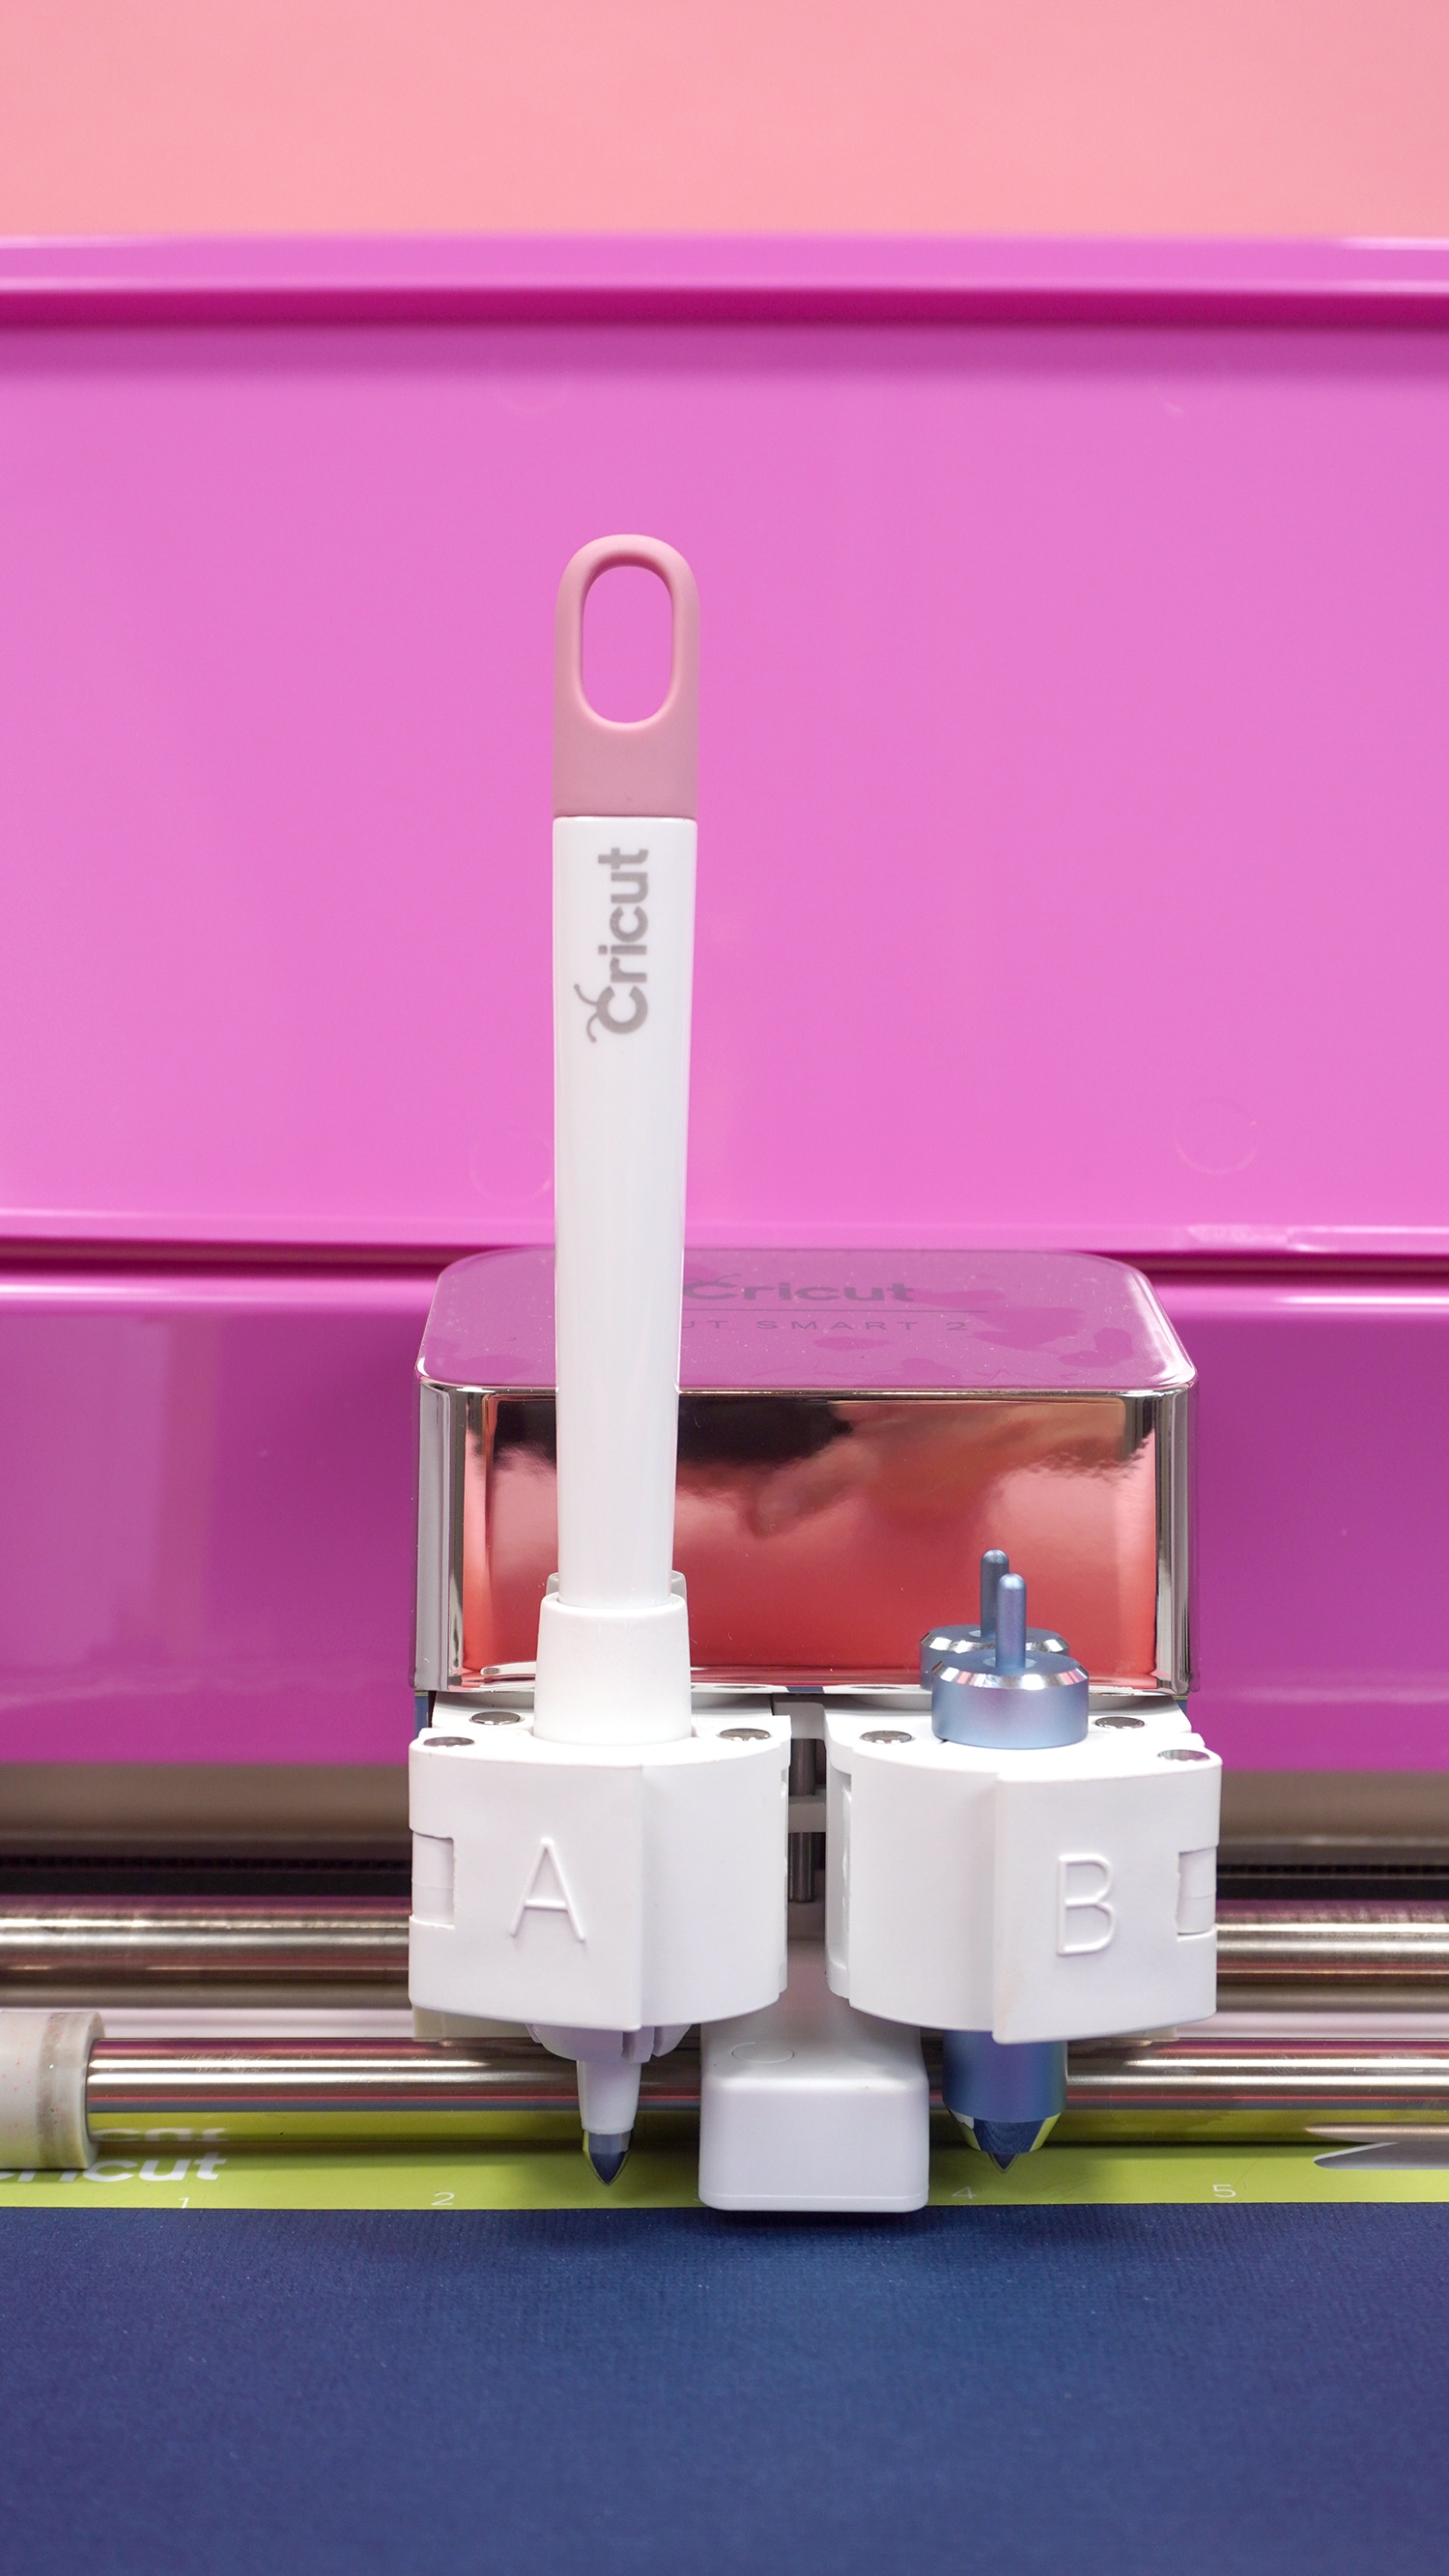
Place the Cricut Foil Transfer Tool into the “B” tool carrier of your machine. In this example, we are also using a Cricut Scoring Stylus in the “A” carrier to create our greeting card.
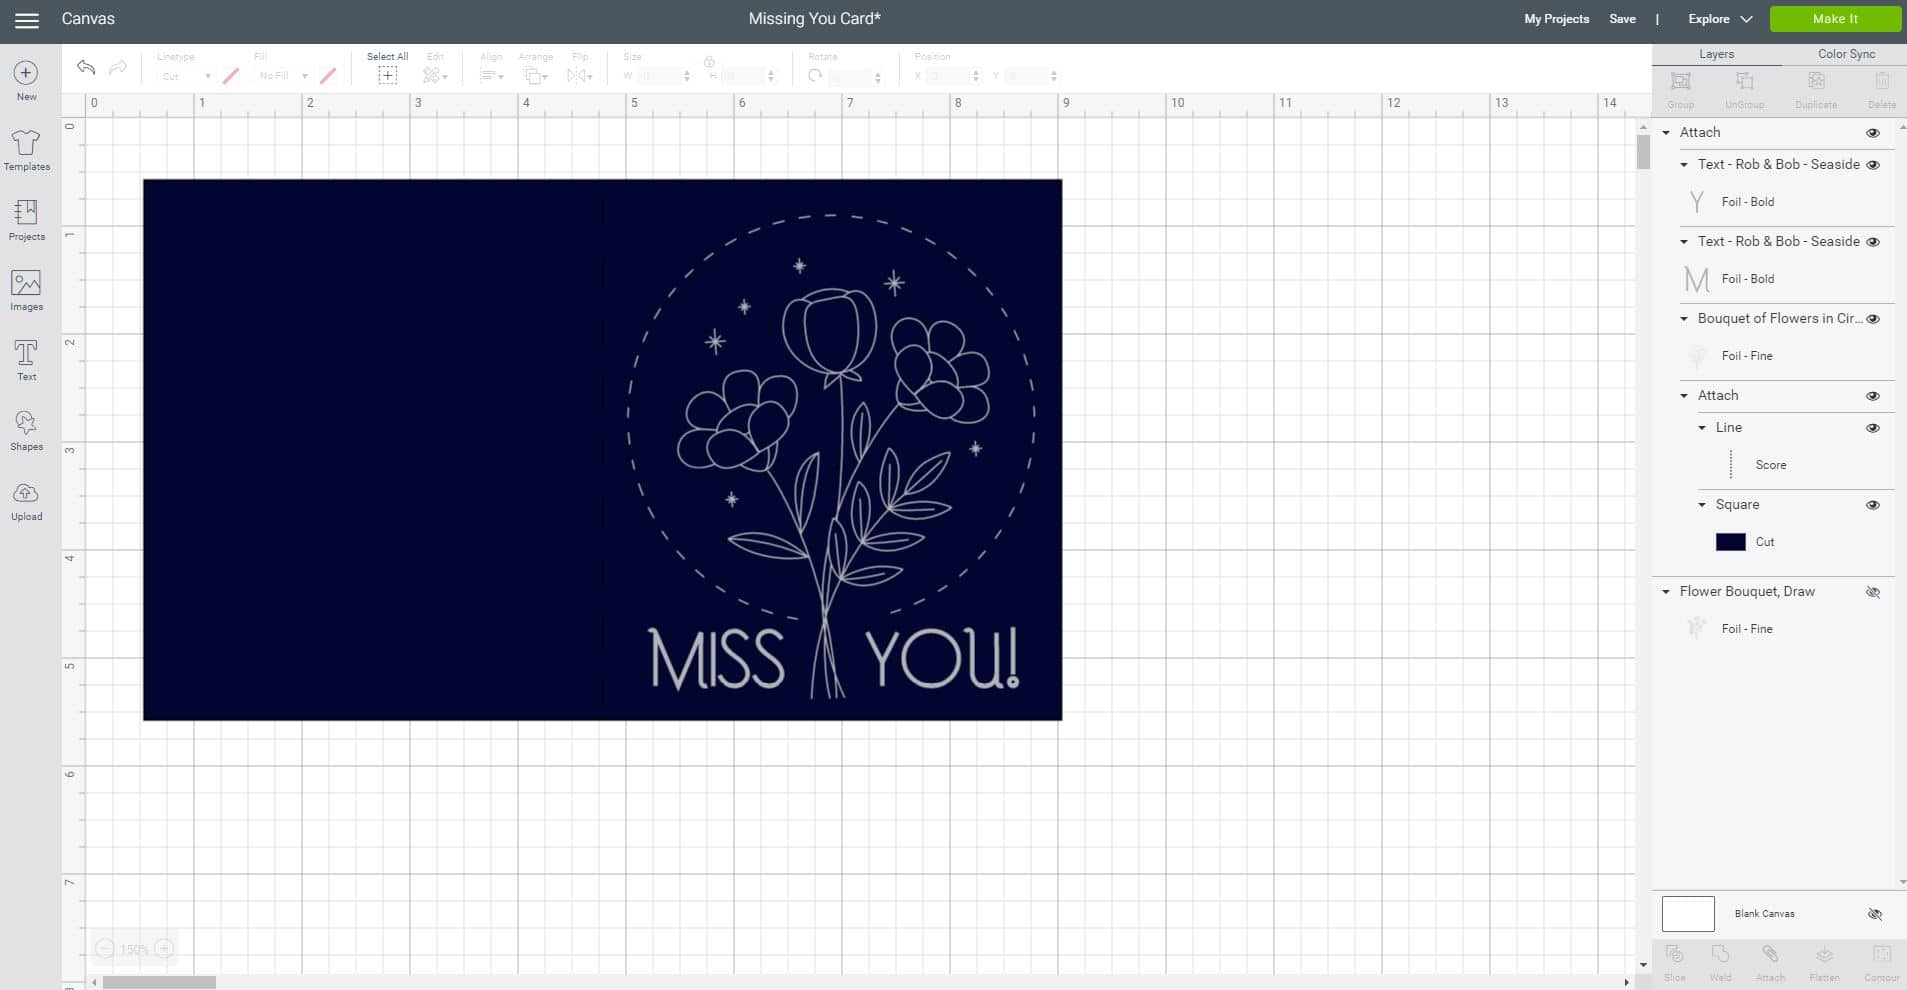
Open up the “Missing You Card” design in Cricut Design Space. Check to make sure that the design is set to “Foil” in the Linetype drop-down menu in the upper toolbar. If everything looks correct, click the green “Make It” button in the upper right hand corner of the screen.
Position your design on the mat so that it is away from the edges. The Foil Transfer Sheets work best when you leave at least a 1/4″ margin between the edges of the foil and the edges of your design, and you also need a little space to tape the foil to your material. If any portion of your design is covered by tape, the foil in those areas will not transfer properly.
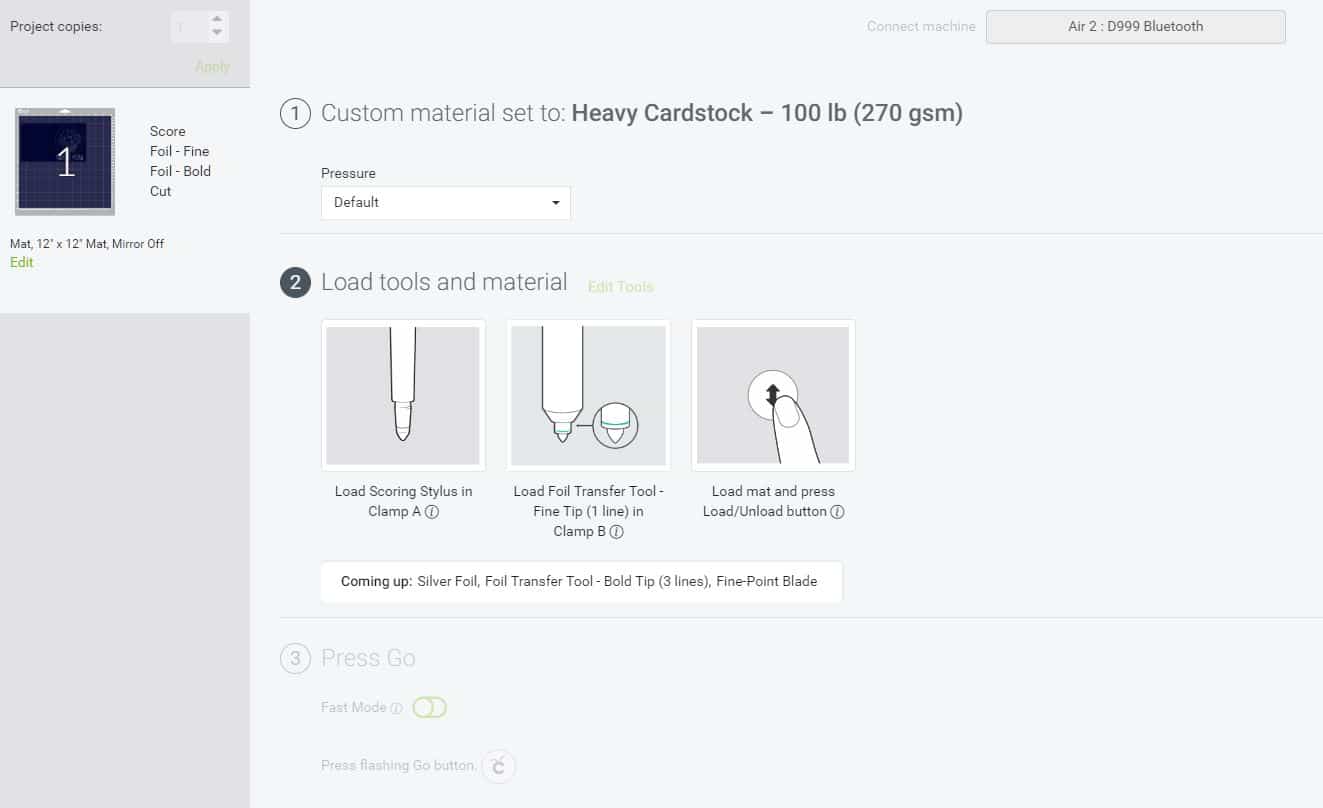
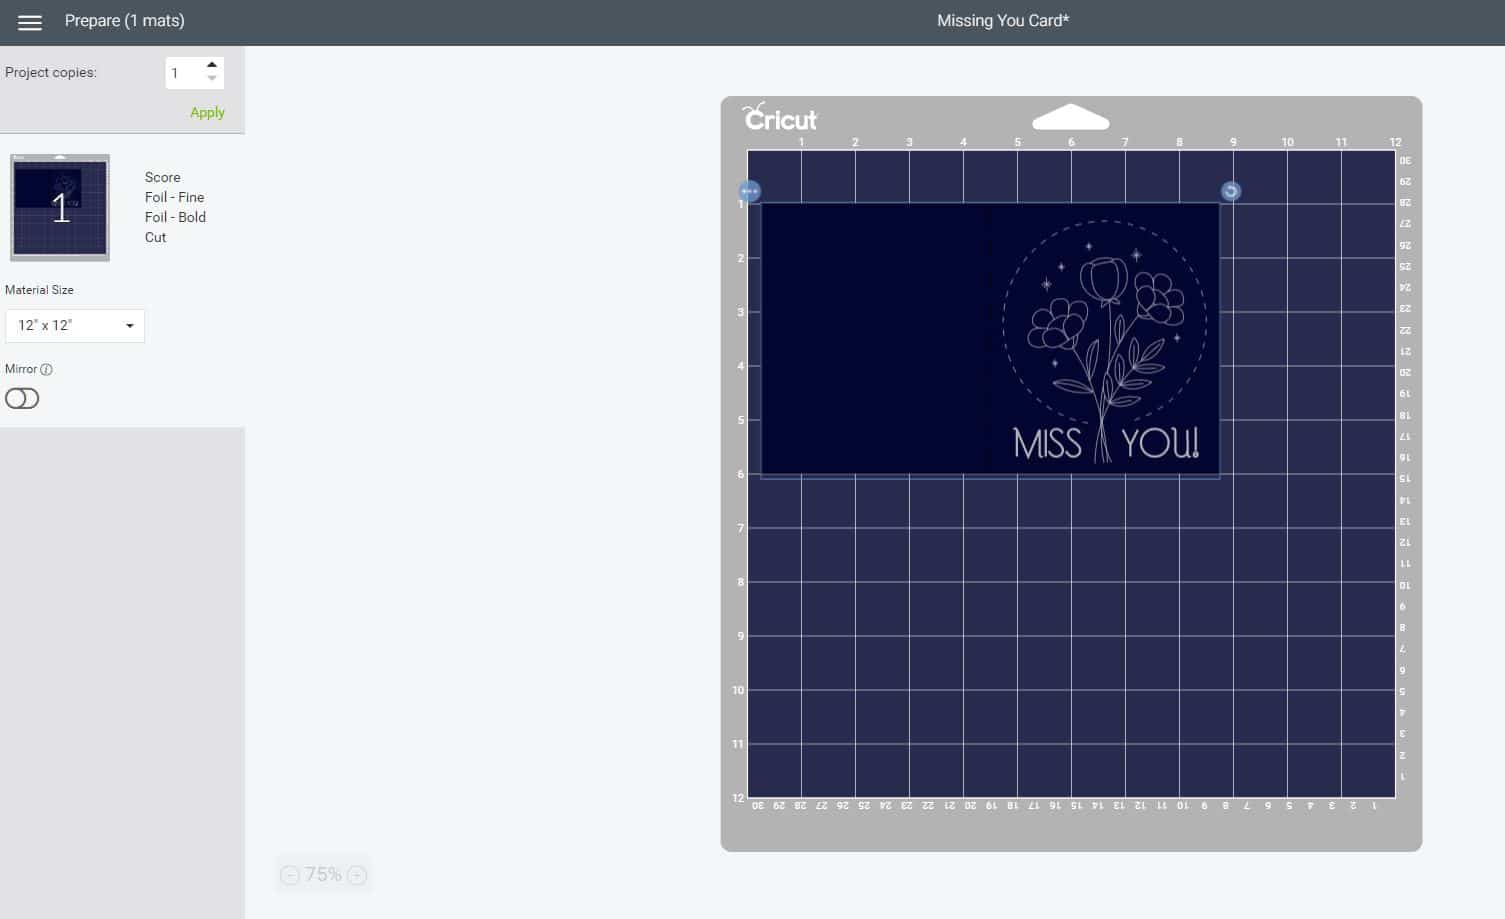
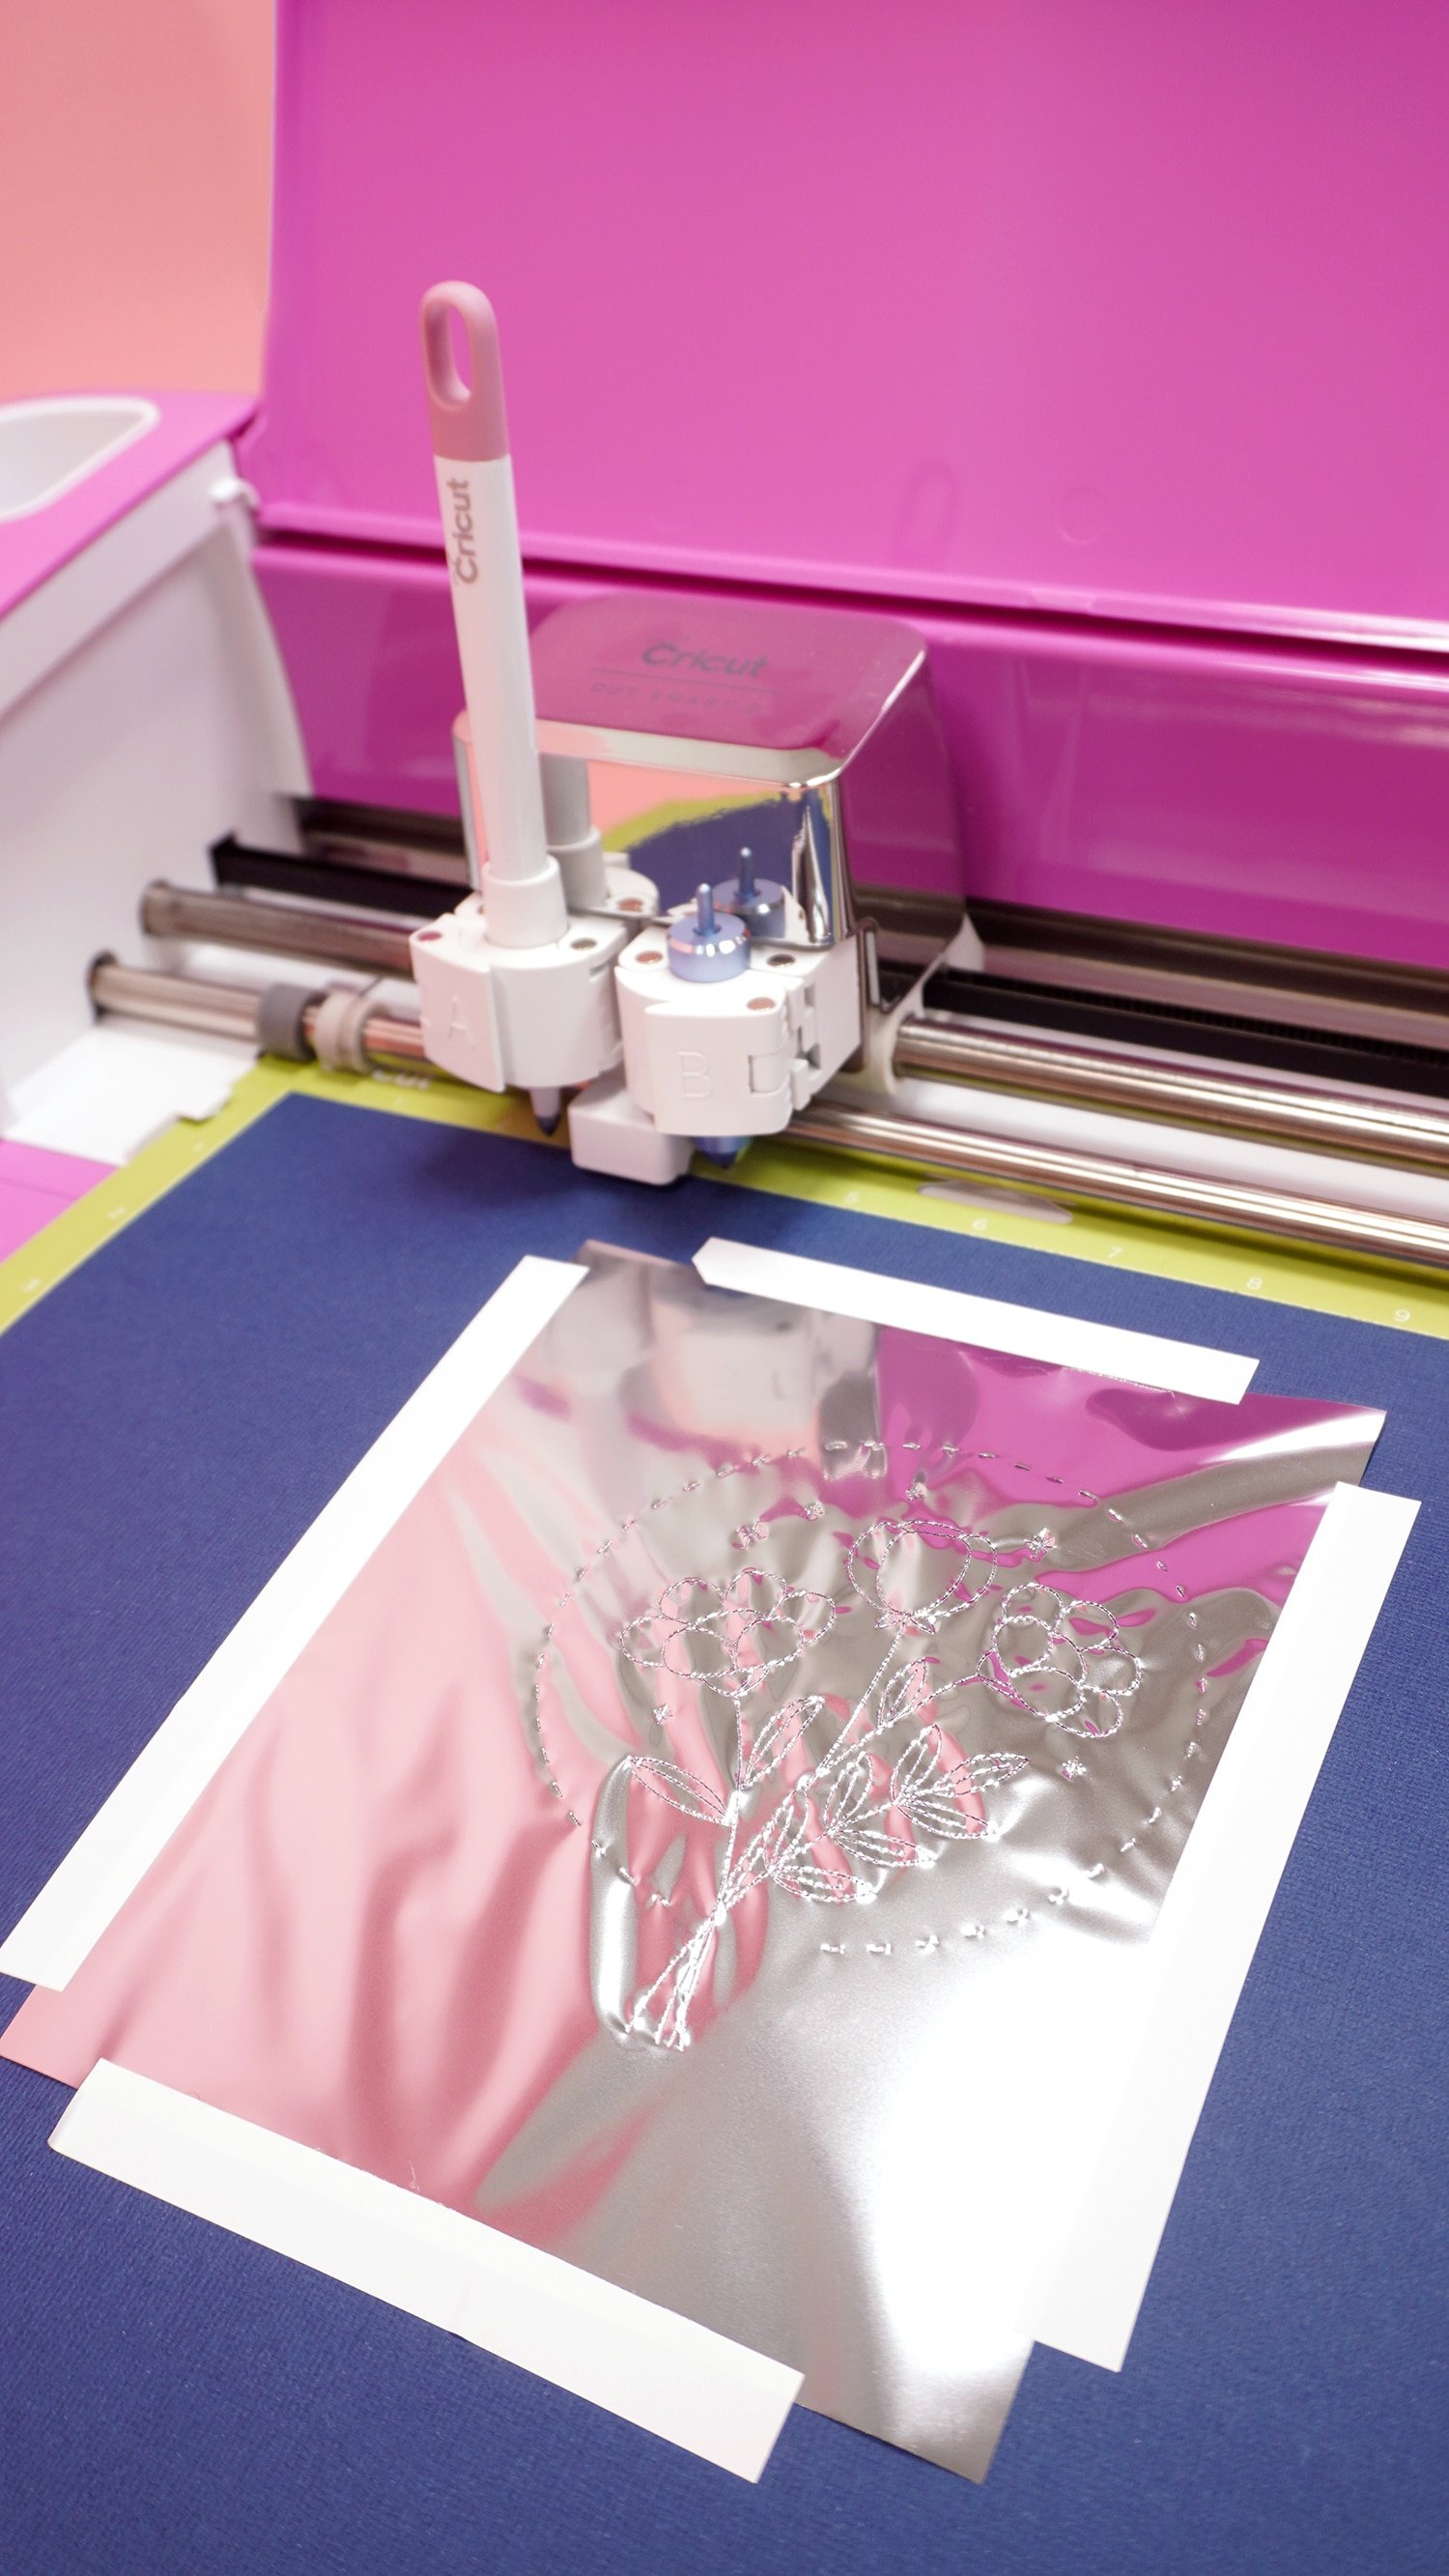
Select your base material, in this instance we used heavy cardstock, and load the mat into your machine. In the left sidebar panel you will notice the order in which the tools will be used – first the scoring stylus, then the Foil Transfer Tool with the fine tip, followed by the bold tip, and finishing with the standard cutting blade. Press the flashing Cricut button on the machine, and the scoring stylus will create a score line for folding the card.
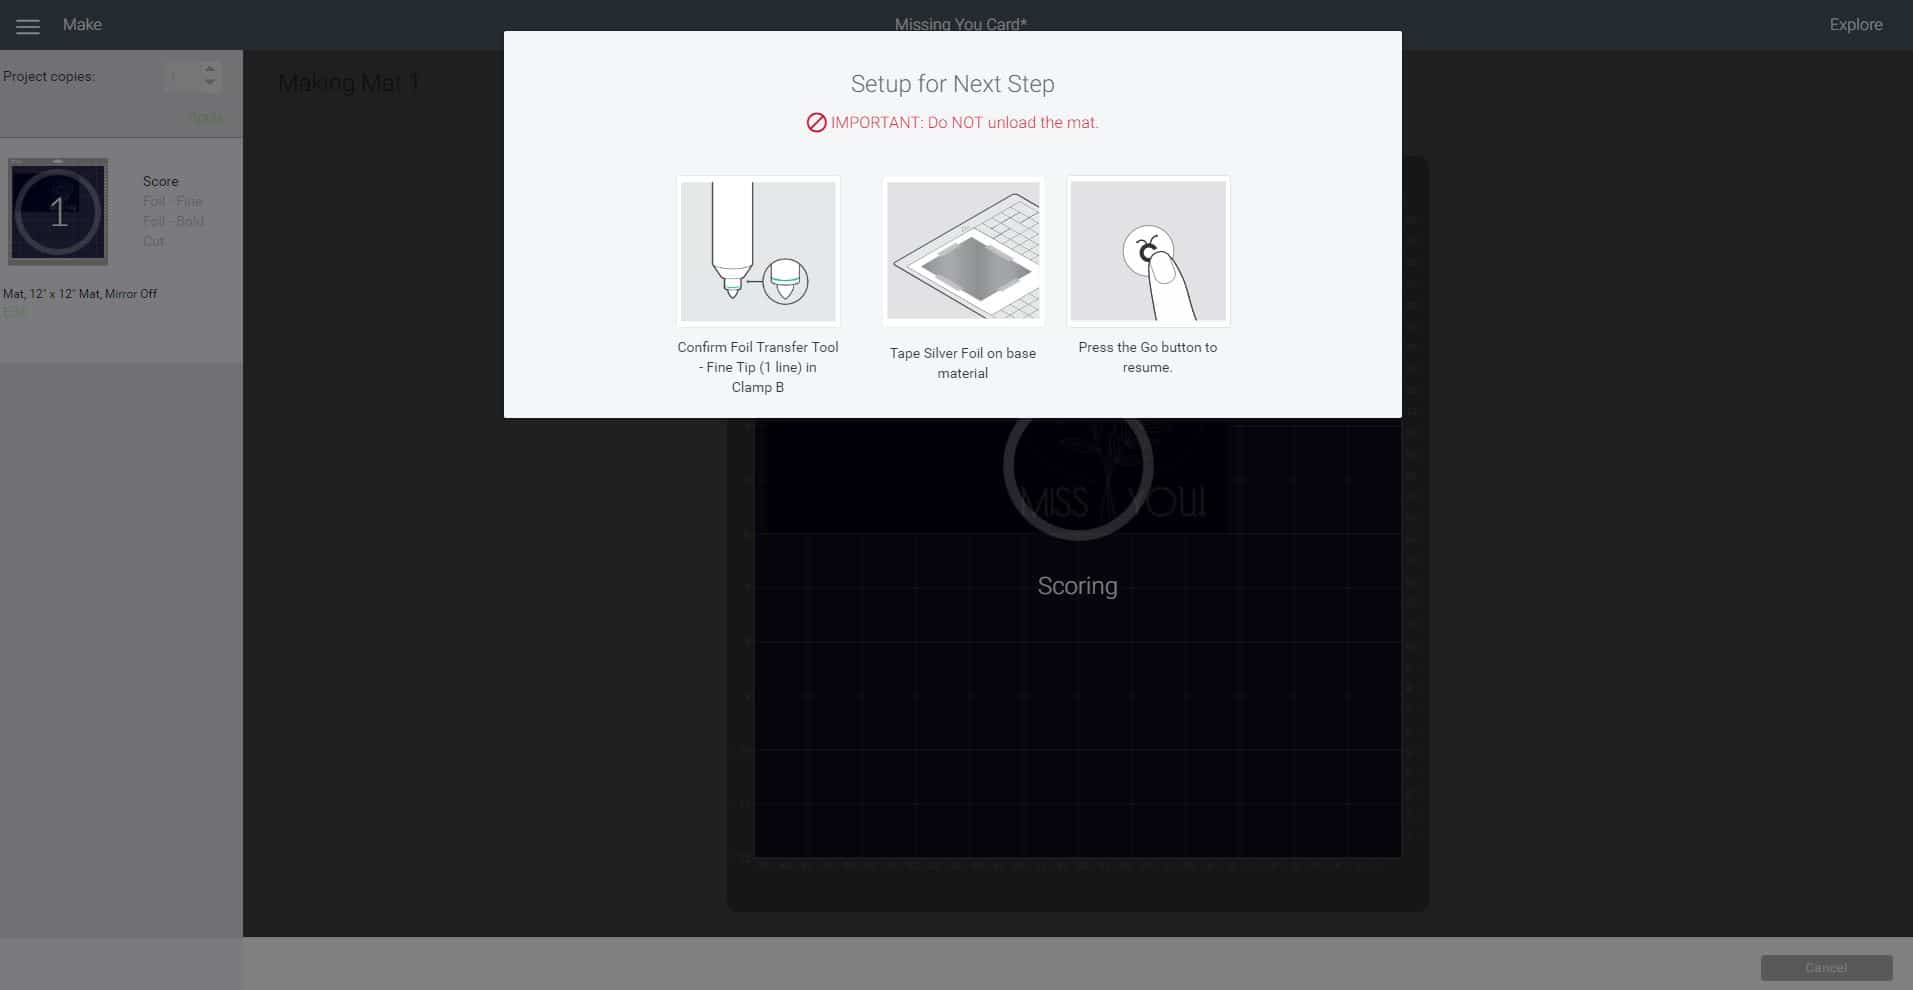
Next, trim your Foil Transfer Sheet to size (slightly larger than your design, but smaller than the base material), and tape the foil (shiny colored side up) to the base using the provided tape strips. DO NOT remove the mat from the machine! Make sure that the foil is smooth, taught, and secured on all four sides.
Note: Do NOT place the Foil Transfer Sheet directly on to your cutting mat! The foil will stick to your mat and leave foil particles embedded in the adhesive that may transfer to subsequent projects using the same mat.
Press the flashing Cricut button to begin foiling.
The machine will pause after it is finished foiling with the fine tip and the software will prompt you to switch to the bold tip. Remove the Cricut Foil Transfer Tool from the “B” carrier, swap the tips, and replace the tool in the machine. Do NOT remove the mat from the machine!
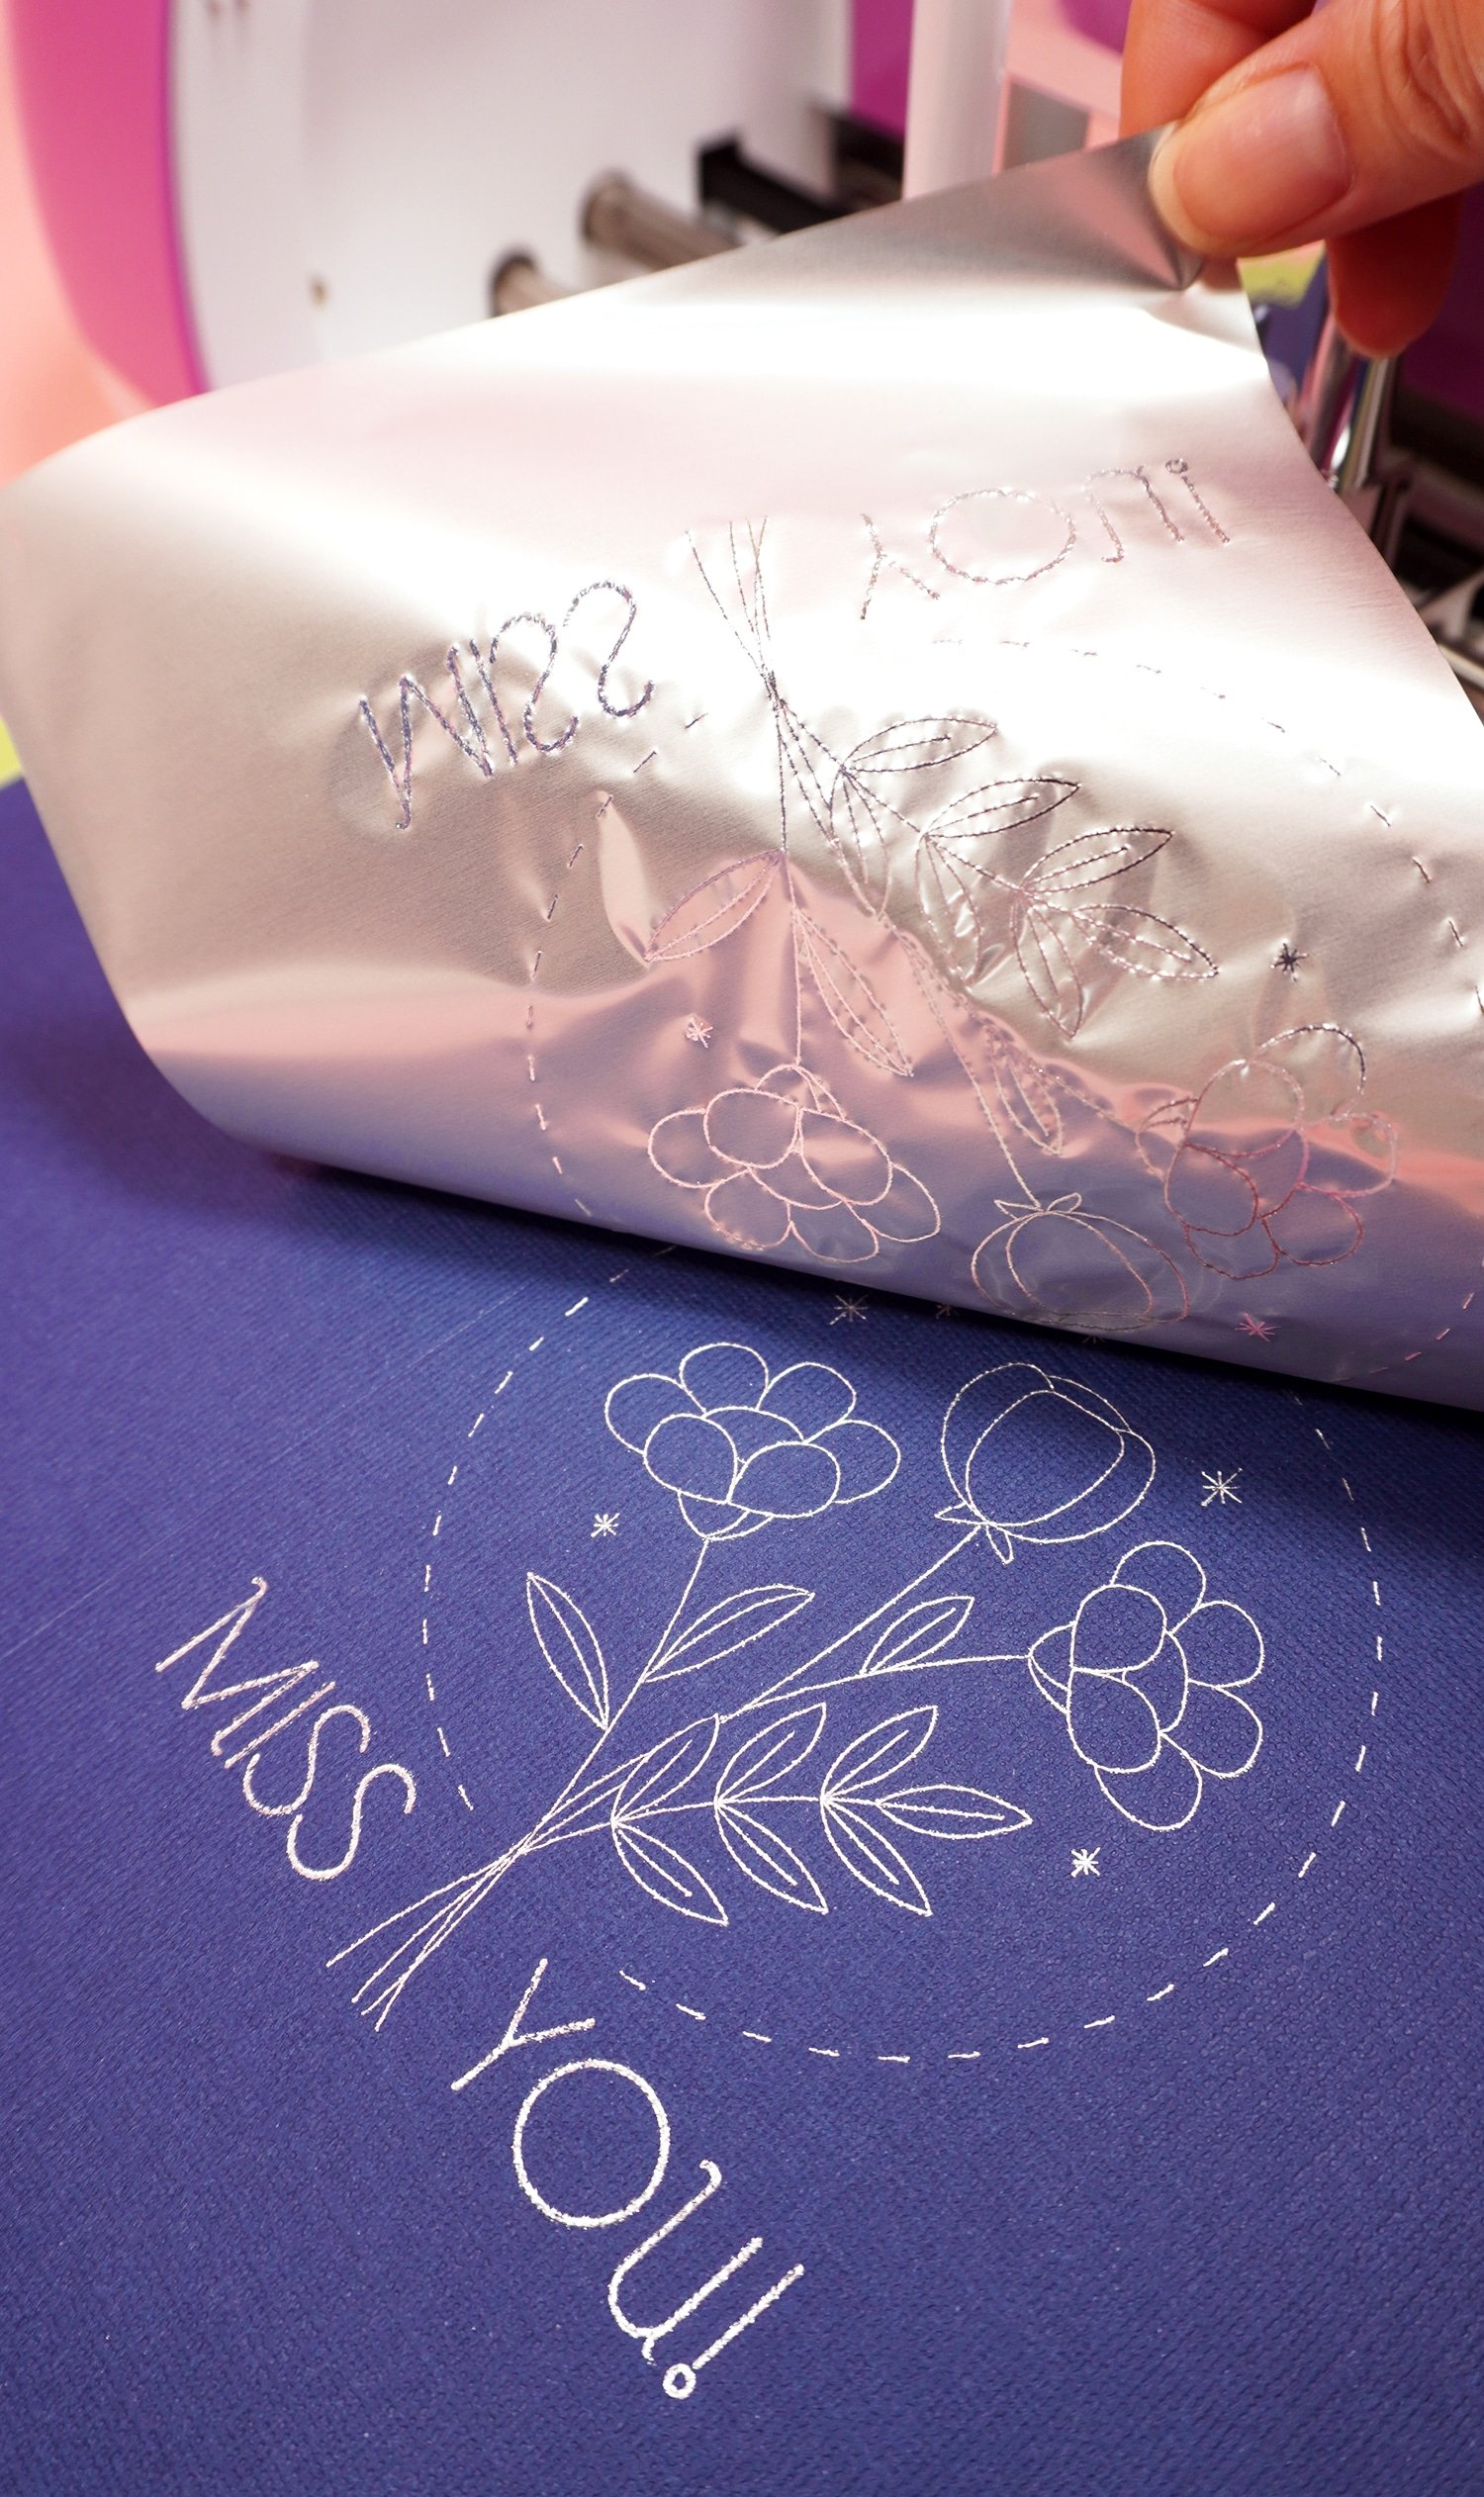
When the foiling process is complete, gently remove the tape and peel back the Foil Transfer Sheet to reveal your stunning foil design!
Swap out the Foil Transfer Tool for the standard Fine-Point Blade and cut the card out.
Isn’t that pretty?!
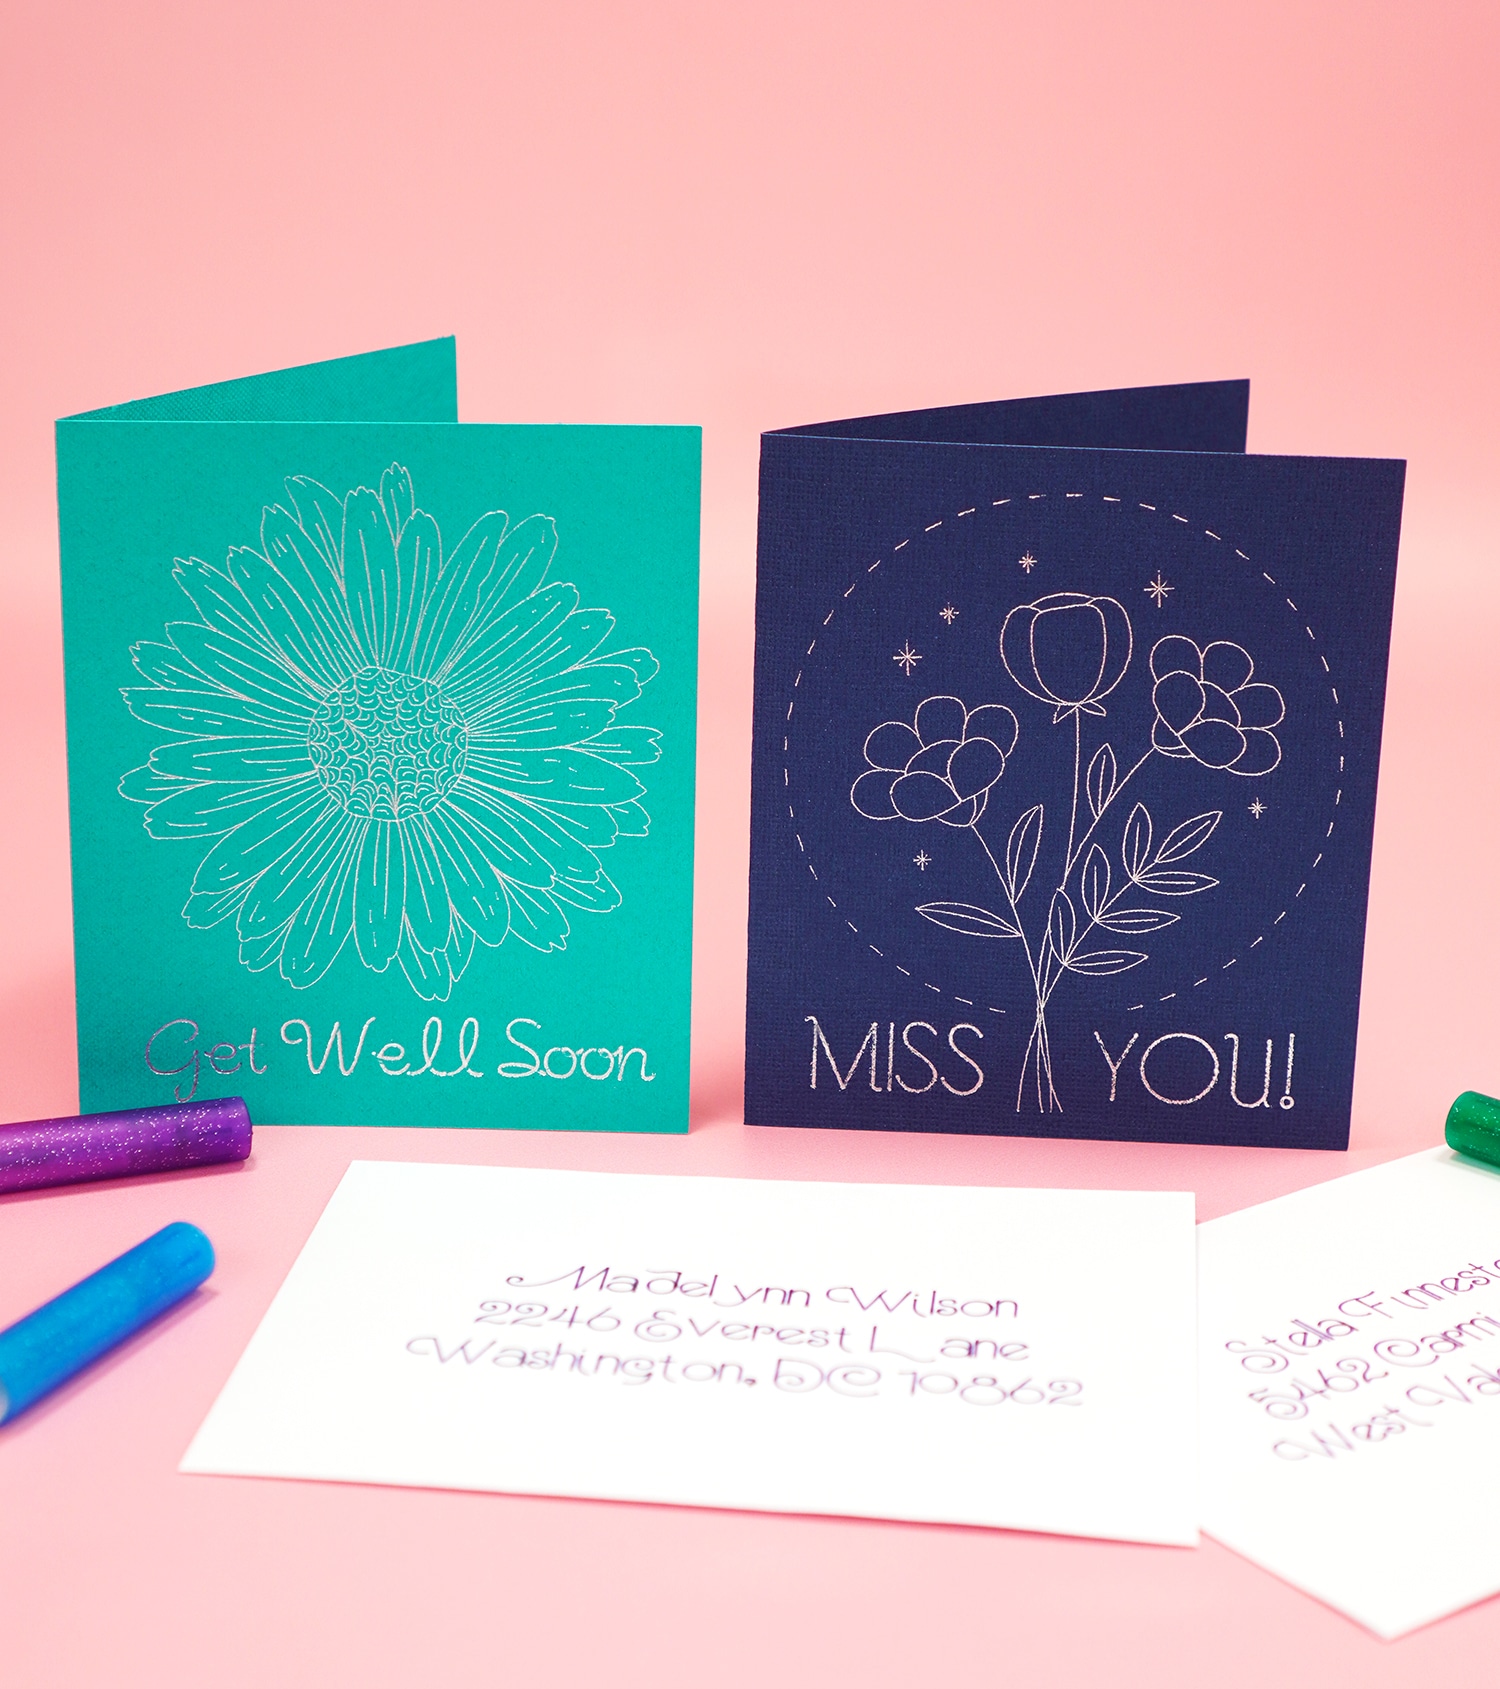
With the Cricut Foil Transfer System, you can make elegant foiled cards for every occasion quickly and easily!
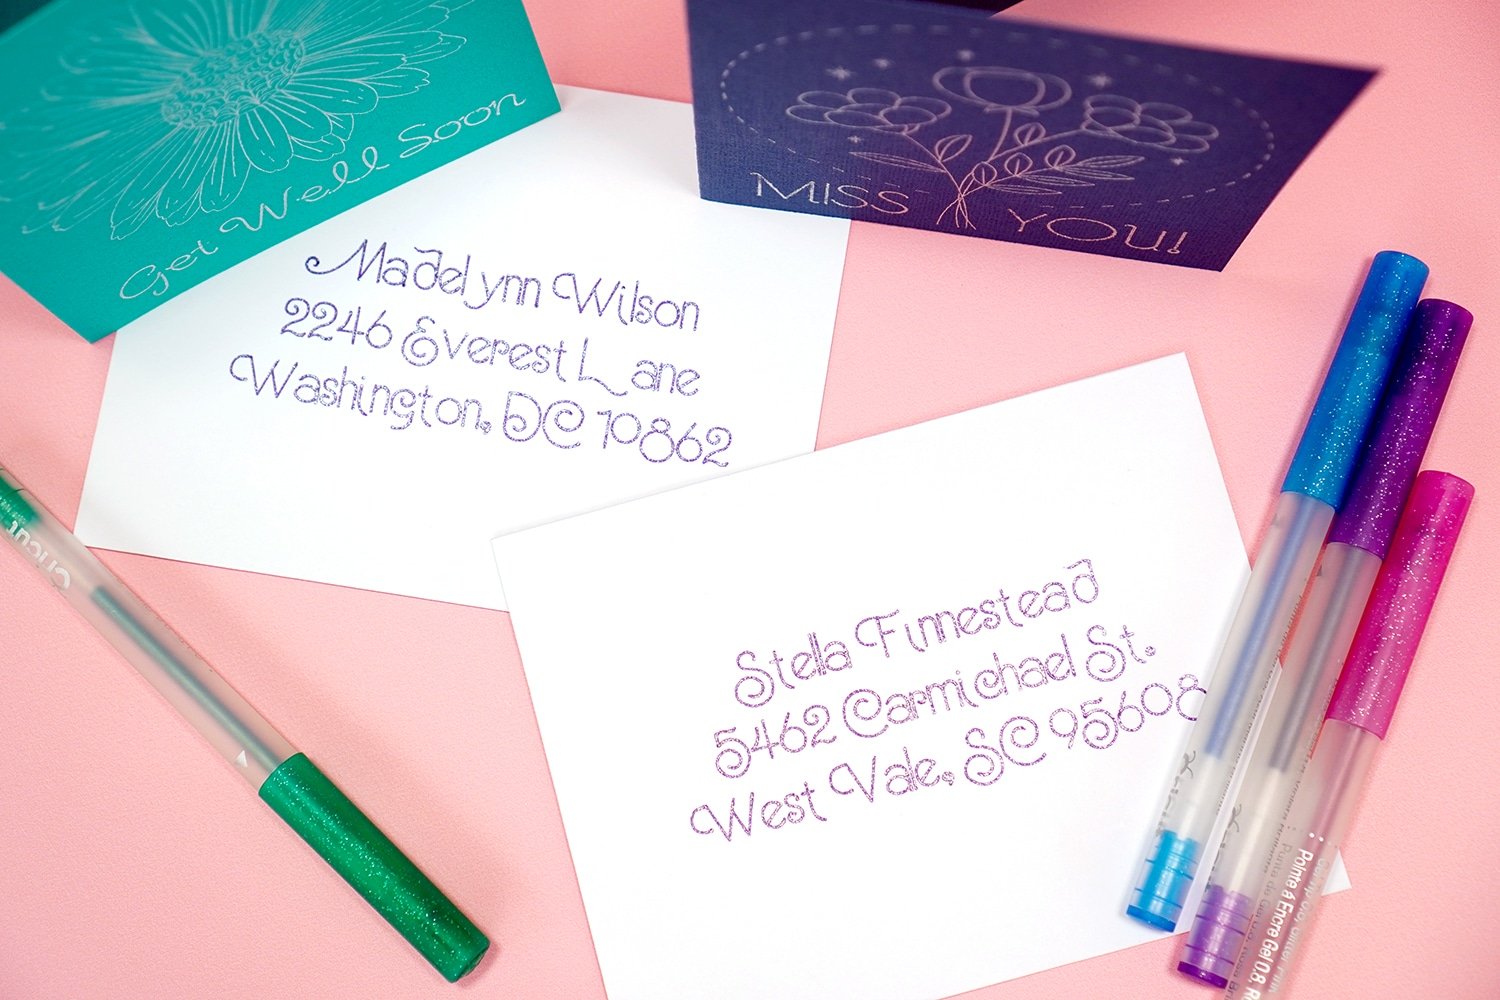
You can even add sparkle and shimmer to the envelopes!
How is the Cricut Foil Transfer System Different Than Other Foil Tools?
There are other foil tools on the market, but none are as easy or as versatile as the Cricut Foil Transfer Tool!
While other foil tools use heat to apply foil effects (which means you have to spend time waiting for the tool to heat up and use a special plate to protect your machine from melting), the Cricut Transfer Tool uses a unique pressure activated system to produce stunning foil effects with far less time and effort.
Heated foil tools use the “A” tool carrier of your Cricut machine, which means that the tool can only draw in one single “draw” linetype, and you will need to purchase multiple tools for varying line weights. If you want to use a heated foil tool in a project design with different line weights, you will have to perform a few hacks during the design process to make it work, and you will need to wait for each additional tool to heat up (5-7 minutes) before moving on to the next set of lines.
The Cricut Foil Transfer Tool uses the “B” carrier along with a series of easily interchangeable tips (fine, medium, and bold) and pressure-sensitive foil to quickly infuse your material with shimmery foil effects in a fraction of the time! Since clamp “B” is fully integrated with Cricut Design Space, your project can be designed with all three of the different foil line widths in the same design – easy peasy, and no hacks needed!
Plus, the heat-free foil transfer means that you don’t have to worry about accidentally burning yourself or melting your machine!
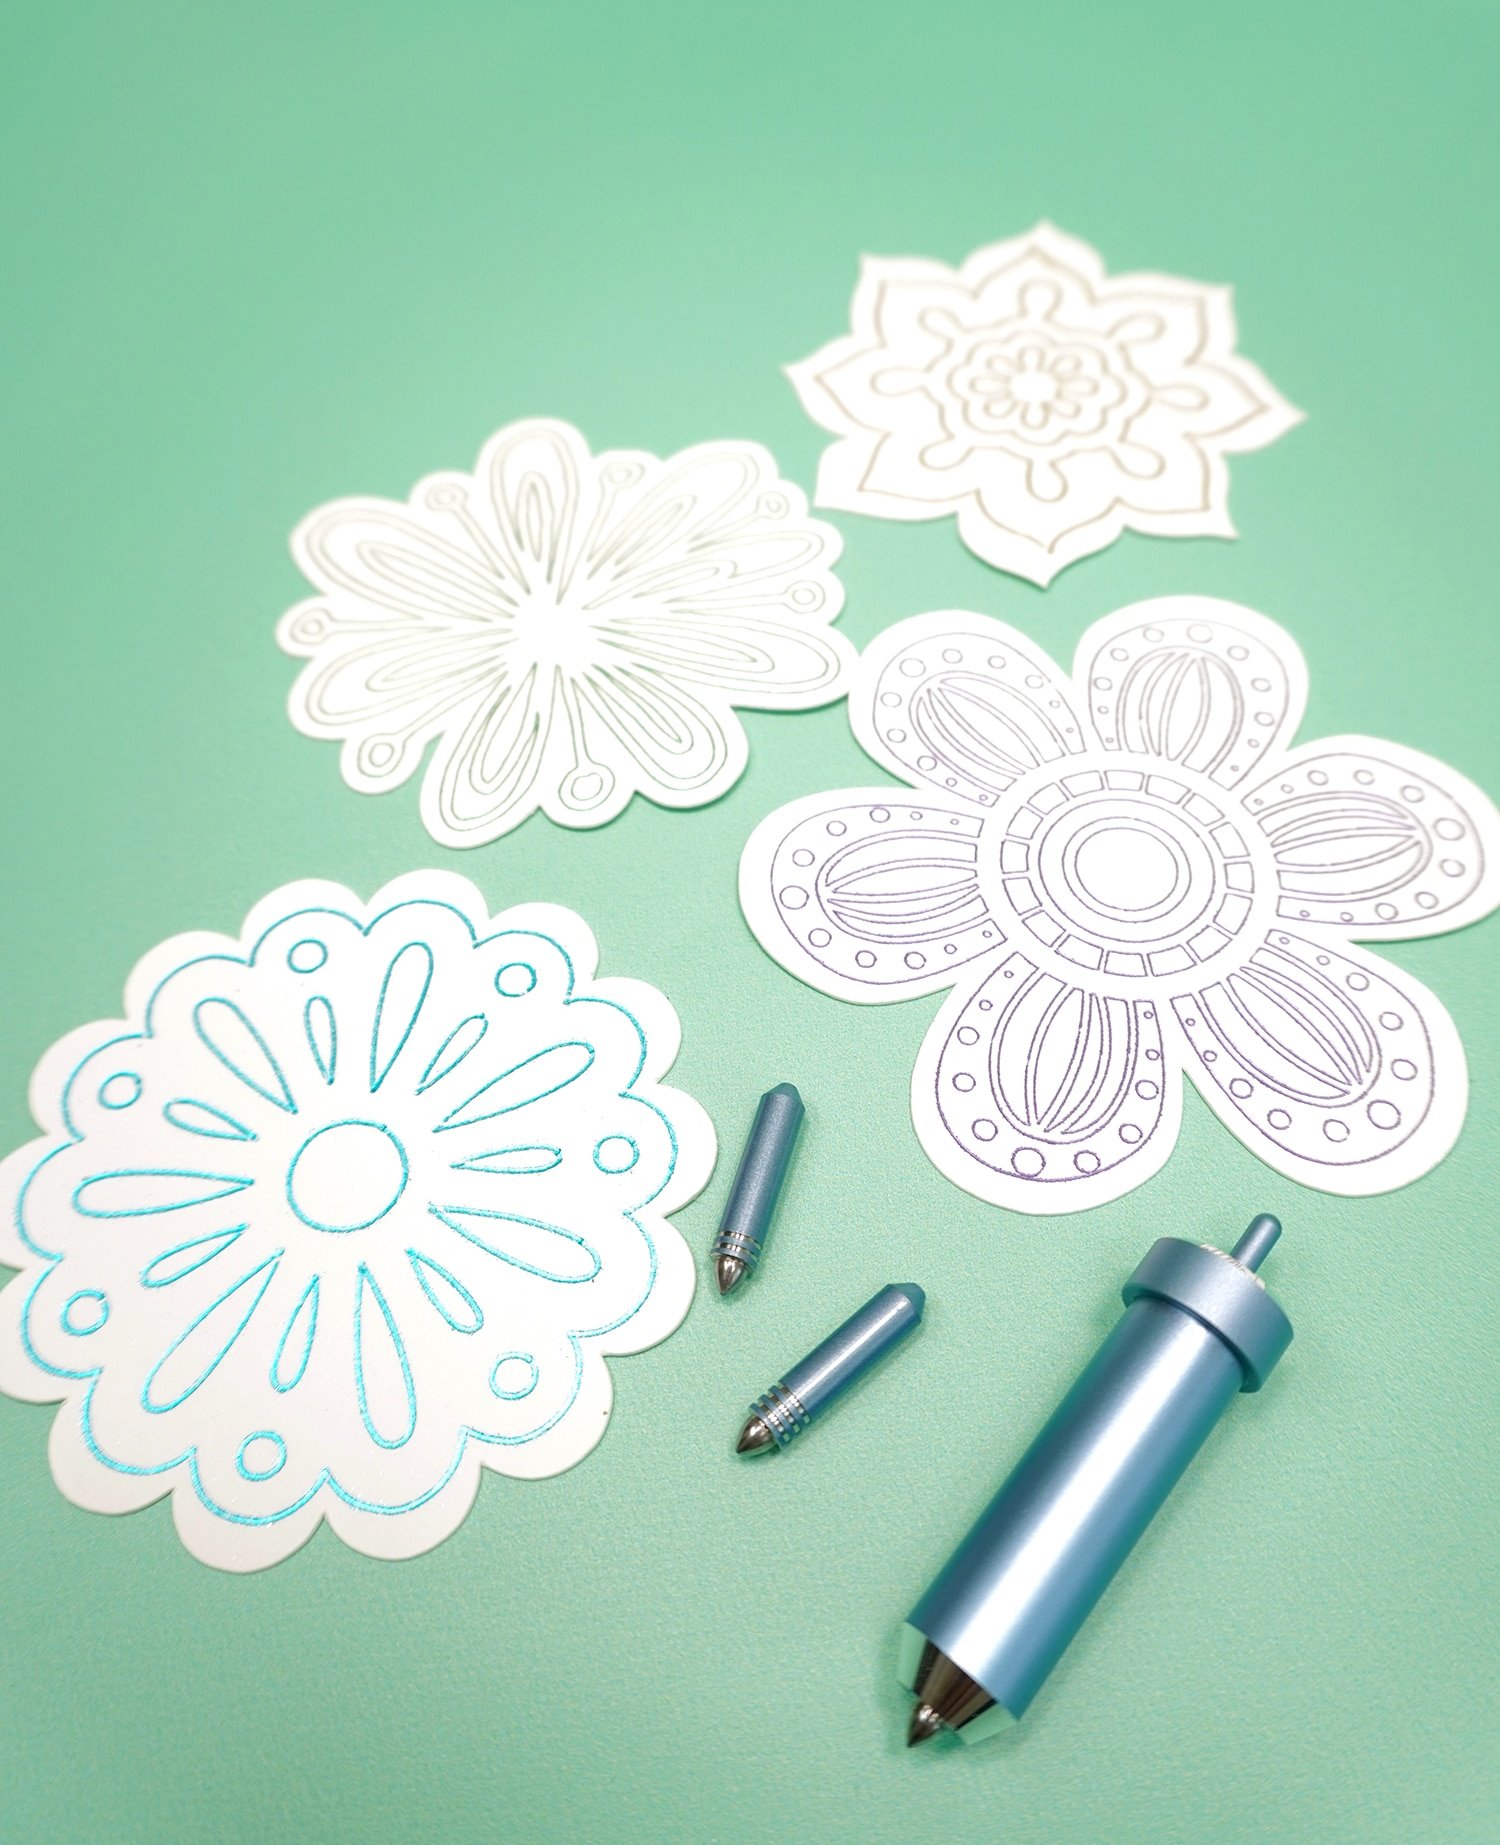
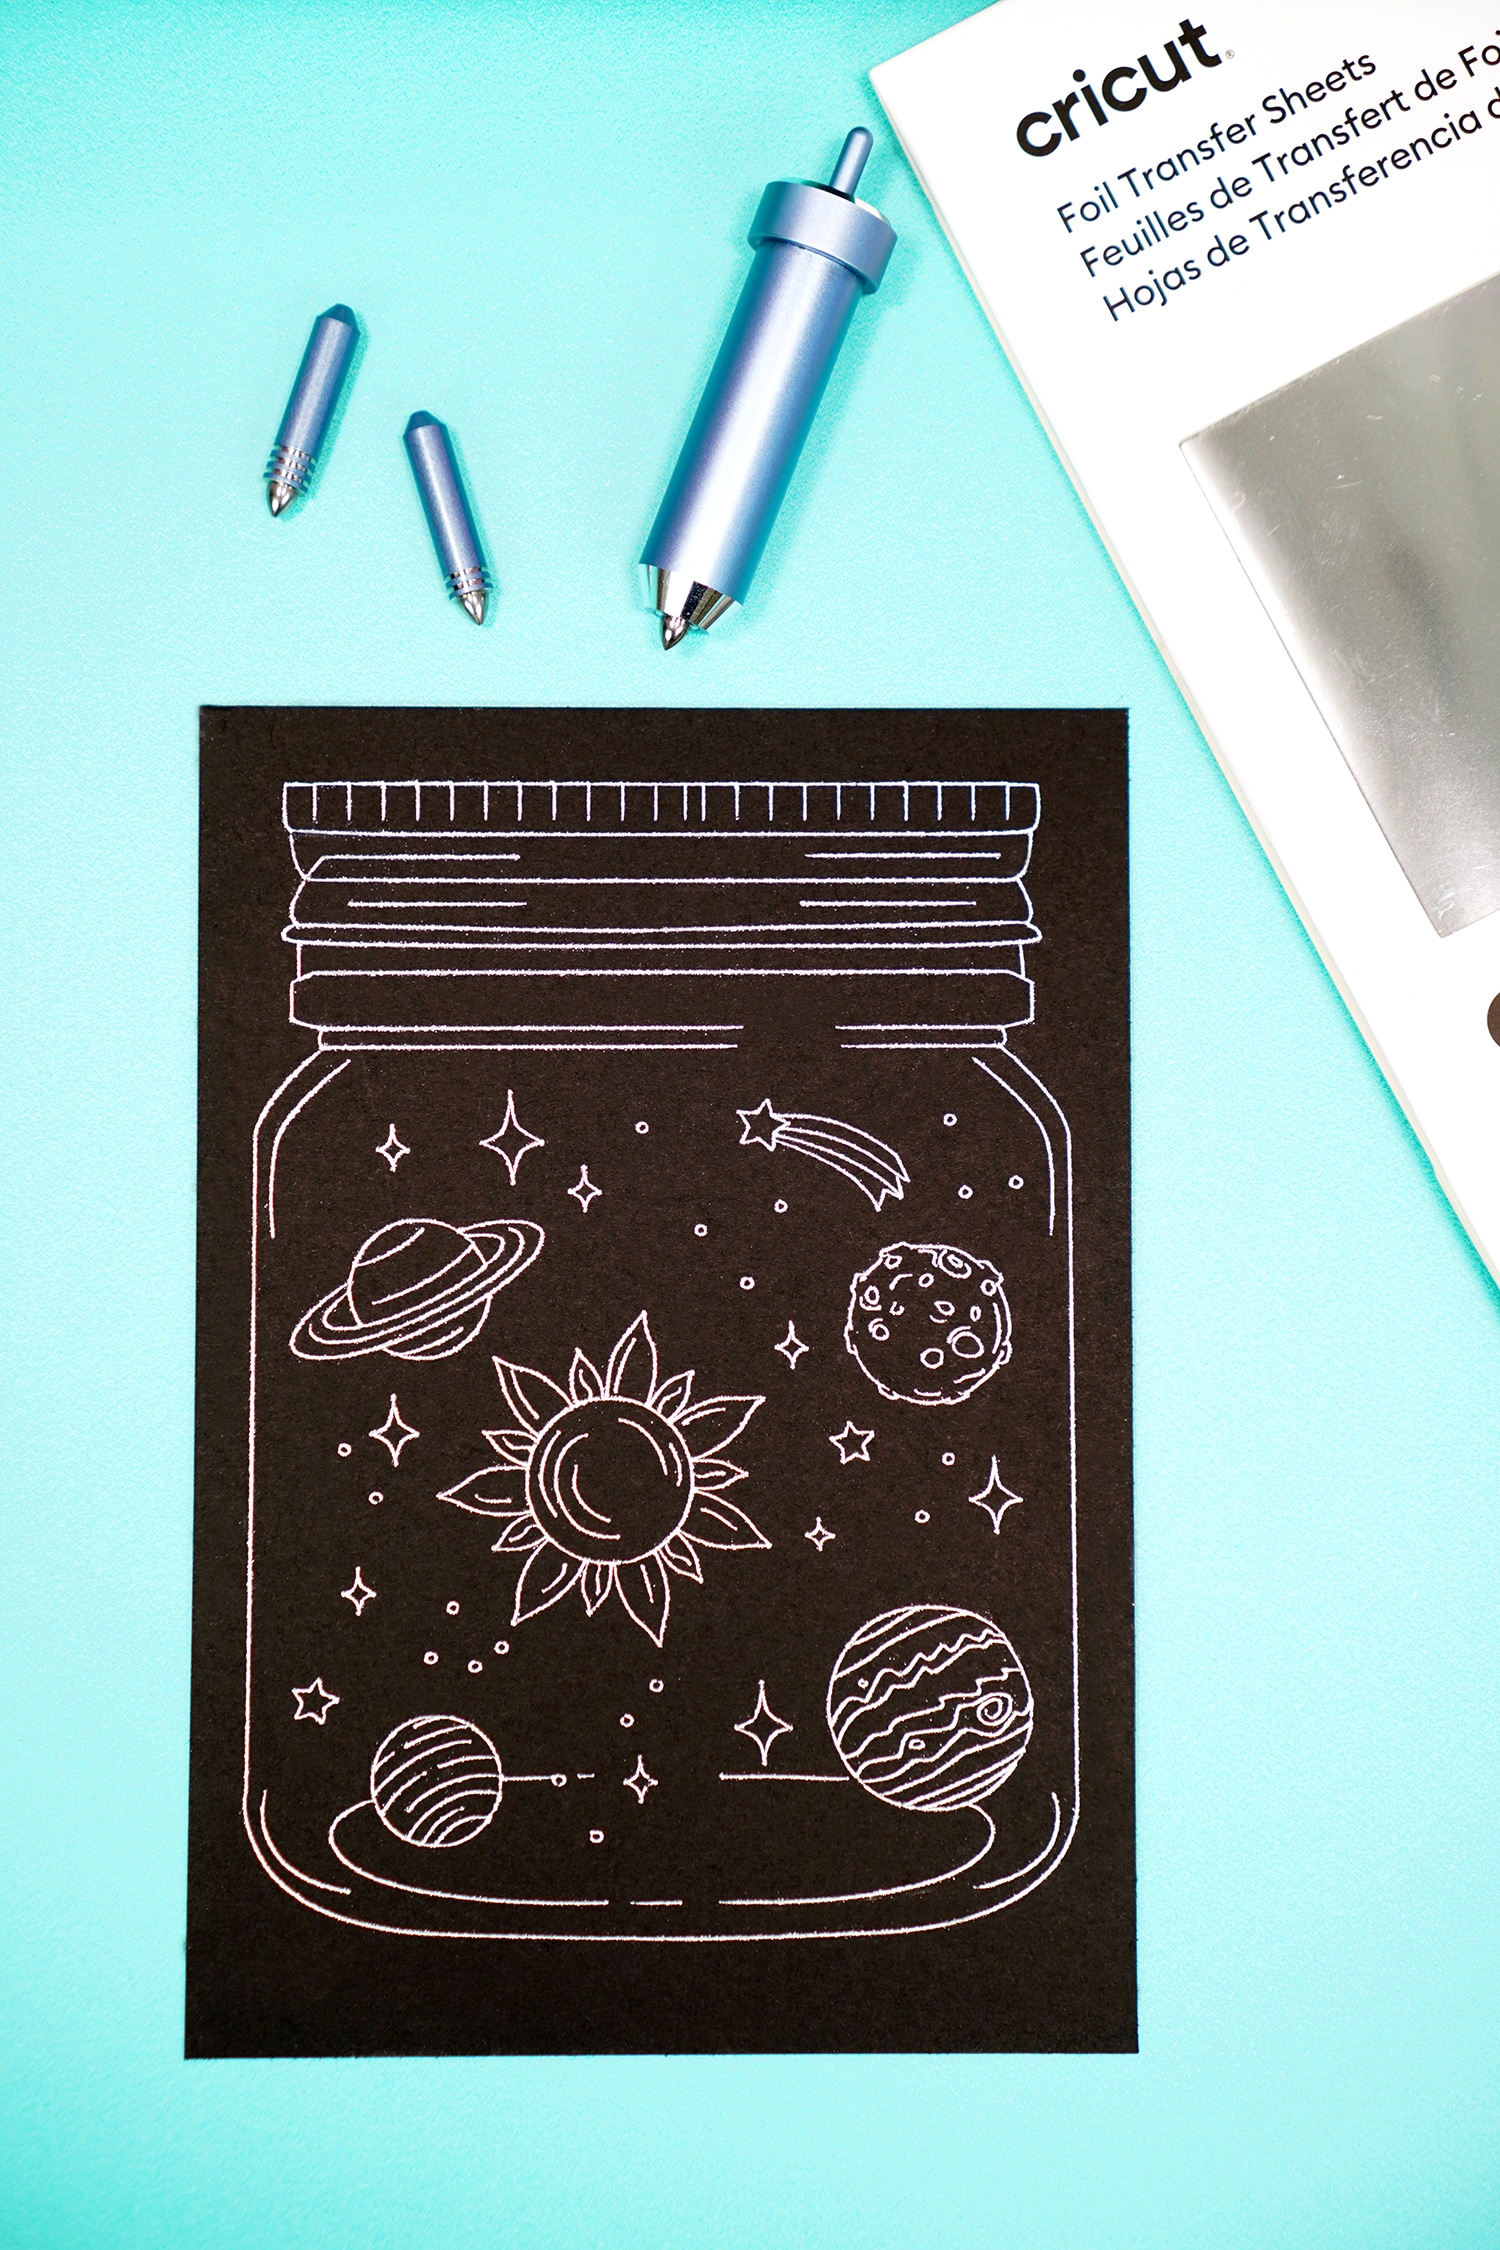
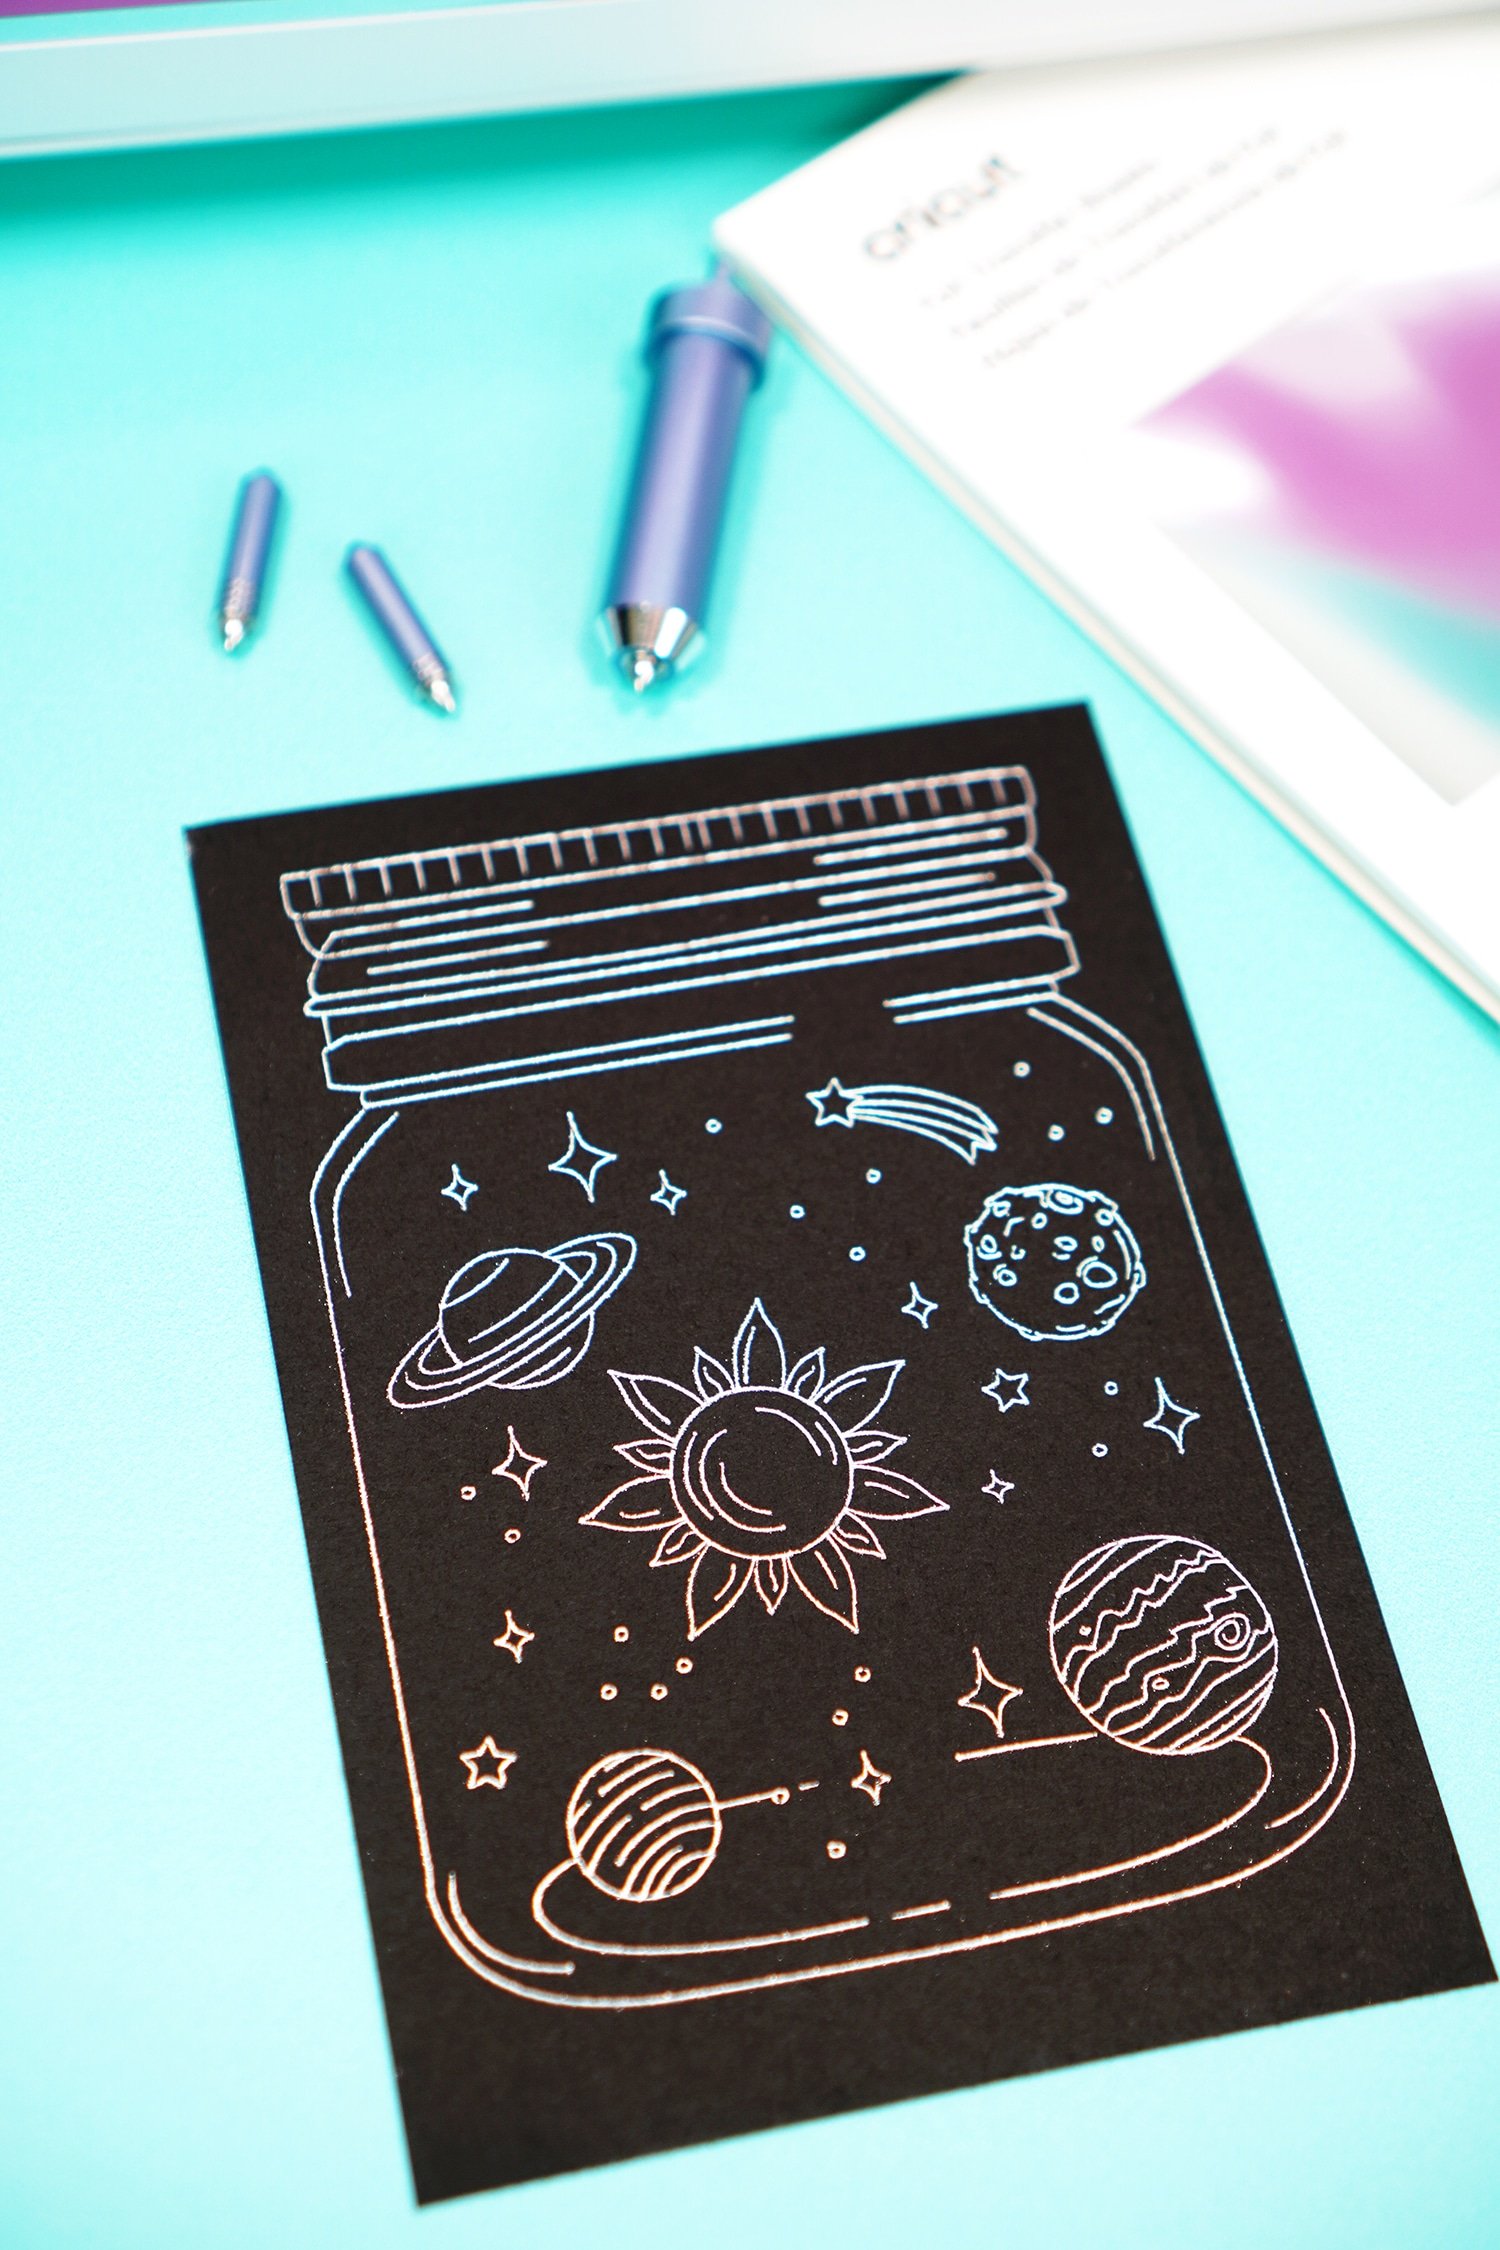
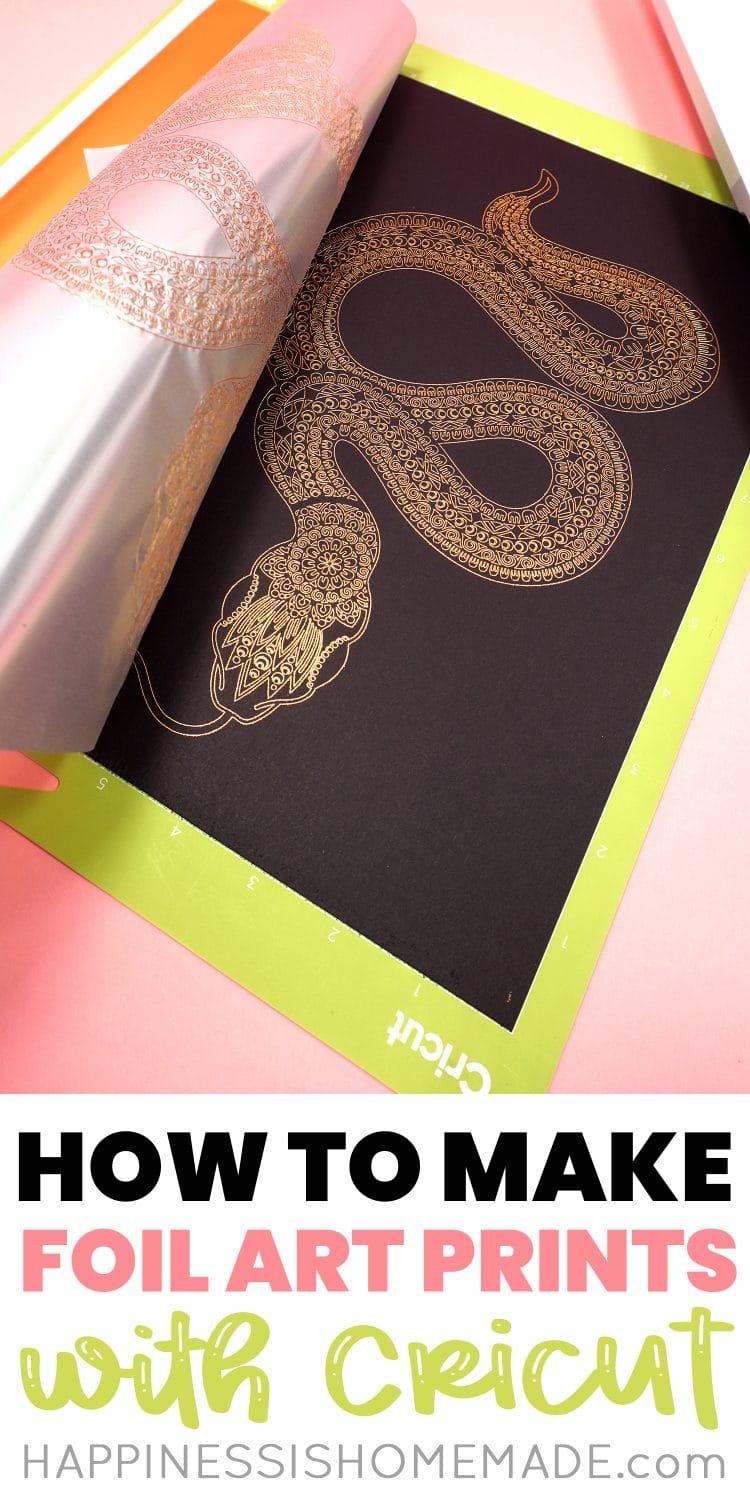
What Can I Make with the Cricut Foil Transfer Tool?
Cricut’s Foil Transfer Sheets work with a wide variety of base materials including paper/cardstock, kraft board, faux leather and suede, vellum, and printable vinyl (and we’re still testing out some other materials for compatibility!). Anything that you can dream up that’s made with those materials is fair game!

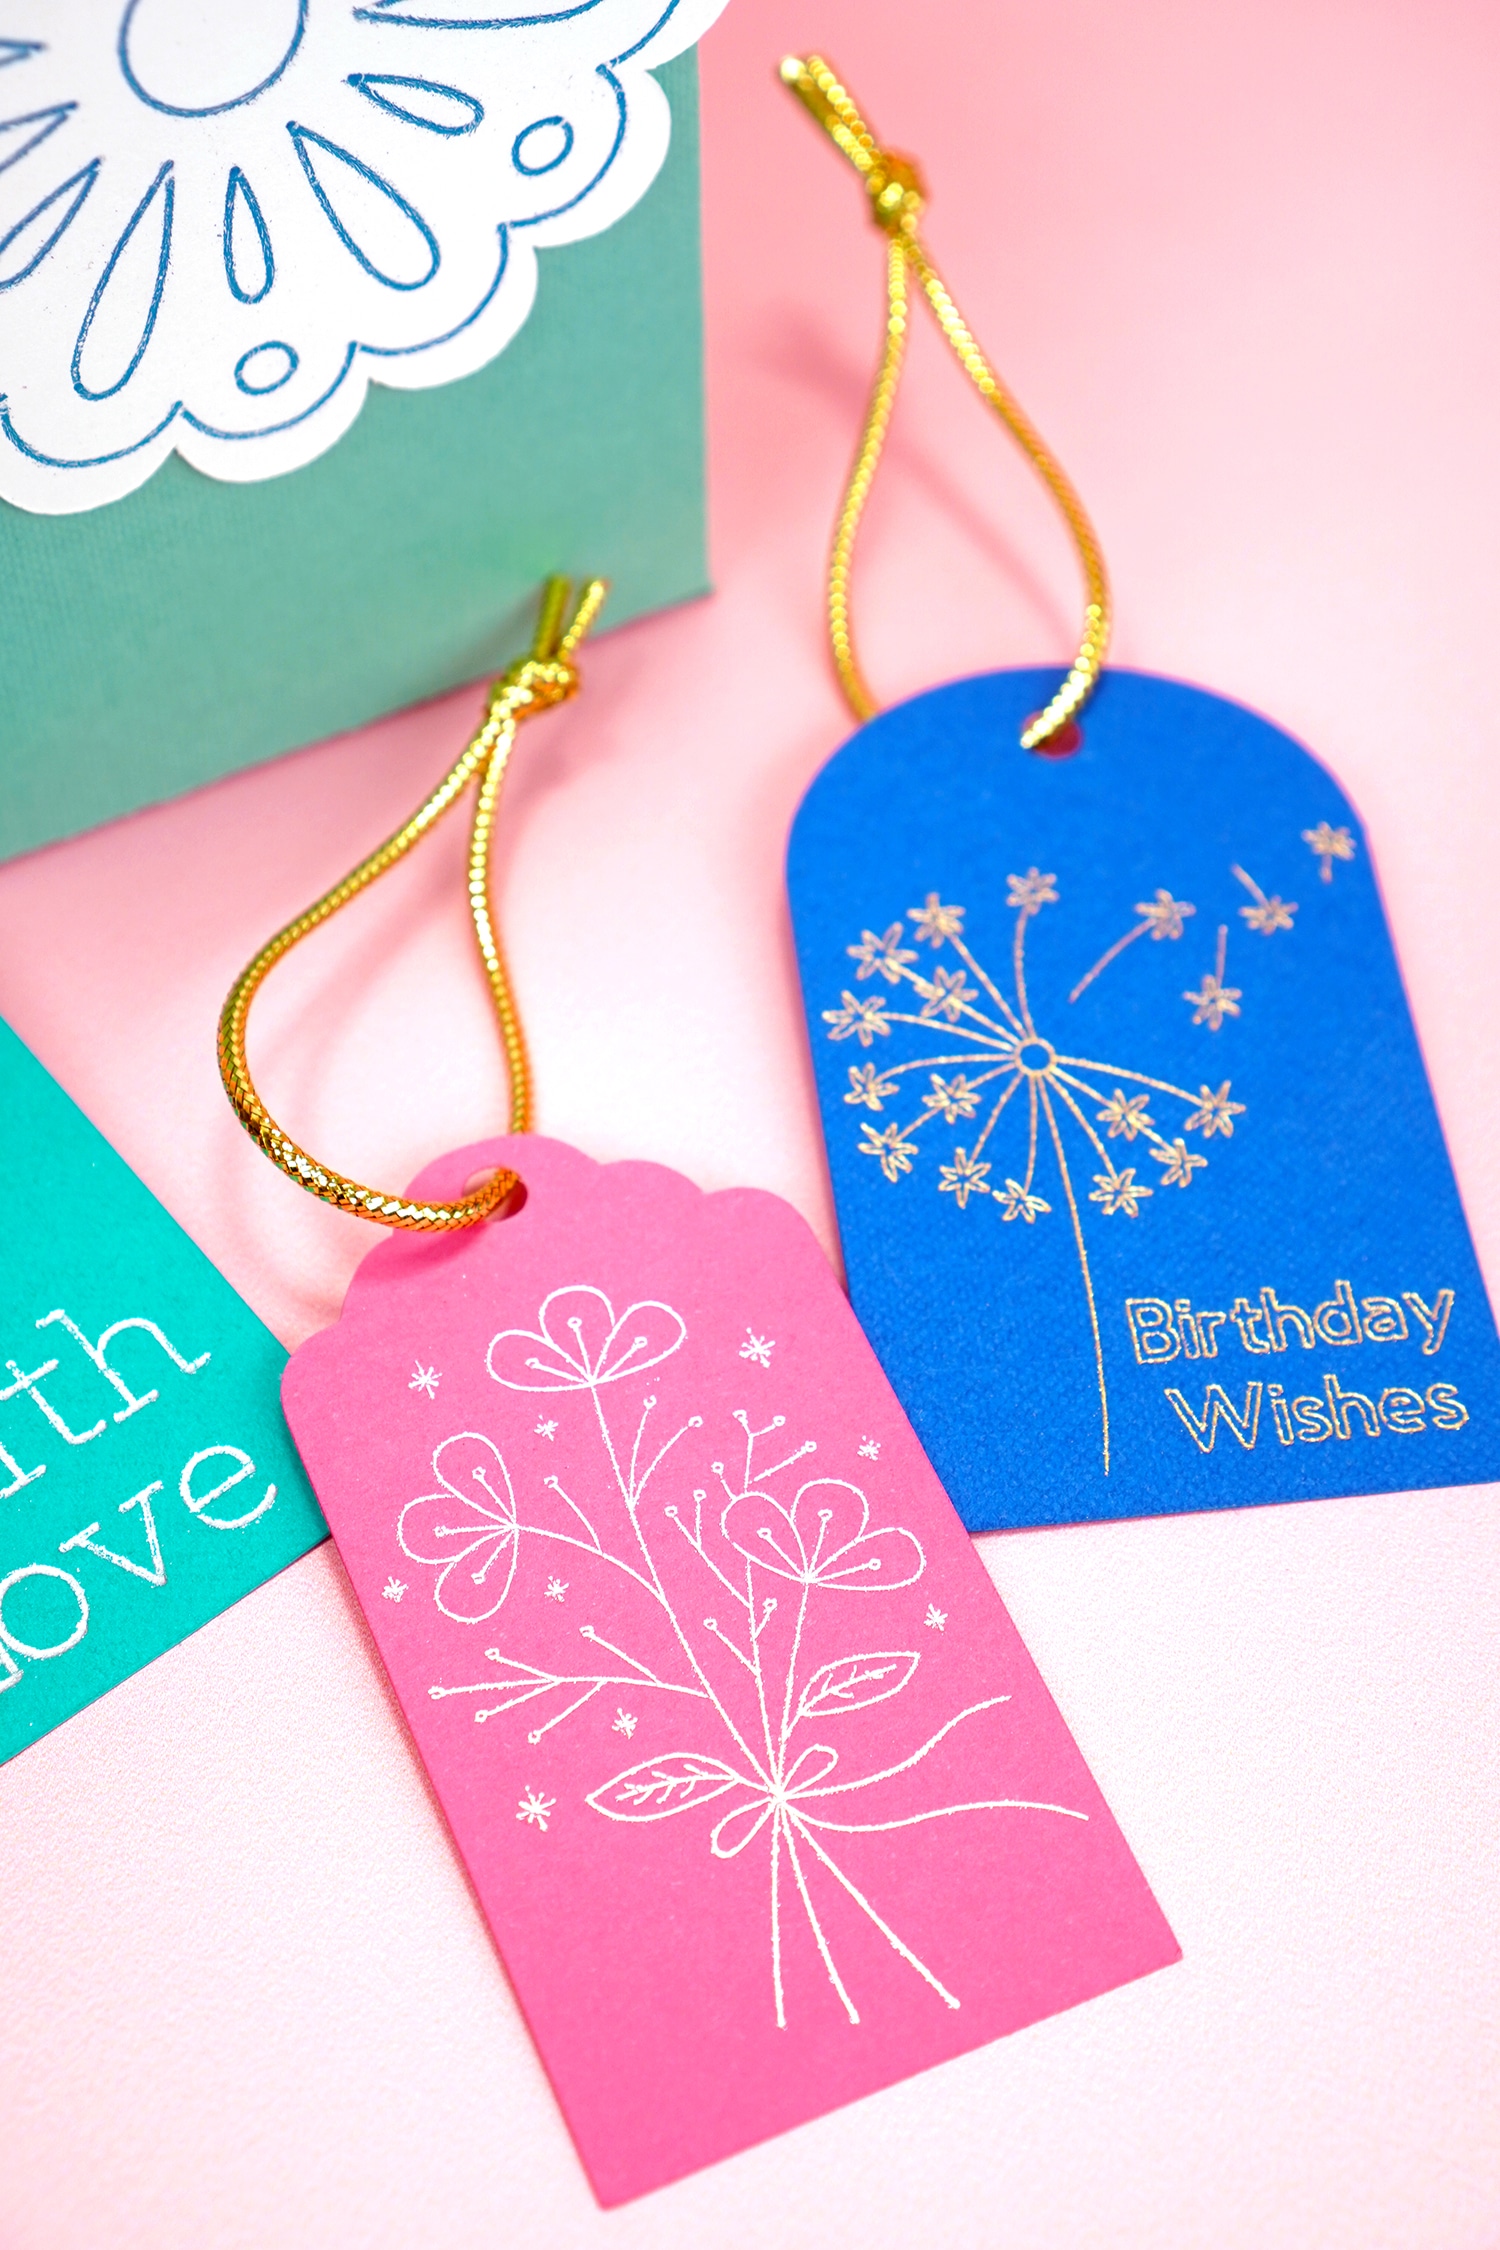
Gift boxes, bags, and gift wrap are a fun way to add some glitz and glam to a special occasion!
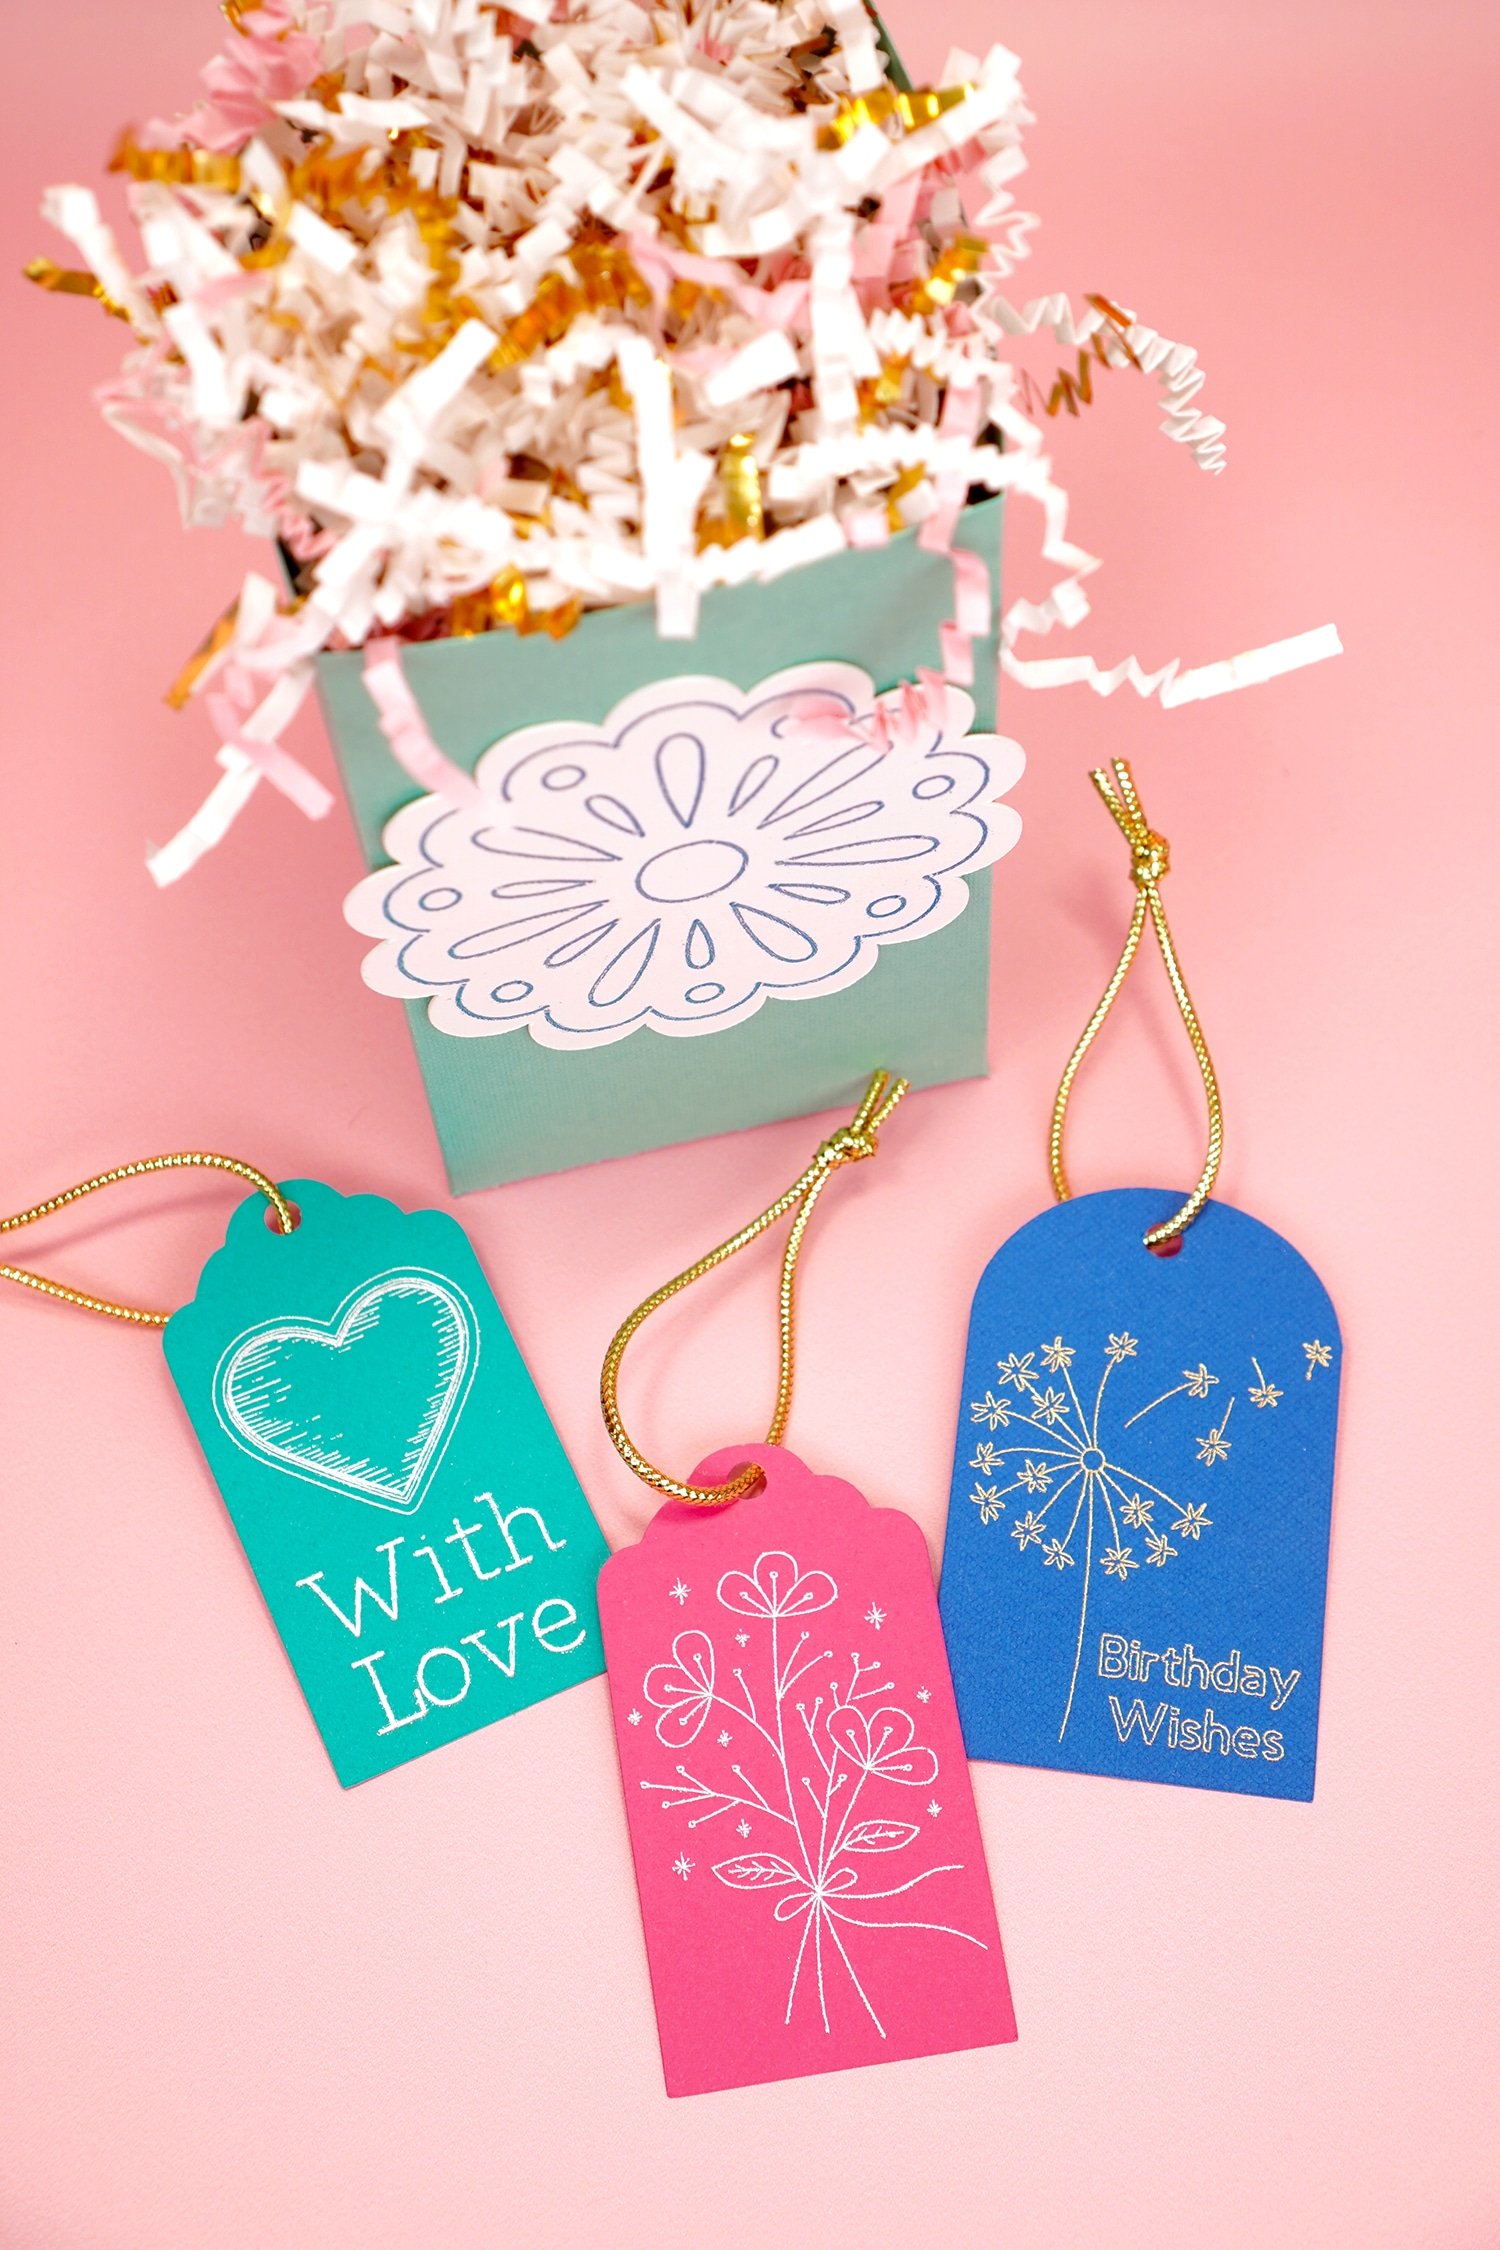
These foil gift tags were super fast and easy to make, and they definitely elevate my gift and add a little something special!
Foil Art Prints are SUPER popular these days, and for good reason! Who wouldn’t want to hang up something shimmery and eye-catching in their home! You can learn How to Make DIY Foil Art Prints with Cricut here!
I love the way that the silver foil contrasts with the black kraft board! It’s so chic!
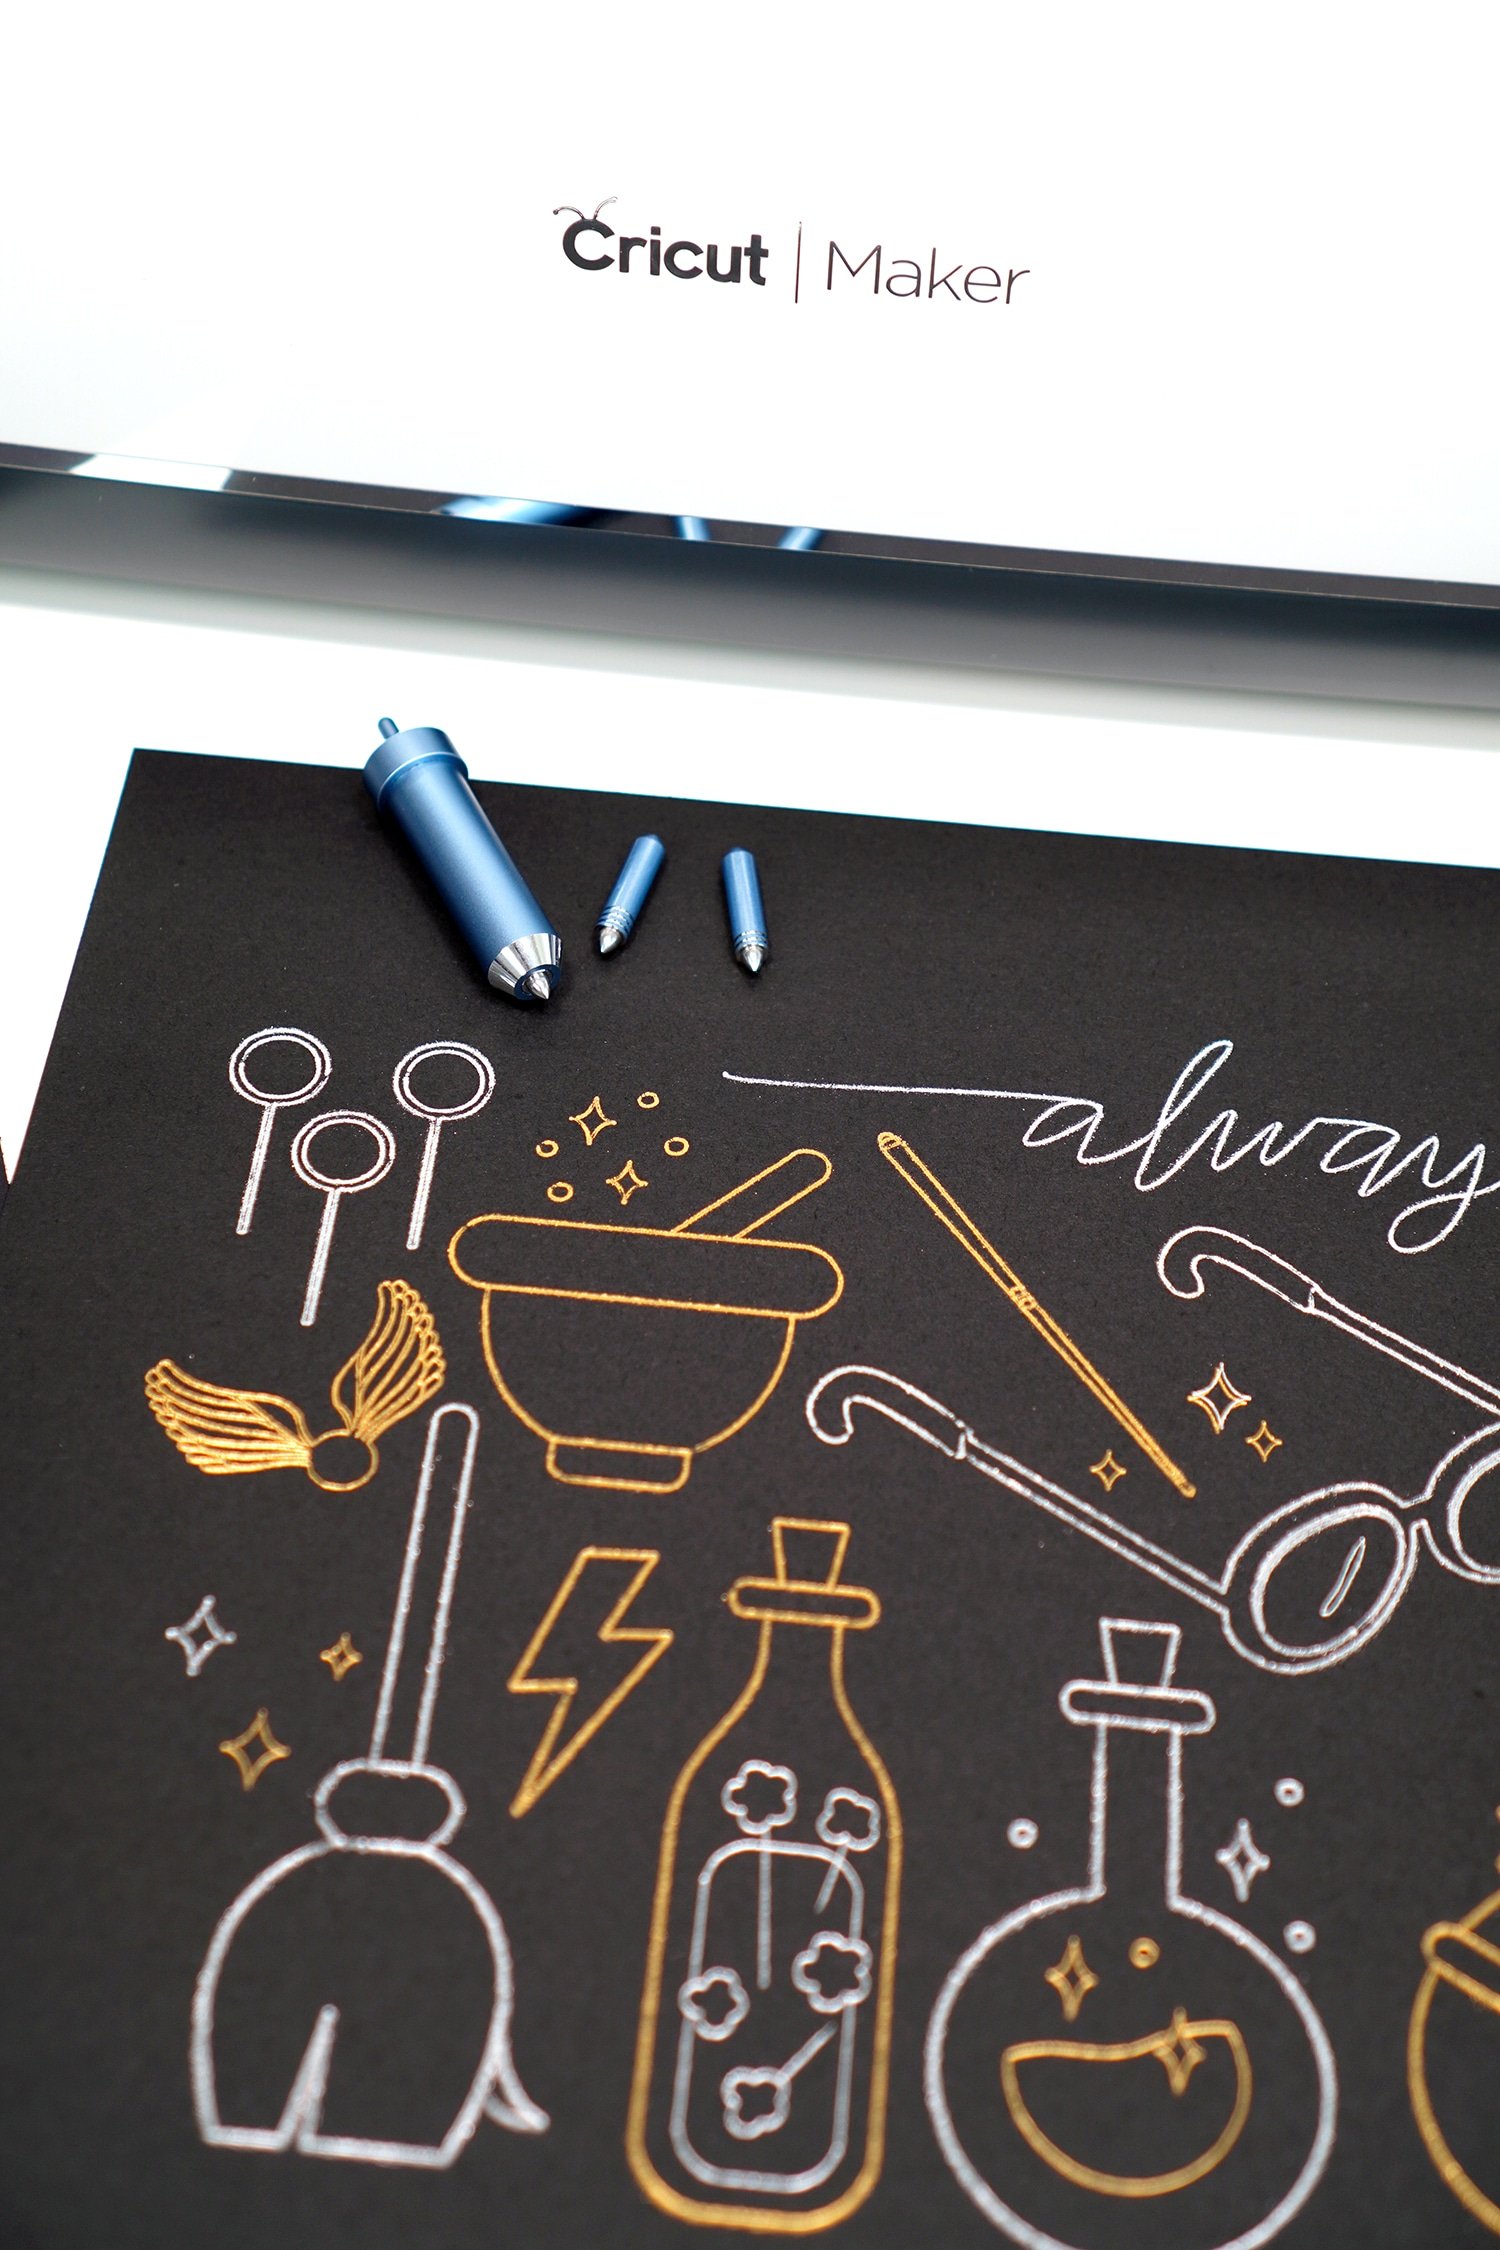
Of course, you can also use multiple colors of foil in one art piece like we did with this Harry Potter inspired foil art print!

These fun foil “doodled” bookmarks would make a really cute reward incentive for your little readers!
There are lots of really great projects that you can make with the Cricut Foil Transfer System – this is just the tip of the iceberg!
So, what are your first impressions of the Cricut Foil Transfer Tool? Are you excited? What are you going to make first? Let me know in the comments!

You May Also Like:
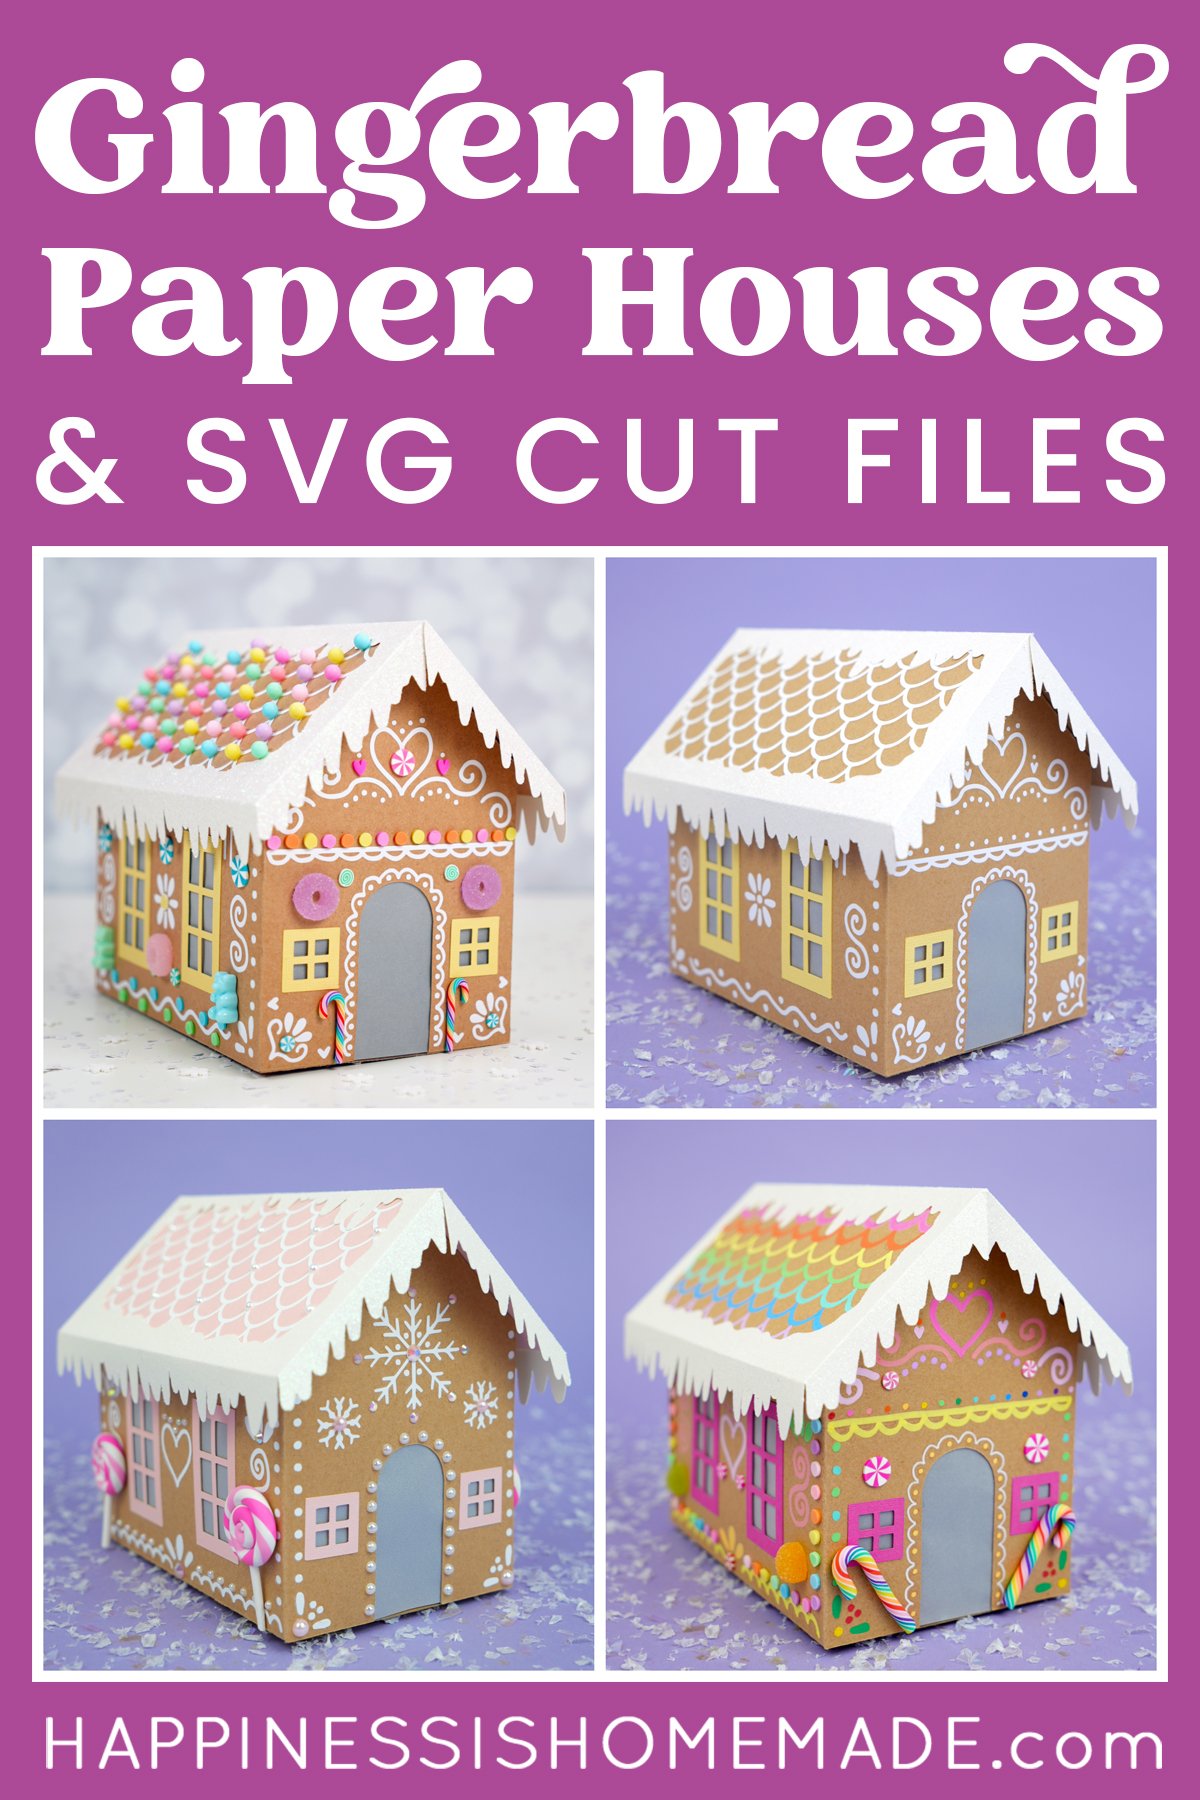
 Cardboard Gingerbread Houses + SVG Files
 Thanksgiving Treats: Turkey Lollipops
 35+ Mother’s Day Cricut Craft Ideas
 Free Christmas Countdown SVG +16 Christmas Cut Files
- 13 Free Bat SVG Files for Halloween
- 3D Stars + Christmas Ornament SVG Files
- Ouija Board Halloween Sign + SVG
- Back to School SVG + Coloring Shirt


Don’t Forget to Pin This Cricut Foil Transfer System Overview for Later!


Heidi Kundin has captivated the hearts of millions with her colorful and inspiring approach to crafting, celebrations, and family fun. With over 15 years of experience, Happiness is Homemade has become a must-visit destination for those seeking quick and easy creative ideas and last-minute solutions. Heidi’s warm personality shines through her posts, inviting readers to join her on a creative journey that’s fun, rewarding, and achievable. Heidi is also the author of Homemade Bath Bombs & More and DIY Tie-Dye.
Hello!
I was wondering how well the foil worked on metal, I have a metal NFC business card and want to add something to it, but do not want to order a new card to have them put it on because they can be a bit pricey.
Any feedback or info would be awesome, thank you in advance!
Hi Brian,
I actually haven’t tested the tool out on metal, so I can’t speak to how well it would work or not. If you try it, though, I’d love to hear how it turned out for you!
Have you tested any other brands of foil for transfer. I’m all for saving money and I wonder if there are cheaper alternatives out there that would work.
I have not personally tested any yet, but my friend Cori at Hey, Let’s Make Stuff just did a test here that’s full of great information: What Foil Works with the Cricut Foil Transfer System?
will it work with an expression that has only one tool holder not two?
Hi Donna, unfortunately, the Foil Transfer Tool is only made to work in the Maker or the Explore family of machines.
Is it true you can’t use your this on your phone ? As in though design space
Hi Shona,
Yes, for now, the foil line types are only available in the desktop version of the Cricut Design Space software and not on the Design Space app.