

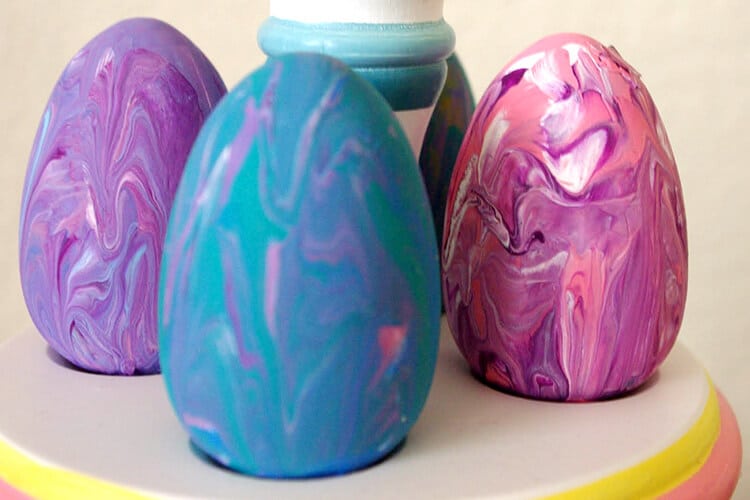
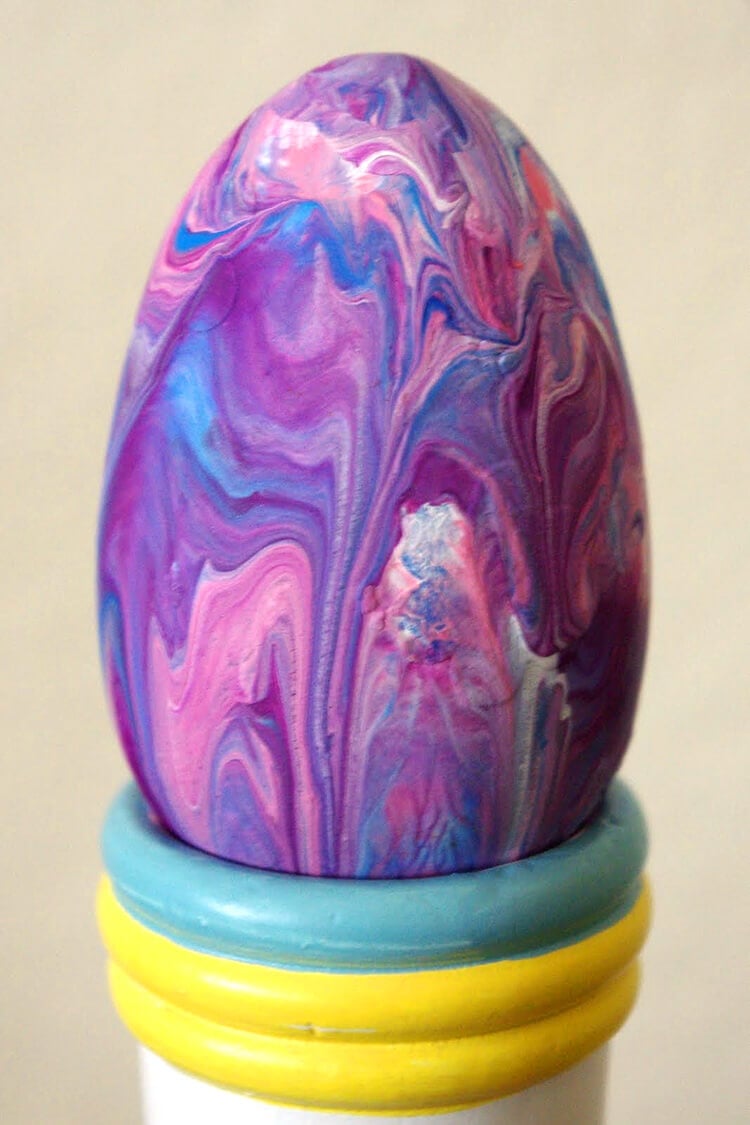
These Marbled Easter Eggs are a quick and easy Easter kids’ craft that anyone can make! All it takes are wooden eggs, acrylic paint, and a baking pan!
This post may contain affiliate links. I will receive a small commission from these sales at no additional cost to you!
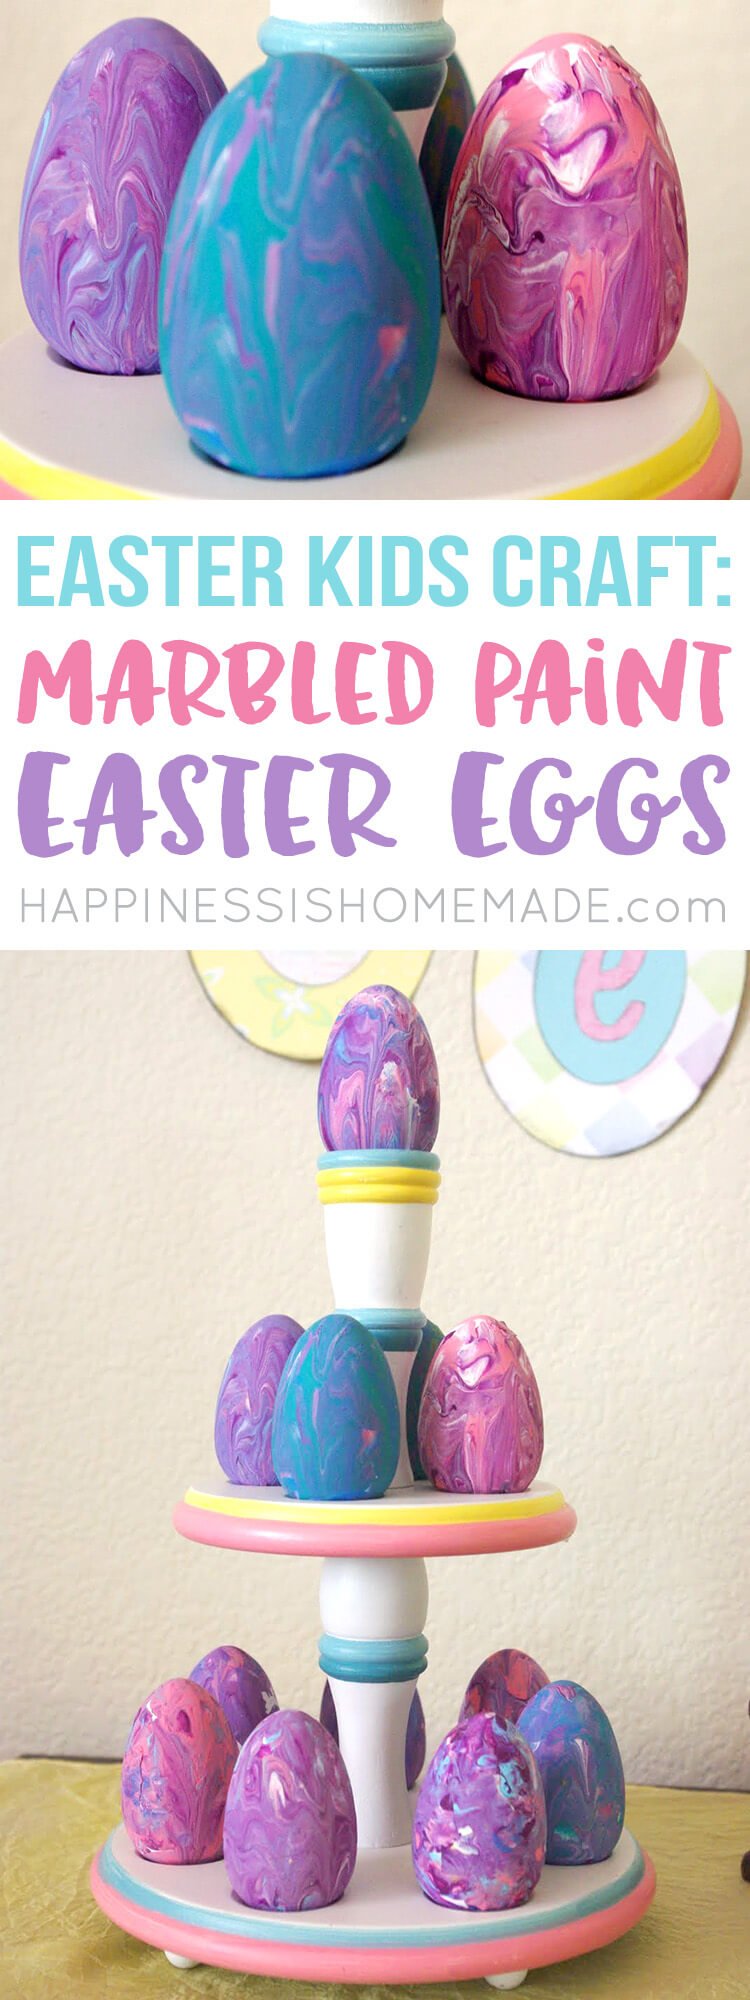
Easy Marbled Easter Eggs
Yesterday my boys made marbled Easter eggs using wooden eggs and acrylic paint. We used the same technique that we use to marbleize paper with actual glass marbles, and I love the way that they turned out!
You May Also Like These Easter Ideas:
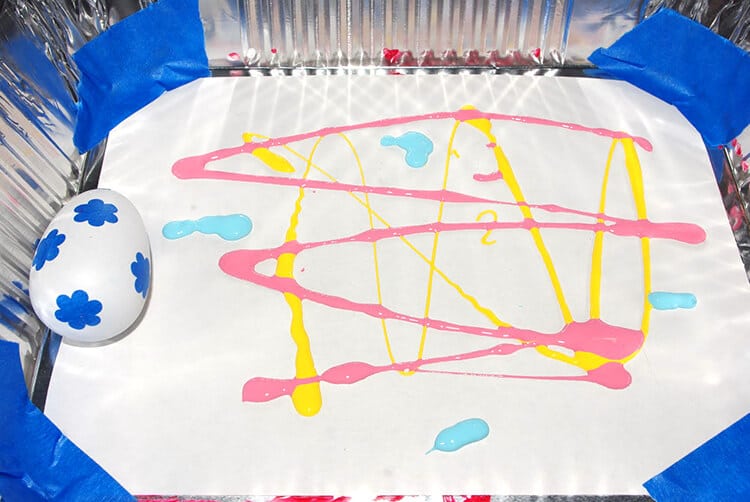
We use disposable roasting pans from the dollar store, lined with a piece of white construction paper, to minimize cleanup. It also gives you a nice bonus piece of artwork at the end of the project!
Add a wooden egg and a few blobs of acrylic paint…you’ll notice that we stuck stickers to a few of our eggs in an attempt to recreate the loveliness we saw HERE…but, the truth of the matter is that the paint got too thick and gloppy for it to work properly. I couldn’t even find the stickers under all that paint on most of the eggs when we were done! We’ll probably try using stickers with regular egg dye when we do the traditional egg dying later. In the meantime, ignore what we did, and skip the stickers for this project 🙂
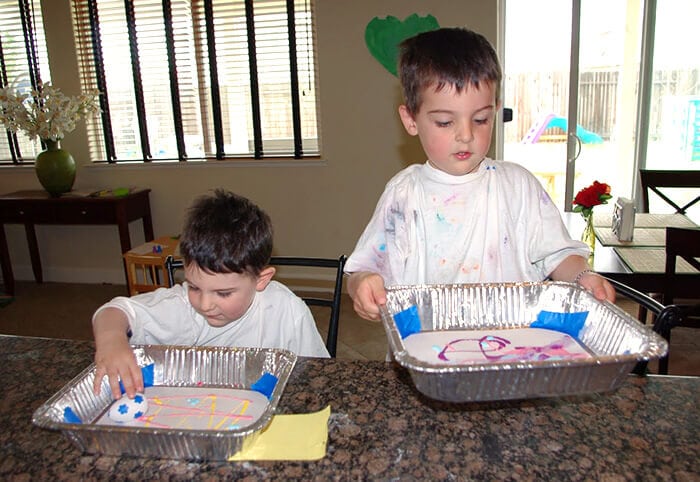
Give your kiddos their trays and start rolling them around. It works best if you actually pick up your tray and tilt it side-to-side like Sawyer is doing here.
Sutton finally caught on to the proper technique and was totally thrilled with how his eggs looked!

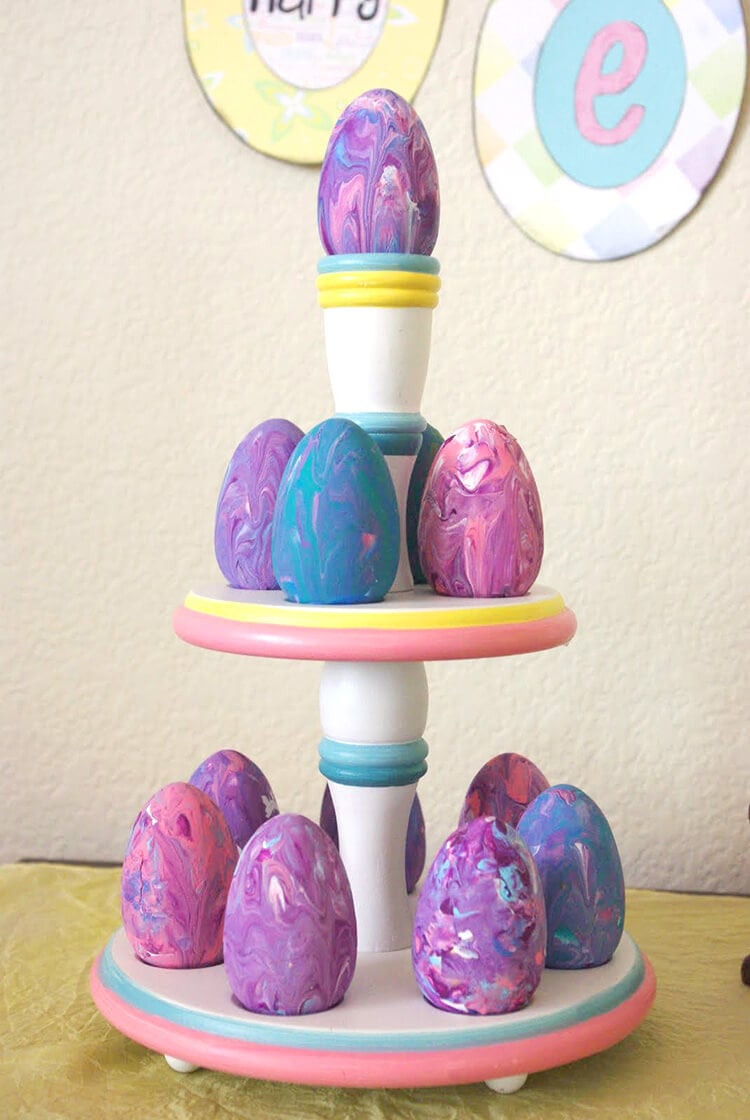
See what I mean about that bonus artwork at the bottom of the tray? We’re going to cut ours up and make Spring/Easter cards to mail to our family and friends.
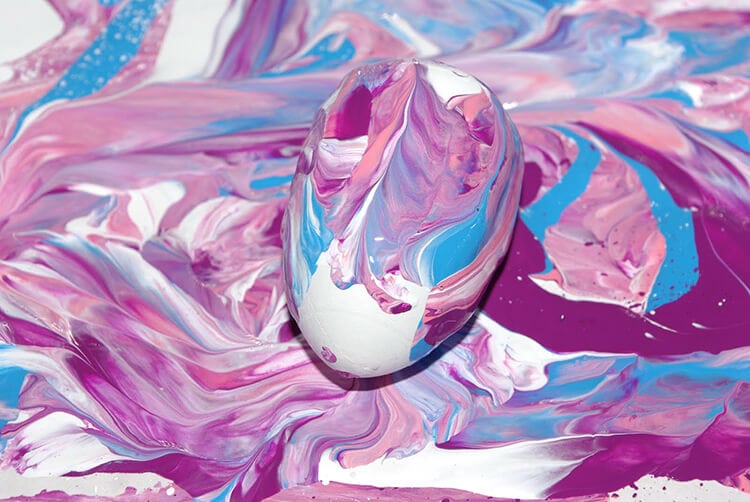
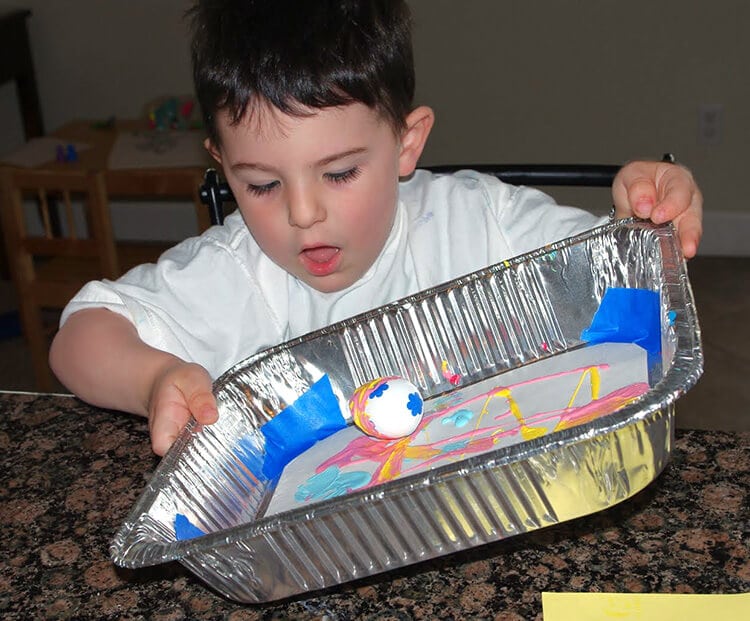
When your egg is mostly covered (it usually won’t get 100% covered because its odd shape rolls kind of awkwardly), have an adult take the egg out of the pan carefully and dip the remaining white spots right back into a swirly blob of paint. That should take care of covering the whole thing!
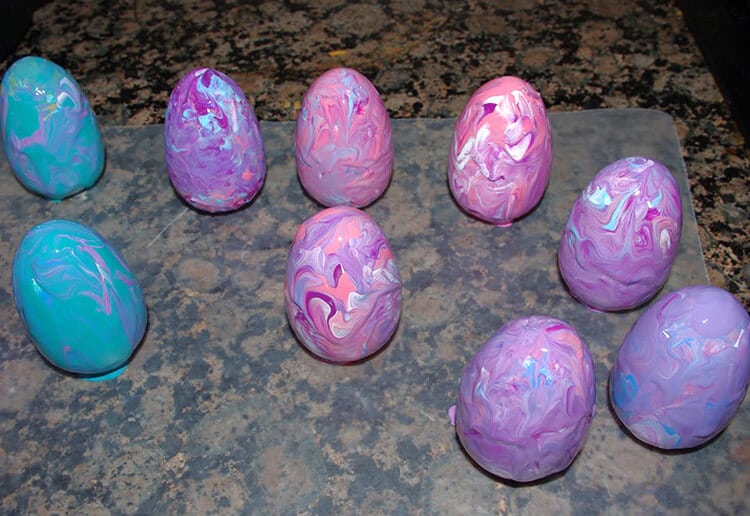
Place on a sheet of waxed paper to dry overnight. After a few hours, when the top surface of the paint was dry, I turned the eggs on their sides so that the bottoms could dry. The paint was really thick, so it took quite a while for the eggs to dry completely.


If you like this idea, don’t forget to pin it!

Heidi Kundin has captivated the hearts of millions with her colorful and inspiring approach to crafting, celebrations, and family fun. With over 15 years of experience, Happiness is Homemade has become a must-visit destination for those seeking quick and easy creative ideas and last-minute solutions. Heidi’s warm personality shines through her posts, inviting readers to join her on a creative journey that’s fun, rewarding, and achievable. Heidi is also the author of Homemade Bath Bombs & More and DIY Tie-Dye.
Oh my goodness those are beautiful – and you’re right! SO EASY! We did a similar marbling technique at Vday – but with paper – not an Egg!! SO EASY! I LOVE IT!
These are great. I love the technique, it looks fun 🙂
Thanks so much for sharing this at For the Kids Friday at Sun Scholars! I’ll be posting the next link party tonight, so be sure to stop by. I can’t wait to see what you have to share this week!
🙂 rachel @ SunScholars.blogspot.com
Cool, I may try this.
This is a great idea! The eggs came out great. I’ve included your post on my weekly favorites here: http://play2grow.blogspot.com/2011/03/weekly-favorites-for-march-20-2011.html
They are beautiful thanks for the great idea.
I love this idea and I double love that the kids can help! I featured this on my Friday Favorites post today. I have a featured button if you want to grab it. Have a beautiful and blessed weekend!
What a fun technique!
I’d love to have you share at my For the Kids Friday Link Party! I’m sure you’ll find some fun ideas while you are there! Come join the fun!
http://sunscholars.blogspot.com/2011/03/for-kids-friday-3.html
How cute and so easy!
So pretty! I would love if you linked this up to my kids activities linky party next Monday! Visiting from Someday Crafts and I am a new follower!
Have a great day!
Michelle
http://www.delicateconstruction.blogspot.com
That’s such a neat idea! I’ll have to grab some eggs on clearance! Very nice!
Thanks for sharing this great idea. Love how they turned out.
This is such a great idea. I love the look and how easy and fun it is. Thanks for sharing this.
Cheers,
Tracy http://allthumbscrafts.blogspot.com
I love them- thanks for sharing!
That is a great idea! I will have to try this.
So easy and so effective. Wondering if I can get some wooden eggs from Ebay, hmmm.
U can probly get wooden eggs in your craft store or walmart
U can probly get wooden eggs in your craft store or walmart
So simple and creative! Love it!
So pretty! And I love the idea of using the leftover marbleized patterns for card making! I am hosting a link party this aft, I would love it if you could link up. http://untilwednesdaycalls.blogspot.com/
Cheers!
So going to do this with the kids! No wooden eggs so we’ll have to use the real thing!
Thanks for the idea!
Love this idea! I bought a set of the wooden eggs a few years ago and have Maddie decorate one every year. I think we will be trying out this technique this year!