


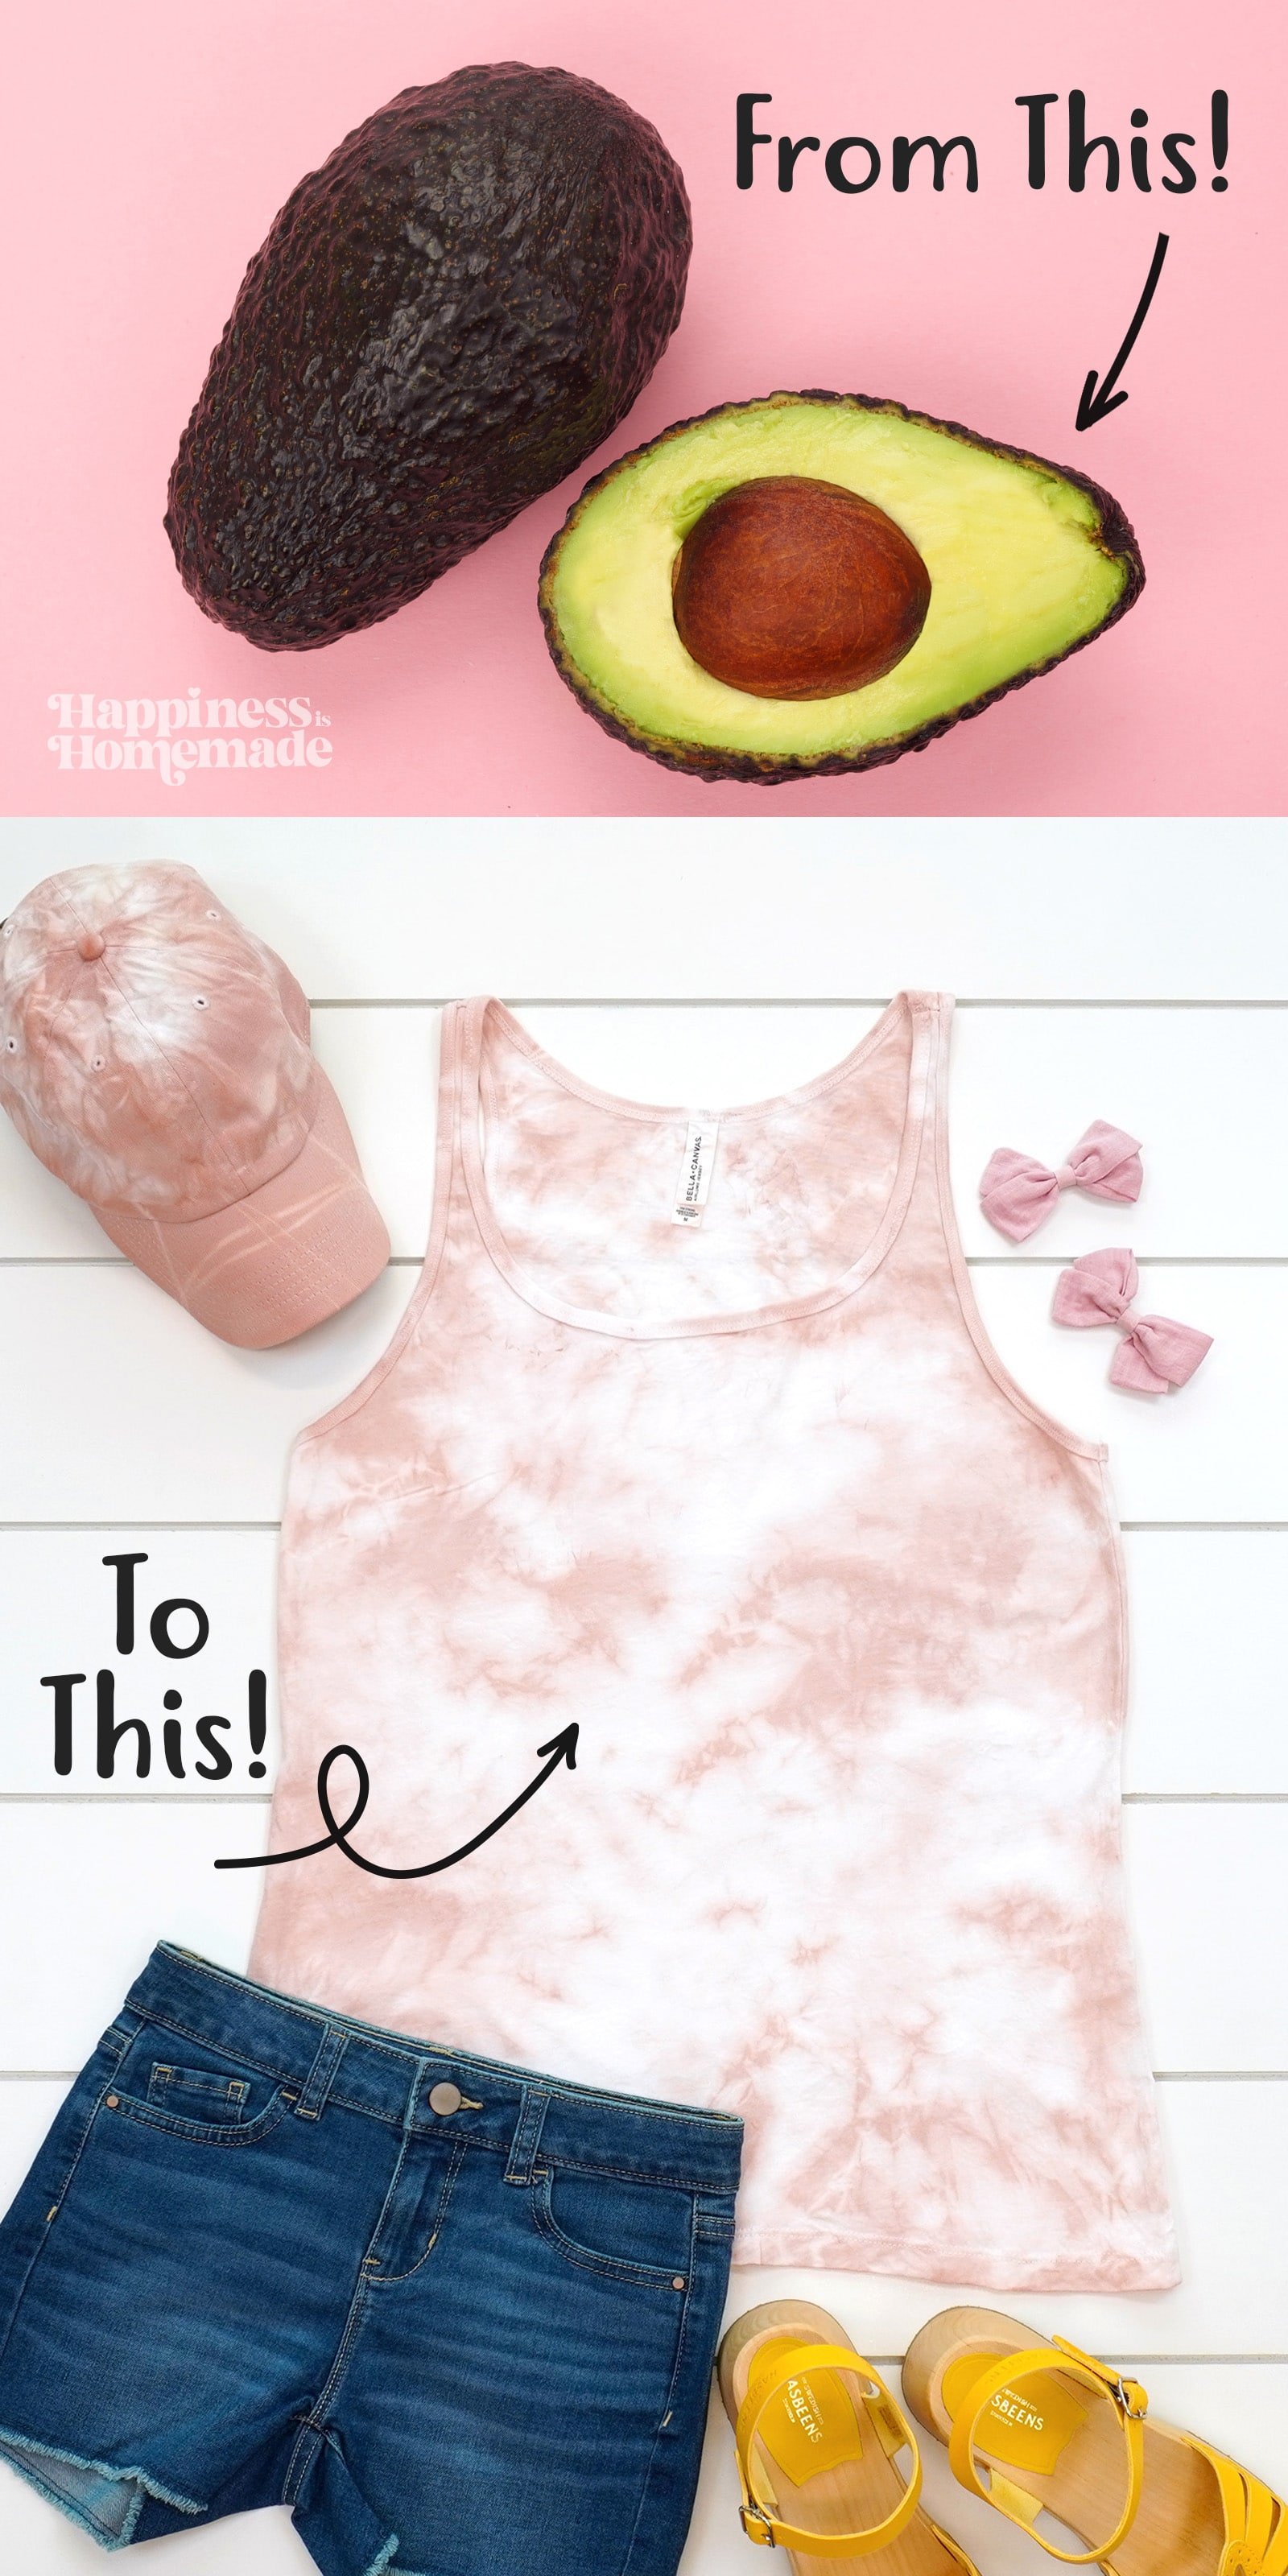
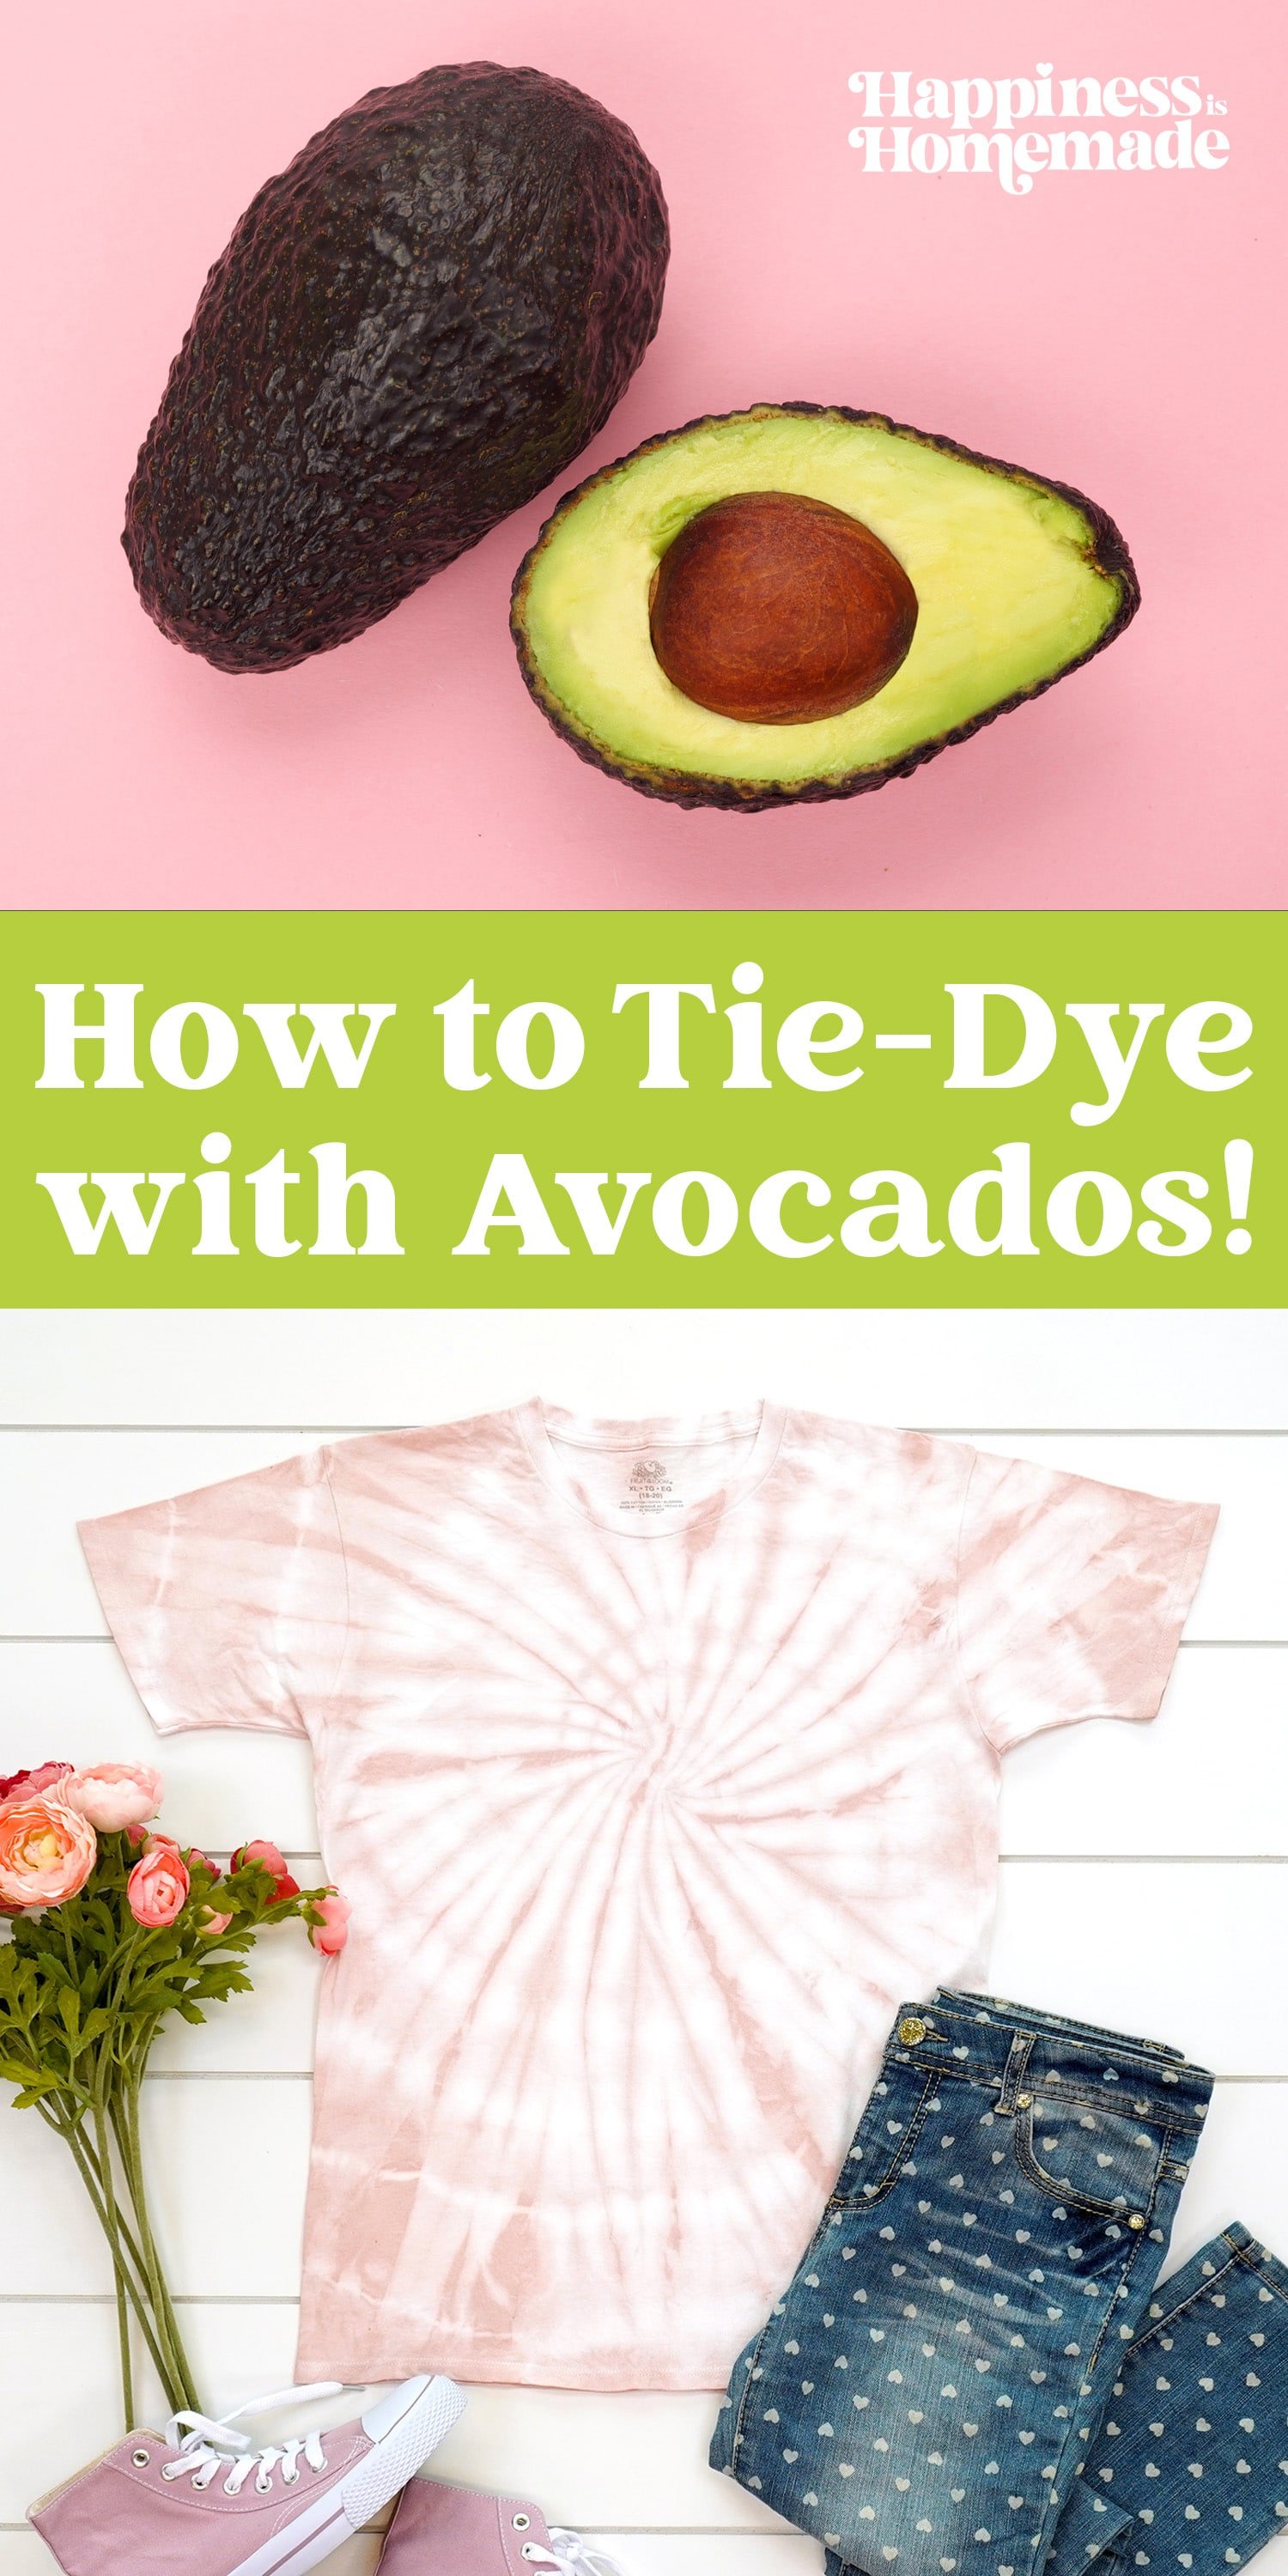
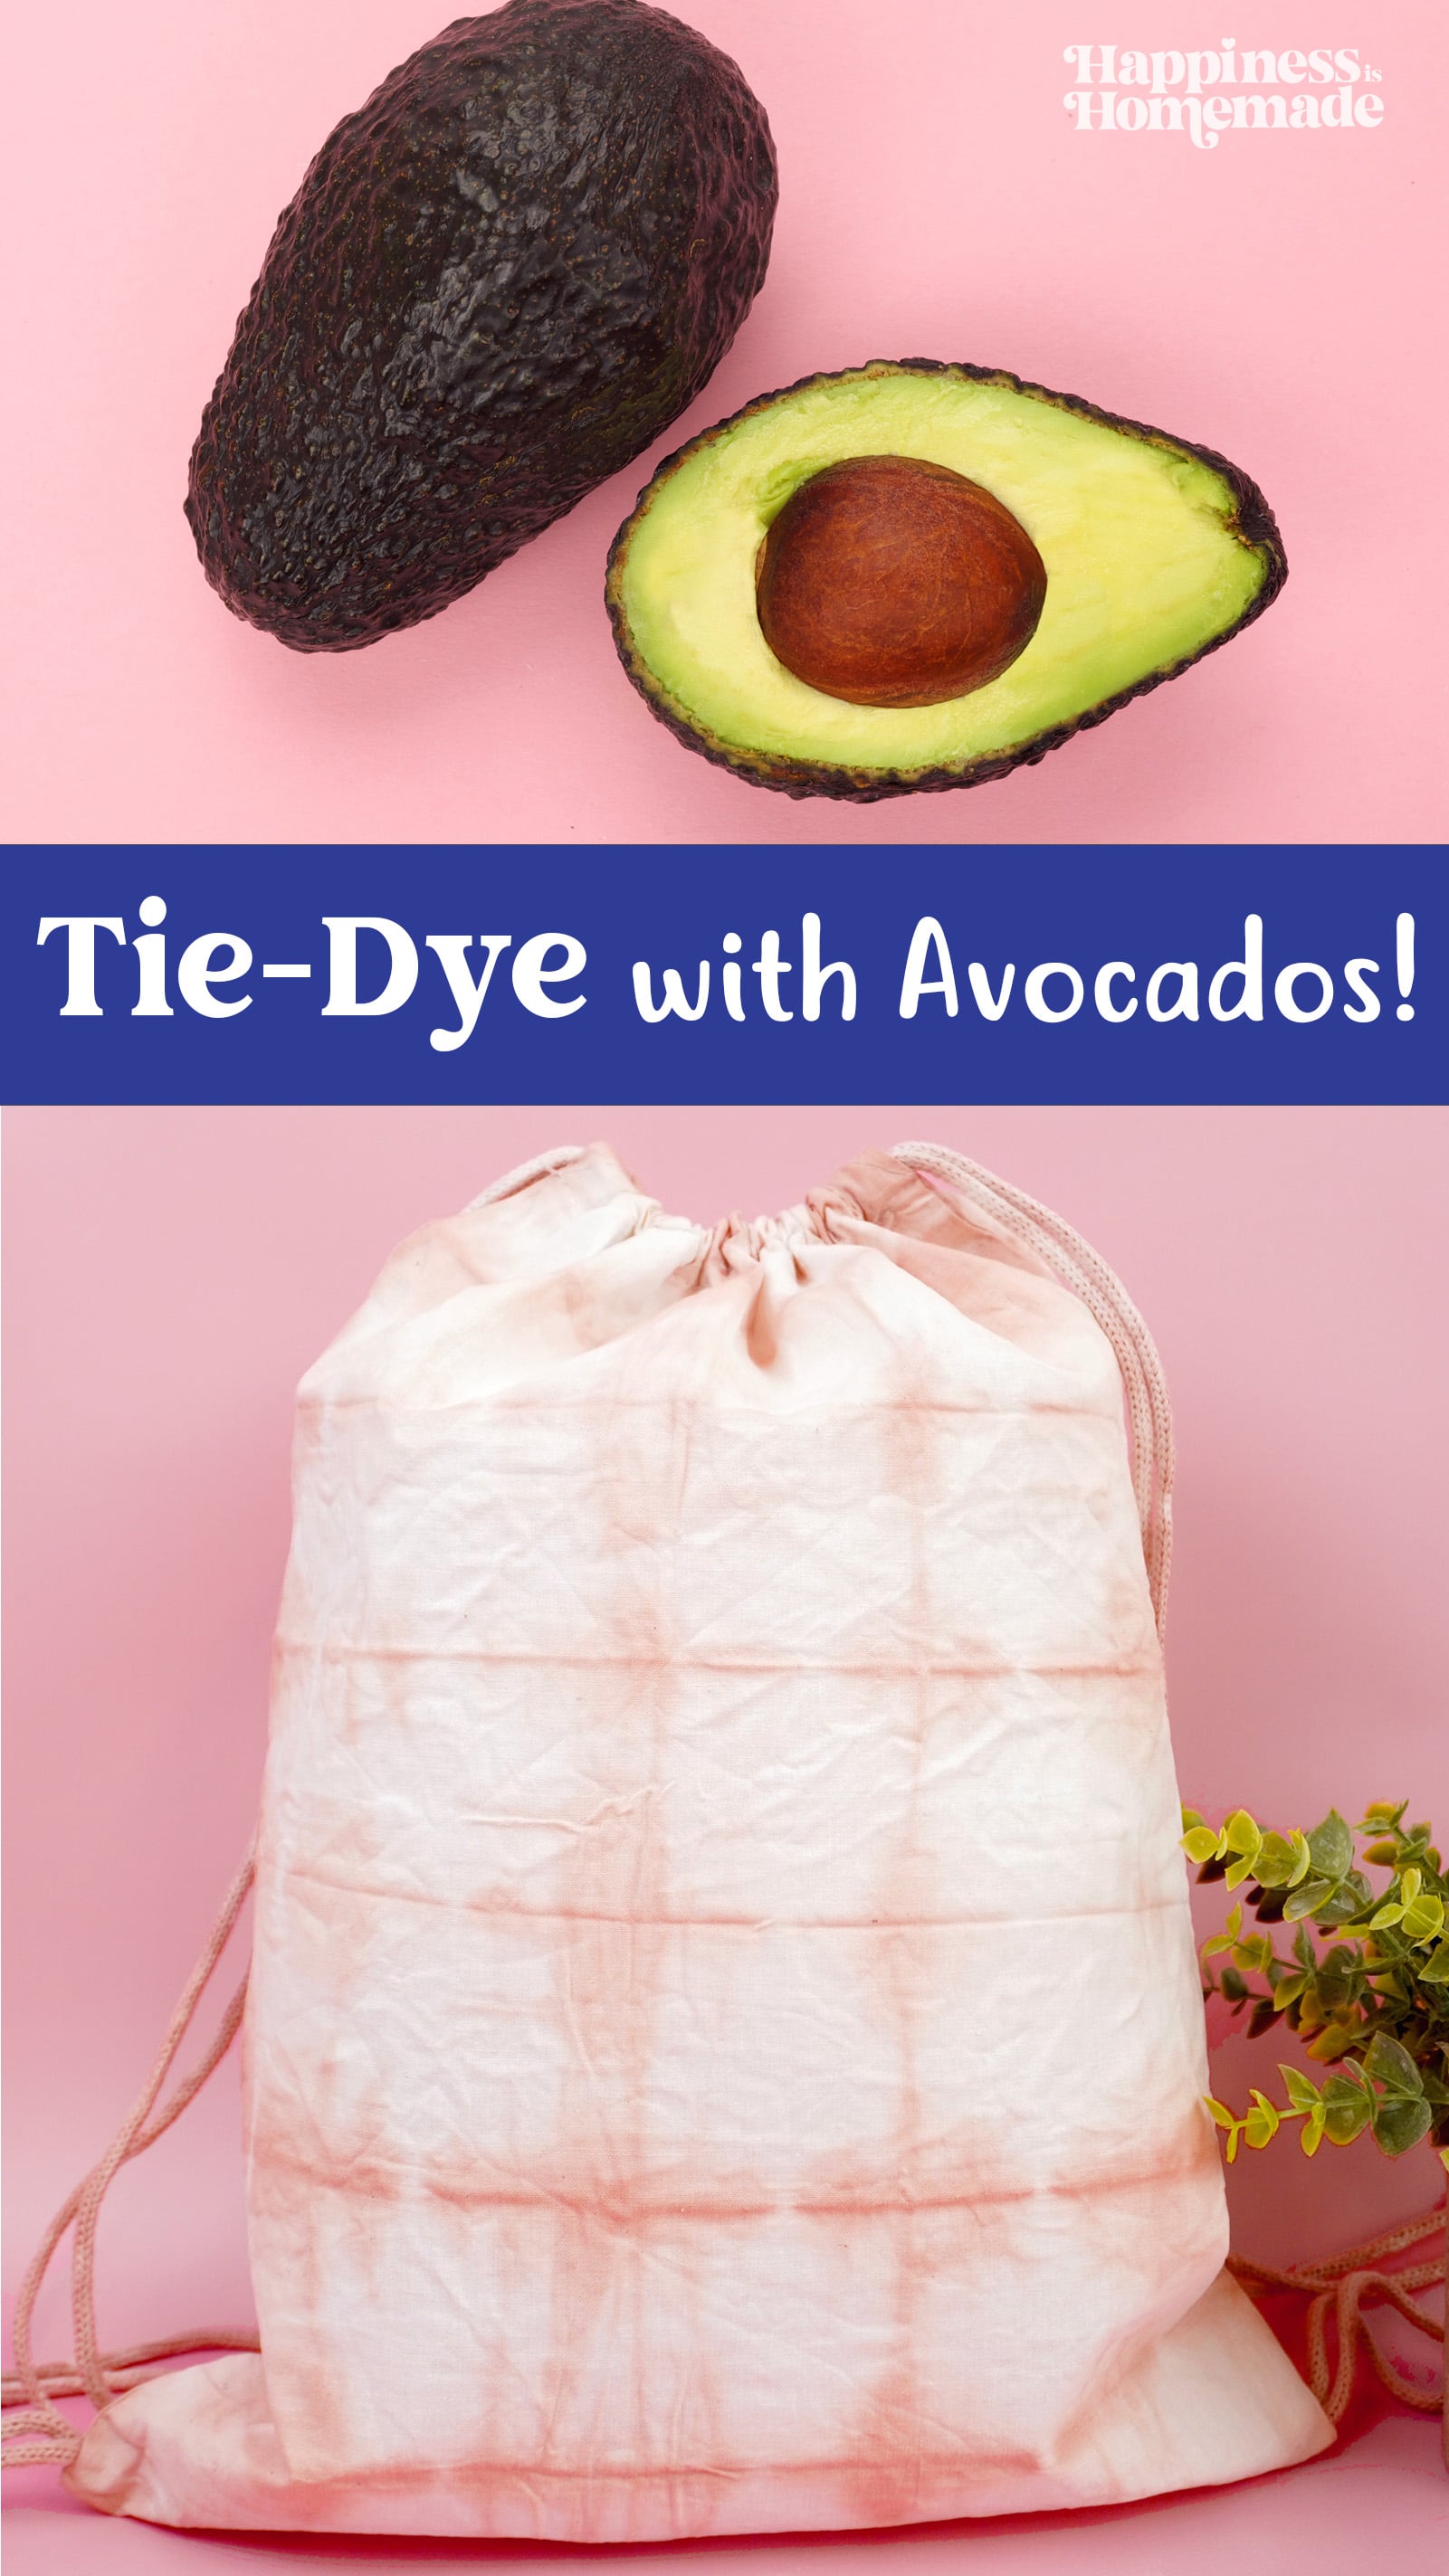
Learn how to make avocado dye and tie-dye clothing using avocado pits! Avocado pit dye makes a pretty pink color! It’s so fun and easy!

This post may contain affiliate links. I will receive a small commission from these sales at no additional cost to you!
Learn how to make avocado pit dye and tie-dye clothing using avocados! It’s so fun and easy!
My very first natural dyeing experiments were in my neighbor’s backyard when I was nine years old. Our neighbors led a very nature-centric lifestyle, and the mom had tasked myself and her daughter with dyeing some wool yarn that she had carded and spun by hand. She handed us two skeins of wool, two small buckets, and some yellow onion skins, and encouraged us to experiment with natural materials from the yard to create two different dyes for the yarn.
We created a lovely golden-colored yarn with the onion skins, and we dyed the other skein a gorgeous shade of violet using blackberries and flower petals. After that, I was hooked on dyeing, and over the years, I have learned to dye with many natural dye materials.
One of my most favorite natural dyes is made from avocado pits – it produces the most amazing blush pink color and is colorfast thanks to the natural tannins found in the avocado stones. It’s a great dye for your first time dyeing with natural materials!
So, how do you dye your clothes with avocado?
It’s easy! Simply follow our step-by-step instructions to create avocado dye (below), soak your fabric in the dye bath, rinse, and enjoy!
Check Out My New Book!
Get my new book, DIY Tie-Dye: Step-by-Step Instructions for Creating Cool, Colorful Clothing and Accessories, for 35 easy-to-follow tutorials for creating 35 totally awesome tie-dye projects for your home and wardrobe!
How to Make Avocado Dye with Avocado Pits
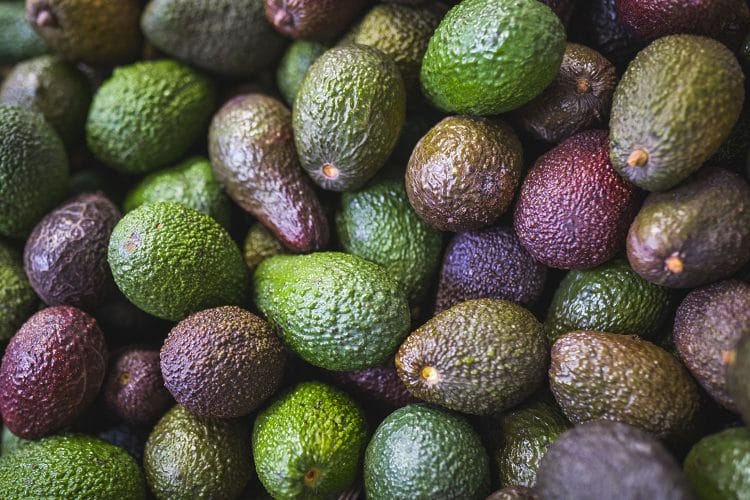
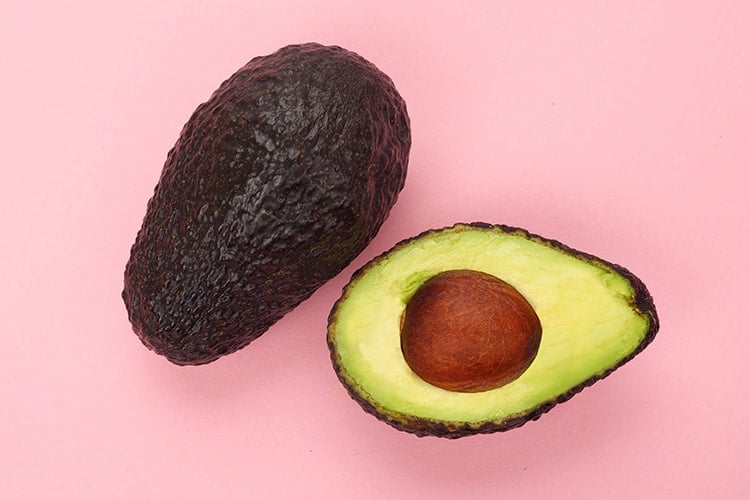
A Note About Avocados: I have always used Haas avocados to create my avocado pit dye, so I can’t speak to the success/failure of any other variety. The best avocados for making dye are ones that have a natural pink or purple hue to the skins. Choose dark skinned, ripe avocados for best results.
You may also experiment with using the avocado skins to create dye, however, I do not recommend mixing avocado pits and skins together in the same batch of dye.
Supplies Needed to Make Avocado Dye:
- Avocado Pits
- Enameled Cast Iron Pot or Stainless Steel Pot
- Fabric with Natural Fibers (chose cellulose fibers or protein fibers such as cotton, rayon, wool, etc.)
- Rubber Bands and/or Waxed Sinew
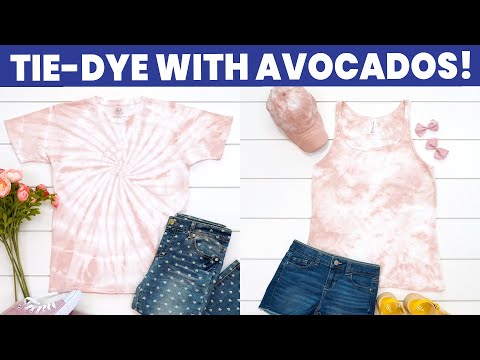
Watch our video tutorial here, and keep reading for all the details, plus even MORE helpful tips & tricks!
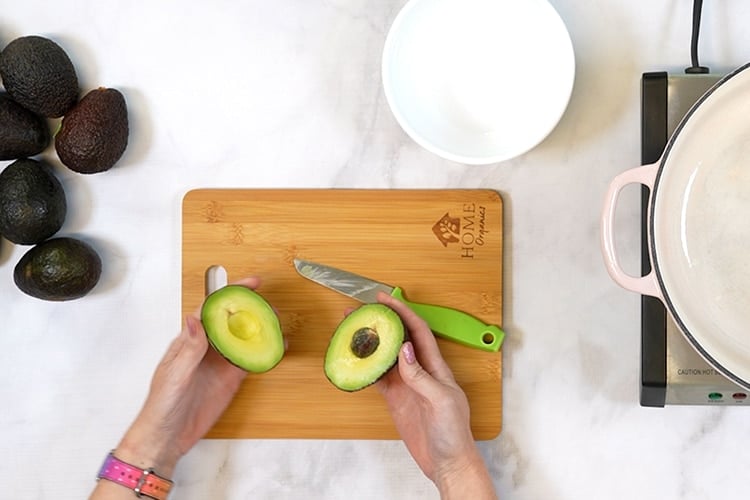
Start by making a big batch of fresh homemade guacamole 😂, or you can also collect your avocado pits and skins over time. I typically use between 8-12 avocado pits along with 3 quarts of water for each batch, and I dye between 3-5 items with each batch, depending on the size of the fabric.
Use hot water to rinse any green fleshy bits off, and then set aside to dry. If you are not going to be using them immediately, store the pits and skins separately in plastic bags in your freezer until you are ready to use.

When you are ready to make your dye, place a large pot of water on the stove top (it’s fine to use tap water!), and add the avocado pits to the pot.
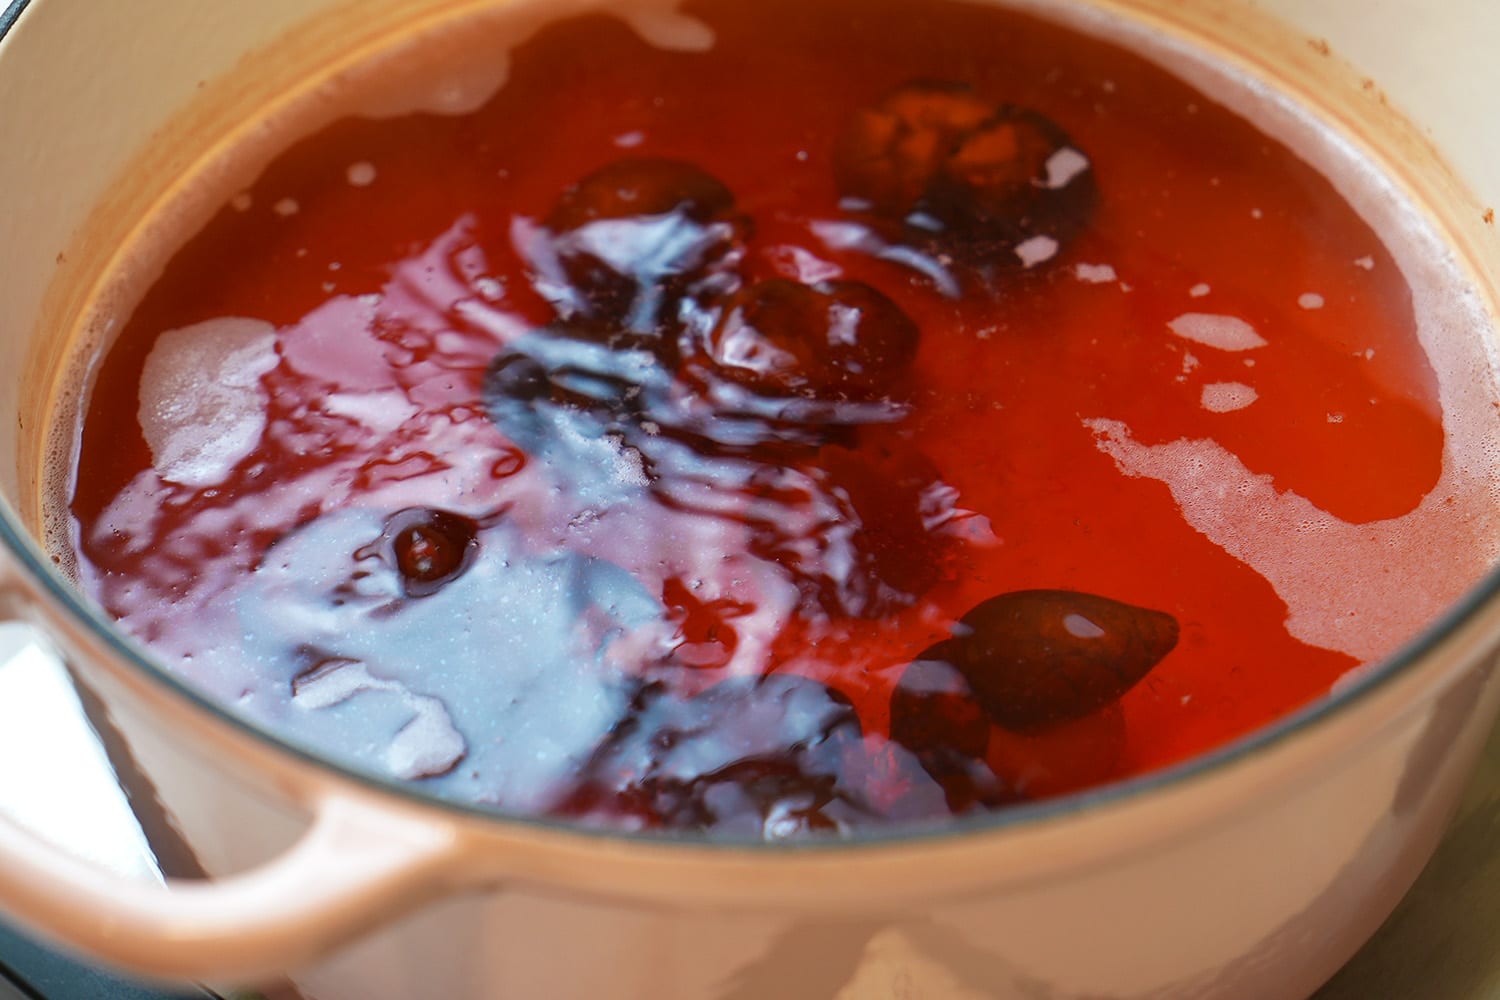
Bring the water to a very low boil, and then reduce the heat and lightly simmer for at least 30-60 minutes until the avocado dye turns a deep maroon or red color. Do not bring the dye to a full boil – adding too much heat will cause the dye to brown!
If desired, remove the pot from the heat after an hour, cover, and let it sit overnight for more intense and darker color results. Use tongs to remove the avocado pits when the dye color is to your liking.
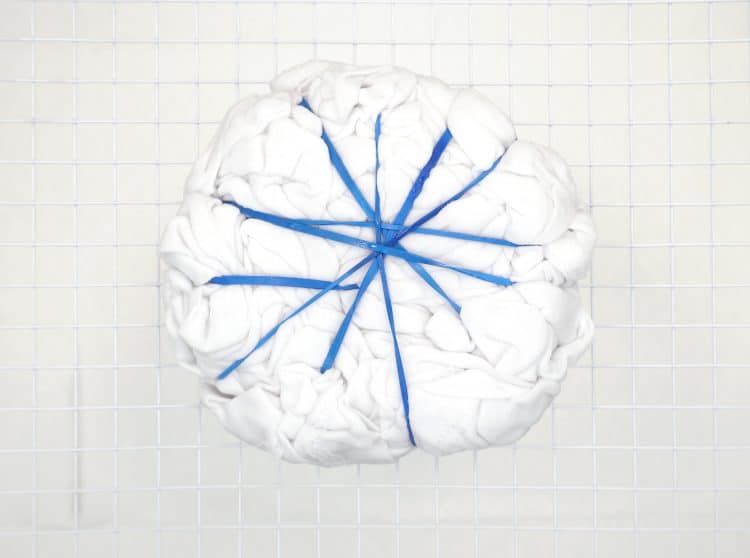
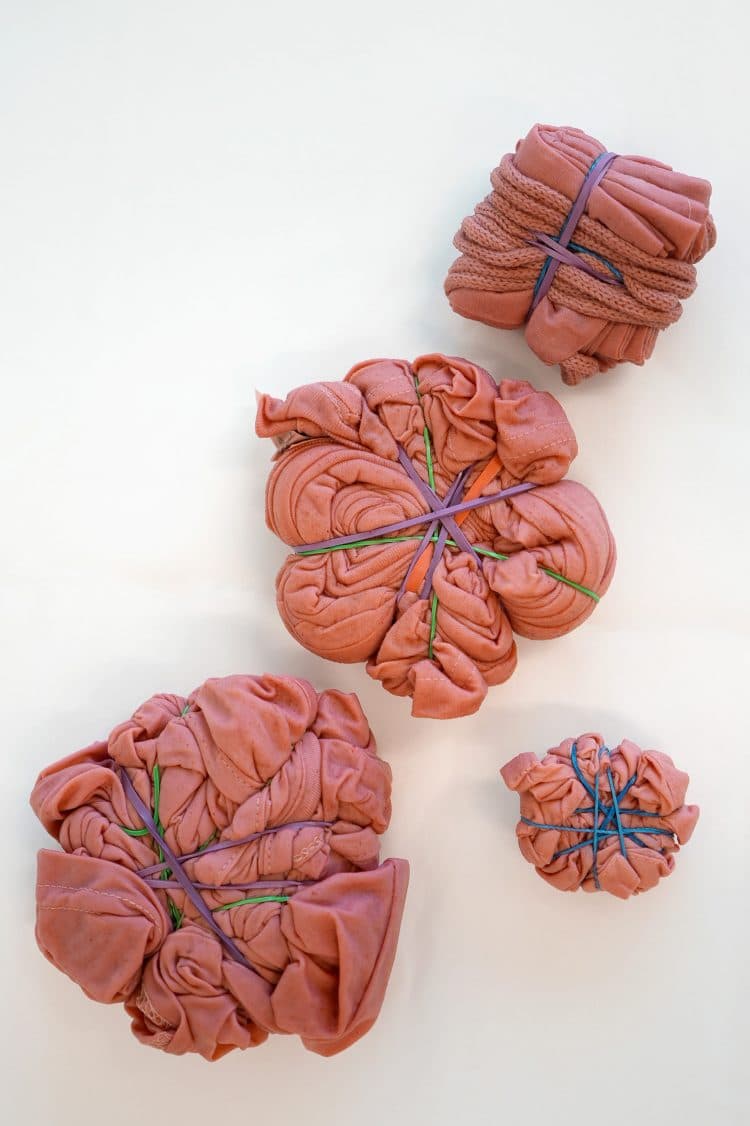
When you are ready to dye, wet the fabric with water, wring out, fold your garment as desired (you can learn how to fold a classic spiral here!), and secure with rubber bands or waxed sinew.
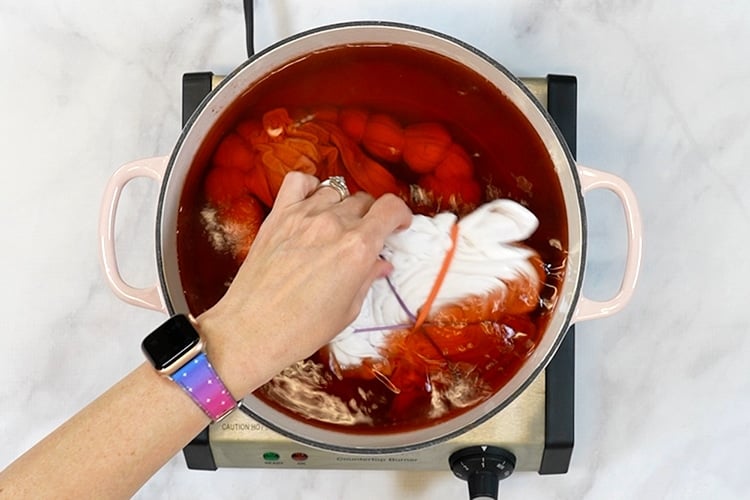
Place all of the fabric items into the avocado dye pot and allow them to sit in the dye bath for at least one hour or until it reaches the desired shade.
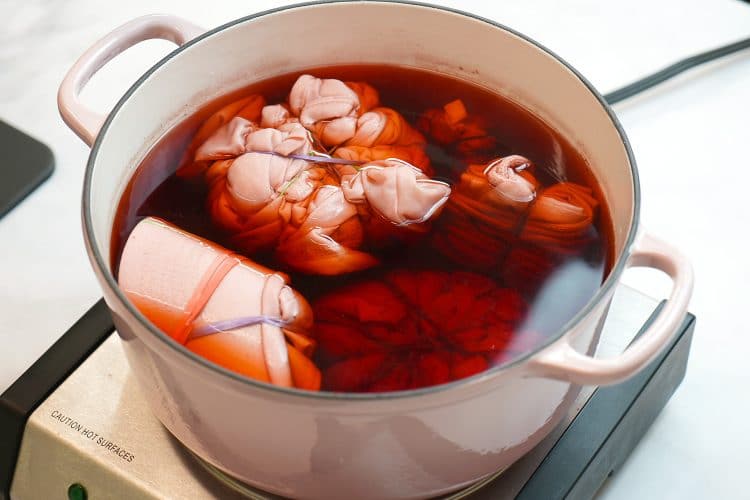
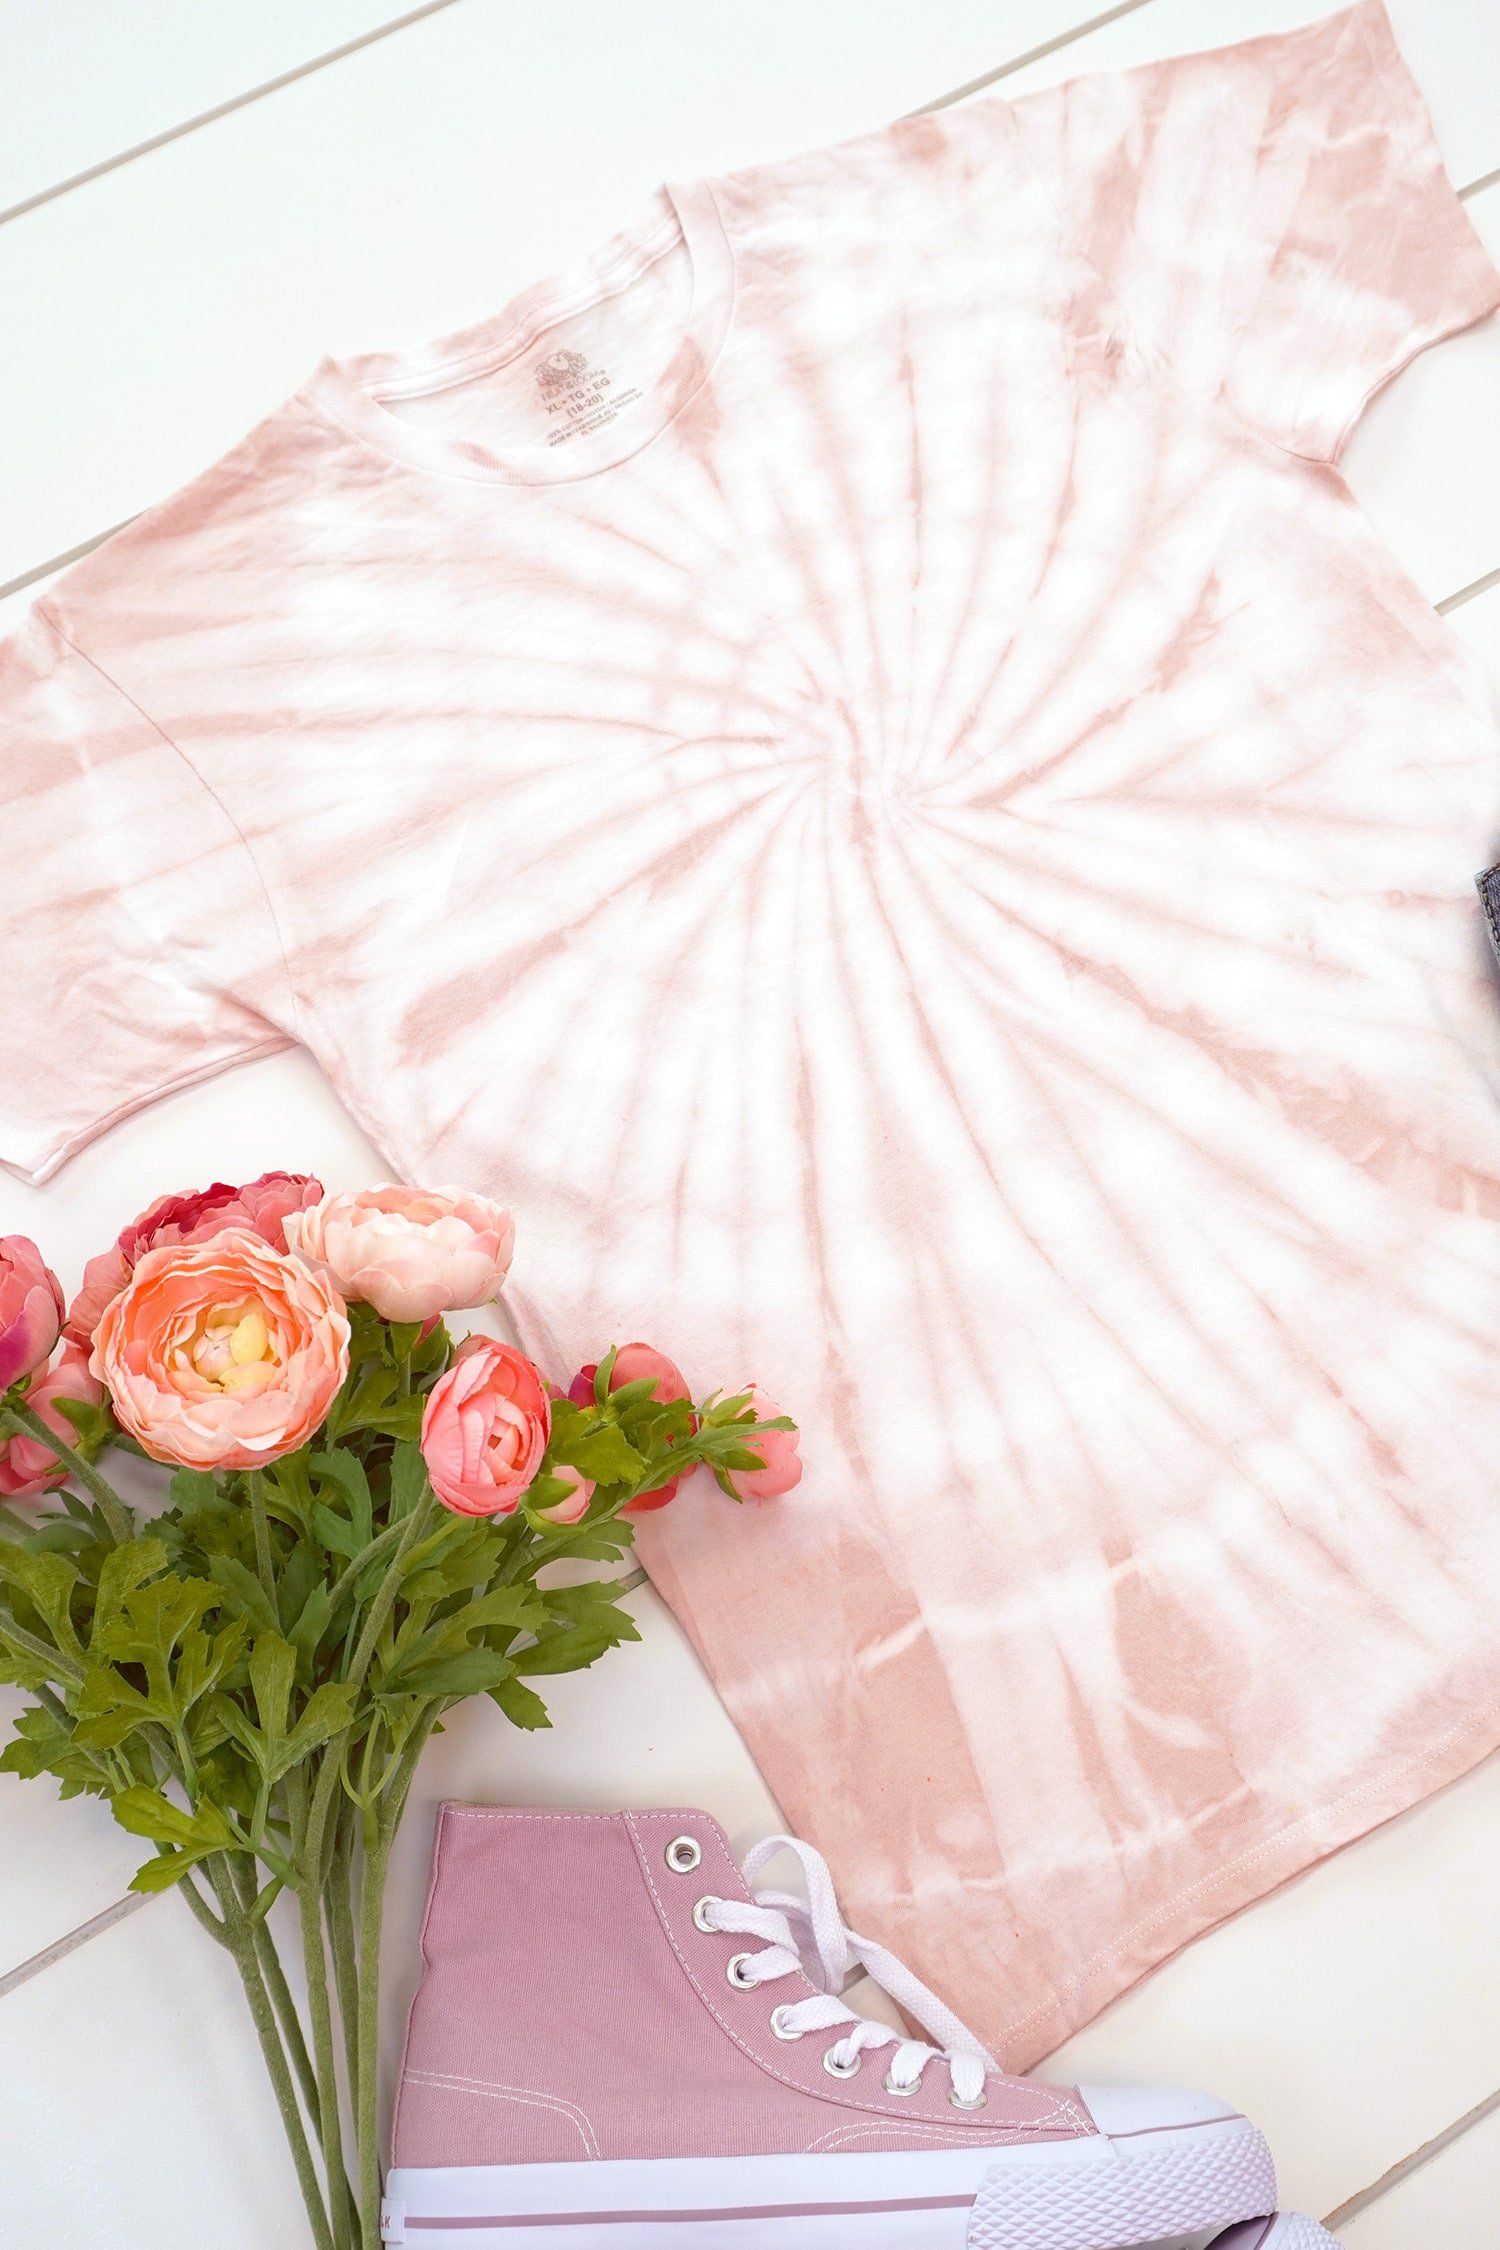
The fabric will start out as a lighter color, but it will intensify the longer it sits – I usually let mine soak overnight until the next day. Keep in mind that the fabric will dry several shades lighter than it looks when it is wet!
Carefully remove the fabric from the dye, unwrap, and rinse until the water runs clear. Allow the garment to dry completely, and if possible, wait a week before machine washing to allow the color to set as fully as possible.
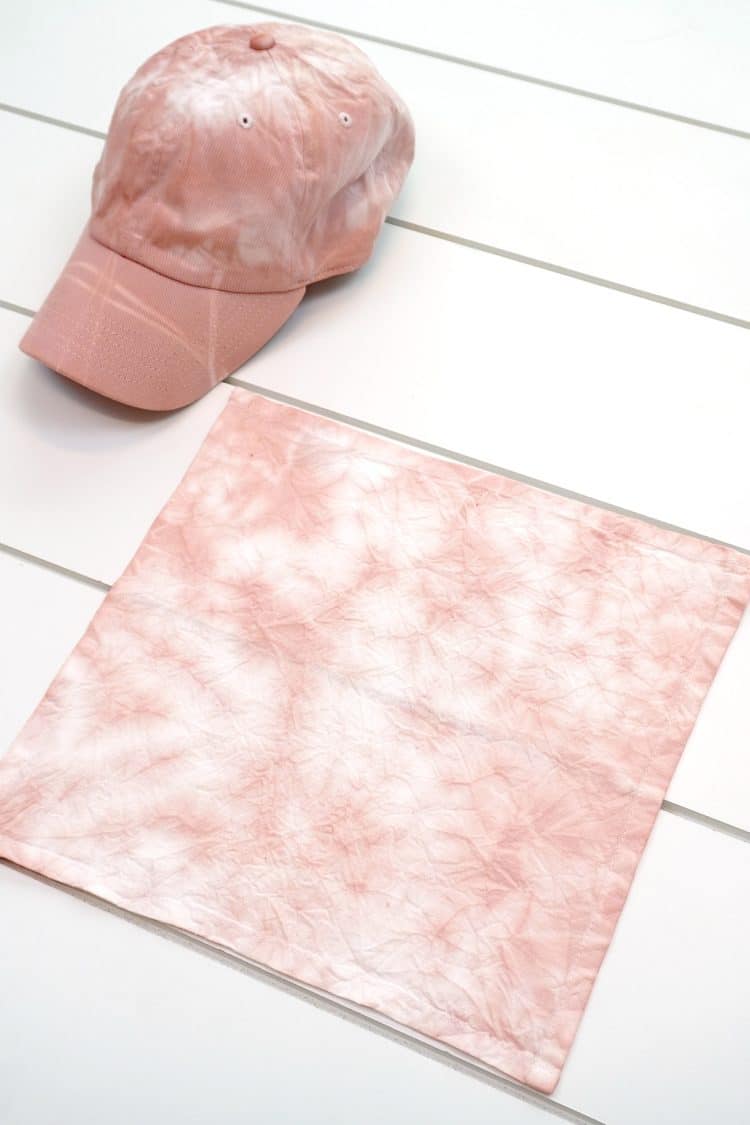
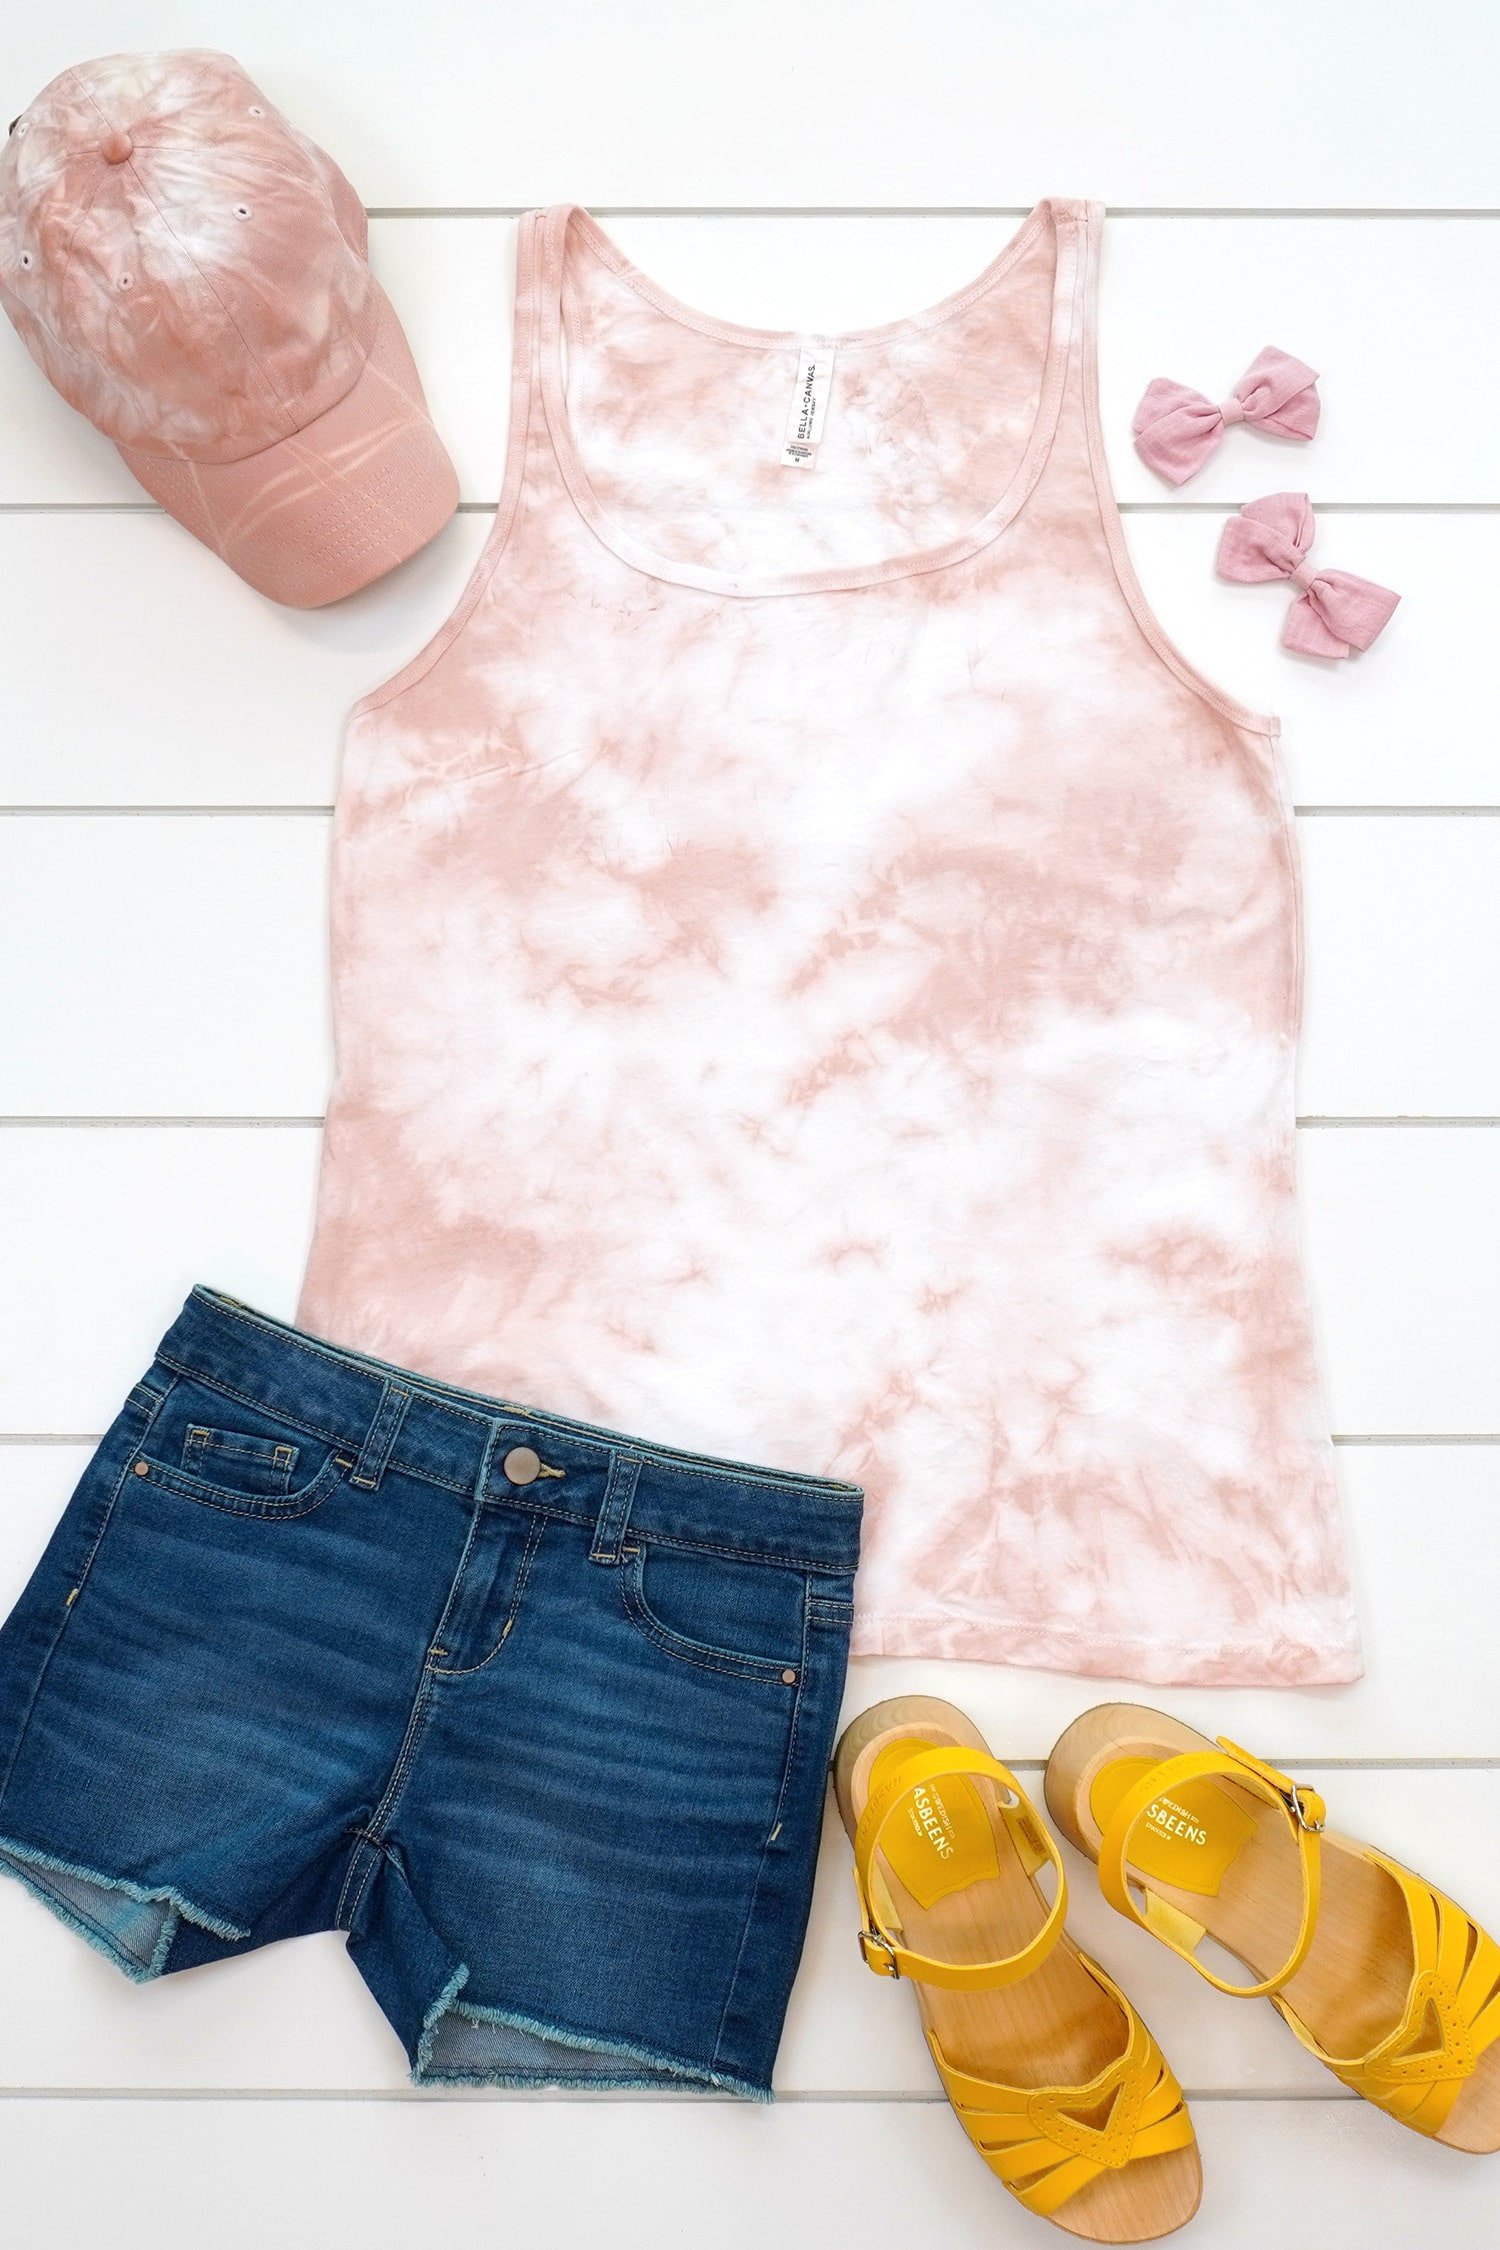
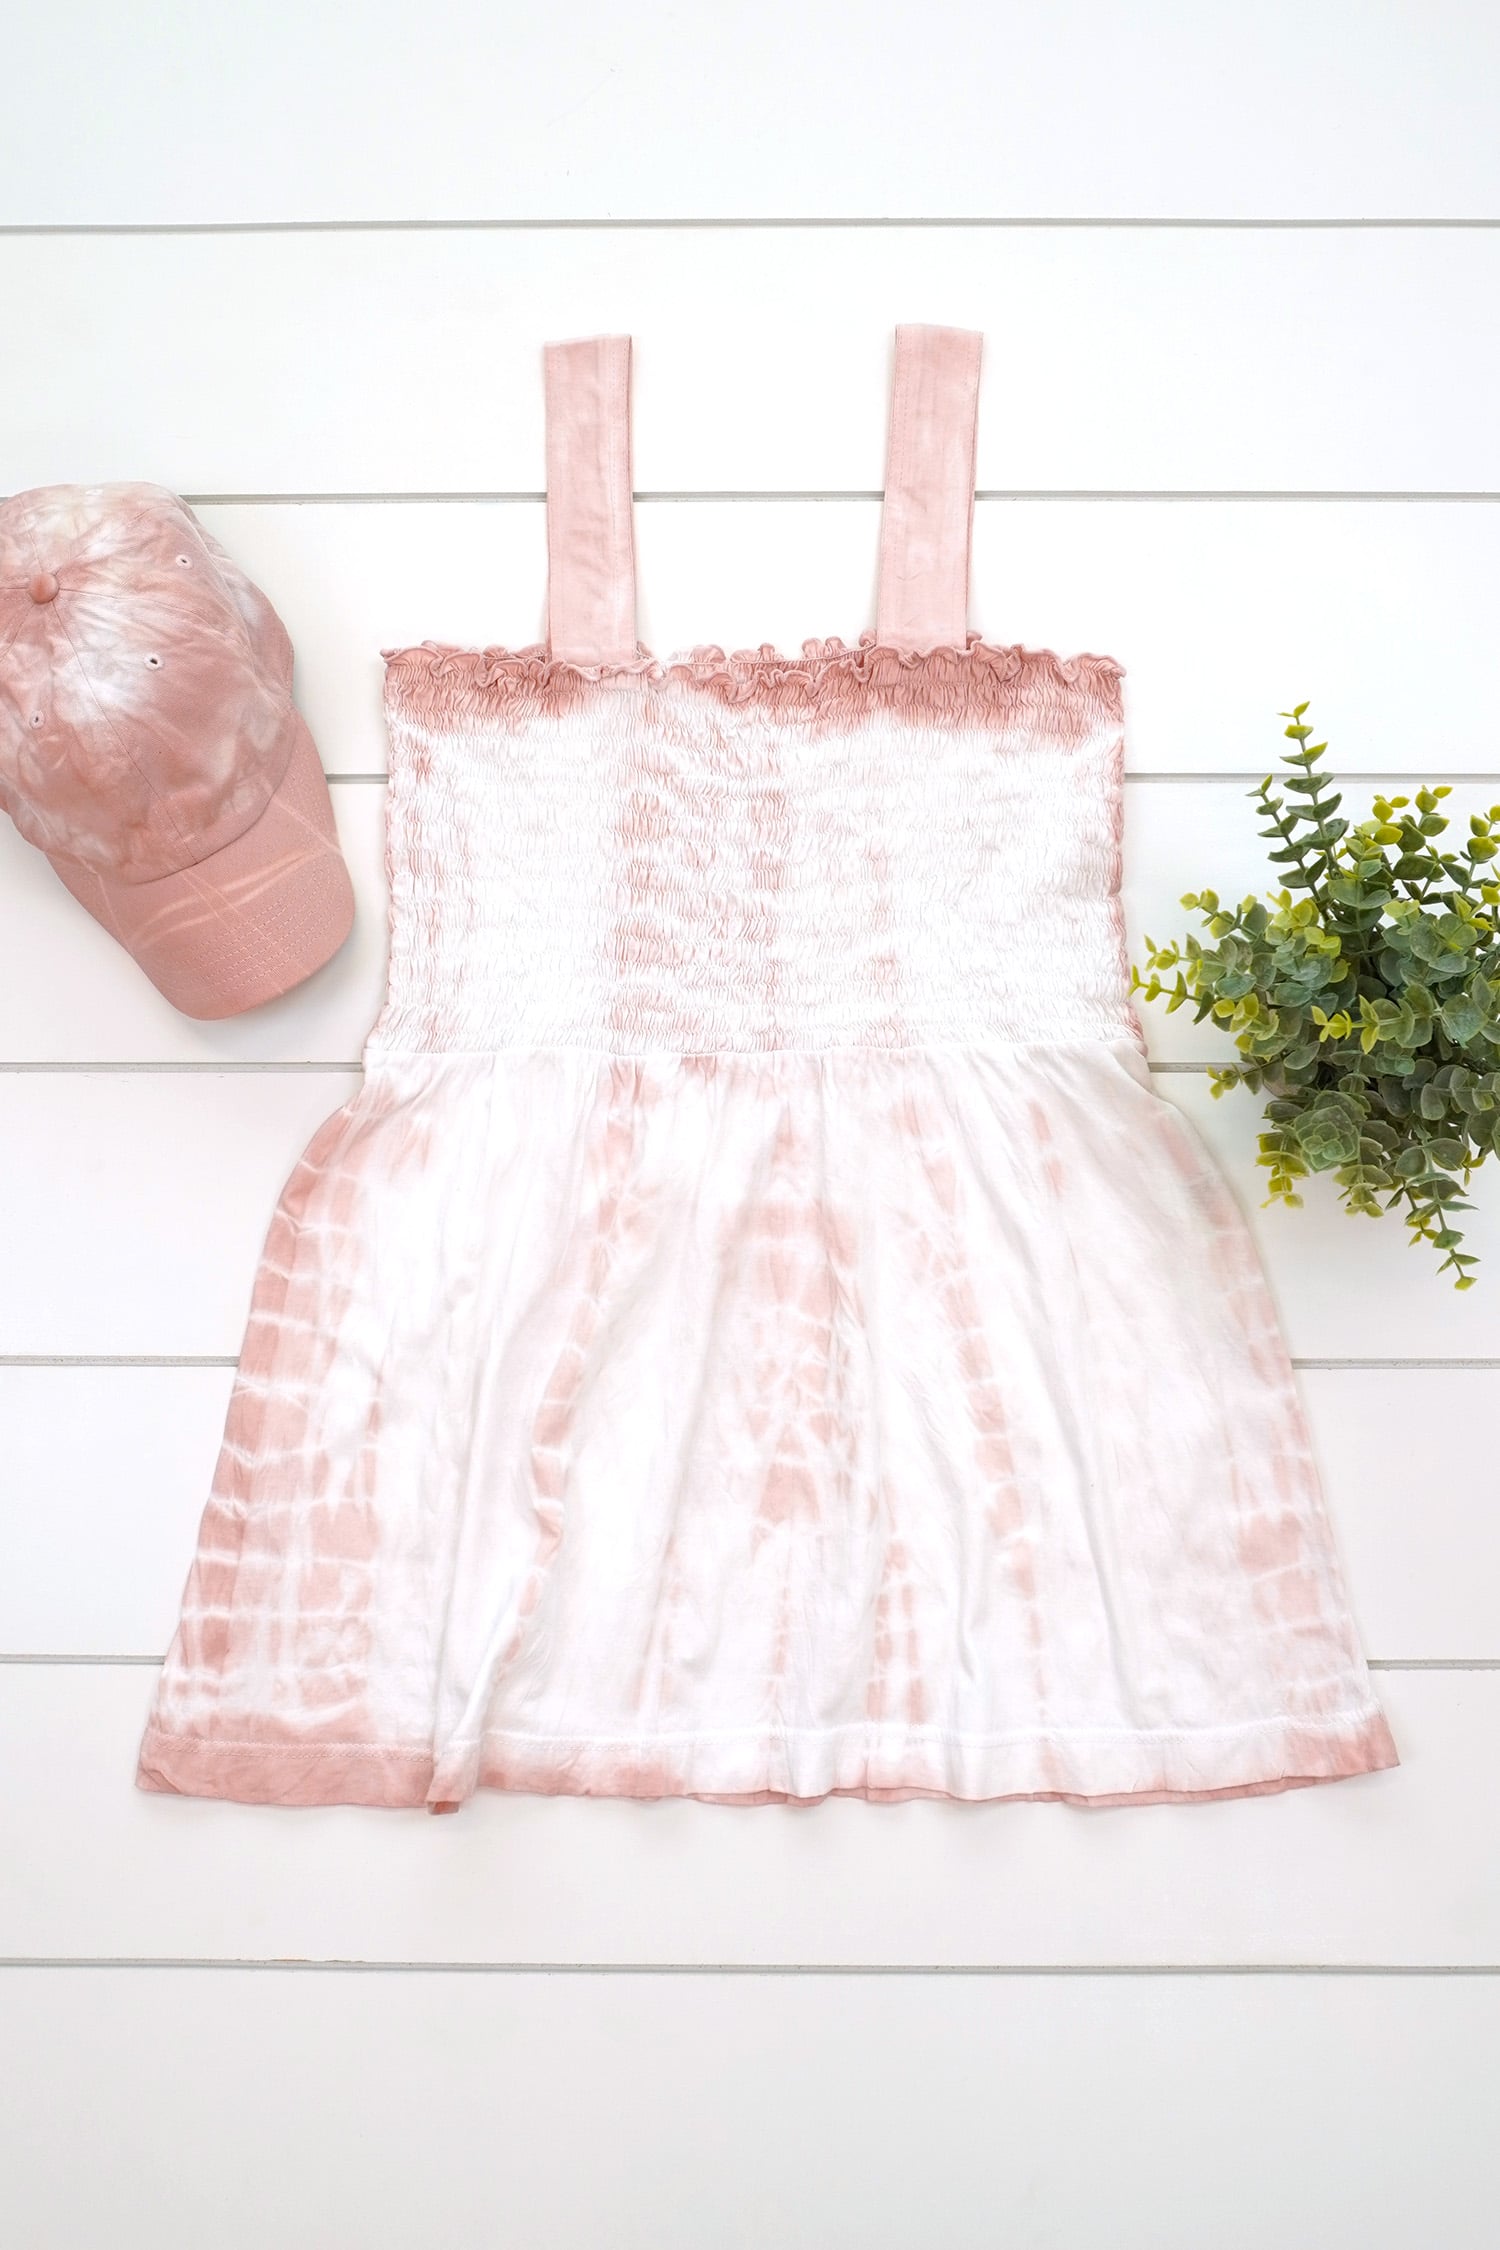
For each new dye that I use, I like to create a color swatch sample with a cotton fabric napkin that I can refer back to for future dyeing projects – this avocado dye produces the most lovely shade of blush pink! It’s so neat to see the most incredible colors come from “food waste!”

Natural Avocado Dye: Frequently Asked Questions
Does avocado dye need a mordant?
No! Avocado pits contain high levels of tannins that act as a natural mordant to help the dye bind with the fabric for long-lasting colorfast results!
Additional mordants such as alum or iron may be used at your own discretion, but they are not necessary, and will very likely alter the final color of your avocado dye.
Will avocado dye wash out?
All natural dyes will likely experience some degree of fading; however, avocado pit dye is one of the most colorfast natural dyes thanks to an abundance of natural tannins that act as a mordant for the dye. You can rest assured that your avocado-dyed garments will stay nicely colored through many washings!
For best results, use a mild detergent for laundering, and it’s always a good idea to store naturally dyed items out of direct sunlight.
How many avocado pits do you need for dye?
I use between 8-12 avocado pits and 3 quarts of water for each batch of my avocado dye. I dye between 3-5 items with each batch depending on the size/weight of the fabric. You may adjust the amounts accordingly depending on how much dye your project will need.
How do you save avocado pits and skins to dye with them?
First, clean and dry the avocado pits and skins to remove any remaining green flesh. Allow to dry completely. Store the skins and pits in separate plastic bags in the freezer until ready to use. You may also opt to dehydrate the avocado skins by placing them on a rack in a warm and sunny location for a few days to remove all moisture, and then storing in a paper bag until ready to use. Do not store the pits in a paper bag as they have the tendency to mold when stored at room temperature.
Do You Need Soda Ash to Tie-Dye with Avocado Dye?
You do not need to pre-treat fabrics with soda ash or add soda ash to your dye bath. However, you may wish to use a small amount of soda ash to alter the color of your dye, though (see tips below)!
Can you alter the color of avocado dye?
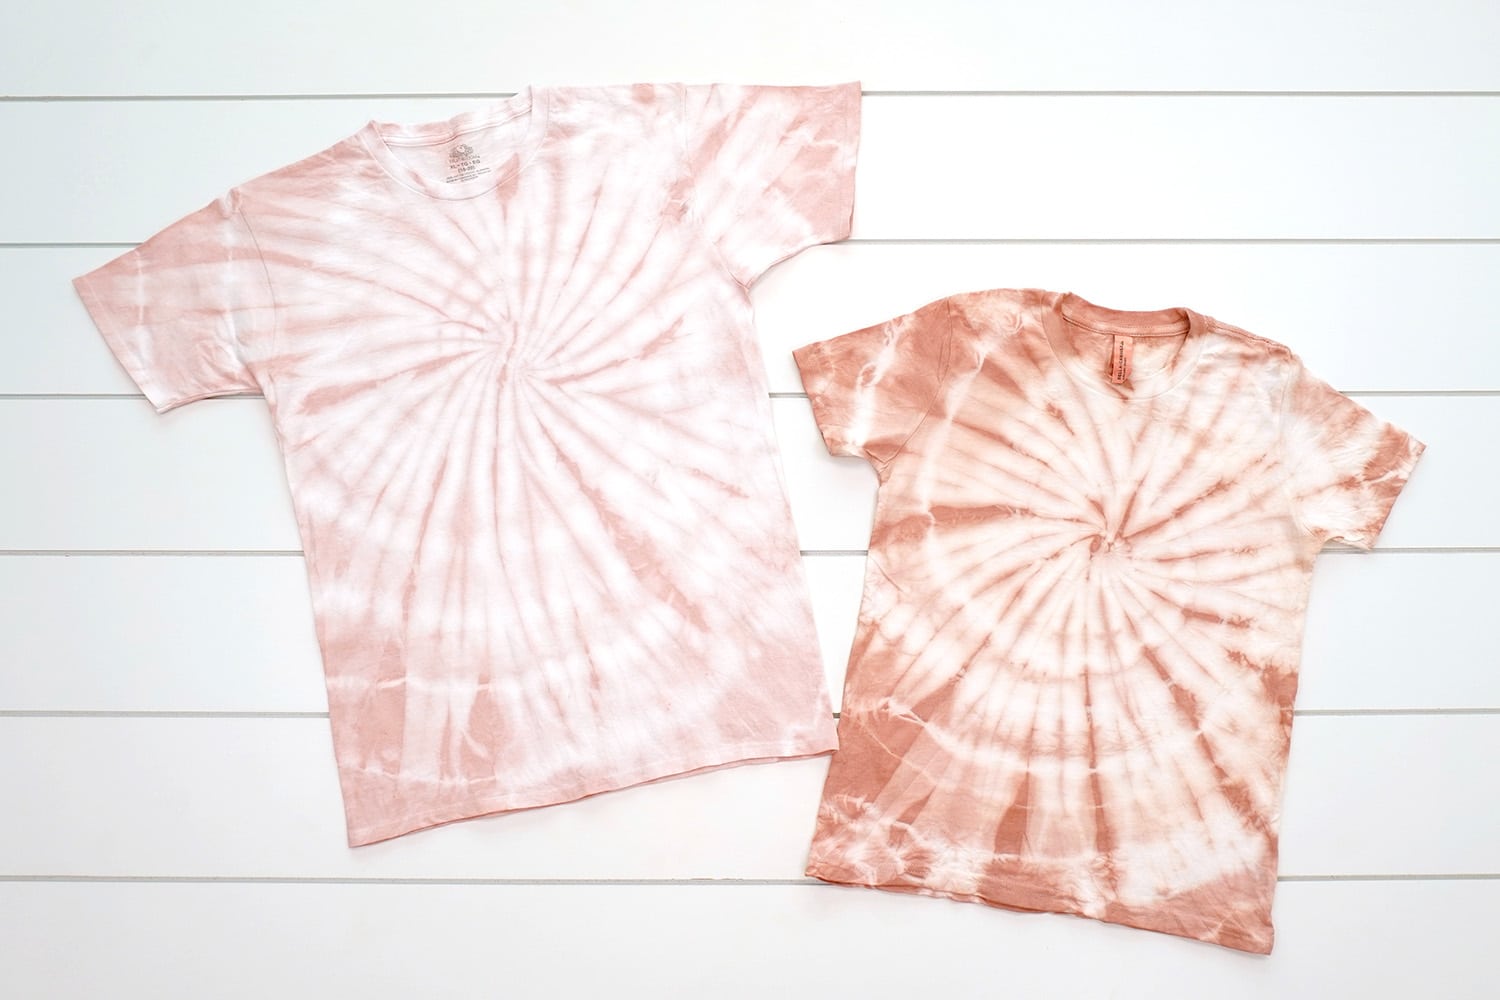
Avocado dye can naturally vary quite a bit in its range of hues from pale pink to dark coral and even brown shades. The ripeness of the avocados, the variety of fruit, and the temperature and time at which the pits and/or skins are cooked can all create different shades of color.
Despite the variety, though, there are a couple of things that you can do to help ensure that your avocado dye is the color you’re hoping for:
Do you want your avocado dye to lean more towards the orange or peachy side? Make the dye more acidic by adding a splash of white vinegar to the dye pot. Alternately, you could also spritz your dyed fabric with a 50/50 mixture of vinegar and water before rinsing (like I did for the shirt on the right side above!).
Want stronger color and deeper pink hues? Try adding a little bit of baking soda or soda ash to the dye bath to make it more alkaline.
The chemistry of each batch of dye is unique, so play around with the amounts (start small!) until you find what works best for you!

Of course, using natural plant dyes can yield different results during the dyeing process since the ingredients are all fresh and uniquely formulated. It’s always best to perform your own experiments to determine which variables (amounts, time, temperature, add-ins, etc.) work best for your batch of dye. Experimenting is part of the fun with natural dyes!
How to Tie-Dye with Avocados

Equipment:
- Enameled Cast Iron or Stainless Steel Pot
What You’ll Need:
- 8-12 Avocado Pits
- 3 quarts Water
- 3-5 Fabric Items with Natural Fibers
Instructions:
- Clean avocado pits to remove any green flesh.
- Place a large pot of water on the stove top and add the avocado pits to the pot. Bring to a very low boil, reduce the heat, and simmer lightly for 30-60 minutes.
- If desired, allow the dye bath to sit for up to 24 hours to increase the intensity of the color. When ready to dye, remove the avocado pits from the dye bath.
- When you are ready to dye, wet the fabric with water, wring out, fold your garment as desired, and secure with rubber bands or waxed sinew.
- Place all of the fabric items into the avocado dye pot and allow them to sit in the dye bath for at least one hour (and up to 48 hours) until it reaches the desired shade. The fabric will start out as a lighter color, but it will intensify the longer it sits – I usually let mine soak overnight until the next day. Keep in mind that the fabric will dry several shades lighter than it looks when it is wet!
- Carefully remove the fabric from the dye, unwrap, and rinse until the water runs clear. Allow the garment to dry completely, and if possible, wait a week before machine washing to allow the color to set as fully as possible.
- Always use a mild laundry detergent and store fabrics out of direct sunlight for long-lasting results.
Dyeing with natural plant materials and food items is SO much fun! Happy crafting!

Check Out These Other Fun Ideas!


Don’t Forget to Pin This for Later!


Heidi Kundin has captivated the hearts of millions with her colorful and inspiring approach to crafting, celebrations, and family fun. With over 15 years of experience, Happiness is Homemade has become a must-visit destination for those seeking quick and easy creative ideas and last-minute solutions. Heidi’s warm personality shines through her posts, inviting readers to join her on a creative journey that’s fun, rewarding, and achievable. Heidi is also the author of Homemade Bath Bombs & More and DIY Tie-Dye.
Do you have more natural dye recipes?
We have one coming up soon on dyeing with turmeric! 🙂
This is so cool! I have not yet ventured into natural dyes, but this looks really fun.