
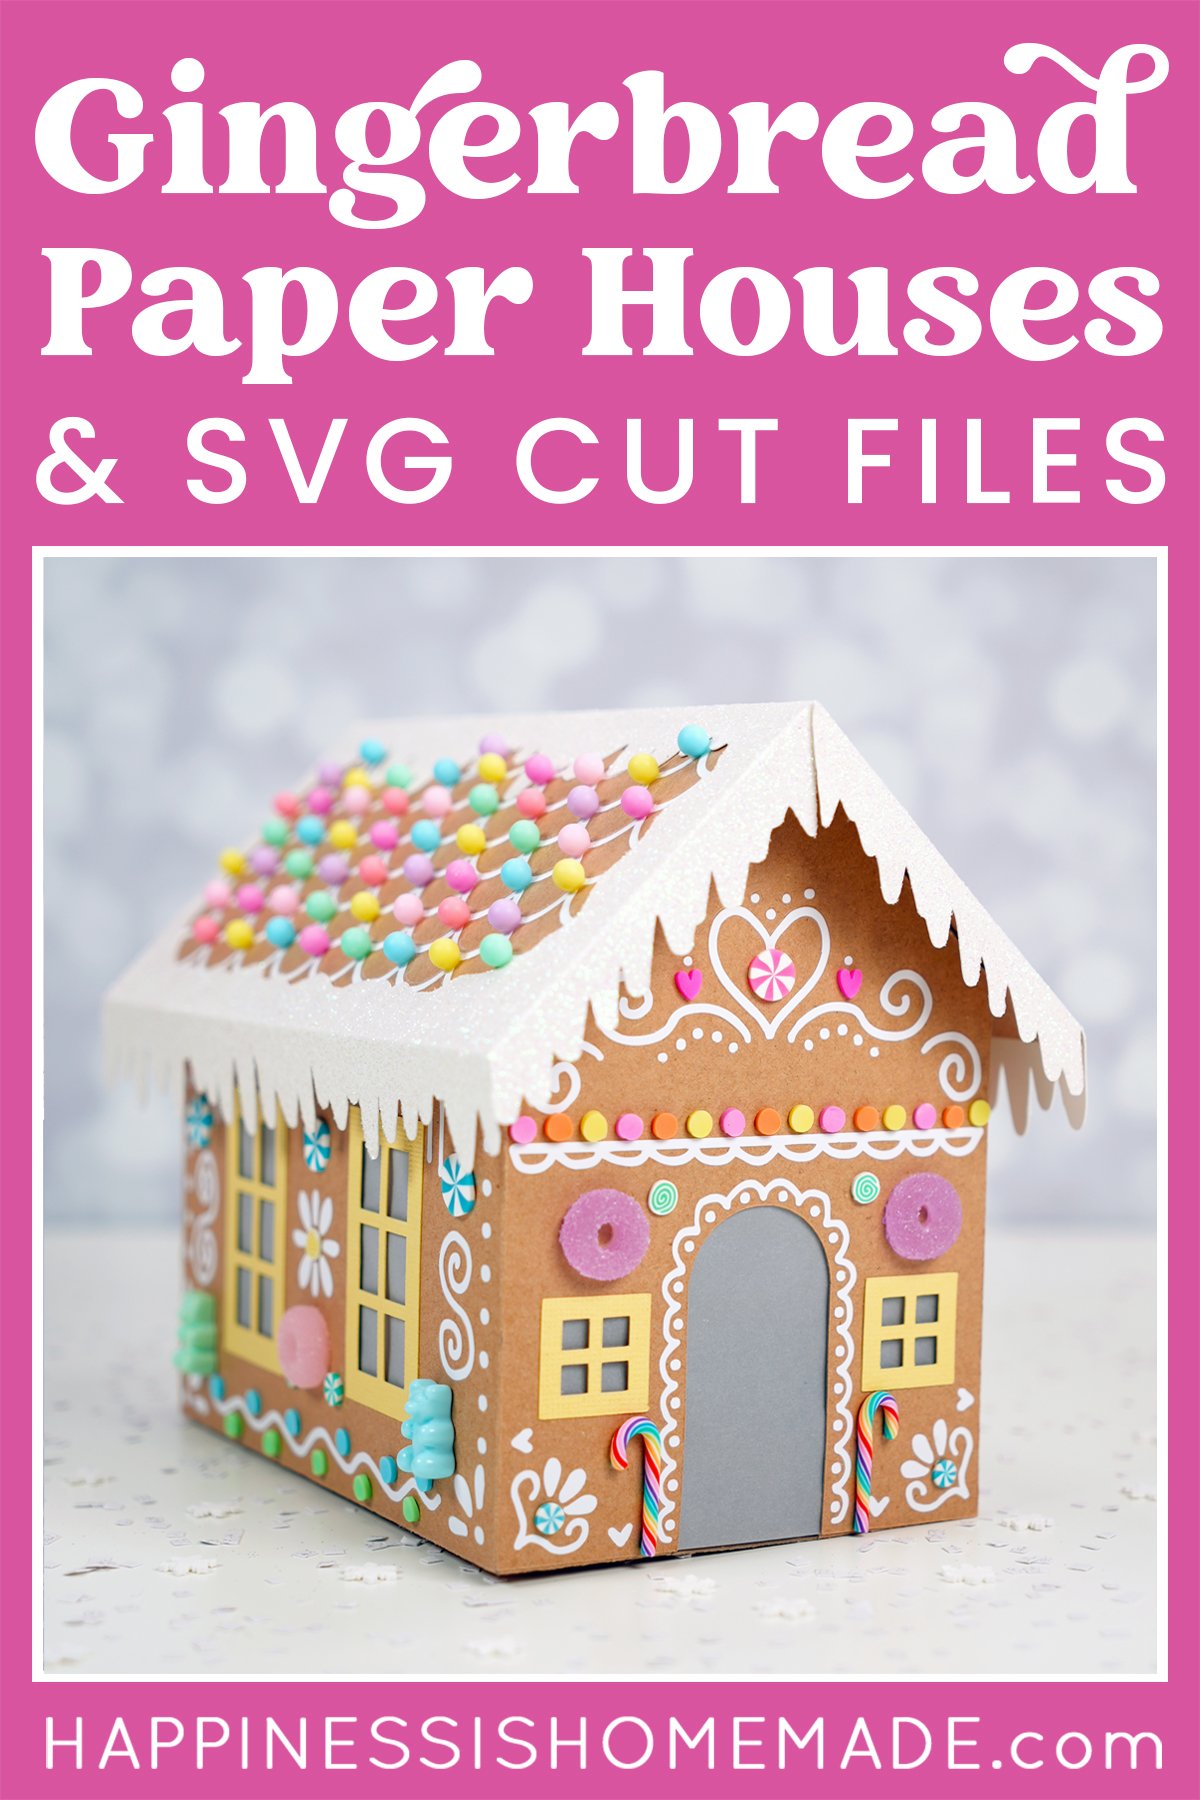


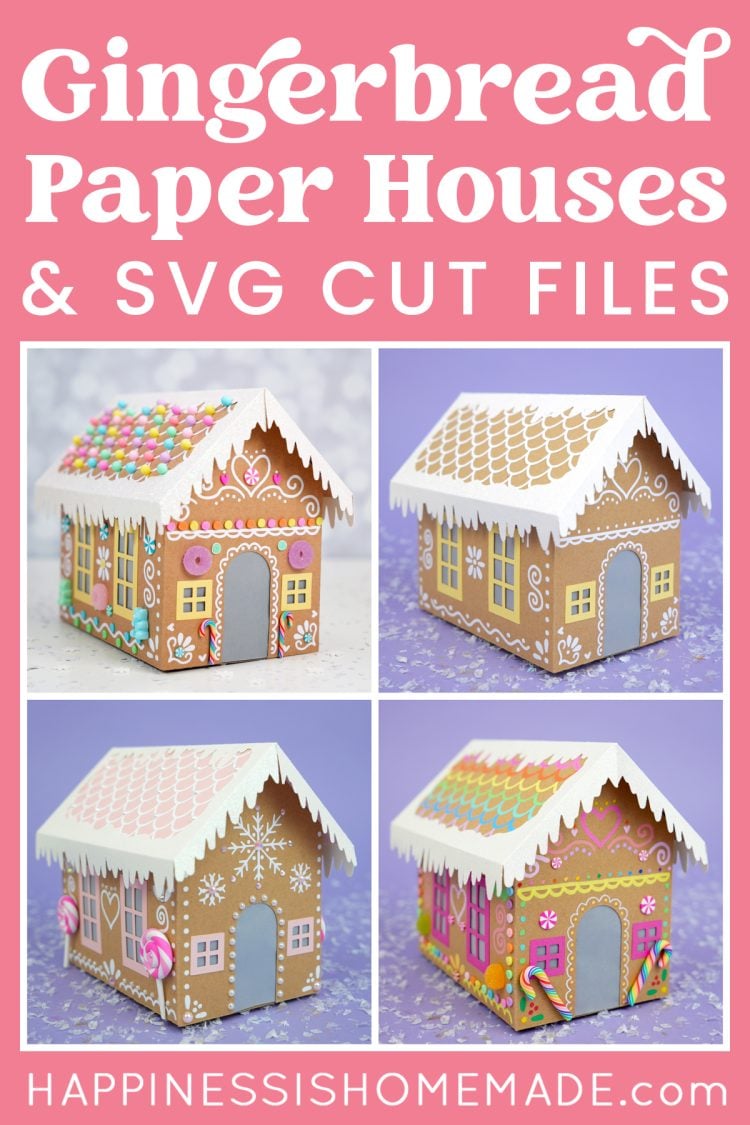
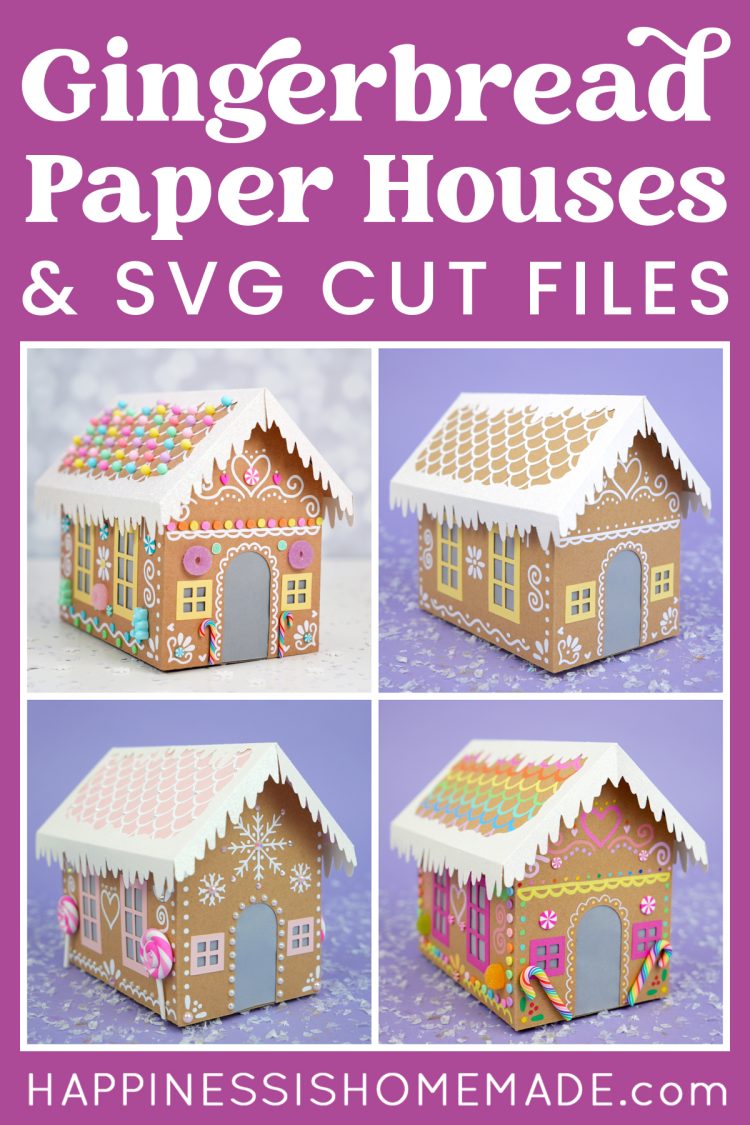
Learn how to make a Paper or Cardboard Gingerbread House using this step-by-step tutorial, printable template (for hand-cutting), and gingerbread house SVG files for your Cricut or Silhouette machines!
This post may contain affiliate links. I will receive a small commission from these sales at no additional cost to you!
Hey there, crafty friends! Are you ready for one of the most adorable Christmas crafts ever? Today, I’m going to teach you how to make these SUPER cute cardboard gingerbread houses that are SO much fun to create!
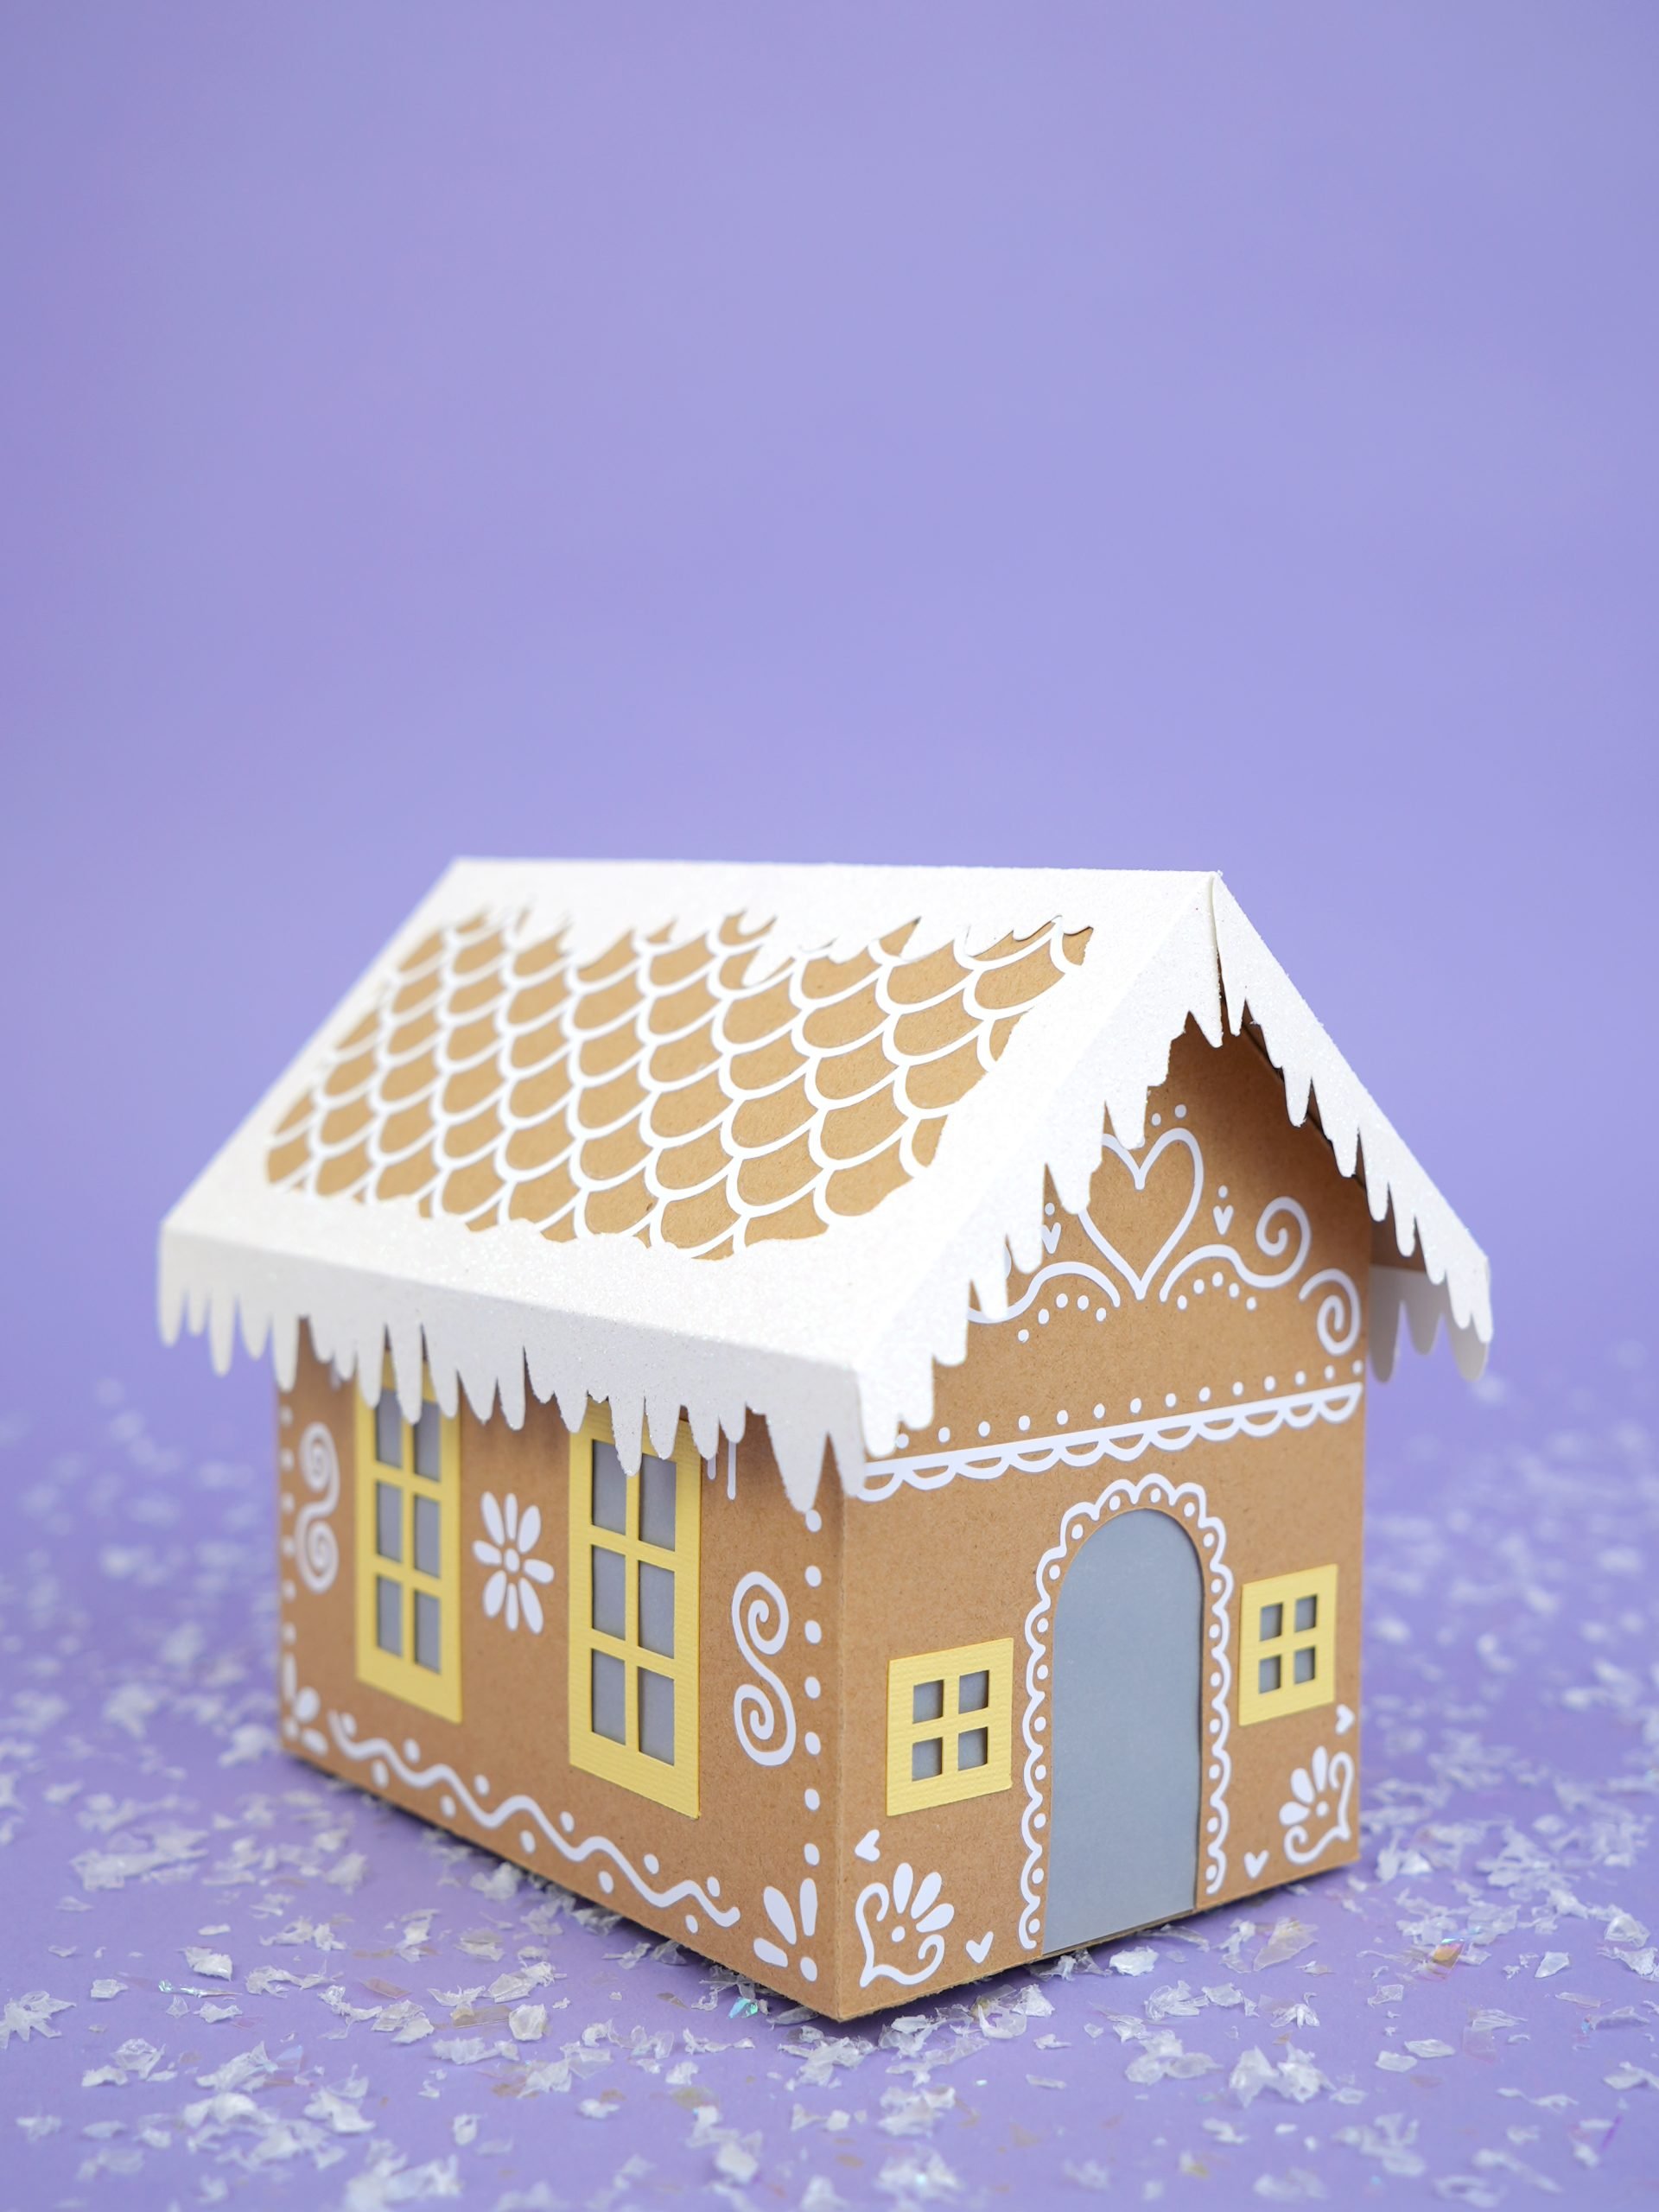
These little paper houses make fabulous holiday decorations – you can customize them in colors and styles to match any Christmas decor or theme, and you even can add a flameless candle inside to light them up and make them extra special!
You can also change up the colors and decorations to make these into Valentine’s Day houses, haunted Halloween gingerbread houses, Easter Bunny cottages, and more! Plus, unlike real gingerbread houses, this paper version will last year after year!
Please note that I am using the term “cardboard” gingerbread houses loosely here because these gingerbread houses can actually be created from any sturdy paper product – cardboard boxes or sheets, mat board, kraft board (my favorite), poster board, cardstock, recycled cereal boxes – you name it!
Depending on the supplies used, you may wish to cut your project pieces by hand if you’re using heavy materials (we suggest using an Xacto knife or a box cutter), or you can choose to use our gingerbread house SVG files (available below) to cut lighter-weight materials with your cutting machine.
This project tutorial has lots of steps and tons of photos, but don’t get overwhelmed! I’m going to walk you step-by-step through the entire process so that you can easily make this cute holiday craft – easy peasy!
Check Out These Other Christmas Crafts & SVGs!

How to Make a Paper Gingerbread House
This SVG file will create a sweet gingerbread cottage that measures approximately 7.25″ x 5″ x 6″ h.
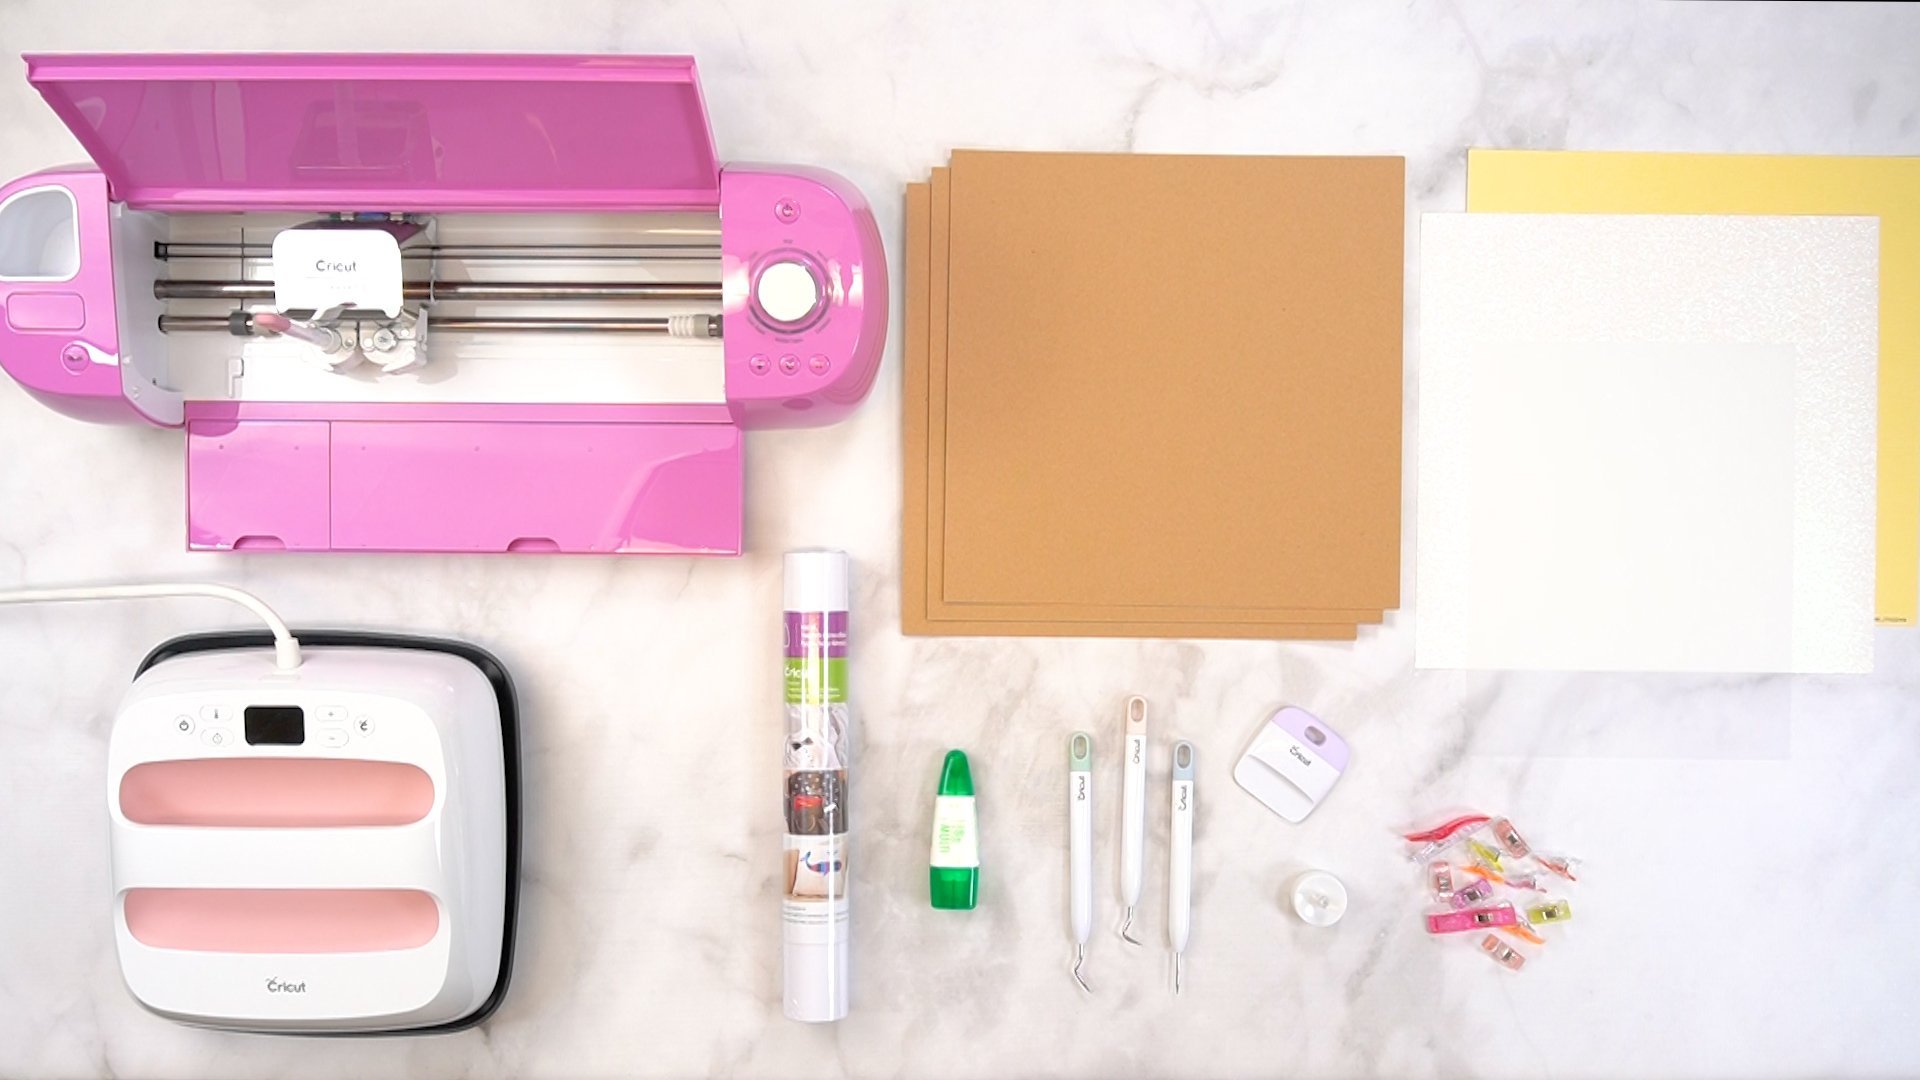
Supplies Needed to Make Cardboard Gingerbread Houses:
To make a paper gingerbread house, you’ll need:
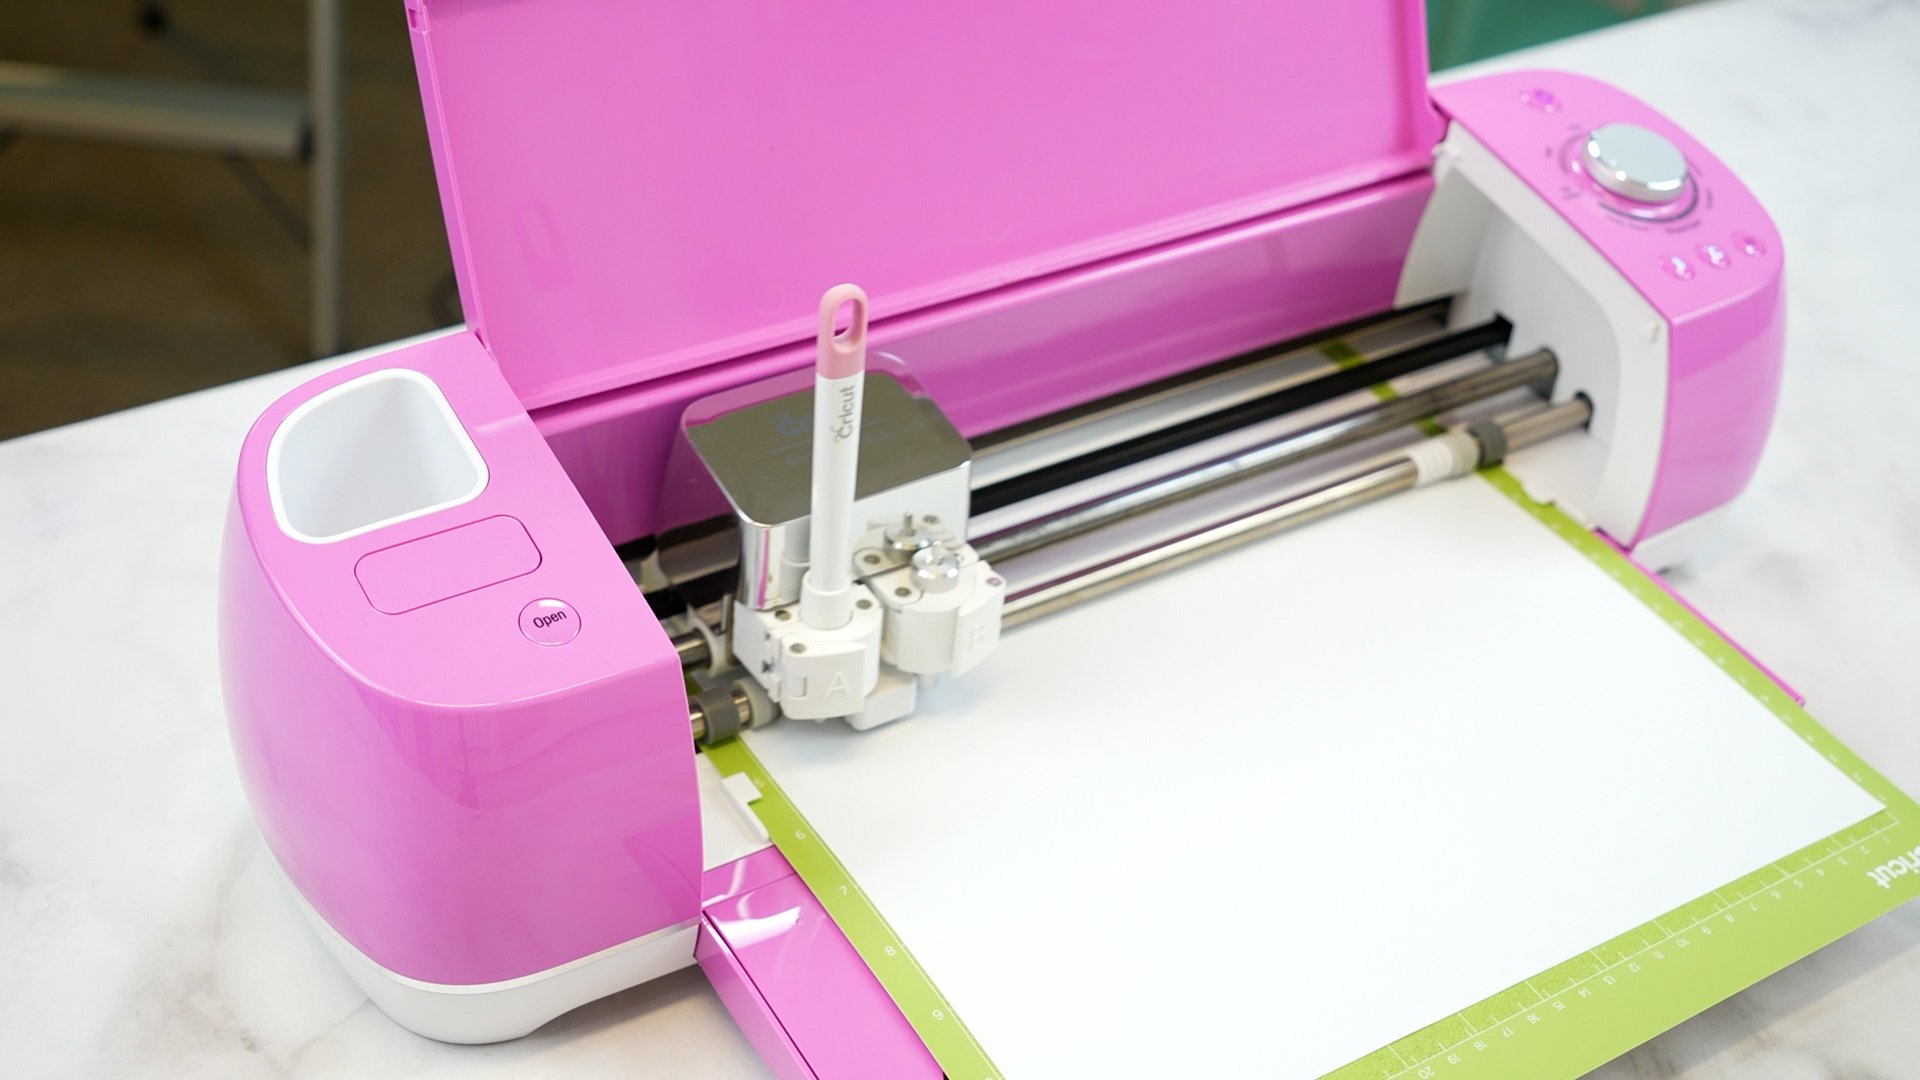
- Cricut Explore or Cricut Maker machine with the Fine-Point Blade (or Knife Blade depending on base material used) and Scoring Stylus or Scoring Wheel
- EasyPress or Heat Press
- (3) 12×12 Sheets of Kraft Board (or other cardboard/heavy paper of choice)
- (1) Sheet of Cardstock
- (1) Sheet of Translucent Vellum (or tracing paper)
- (1) 12×12 Sheet of White Glitter Cardstock
- (2) 12×12 Sheets of White Iron-On (Heat Transfer Vinyl)
- Paper Glue
- Weeding Tools
- Sewing Clips, optional
- Flameless Candle, optional
- Additional Embellishments, optional – Faux candy, rhinestones, beads, glitter, etc.
Setting Up & Cutting the Project in Cricut Design Space

Gingerbread House – Part 1
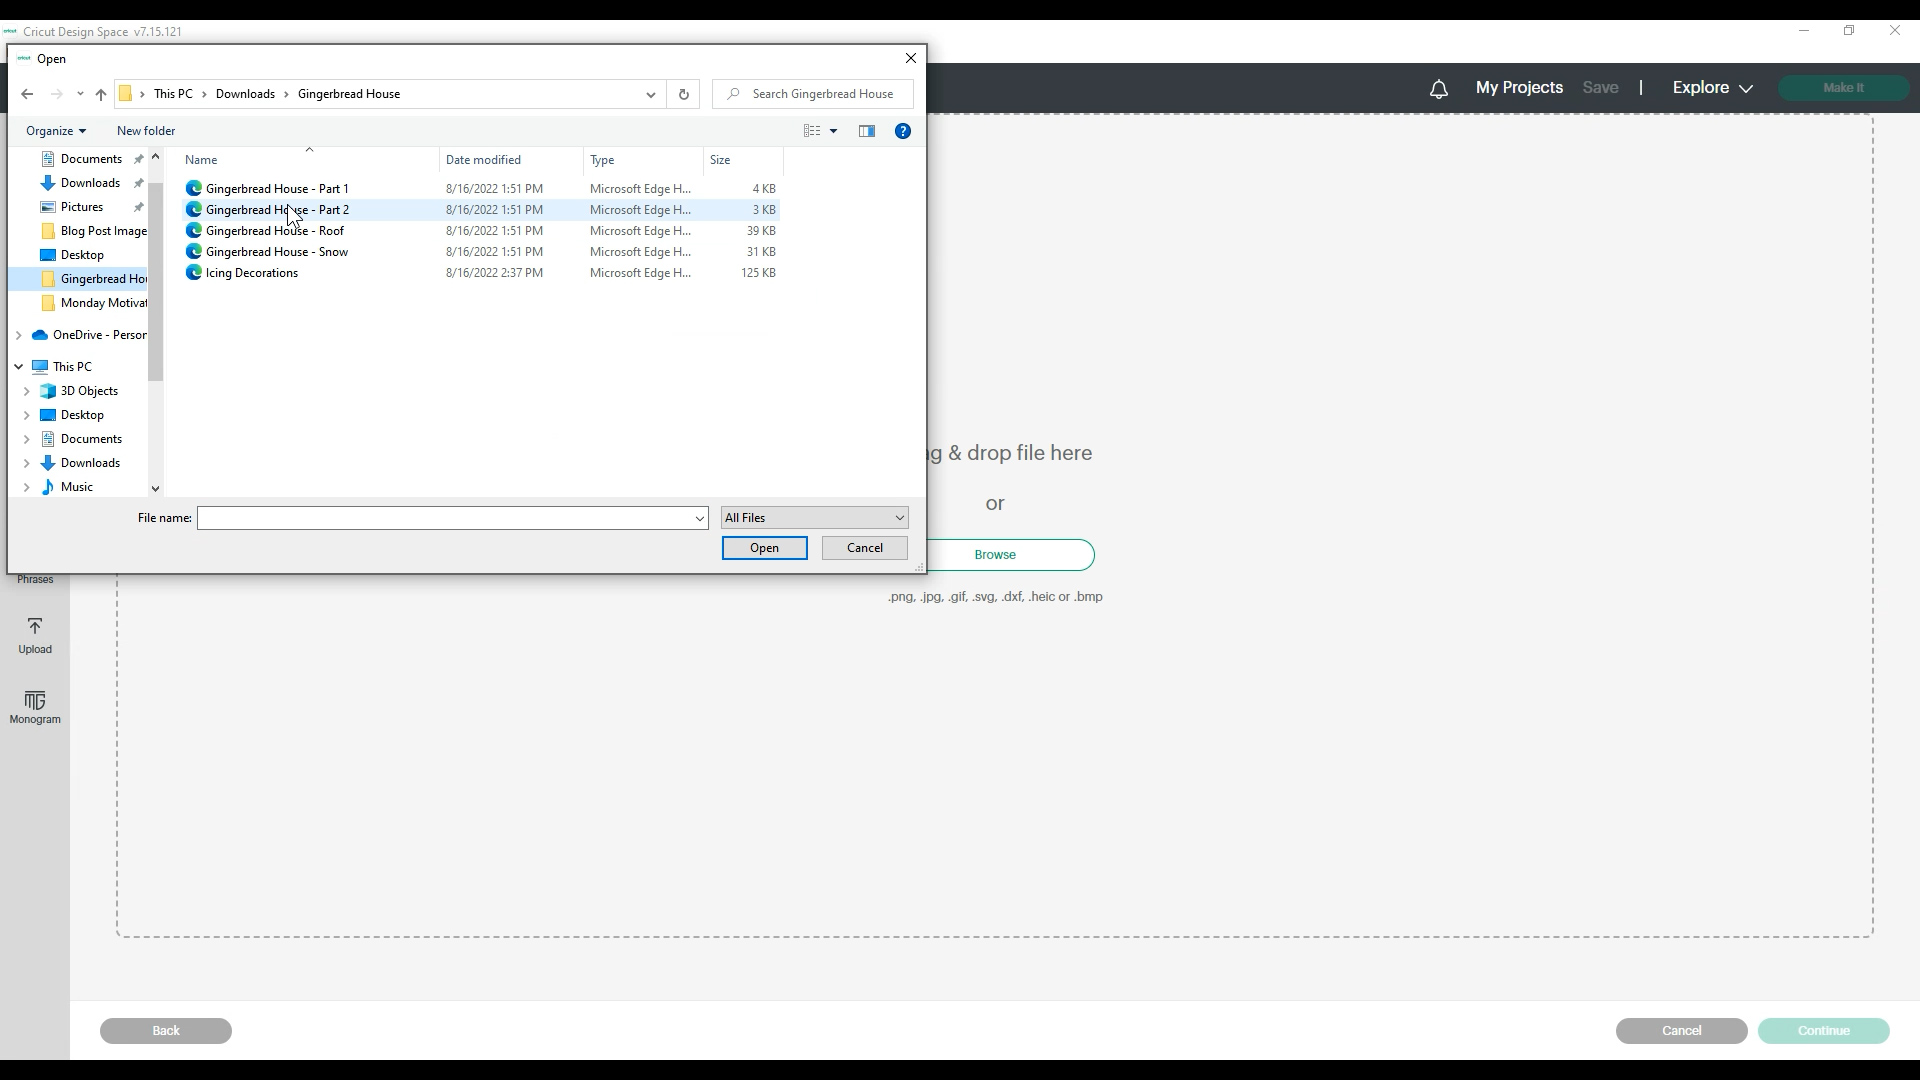
To get started, download the gingerbread house ZIP file (available below)) and unzip it. After you’ve unzipped the file, you should have five different SVG files.
Upload the “Gingerbread House – Part 1” file to Cricut Design Space and insert it into a new canvas.
For assistance with these steps, check out these posts:
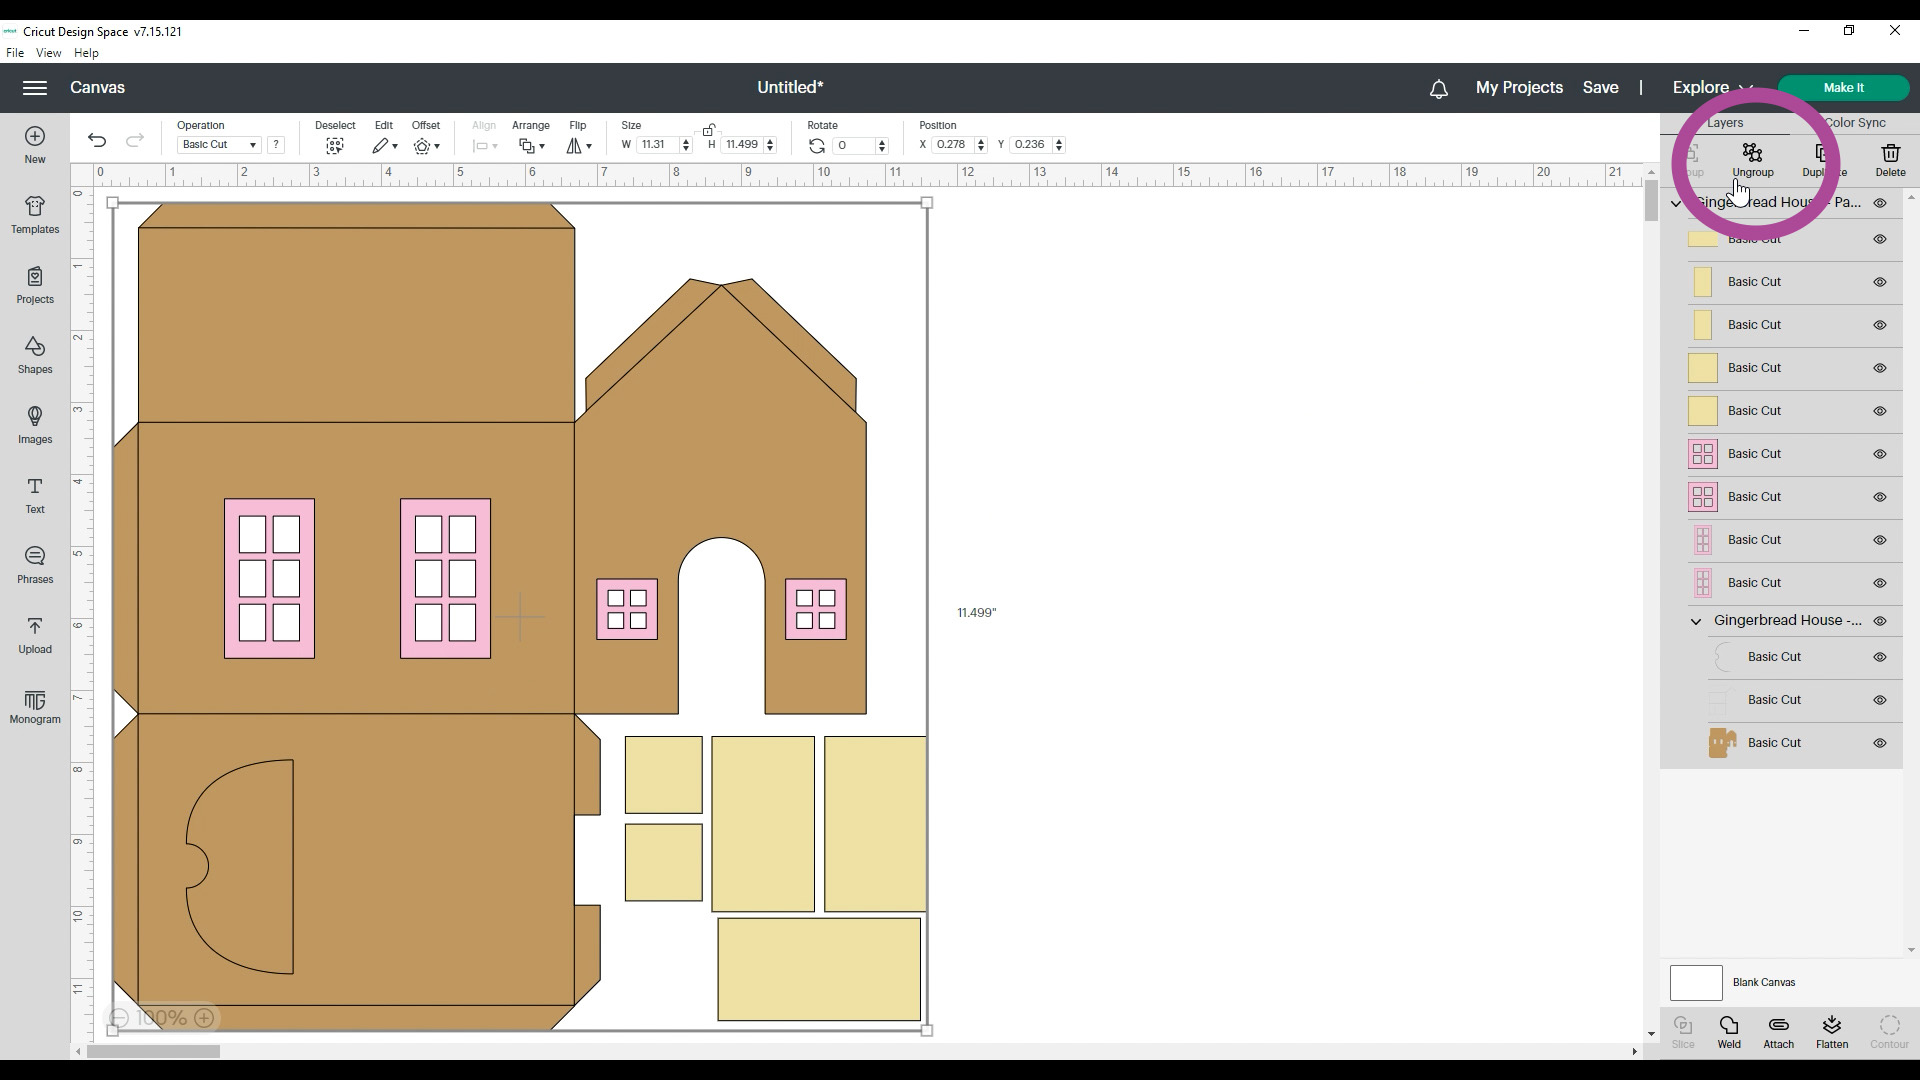
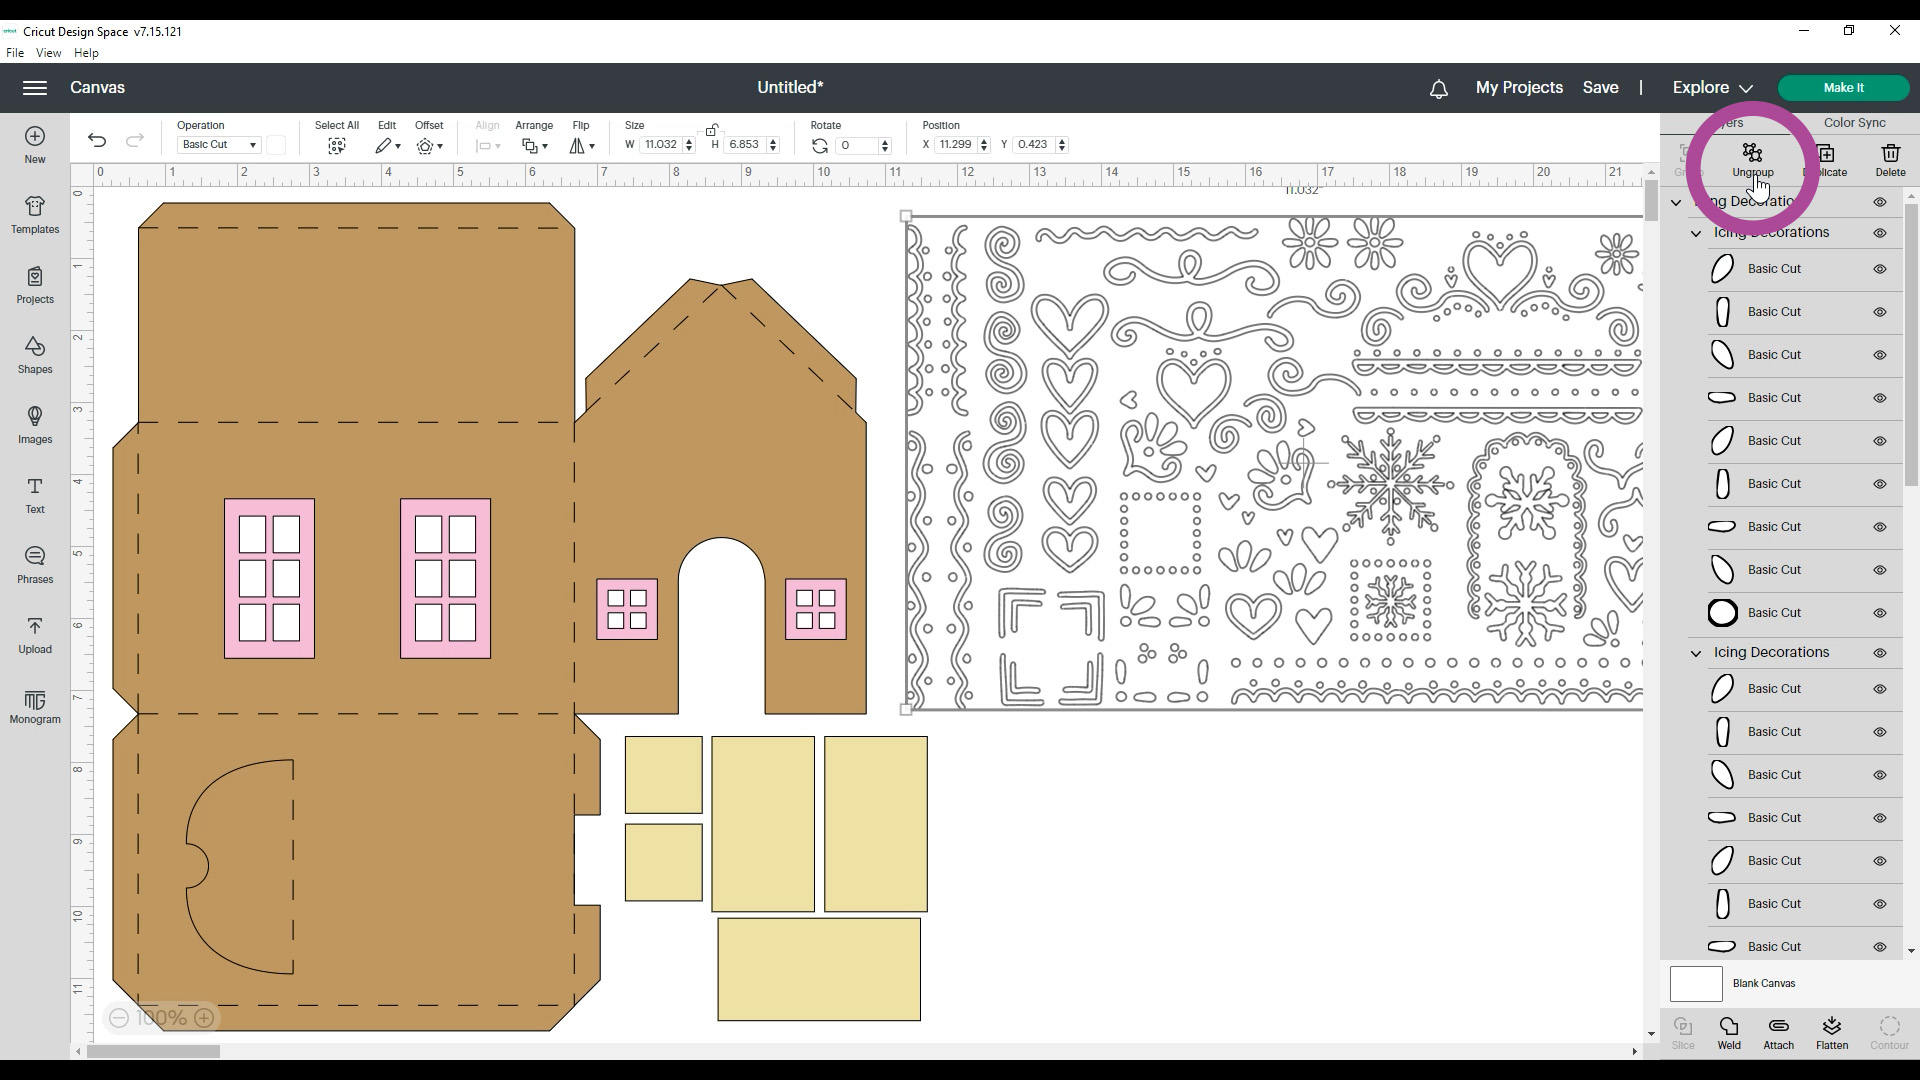
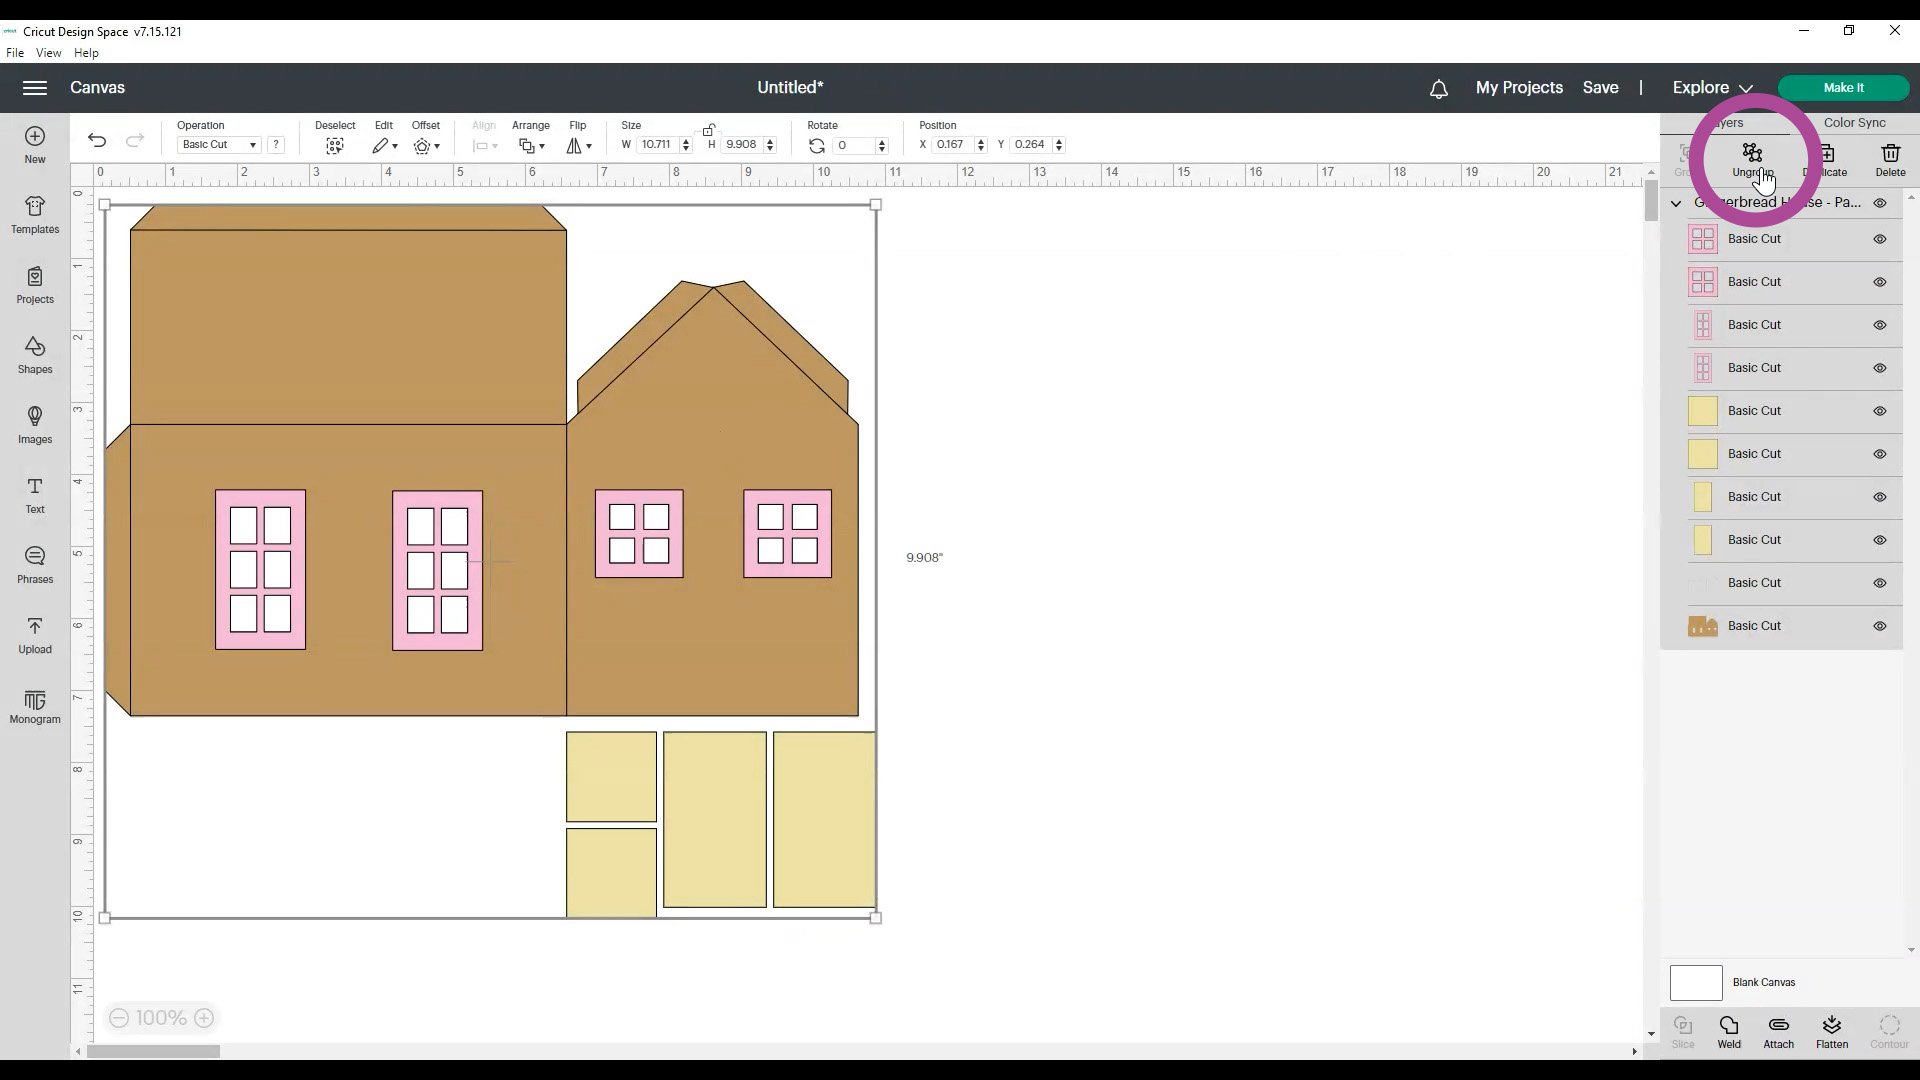
After you import the SVG file, you will see that all of the individual pieces and layers are grouped together, so the first step is to ungroup all of them.
Ungrouping the elements will place each of the yellow and pink pieces on their own layers – those layers will eventually become the vellum backing pieces for the windows and the cardstock window frames.

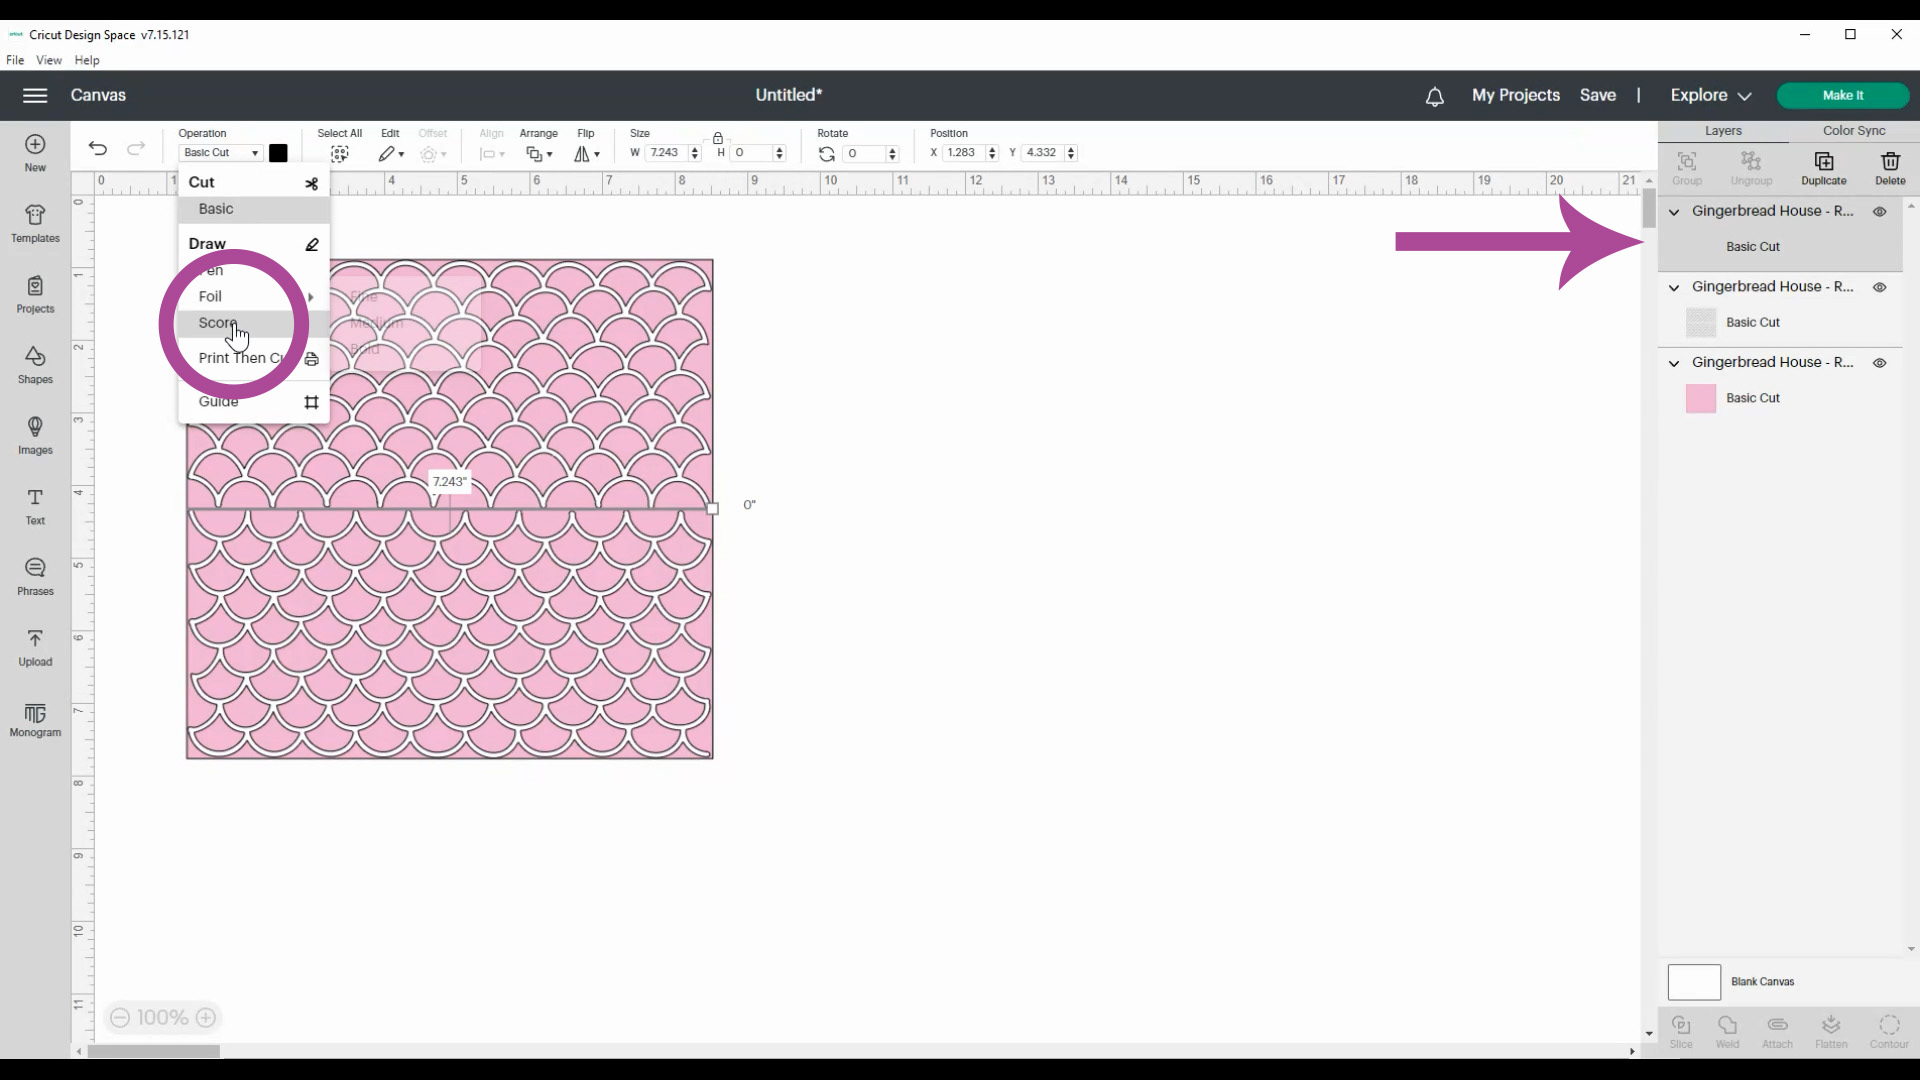
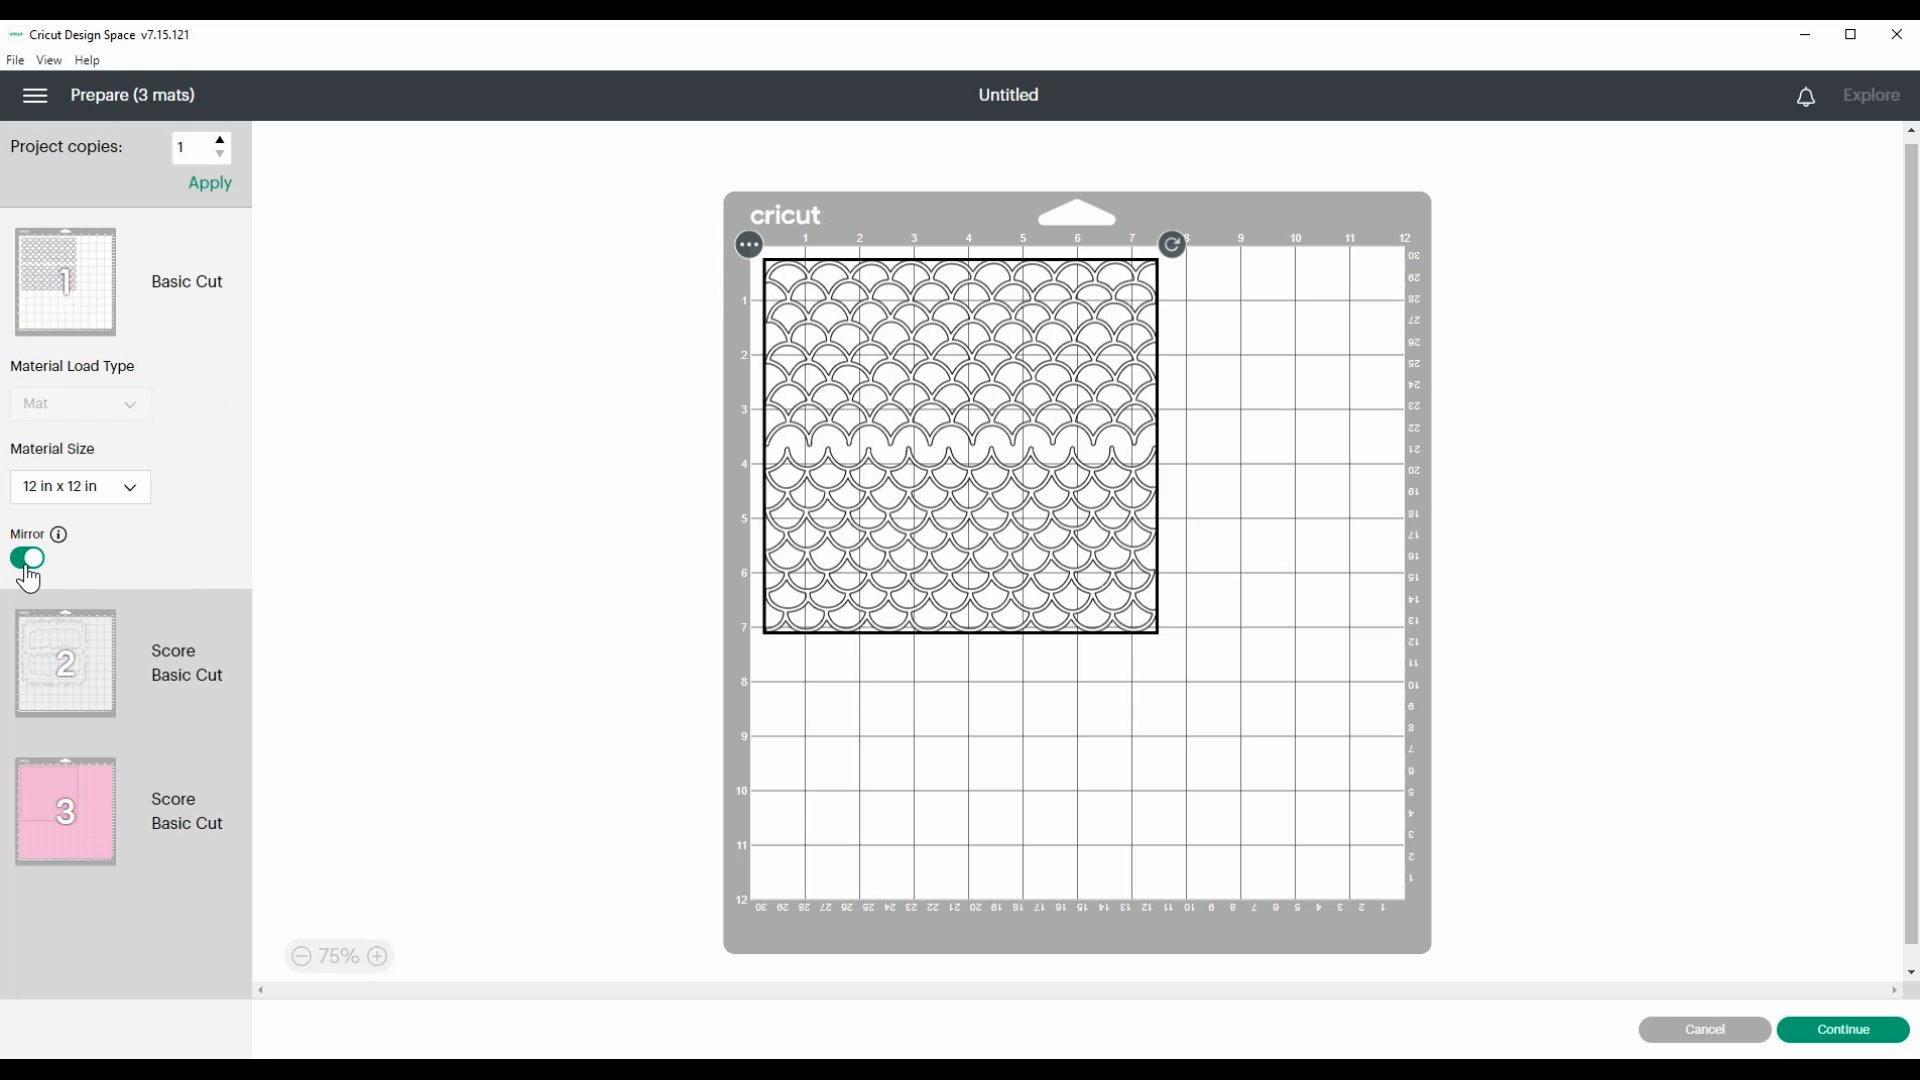
It will also leave these three layers, still grouped together in one additional group – you want to leave these grouped together. You can see, though, that all of the lines in this grouping are showing up as “Basic Cut” layers, and we want to change some of these into score lines.
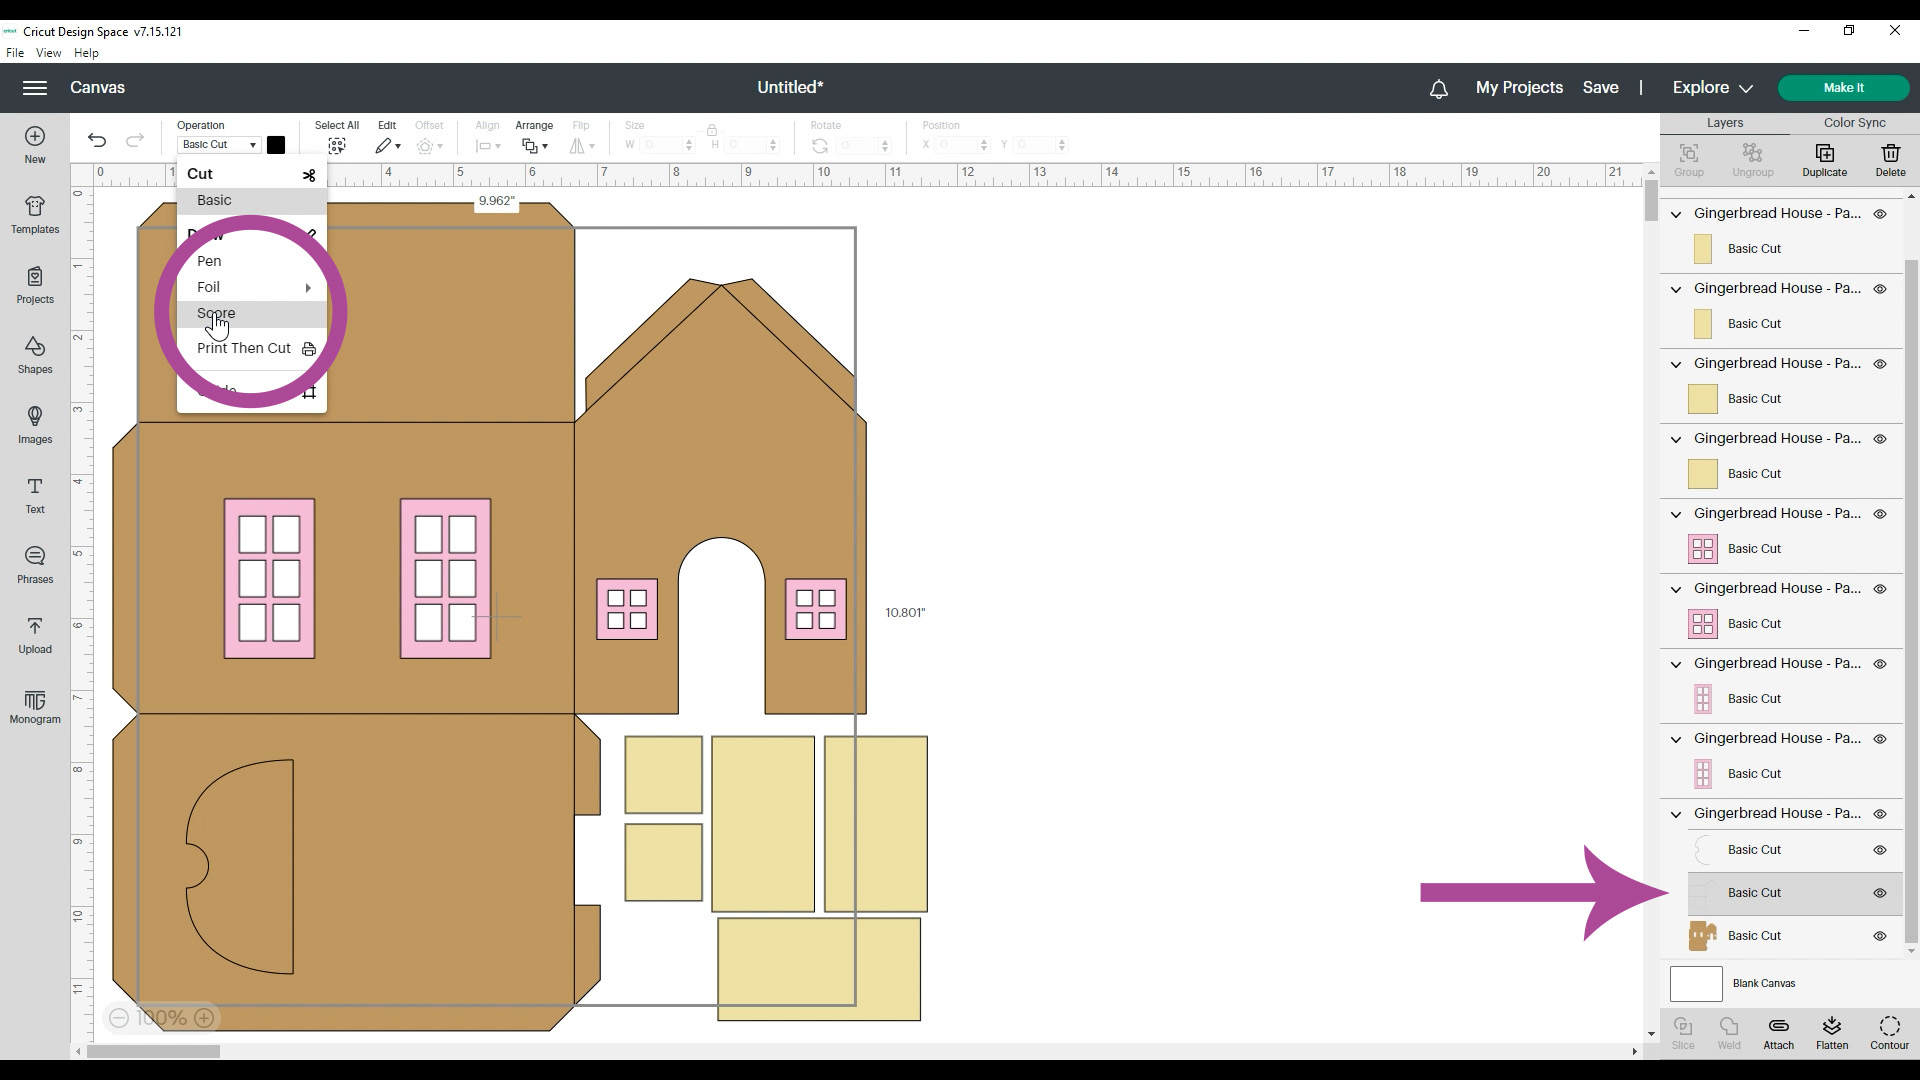
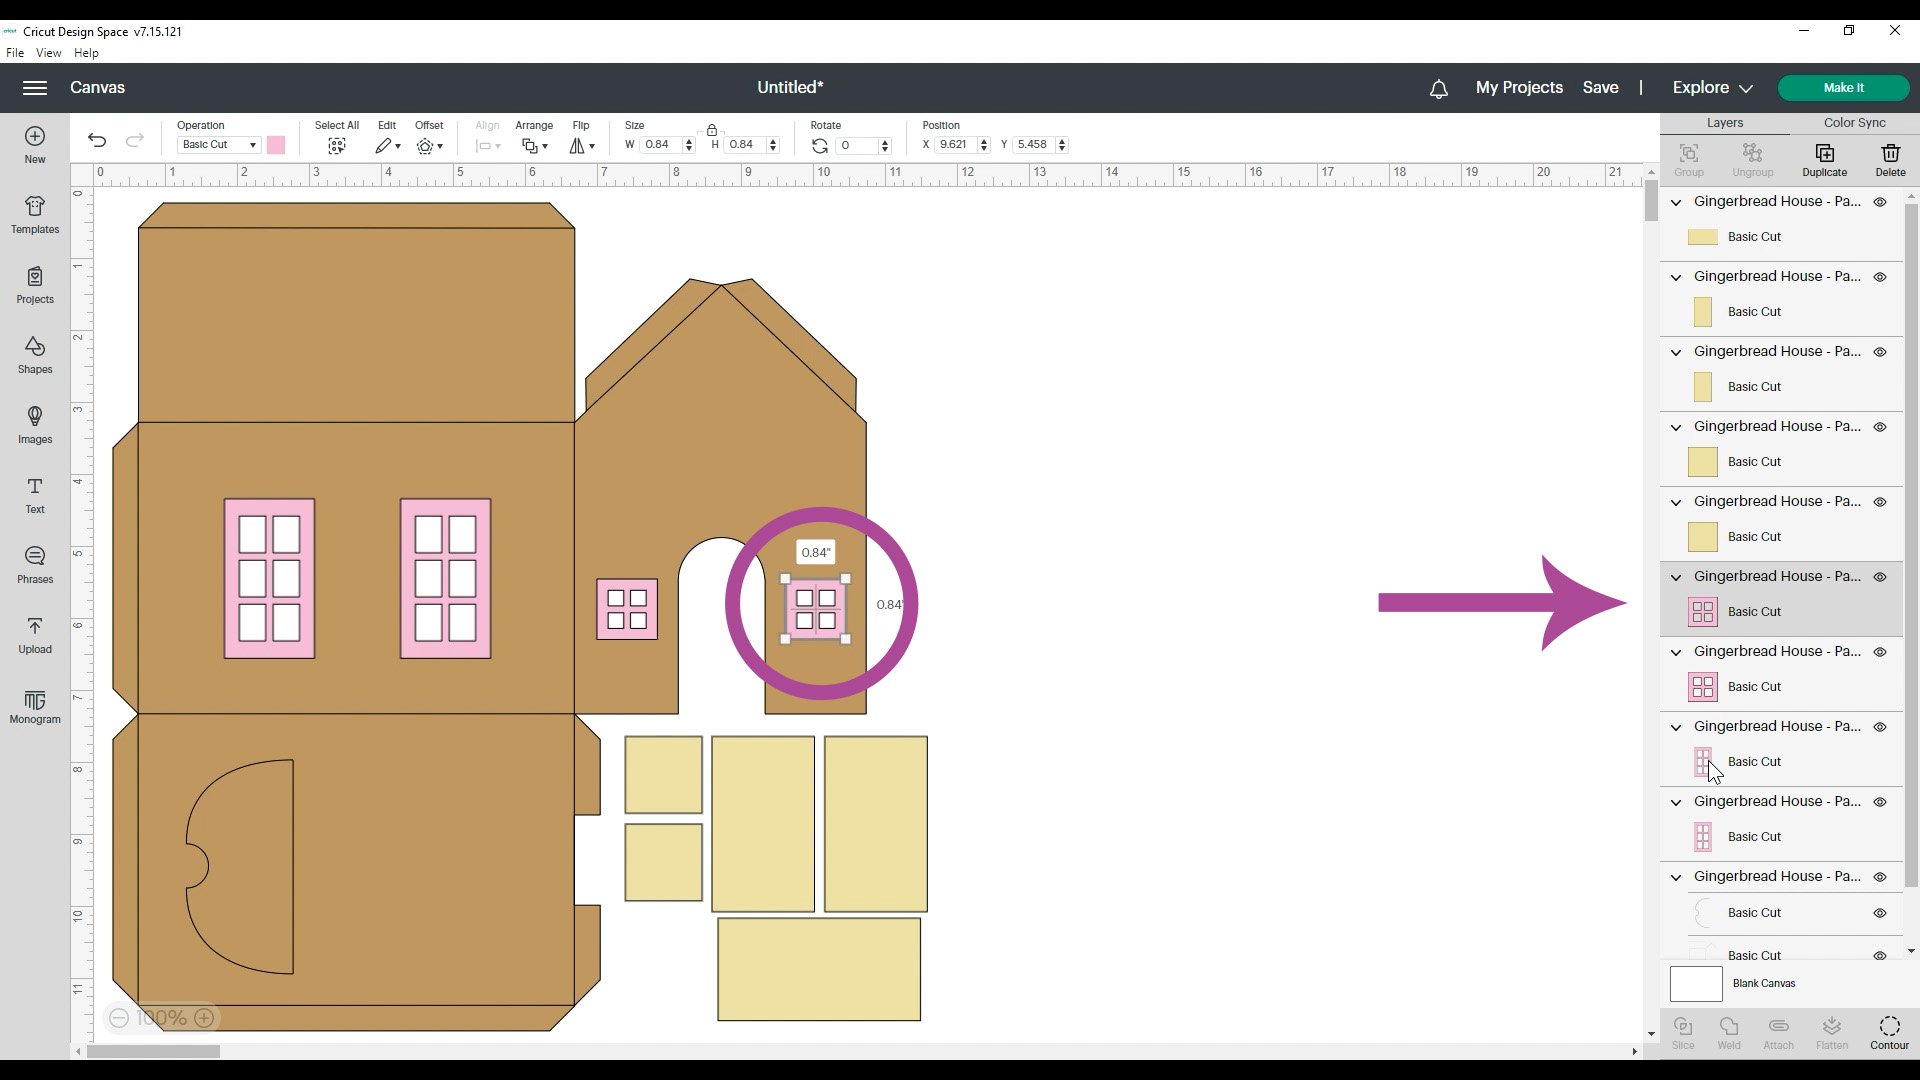
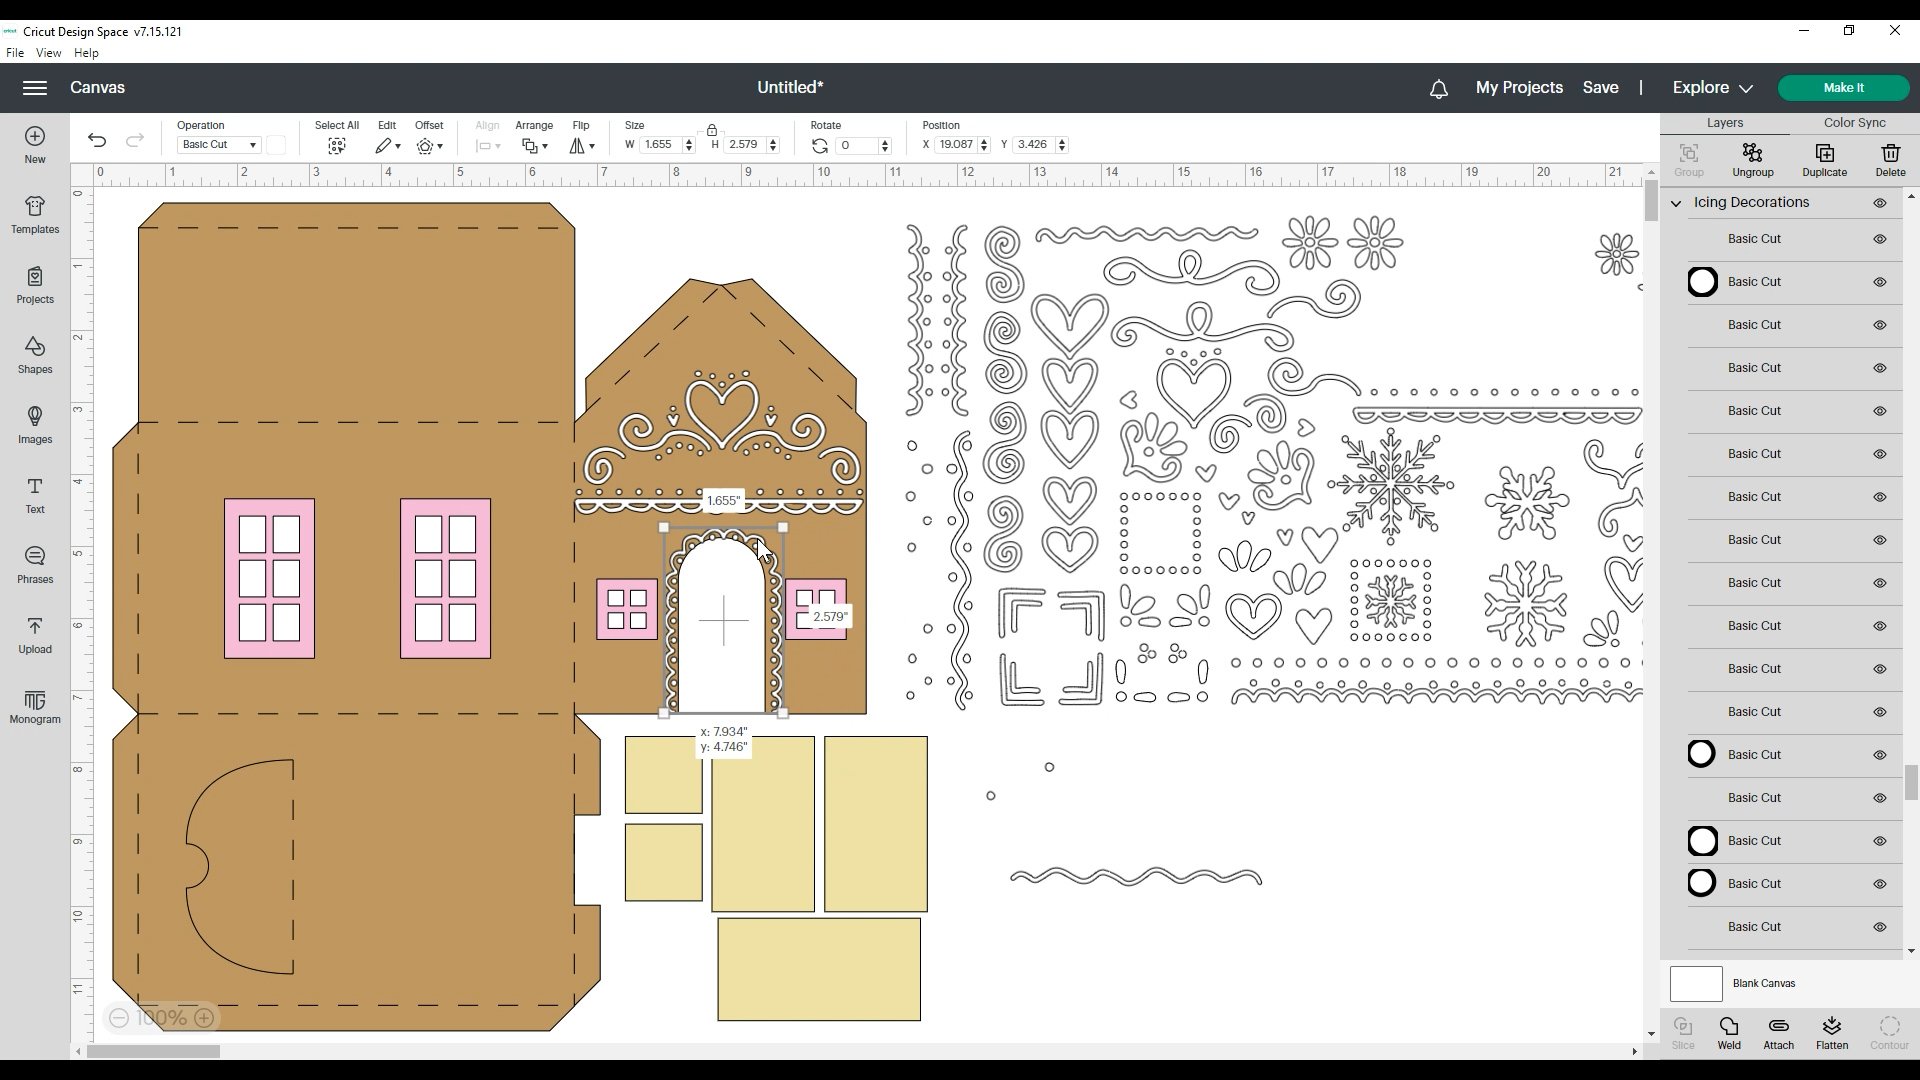
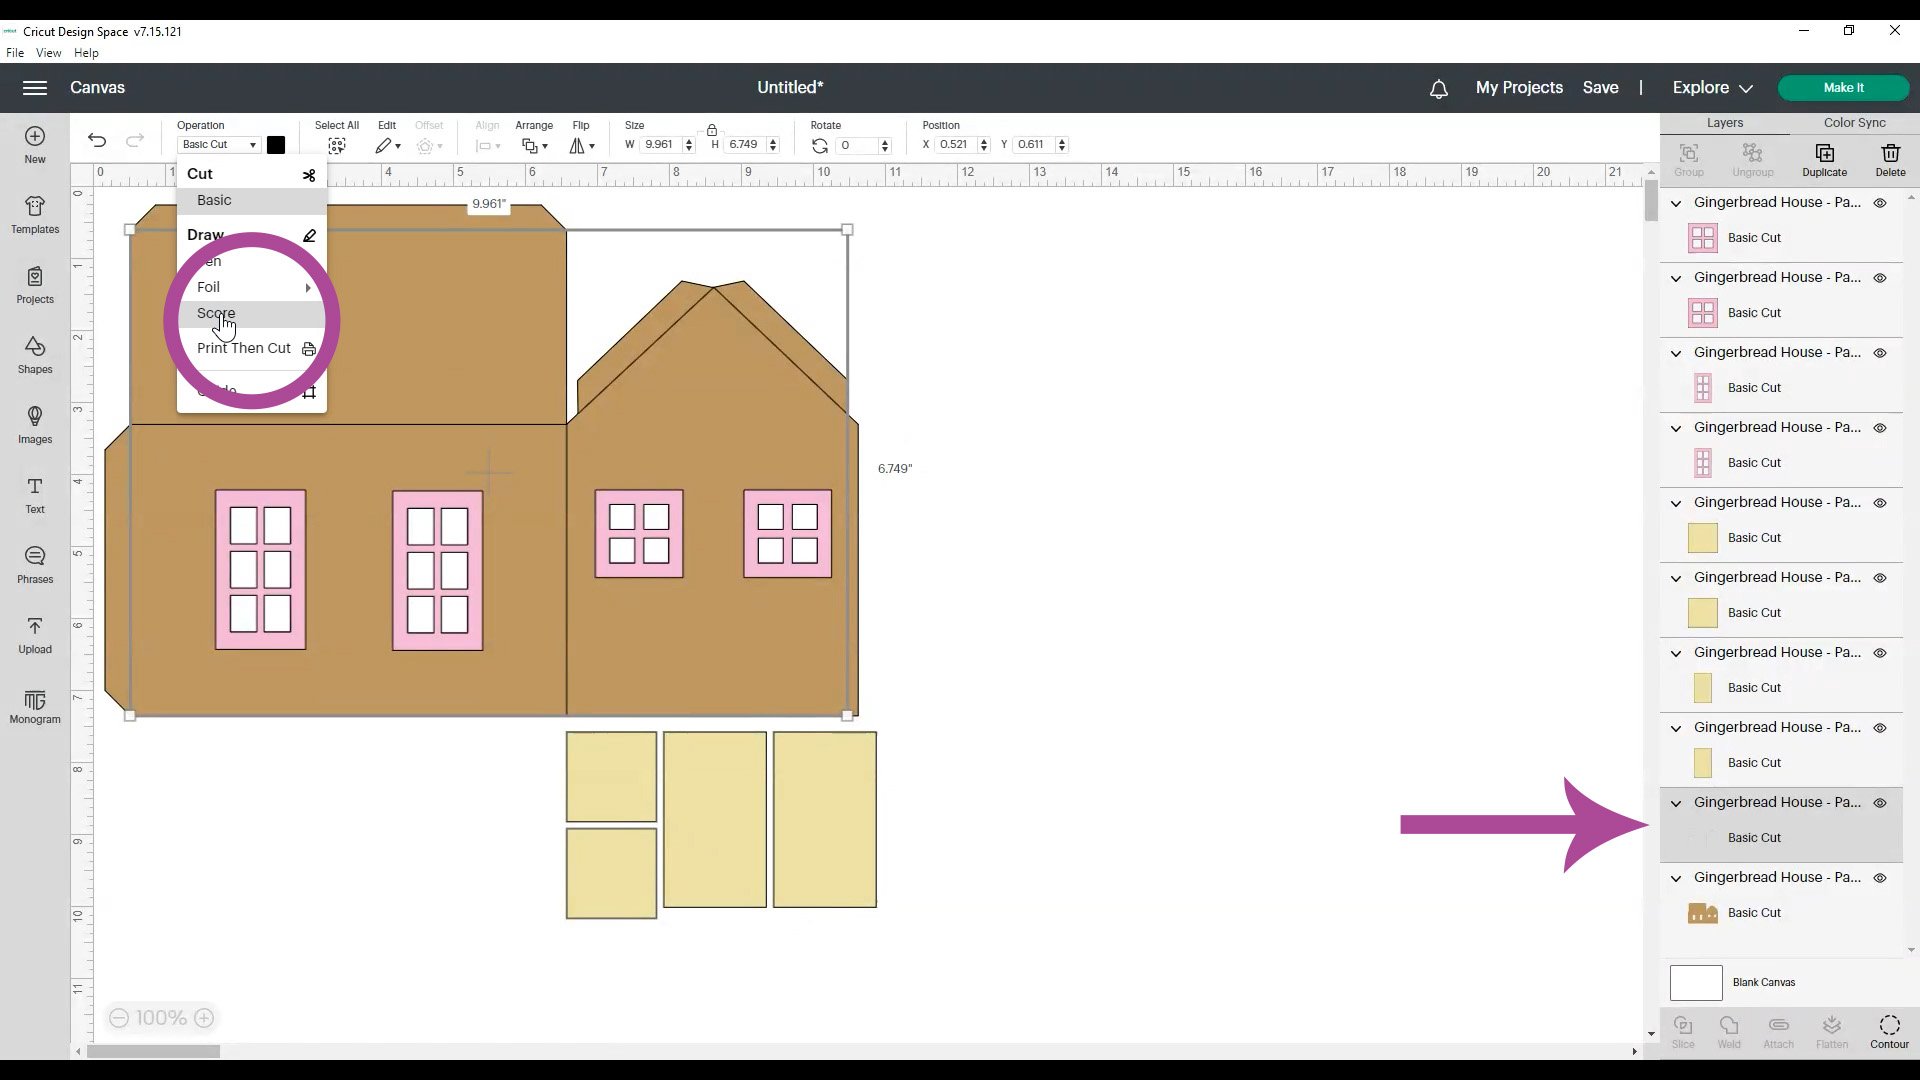
Use your mouse to select only the center layer of the grouping, and you will see that it shows an outline of the area where our folding tabs are going to be. We want these lines to score and NOT cut, so you need to go up to “Operation” drop-down menu and change the cut lines to “Score.”
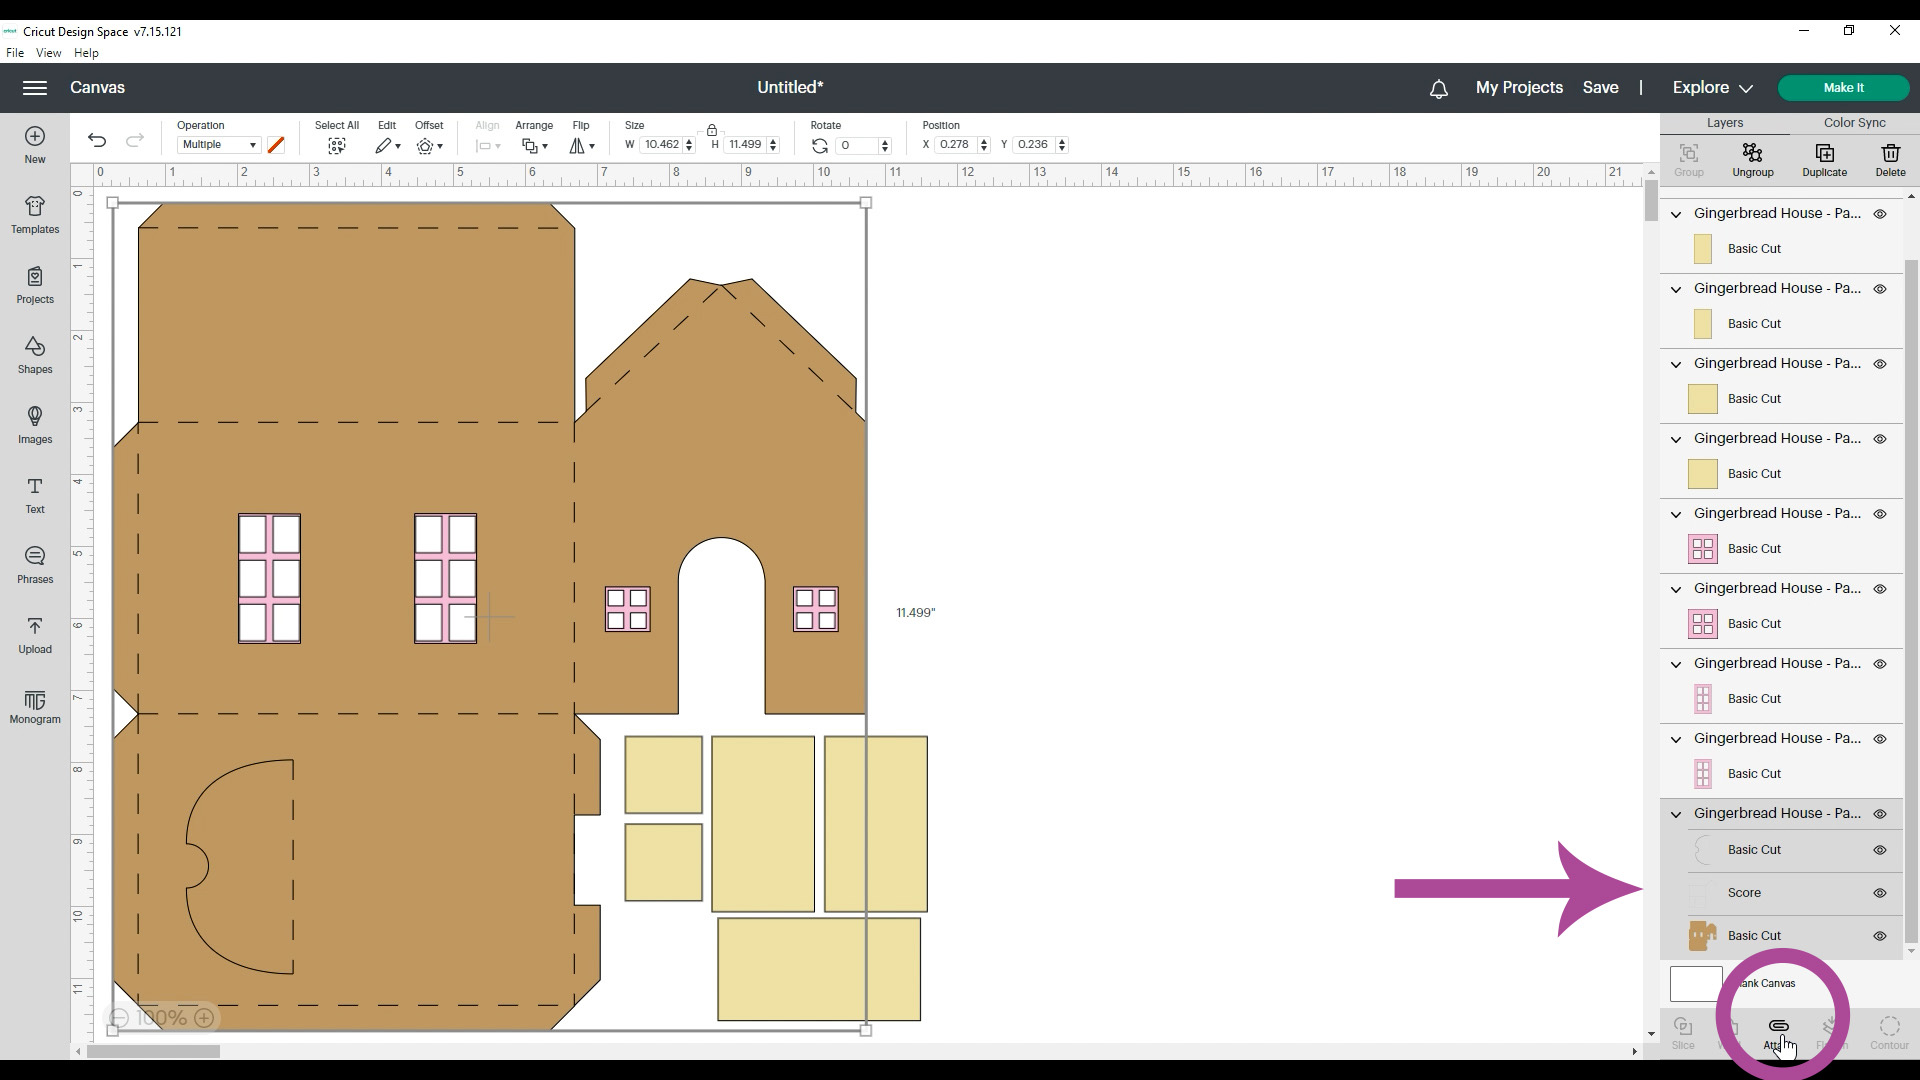
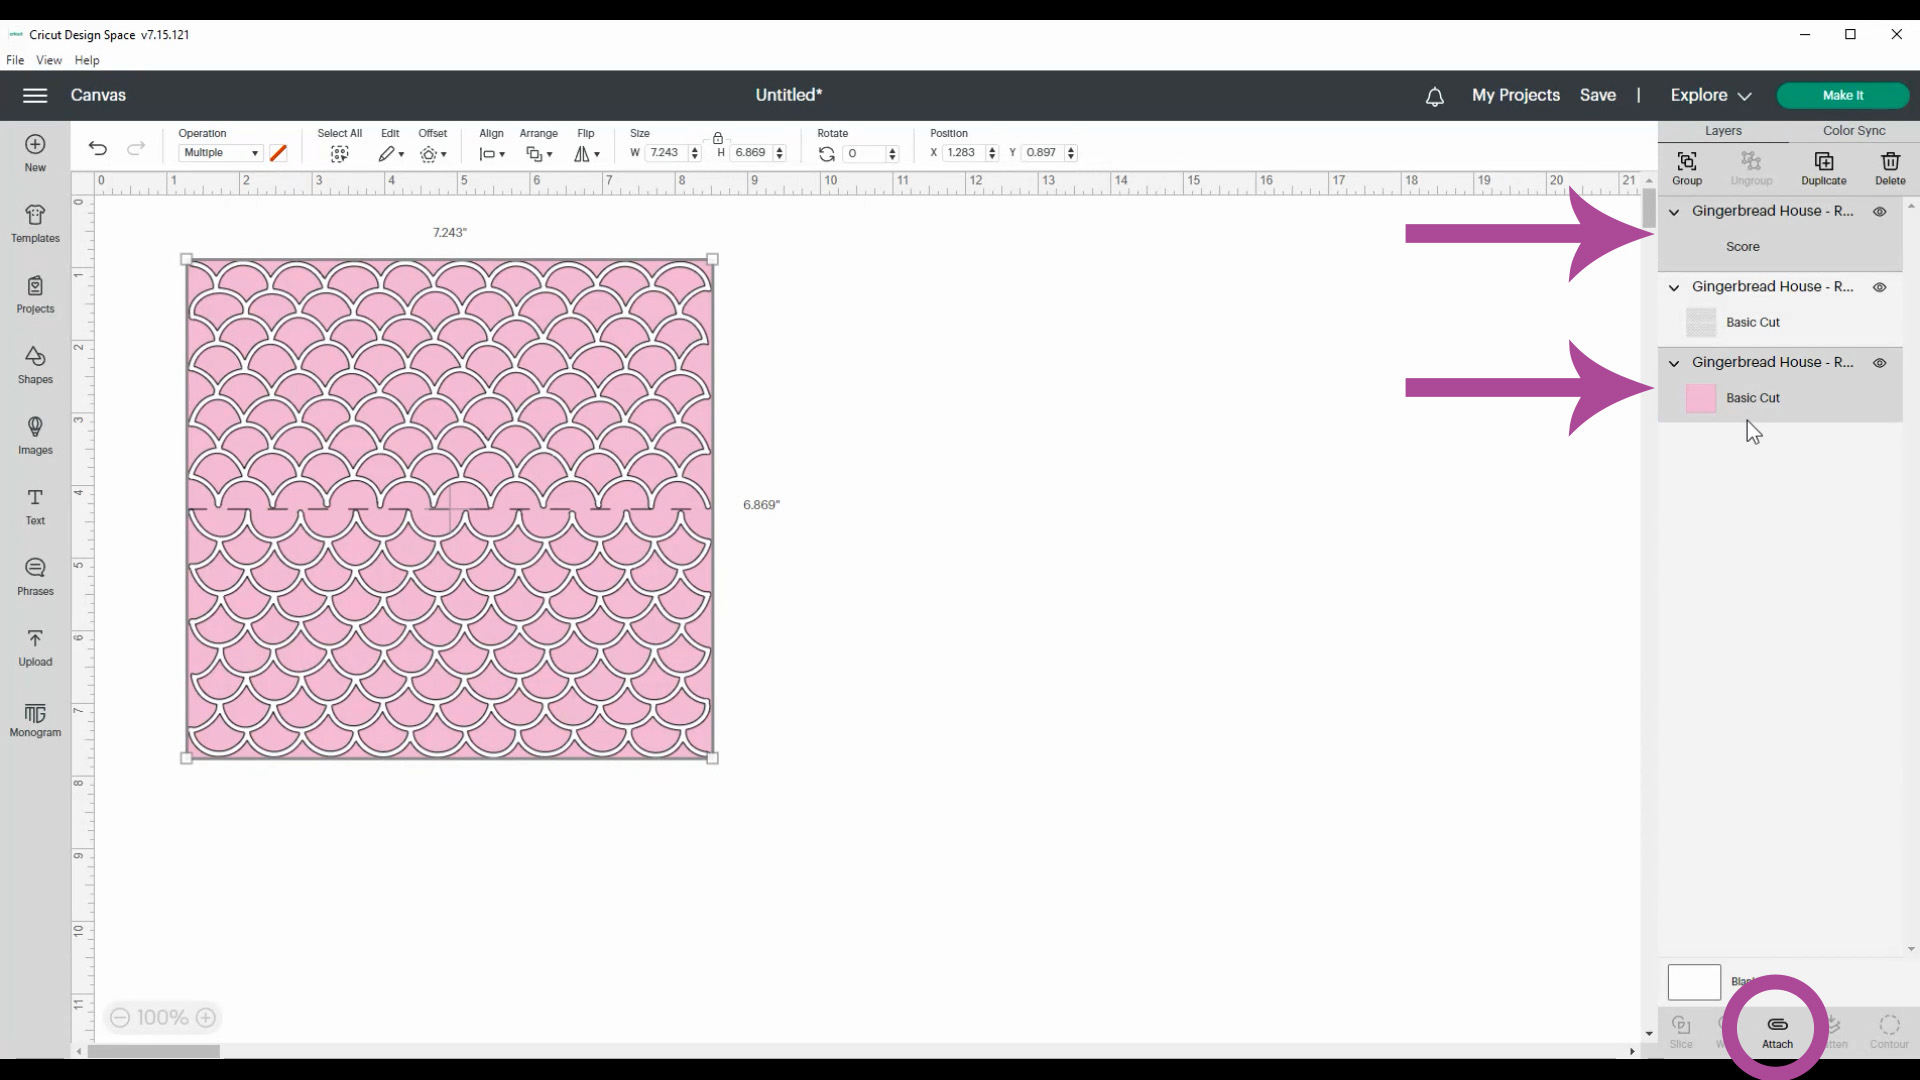
While everything looks nice here on the canvas, if you were to click “Make It” right now, it would put the score lines on their own individual mat separate from the rest of the gingerbread house base.
To fix that, select all of the layers in this group – the base of the gingerbread house, the cut line for the opening for our flameless candle, and the score lines – and use the Attach Tool to link them all together. Now, when you click “Make It,” it will cut and score all of these layers together, in place, on the same mat.
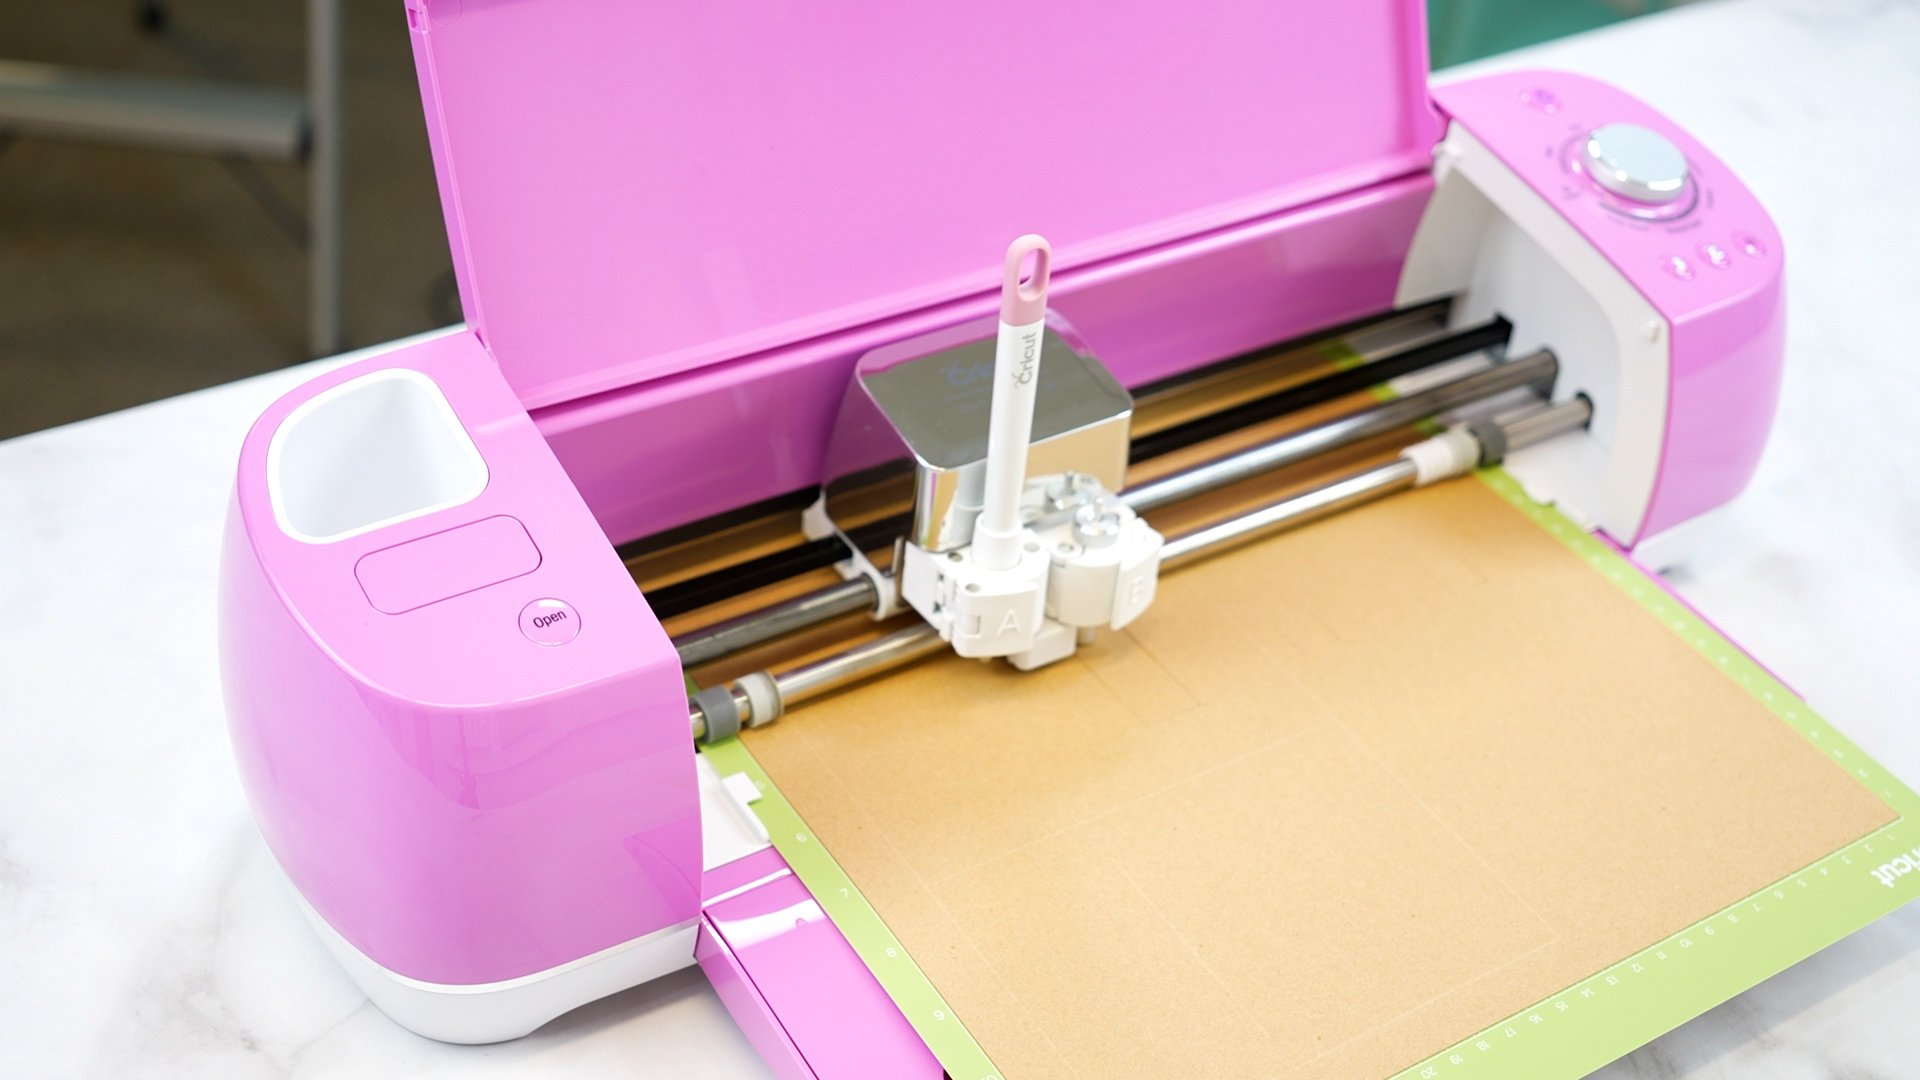
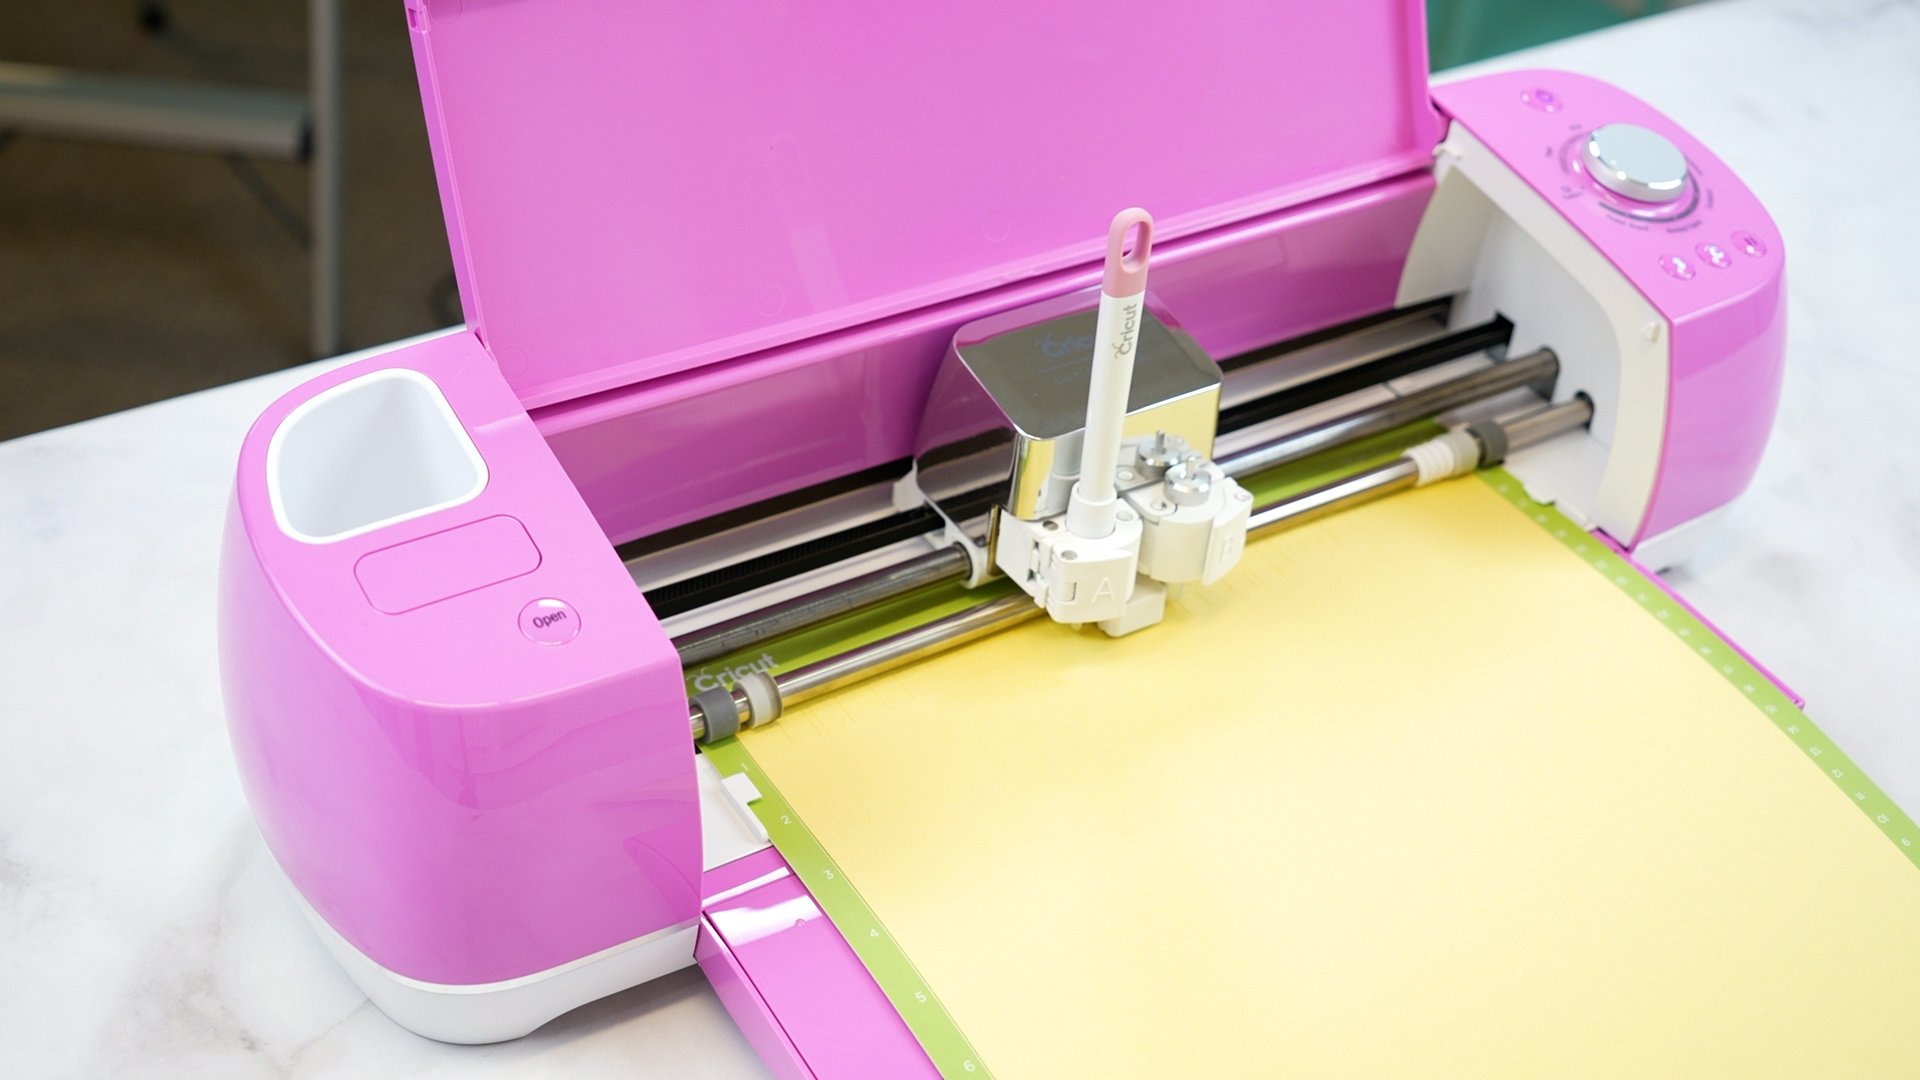
Now that the pieces have been properly set up in Design Space, click on the green “Make It” button, and use your cutting machine to cut the different pieces.
NOTE: for my demonstration, I am using kraft board for the base of my gingerbread house, which is about the same thickness as traditional poster board. When cutting kraft board, I like to use the “More Pressure” setting on my machine.

For the window and door backing pieces, I am using vellum, and for the window frames, I am using cardstock with the “Cardstock for Intricate Cuts” setting with “More Pressure.”
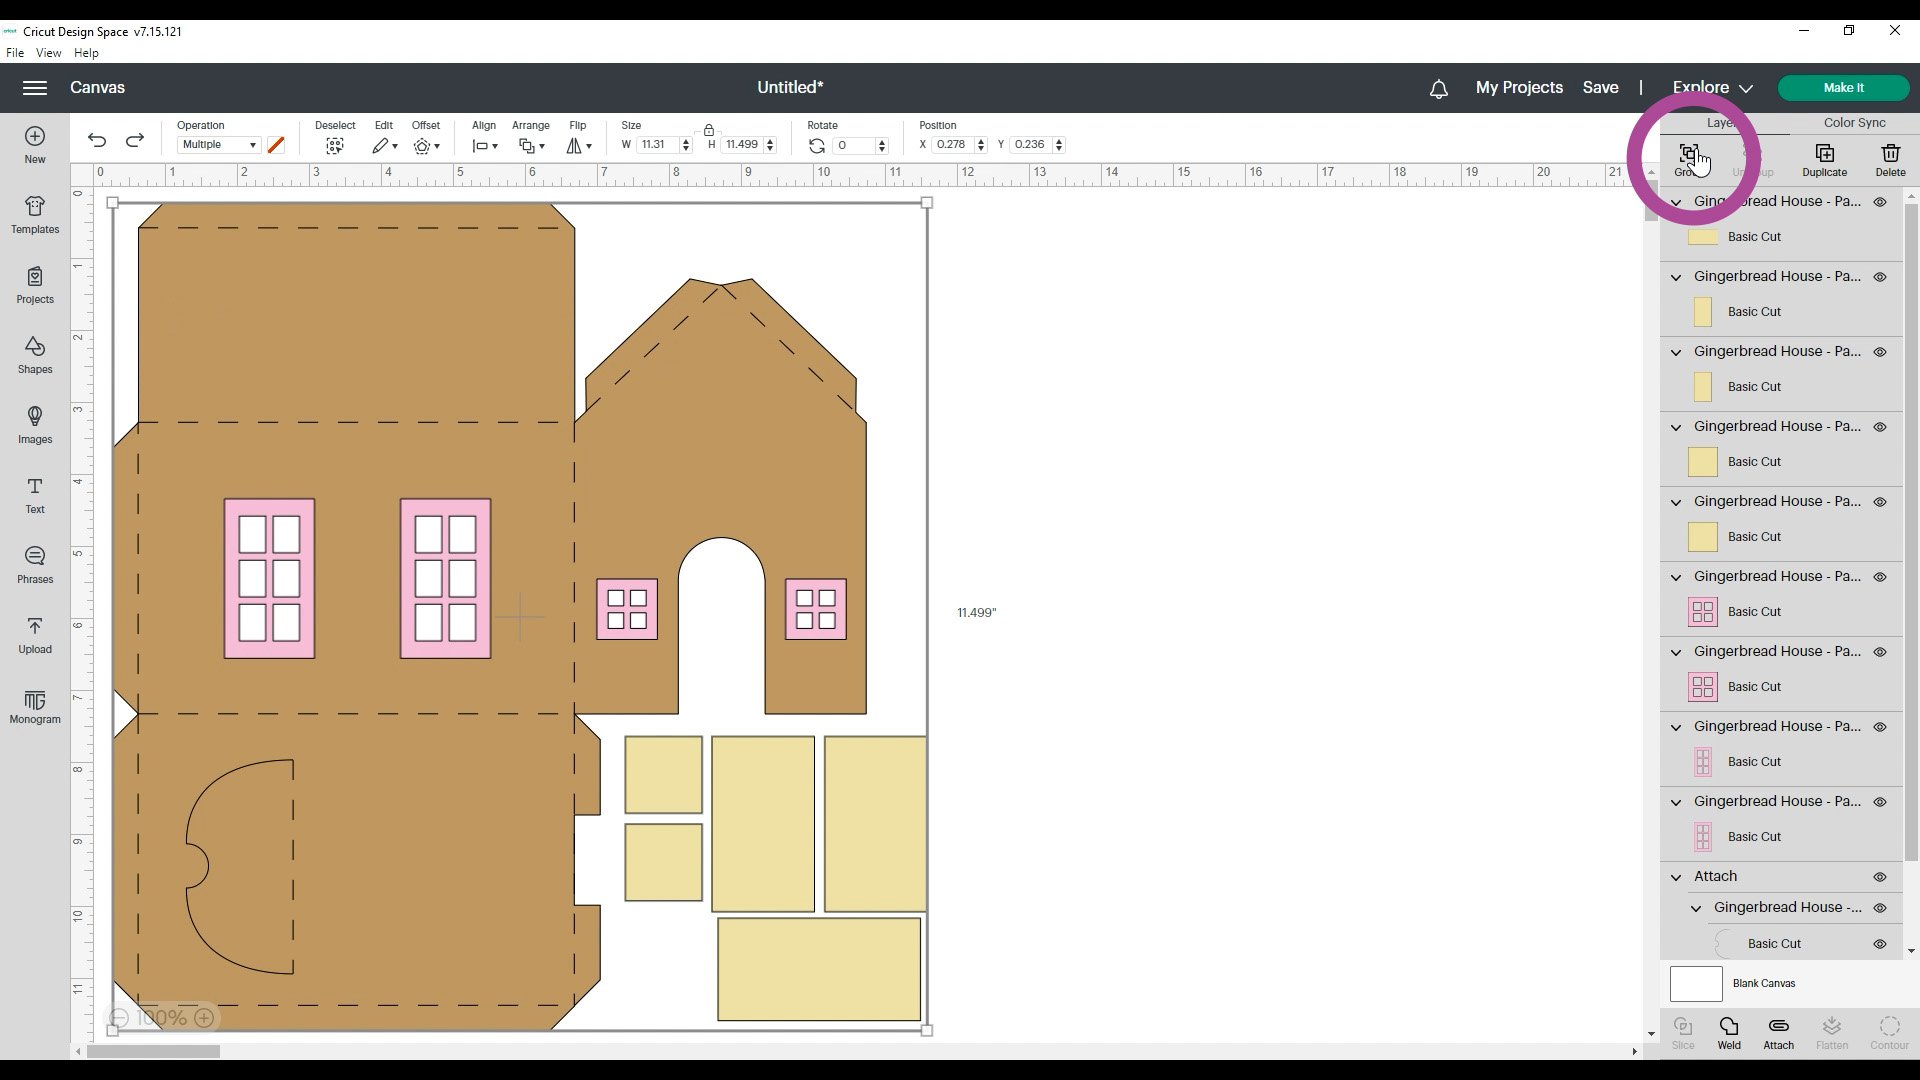
Once everything is done cutting, go back to your Design Space canvas again and re-group all of the gingerbread house pieces and layers.
Icing Decorations – Part 1
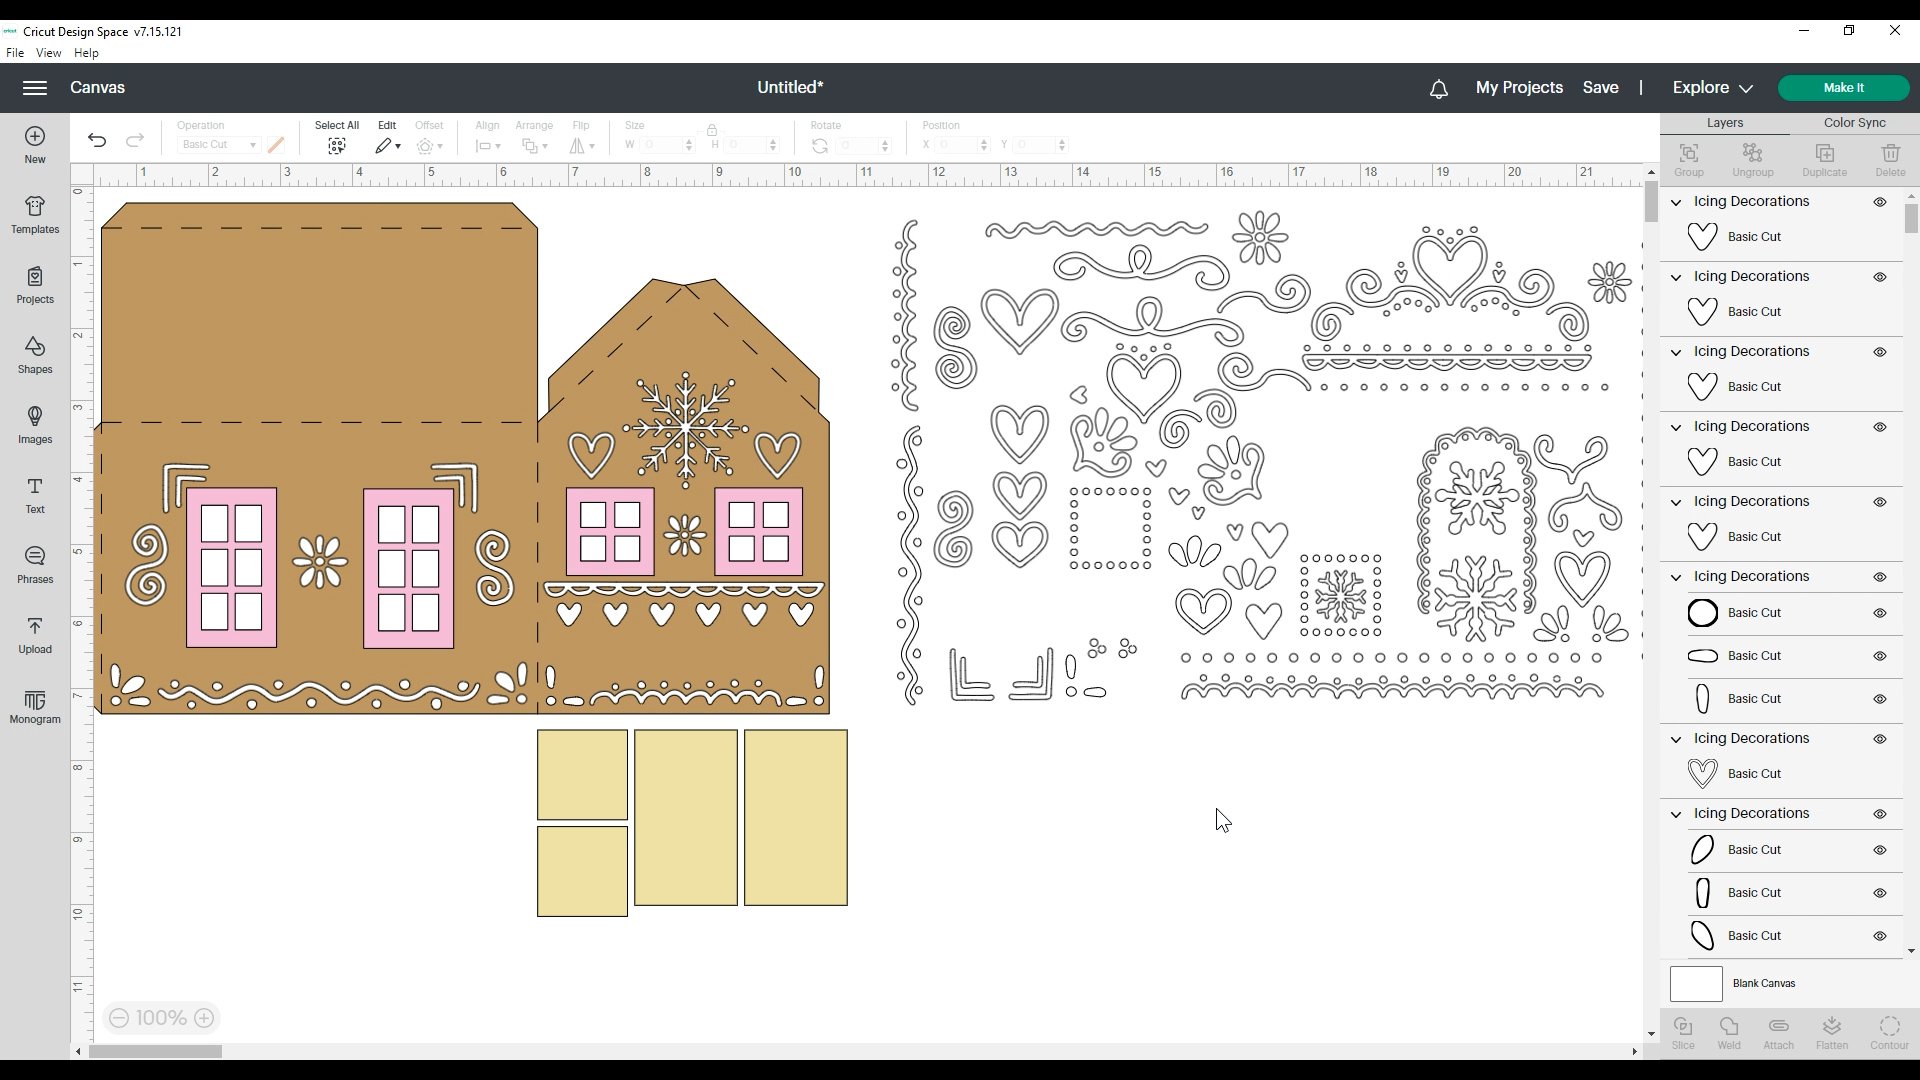
Next, upload the “Icing Decorations” file and add it to the canvas. The decorations are grouped so that you can move them all at once – place them over to the side of the gingerbread house base, and then click on “Ungroup” to separate the elements.
As you can see, that creates a LOT of layers on the side panel there. I really wanted to give you a TON of options when it came to decorating your gingerbread house (since that’s the fun part, right?), so each of the grouped elements in the layers panel can also be ungrouped and broken down into each individual dot/swirl/whatnot for maximum decorating options.
Of course, you can also resize the different elements, rotate them, mirror them, etcetera, so you have lots and LOTS of different ways in which you can customize your gingerbread house decorations!
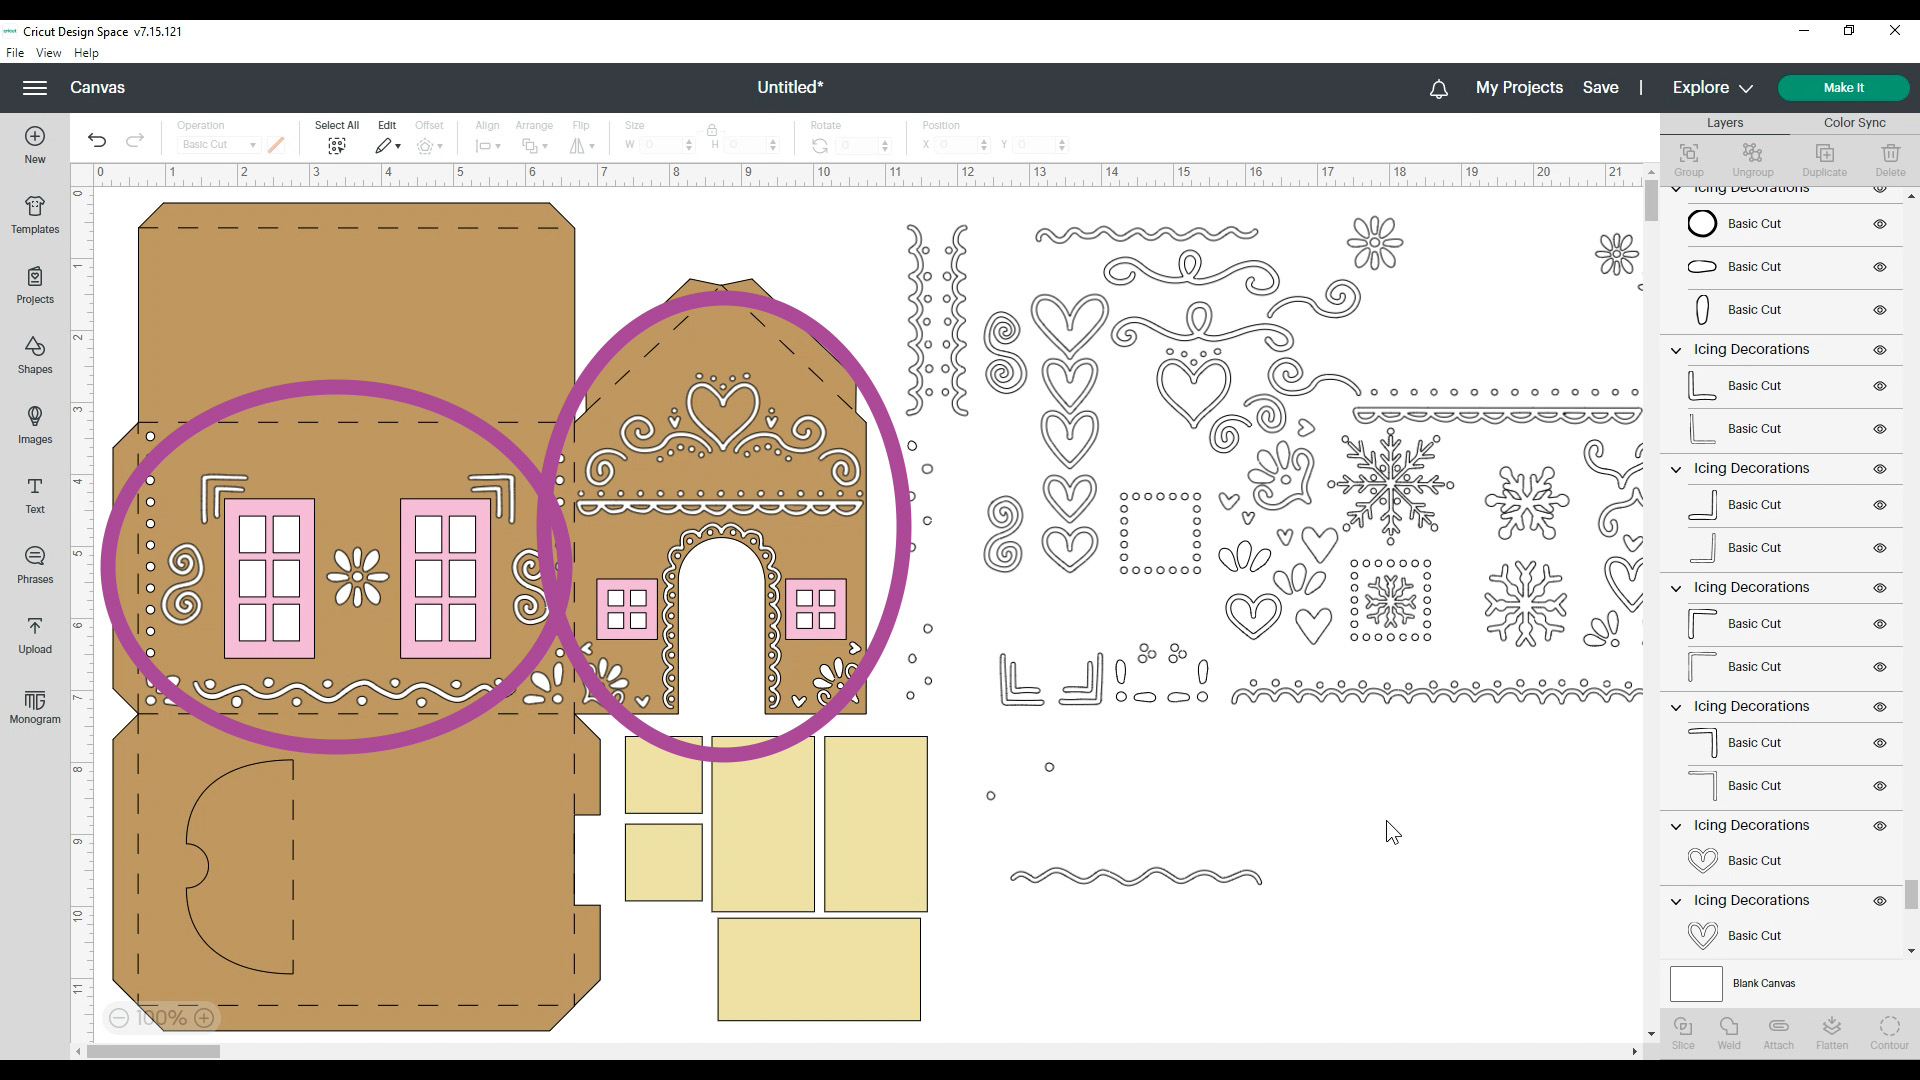
You only need to decorate these two panels here because the roof flap will be covered up by the additional roof pieces that you will cut in a moment, and the other panel is the bottom of the house.

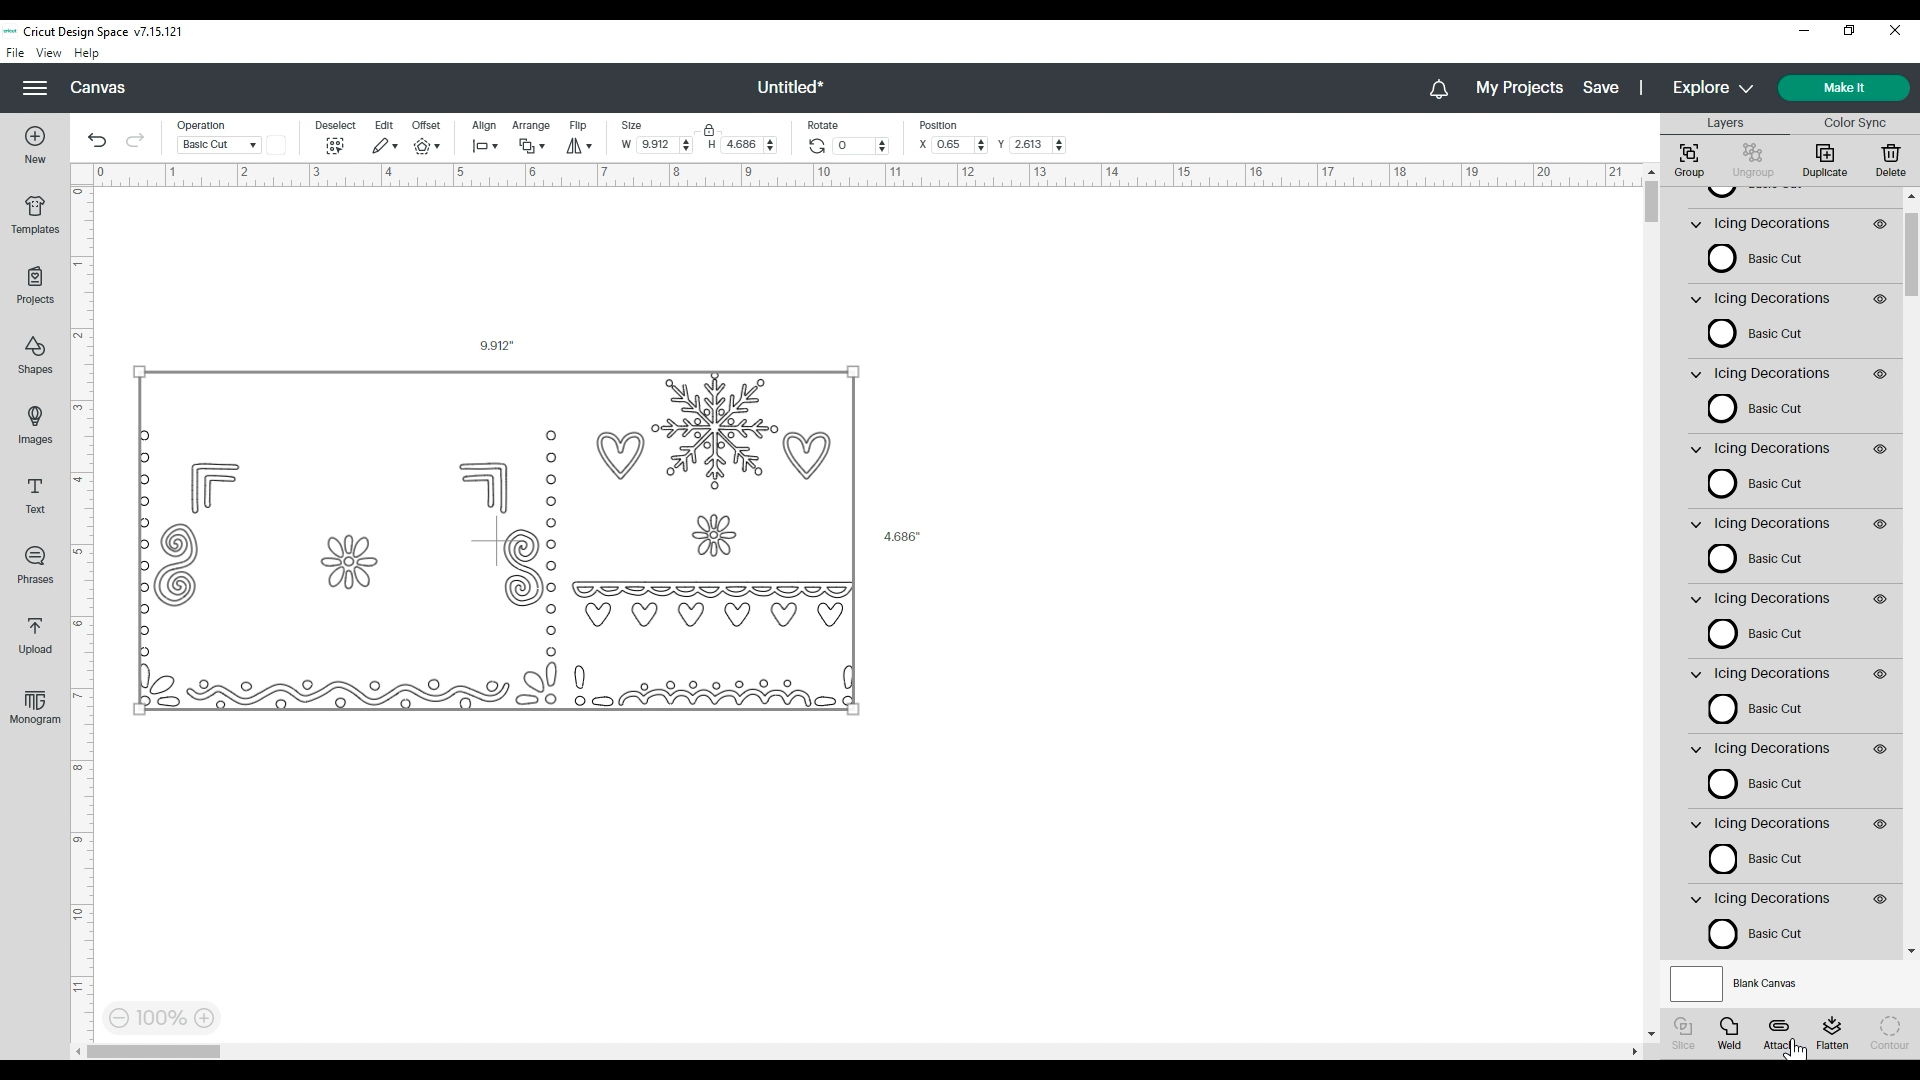
Once you have all of your decorations in place where you want them, delete all of the unused icing elements.
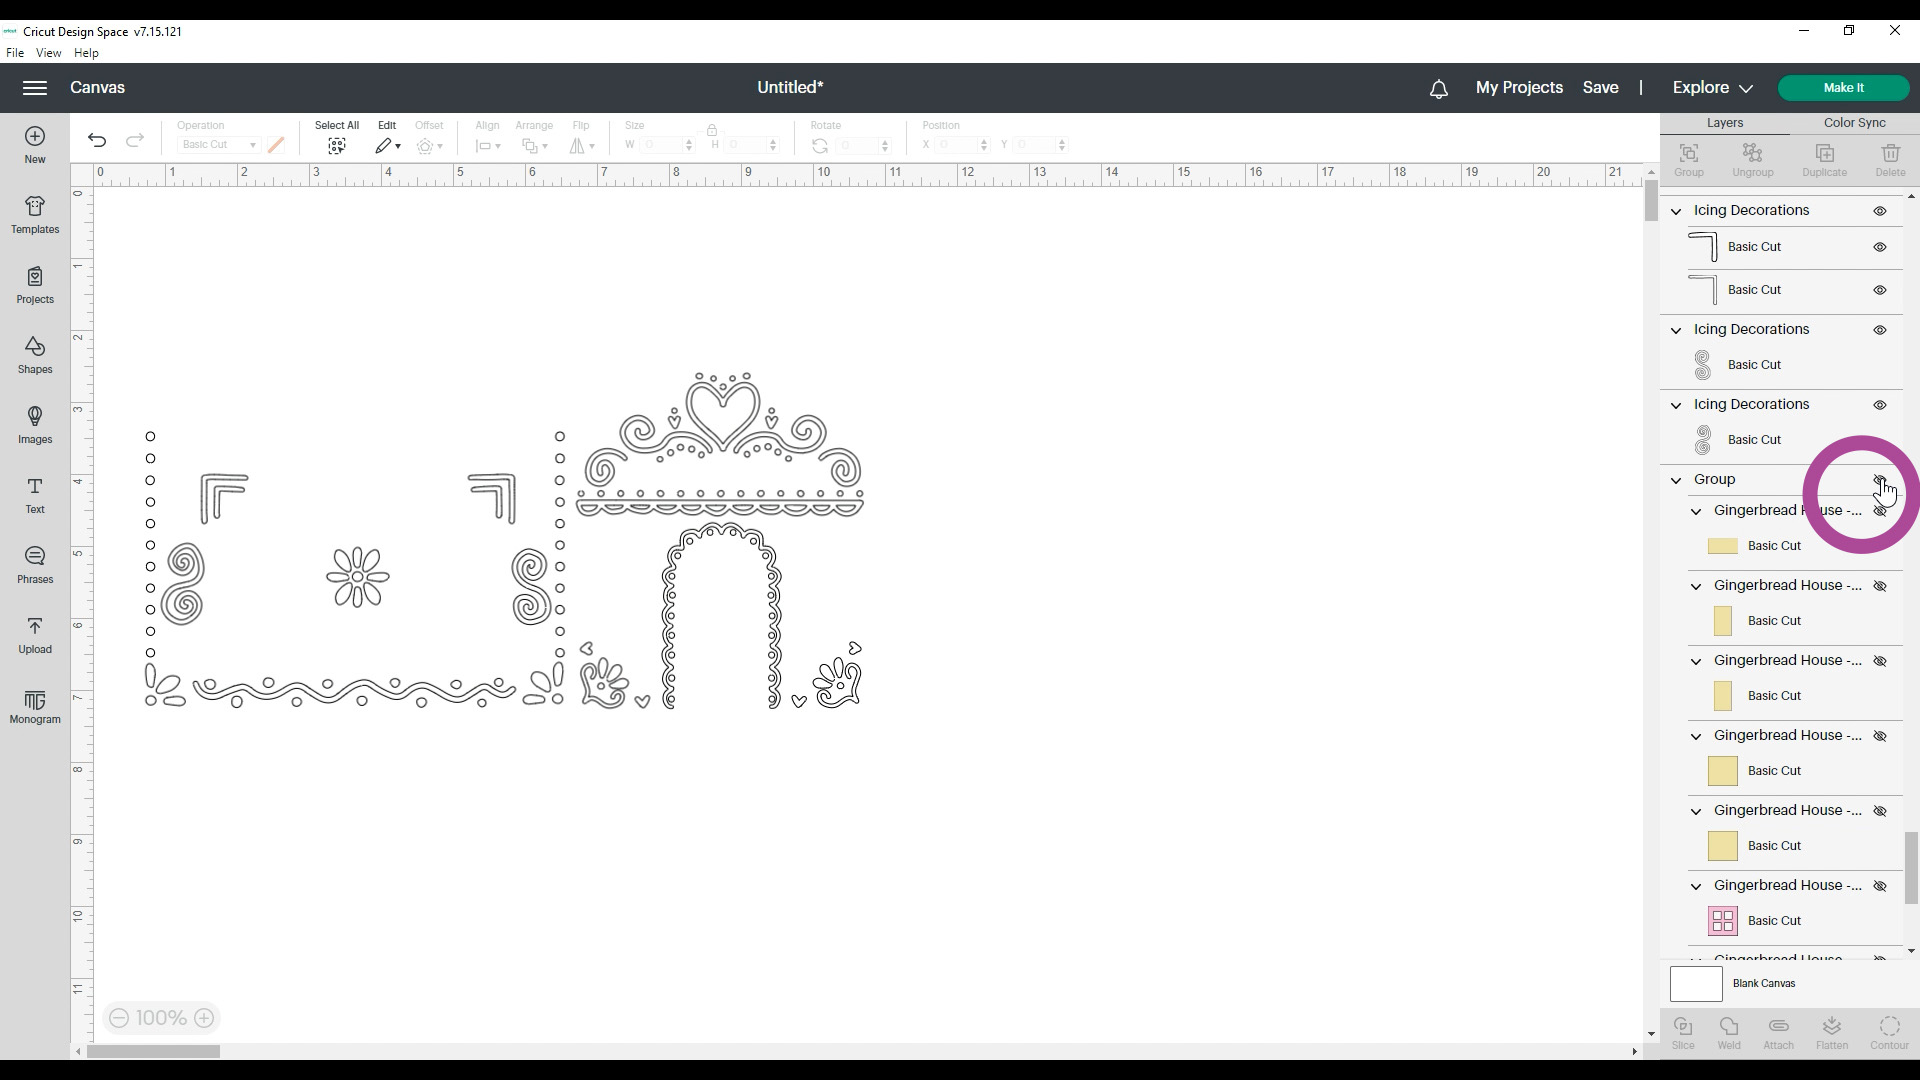
Then, locate the gingerbread house base layers in the side panel, and click on the eyeball icons to turn off visibility.
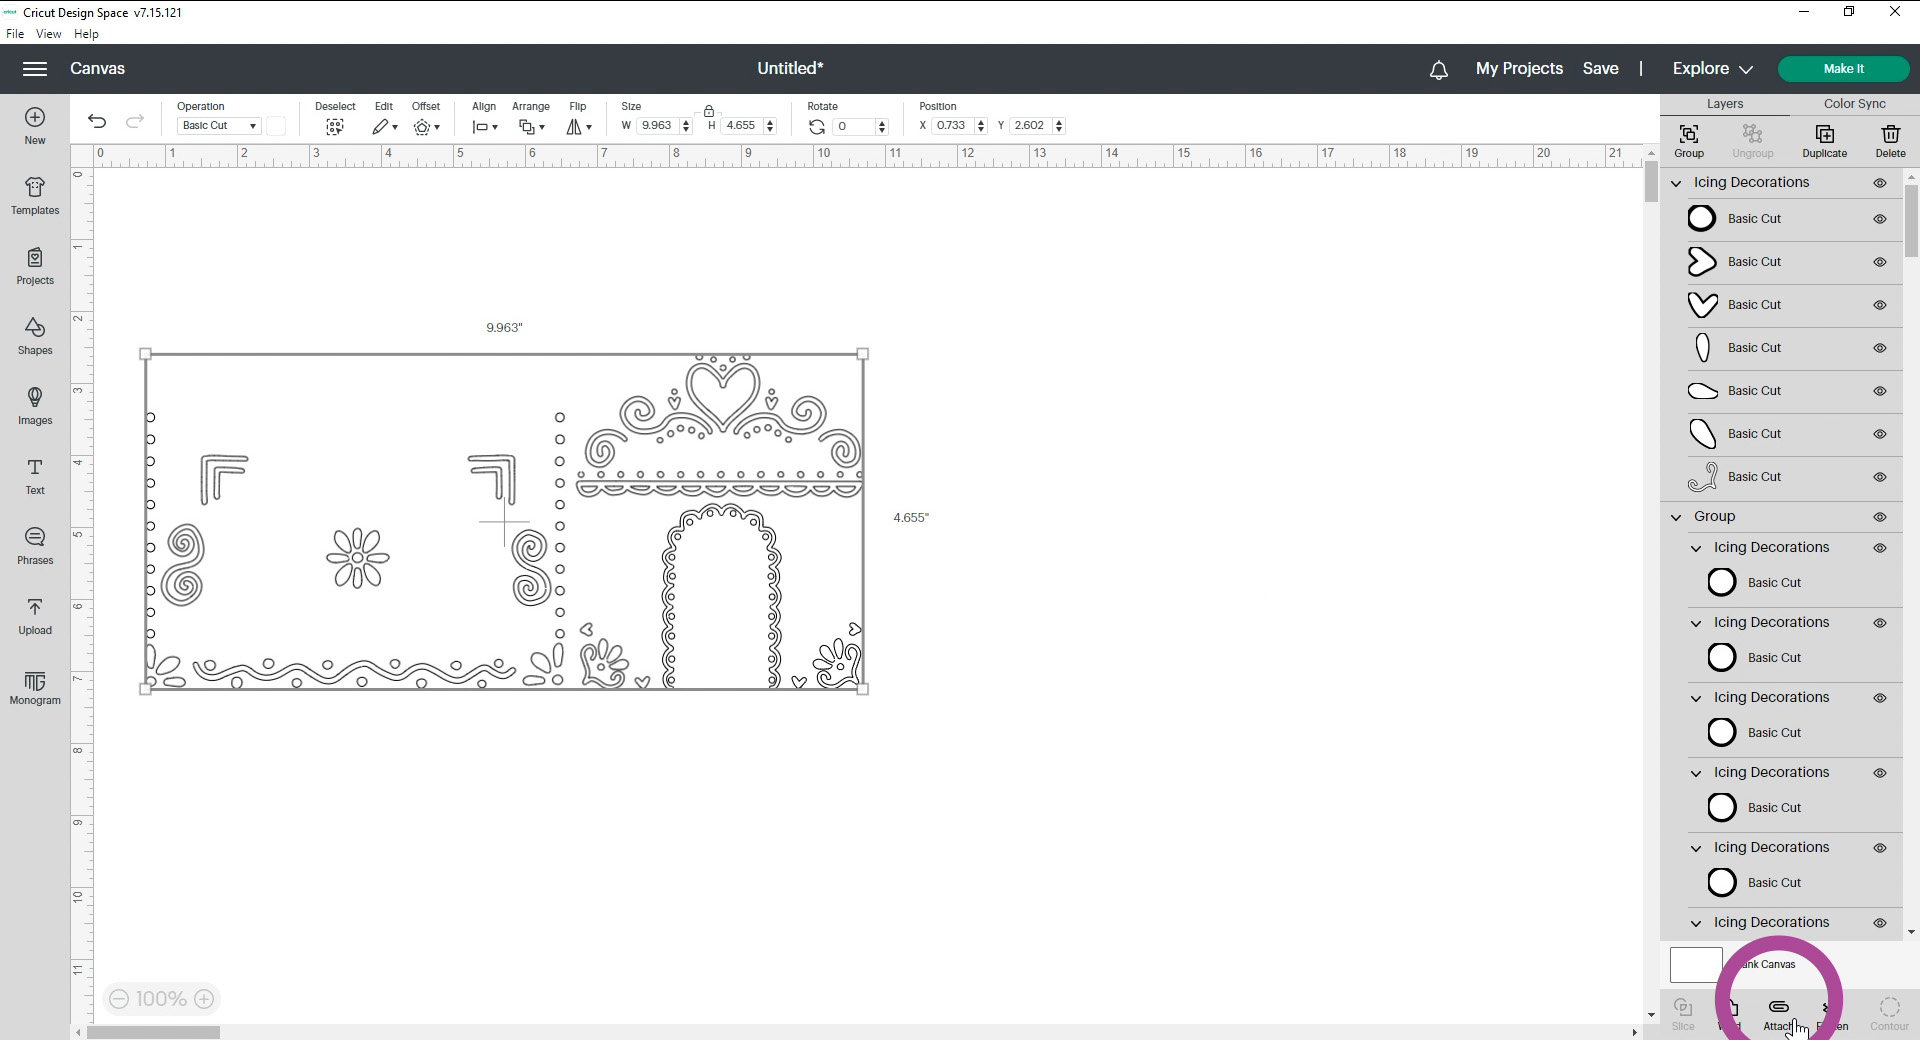
Select all of the remaining icing layers, and use the Attach Tool so that all of the elements will cut in place as you have them arranged here on the canvas. Once the elements are attached, click on the green “Make It” button.
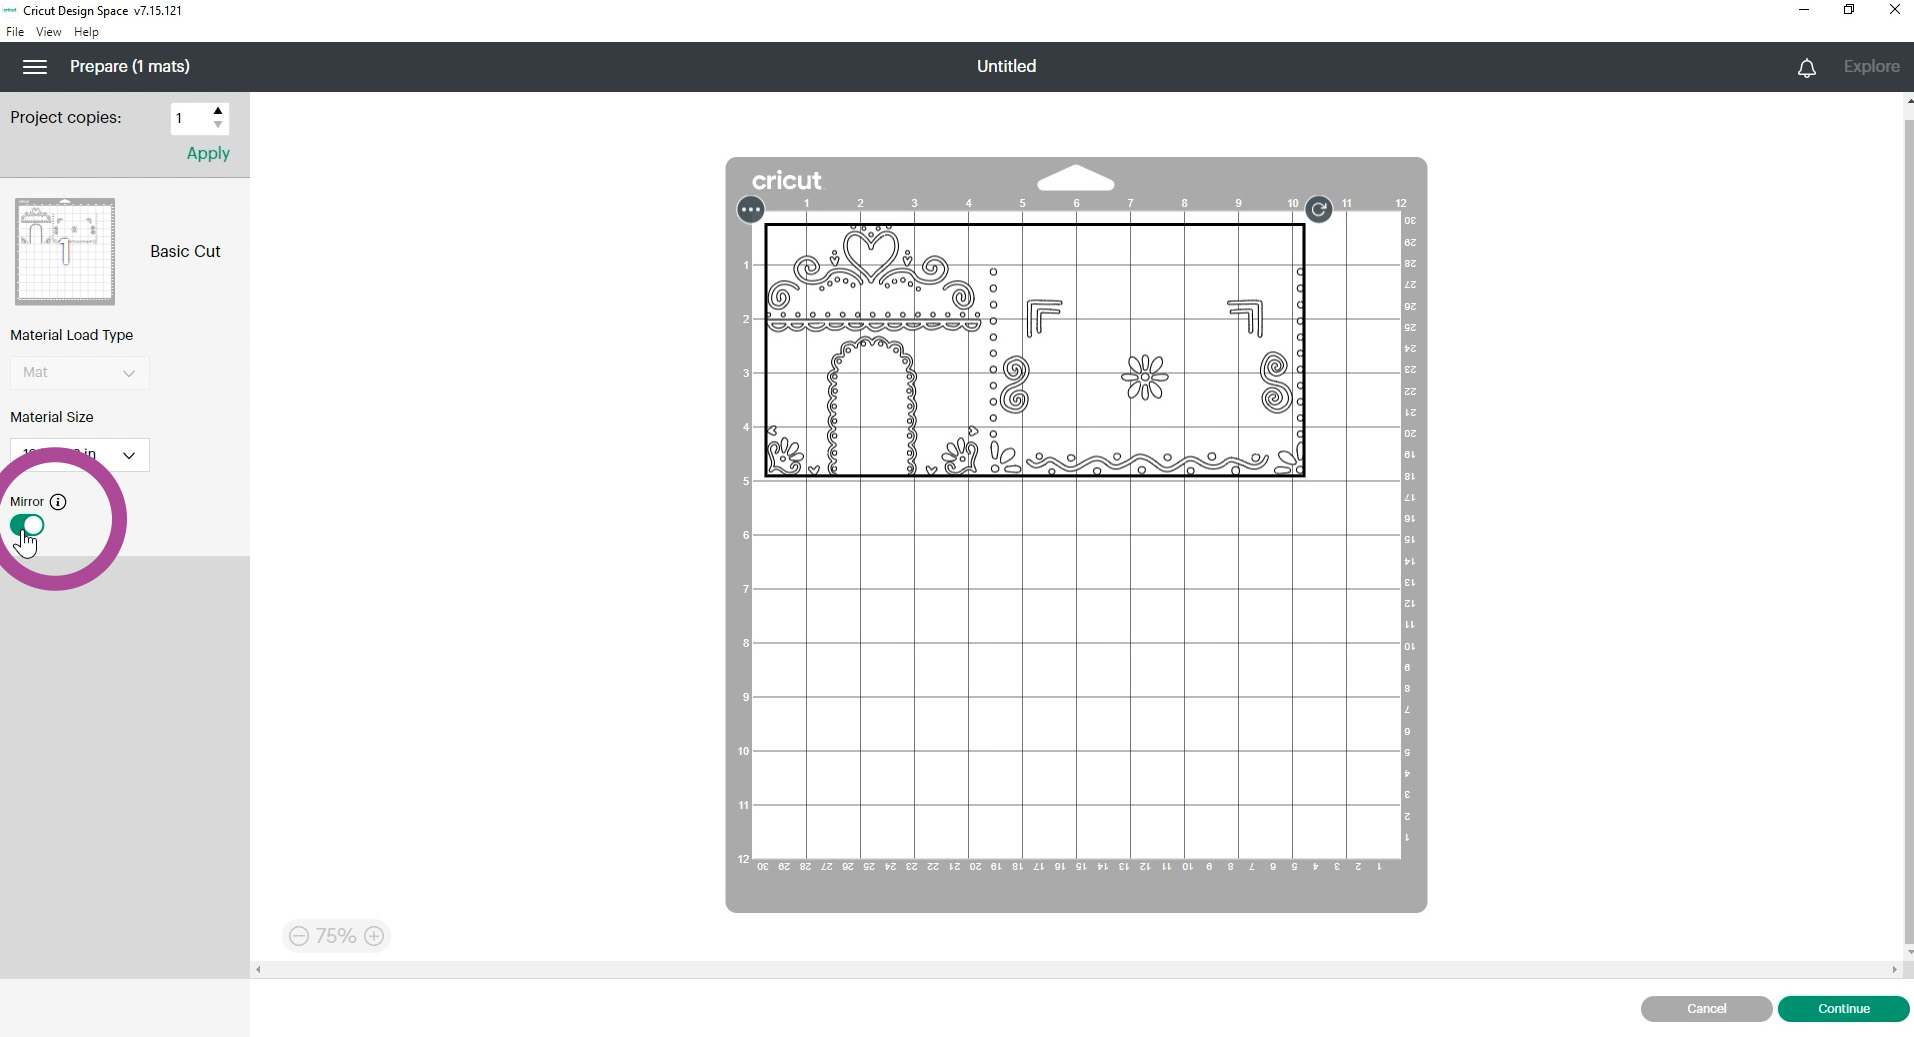
Since the icing decorations are going to be cut from iron-on heat transfer vinyl, you will need to mirror the mat before cutting.

Select your material (I’m using Everyday Iron-On) from the materials list, and since this design has all of those tiny little dots, you will want to use “More Pressure” to ensure that you get a nice, completely clean cut on all of those tiny pieces.
Cut your HTV, and set it aside for now.
Save your project in Cricut Design Space and then click to start a new canvas.
Gingerbread House – Part 2
Next, you’re going to repeat the process for the 2nd half of the gingerbread house.
Note that while you CAN include both halves of the gingerbread house on your Design Space canvas at the same time, and add the icing decorations to both halves all at once, the icing file is very large with LOTS of layers, as you’ve seen. If you have an older computer, it may become sluggish or struggle with having that many layers open at once, which is why I recommend that you design each half of the house separately, one at a time.
If you have a super fast computer with lots of memory, though, feel free to do these all on the same canvas!
Upload the “Gingerbread House – Part 2” file, position it on your canvas, and ungroup the elements.
Find the layer for the folding tabs, change the black cut line to score lines, and then attach the score lines to the gingerbread house base like you did in the previous steps.
Click “Make It” and cut the mats from kraft board, vellum, and cardstock as before.
Icing Decorations – Part 2
Back in Design Space, re-group all of the house pieces, and insert the icing decorations file. Ungroup the icing elements, and decorate the house as before. You can choose to have these panels match the ones from the other half of the house, or you can give them a completely different design – it’s up to you!
Hide the gingerbread house base layers. Select and attach all of the icing elements before clicking on “Make It” and cutting them out of iron-on – again, don’t forget to mirror the mat when working with heat transfer vinyl!

Roof & Snow
Back in Cricut Design Space, save your previous project, and open up a new canvas.
Upload the “Gingerbread House – Roof” file and add it to the canvas. Click “Ungroup” to separate the layers.
As before, we’re going to select the center line that is currently reading as a cut line and change it to a score line.
Then, attach the score line to the pink base roof layer.
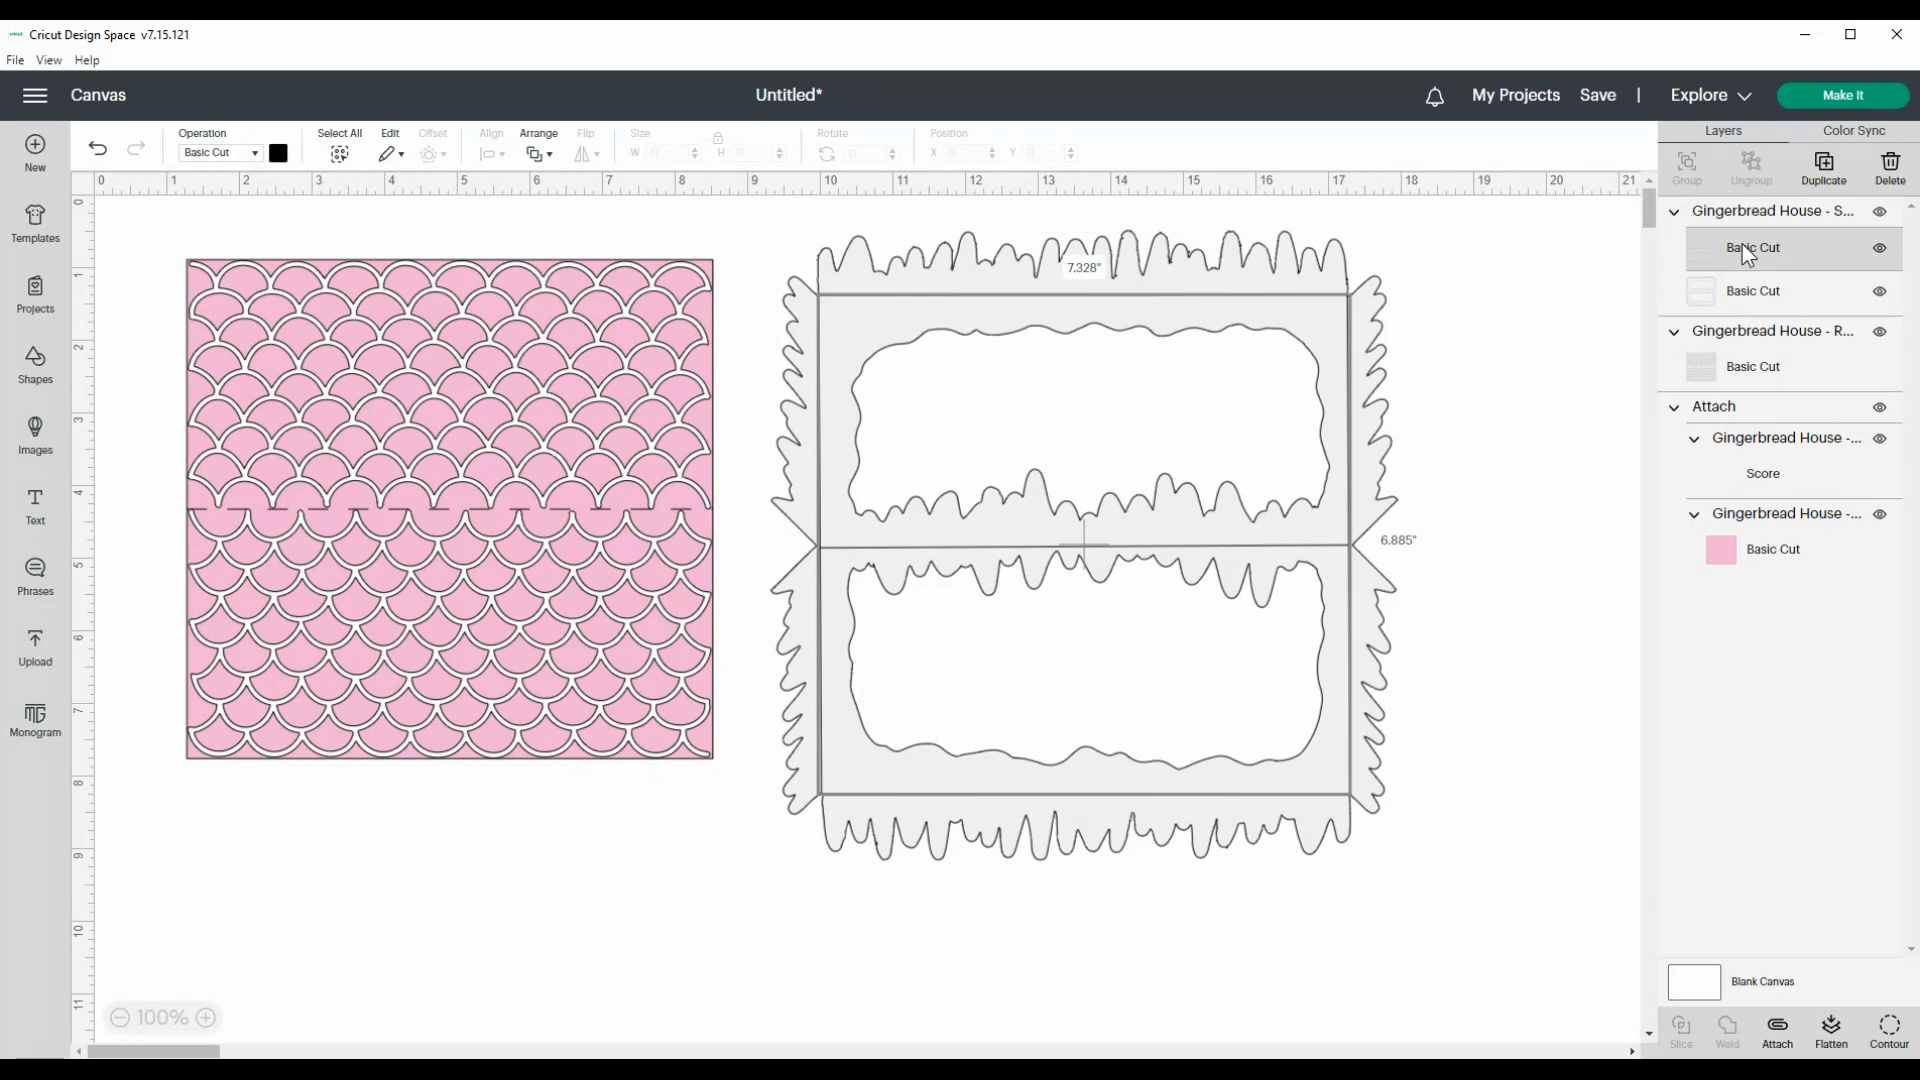
Next, upload the Snow SVG file and add it to this same canvas.
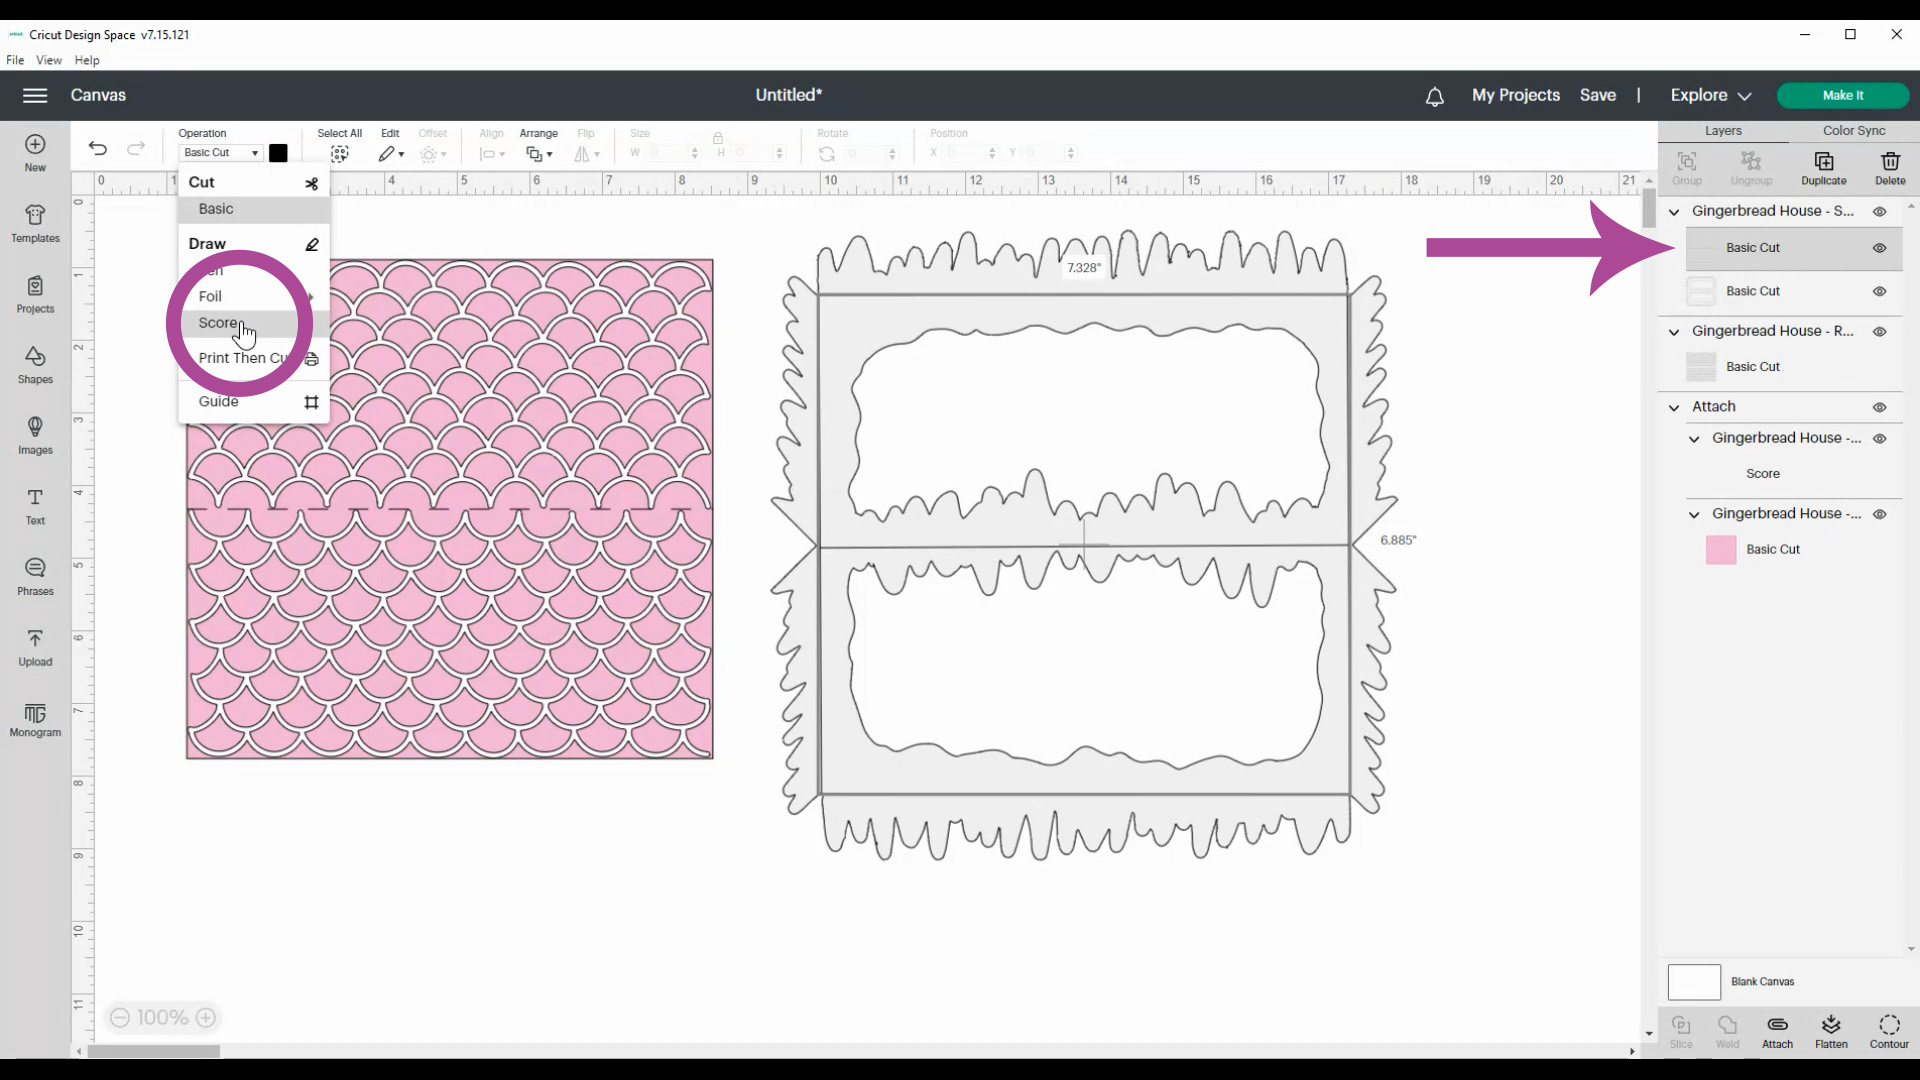
Change the black lines to score lines, and attach the two layers. Then, click on the green “Make It” button.
For my cardboard gingerbread house, I cut the roof base from another sheet of kraft board, because I really like the additional stability that it provides to the house.
For the scalloped roof tiles, I used white iron-on heat transfer vinyl, just like I used for the icing decorations. (Don’t forget to mirror the mat for the iron-on layer!)
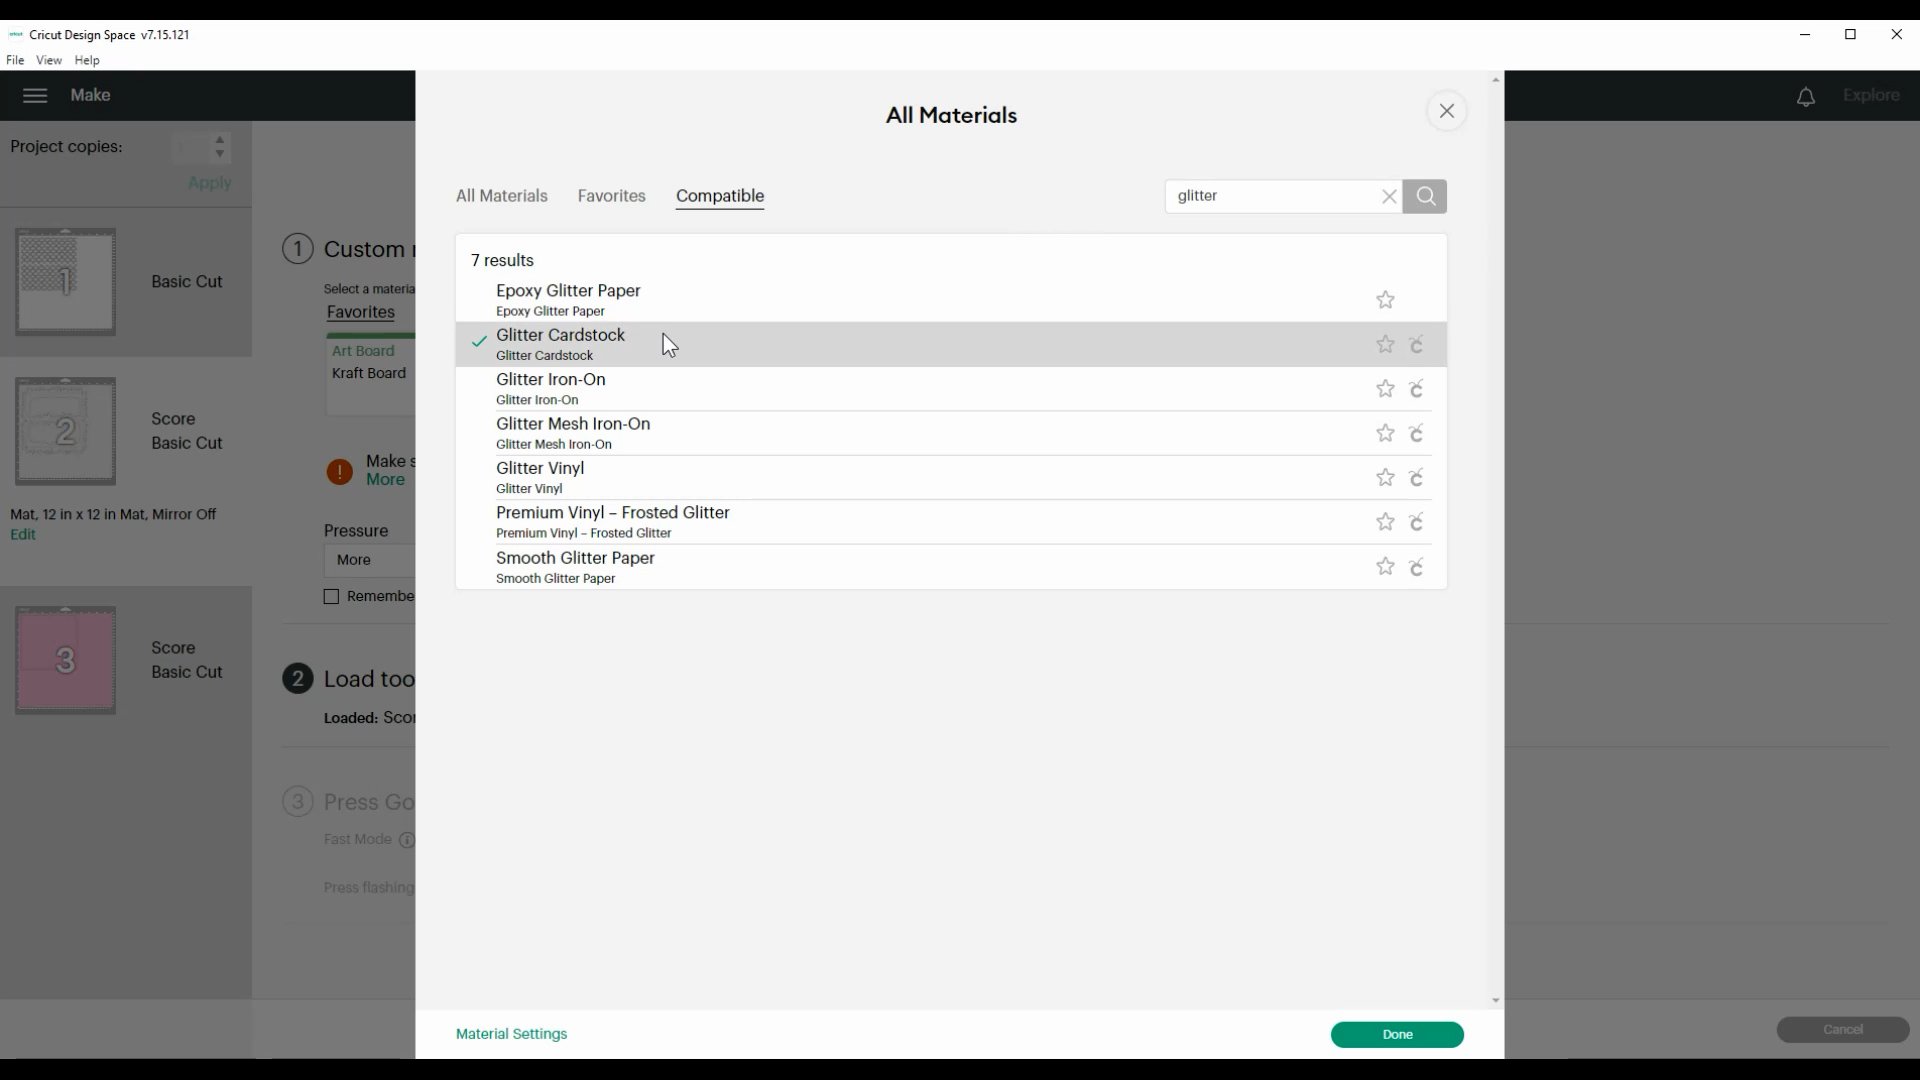
For the snow, I used glitter cardstock with the “More Pressure” setting.
Okay, those are all of the pieces that you need to cut, so now it’s time to move on to assembly and decorating!
How to Assemble the Cardboard Gingerbread House
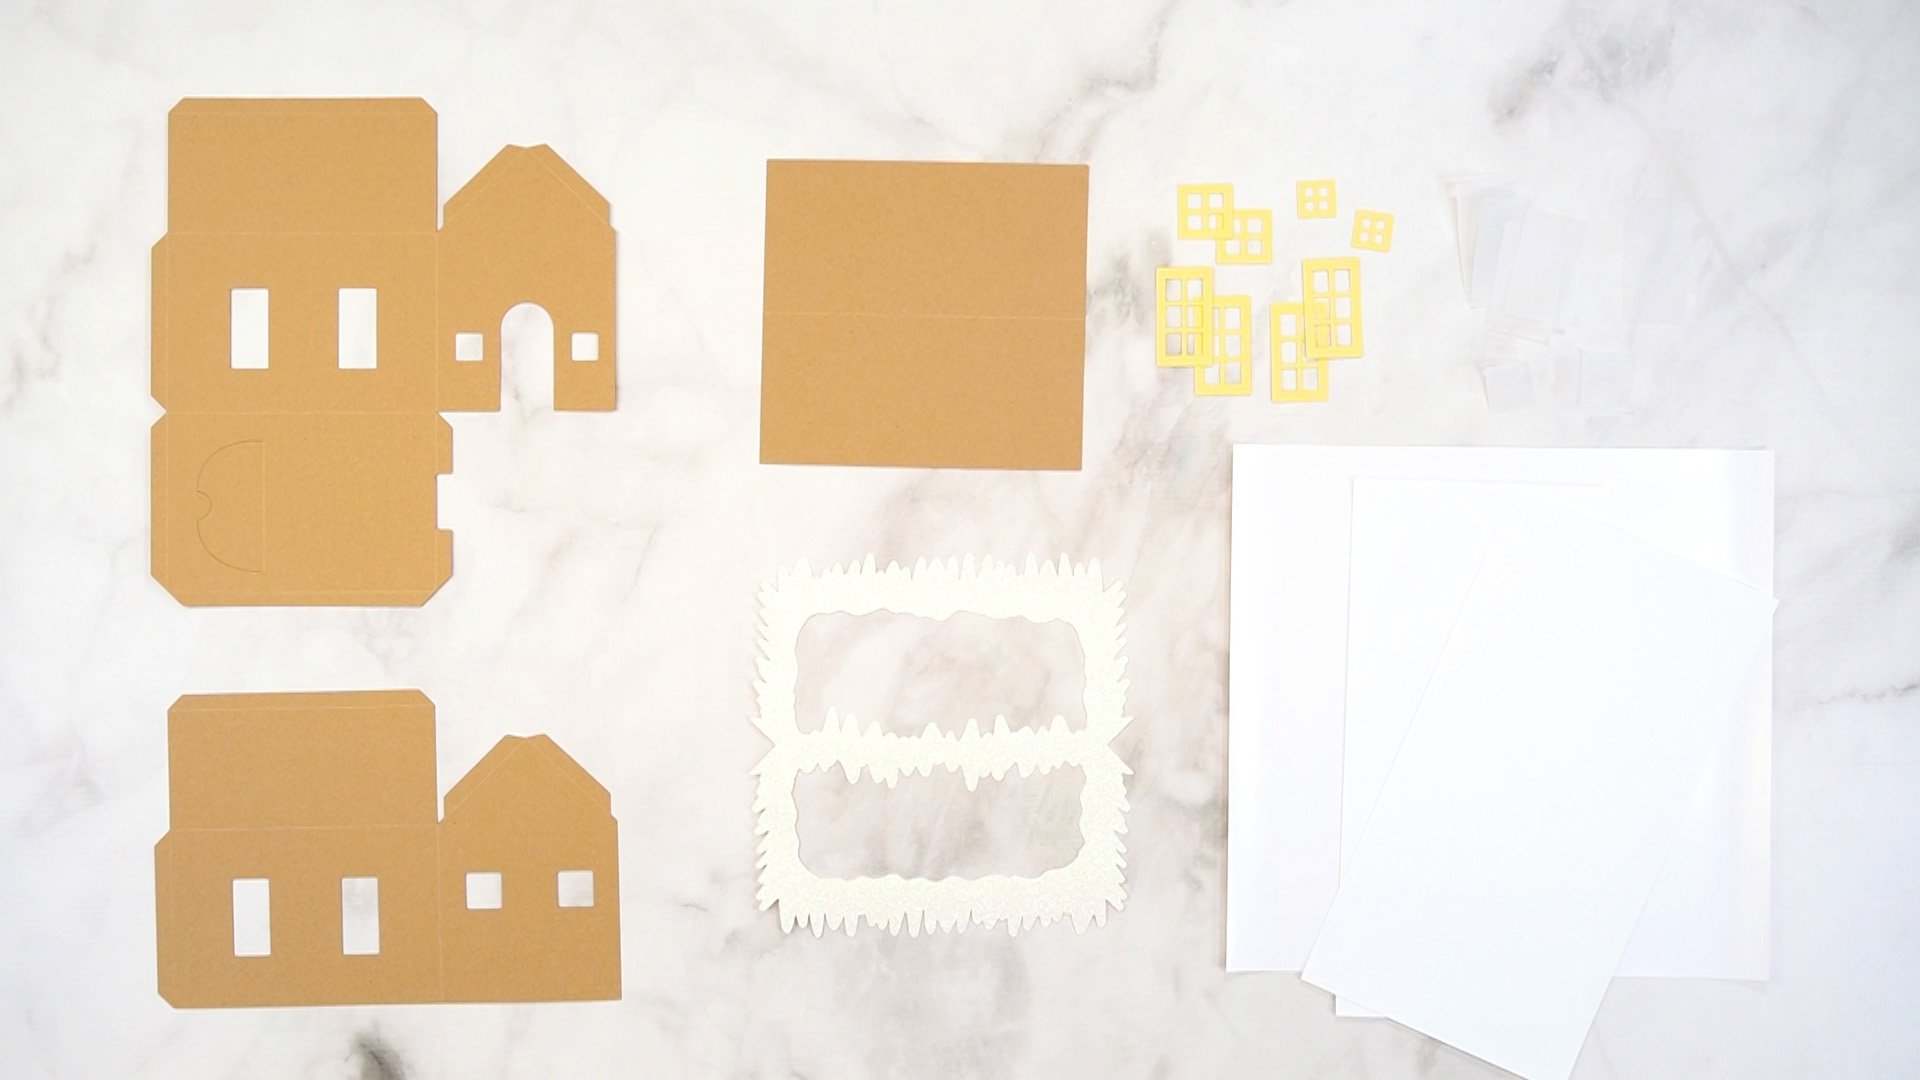
You should have:
Adding the Gingerbread House Decorations
The first step is to weed all three of the iron-on sheets. There are some tiny detailed pieces here, so take your time and go carefully!
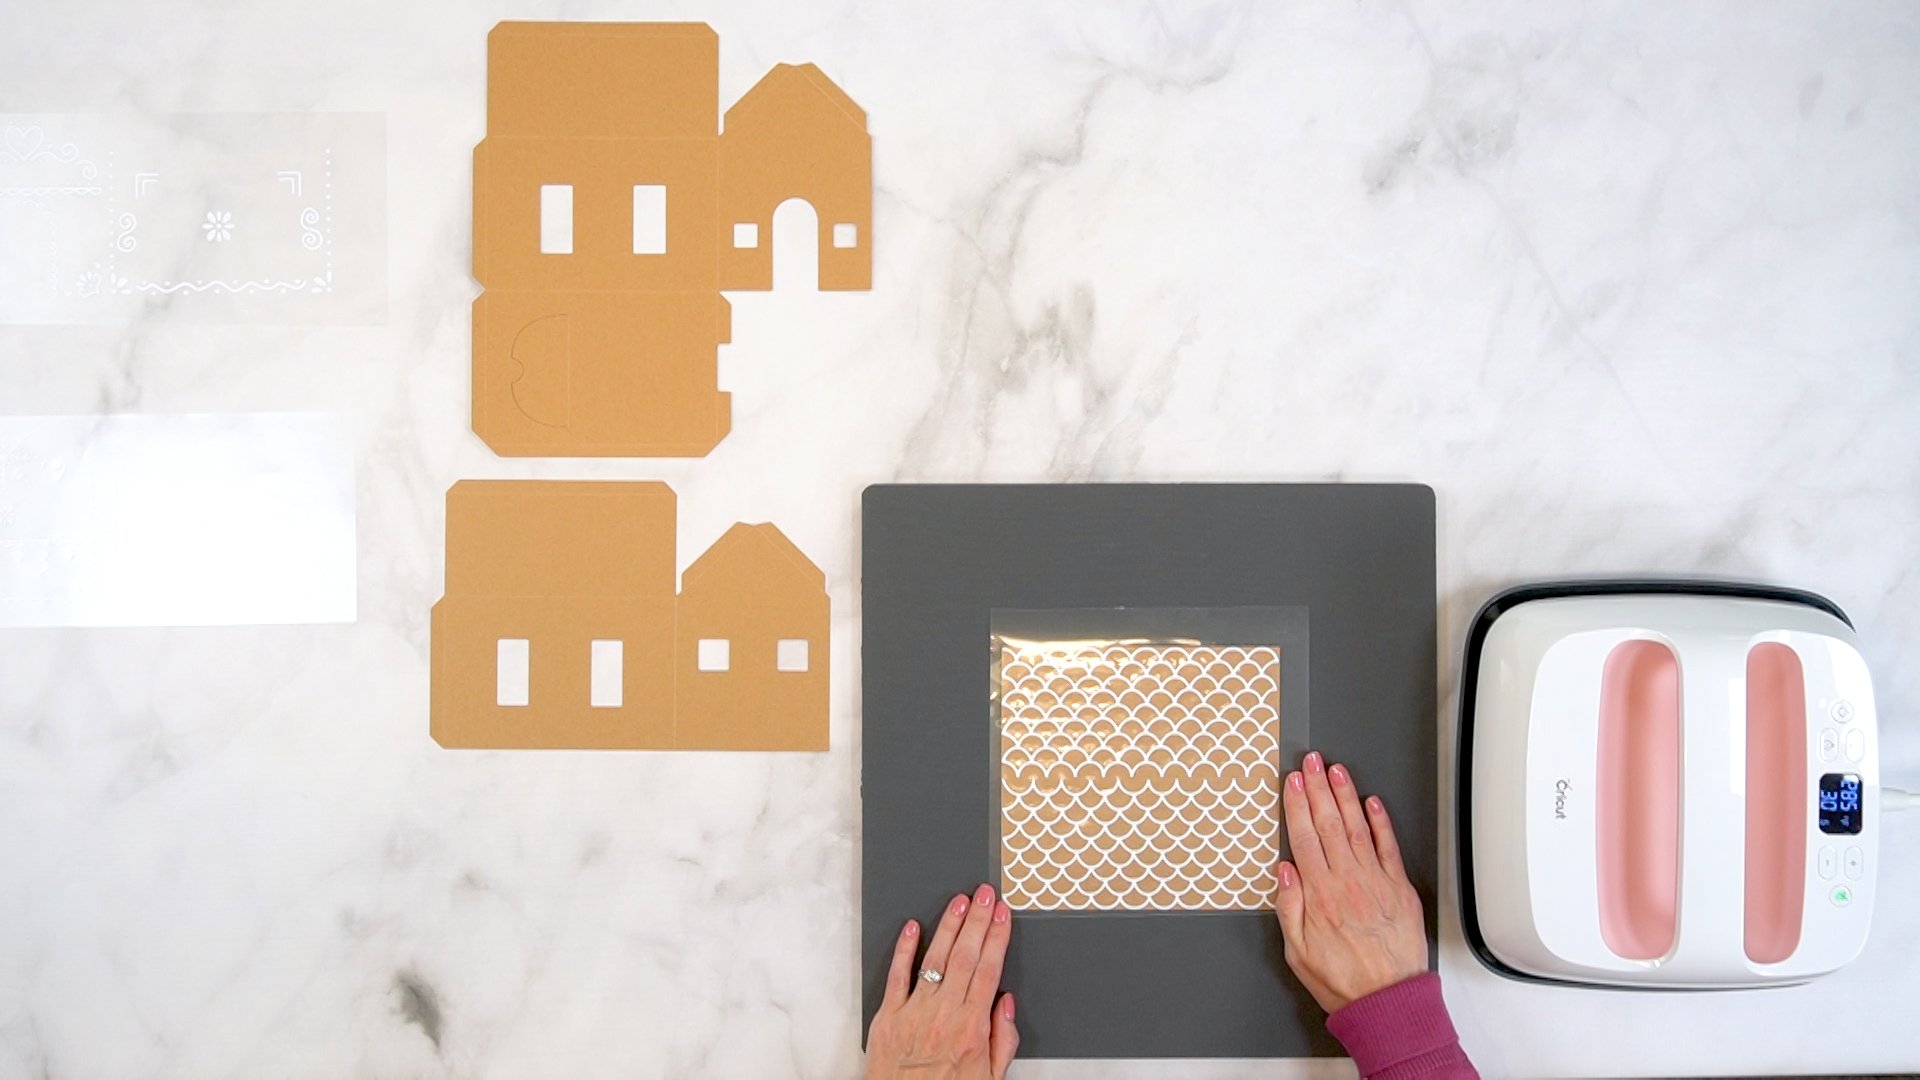
When the pieces have been weeded, place them into position on the kraft board house pieces.
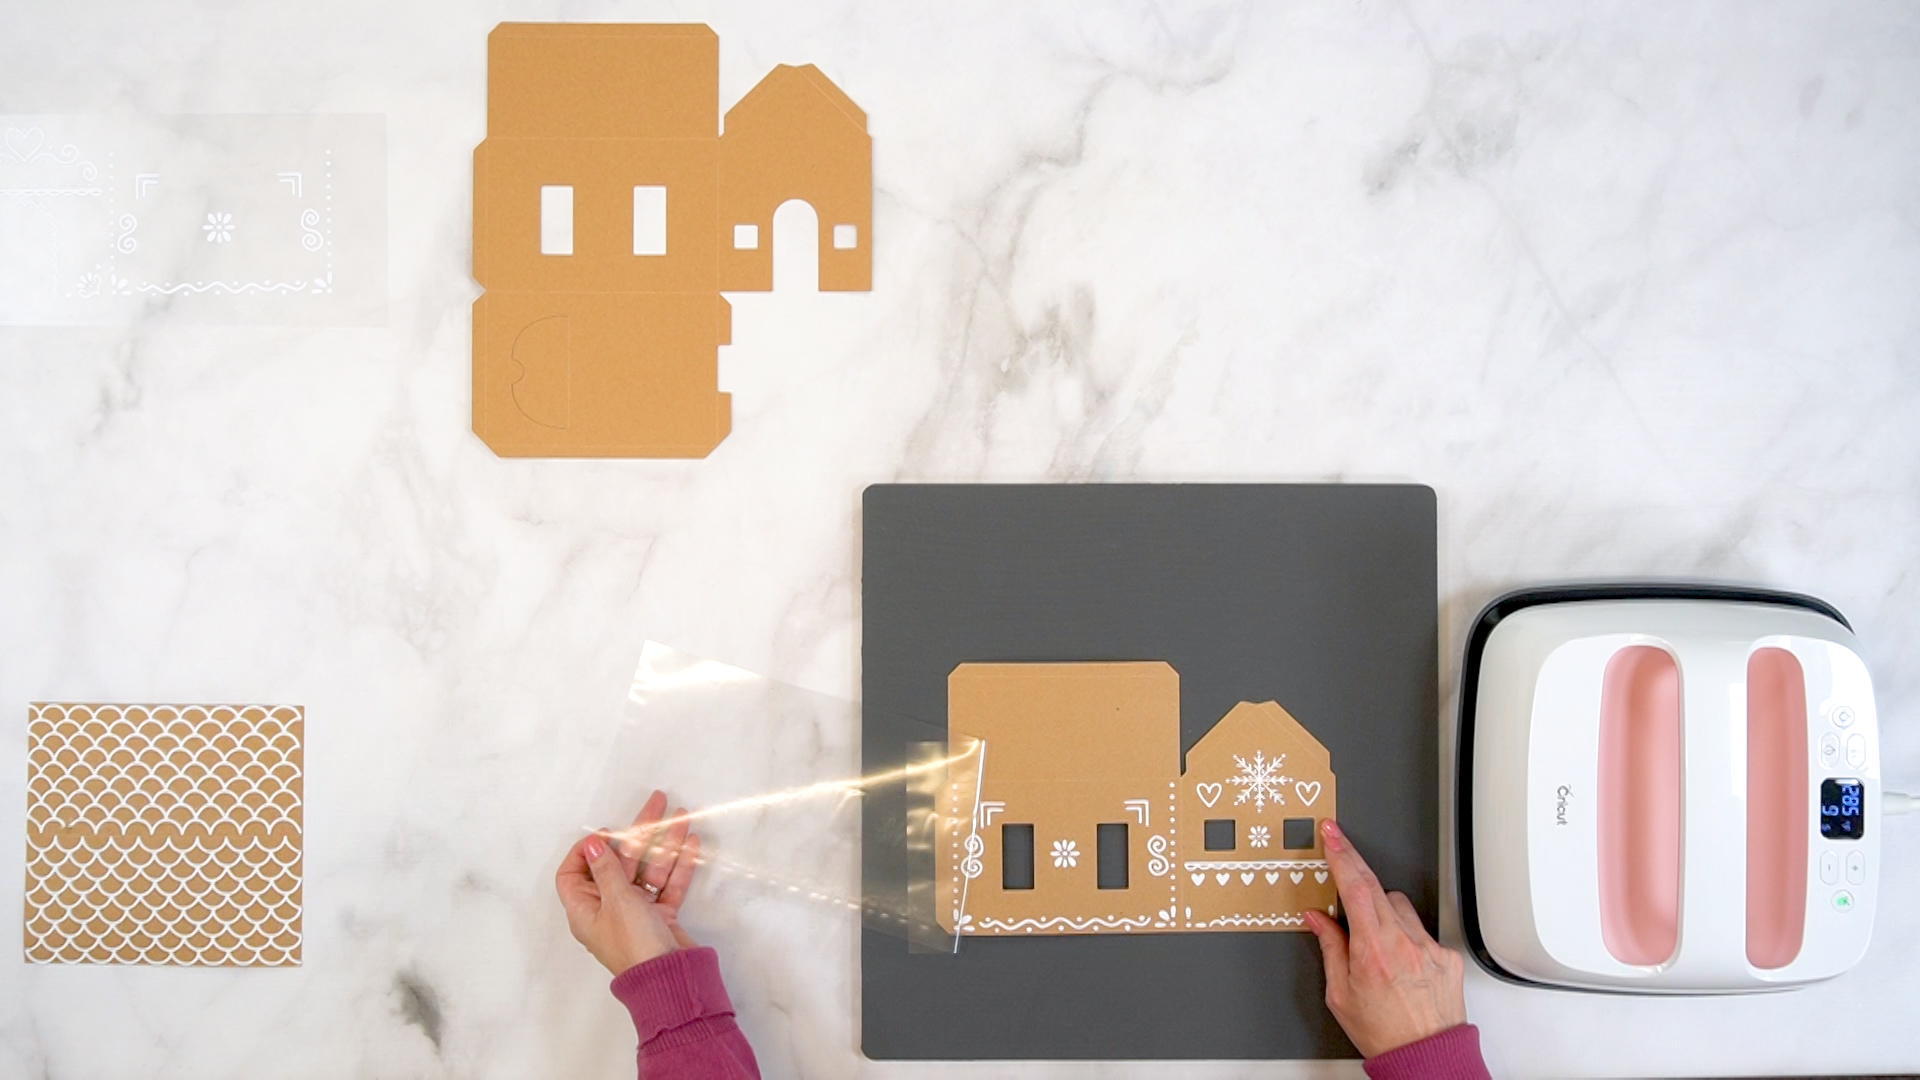
Heat your EasyPress or heat press to 285 degrees, and then press the iron-on to the kraft board (use the time recommended for your specific brand of iron-on – mine was 30 seconds).
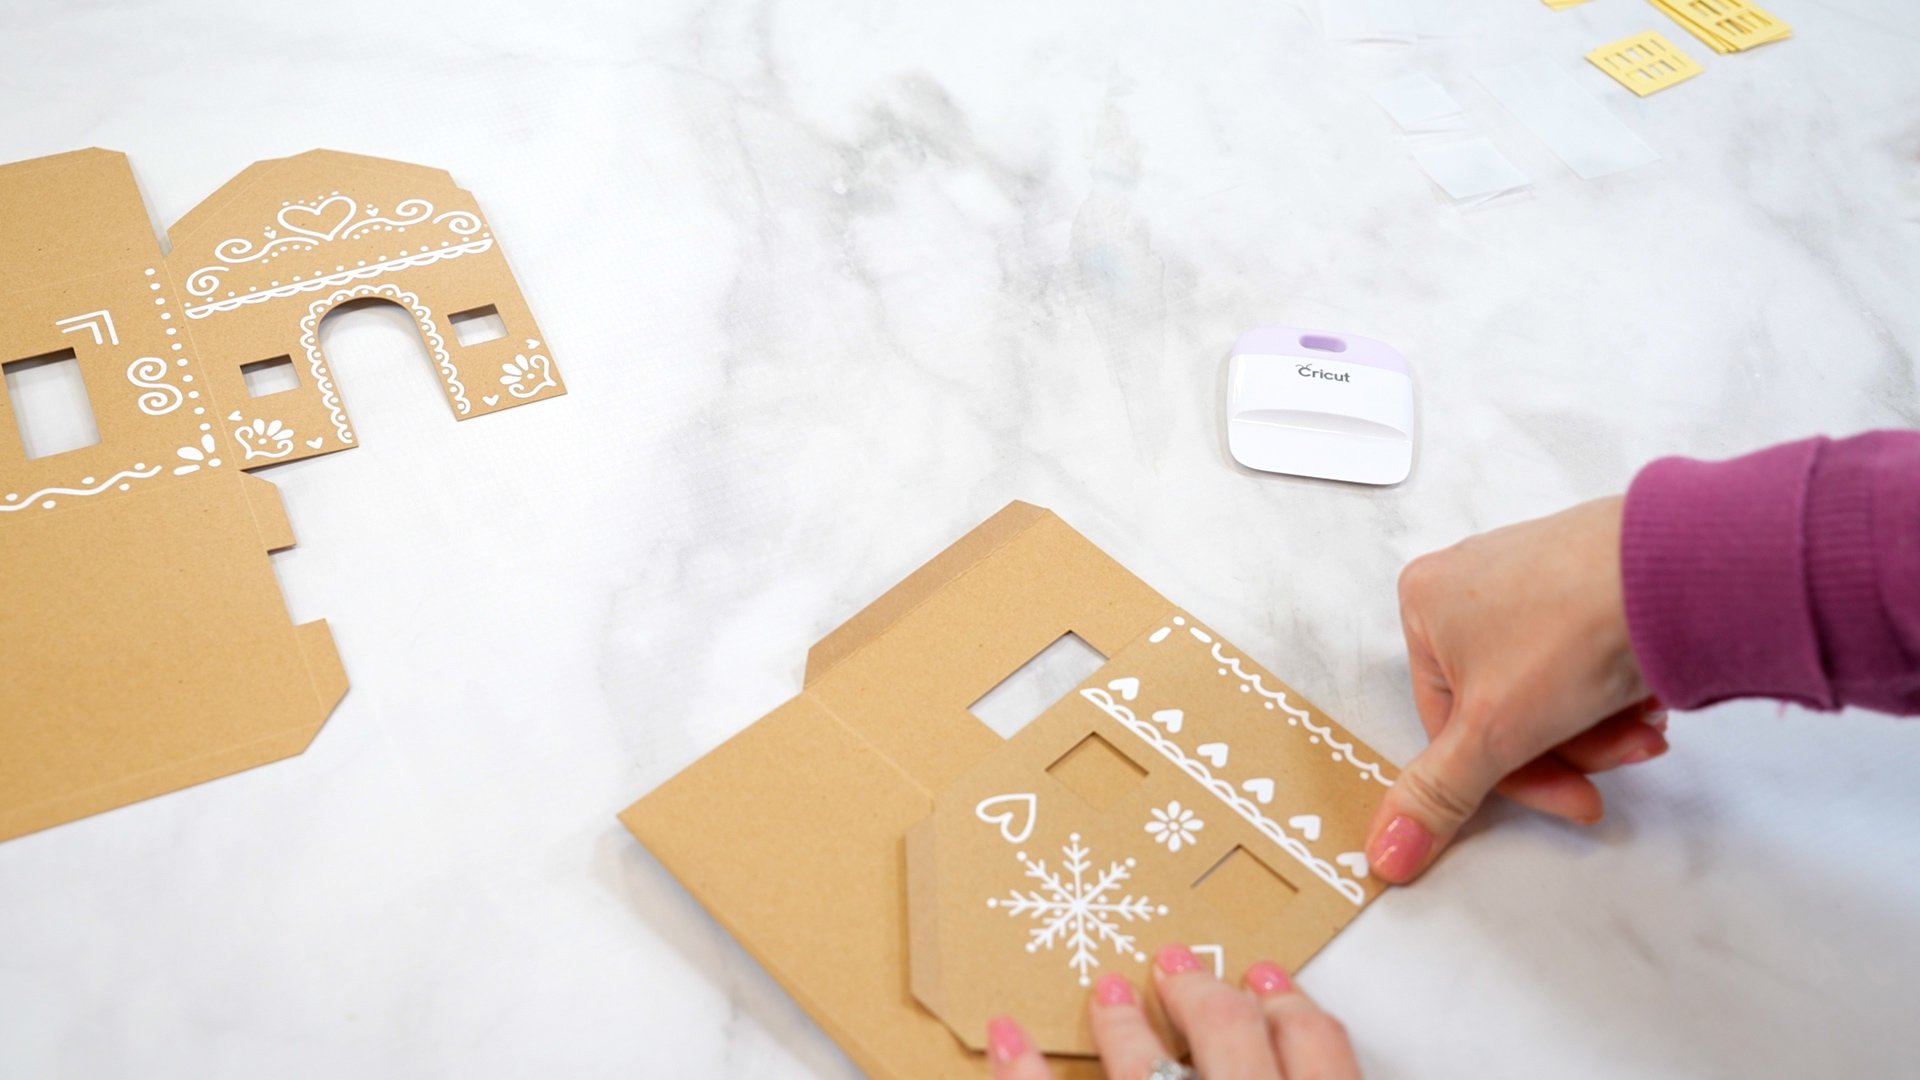
Next, carefully fold over all of the score lines on both halves of the house to create your glue tabs. You can use a scraper tool or a bone folder to press down on the edges and create a hard fold, but be careful when using the tools in the areas where the iron-on is located.
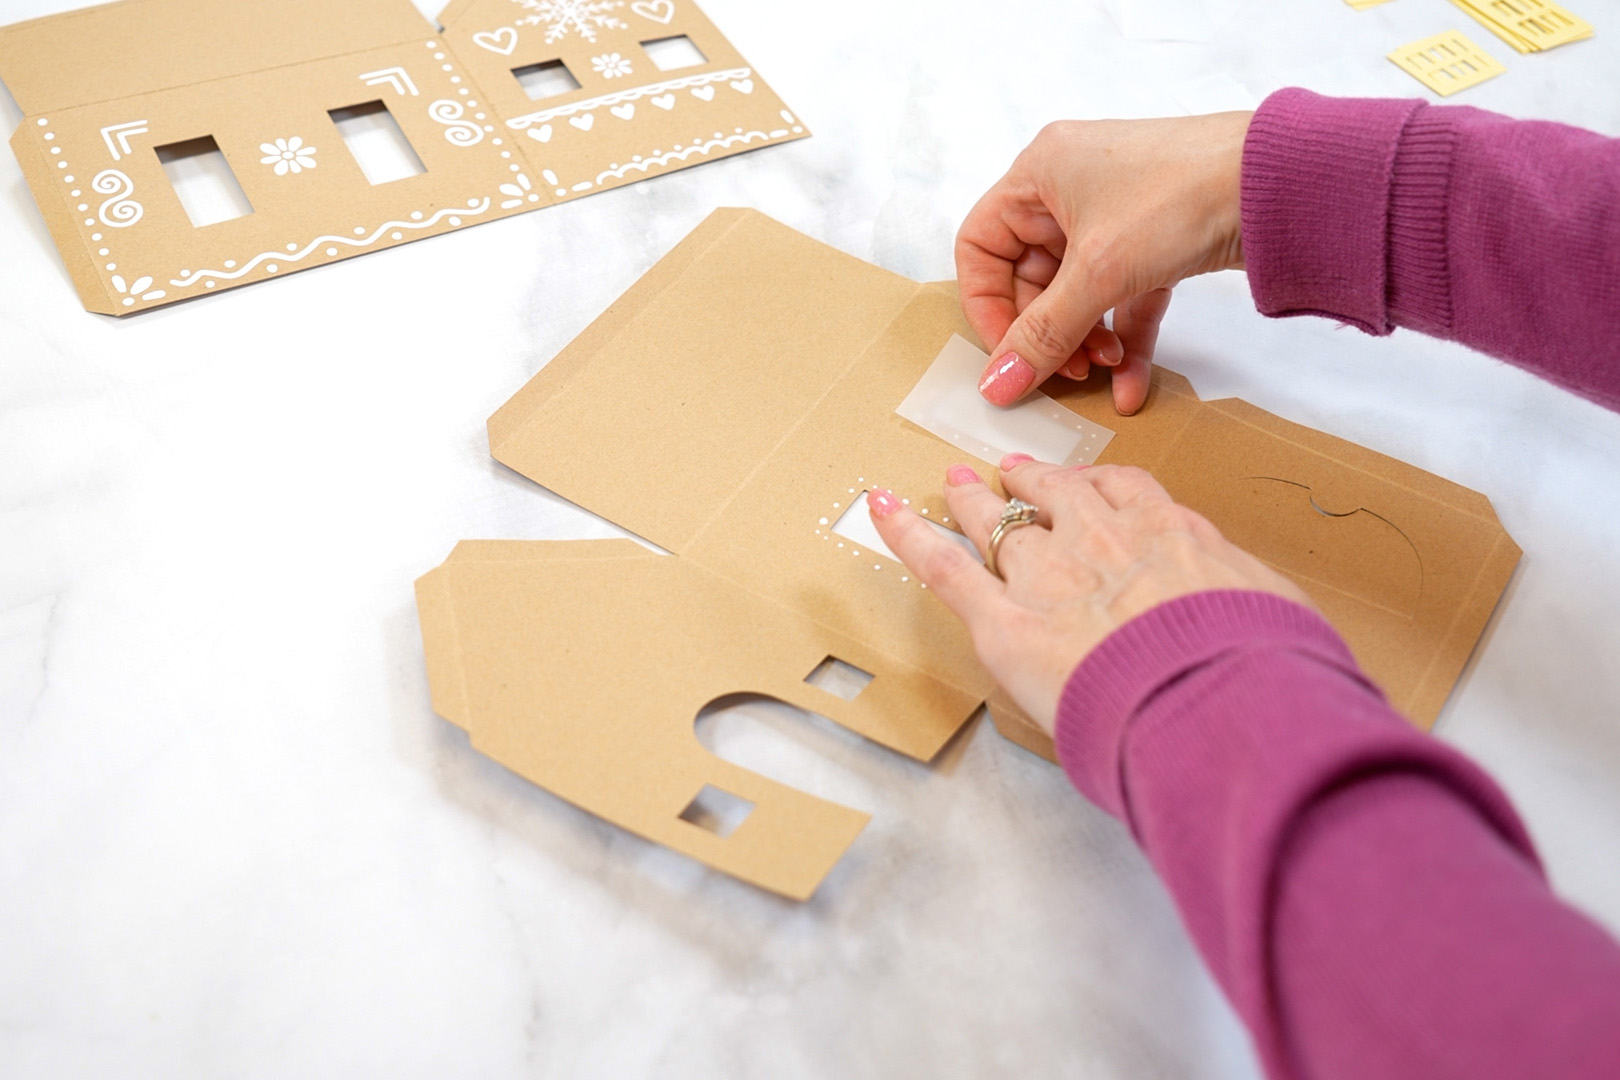
Use paper glue to attach the vellum pieces to the inside of the house at the window and door openings.
Allow those pieces to dry for just a minute. I used Tombow paper glue, and it holds and dries quickly, so it doesn’t take long. You could also opt to use a hot glue gun, but I like the few extra seconds of working time that the Tombow glue gives me.
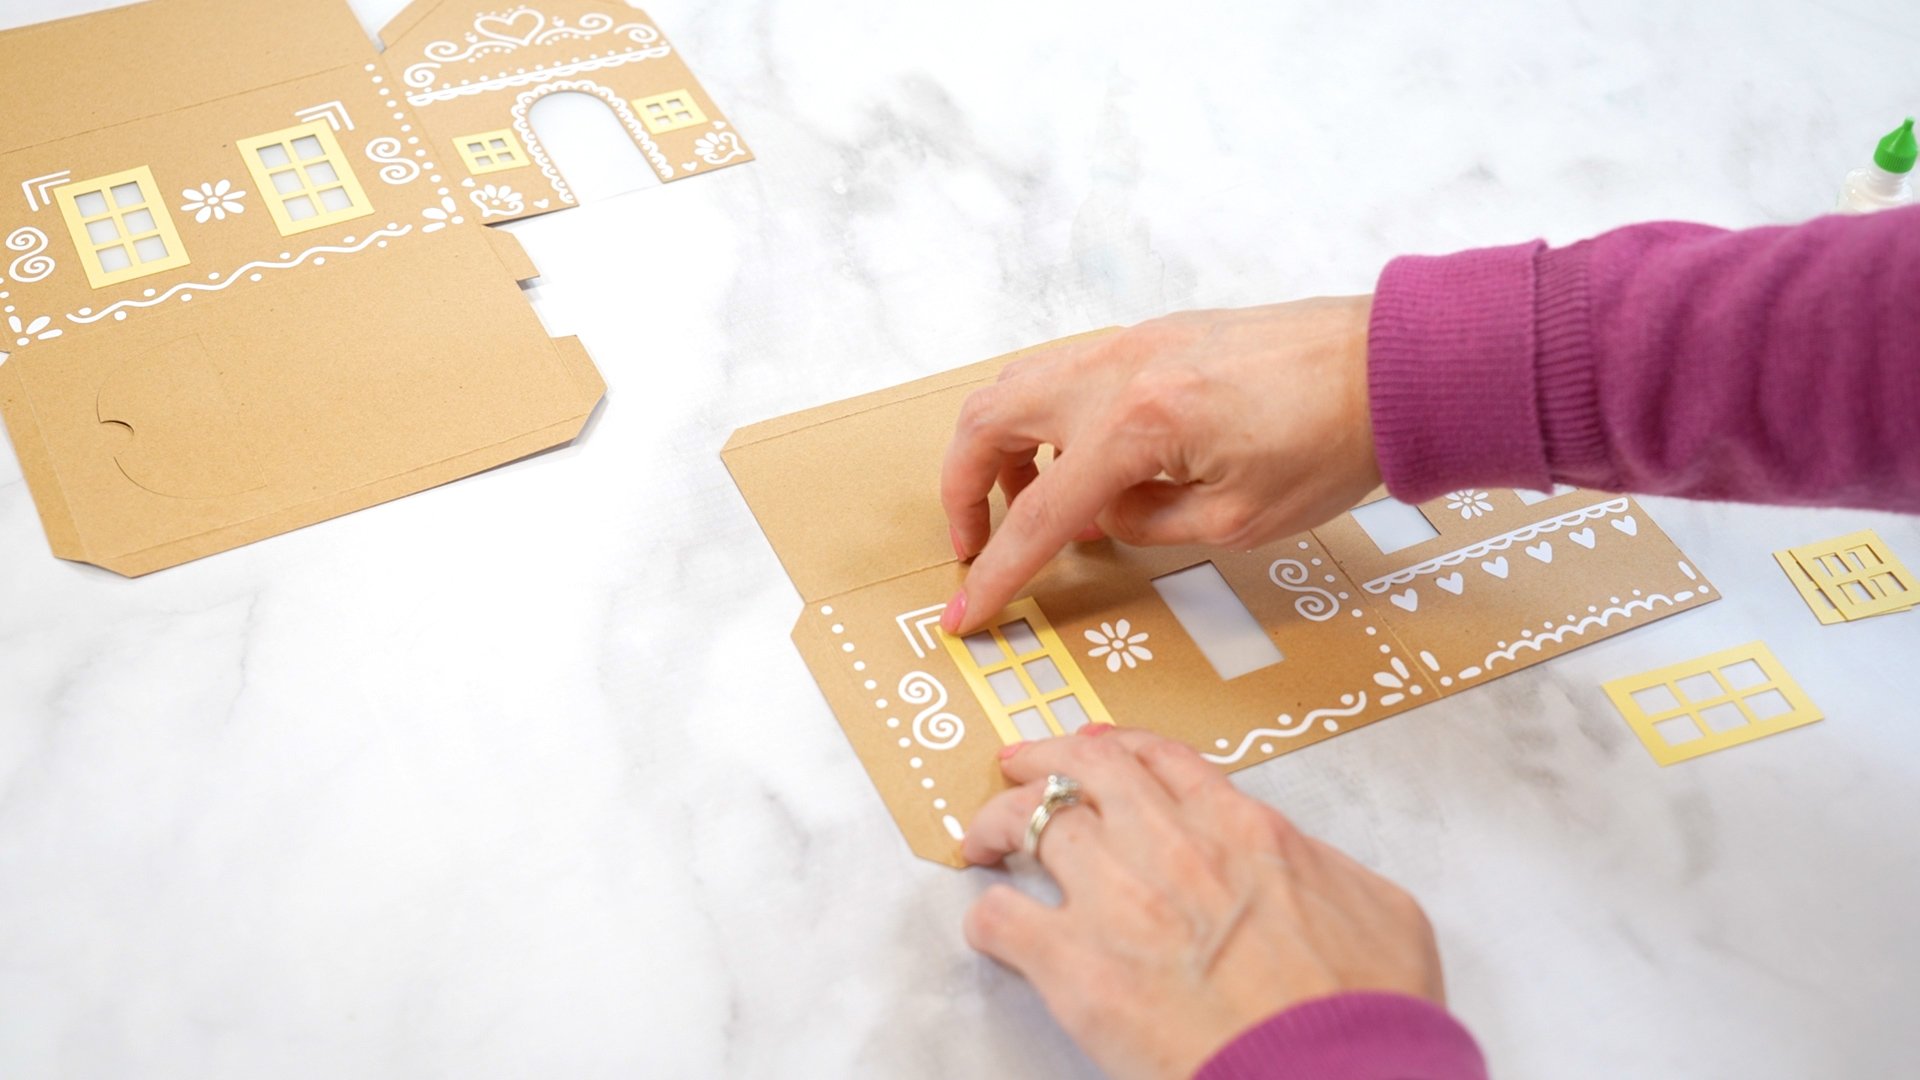
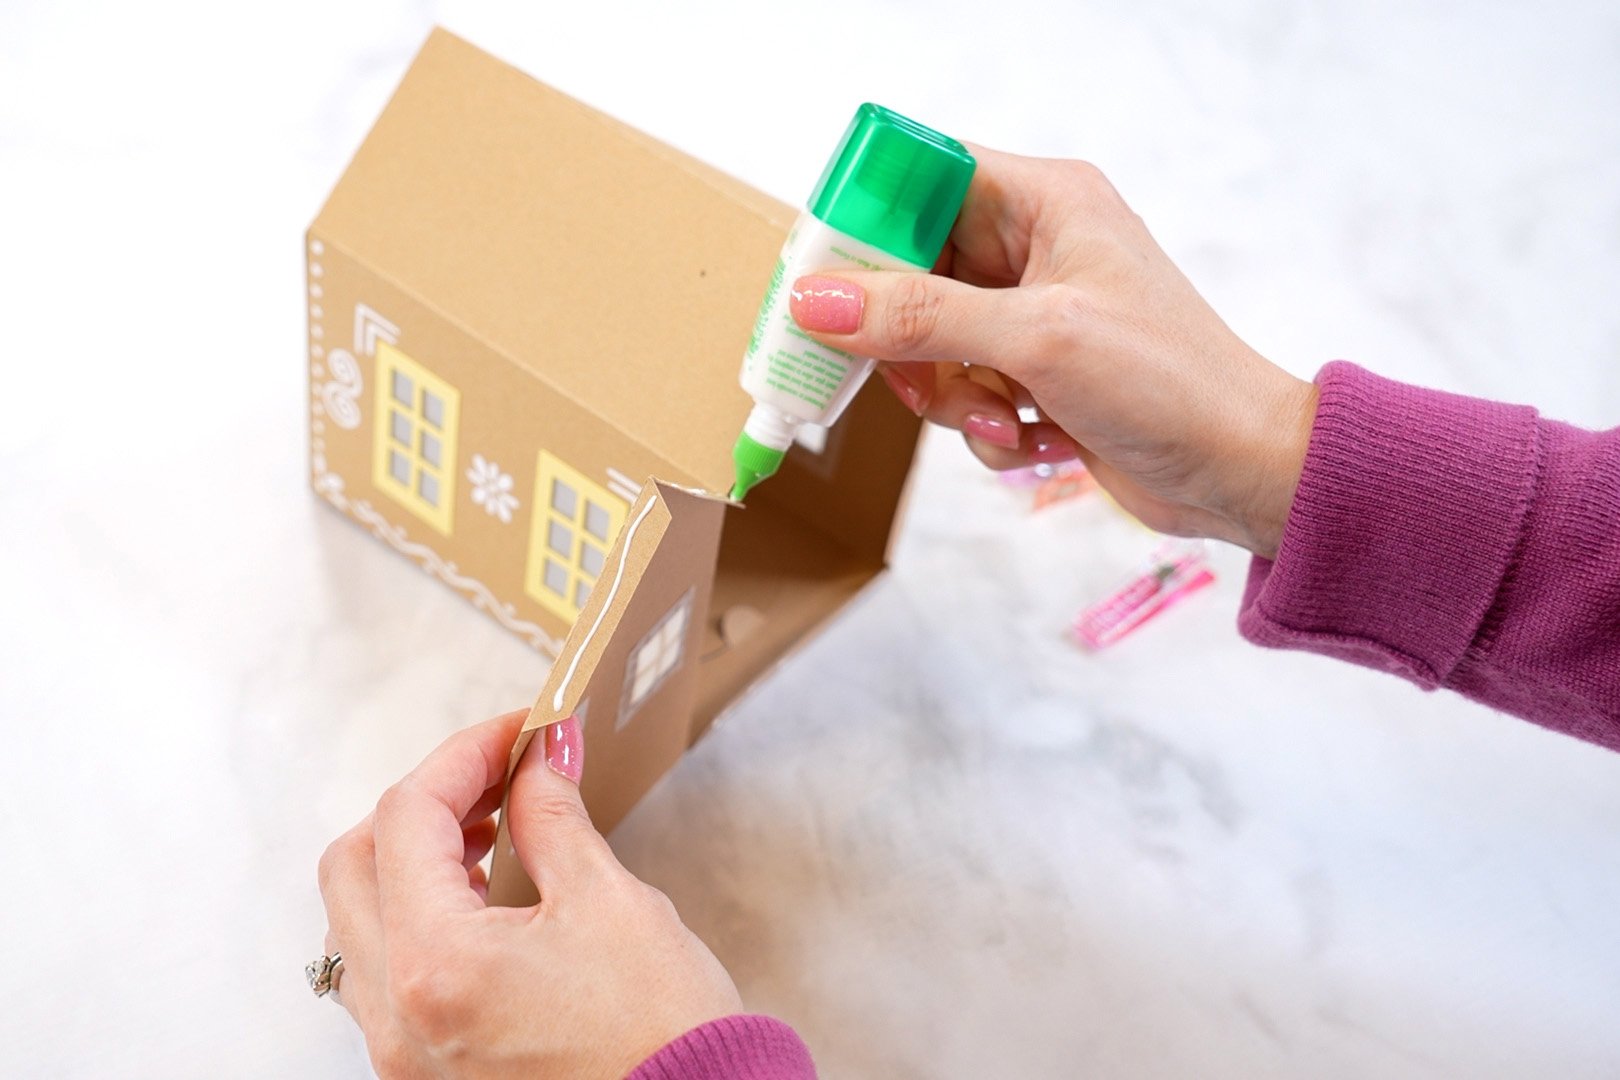
Next, use the paper glue to attach the window frames to the opposite side of the house.
When the window frames are dry, it’s time to start assembling the two halves of the gingerbread house.
Building the Paper Gingerbread House
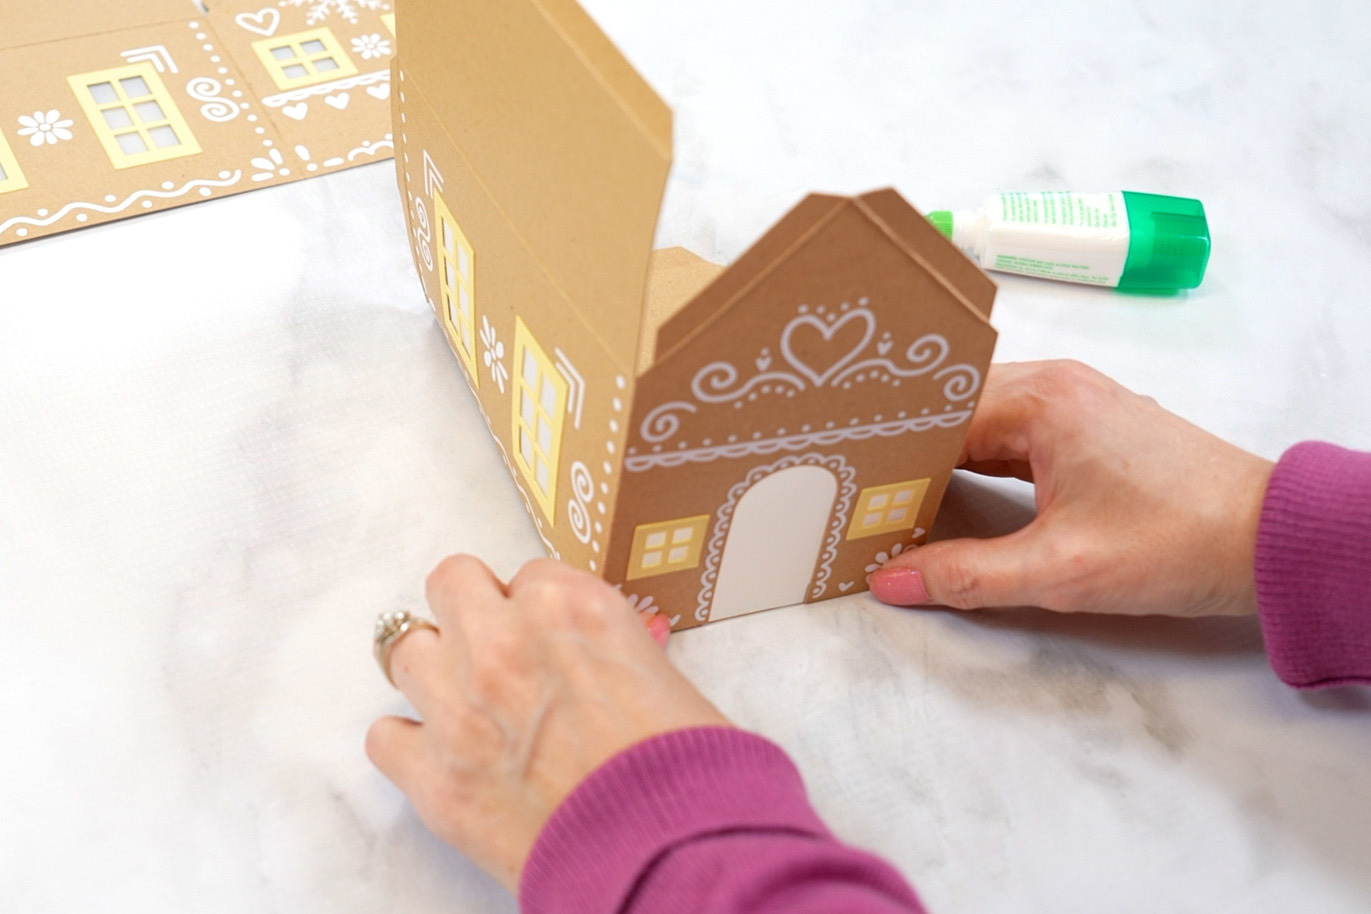
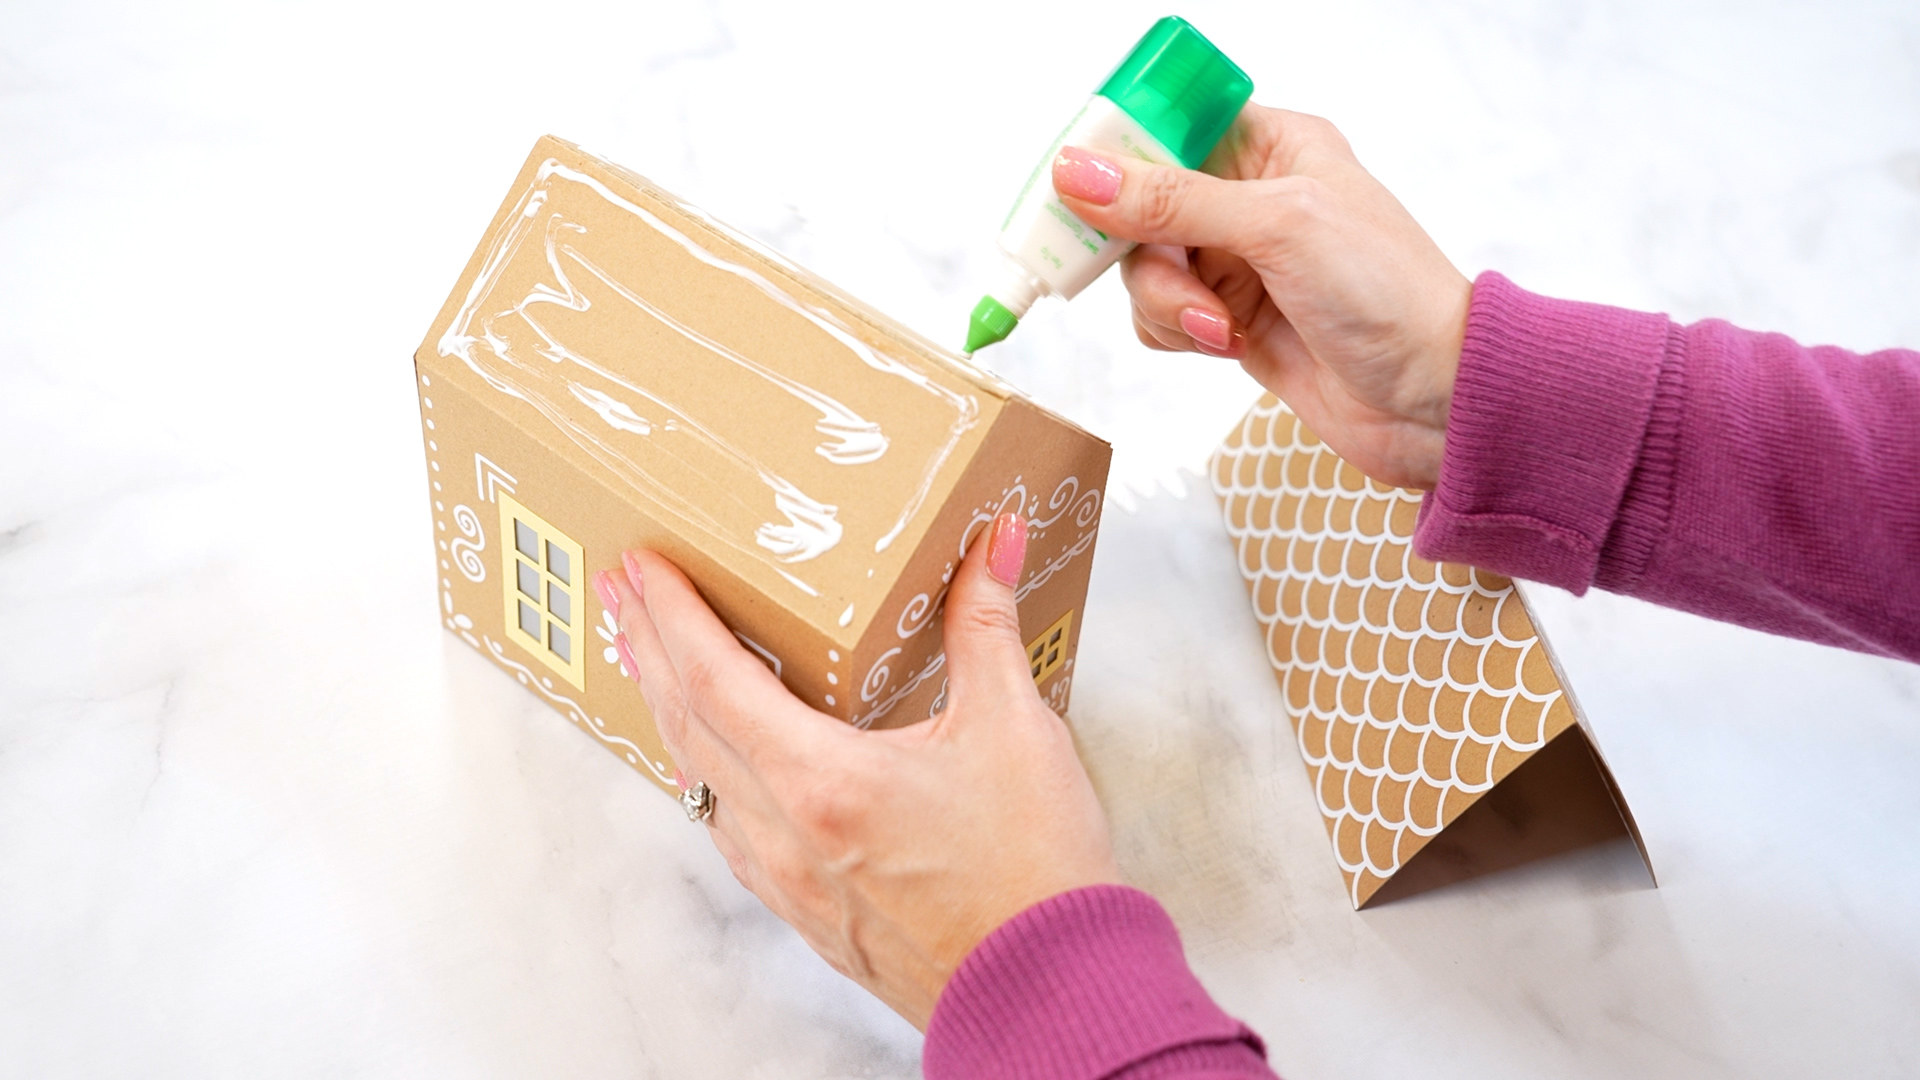
Start by assembling the walls and the base of the first half of the gingerbread house.
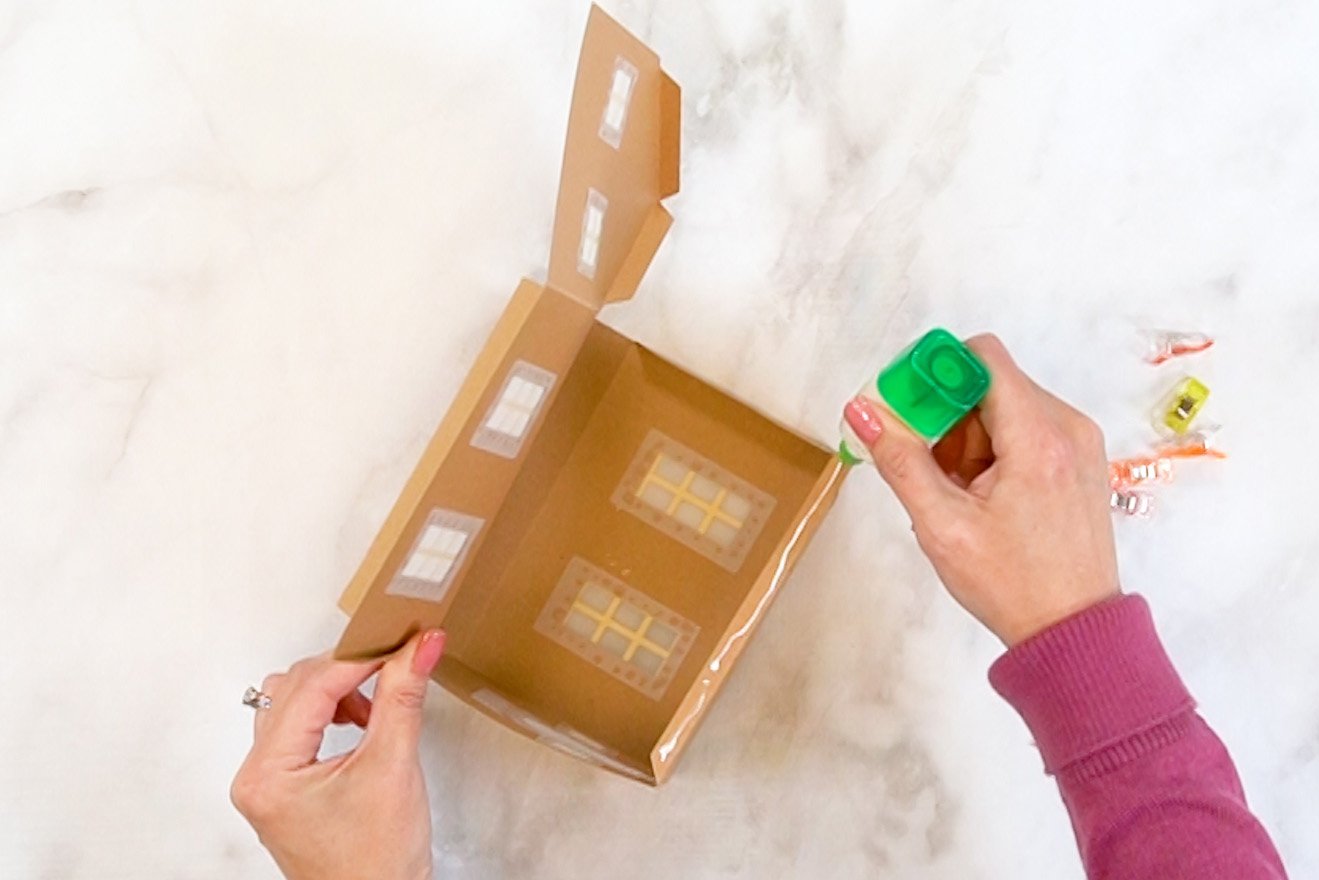
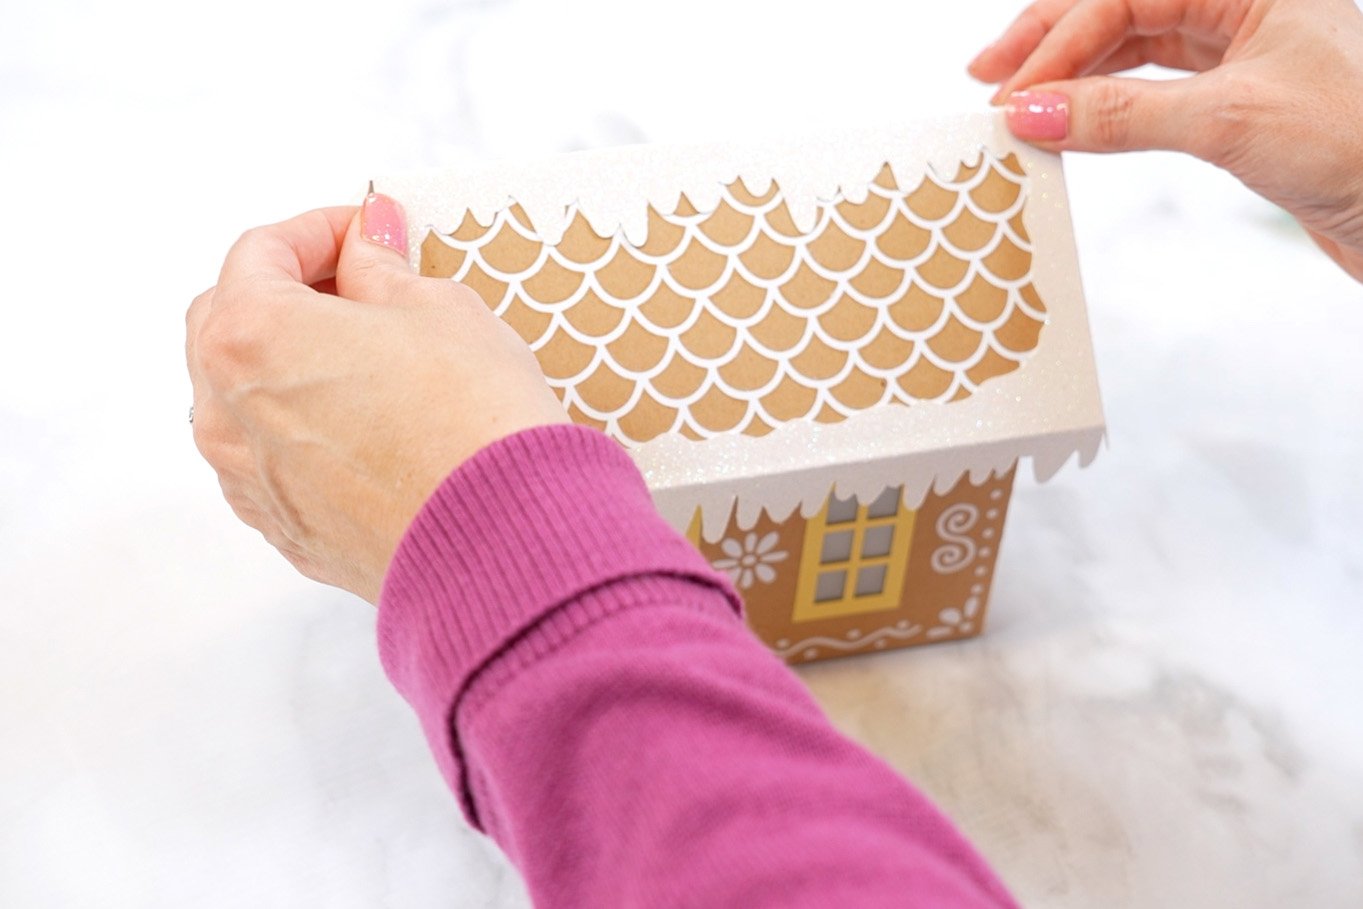
Then, glue the edges of the roof to the peak. Allow the glue a few minutes to set and hold.
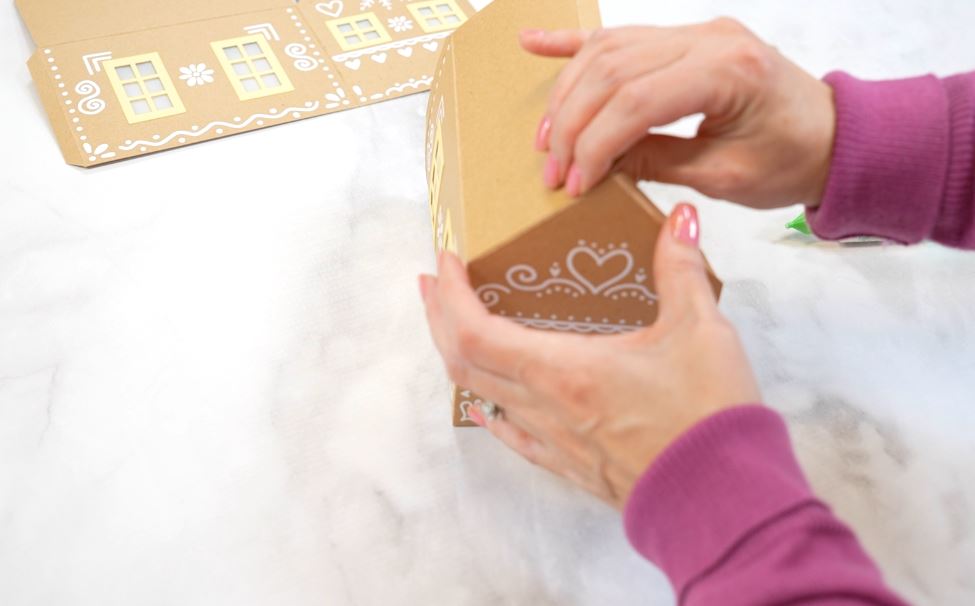
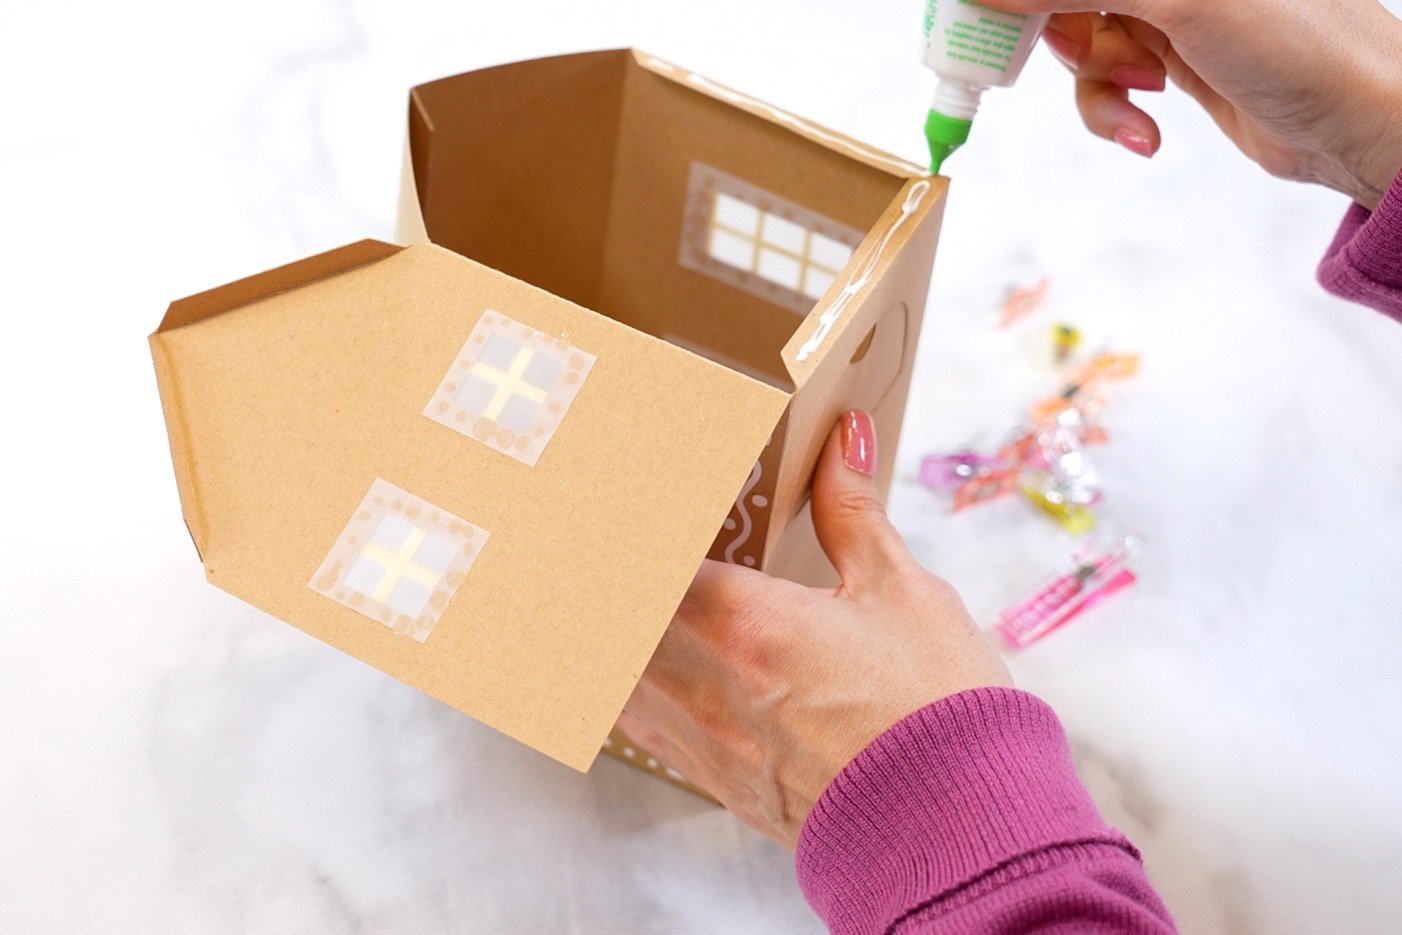
Next, attach the two halves of the gingerbread house along the roof ridge at the top of the house.
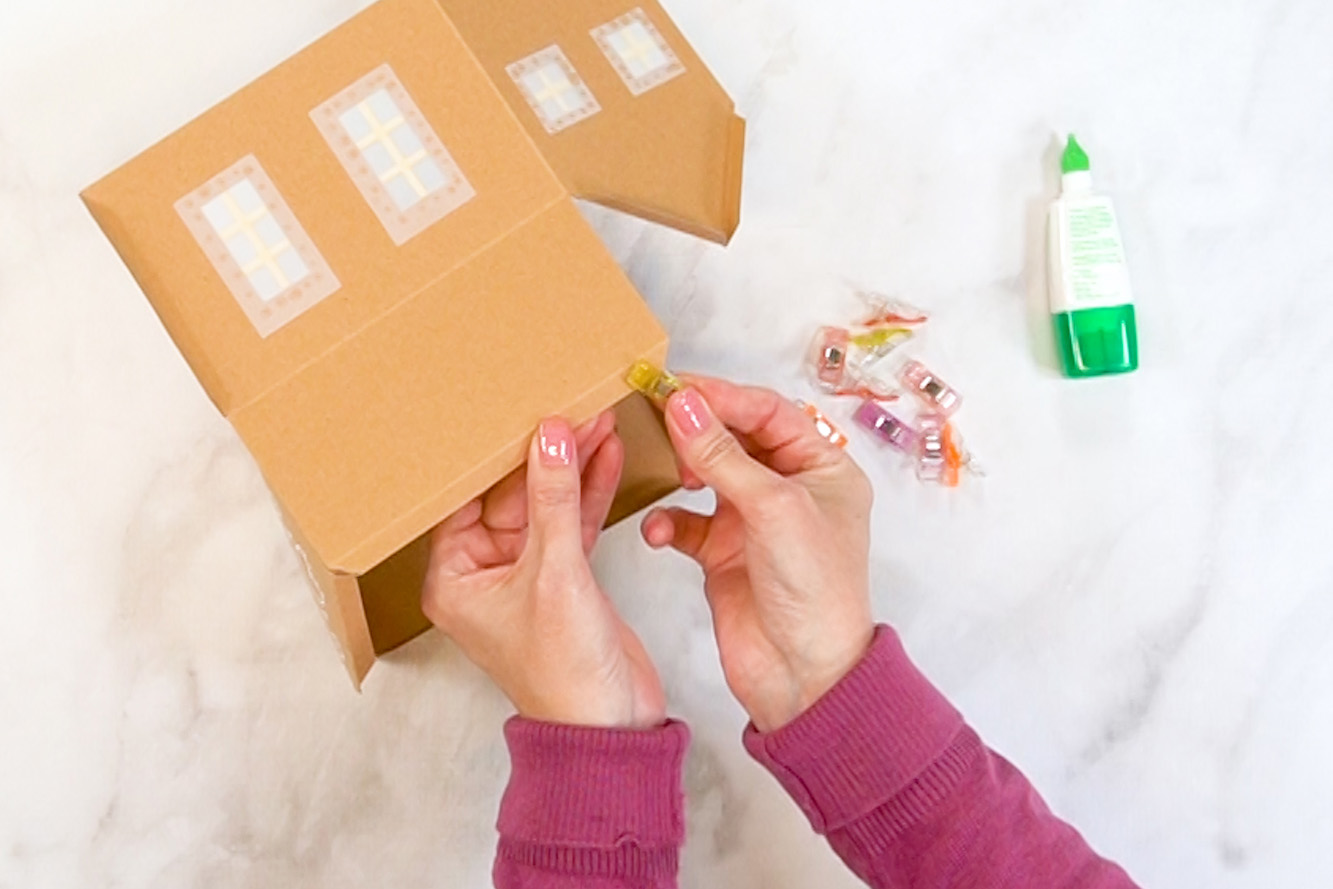
I like to use these sewing clips on the inside of the roof ridge line to hold everything in place while the glue dries.
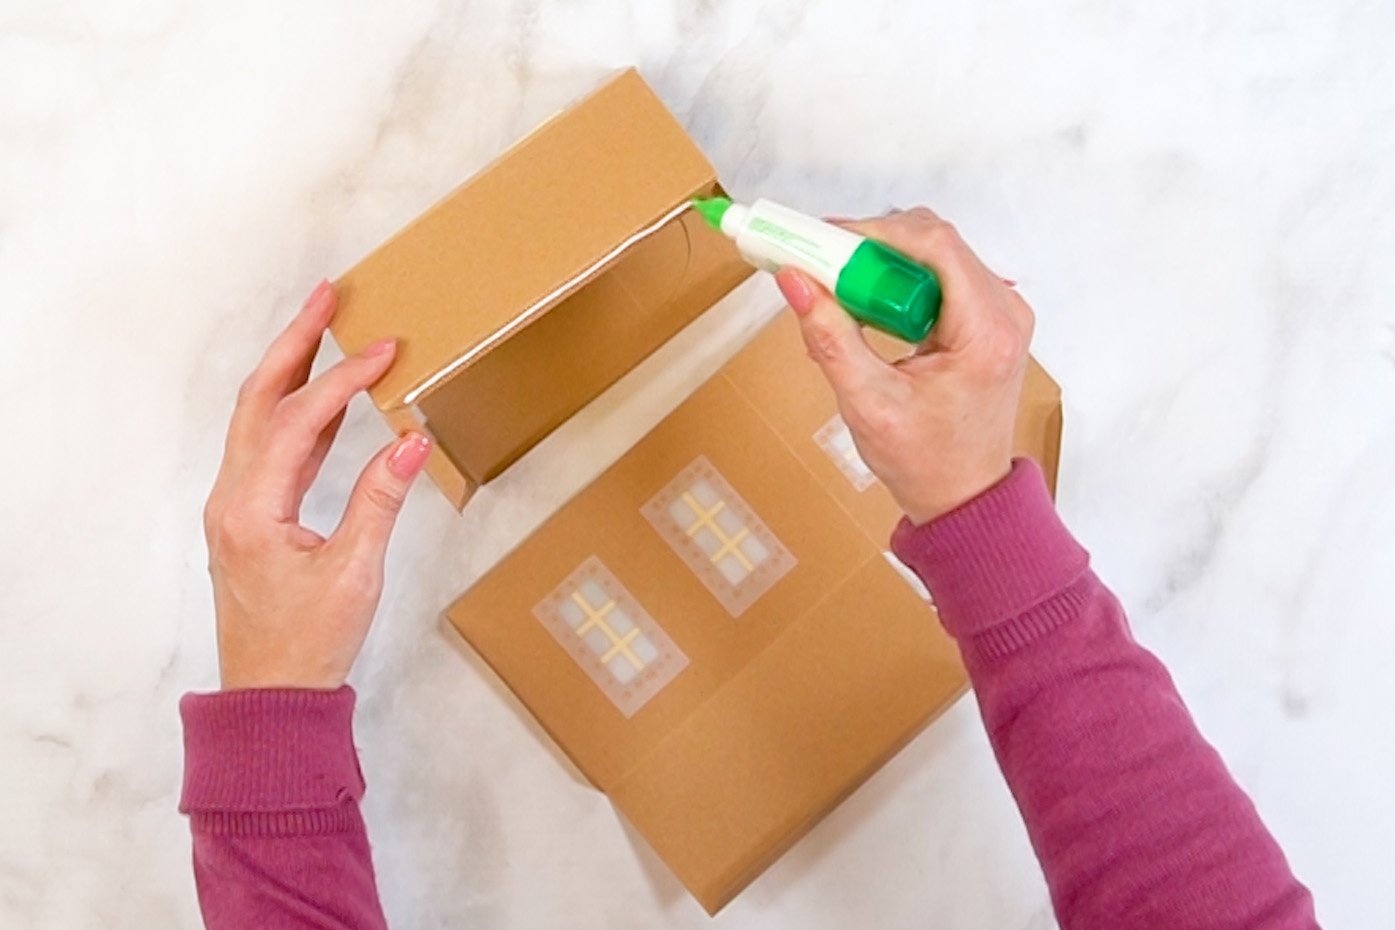
When the roof ridge glue is set, remove the clips, and glue the walls of the second half of the gingerbread house into place.
Finally, glue the rear roof slope and the remaining wall tabs.
For the roof, fold the square roof piece in half along the score line, and glue it to the house.
Fold the snow piece along the score lines, and use glue to attach it to the roof.
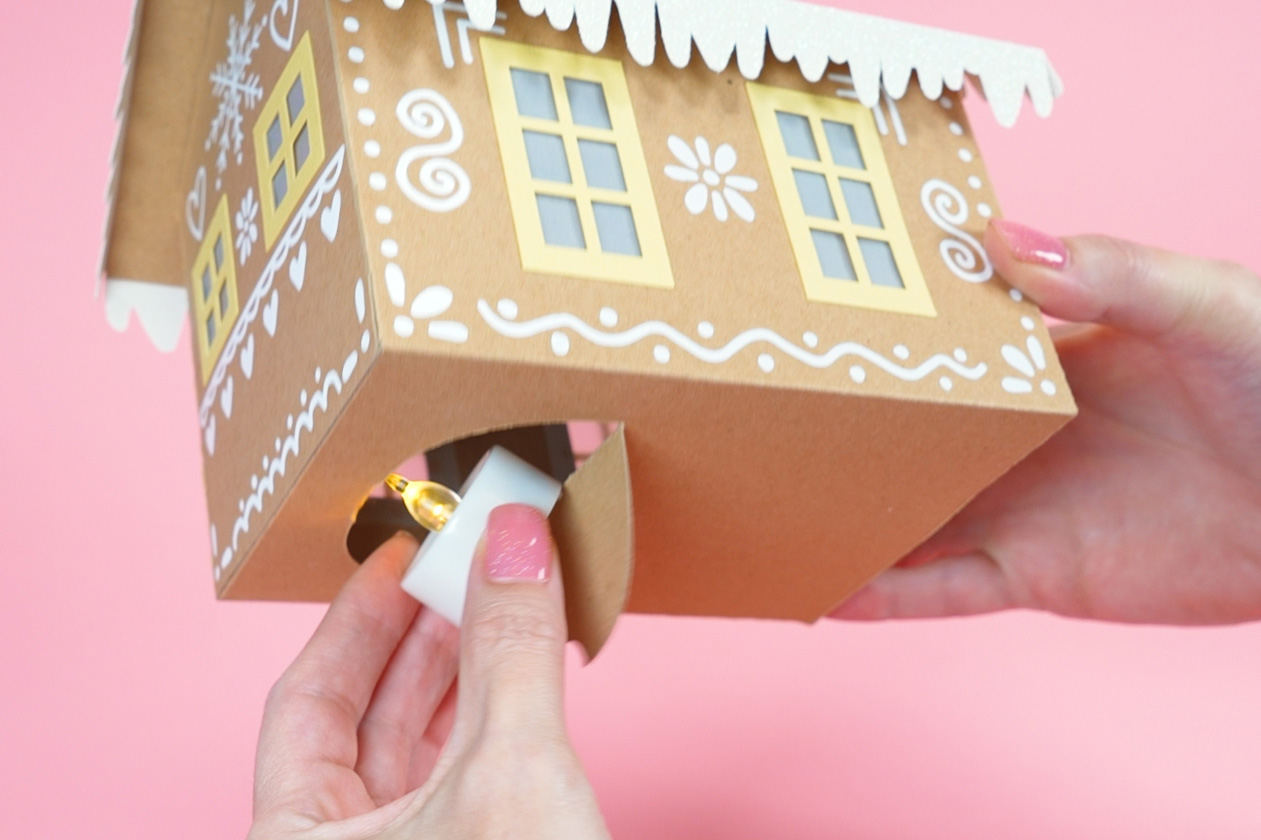
Open the flap in the bottom to insert a flameless tea light candle, and your adorable gingerbread house is ready for display!
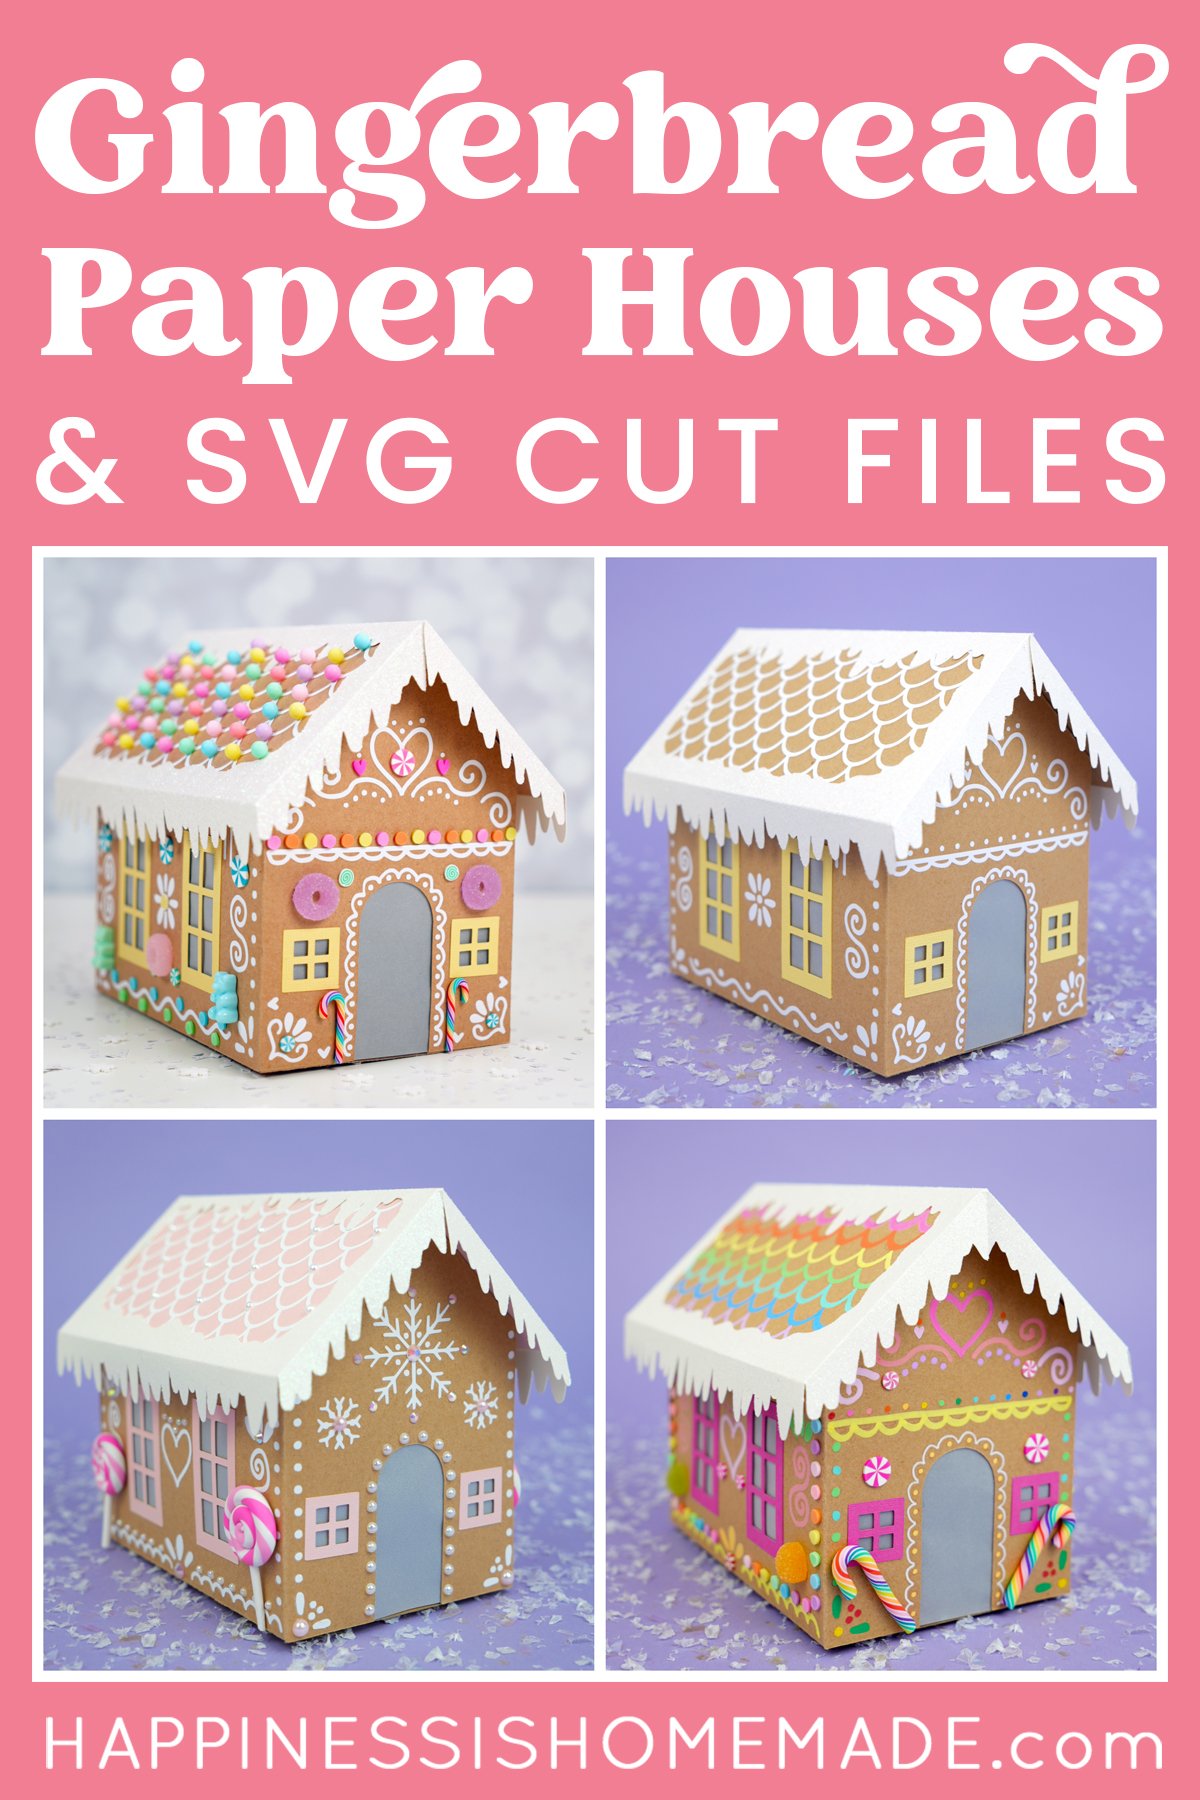
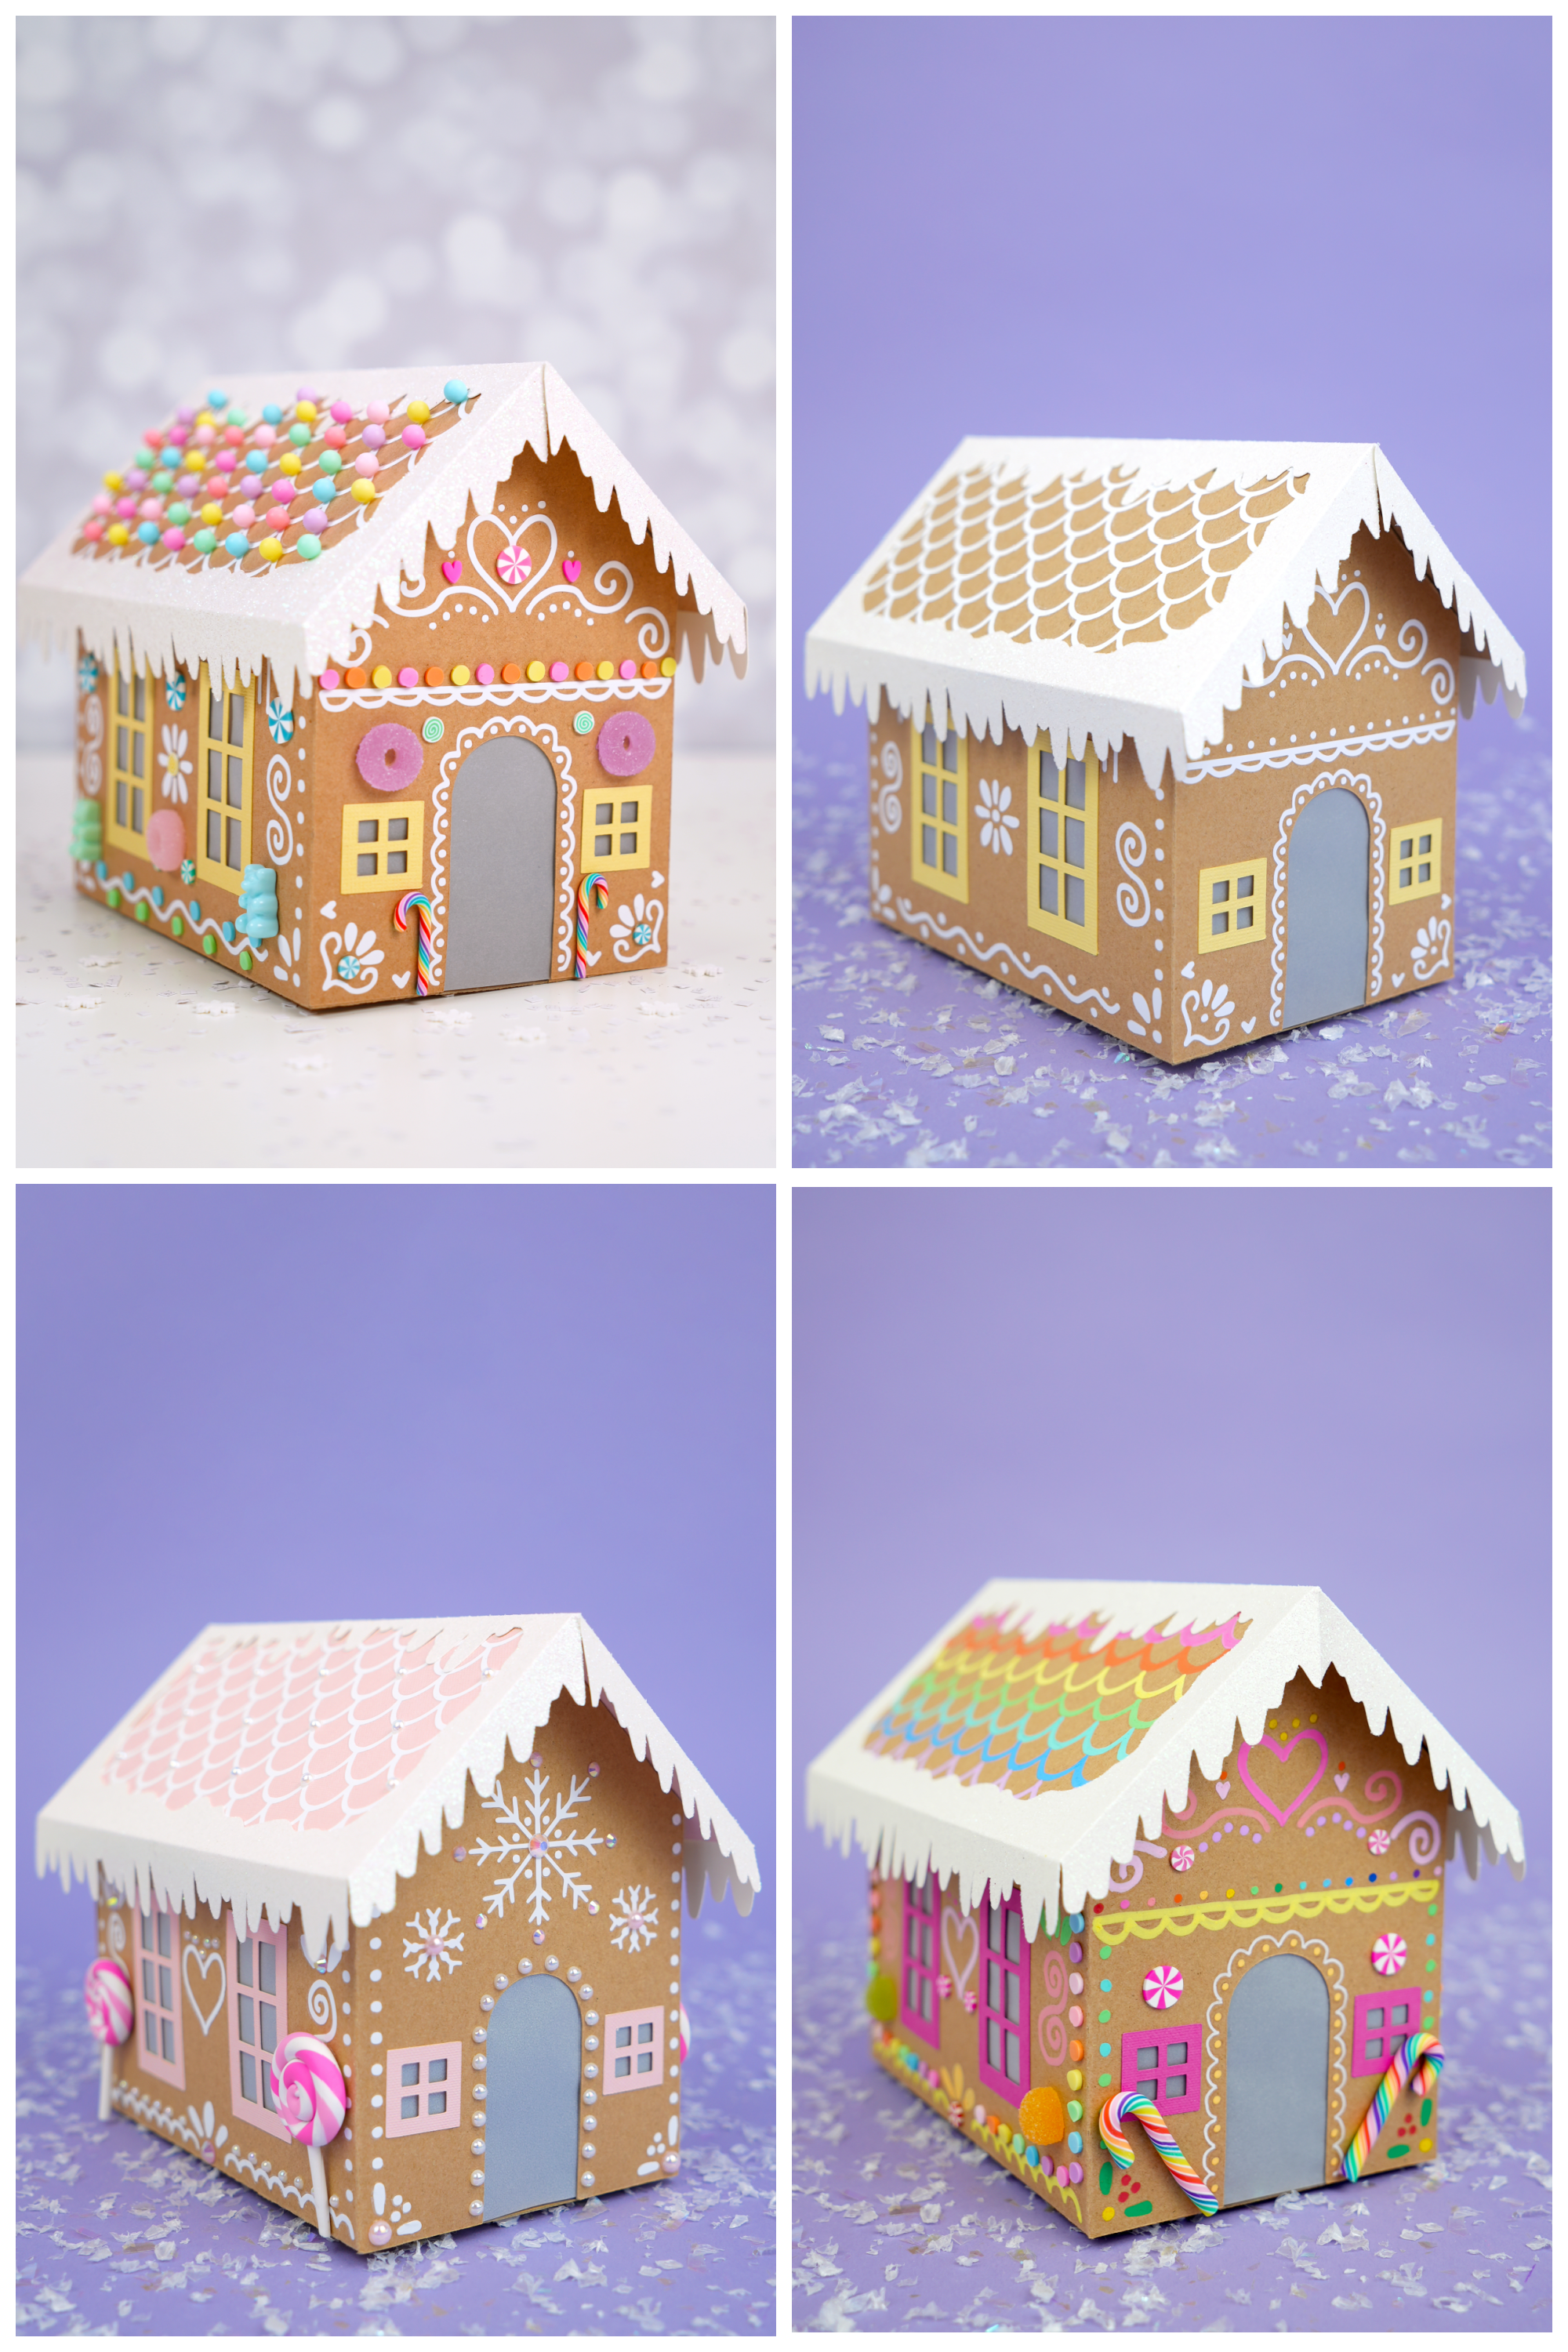
Additional Decorations & Embellishments
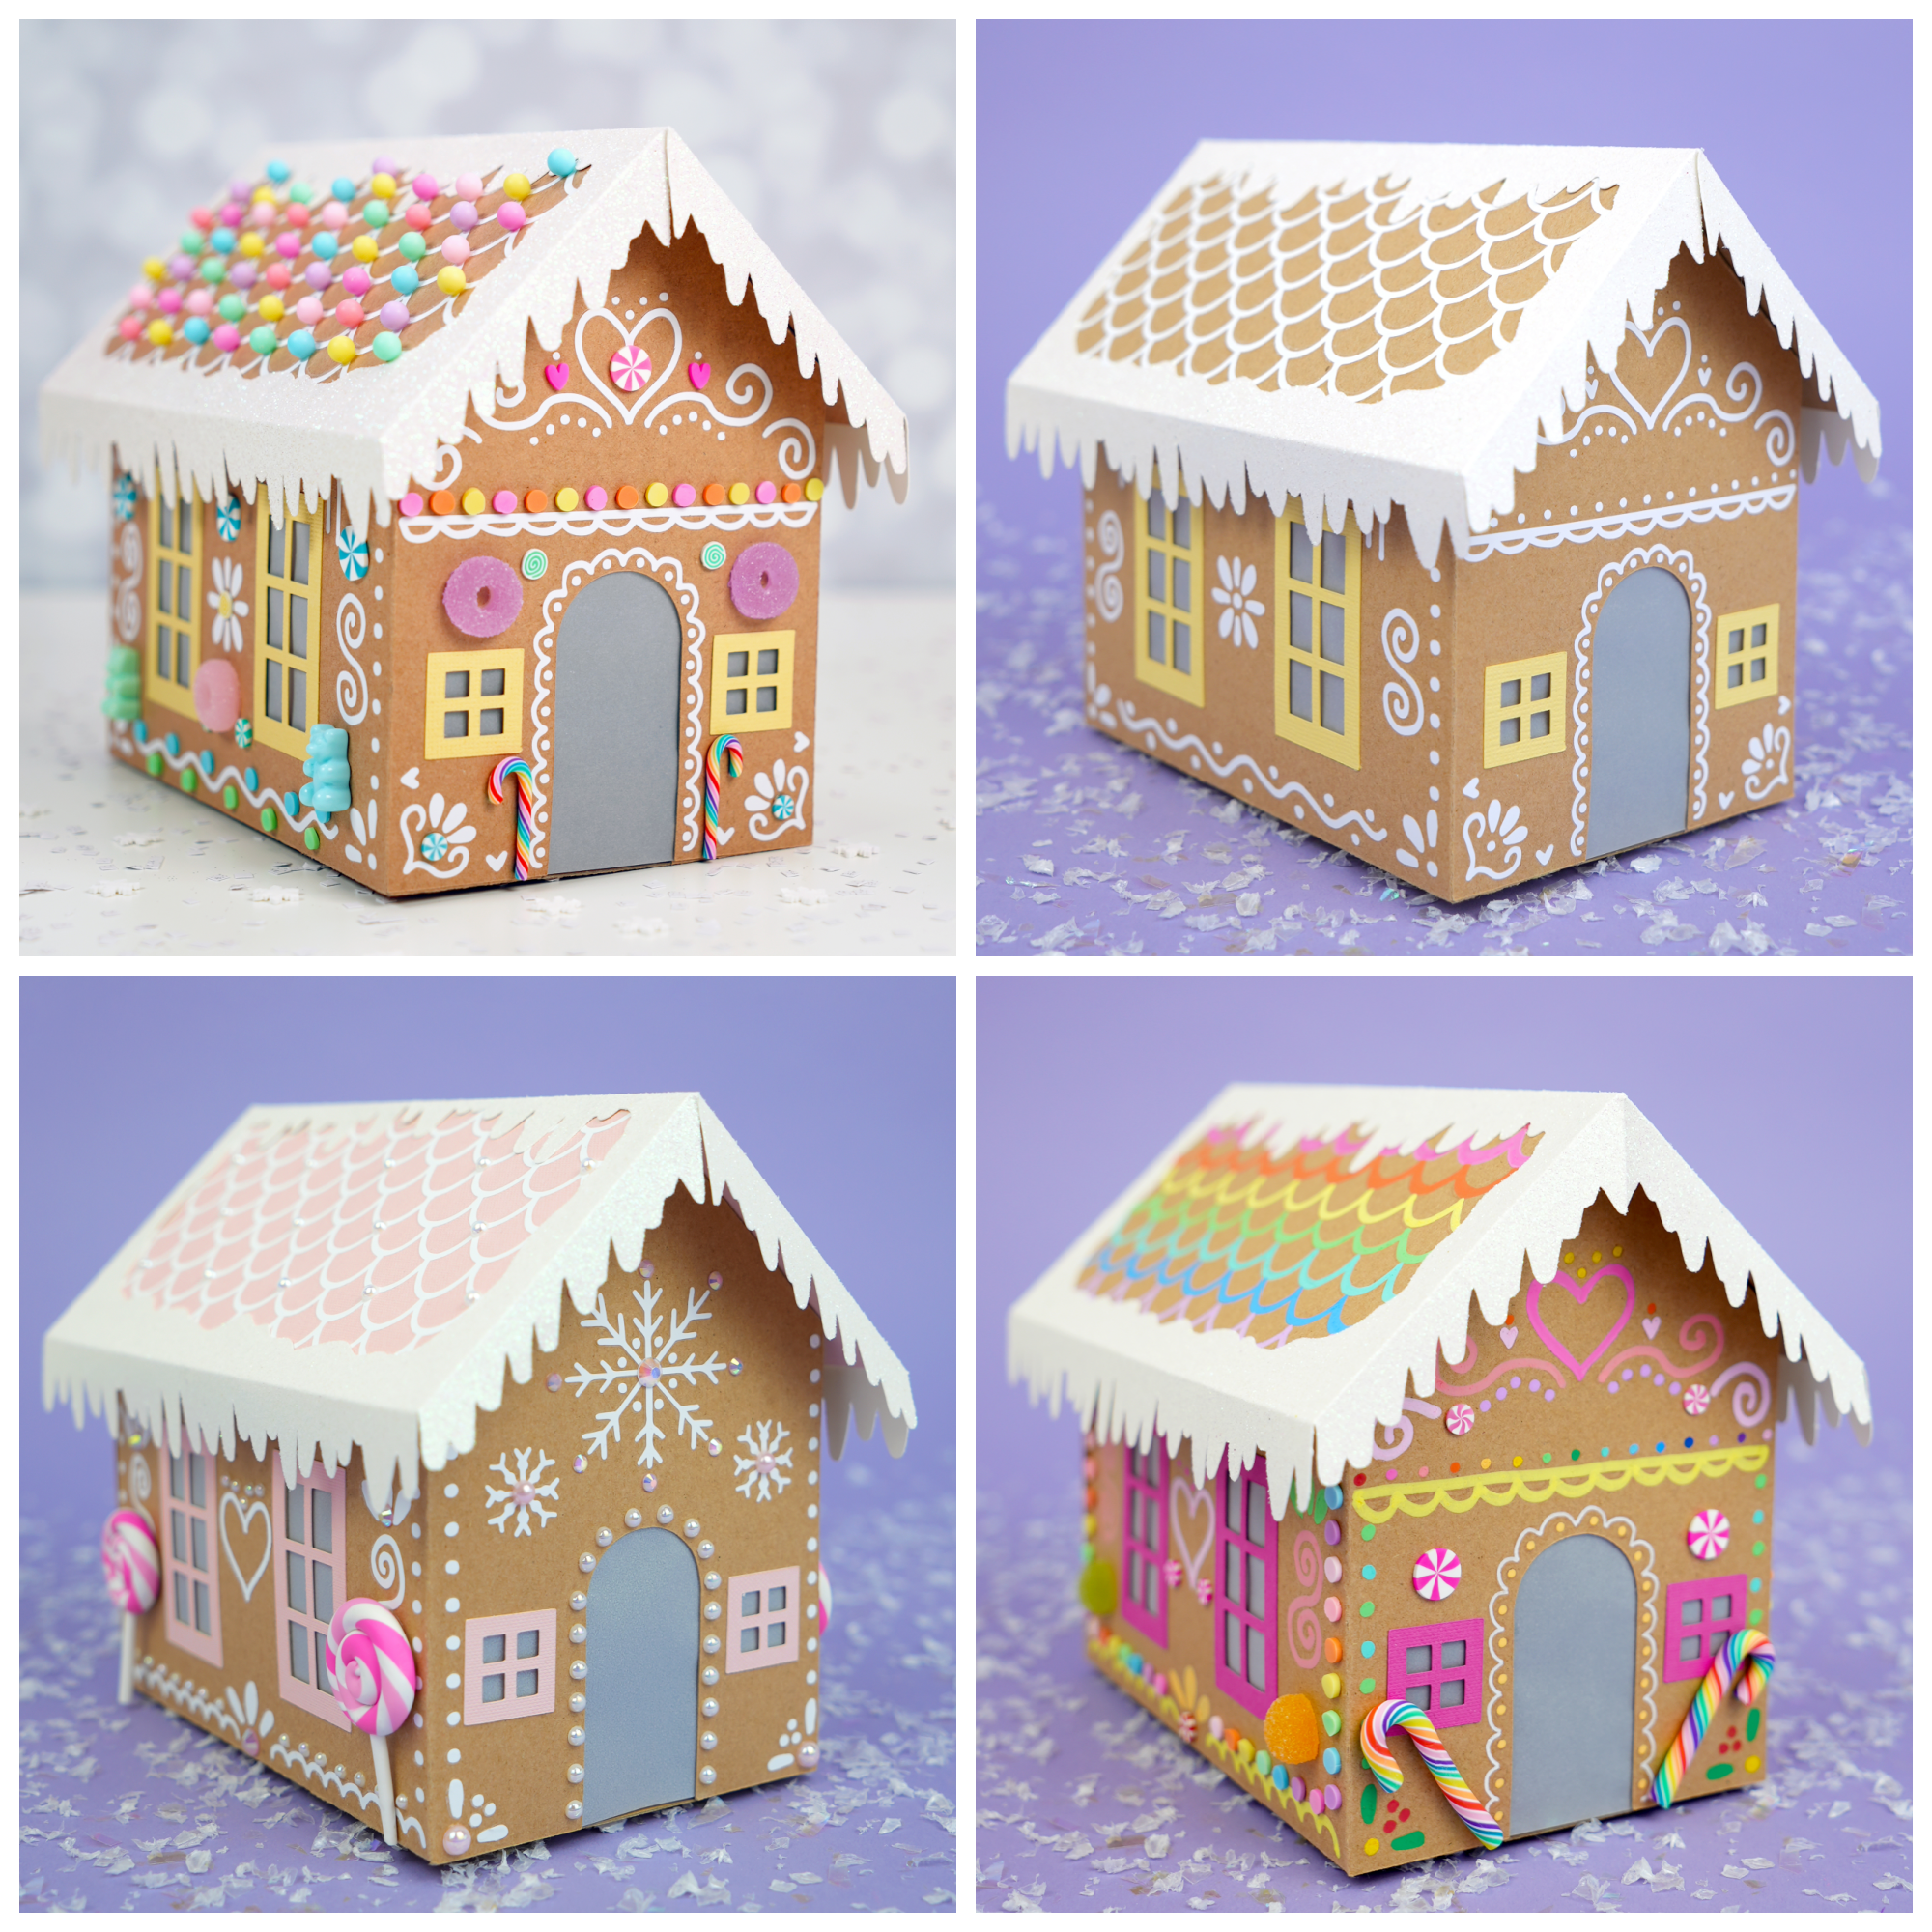
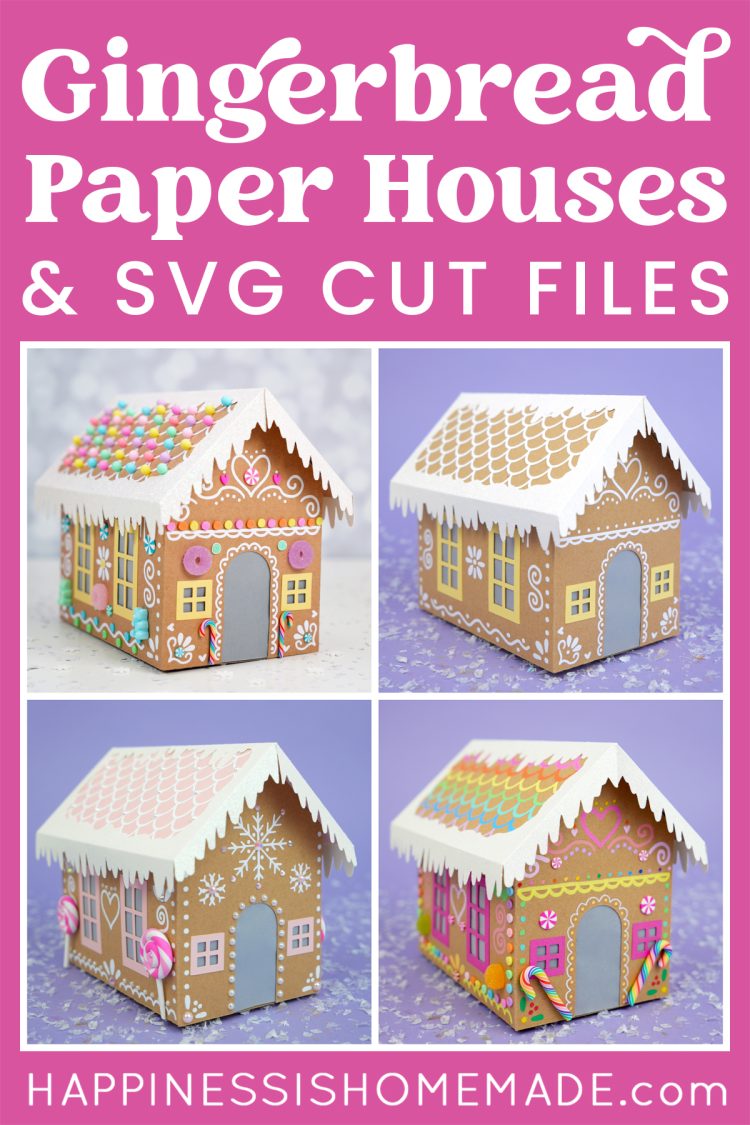
Of course, if you know me at all, you know that I like to get a little bit extra with my craft projects…so, that said, let’s take a peek at a couple of other finished gingerbread houses that I made that have even more decorations and embellishments!
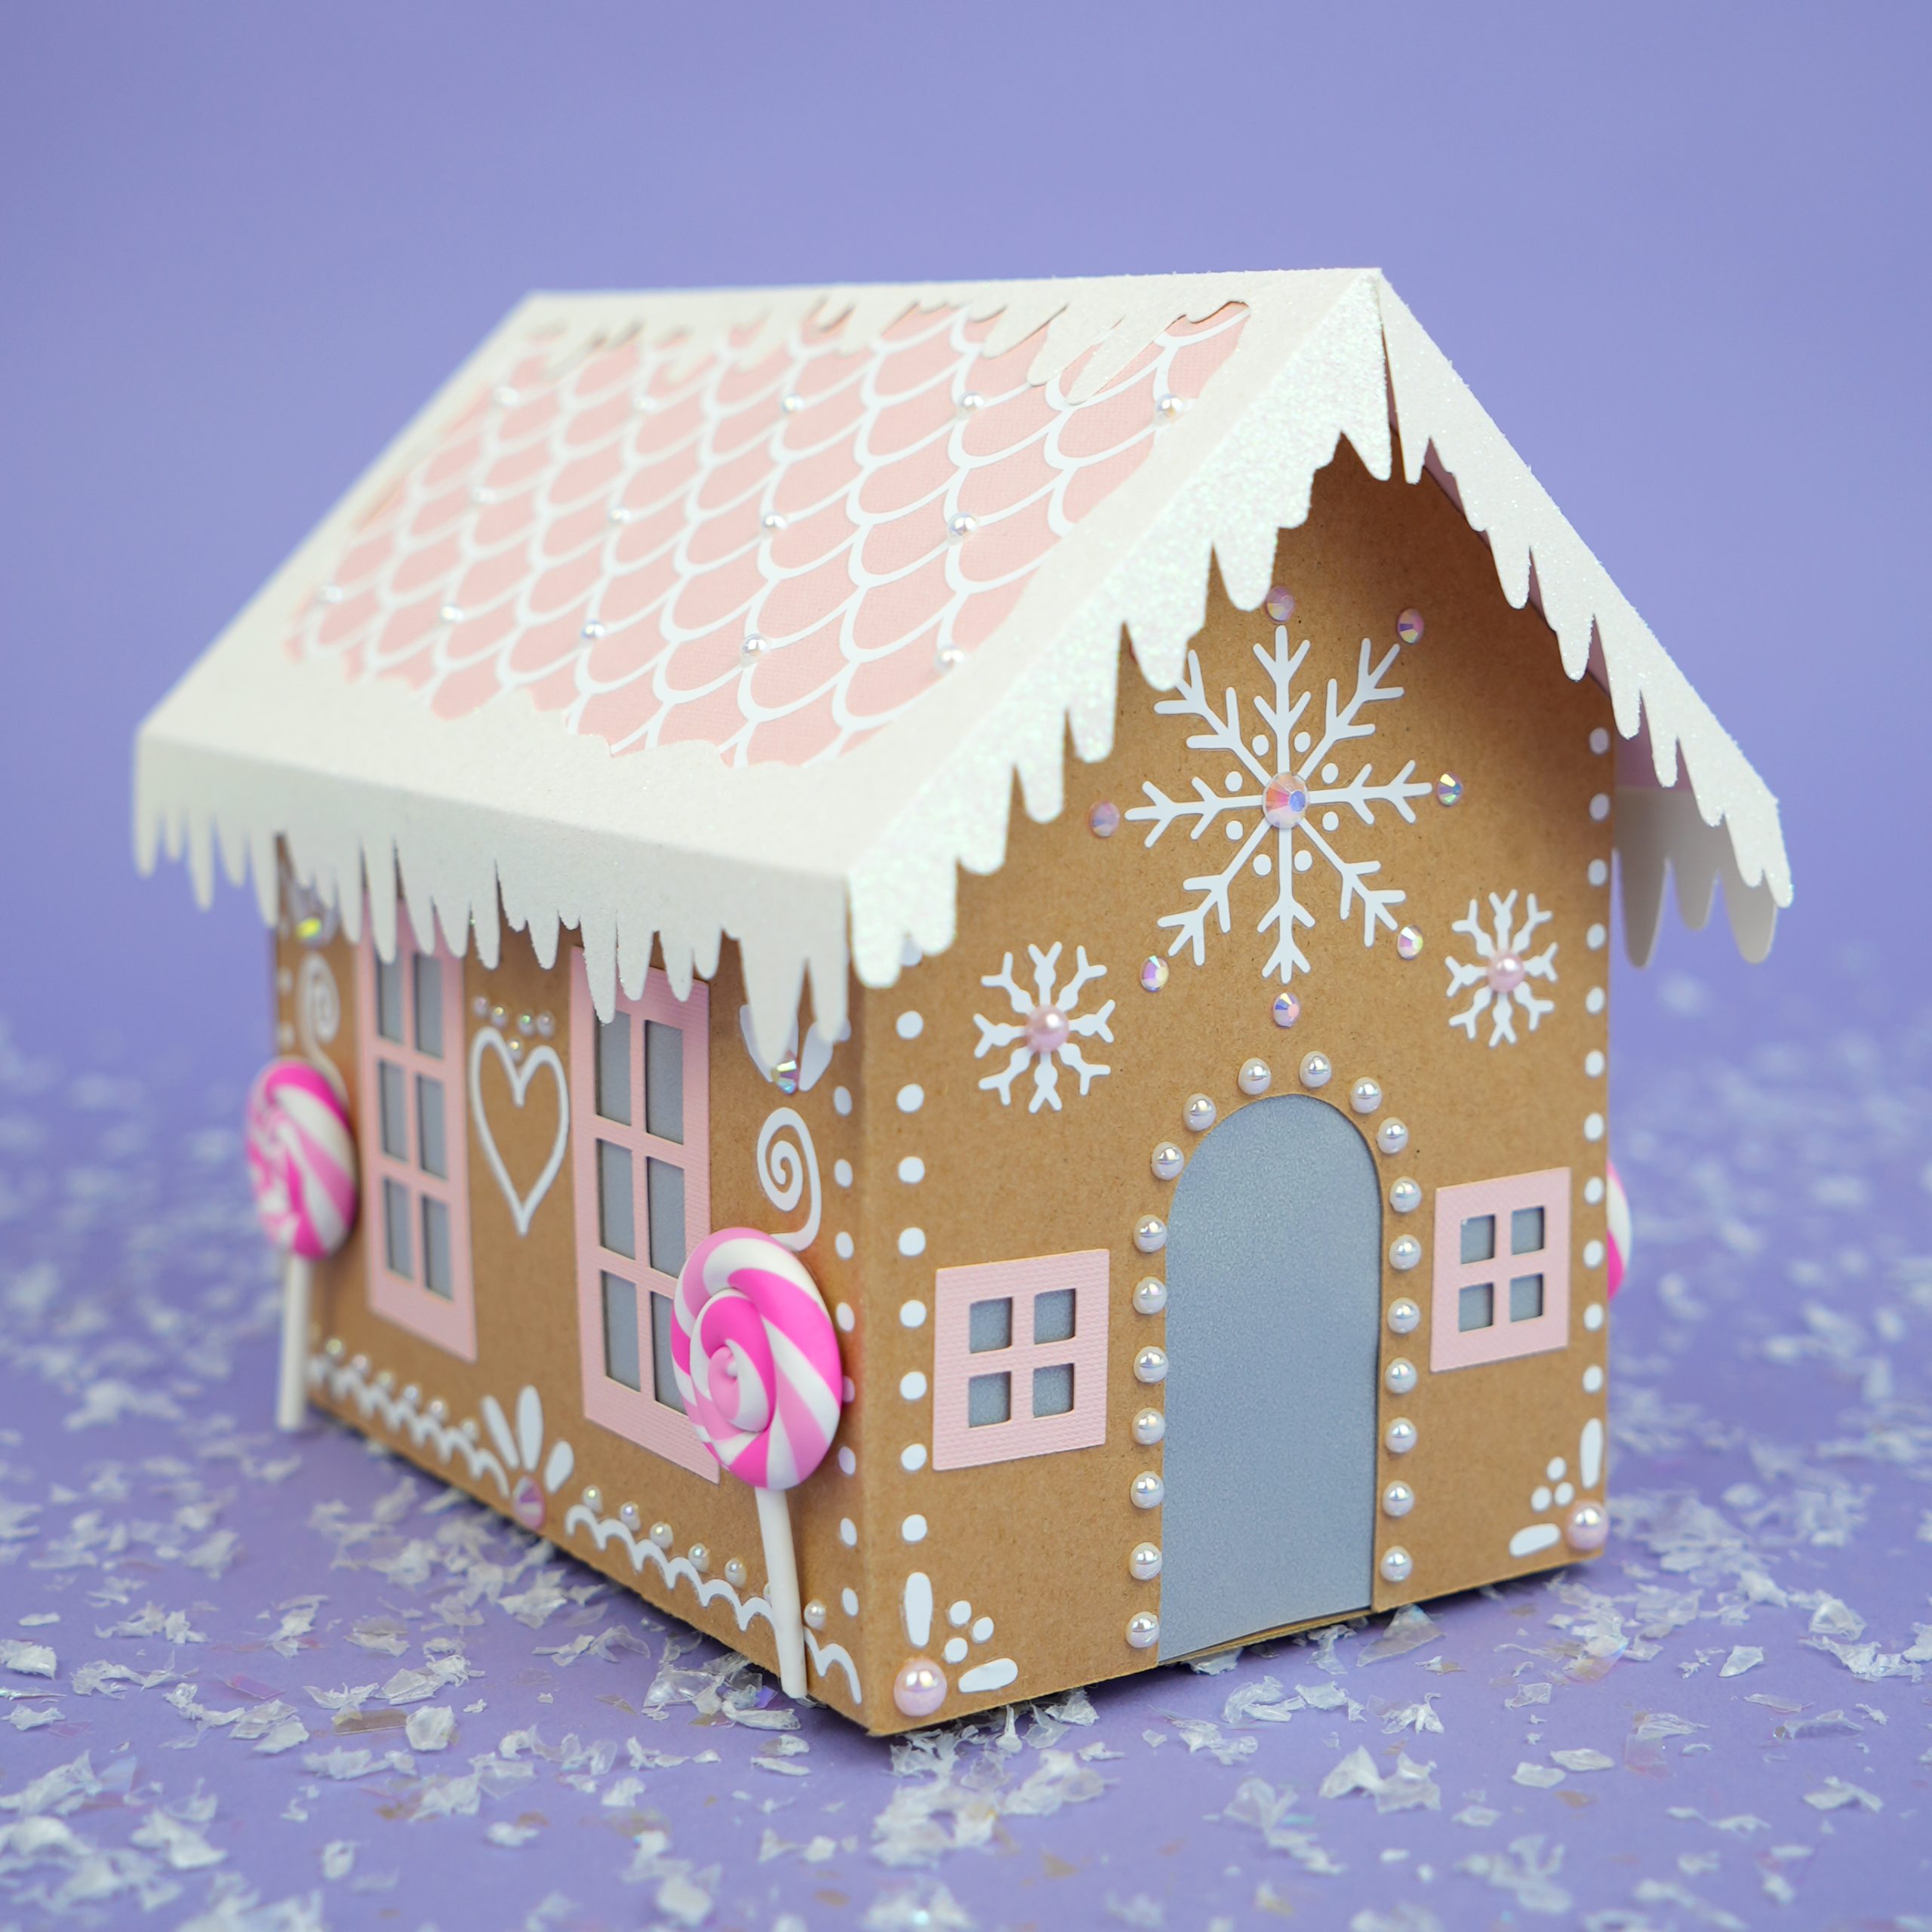
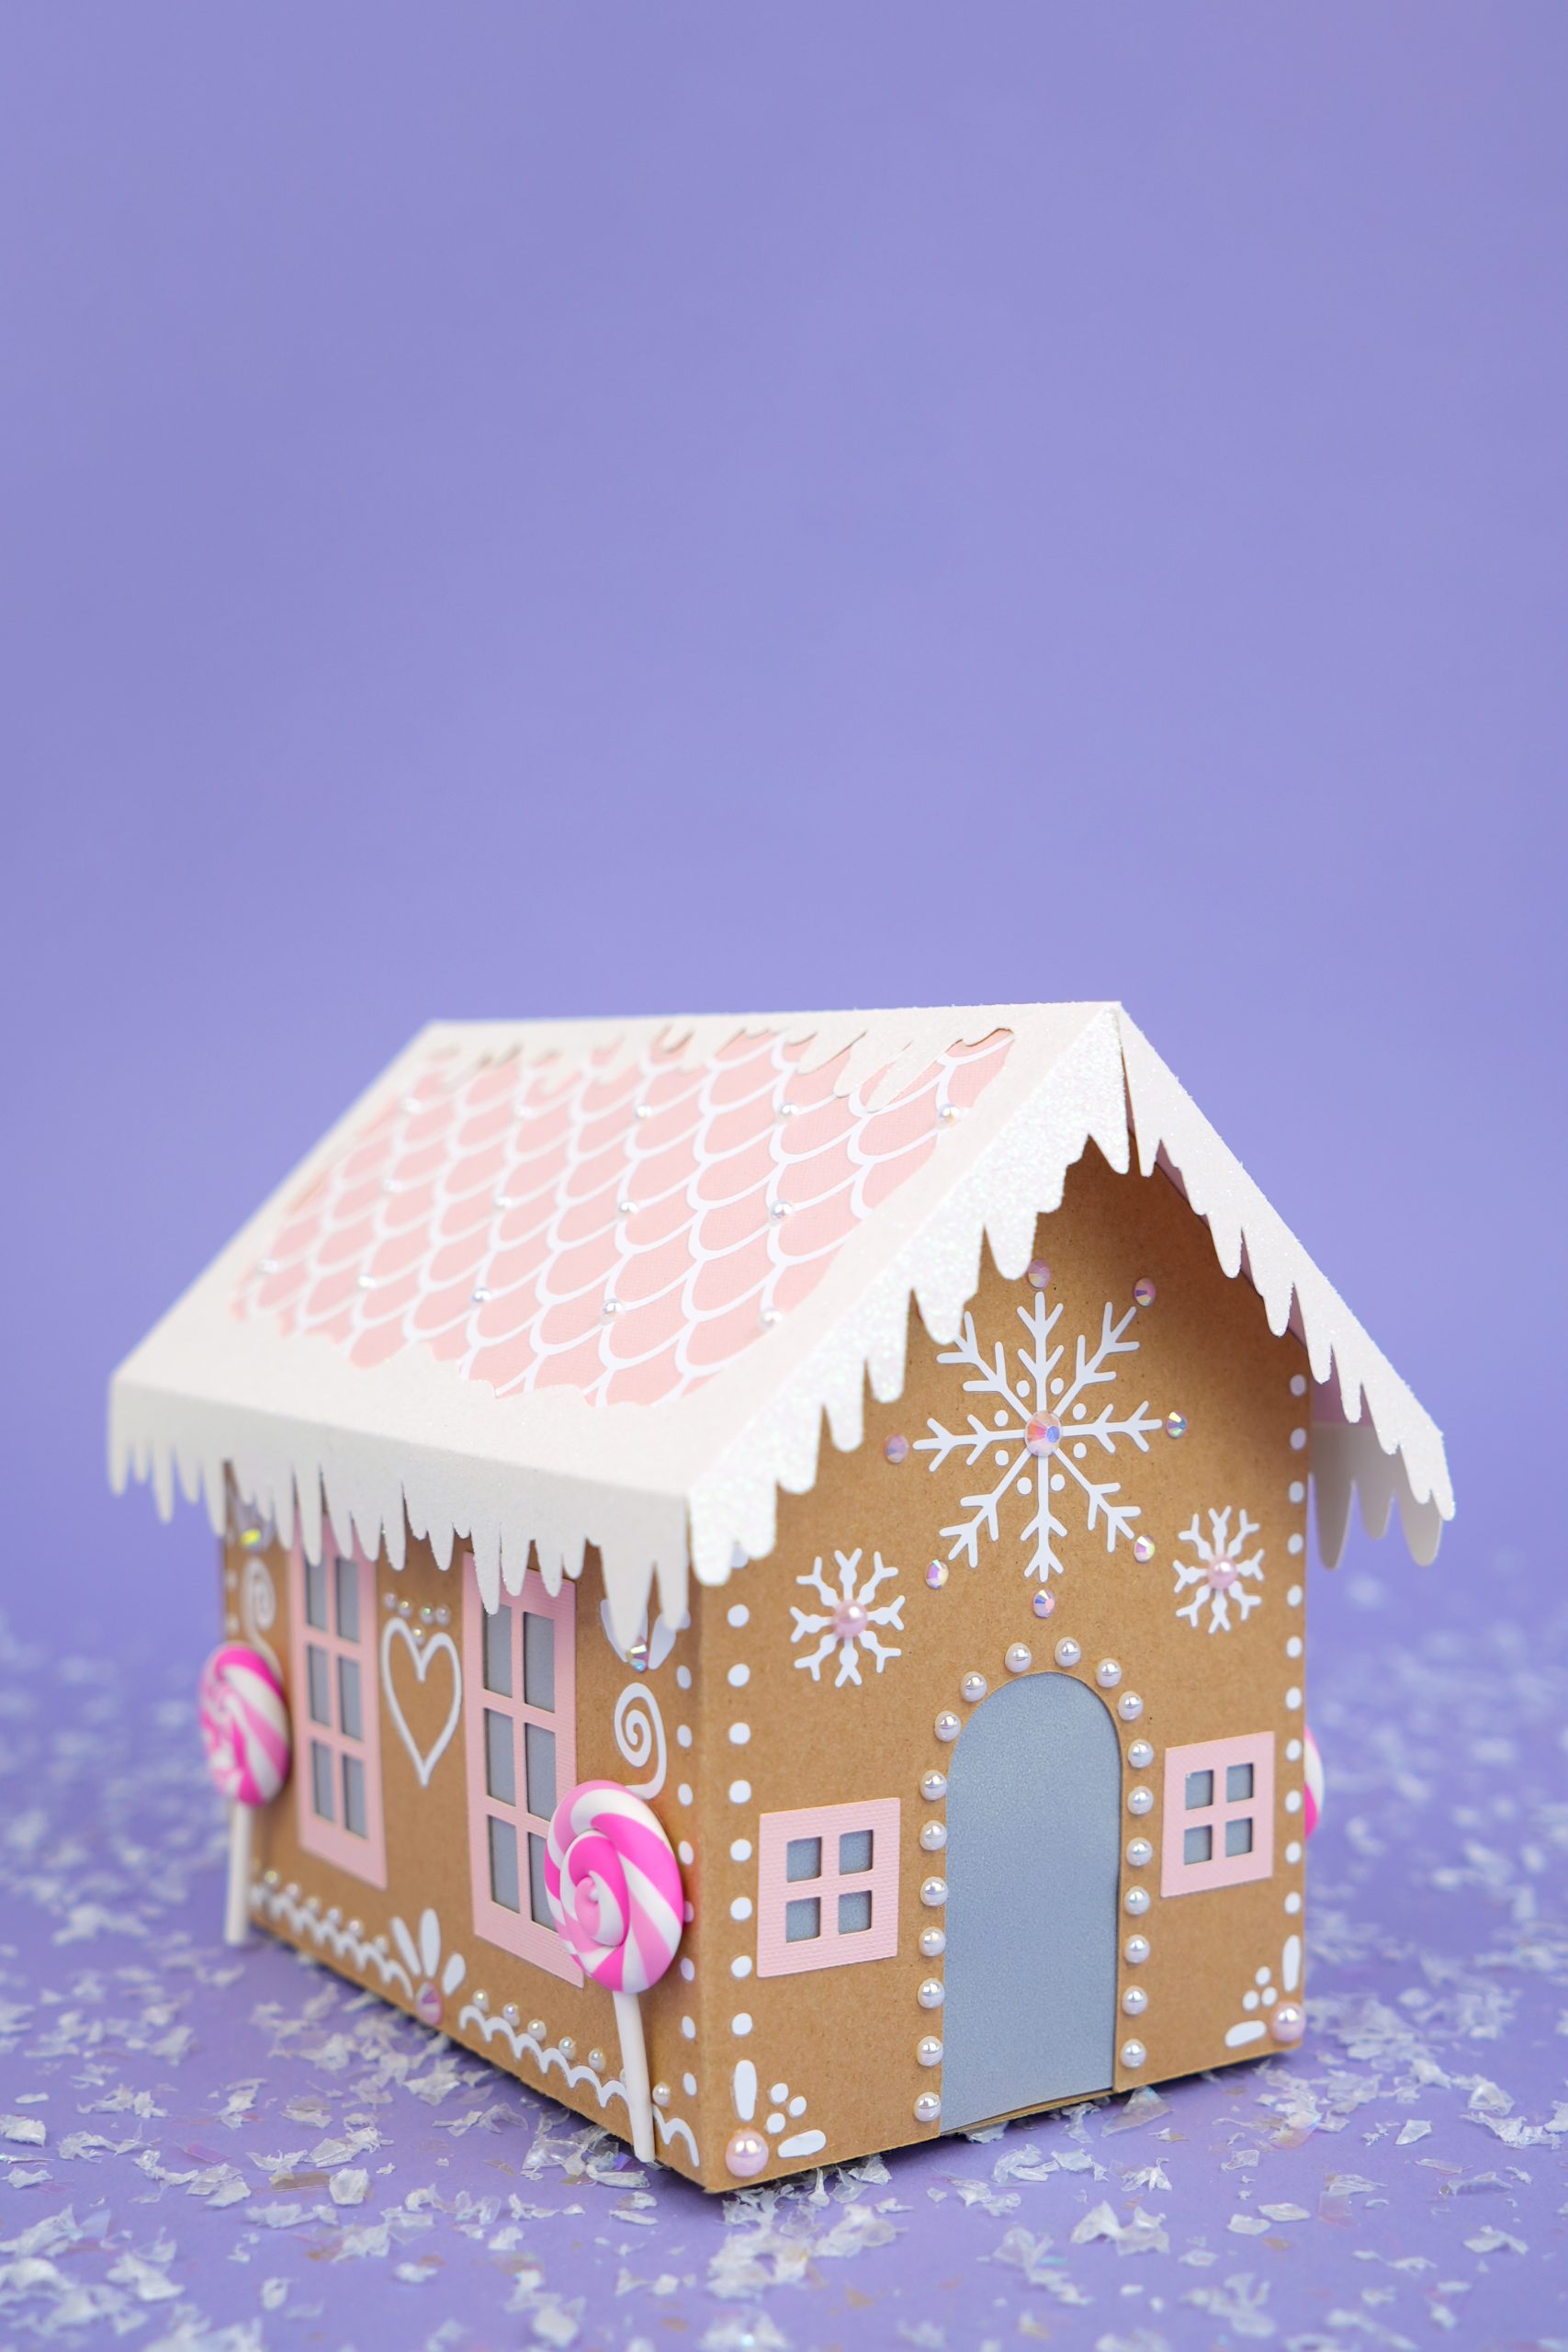
Pearls & Bling
One of my favorite ways to add even MORE personality and style to these gingerbread houses is with a little extra BLING! ✨
Shimmery half-pearls and rhinestones on the walls and roof of this paper gingerbread house really make these holiday decorations sparkle! The sweet pink lollipops add a touch of classic gingerbread house whimsy.
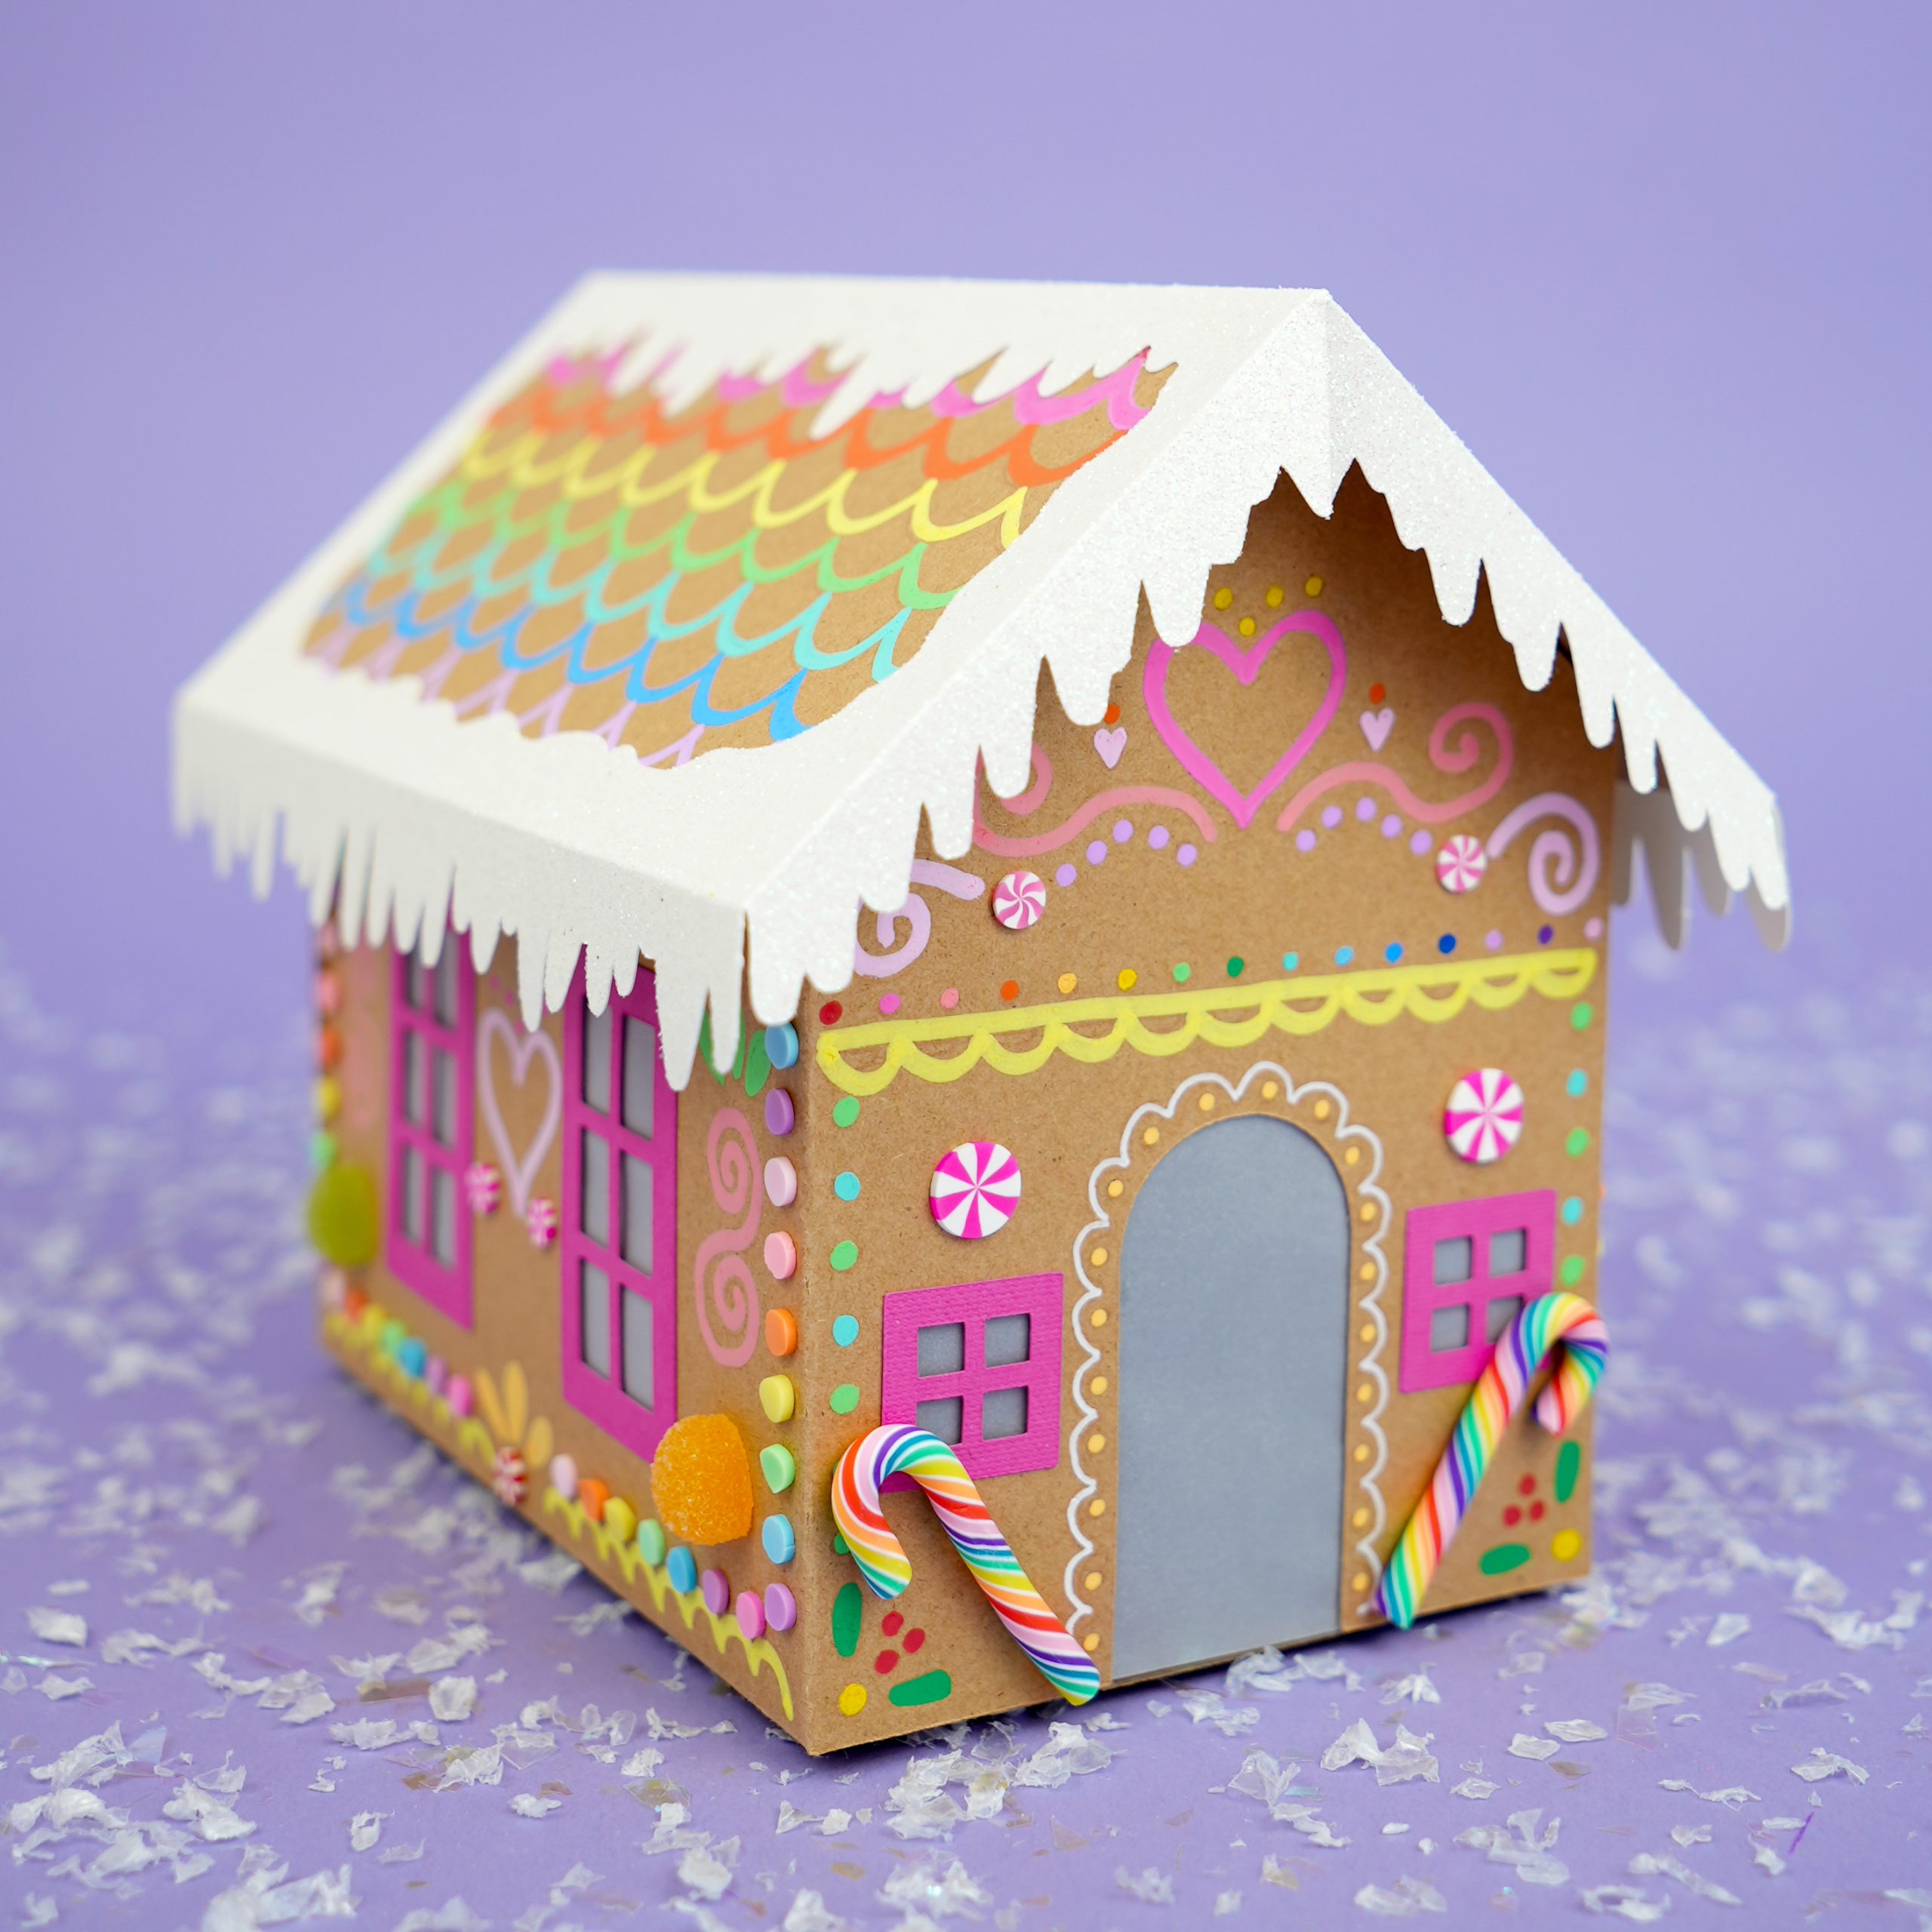
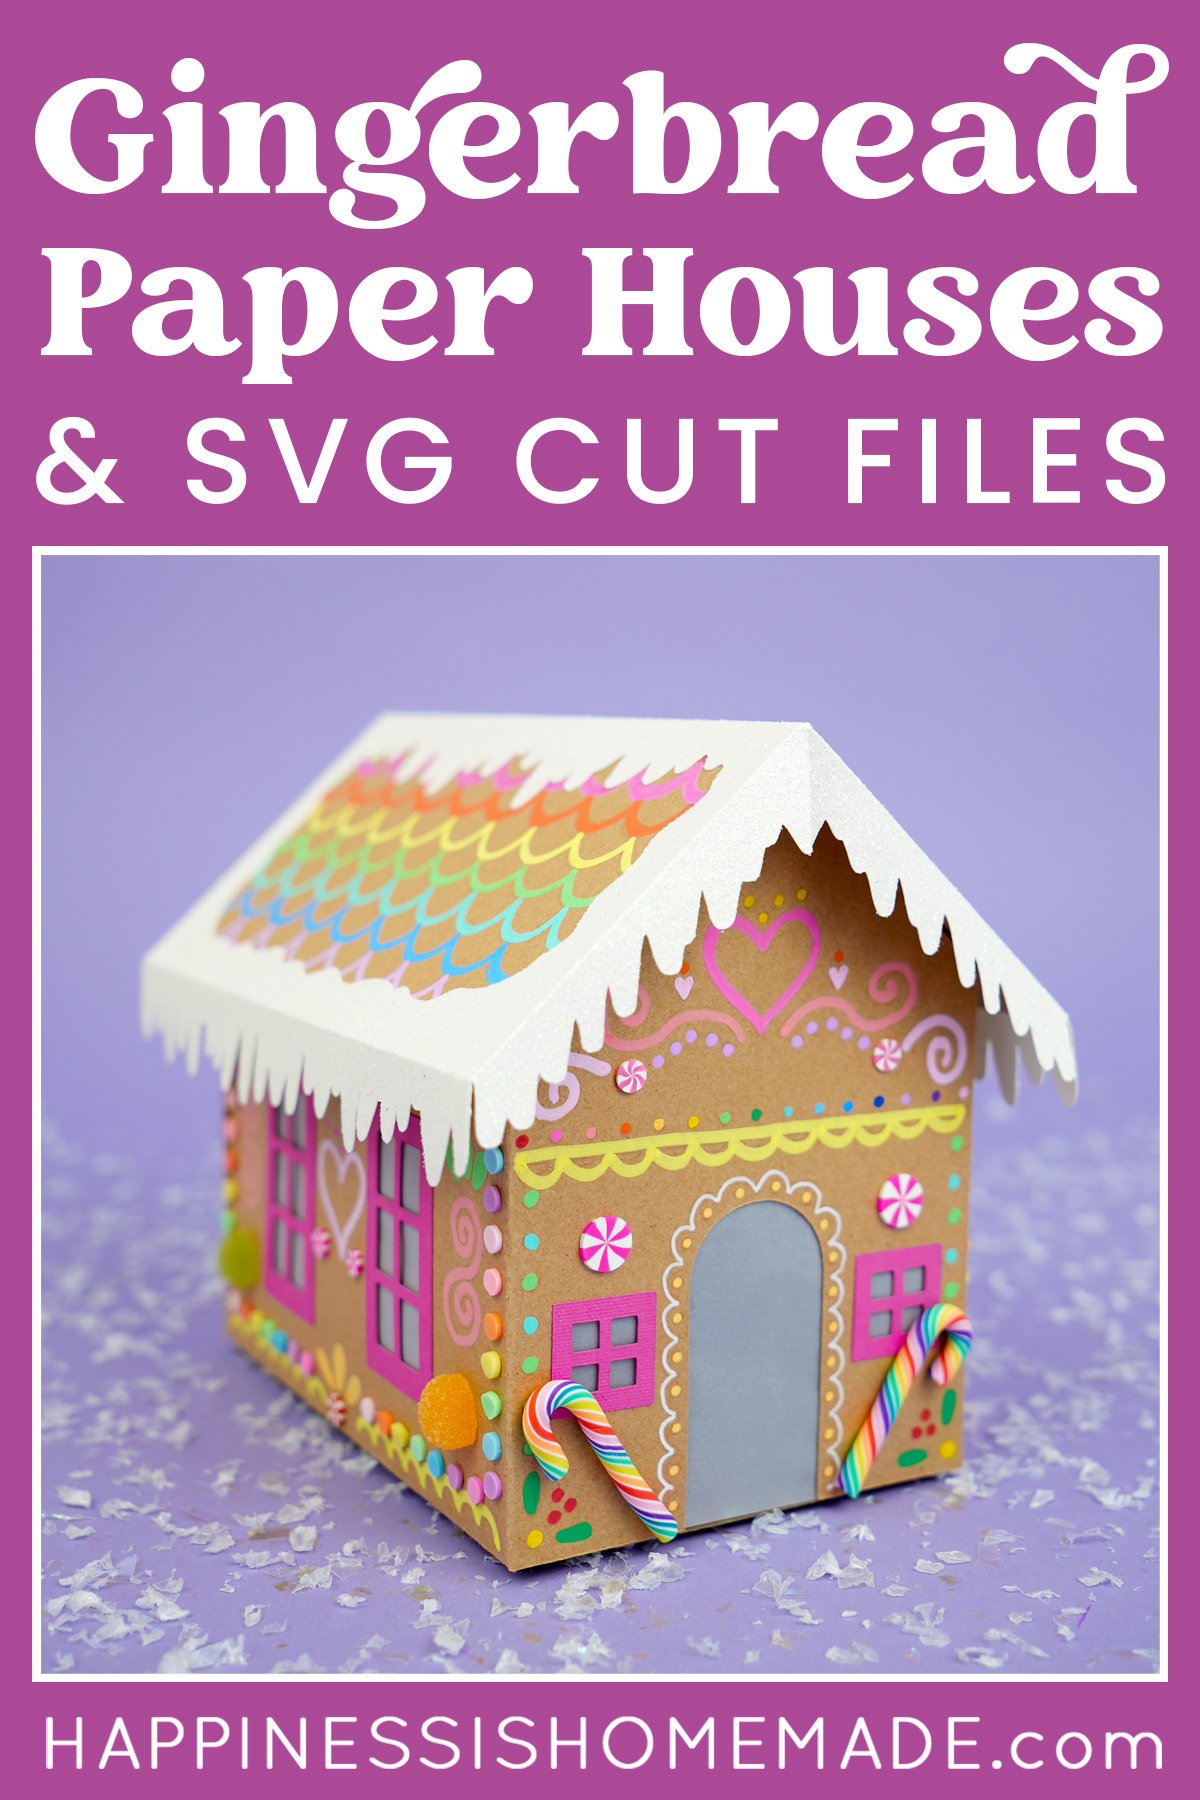
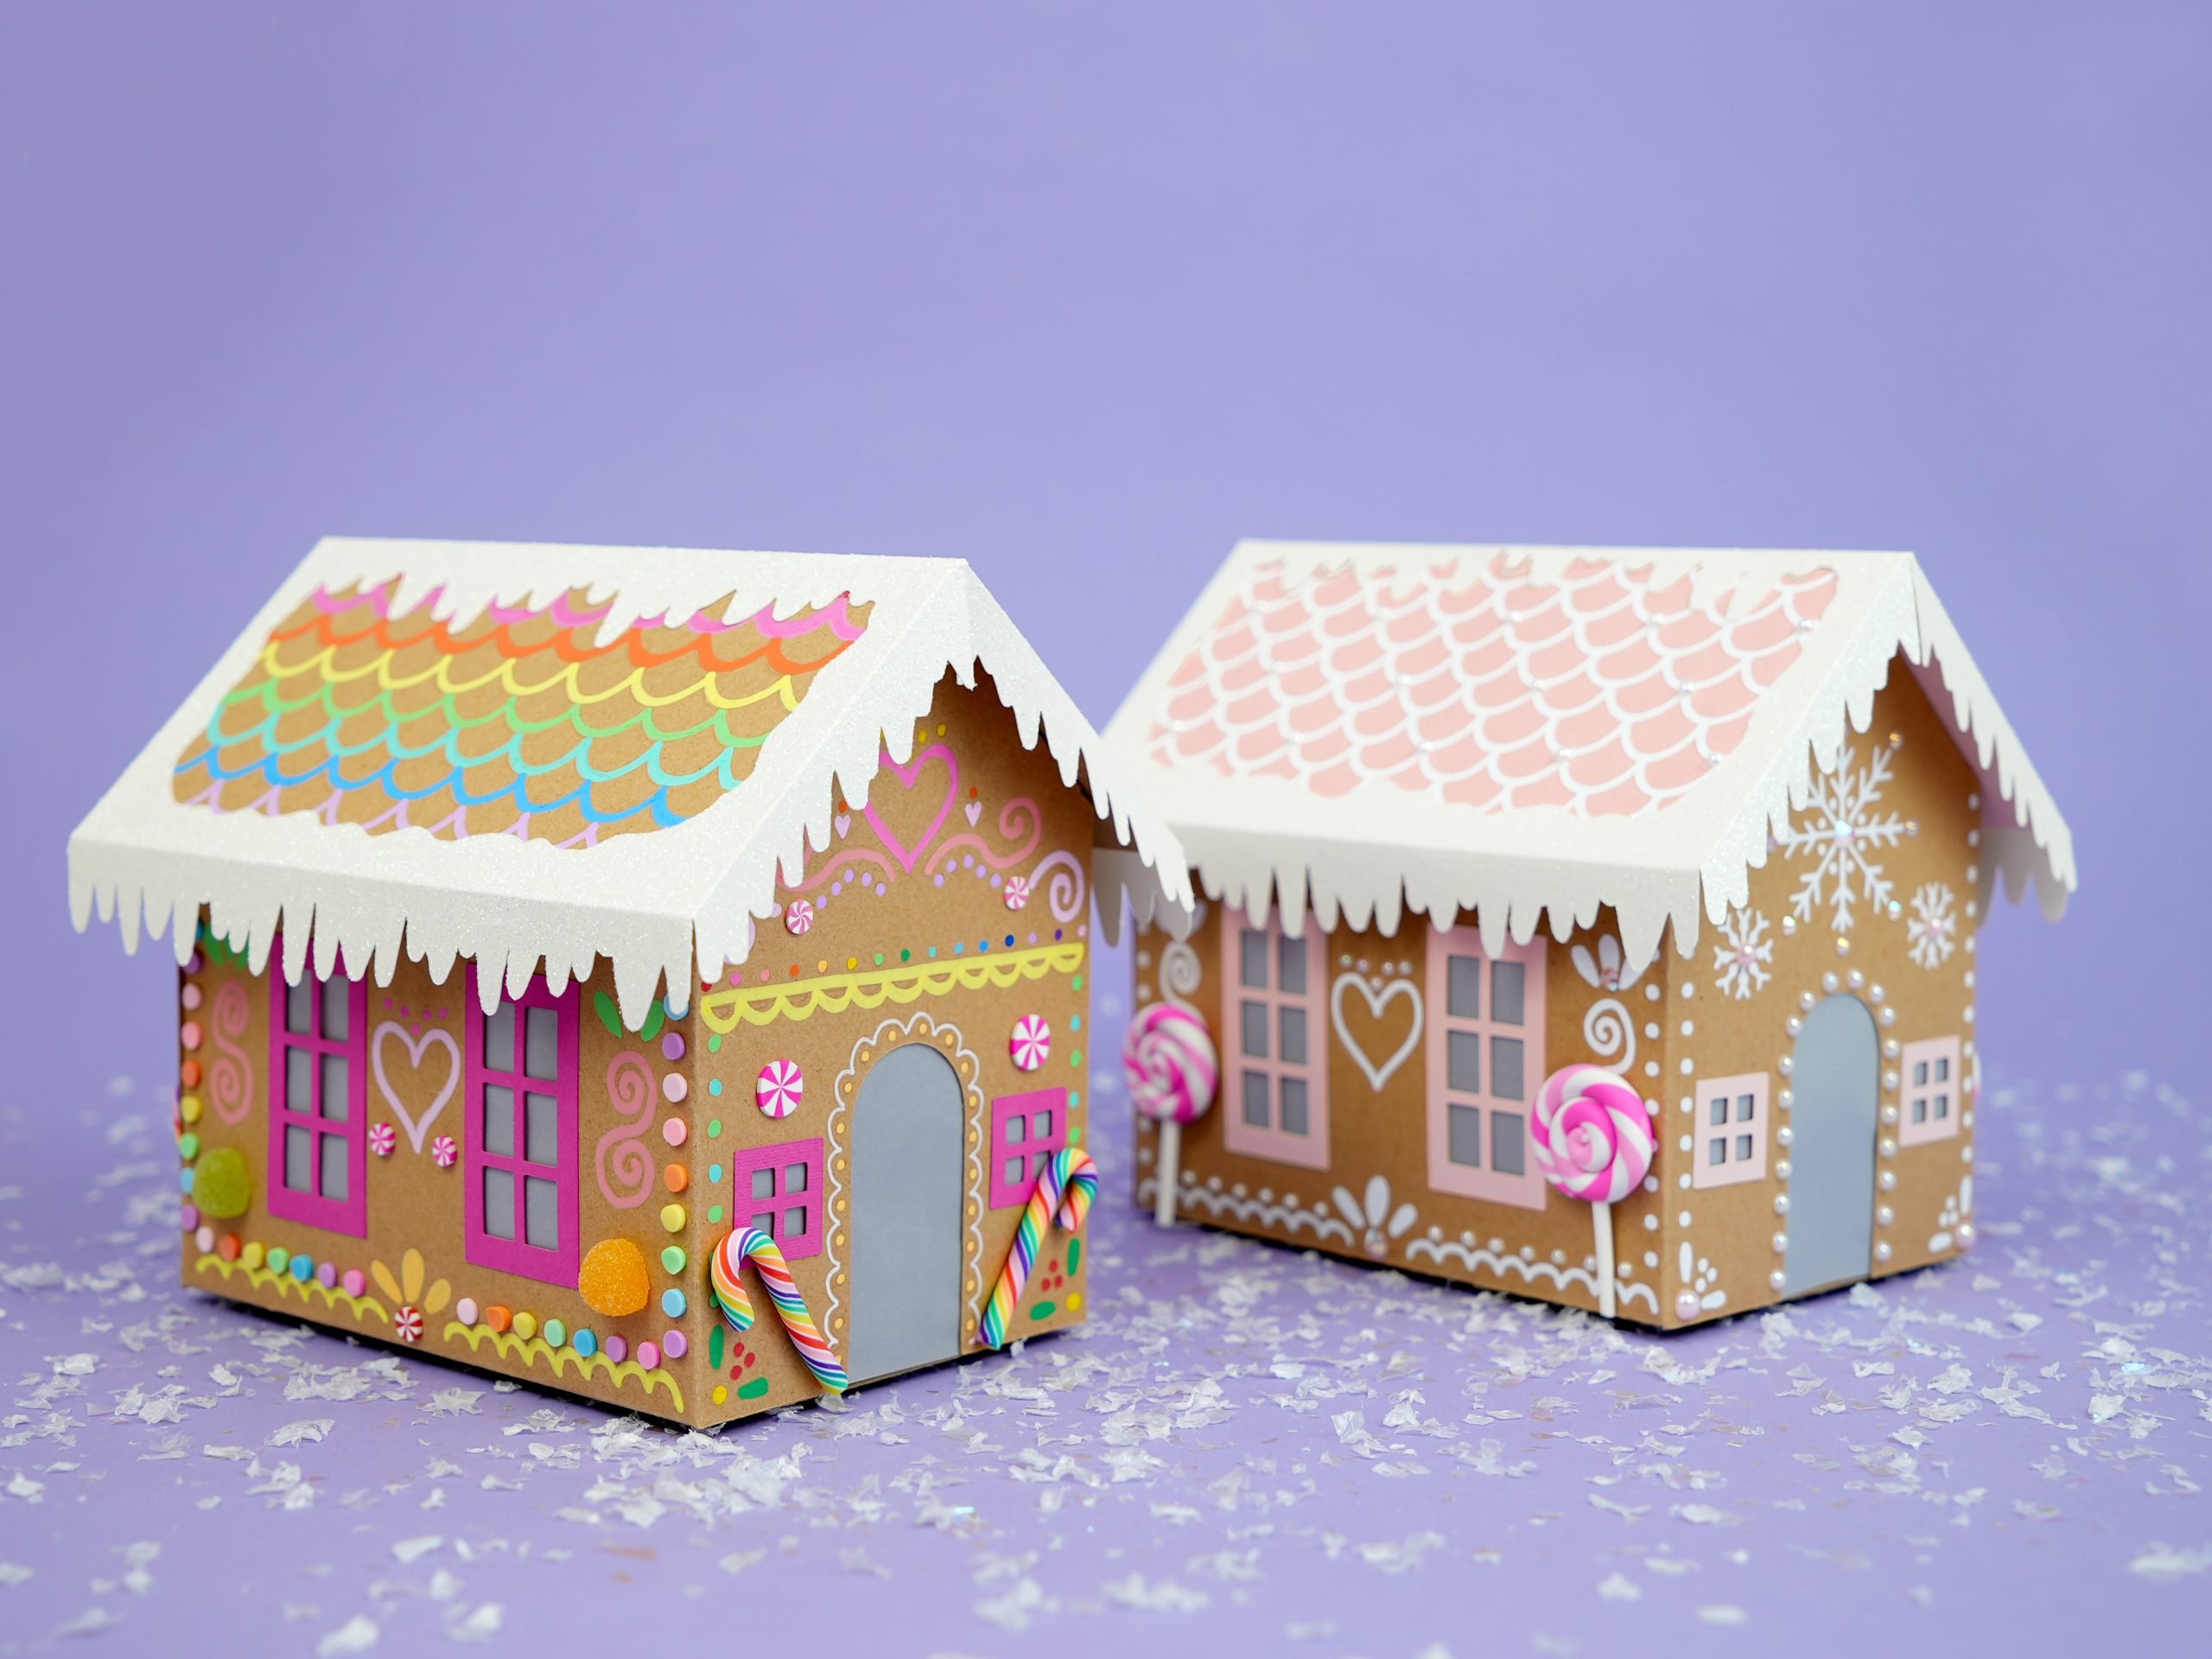
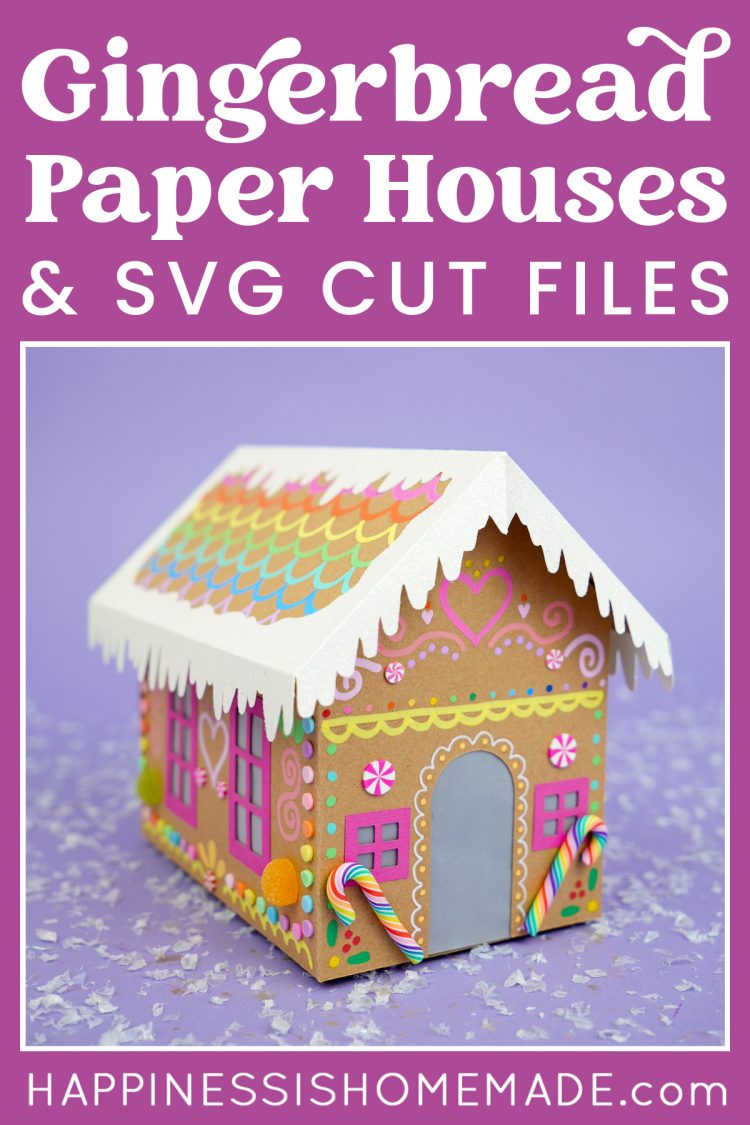
Rainbow Paint Pens
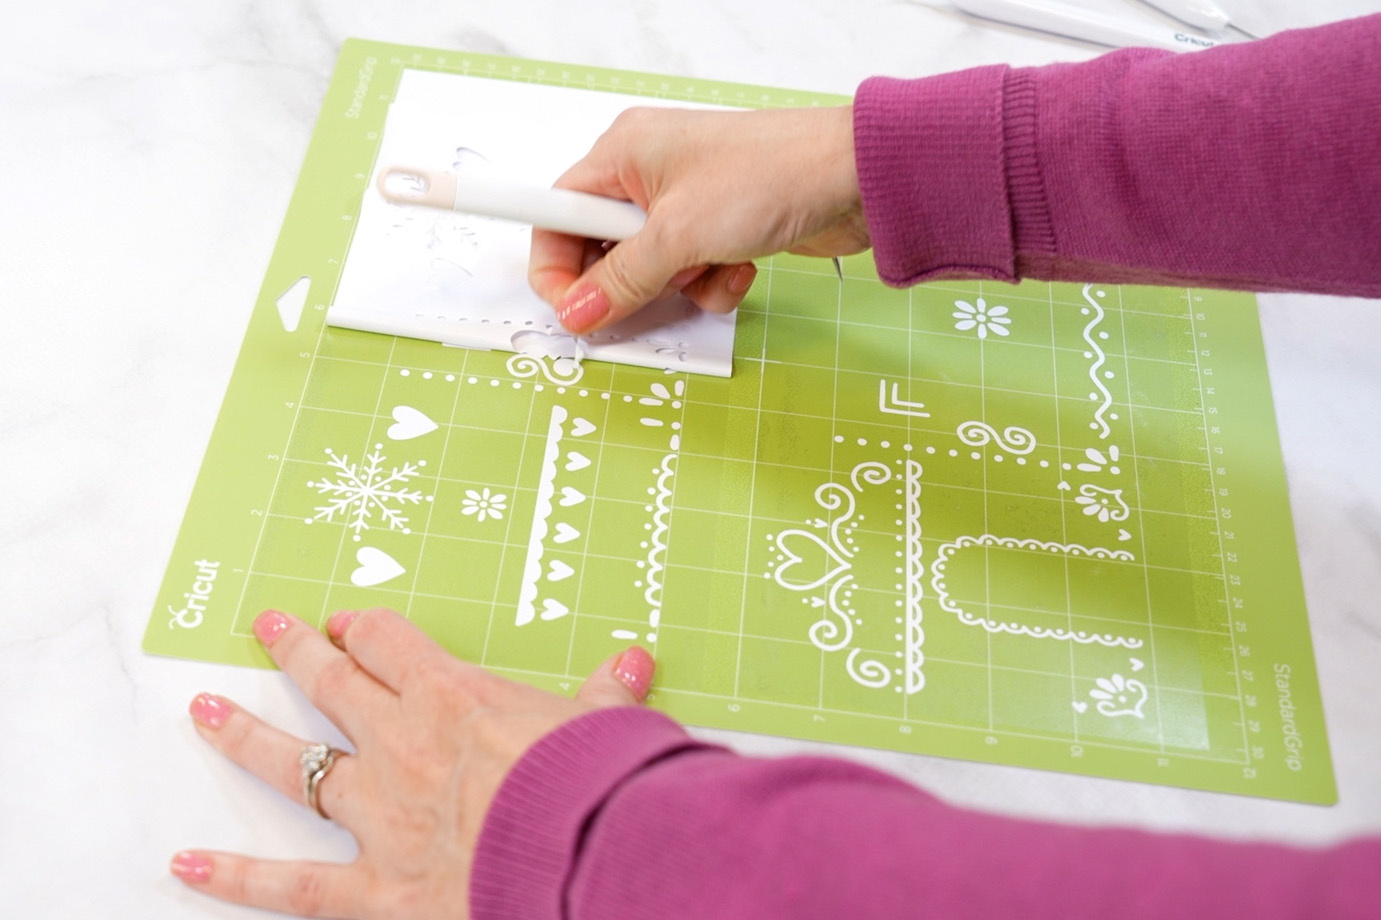
For this house, instead of using heat transfer vinyl to create the icing decorations, I used a Cricut pen to draw the outline of the decorations onto the kraft board pieces. Then, I used paint markers to fill in the designs and added faux candy for a fun and colorful look!
You could also use this technique with a white paint pen for simple and classic white icing decorations, but I thought the rainbow color scheme was a little different and it turned out super cute! Those rainbow candy canes are my favorite!
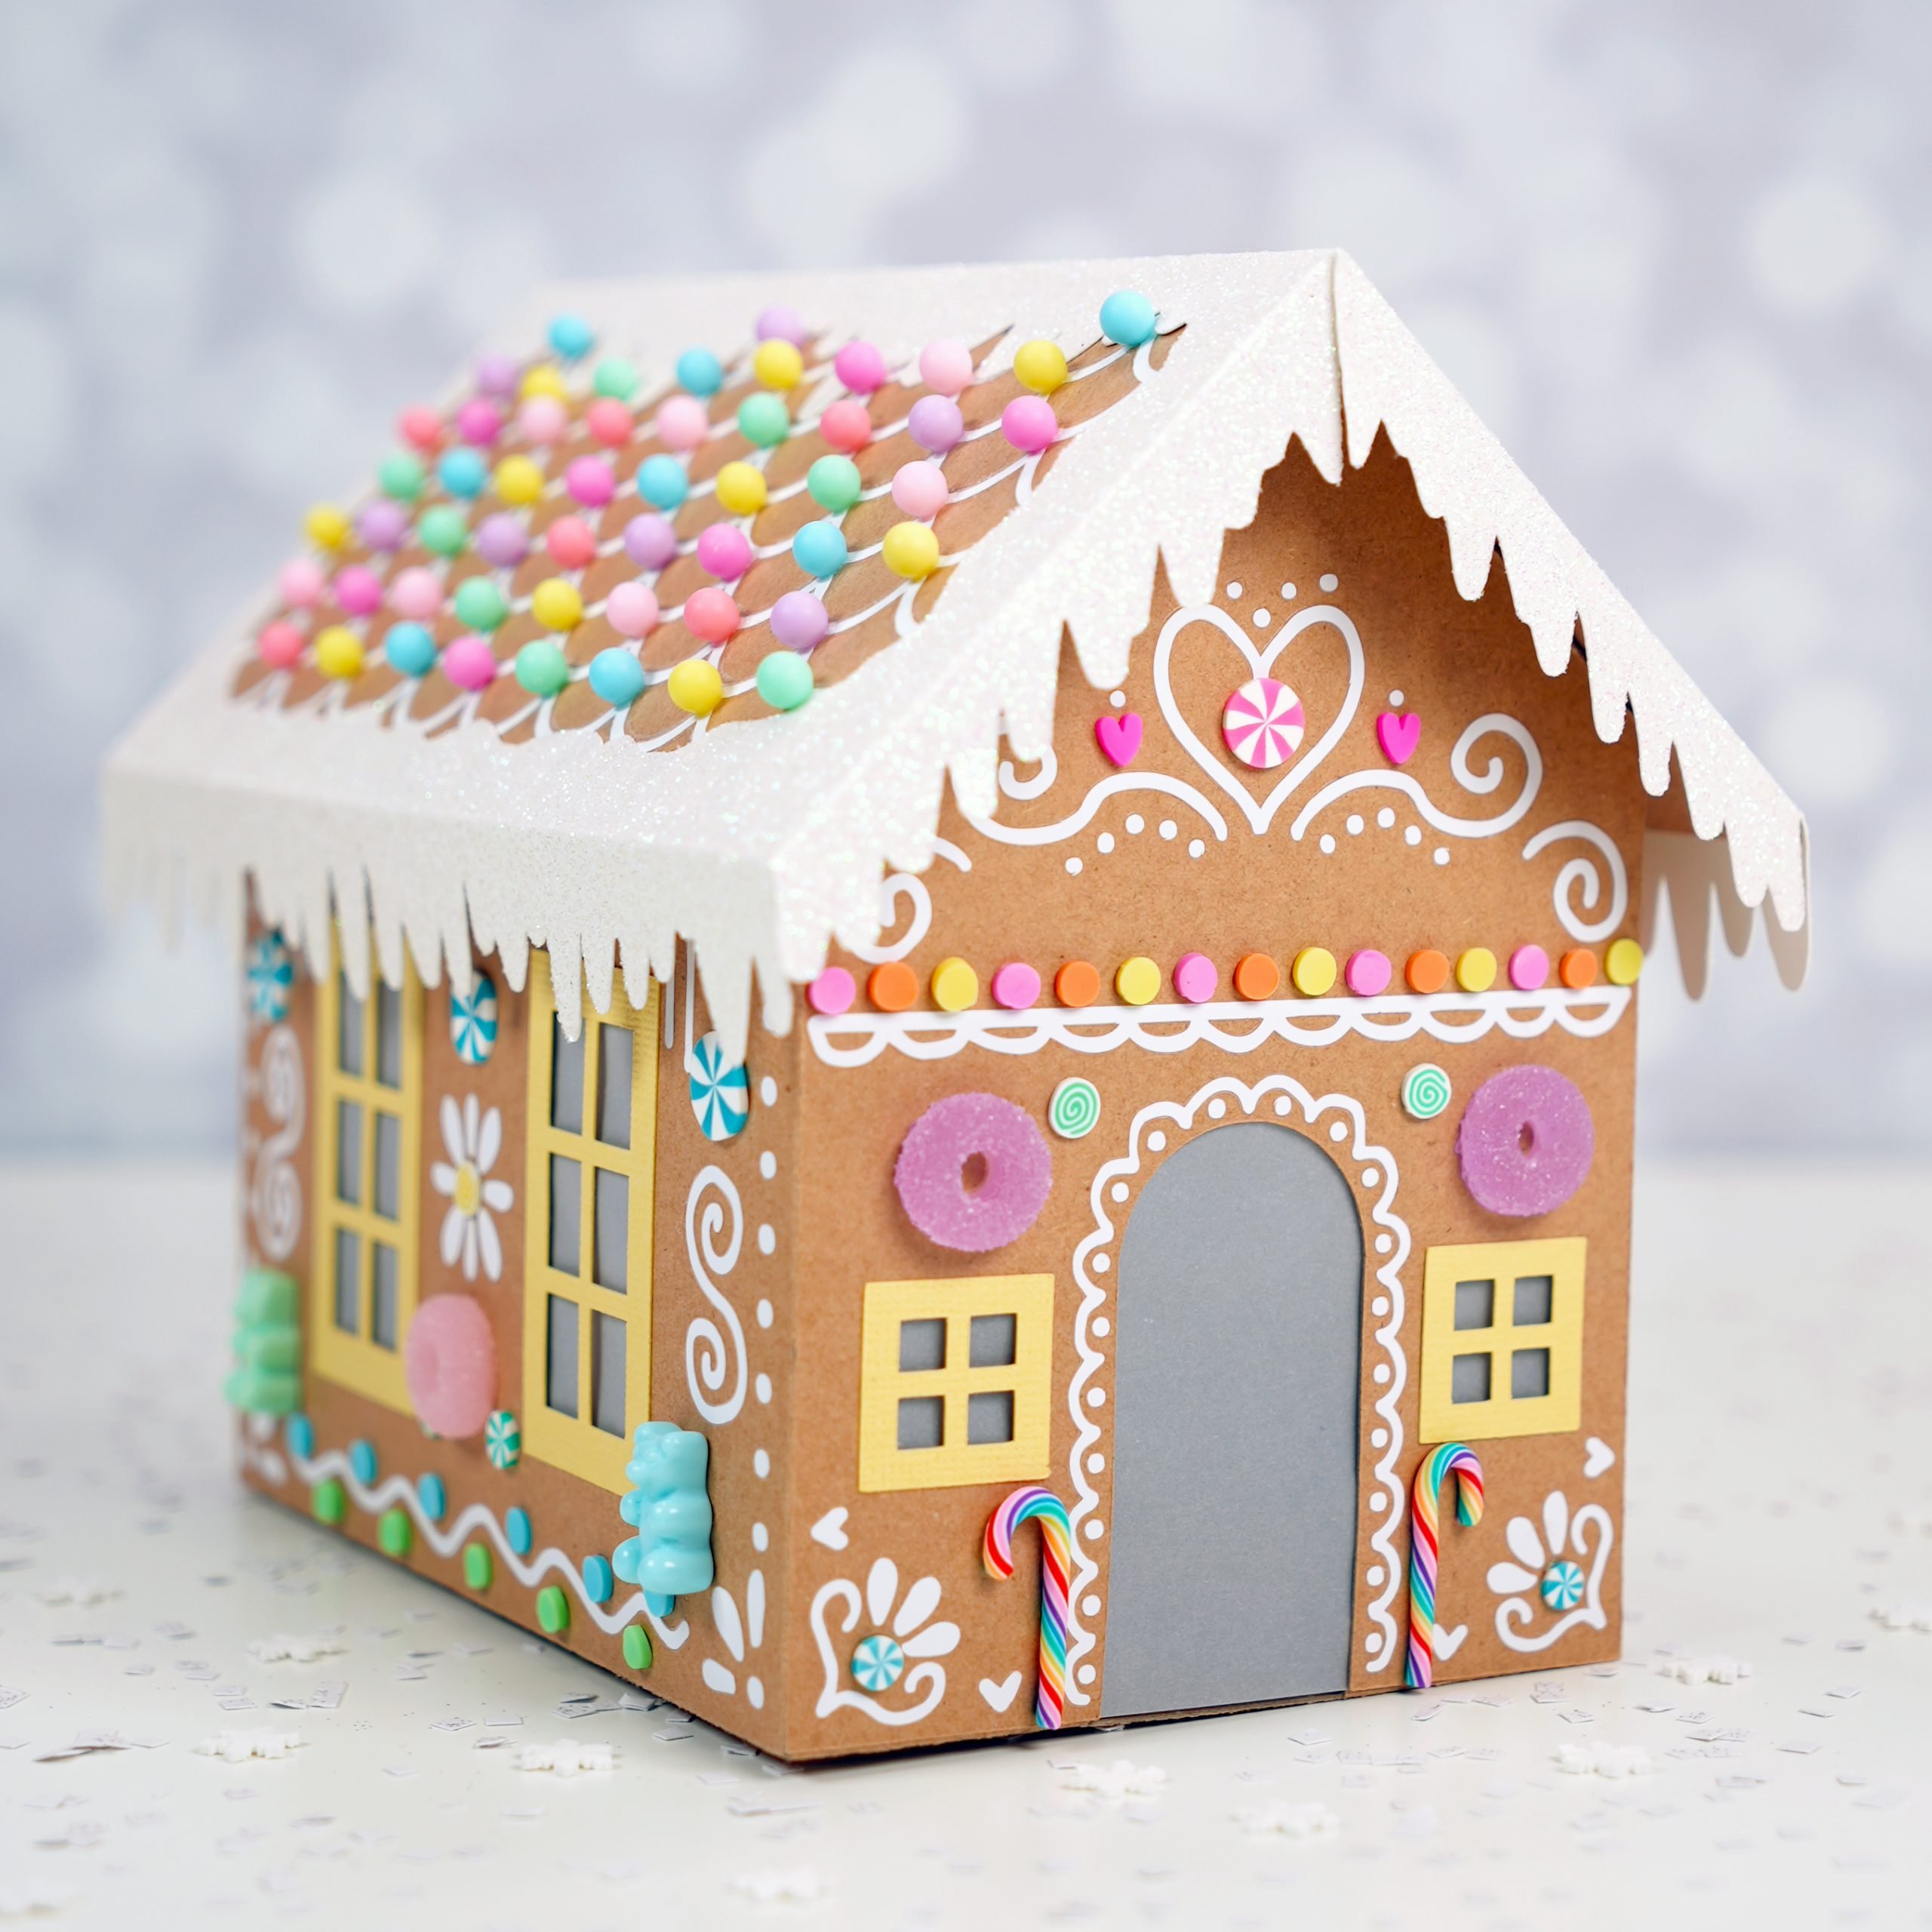
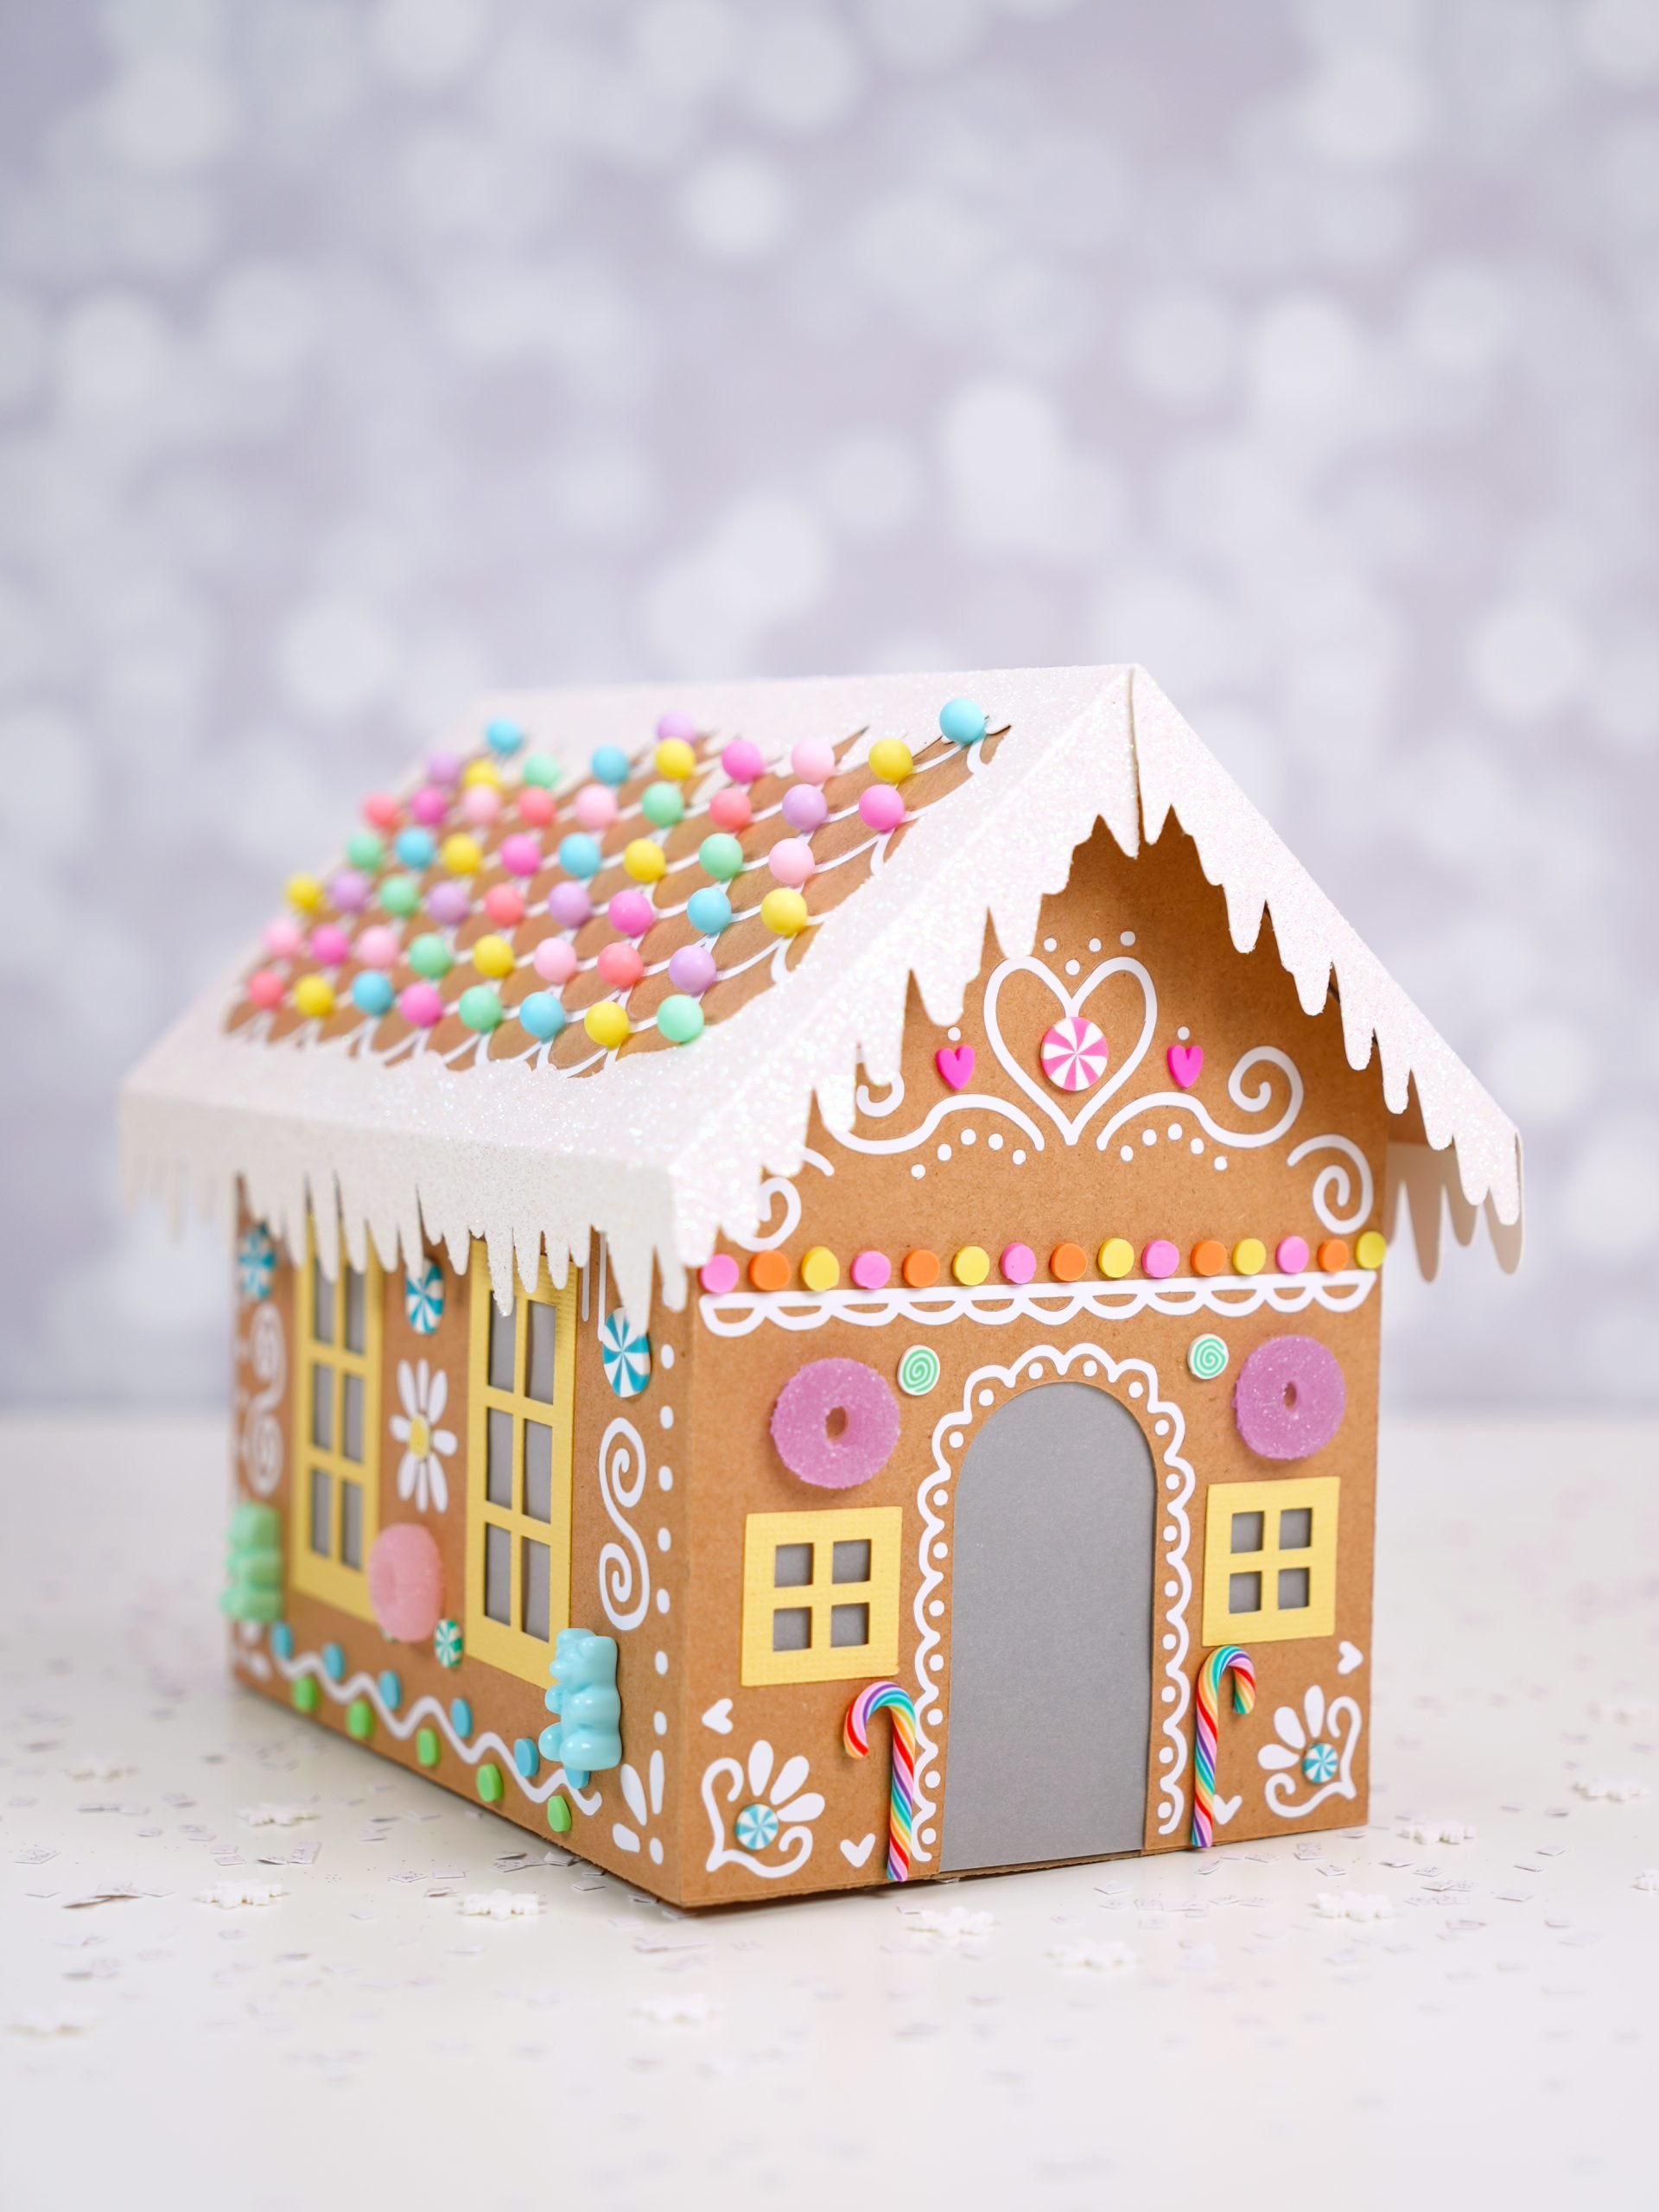
Pastel Faux Candy
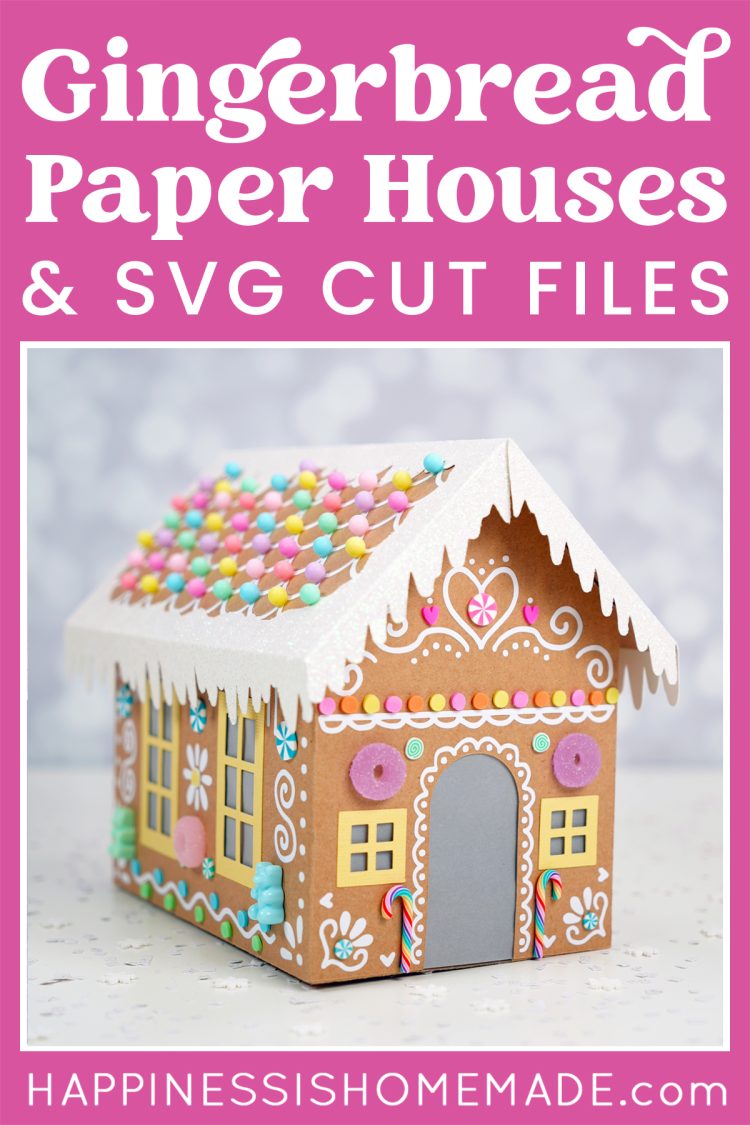
These candy decorations are made from polymer clay and resin, and they are absolutely PERFECT for making your gingerbread houses look sweet enough to eat! For this house, I used a pastel color palette, but you could use any color scheme that matches your holiday decorating theme!
These peppermint candy pieces, gum drops, gummy bears, candy canes, and sprinkles are all from Happy Kawaii Supplies on Etsy. Those awesome gumball-like oversized sprinkles on the roof are from there, too!
Plus, you could also use other embellishments such as lace, ribbon, rick rack, pom poms, glitter…whatever you want! There are SO many different possibilities you can use to match your holiday decor!
Get the Gingerbread House SVG Files
What would your gingerbread house look like? Let me know in the comments and tag me on Instagram @heidikundin to show off what you’ve made!

Check Out These Other Christmas Craft Ideas!
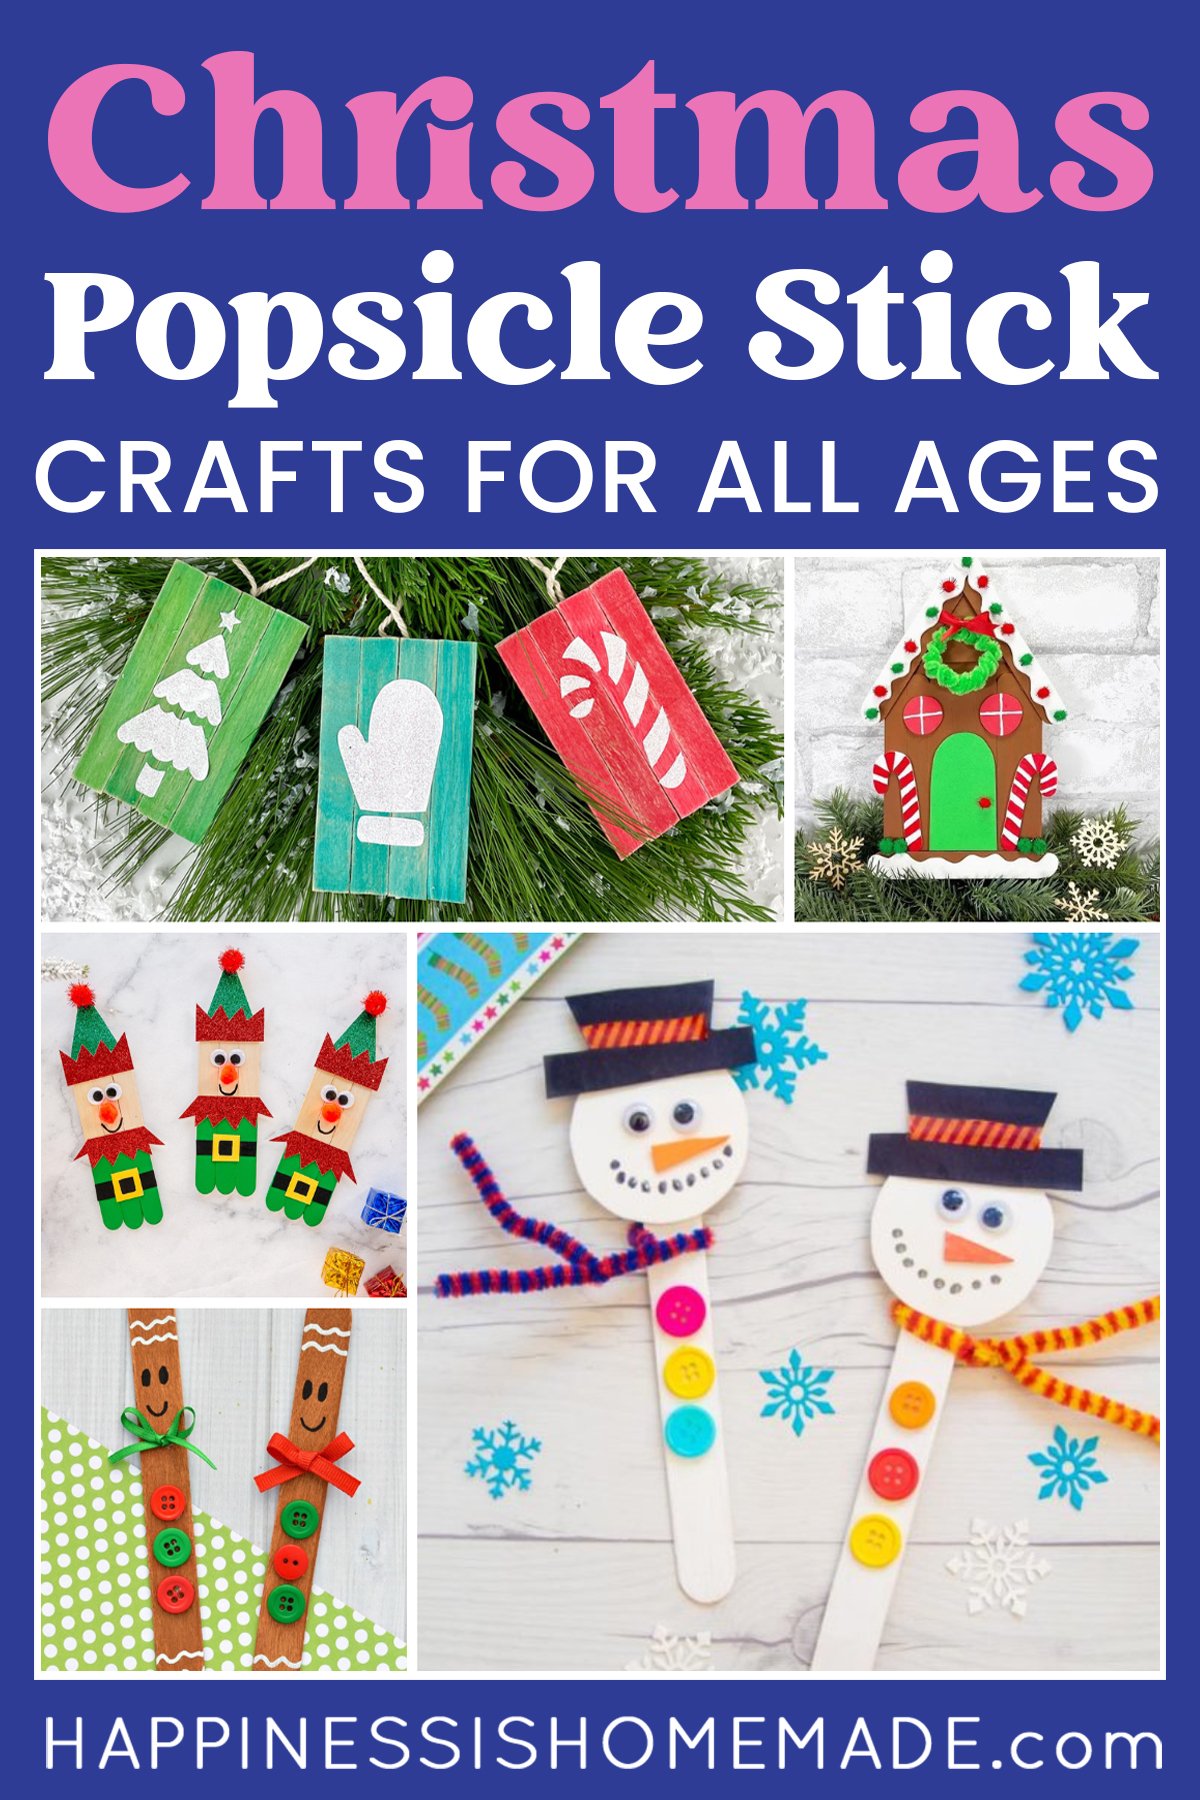
 50+ Popsicle Stick Christmas Crafts
- Cardboard Gingerbread Houses + SVG Files
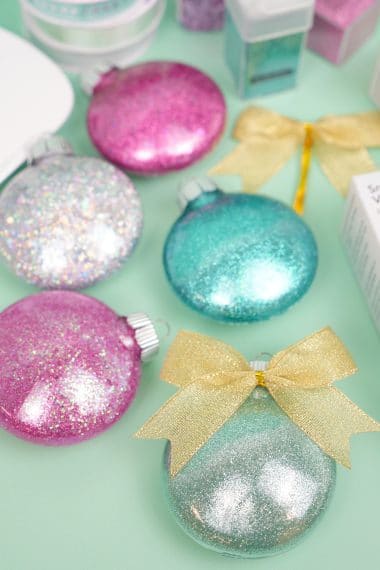
 Glitter Ornaments: Easy Christmas Craft
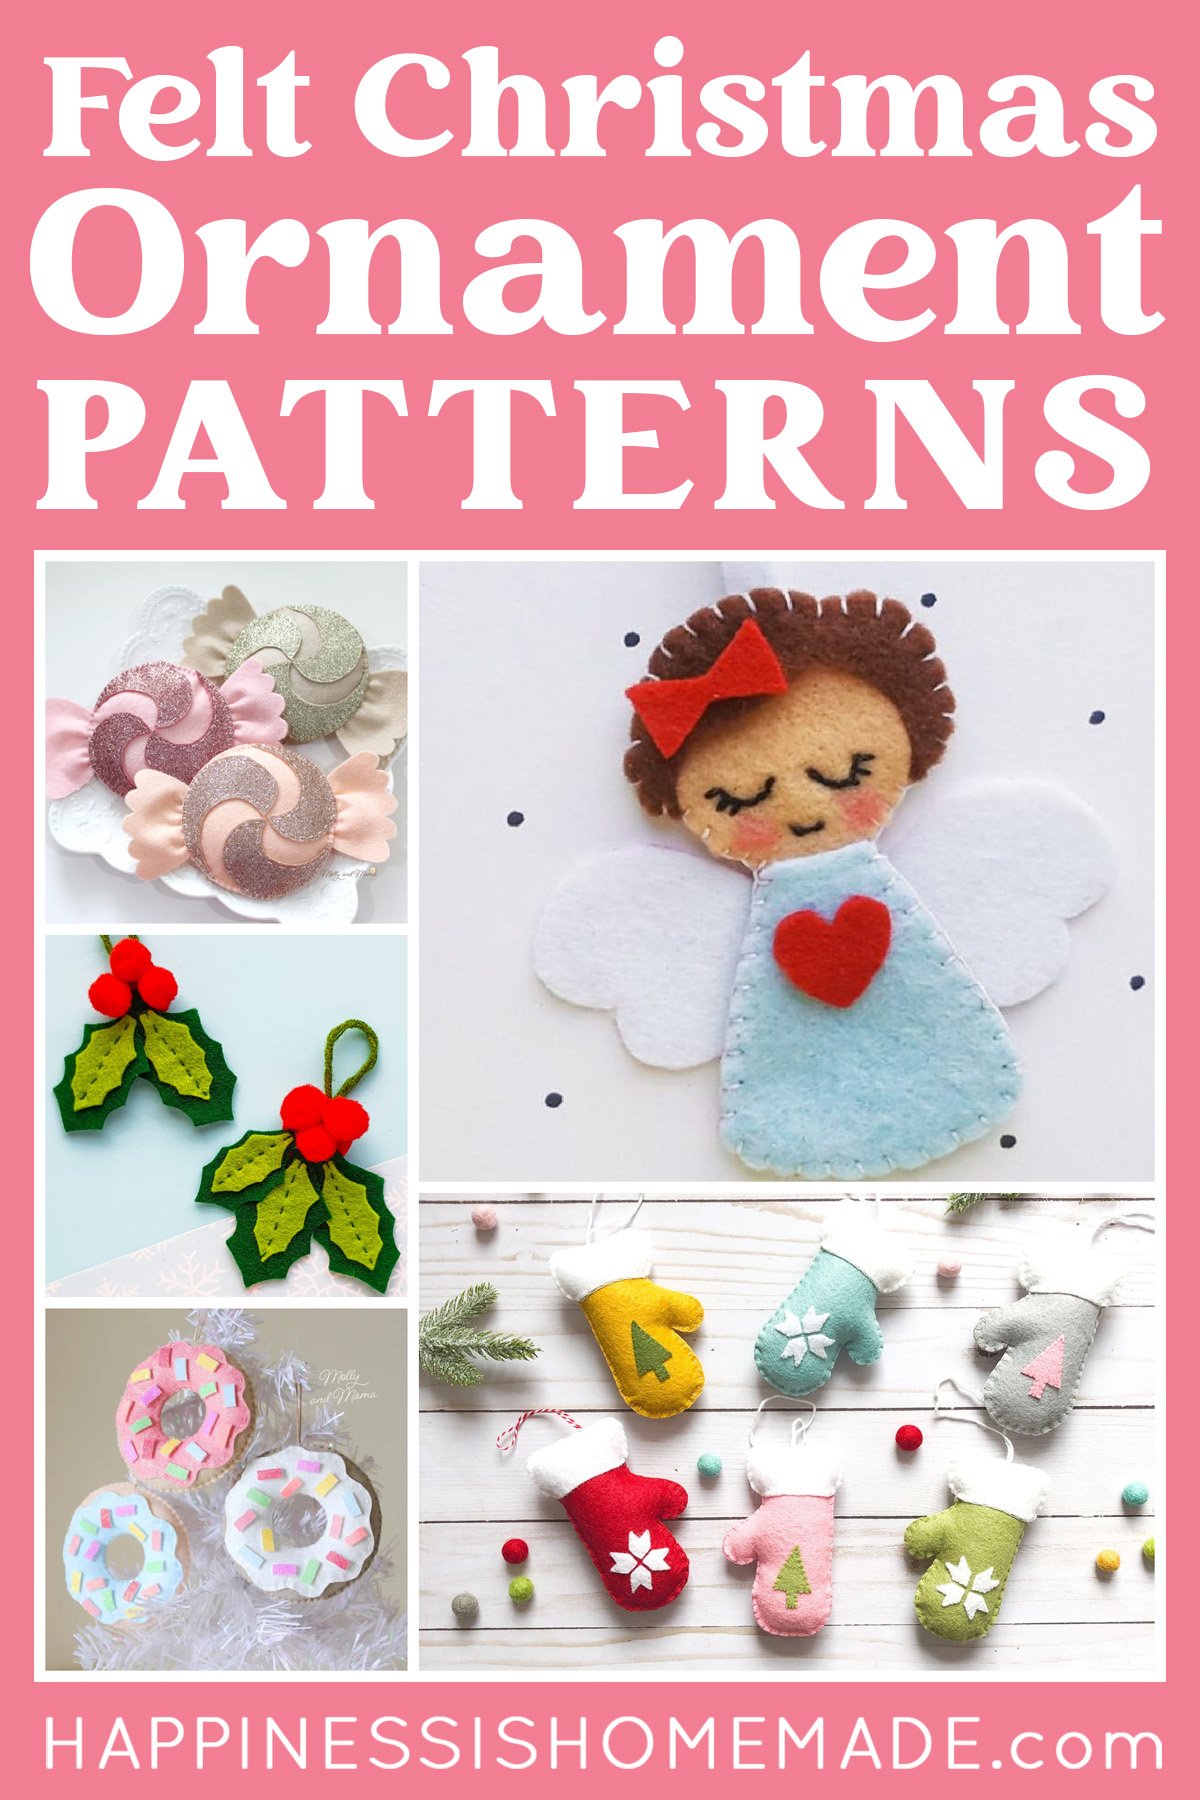
- 35+ Free Felt Christmas Ornament Patterns
- Christmas Kids Craft: Grinch Ornaments
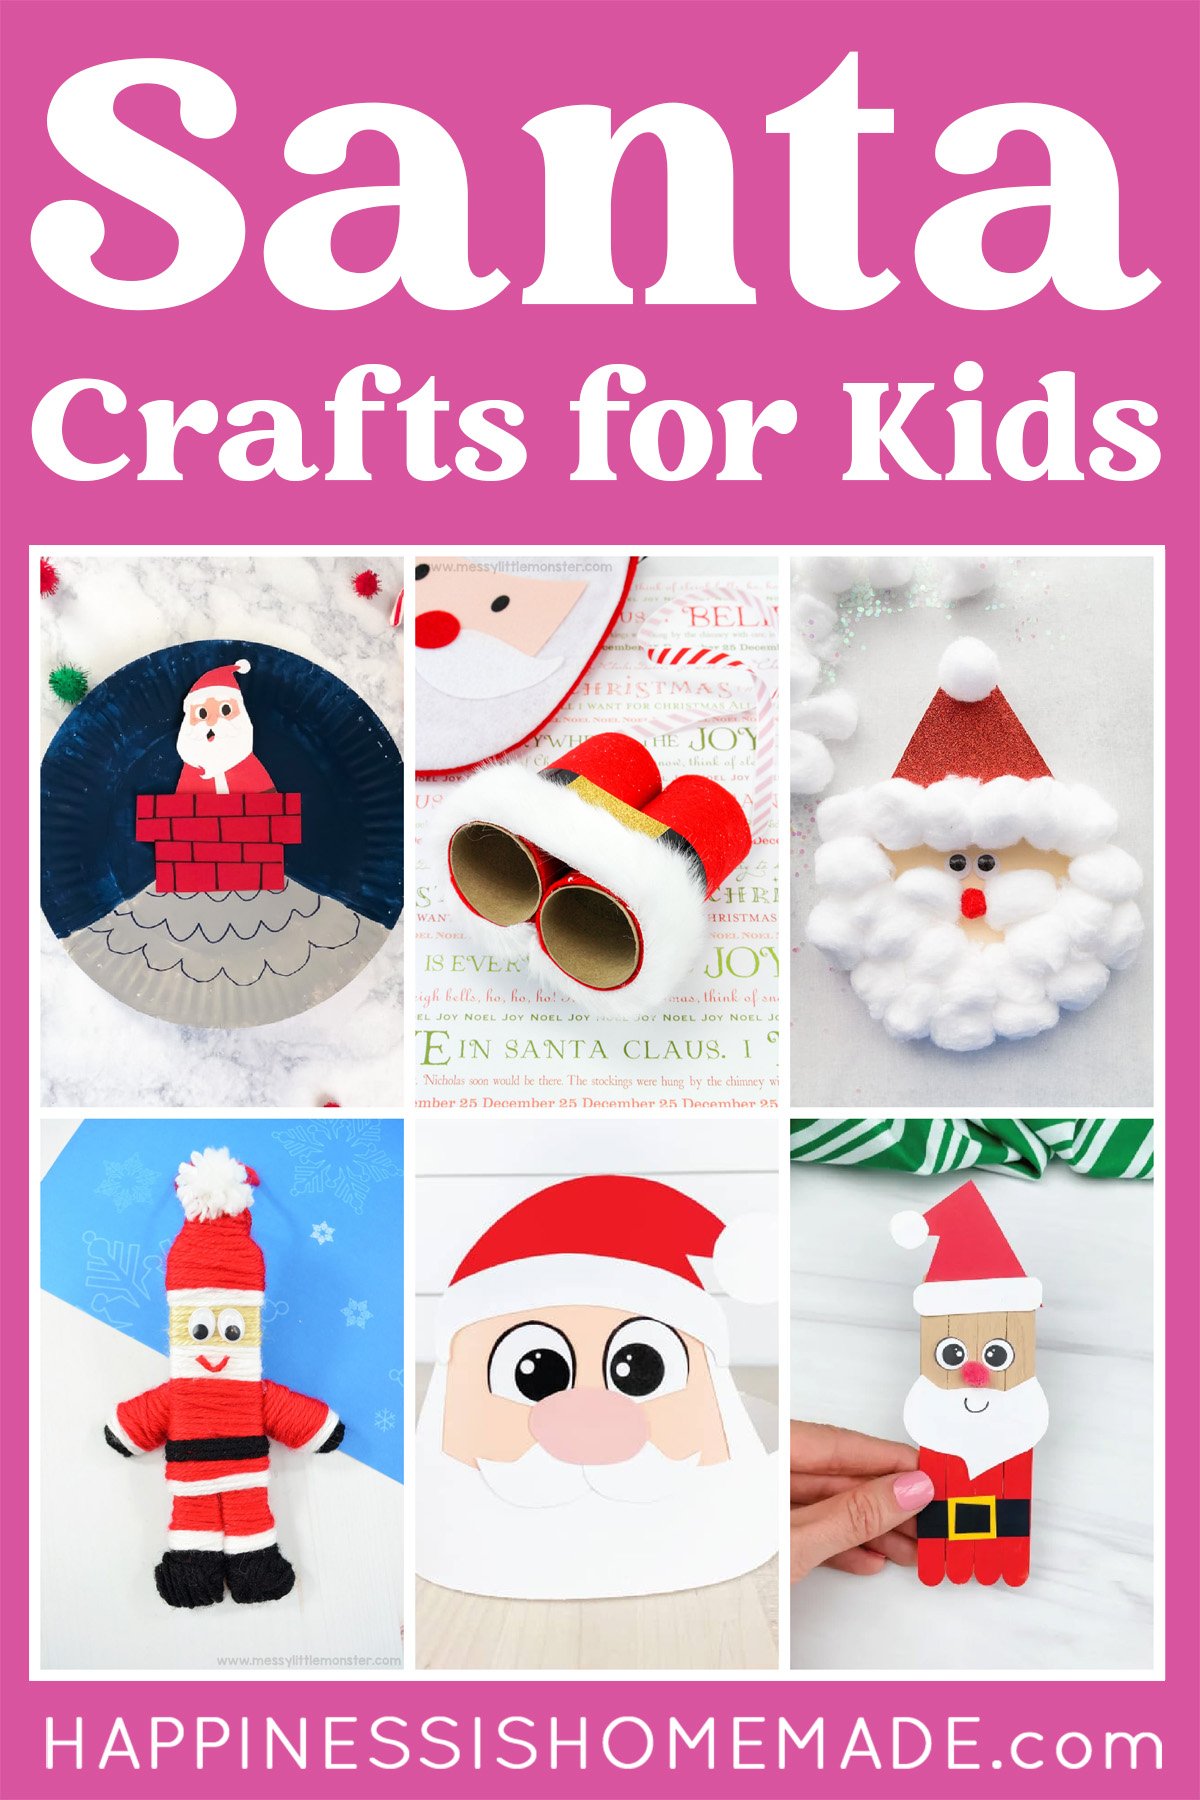
- 30+ Santa Crafts for Kids
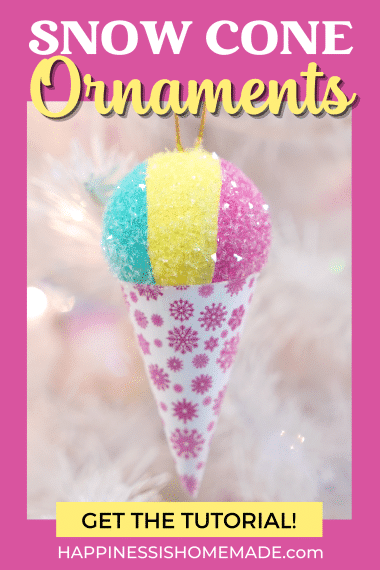
- DIY Snow Cone Ornaments
- 40+ DIY Ugly Christmas Sweater Ideas


Pin These Cardboard Houses for Later!

Heidi Kundin has captivated the hearts of millions with her colorful and inspiring approach to crafting, celebrations, and family fun. With over 15 years of experience, Happiness is Homemade has become a must-visit destination for those seeking quick and easy creative ideas and last-minute solutions. Heidi’s warm personality shines through her posts, inviting readers to join her on a creative journey that’s fun, rewarding, and achievable. Heidi is also the author of Homemade Bath Bombs & More and DIY Tie-Dye.
Hi Heidi I was wondering if your Gingerbread Houses have a free SVG or is a paid one? I’m trying to download it but CAN NOT find them on your site. Can you help me?
Hi Mari, this is a paid file in our shop. You can find it here – https://shop.happinessishomemade.net/products/3d-gingerbread-house-svg – and there is also a button within the post that will allow you to purchase it as well. 🙂