Follow this easy step-by-step tutorial to learn how to upload SVG files in Cricut Design Space and quickly start creating your own customized apparel, home decor, and more!
How to Upload SVG Files in Cricut Design Space
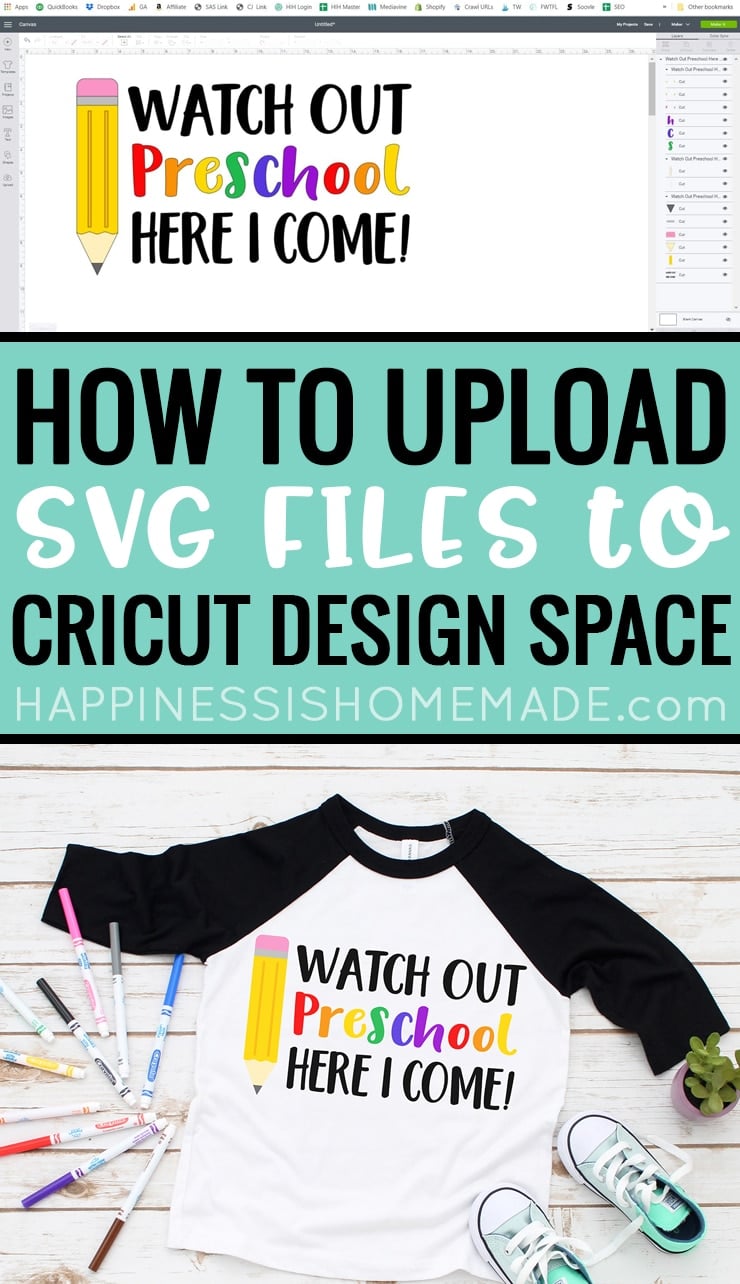
This easy step-by-step tutorial will walk you through the process of uploading an SVG file to Cricut Design Space in just a few simple steps!
If you’re new to Cricut, you may also be brand new to Cricut Design Space, but rest assured that this tutorial is TOTALLY do-able for a complete beginner! Or, maybe you have spent some time playing around with the software and the images in Cricut Access, and you’re ready to move on to the next level by importing your own custom SVG designs. Either way, we’re here to help walk you through the process!
But first, what is an SVG file? And where do you get them?
You may have seen graphics like the one above on Pinterest, Google, or other websites. The designs are fun (and often FREE!), but what in the world IS an SVG file?
SVG stands for Scalable Vector Graphic, and they’re the preferred file format for working with Cricut Design Space and other cutting machine/design software. There are lots of technical reasons why SVGs are the best file type for the job, but simply put, they are the easiest for your machine (and YOU!) to work with (in the least amount of steps!).
Many bloggers offer free SVG files on their websites, and you can find hundreds of thousands of additional inexpensive SVG files in online shops across many platforms. Some of my favorite places to find SVGs are:
- Happiness is Homemade SVG Library
- Happiness is Homemade Shop
- Hey, Let’s Make Stuff
- That’s What Che Said (scroll to the bottom of the page for the SVG collection!)
- Pineapple Paper Co.
- My Designs in the Chaos (check out the FREEBIE page plus lots of files in the shop!)
- Etsy (a recent search showed over 685k SVG files available on Etsy – WOW!)
- Creative Market (check out their bundle deals for MAJOR savings!)
- Design Bundles
Note: Most SVG files are generally downloaded as a ZIP file and will need to be unzipped and extracted before you can use them in Cricut Design Space. If you are trying to download a ZIP file to your iPhone or iPad, please follow these instructions.
Make sure to save the SVG file to a folder that you can easily find again later! I recommend creating a folder specifically for your SVG files because once you start using them, you’re never going to stop!
How to Upload SVGs to Cricut Design Space
Note: There are two different ways that you can upload a file to the Cricut Design Space software – via computer desktop software or via tablet or phone app. Because the screens vary between the desktop and app version of the software, we are going to show you screenshots from both versions, and you can choose to follow the tutorial that is appropriate for your platform.
How to Upload an SVG File in Cricut Design Space Software (on computer)
Note: for this tutorial, we are using our Free Heartbreaker SVG file, available here!
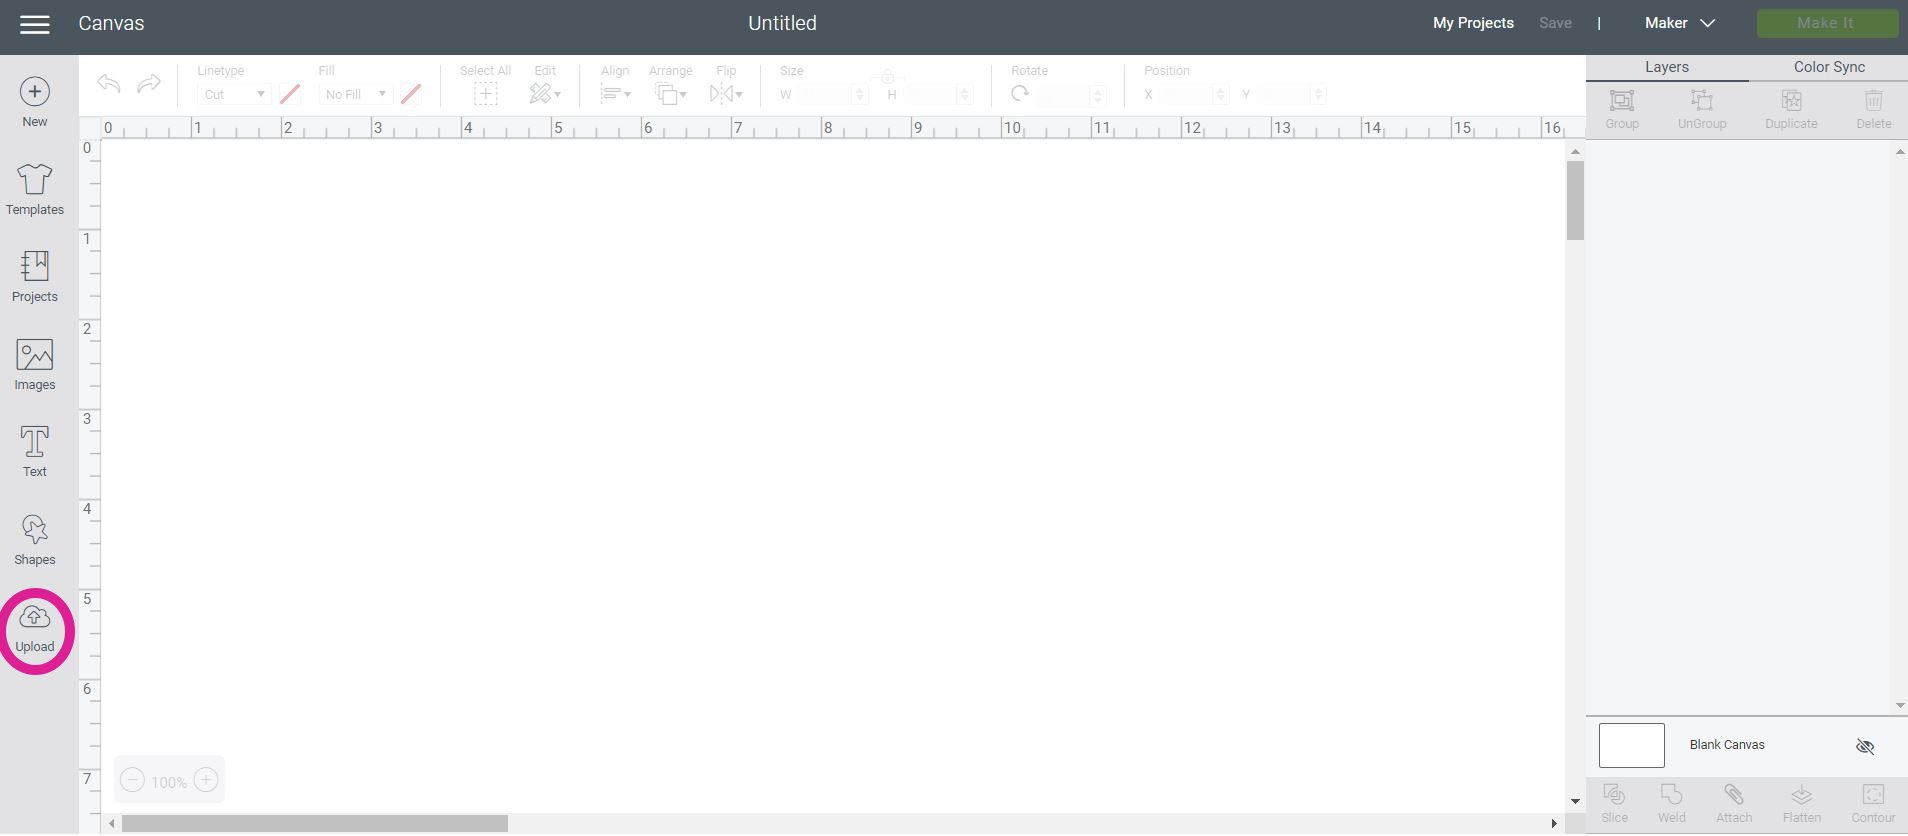
First, open the Cricut Design Space software on your computer (you may need to create an account and download the software if this is your first time using it). In the lower left-hand corner of the screen, you will see an “Upload” icon. Click on the Upload icon to begin the process of uploading an SVG file.
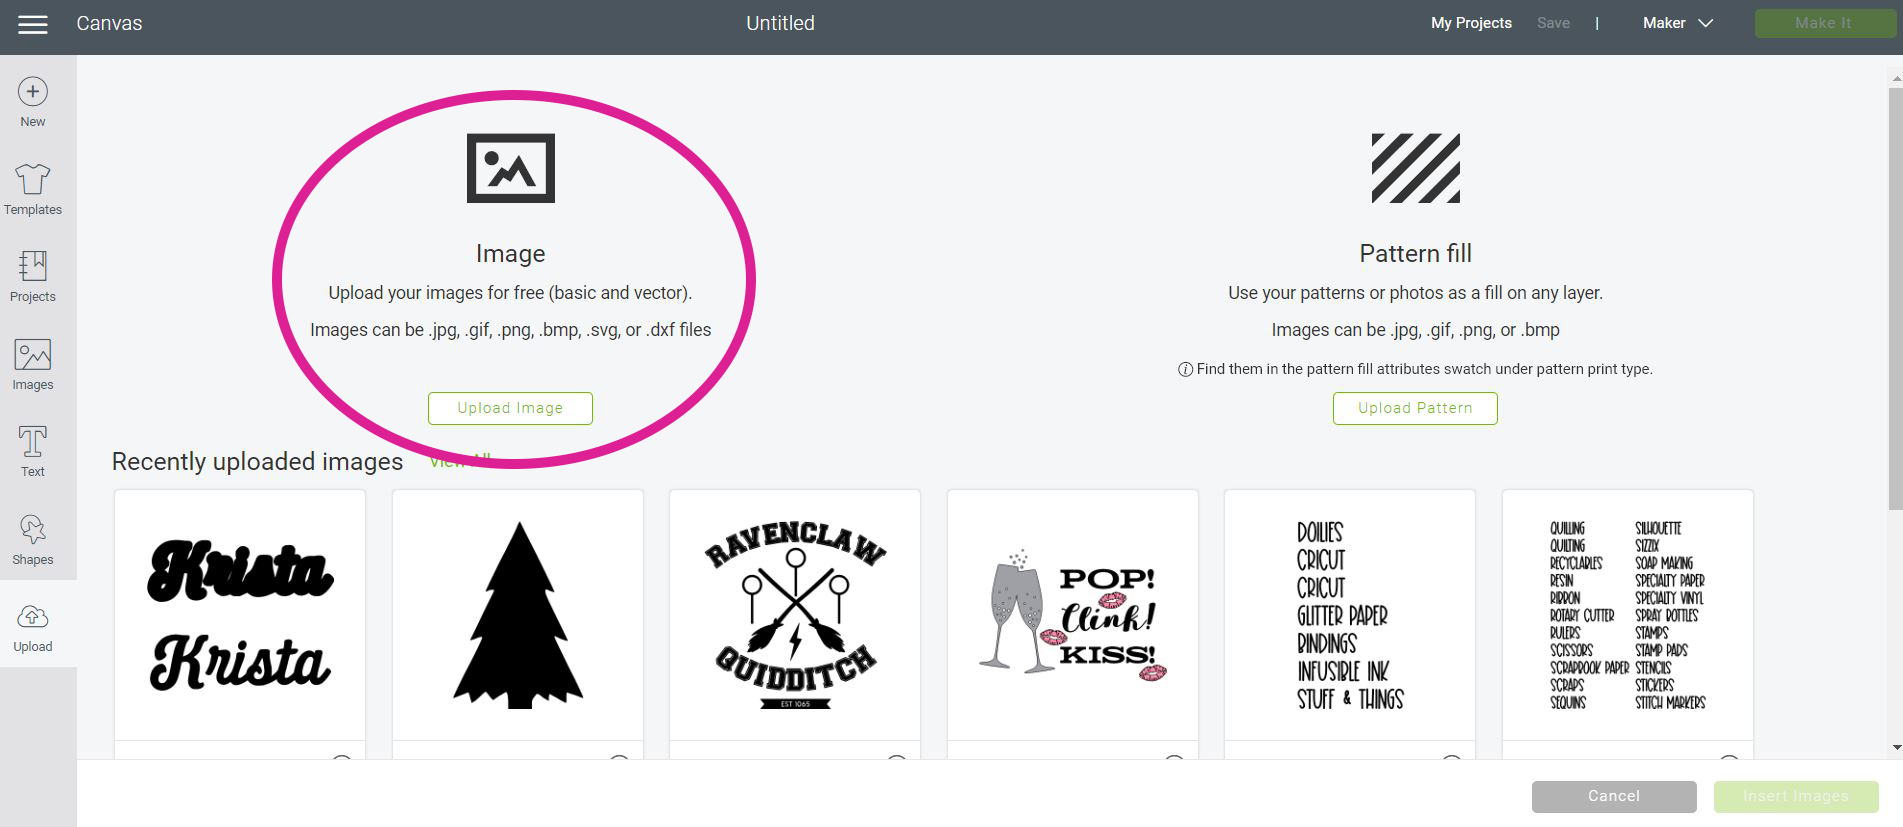
A new screen will appear which displays your most recently uploaded images. Click on the “Upload Image” button in the top left-center of the screen to upload a new file.
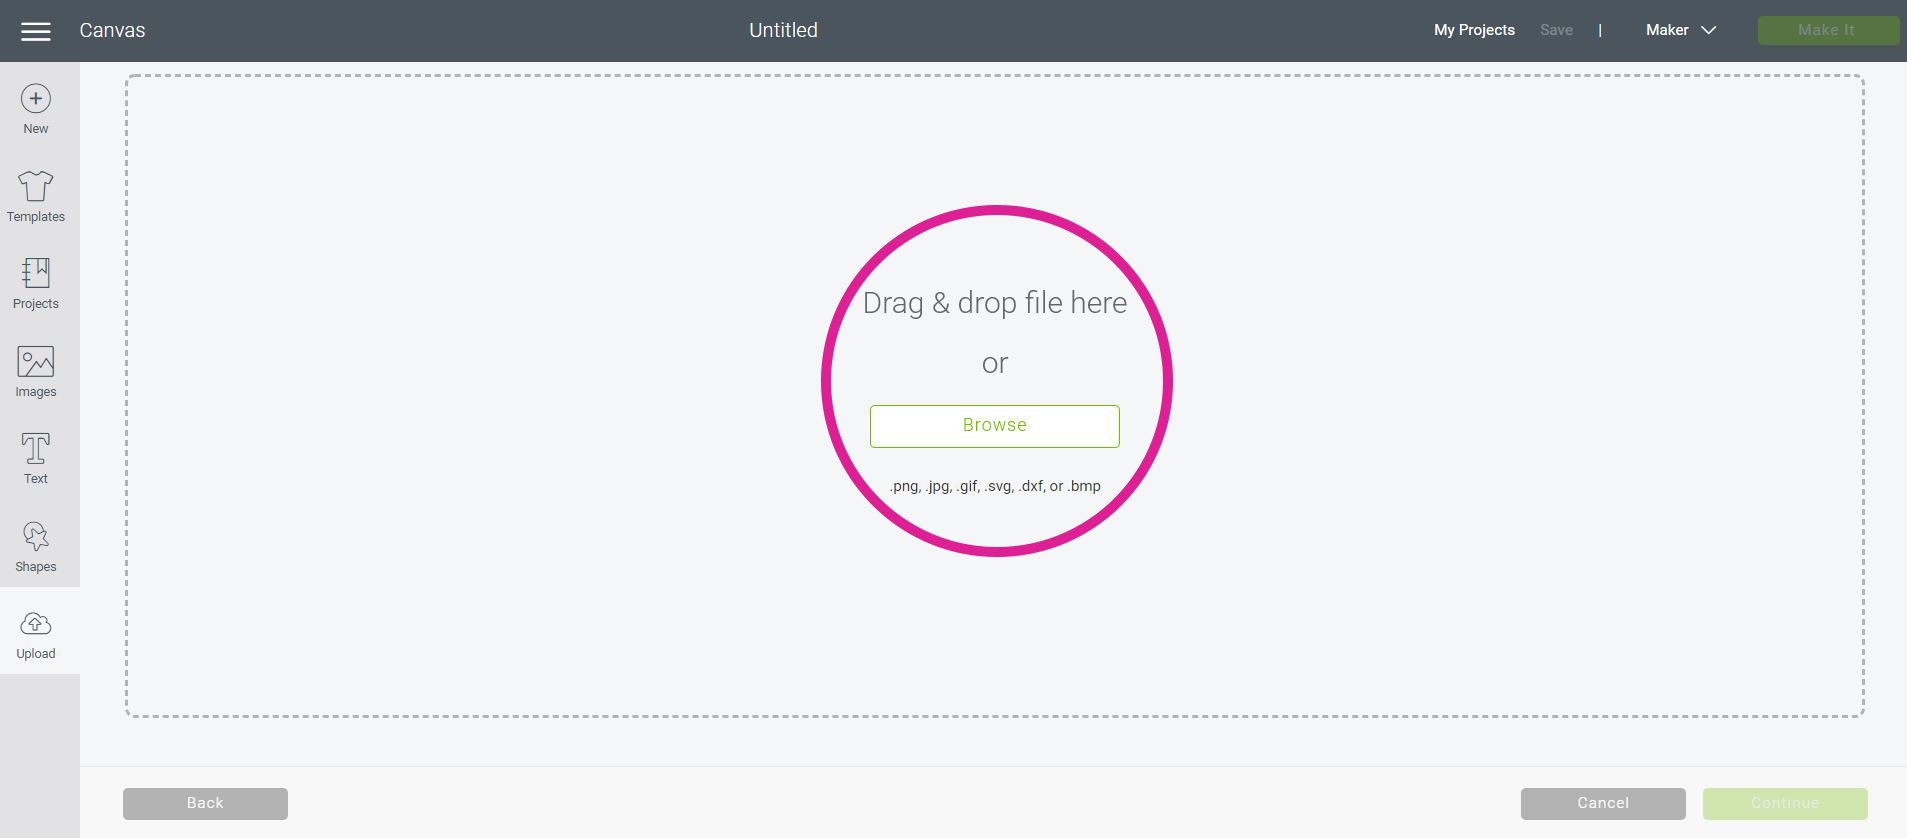
Click “Browse” to select the file from your computer or simply drag and drop the file from your computer folder in to this window.
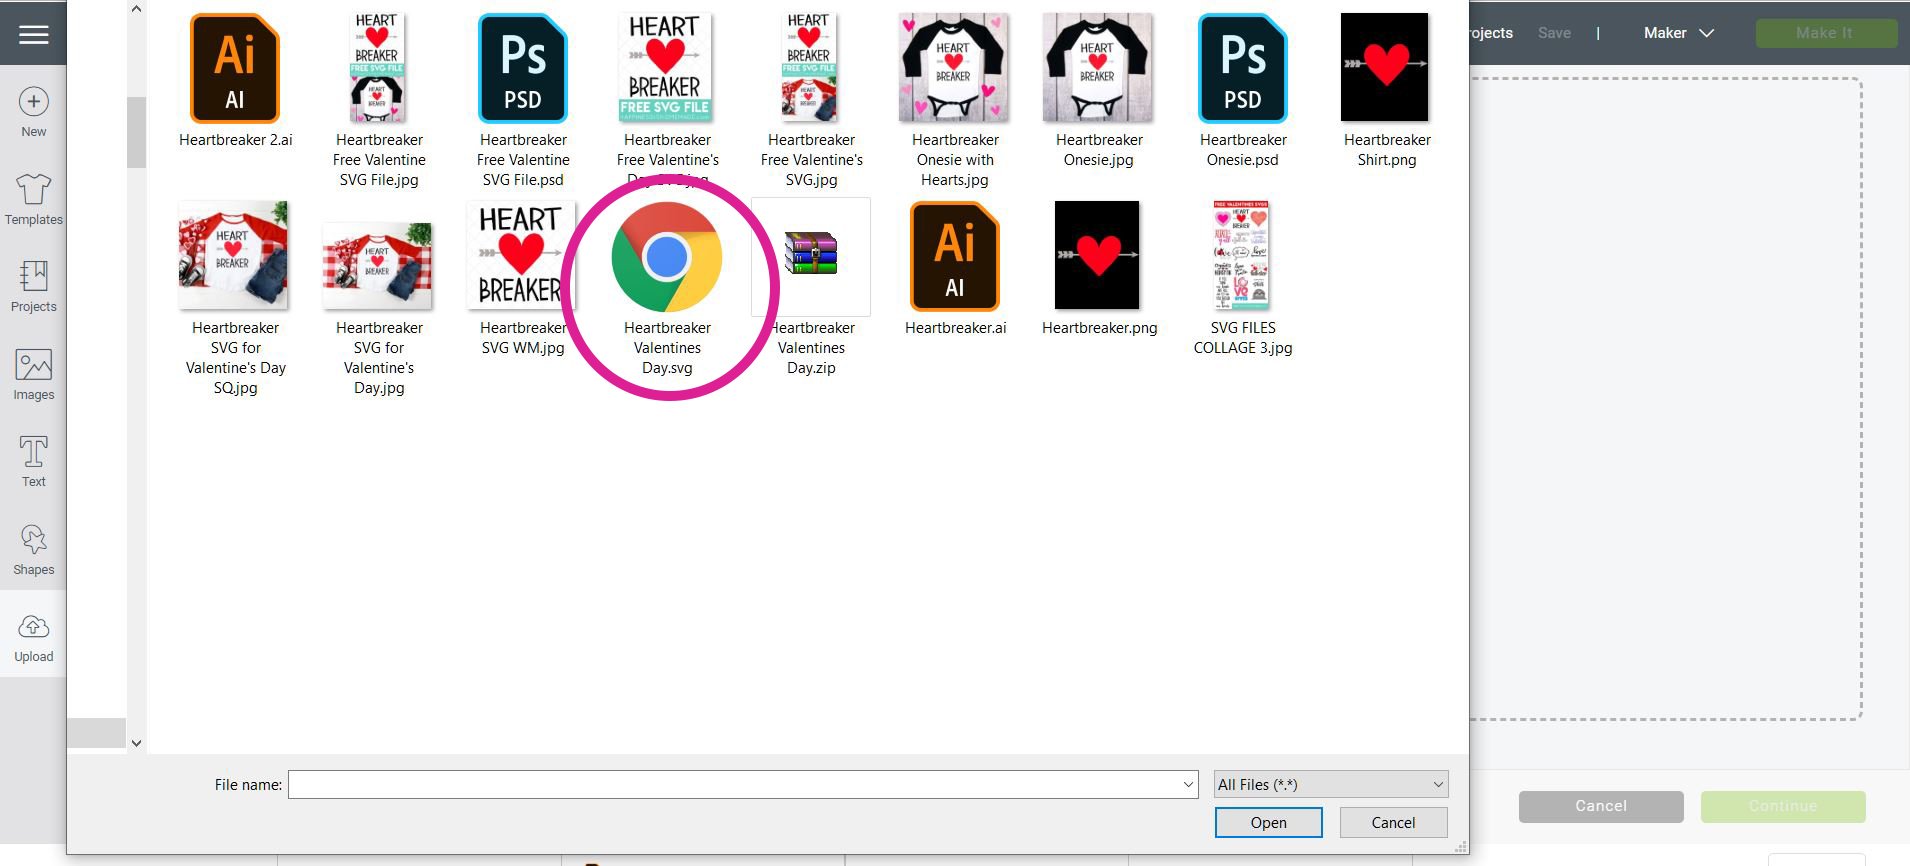
Note: in your computer’s folder, your SVG files may appear with the icon of your web browser (for example, I was using Google Chrome for these screenshots, and the Heartbreaker Valentines Day SVG file is showing up in the folder with the Chrome icon) – don’t worry, this is normal!
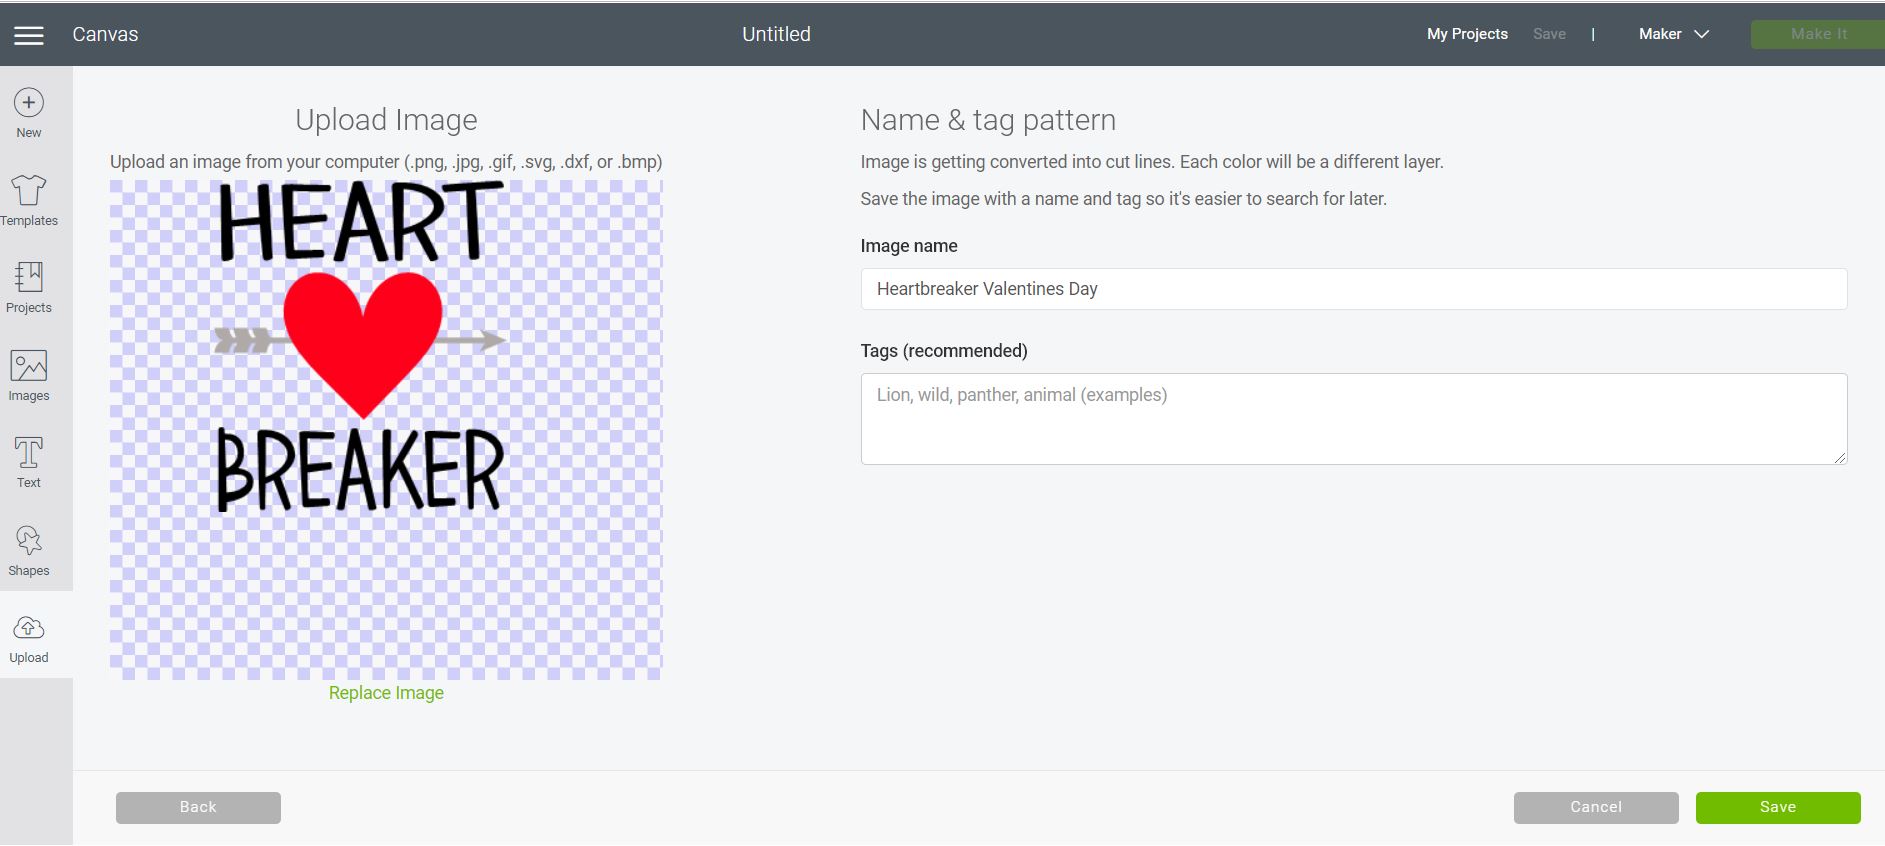
The next screen will give you a preview image of your SVG. Give your image a name and add any tags that you desire (for example, this file might be tagged with “heart, Valentine, etc.” Tags will help you filter and sort your files later once you’ve amassed a larger library of uploaded images). Click the green “Save” button in the lower right-hand corner.
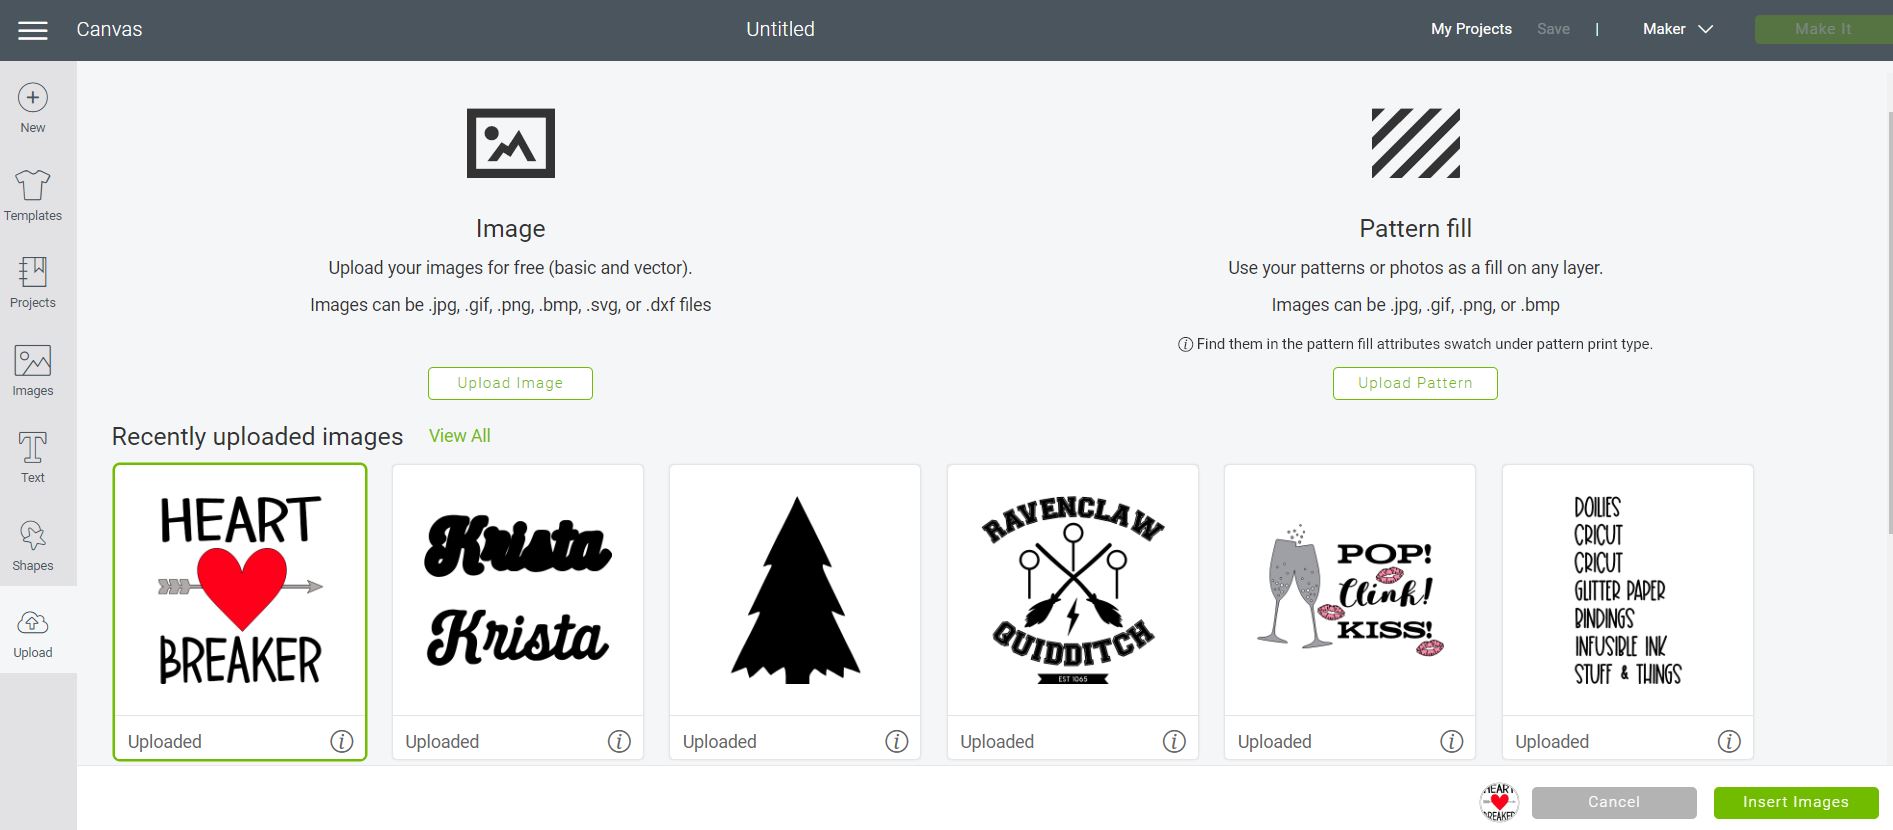
Now, your newly uploaded file will appear in the “Recently Uploaded Images” gallery. Simply select the image (a green box will appear around the image) and click on the green “Insert Images” button in the lower right-hand corner.
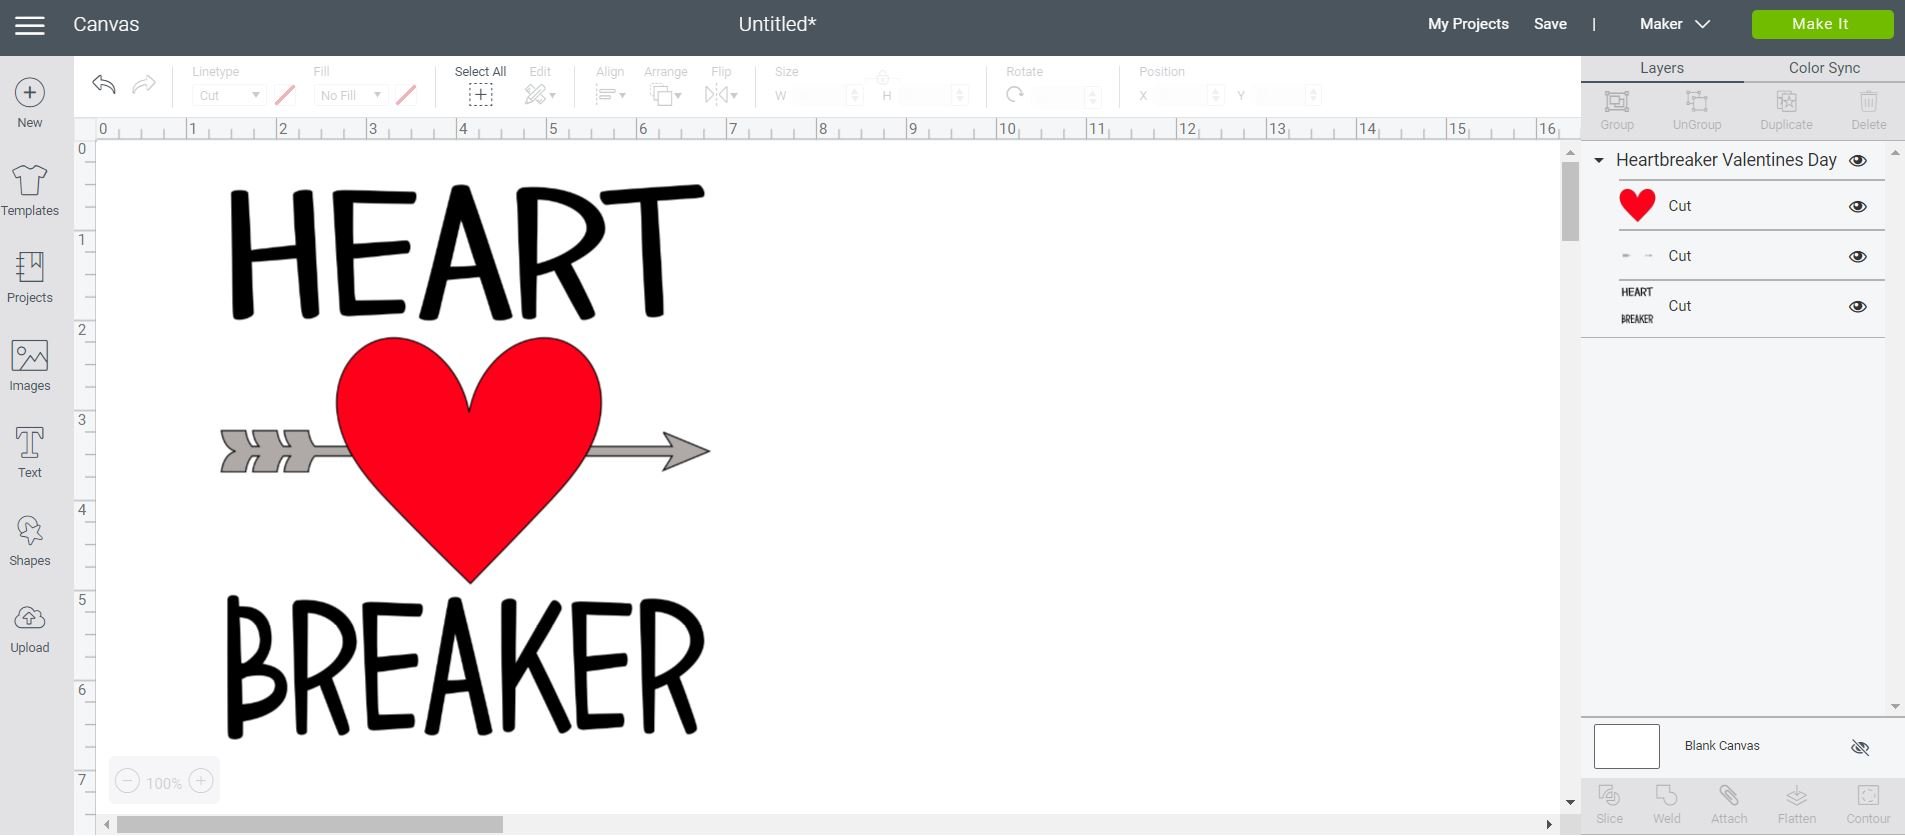
Your image in on-screen and ready to be cut! For more information on how to use this SVG file to create your own shirts, check out this tutorial!
How to Upload an SVG File in the Cricut Design Space App (for Android and iOS devices)
Note: For this tutorial we are using our free “Pop, Clink, Kiss!” New Year’s Eve SVG file, available here.
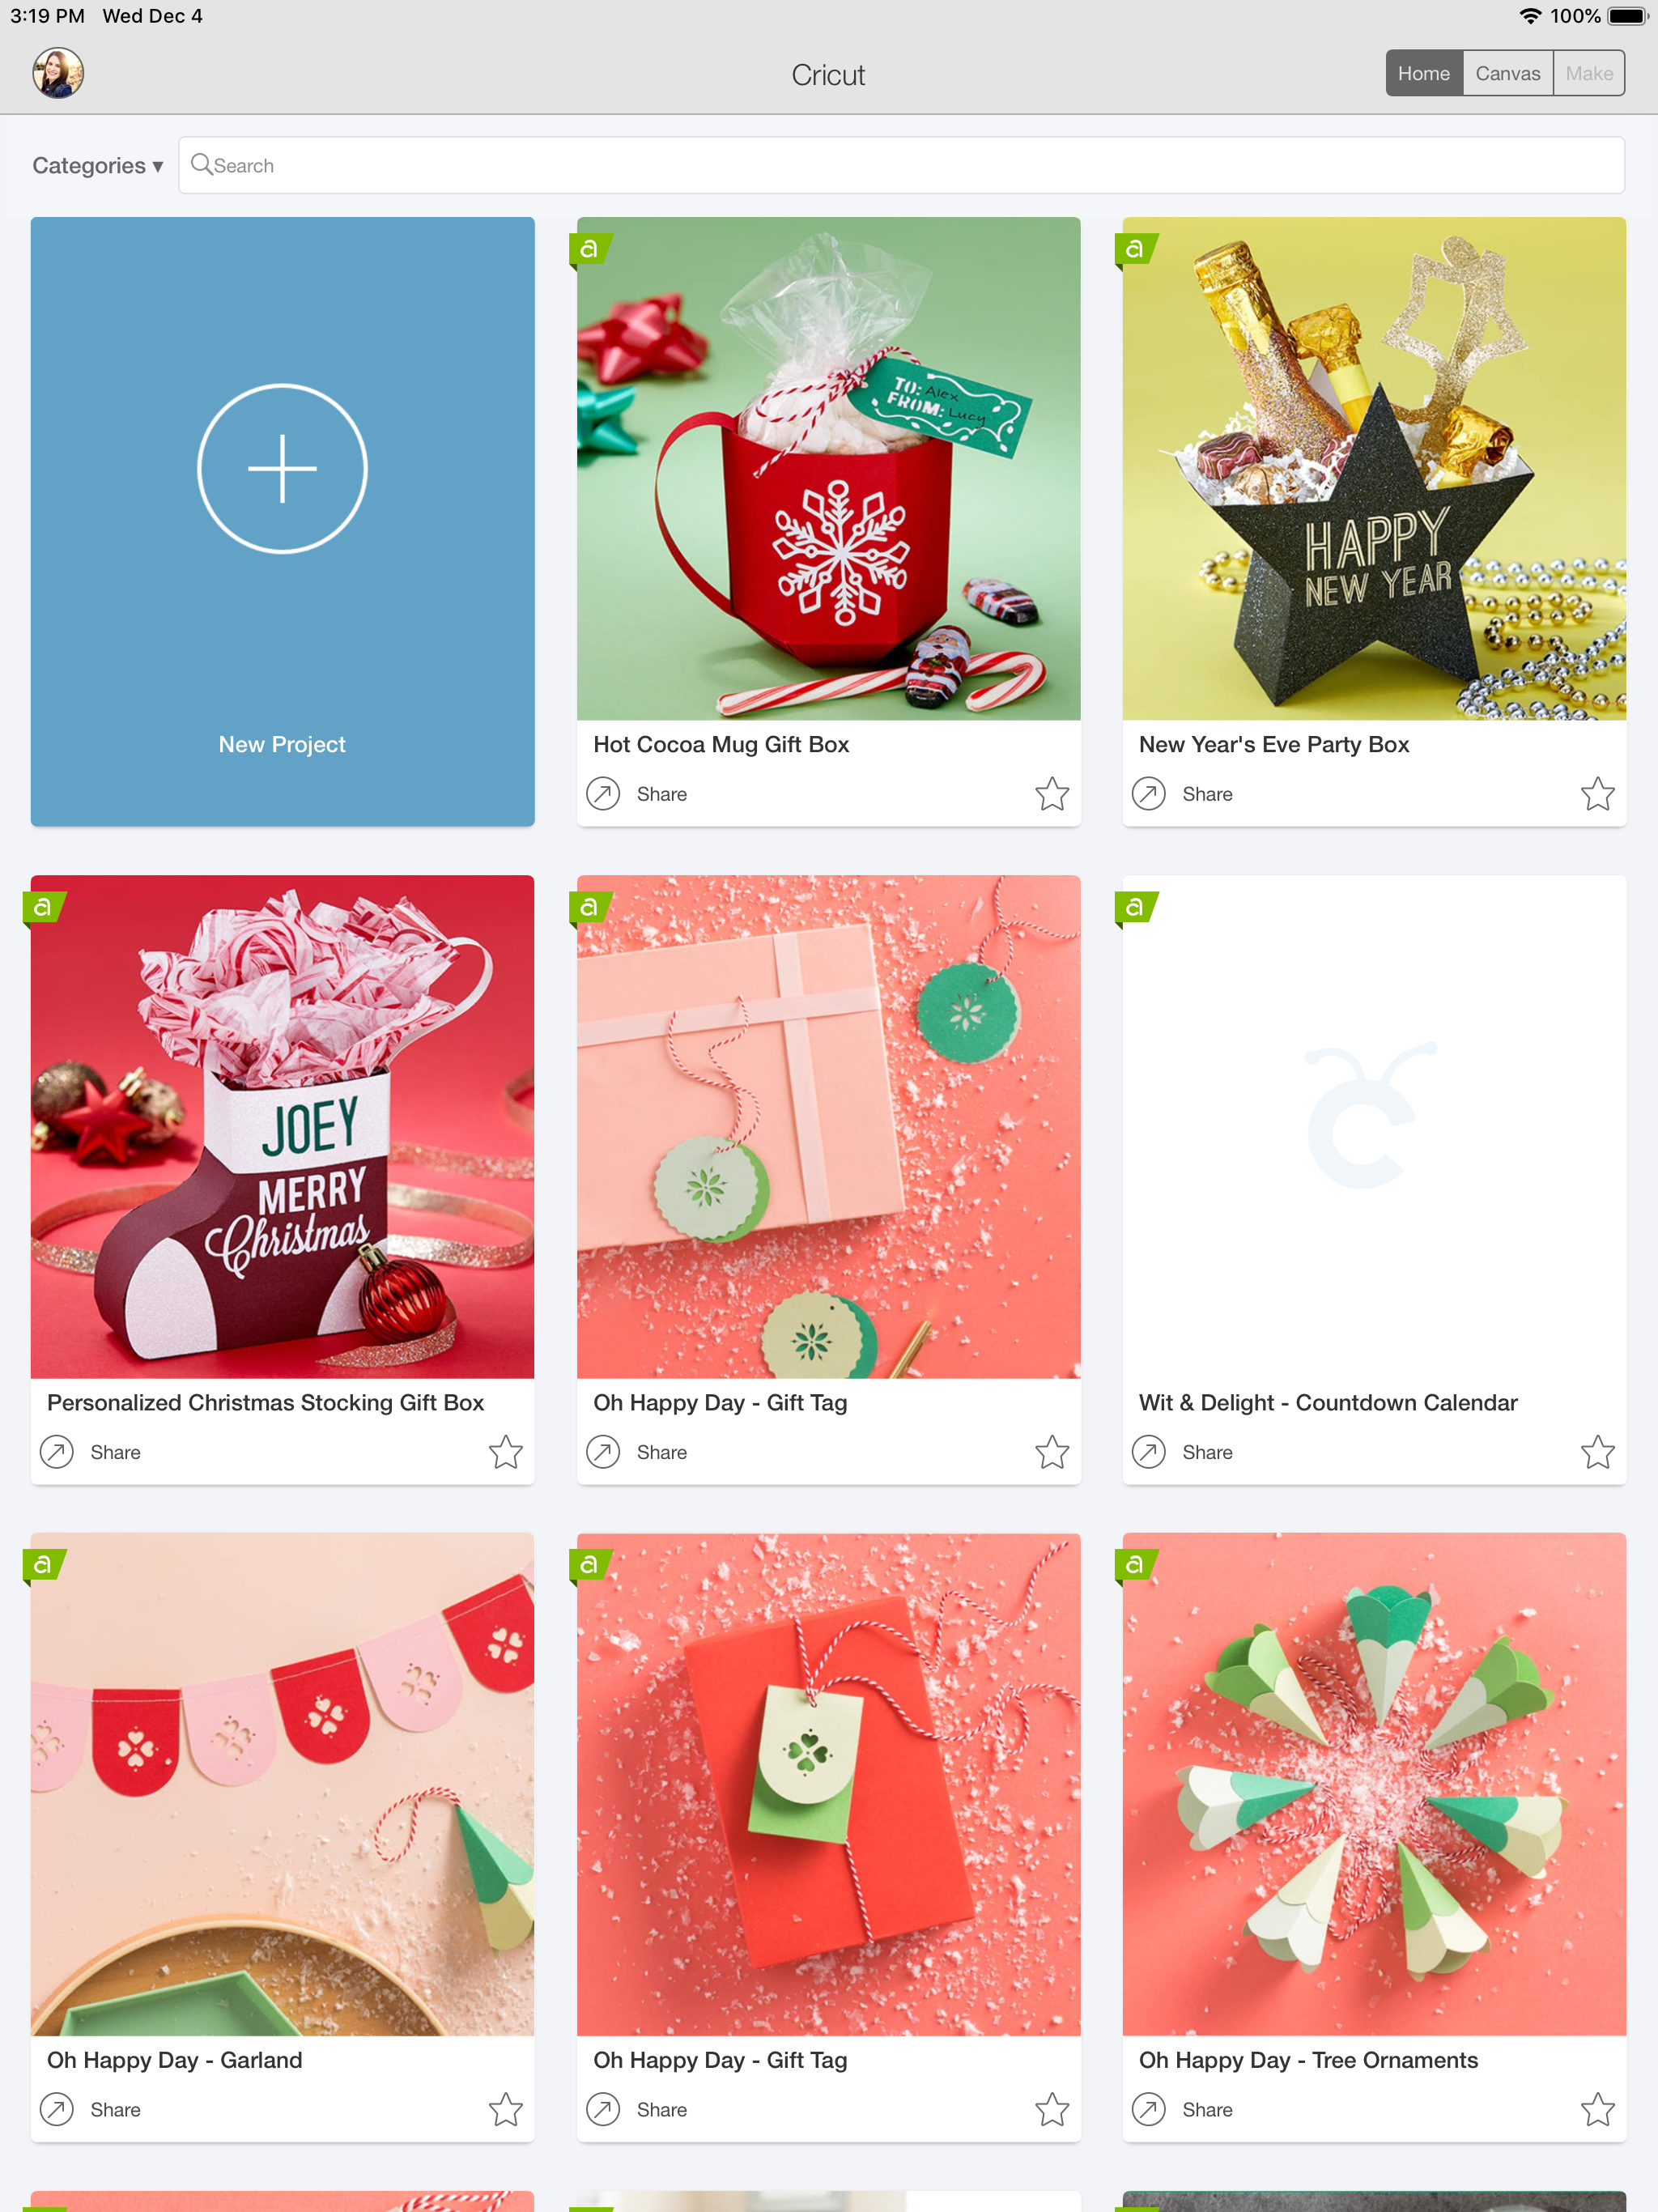
If you don’t yet have the Cricut Design Space app installed on your device, click here to download and install it and create a new user account. Open up the Cricut Design Space app, and click on the large blue “New Project” box in the upper left corner.
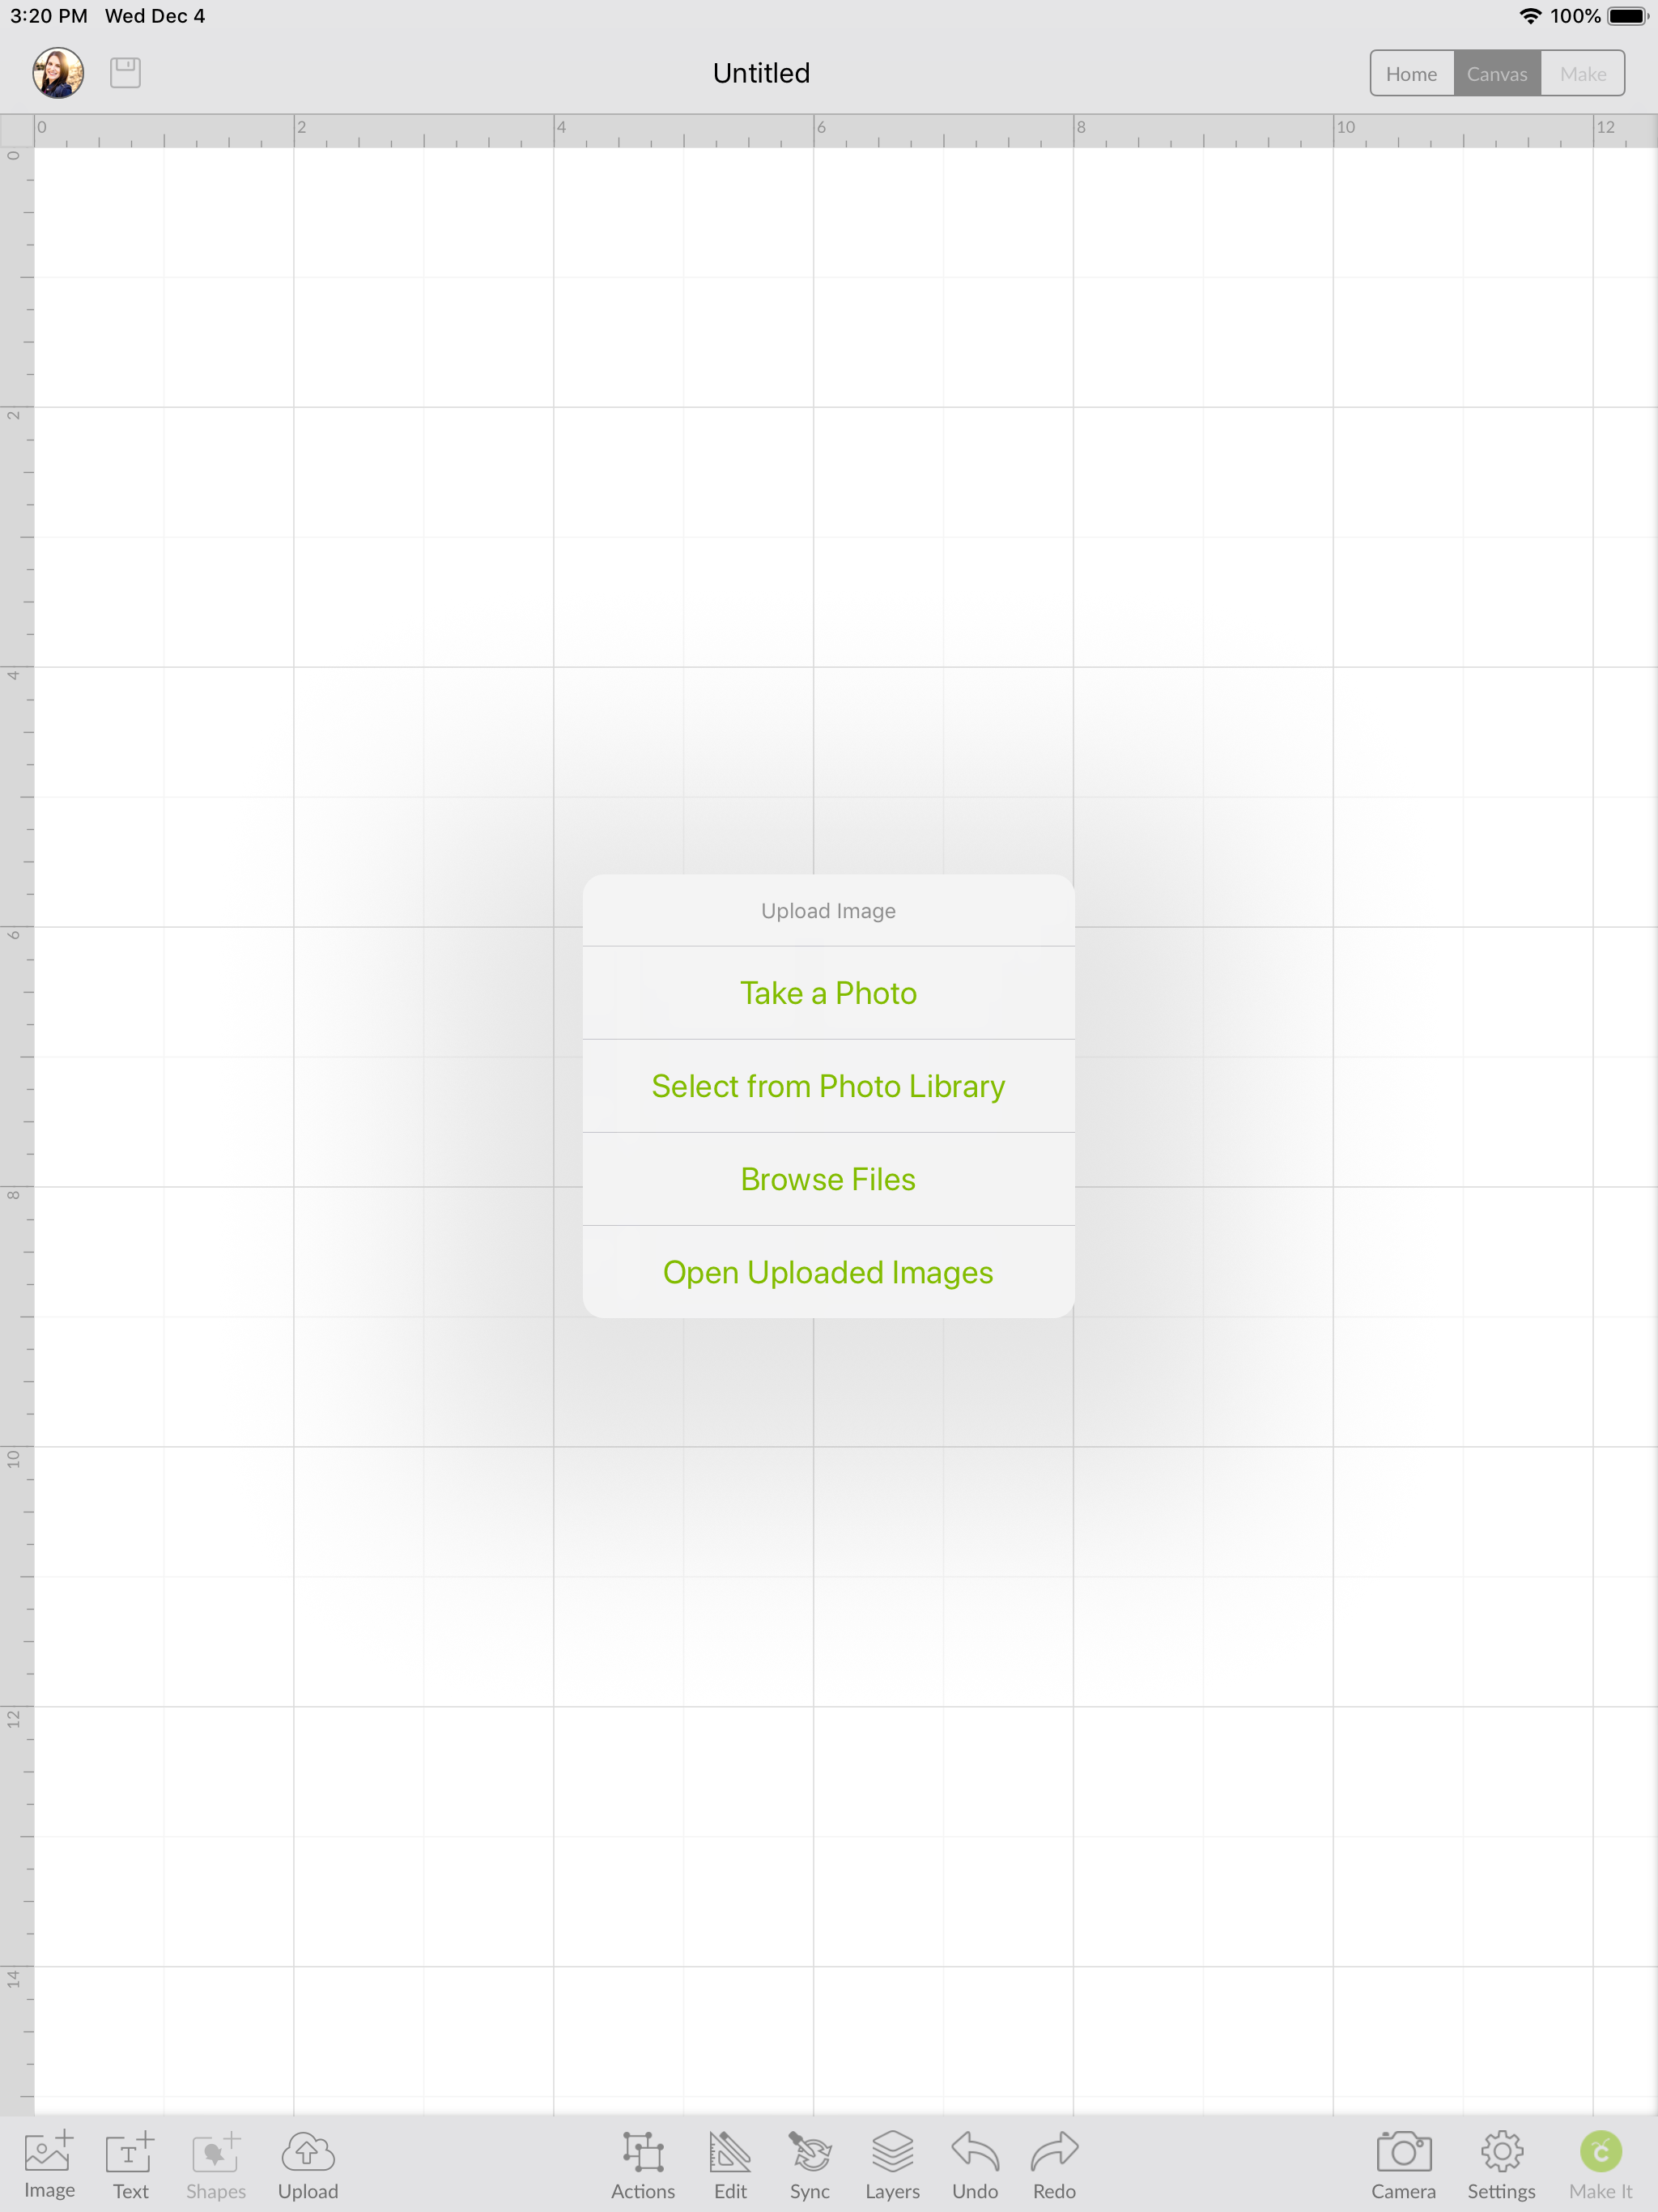
Click on the “Upload” icon in the lower left-hand side of the bottom menu bar, and the upload image menu box will pop up as shown above. Click “Browse Files” and select the SVG file from the appropriate location on your phone or tablet.
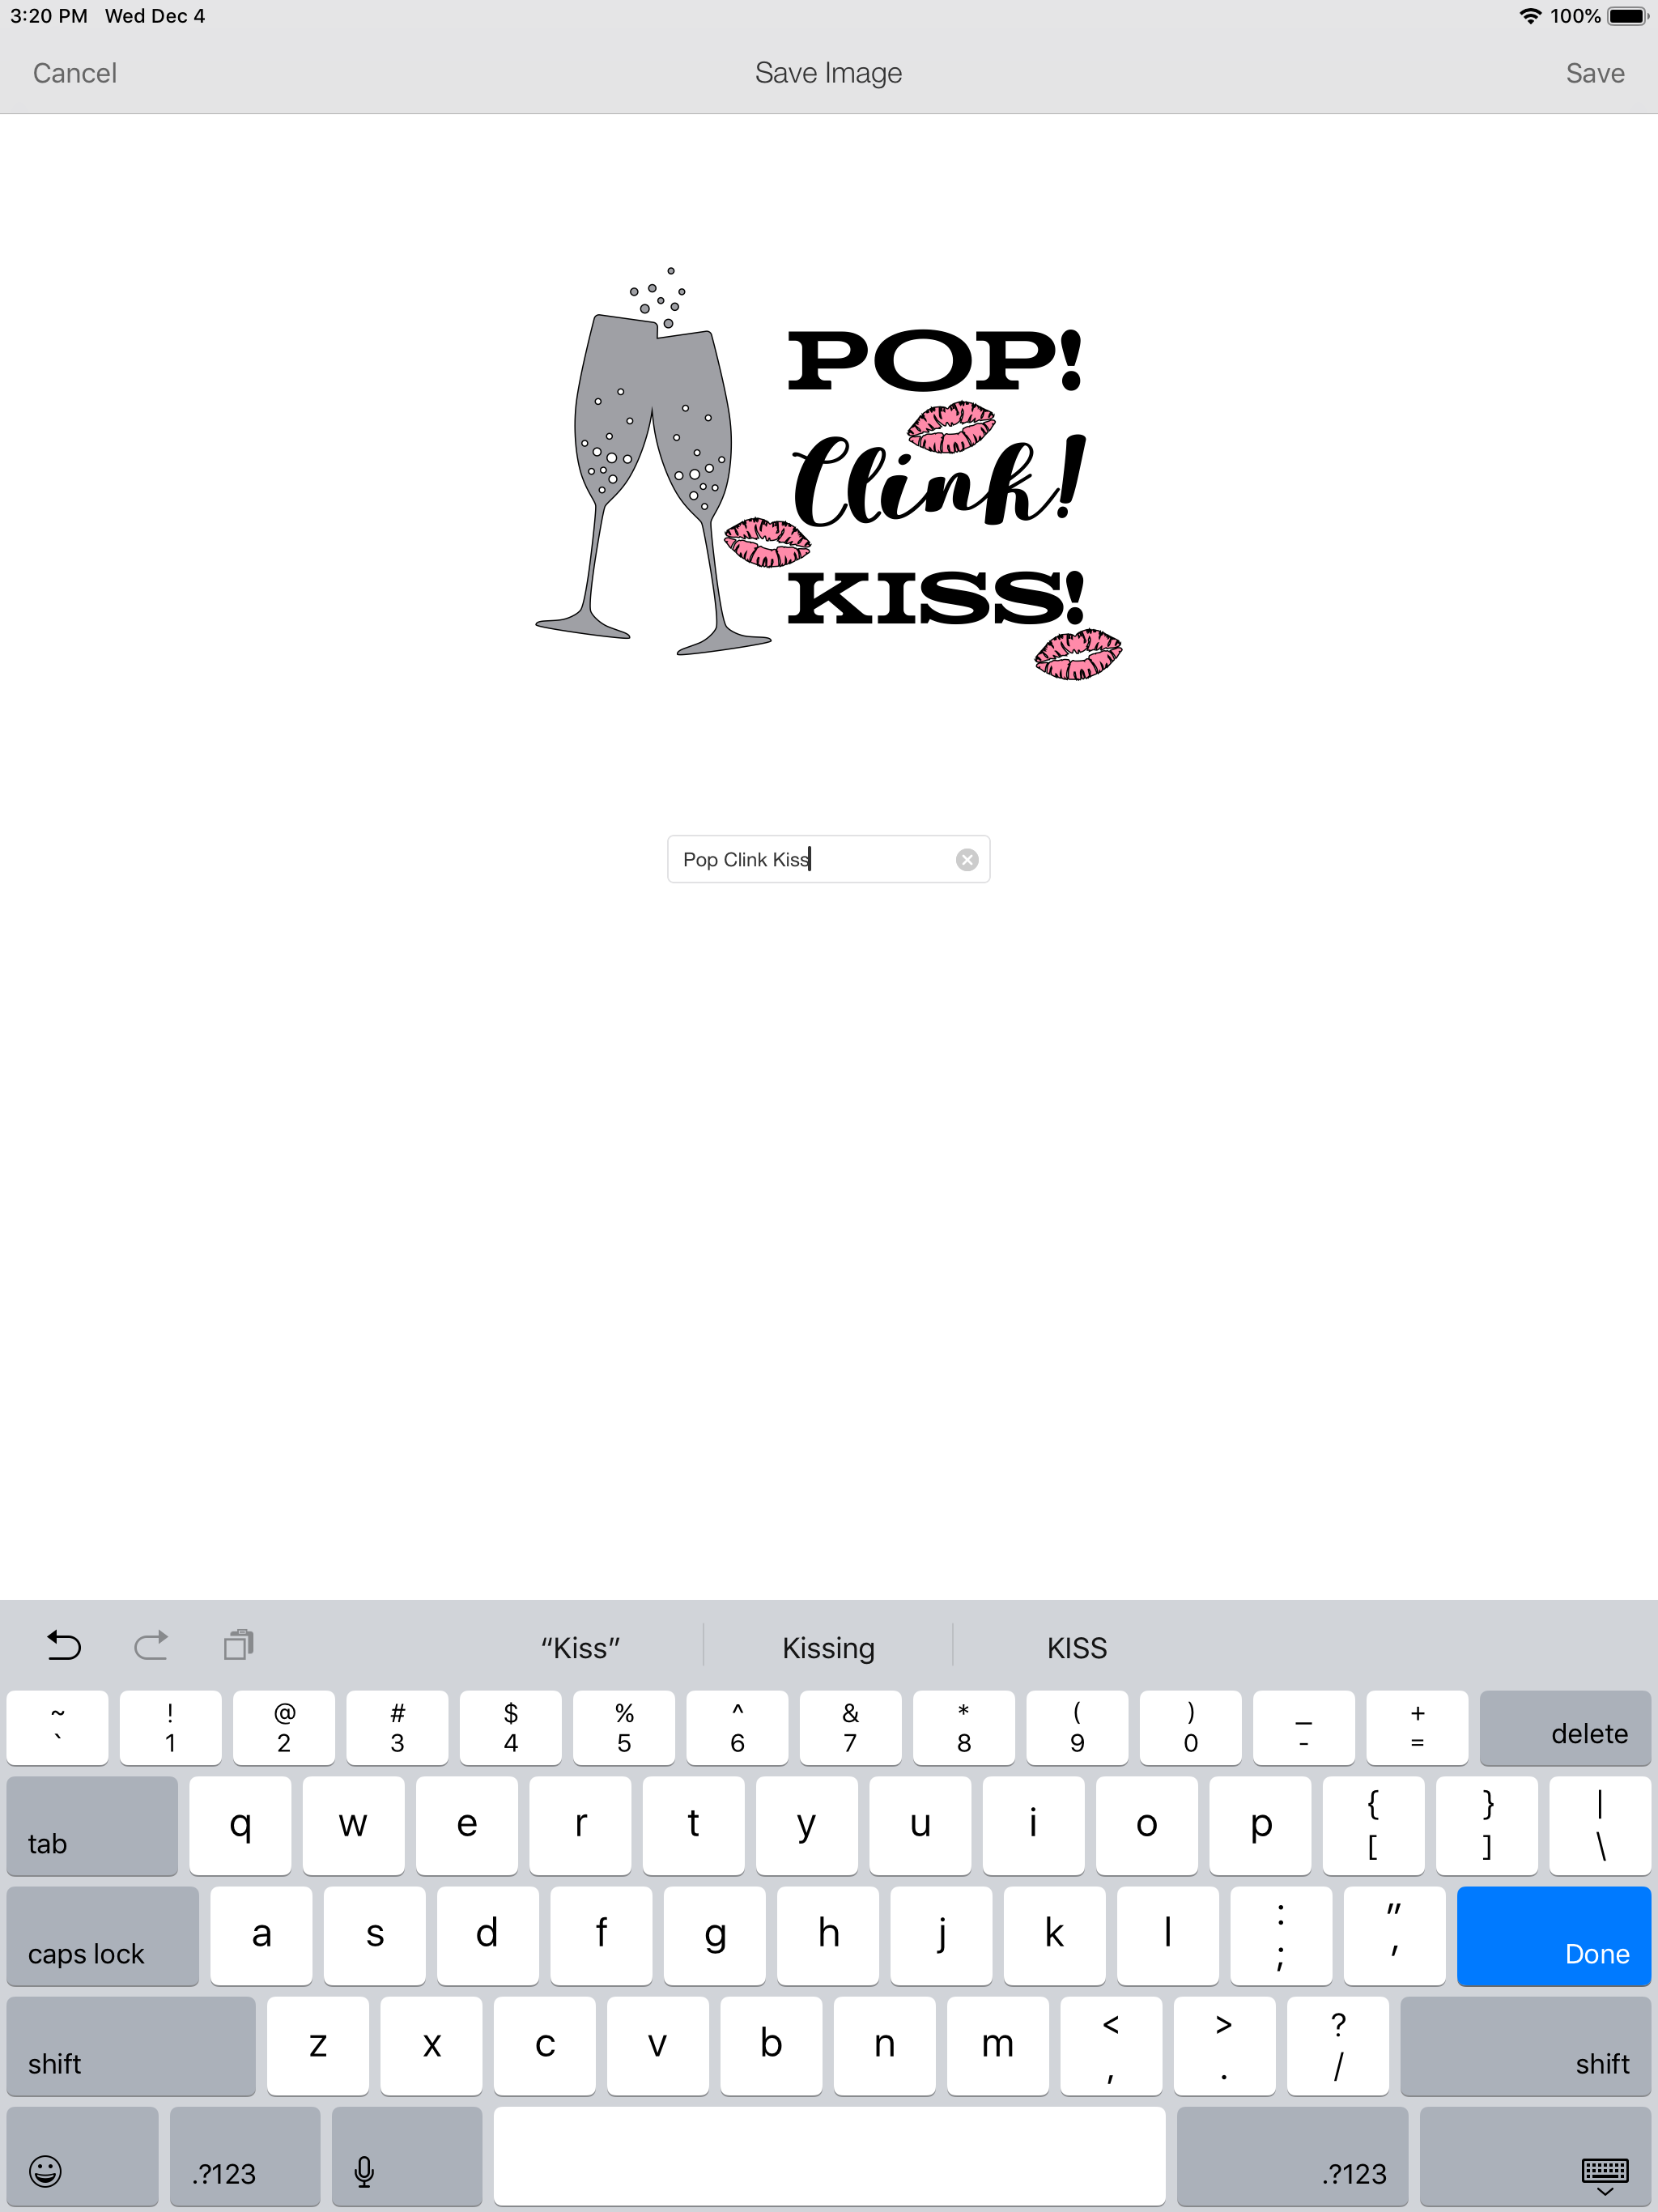
A preview of the file will appear in the center of your screen. Name the image and save the file.
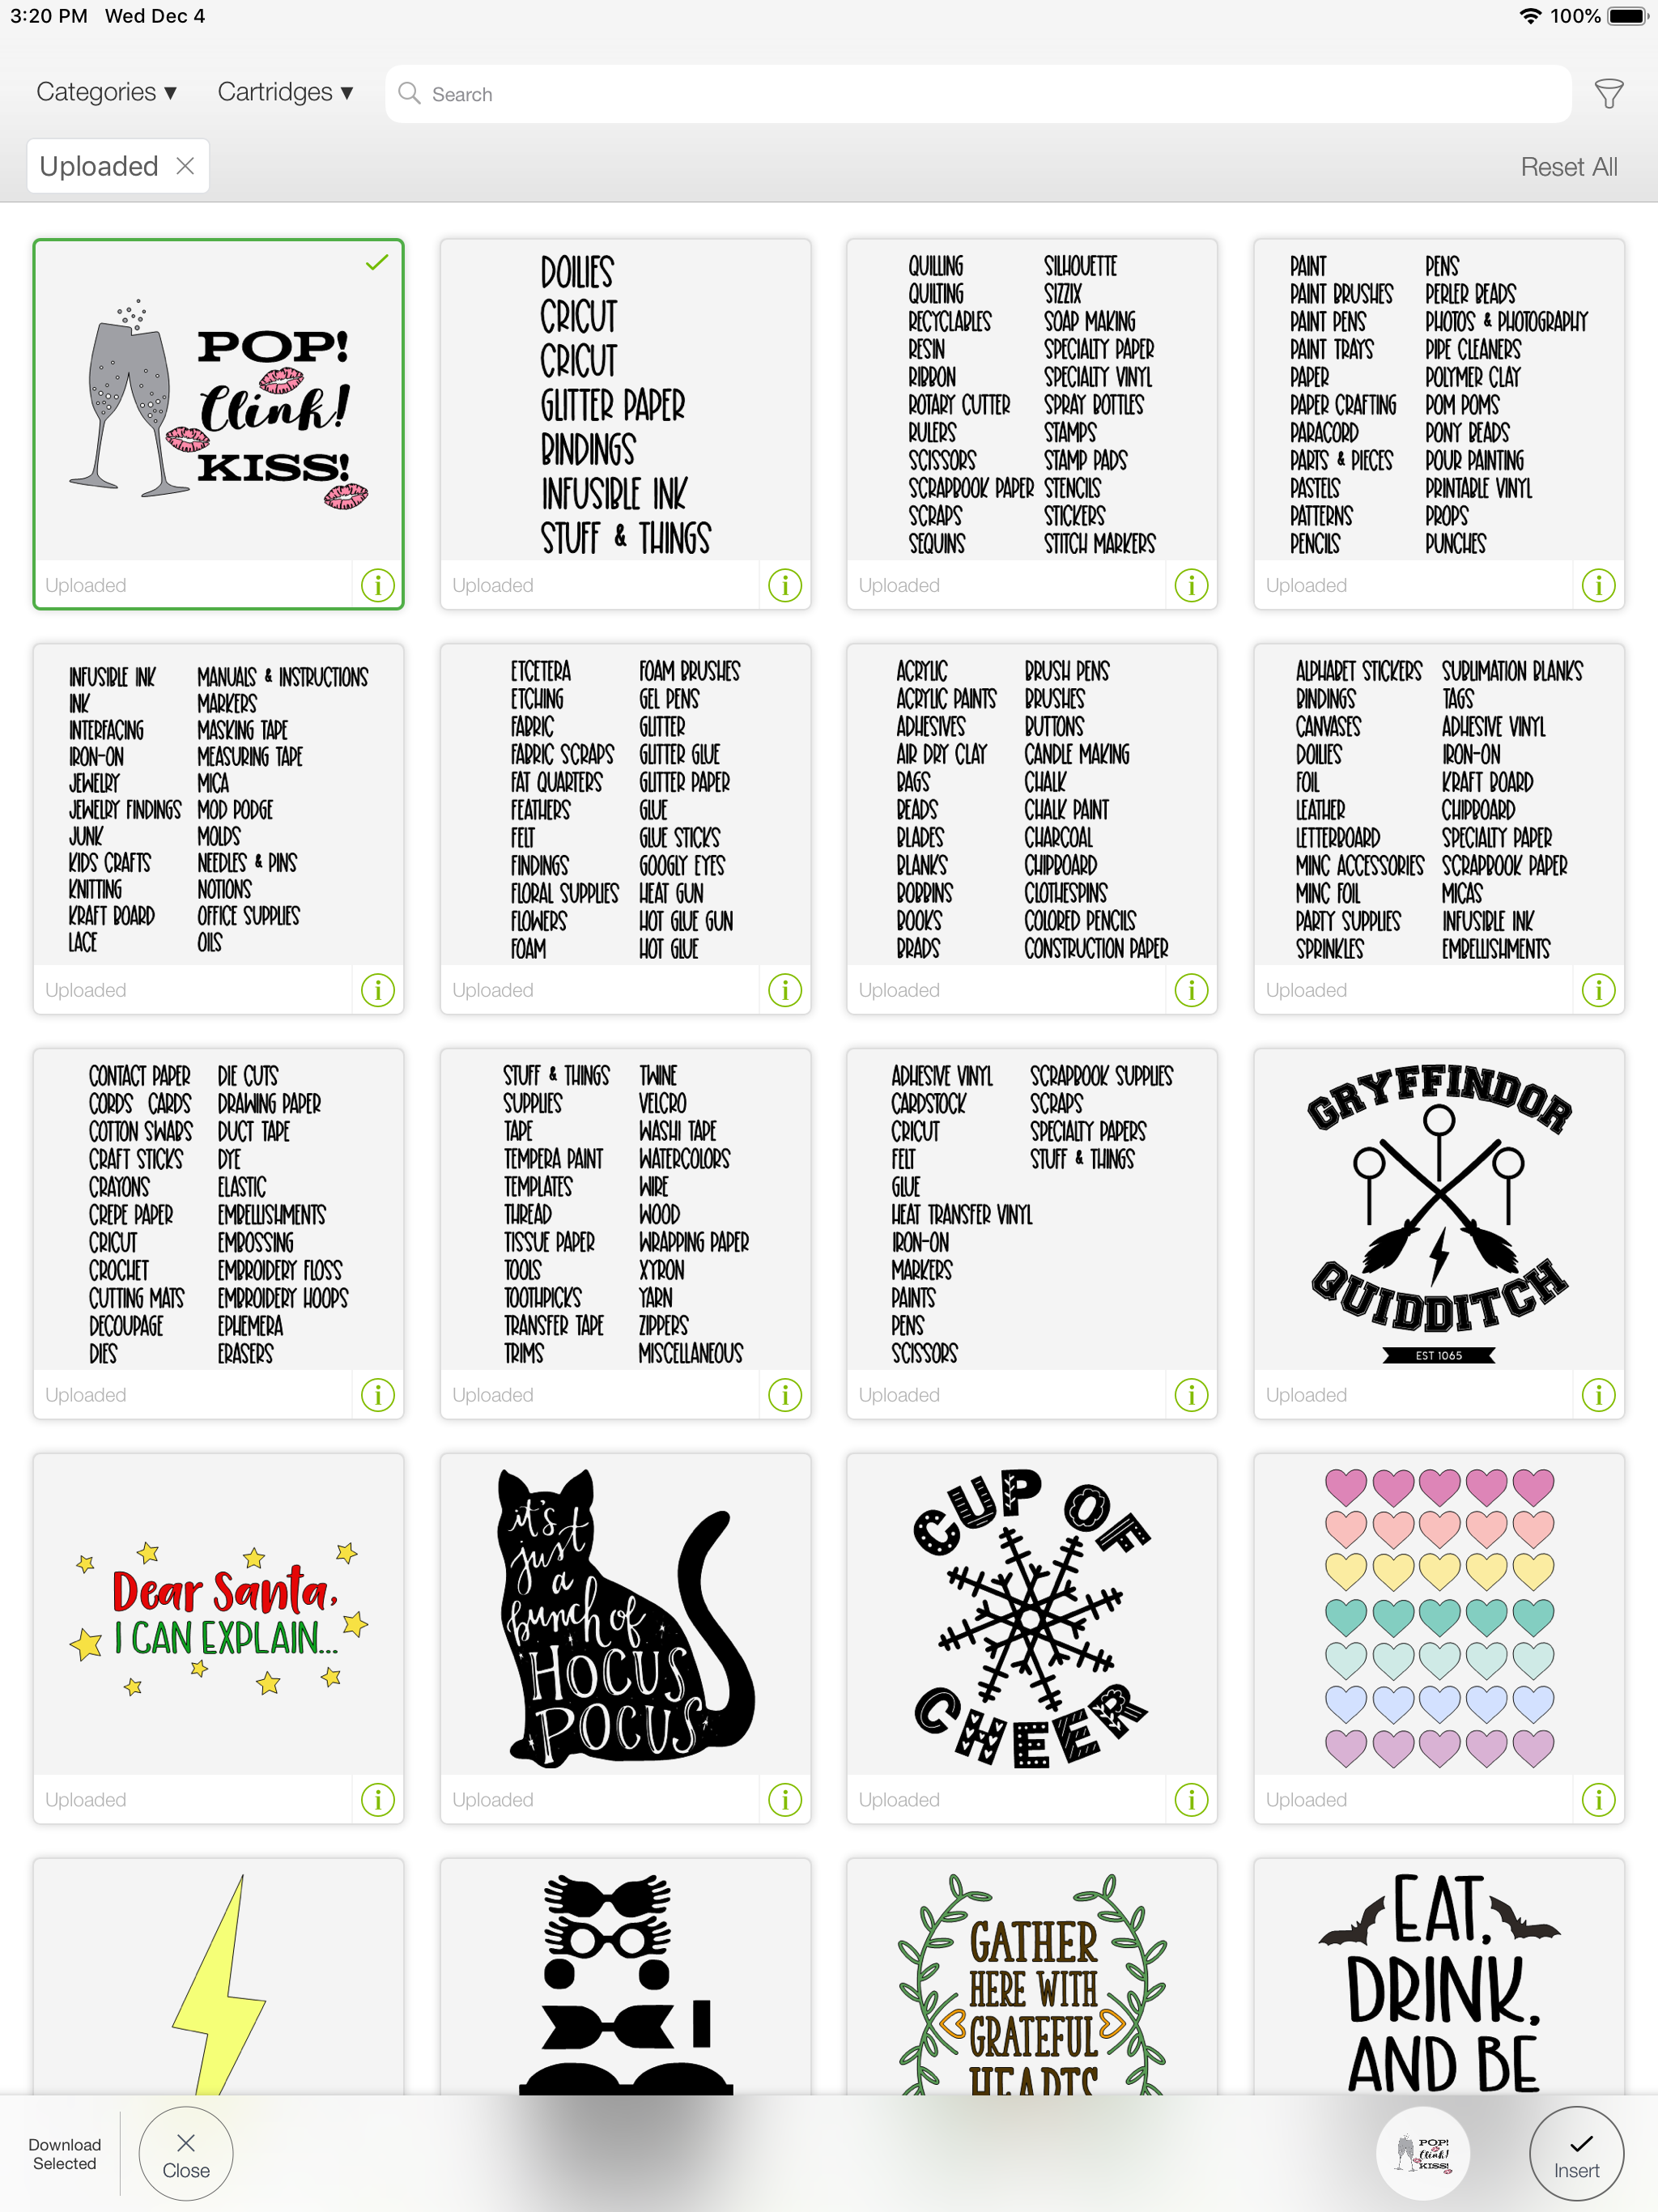
The file will now appear in your Uploaded Images panel. Simply select the file (a green box will appear around the image) and click on the “Insert” button in the lower right-hand corner.
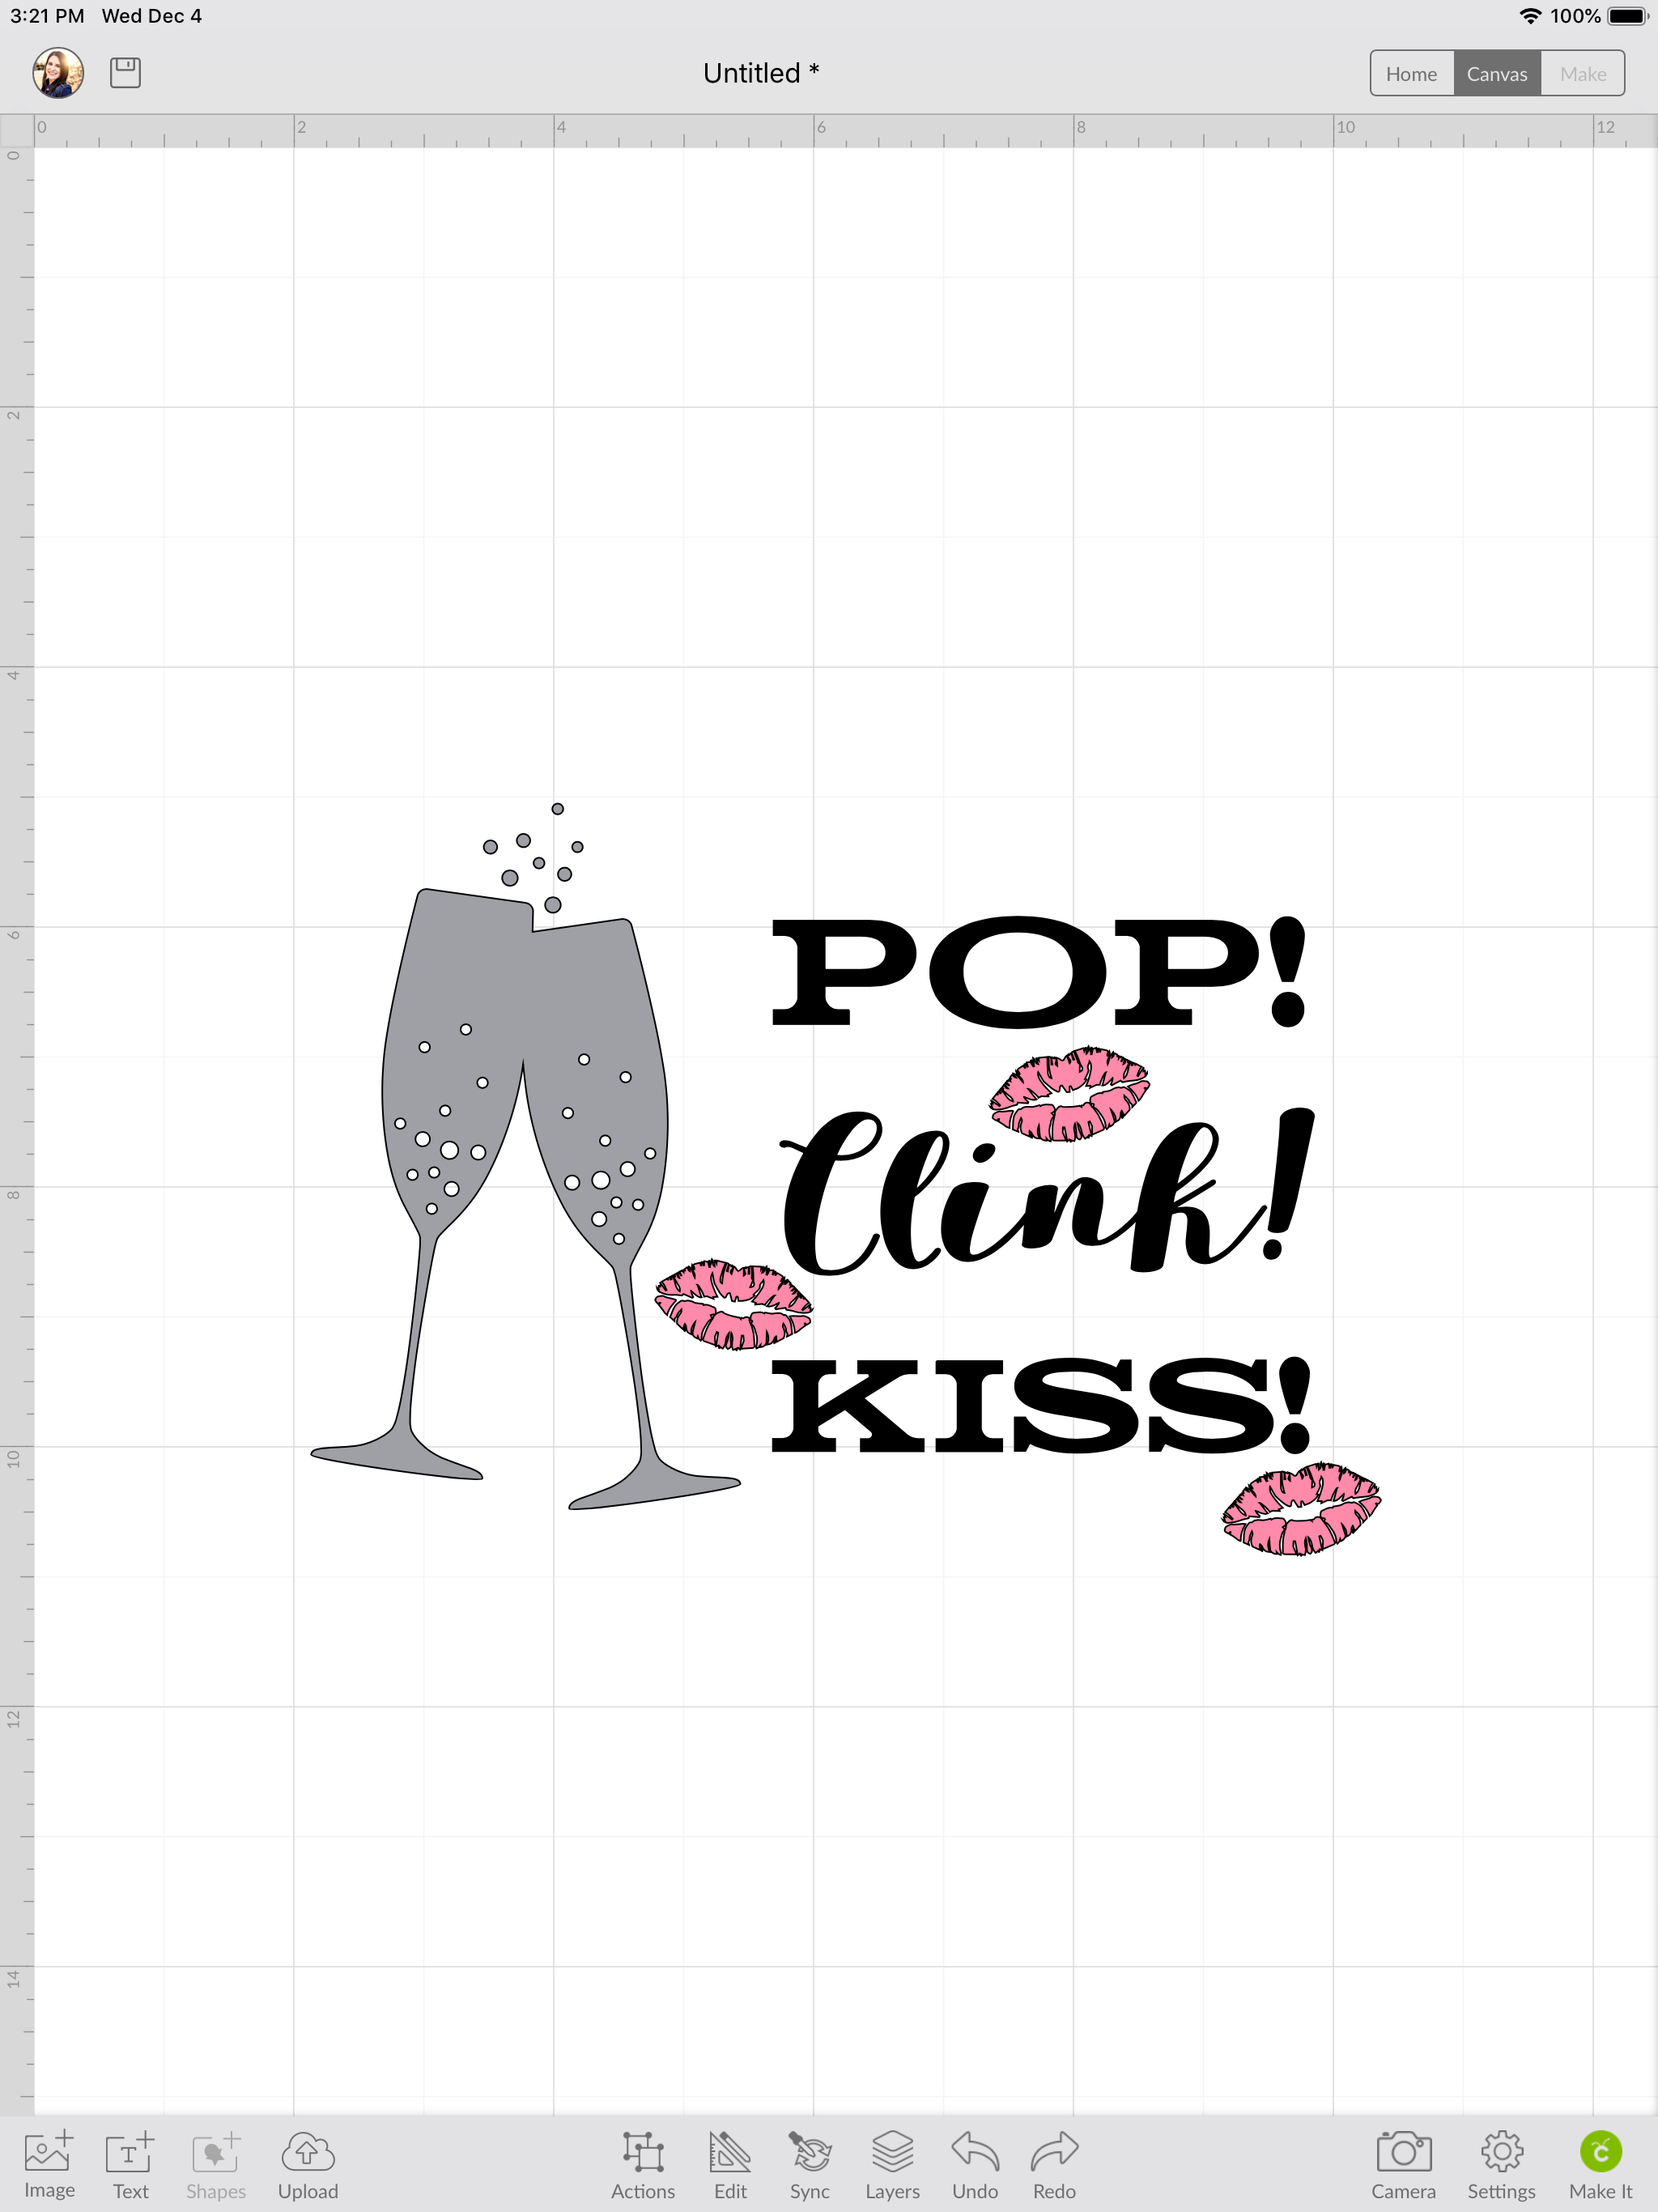
Now, the SVG file is on-screen and ready to be cut for your next project!
Don’t forget to check out our SVG file collection as well as our Cricut Project Gallery!

Check Out These Other Cricut Ideas!

Heidi Kundin has captivated the hearts of millions with her colorful and inspiring approach to crafting, celebrations, and family fun. With over 15 years of experience, Happiness is Homemade has become a must-visit destination for those seeking quick and easy creative ideas and last-minute solutions. Heidi’s warm personality shines through her posts, inviting readers to join her on a creative journey that’s fun, rewarding, and achievable. Heidi is also the author of Homemade Bath Bombs & More and DIY Tie-Dye.


