
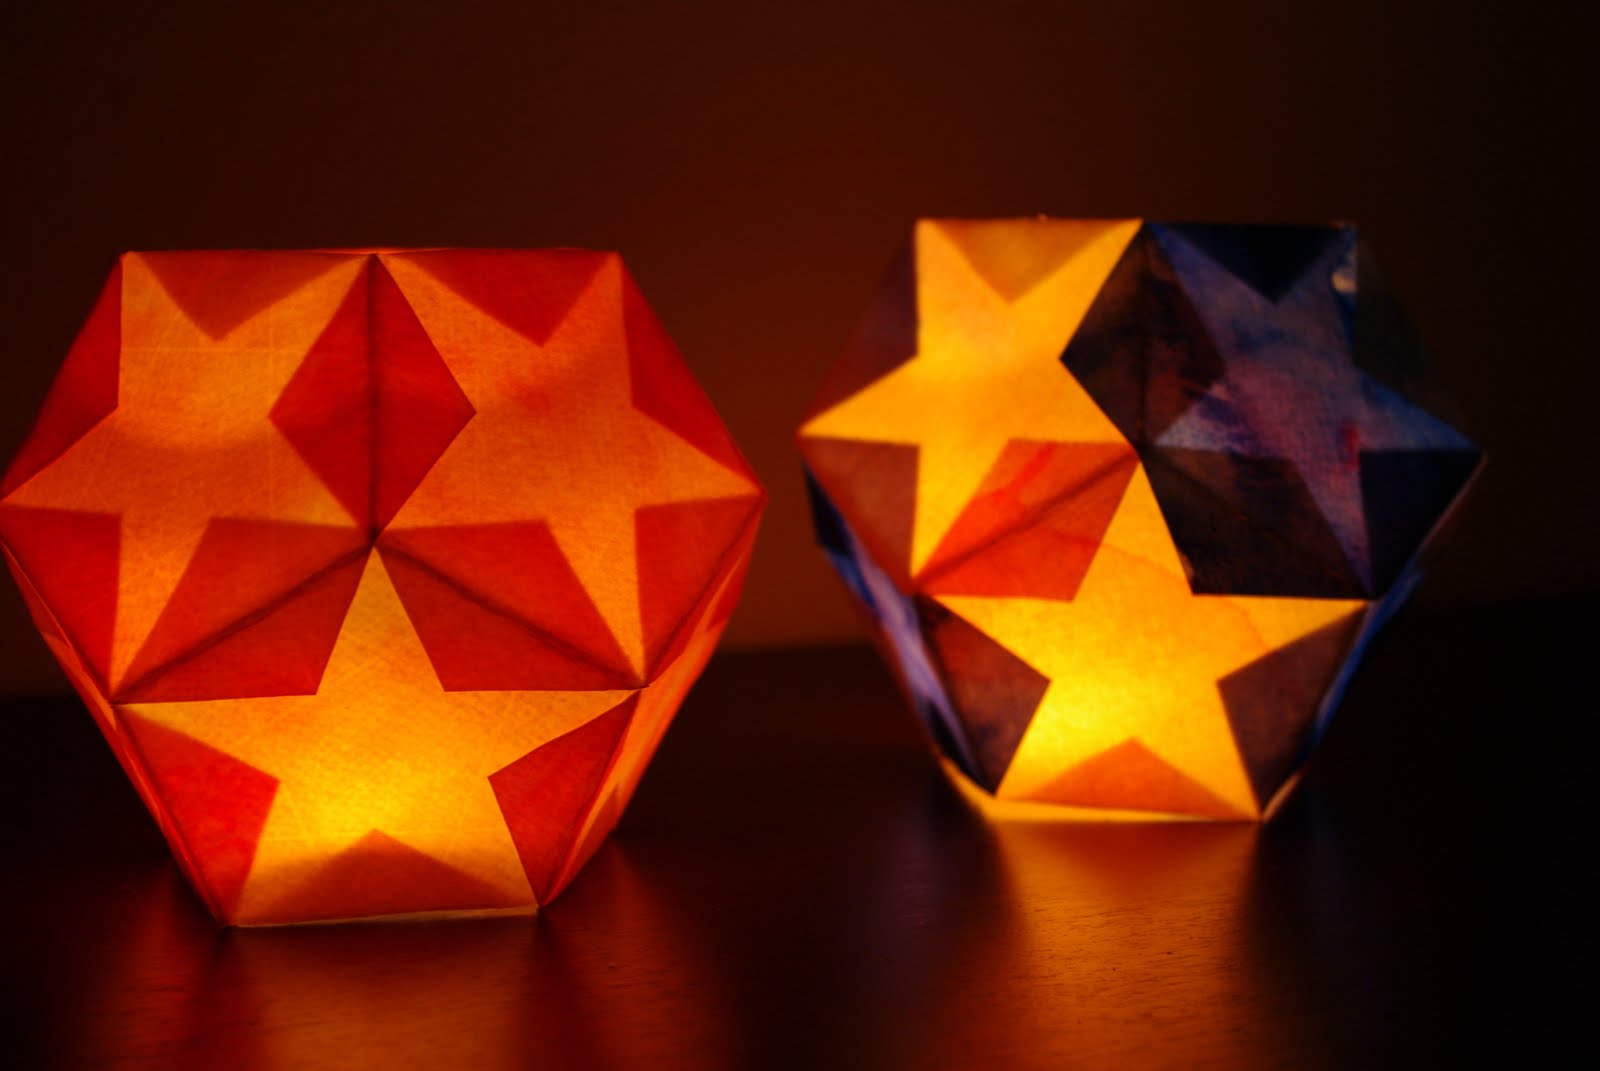
You might remember my very first dodecahedron star lantern that I posted last Summer. I fell in love with our bold crayon colored lantern, but I still wanted to find the time to make more in the original soft style of oiled watercolor papers. It had been brought to my attention several times that the tutorial I linked to no longer exists in Blogland, and I noticed on my blog statistics that quite a few people have found their way here while Googling “dodecahedron star lantern tutorial.”
I did a quick internet search and realized that most of the other search results linked back to the same tutorial that no longer exists…so I decided to recreate it! Not quite as beautifully explained or photographed as the original, but I couldn’t leave all those Google searchers hanging, could I? 😉
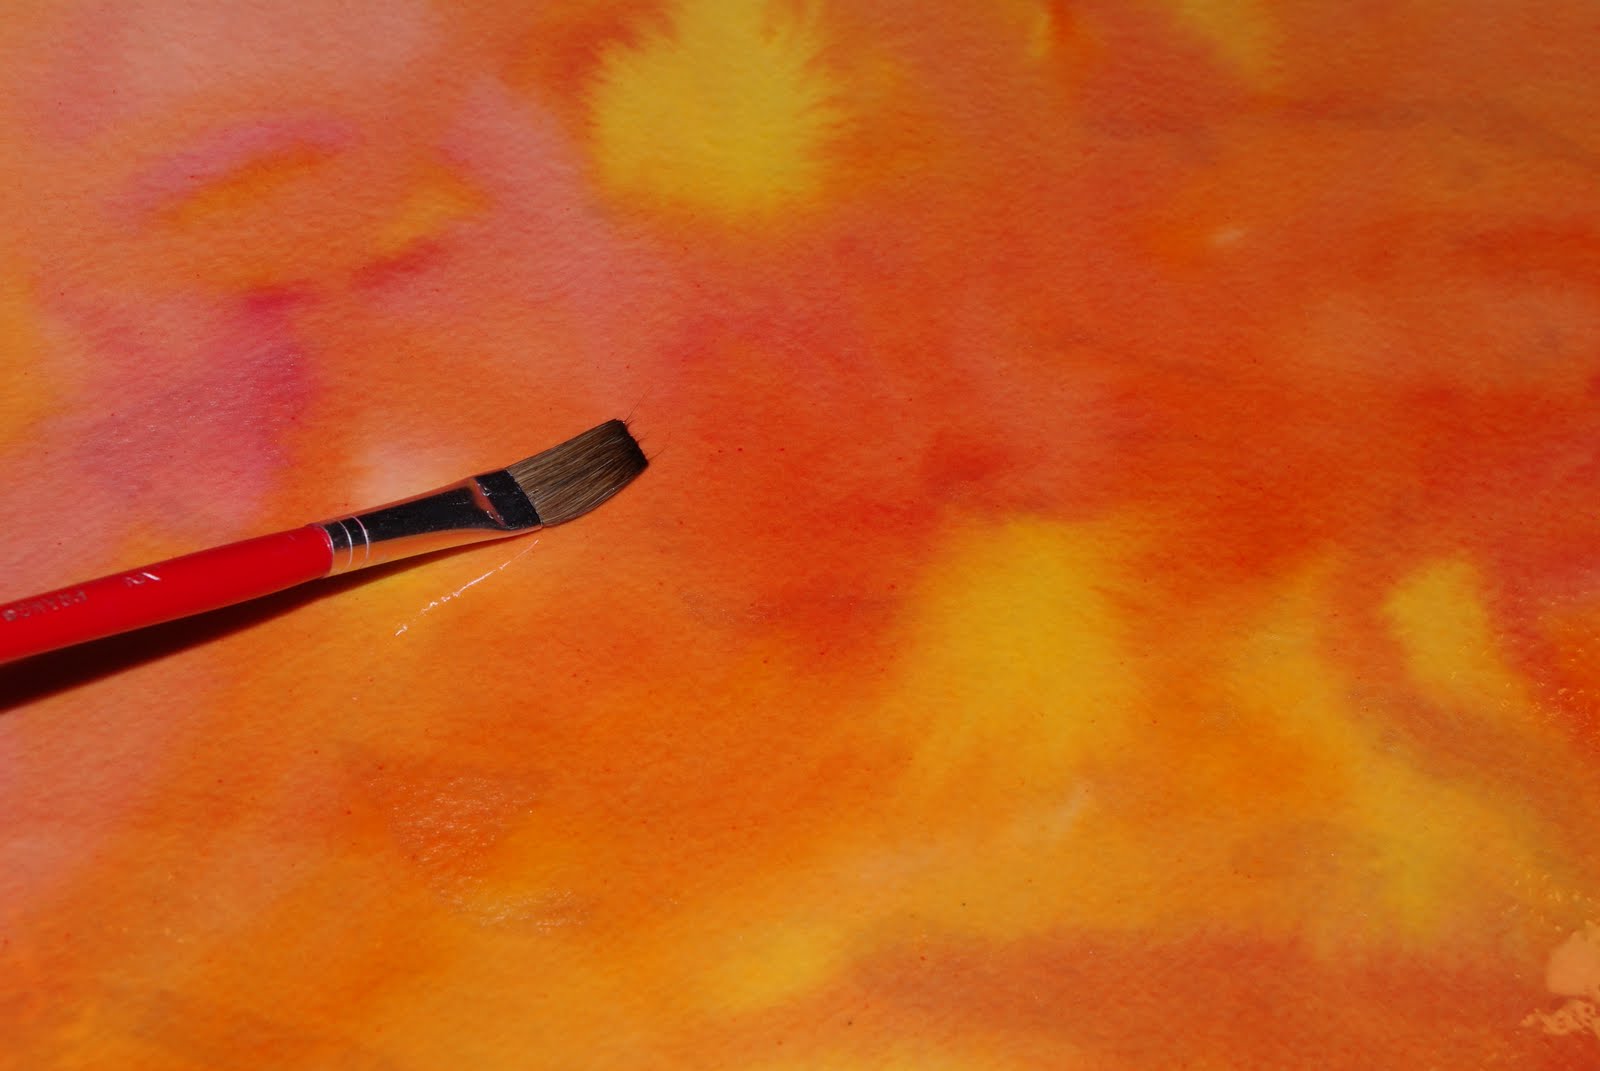 I started by painting two 11″x14″ wet-on-wet watercolor paintings, just some basic color washes since they are going to get cut up into smaller pieces. Once the paint was dry I rubbed the papers with a thick layer of olive oil until it was saturated through to the back side, blotted off the excess and allowed the paintings to dry overnight.
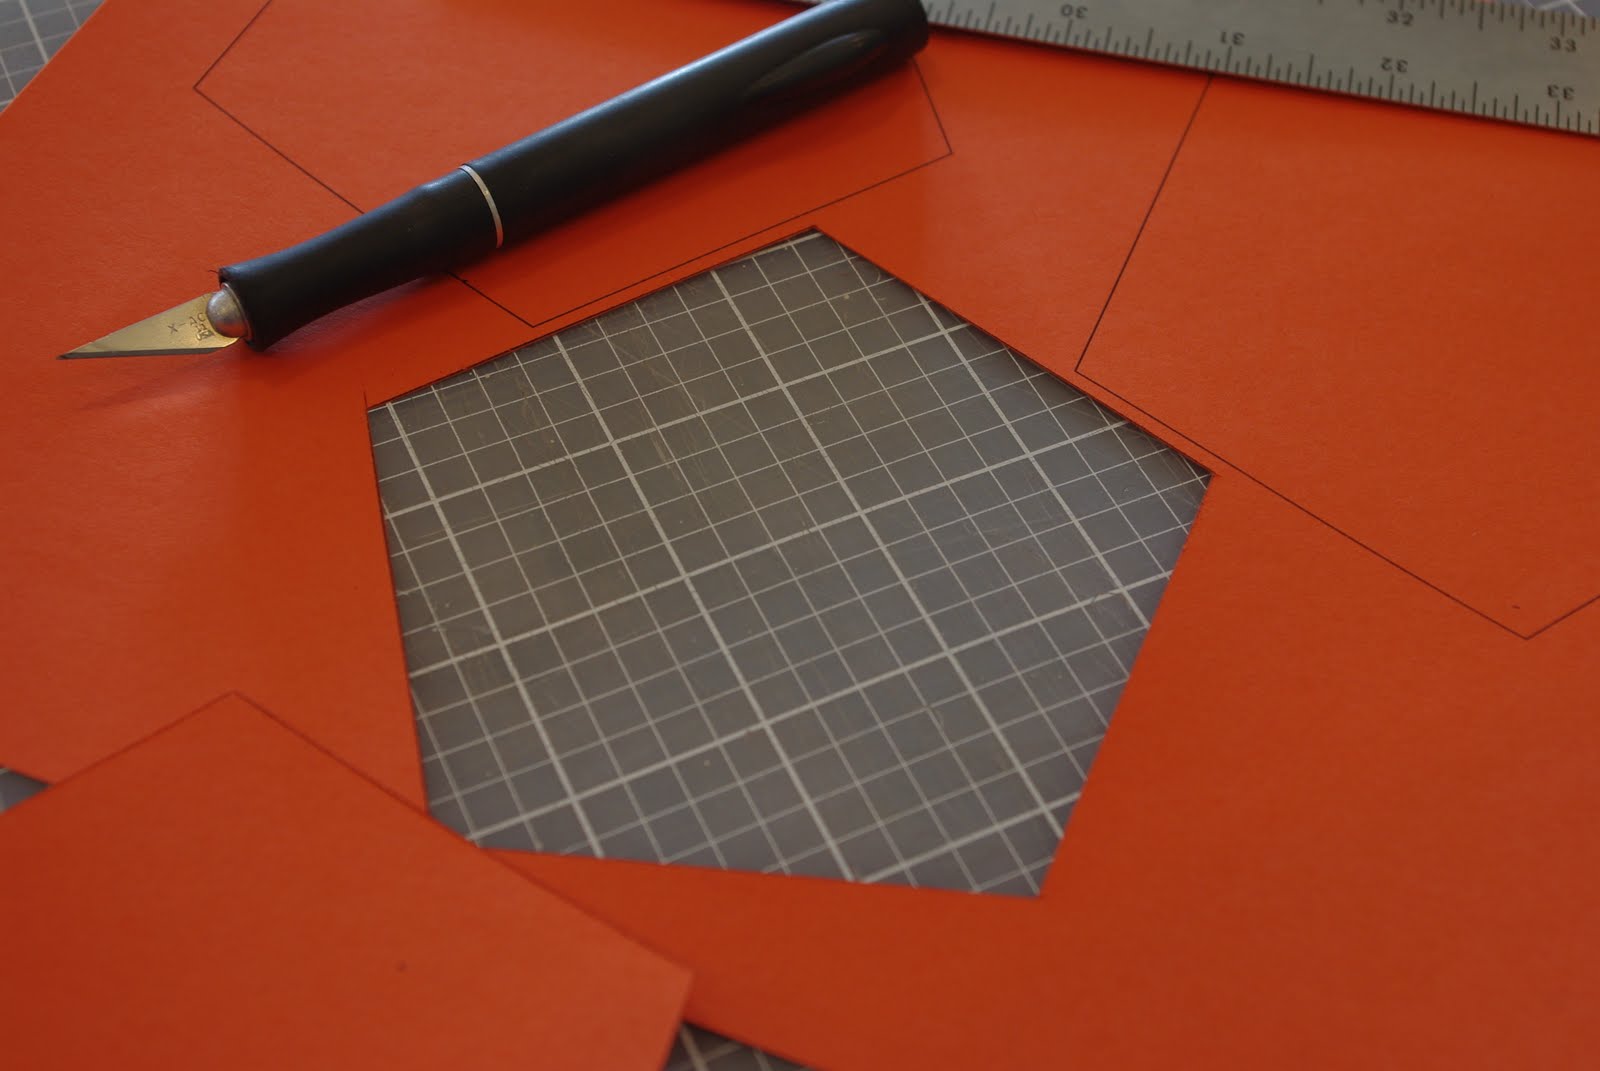 While I was waiting for the paintings to dry, I printed out my Pentagon Template and used my Xacto knife to cut out one of the shapes to use as a stencil.
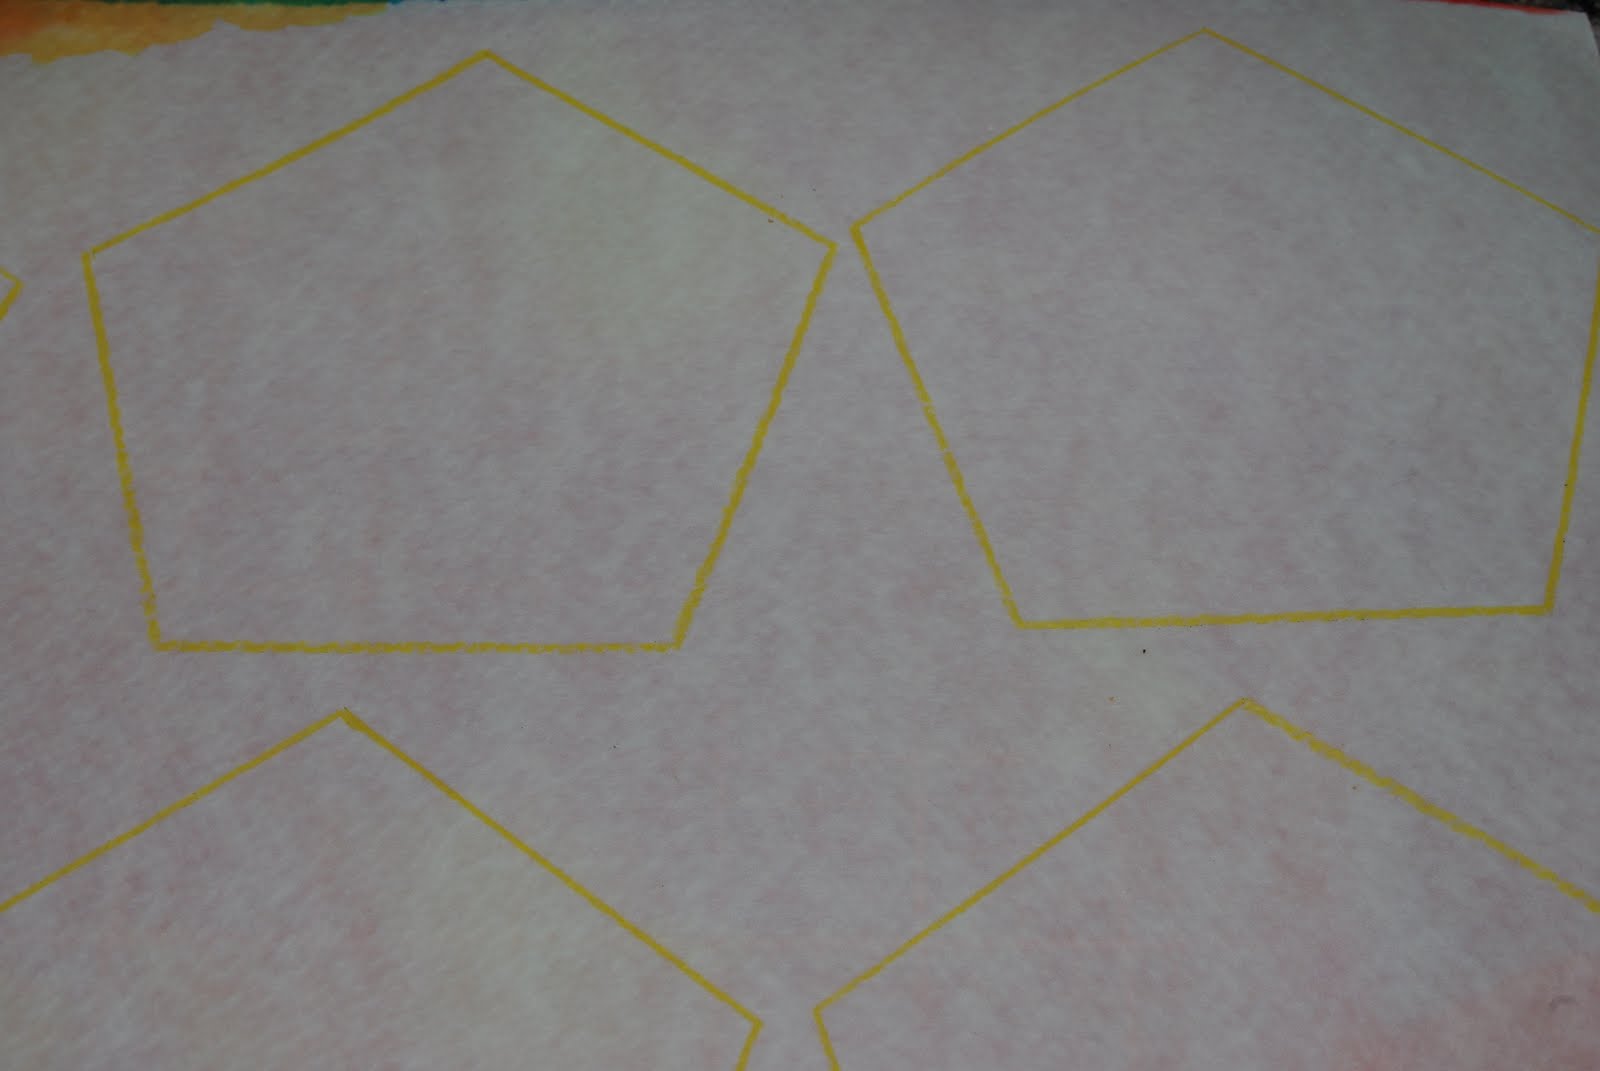 I traced the pentagon shape onto the back side of the paintings using a light colored pencil in a complimentary shade.
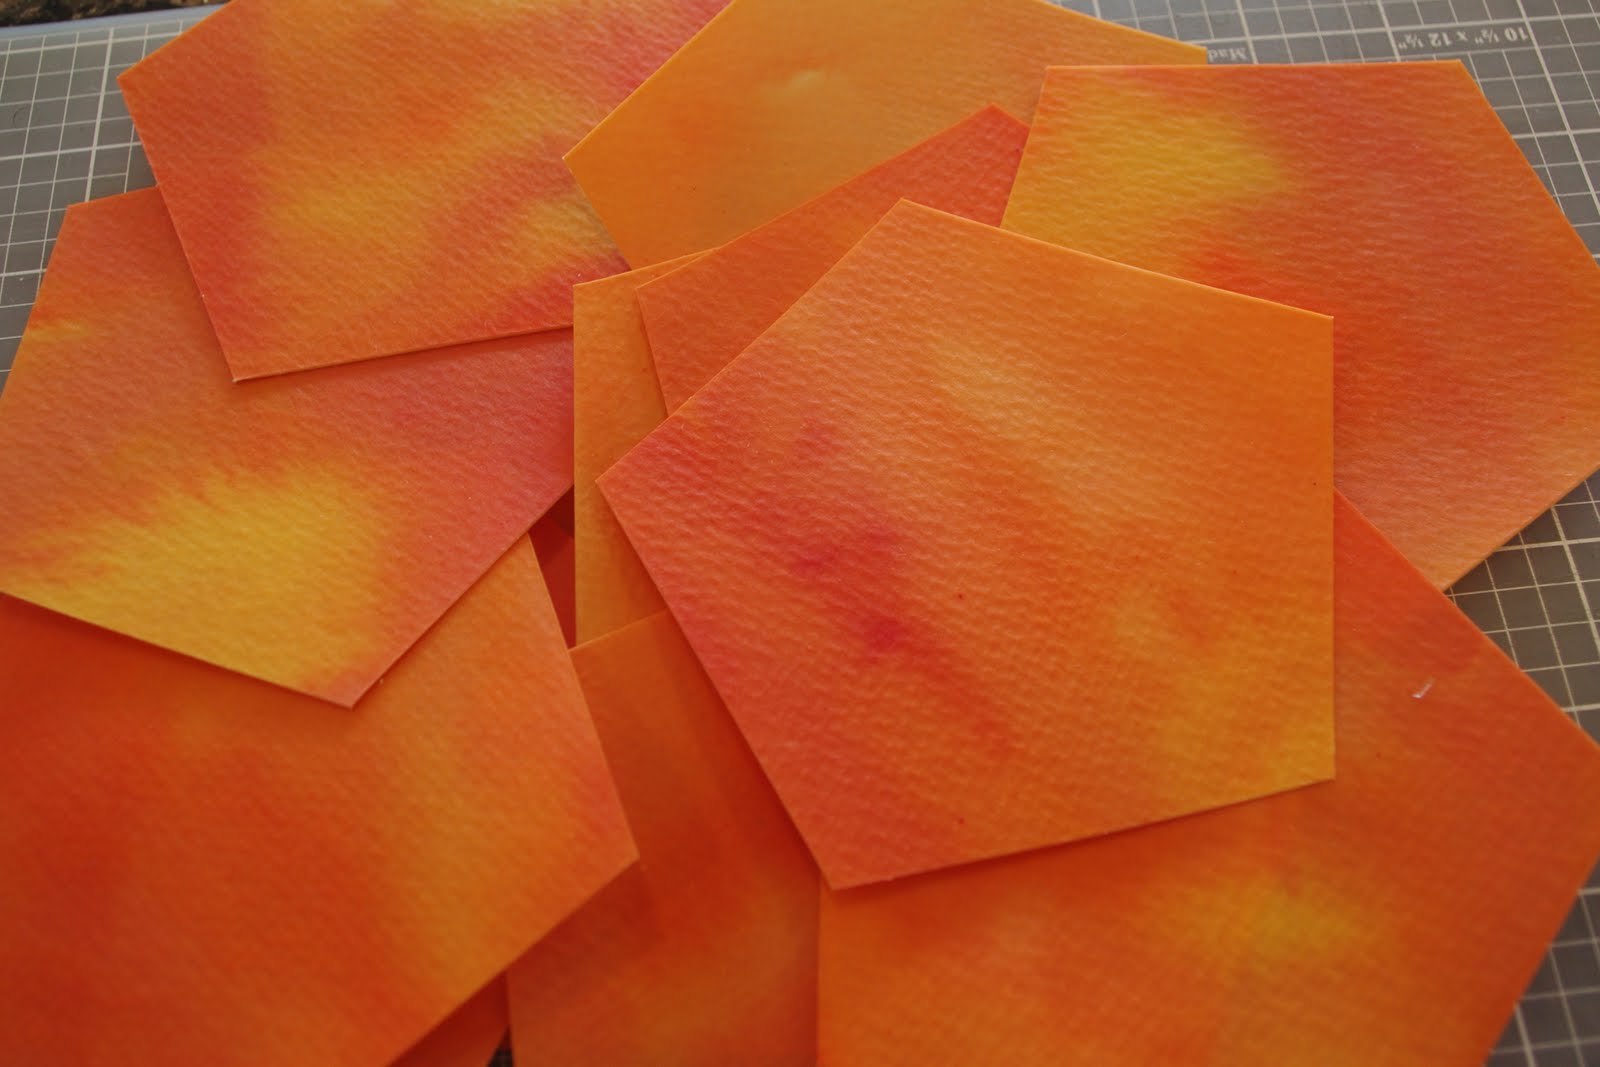 You will need to cut out ten pentagons (eleven if you want to give your lantern a base/bottom).
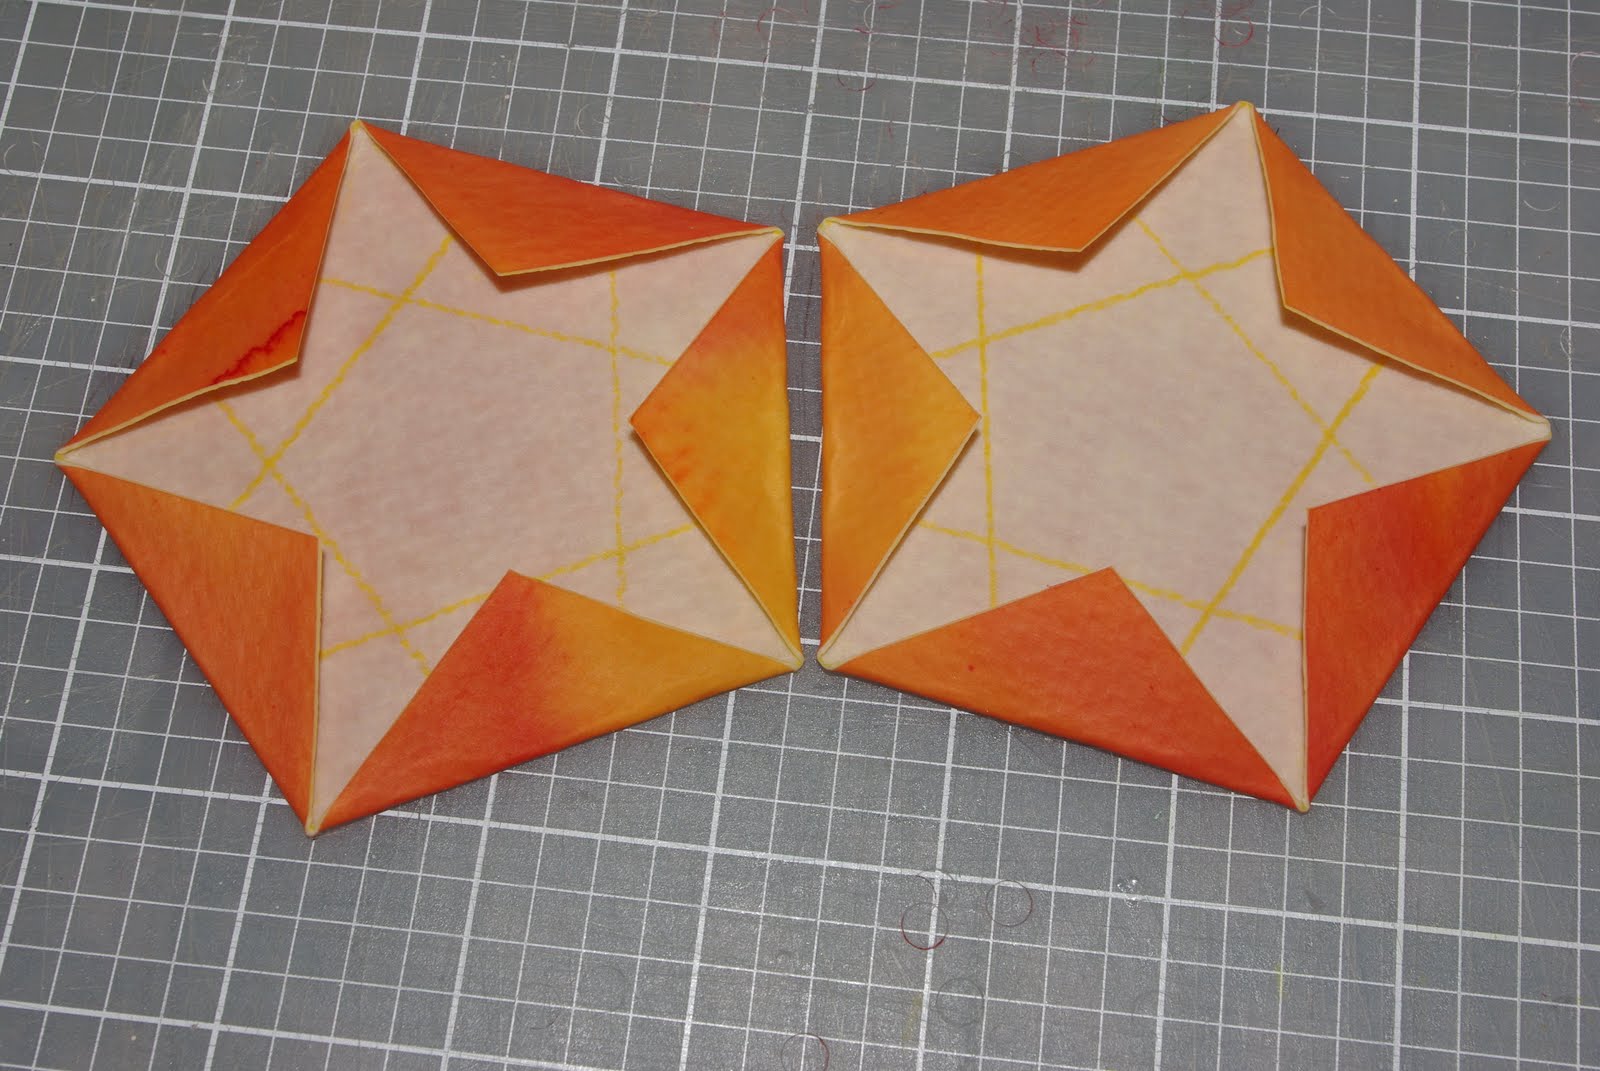
 Starting at one of the corners, draw a line down to each of the opposite corners, and repeat until two lines have been drawn from each corner (it will look like you have drawn a star).
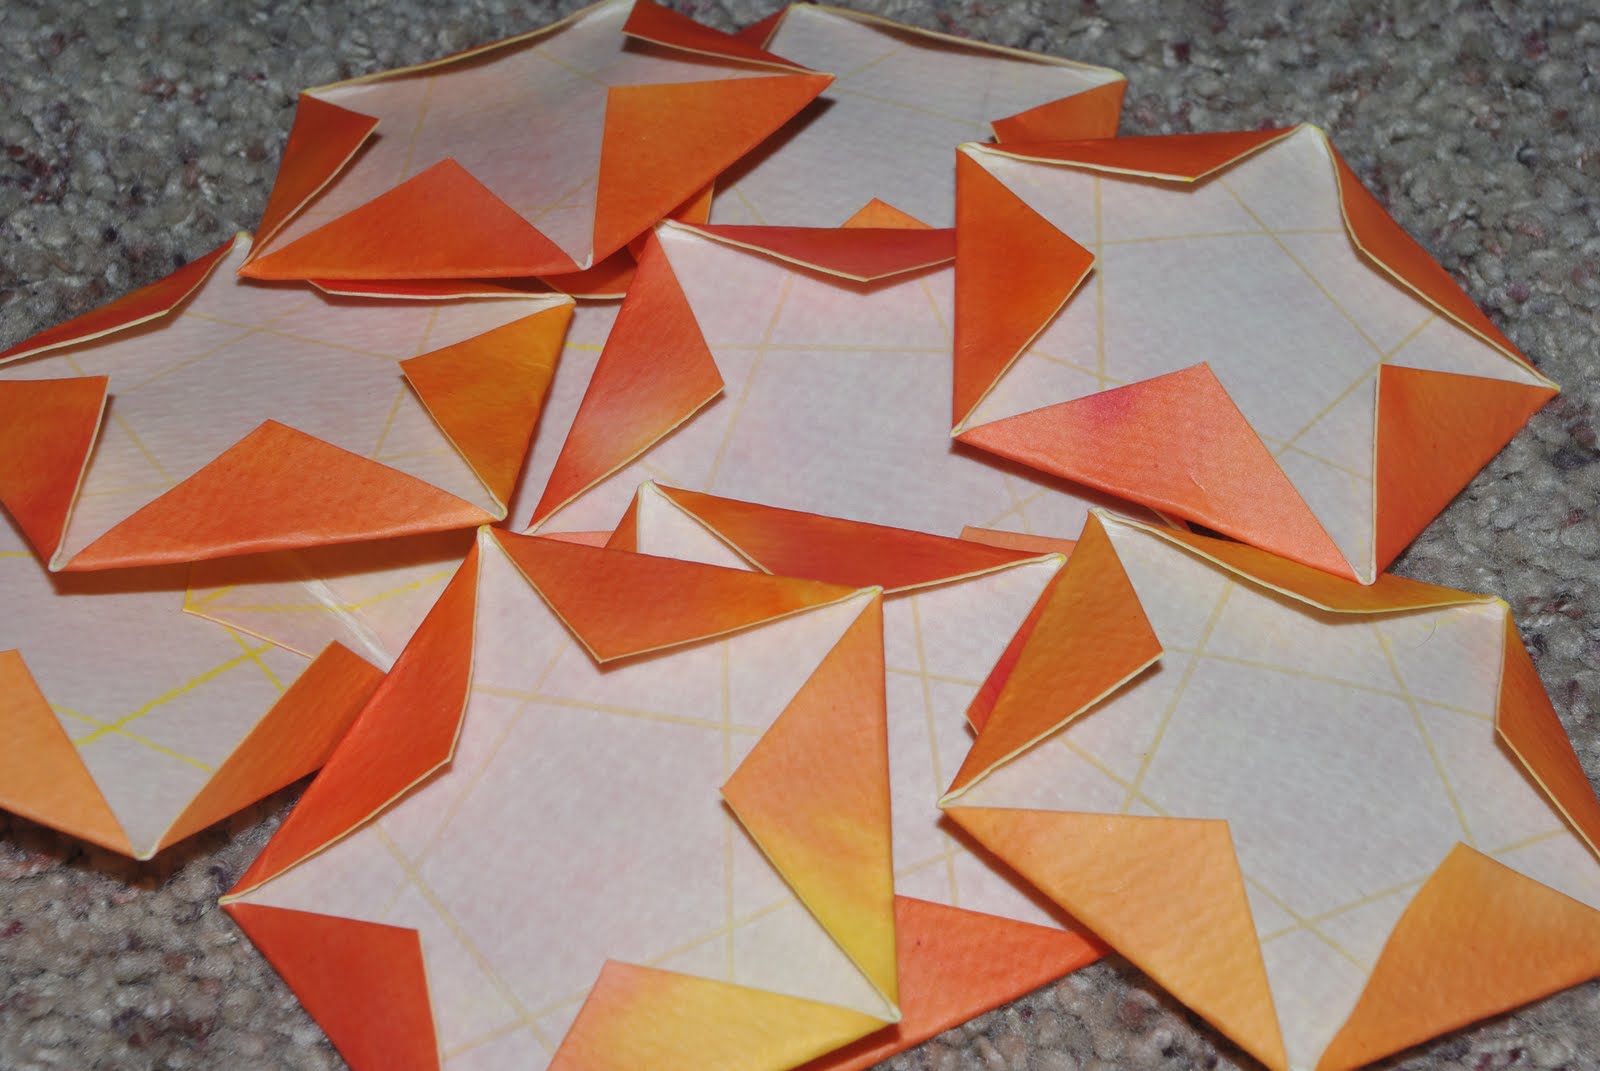
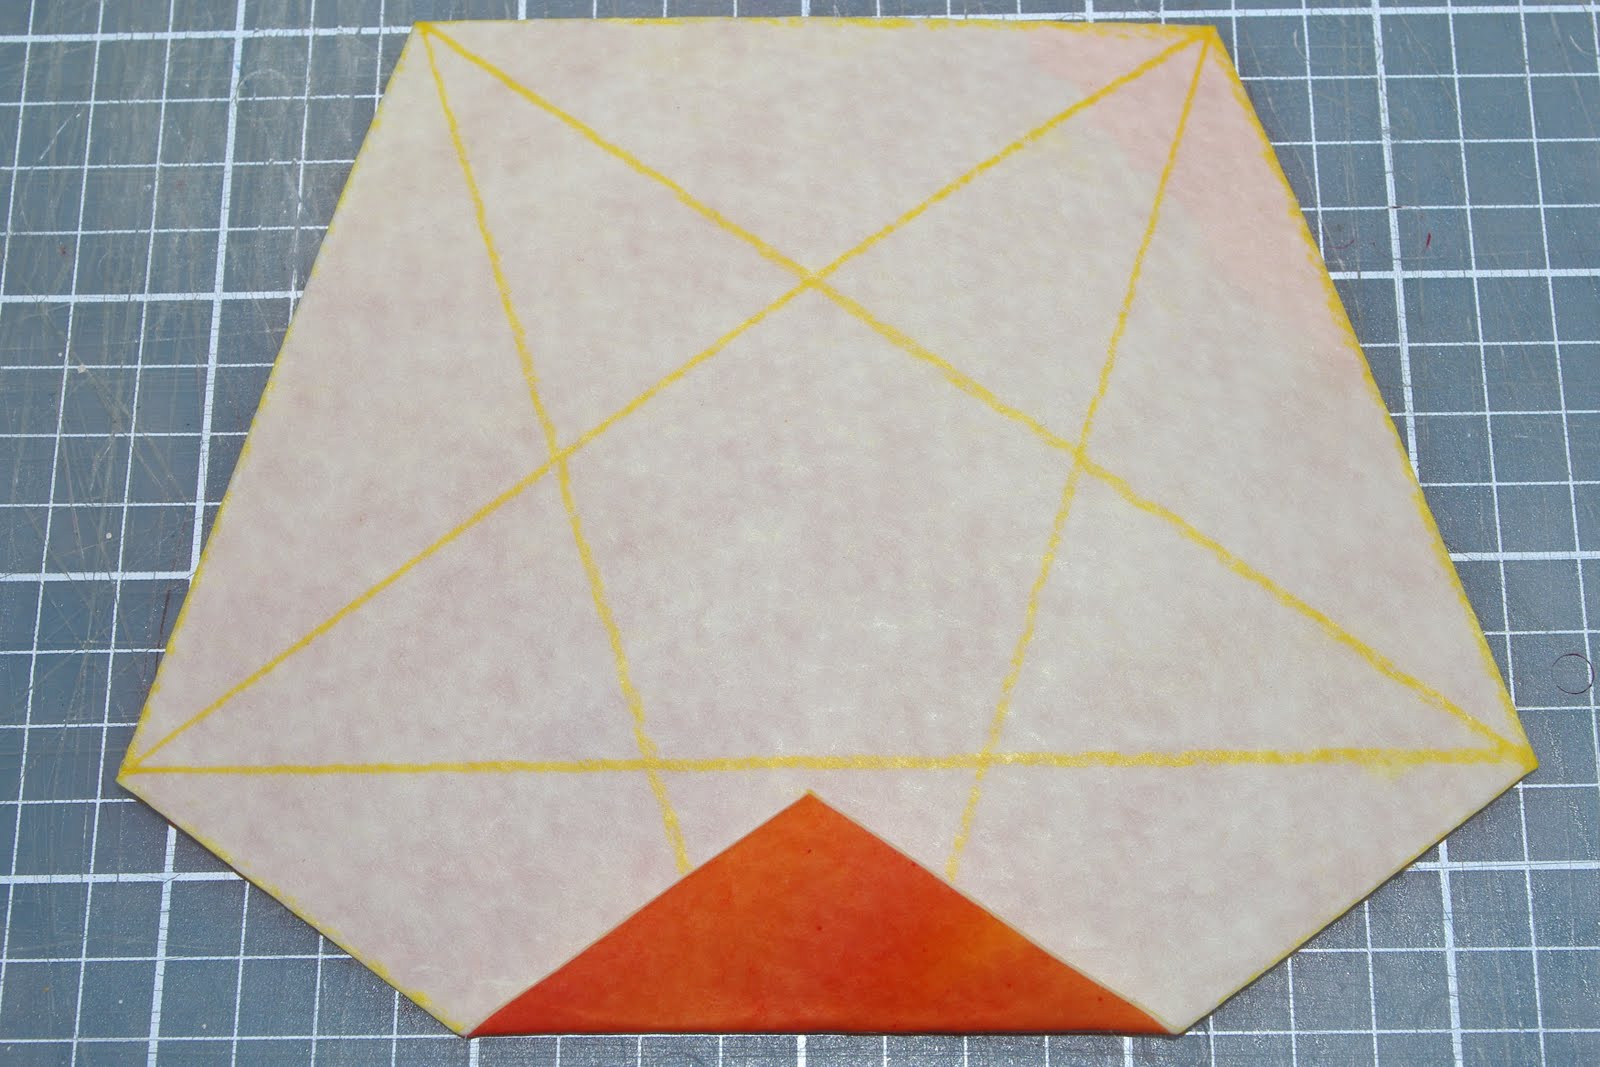 Fold the first corner in to meet the center of the line as shown above. Repeat for all five corners.
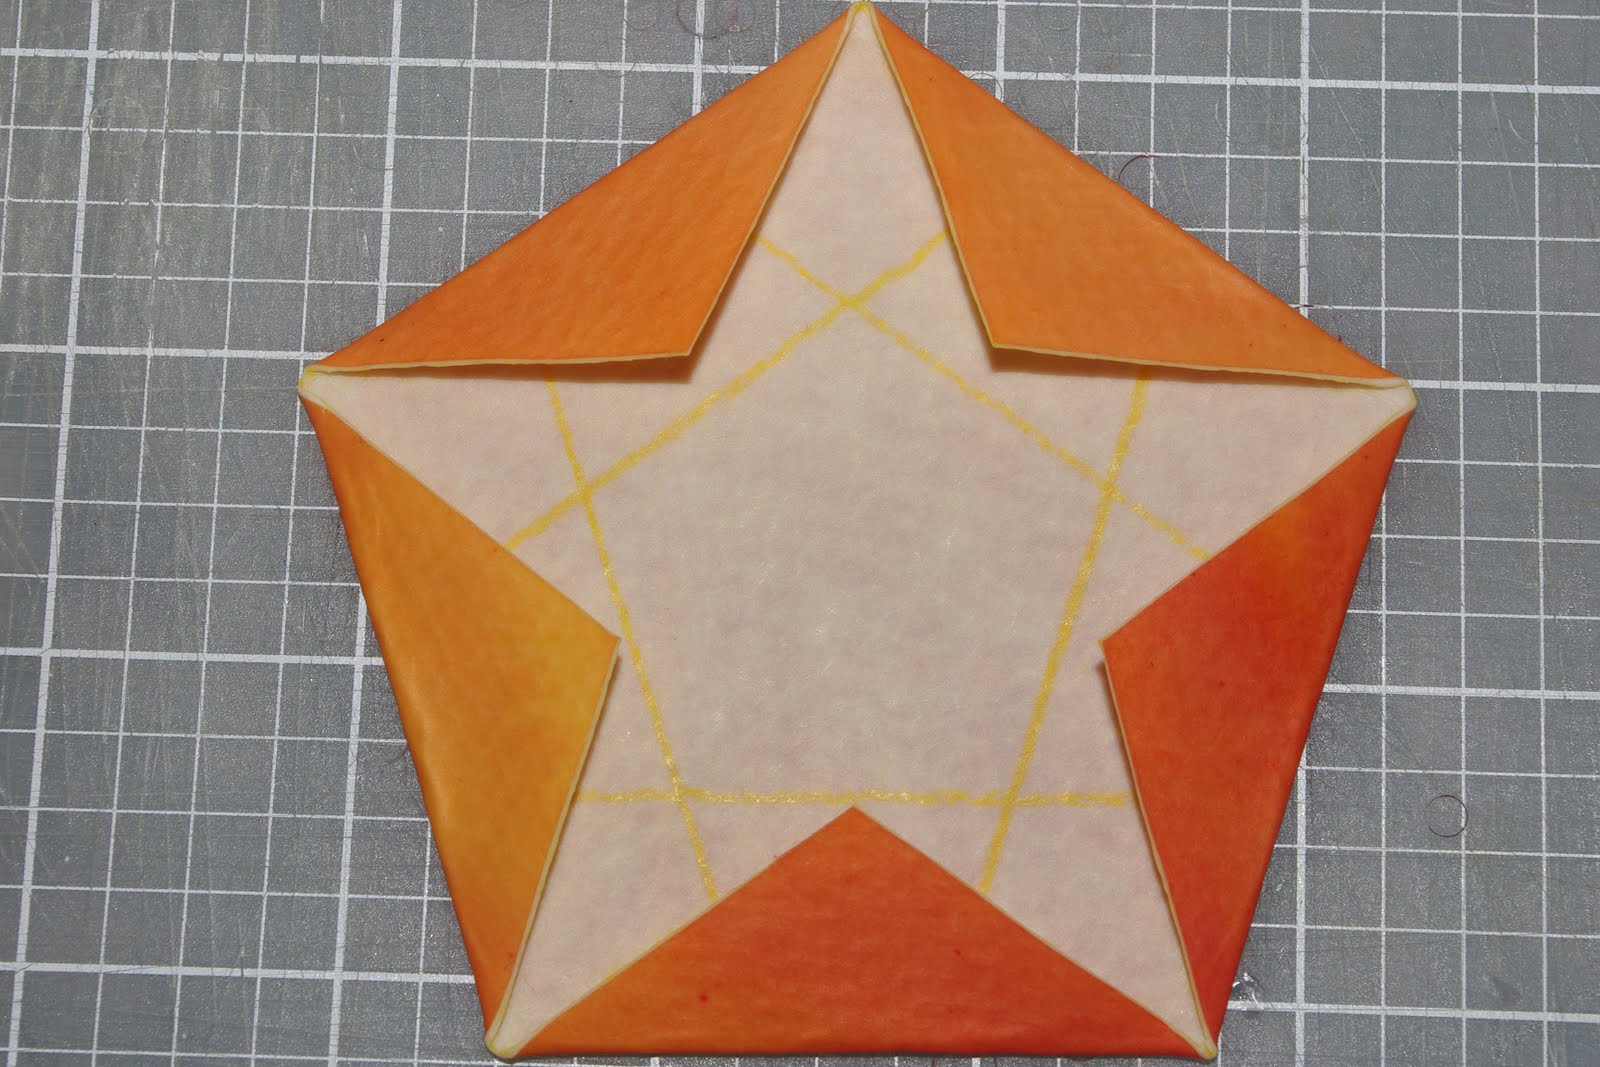
 Line up two pentagons side-by-side. Open the flaps on the side where the pentagons are touching and lay both flaps open flat.
 Glue the flap from the pentagon on the right to the inside of the left pentagon. Turn the pentagon over and glue the flap on the outside down as well. Make sure to align the creases of the folds. I find that paperclips can be incredibly helpful to hold the pieces together while the glue dries. It seems to take a little while longer for the glue to dry since the paper has been oiled.
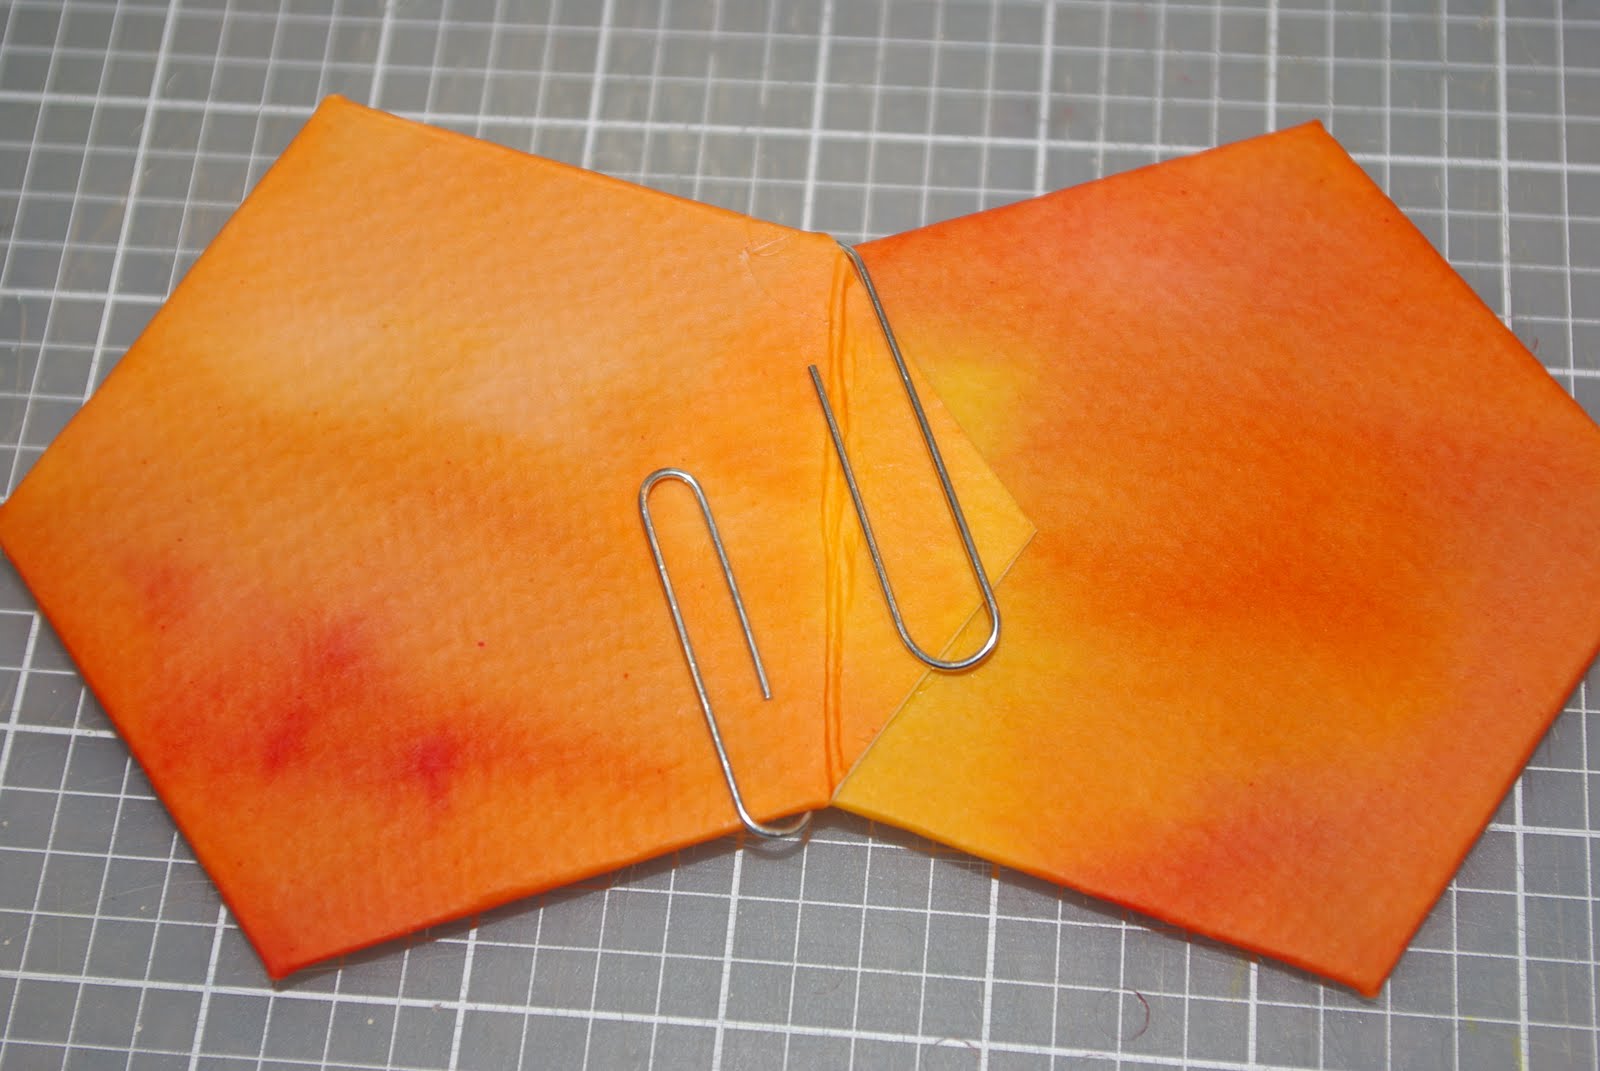
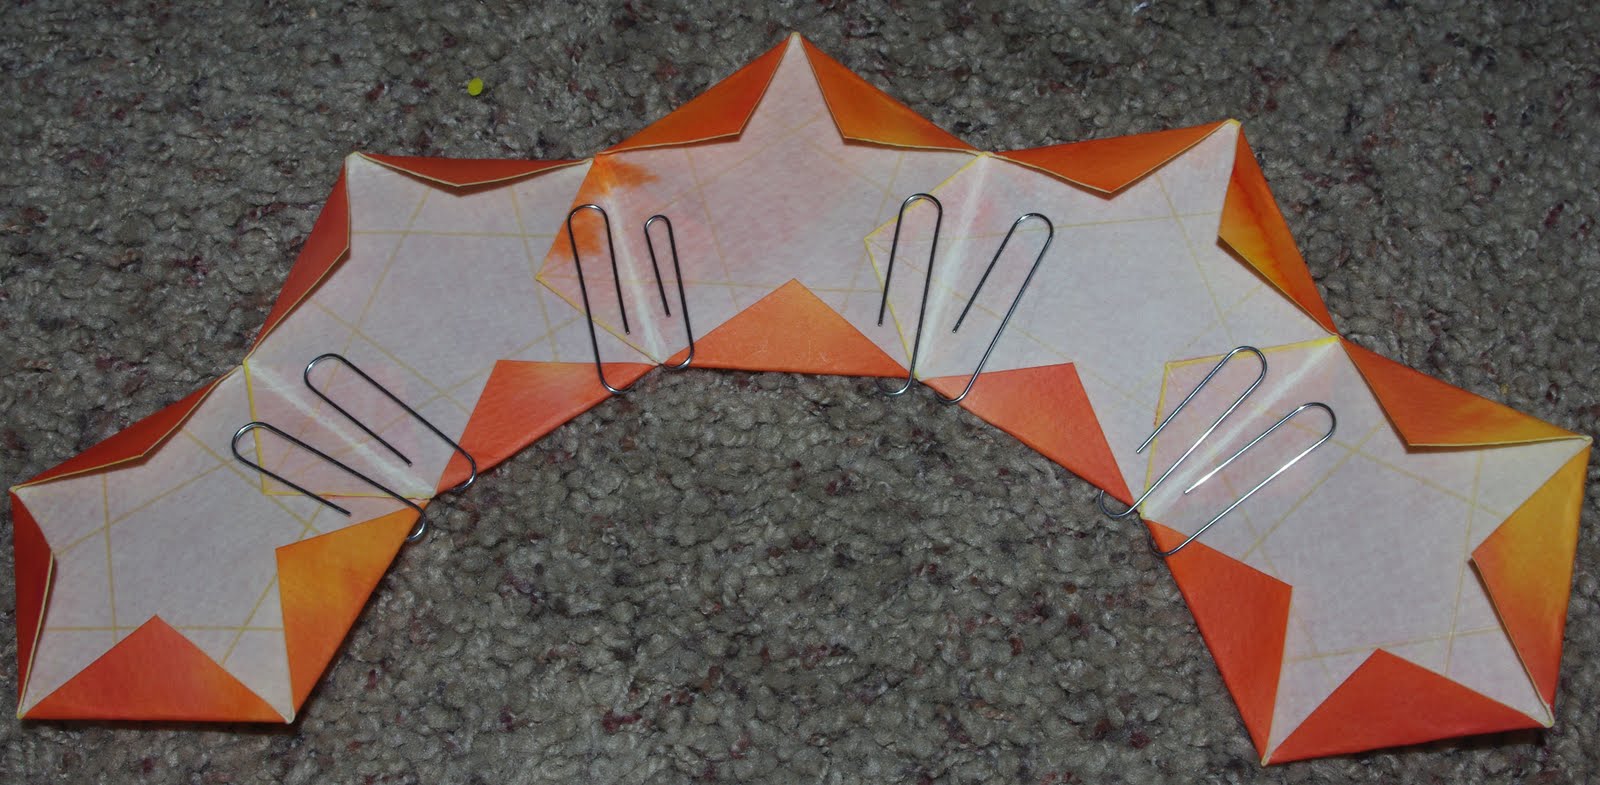 Continue gluing the pentagaons together in the same fashion until you have created a chain of five.
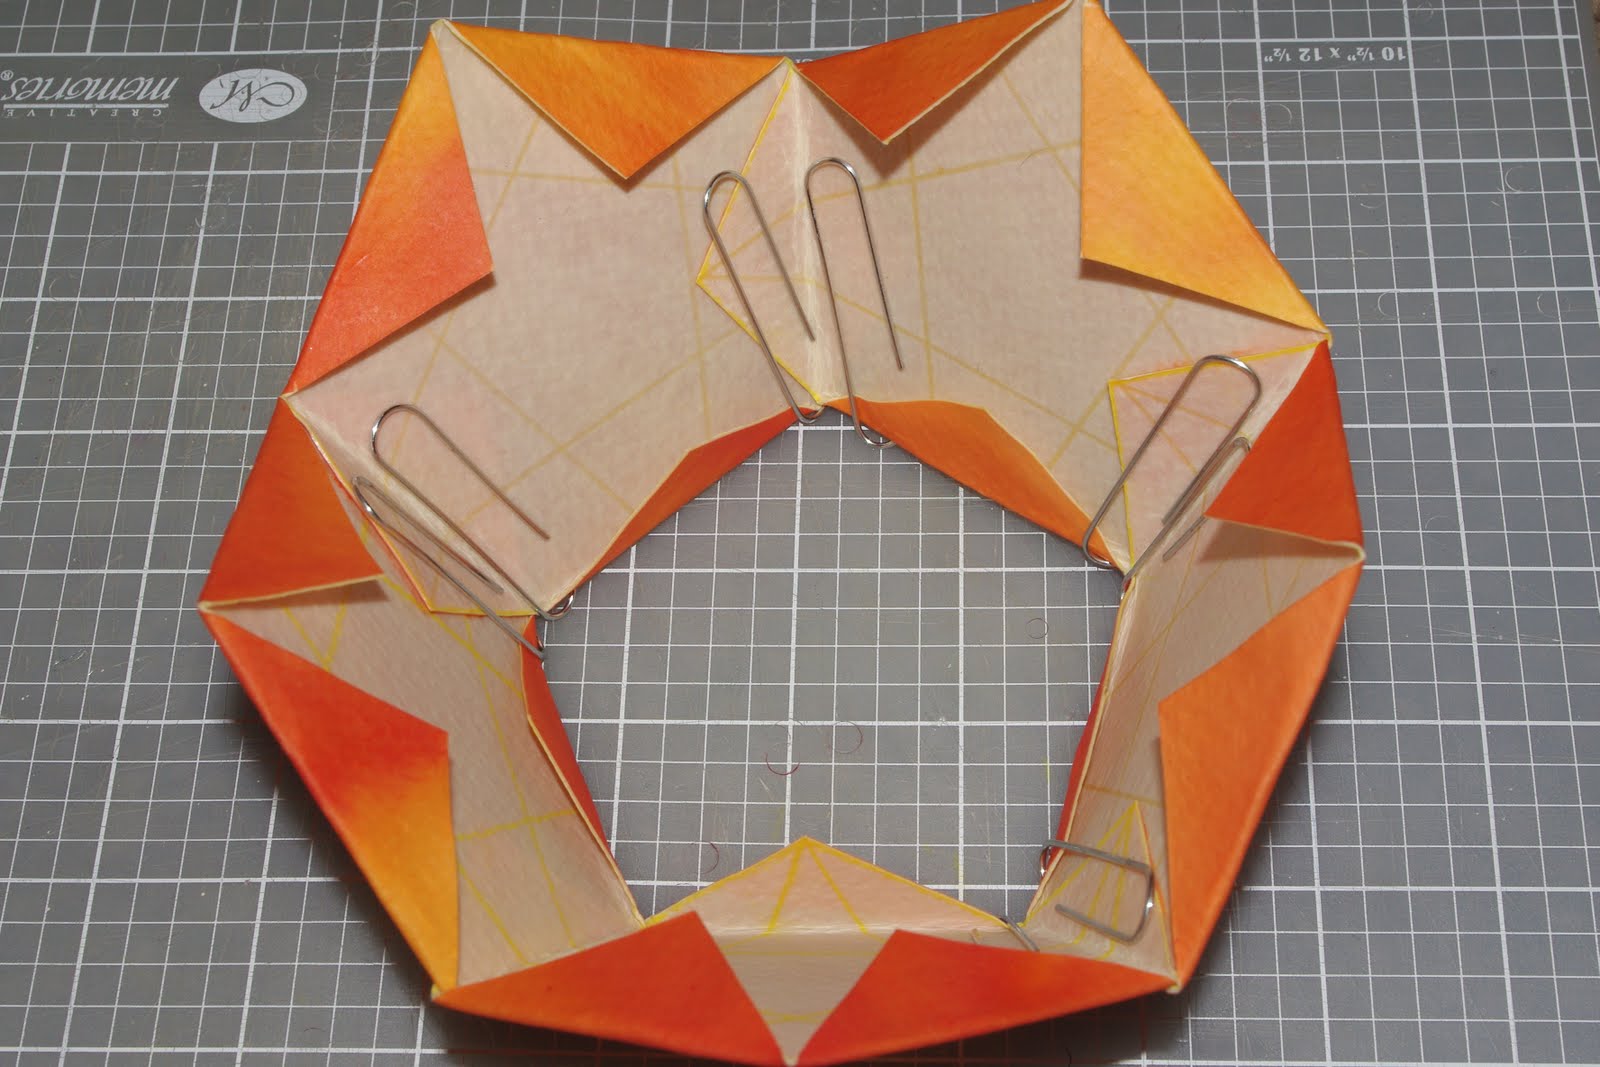 Glue the first and last pentagon together to close the chain and make a loop. Repeat these steps again with the other five pentagons, and you will end up with the two halves of your lantern. Okay, here’s the part where I forgot to take a good picture – so sorry! (I know, I know…of course it would be at a critical step!)
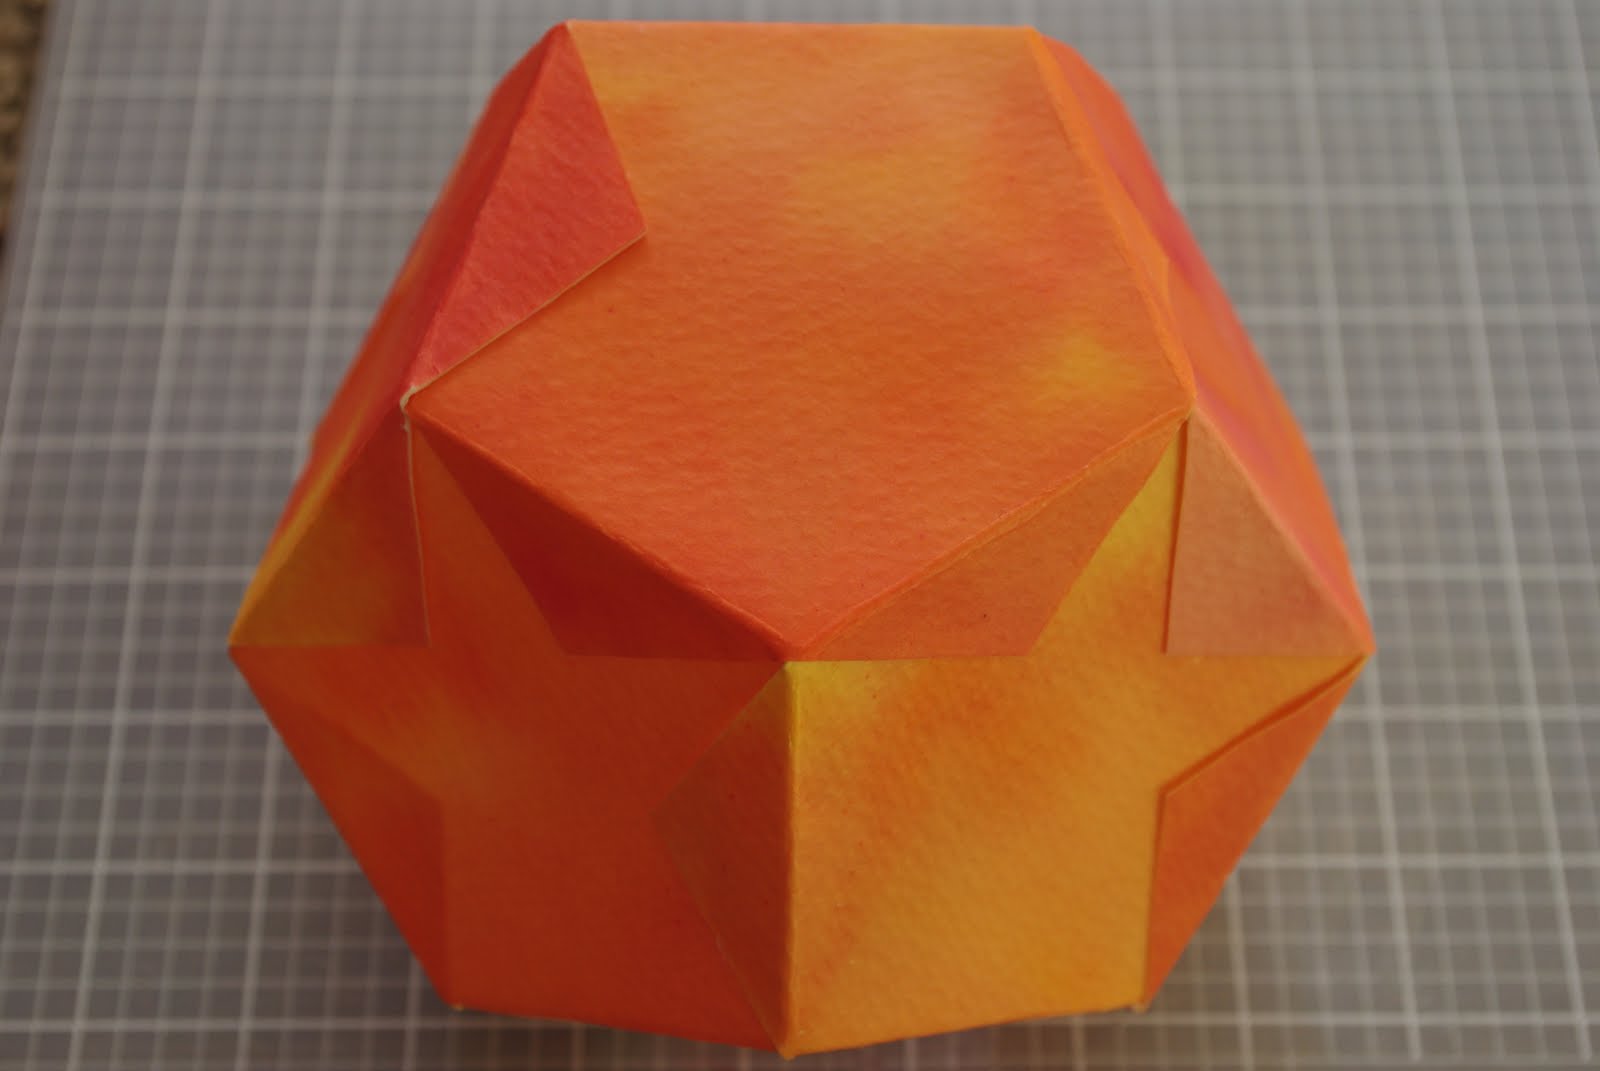
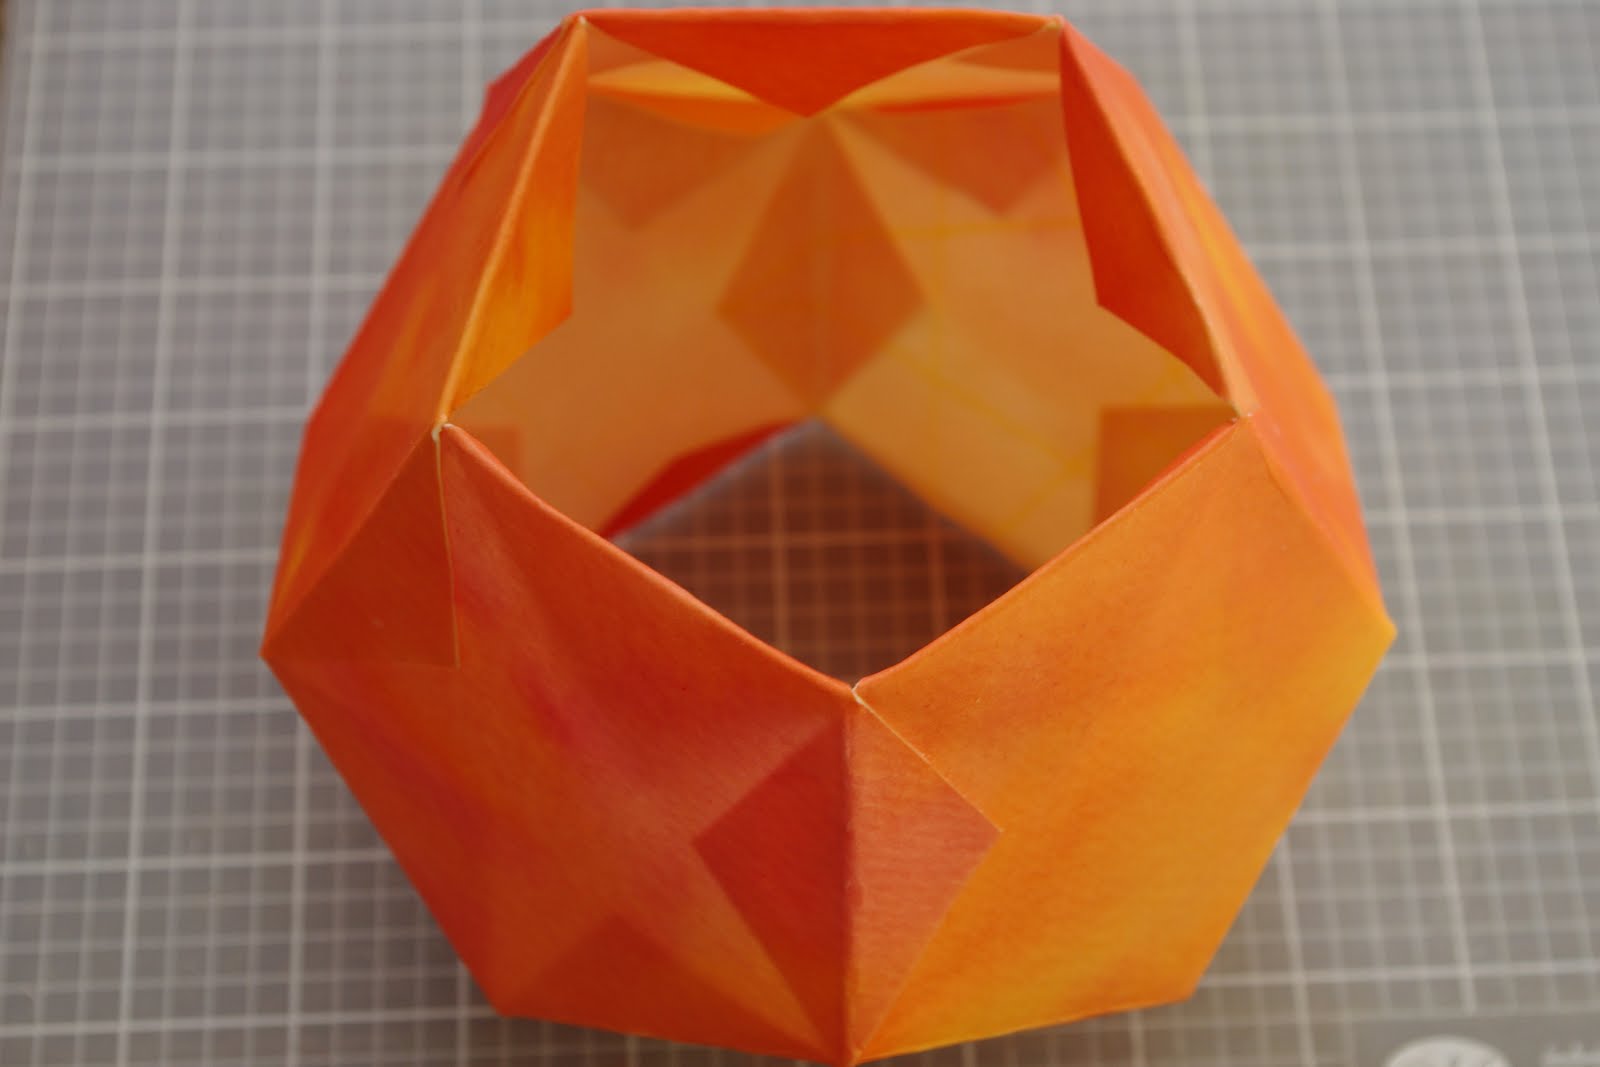 You will also need to glue the inside flaps at the seam, as well as the inside flaps at the top and bottom of the lantern. If you choose to add a base to your lantern, now would also be the time to add the 11th pentagon to the bottom of the lantern. I like to be able to slip my lantern right over my candle, so I choose to leave both the top and bottom open.
 Again, paperclips work wonders if you don’t want to sit around waiting for the glue to dry!
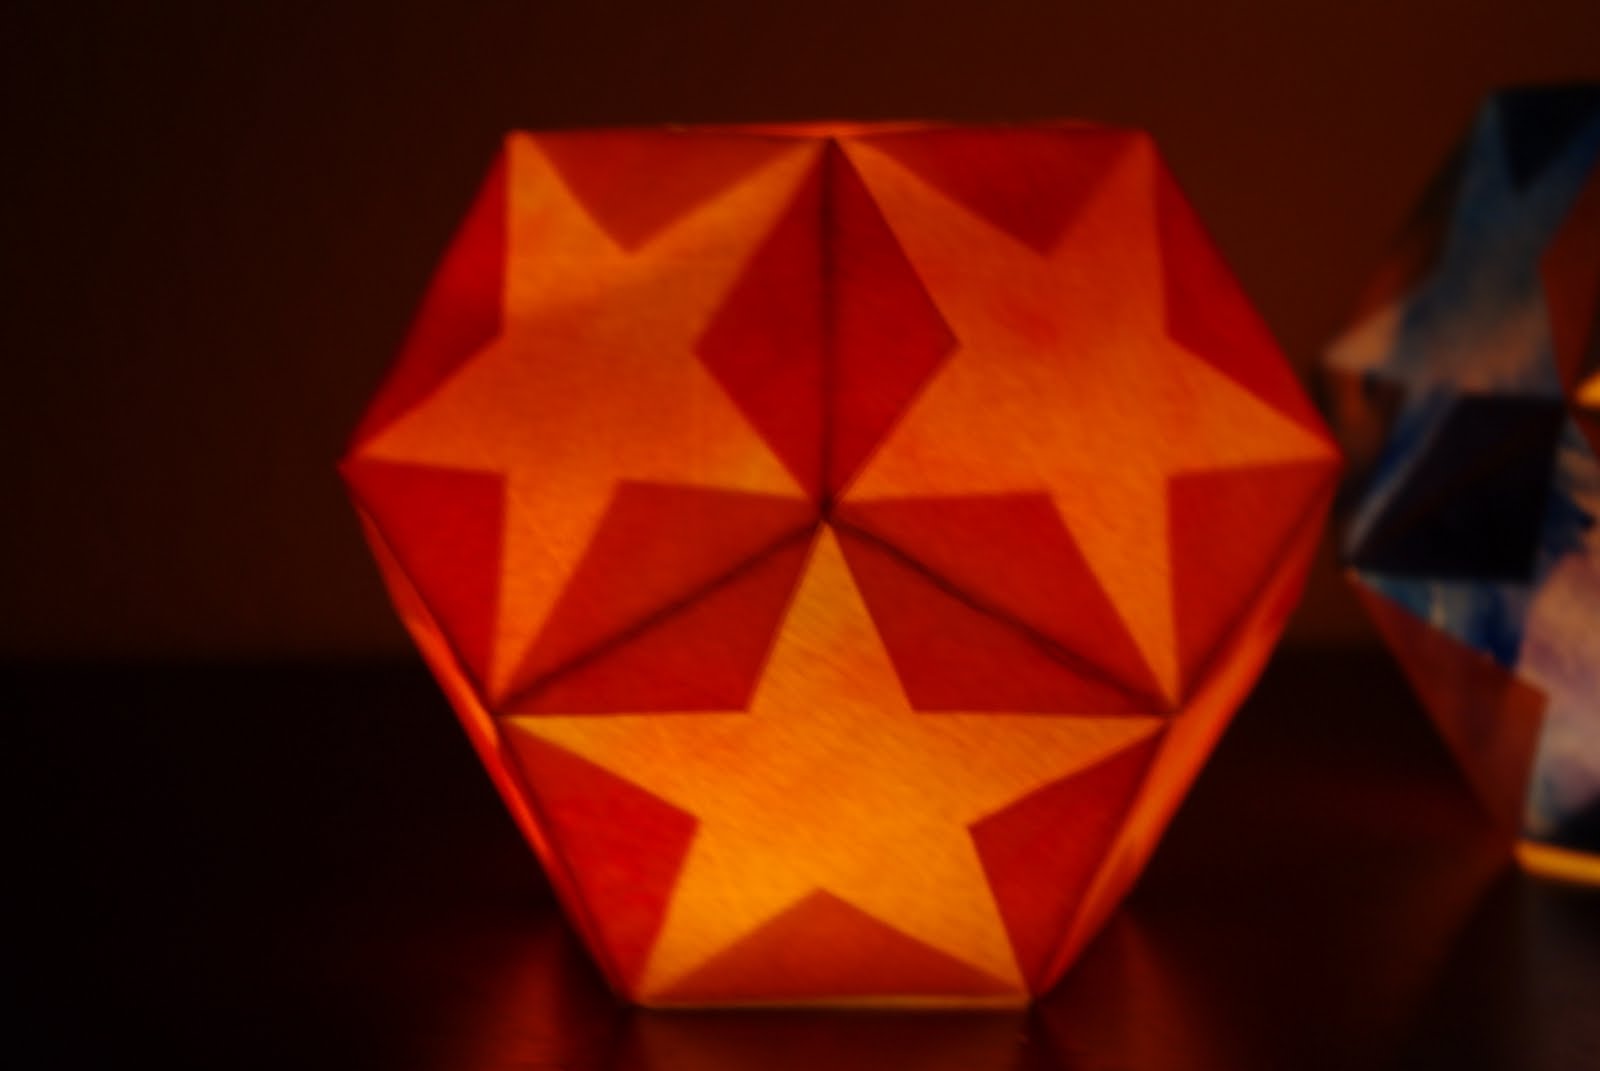
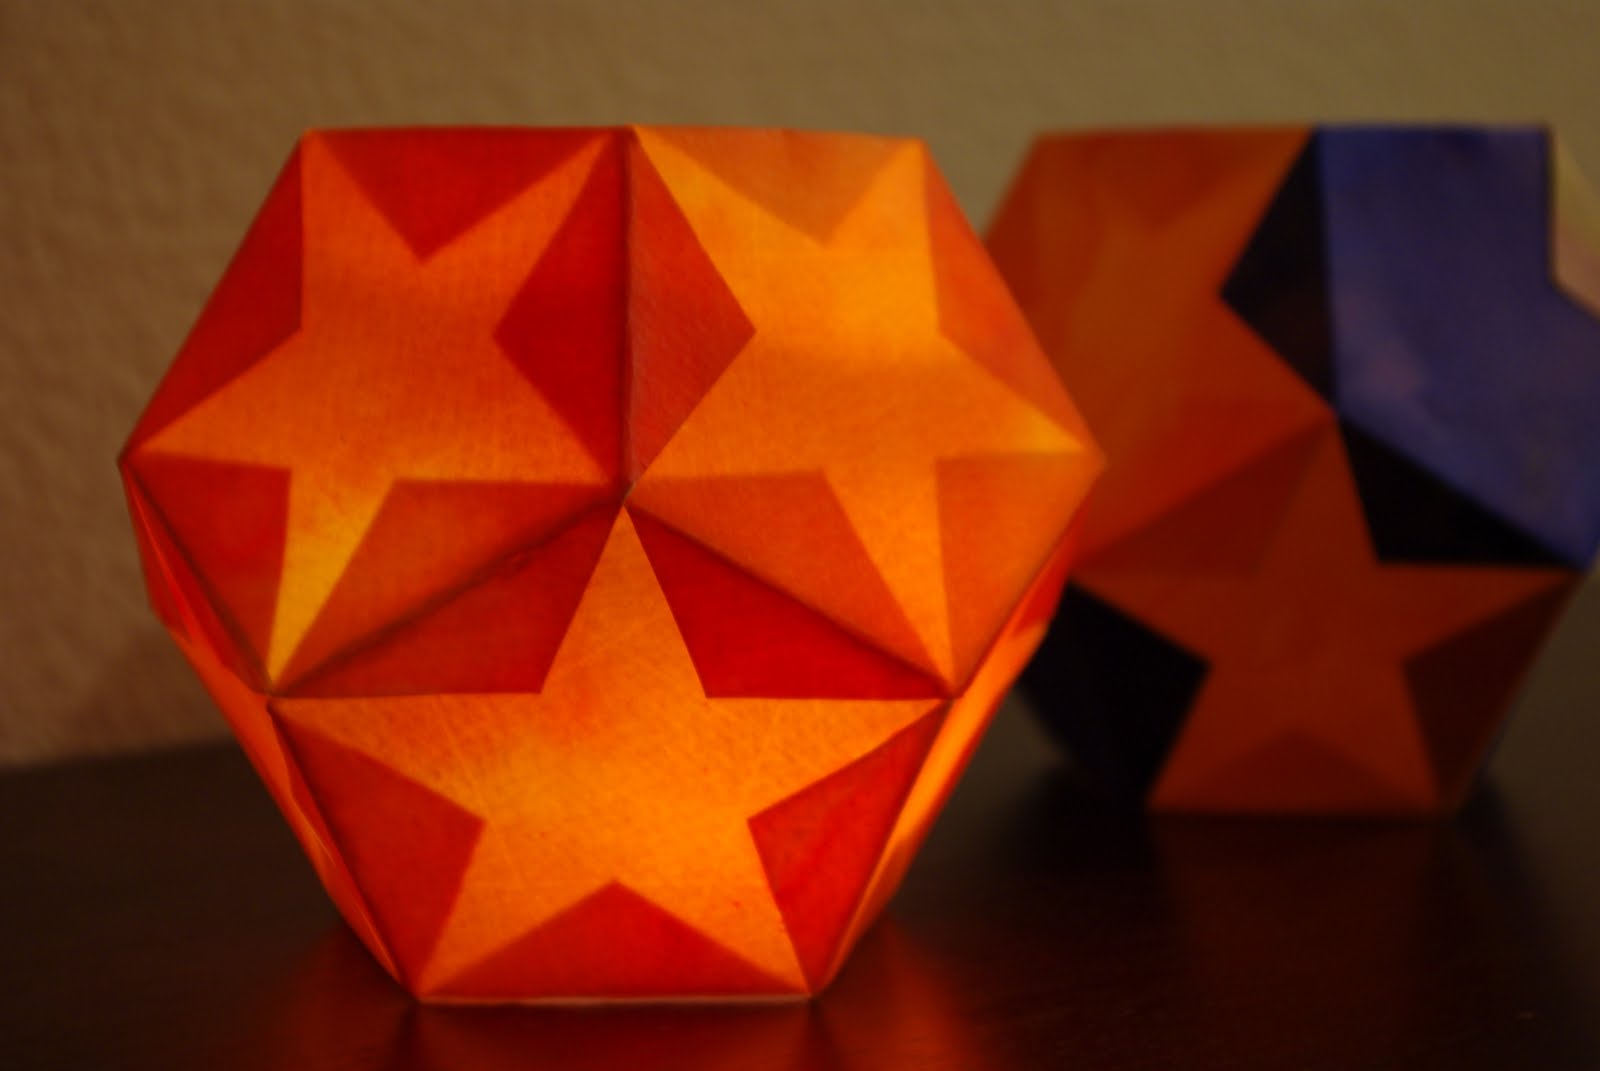
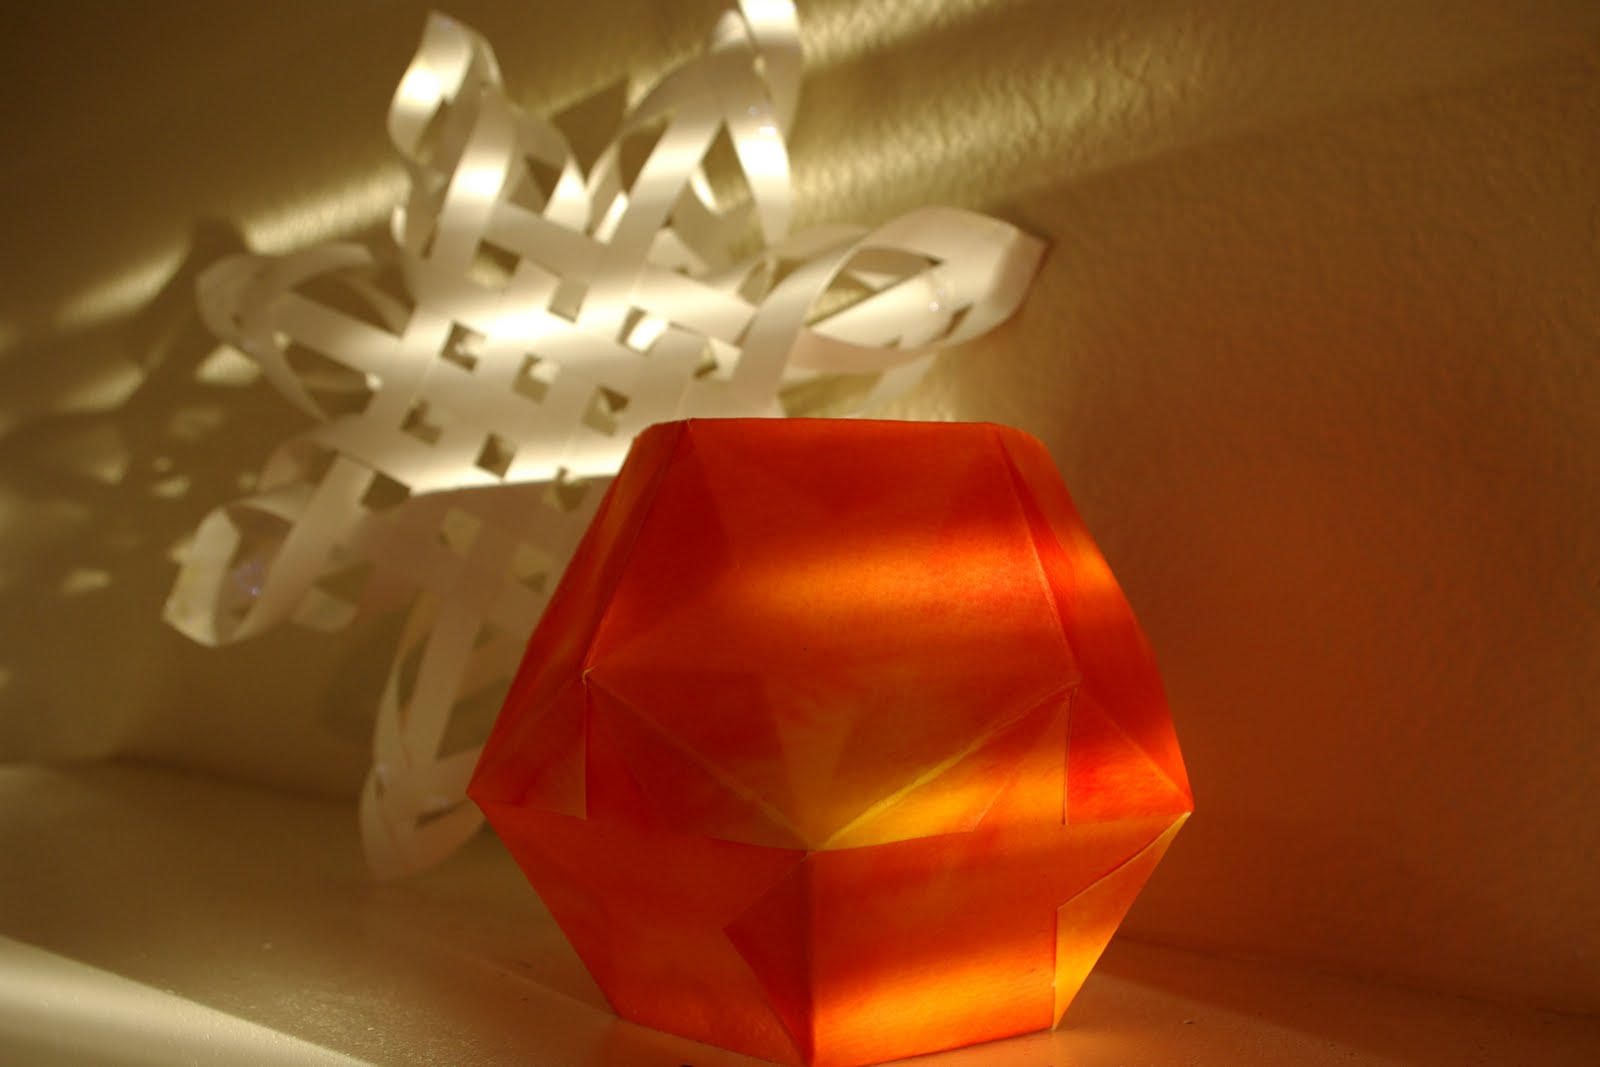 The lantern looks so cheery and whimsical sitting on our sunlit mantle during daytime, but the real fun begins when night falls…
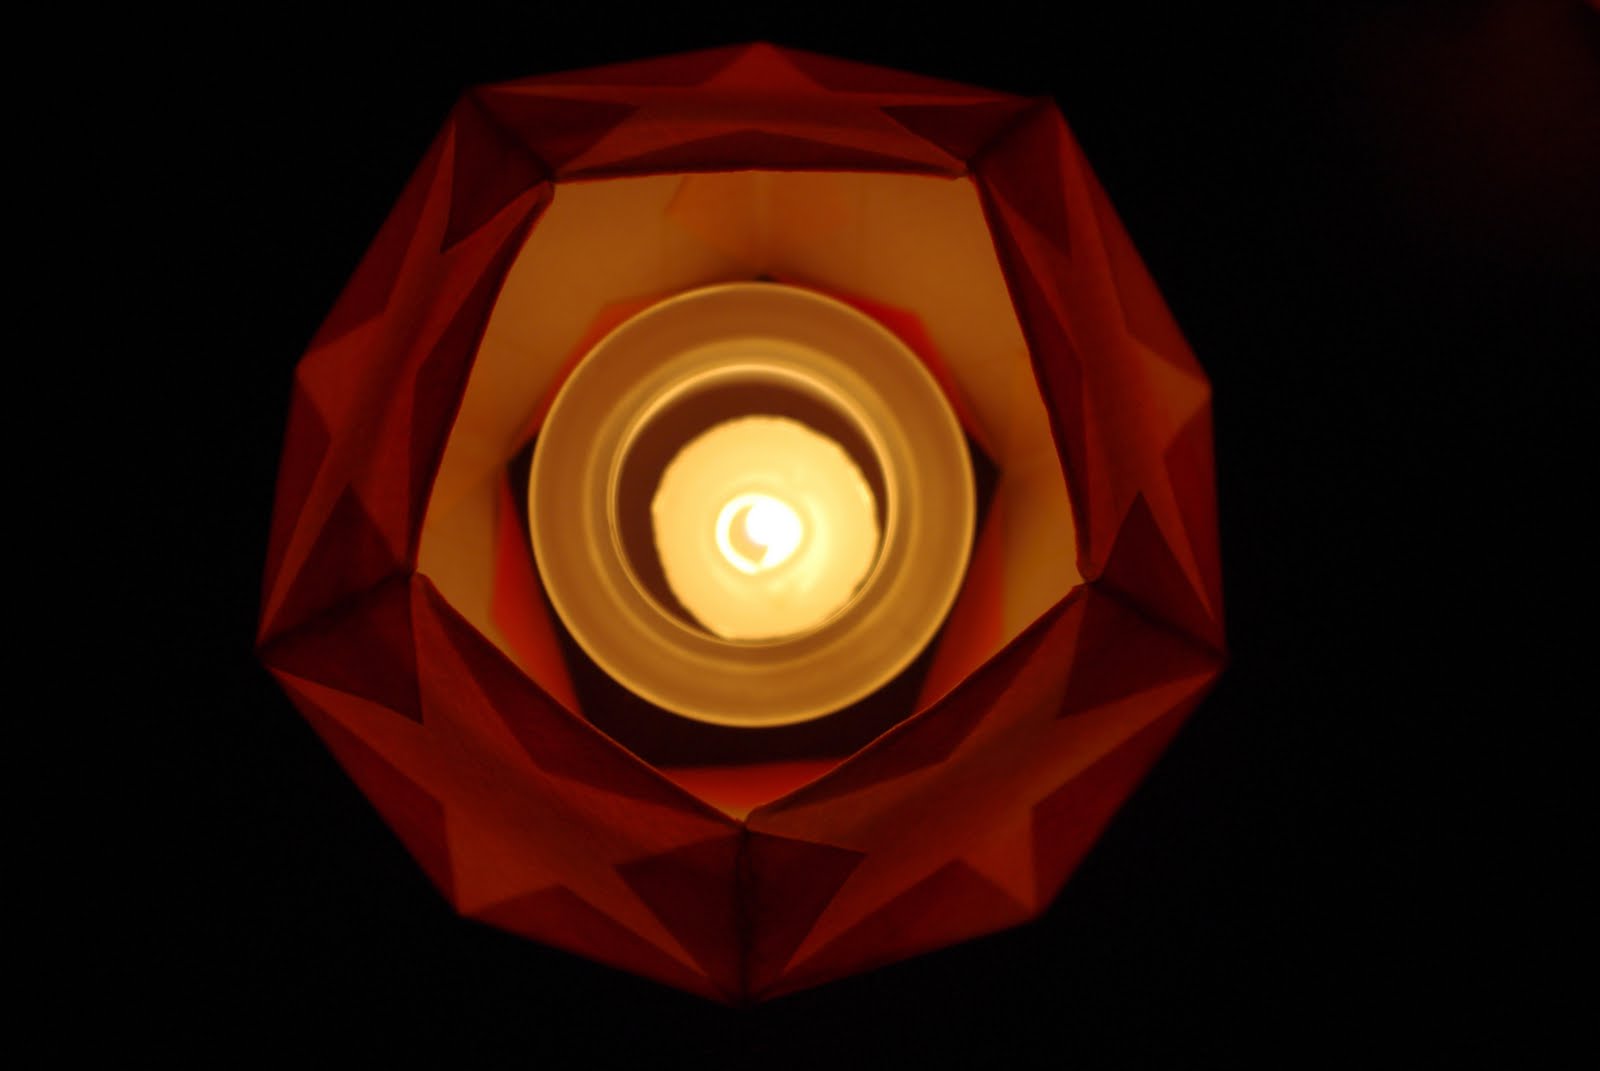 All you need is softly glowing candlelight ♥
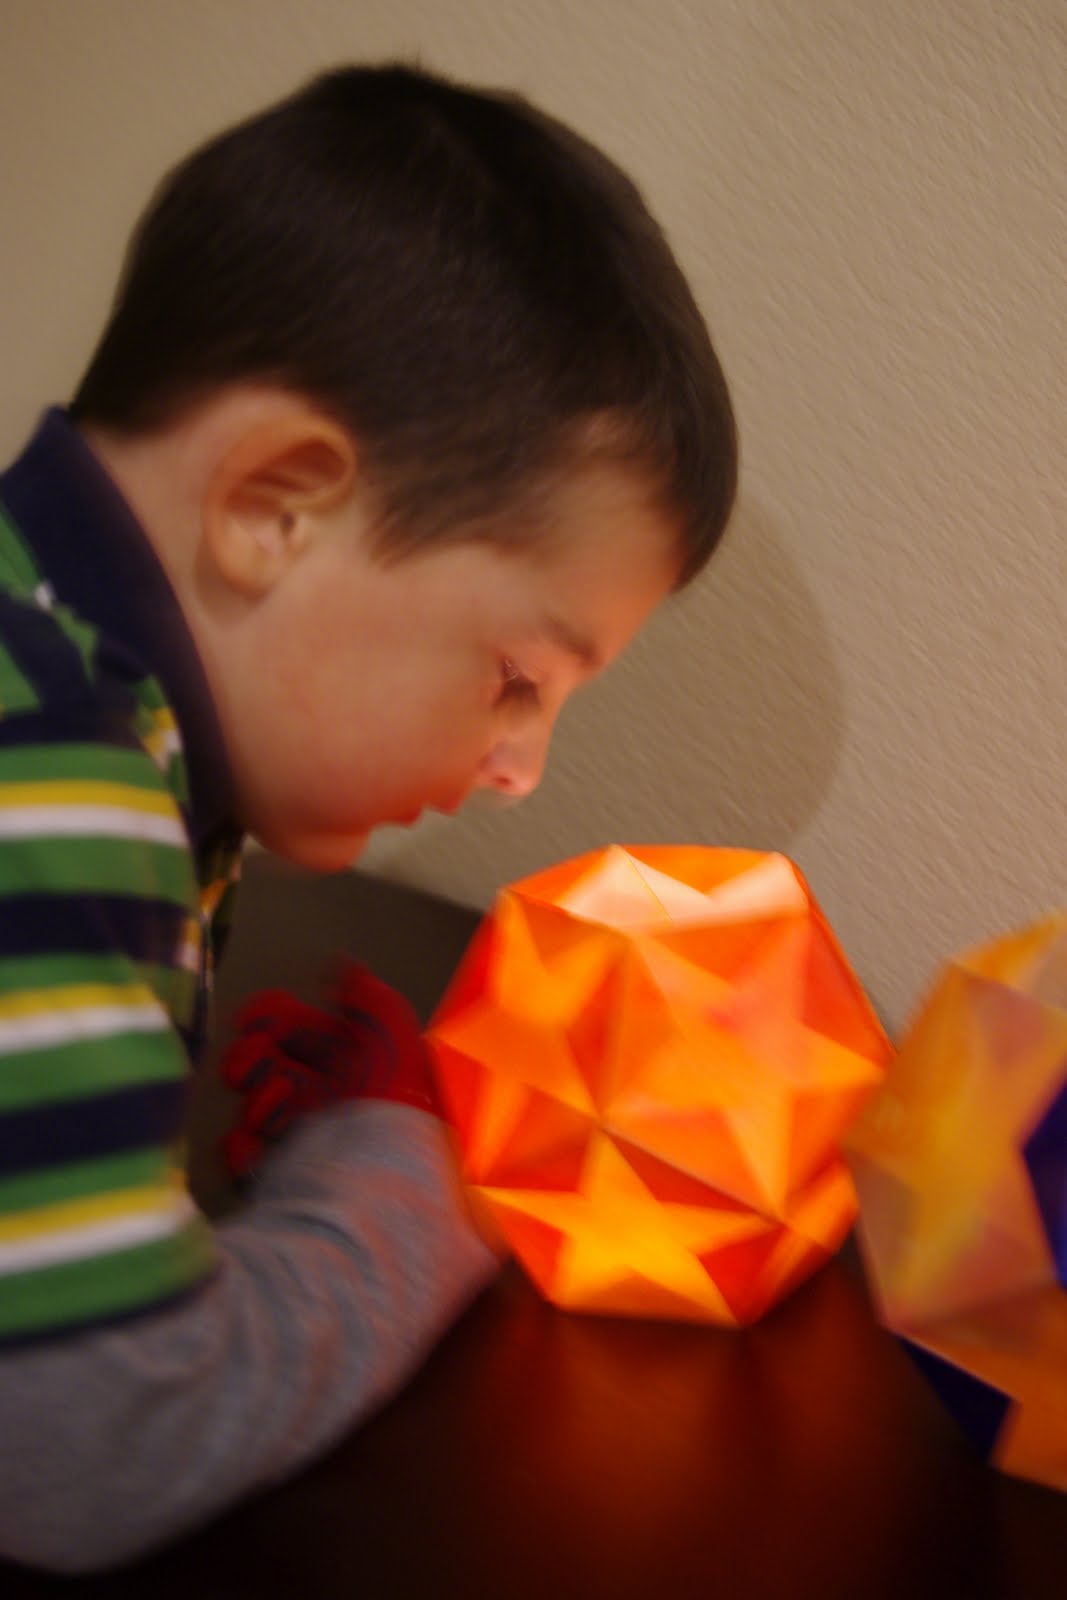 I lit our candle just as the sun was starting to set, and the boys were immediately drawn to it. I use a tealight set inside of a votive holder to keep the flame far from the paper, but you can opt for a battery operated candle too.
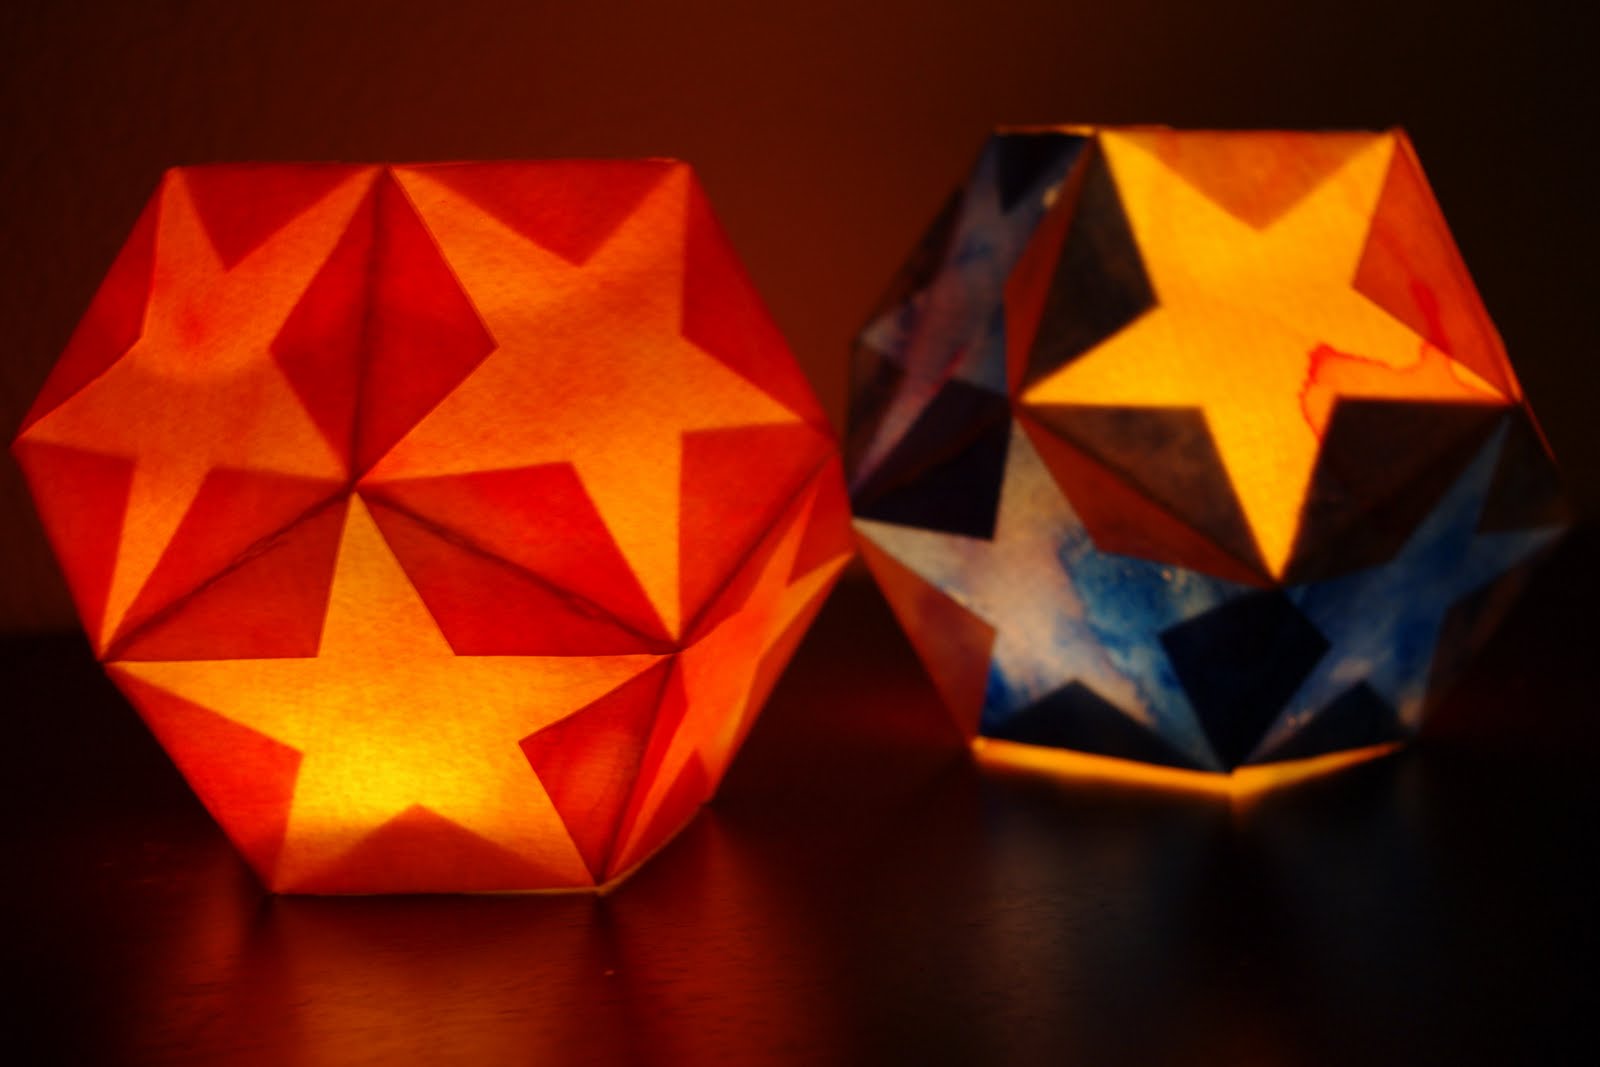


Heidi Kundin has captivated the hearts of millions with her colorful and inspiring approach to crafting, celebrations, and family fun. With over 15 years of experience, Happiness is Homemade has become a must-visit destination for those seeking quick and easy creative ideas and last-minute solutions. Heidi’s warm personality shines through her posts, inviting readers to join her on a creative journey that’s fun, rewarding, and achievable. Heidi is also the author of Homemade Bath Bombs & More and DIY Tie-Dye.
Thank you for this tutorial! I did this with my 8th graders and they had a blast. We couldn’t figure out how to get the glue to stick (we used stick glue and hot glue–I guess we needed the white stuff, lol) so we used staples. 🙂
Hi there, love your lantern, what glue did you use on the oiled paper please?
Hi Toni, we used classic white school glue for our lanterns. 🙂
What à Wonderfeel Pentagon lamp. Thanks. 🌿🌸🌿🫶
Hello! I love these lanterns and want to make them with my children this year. Did you use the standard 140 lb watercolor paper? Thank you!!
Yes! I saw that you found the answer in the comment, but answering here, too. 140 lb watercolor paper is perfect, but you could go a little bit lighter or heavier weight and still get good results as well. 🙂
Very beautifully made. Thank you for sharing