

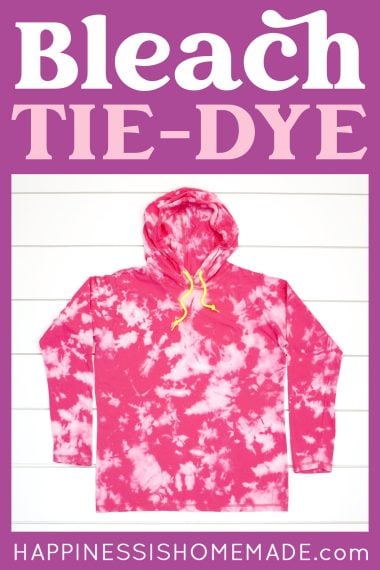
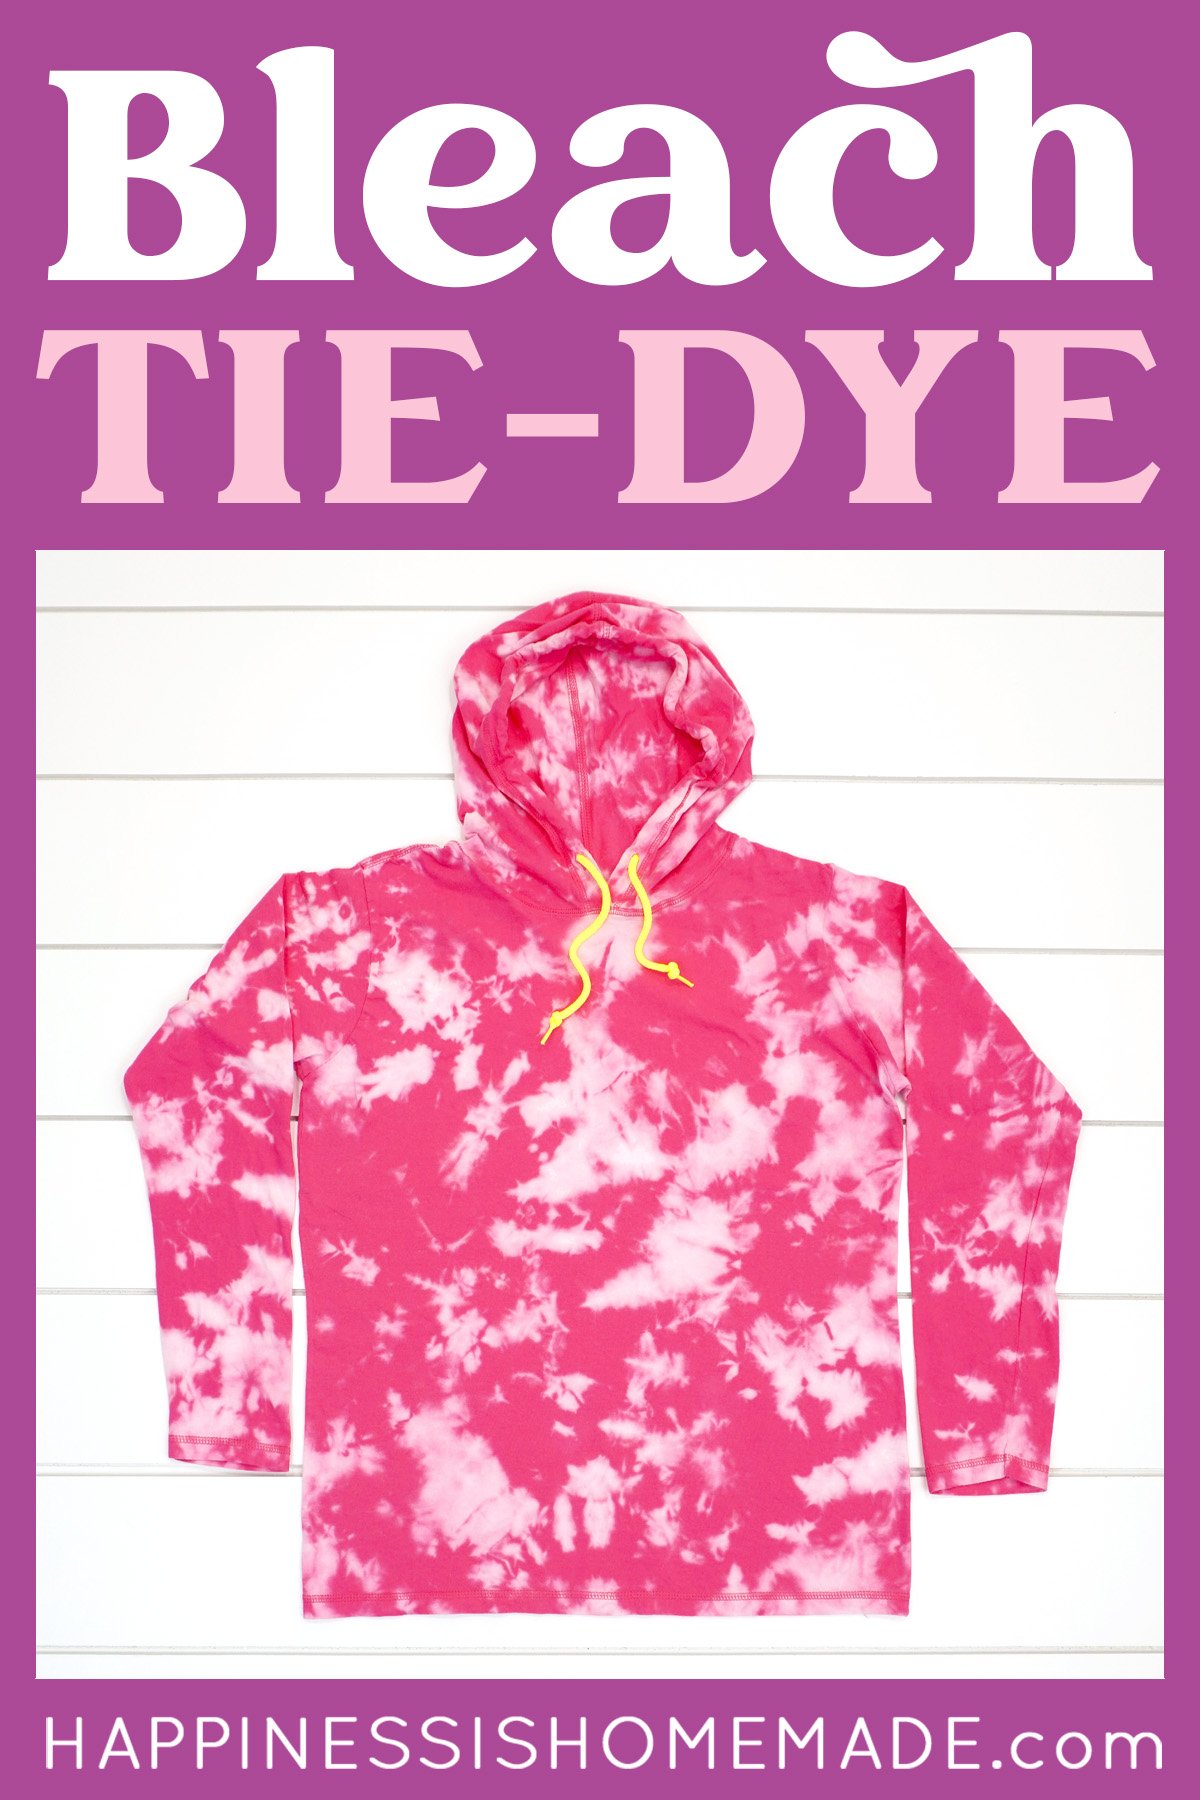
Learn how to bleach tie-dye (AKA How to Tie-Dye a Shirt with Bleach)! Discover the art of reverse tie-dye and transform your clothing with this easy bleach tie-dyeing technique!
This post may contain affiliate links. I will receive a small commission from these sales at no additional cost to you!
Bleach Tie-Dye
Bleach tie-dyeing is a fun and creative way to give new life to your old clothes or add some unique style to your wardrobe! This easy reverse tie-dye method involves removing color from clothing and fabric using a simple bleach solution. With this technique, you can create everything from Bleach-Stenciled Shirts to traditional tie-dye patterns and styles that will add a splash of personality to any piece of clothing. It’s a great way to dress up your wardrobe!
In this comprehensive guide, we’re going to cover everything you need to know about bleach tie-dyeing, including information about materials and techniques, along with handy tips that will help you achieve the best results!
Check Out These Helpful Related Resources:
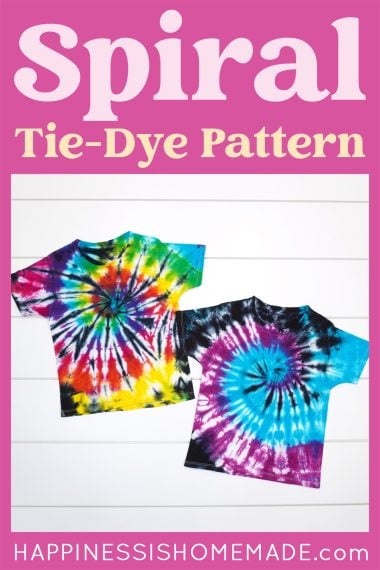
How to Fold a Classic Spiral Tie-Dye Pattern
Must-Have Tie-Dye Supplies – everything you need and where to get it!
How to Tie-Dye Naturally with Avocado Dye (you won’t believe the gorgeous color it creates! 🤯😍)
What is Reverse Bleach Tie Dye?
While traditional tie-dyeing is the art of adding colorful dye to a garment to create designs, this bleach tie-dye technique, also called reverse tie-dyeing, is the process of using a bleach solution to remove the color from garments and fabrics to create patterns and designs.
Before you start your bleach tie-dye project, it’s important to gather all of your materials and prep your workspace.
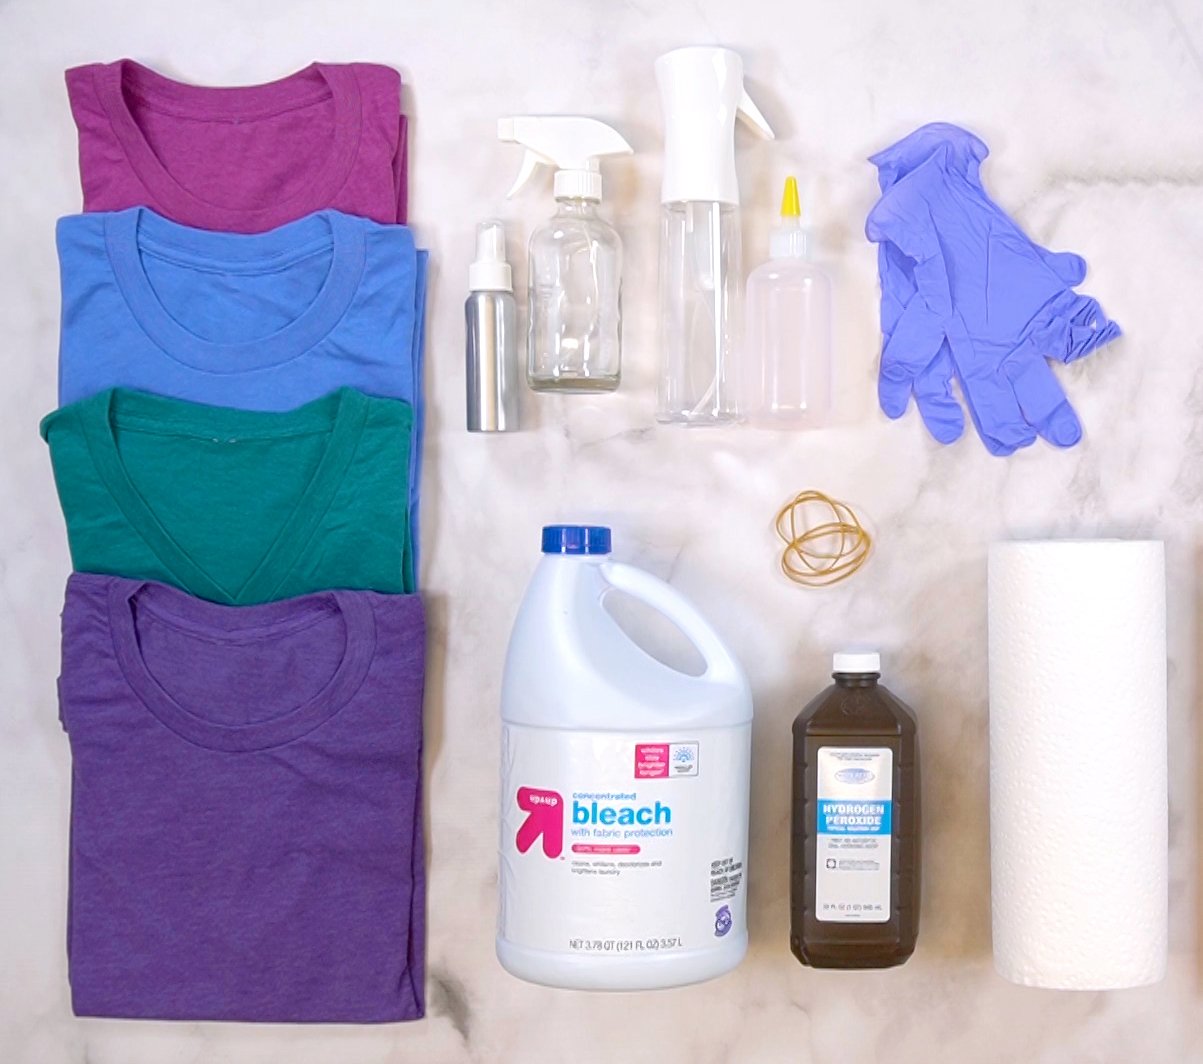
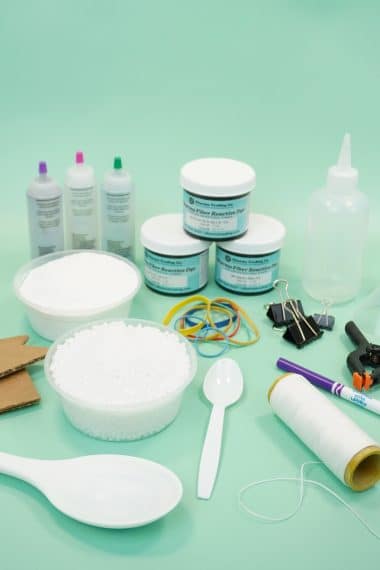
Supplies Needed for Bleach Tie Dye Shirts:
- Dark or Colored Shirts*
- Household Bleach (Chlorine Bleach)
- Hydrogen Peroxide
- Rubber Bands
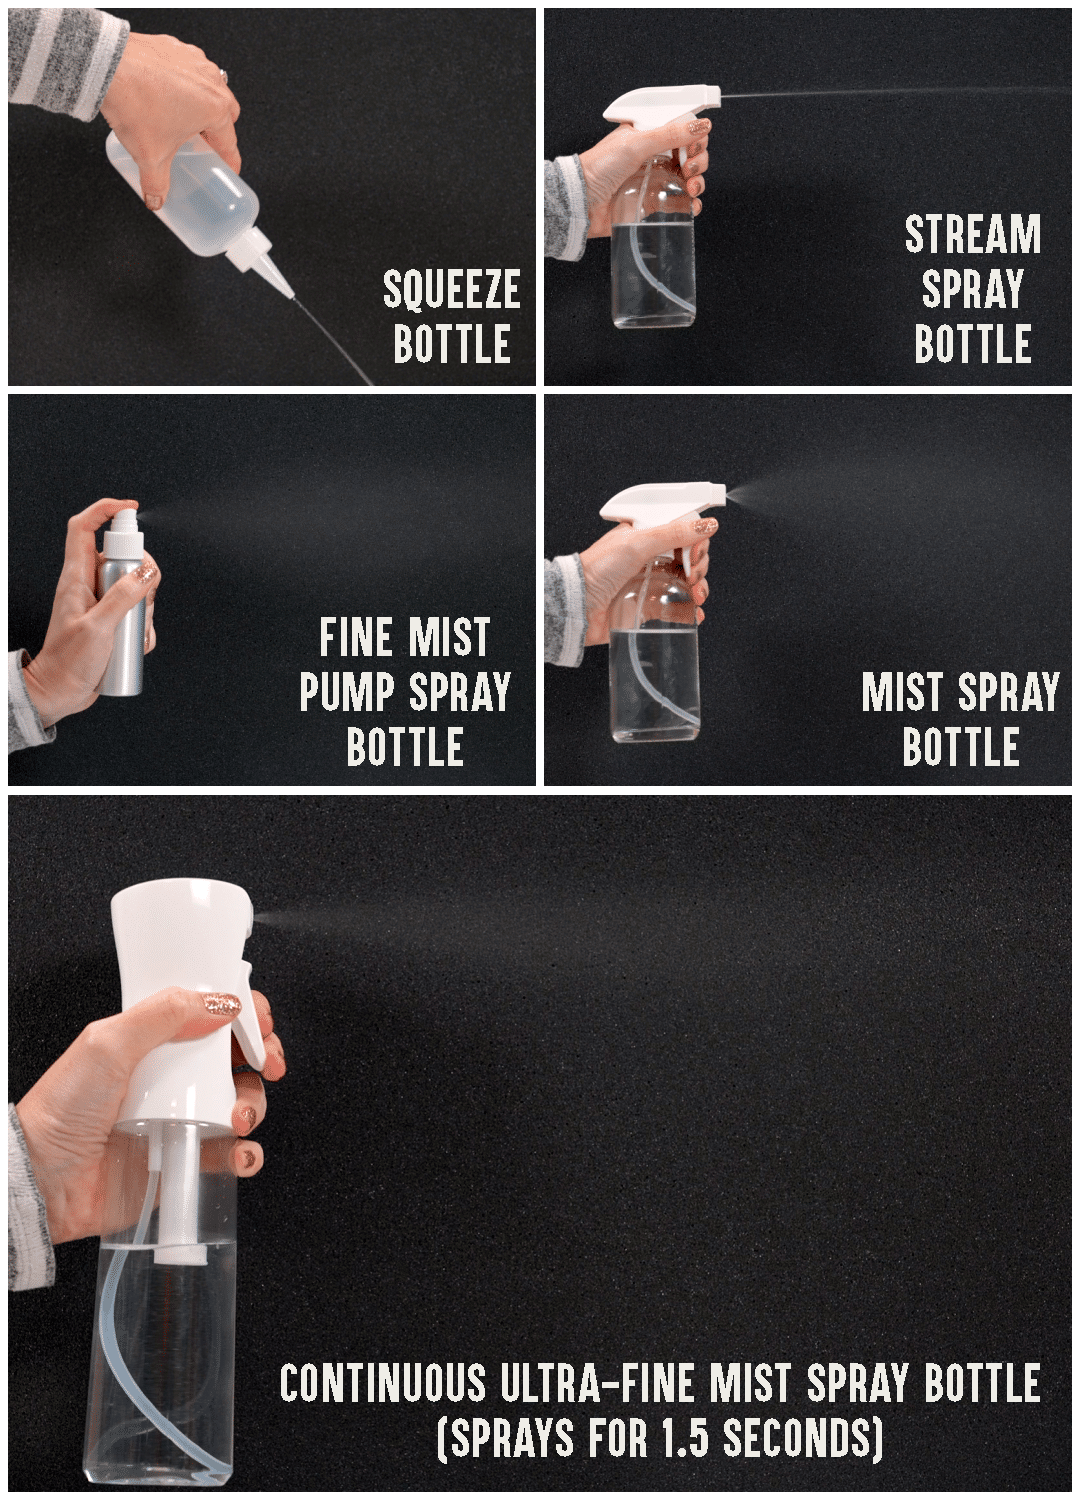
- Spray Bottle, Squirt Bottle, or Squeeze Bottle
- (2) Small Plastic Tubs (may use a bathroom or kitchen sink in lieu of one tub if desired)
- Gloves
- Mask, optional
* Note: Cotton and cotton/polyester blend fabrics work best. See additional notes in the instructions below when working with 100% cotton fabric.
IMPORTANT!
Bleach can be harmful if handled incorrectly, so it’s crucial that you work in a well-ventilated area, wear old clothing and PPE, and protect your work surface (plastic or old newspapers work well).
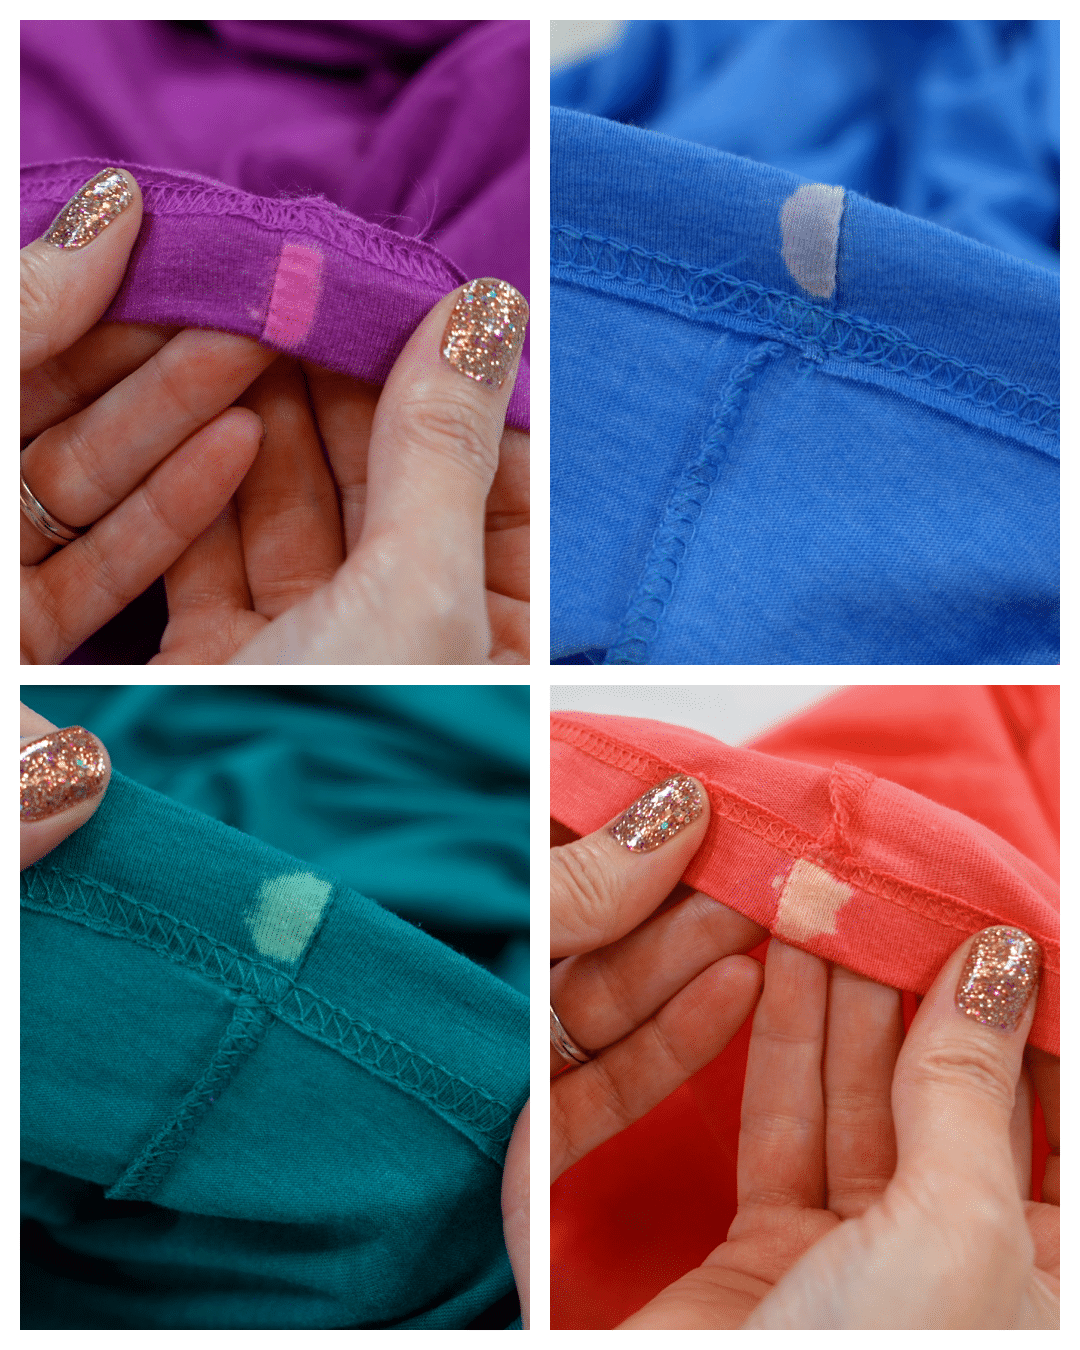
It’s always a good idea to test your bleach solution on a small section of the fabric before starting your project. This will give you an idea of how the fabric is going to react to the bleach solution and what color it will turn, and it will help you determine the best time for your desired results. I typically test a small swatch on the bottom inside hem of the shirt where several layers of fabric overlap – this way it won’t bleed through to the front.
Adding bleach to a colored shirt doesn’t always work the way that you expect it to! For example, a black shirt will often bleach to orange, and navy blue occasionally bleaches to bright pink – so I always recommend doing a patch test first to make sure that you’re going to be happy with the color change.

How to Tie-Dye with Bleach
Click play to watch me make these fun reverse tie-dye projects, and then keep reading for even more tips and tricks!

Step 1: Prepare Your Shirt
Begin by washing and drying your shirt to remove any sizing, dirt, or debris that might interfere with the bleaching process. For this folding technique (spiral tie-dye), we are going to use a very lightly damp shirt which will allow the bleach mixture to spread more evenly and soften the lines of the design. Once the shirt is clean, lightly dampen it by spraying it with water, and wringing out any excess water.
Note: Depending on your design and the desired look, you may choose to begin with either a dry or a damp t-shirt.
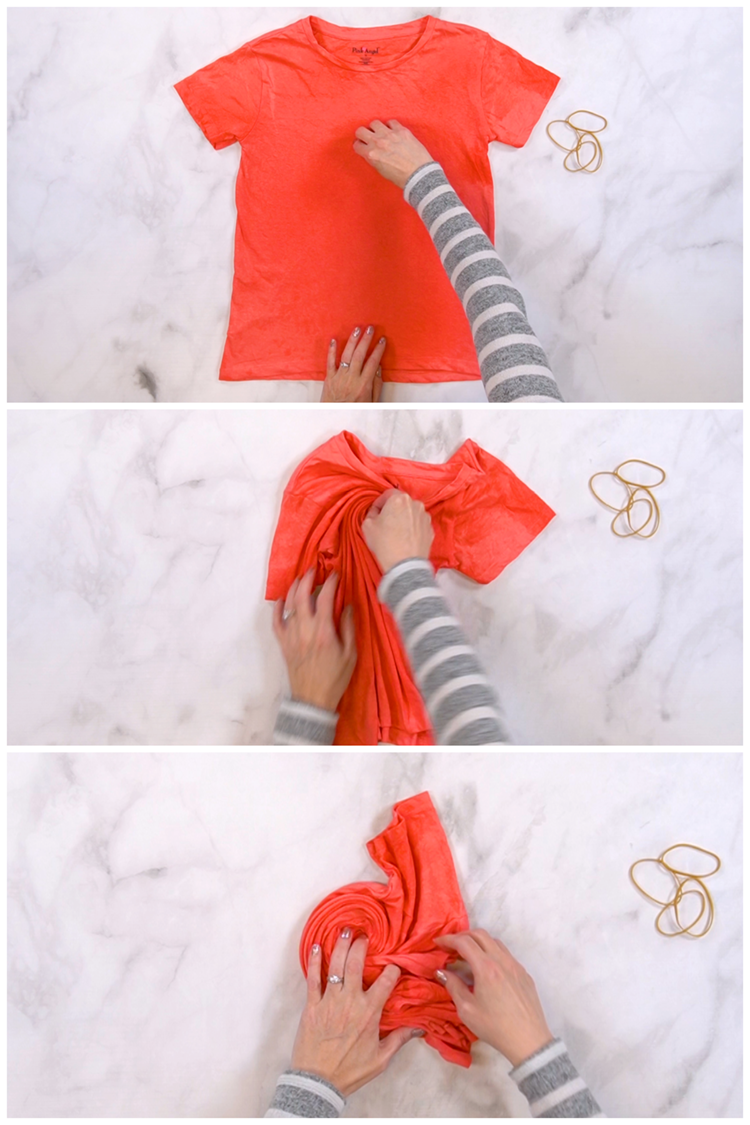
Step 2: Fold Your Desired Pattern
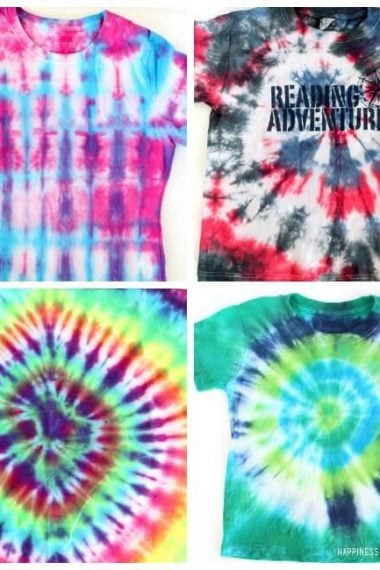
There are countless different patterns and different designs that you can use to create your tie-dye clothing! Here, we are using a Spiral Tie-Dye Fold, but you can feel free to experiment with folding, twisting, and scrunching your fabric in different ways to achieve a unique design of your own.
RELATED: Learn How to Fold & Dye a Classic Spiral Pattern Tie-Dye Shirt
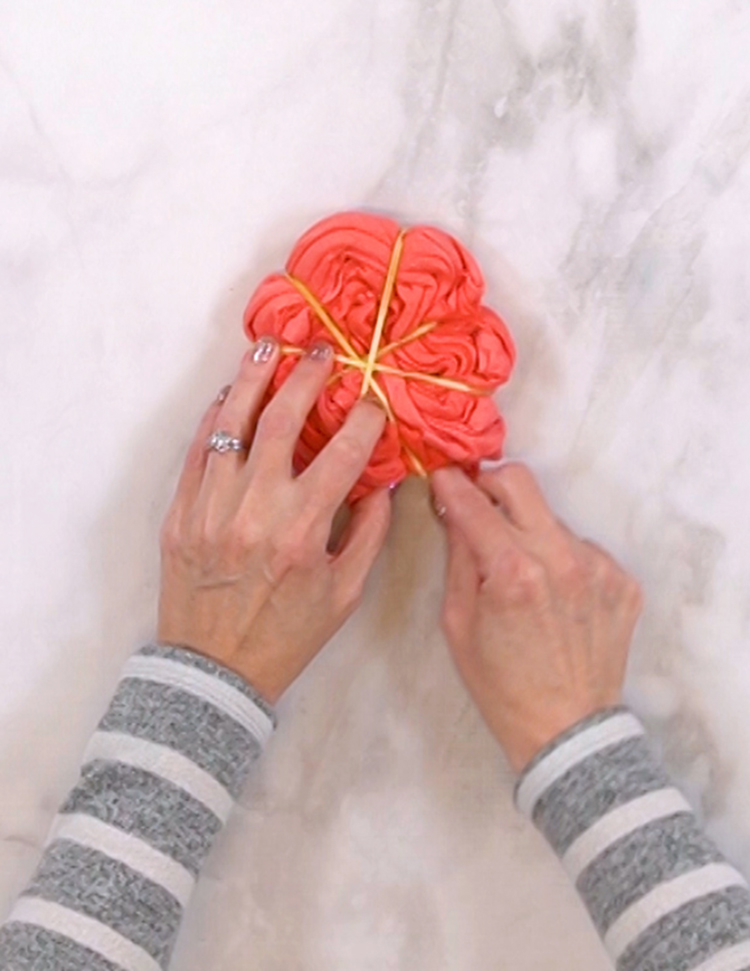
Once you are finished folding, use rubber bands to secure the fabric.
Step 3: Mix Your Bleach Solution & Neutralizer
In a spray, squeeze, or squirt bottle, mix equal parts of water and liquid bleach (one part water to one part bleach, 1:1 ratio). Depending on your folding technique and the look desired, you may wish to use one of these methods or a combination of methods.
This water-bleach mixture is more gentle on the fabric than using straight bleach, but it will still have the ability to eat through delicate natural fibers, so be sure to follow the specific instructions below to avoid any mishaps!
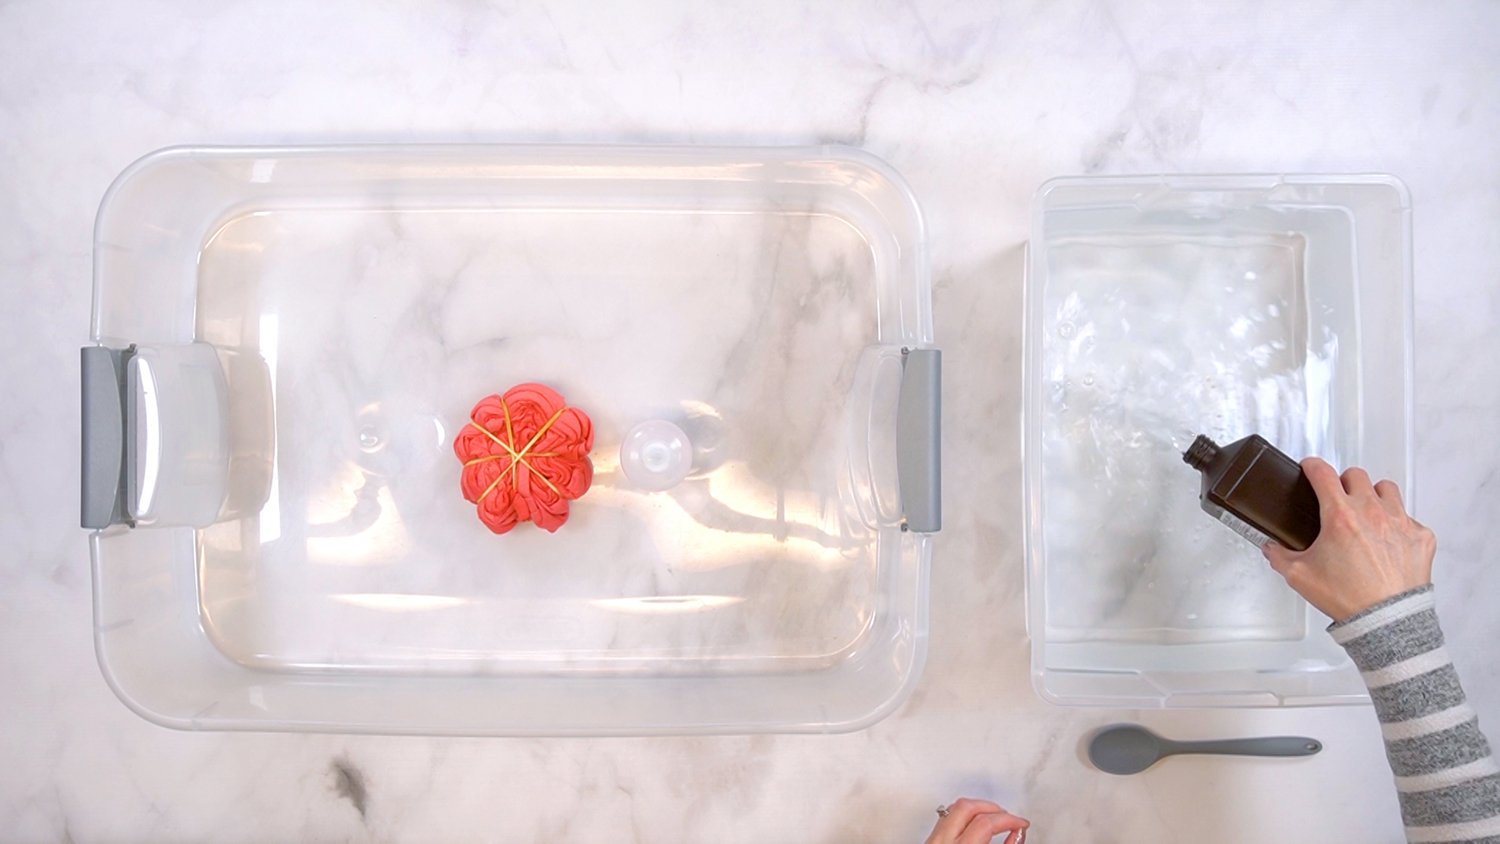
In a small plastic tub, mix up the bleach-neutralizing solution from a combination of one part hydrogen peroxide to ten parts water (1:10 ratio).
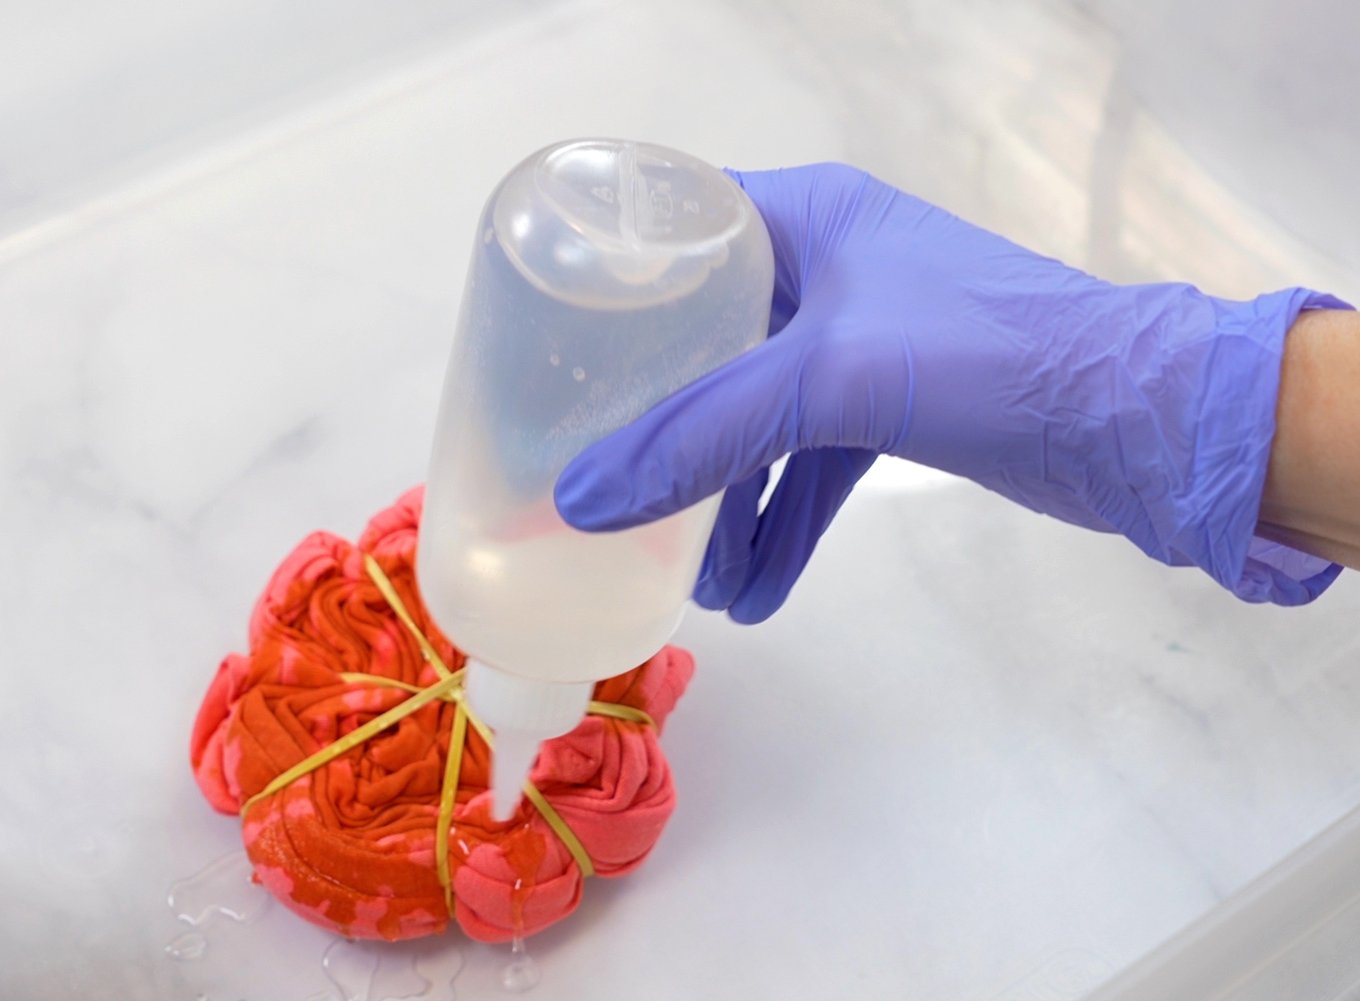
Step 4: Apply the Bleach Mixture
Lay your shirt on a protected, flat surface (I like to use the inside of a shallow plastic tub), and apply the bleach solution to the areas you want to remove the color from. Use a spray bottle for a more gentle and diffused effect or use a squirt bottle for a heavy, overall application.
IMPORTANT!
Remember, always wear gloves when handling bleach to protect your skin!
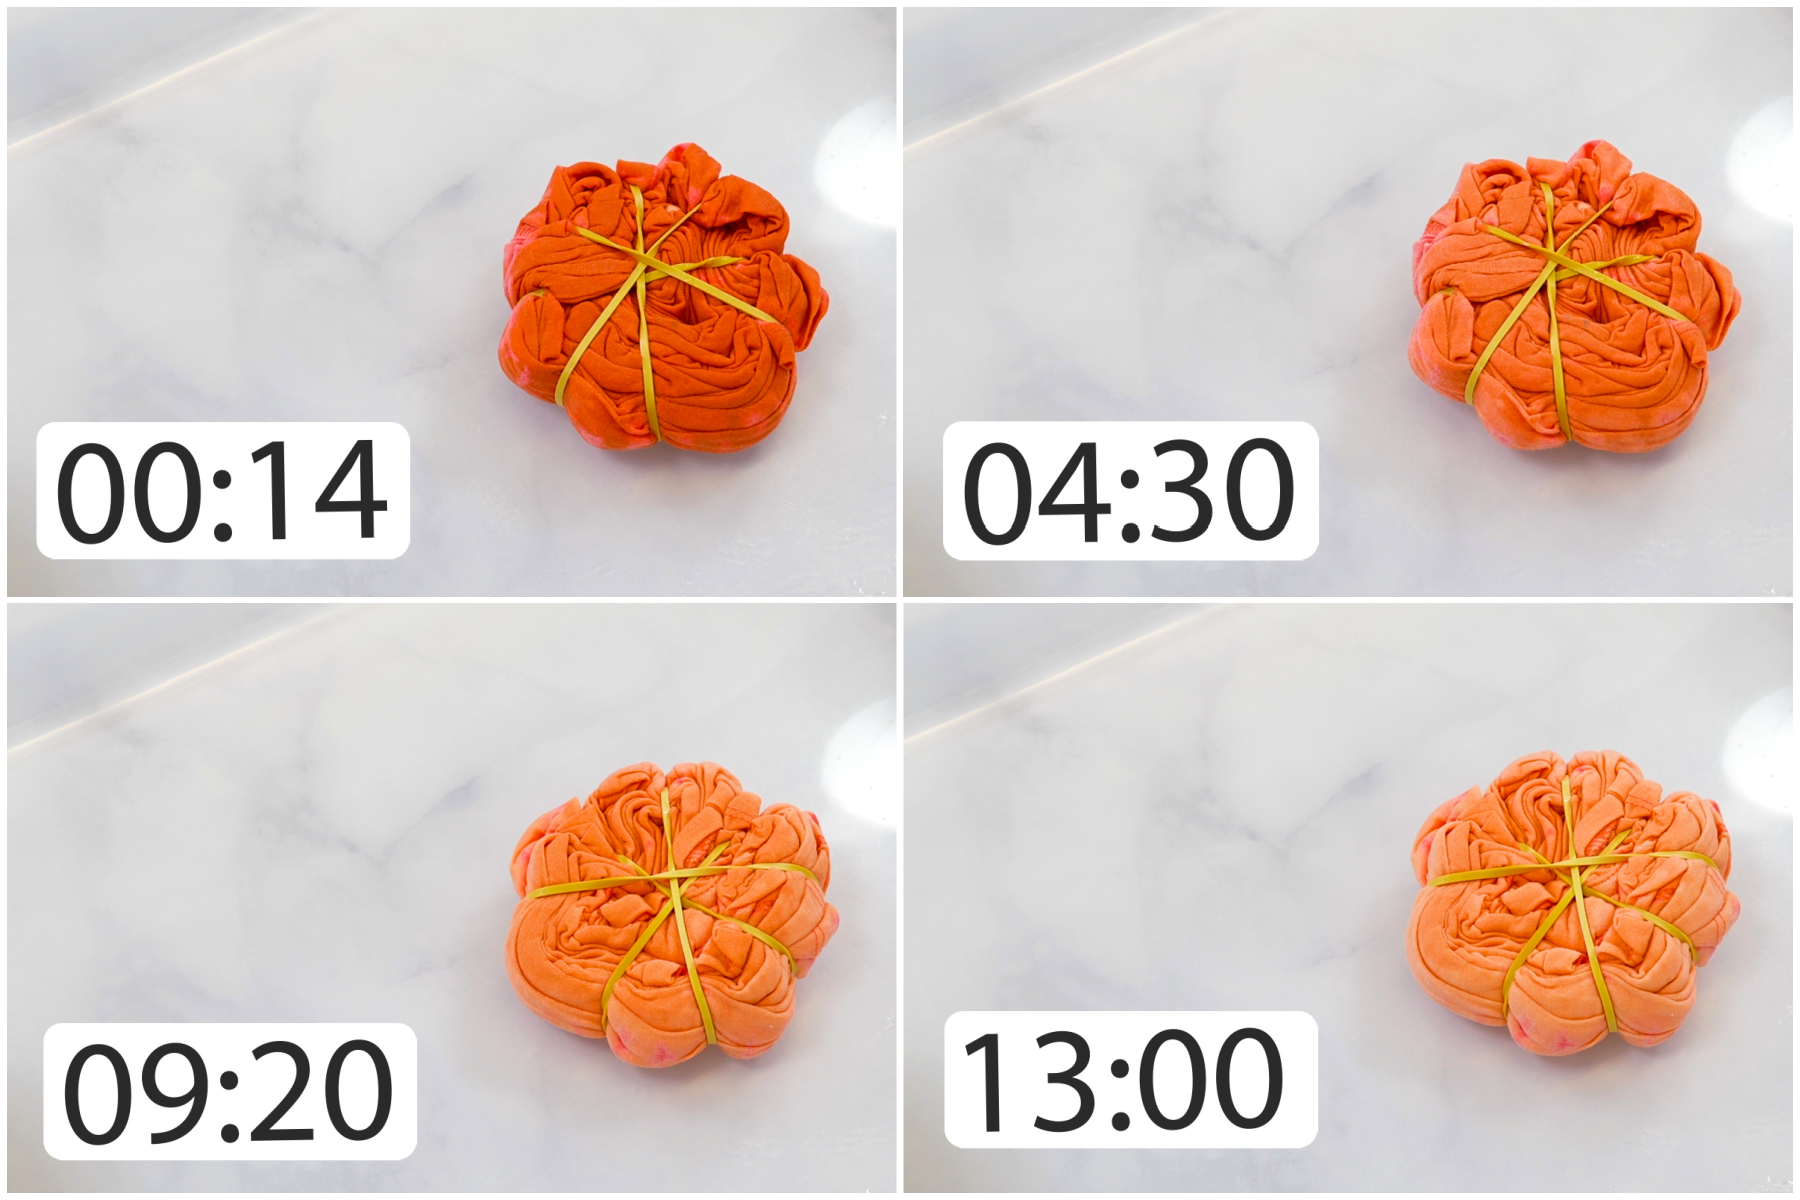
Step 5: Allow the Bleach to Work Its Magic!
Once you’ve applied the bleach to the shirt, allow it to soak into the fabric and remove the color. This process can take anywhere from 5-20 minutes, depending on the fabric and concentration of the bleach.
Do NOT bleach your shirt for more than 30 minutes or you will run the risk of damaging the fibers! Cotton and natural fibers will begin to weaken (and start to disintegrate) more quickly than polyester fibers, so I typically bleach 100% cotton shirts for NO longer than 15-20 minutes to avoid damaging the fibers of the fabric.
Pro Tip!
You can accelerate the bleaching process by doing this step outdoors on a warm, sunny day!
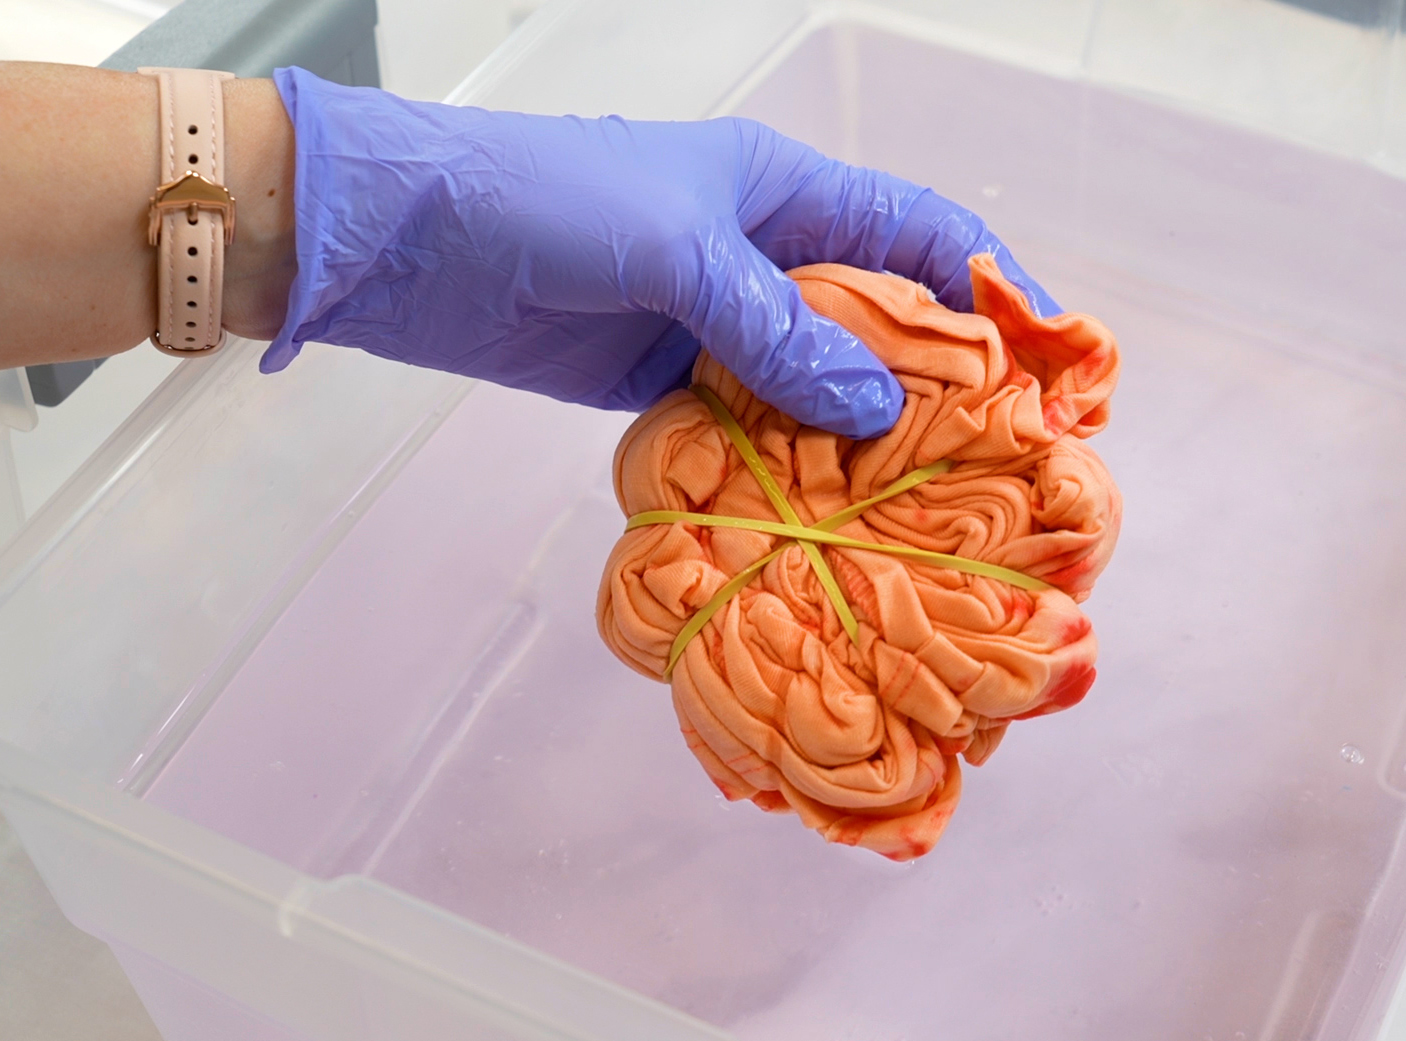
Step 6: Rinse & Wash Your Bleach Dyed Shirt
When you are satisfied with the color change, remove the rubber bands, and place the shirt in the bleach-neutralizer to stop the bleaching process.
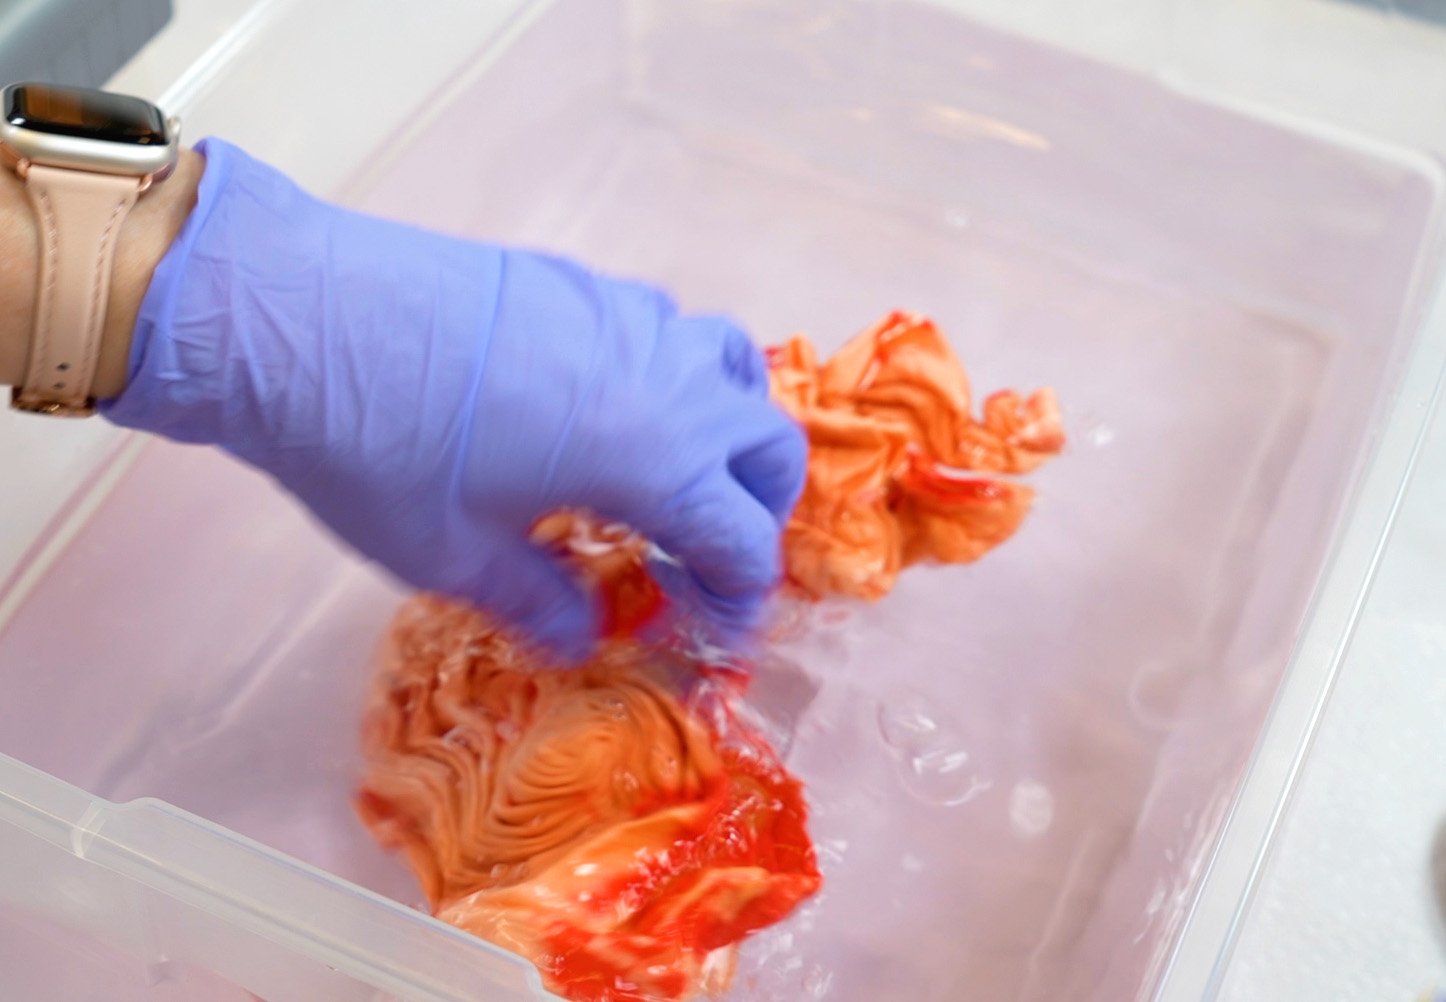
Swish the fabric around in the solution a bit, and allow it to soak for 5 minutes before rinsing the shirt in cool water. After rinsing, wash the shirt separately in the washing machine with cold water and mild detergent, and then dry as usual.
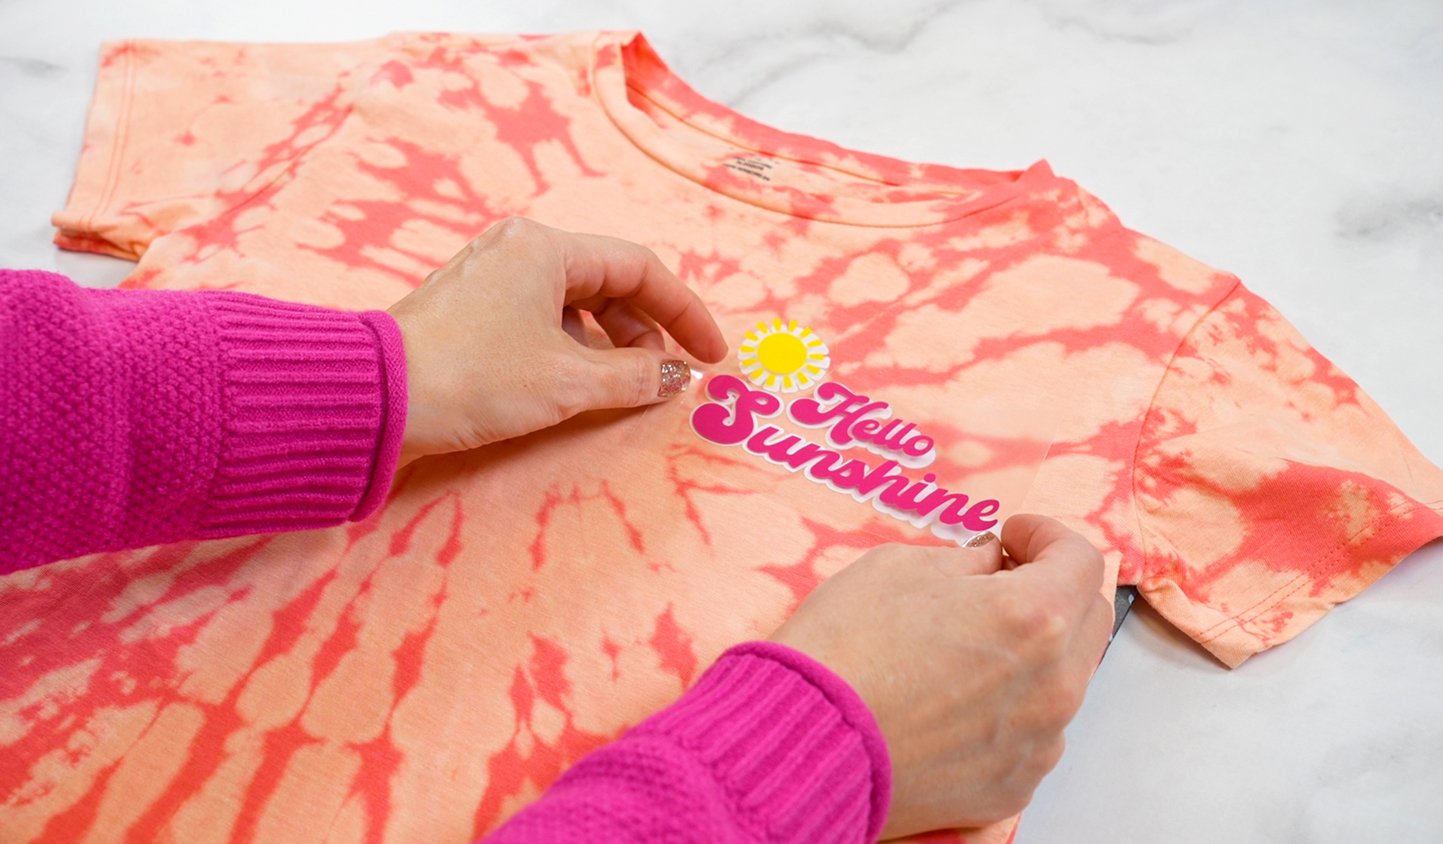
Step 7: Add Optional Details & Embellishments
If desired, add any extras to your shirt to customize it and make it uniquely your own. Here, I added a “Hello, Sunshine” graphic using iron-on heat transfer vinyl. Cute and easy!
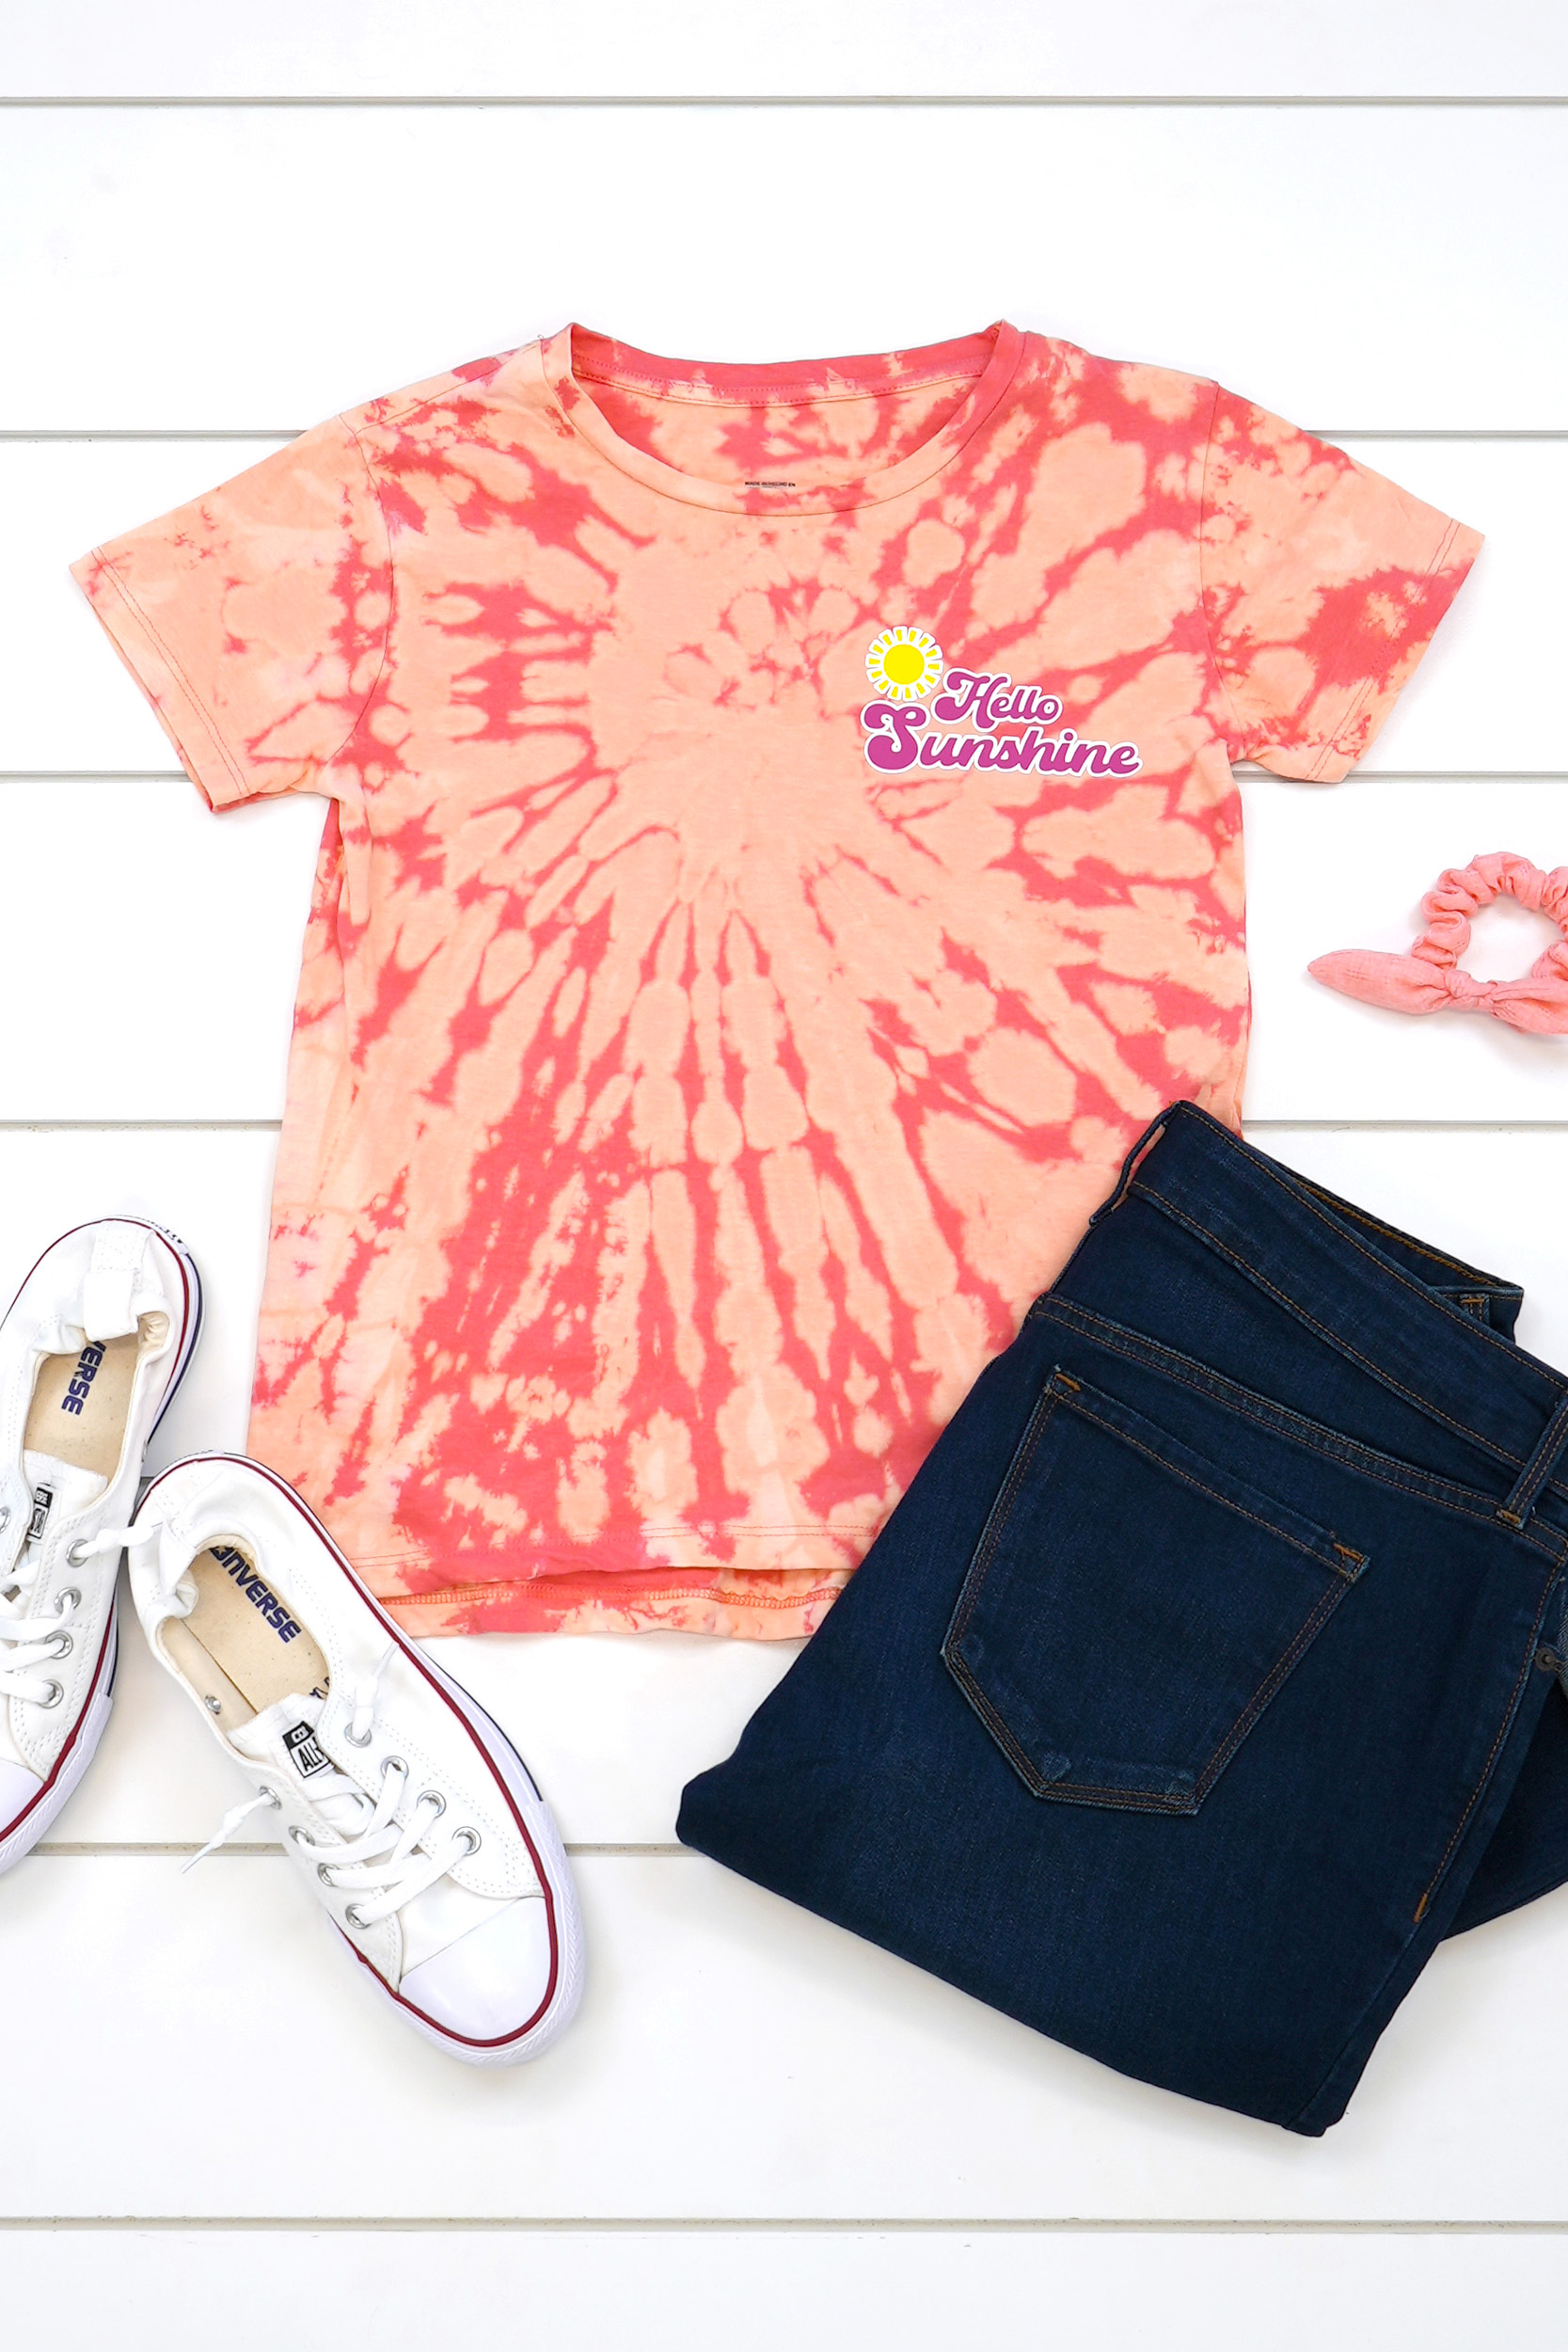
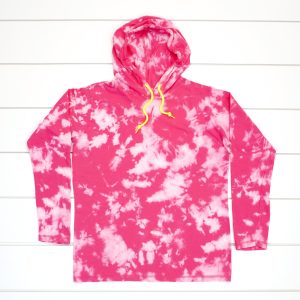
How awesome did this turn out!? 😍 Bleach tie-dye is SUCH a fun and easy way to make awesome, personalized designs on your shirts and other fabric items!
Frequently Asked Reverse Bleach Tie-Dye Questions
What Color Do Bleach-Dyed Shirts Change?
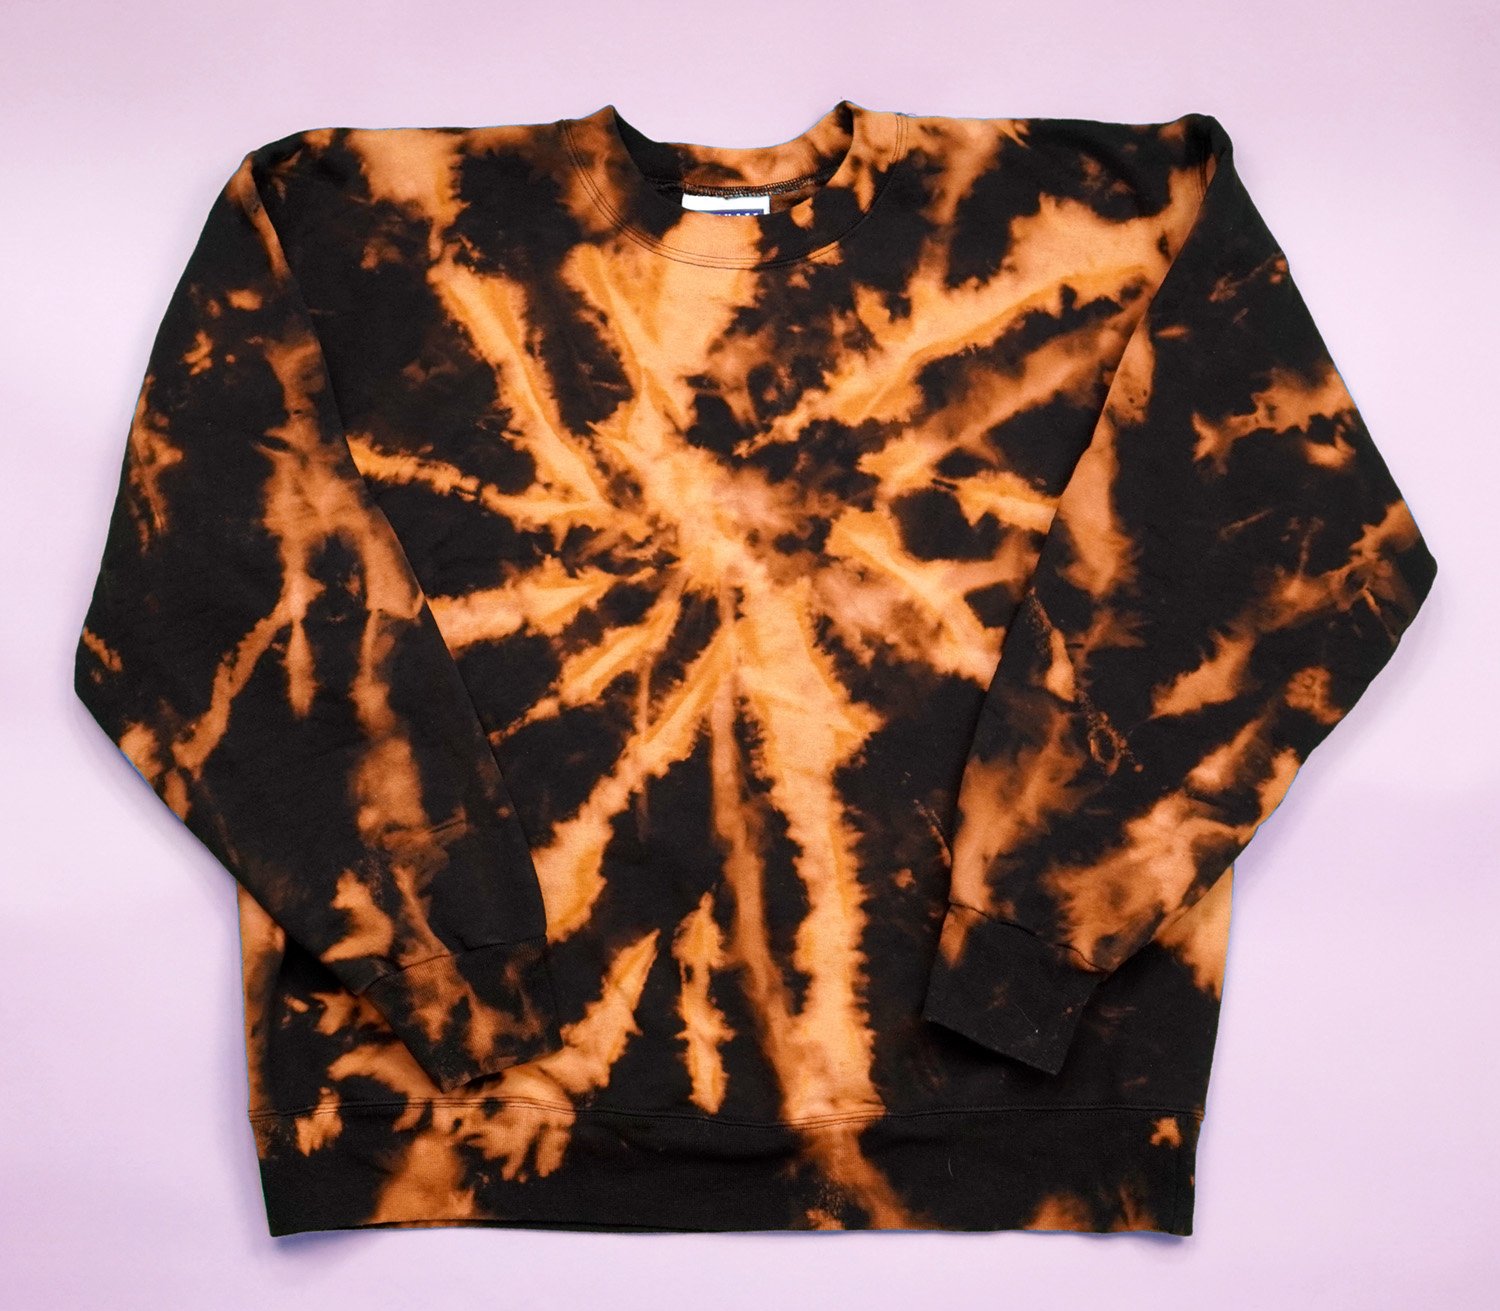
The color that your shirt will change once bleach-dyed can vary GREATLY depending on the starting color, dye type, and fabric composition. While many shirts will bleach to a lighter version of the initial color, you may be surprised by some of the color changes! As you can see above, black fabric frequently bleaches to a rusty orange color, which isn’t what you might expect! Though many people are hoping that their colored shirts will bleach all the way to white, not all shirts will be able to lighten that dramatically, and you may run the risk of damaging the fibers with the amount of bleach concentration and time that it would take to lighten that much.
Your best bet is to always do a preliminary color swatch test with the bleach solution (use a hidden interior seam for your testing) so that there aren’t any surprises when making your bleach tie-dye project.

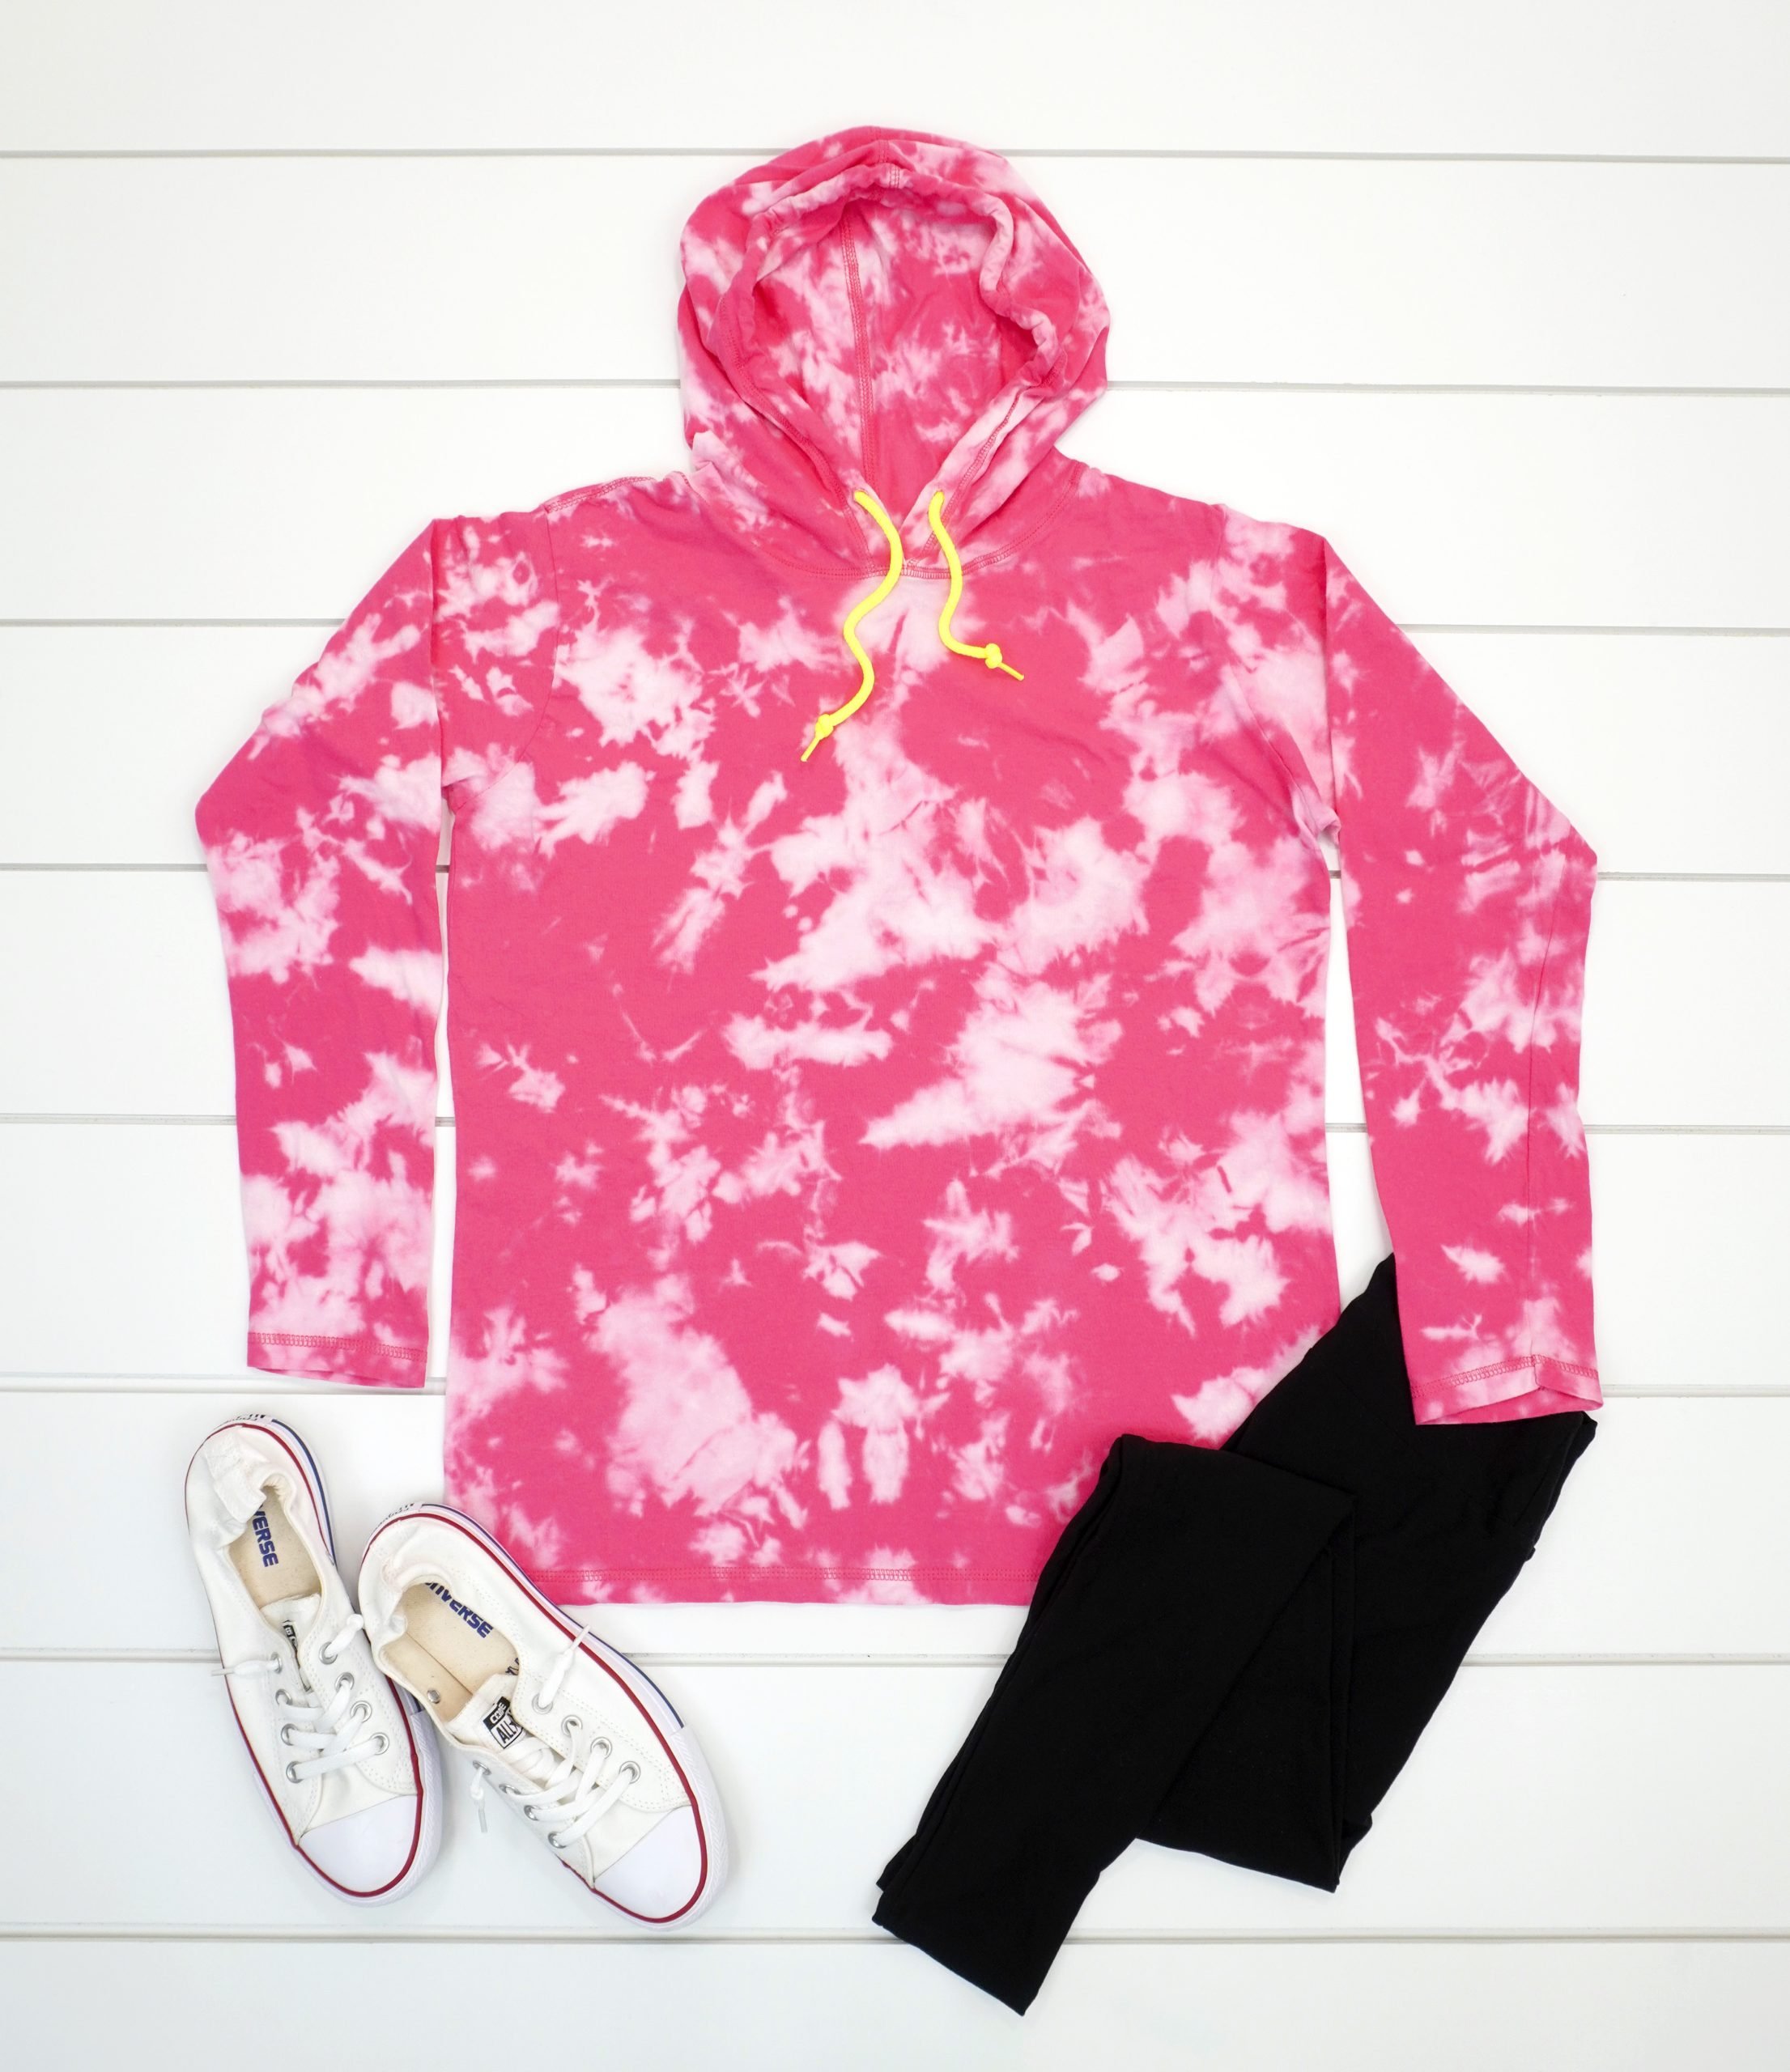
Can I Add Fabric Dye to My Bleach Tie-Dye Project?
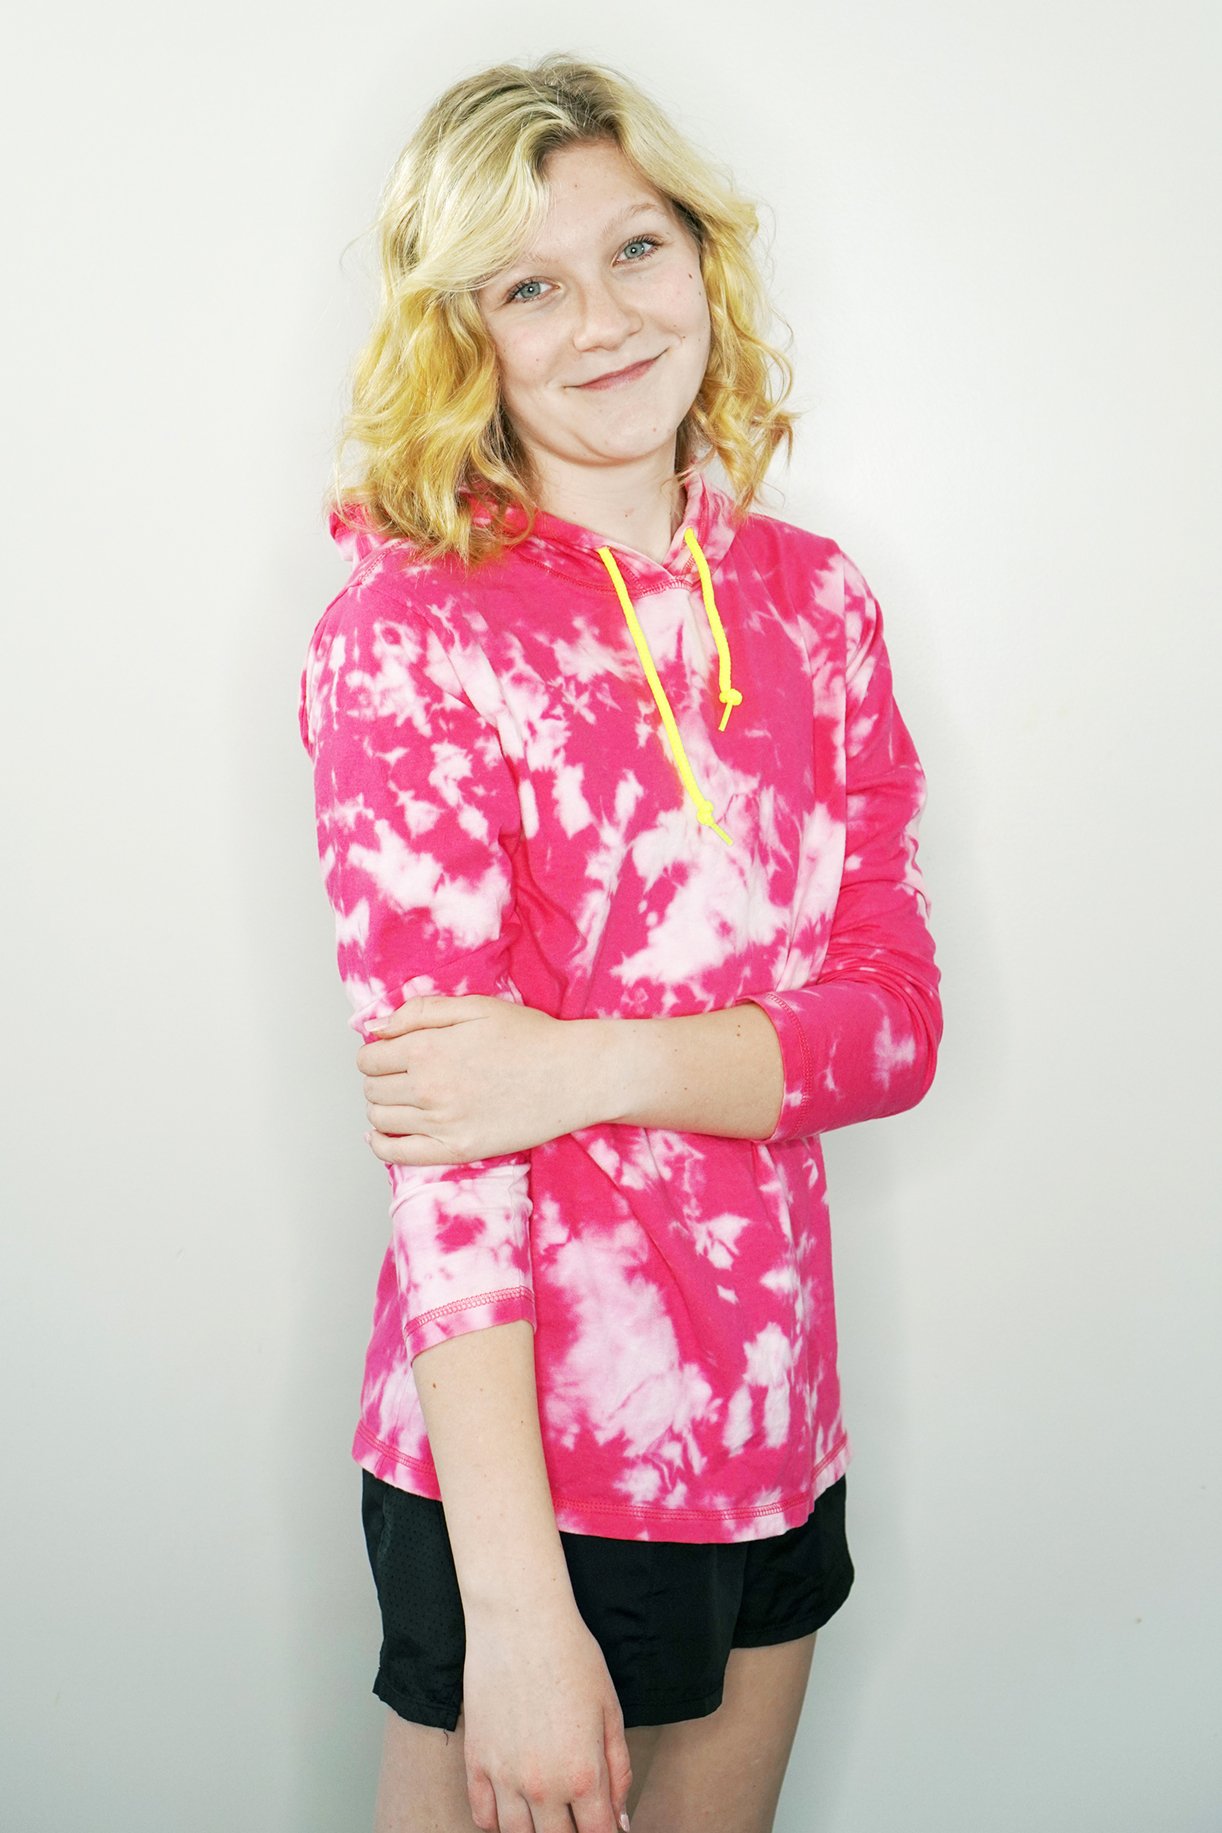
Want to use fabric dye to add some color to your bleach-dyed shirt? You can absolutely do that! Use fabric dye (a tie-dye kit works great!) to add a variety of colors to your bleach-dye project for a different look that’s just as fun! This sweatshirt that I’m wearing here is the same black and orange sweatshirt from the previous photo!
After rinsing and washing your bleached clothing item, use a squirt bottle to distribute fabric dye to the areas that you wish to add color to. Place the item in a sealed plastic bag for 8-24 hours to allow the dye to set and cure. Rinse under hot water, followed by cool water, until the water runs clear. Then, wash separately with a mild detergent, and dry as usual.
Should You Use a Wet or Dry Shirt for Bleach Tie-Dyeing?
For best results, always start with a dry or slightly damp shirt when reverse tie-dyeing with bleach. Do NOT use a WET t-shirt! Using a dry shirt will result in crisp and sharper lines in your bleach tie-dye pattern; using a damp shirt allows the bleach to spread a bit more in the design, creating a softer bleach tie-dye effect.
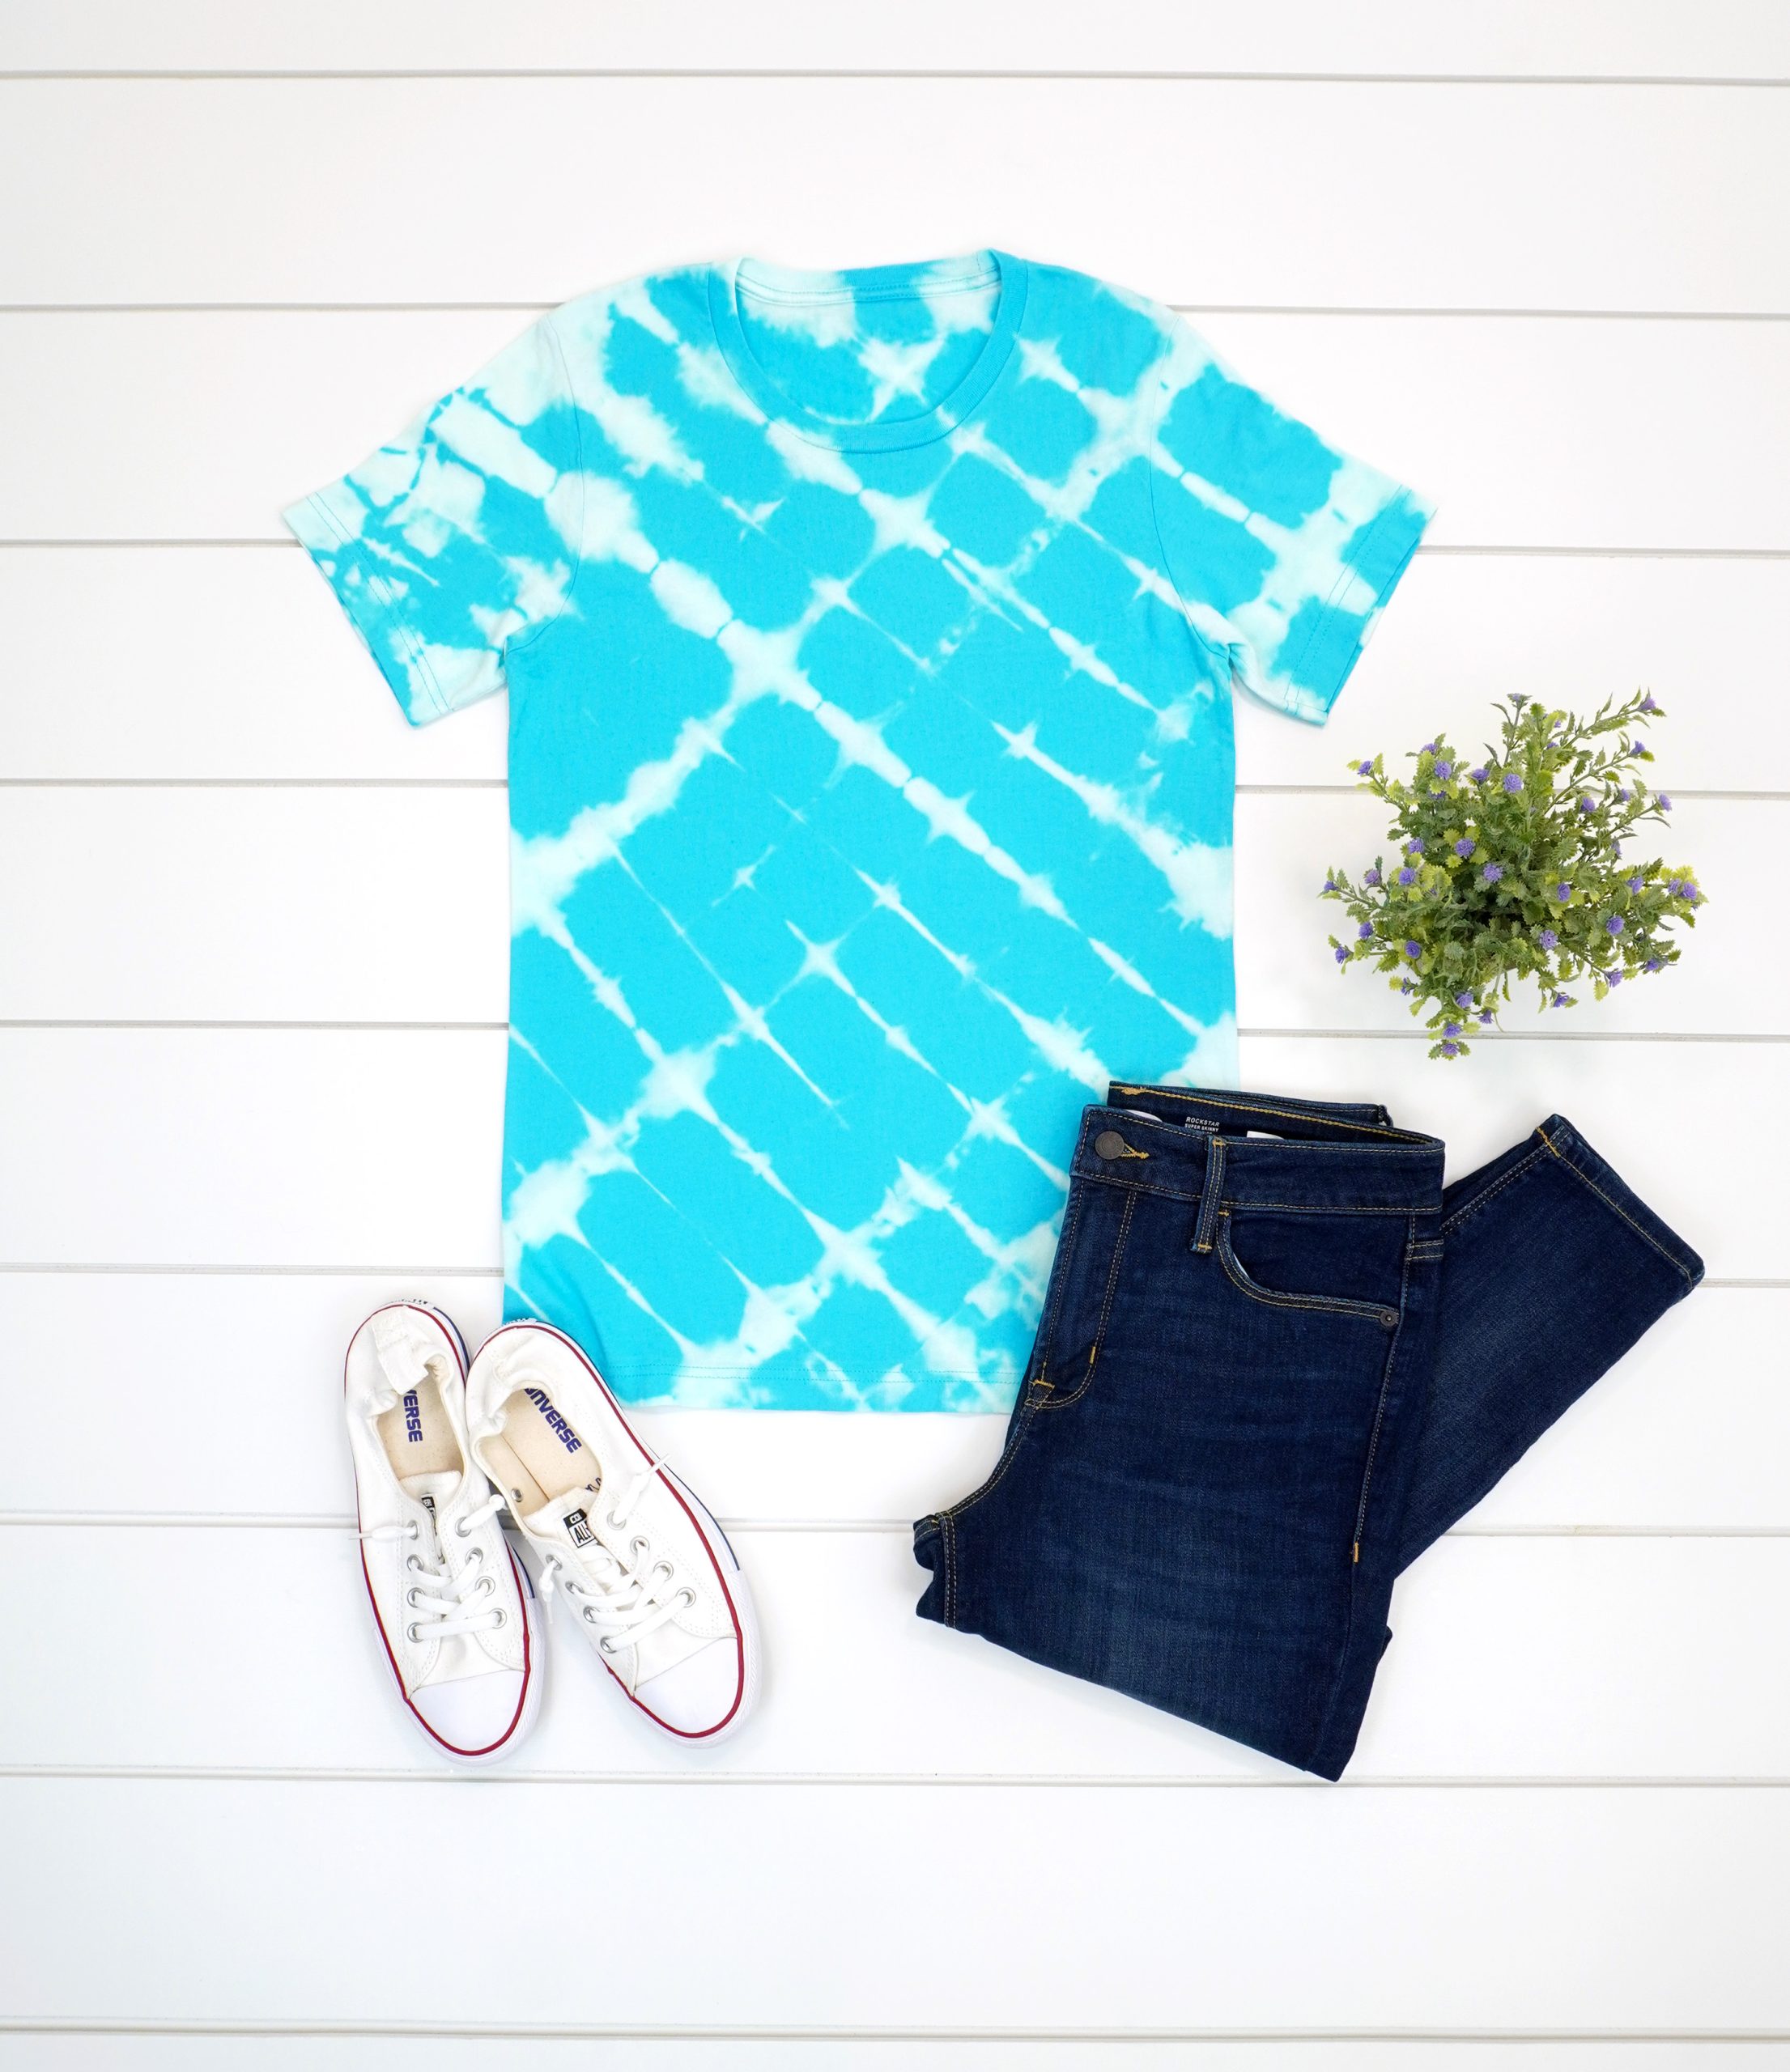
What Types of Bleach Tie-Dye Designs Can I Create?
With bleach dyeing, you can create all kinds of different patterns and designs! From traditional tie-dye patterns such as a classic spiral design or sunburst pattern to bleach-stenciled shirt designs and freeform designs drawn with a bleach pen or painted with a paintbrush, there are LOTS of different ways to have fun with bleach dye!
How to Tie-Dye with Bleach: Printable Instructions
How to Bleach Tie-Dye
What You’ll Need:
- Dark or Colored Shirt
- Liquid Chlorine Bleach
- Hydrogen Peroxide
- Rubber Bands
- Spray, Squirt, and/or Squeeze Bottles
- 2 Shallow Plastic Tubs
- Gloves
- Mask, optional
Instructions:
- Do a patch test to determine the color change and amount of time needed.
- Pre-wash and dry the shirt. Fold the shirt according to your desired look and outcome. Secure with rubber bands.
- In a spray/squeeze/squirt bottle, mix a bleach solution from a 1:1 ratio (equal parts) of bleach and water.
- In a small plastic tub, mix a bleach-neutralizing solution from 1 part hydrogen peroxide to 10 parts water (1:10 ratio).
- Lay your shirt on a protected, flat surface (I like to use the inside of a shallow plastic tub), and apply the bleach solution to the areas you want to remove the color from. Use a spray bottle for a more gentle and diffused effect or use a squirt bottle for a heavy, overall application.
- Once you’ve applied the bleach to the shirt, allow it to soak into the fabric and remove the color. This process can take anywhere from 5-20 minutes, depending on the fabric and concentration of the bleach.
- When you are satisfied with the color change, remove the rubber bands, and place the shirt in the bleach-neutralizer to stop the bleaching process. Swish the fabric around in the solution a bit, and allow it to soak for 5 minutes before rinsing the shirt in cool water. After rinsing, wash the shirt separately in the washing machine with cold water and mild detergent, and then dry as usual.
Notes:
Bleach tie-dyeing is a fun and creative way to breathe life into old clothing or transform new clothing into eye-catching and unique fashion statements! It’s SO fun and easy to create customized clothing with bleach dye!
I can’t wait to see what you make!

Check Out These Other Tie-Dye Ideas!


Pin This Bleach Tie-Dye Tutorial for Later!

Heidi Kundin has captivated the hearts of millions with her colorful and inspiring approach to crafting, celebrations, and family fun. With over 15 years of experience, Happiness is Homemade has become a must-visit destination for those seeking quick and easy creative ideas and last-minute solutions. Heidi’s warm personality shines through her posts, inviting readers to join her on a creative journey that’s fun, rewarding, and achievable. Heidi is also the author of Homemade Bath Bombs & More and DIY Tie-Dye.
What a fun idea! Thank you for sharing.
Such a great tutorial and video! I can’t wait to try this!