


Learn how to ice dye with our easy-to-follow guide, including essential techniques and tips for creating stunning, one-of-a-kind fabric designs with ice tie-dyeing!
This post may contain affiliate links. I will receive a small commission from these sales at no additional cost to you!
Everything You Need to Know About Ice Dye
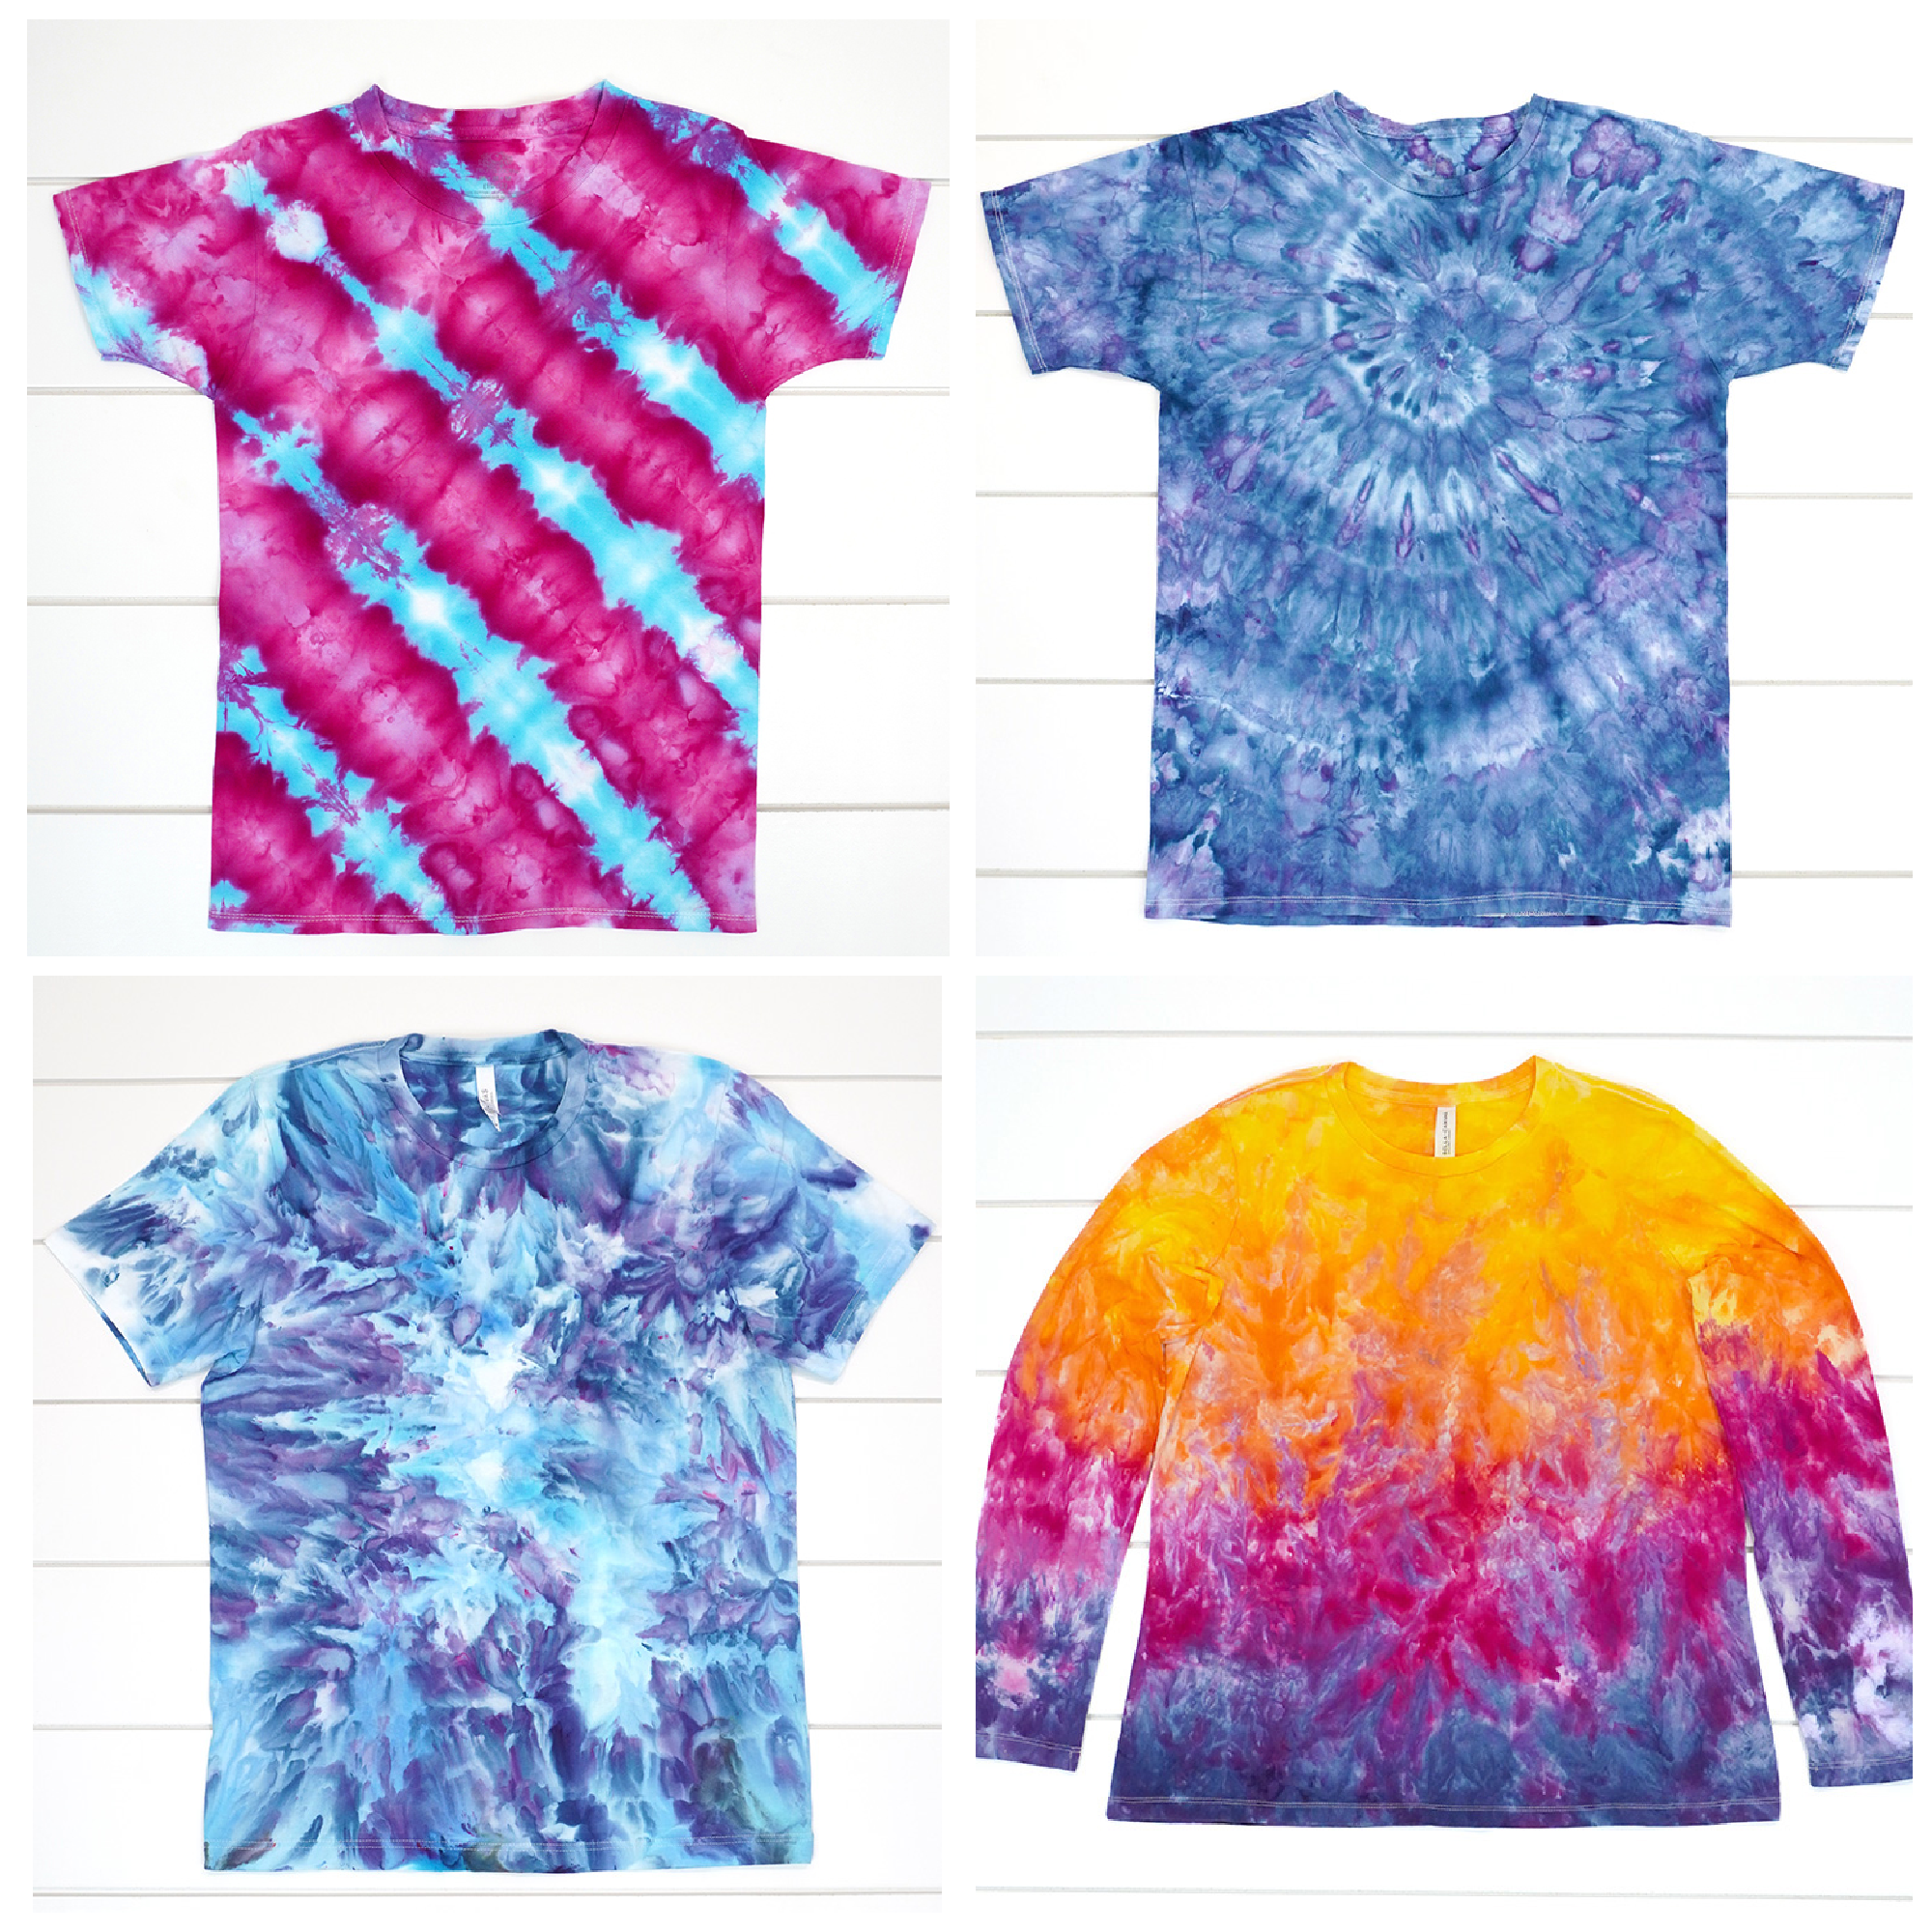
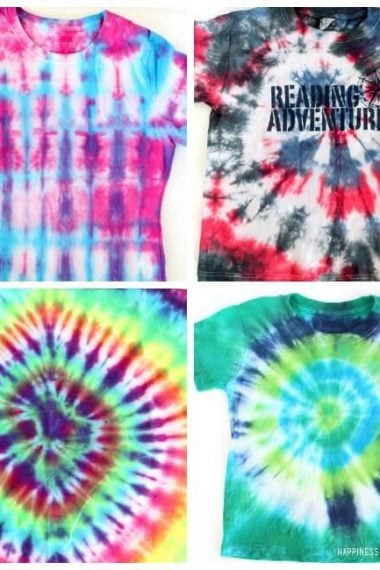
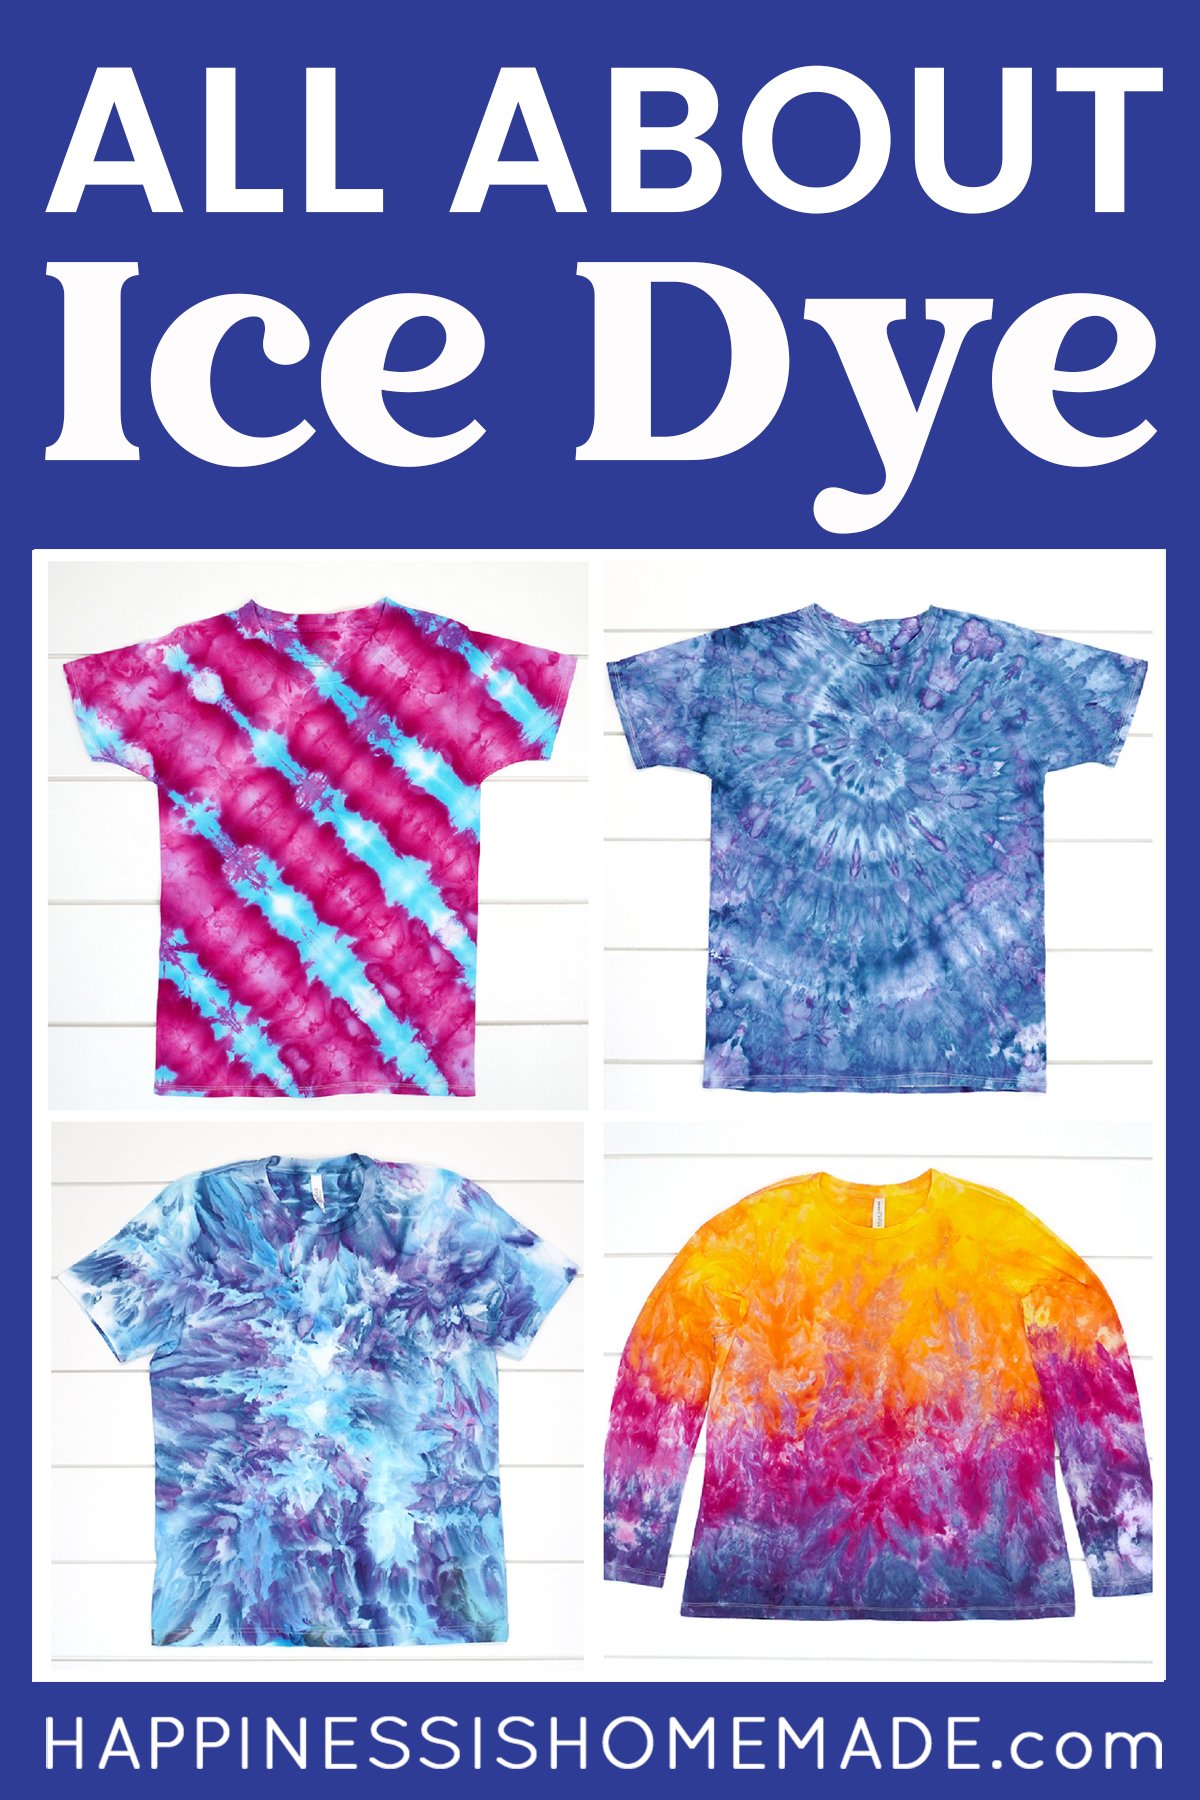
Are you looking for a unique creative outlet that’s a bit out of the ordinary? Ice dyeing is an awesome twist on traditional tie-dye that’s super simple to create! Both adults and older children alike will fall in love with this easy and enchanting craft! It’s SO much fun!
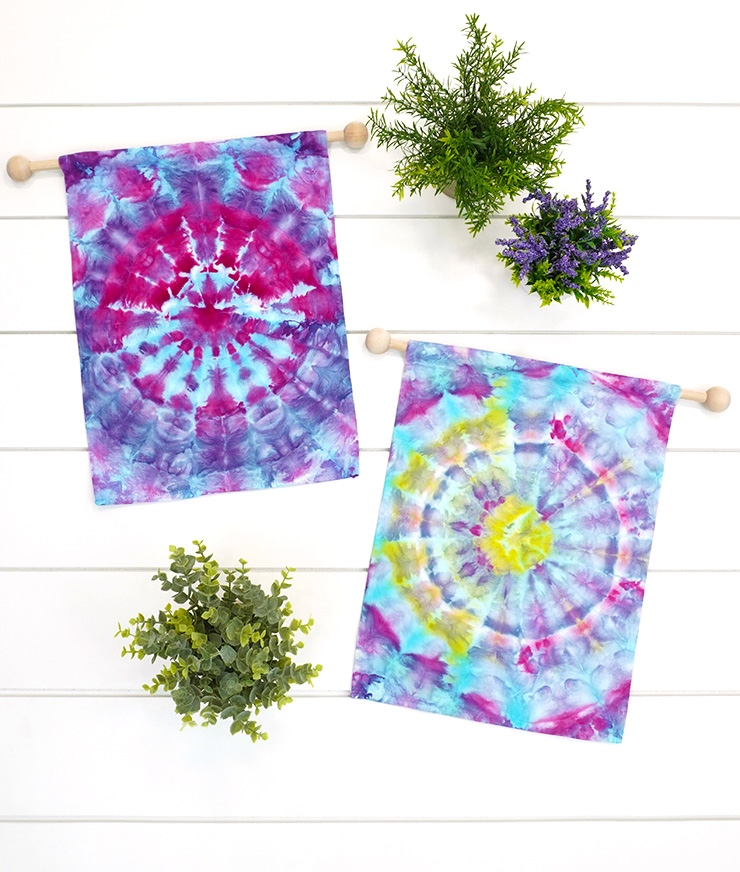
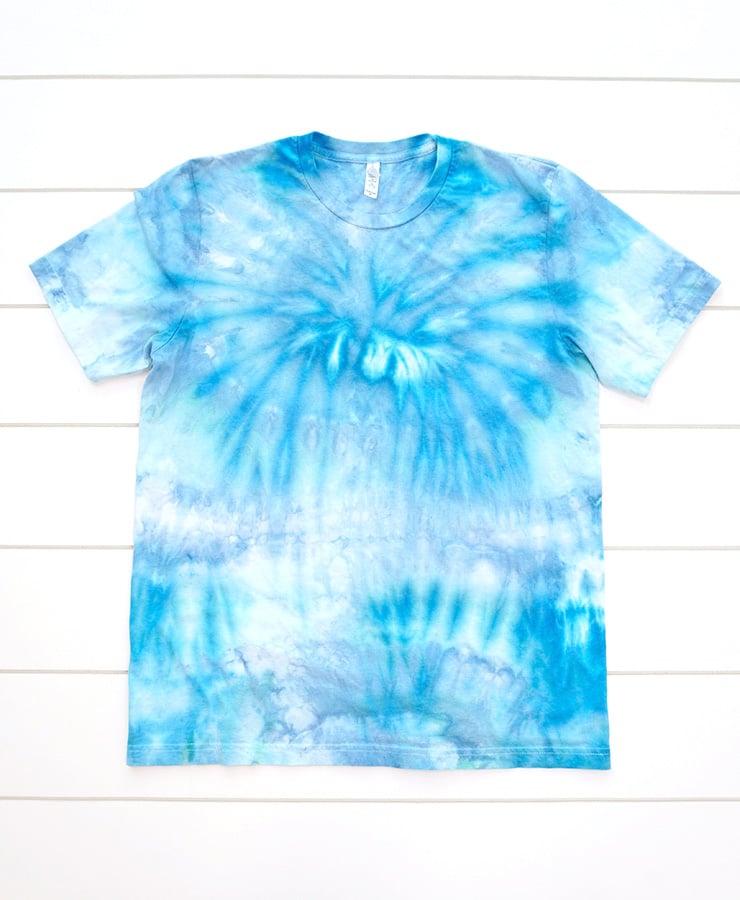
Ice dyeing truly is a magical process! You start with fabric made from natural fibers, like a blank canvas waiting for its masterpiece, and then add ice and dry dye powder. As the ice melts, it transforms the colored powder into a liquid dye that flows into the folds of the fabric, creating unique patterns and vibrant hues. No two patterns are the same, each one as unique as a snowflake, and each with its own color story.
The best part – you don’t need a whole art studio or craft room to start having fun! Just a sprinkle of powdered dye, some rubber bands, or waxed twine, and you’re all set! Don’t worry if you don’t consider yourself “crafty” or the “artsy” type. Ice dyeing is wonderfully forgiving, and its charm lies in the unpredictable nature of its patterns and color blends.
Whether you’re looking to create personalized gifts, add a splash of color to your home, or simply explore a new hobby, ice dyeing offers an accessible and fulfilling artistic adventure.
In today’s post, I’ll cover all of the basics of how to ice dye, plus we’ll chat about the importance of soda ash solution for vibrant color, how to manage your work area for the best results, and the sheer joy of witnessing the ice tie-dye magic unfold. Get ready to dye fabric like you’ve never done before – it might just be your next favorite thing!
You May Also Like:
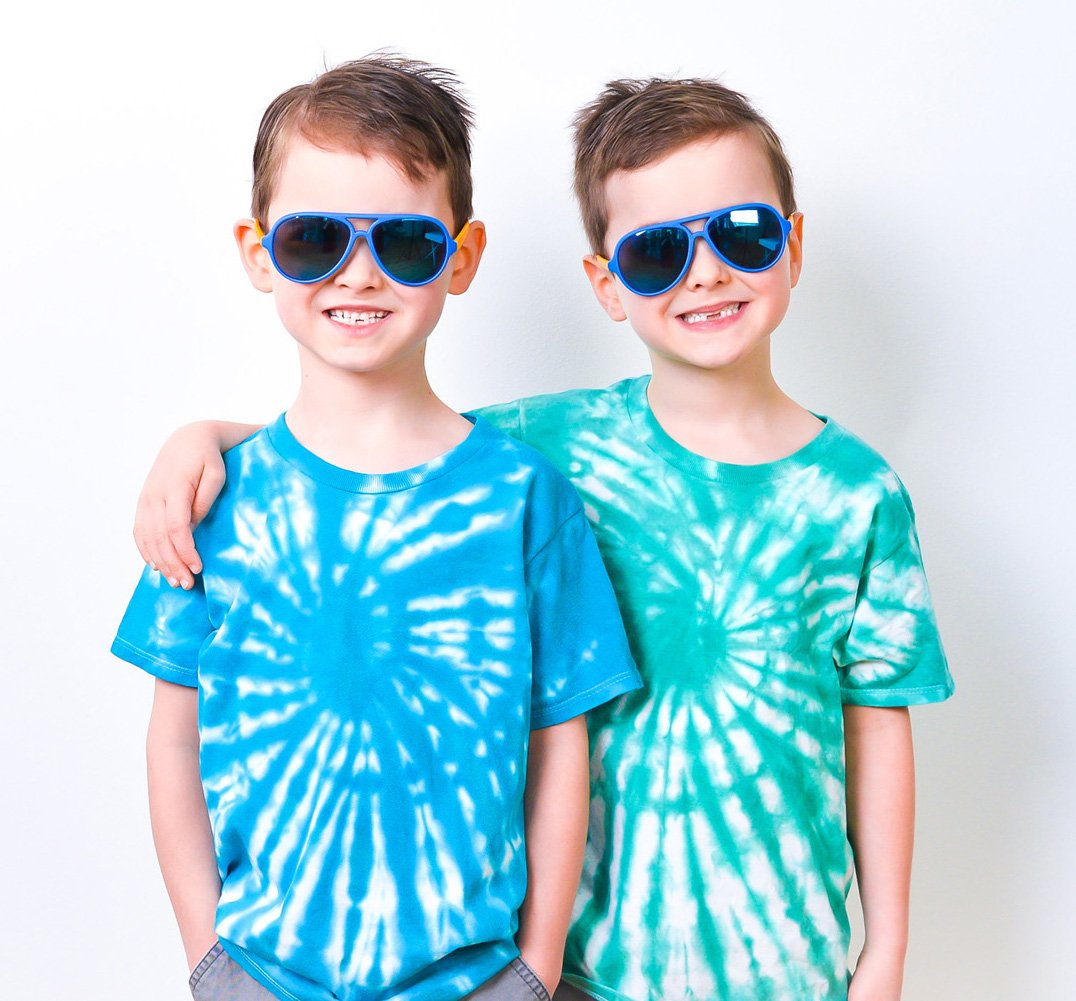
Ice Dye vs. Tie-Dye
When it comes to the art of fabric dye, two of the most popular methods are ice dyeing and tie-dyeing. Both of these different methods produce vibrant results, but they each have their own unique process, charm, and characteristics. Let’s take a closer look at each of these techniques and what sets them apart.
About Ice Dyeing
I like to think of ice dyeing as the “free spirit” of fabric arts. This fun textile art form turns the dyeing process into a slow, revelatory experience over which you have little control. No matter how much you might try to plan the outcome of your ice dye projects, it most often has a mind of its own!
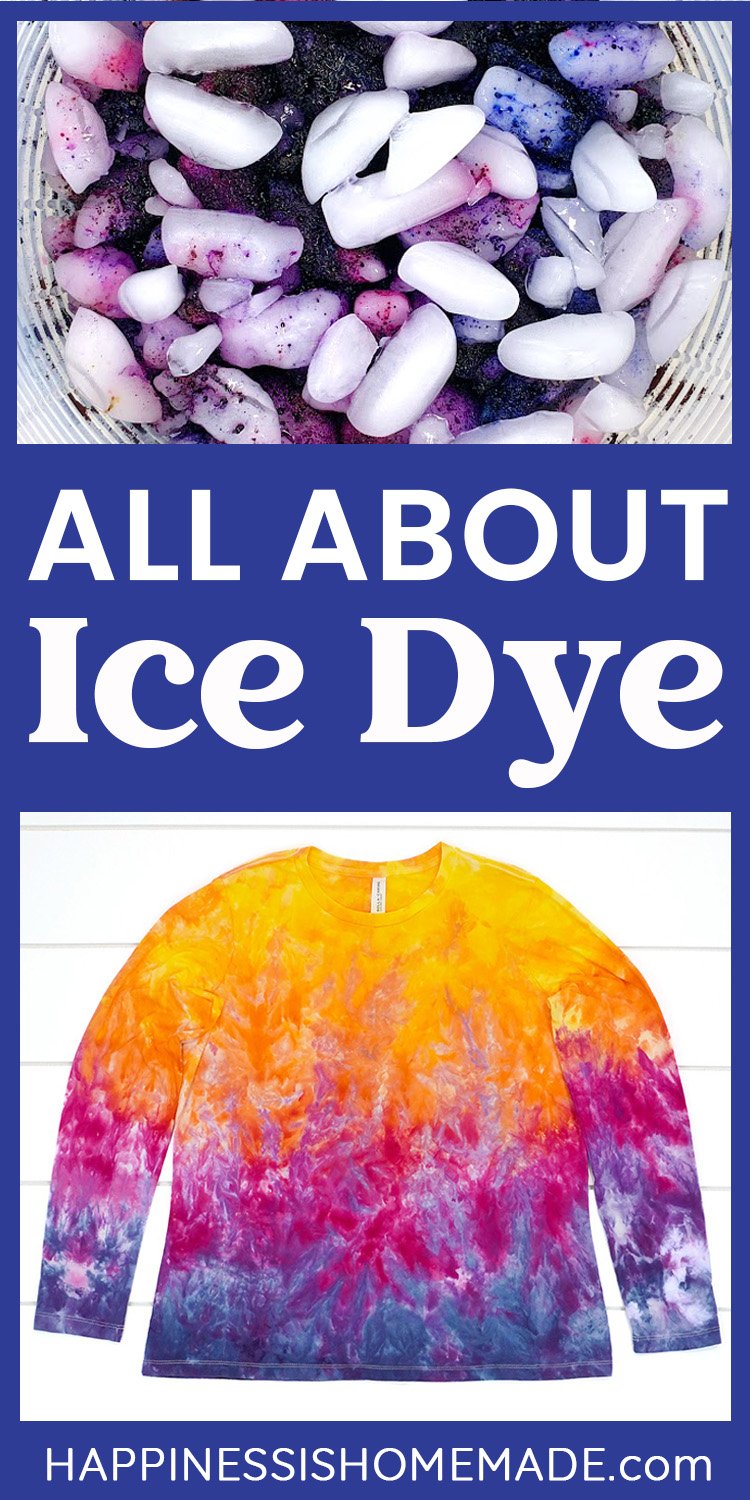
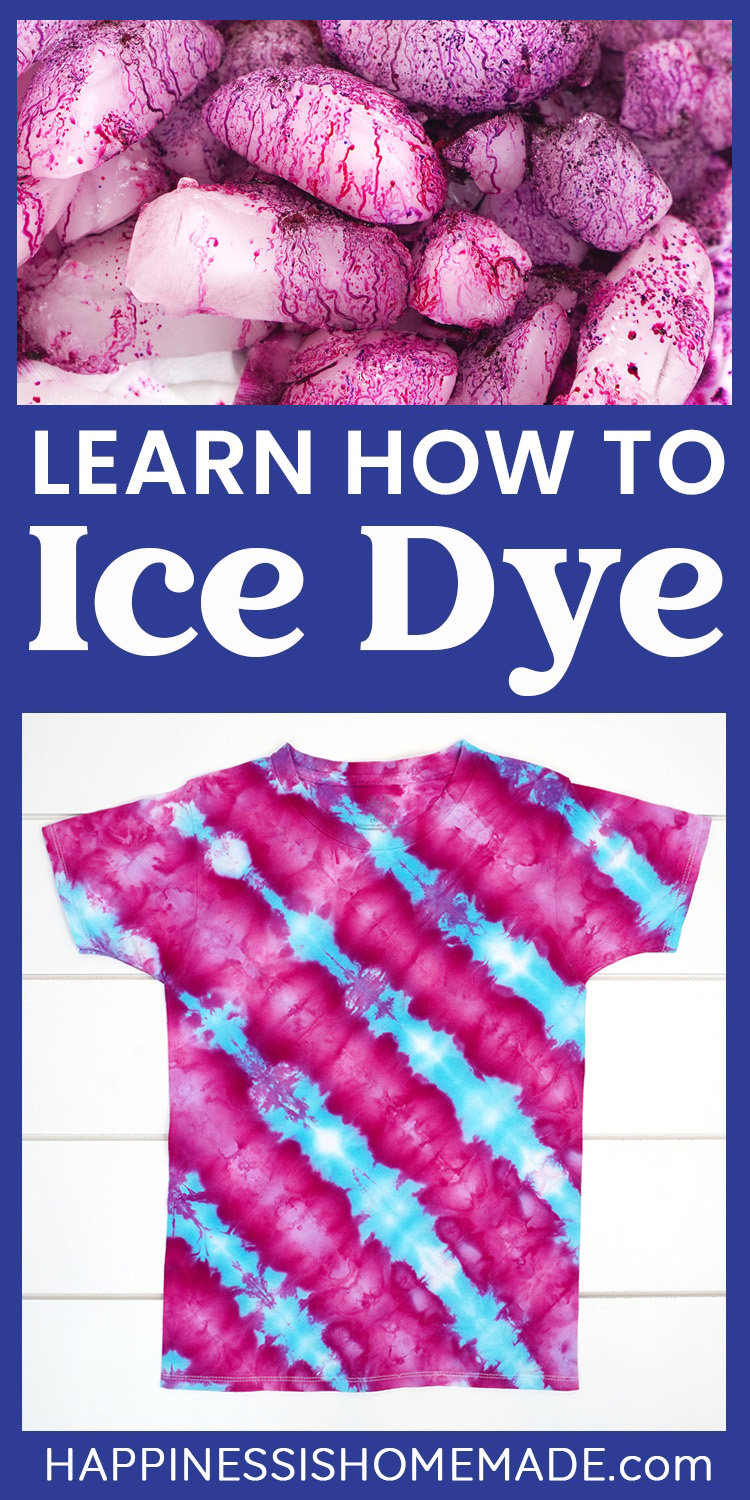
To ice dye, powdered fiber-reactive dye is sprinkled over a pile of ice that has been placed on top of the fabric. As the ice melts away, it carries the dye along for a ride, creating a surprise pattern every time. Ice dyeing is all about letting go of control and enjoying the show as each ice cube melts into vibrant liquid dye, leaving behind a one-of-a-kind design.
About Traditional Tie Dyeing
I called ice dyeing the “free spirit” of fabric dyeing, and in that same vein, I would call traditional tie dye “the planner” of fabric dyeing. The tie-dye process is much more involved and hands-on, and it also gives the crafter far more control over the finished product. Fabric is folded, twisted, and bound with rubber bands or strings before being submerged in or squirted with liquid dye in squeeze bottles. The areas bound tightly resist the dye, creating distinct patterns once the bindings are removed. Traditional tie dyeing generally yields more controlled and predictable patterns, and while variations in pattern are typical, this method offers far more precision than ice dyeing.
The Key Differences Between Ice Dye & Tie Dye
While both methods can be a lot of fun, and both allow for a variety of different patterns and colors, the key differences between them lie in their techniques and outcomes. Ice dyeing involves a more passive approach, where time and temperature play crucial roles. In contrast, tie-dye is an active process that depends on the crafter’s precise dye application and the manipulation of the fabric.
How to Ice Dye – Tutorial
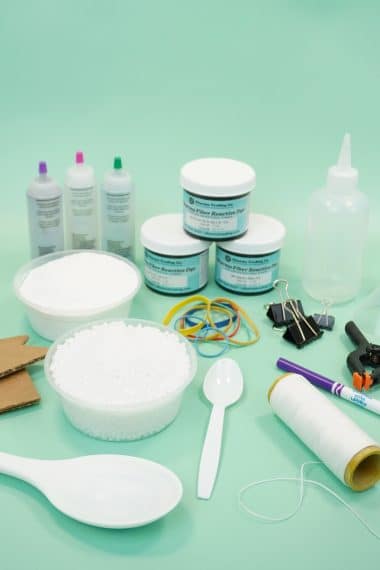
Before you begin your ice-dyeing adventures, you will want to gather all of the necessary supplies. You can read more in-depth and detailed information about Our Must-Have Tie-Dye Supplies and product recommendations here.
Supplies Needed for Ice Dyeing
- Fabric: Choose items made of natural fibers like cotton, linen, rayon, or silk for the best results. These natural fabrics with cellulose fibers react well with the dye and absorb colors beautifully.
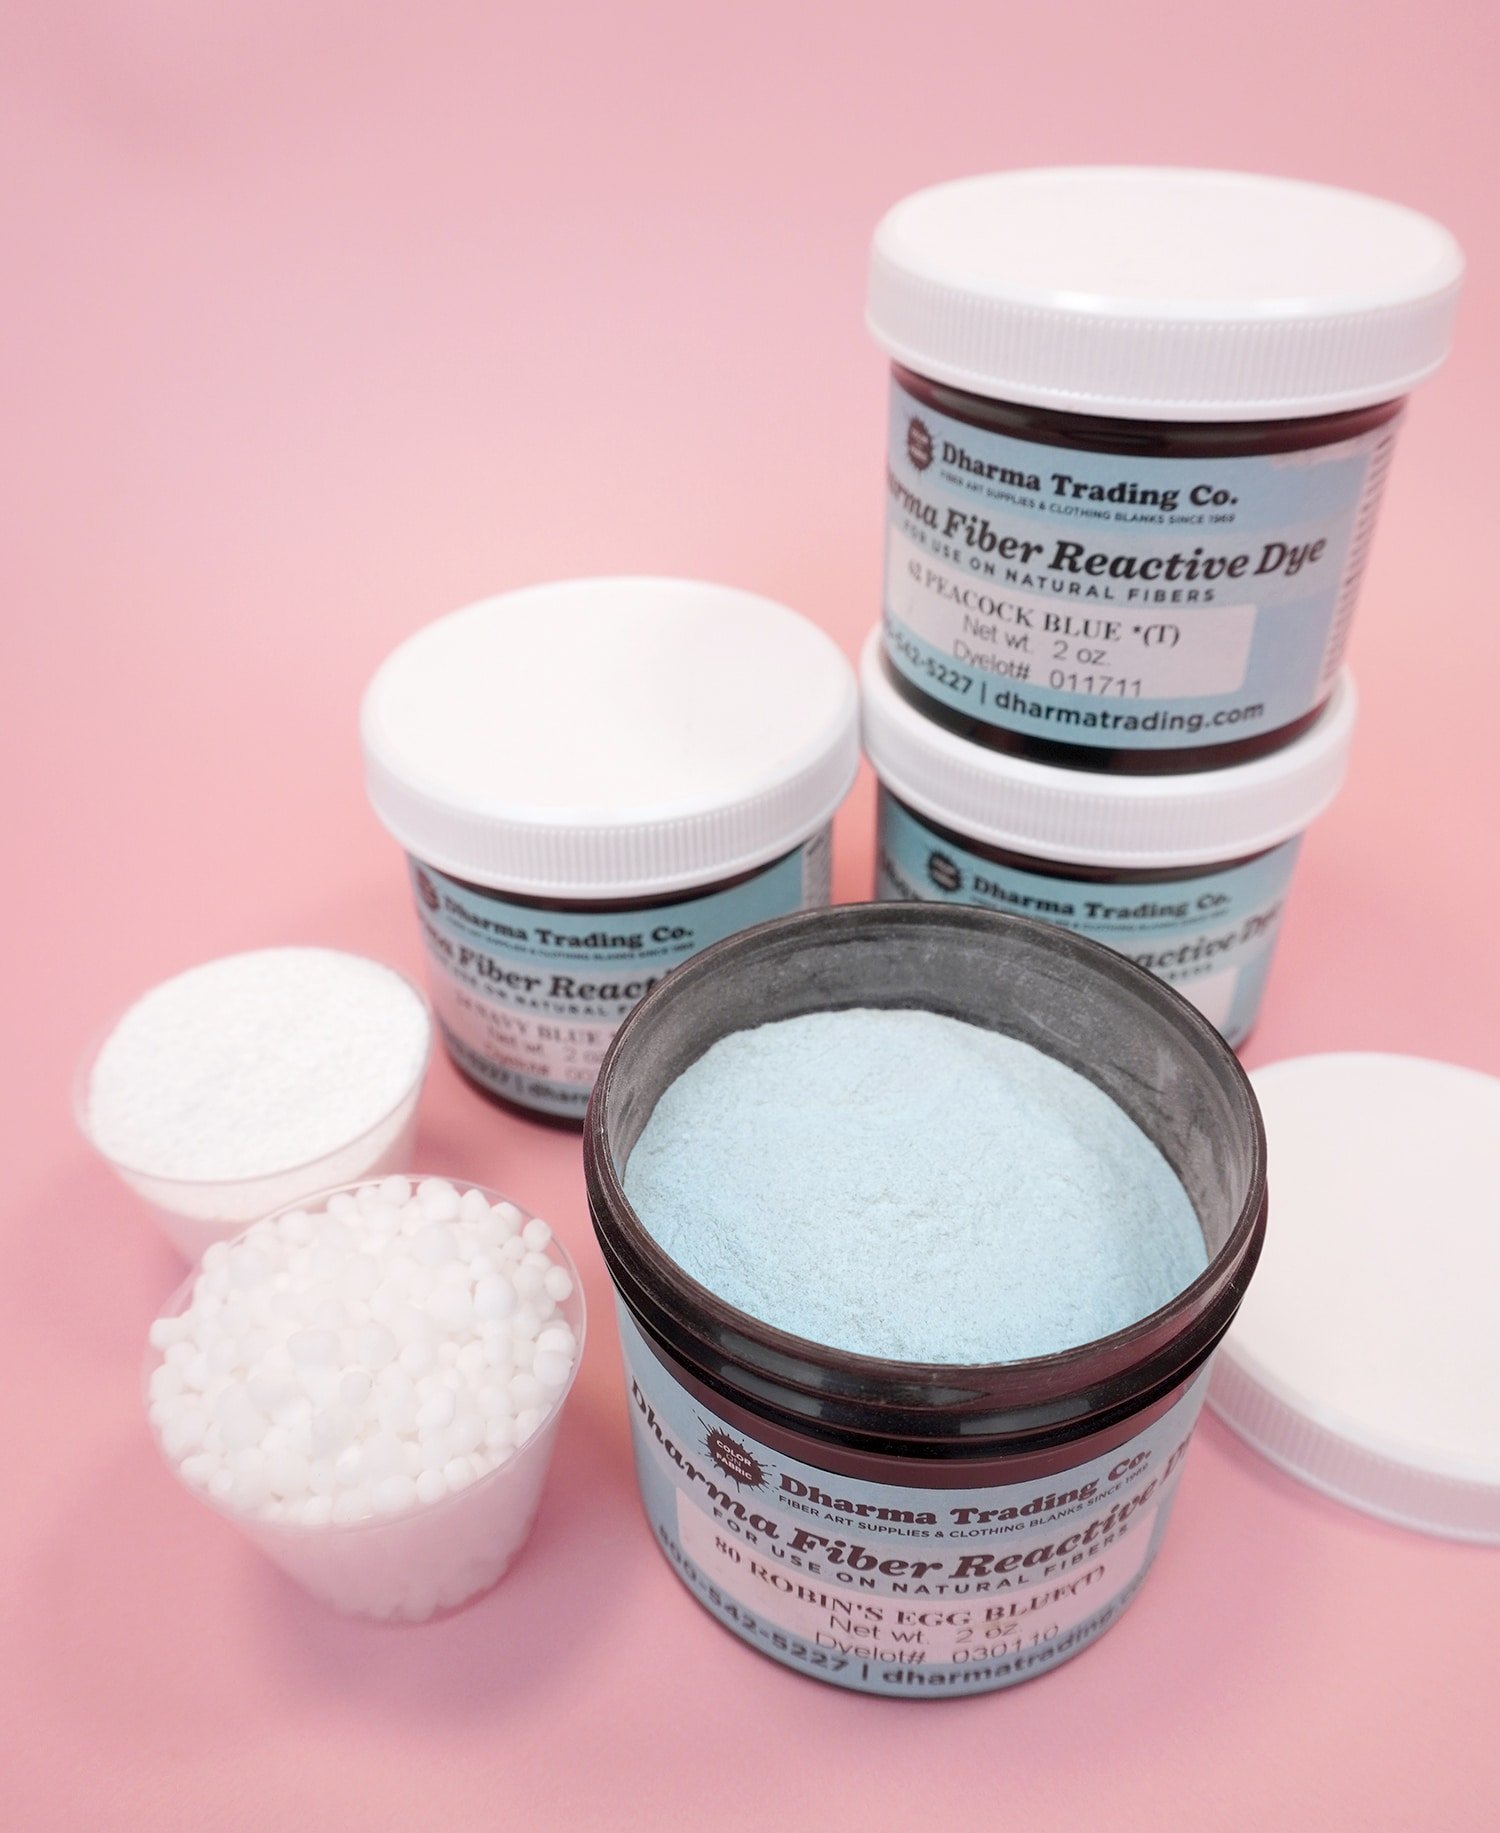
- Reactive Dye Powder: This is the star of the show! Reactive dyes bond chemically with the fabric, ensuring vibrant and long-lasting colors. We recommend using Dharma Fiber-Reactive Procion Dyes (my favorite!) or Jacquard Procion MX dyes for the best and most vibrant results. You may also opt to use Rit Dye (in powder form) or a Tulip one-step tie dye kit; however, these brands frequently result in more muted colors in your finished projects.
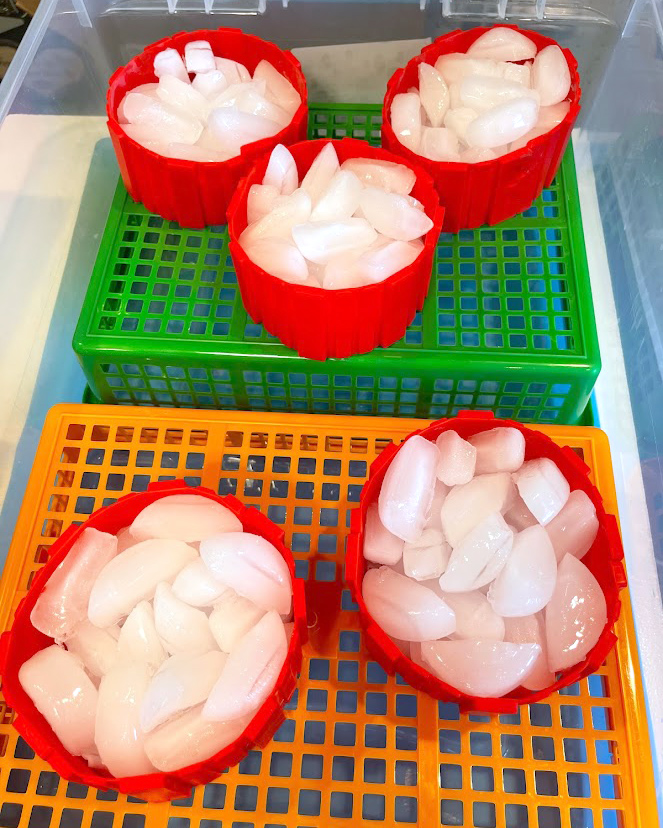
- Ice or Snow: You’ll need enough to completely cover your fabric. If you’re doing this in warmer weather, you may wish to purchase a bag of ice or two from the supermarket so that you have plenty on hand! In the winter, snow dyeing is also a possibility, using fresh, clean snow instead of ice.
- Rubber Bands or String/Waxed Sinew: These are used for tying the folded fabric to create different patterns.
- Large Plastic Bin or Tub: This will be used to catch the melting ice and excess dye.
- Cooling Rack or Wire Rack: Elevates the fabric above the bottom of the tub, allowing the ice and dye to flow through.
- Soda Ash: Pre-soaking your fabric in a soda ash solution (a mixture of warm water and soda ash) facilitates the necessary chemical reaction that helps the dye adhere to the fibers of the fabric better and results in the most vibrant colors.
- Nitrile Gloves and Dust Mask: It’s always a good idea to use gloves and a mask to keep your hands clean and avoid inhaling any dye powder.
- Plastic Wrap: To cover the dyed fabric while the ice melts.
- Plastic Bags: to hold the fabric after the ice has melted.
- Measuring Cup and Measuring Spoons: For accurate measurement of soda ash and dye.
Ice Dyeing Instructions
Prepare the Fabric
Begin by washing your fabric in warm water to remove any impurities, sizing, or fabric softeners from the manufacturing process that could interfere with the dyeing process.
Soak in Soda Ash Solution
Mix a cup of soda ash with a gallon of water. Soak your fabric in this solution for at least 15 minutes to help the reactive dye bond with the fibers. Wring out the fabric tightly by hand before moving on to the next step.
NOTE:
Ice dyeing works best when you start with a pre-soaked, lightly damp shirt!
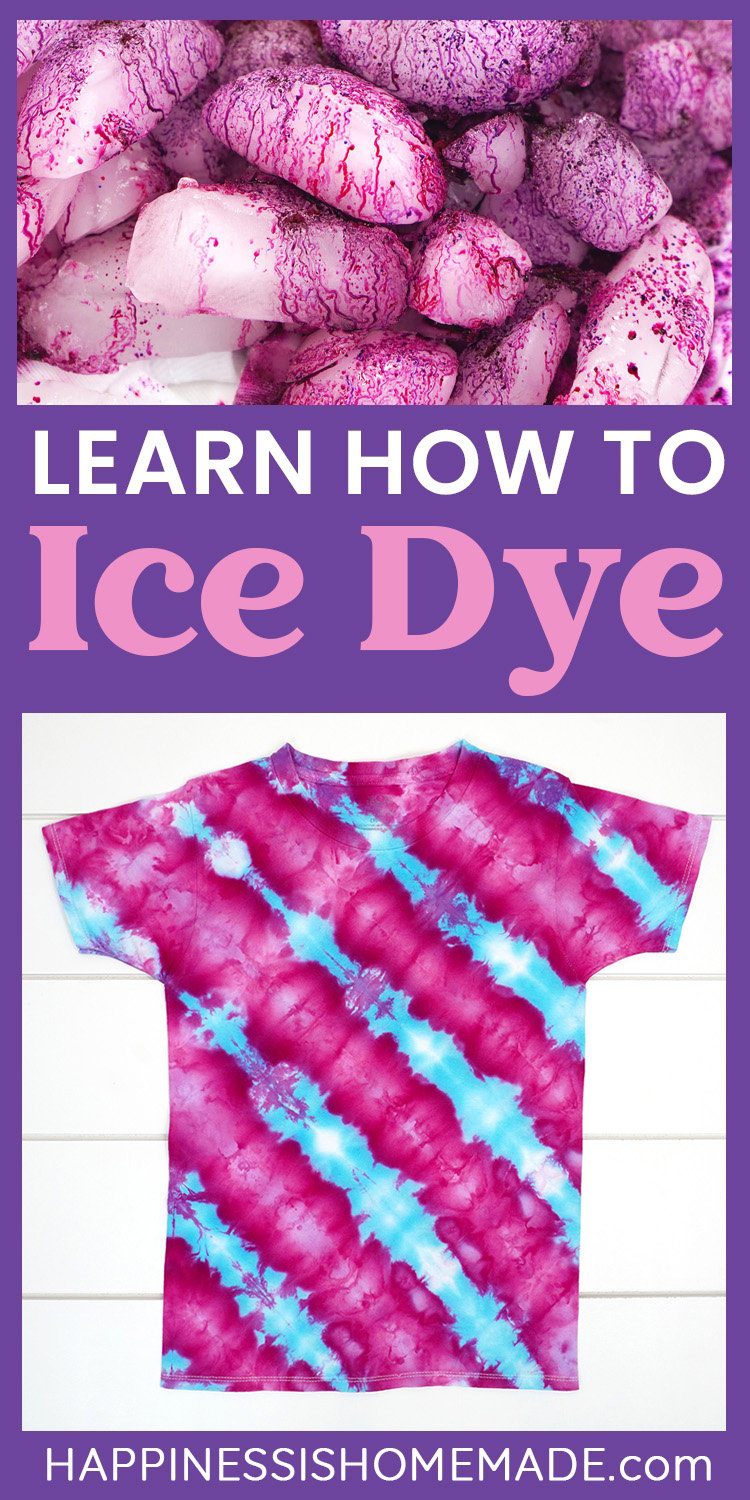
Bind the Fabric
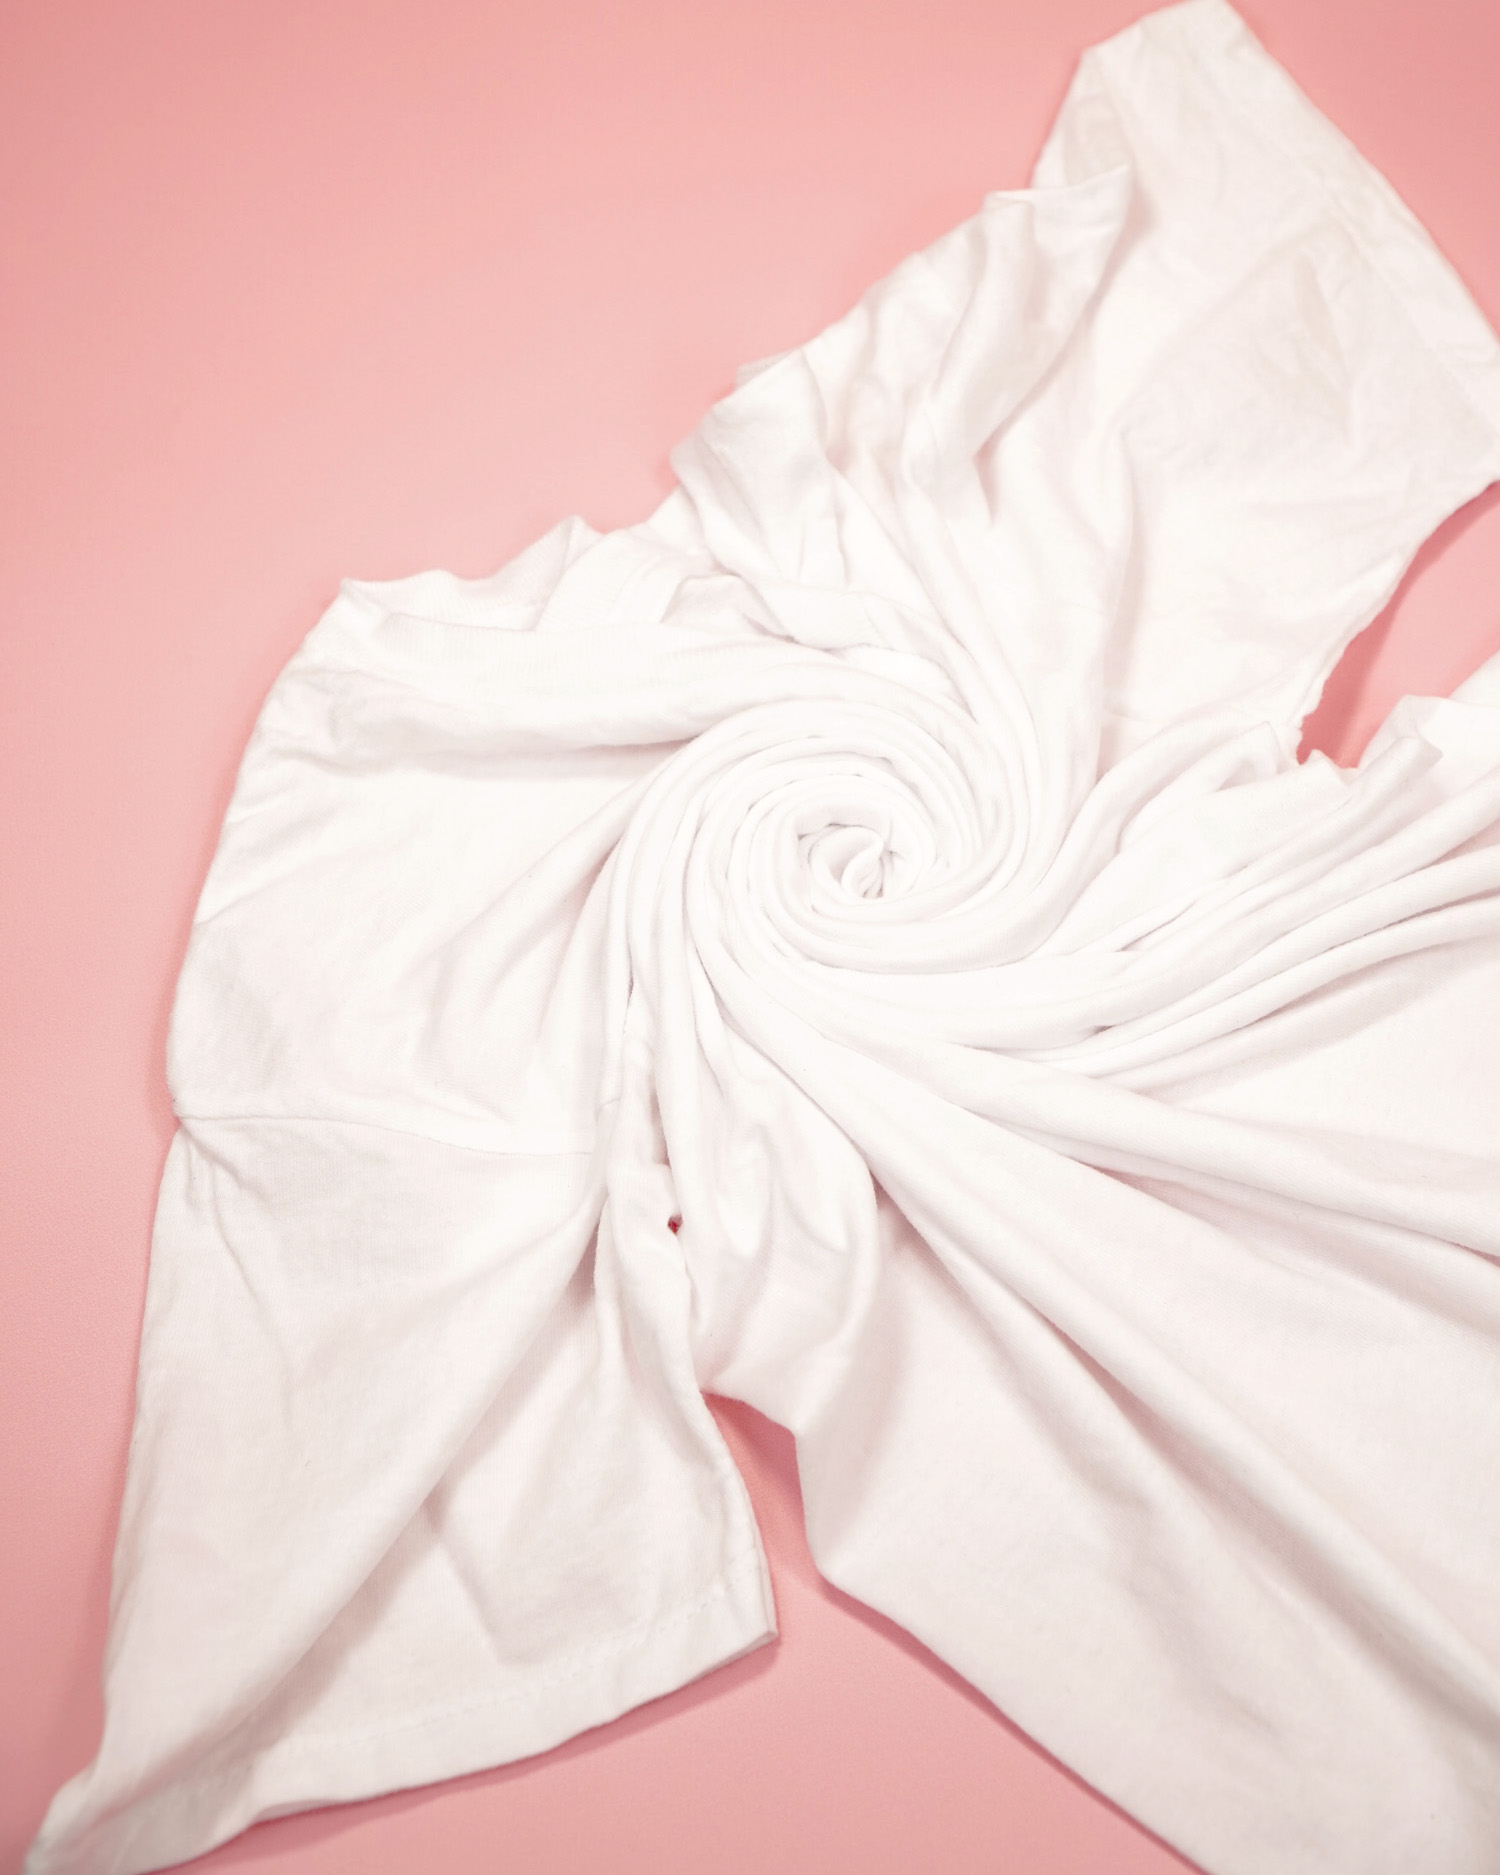
Bind the fabric, if desired: Twist or fold the damp fabric into your desired pattern fold and secure it with rubber bands or waxed sinew. This will create different patterns and resist areas similar to the folds in traditional tie-dye. You may also choose to “crumple fold” or gently scrunch up the fabric during the next step instead.
This optional step combines essential elements of both ice dye and tie dye into a new ice tie-dye technique. You can create a different look from each of the different folding techniques!
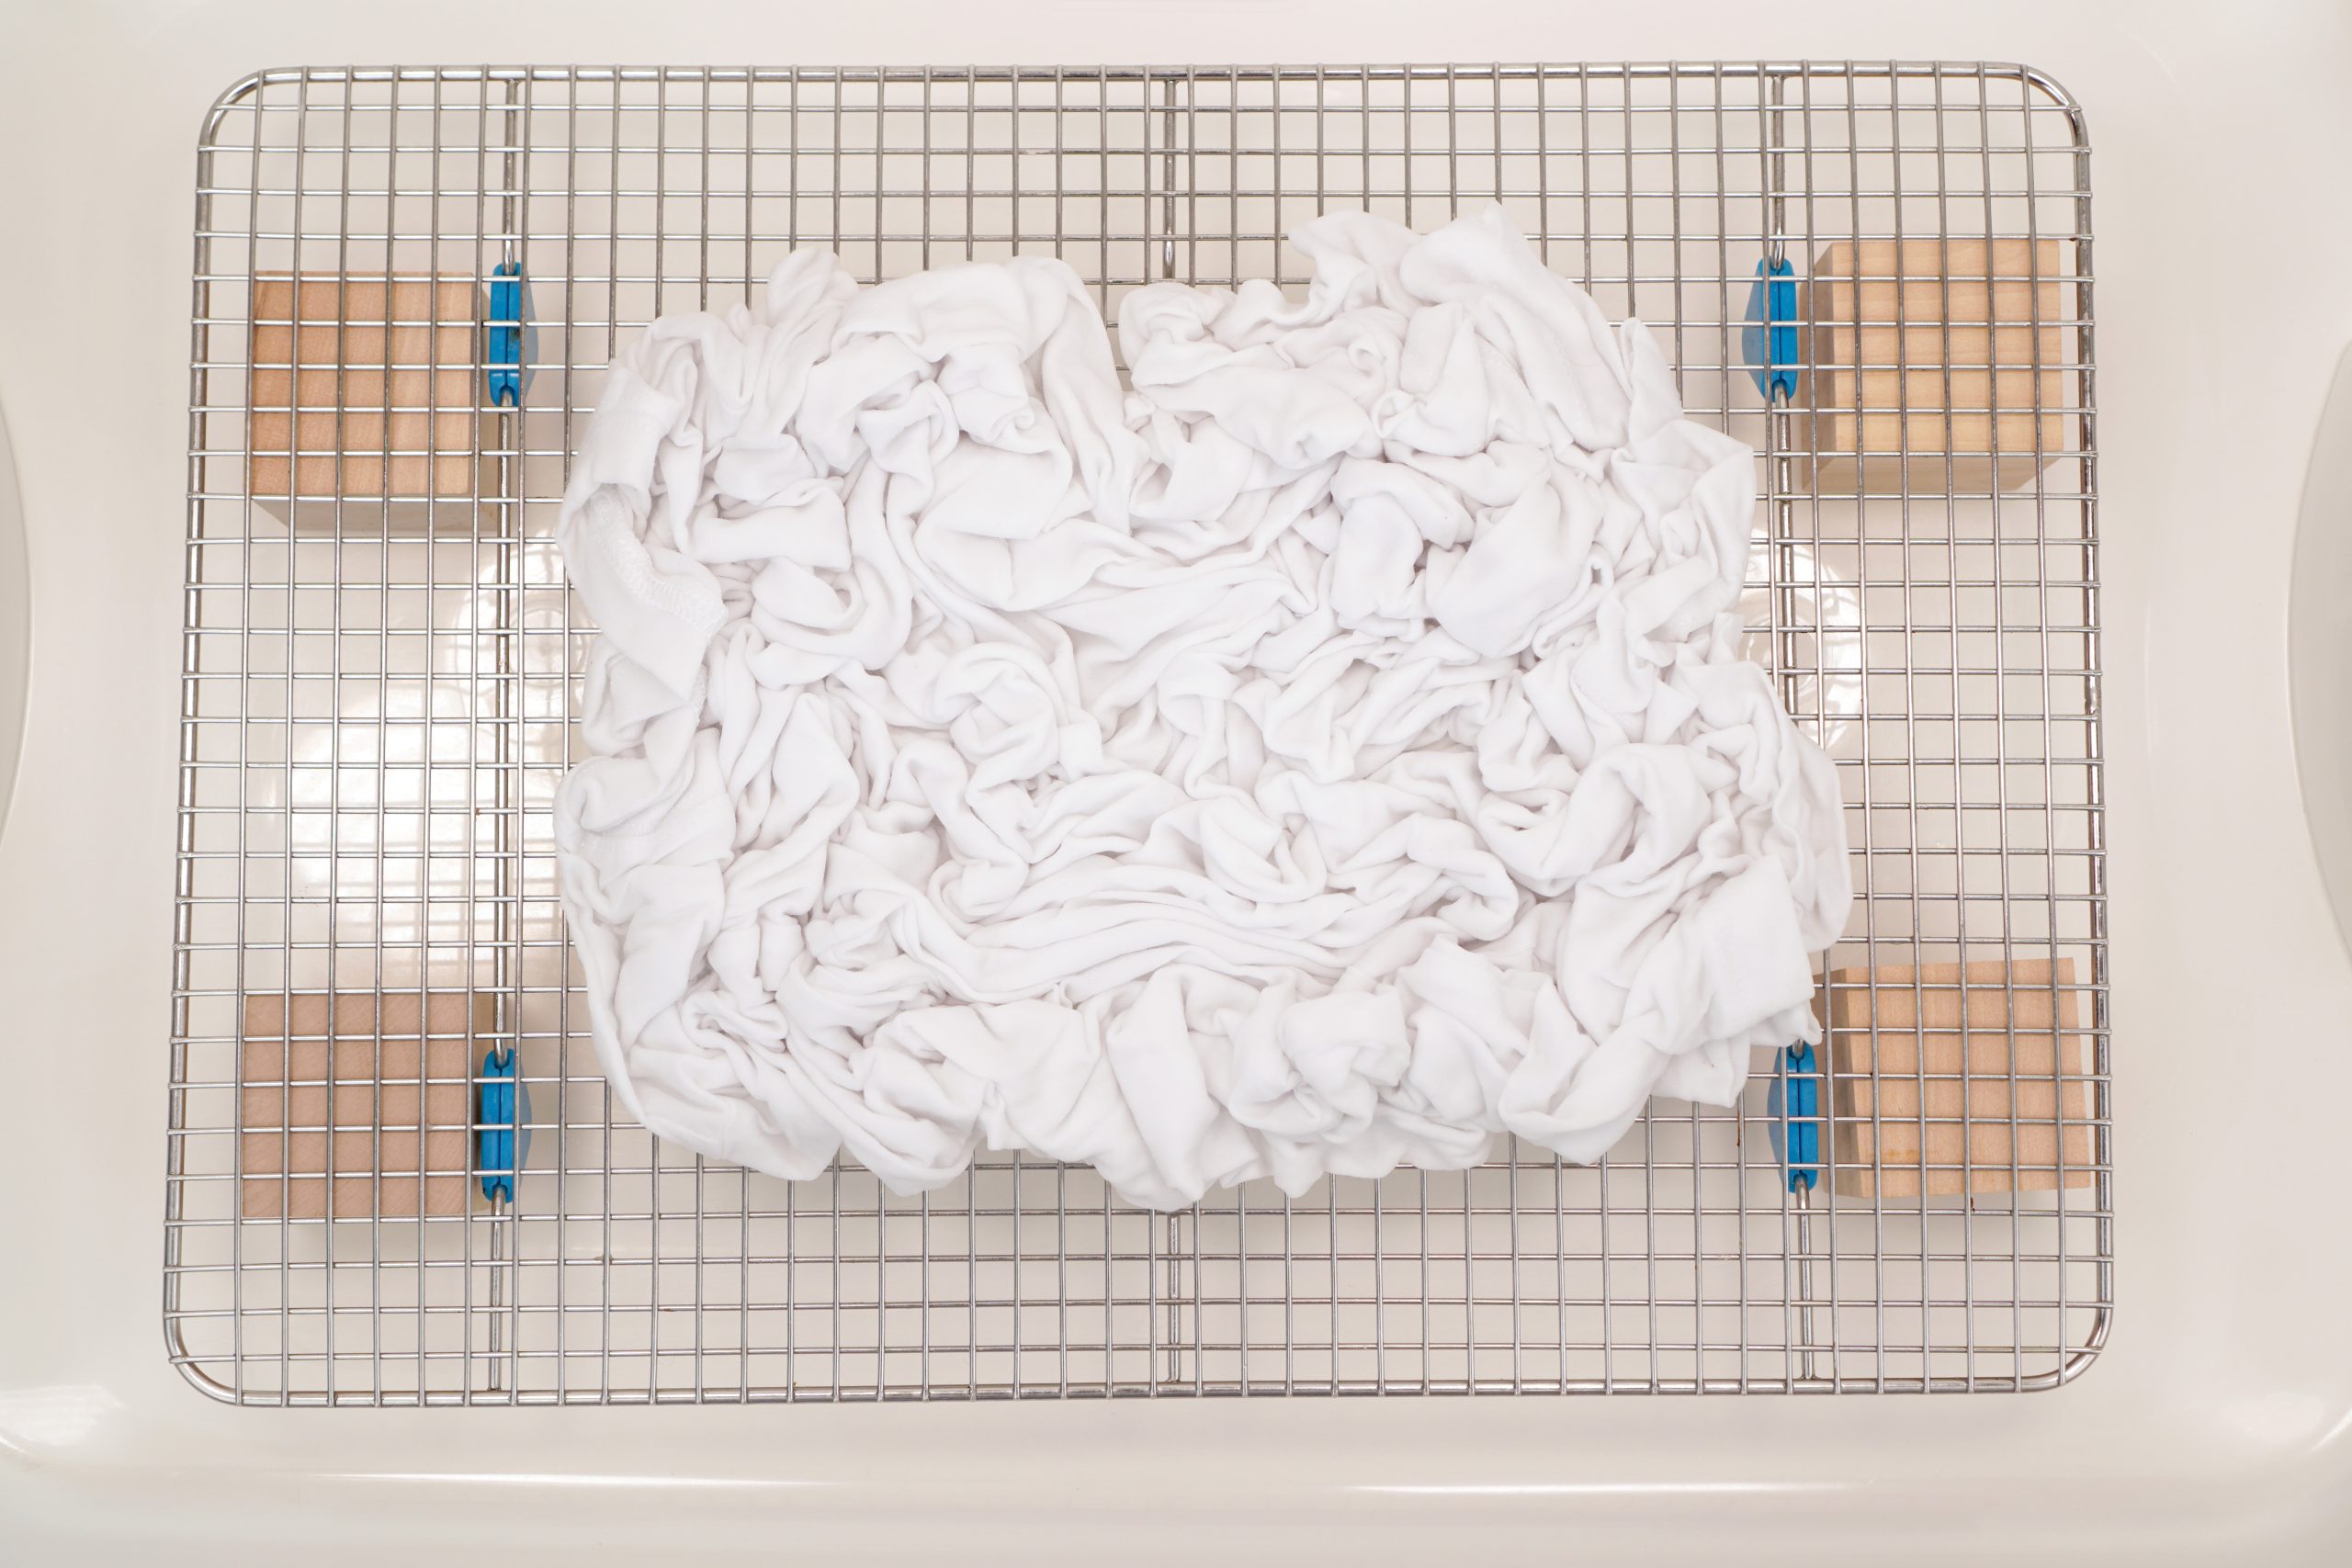
Set Up Your Ice Dyeing Area
Place the wire rack in the bottom of the plastic tub (if desired, you can elevate the rack even further by placing wood blocks at each corner), then set your prepared fabric on top of the rack.

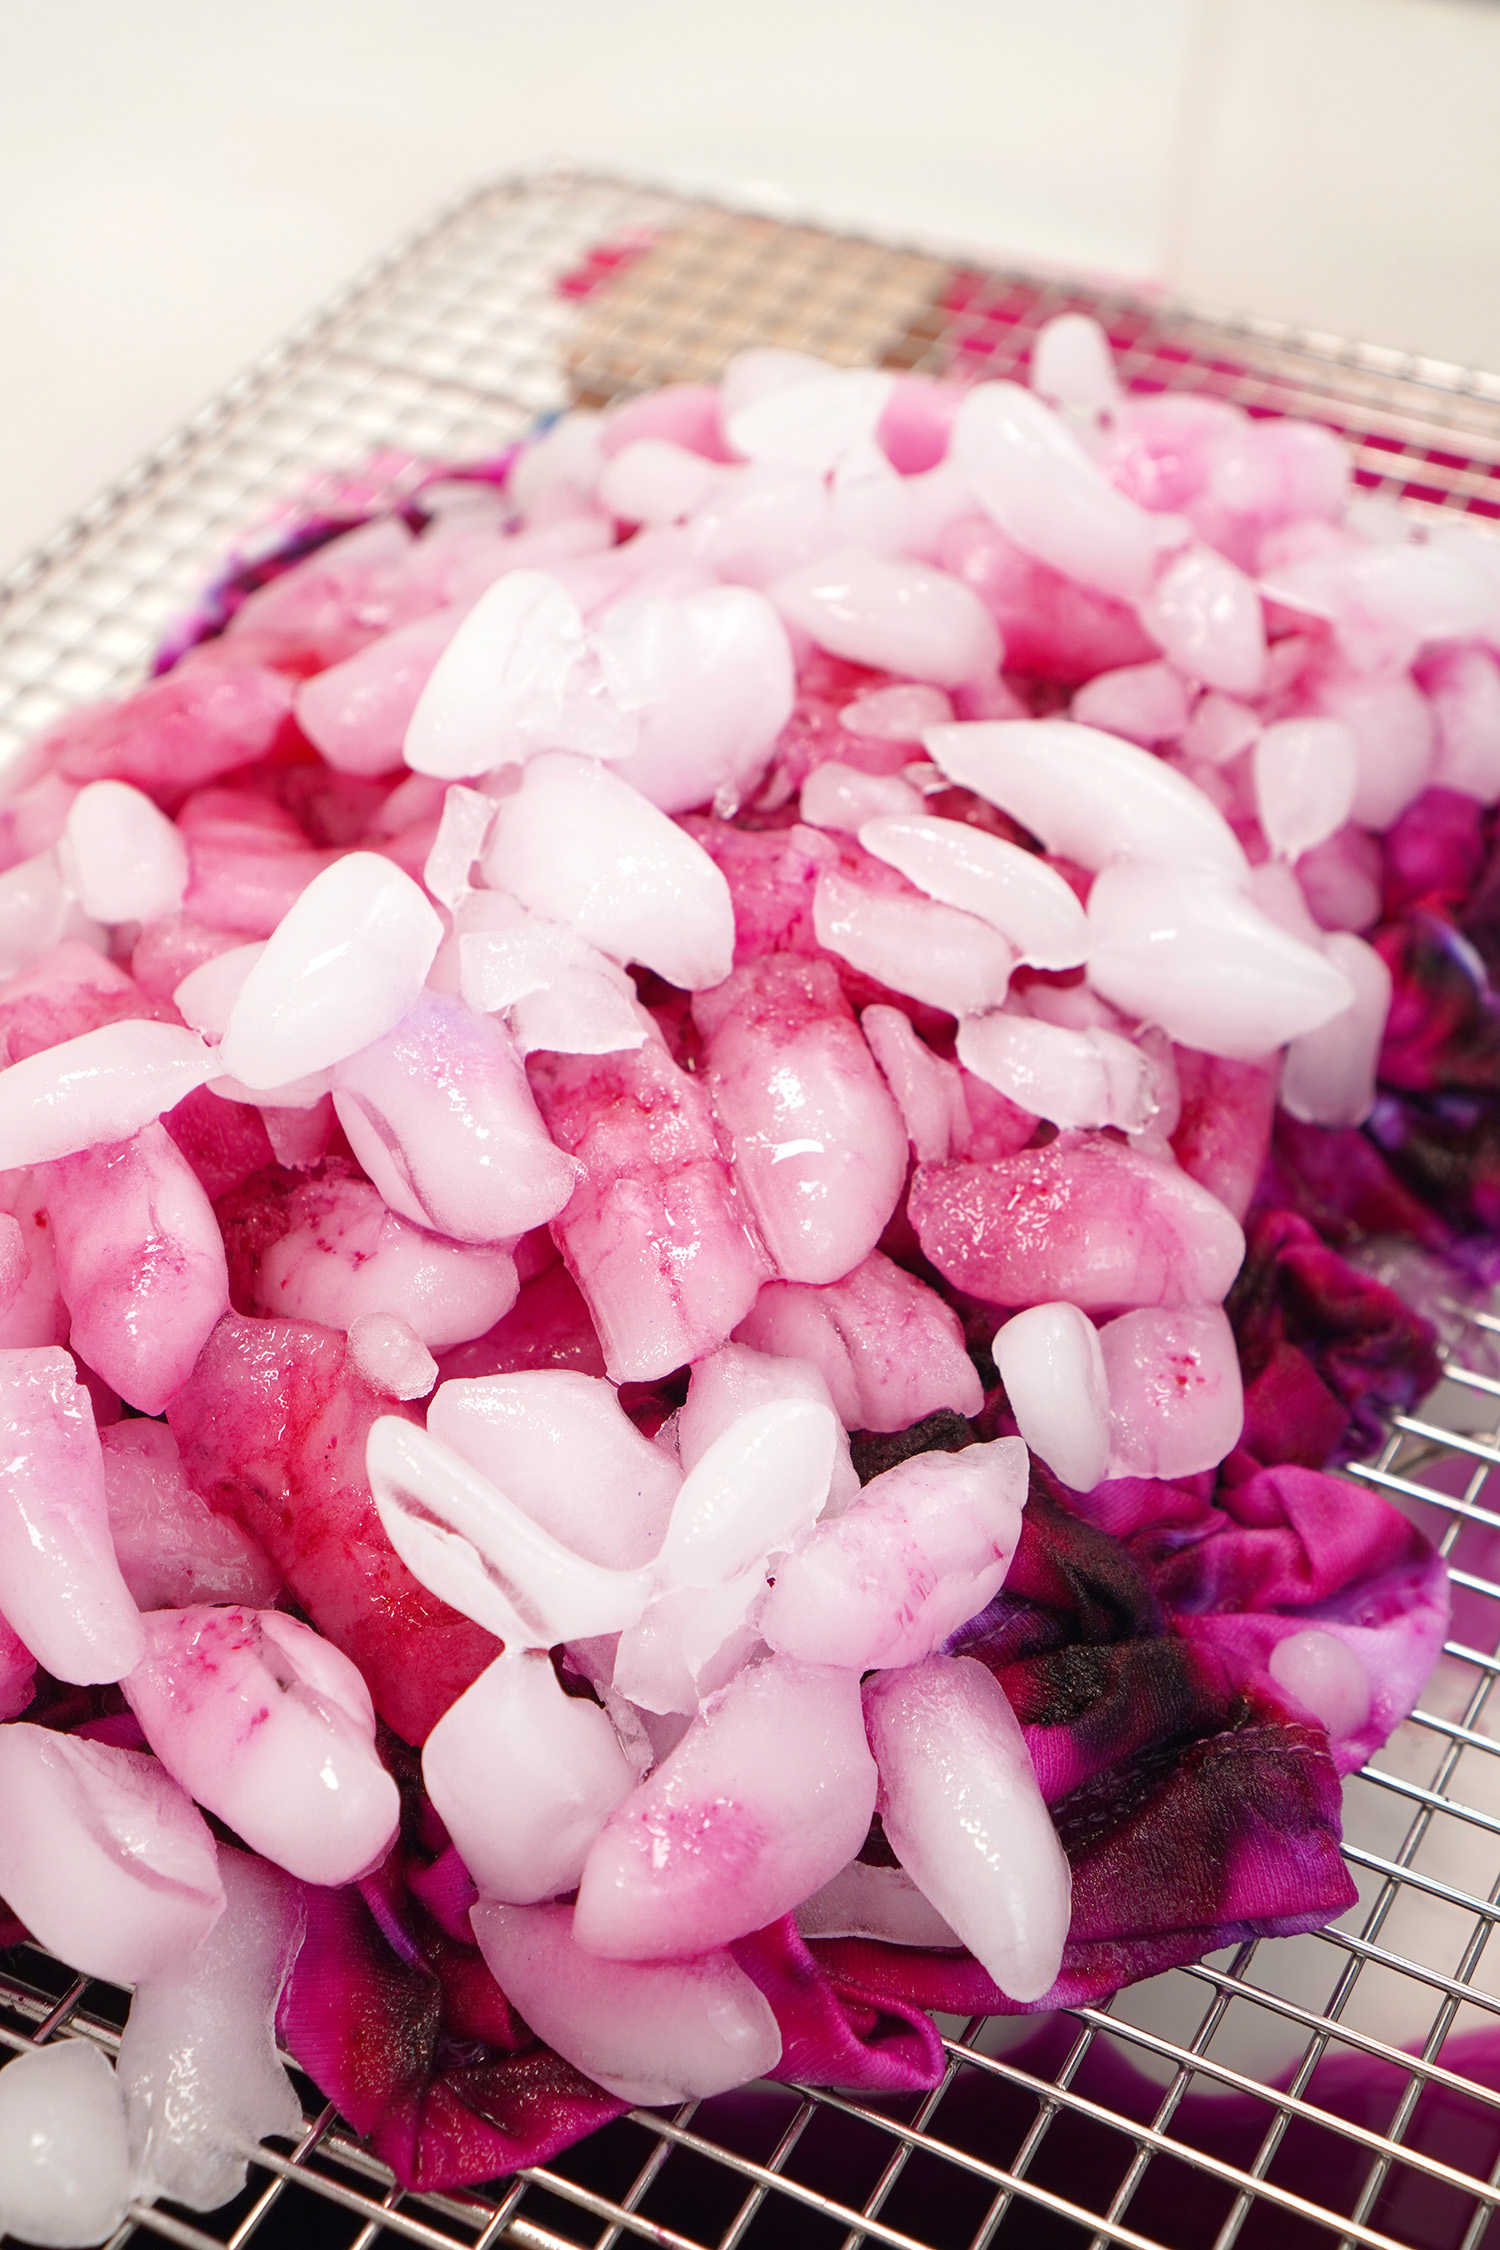
Cover the Fabric with Ice
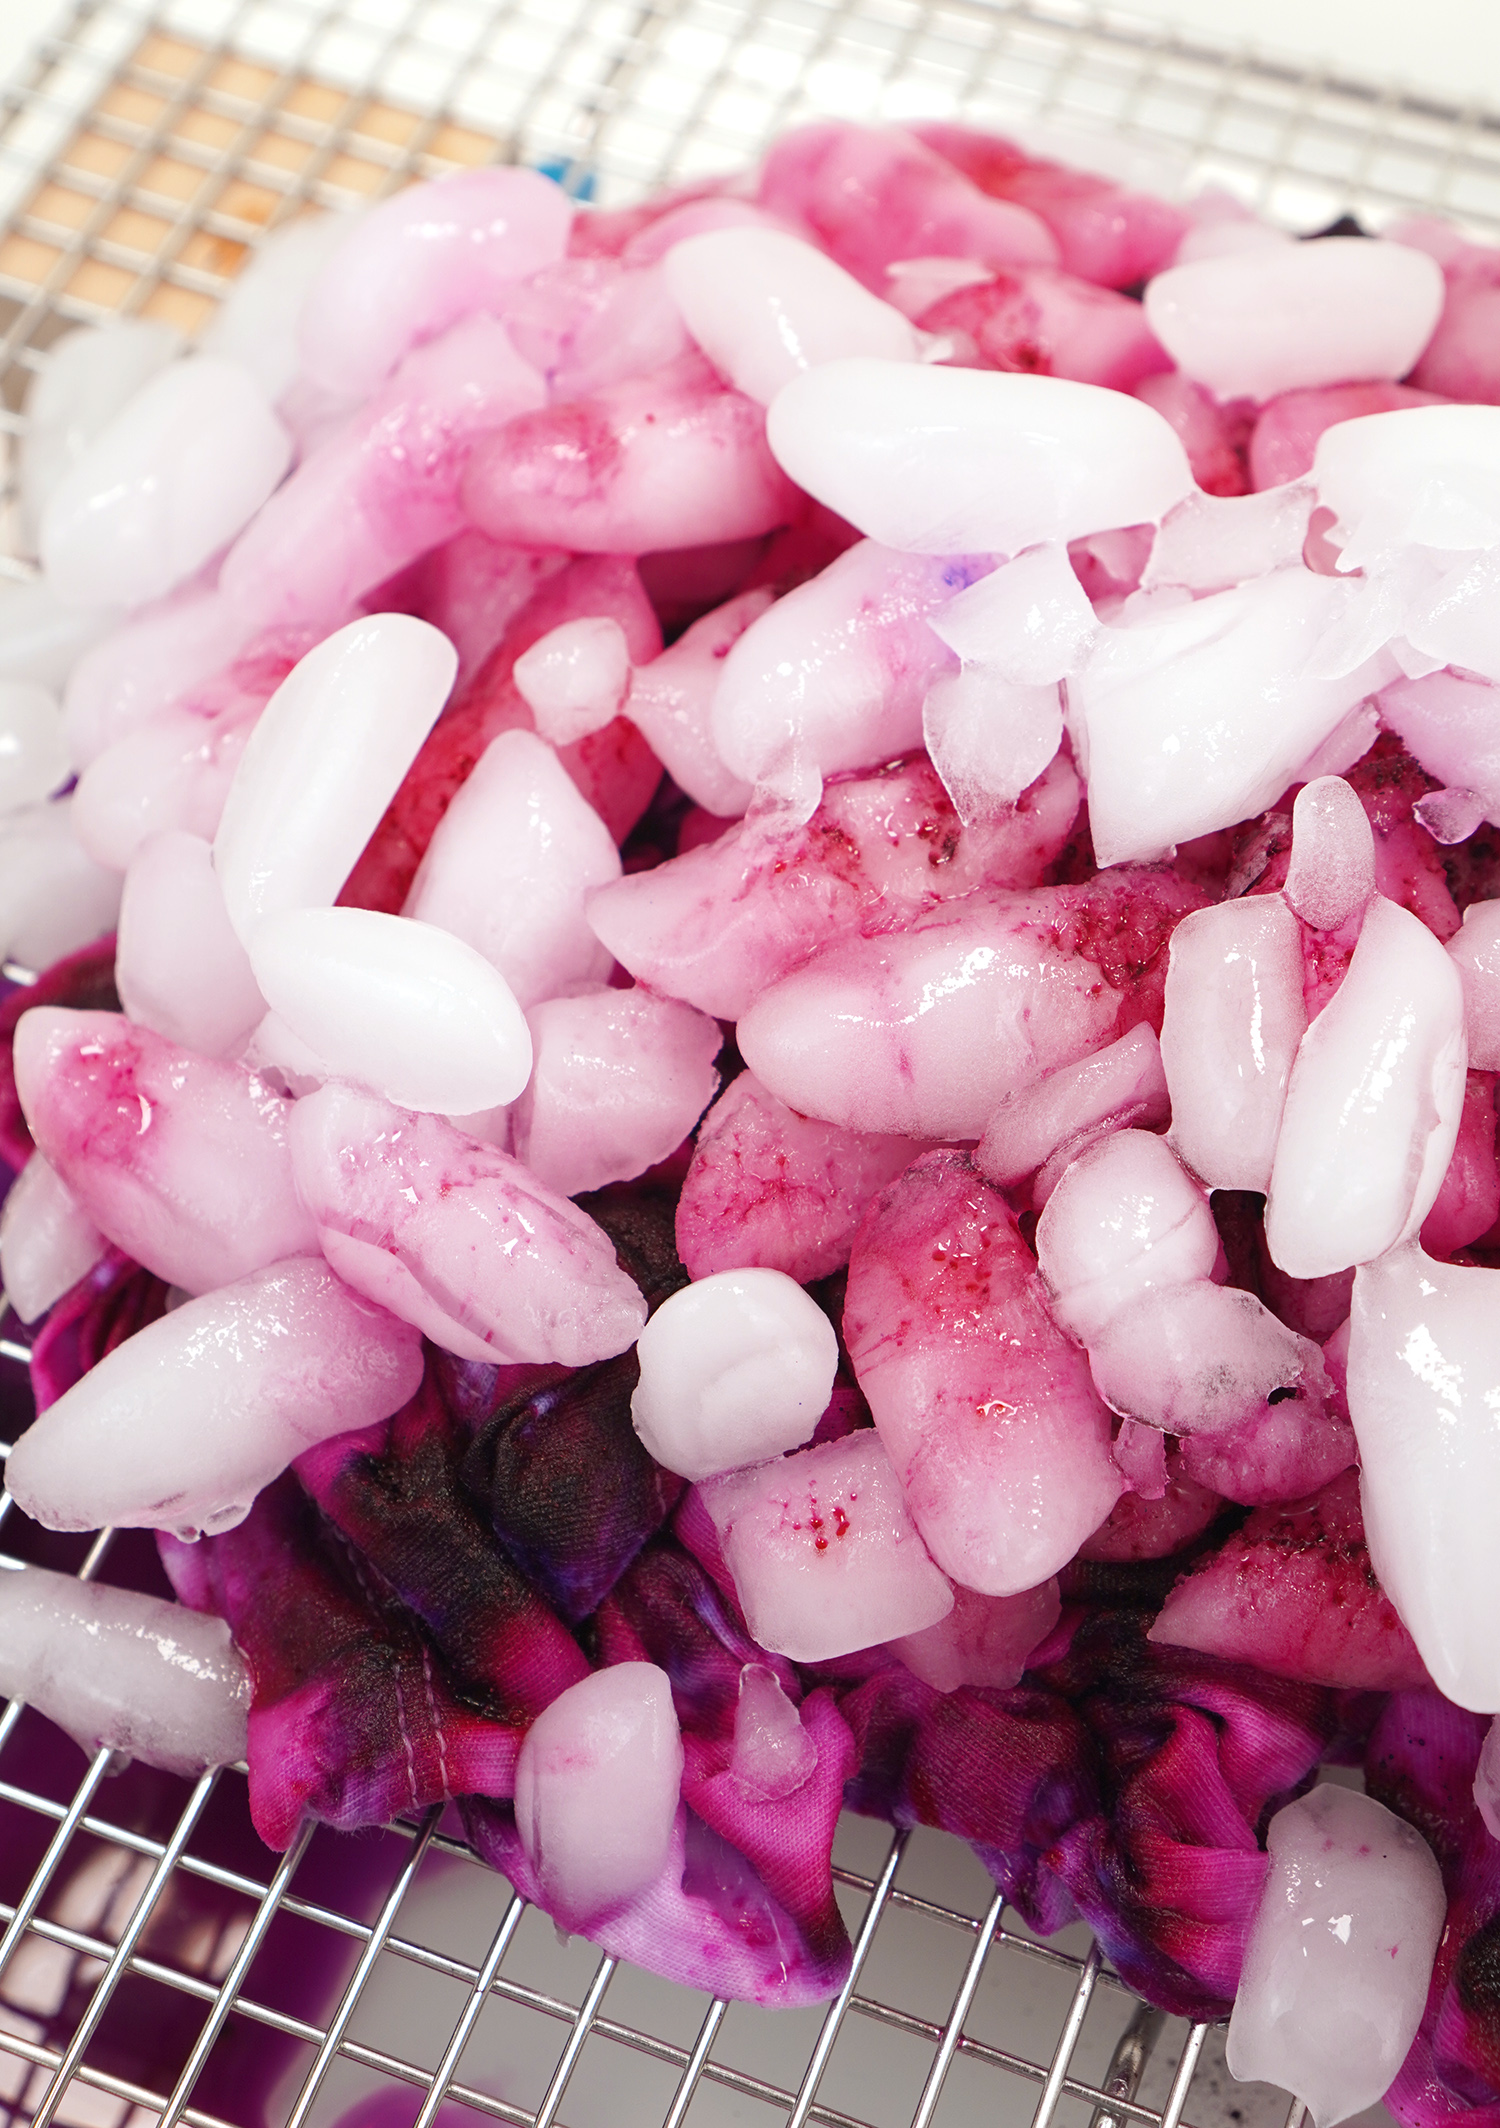
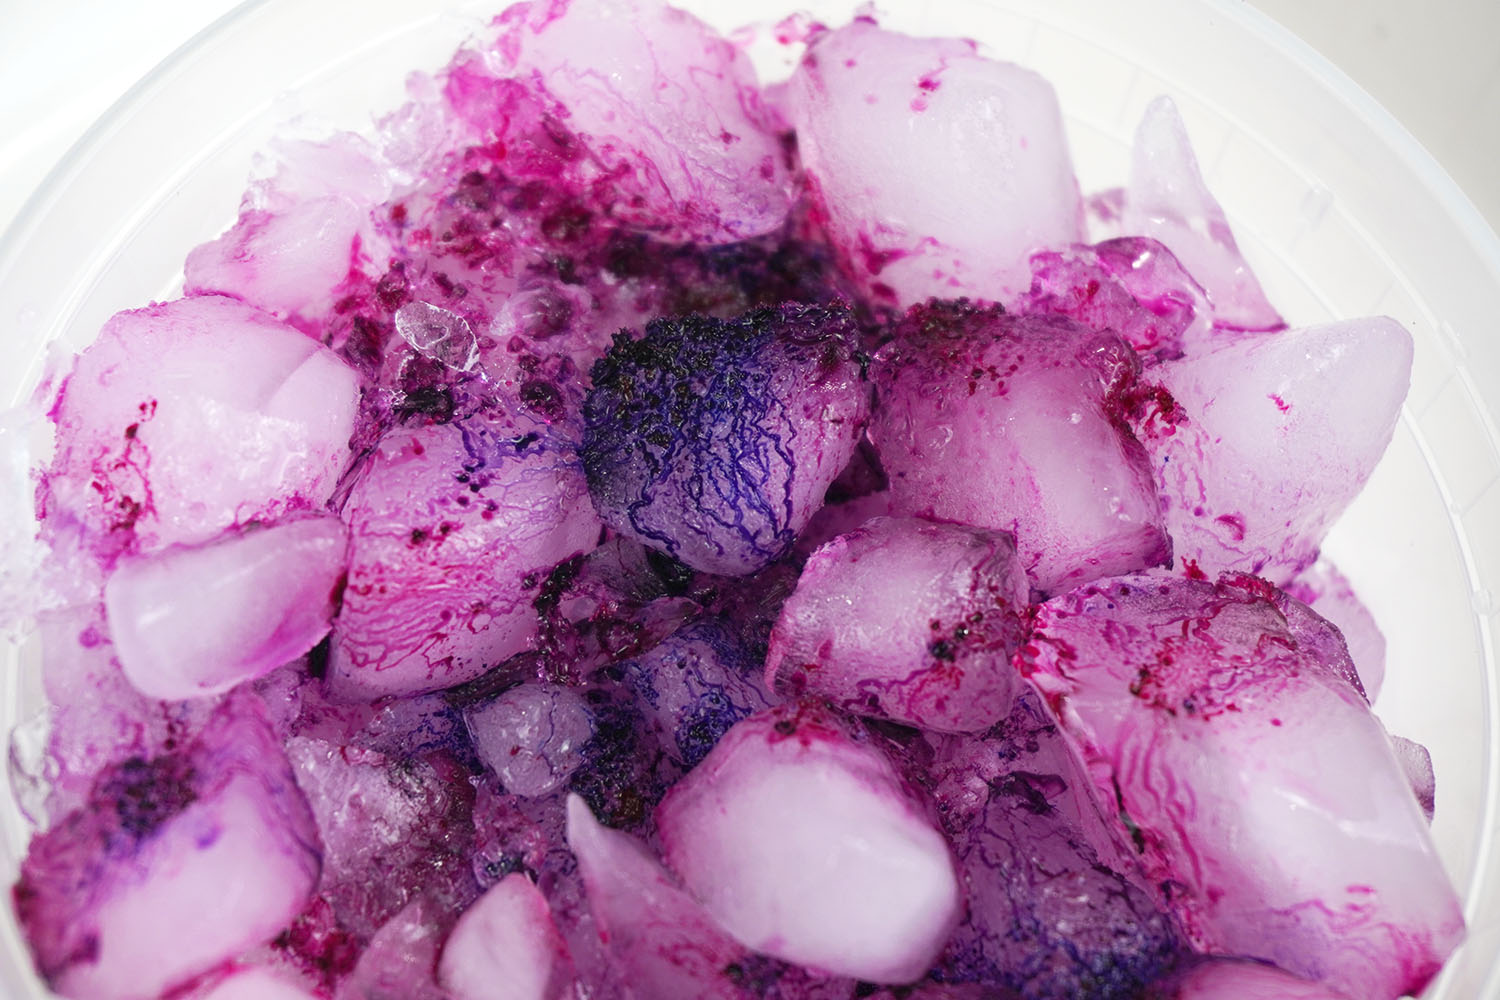
Pile the ice cubes on top of the fabric, making sure to completely cover the entire thing with ice. The more ice, the more interesting the melting process and the patterns will become!
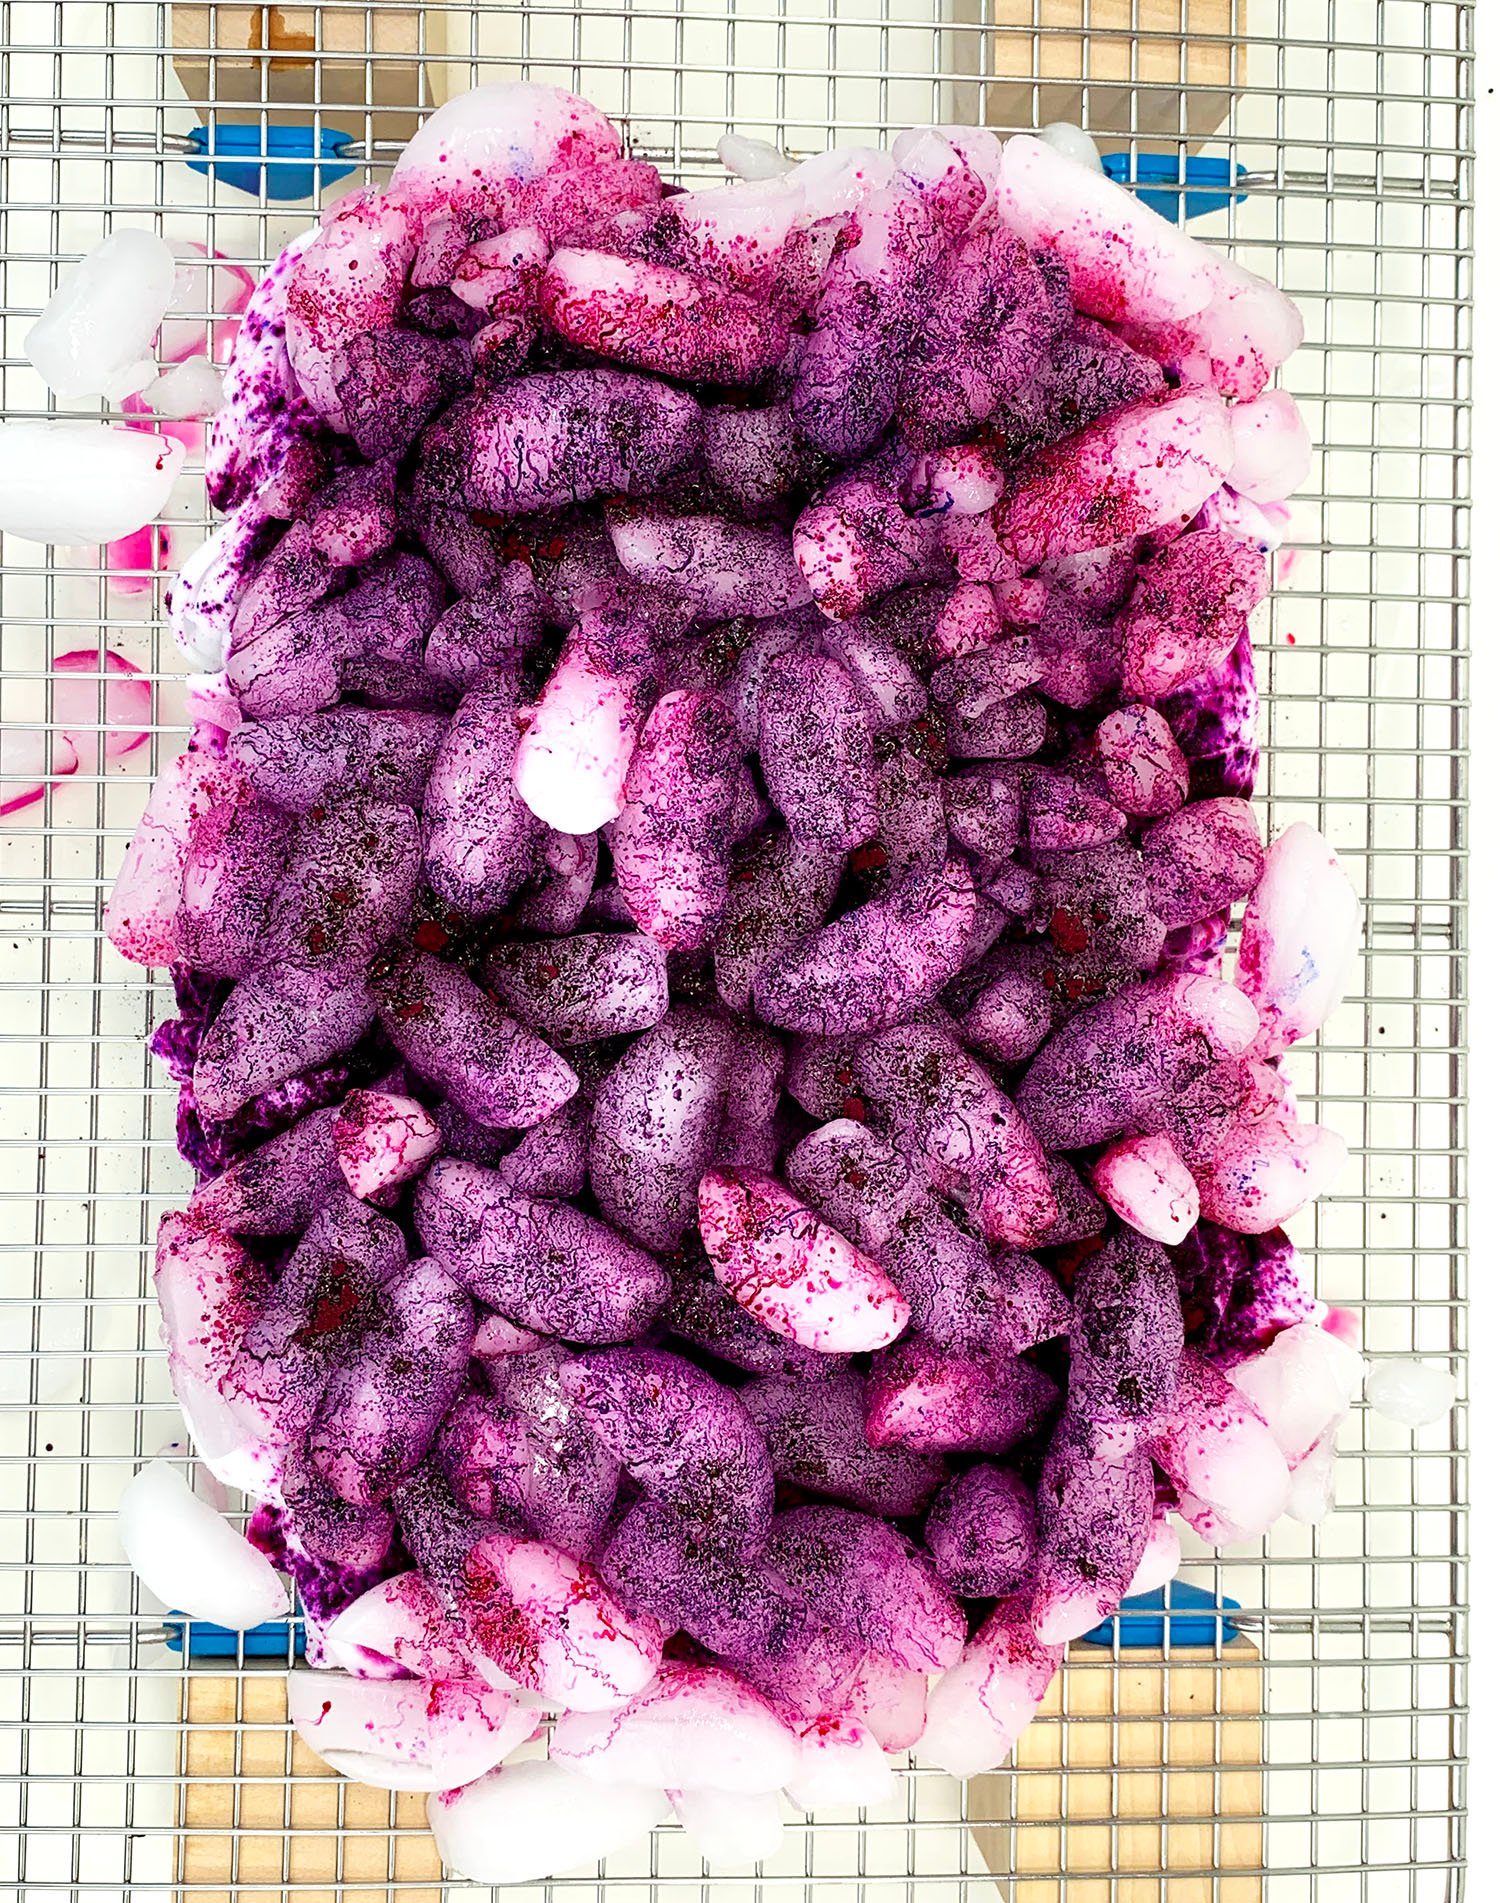
Apply the Dye
Sprinkle a small amount of powdered dye over the ice. Feel free to experiment with different colors, color combinations, and the amount of dye. More dye will result in more complete coverage and intense colors; less dye can result in more subtle shades and less coverage.
Do not be surprised if the color of dye that you sprinkle on your fabric is NOT the same color that it turns out! Read the section below about Color Splitting to learn more about this interesting phenomenon and how to use it to your advantage.
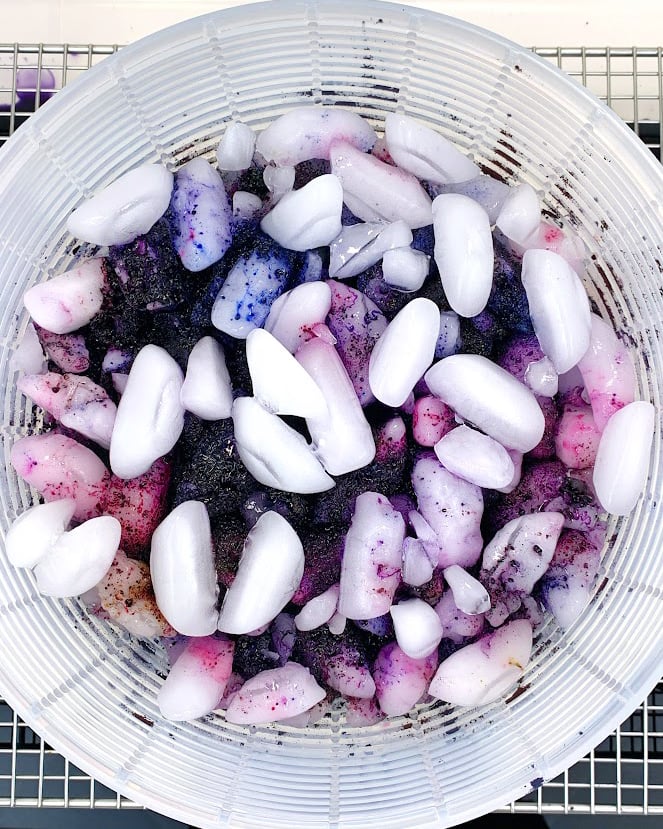
Allow the Ice to Melt
Loosely cover the top of the bin with plastic wrap and let it sit until the ice has completely melted. This could take several hours or a full day, depending on the temperature. Once the ice has melted, place the fabric into a plastic bag, and allow it to sit in a warm location for 24-48 hours.
Reveal the Magic!
Unfold your fabric and admire the unique, intricate patterns you’ve created!
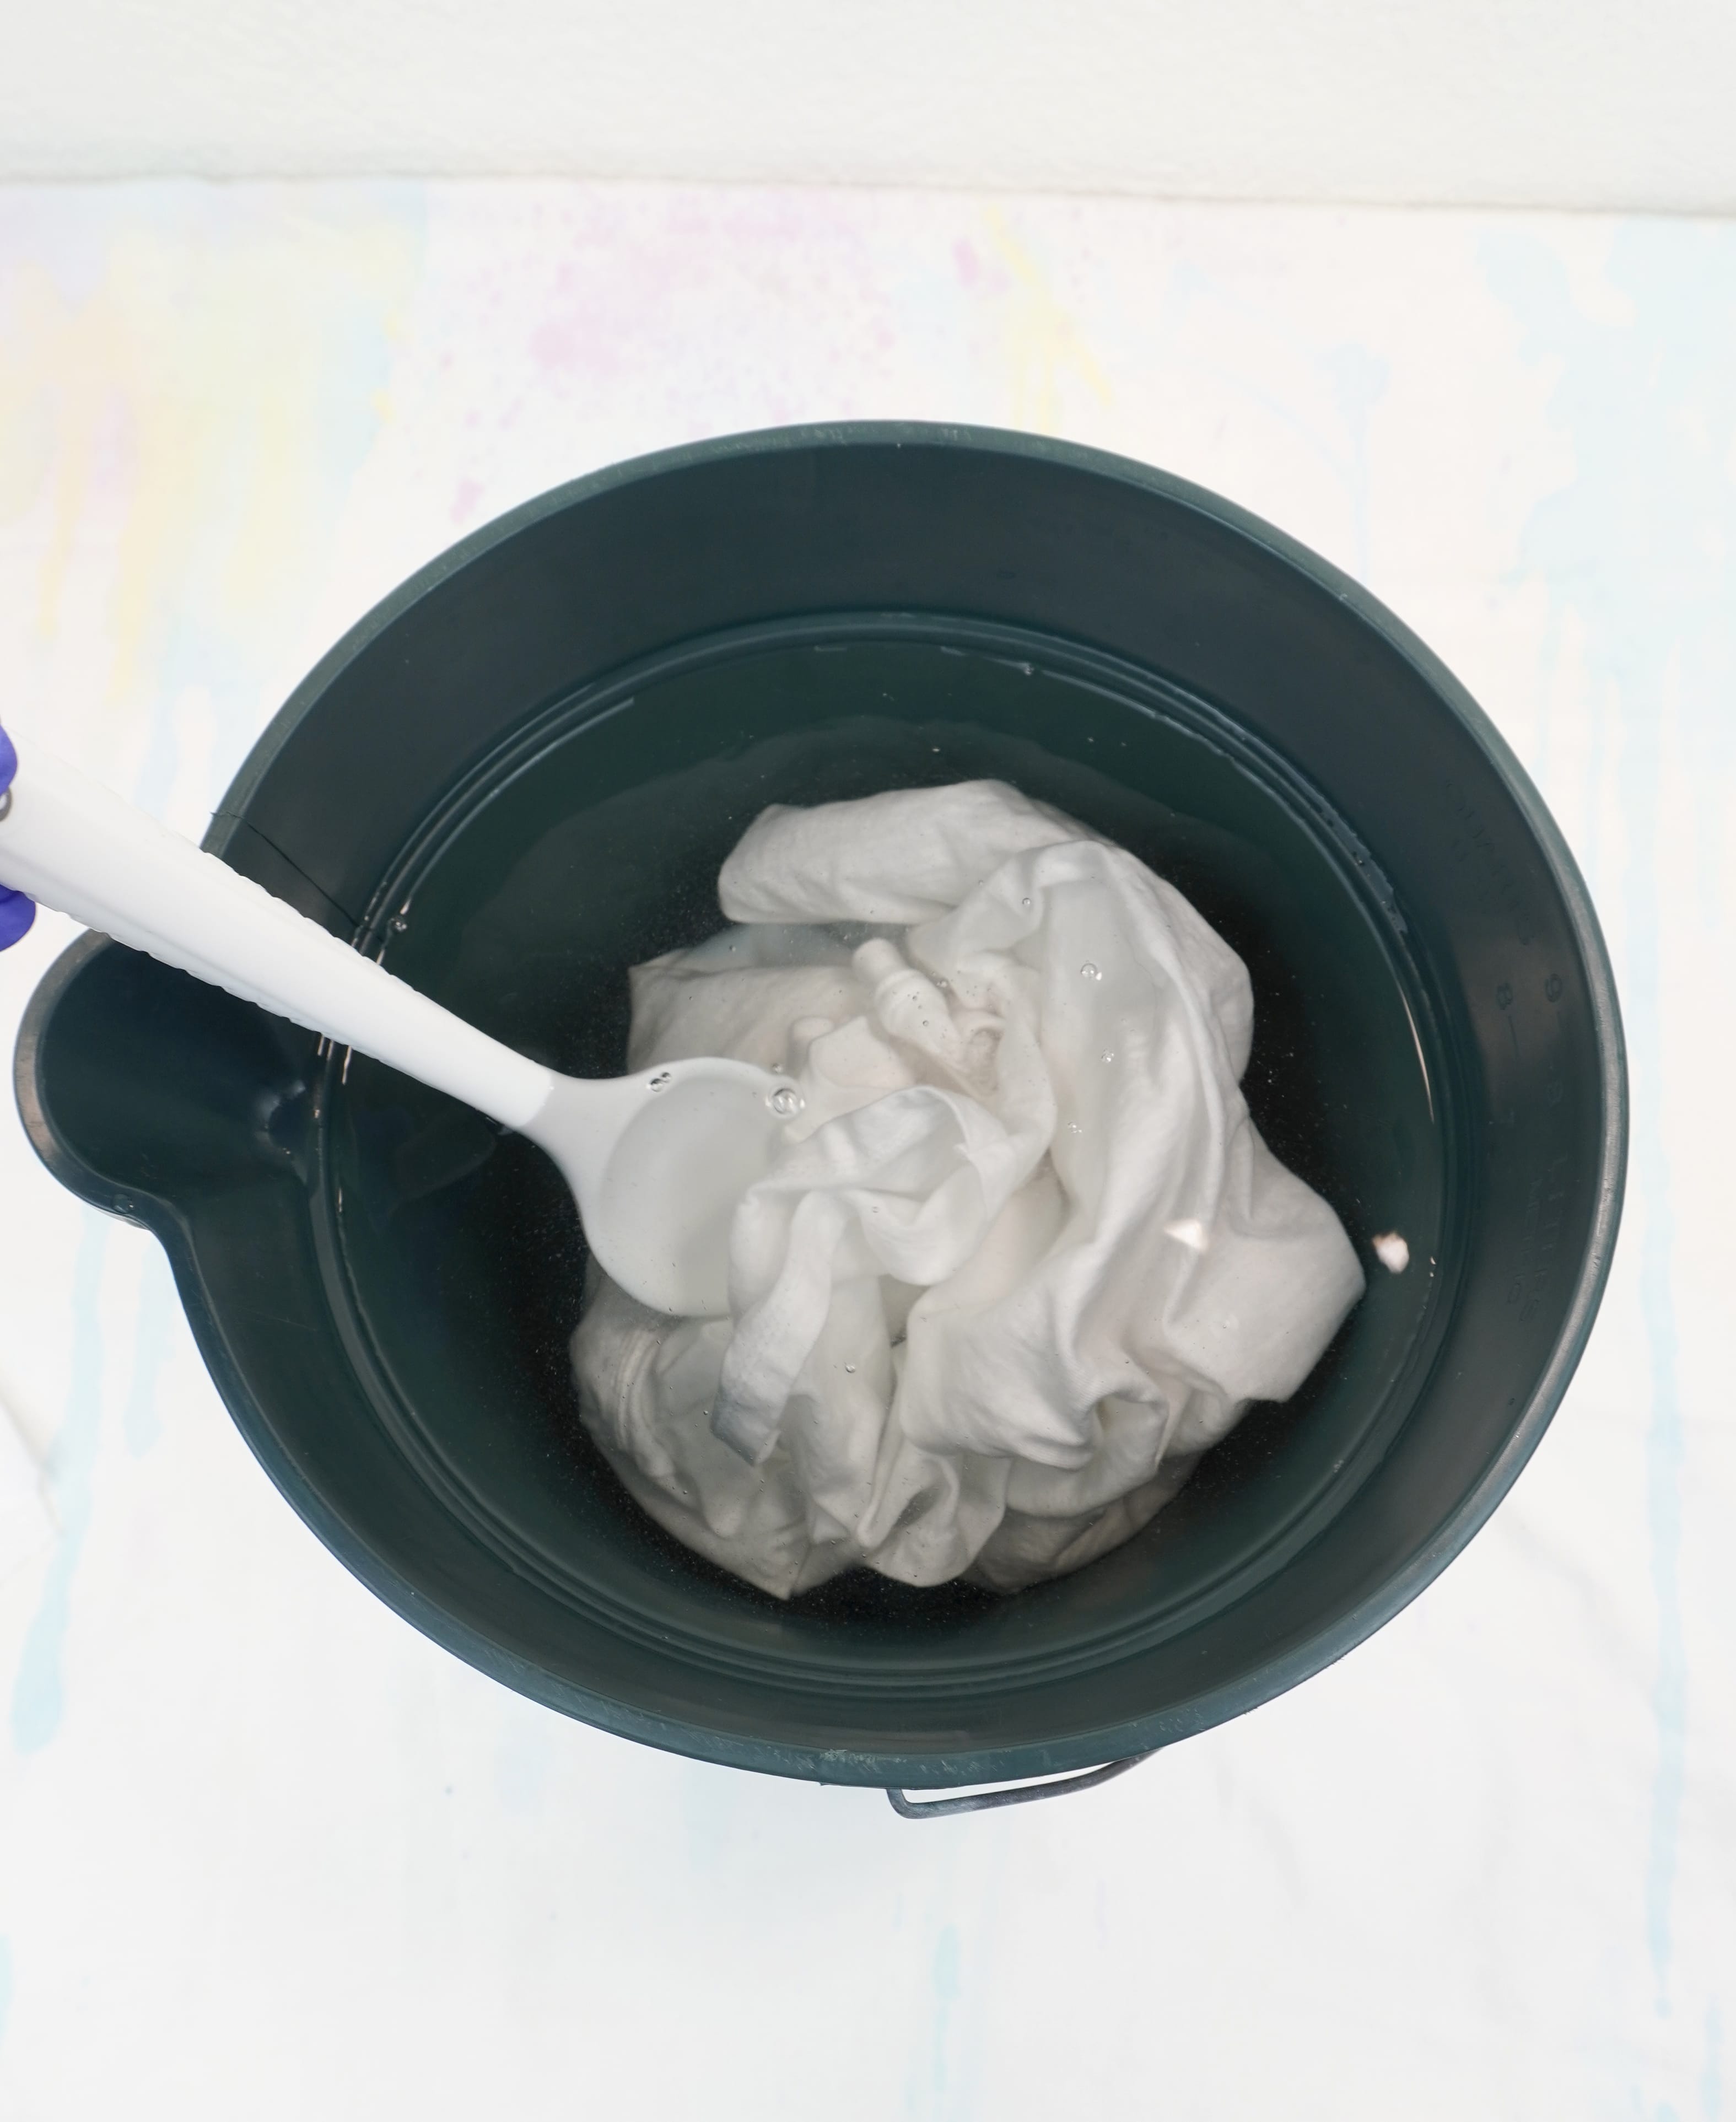
Rinse and Wash
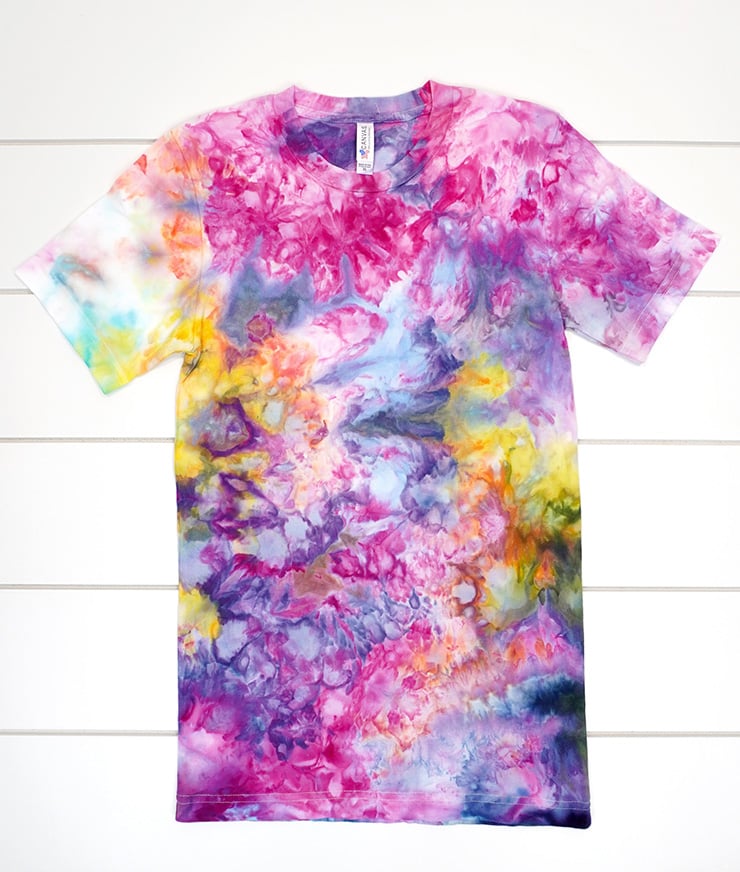
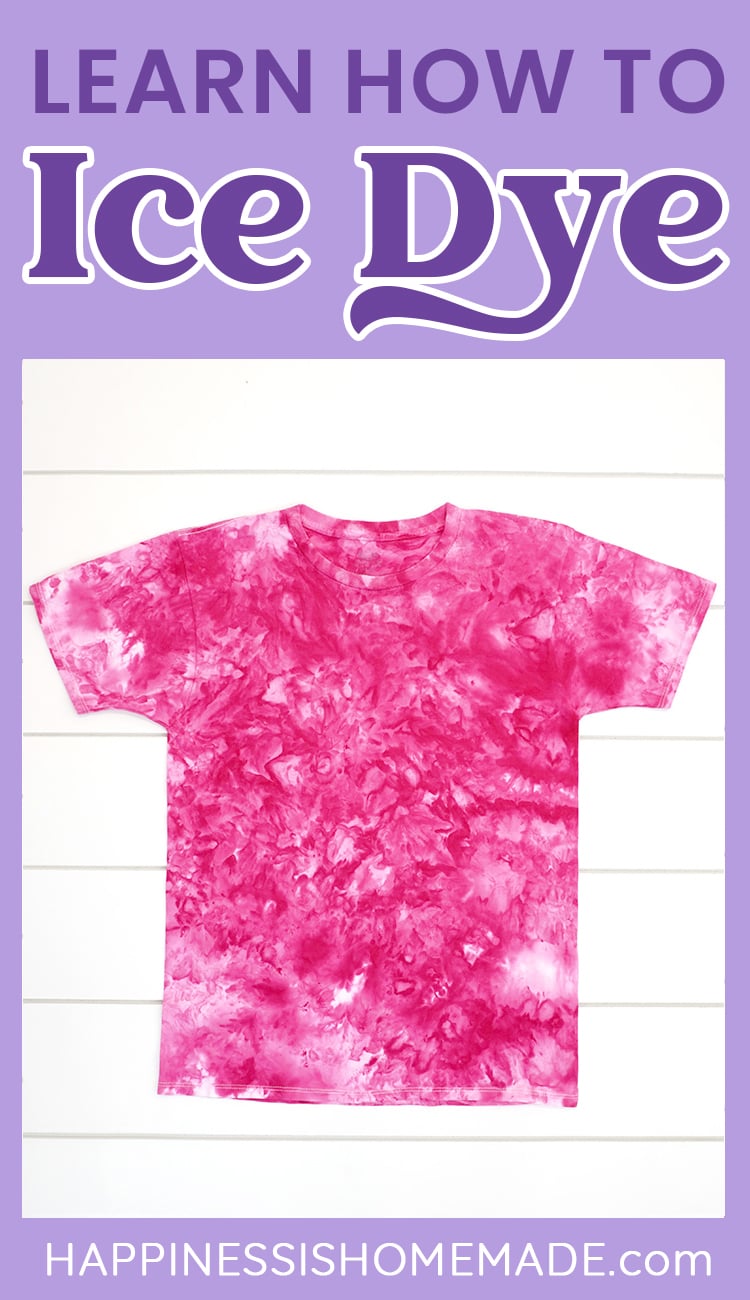
Rinse the fabric in cold water (until the water runs clear) to remove excess dye. Then, wash it in the washing machine with a professional textile detergent to get rid of any remaining dye. The result of the crumple folding method is this stunning mottled watercolor look that I just can’t get enough of!
Color Splitting & Shifting
In ice dyeing, when powdered dyes are sprinkled over ice and gradually dissolve, they can shift and split into multiple colors due to a phenomenon known as color splitting or color shifting. It’s one of my favorite things about ice dyeing!
This happens because the vast majority of dye powders are created by combining several different component colors. There are well over 100 shades of fiber-reactive dyes available; however, there are only about a dozen “pure” (non-mixed, single-hue) colors of dye. The rest of the dye options are made from a combination of colors, and there is no process that better shows off those mixed colors than ice dyeing!
As the ice slowly melts, these multi-colored components dissolve and migrate at varying rates, revealing the individual hues that make up the original dye color, resulting in a complex and multi-colored pattern on the fabric.
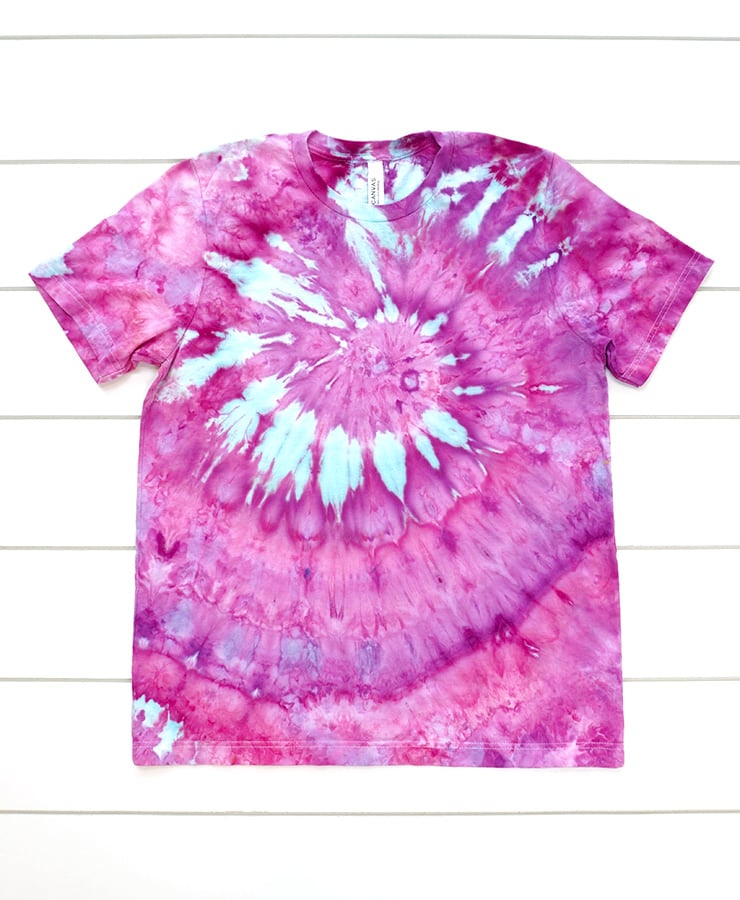
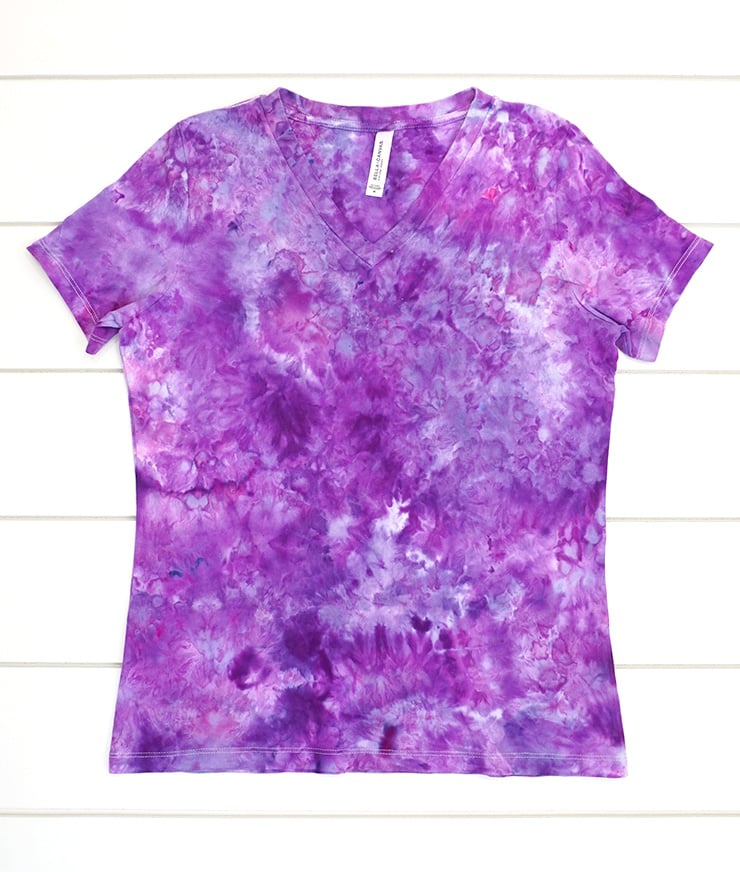
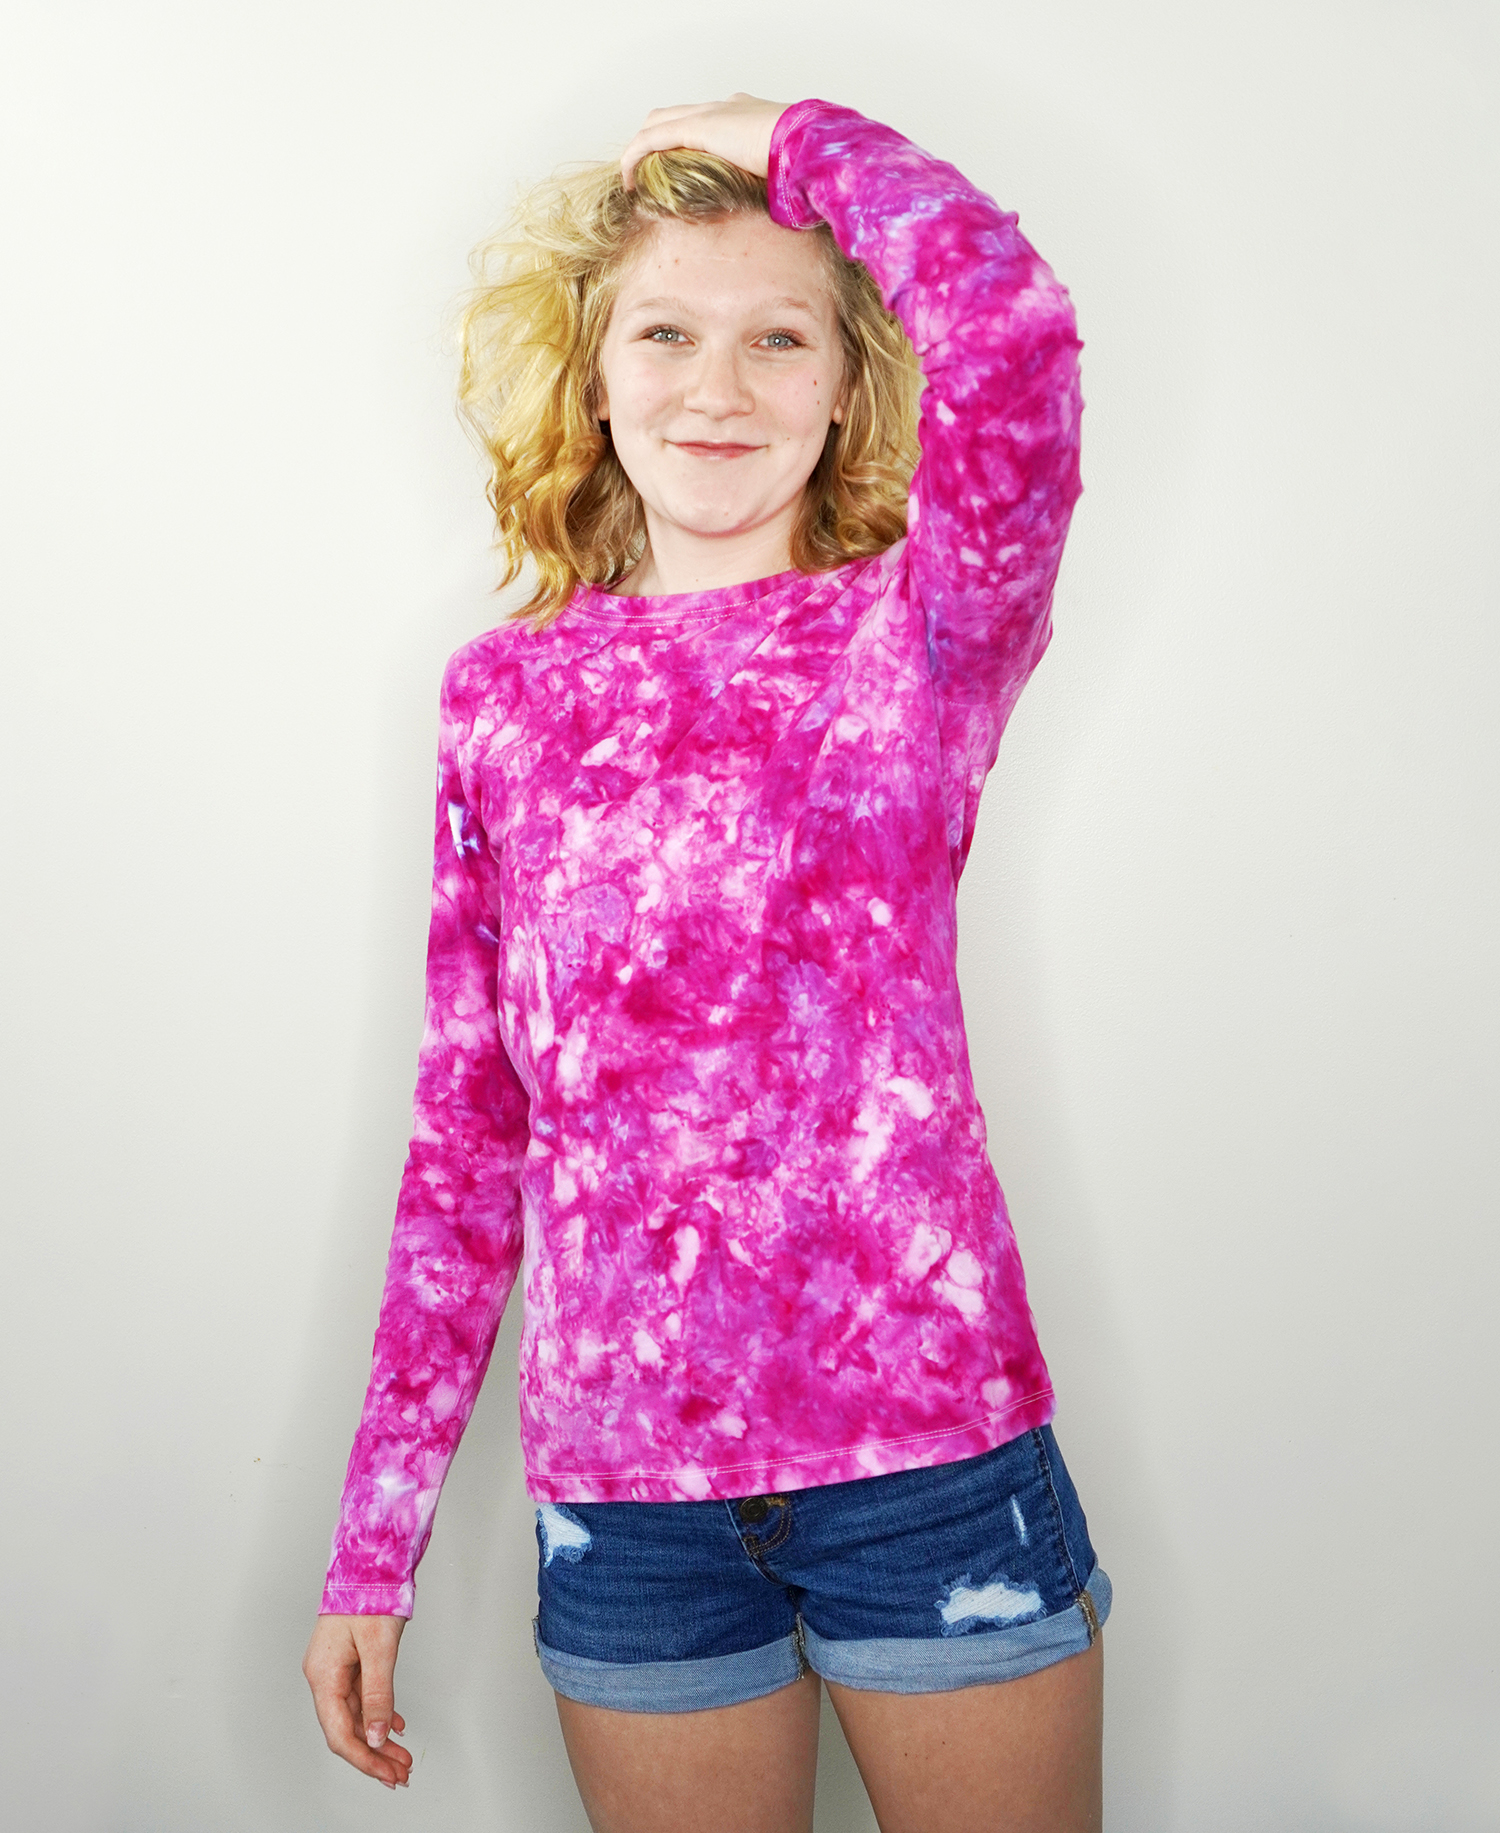
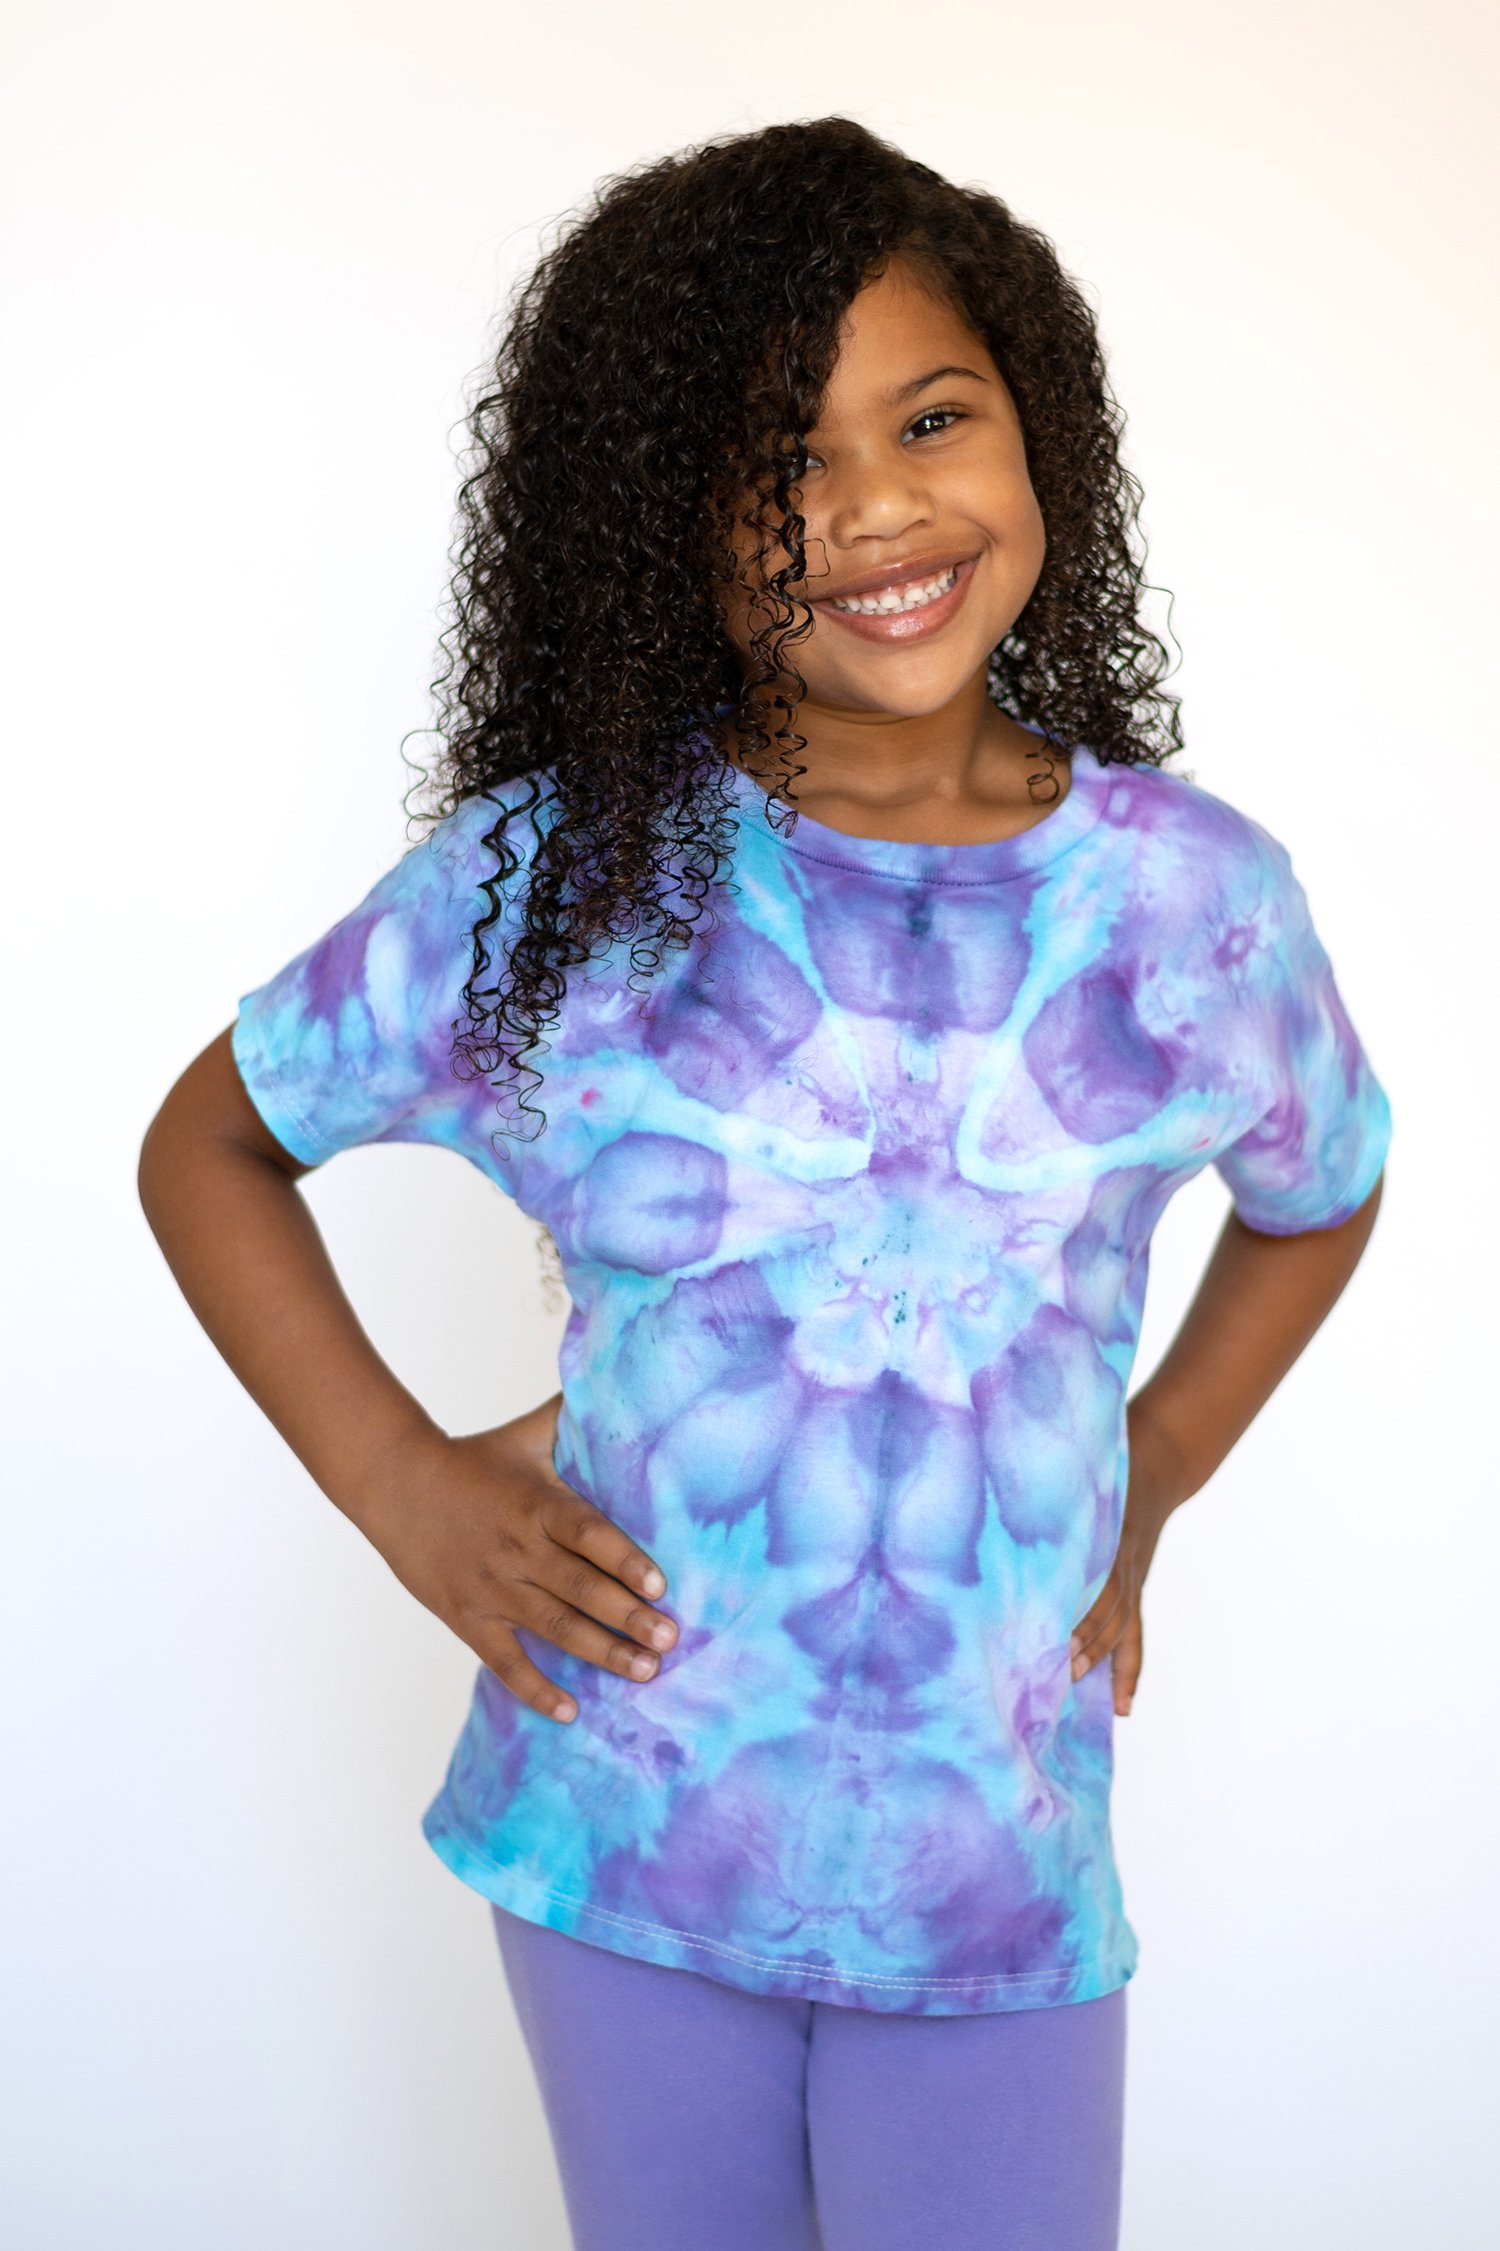
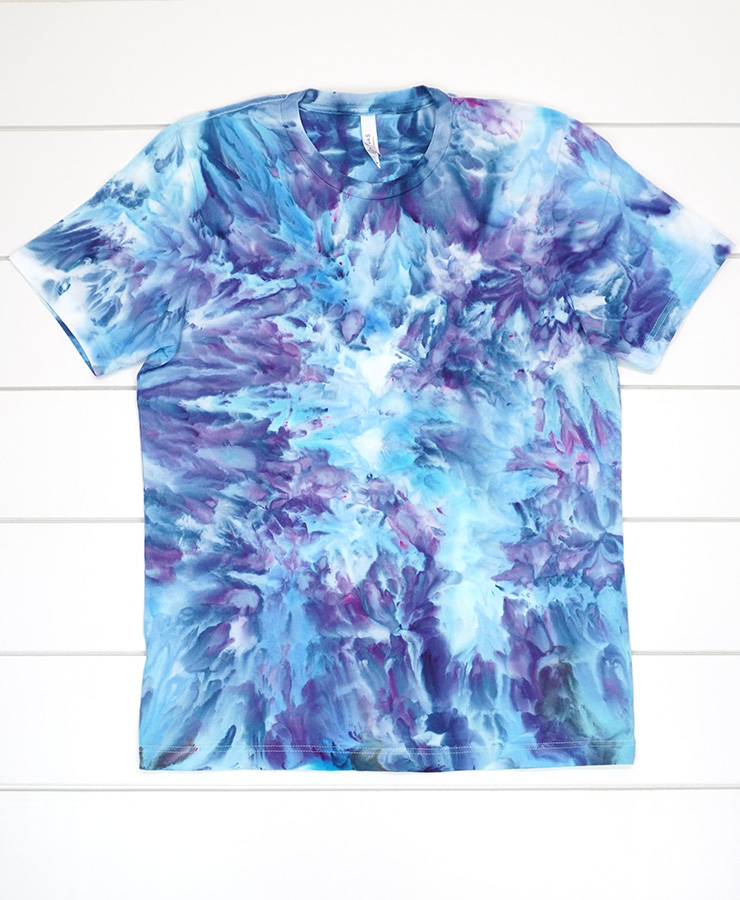
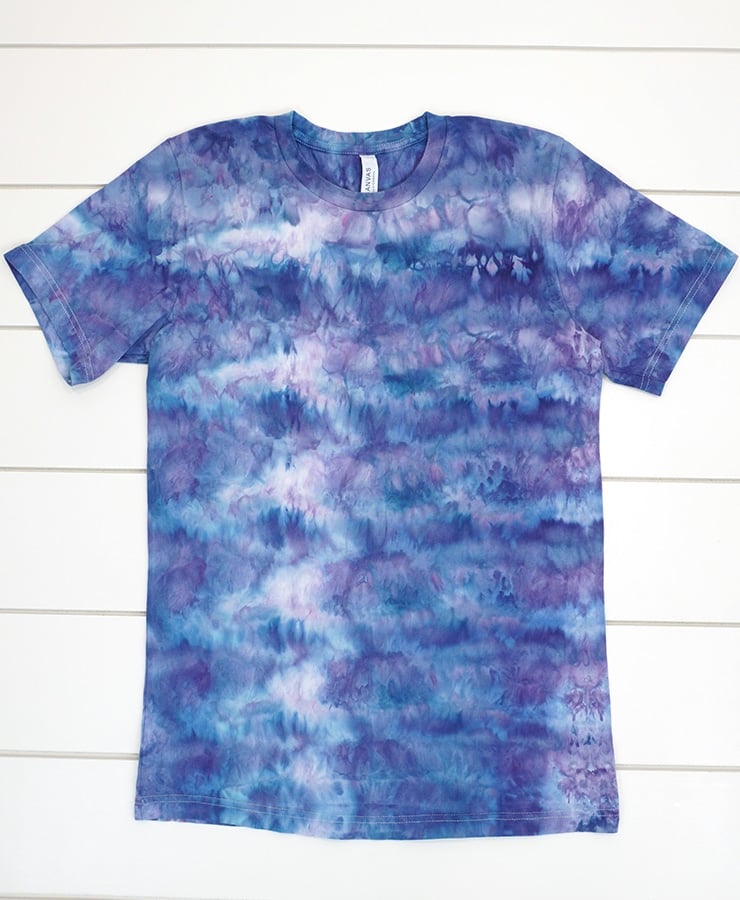
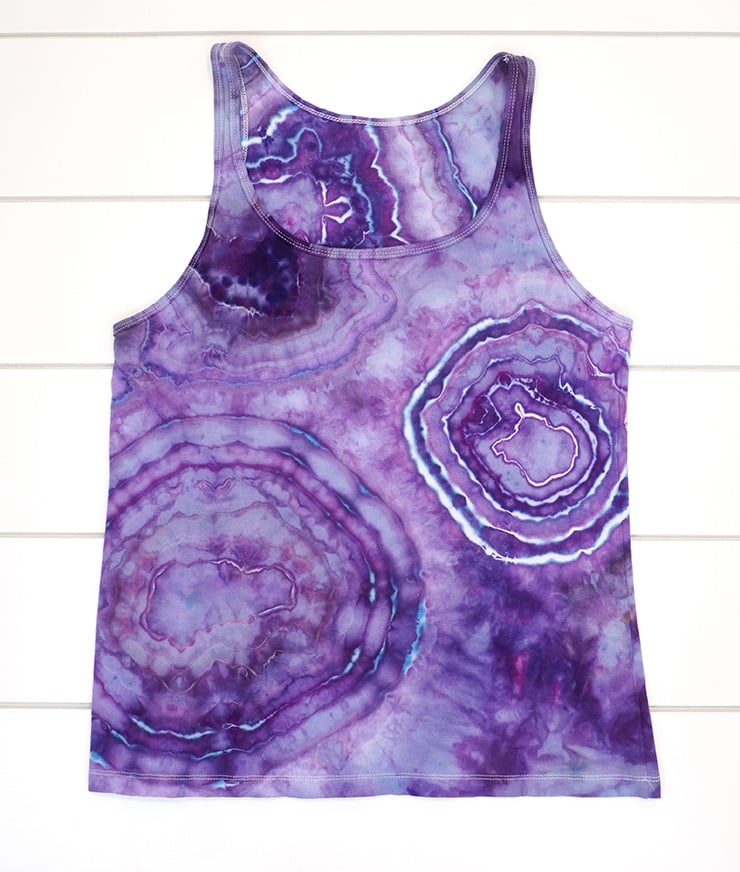
Believe it or not, this shirt shown here (above) was created using only ONE single color of powdered dye! 😮 (Dharma Fiber-Reactive Procion Dye in #15 Amethyst)
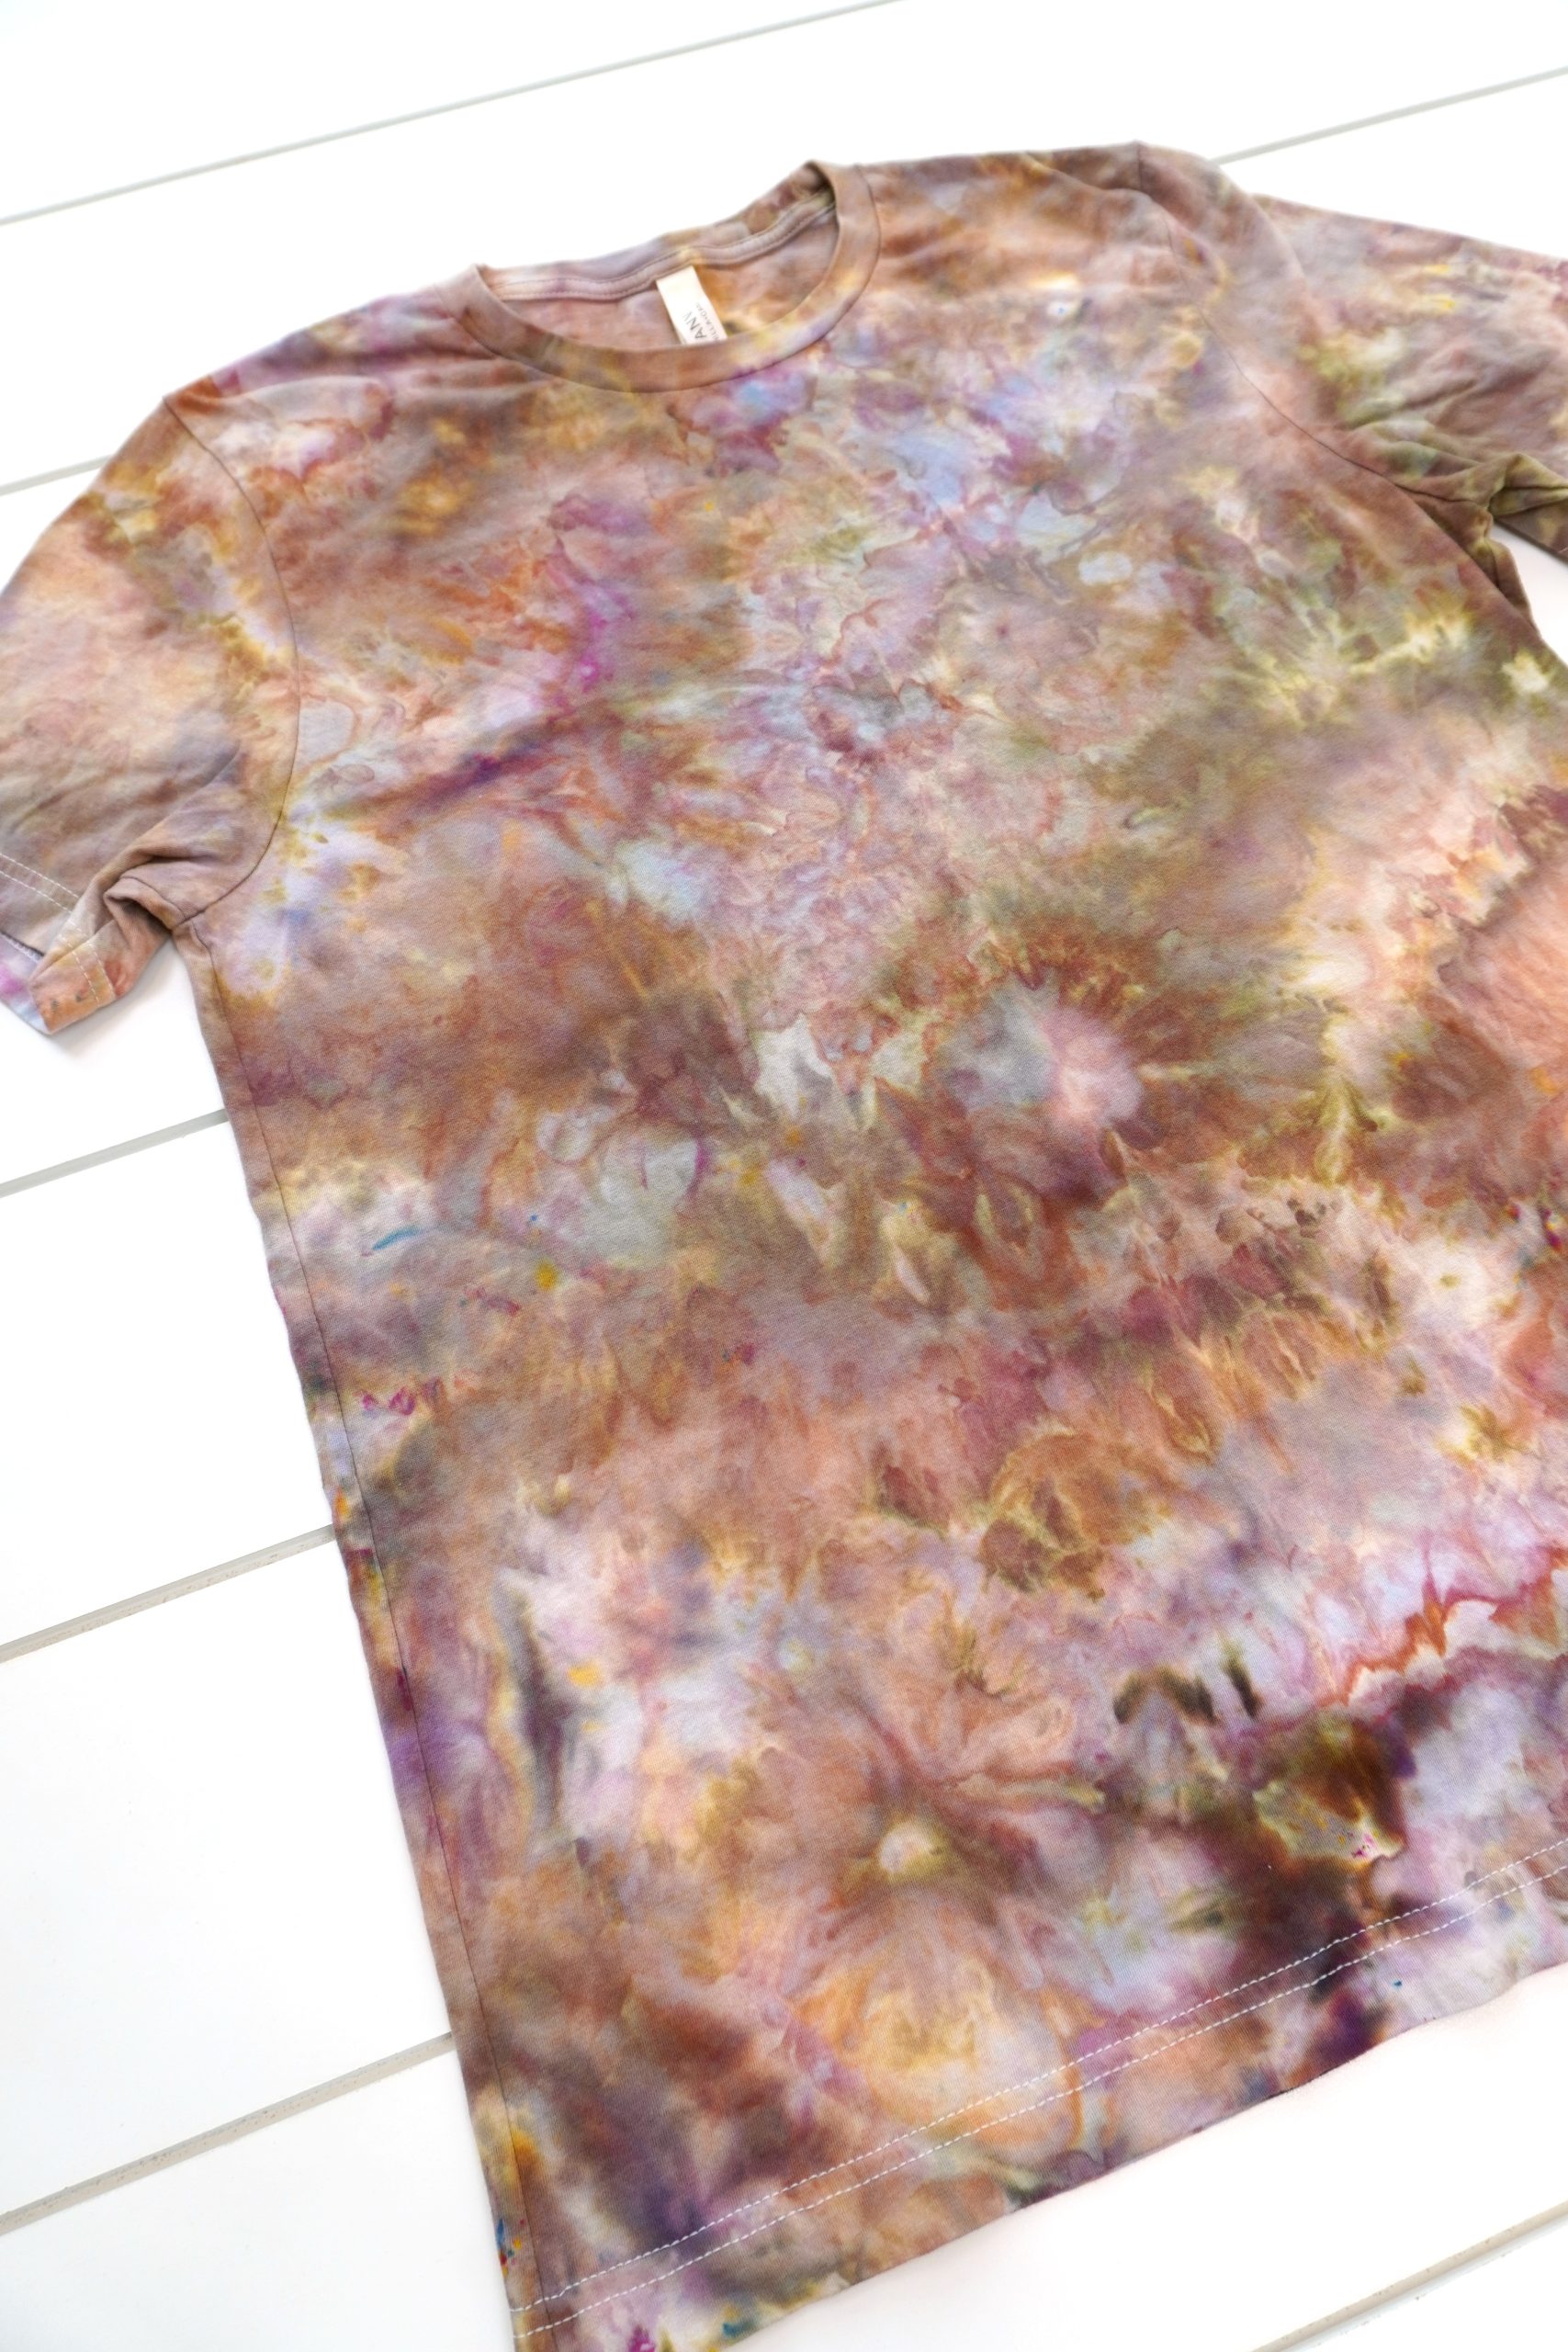
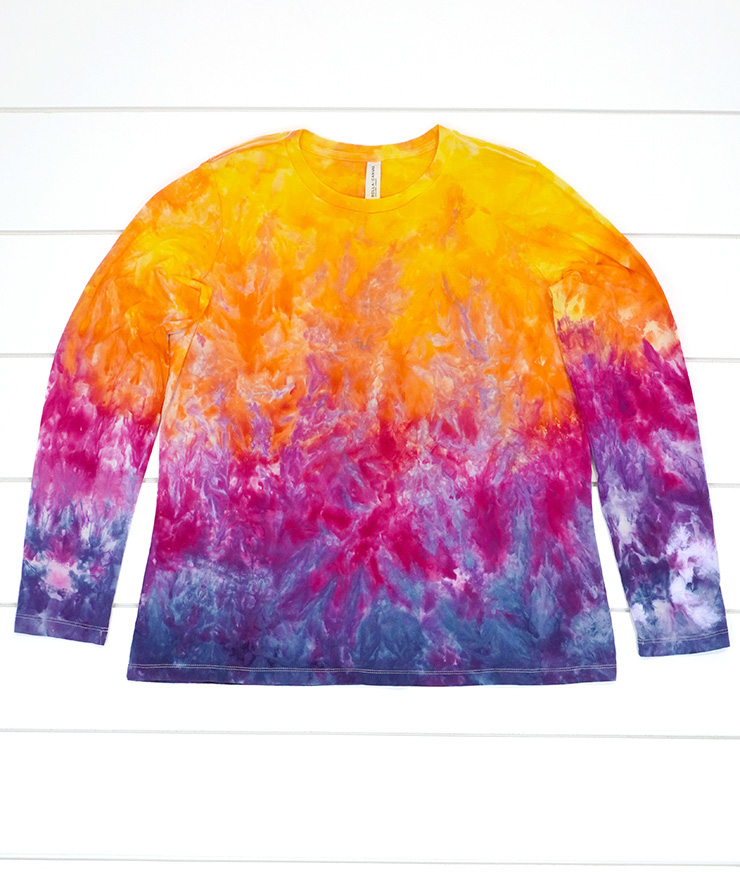
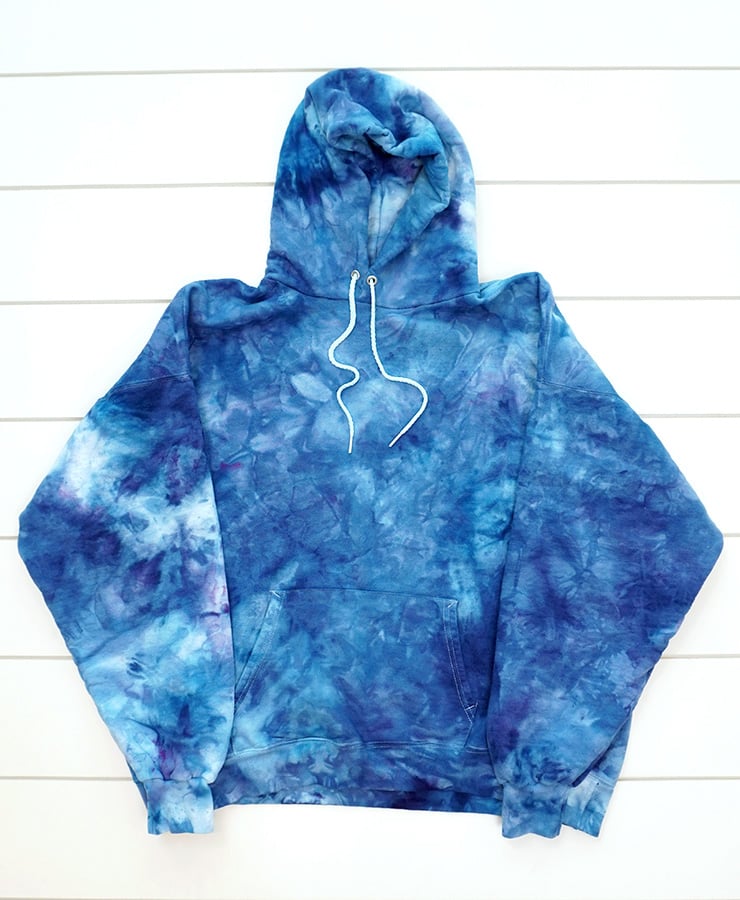
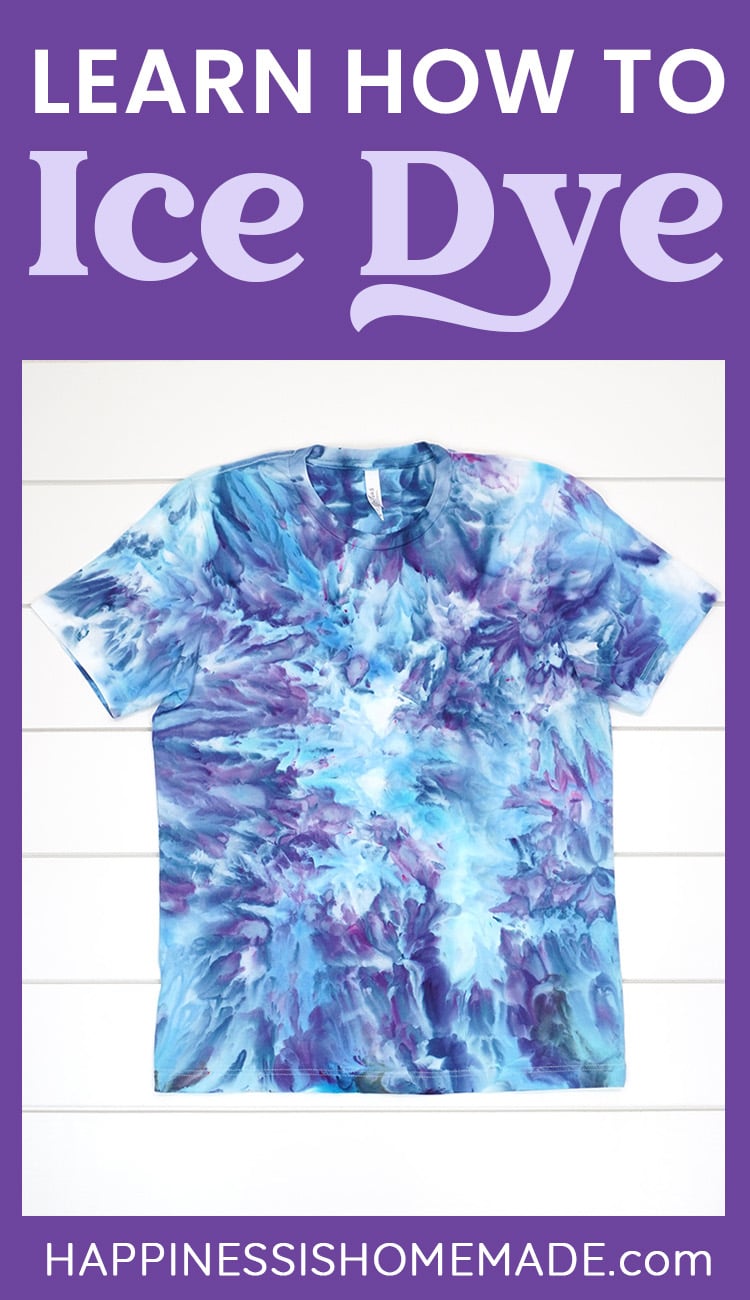
This shirt above was also created from ONE single color of dye (Dharma Fiber-Reactive Procion Dye in #178 Shitake Mushroom)! You can get some truly incredible color splits from compound dye colors! It’s amazing how many different colors are often combined to create each unique shade of dye – I spy at least ten different hues in this blend!
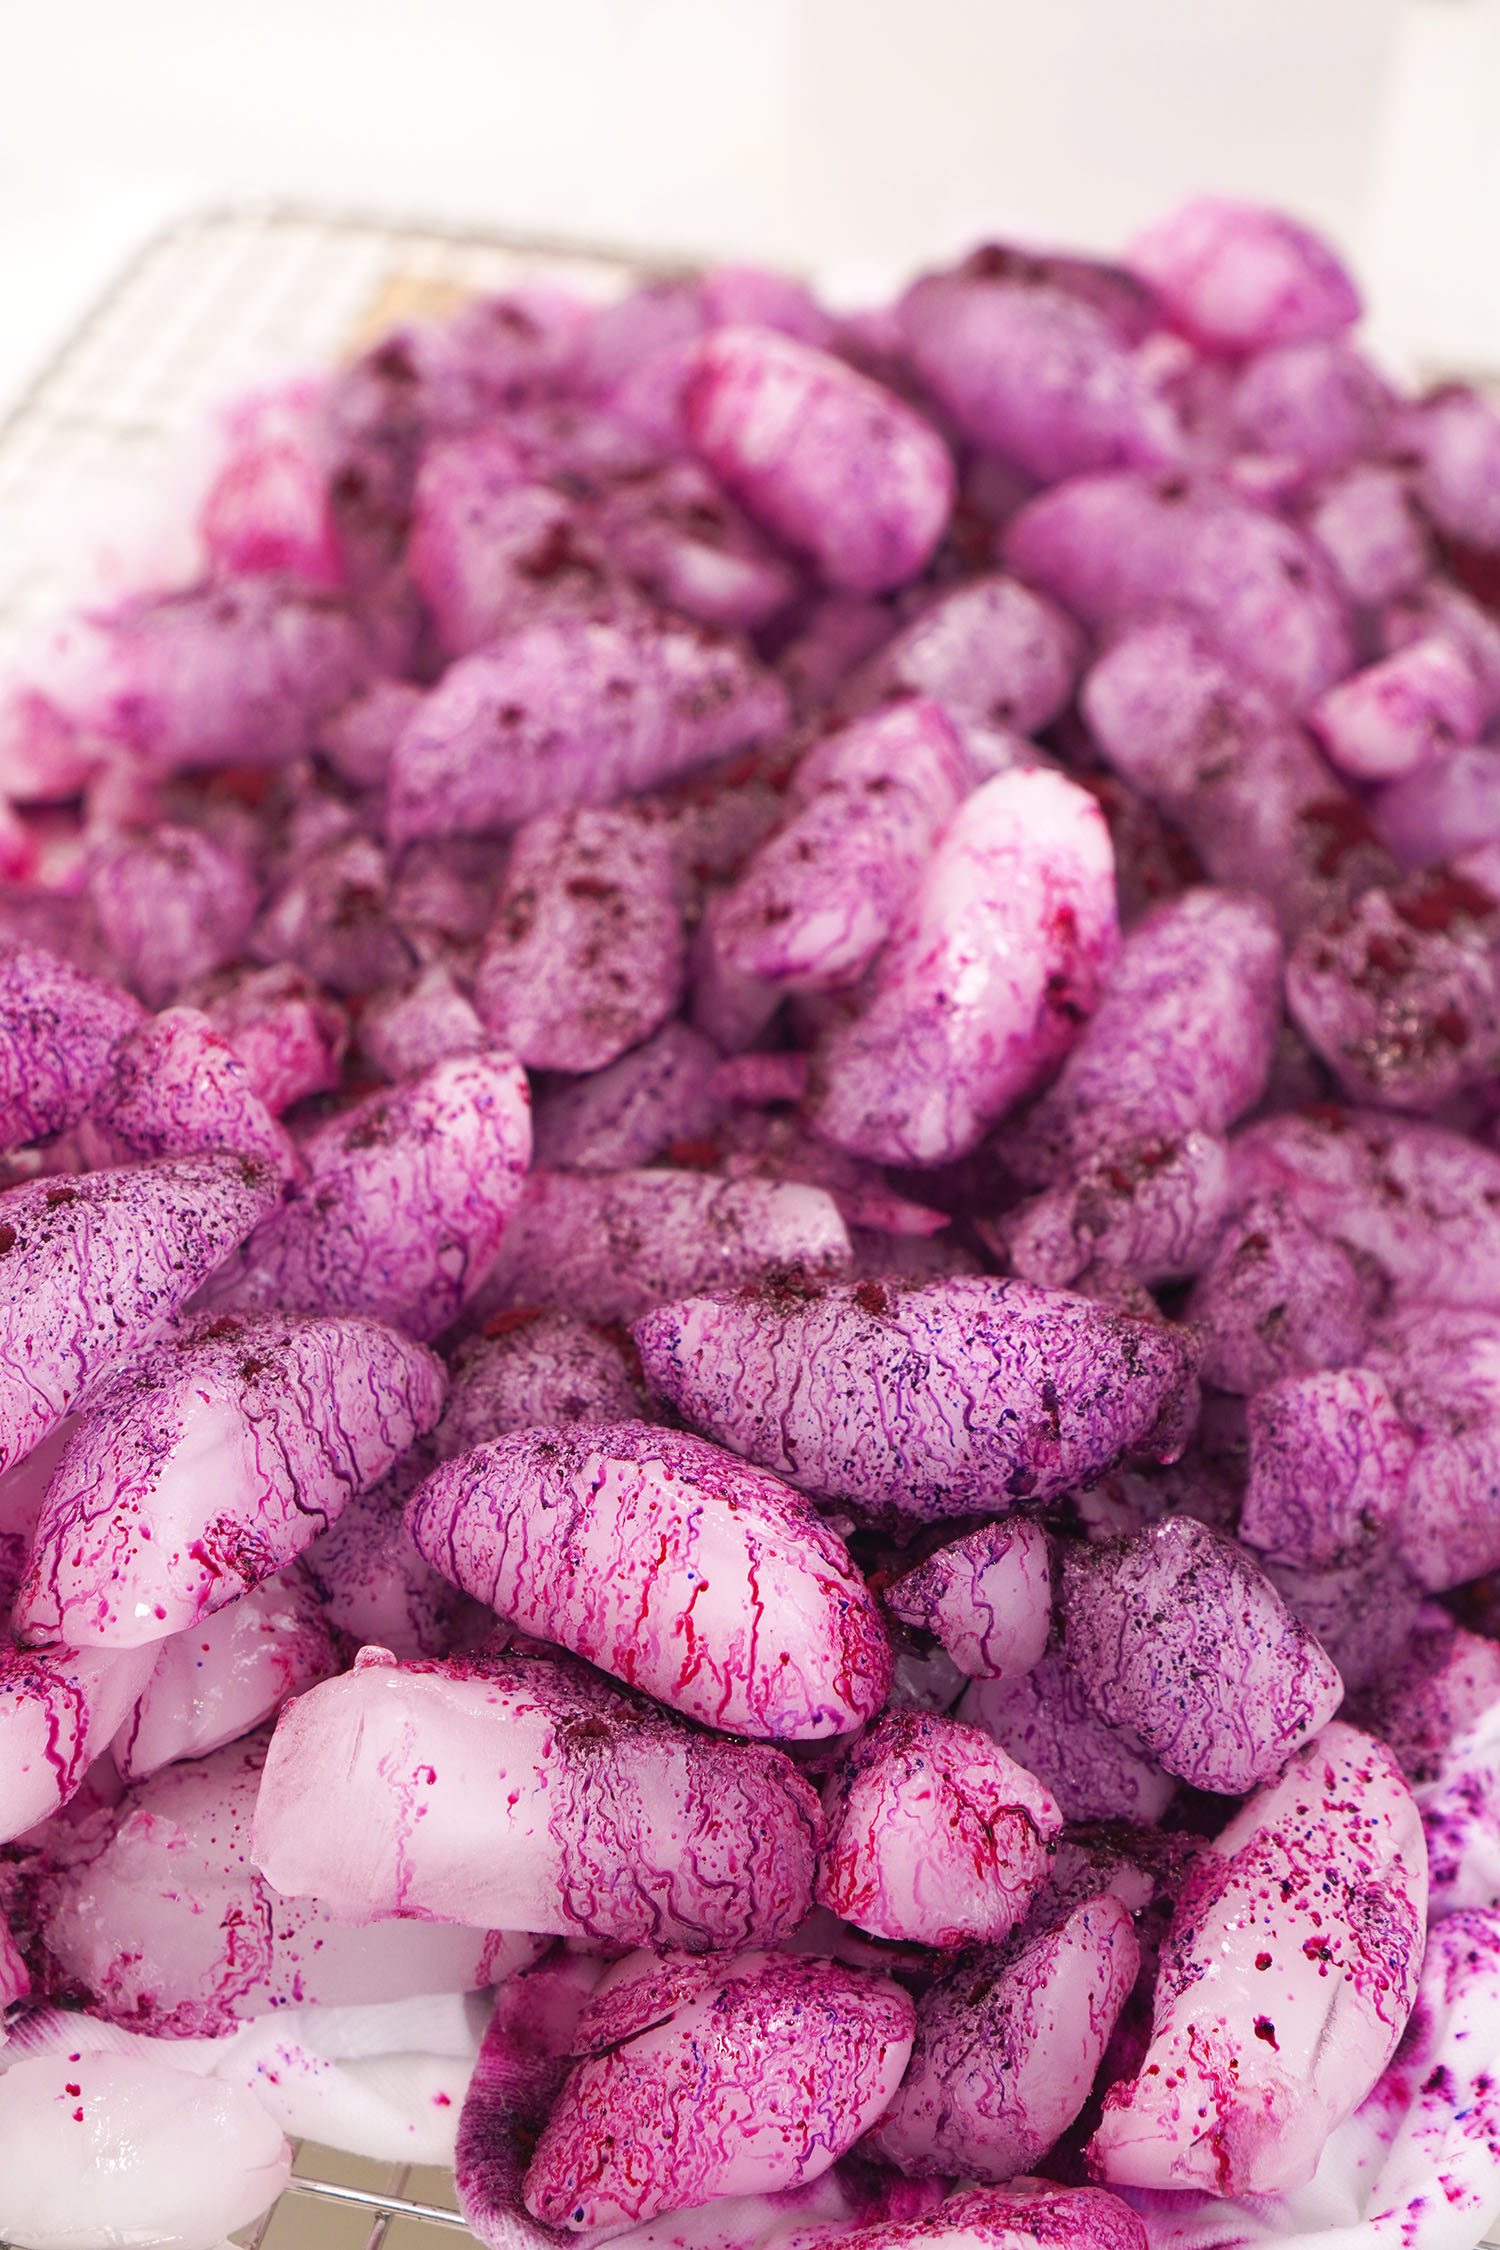
If you’d like to test a dye’s splitting properties before using it for your ice dye project, I recommend placing a few pieces of ice in a small plastic dish and sprinkling a tiny amount of powdered dye on top. Wait 15-20 minutes for the ice to begin melting to see the full effect of the color split and shift.
Design Techniques for Ice Dyeing
Exploring the art of ice dyeing opens up a world of creative possibilities! While the unpredictability of this method is largely part of its charm, there are some techniques and tips you can use to influence the patterns and intensity of your designs. Let’s take a look at some of these strategies to enhance your ice dyeing projects.
Creating Patterns with Ice Dye
Folding & Fabric Manipulation
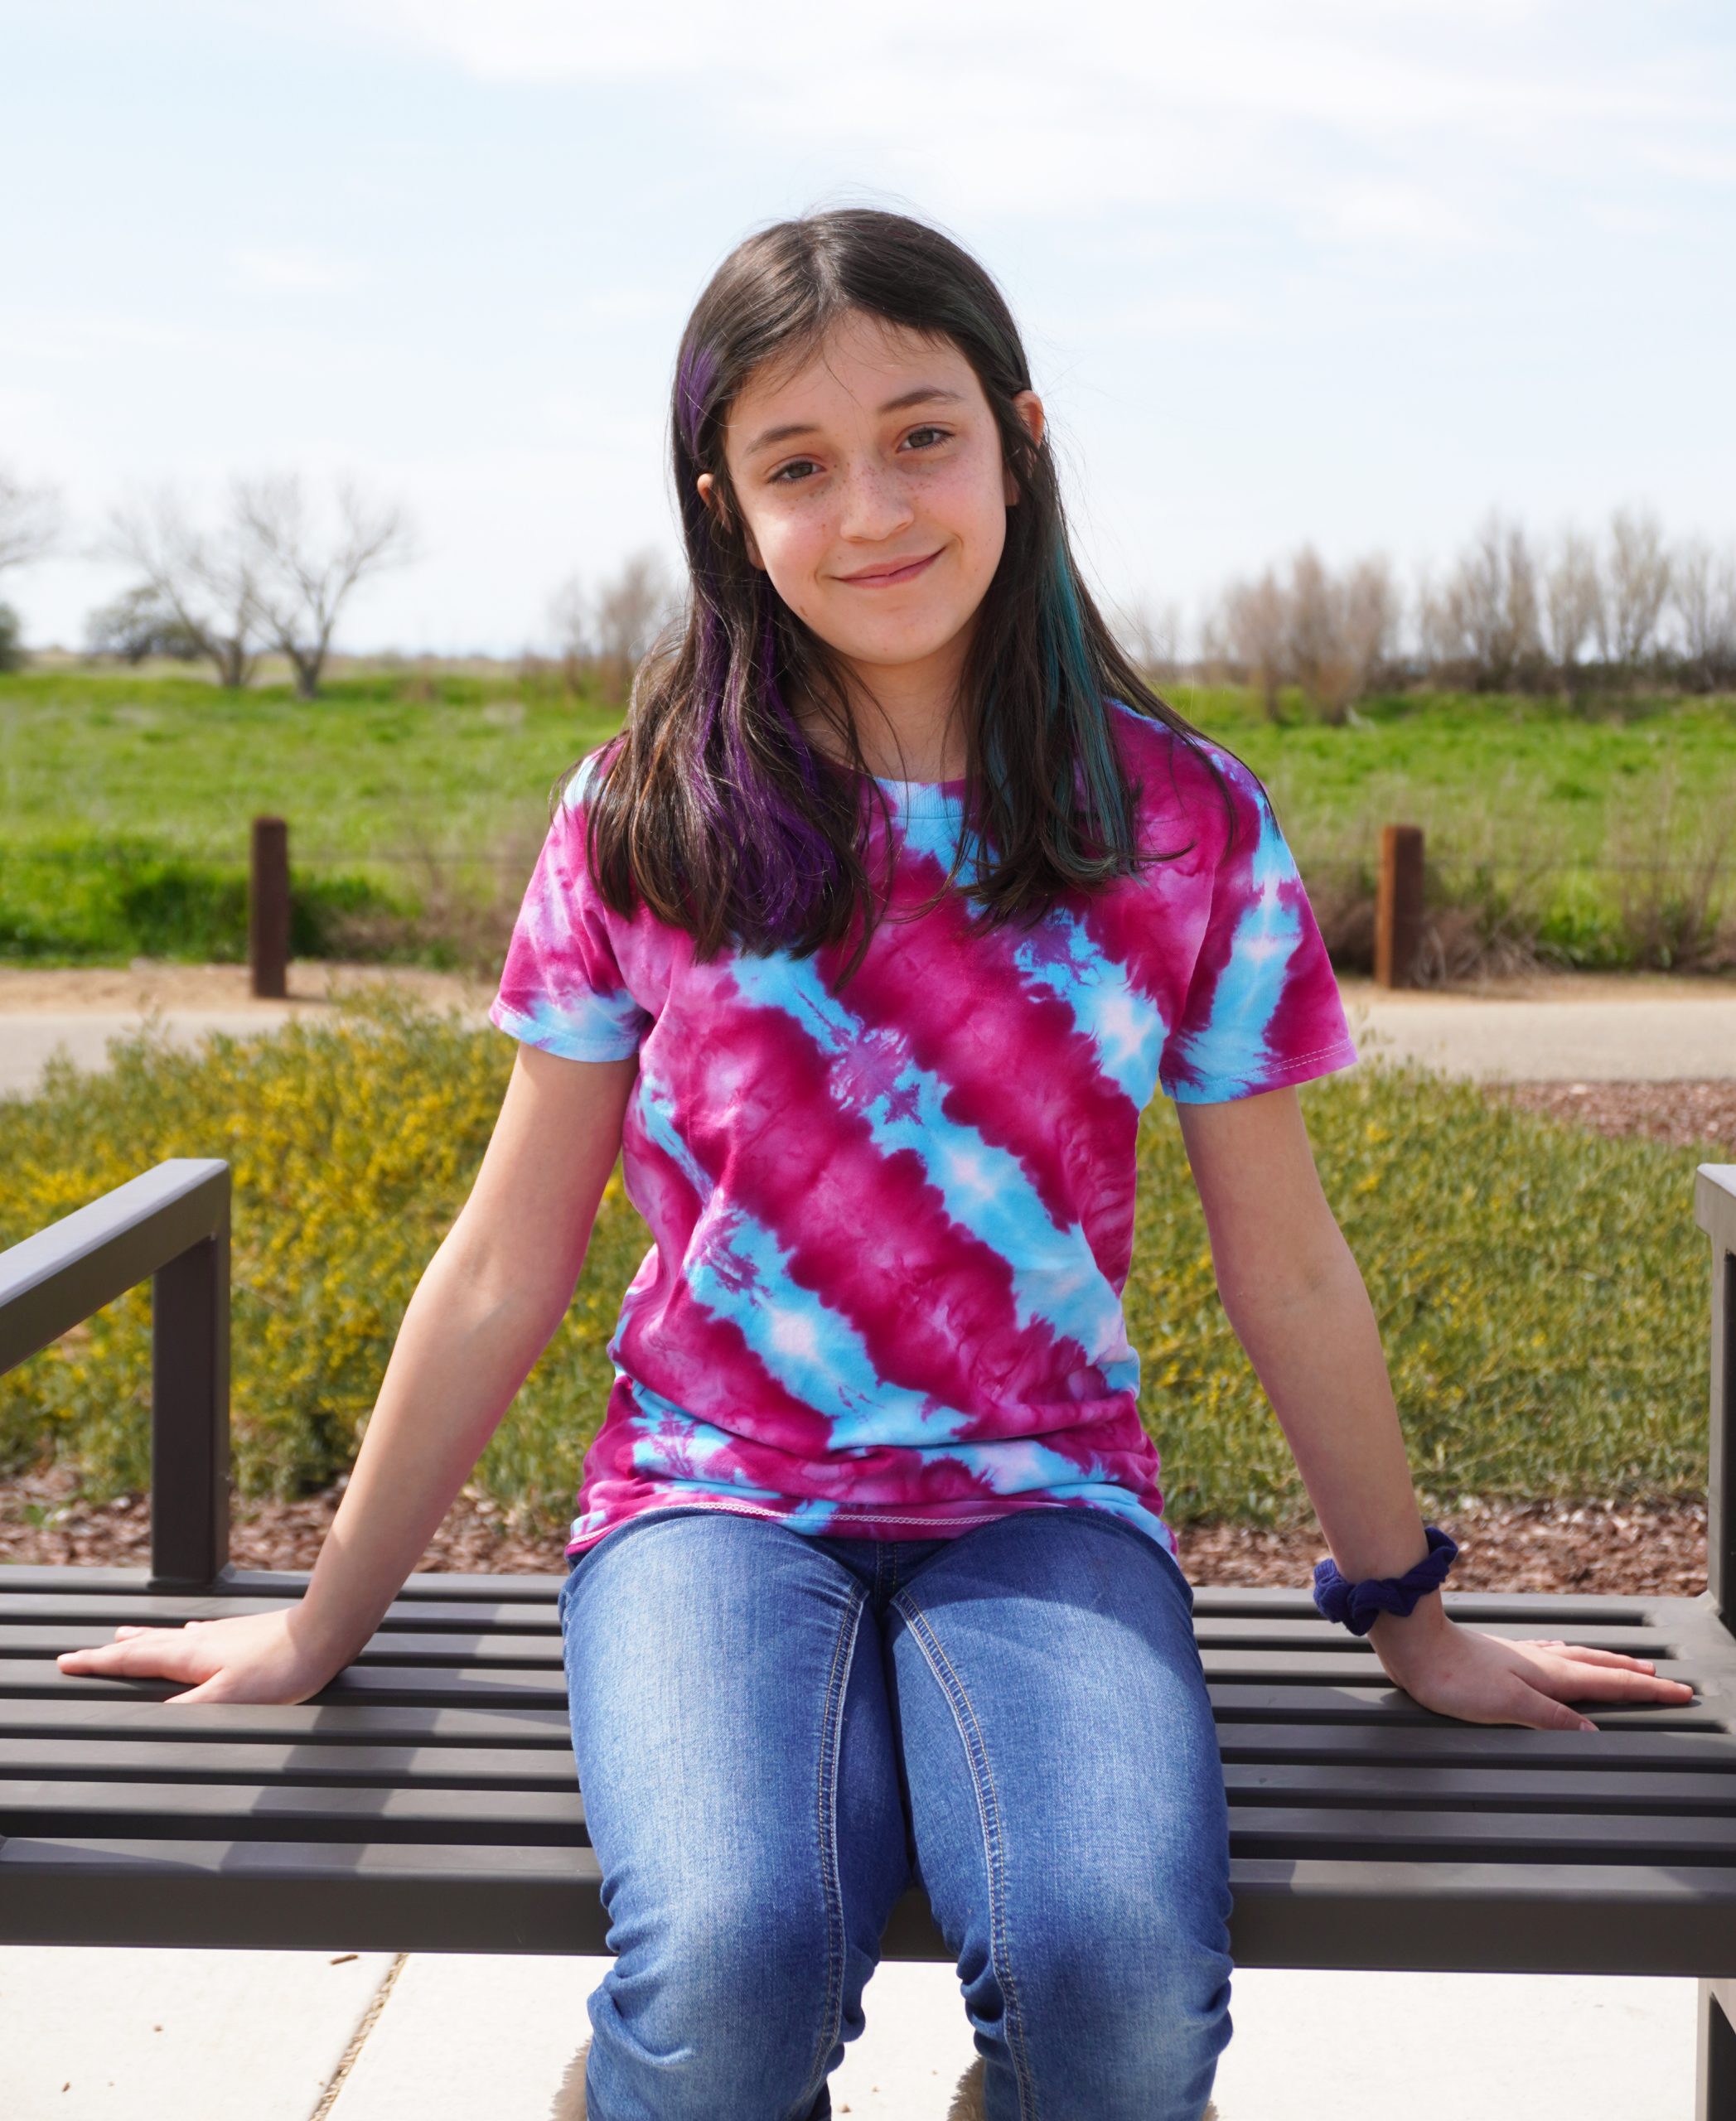
Before applying the ice, manipulate your fabric using techniques like folding, twisting, pleating, or bunching to create various patterns. For instance, a simple accordion fold creates linear patterns, while twisting the fabric can result in more abstract, spiral designs.
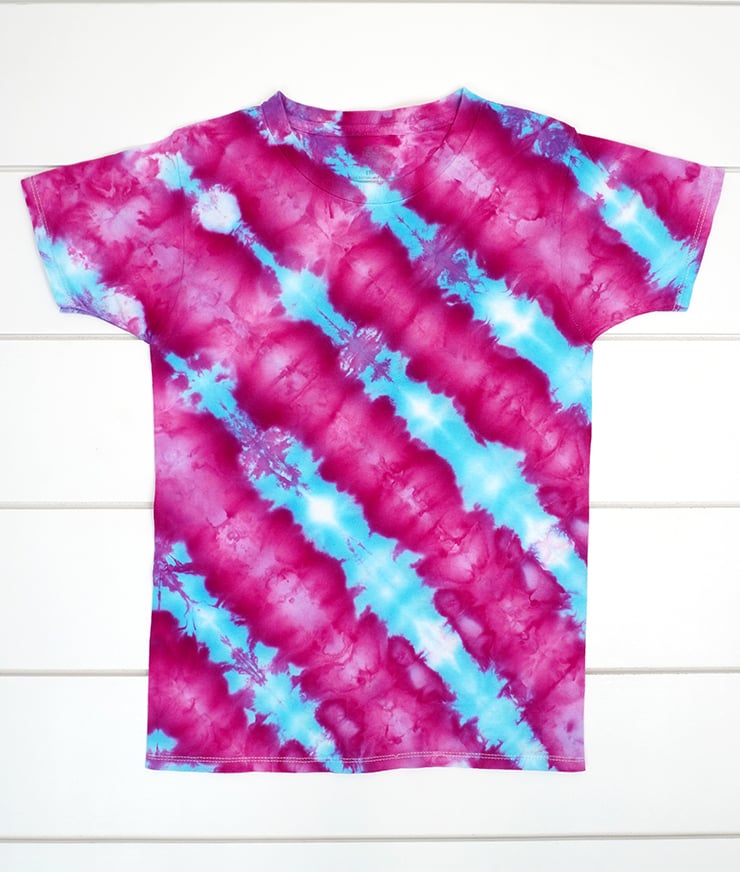
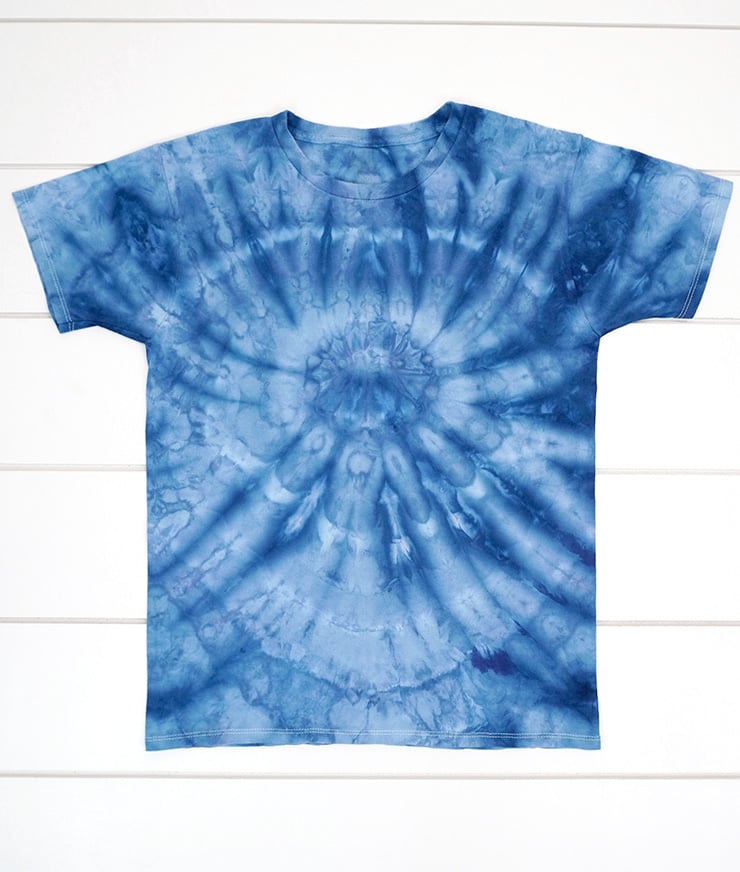
The shirt above, for example, was folded diagonally in accordion pleats, and then accordion pleated in the opposite direction. I piled ice on top of the folded garment, followed by Amethyst colored dye. This configuration allowed the purple dye to separate into its base pink and blue components. The blue dye is heavier than the pink, so as the ice melted, the blue migrated to the bottom of the garment first, creating the blue stripes, and left the pink color remaining in the upper striped folds.
The final product is a super cool look that required only minimal effort to achieve!

If your fabric is significantly smaller than your wire rack, or it’s folded in a way that makes it hard to place ice on top, consider putting the fabric inside a smaller plastic container on top of the rack. Make sure that the plastic container has lots of holes in it for the ice water to flow through!
My two favorite things to use are these small plastic baskets or the inner basket of a salad spinner that I picked up at Goodwill! If you want to create your own shape or have flexibility in the size, these silicone cake molds are also fantastic!
Ice Size & Placement
The way you place or pile the ice on top of the fabric can also impact the dye flow. More ice and/or larger pieces of ice will result in a larger dye spread and will result in a more fluid “watercolor-like” appearance of the colors in the finished patterns and designs; less ice and smaller pieces of ice will result in more concentrated areas of dye since there will be less liquid to carry the dye throughout the garment.
Dye Placement & Layering
Apply different powdered dyes in specific areas atop the ice. As the ice melts, the colors will flow according to where you placed the dye, allowing for some measured control over the color scheme.
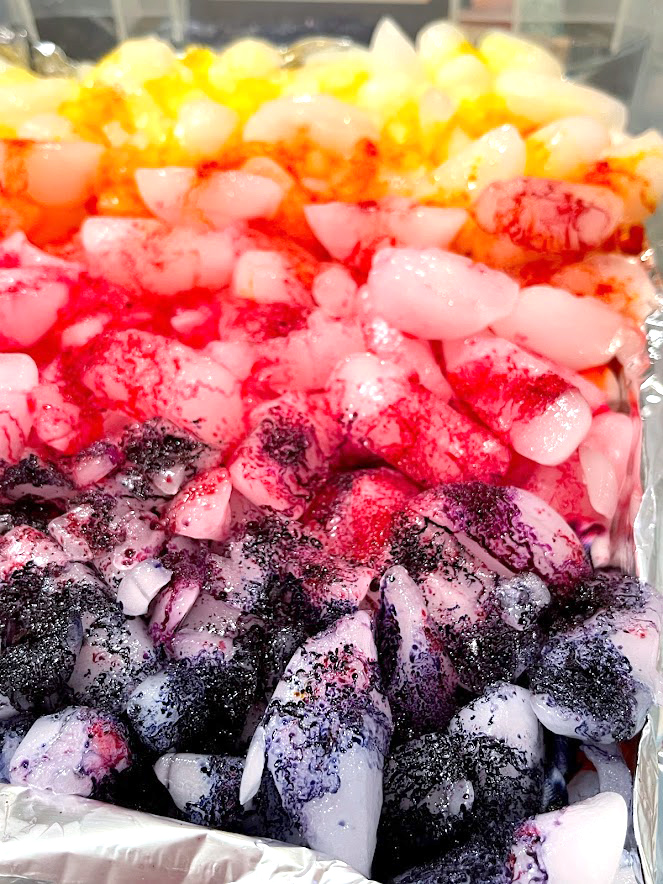
Sprinkle different colors of powdered dye in layers or in sections. Start with lighter shades and gradually add darker or more intense colors. This technique can create a sense of depth and complexity in your designs. As the ice melts, the colors will blend and create new hues and gradients.
Understanding the color wheel can help in selecting dye colors that blend well together or create specific contrasts. Complementary colors can create striking high-contrast effects (though you need to be careful that they don’t become muddied where they mix!), and analogous colors blend together smoothly and effortlessly.
Remember that some powdered dyes, especially in the Procion dye range, will likely split into their component colors. Use this to your advantage by anticipating the potential color splits to create intriguing effects.
Temperature & Melting Rate
The temperature of your work area can affect the ice melting rate, which can in turn affect the way your fabric absorbs the dye. A slower melt (in a cooler environment) allows for more gradual dye absorption, which can lead to more well-defined and intricate patterns. A faster melt typically leads to an overall “soft watercolor vibe” and may also result in lighter color saturation.
If you find that your ice is melting too quickly for your liking, you can always add an extra layer of ice on top of the previous one. This can actually create some really striking effects depending on the colors of dye used!
Dye Concentration & Intensity
The amount of powdered dye you use plays a significant role. More powder will result in more saturated colors, while less dye leads to lighter shades. Experiment with varying amounts of dye powder and ice to see the different results.

By incorporating these design tips into your ice dyeing process, you can create pieces that not only showcase vibrant colors and patterns but also reflect a refined, high-end aesthetic. Play around with these ideas, and let your creativity lead the way to stunning, one-of-a-kind ice-dyed creations!
Frequently Asked Ice Dye Questions:
Why are my ice-dye colors not as vibrant as I expected?
This can happen if the fabric wasn’t properly pre-soaked in a soda ash solution, or if not enough dye was used. Ensure your fabric is soaked in a soda ash solution for at least 15-30 minutes before dyeing, and don’t be shy with the dye – especially for darker or more vibrant colors. Make sure to ensure that your dye is fresh and properly stored, as old or improperly stored powder dye can lose its potency as well.
Why does my ice dye look muddy?
Muddiness occurs when too many colors mix or when complementary colors (opposite on the color wheel) blend and bleed together. To avoid this, use fewer colors or choose colors that are close to each other on the color wheel. Additionally, controlling the amount of ice can also help, as less ice reduces the flow and mixing of colors.

Why is my ice dye washing out after rinsing?
This could be due to insufficient time for the dye to set. Fiber-reactive dyes work best at warm temperatures, so at these lower temperatures, it becomes imperative that you give the dye sufficient time to set. After the ice melts, it’s advisable to let the fabric sit wrapped in plastic for at least 24 hours to fully bond the dye to the fibers. Also, ensure that the first rinse is in cold water, as hot water can cause the color to bleed out.
My fabric has a crunchy texture after ice dyeing. What can I do?
This texture usually results from residual soda ash or dye remaining on the fabric. After the dyeing process, thoroughly rinse the fabric in cool water until the water runs clear, and then wash it in warm water with a mild detergent or specialty textile detergent. This should restore the softness of your fabric.
How do I get more defined patterns in my ice dyeing?
First and foremost, consider the fabric’s folding or binding technique as the primary way of incorporating more defined patterns into your ice dye projects. Different folding techniques will produce different patterns.
For more defined patterns, use larger chunks of ice and apply the dye powder more strategically. The larger ice melts slower, allowing for a more controlled dye spread.
Why do my ice-dye colors look different than I expected?
In addition to the color-splitting phenomenon that we already discussed, there are several other factors that can influence the colors as well. Different factors can affect dye colors, such as the type of fabric, the pH level of the water in the ice, and the dye’s age. Natural fibers like cotton and linen typically display colors most accurately. Also, water impurities can alter the final color, so using distilled water might help achieve more predictable results.
Printable Instructions for Ice Dyeing
How to Ice Dye
What You’ll Need:
- Natural-Fiber Fabric (cotton, rayon, linen, etc.)
- Fiber-Reactive Dye Powder
- Soda Ash
- Ice
- Plastic Tub
- Wire Rack
- Plastic Wrap and/or Plastic Bags
- Gloves and Mask
- Rubber Bands and/or Waxed Sinew , optional
Instructions:
- Begin by washing your fabric in warm water to remove any impurities, sizing, or fabric softeners from the manufacturing process that could interfere with the dyeing process.
- Mix a cup of soda ash with a gallon of water. Soak your fabric in this solution for at least 15 minutes to help the reactive dye bond with the fibers. Wring out the fabric tightly by hand before moving on to the next step.
- Bind the fabric, if desired: Twist or fold the damp fabric into your desired pattern fold and secure it with rubber bands or waxed sinew. This will create different patterns and resist areas similar to the folds in traditional tie-dye. You may also choose to “crumple fold” or gently scrunch up the fabric during the next step instead.
- Place the wire rack in the bottom of the plastic tub (if desired, you can elevate the rack even further by placing wood blocks at each corner), then set your prepared fabric on top of the rack.
- Pile the ice cubes on top of the fabric, making sure to completely cover the entire thing with ice.
- Sprinkle a small amount of powdered dye over the ice. Feel free to experiment with different colors, color combinations, and the amount of dye. More dye will result in more complete coverage and intense colors; less dye can result in more subtle shades and less coverage.
- Loosely cover the top of the bin with plastic wrap and let it sit until the ice has completely melted. This could take several hours or a full day, depending on the temperature. Once the ice has melted, place the fabric into a plastic bag, and allow it to sit in a warm location for 24-48 hours.
- Unfold your fabric and admire the unique, intricate patterns you’ve created!
- Rinse the fabric in cold water (until the water runs clear) to remove excess dye. Then, wash it in the washing machine with a mild professional textile detergent to get rid of any remaining dye.
I hope you’ve enjoyed this tutorial! Remember, ice dyeing is so much more than just a craft – it’s an exploration of creativity and a celebration of color. Each piece you create is a unique expression of your artistic vision, a blend of technique, chance, and individual flair. Have fun with the different techniques and experiment with the materials to create unique tie dye shirts and fabrics you can be proud of!
We’d love to see what beautiful designs and color combinations you come up with! Share your ice dye creations and experiences by tagging me (@heidikundin on Instagram and @hihomemadeblog on Facebook) in your social media posts.

Check Out These Other Tie Dye Ideas!


Don’t Forget to Pin This for Later!


Heidi Kundin has captivated the hearts of millions with her colorful and inspiring approach to crafting, celebrations, and family fun. With over 15 years of experience, Happiness is Homemade has become a must-visit destination for those seeking quick and easy creative ideas and last-minute solutions. Heidi’s warm personality shines through her posts, inviting readers to join her on a creative journey that’s fun, rewarding, and achievable. Heidi is also the author of Homemade Bath Bombs & More and DIY Tie-Dye.
So fun and easy! Thanks for all of the information!