
This post may contain affiliate links. I will receive a small commission from these sales at no additional cost to you!
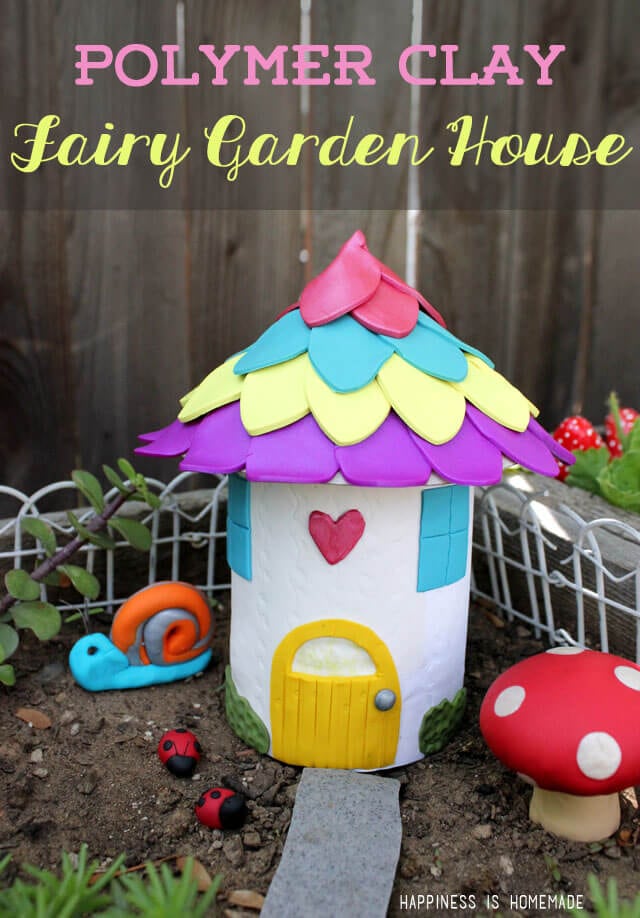
I have been fortunate to work with all kinds of craft supplies and materials over the years, but one thing that I have never really delved into is the world of polymer clay. I don’t know why, but despite all of the incredible clay projects that I have pinned to my Pinterest boards, there was just something about it that seemed daunting and, dare I say, out of my league. When I decided to give our fairy gardens a makeover this year, I knew that I wanted to add a DIY fairy house and some cute garden decorations, and I knew that Premo Clay was the best choice of medium to give me the effect and durability that I needed. I still wasn’t sure that I was going to be able to get the hang of working with oven-bake clay on my own, so I enlisted my junior craft helpers and their imaginations to help me condition the clay and come up with some fun ideas for our garden.
You May Also Like These Outdoor Craft Ideas:
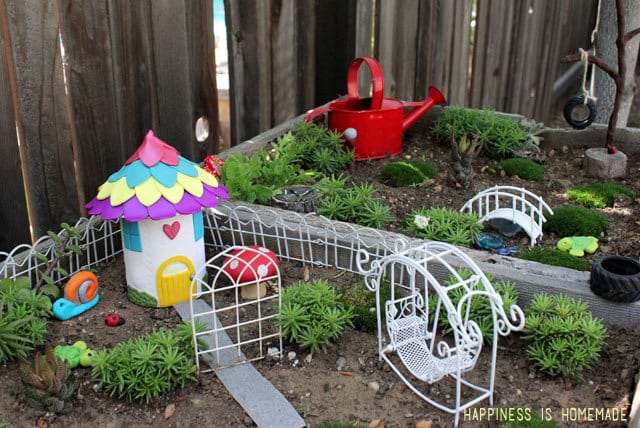
DIY Fairy Garden Houses & Decorations
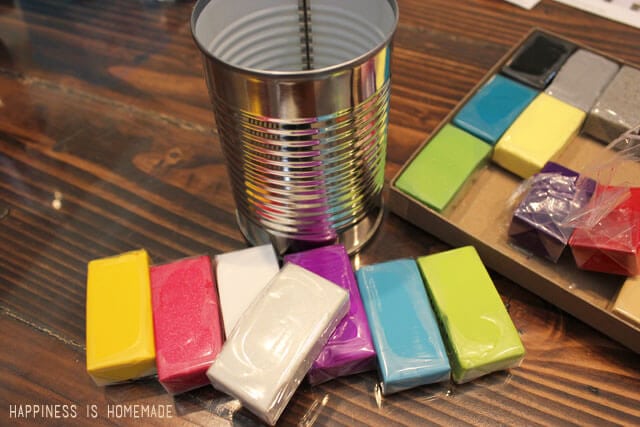
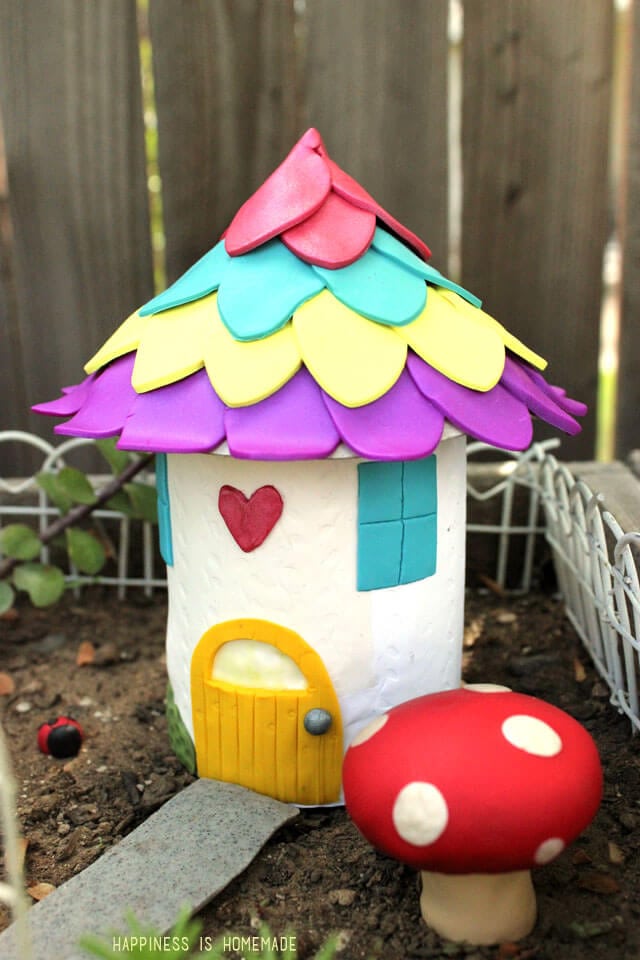
I used a recycled can as the base of my fairy house – this gave me a nice solid structure, and it allowed me to use far less clay than if I were trying to create the entire piece completely from clay. Besides, I honestly wasn’t sure that I was going to be able to do much more with the clay than roll it out and cut it, so this was a great basic starting point! I was worried that it would be a messy project, but I soon found out that Premo Clay really isn’t messy at all. We did all of our sculpting and rolling of clay on leftover white tiles that we had in the garage, and the only cleanup that we needed to do when we were finished was throwing away the clay wrappers!
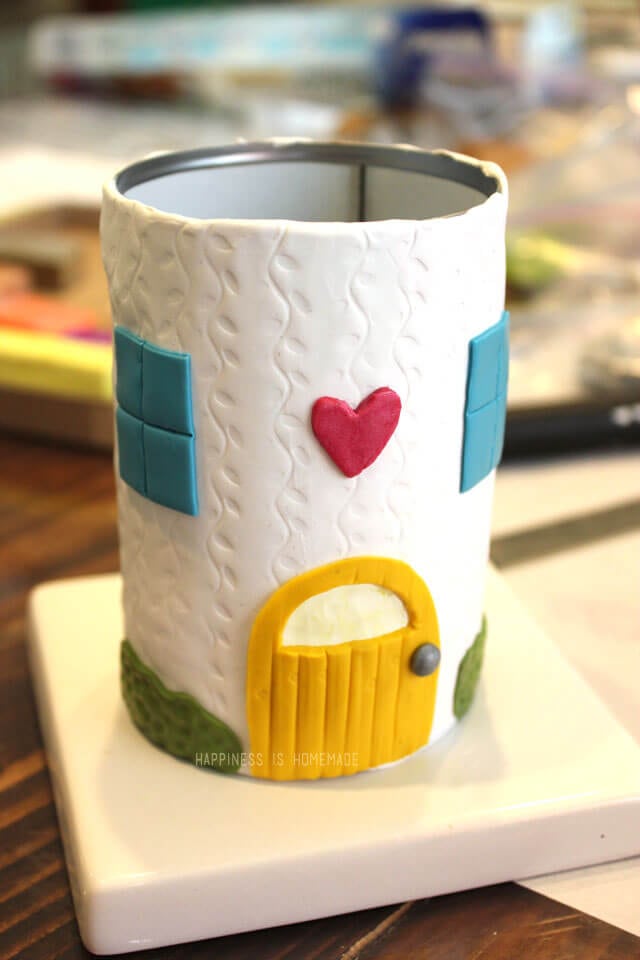
I was surprised that the Premo Clay was even more pliable than I had imagined it would be. It took a little while to condition the clay (some colors were softer than others straight out of the package), but once it was softened up the clay rolled out really smooth and evenly. I was totally impressed with how thin I was able to roll it while still maintaining its shape and integrity! I rolled out an ultra-thin layer of white to cover the can and then added some vine detail and texture with a patterned roller. Next, I cut bushes, windows, a door, and a tiny heart from other colored thin sheets of clay and attached them to my white house base. I added some texture and detail with a basic set of clay tools.
I baked the entire piece for 30 minutes at 275 degrees and then allowed it to cool completely before handling it.

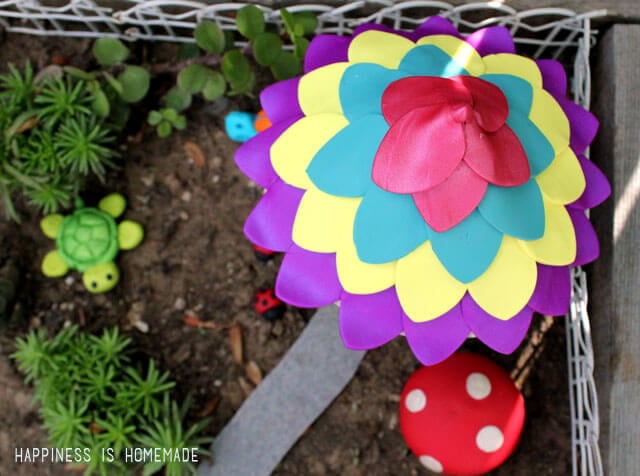
To make the roof of our fairy house, I started with a circle of chipboard (recycled thin cardboard would work great, too!) that was about 8″ in diameter. I turned the circle into a cone shape by cutting a slit from one edge of the circle into the center, overlapping the ends to create a cone, and securing the edges with glue (you can find better directions for this step HERE). I used a leaf-shaped mini cookie cutter to create the “petals,” and started layering them in rows from the bottom of the cone to the top. Again, I baked the piece for 30 minutes at 275 degrees, allowed it to cool, and then used a strong adhesive to attach the roof to the house.
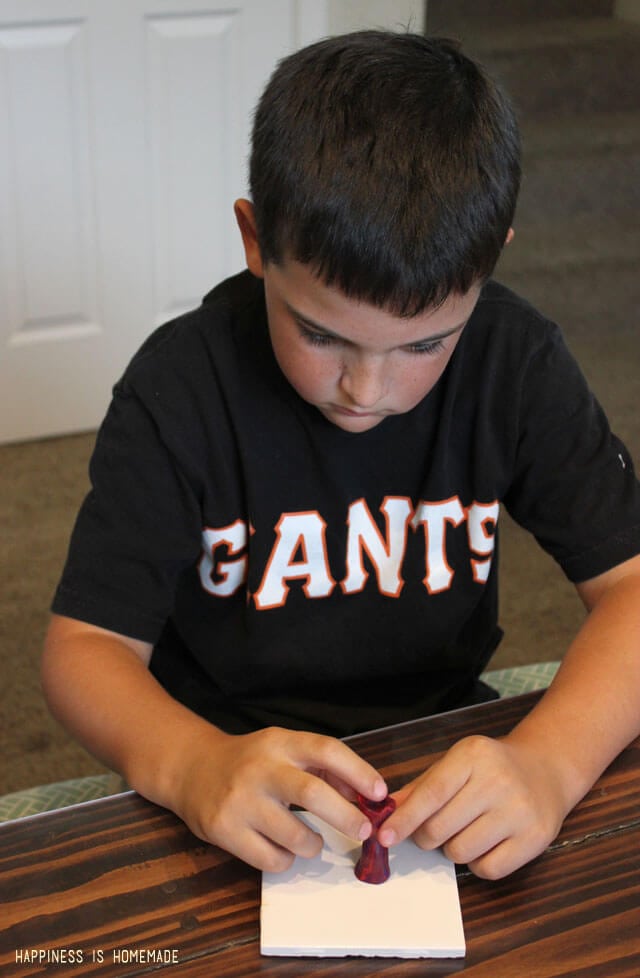
While I was engrossed in working on the fairy house, my boys were busy working on garden decorations of their own.
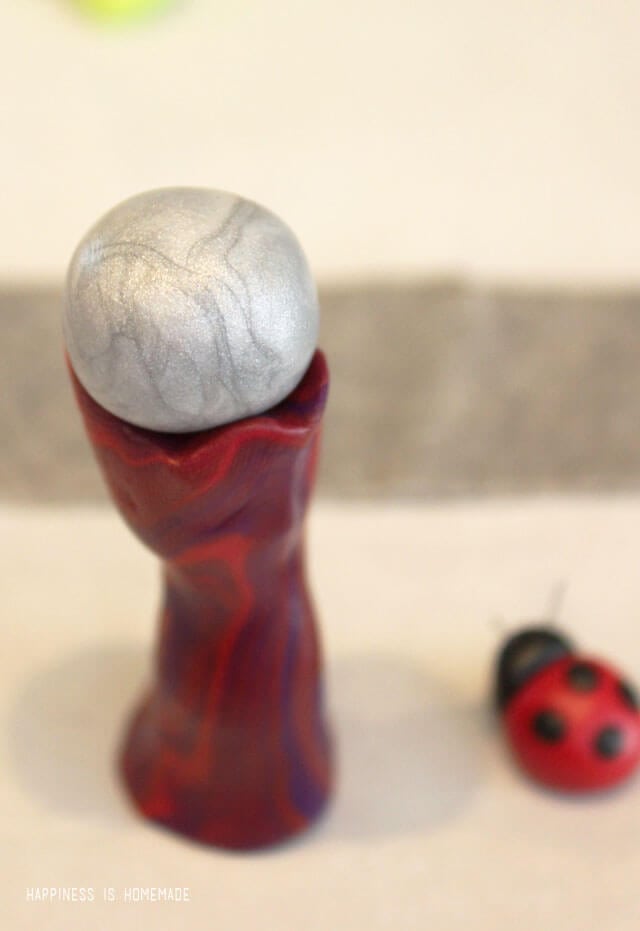
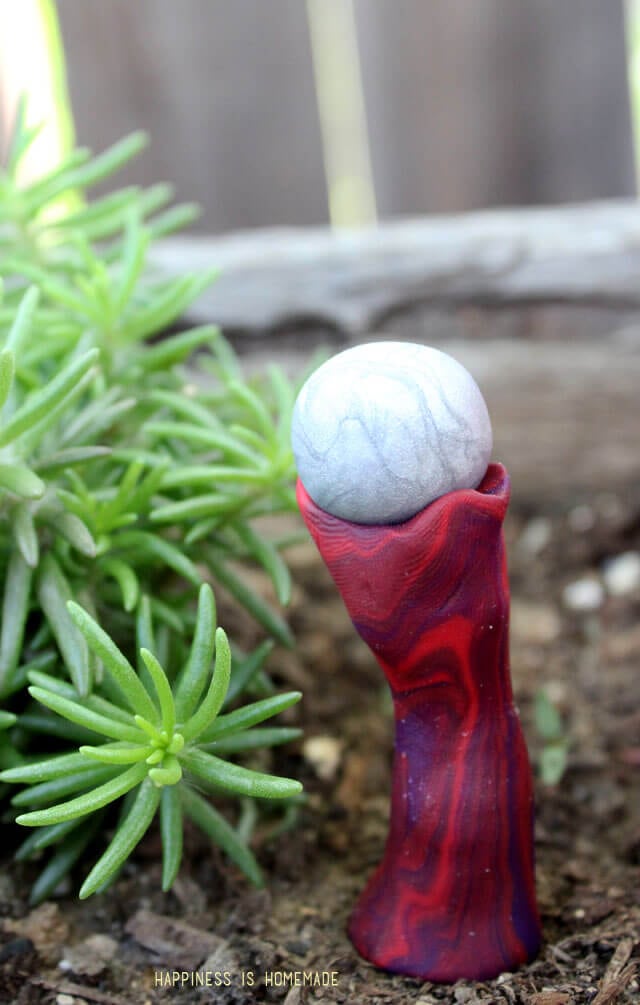
Sawyer (age 8) made this swirly gazing ball and stand for the fairy garden. He had no trouble at all working with the clay, and he actually sat at the table and made miniature creations for almost two hours that day!
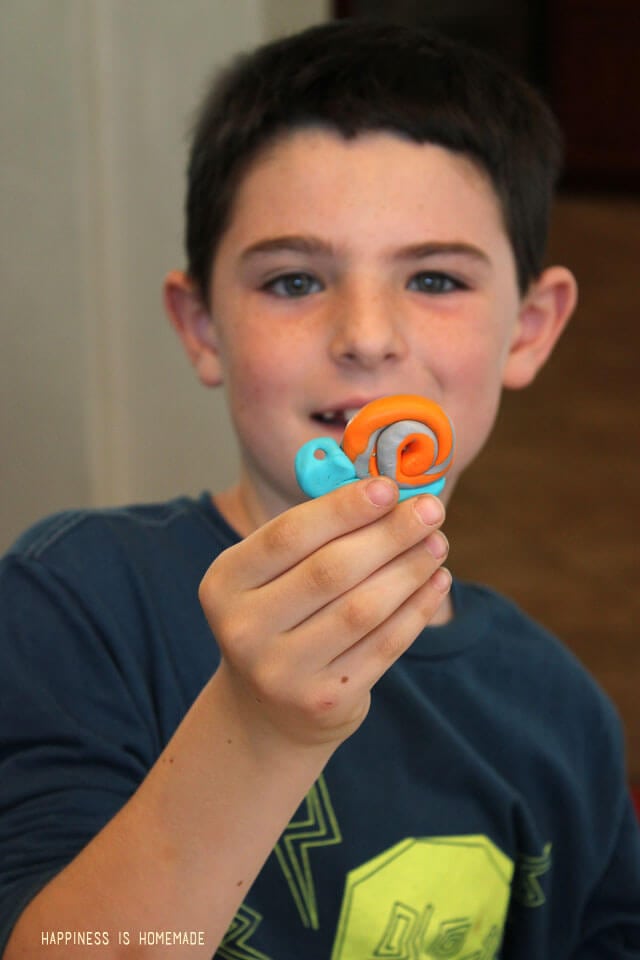
Sutton (age 7) swirled his colors together into a coil to create a bright and colorful snail for the garden. We added two small pieces of wire for antennae before we baked his piece.
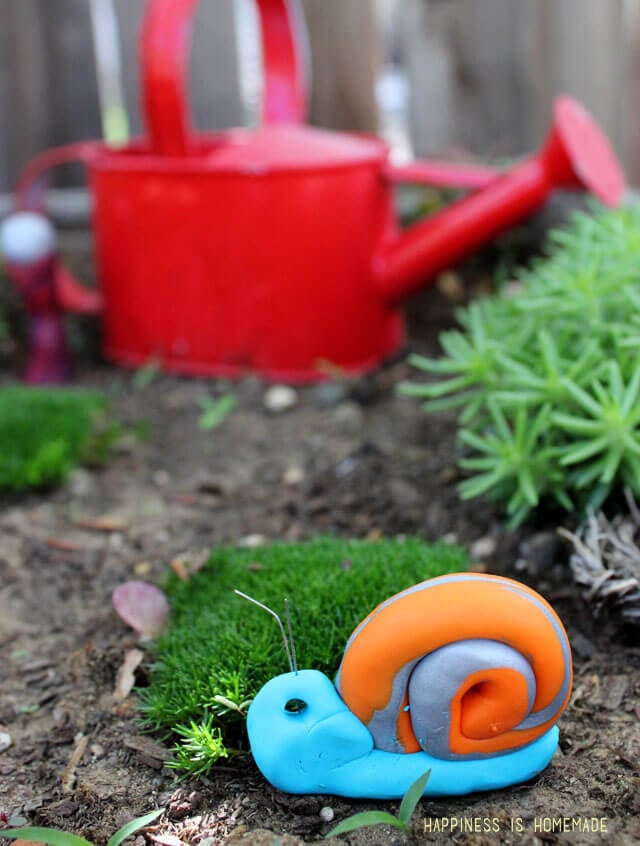
Doesn’t it look so cute hanging out in the garden?
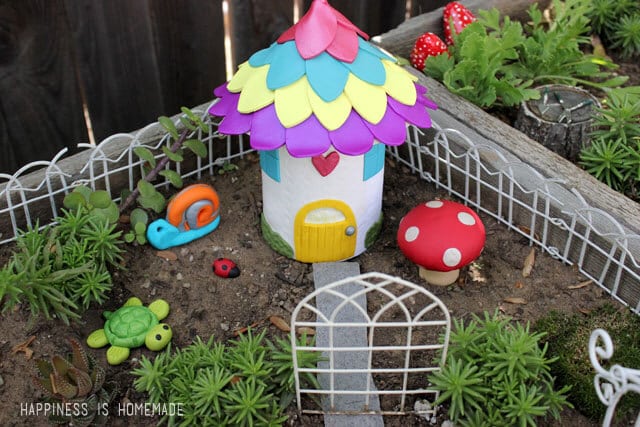
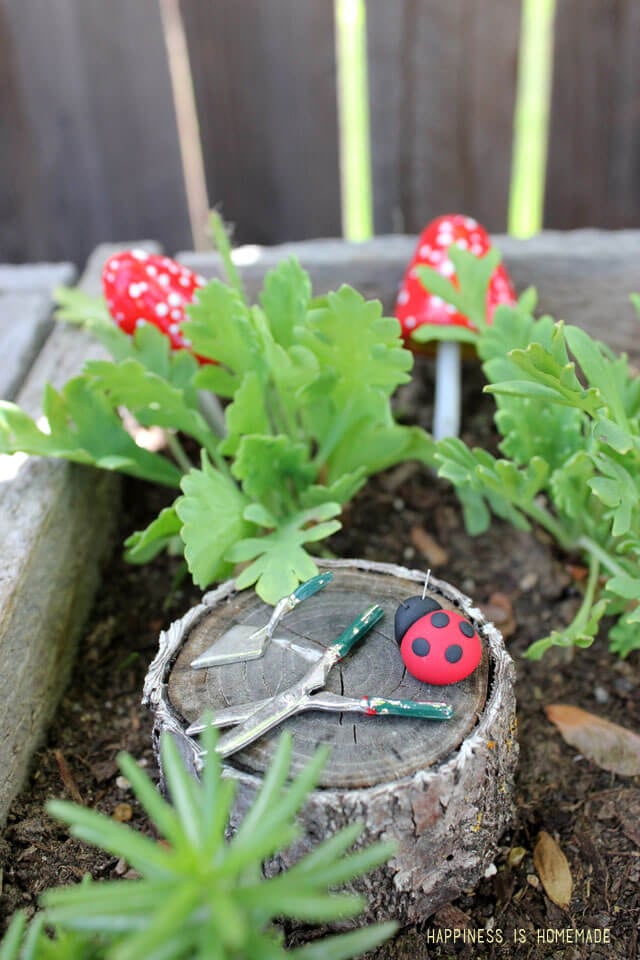
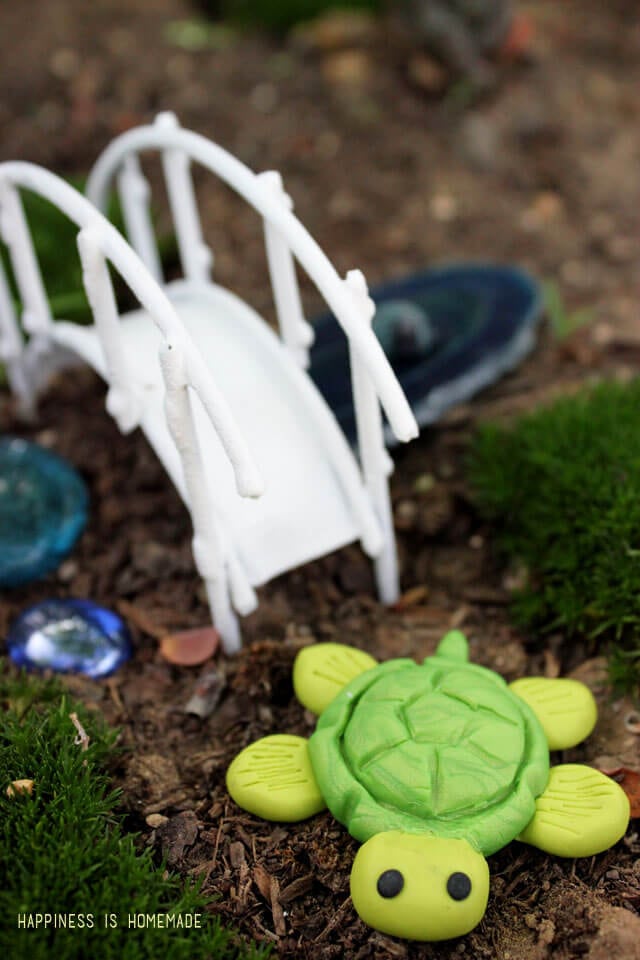
I quickly whipped up a few little red polka-dotted toadstools that look right at home in the garden, and we couldn’t resist making a few little ladybugs and turtles, too! I absolutely love this little corner of the garden, and now I’m hoping to make a couple more houses to create an entire fairy village! Since this is only the beginning of our fairy garden makeover, we still need to decide what we want to put in each of the open areas, so for now our plants are sparsely planted. Once we make a few more goodies we will fill in all the blank dirt spaces with more moss.
I love all of the vibrant colors of the clay, and I adore the shimmer that some of the colors have. I had no idea that polymer clay came in such a HUGE variety of colors and styles!
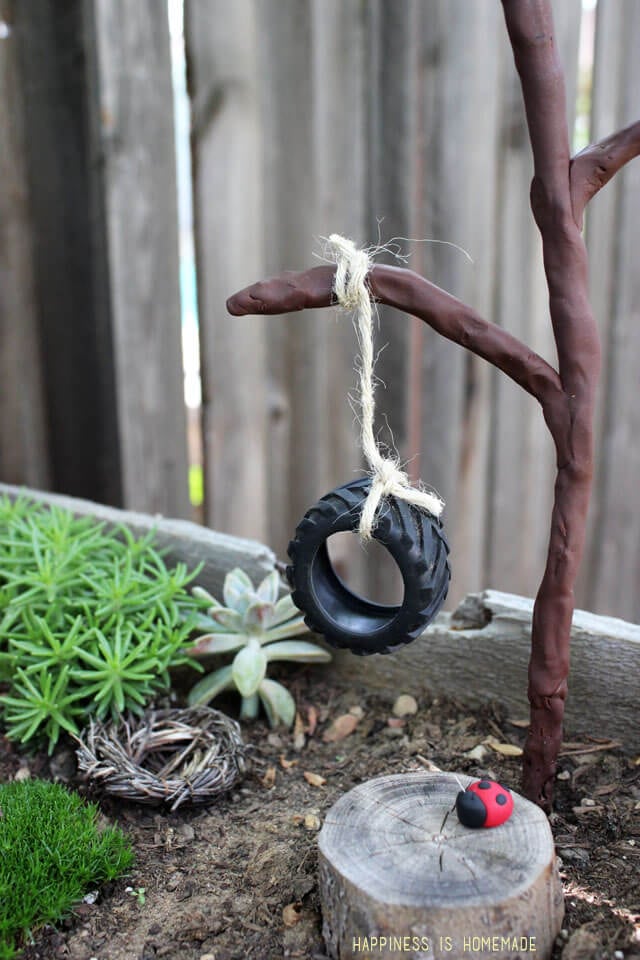
This awesome tire swing was another one of Sawyer’s ideas and his handiwork. He made a “tree” from the Premo Clay and then added a tire from one of his broken toys. So far it’s the most popular thing that the kids all want to play with in our fairy garden!
I can’t wait to add more fun to our fairy garden, and I’ll be checking out the Sculpey blog for lots of inspiration! Be sure to give Sculpey a follow on Facebook, Twitter, and Pinterest for loads of tips, tricks, and great ideas!

Check Out These Other Kids Ideas!


Heidi Kundin has captivated the hearts of millions with her colorful and inspiring approach to crafting, celebrations, and family fun. With over 15 years of experience, Happiness is Homemade has become a must-visit destination for those seeking quick and easy creative ideas and last-minute solutions. Heidi’s warm personality shines through her posts, inviting readers to join her on a creative journey that’s fun, rewarding, and achievable. Heidi is also the author of Homemade Bath Bombs & More and DIY Tie-Dye.
Does this weather well?
Tracey, ours sat outside for a full year weathering the elements, and we just cleaned everything up and made them look perfectly fresh again the other day. In my experience, they weathered VERY well, but I live in California with a mild climate. 🙂
Lovely, Heidi! Clay molding activity would be great for my daughter. My wife and I plans to redesign our garden and fairy houses are now on the list. I can imagine how excited my girl would be when she sees this!