
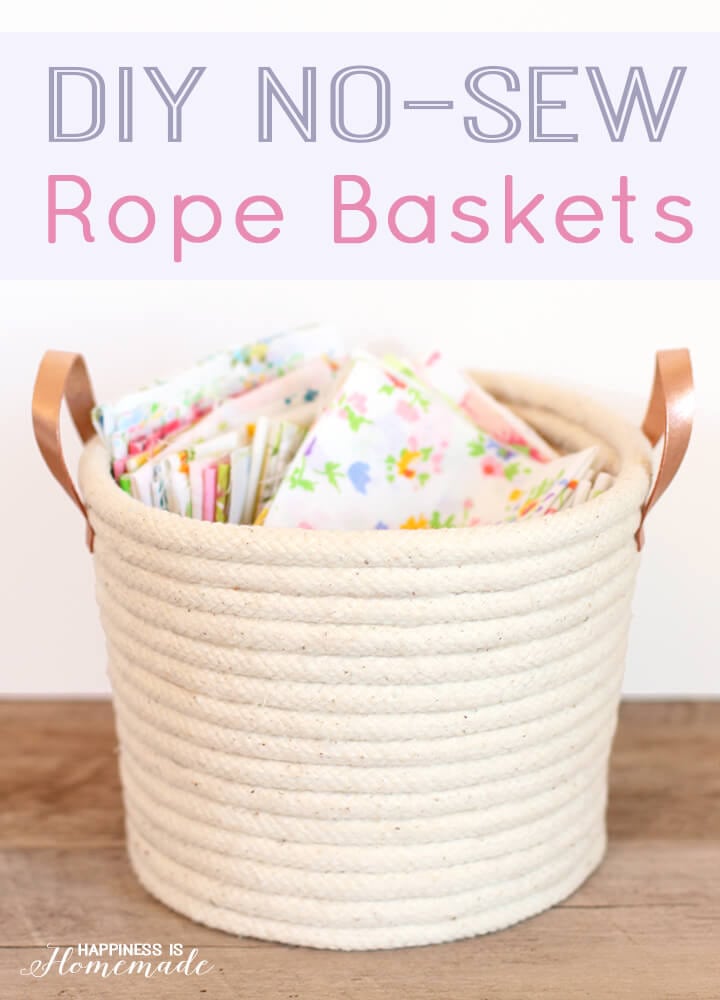

These chic DIY rope baskets come together easily with Elmer’s new CraftBond® Hot Glue Gun and Less Mess Glue Sticks (no more drips & glue strings!)!
DIY Coiled Rope Baskets
These DIY rope baskets are the perfect way to make your own customized storage and organization solutions! They can be made in a vast array of shapes and sizes, and they’re surprisingly strong and sturdy!
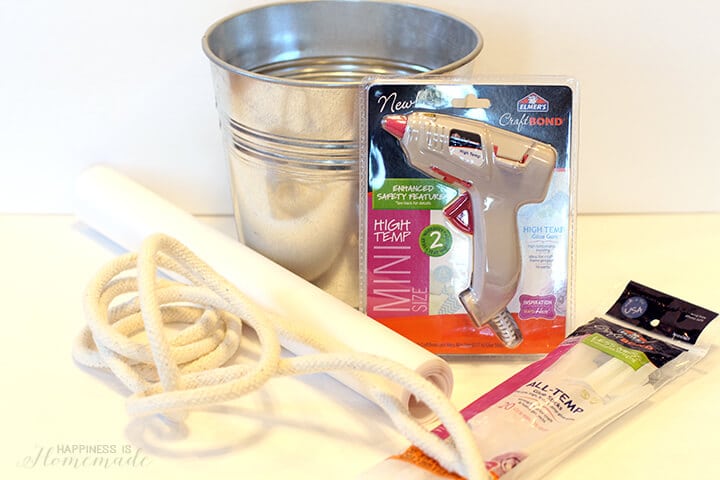

What You’ll Need:
- 3/8″ thick cotton piping cord (I used approximately 10-15 yards per basket)
- Elmer’s CraftBond® Mini High Temperature Glue Gun
- Elmer’s CraftBond® Less Mess 8-inch Glue Sticks (also available in 4-inch size)
- Metal or glass vessel such as a bowl, pail, or bin to use for shaping your basket
- Parchment Paper
- Fabric or leather for embellishments (optional)
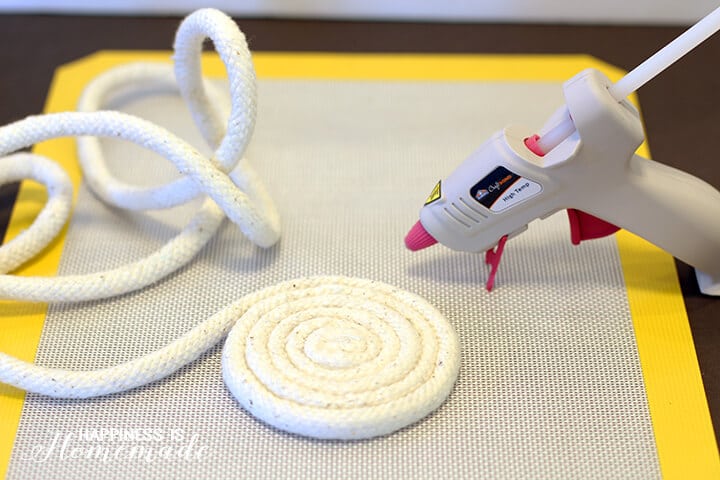
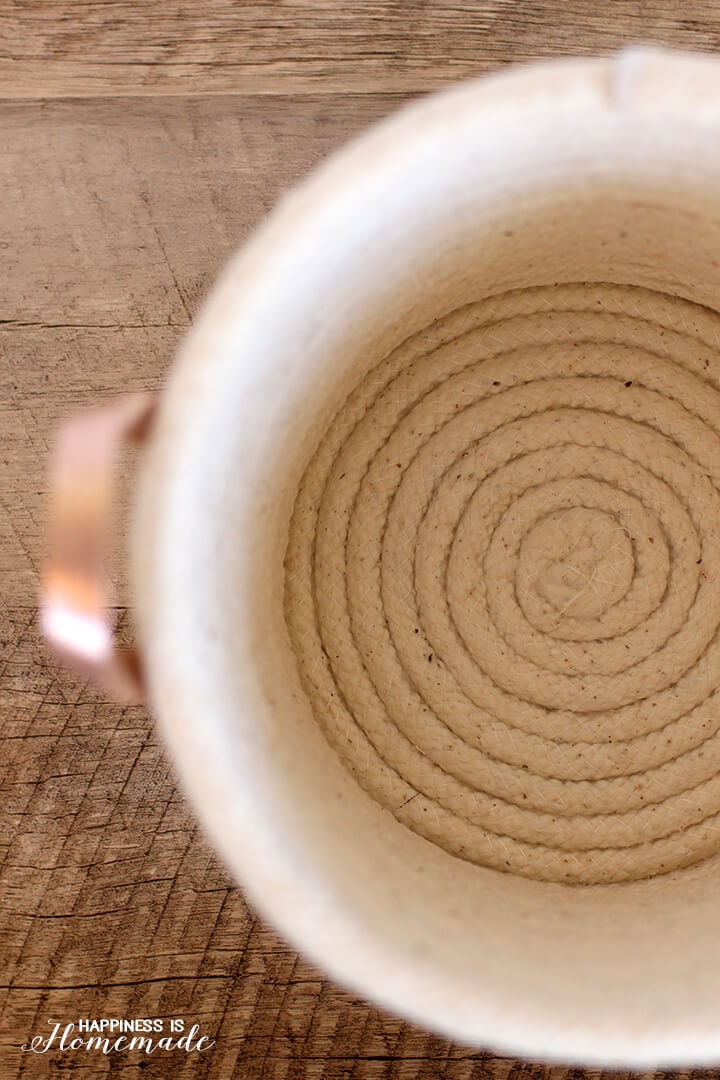
I began by forming a tight coil of rope to serve as the base of my basket. I used my new Elmer’s CraftBond® Hot Glue Gun to glue the rope together every inch of the way, and I was pleasantly surprised that the “Less Mess” glue sticks really do live up to their name – I had NO dripping or messy glue strings during the entire time that I was working on this project! (Honestly, if you’ve ever used a glue gun before, you should realize that’s practically a miracle!)
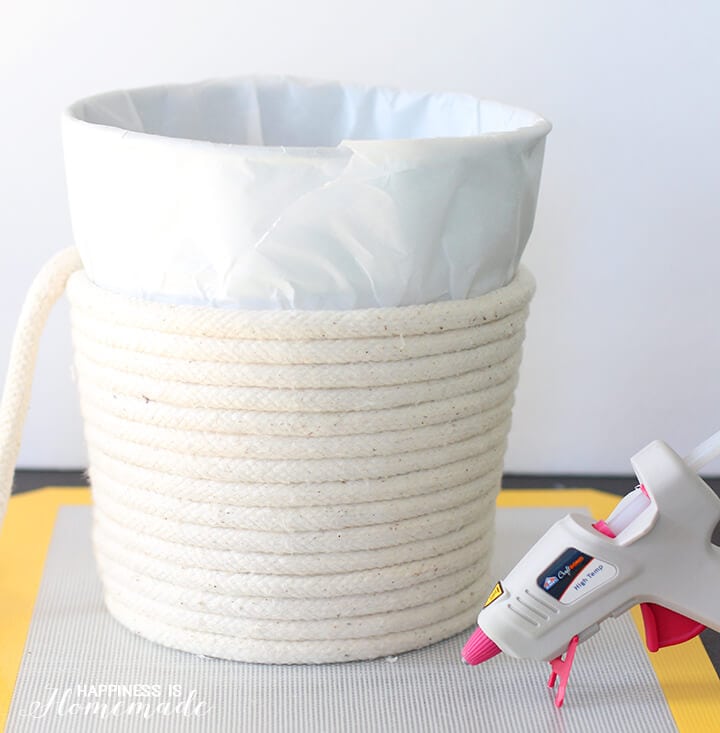
I covered a metal pail with a sheet of parchment paper to provide a layer of protection and to form a barrier against the glue. When my coiled rope base was the same size as my metal pail, I started wrapping the rope tightly around the pail (gluing the rope every step of the way!) to form the shape of my basket. When the basket was as tall as I desired, I simply removed the pail from the inside – easy peasy!
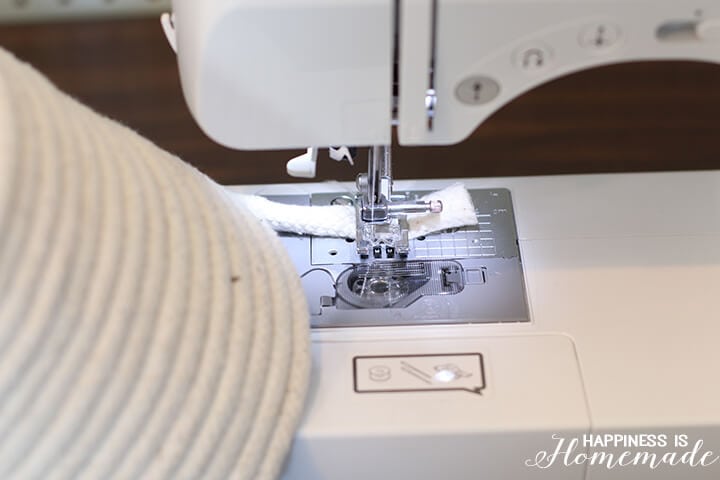
Okay, okay, I know that I said this is a “no-sew” project, and it totally CAN be…but, for added strength and stability, I chose to stitch the end of my rope closed since the piping cord has a tendency to unravel at the ends. You can also use the hot glue to create a finished end piece.
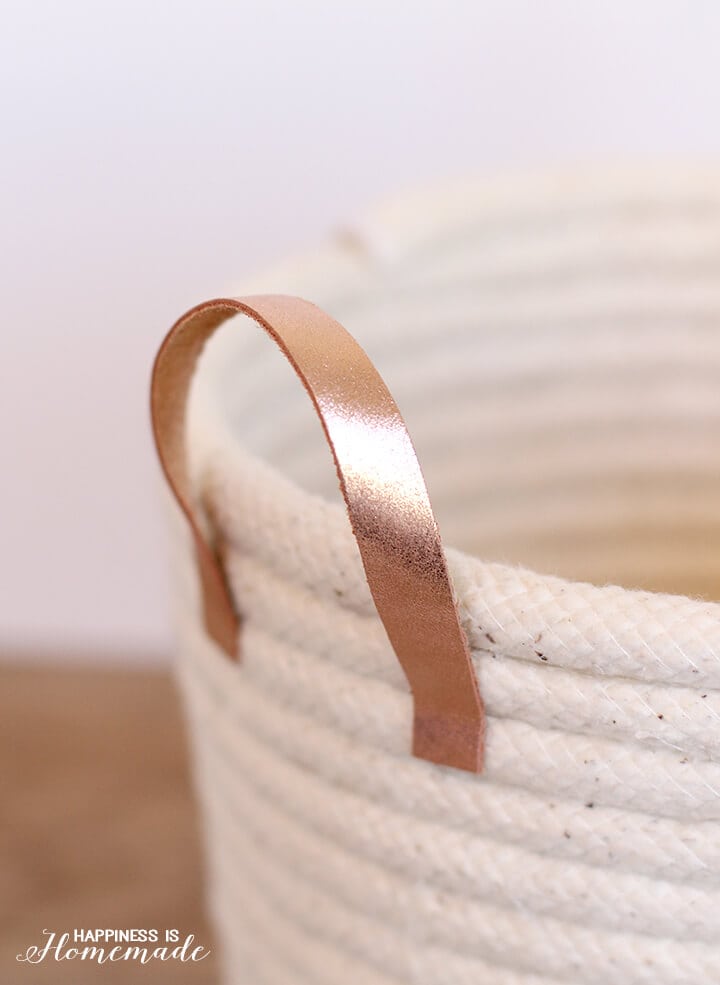
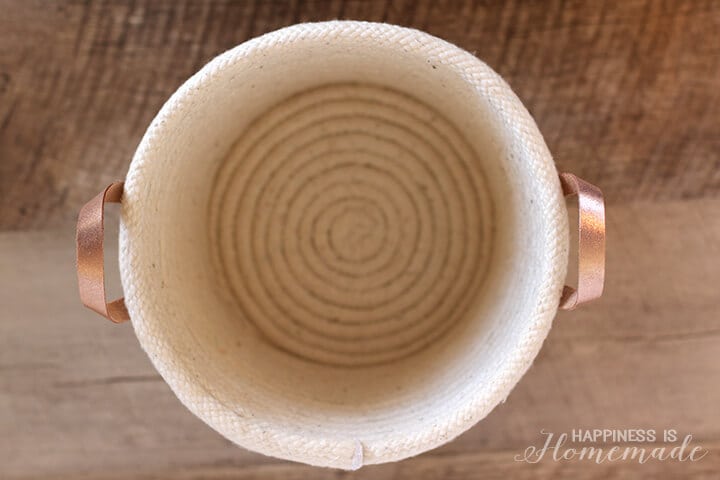
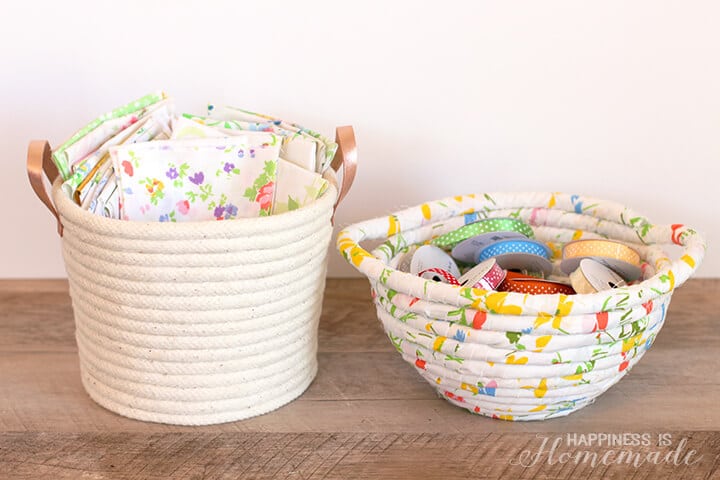
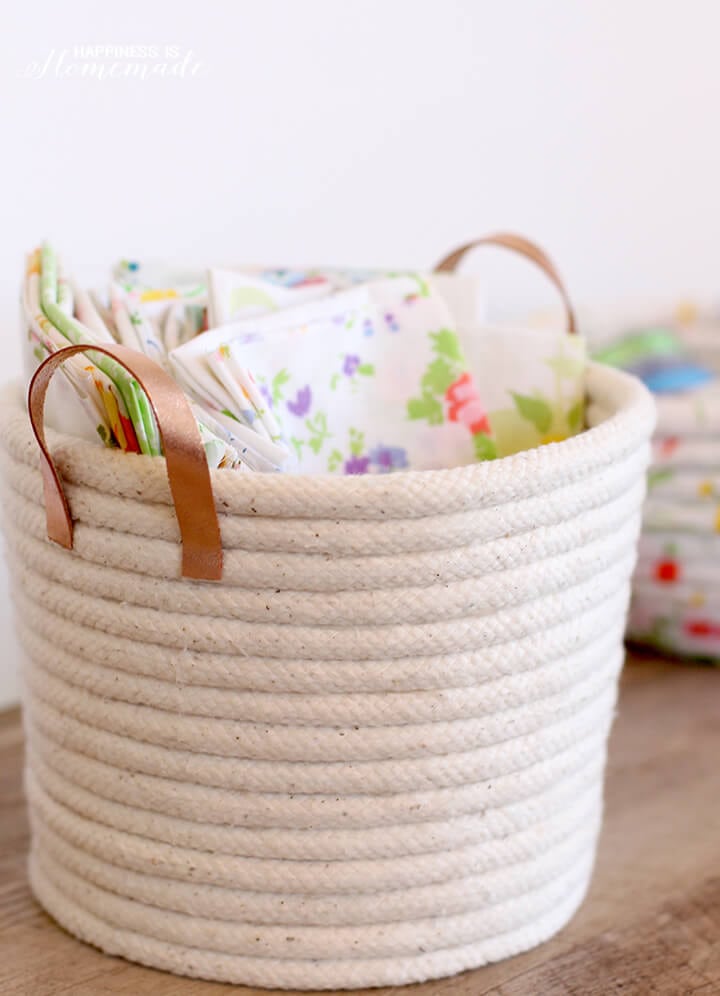
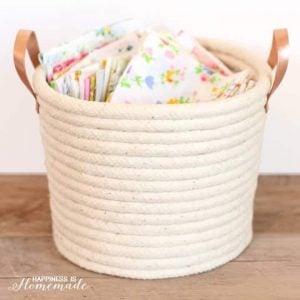
I love the natural color of the cotton rope basket, but I also wanted a little bit of glam and shine, so I added two handles made of of luxurious rose gold leather. It’s the perfect finishing touch!
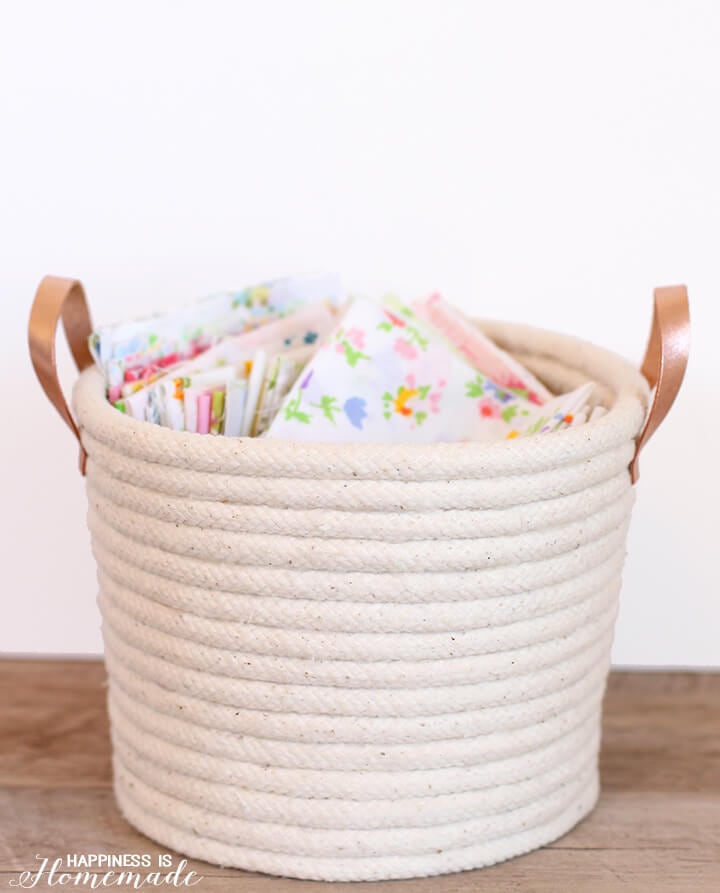
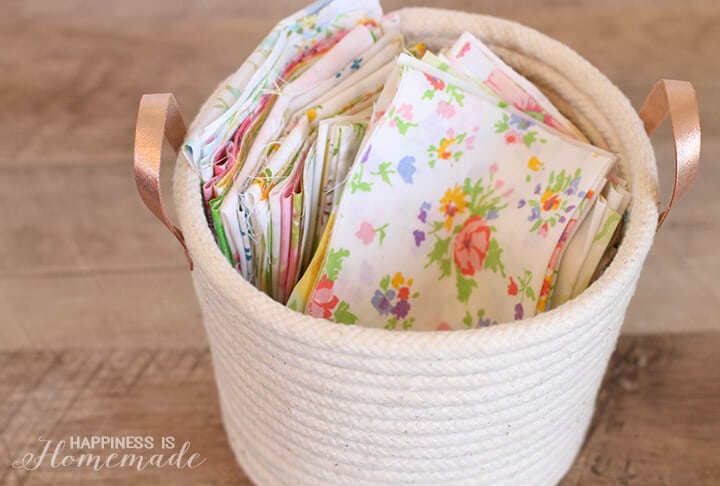
I’ve discovered that this basket size is incredibly handy for lots of different applications, so I’m planning on making a bunch more! This one is currently home to some of my favorite vintage sheet fat quarters, and it makes me happy every time I see it!
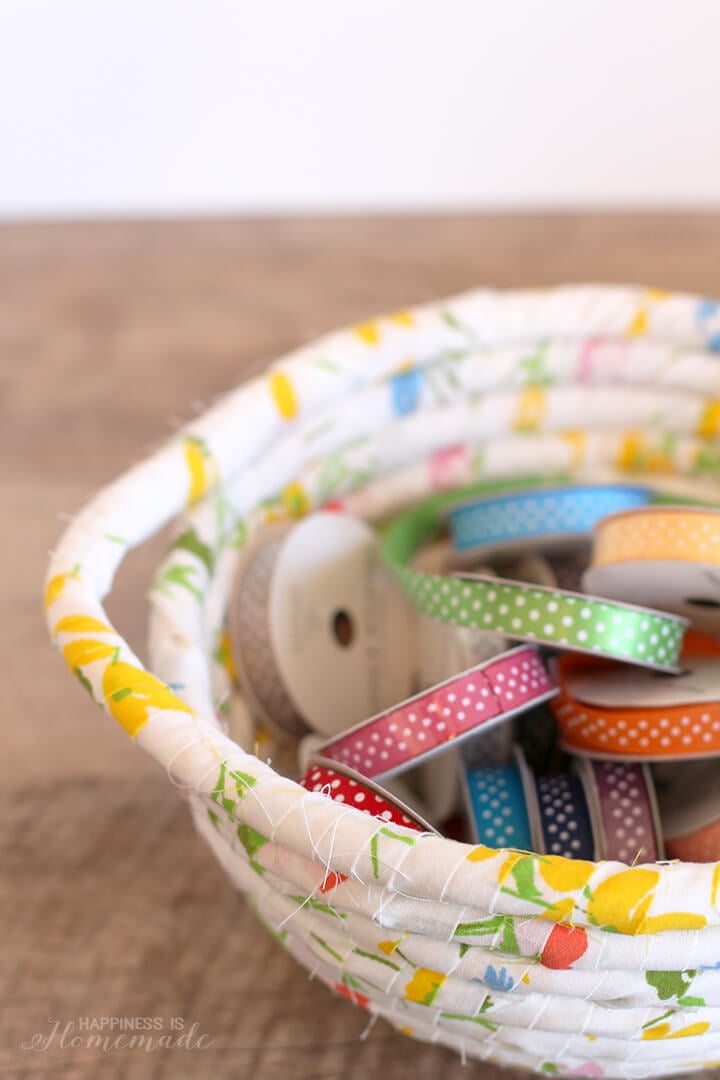
Speaking of vintage sheets, I decided to try my hand at a second version of the rope basket, based off of the fabric-wrapped baskets that my mom used to sell at craft fairs when I was a kid.
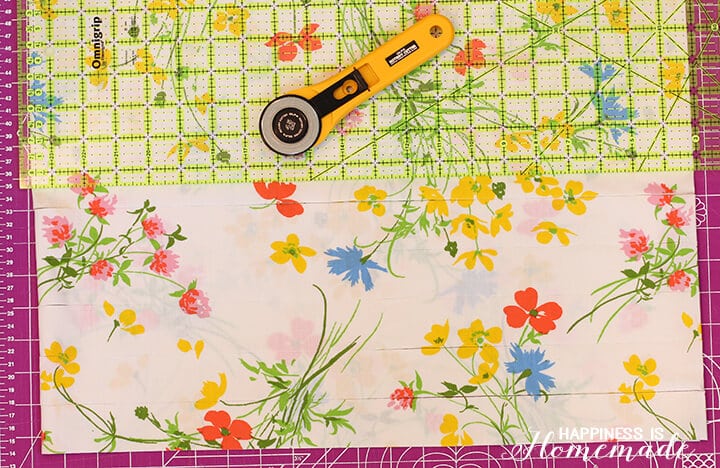
I started by cutting a vintage sheet into 1.5″ strips (note: I used about 1/3 of a full sized flat sheet).
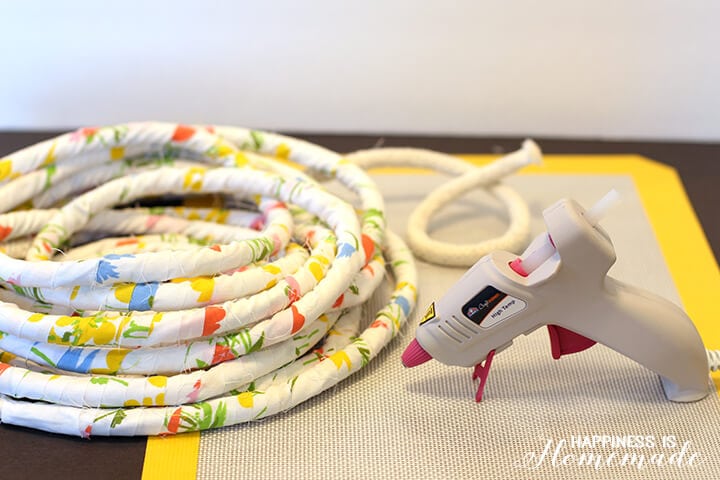
Wrap the fabric strips around the length of rope, and use your super awesome Elmer’s CraftBond® Mini High Temperature Glue Gun every 1-2 inches to adhere the fabric to the rope.
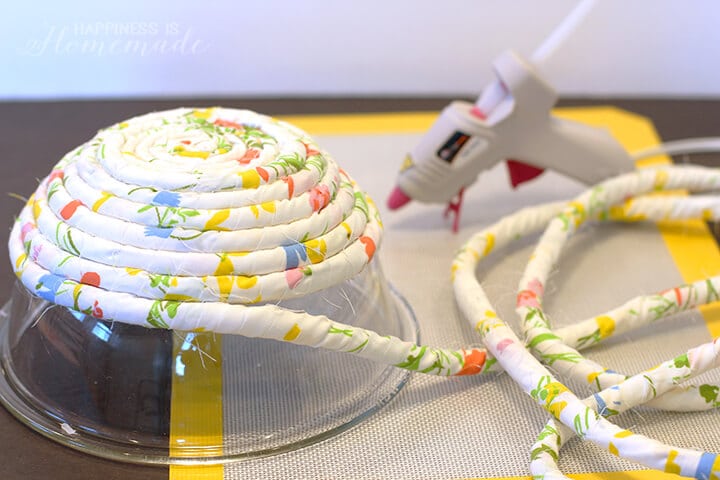
Using the same method that I used for the natural rope basket, I started with a base coil, and then built upon my vessel (in this case, a medium-sized Pyrex bowl) to form the shape of the basket.

I omitted using hot glue from two 4″ long sections along the top coil of rope, and allowed them to bow up gently to create handles.
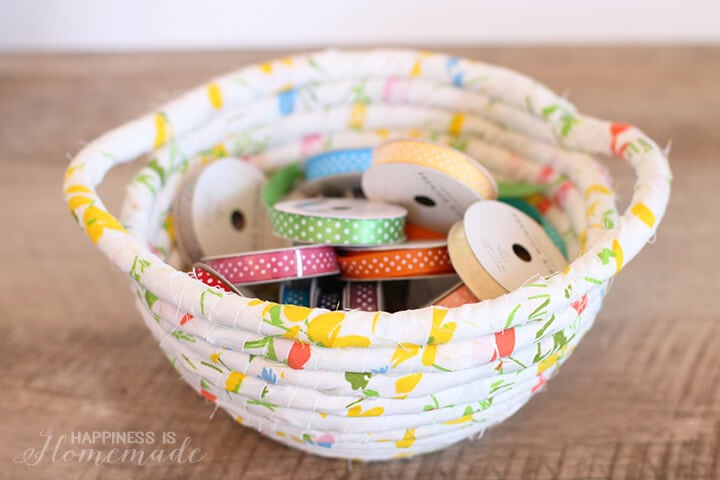
I love the way that it turned out, and it’s the perfect size for storing all of my spools of polka dot ribbon!
I can see a LOT more of these vintage fabric covered baskets in my future as well! Maybe I’ll even mix and match my fabrics next time (just like my mom used to do!)!
For more fun craft ideas, be sure to sign up for the Elmer’s Newsletter and check them out onTwitter, Facebook, Instagram & Pinterest! Happy crafting!
DIY No-Sew Rope Baskets
What You’ll Need:
- 10-15 Yards 3/8 thick cotton piping cord
- 1 Elmer’s CraftBond® Mini High Temperature Glue Gun
- 1 Elmer’s CraftBond® Less Mess 8-inch Glue Sticks
- 1 Metal or Glass Vessel, such as a bowl, pail, or bin for shaping your basket
- 1 Yard Parchment Paper
- 1 Fabric or leather for embellishments optional
Instructions:
- Cover a metal pail with a sheet of parchment paper to provide a layer of protection and to form a barrier against the glue.
- Begin by forming a tight coil of rope to serve as the base of the basket. Working in small sections, use the hot glue gun to glue the rope together as you coil it.
- When the base is the desired size (slightly bigger than the base of your pail), place the pail on top of it and begin to coil the rope vertically, using the shape of the pail to help you structure your basket.
- When the basket reaches the desired height, cut the rope and use the hot glue gun to firmly adhere the end of the rope to the basket. Remove the pail from inside the basket.
- To add handles, cut a strip of leather to size and attach to the basket with hot glue.

Check Out These Other Home Decor Ideas!


Heidi Kundin has captivated the hearts of millions with her colorful and inspiring approach to crafting, celebrations, and family fun. With over 15 years of experience, Happiness is Homemade has become a must-visit destination for those seeking quick and easy creative ideas and last-minute solutions. Heidi’s warm personality shines through her posts, inviting readers to join her on a creative journey that’s fun, rewarding, and achievable. Heidi is also the author of Homemade Bath Bombs & More and DIY Tie-Dye.
Absolutely love both of these baskets and are now on my long list of projects to try. You did an awesome job and appreciate you sharing.
Thank you for a pretty project! This is very doable!!!
Very nice. I can see myself doing this too!
Would this hold up for use with holding kid toys? Looking to do this with my storage cubbies.
The taller they are, the less sturdy they become. I would recommend keeping them relatively small if they are going to be used a lot. Thanks!
The previous question about “can you make this in a square shape.? I woud like to know too. I looks like fun and easy. Thanks so much.
I have never tried making it in a square shape, but I don’t see why that wouldn’t work if you had a square base to start with. If you try it, please let me know how it turns out! I’d love to see the results!
This is what I wanted to do – rectangle – wondering how the base (if started as a coil…) would become non circular.
For future readers:
If you start by laying a length of rope straight for a few inches, then double back on it, and begin wrapping the rope around it you should get a rectangular base. The longer the initial length of straight rope, the longer and narrower your rectangle will be. An almost square could probably be accomplished with a very short straight starting length.(Picture that classic phone game, Snake)
Great idea, Kristin! Thanks for sharing this! 🙂
Can you do this with a square or rectangular box or plastic bin? If yes, how would you do the bottom since it isn’t round? Very interested in trying this but need a square or rectangular basket.
I just finished making a Nautical Rope basket for my sister as a gift. I found your sight while looking for a way to cover up the glue that got on the inside of the basket.
Your work is absolutely beautiful. I need to invest in the Elmer’s Glue Gun and Glue Sticks. Hope you don’t mind but I think I am going to try and make your fabric baskets.
Thank you so much for the tutorial.
Sincerely,
Hi Heidi! A group of us girls want to get together to make these. Is it ok if use this picture and tutorial?
Absolutely! Thanks for asking!
Hi Heidi, I tried to make one of the rope baskets and I used the hot glue gun and parchment paper, but when it was time to take the parchment paper off the hot glue was on the inside of the bowl dried but it looked bad. I really what to try again and make one but how did you keep the glue from getting on the inside of the bowl?
I used the Elmer’s hot glue gun which REALLY helped to cut down on blobs, drips, and glue strings. Take it slowly and be precise with where you are placing the line of glue so that it doesn’t spill out and over the sides. 🙂
Love these baskets and must make some. Thanks for inspiring me to get creative again.
So what happened to the parchment paper? Wasn’t it glued to the cord too when complete?
The parchment paper is non-stick, so it acts as a protective layer between the bucket and the rope. Any glue that gets onto the parchment paper peels off easily, and it does not stick to the rope cording at all.
I made one and I love it. Thank you for the tutorial.
So cute! Where can you buy the leather straps (handles)??
Hi Hayley, I found the rose gold leather strips on Etsy. 🙂
I am loving these baskets ! I must try to make these. Thanks for the tutorial ????❤????
Could you use cotton rope instead?
I think that would probably work, Emma!
Did you glue the handles on? If so, do they seem pretty secure?
Yes, my handles are just glued on as well. I haven’t had any issues with them holding up, but I mostly use my baskets for storing fabric scraps and other lightweight items. 🙂
How did you attach the base to the sides? Hot glue as well?
Hi Kelly, the base and the sides are one single piece. If you look closely at the step-by-step photos you can see that I coil the base and then move the rope to the top of the top of the base to start coiling the sides.
What size of pail did you use in this demo? You’ve done a fantastic job. So classy looking!
Thanks, Corinne! I used a pail that is 8″ tall and 7″ wide.
Would fabric glue work as well?
I don’t think fabric glue will have the same strength as the hot glue, but if you try it, let me know how it works out! 🙂
I made two in less than 2 hours, and one I used nautical rope and untwisted the 3 strands then braided it. I am no fan of hot glue lol!! I used Gorilla glue and found it was much easier to sponge on, it dried within minutes and I could wipe off any excess glue. Just a thought ☮️
That’s a great idea also, Jill! Thanks for sharing!
Thanks so much for the tutorials. I’m so excited to try these. 🙂
I would desrly love to see some step -by-step slow motion video tutorials!!!