
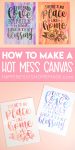

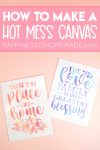
Make a hot mess canvas with this easy reverse stencil technique! Hot mess canvases are a great family project – everyone can have fun with this one!
This post may contain affiliate links. I will receive a small commission from these sales at no additional cost to you!
Today we’re showing you how to make a hot mess canvas, and it is SUCH a fun family project! Let everyone in the family make their own hot mess canvas or collaborate on one or two pieces that the whole family has a hand in making! It’s SO much fun for all ages!
Several years ago, I ran an Etsy shop selling hand-painted wood signs, and this is the same reverse stenciling technique that I always used on wood to produce incredibly sharp, crisp, and professional results!
You May Also Like These Related Ideas:
Hot Mess Canvas Family Craft
We’re joining in with some of our favorite blogger friends to bring you a bunch of fun family crafts with your Cricut machines, so be sure to scroll to the bottom of this post for even more fun ideas!
What is a Hot Mess Canvas?
Hot mess canvases are a popular and relatively new painting style that combines quick and messy painting (hence the term “hot mess”) with a unique reverse stenciling technique. The final result is a multicolored design on a solid color canvas. They’re SUPER cool!
How Do You Make a Hot Mess Canvas?
It’s SO easy! Keep on reading for a complete step-by-step walk-through of the simple directions – it’s as easy as paint, mask, paint again, and peel!
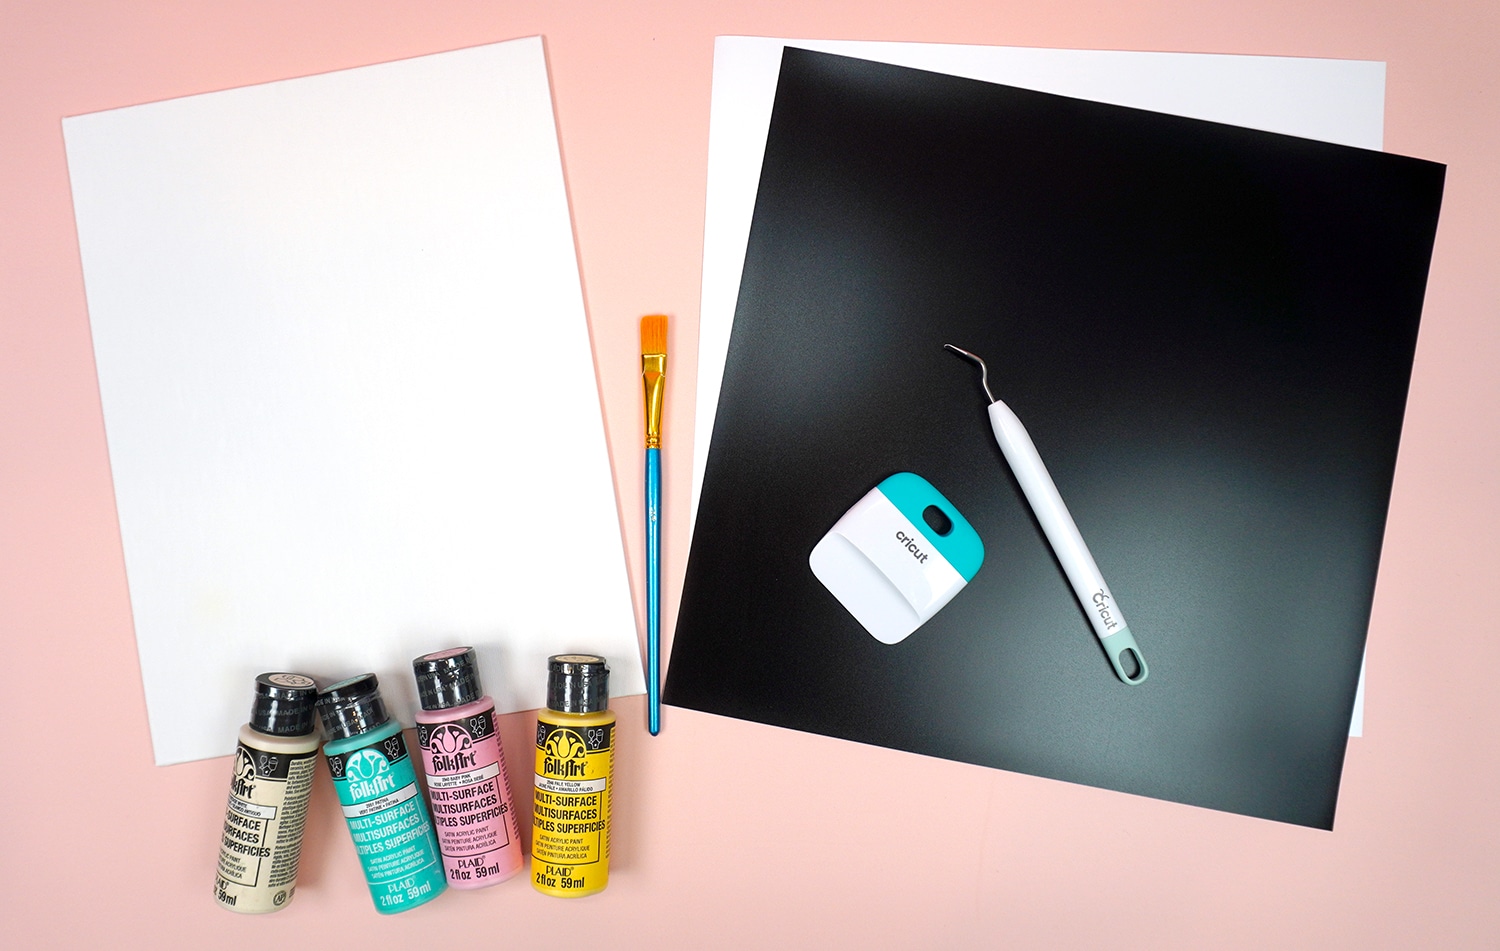
Supplies Needed to Make a Hot Mess Canvas:
- Canvas (we used inexpensive 9″ x 12″ canvas panels)
- Acrylic Paint in Assorted Colors & Paintbrushes
- Rust-oleum 2x Spray Paint (we used white)
- Cricut Explore Air 2 or Cricut Maker machine
- Removable Vinyl
- Transfer Tape and Scraper Tool (or old plastic card)
- Matte Mod Podge, optional
- Plastic Wrap & Brayer, optional
What Kind of Vinyl Do You Use for Hot Mess Canvases?
We recommend using a removable vinyl for your hot mess canvas. Cricut Removable Premium Vinyl is a great option as well as Oracal 631, Siser EasyPSV, and Oramask Stencil Film. For this tutorial, we used Cricut brand vinyl.
How to Make a Hot Mess Canvas
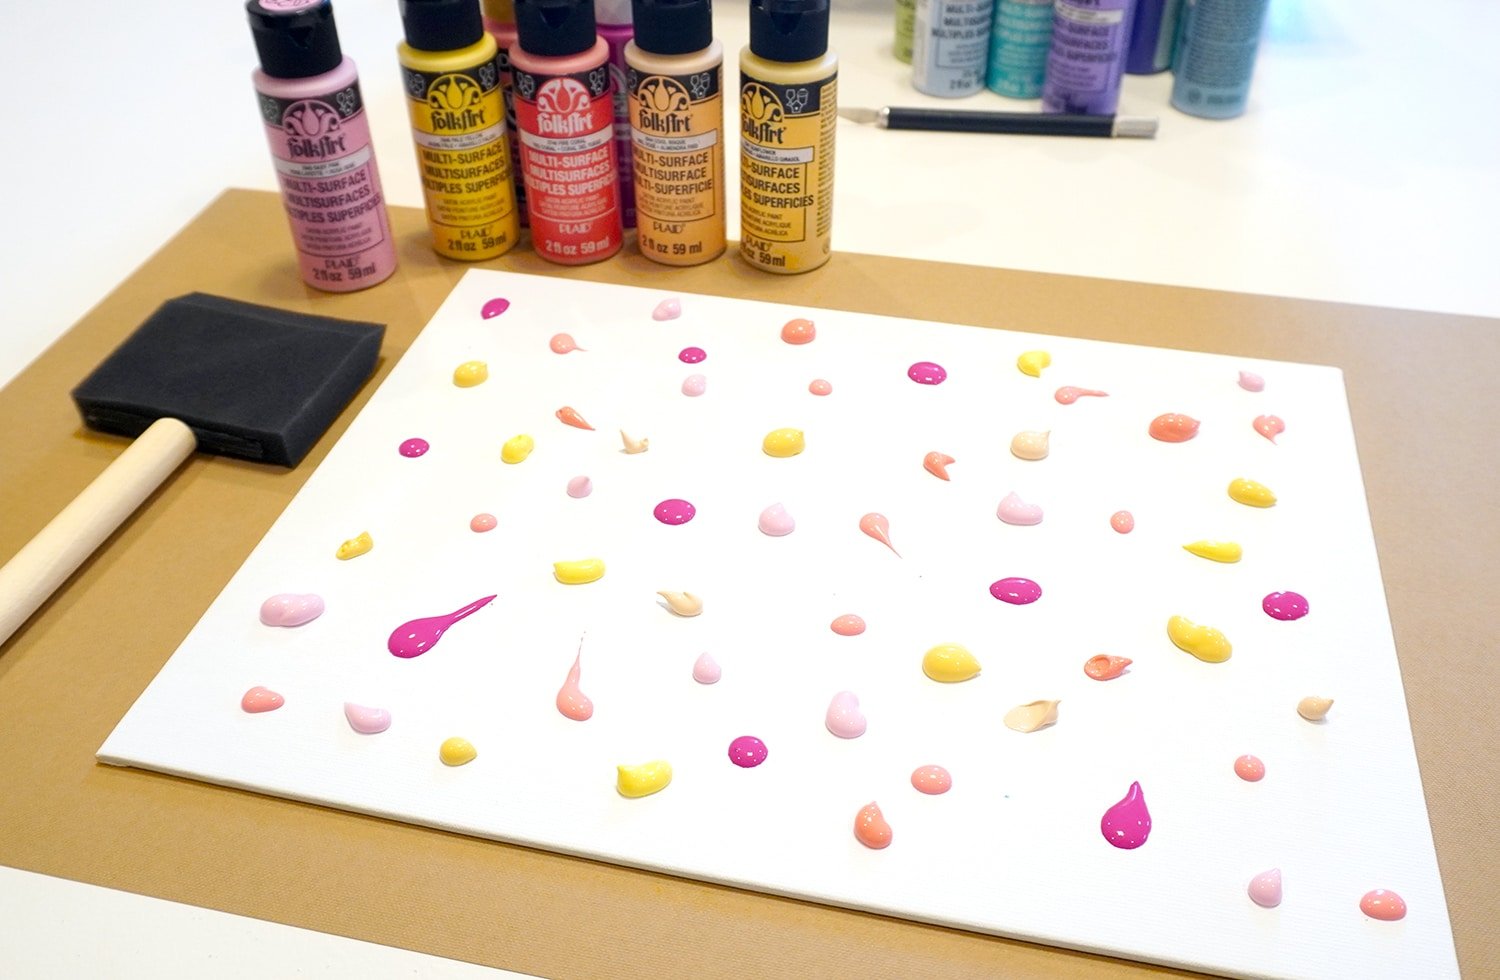
Alright, let’s do this! To start making your hot mess canvas, open a variety of paint colors (it’s best to choose colors that are all in the same color family so they blend well!) and add small drops of each color to the canvas in a random pattern.
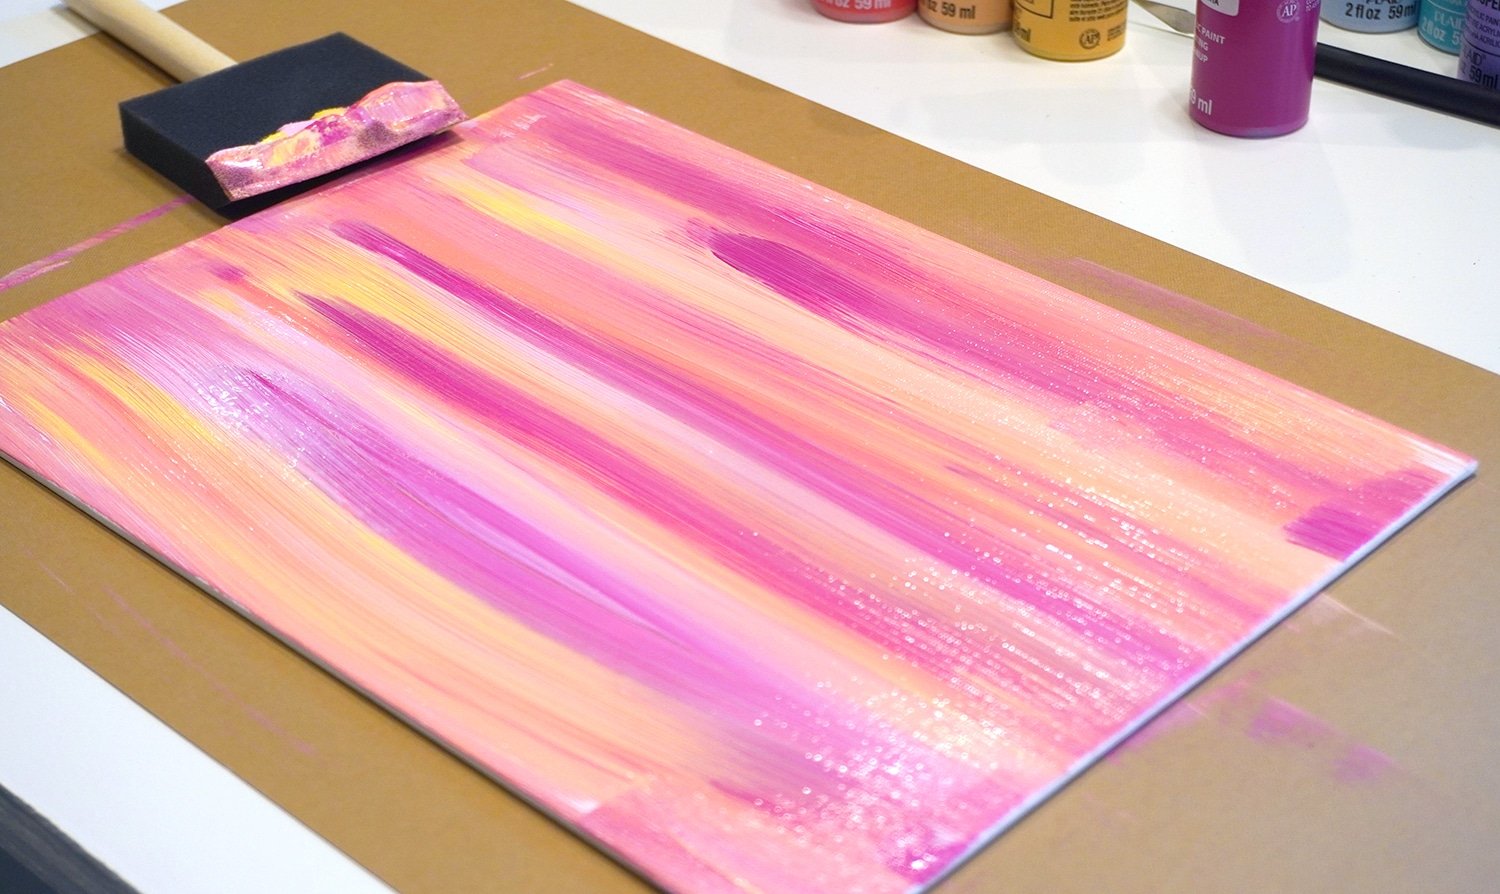
Now, here’s the fun part – use any method you’d like to turn those paint drops into a colorful artwork! Here, I used a wide sponge brush to gently blend the colors into soft sunset-hued stripes and streaks, but you could also use a regular paintbrush to make dots and swirls of color. Get creative with your technique and have fun making your “hot mess!” Your only limit is your imagination!
This is a GREAT job for younger kids, especially since there’s no “wrong” way to do things! Let the kids paint the canvases and then have the grown-ups do the final steps of the process.
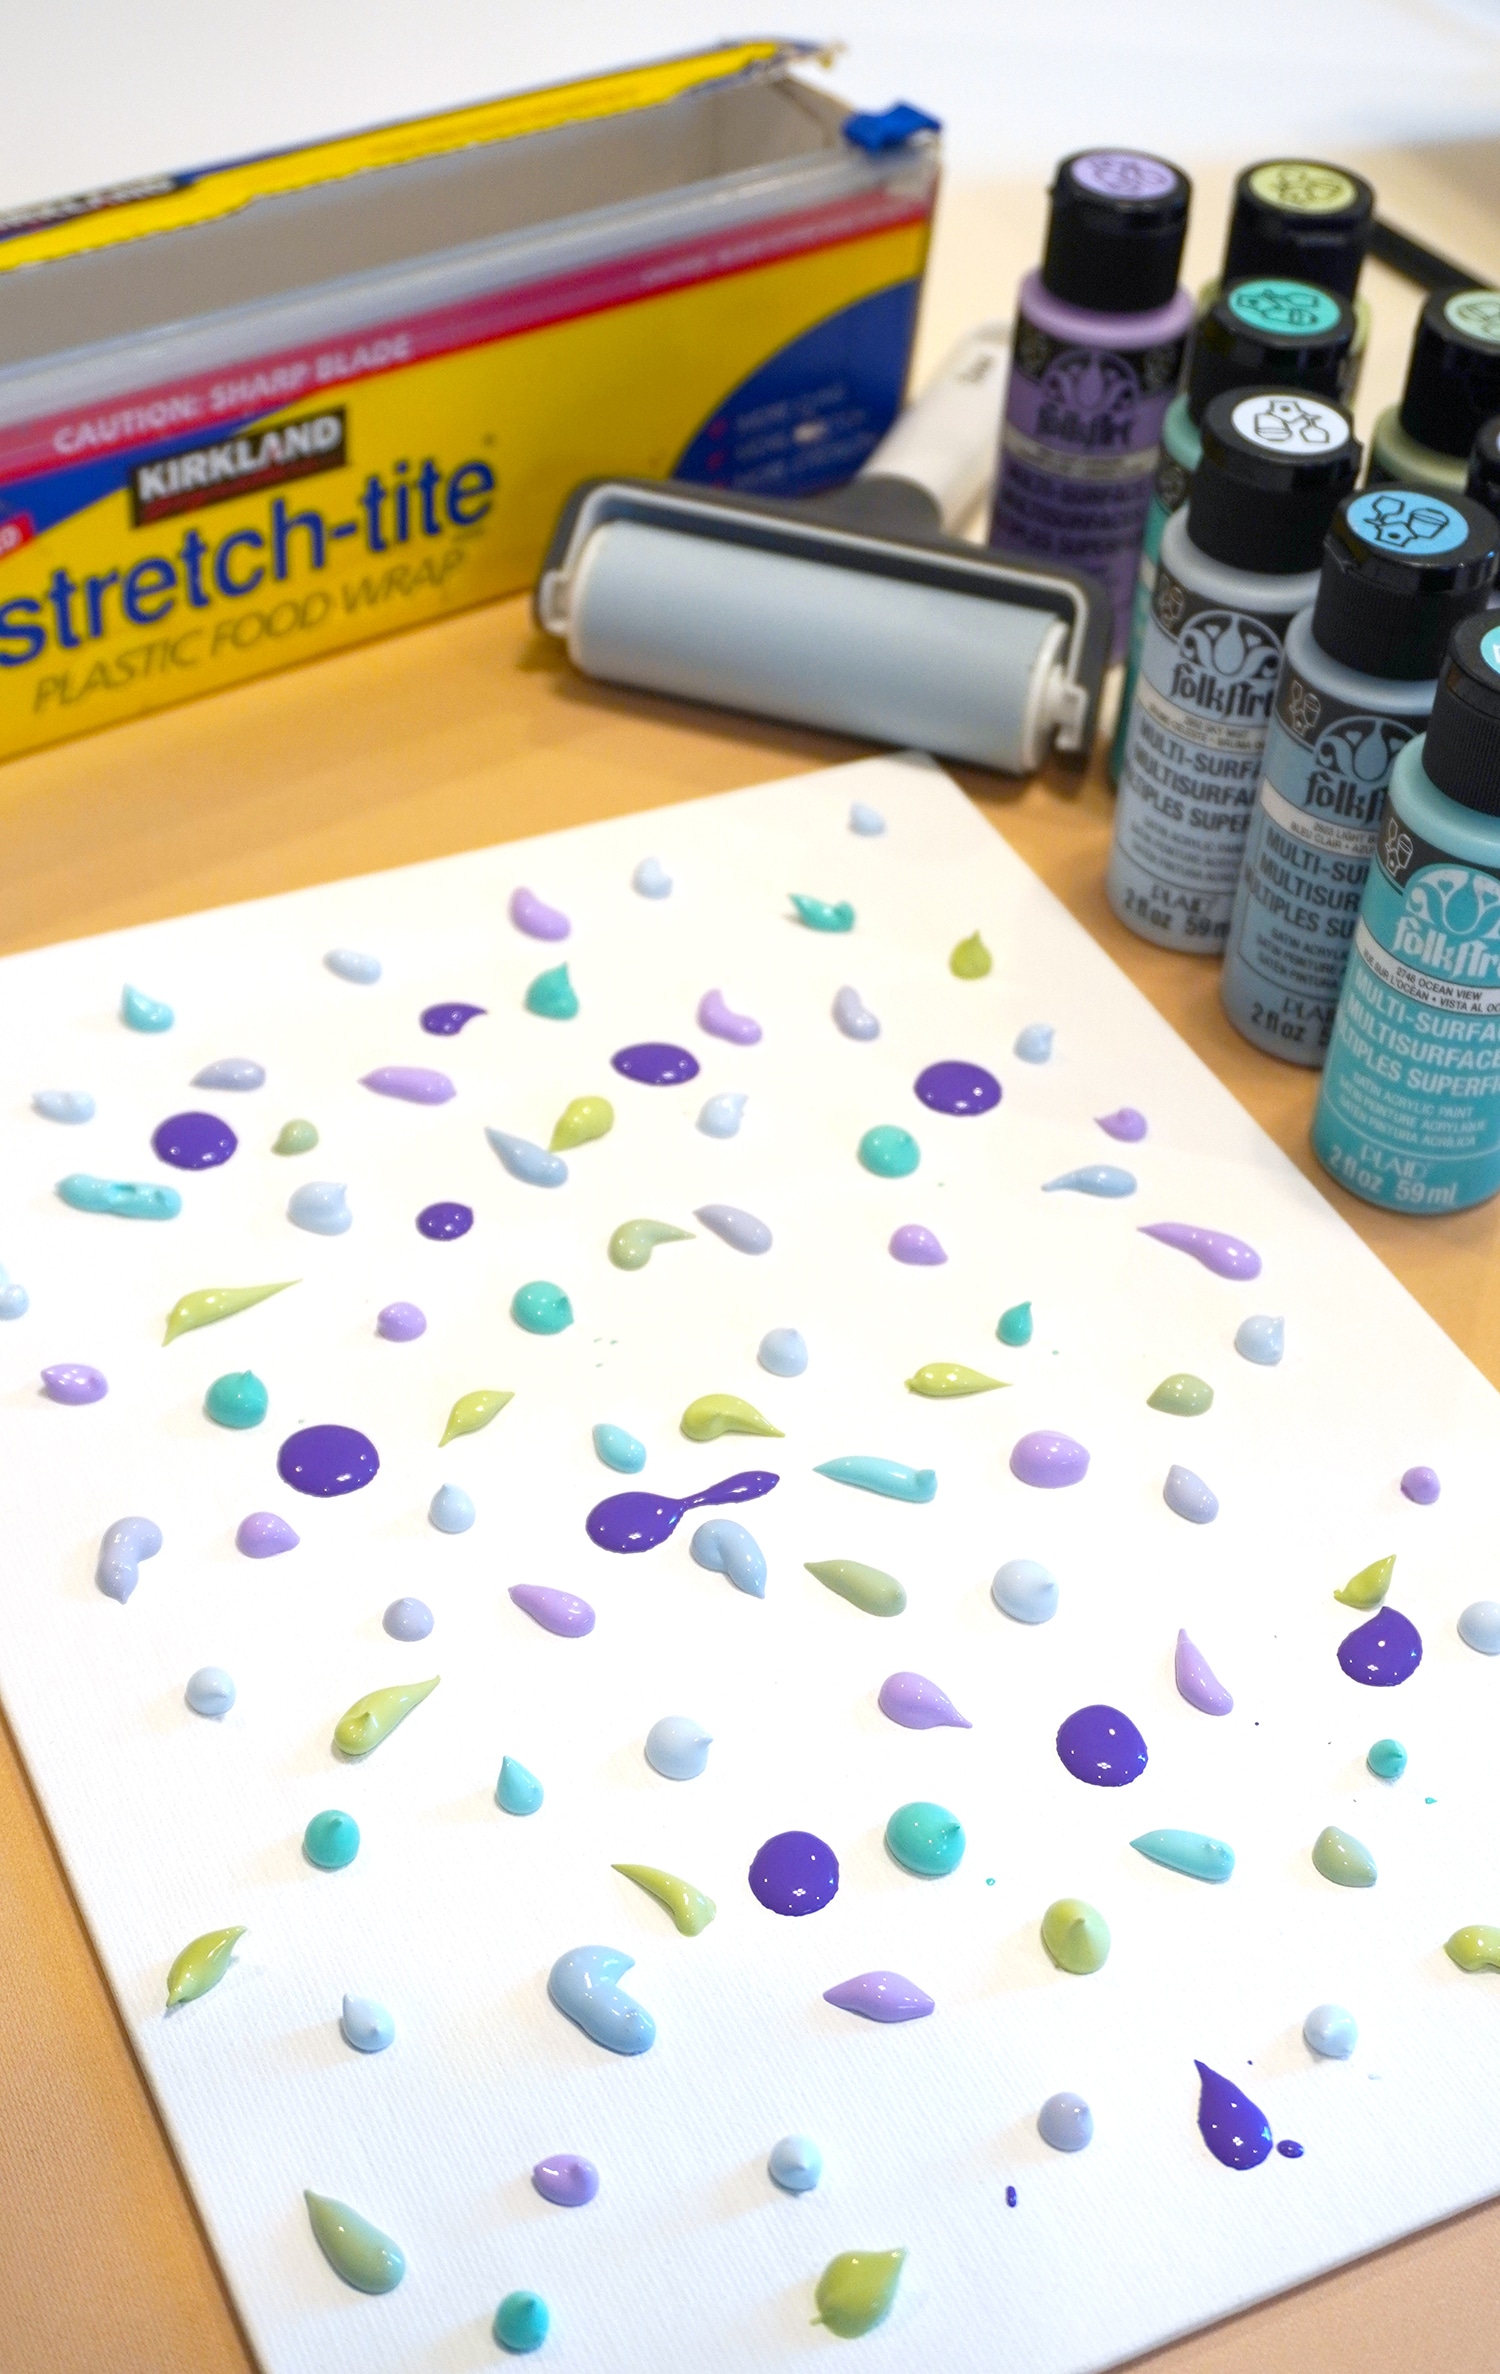
One of our favorite time-saving techniques for filling the canvas with swatches of paint SUPER quickly and easily is to add drops of paint to the canvas and then cover it with plastic wrap.
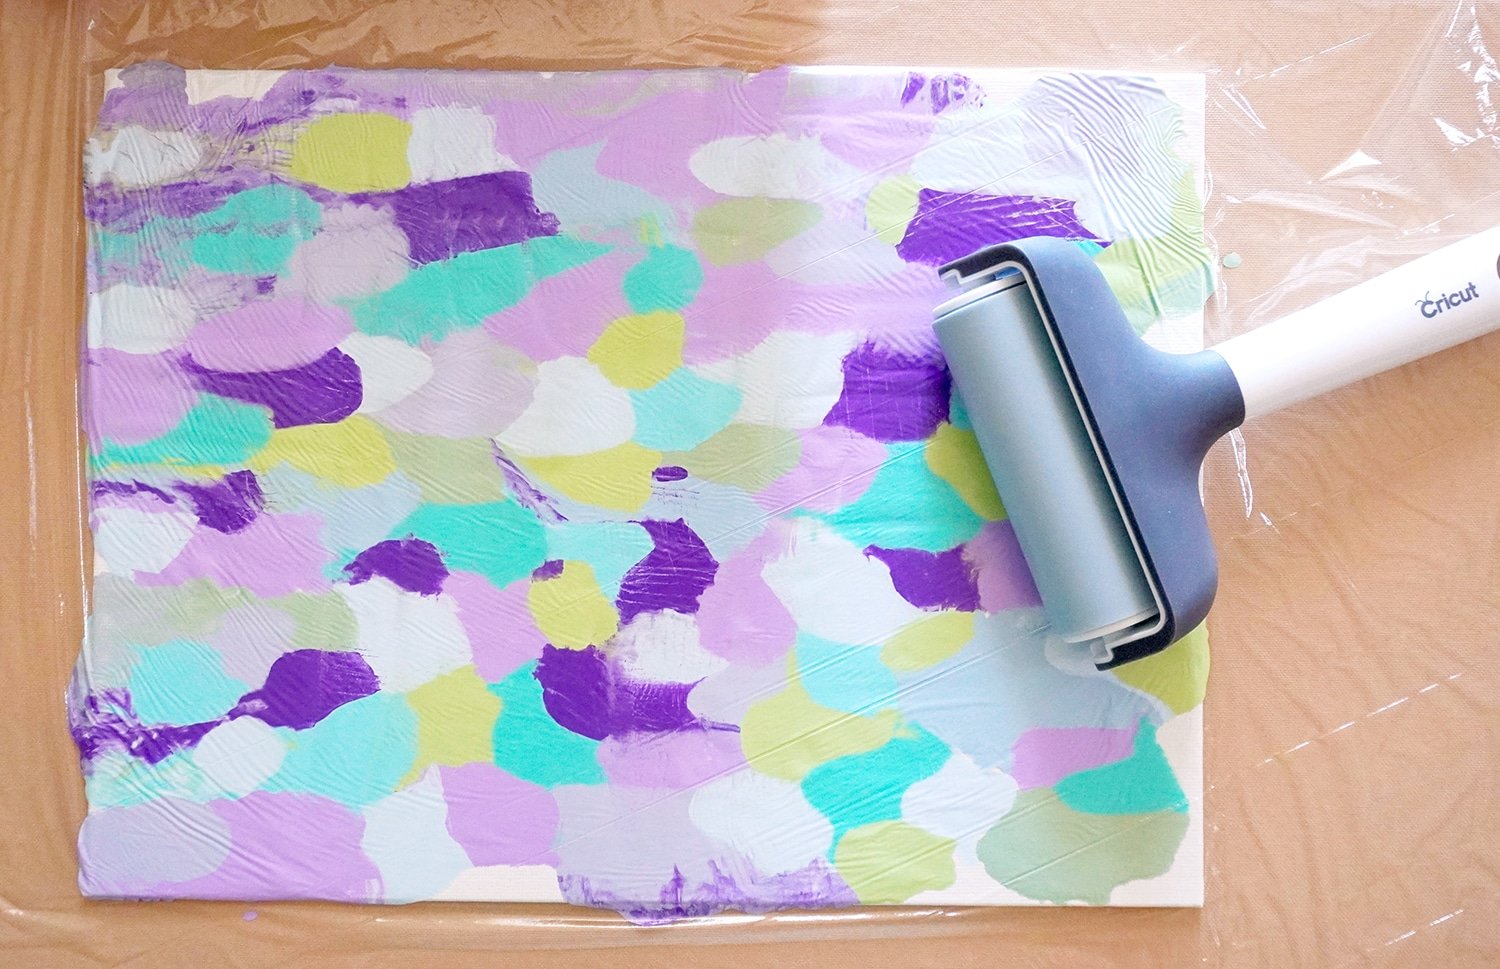
Use a brayer or rolling pin to gently roll the paint blobs to fill the entire canvas before carefully removing the plastic wrap. SO fun and easy!
After painting, set your canvases aside to dry completely. I recommend allowing at least 3-4 hours of drying time, though I generally allow my canvases to dry overnight whenever possible.
Note: If your canvas is not completely dry, you may run the risk of the vinyl stencil peeling up some of the paint, so be sure it is completely dry before moving on to the next step!
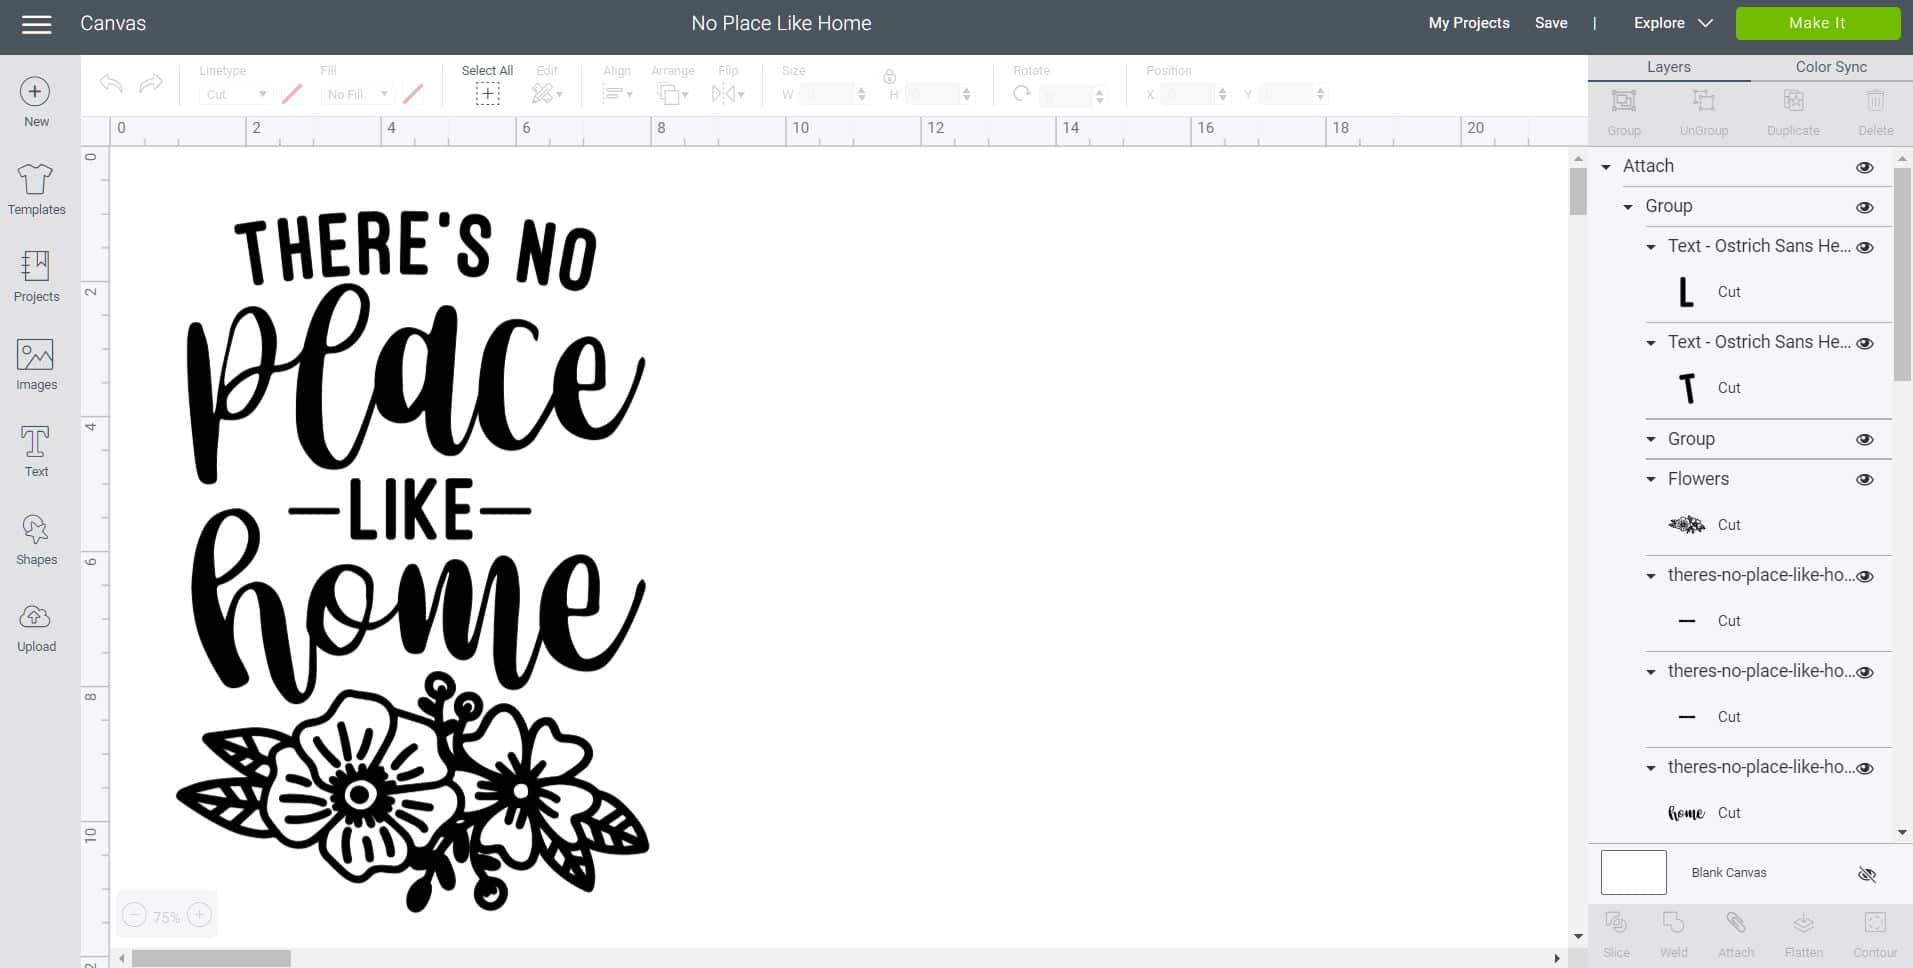
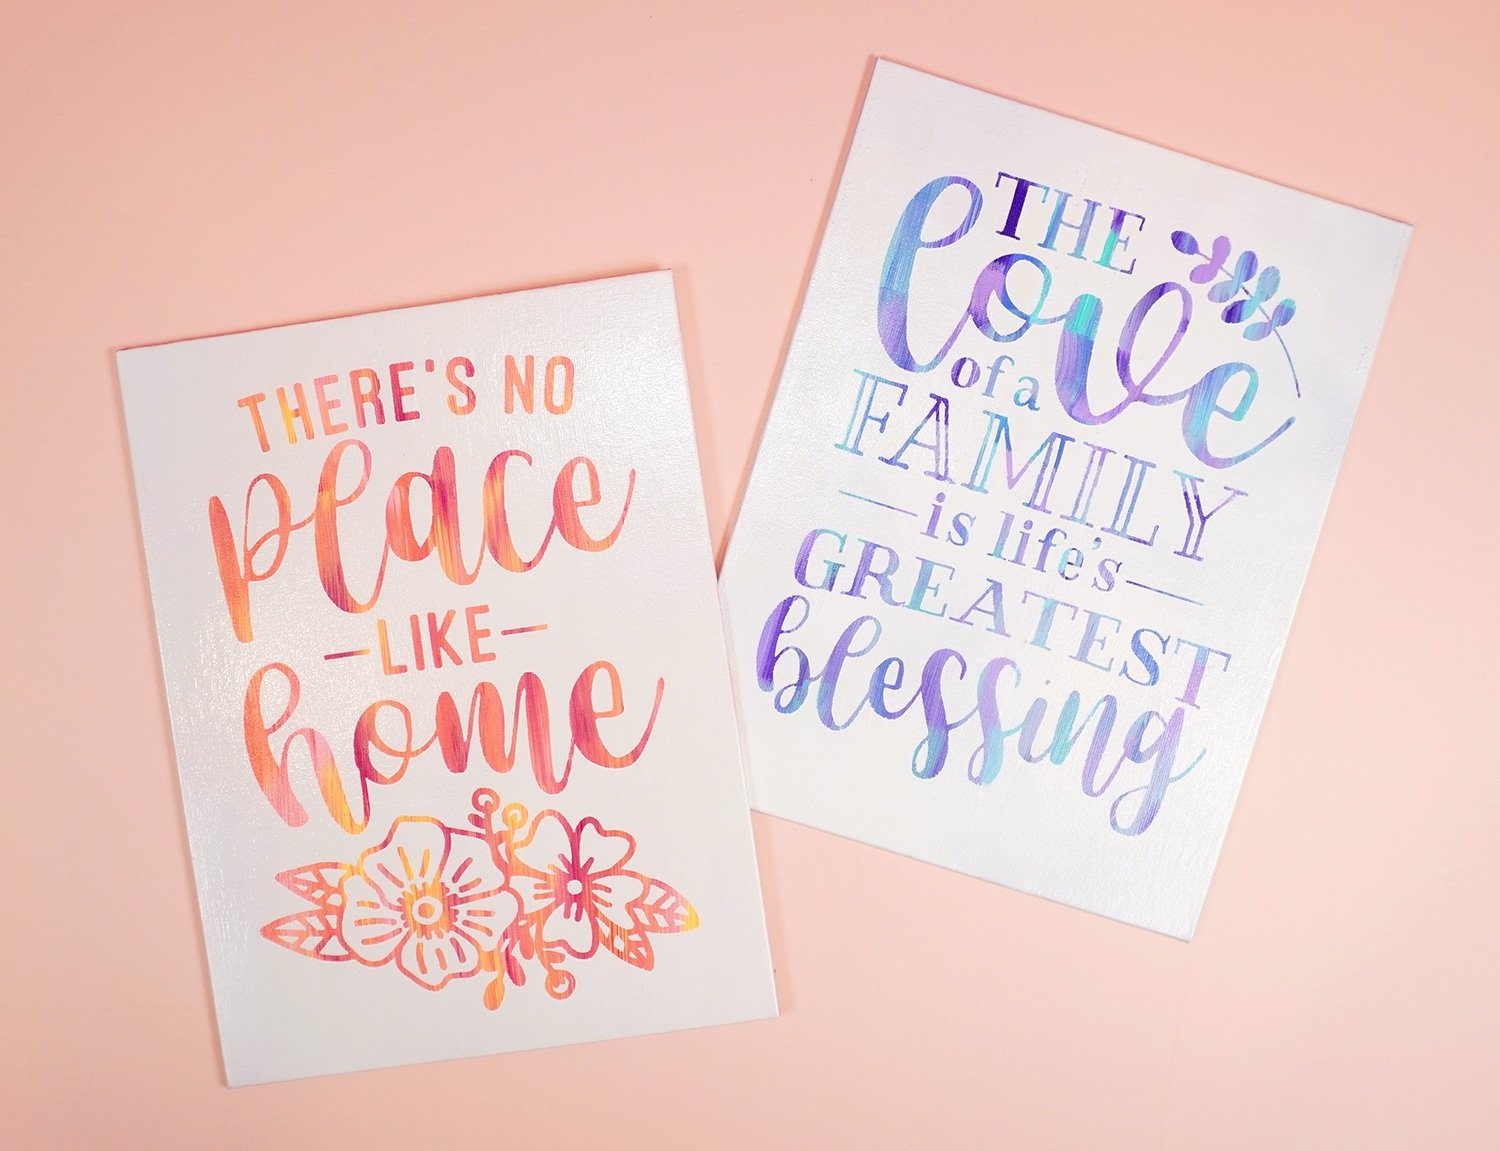
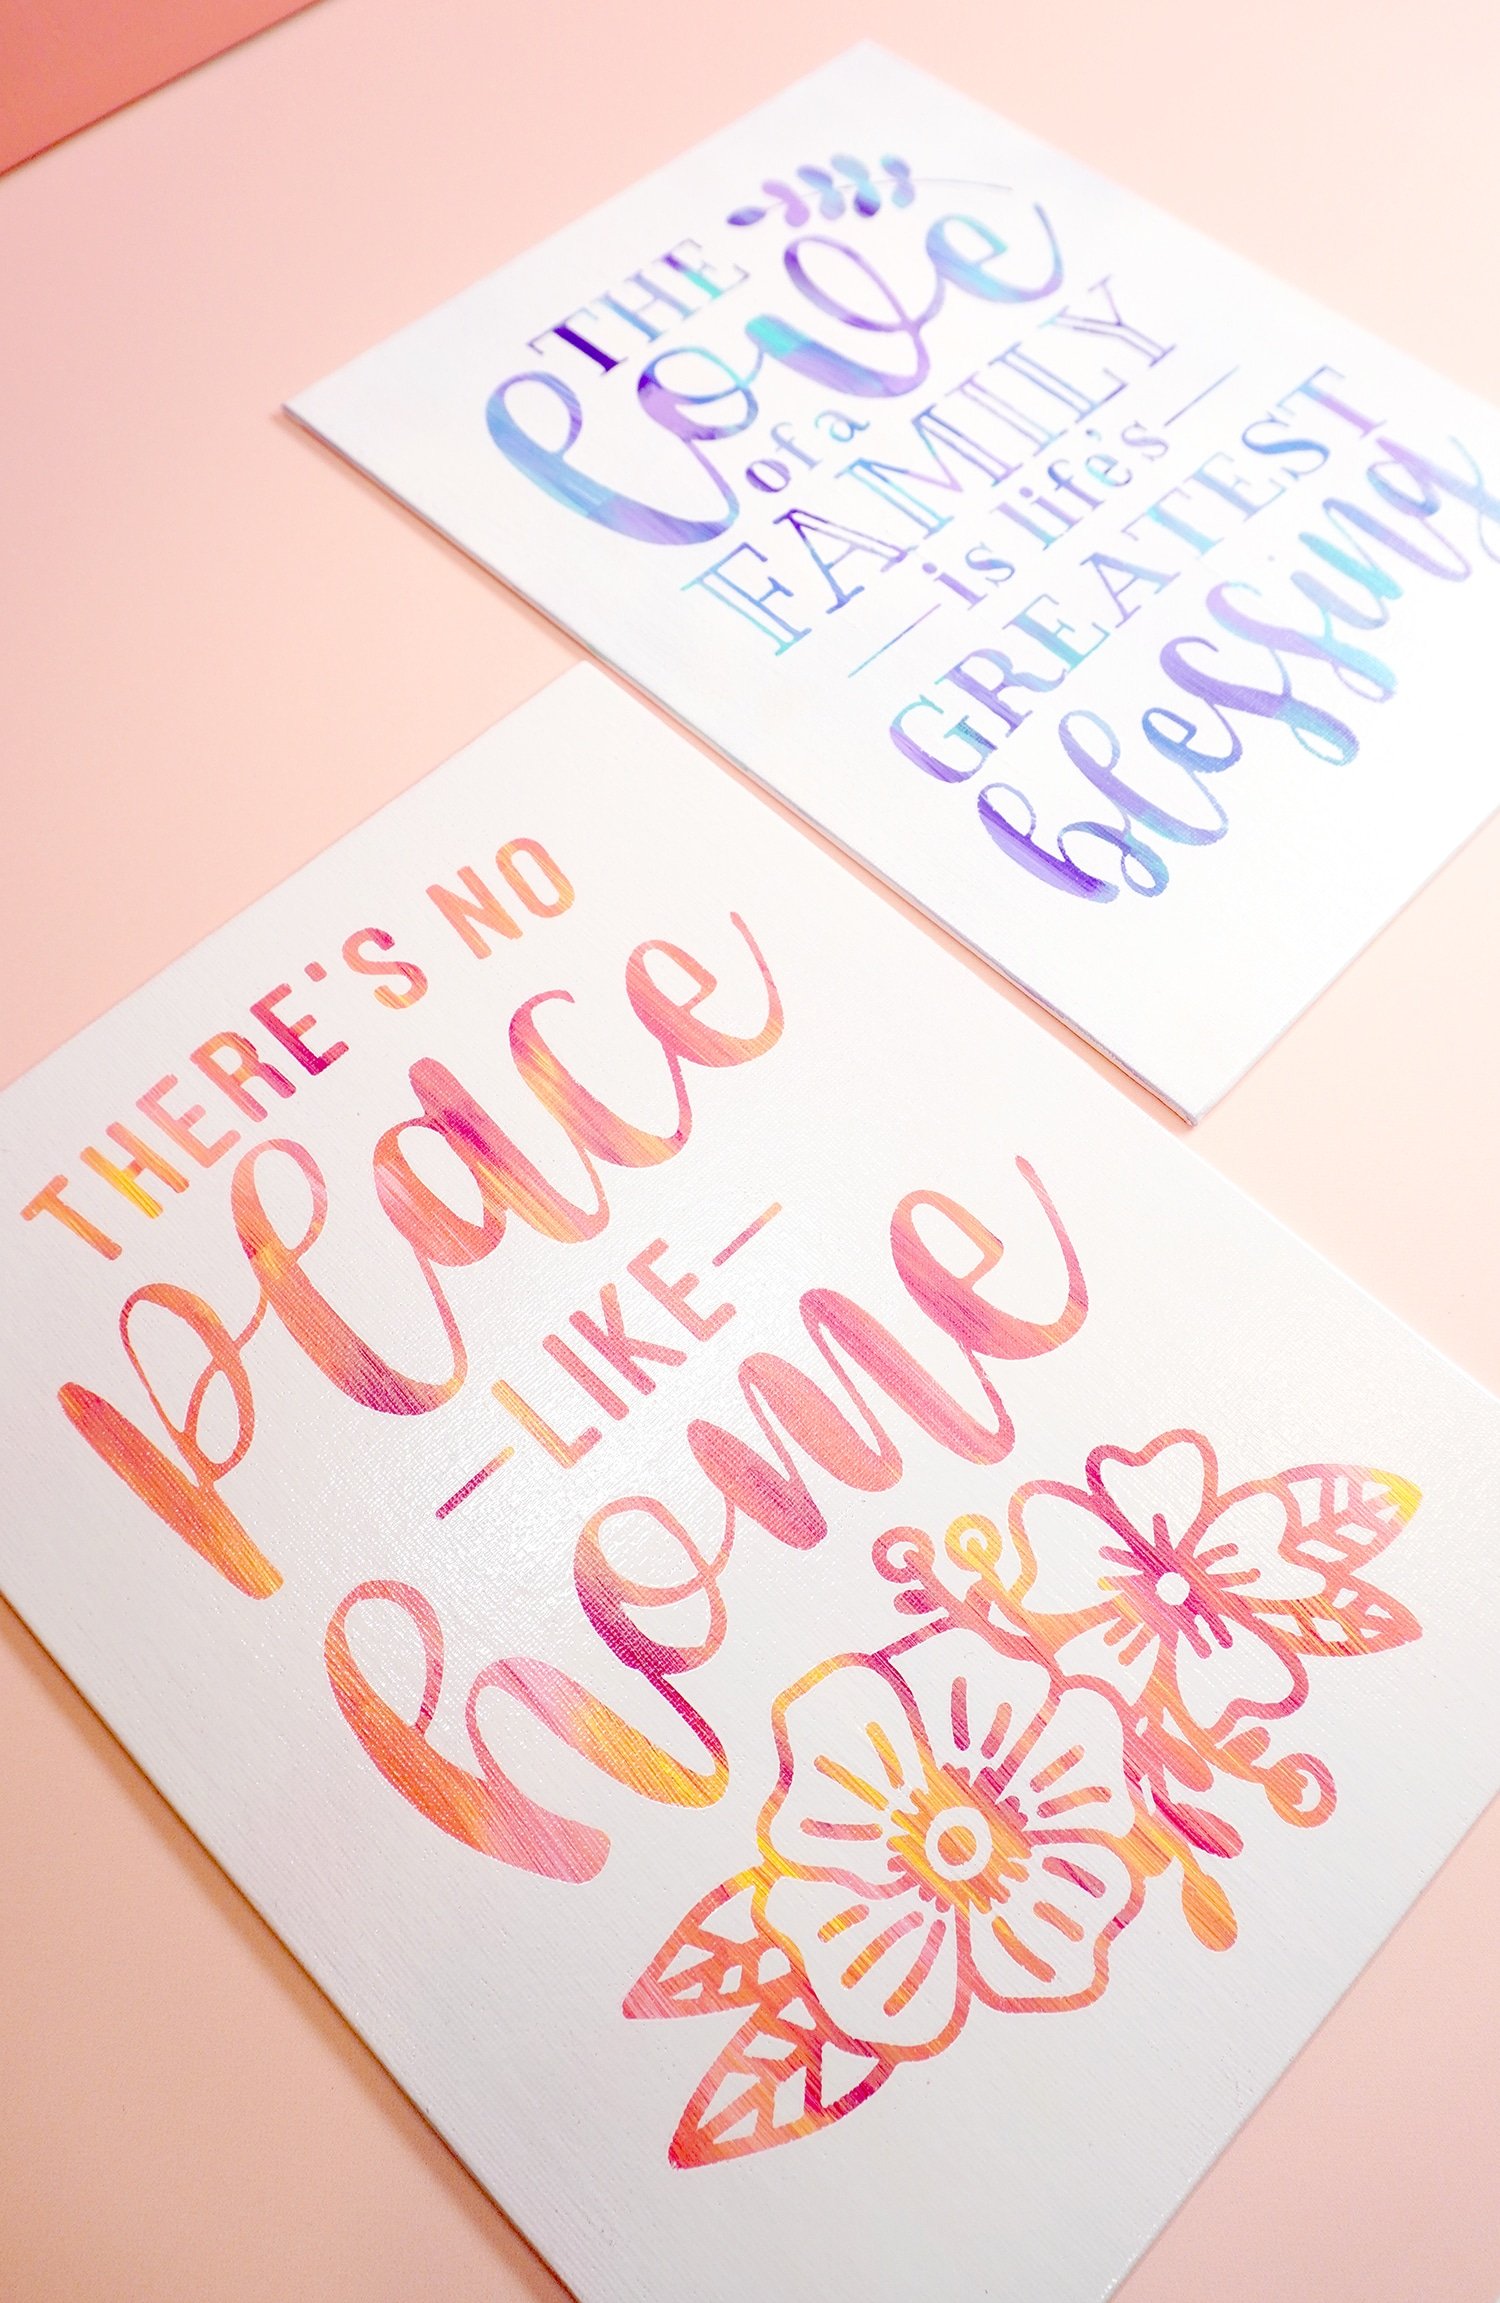
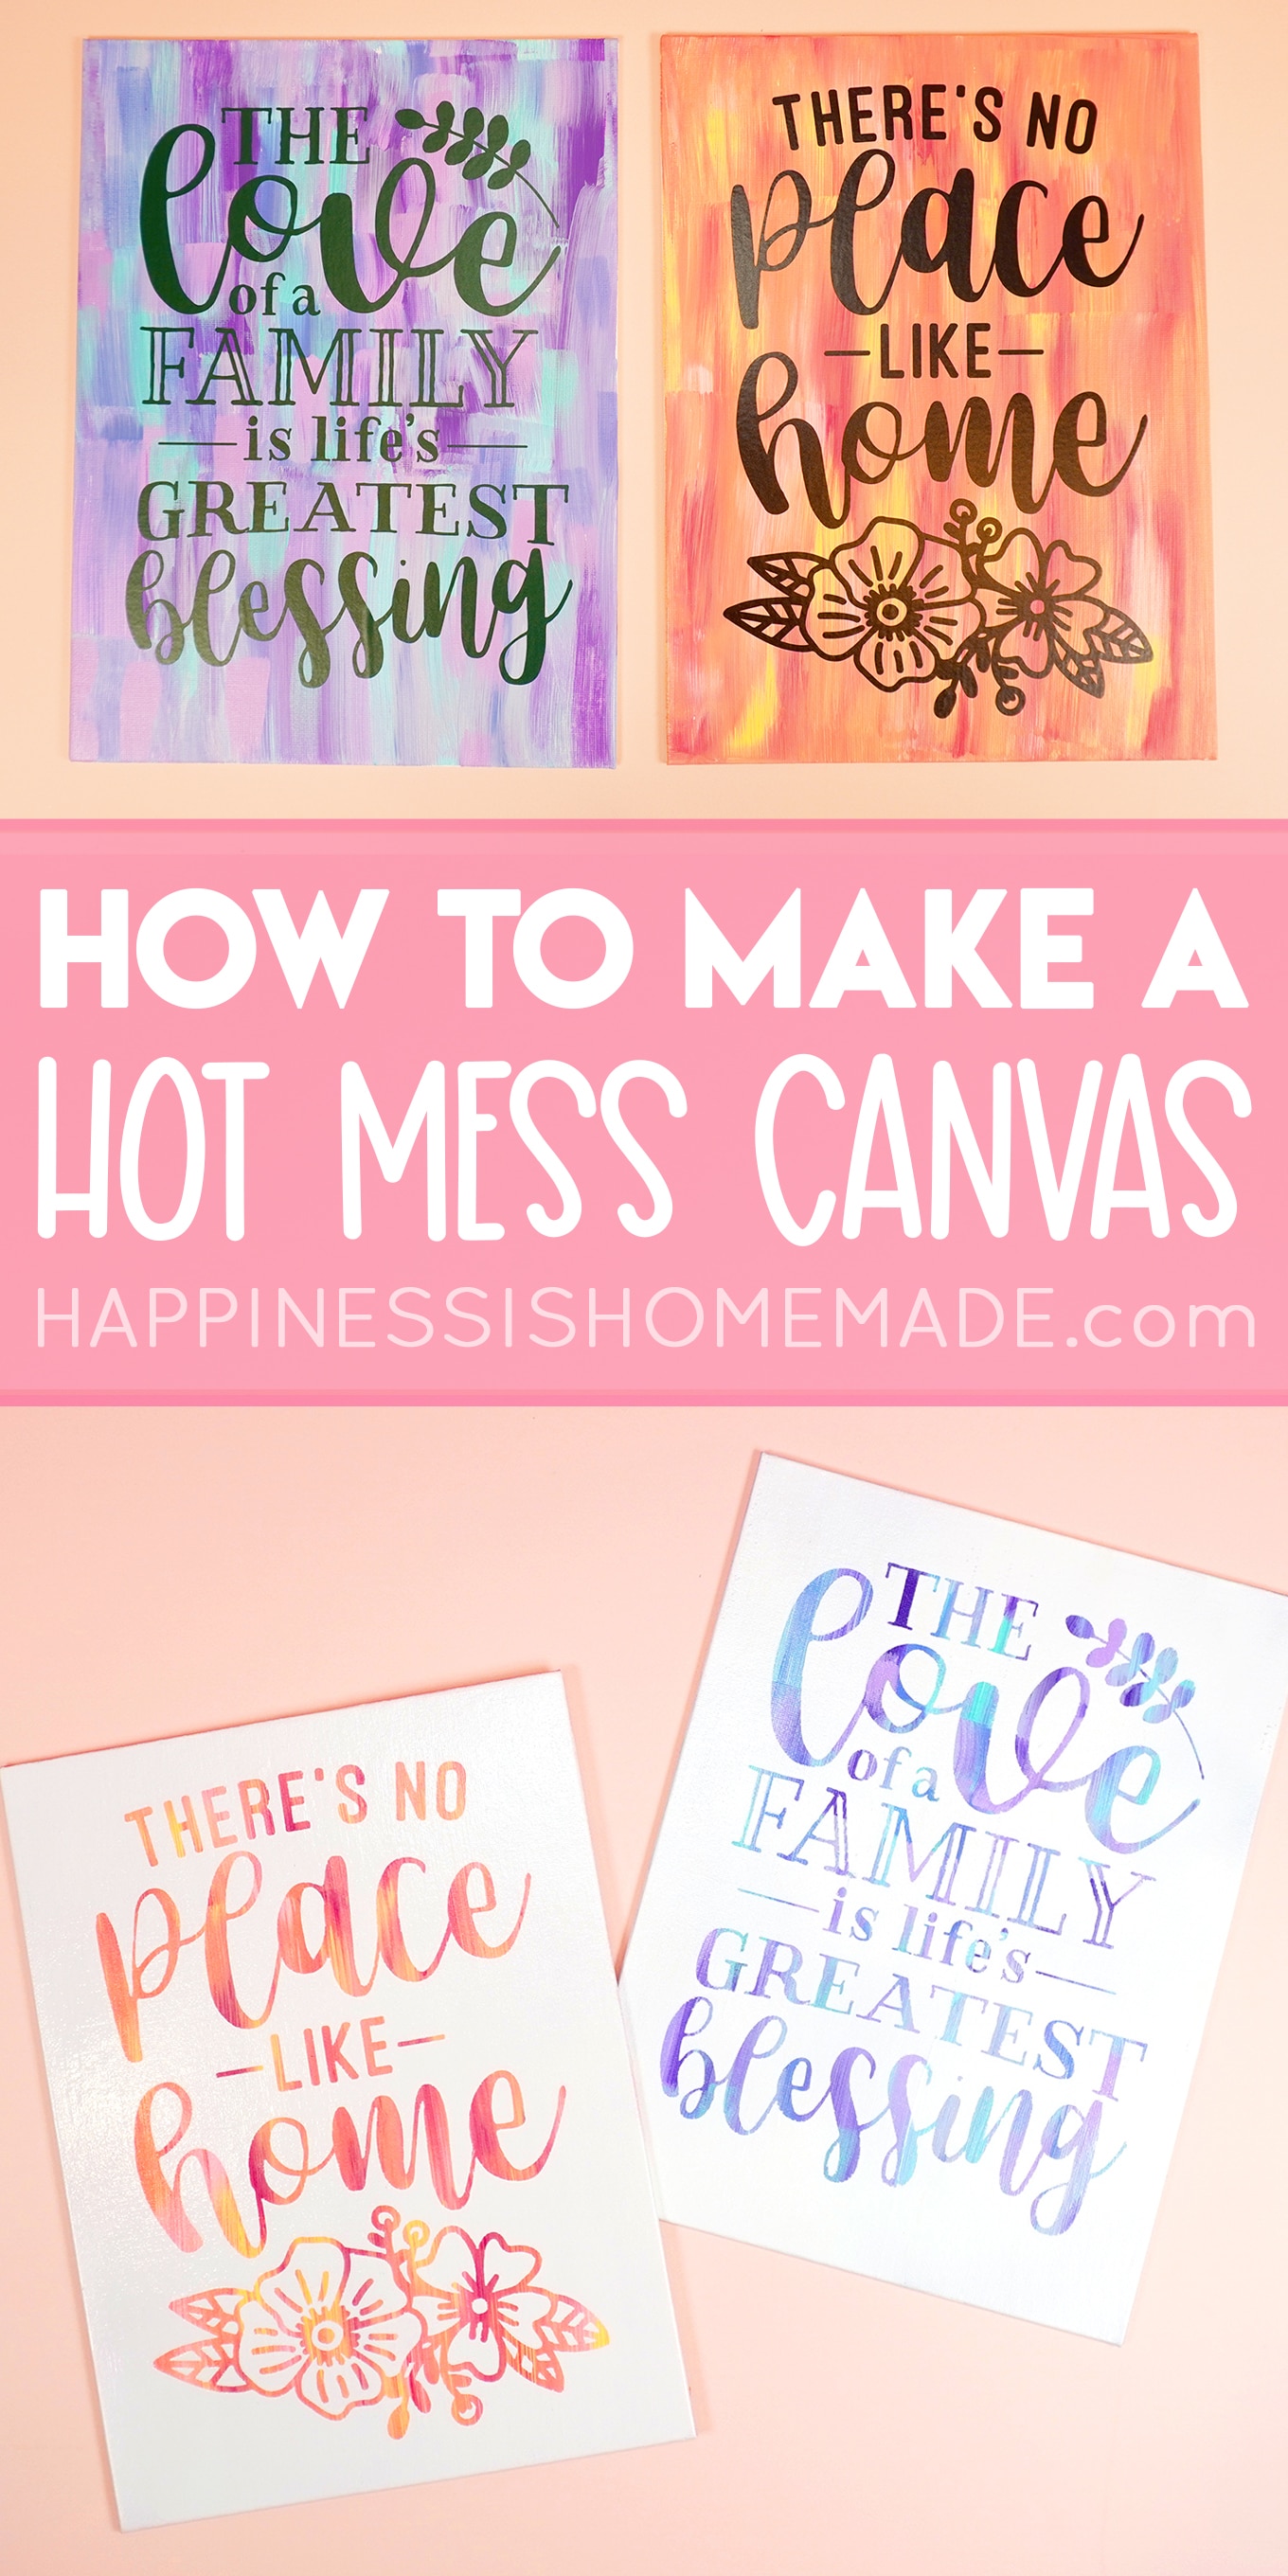
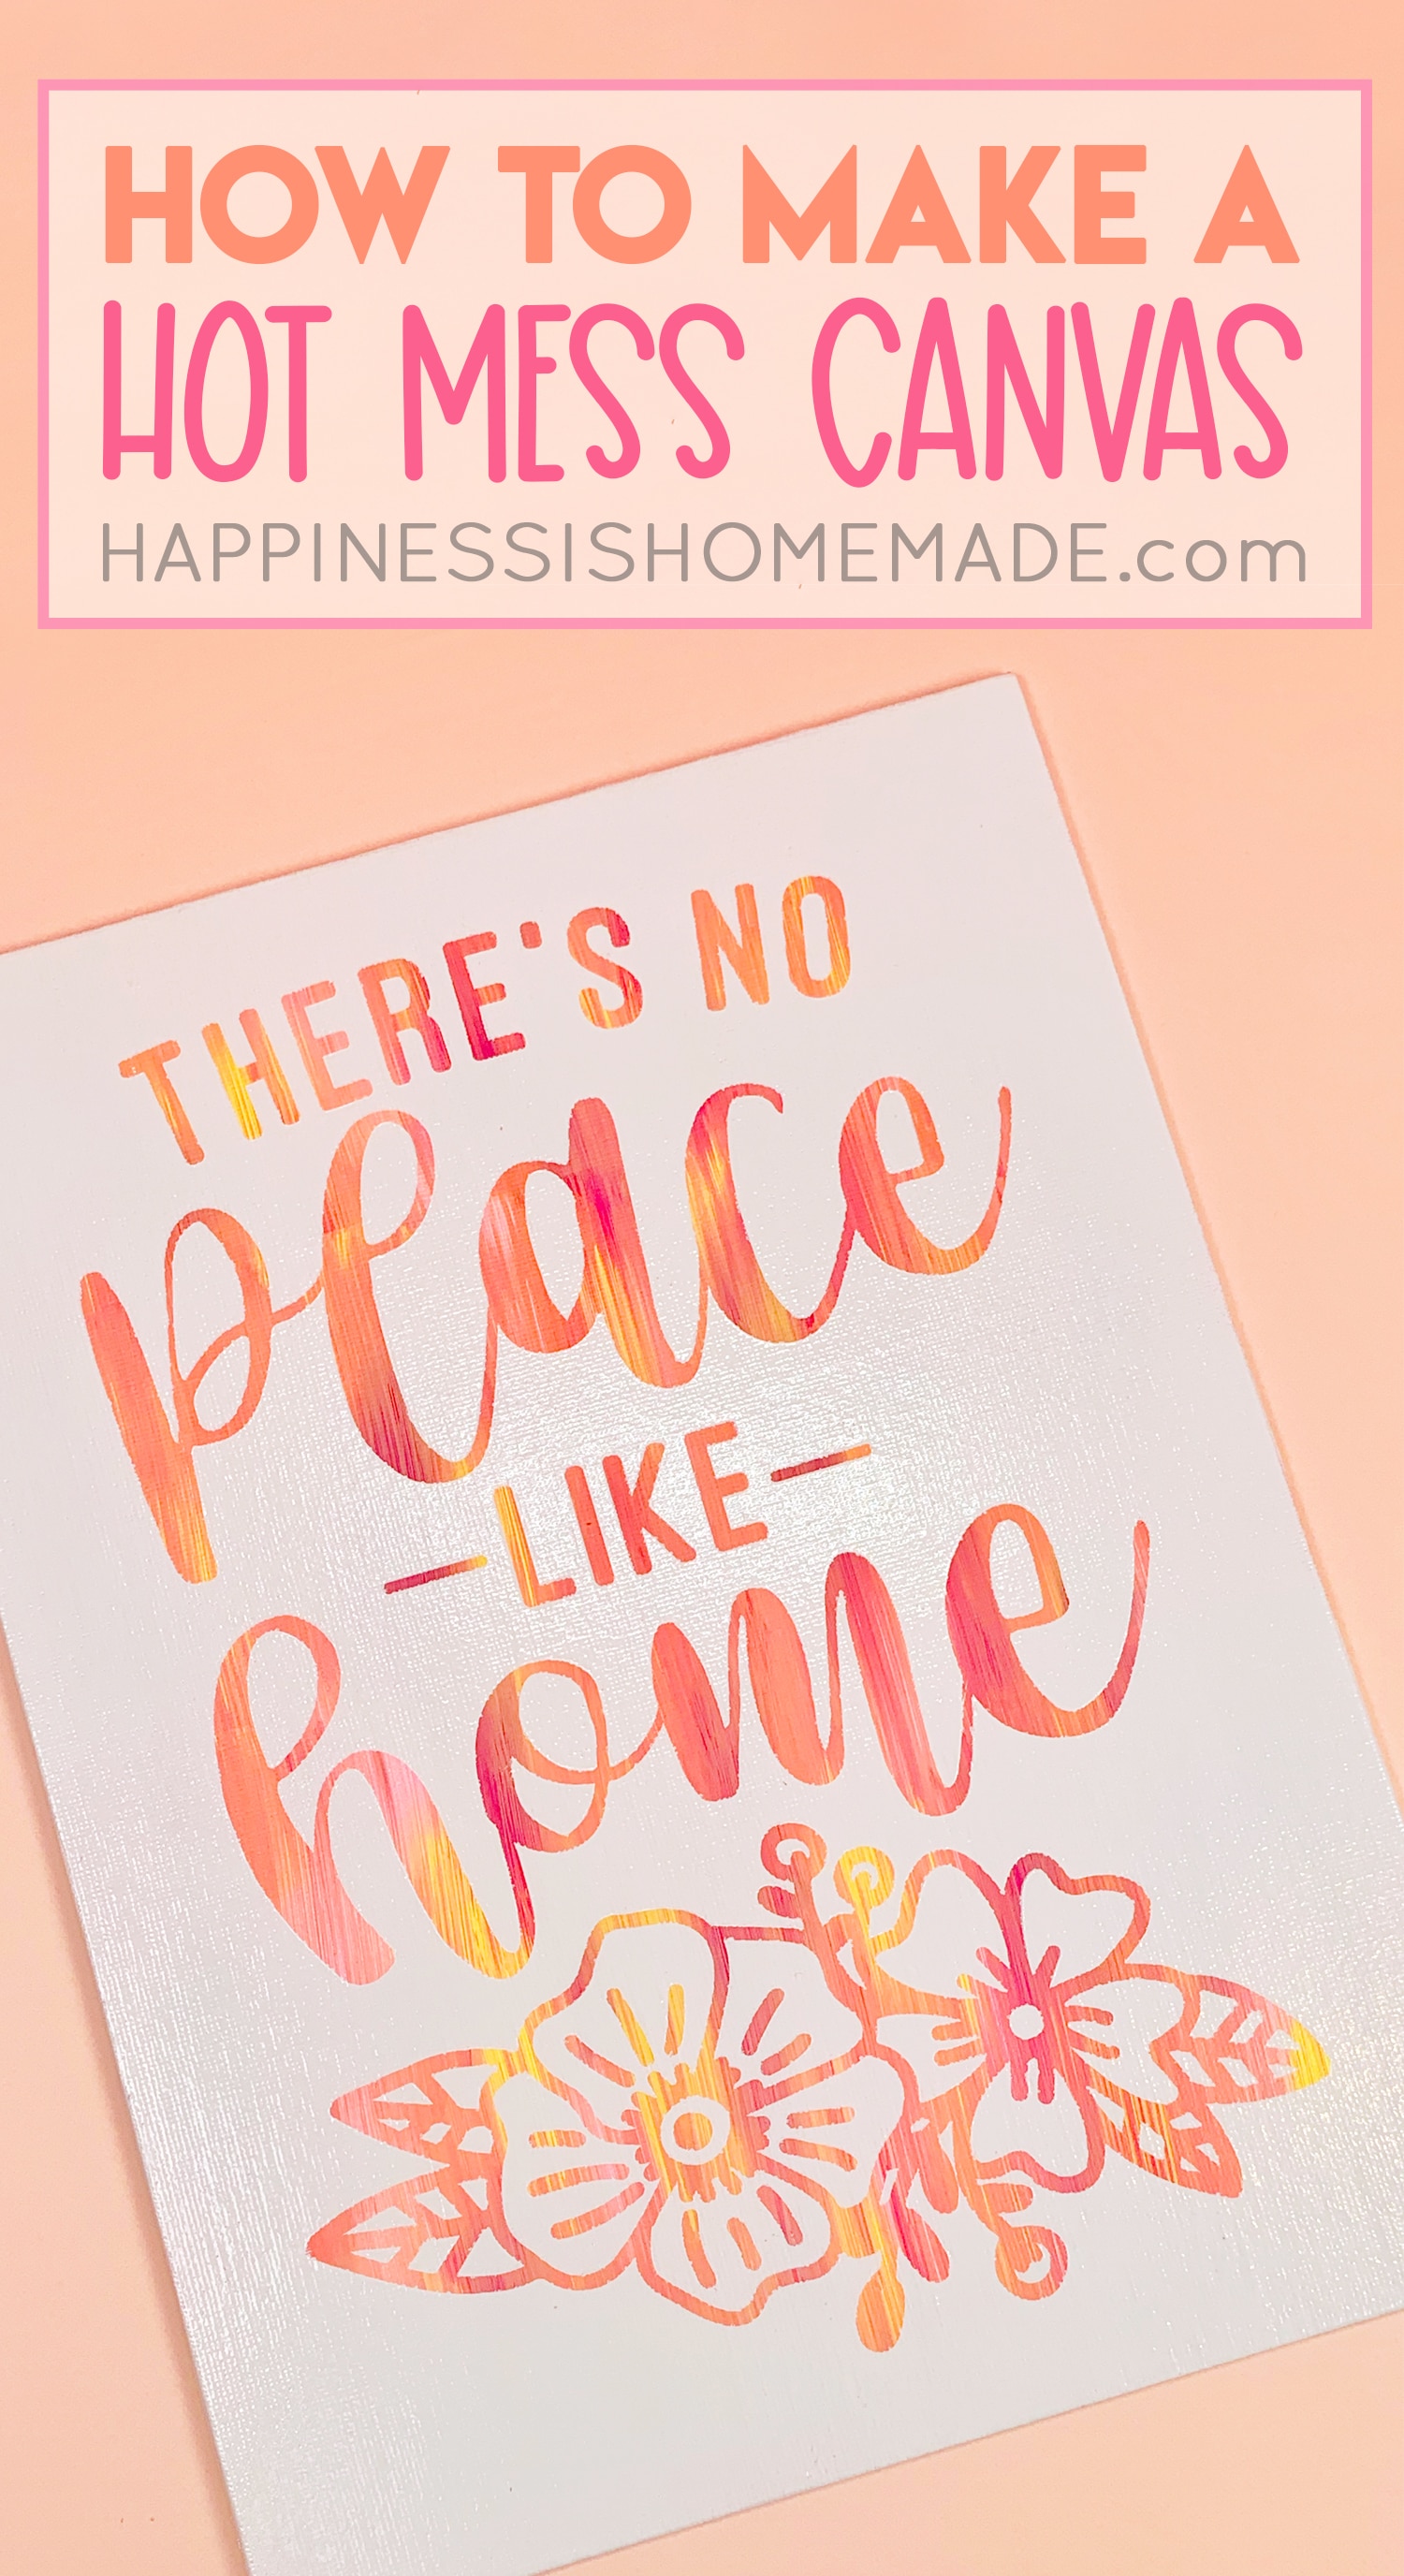
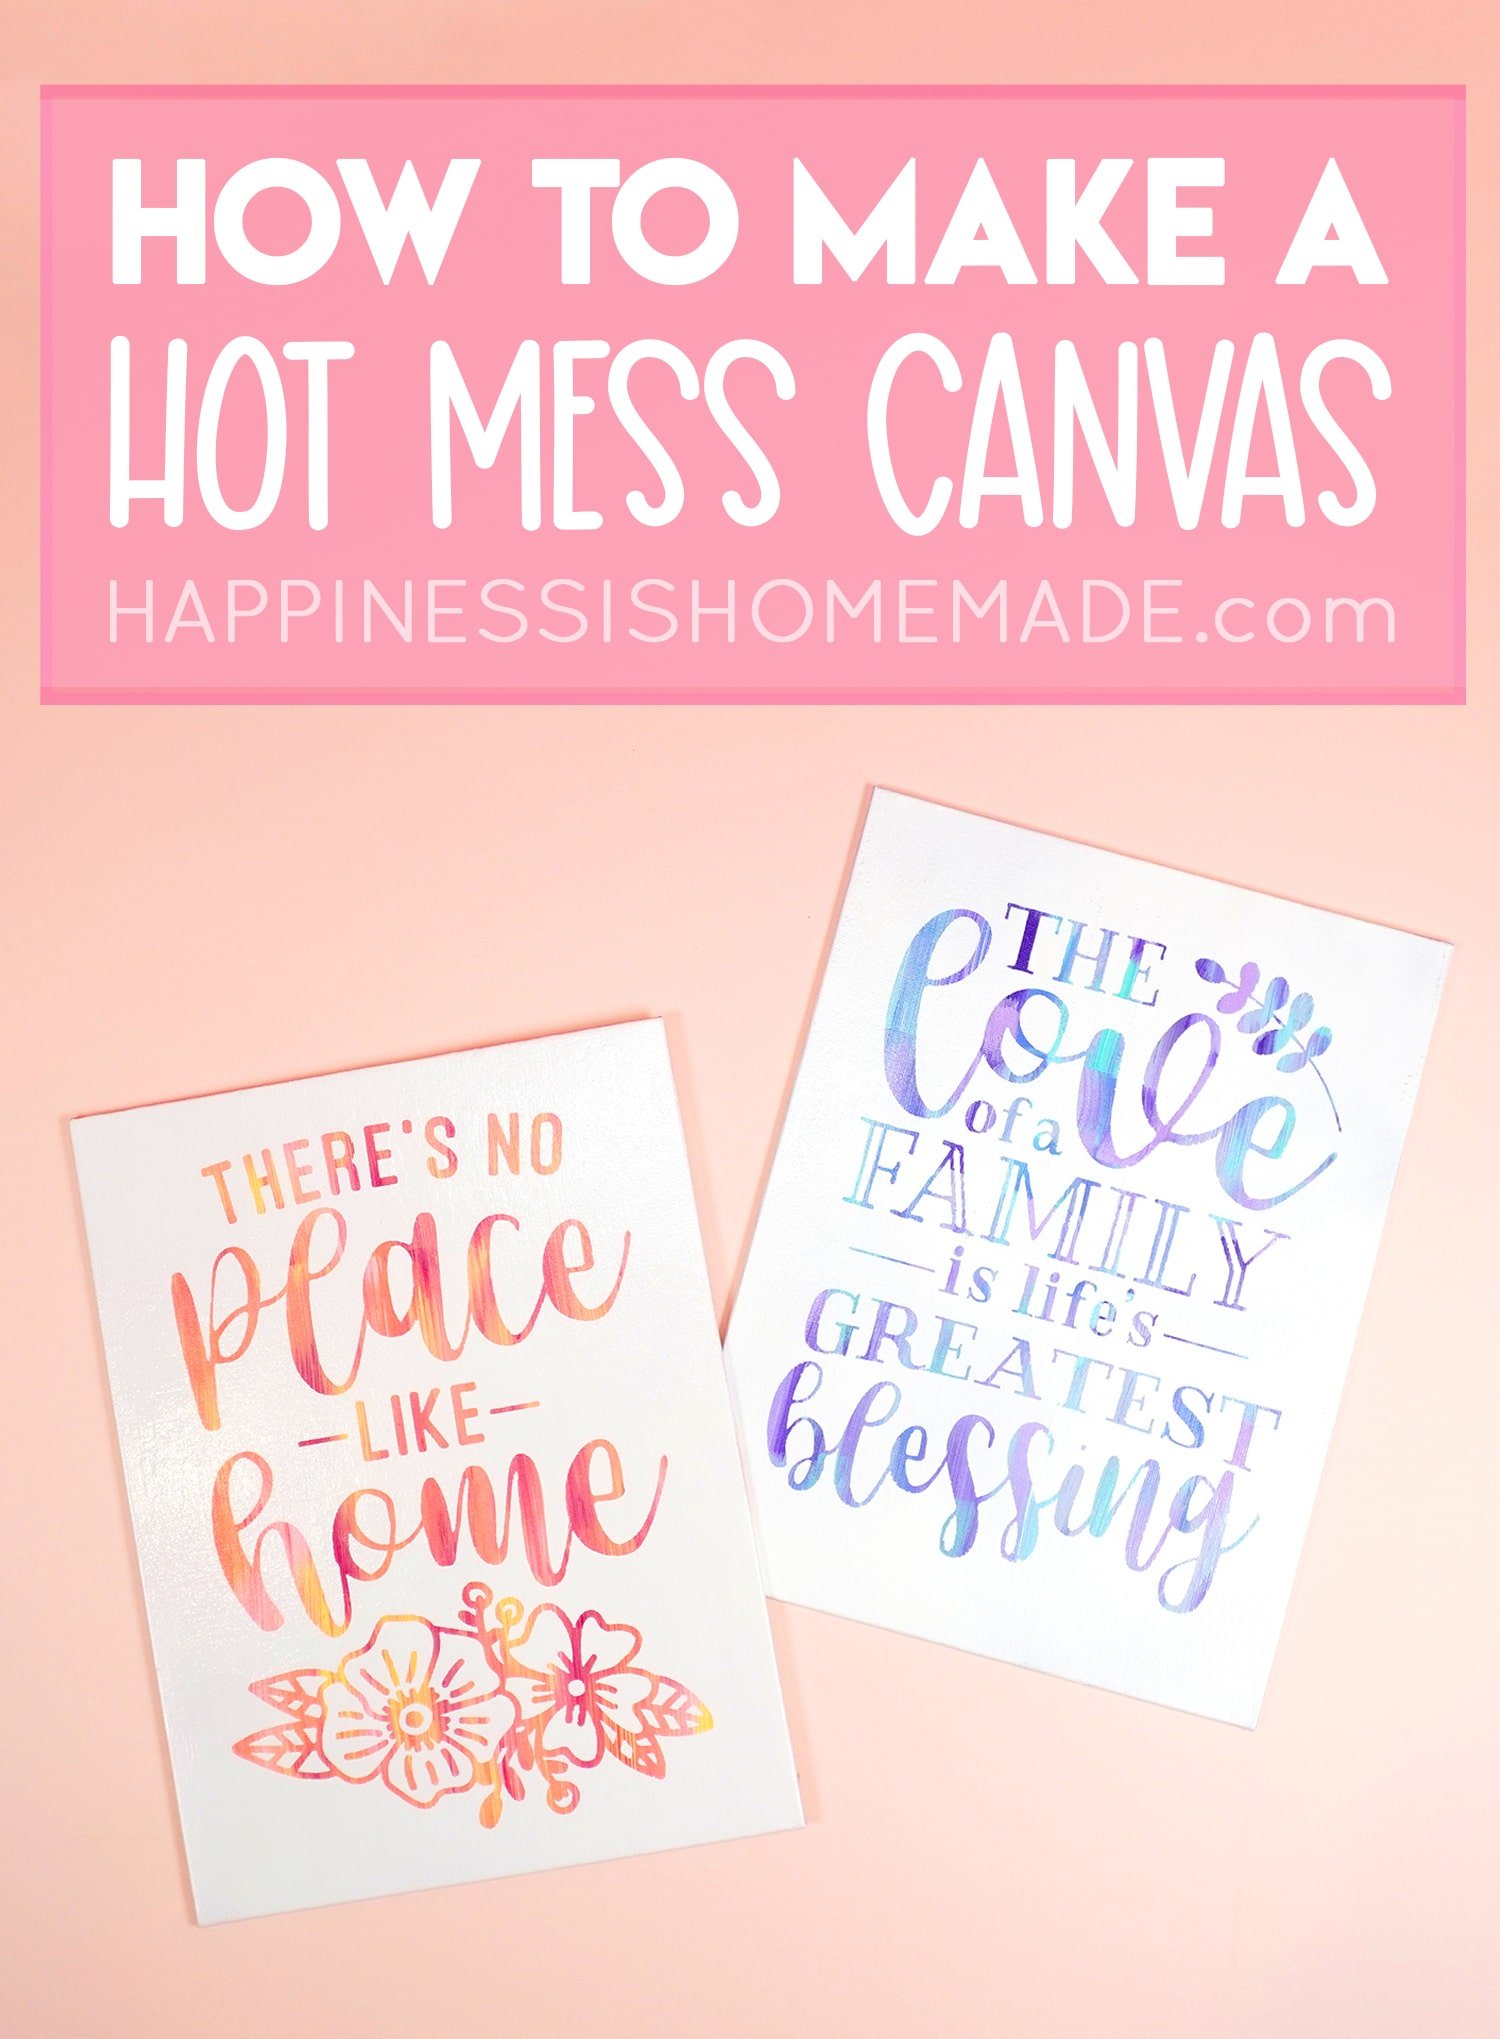
Choose an image or quote that you’d like for your artwork, and open that design in Cricut Design Space. This design shown here is a combination of the “There’s No Place Like Home” SVG by Caluya Studio and Flowers from the Cricut Designs Space image library (search for image #M8EEDBFB). I also used the “Love of a Family is Life’s Greatest Blessing” SVG from Caluya Studio for my second canvas.
If you need help uploading your SVG, click here to learn How to Upload an SVG File in Cricut Design Space!
Size the design to fit your canvas and click the green “Make It” button in the upper right corner of the screen.
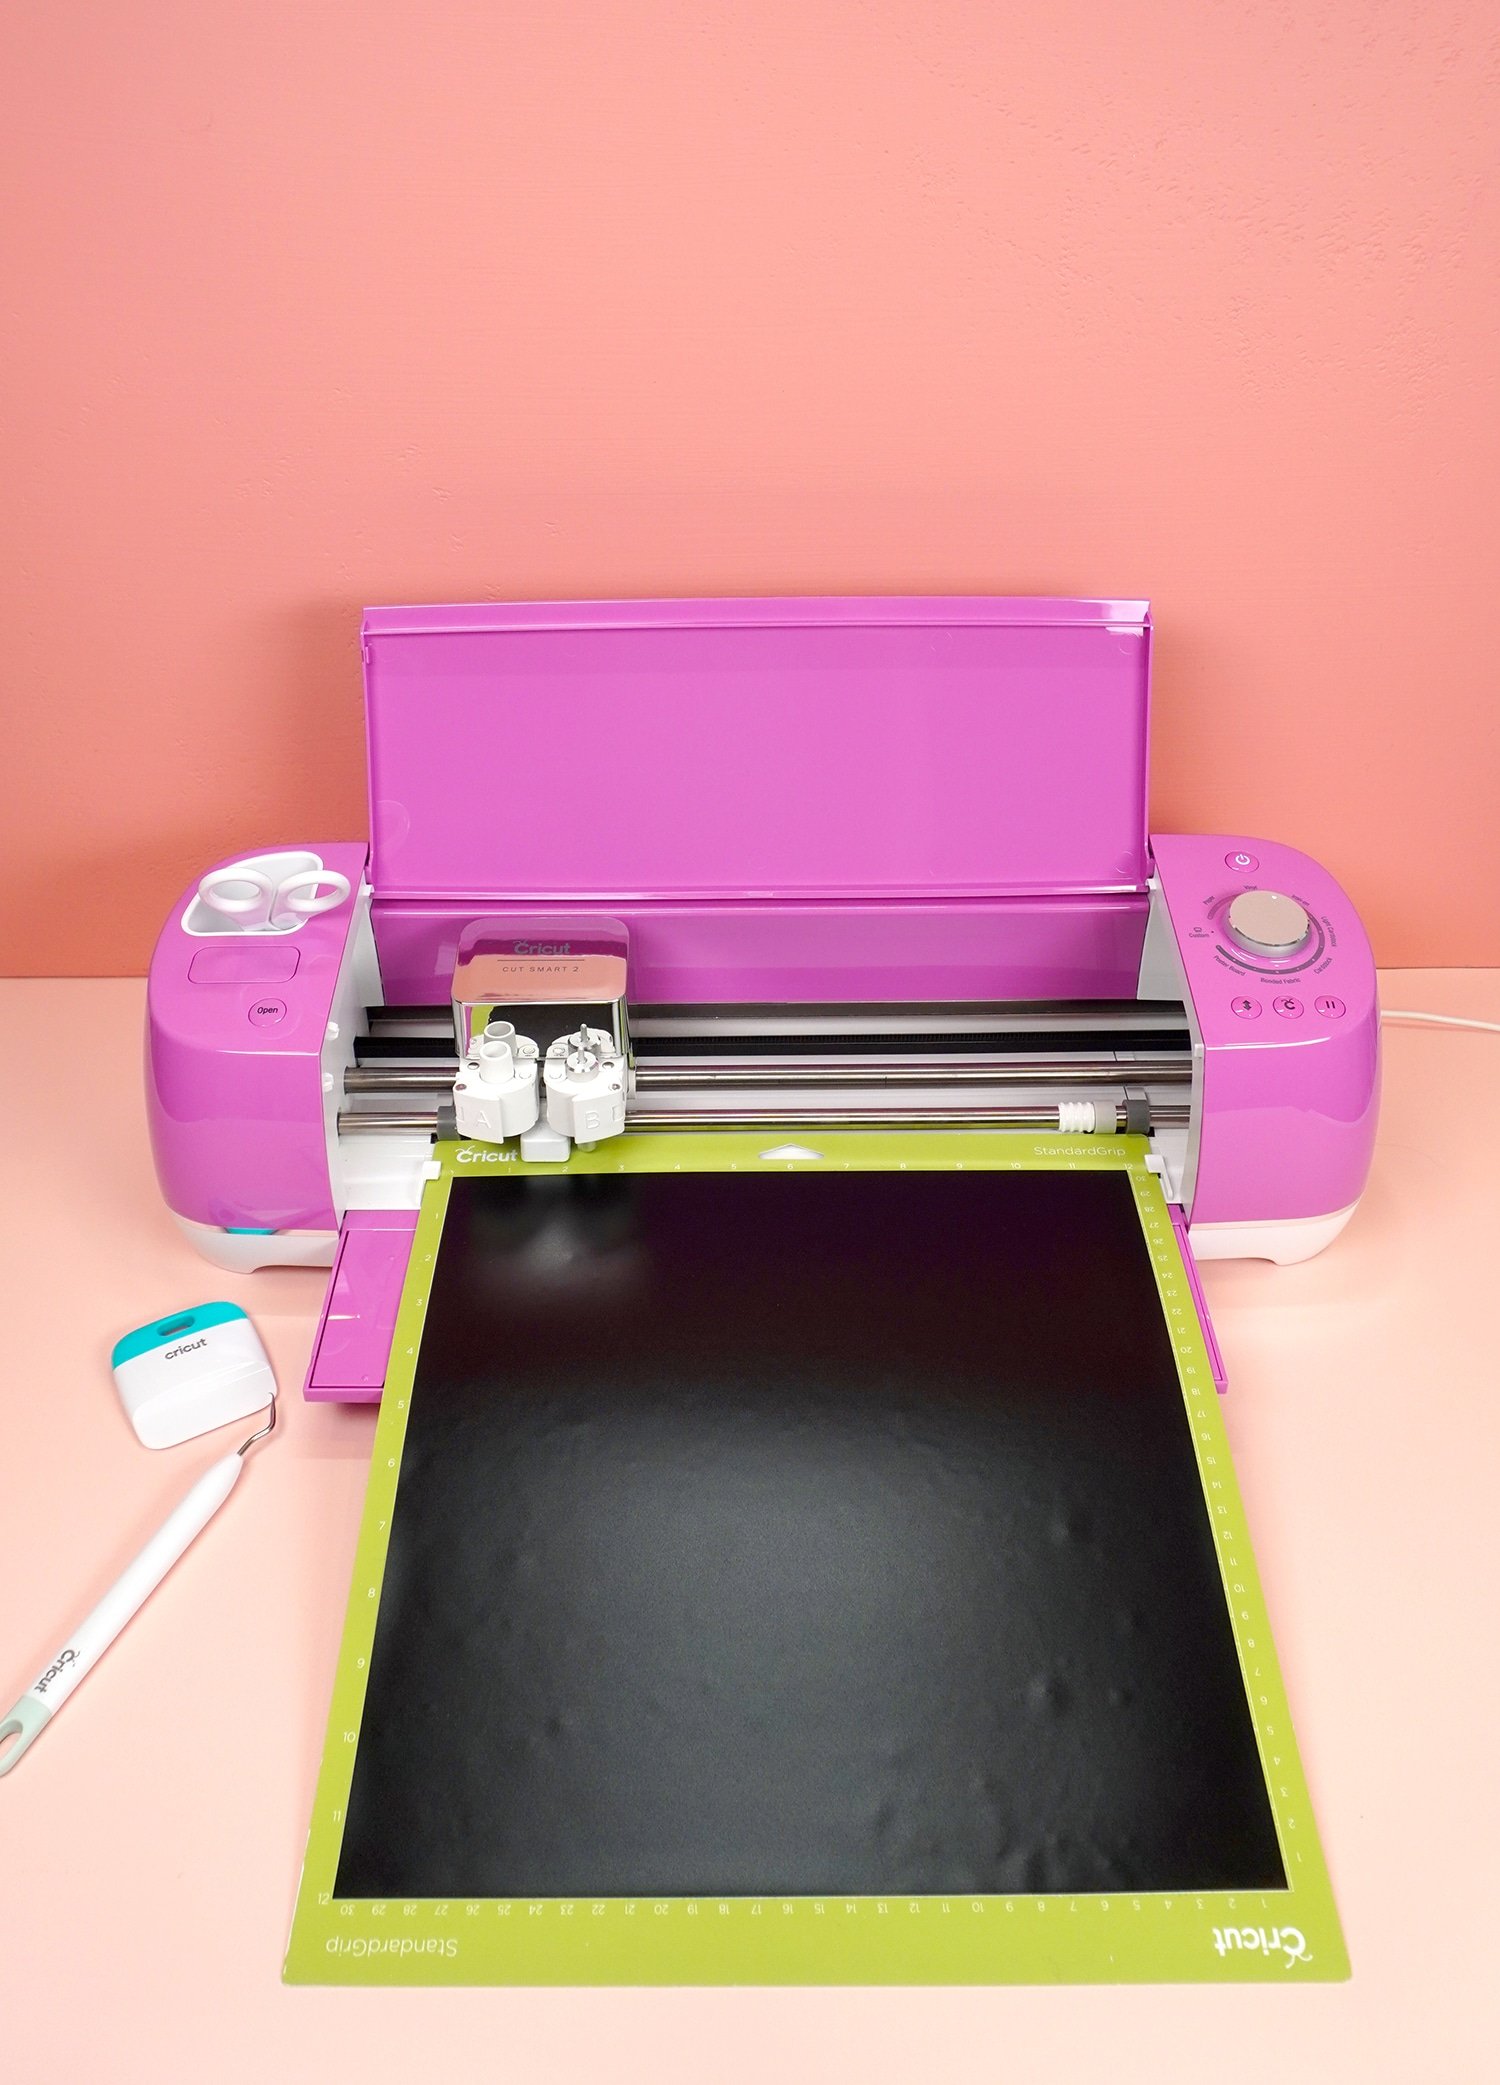
Use your Cricut Explore Air 2 or Maker machine to cut your design from removable adhesive vinyl.
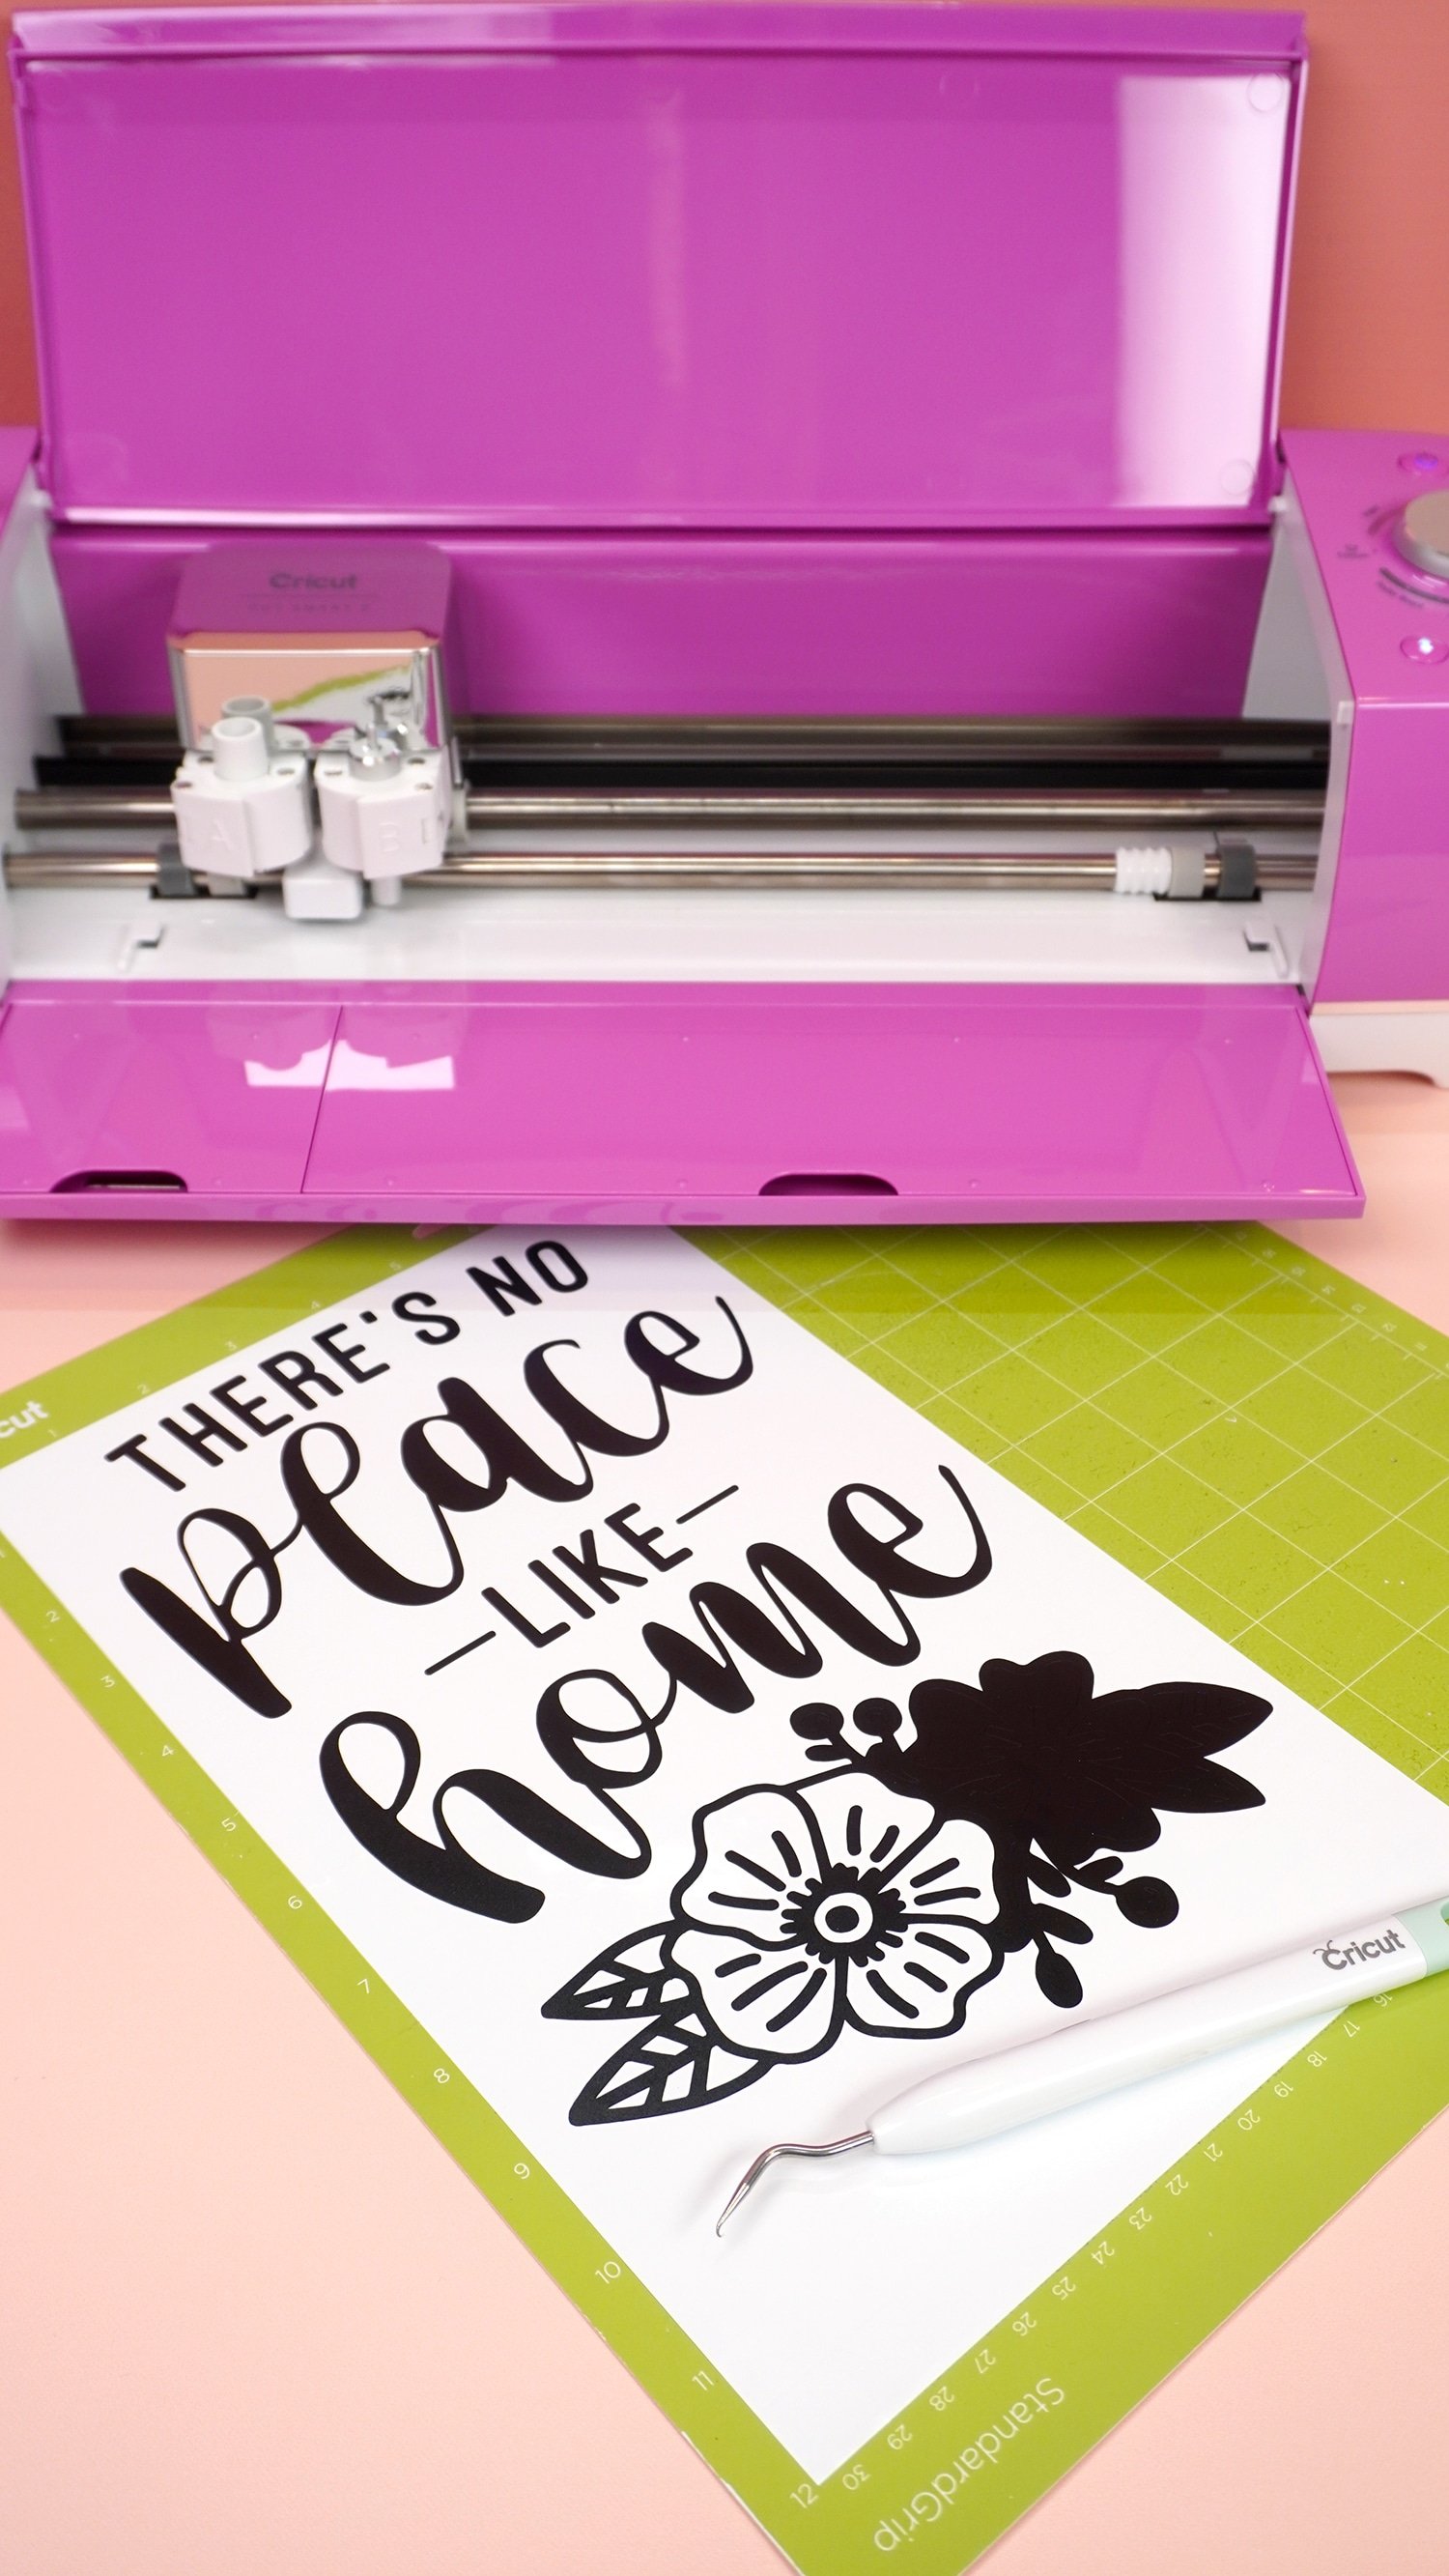
Use your weeding tools to weed the excess vinyl from your design. I love my Hooked Weeding Tool for this job!
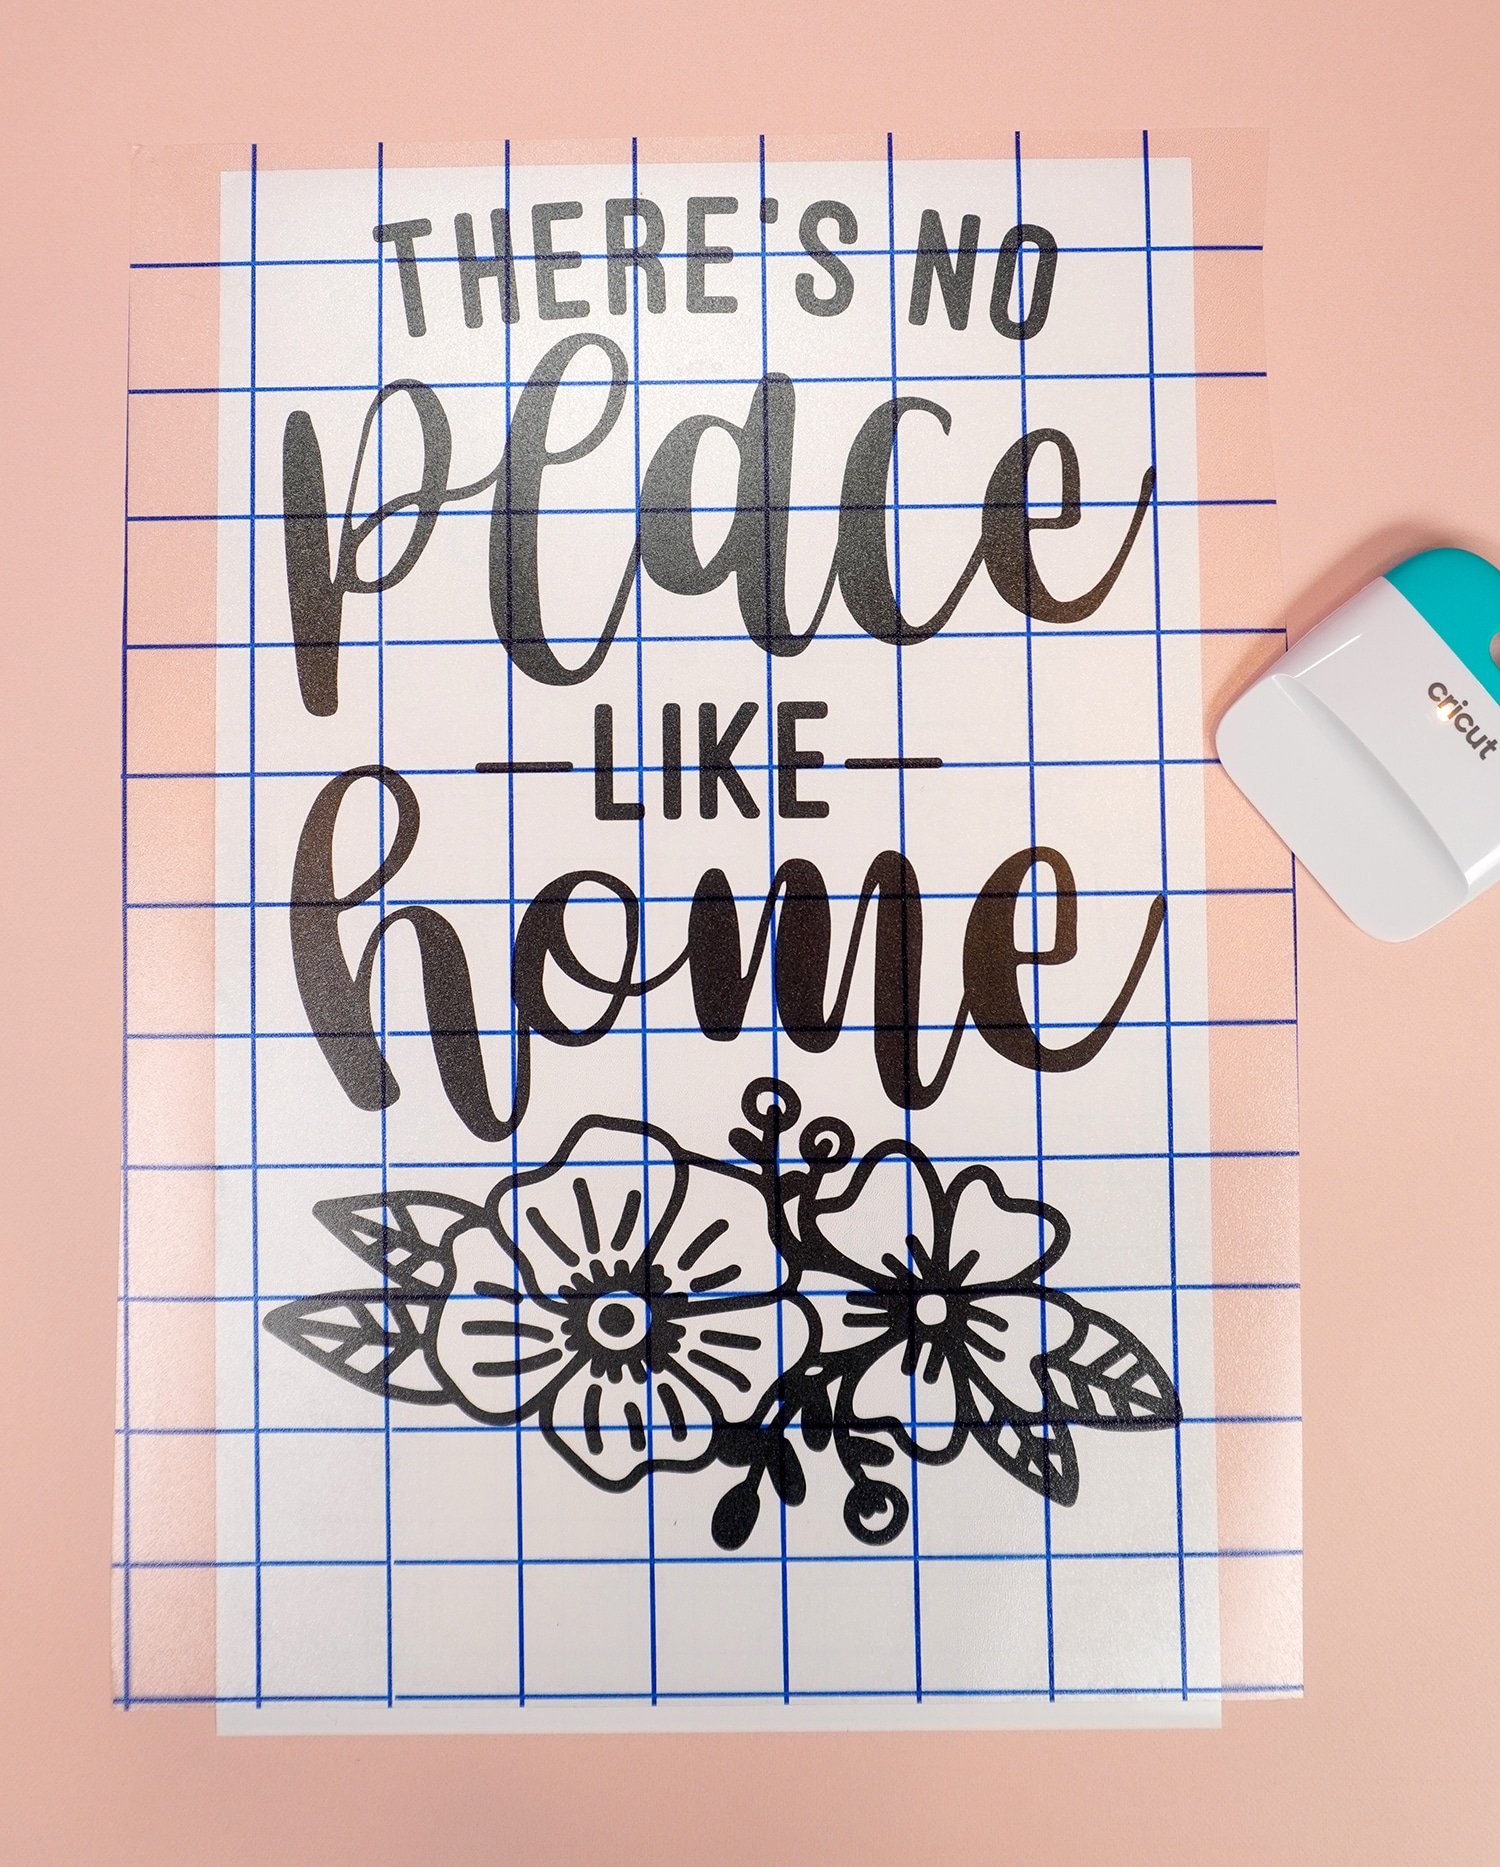
Cut a piece of transfer tape that’s slightly larger than your design. Apply it over the top of the vinyl and use the scraper tool to gently burnish the surface.
Remove the paper backing – the vinyl design with now be stuck to the transfer tape and the back side will be sticky.
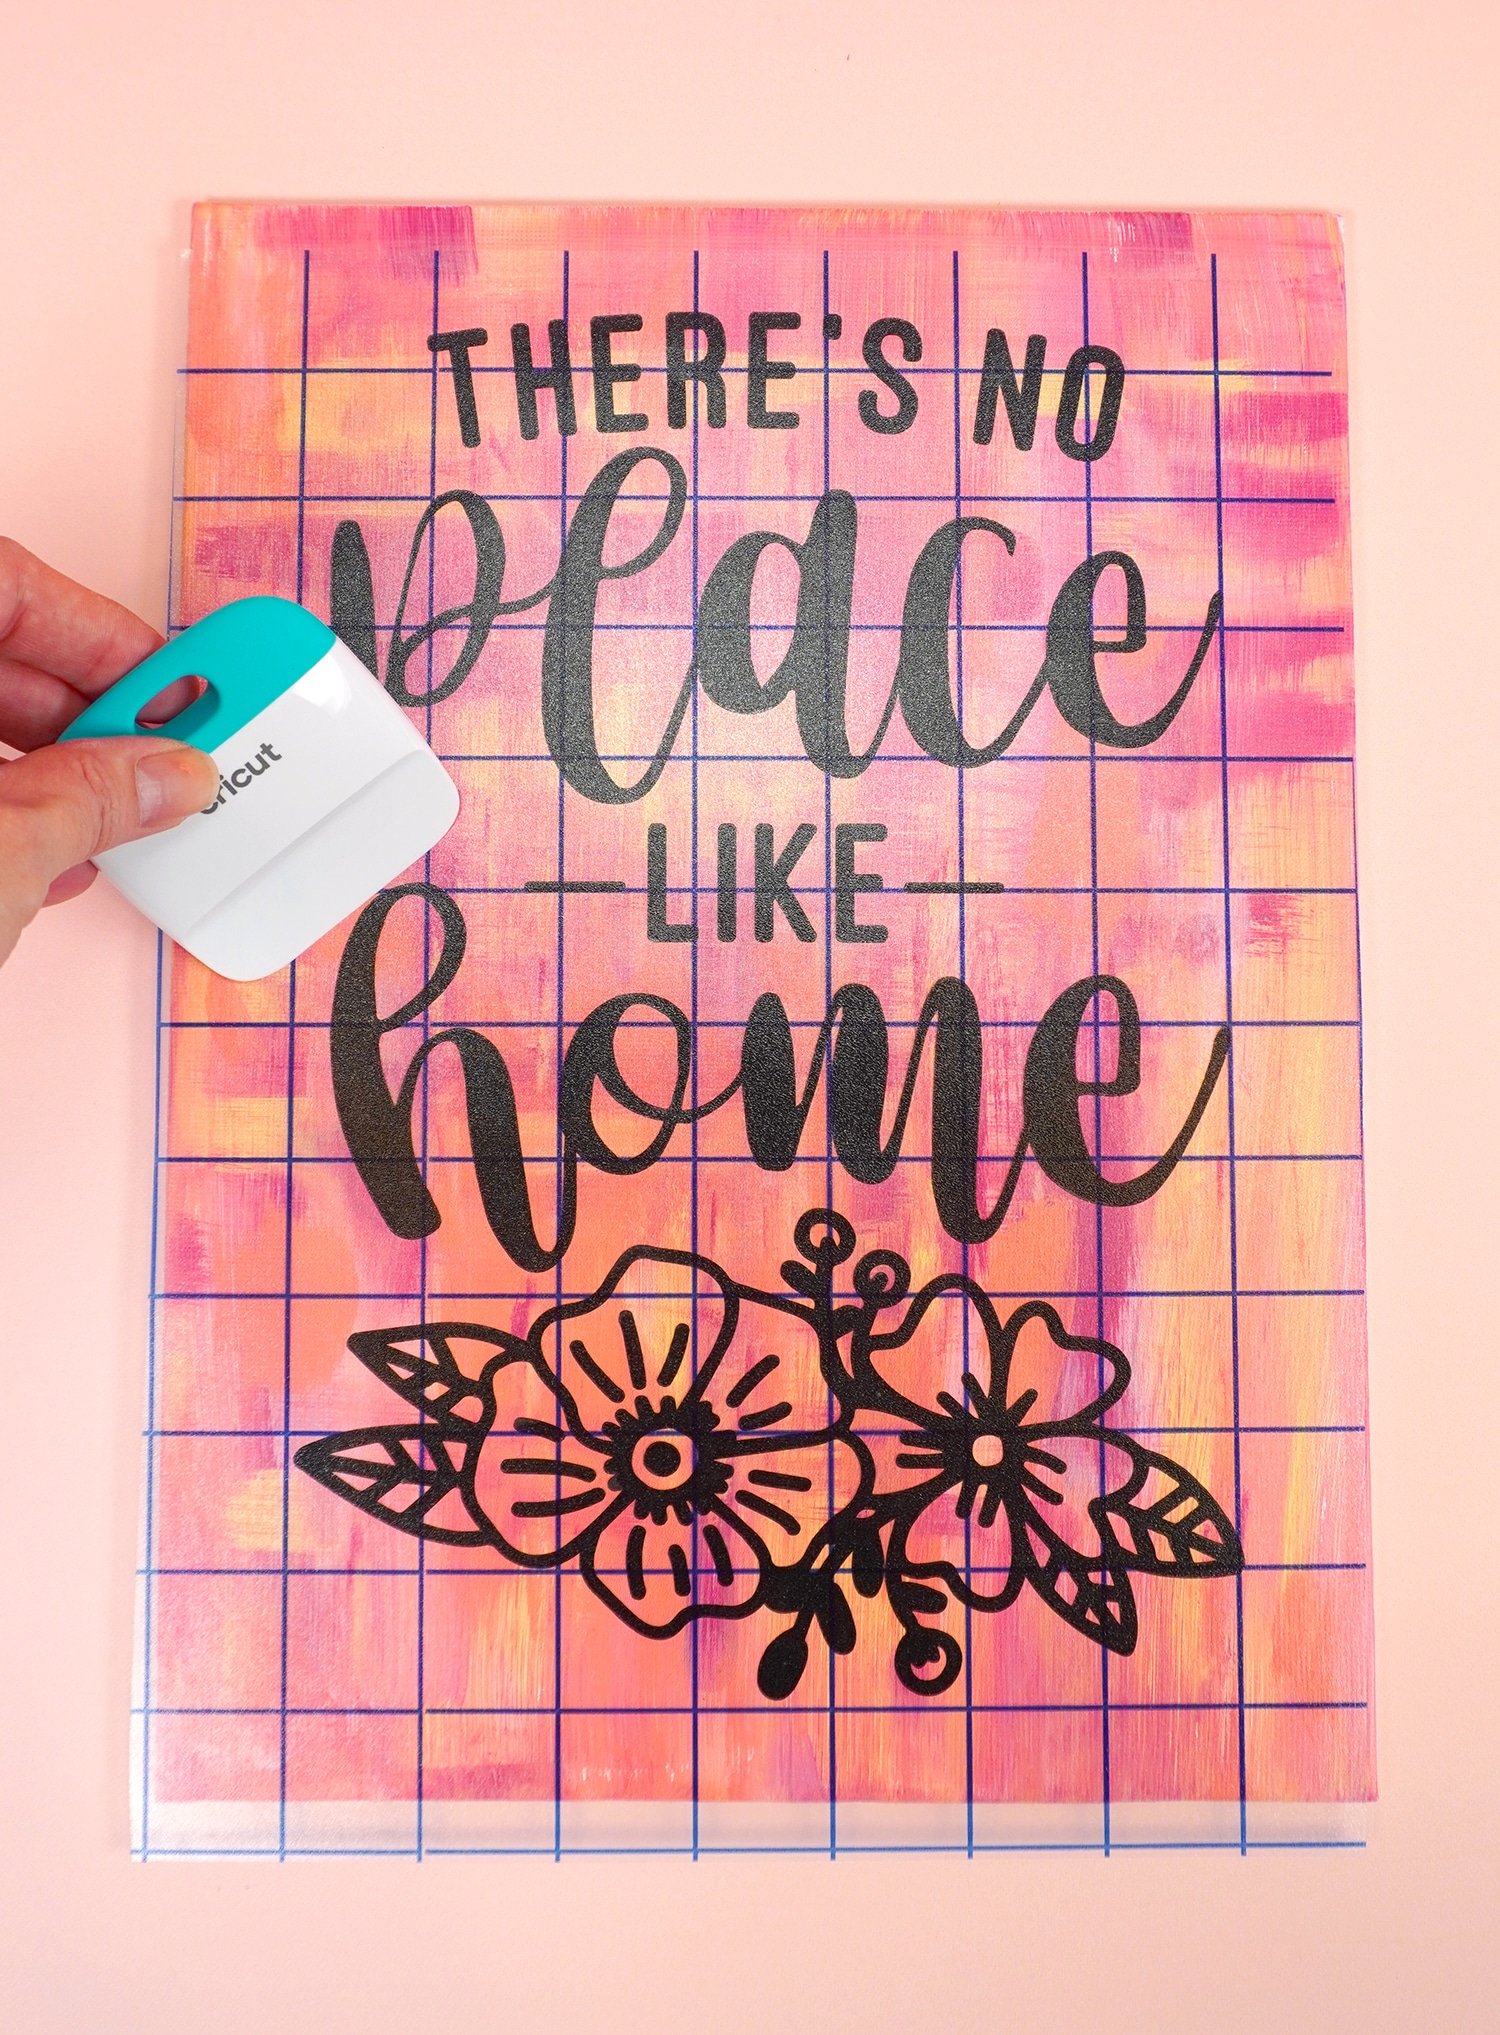
Place the transfer tape and vinyl on top of the hot mess painted canvas. Use the scraper tool to firmly burnish the surface.
Note: using hard canvas panels makes this step easier, however, if you used a traditional wrapped canvas, place a book or other similar object underneath the canvas between the frame to give you a hard surface to burnish against.
Carefully peel back the transfer tape, leaving the vinyl design on the canvas. Cover the canvas with a piece of paper and use the scraper tool to burnish the design one more time and ensure that it completely adheres to the canvas.
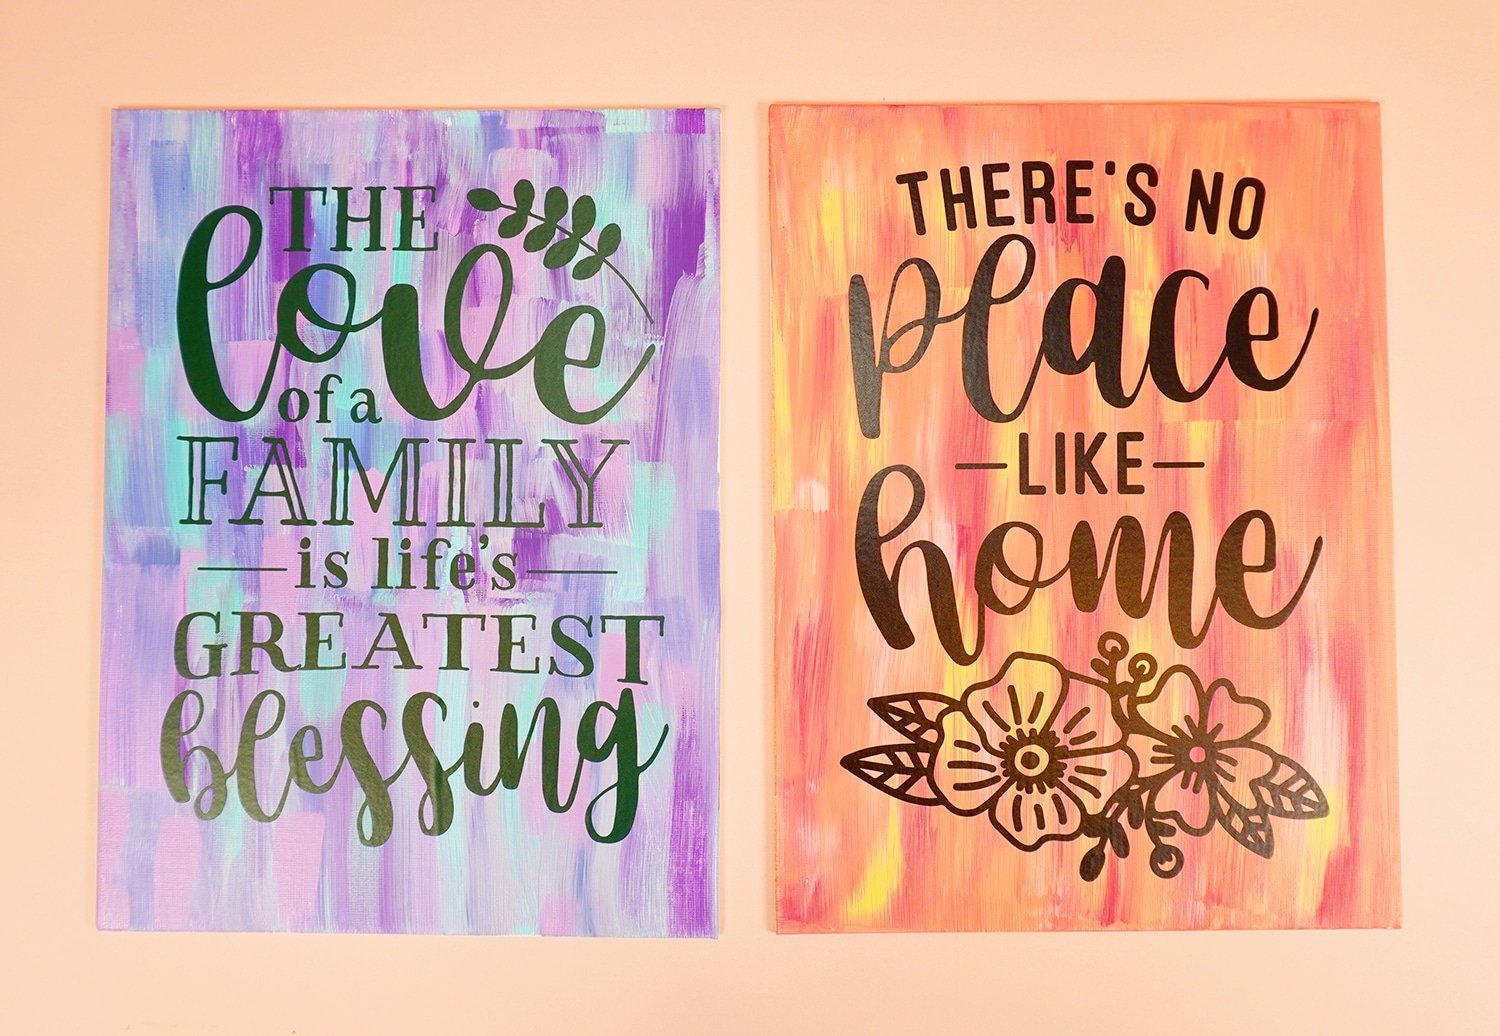
Repeat the process for any additional canvases. This is an excellent time to use some of your “off” colors of vinyl that you wouldn’t normally reach for! I have a TON of dark green vinyl that I used for my second canvas that I have had sitting around for a VERY long time!
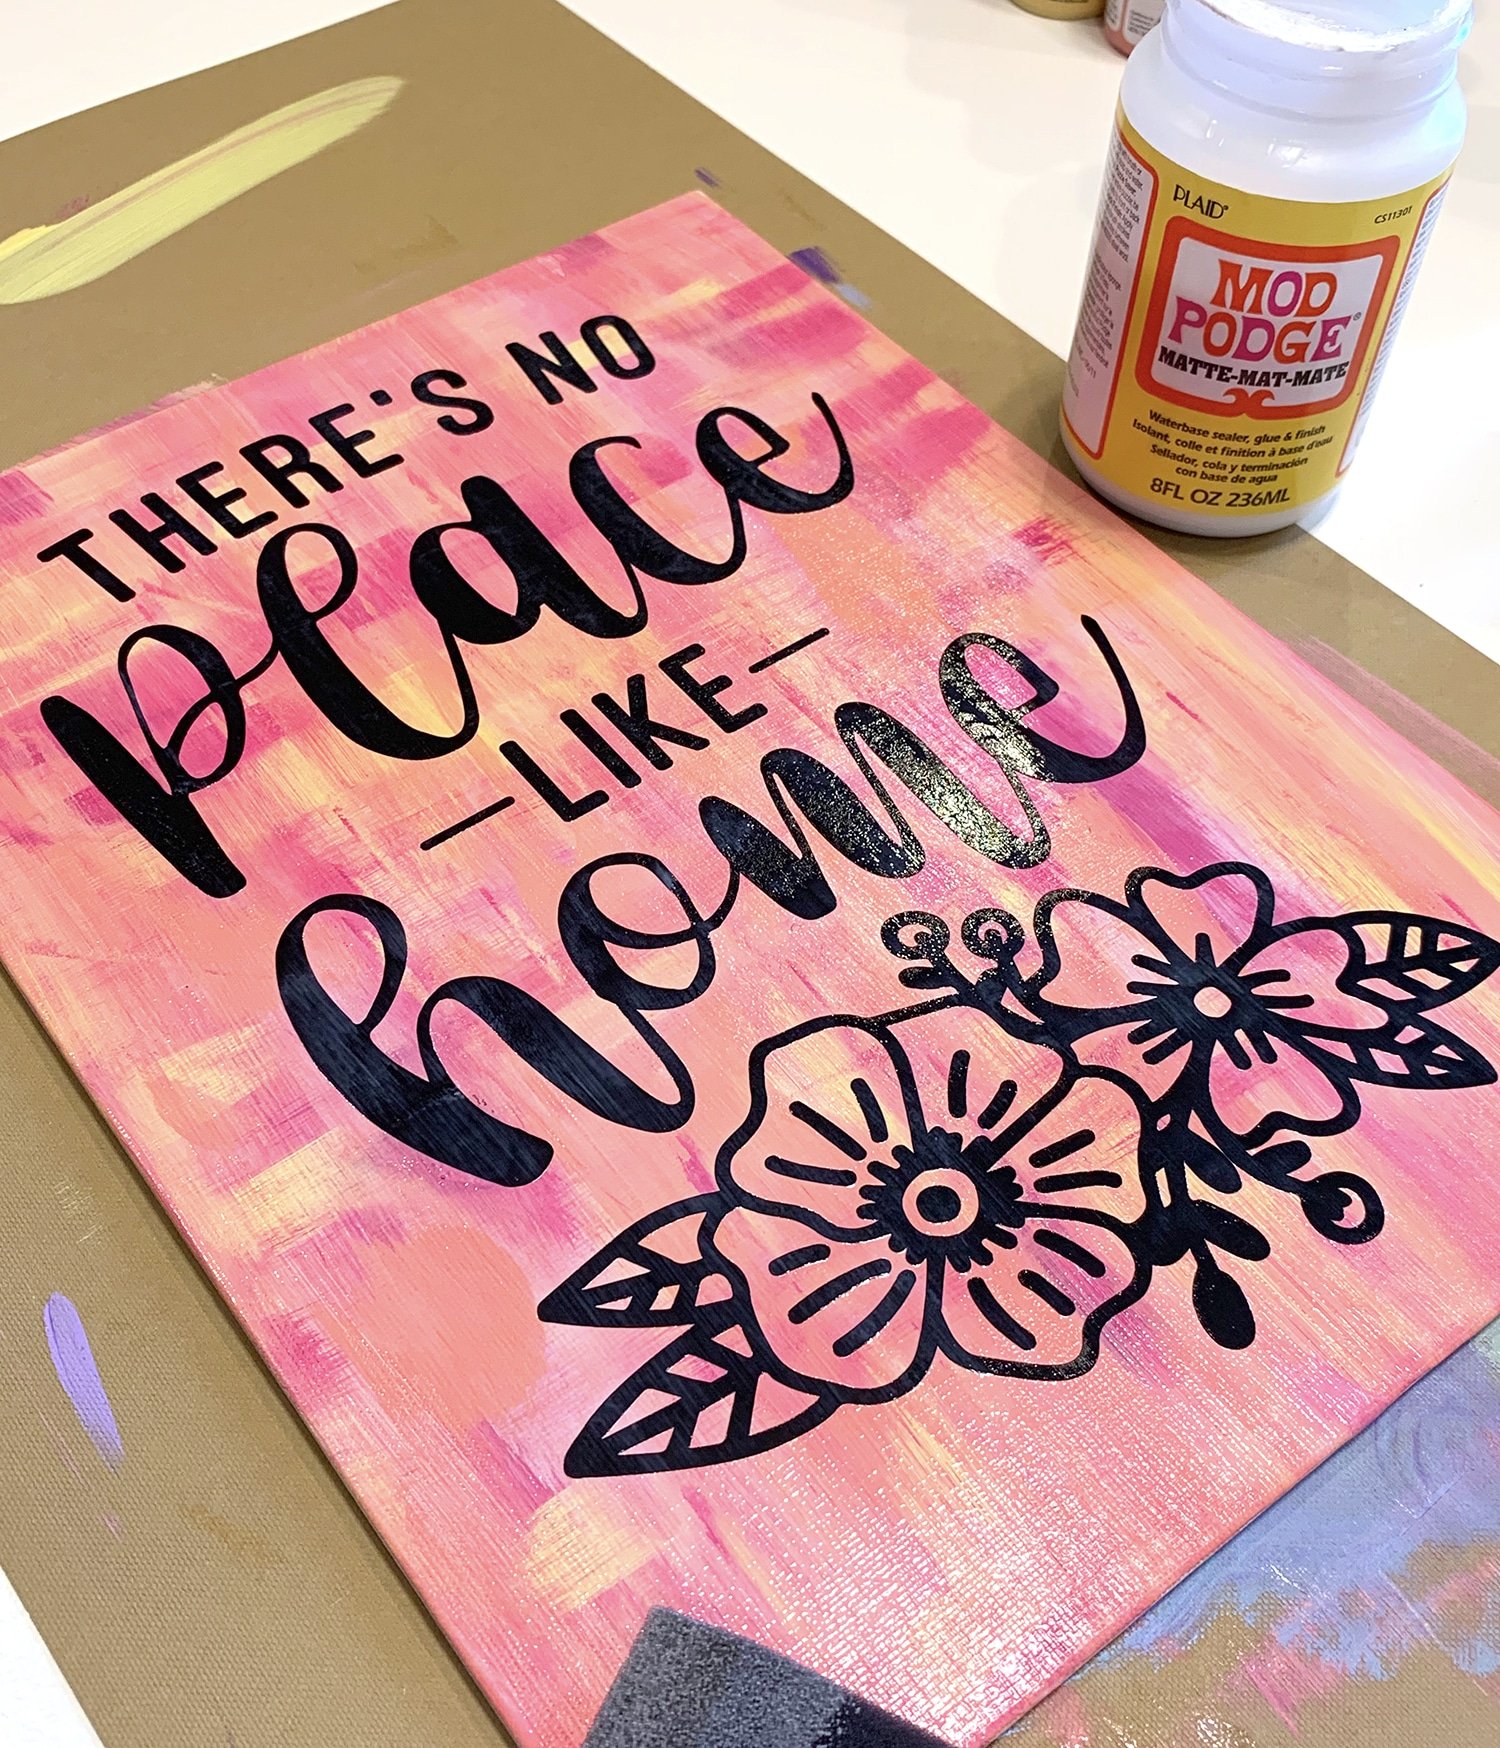
Now, this next step is optional, but I highly recommend it! Give the canvas and vinyl a super thin coat of matte Mod Podge to help prevent any paint from bleeding underneath the stencil. Allow it to dry completely.
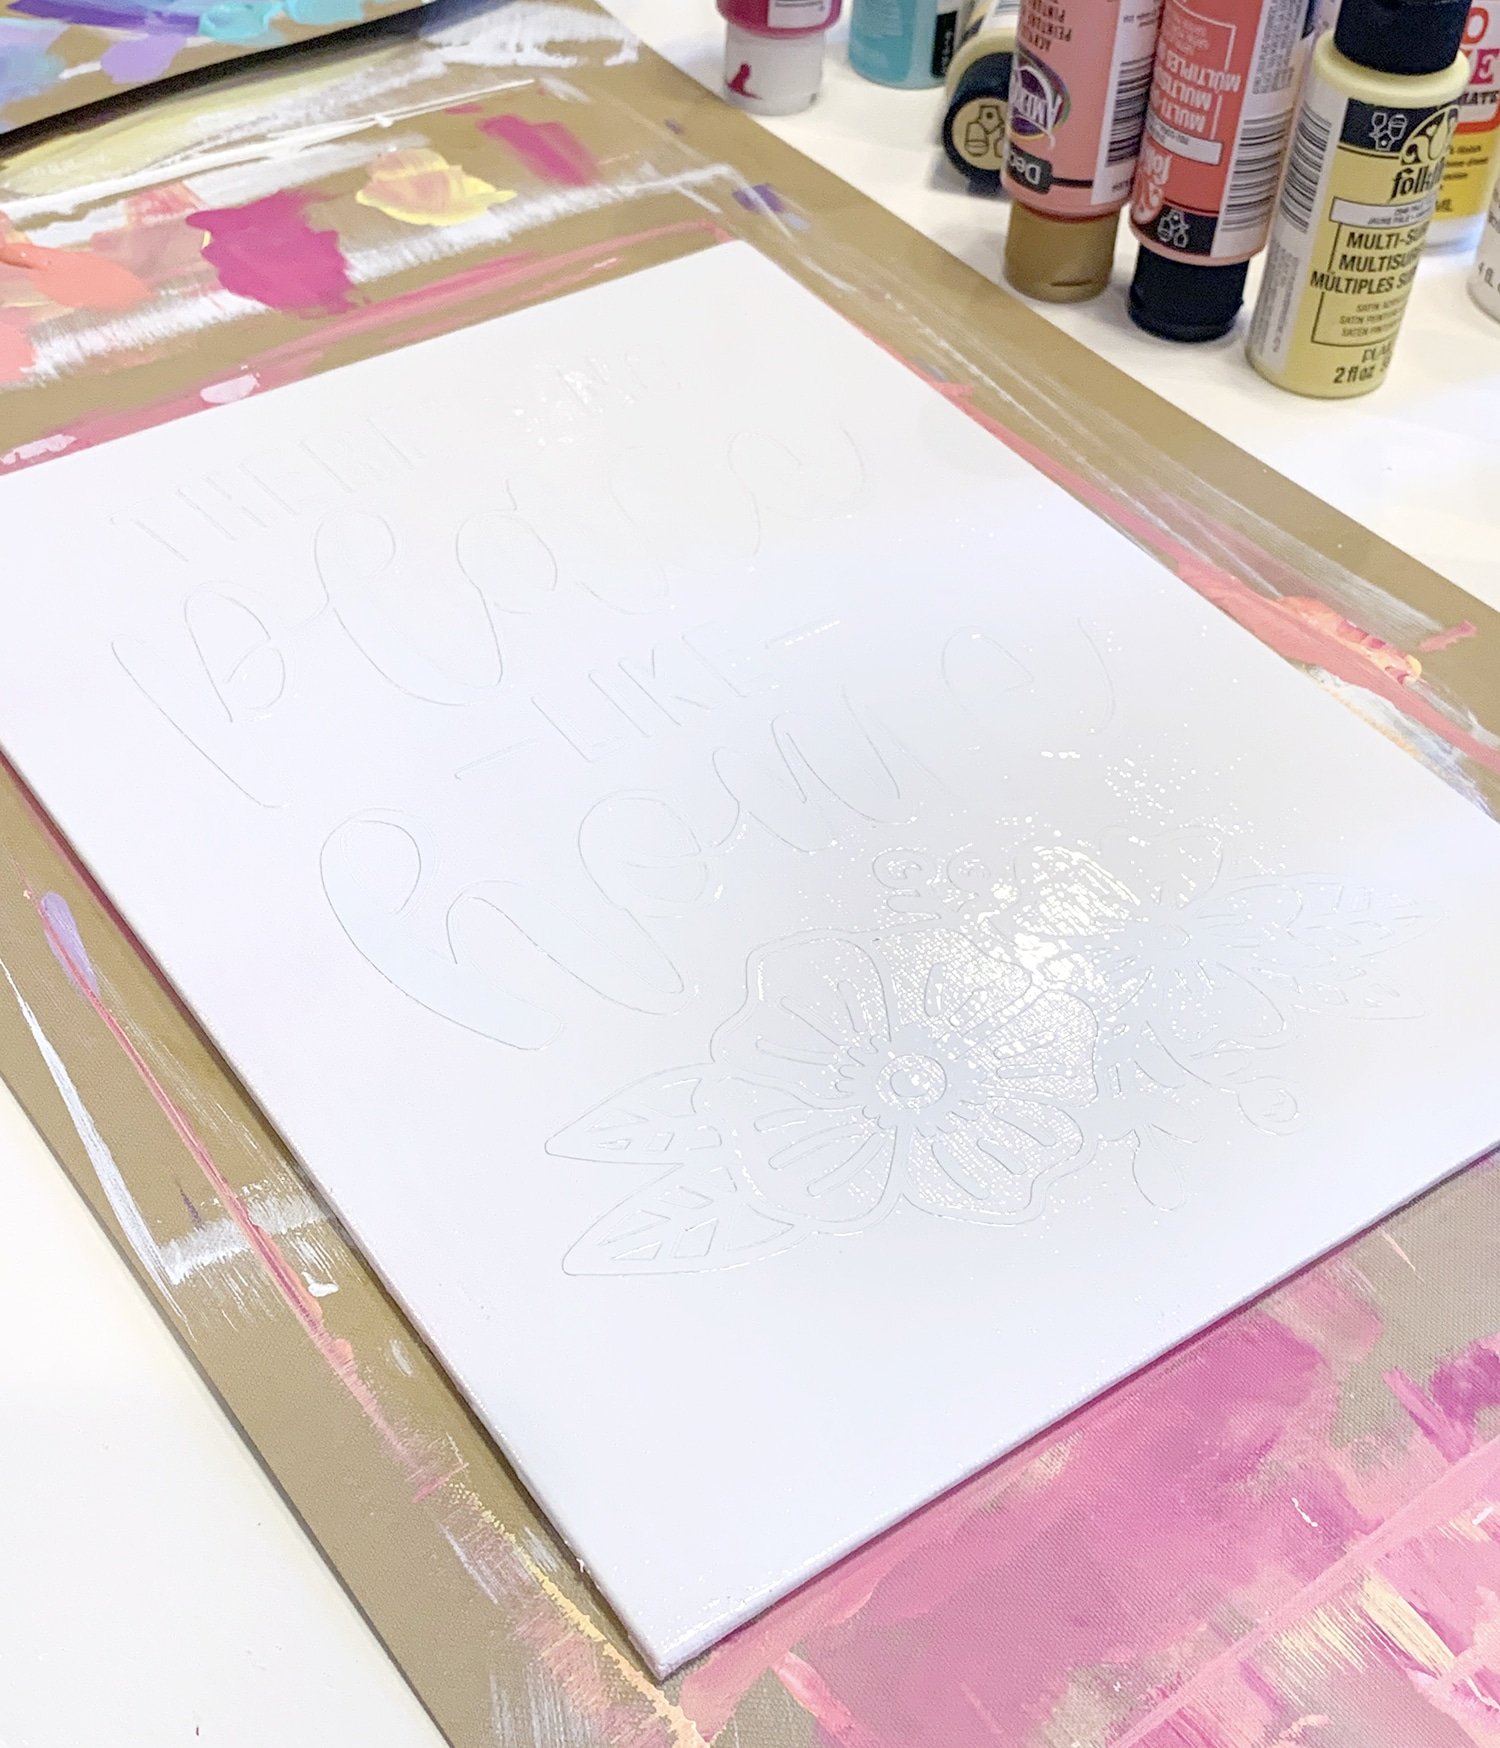
Take the canvas outside (or in a well-ventilated and protected area) and spray paint the entire canvas with one coat of paint in a solid color. Allow it to dry for 10 minutes.
Note: If you are making more than one canvas, work with only one of them at a time during this step since it is time-sensitive!
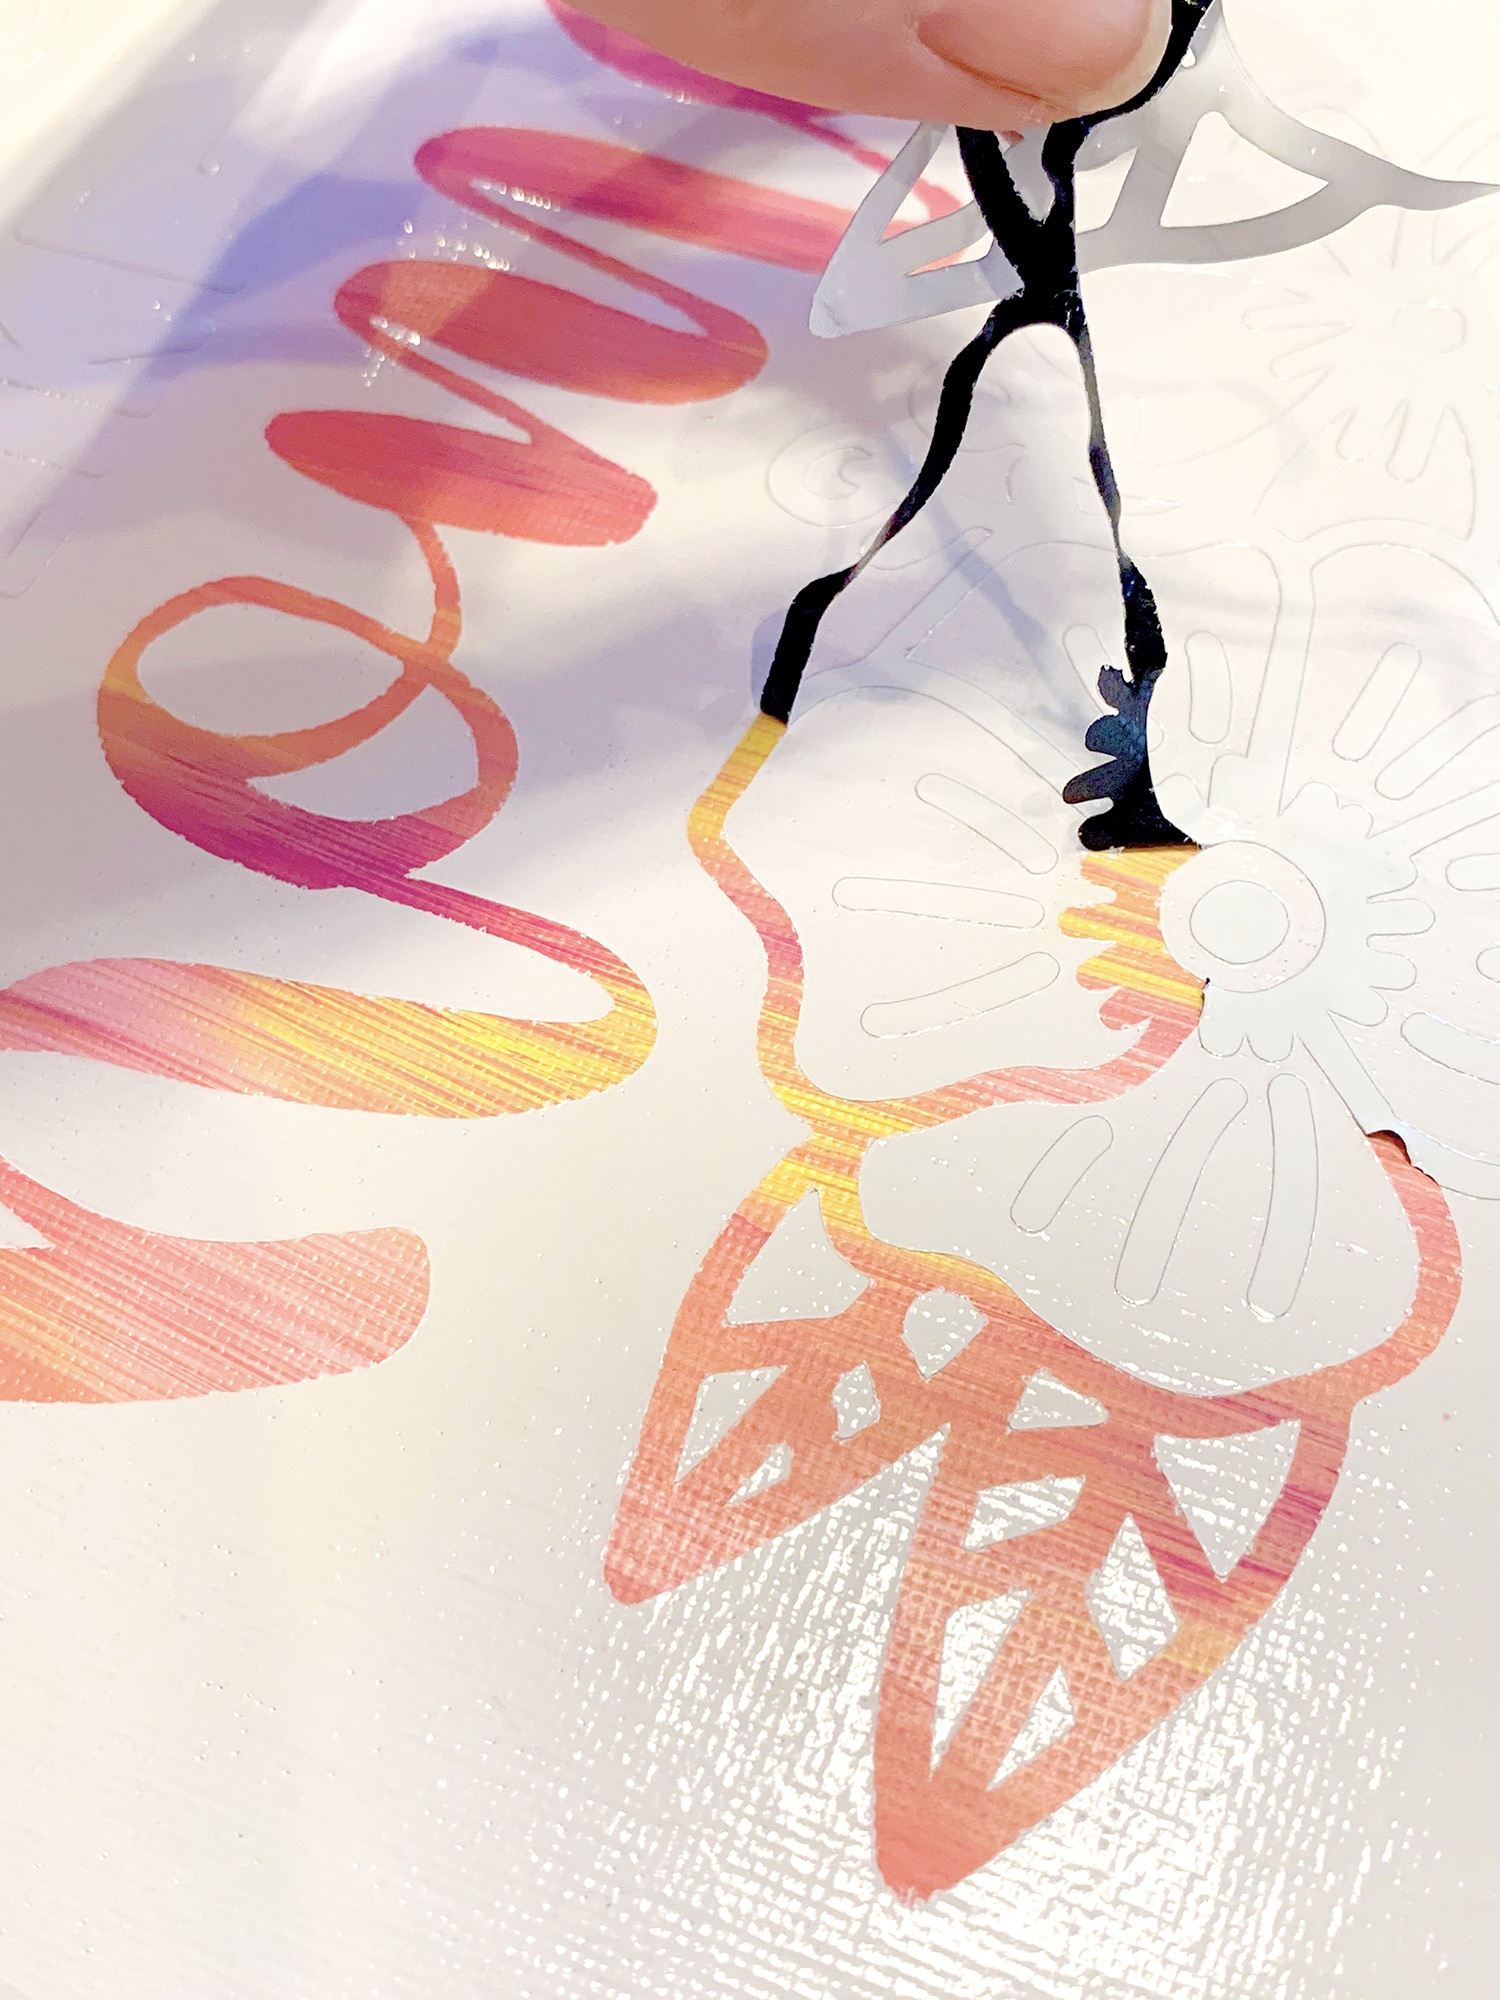
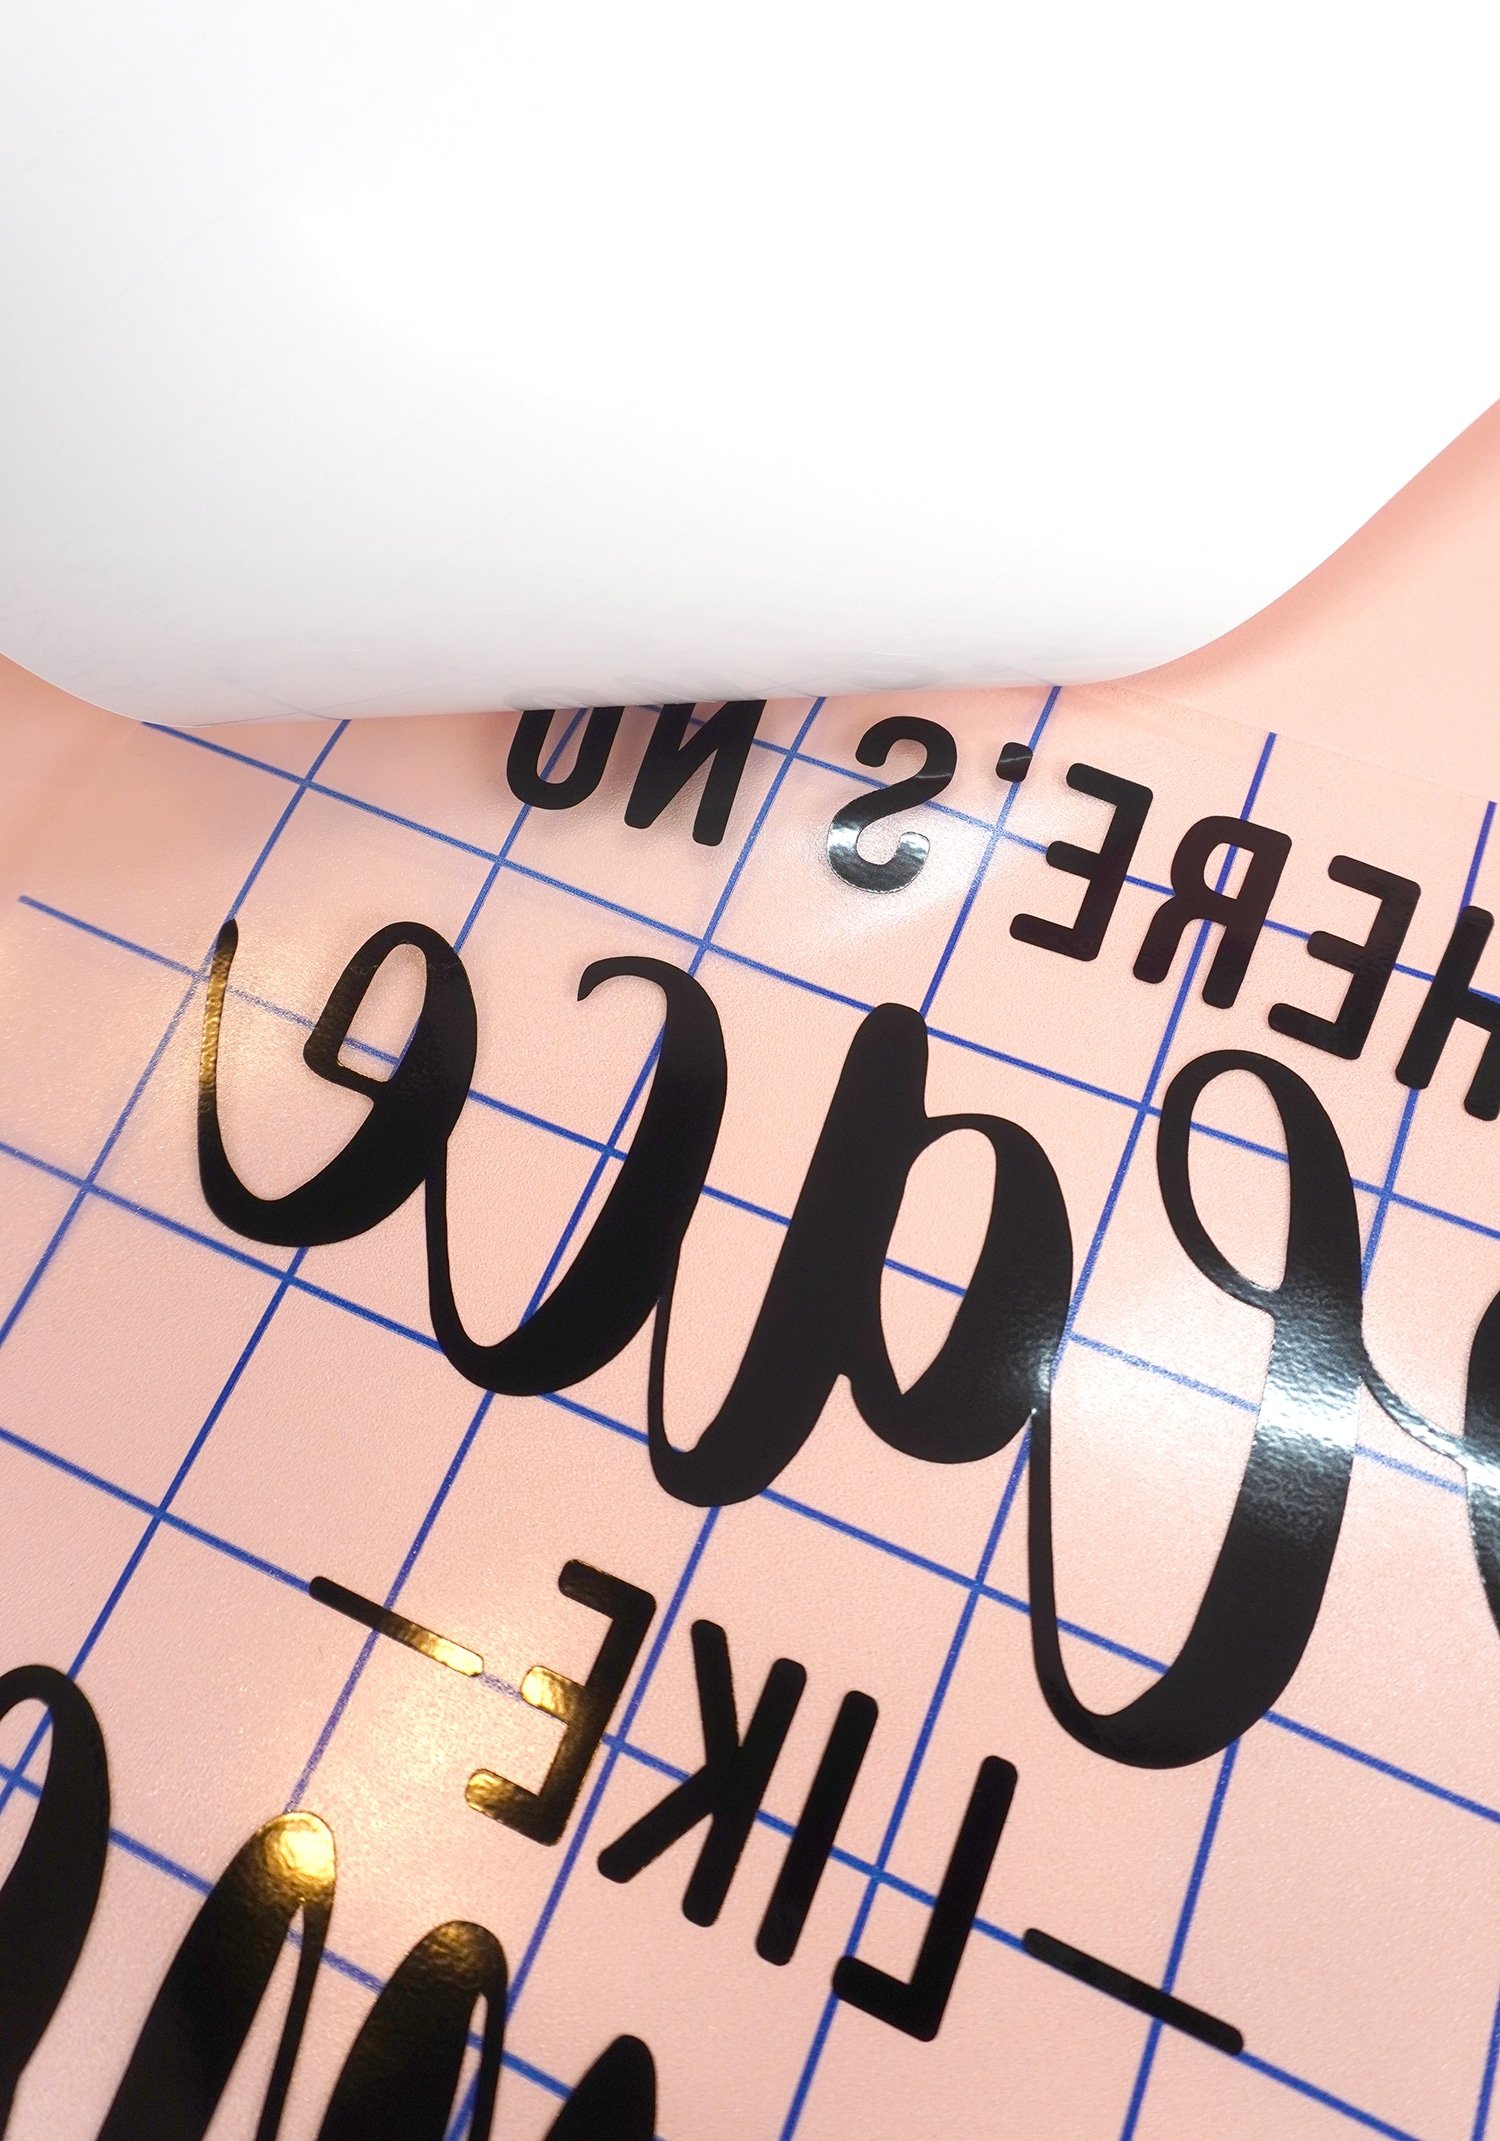
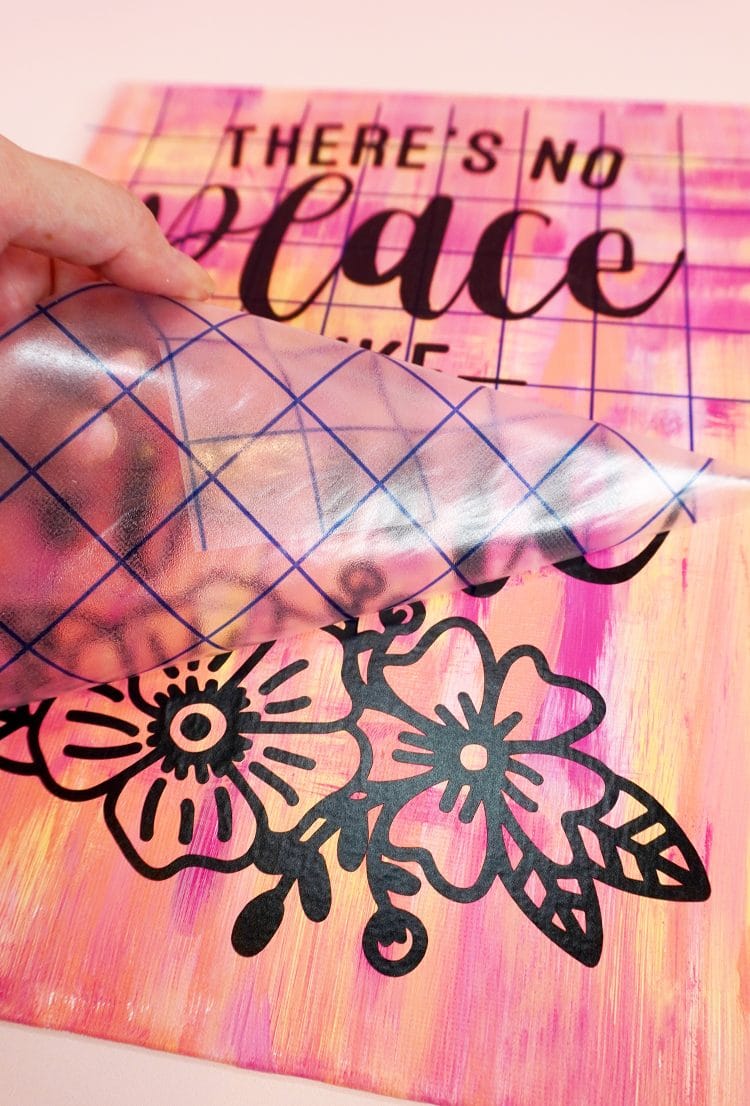
VERY carefully, while the paint is still slightly wet, peel the vinyl stencil off to reveal the awesome colorful design beneath!
Note: Fine Point Tweezers or a True Control Knife are very helpful for lifting up the edges of the vinyl!
Do I Have to Use Spray Paint for My Hot Mess Canvas?
No, but we highly recommend it! You may choose to paint your entire canvas with acrylic paint, but since it may require multiple layers of paint to cover over your “hot mess,” removing the stencil may be more difficult.
Note: If you do choose to use acrylic paint, use VERY thin layers so that you don’t peel up the paint when you remove your stencil!
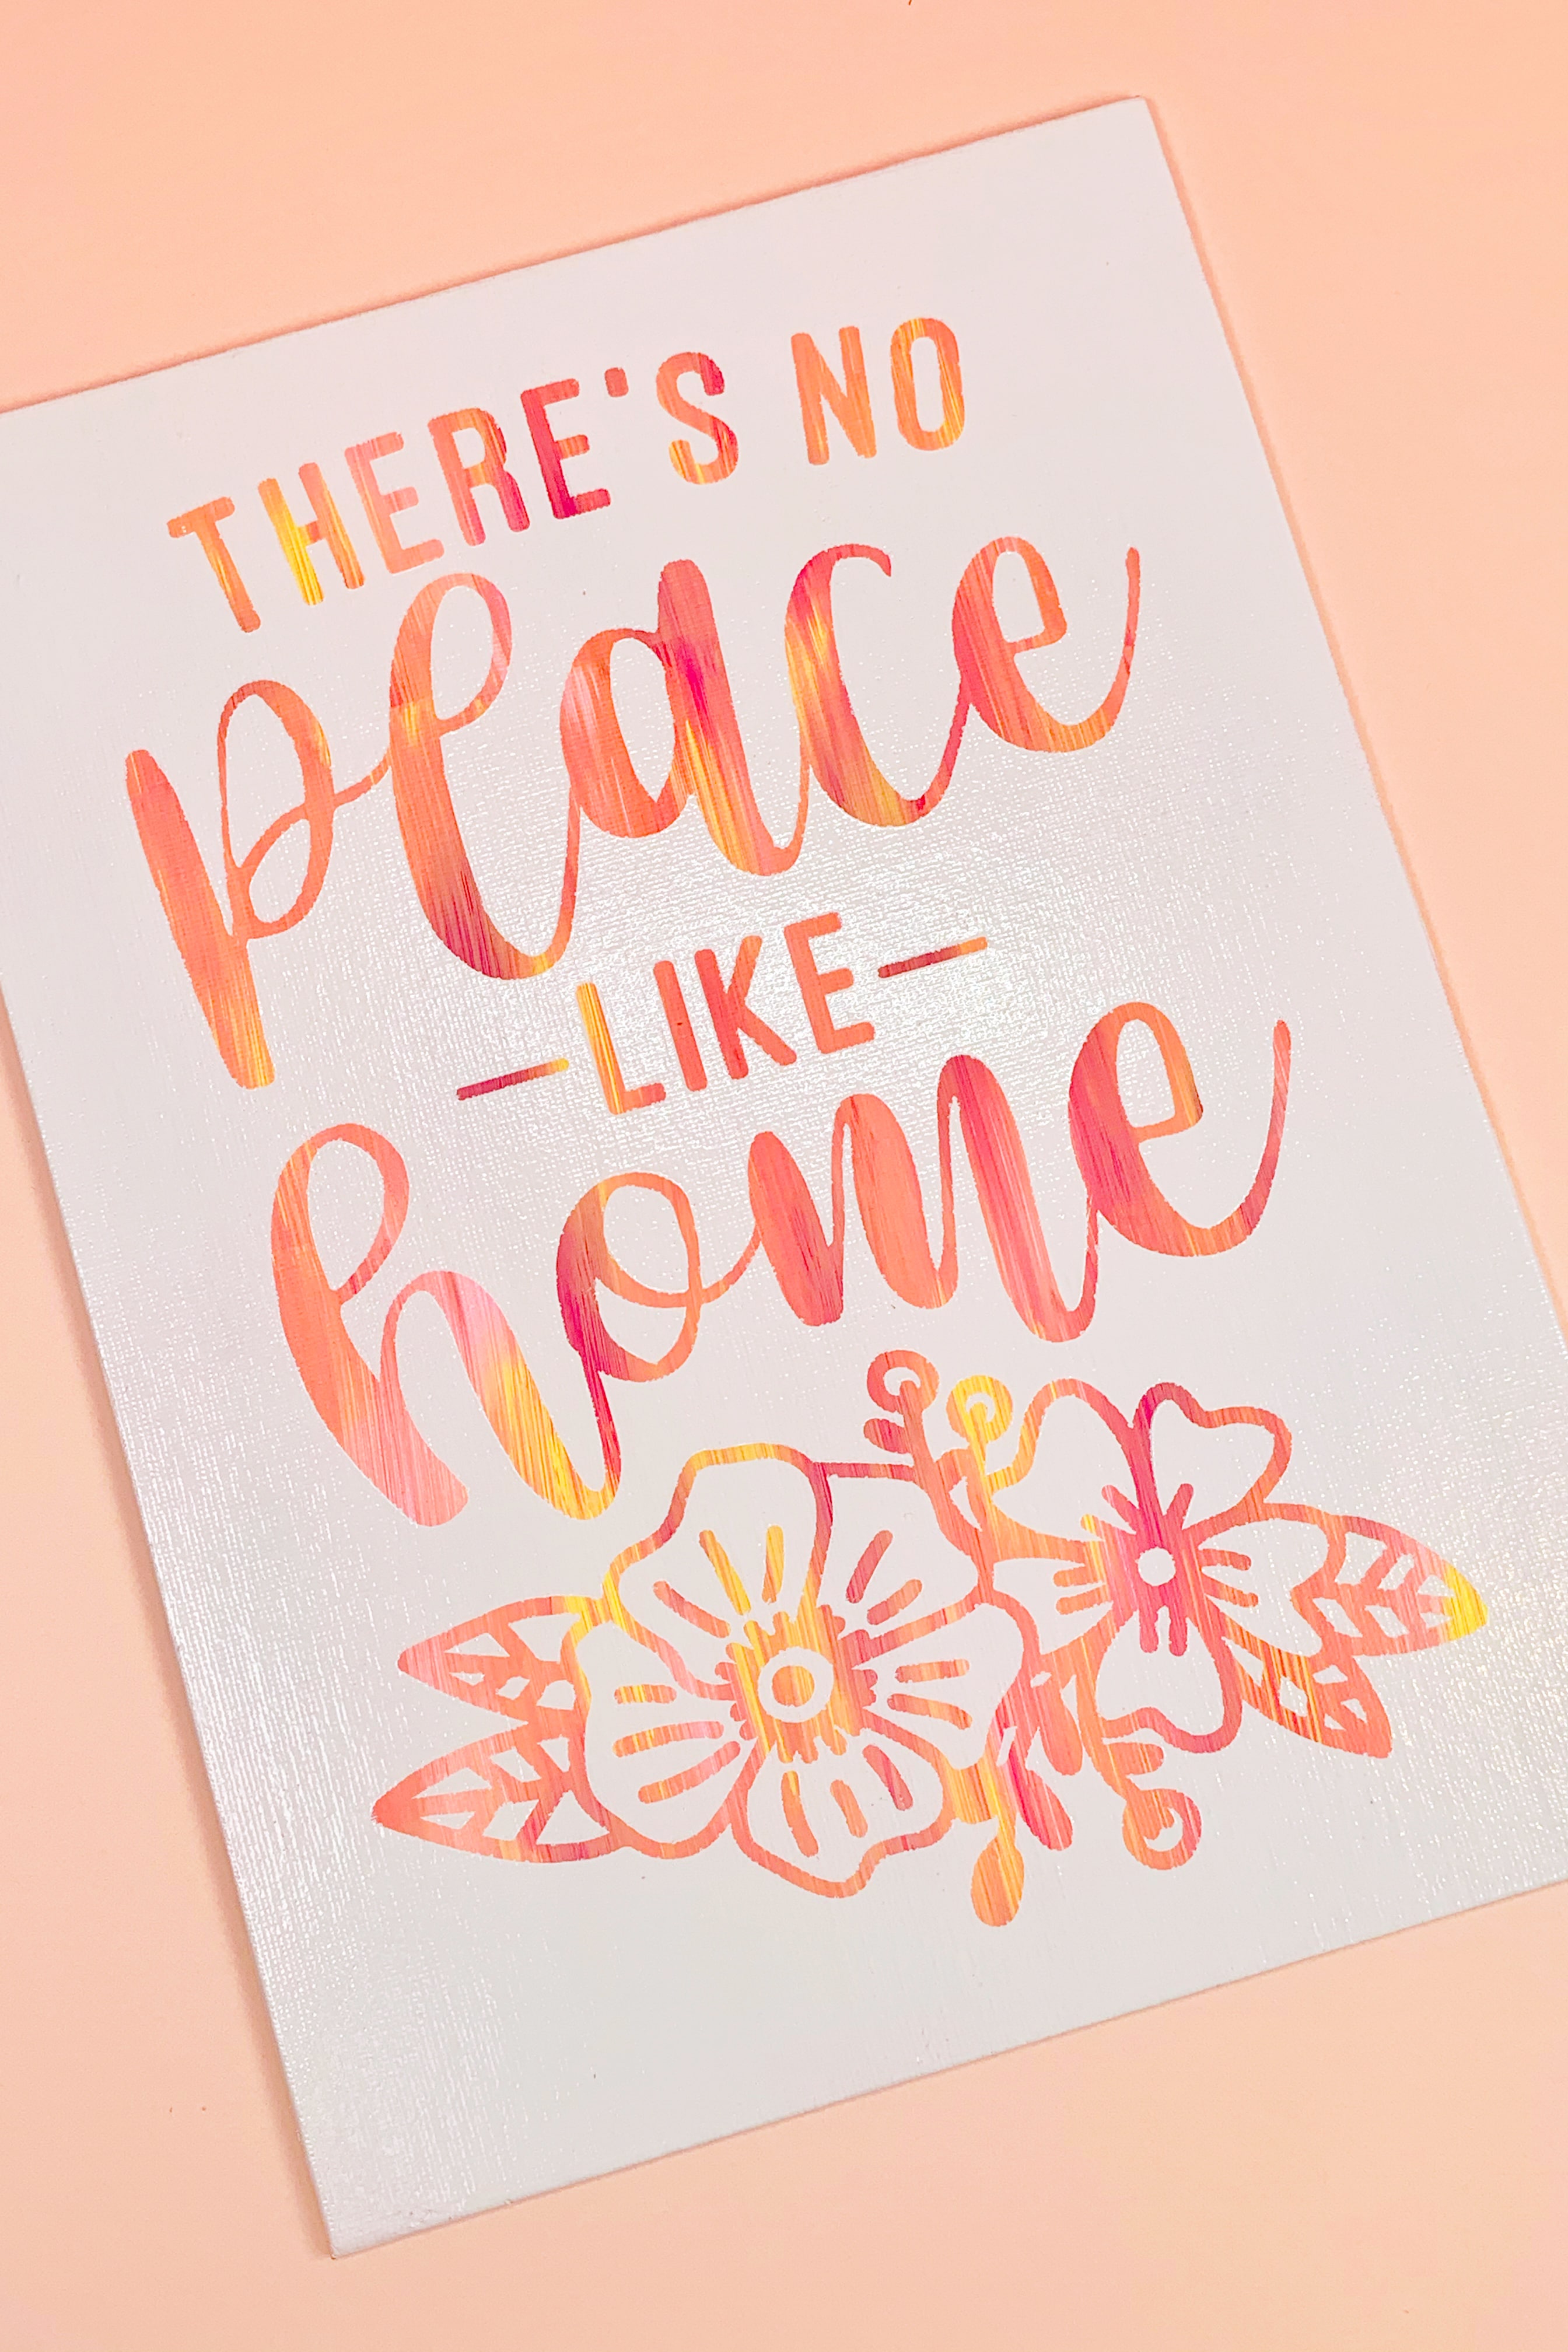
Ta-da! Isn’t that SO super cool?! That hot mess turned into something seriously gorgeous!
Once you start making hot mess canvases, you’re going to want to make a bunch of them (they make a great homemade gift idea!)!
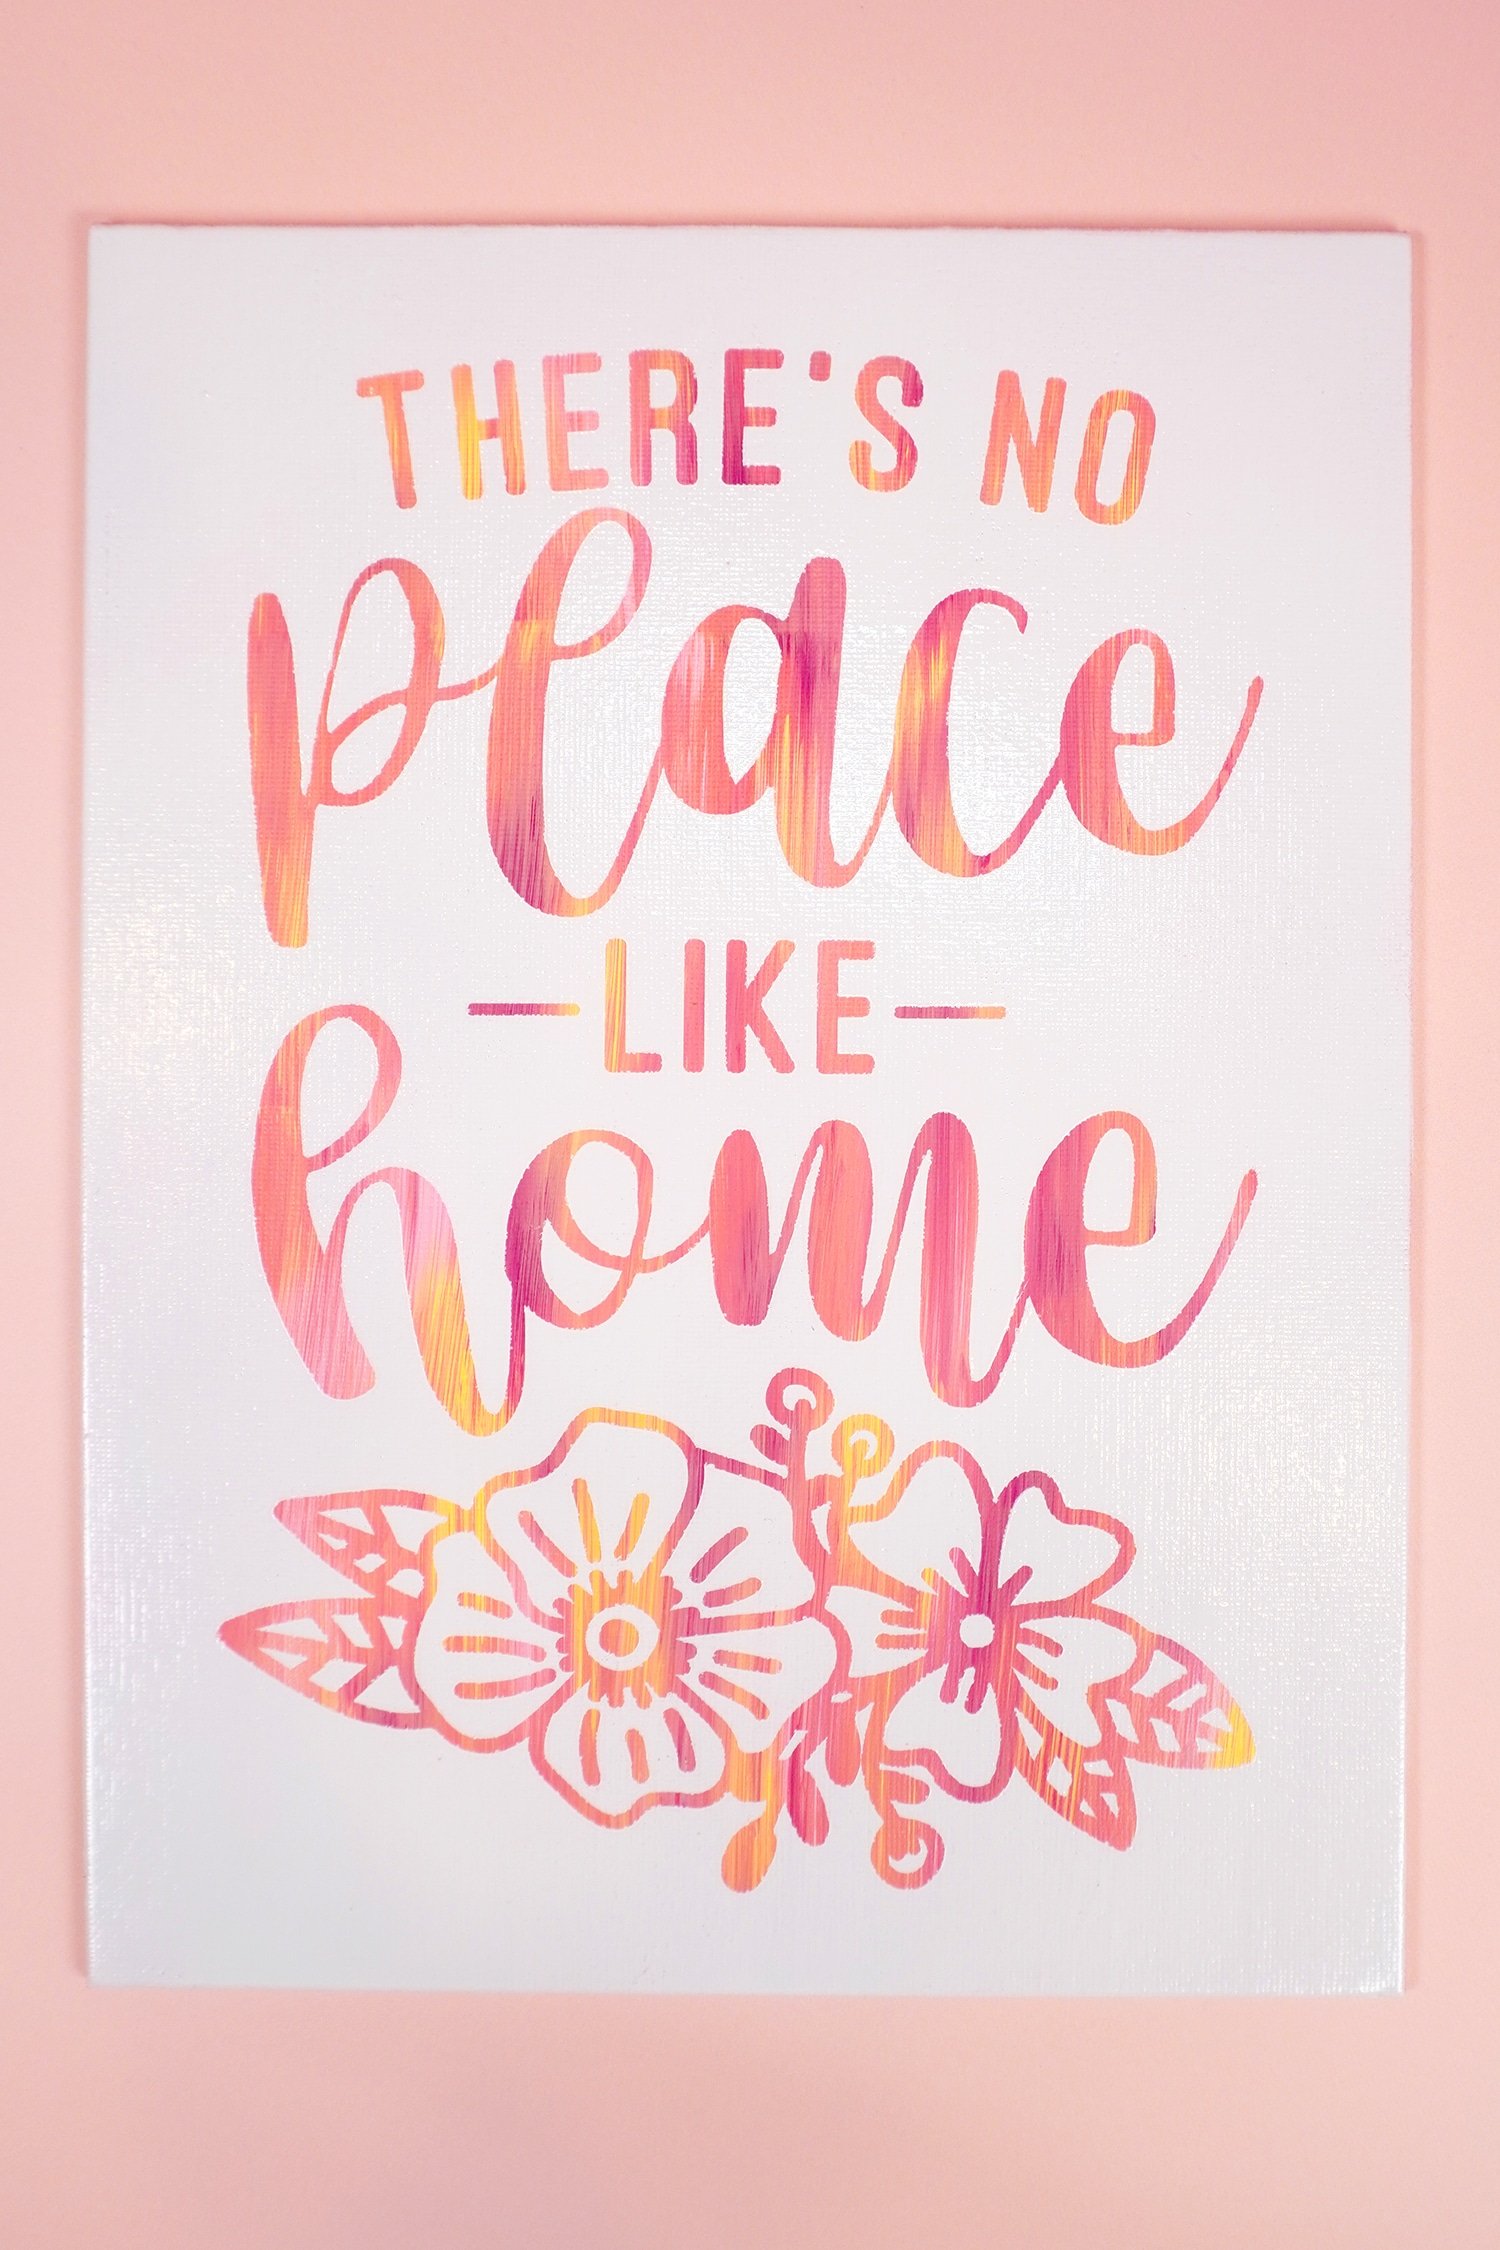
I am SO in love with how this turned out! I always say that “Sunset is my favorite color” and this hot mess canvas perfectly encompasses that!
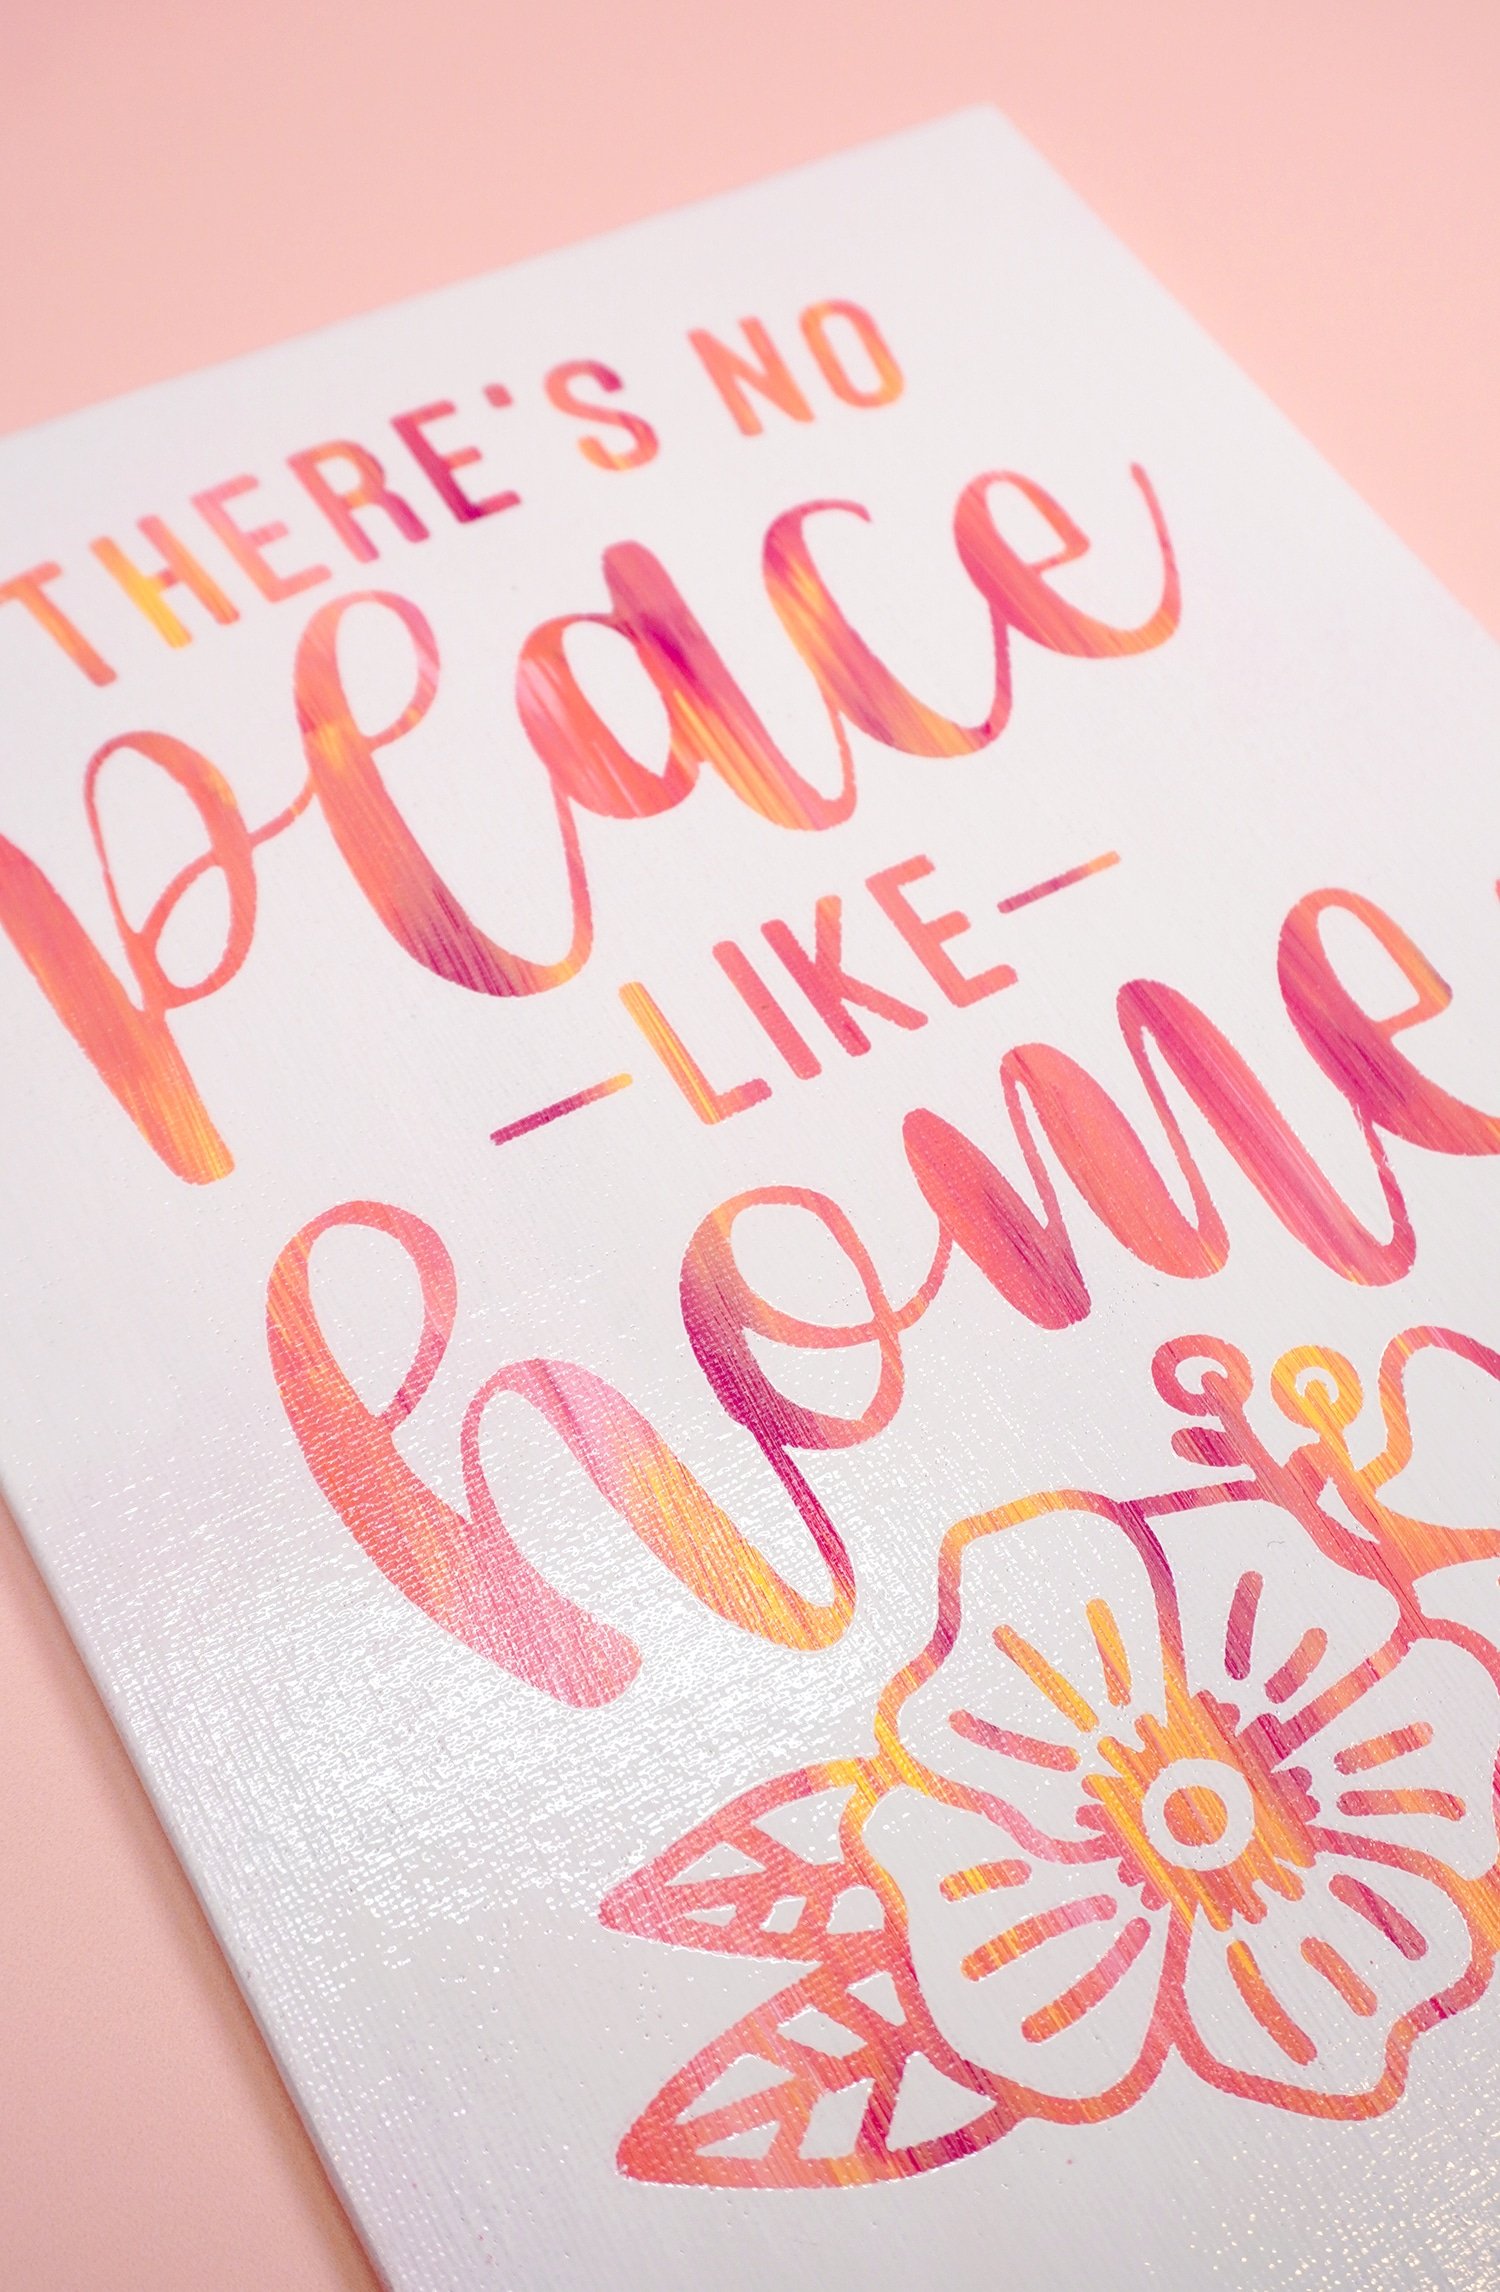
You can see in this close-up that the optional Mod Podge step really helps to give your design crisp clean stencil lines!
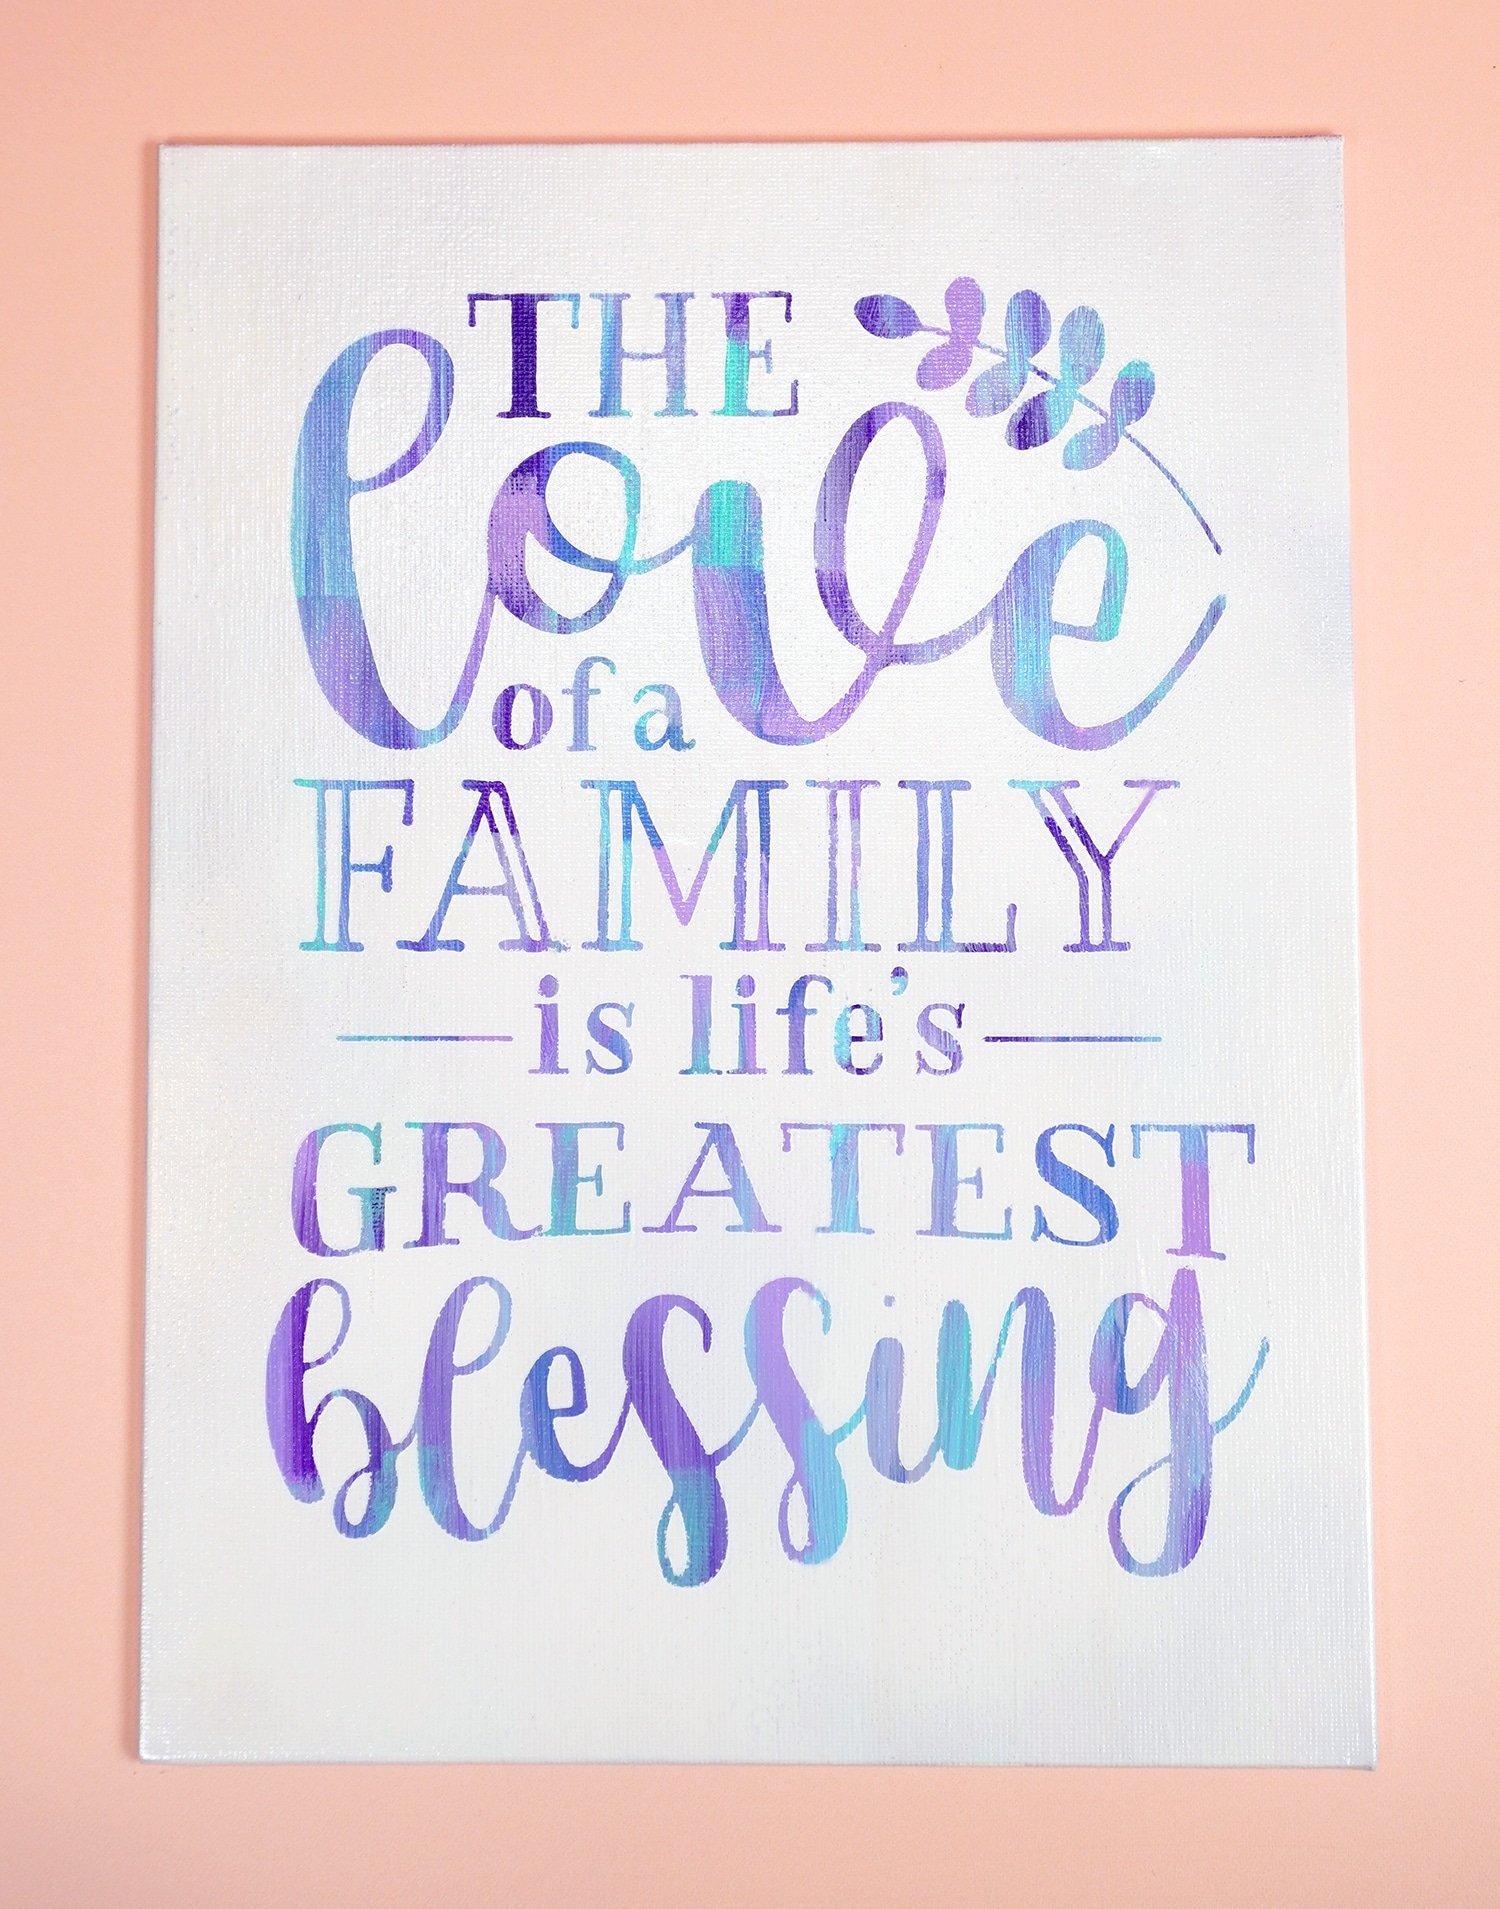
Conversely, we decided to forego the Mod Podge for the cool-toned canvas just to show you the difference. The edges of the stenciling are just a bit fuzzy – it’s not a BIG deal, but it’s enough of a difference that I recommend taking the few extra minutes to Mod Podge!
It’s SO easy to make your own hot mess canvas project! I hope that this simple-to-follow tutorial has inspired you to create your own stunning art pieces for your home! What are you going to make first?


Don’t Forget to Pin These Hot Mess Canvases for Later!

Heidi Kundin has captivated the hearts of millions with her colorful and inspiring approach to crafting, celebrations, and family fun. With over 15 years of experience, Happiness is Homemade has become a must-visit destination for those seeking quick and easy creative ideas and last-minute solutions. Heidi’s warm personality shines through her posts, inviting readers to join her on a creative journey that’s fun, rewarding, and achievable. Heidi is also the author of Homemade Bath Bombs & More and DIY Tie-Dye.