
Learn how to make a rainbow glitter tumbler – perfect for wine and coffee! Makes a great personalized gift idea that you can easily customize with any colors and designs!
DIY Rainbow Glitter Tumblers

This post may contain affiliate links. I will receive a small commission from these sales at no additional cost to you! This is a sponsored conversation written by me on behalf of Cricut. The opinions and text are all mine.
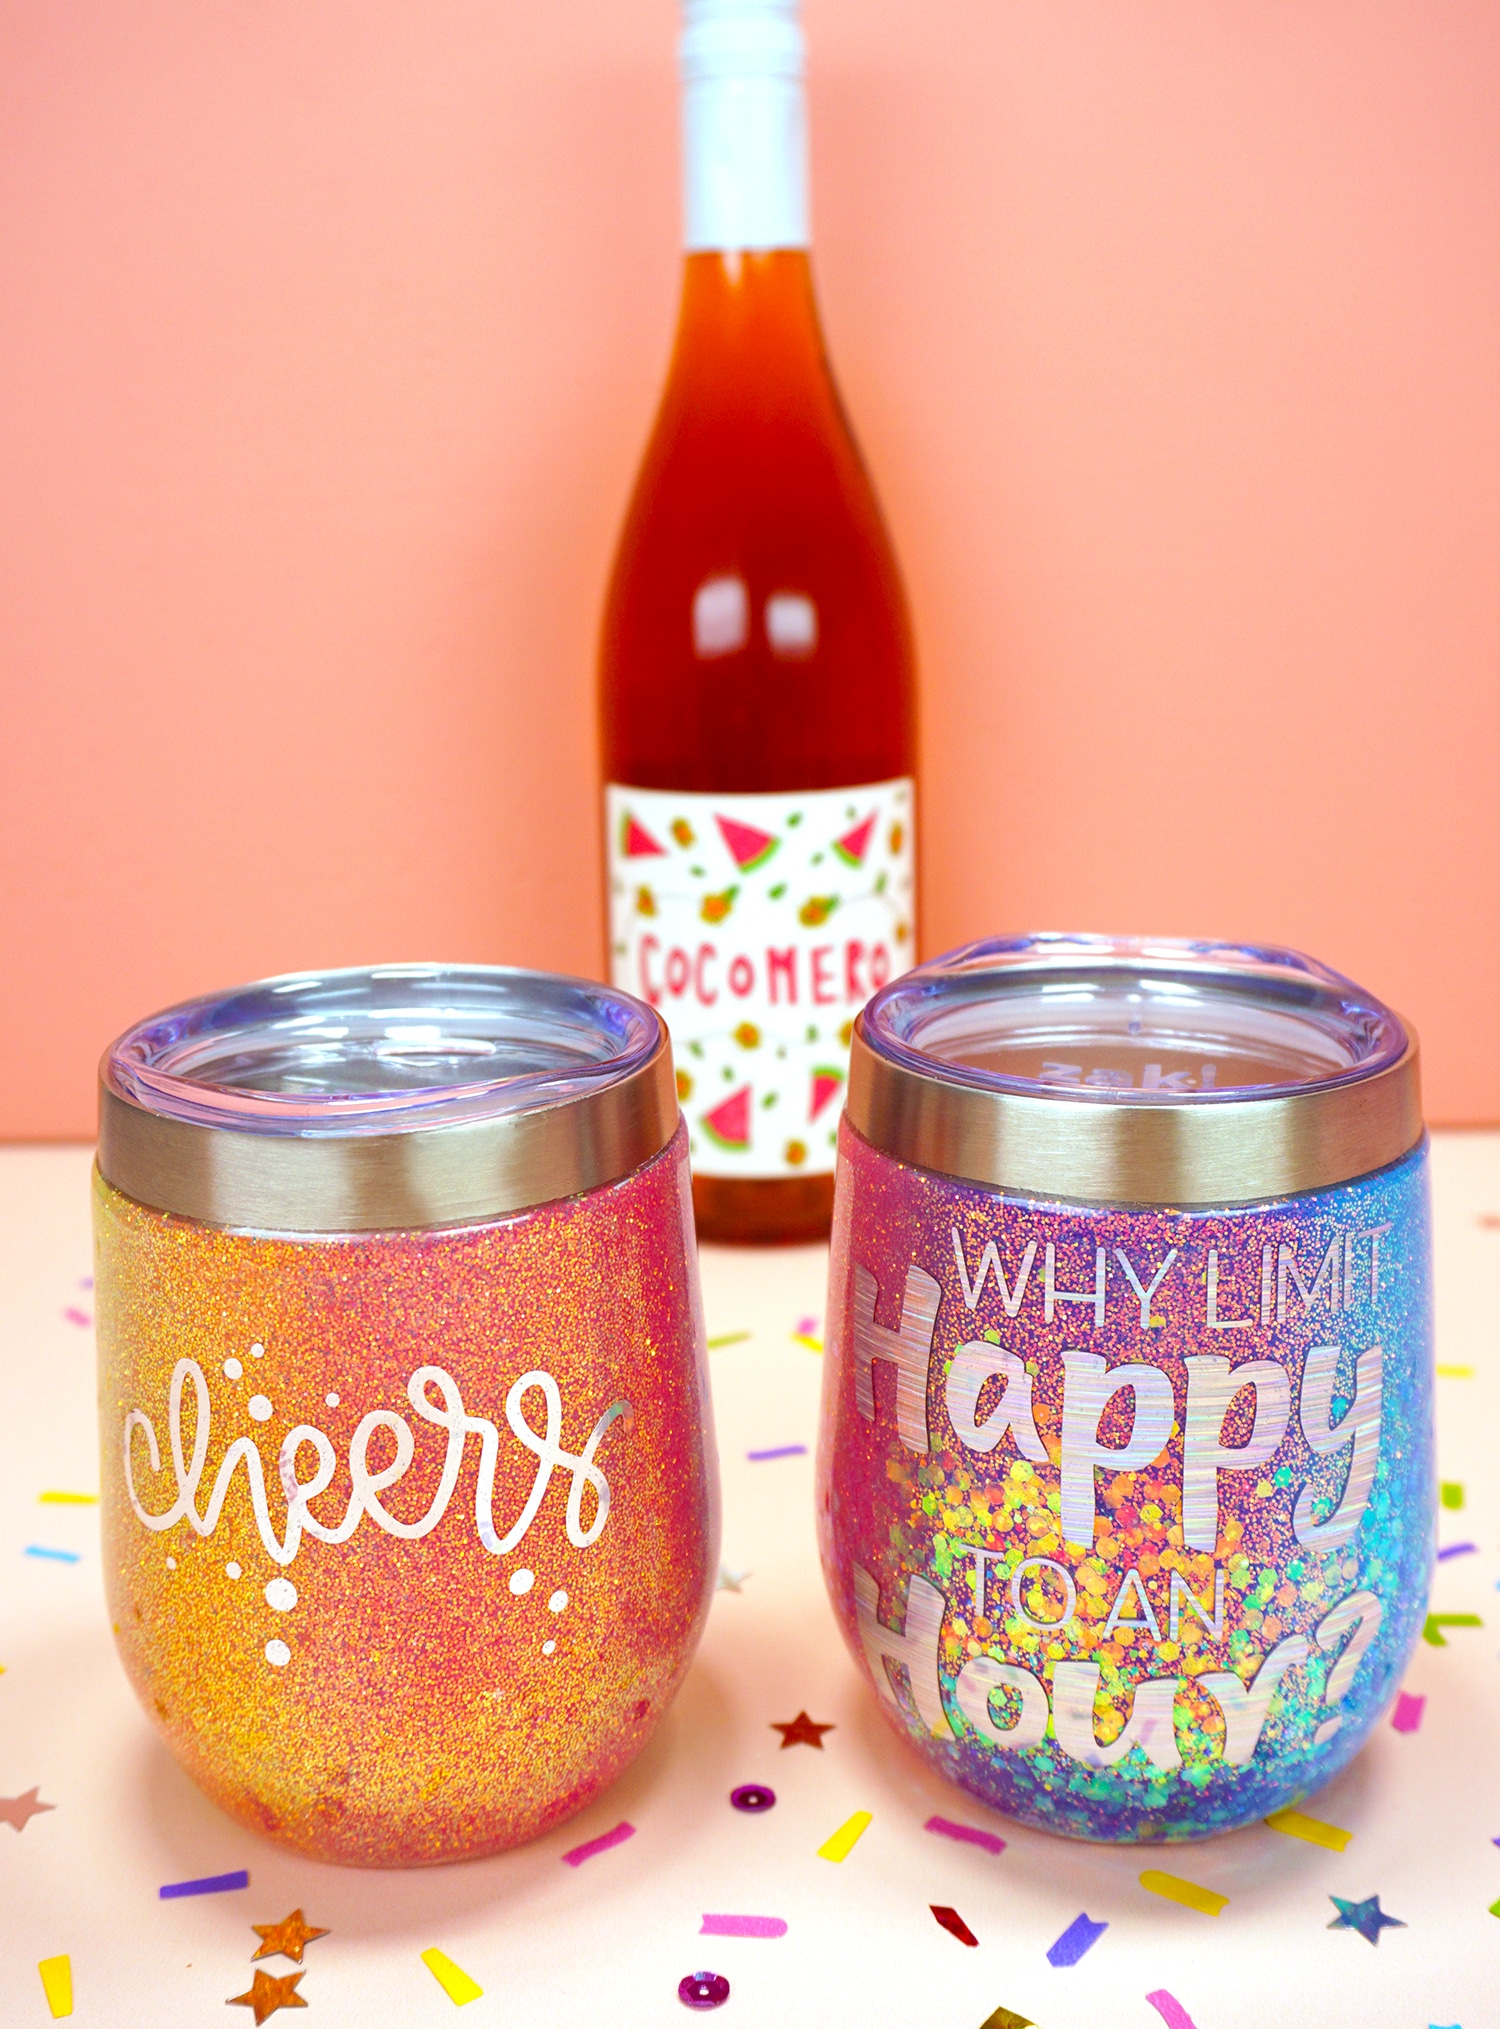
I love making personalized gifts for my friends and family for their birthdays and the winter holidays, and these DIY glitter tumblers are a great custom gift idea! Make it personal with your own color combinations, graphics, and designs!
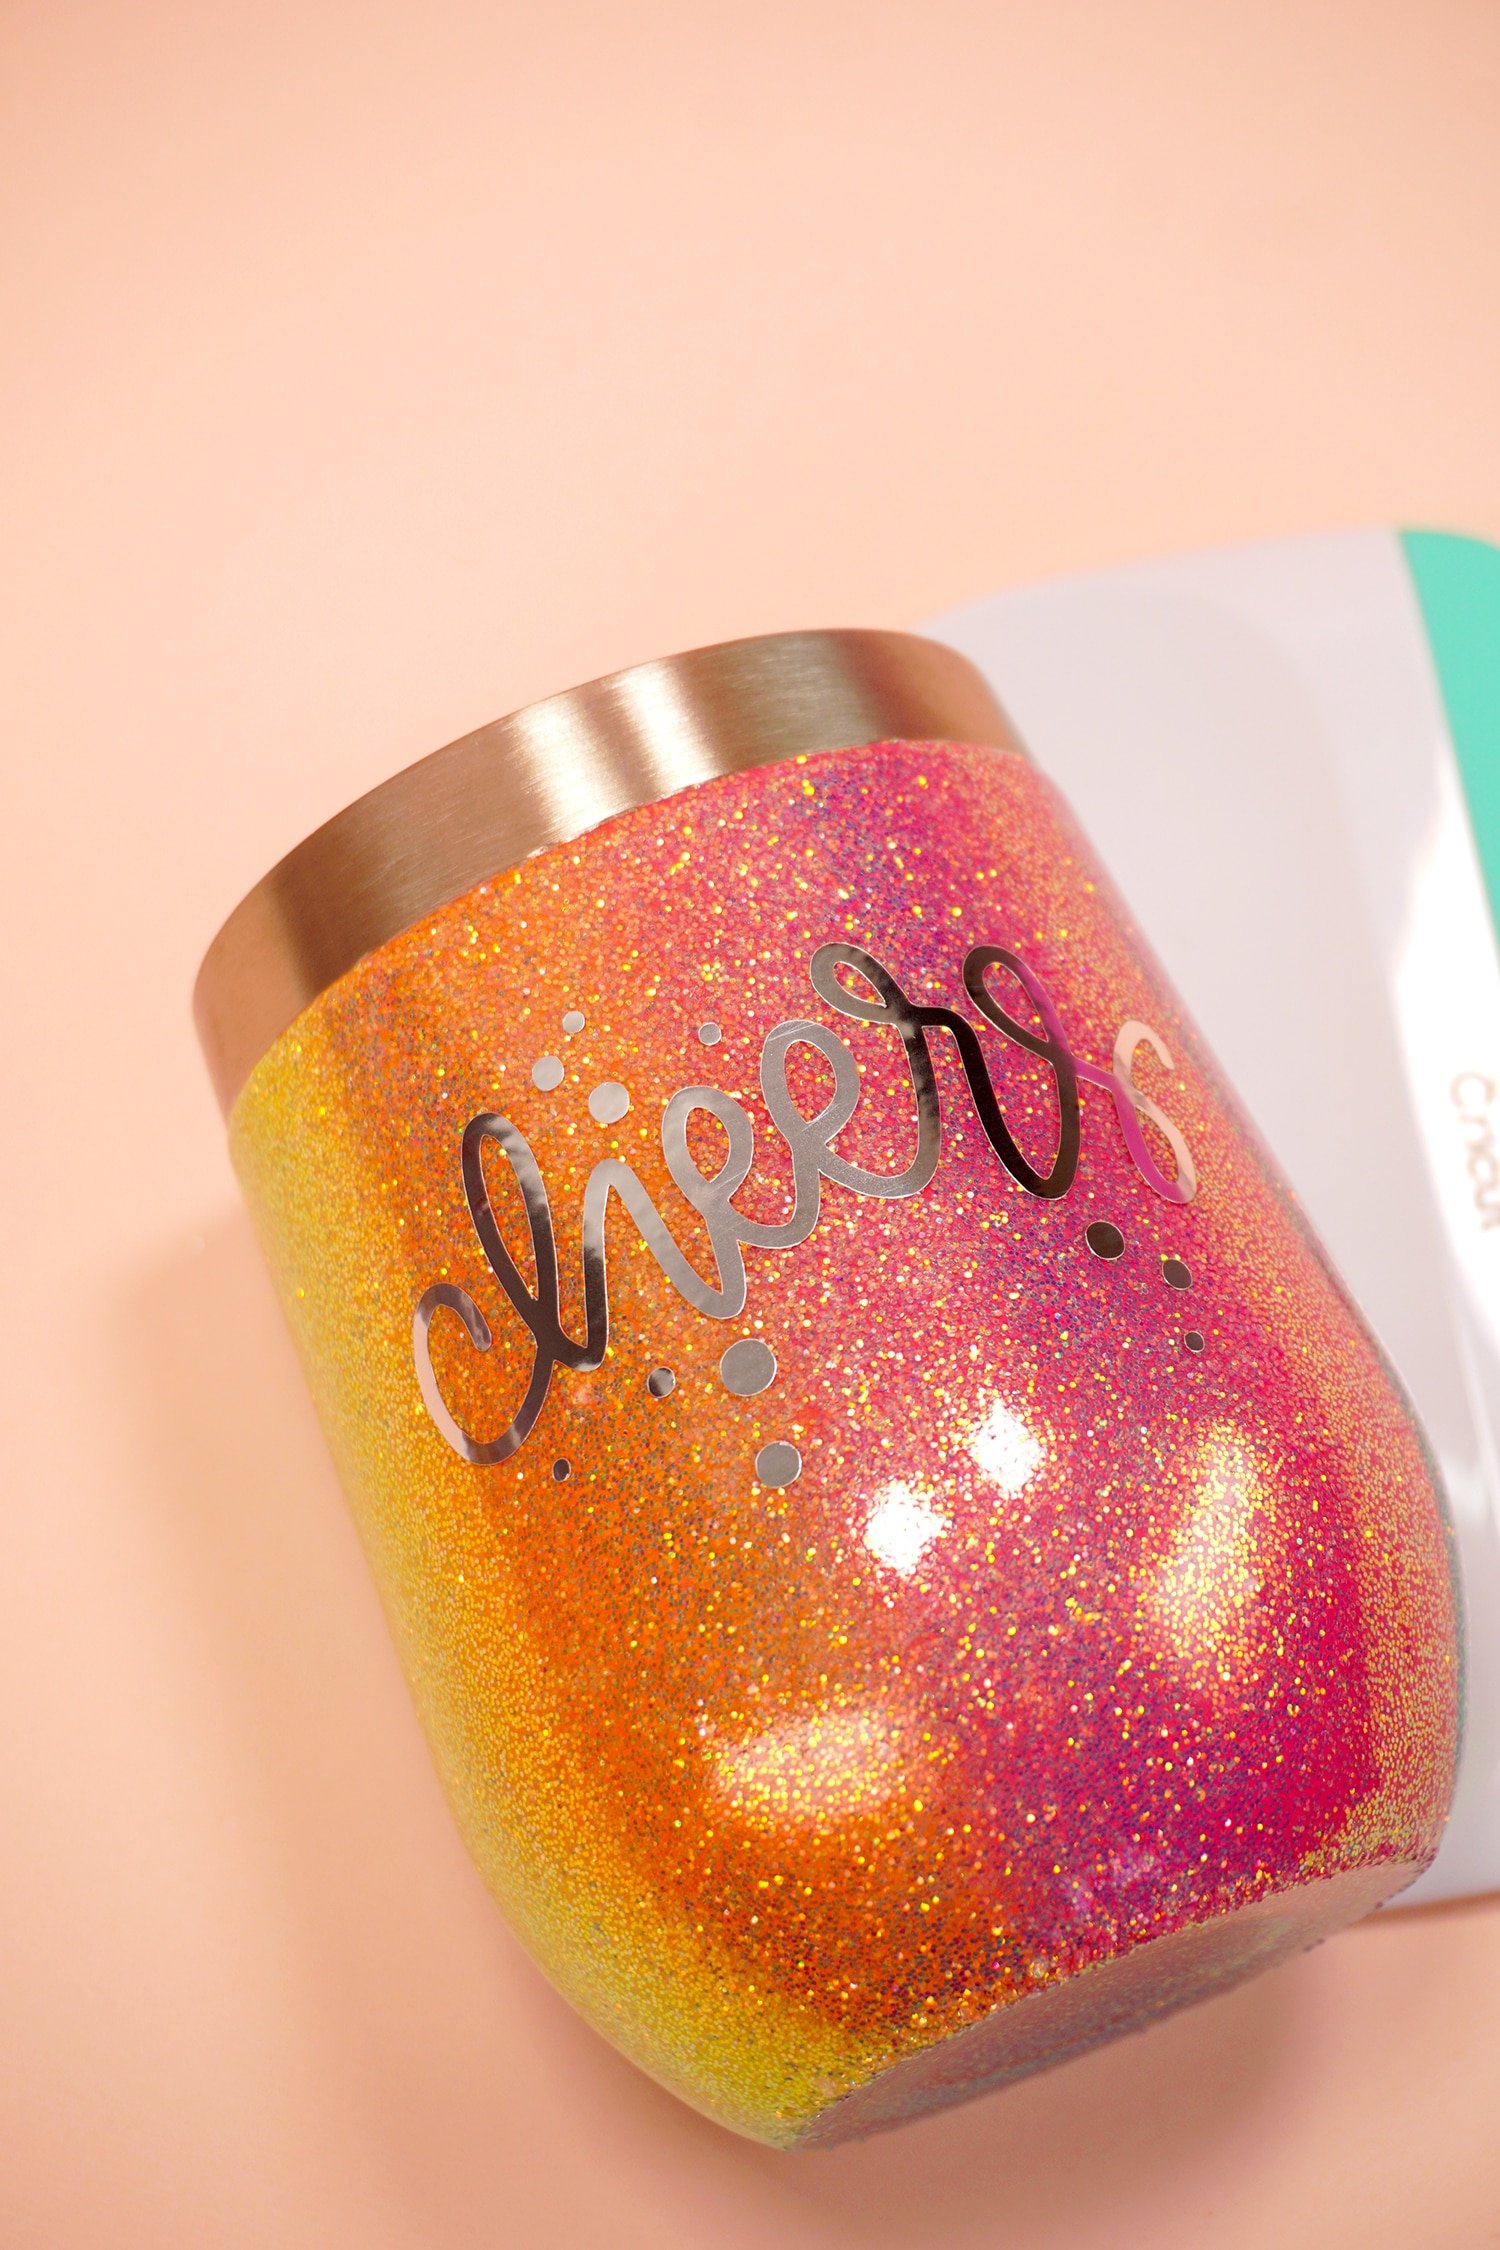
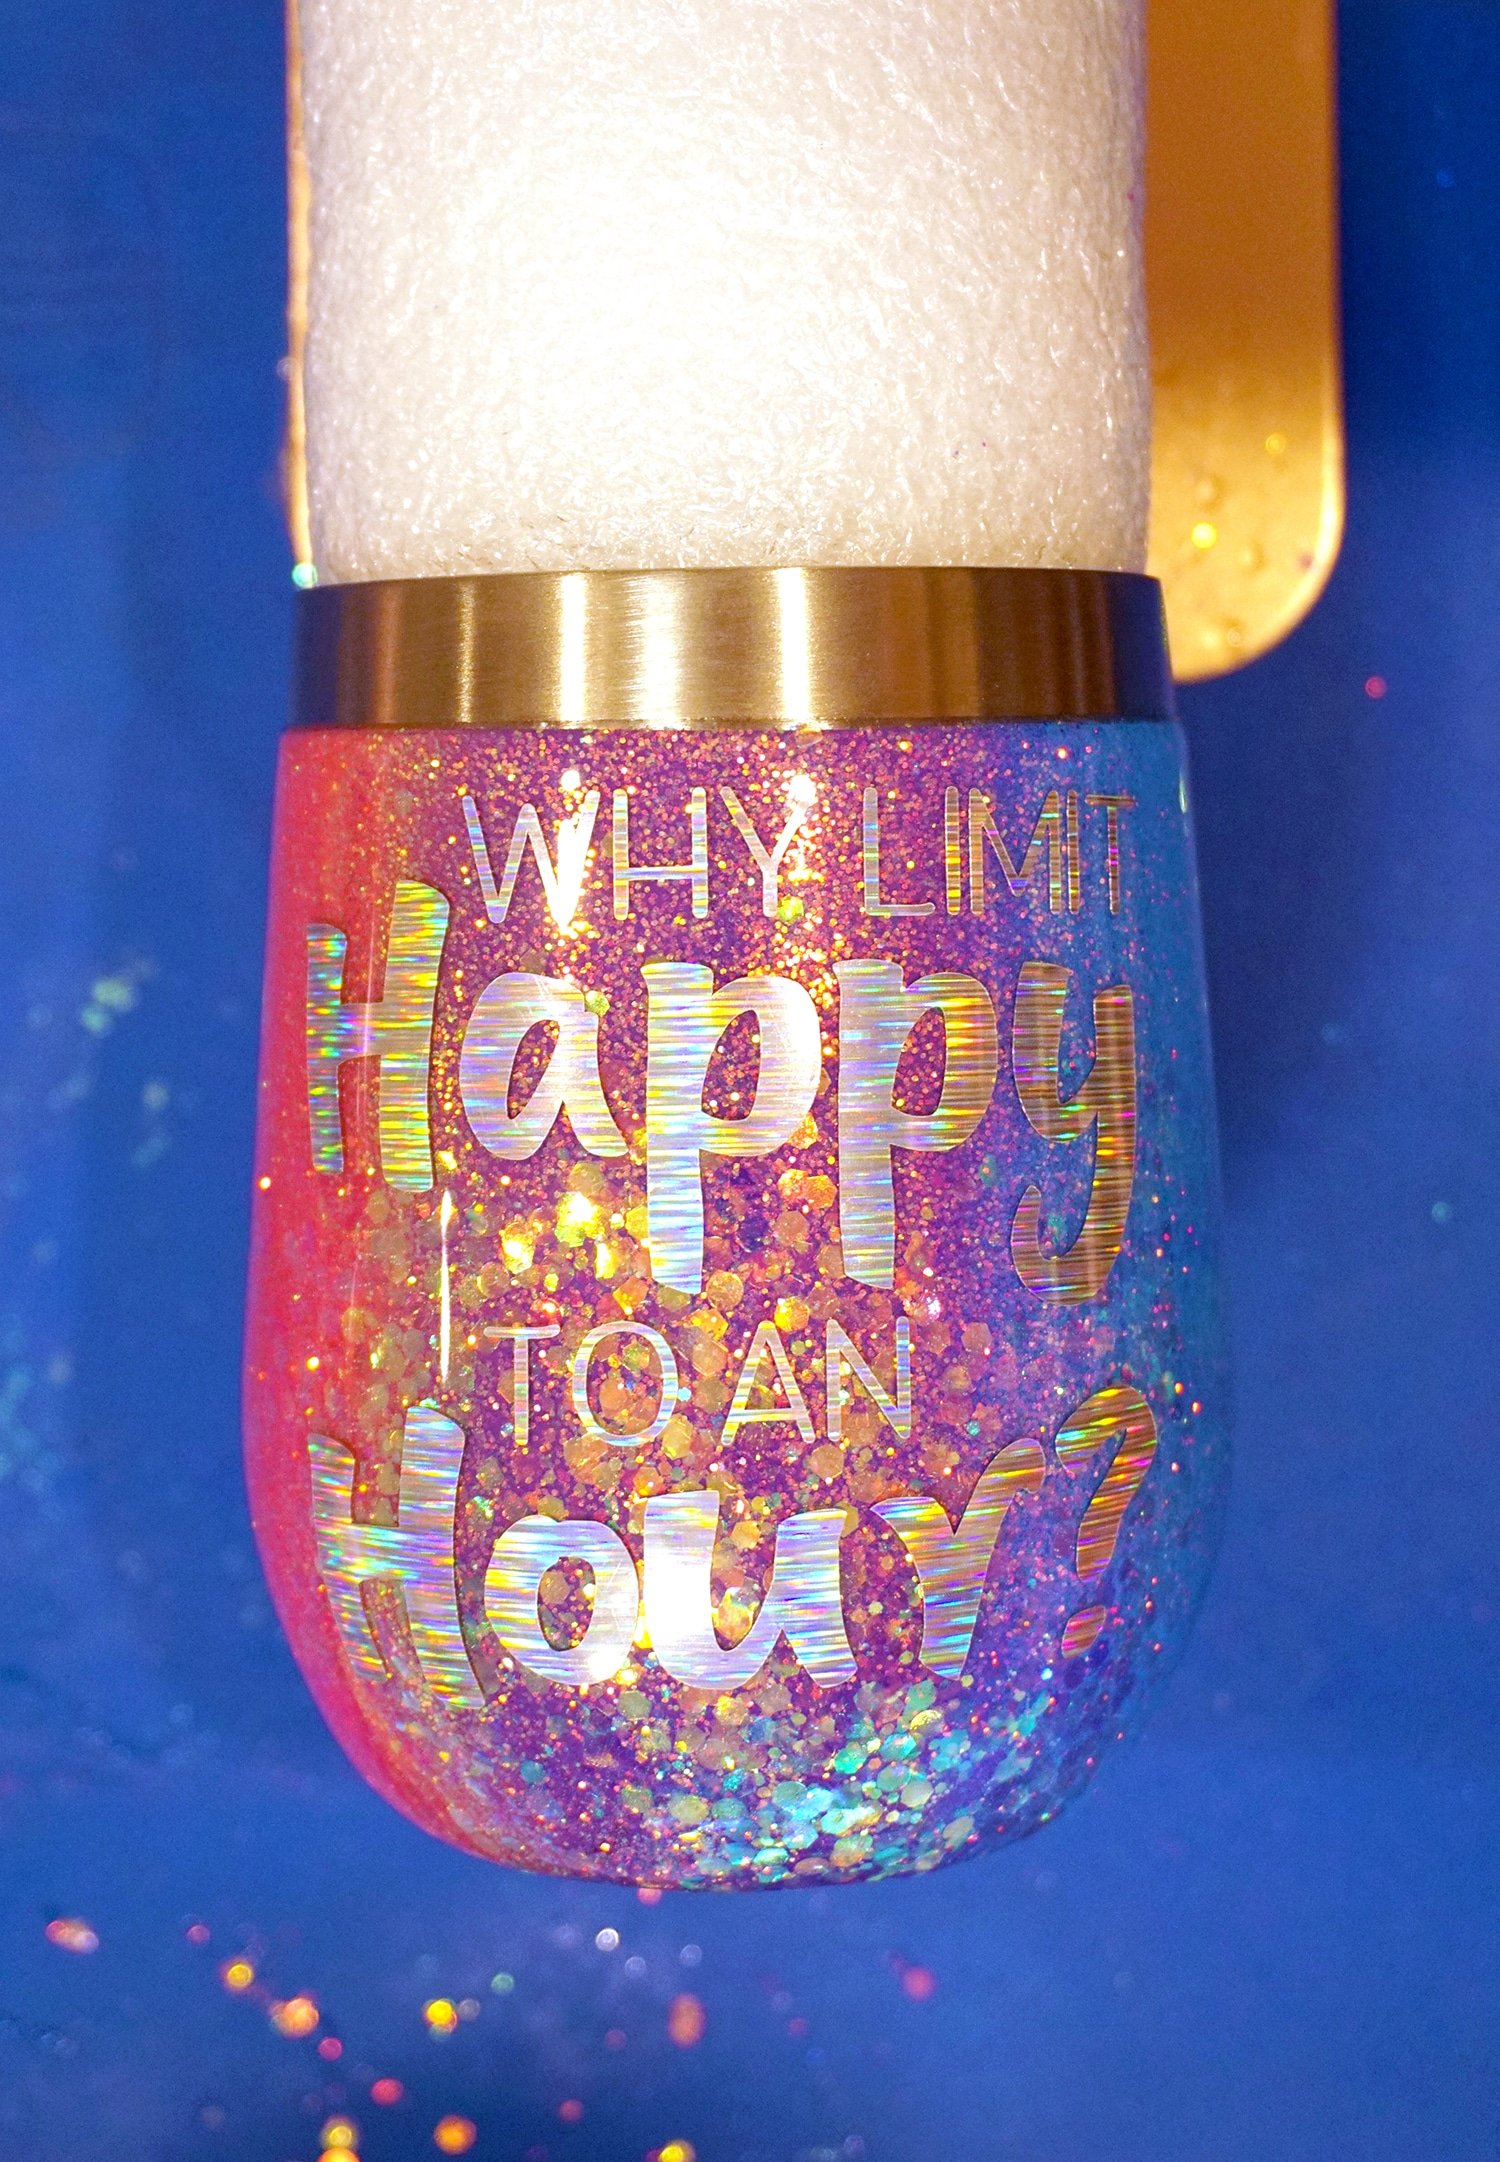
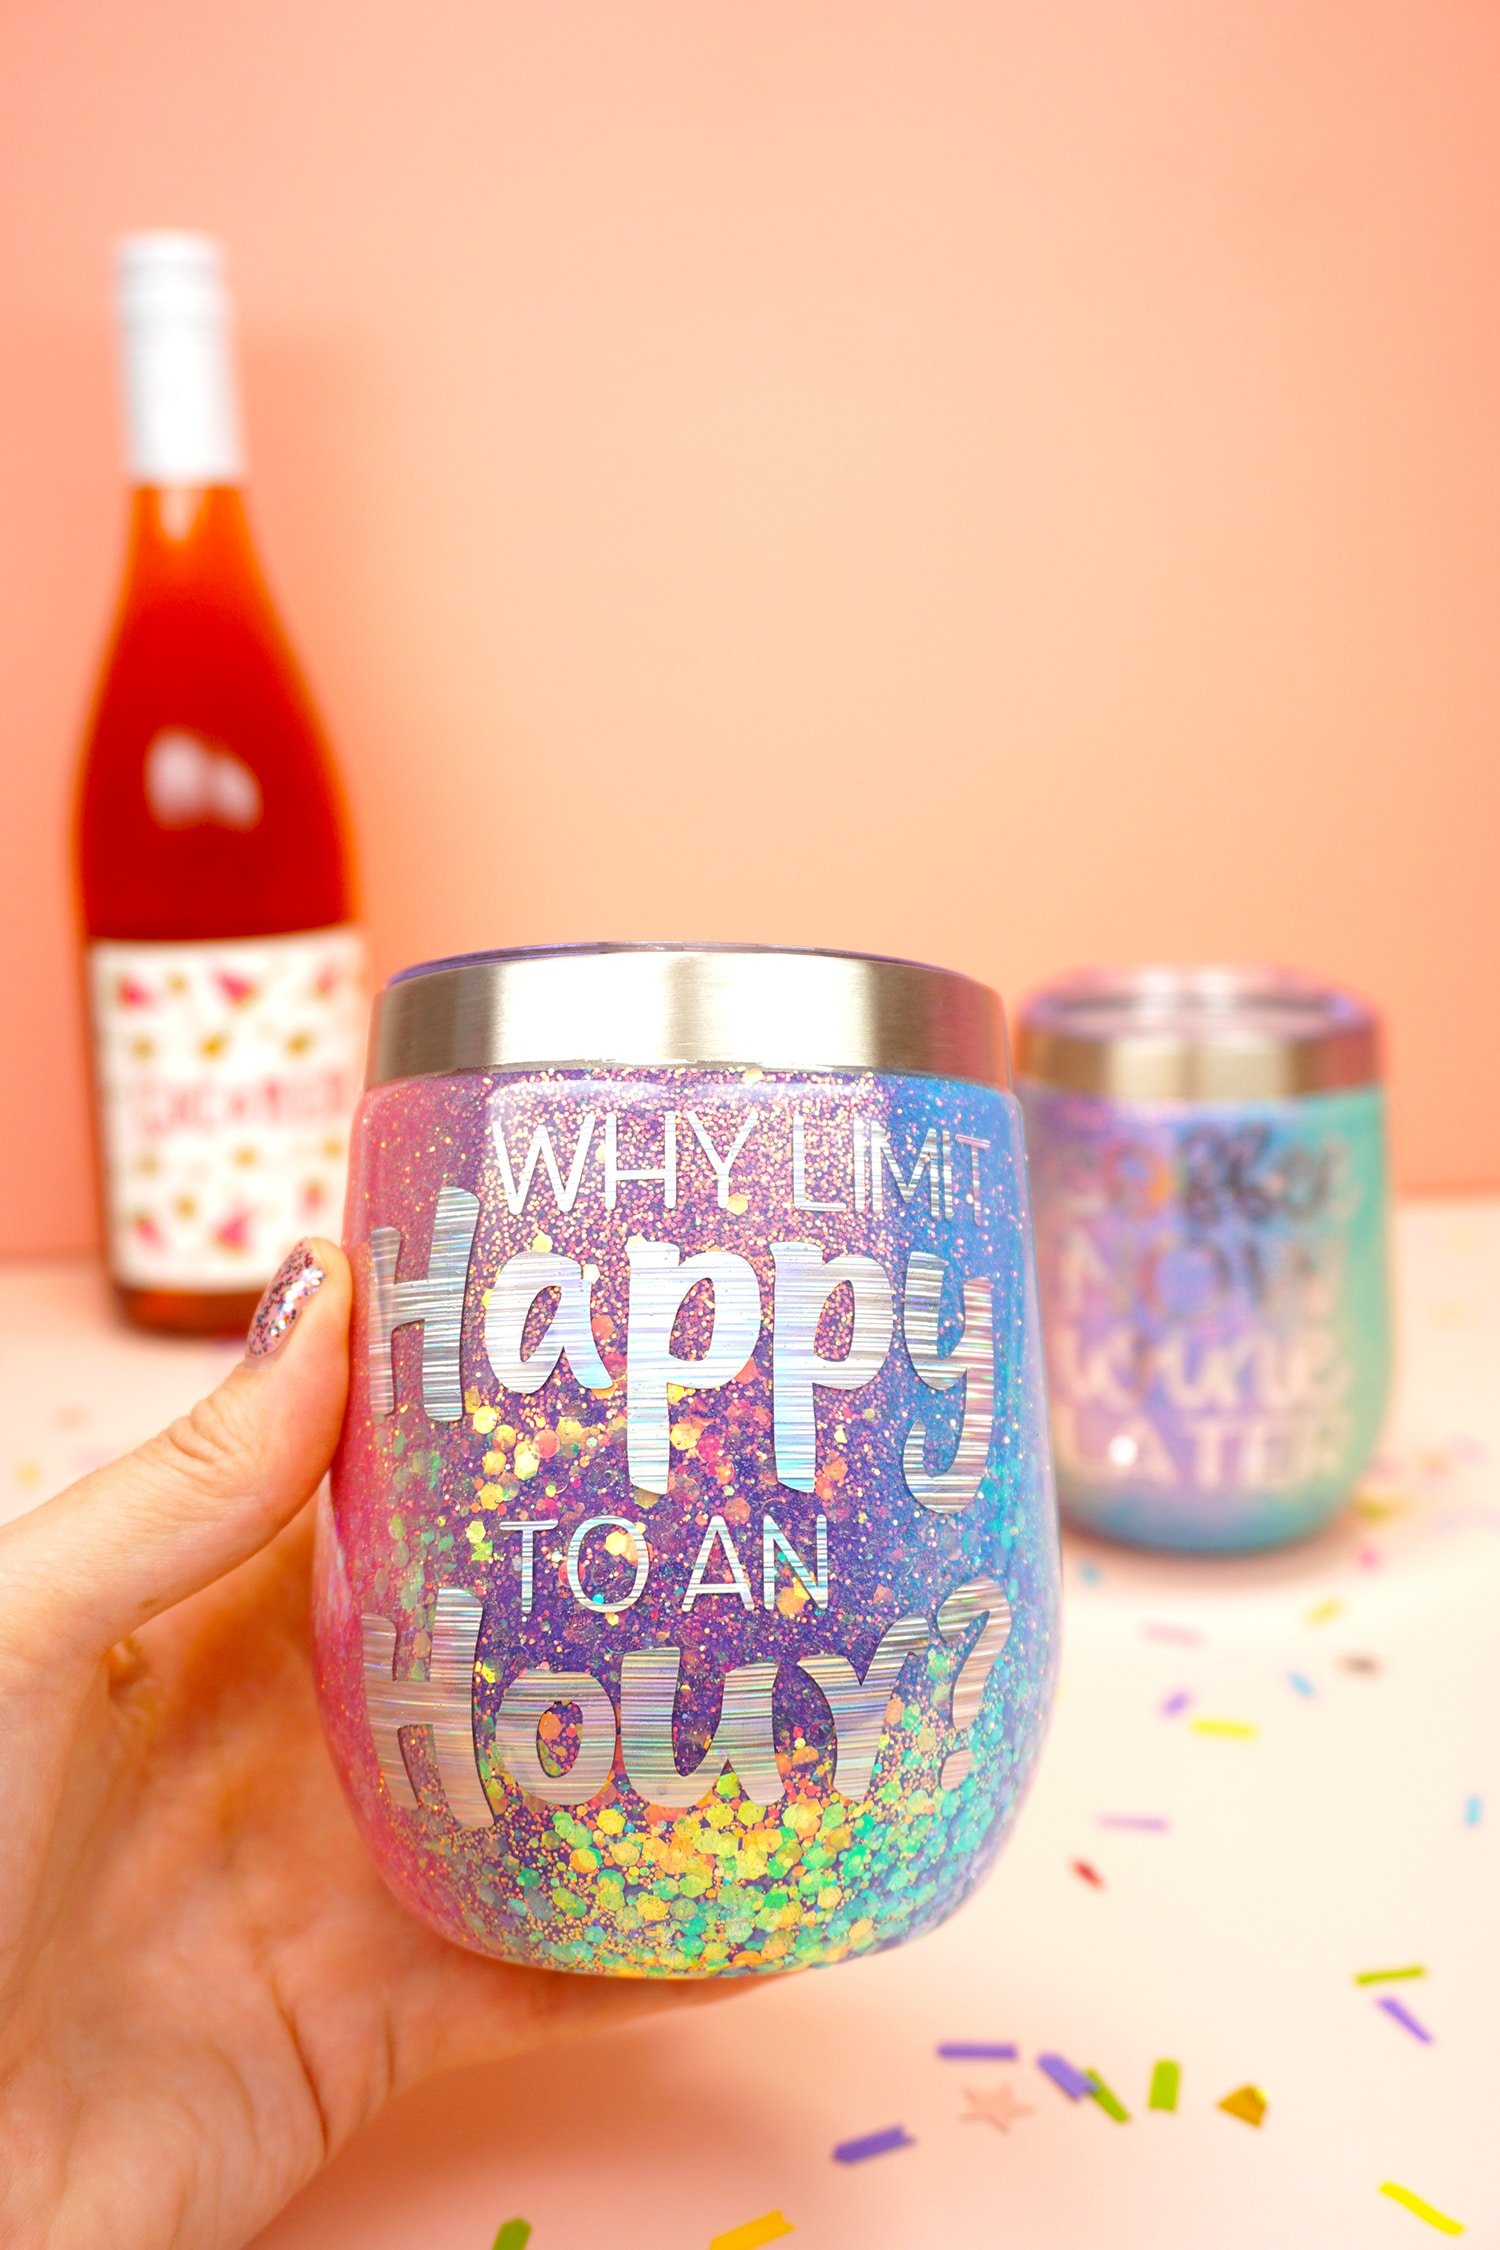
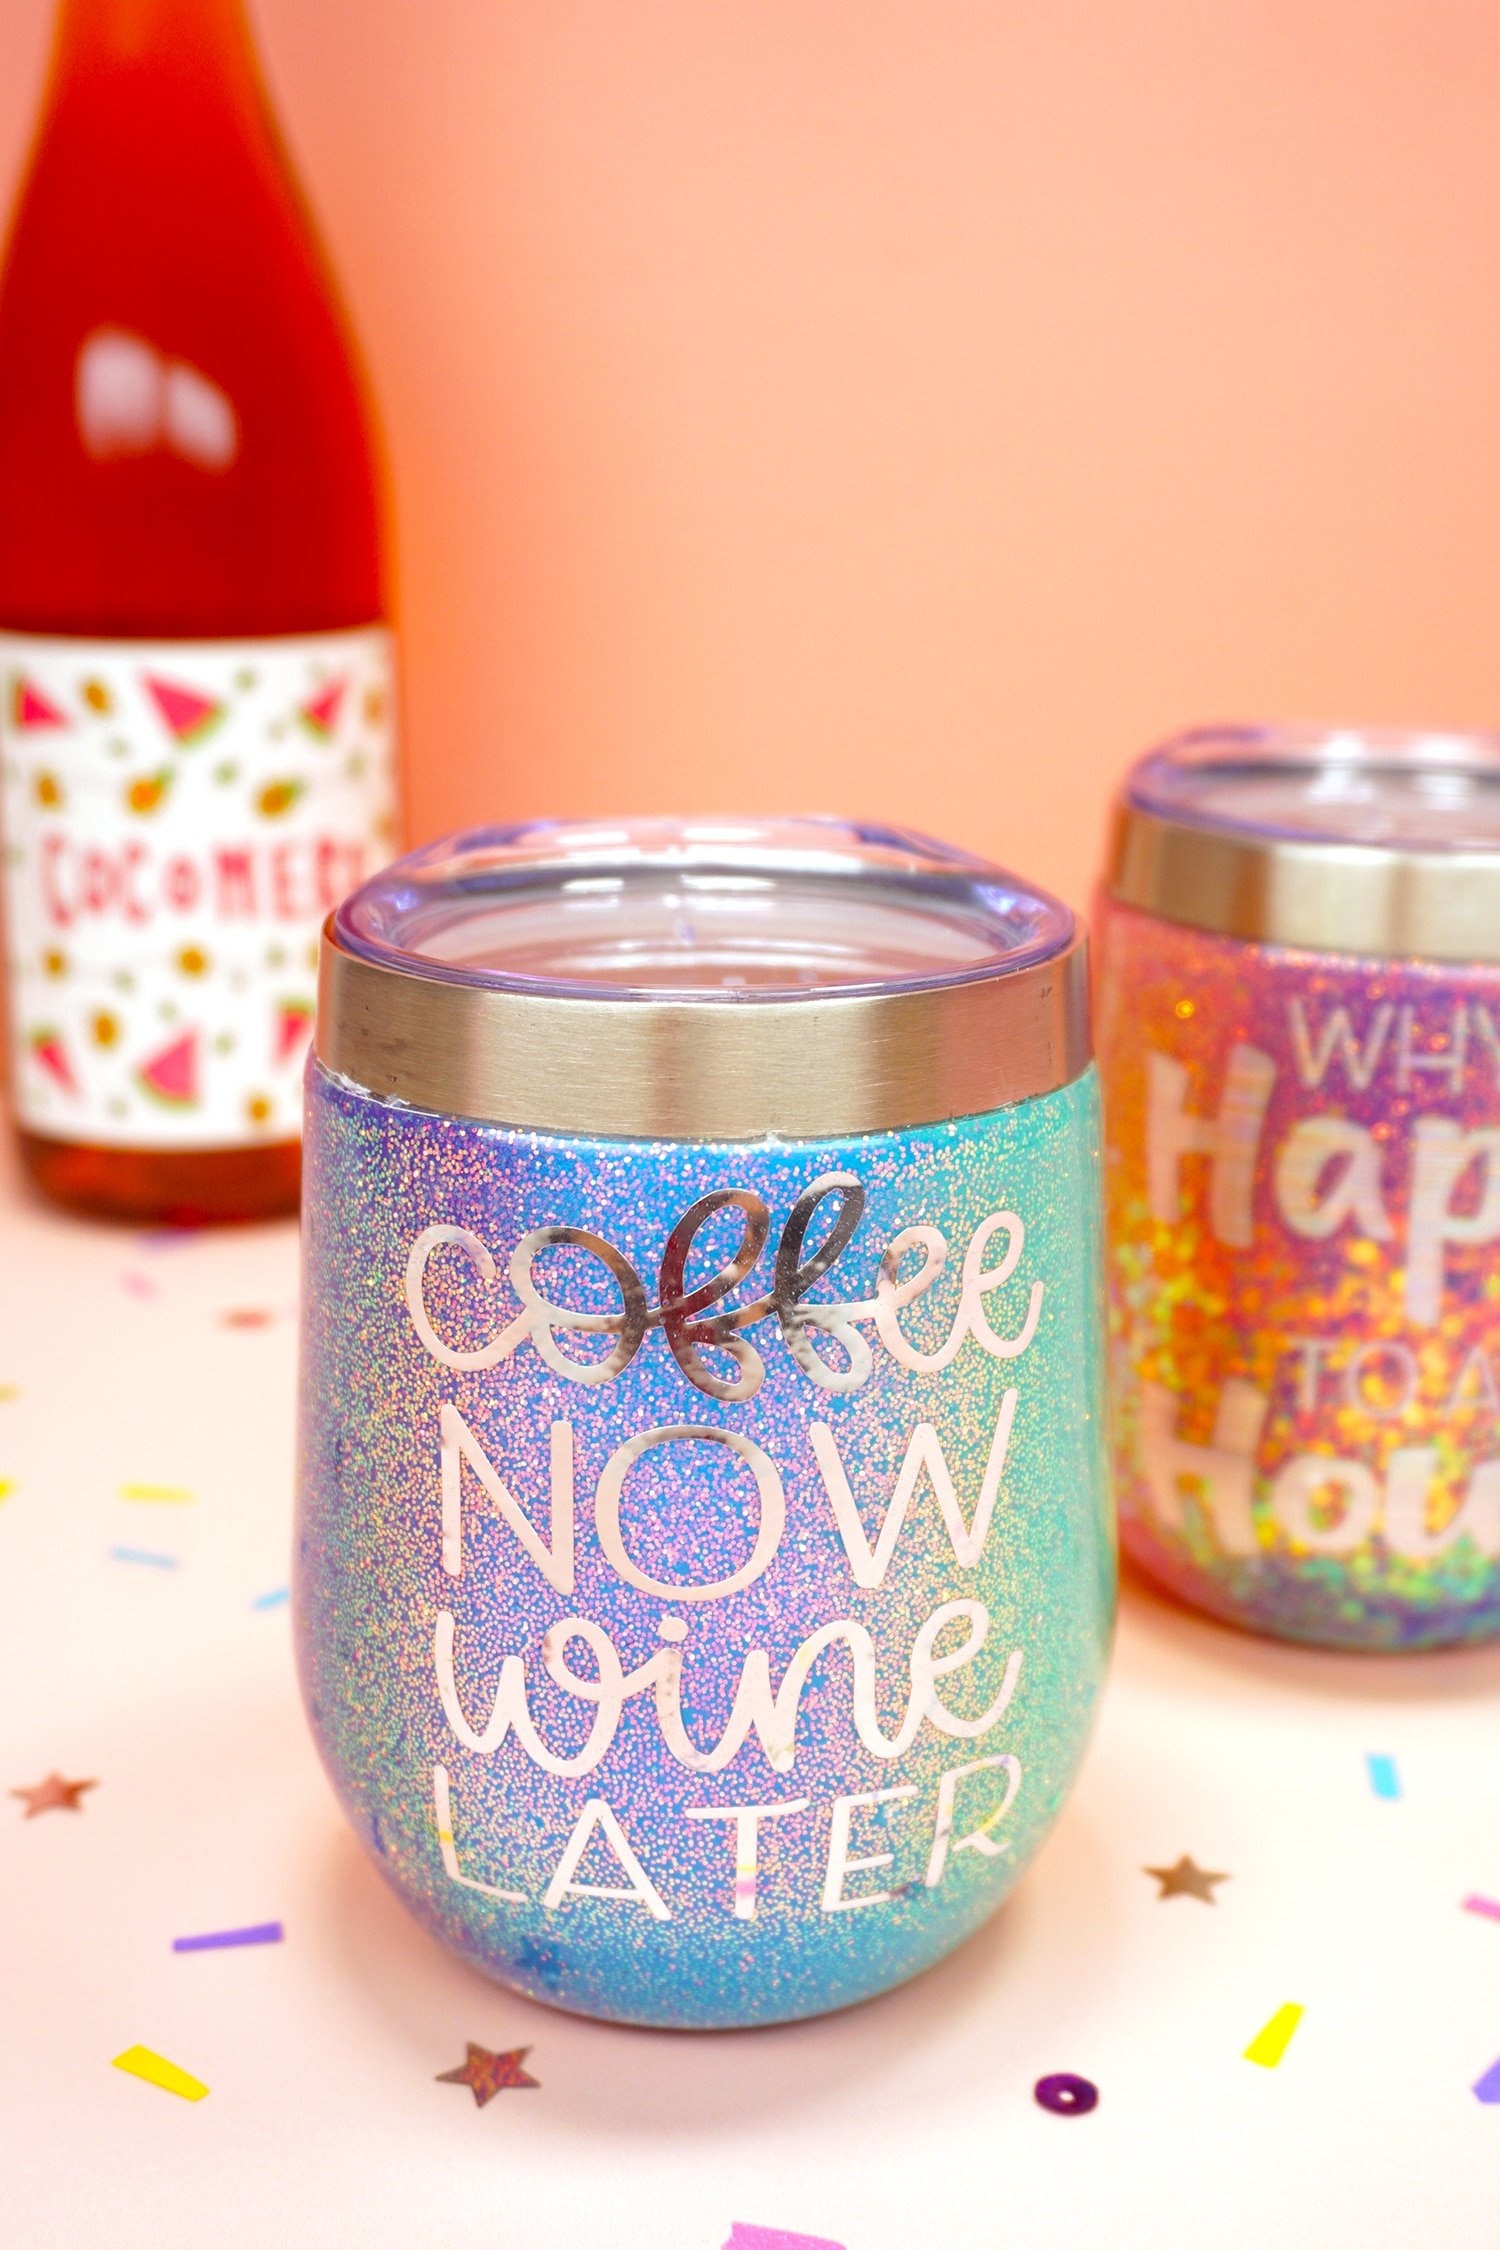
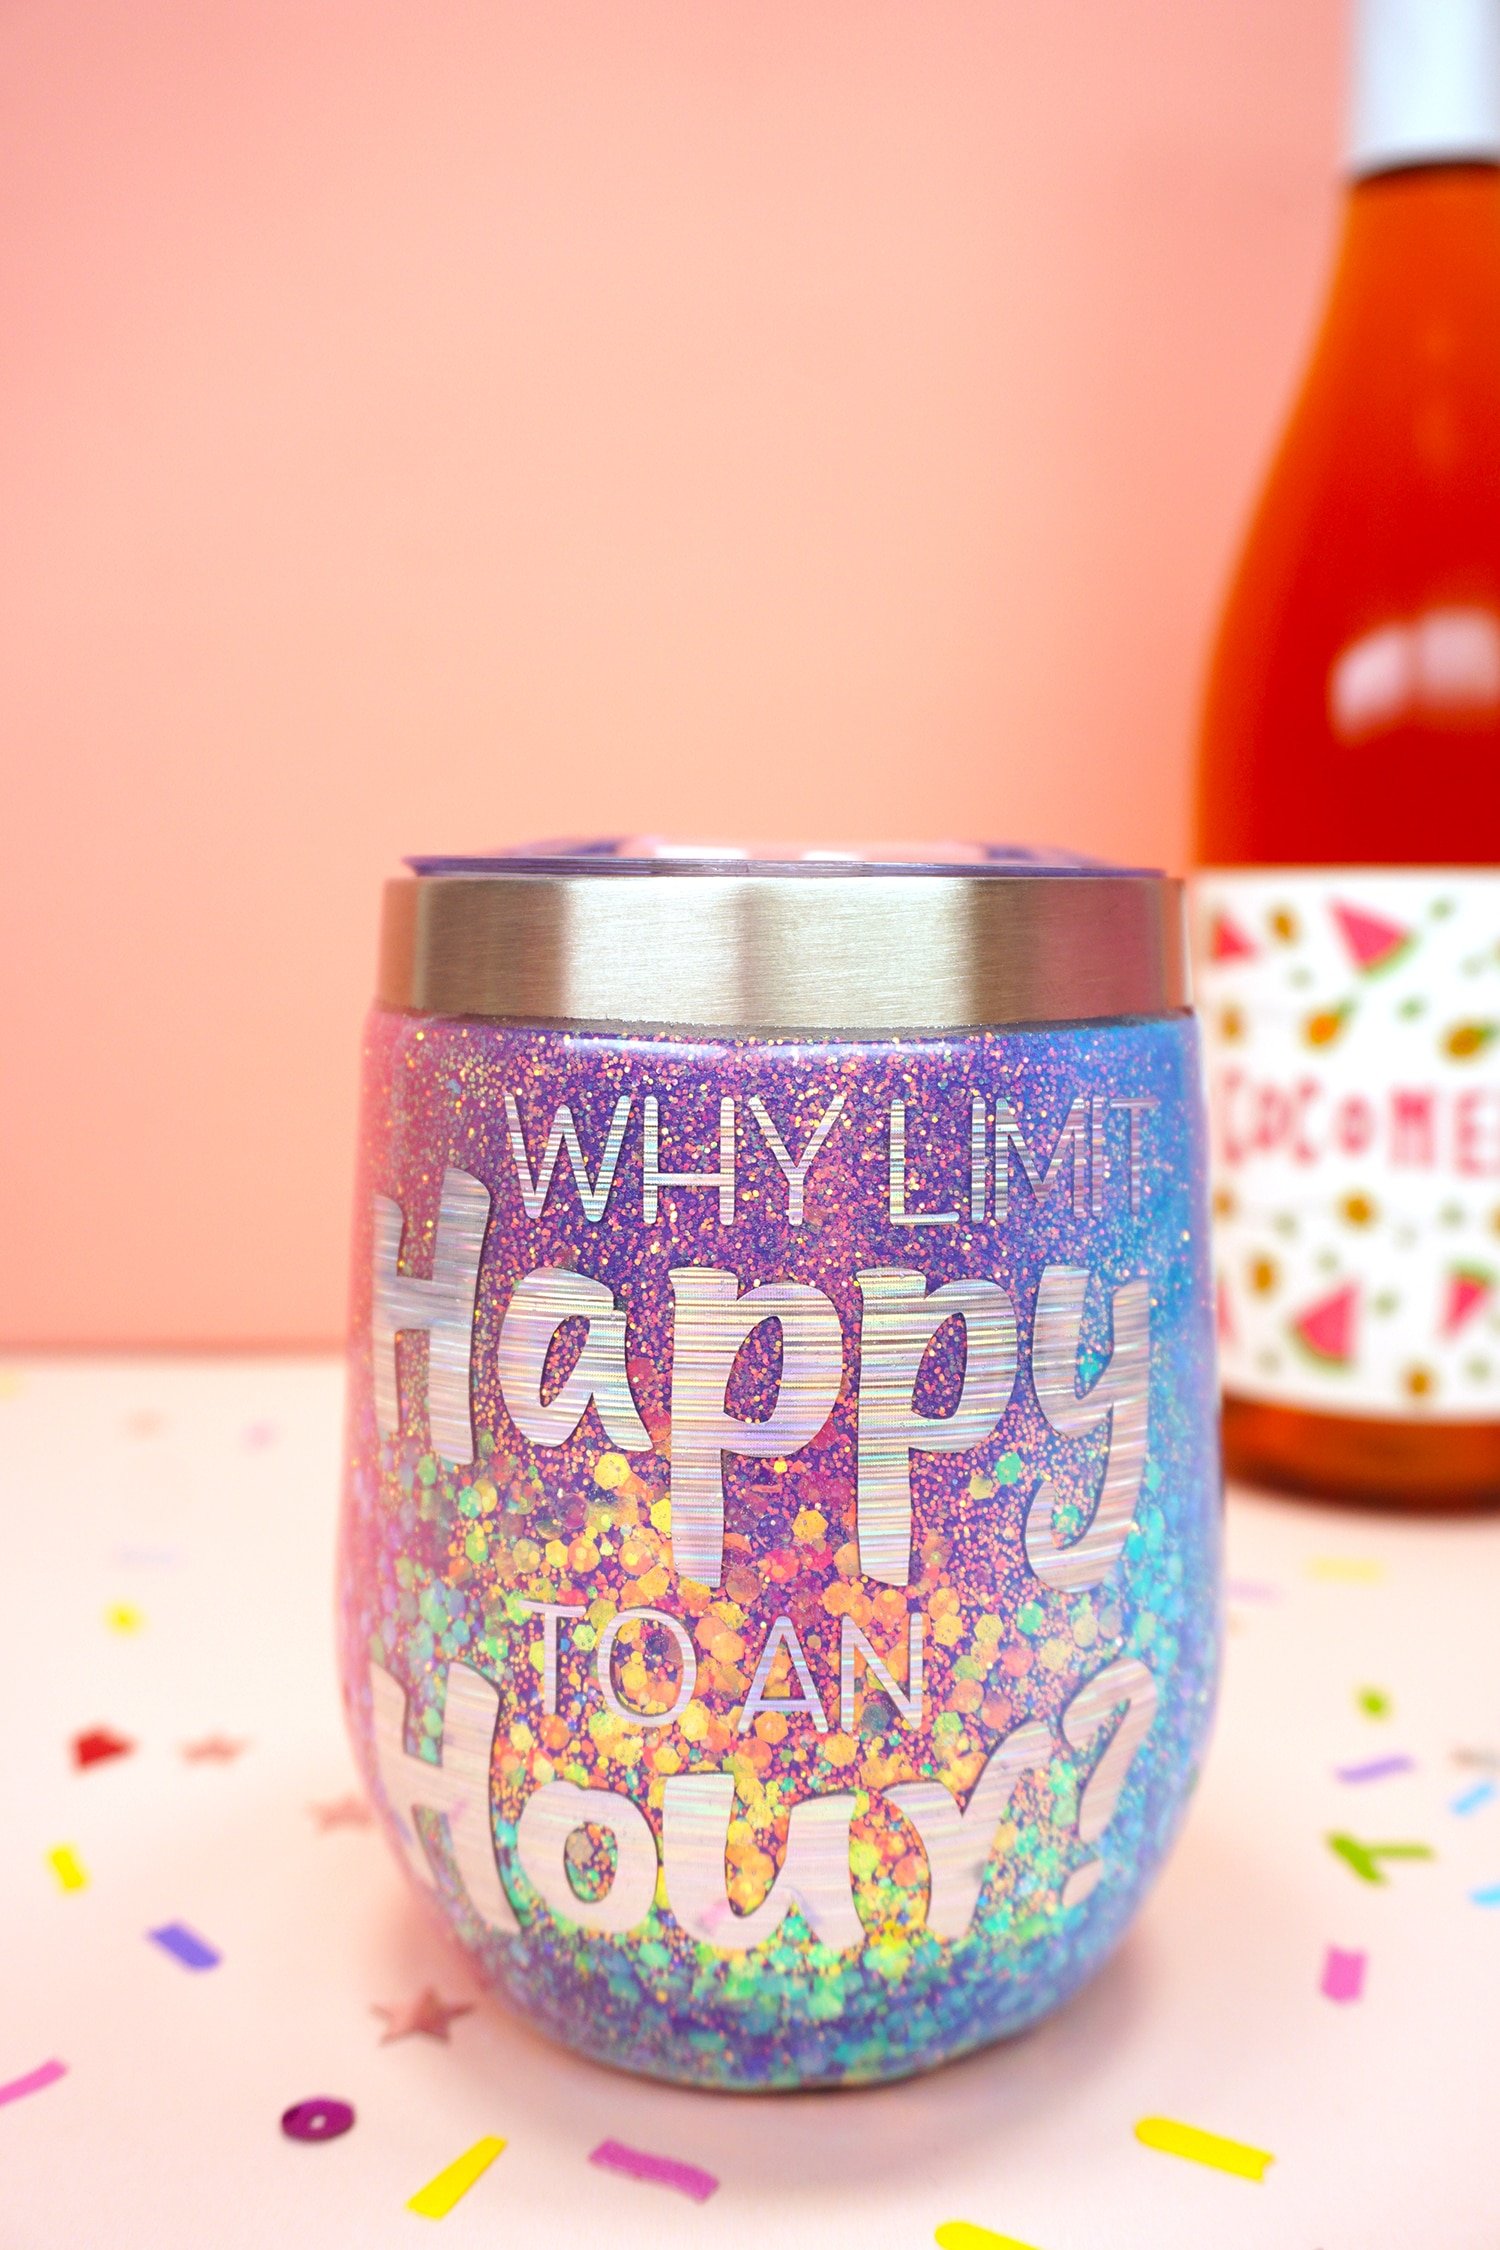
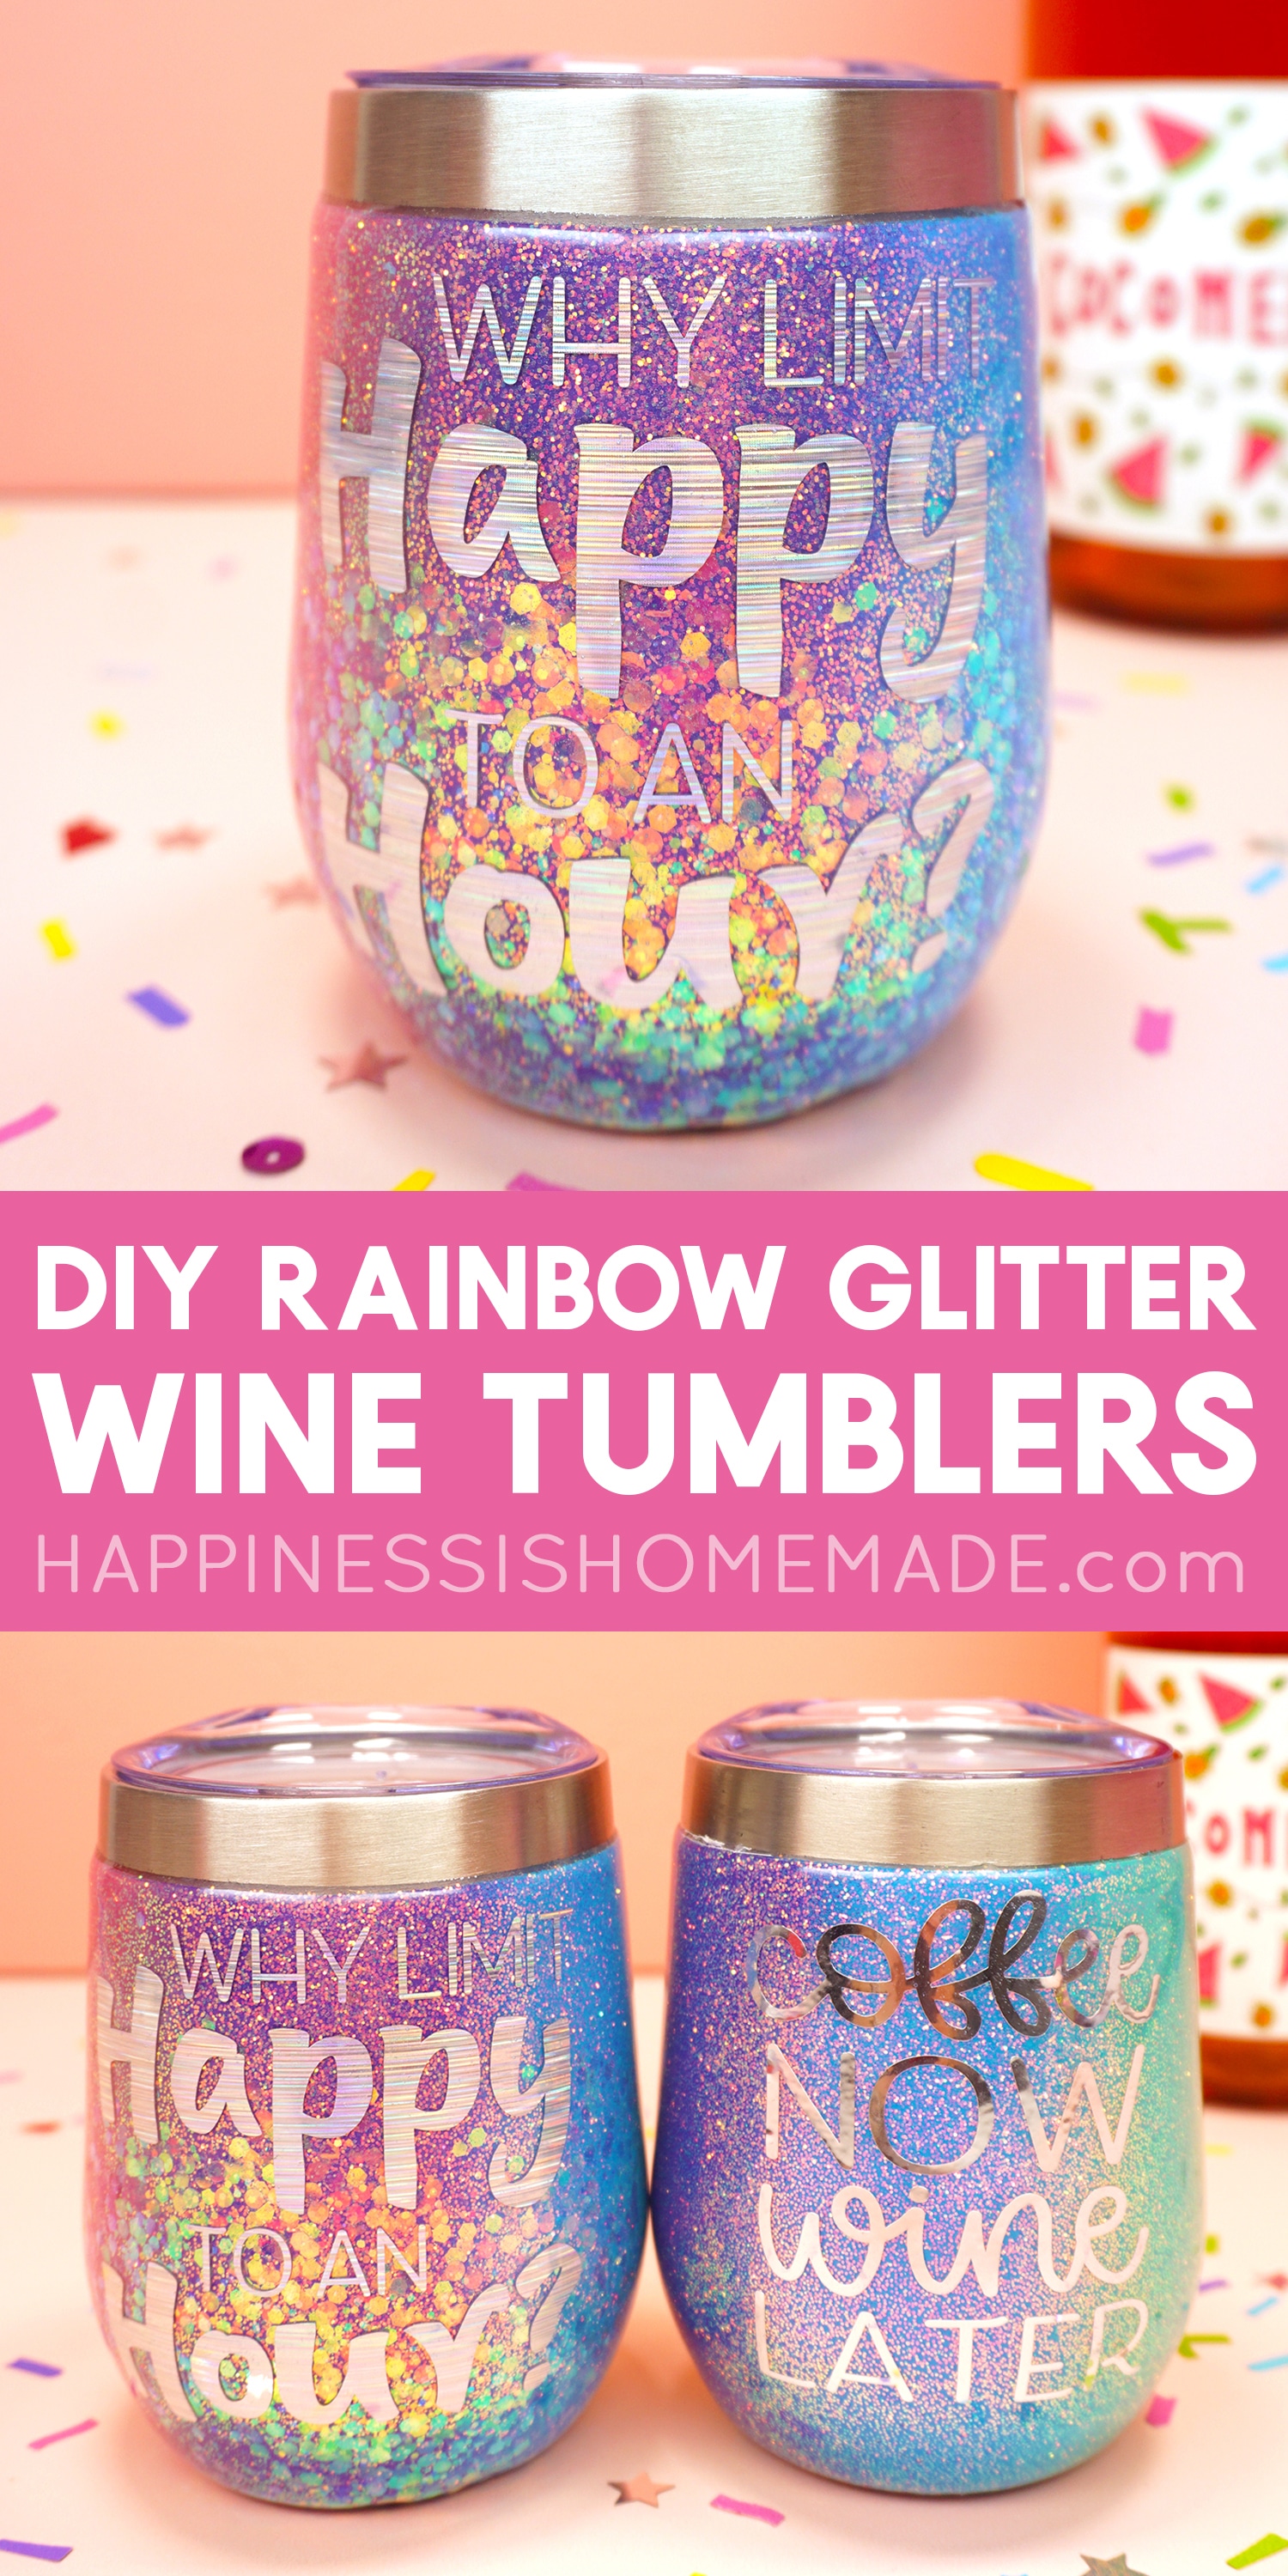
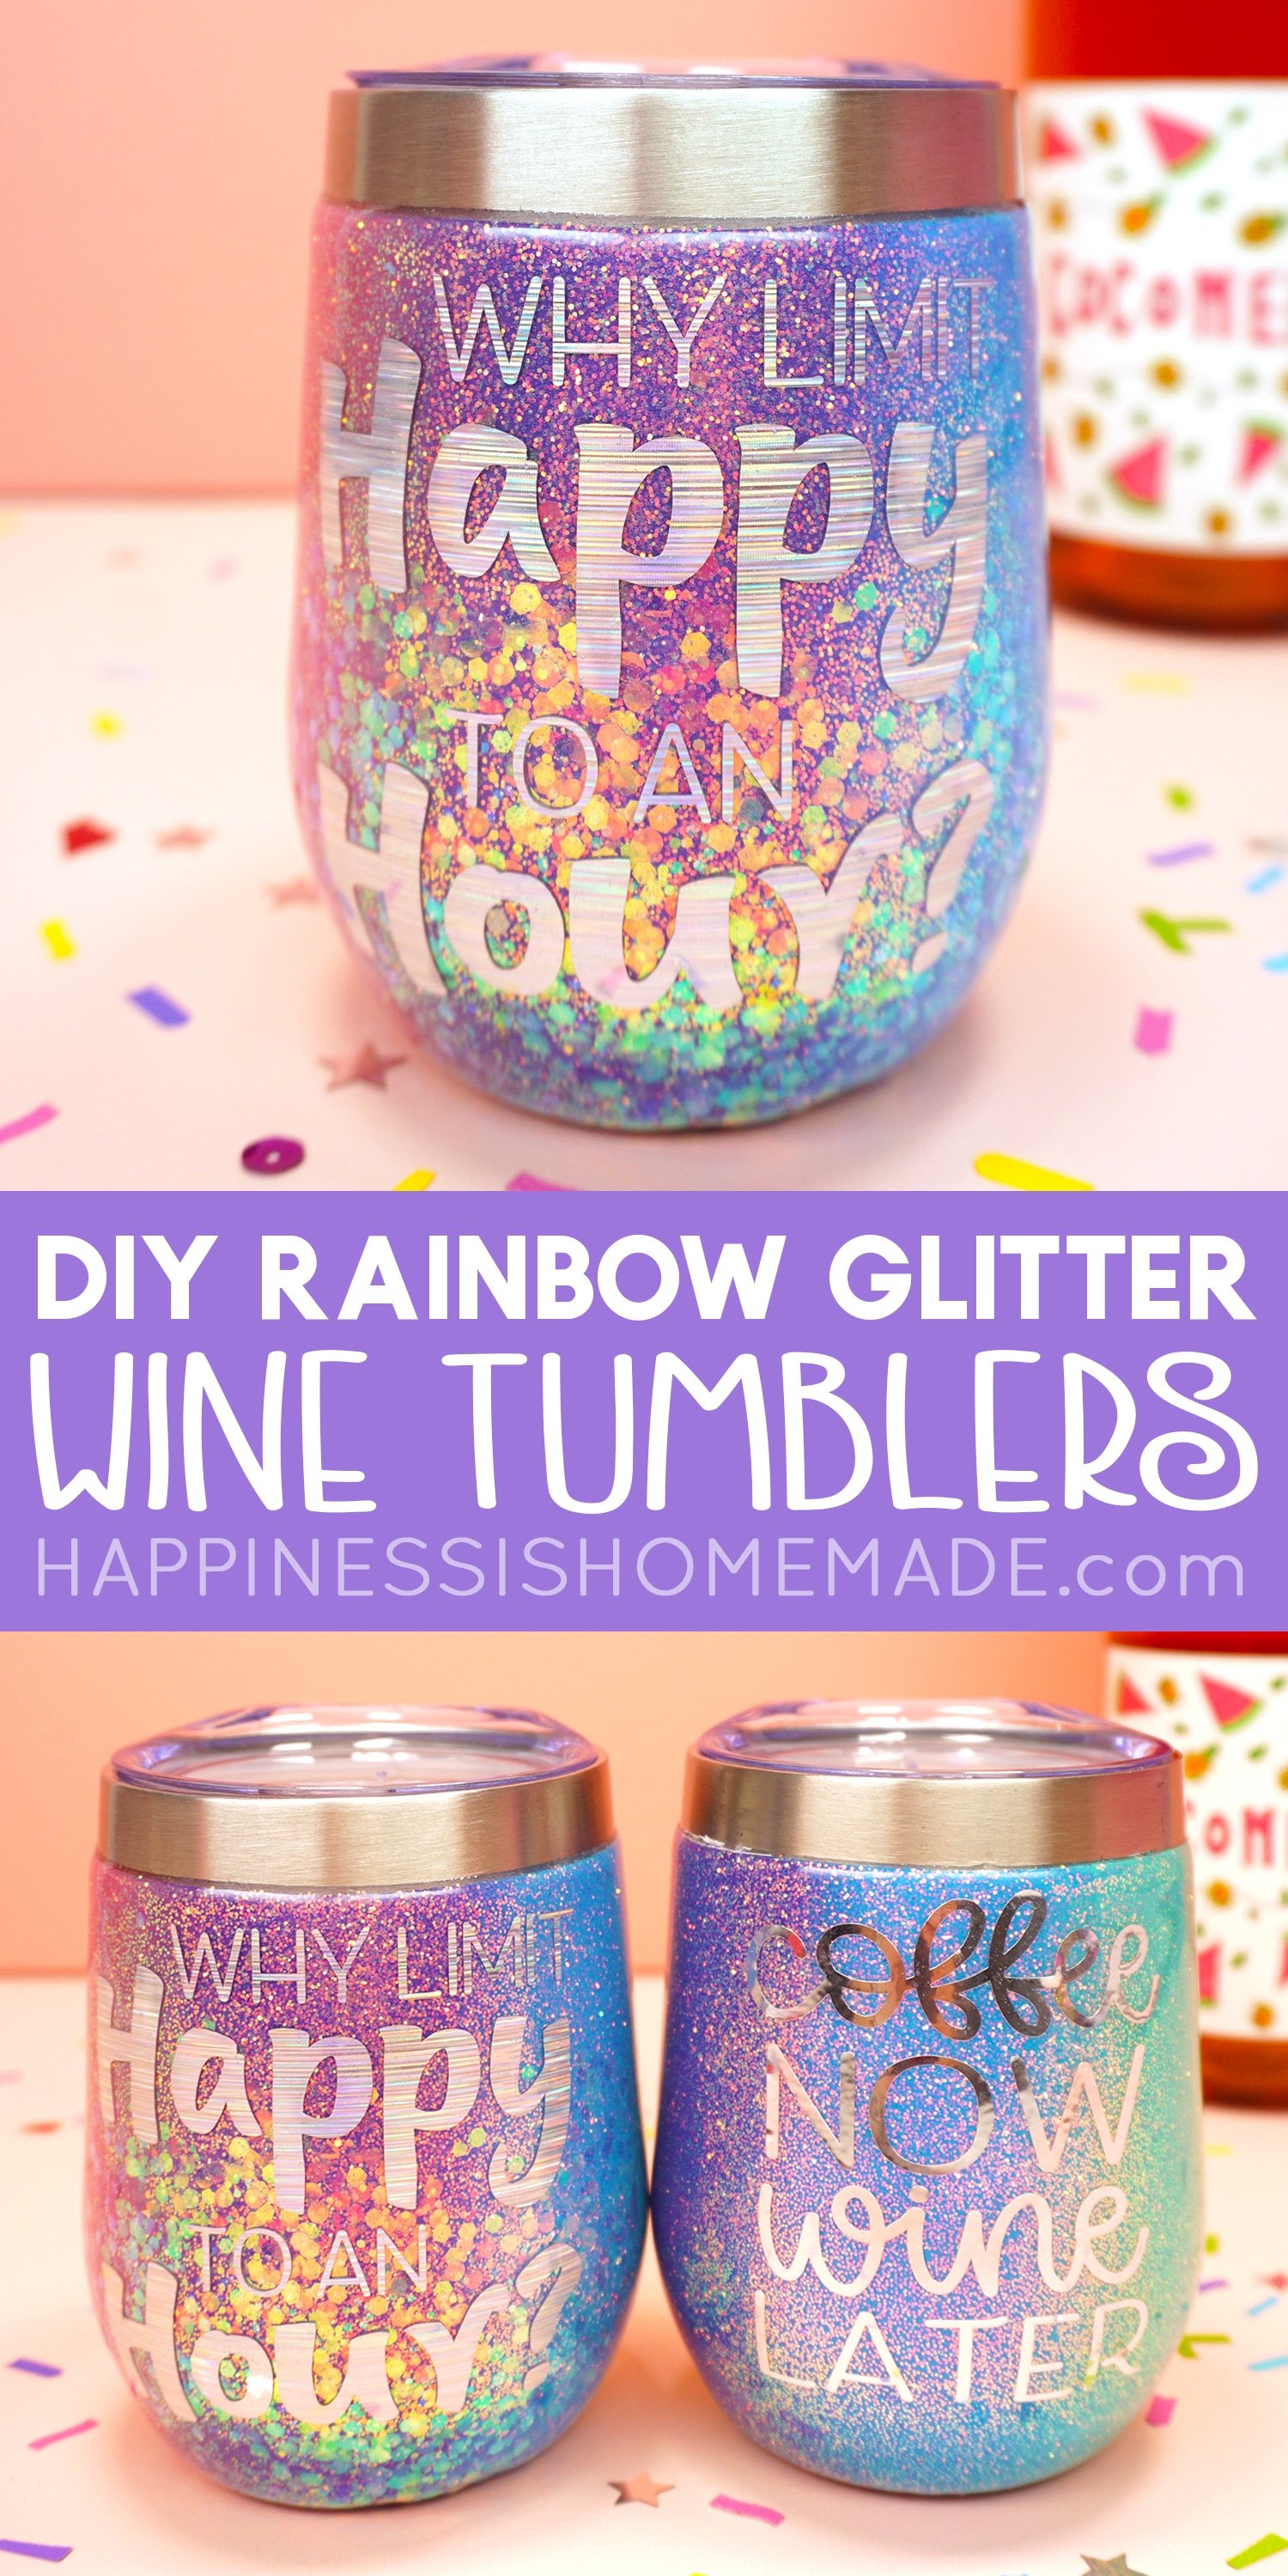
My gift recipient loves rainbows and wine just as much as I do (there’s a very good reason why she’s one of my besties!), so I knew that a customized rainbow glitter wine tumbler would make a perfect gift for her! For these rainbow glitter tumblers, I used my Cricut Explore Air 2 machine to add some fun happy hour sayings, but the design possibilities are truly endless!
How to Make Glitter Tumblers
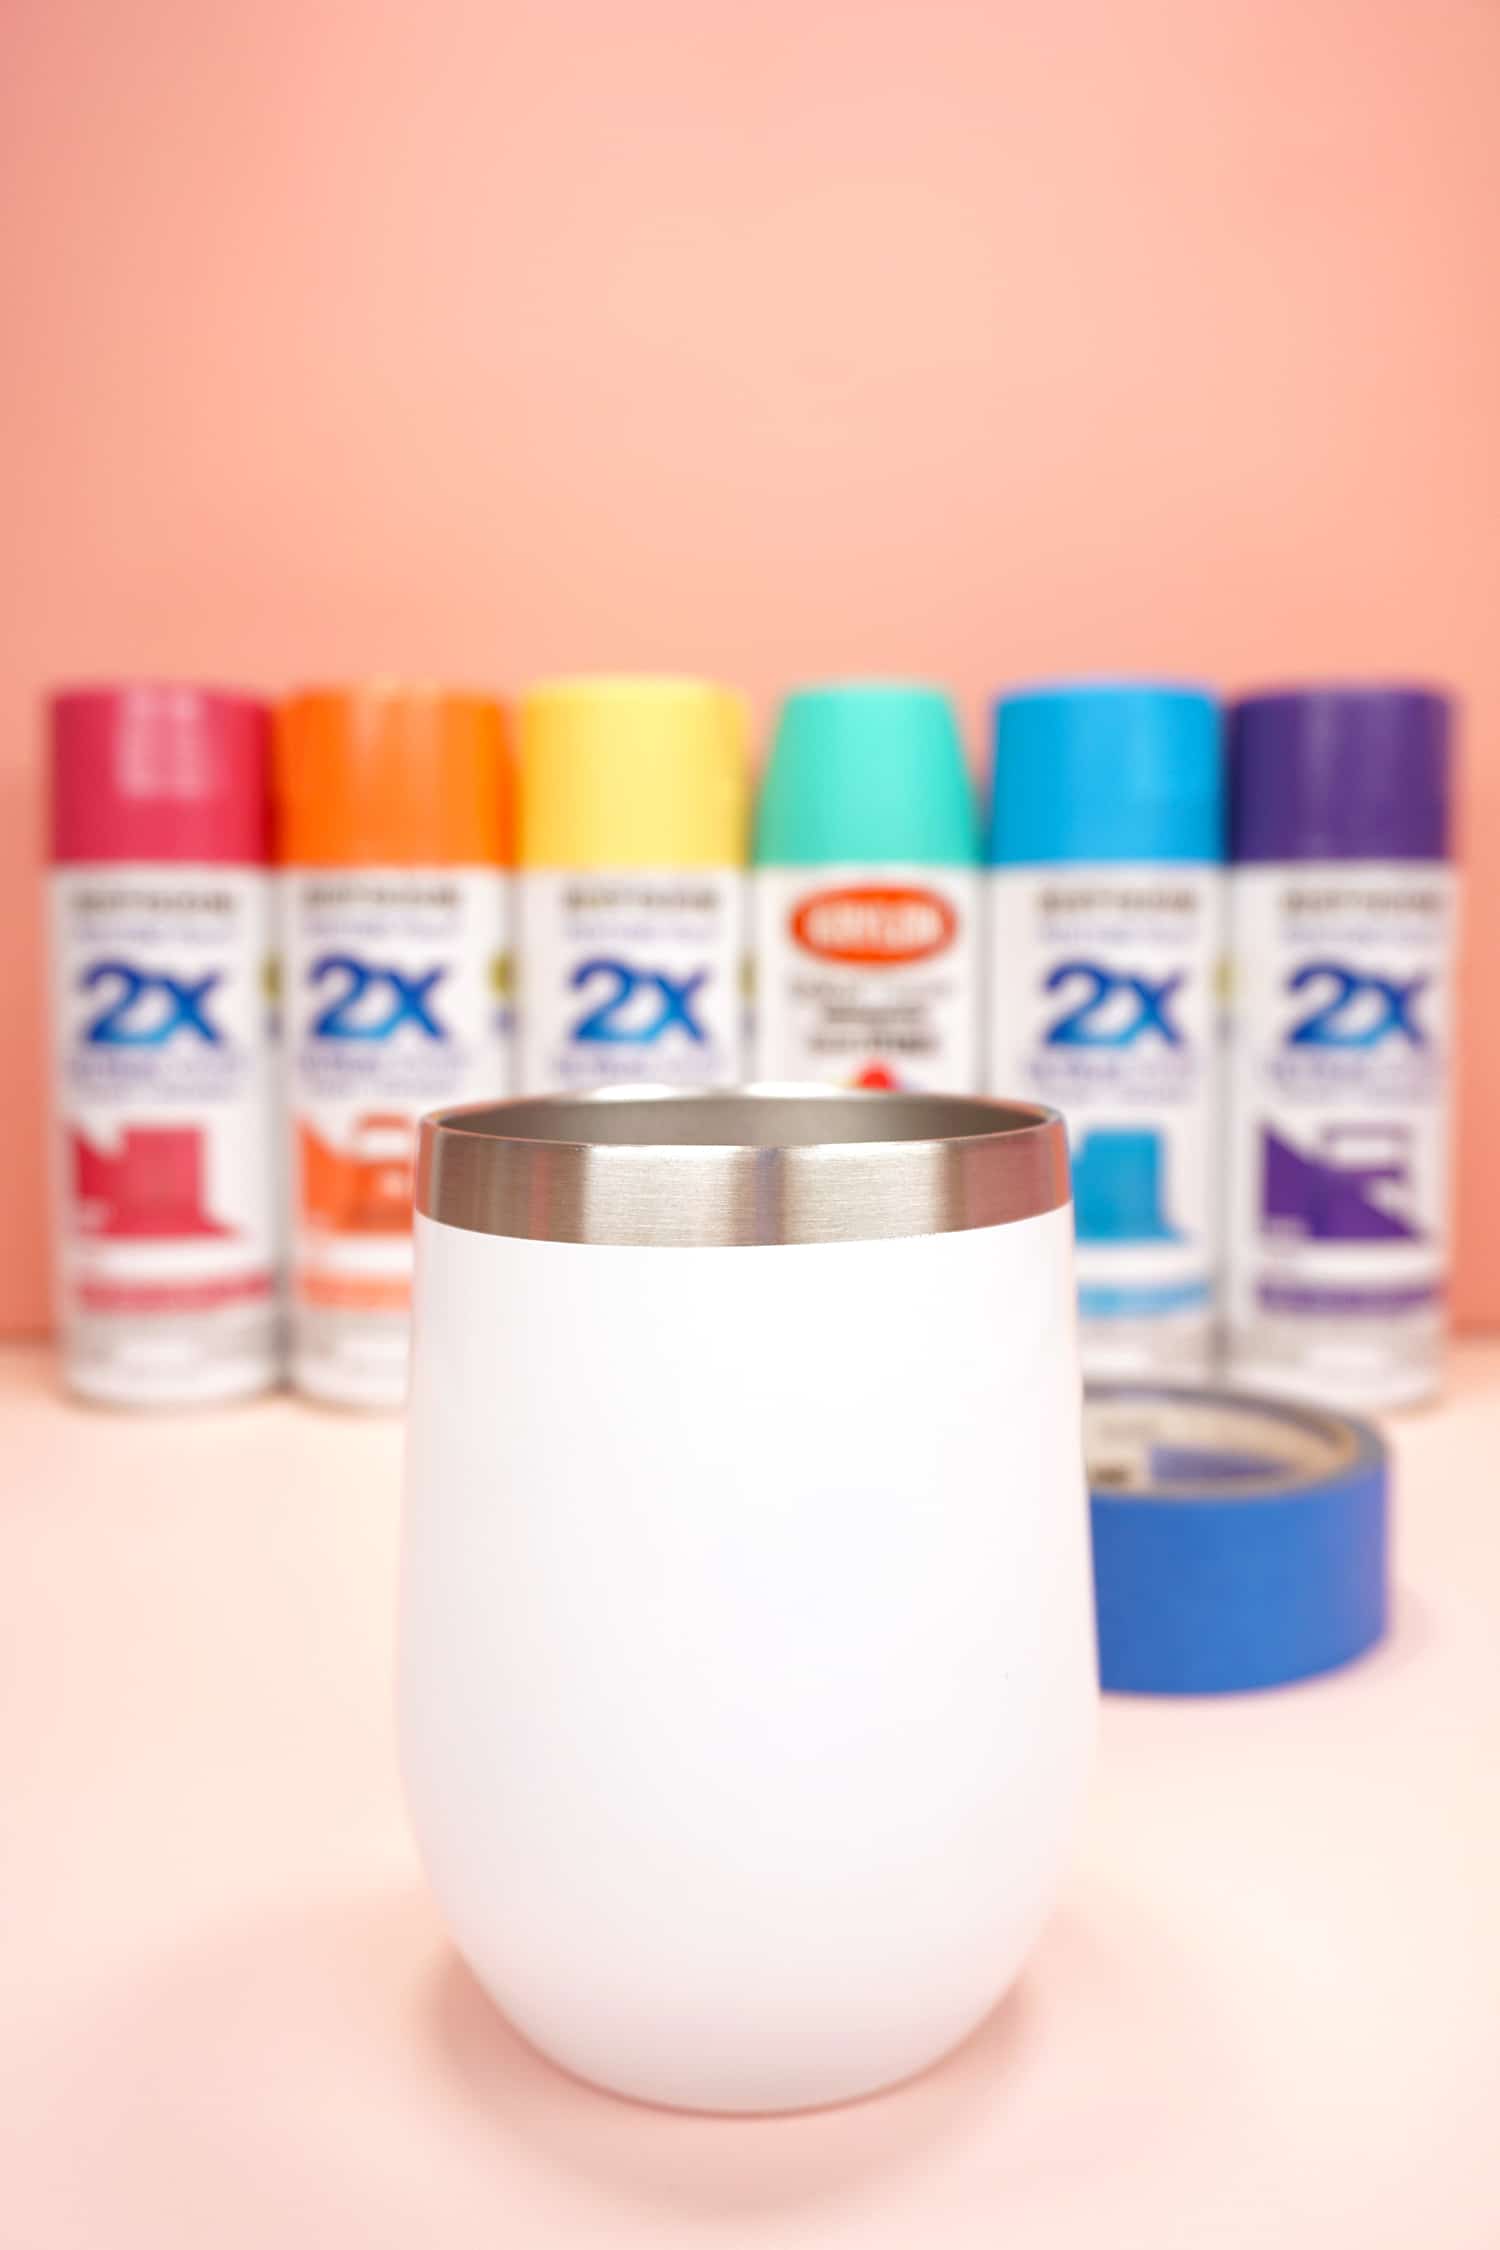
The very first step is to paint your cup with a base coat of color. You can use a single color or a mix of colors, or in this case, an entire rainbow of colors!
Step One: Paint Your Tumbler
What You’ll Need:
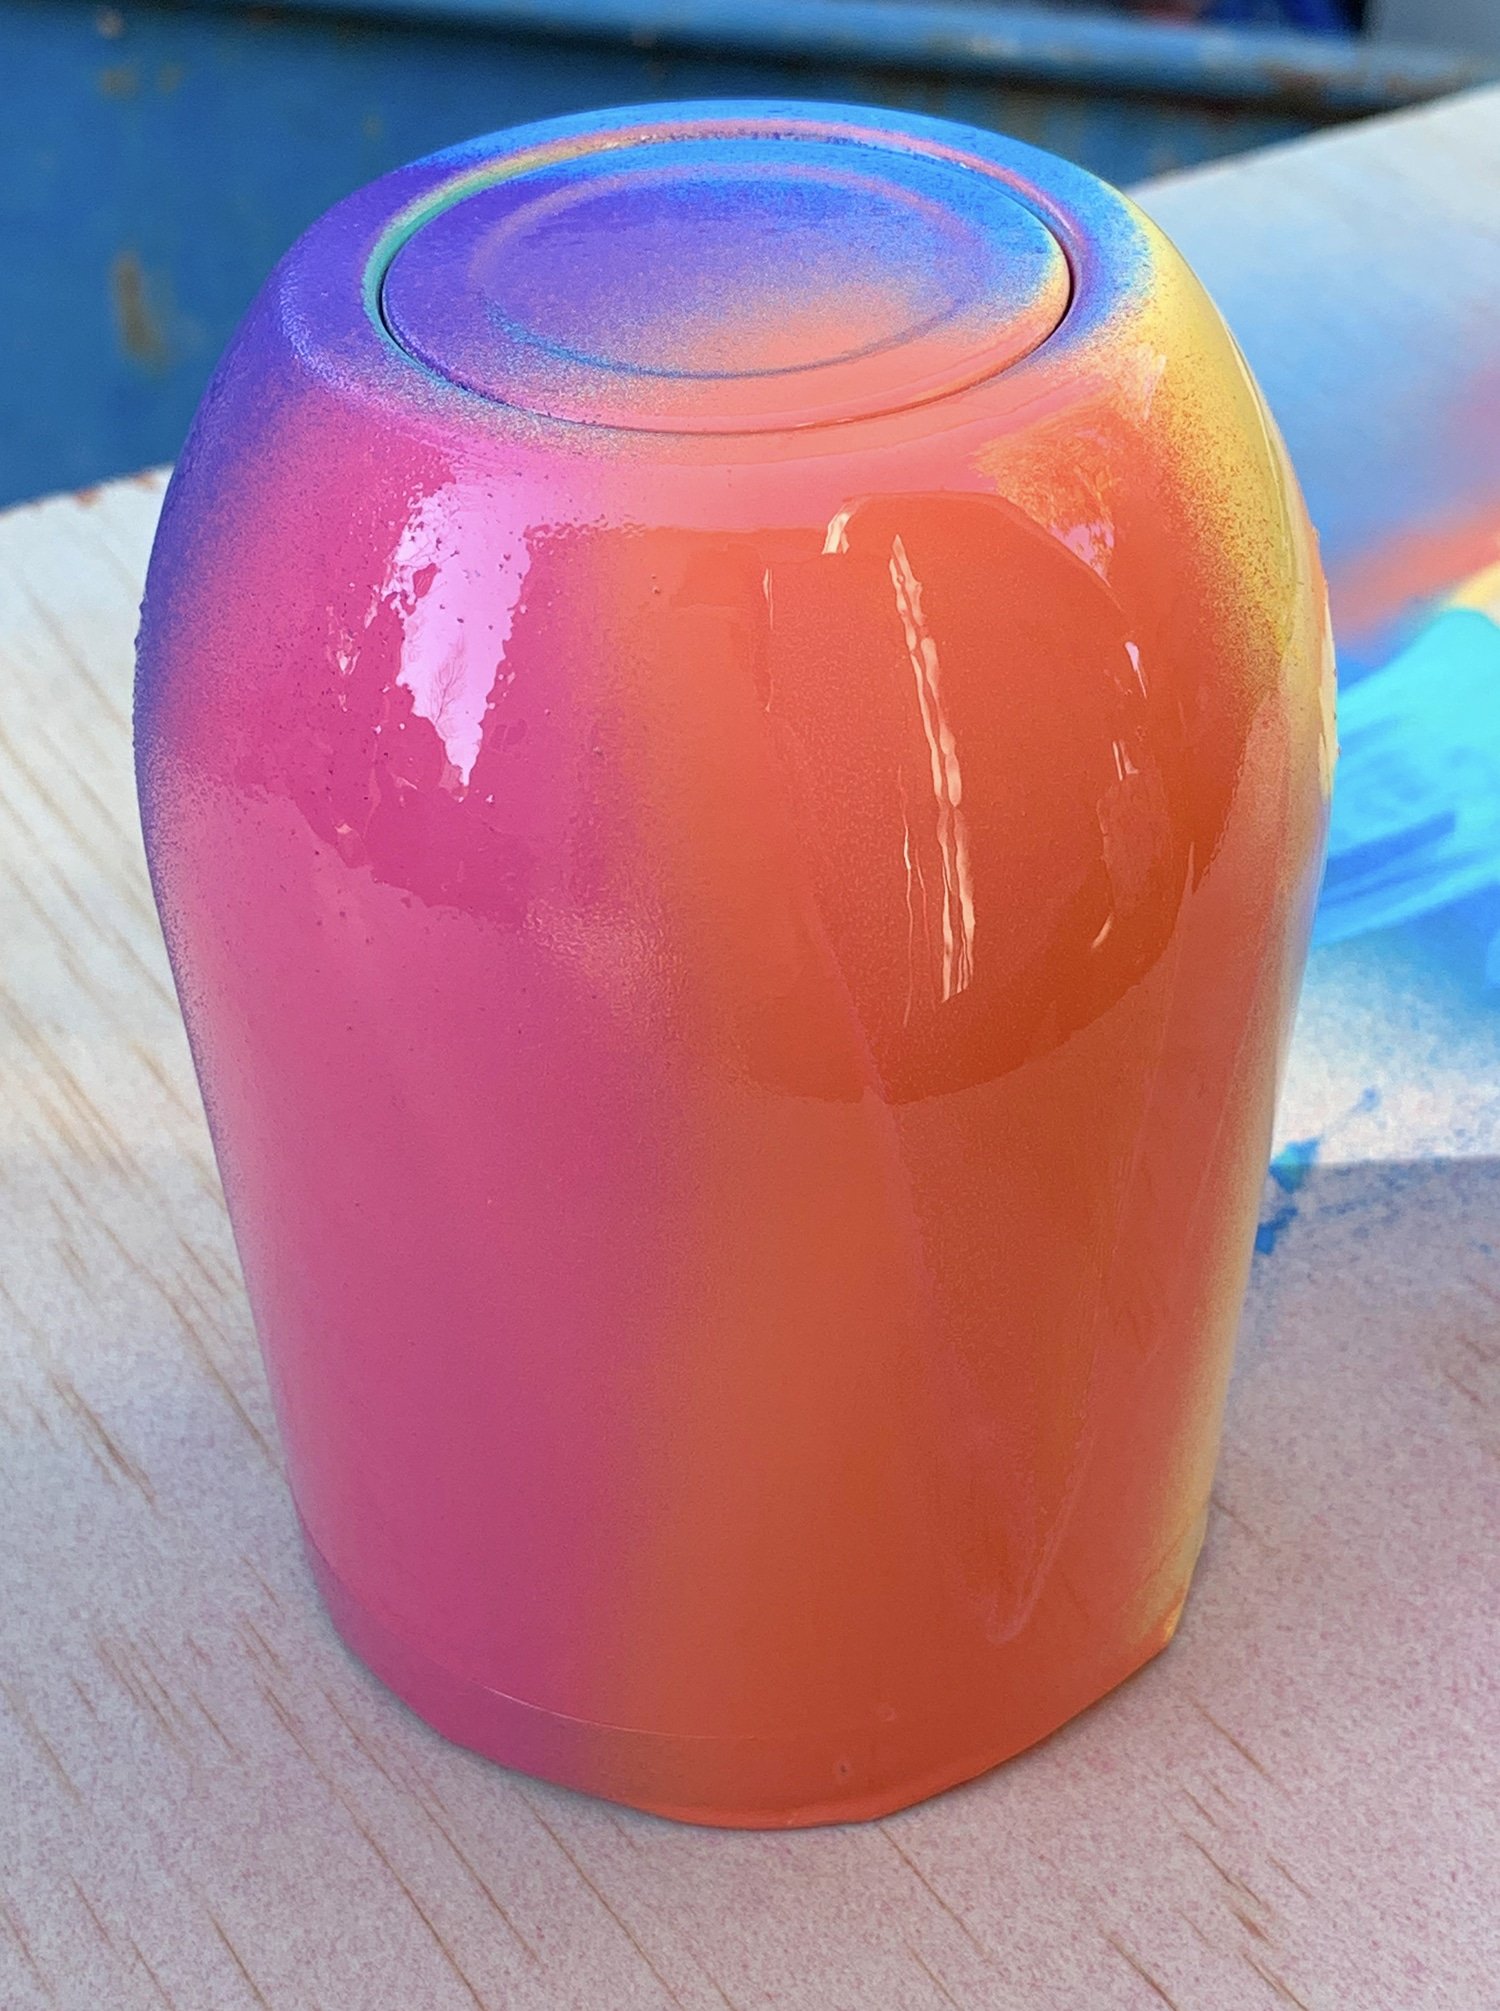
Use the painter’s tape to cover the stainless steel rim at the lip of the cup and set the cup top down on your painting surface. Paint a vertical stripe of each color on to the cup in rainbow order (don’t worry if the stripes aren’t perfect – no one will ever notice!) and allow to dry completely.
Note: always spray paint in a well-ventilated area!
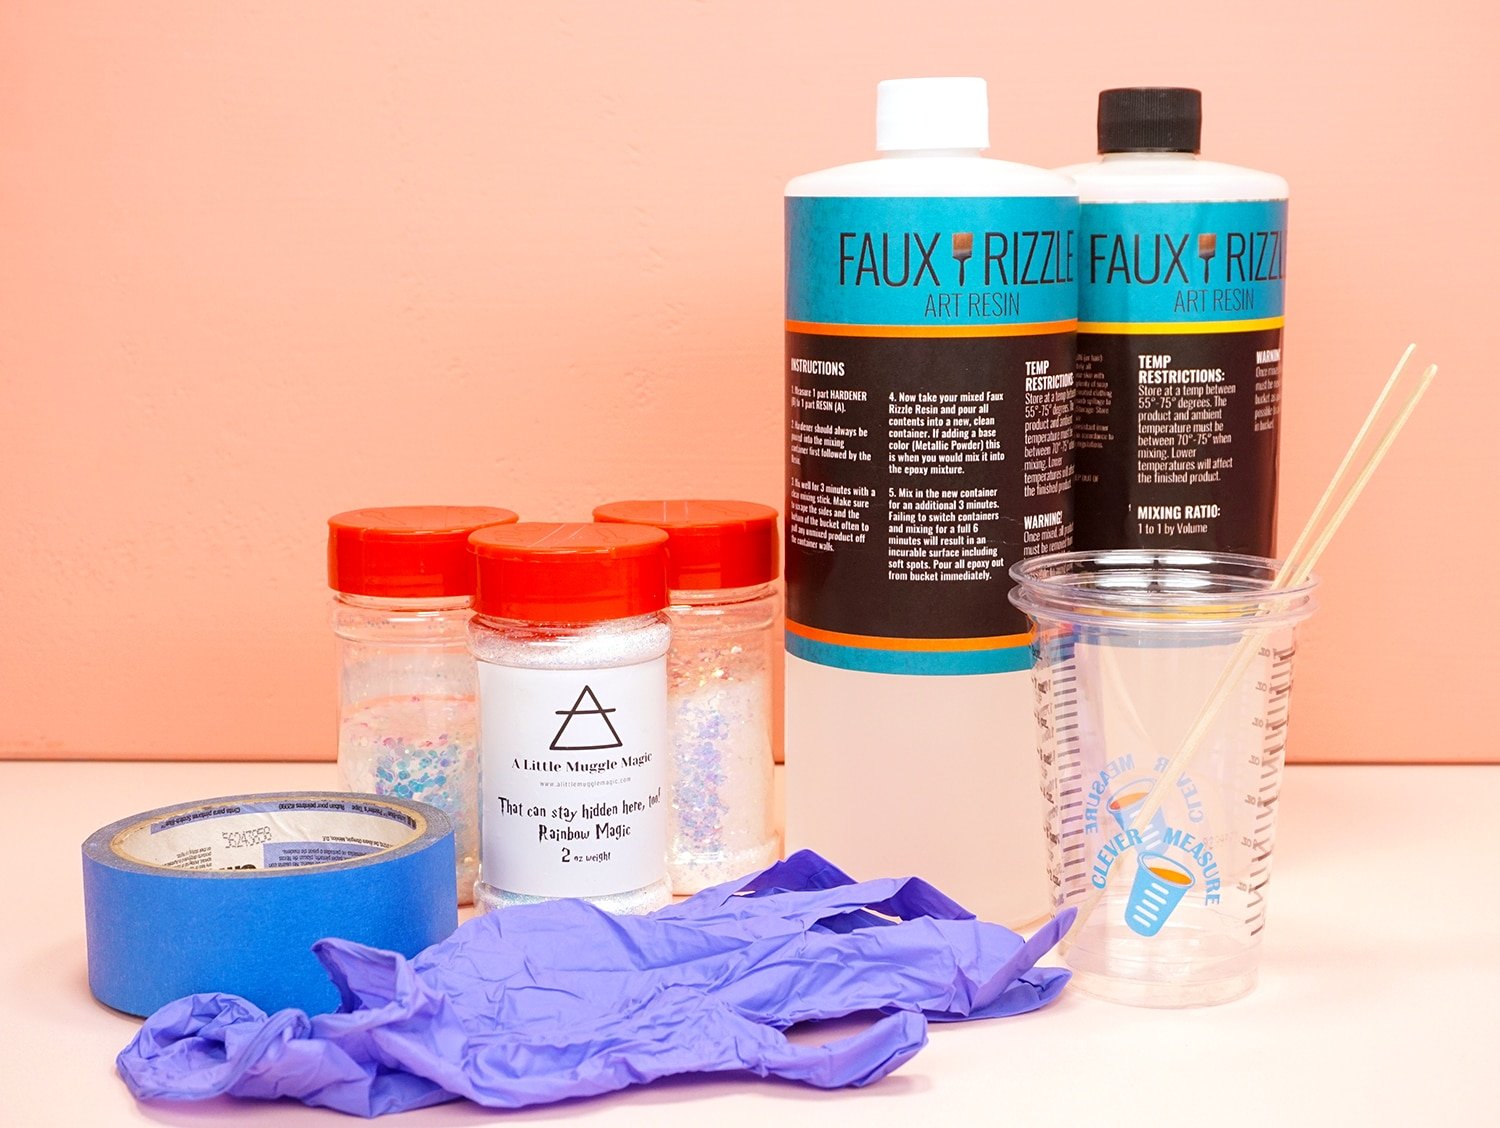
Step Two: Resin and Glitter
What You’ll Need:
- Painter’s Tape
- Nitrile Gloves
- Disposable Measuring Cups
- Stir Sticks
- 2-Part Art Resin
- Glitter – we used When Harry Kissed Ginny and That Can Stay Hidden Here, Too from A Little Muggle Magic (you can also find similar glitter on Amazon)
- Silicone Mat
- Cup Turner/Cuptisserie
- Butane Torch (optional, but useful!)
Note: always make sure to wear proper personal protective equipment when working with resin! The Faux Rizzle brand resin used in this post contains no VOCs and does not require the use of a respirator, however, other brands may require additional equipment. Always use in a well-ventilated area.
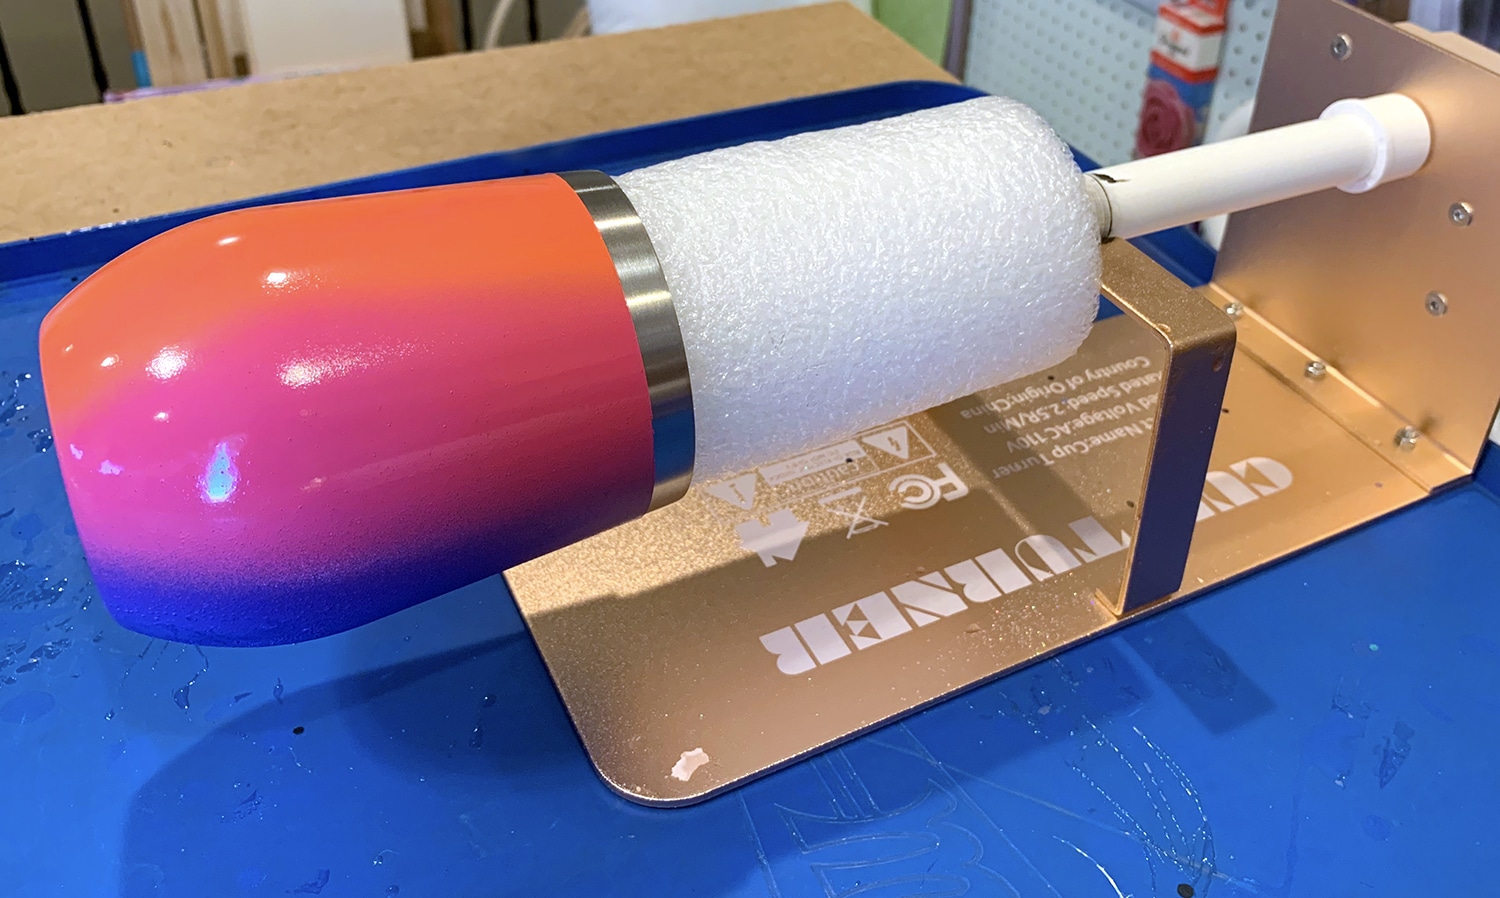
Place the painted cup on the cup turner and tape off the rim of the cup with painter’s tape.
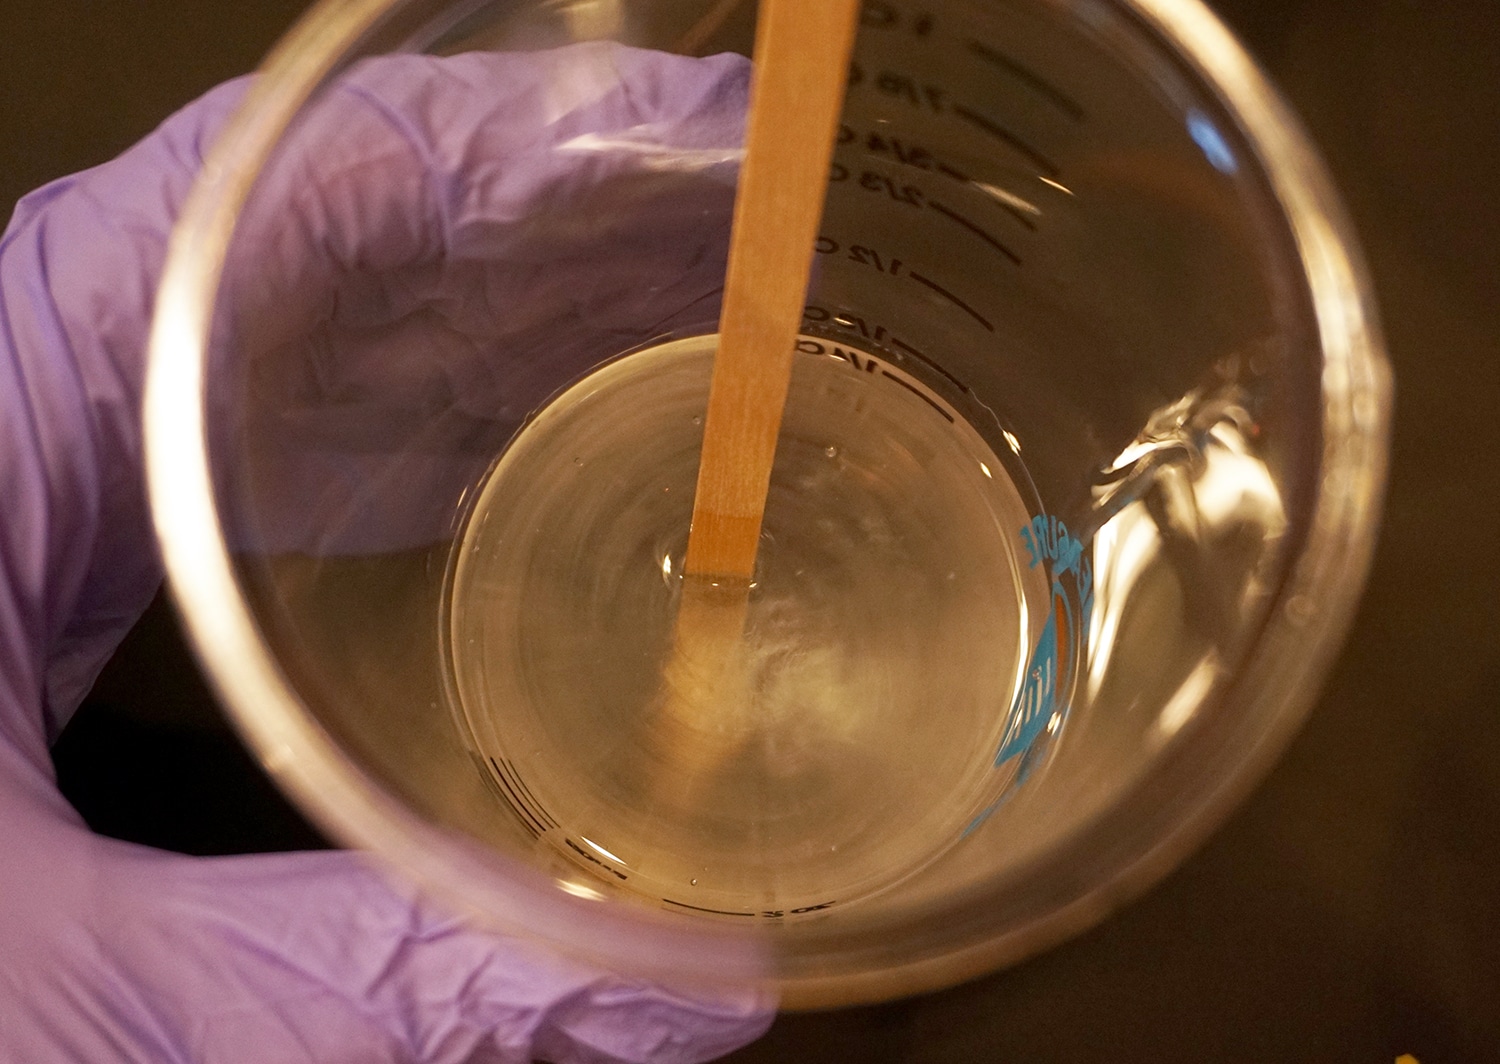
Mix the resin according to the directions. For this resin, I mixed Part A into Part B in a 1:1 ratio (15 ml each) and stirred for six minutes. The mixture will start out cloudy and will turn clear after you’re done mixing.
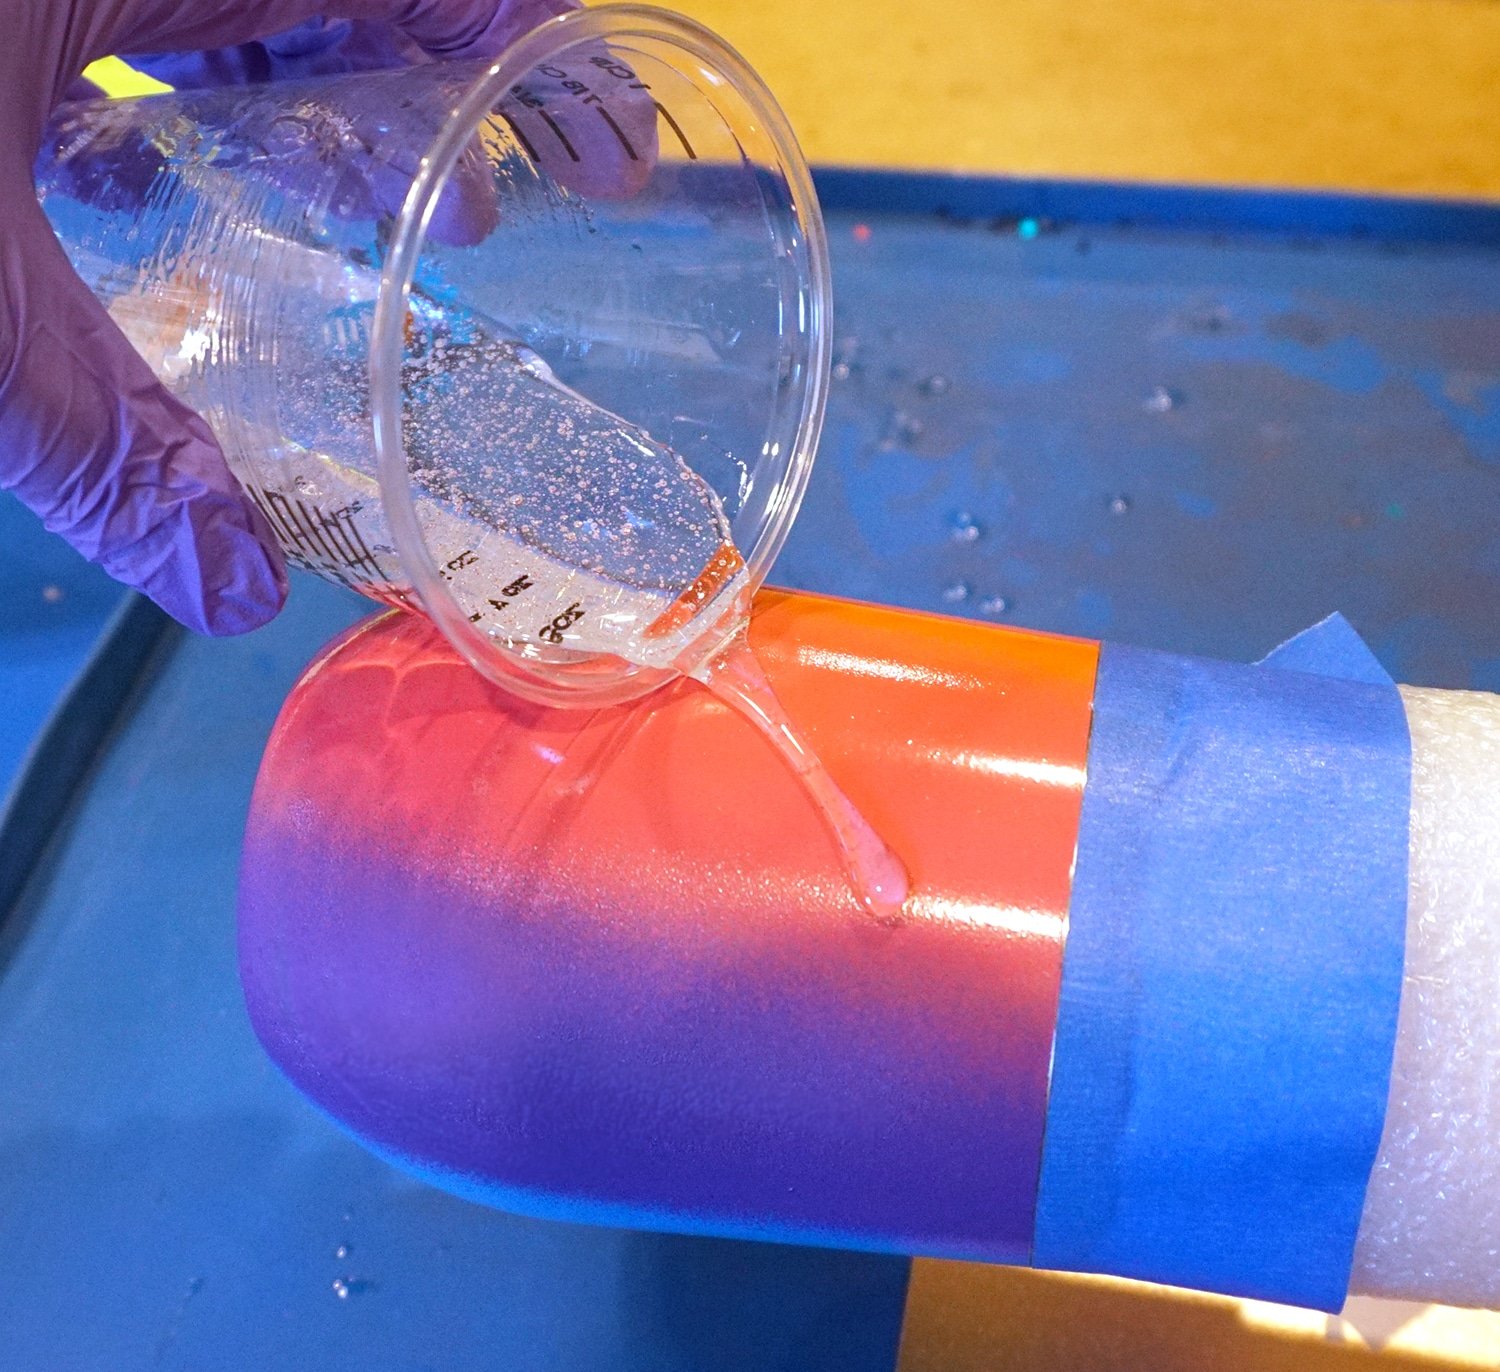
Turn on the cup turner and slowly pour a small amount of resin on to the cup.

You can use a silicone brush to spread the resin around on the cup, but I prefer to use my gloved fingers because I feel like it gives me the most control. Continue to pour and smooth the resin with your fingers until there is a generous (but not drippy!) layer of resin on the cup. Take care to smooth out any uneven spots, but don’t stress about getting it absolutely perfect – the resin will self-level a bit more as the cup spins! If necessary, use the torch to remove any air bubbles from the resin.
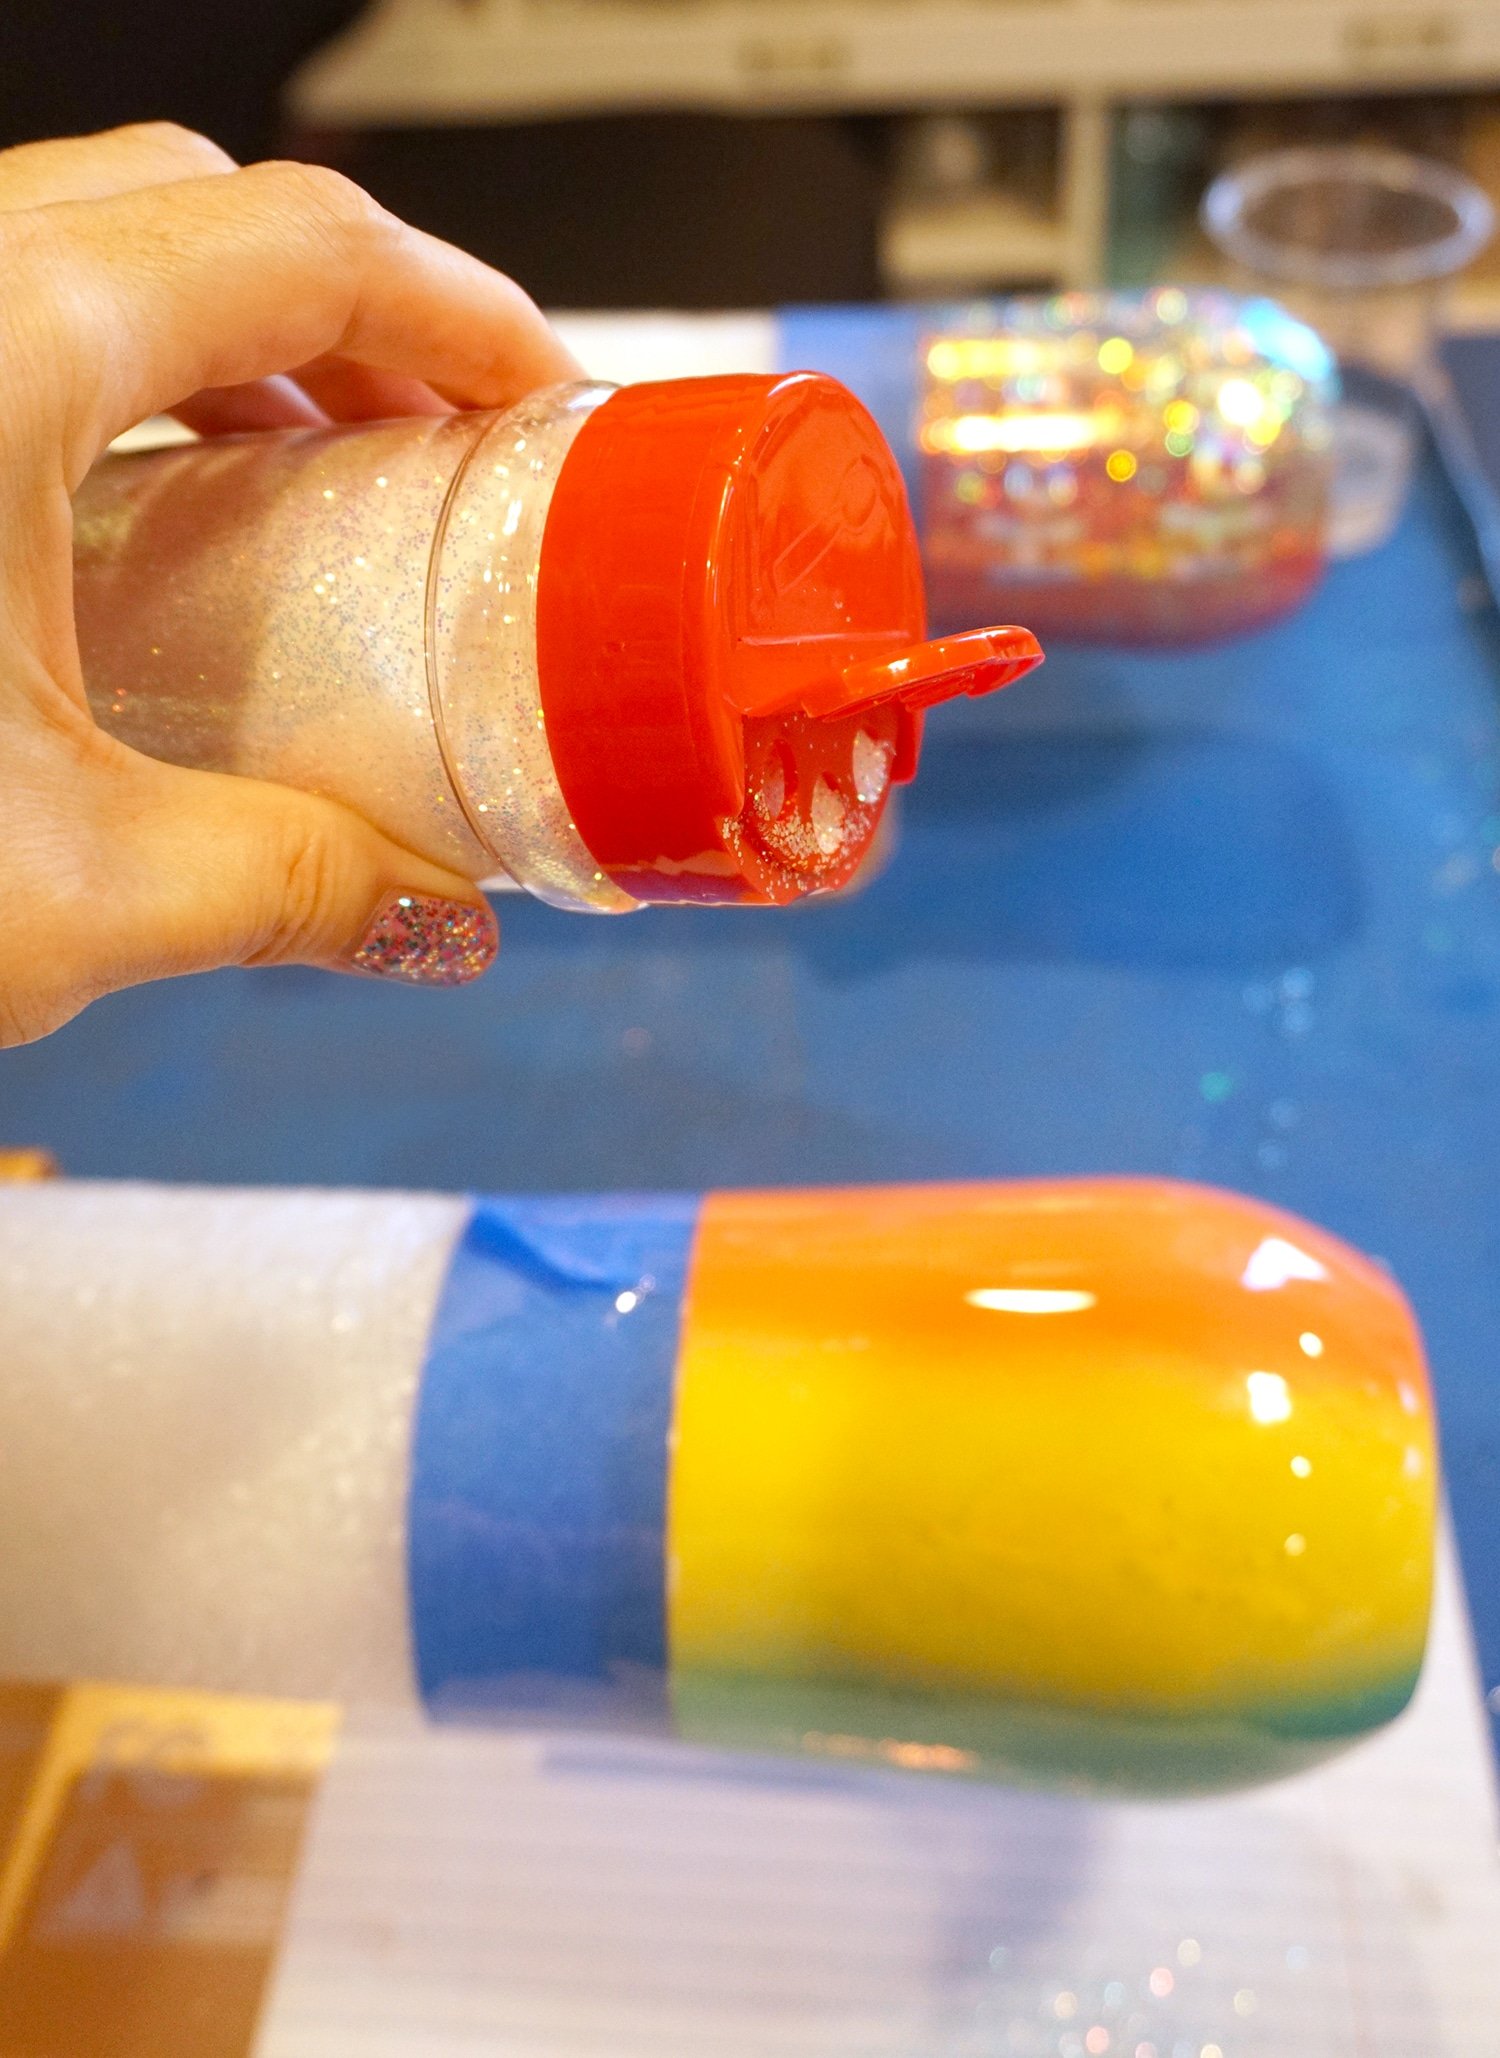
Sprinkle a layer of glitter on to the wet resin to cover the entire cup. If using a chunky glitter, first sprinkle a small amount of chunky glitter on to the bottom half of the cup before sprinkling the fine glitter all over the entire cup. Follow with a bit more chunky glitter if desired for additional coverage.
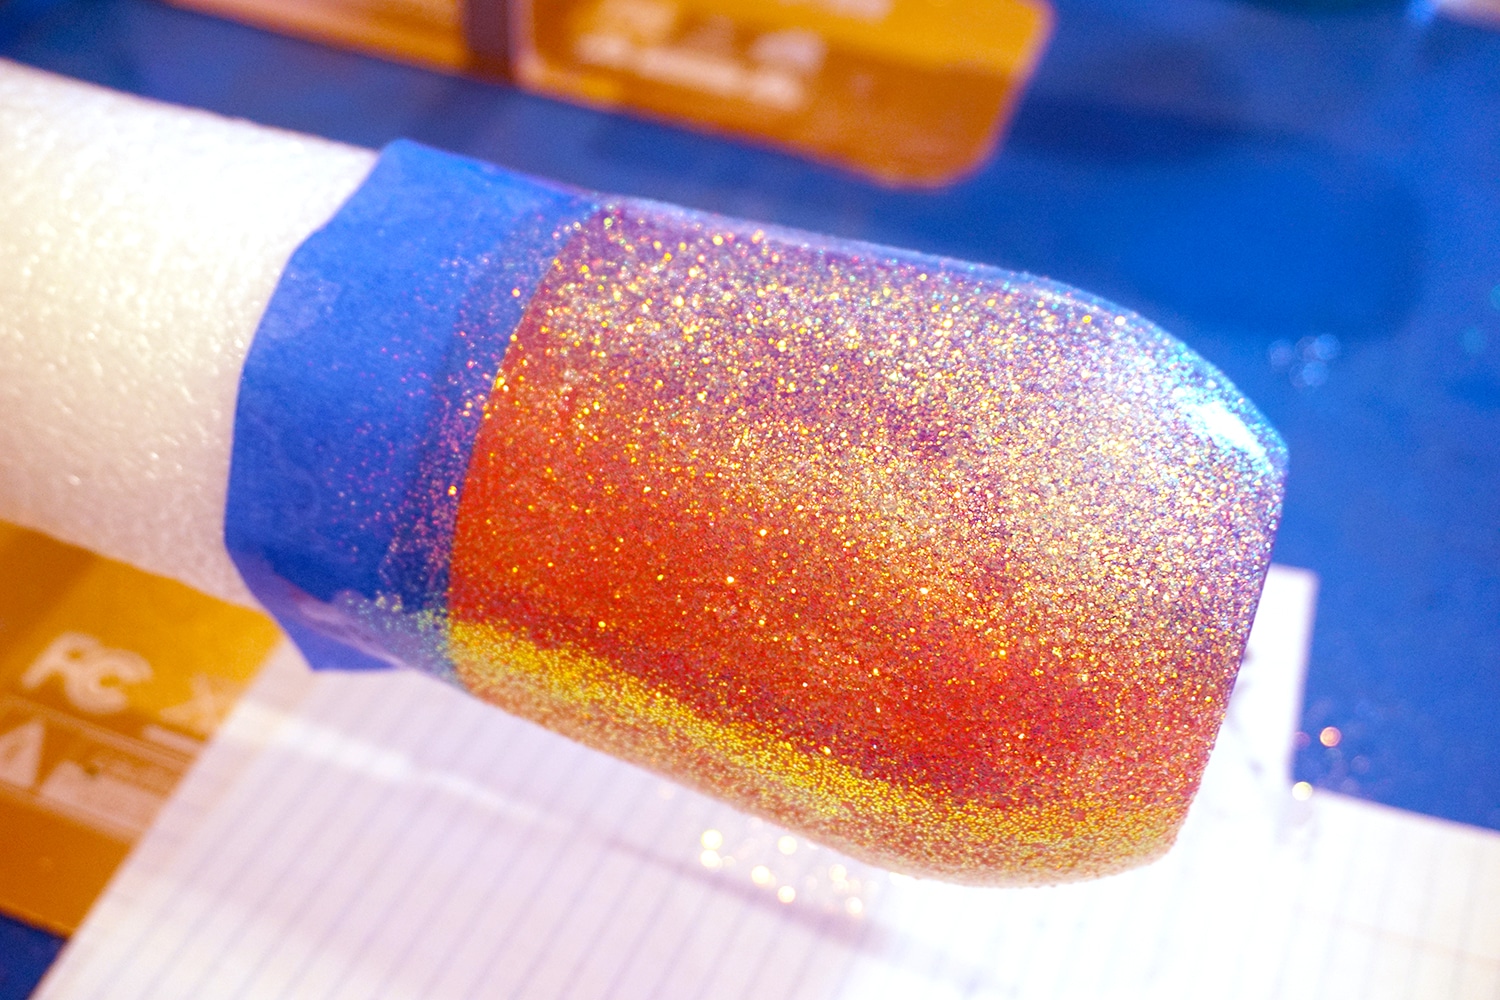
Allow the tumbler to continue to spin on the cup turner for 6-8 hours or until the resin is no longer sticky to the touch. Note: carefully remove the painter’s tape from the rim of the cup approximately an hour after pouring the resin so that you are able to peel it cleanly off!
Step Three: Adding Personalized Details to Tumblers
What You’ll Need:
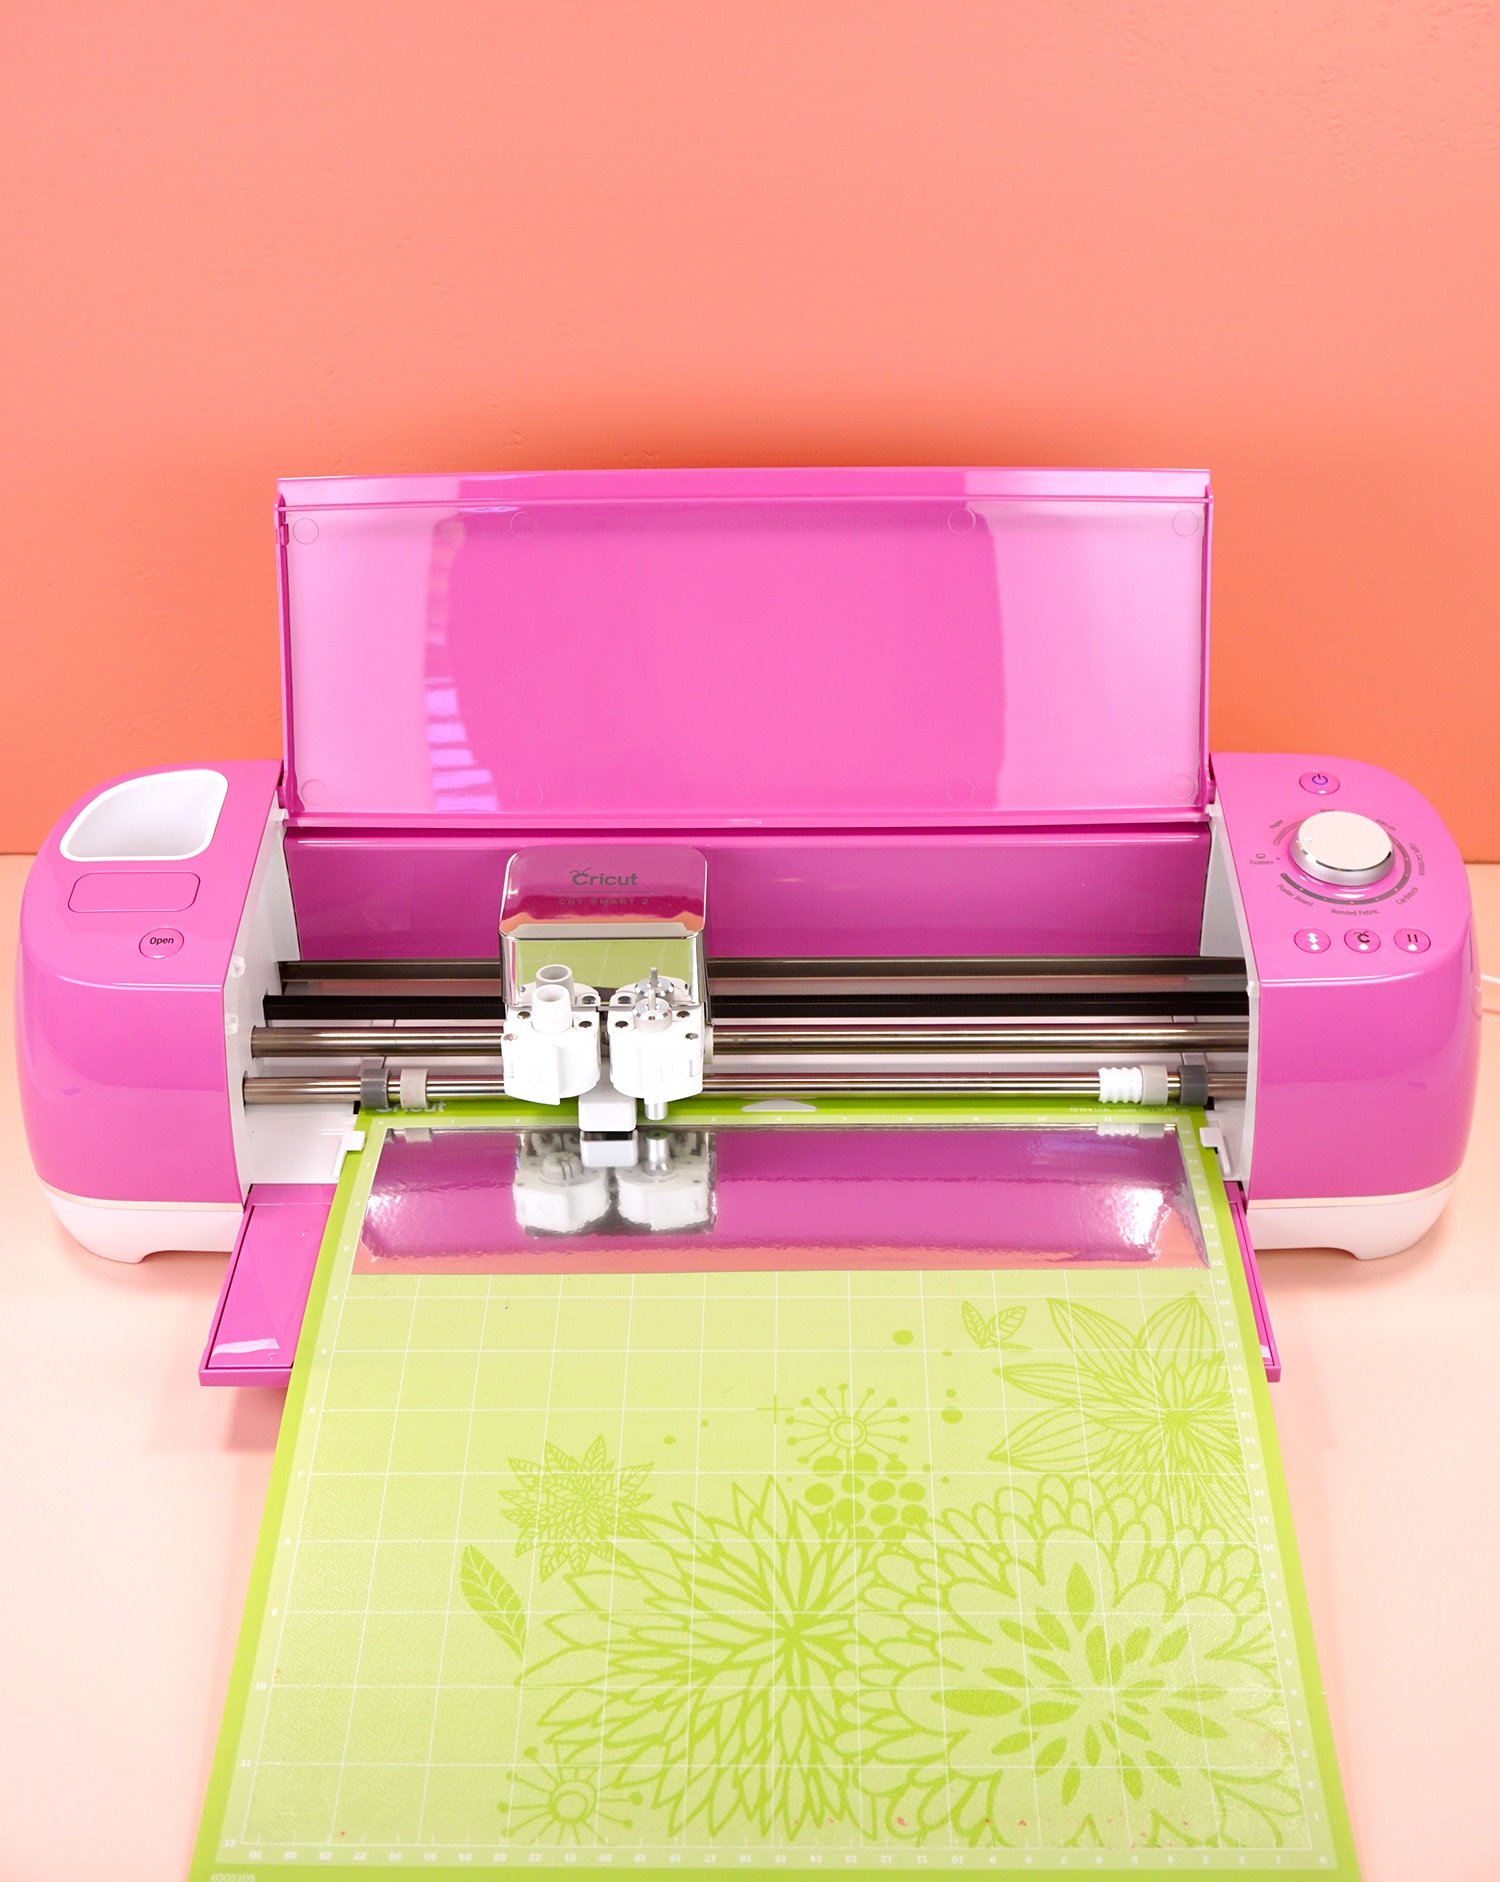
- Cricut Explore Air 2 or Maker Machine
- Cutting Mat
- Assorted Cricut Adhesive Vinyl – we used Adhesive Foil and Holographic Threads Premium Vinyl
- Transfer Tape
- Weeding Tools
- Scraper
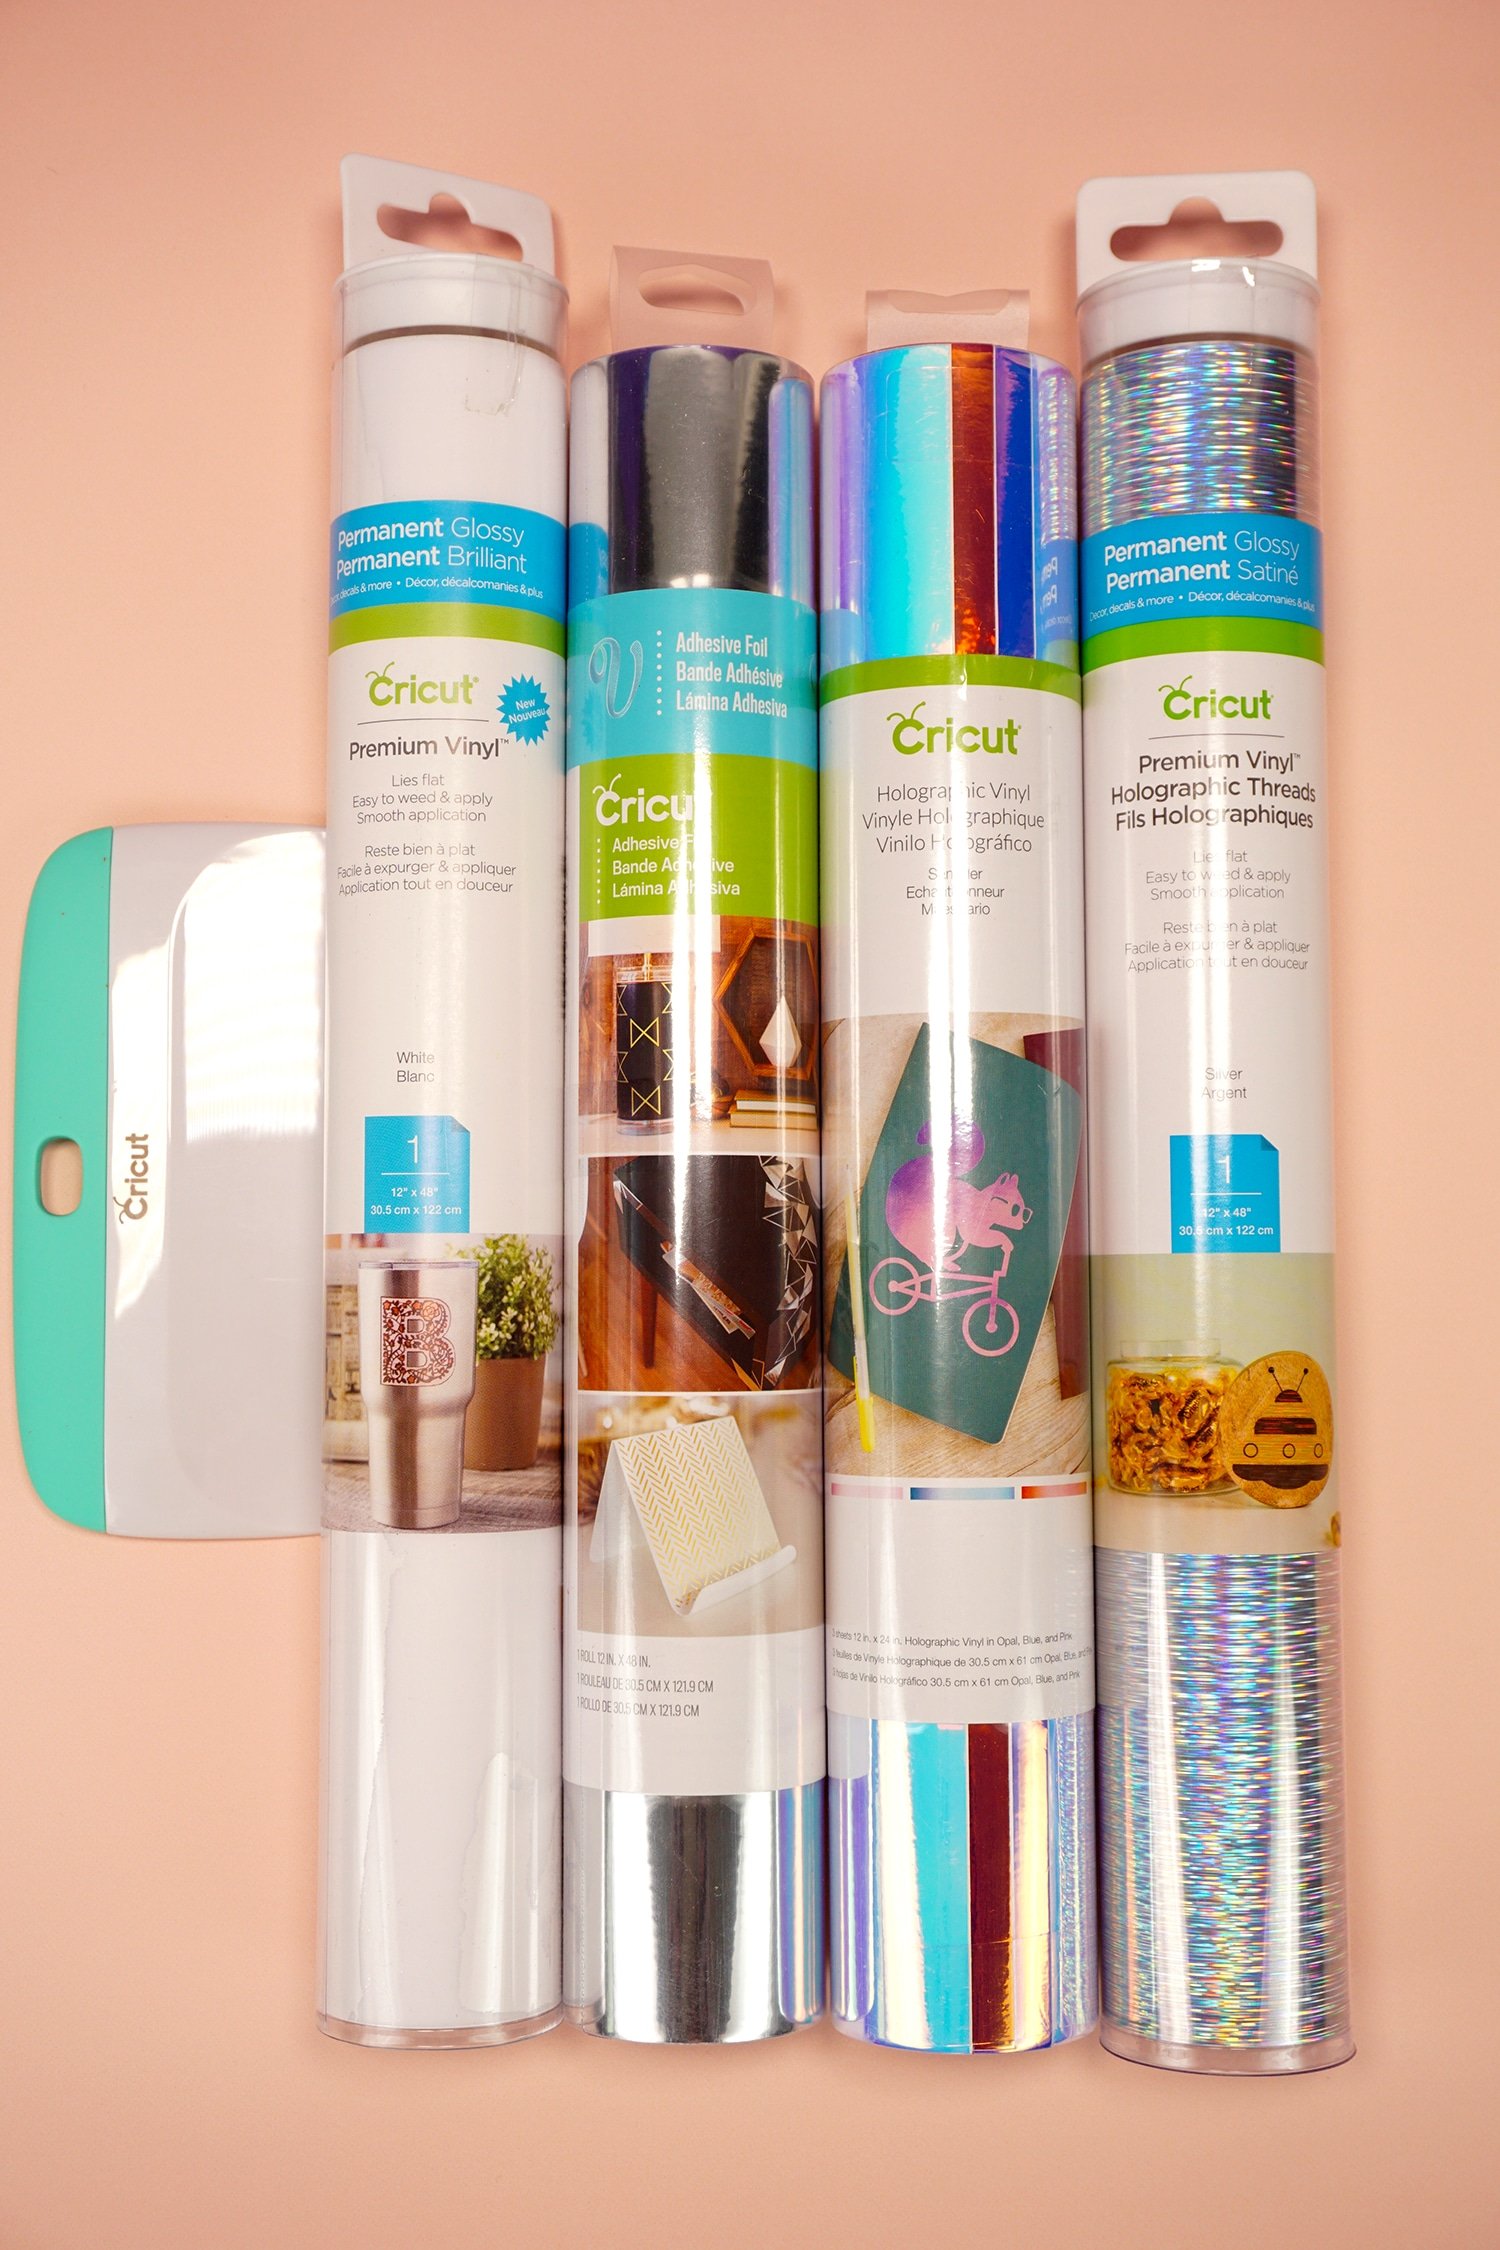
There are LOTS of different vinyl options that you can use to create your cup designs, but out of all the choices, these are my favorites – Premium Permanent Vinyl, Adhesive Foil, Holographic Vinyl, and Holographic Threads Premium Vinyl.
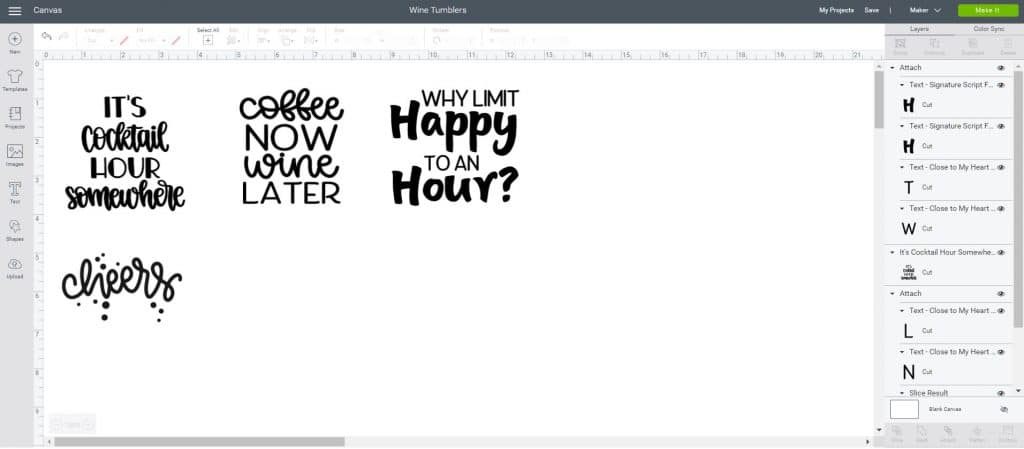
Open the Wine Tumbler designs in Cricut Design Space.
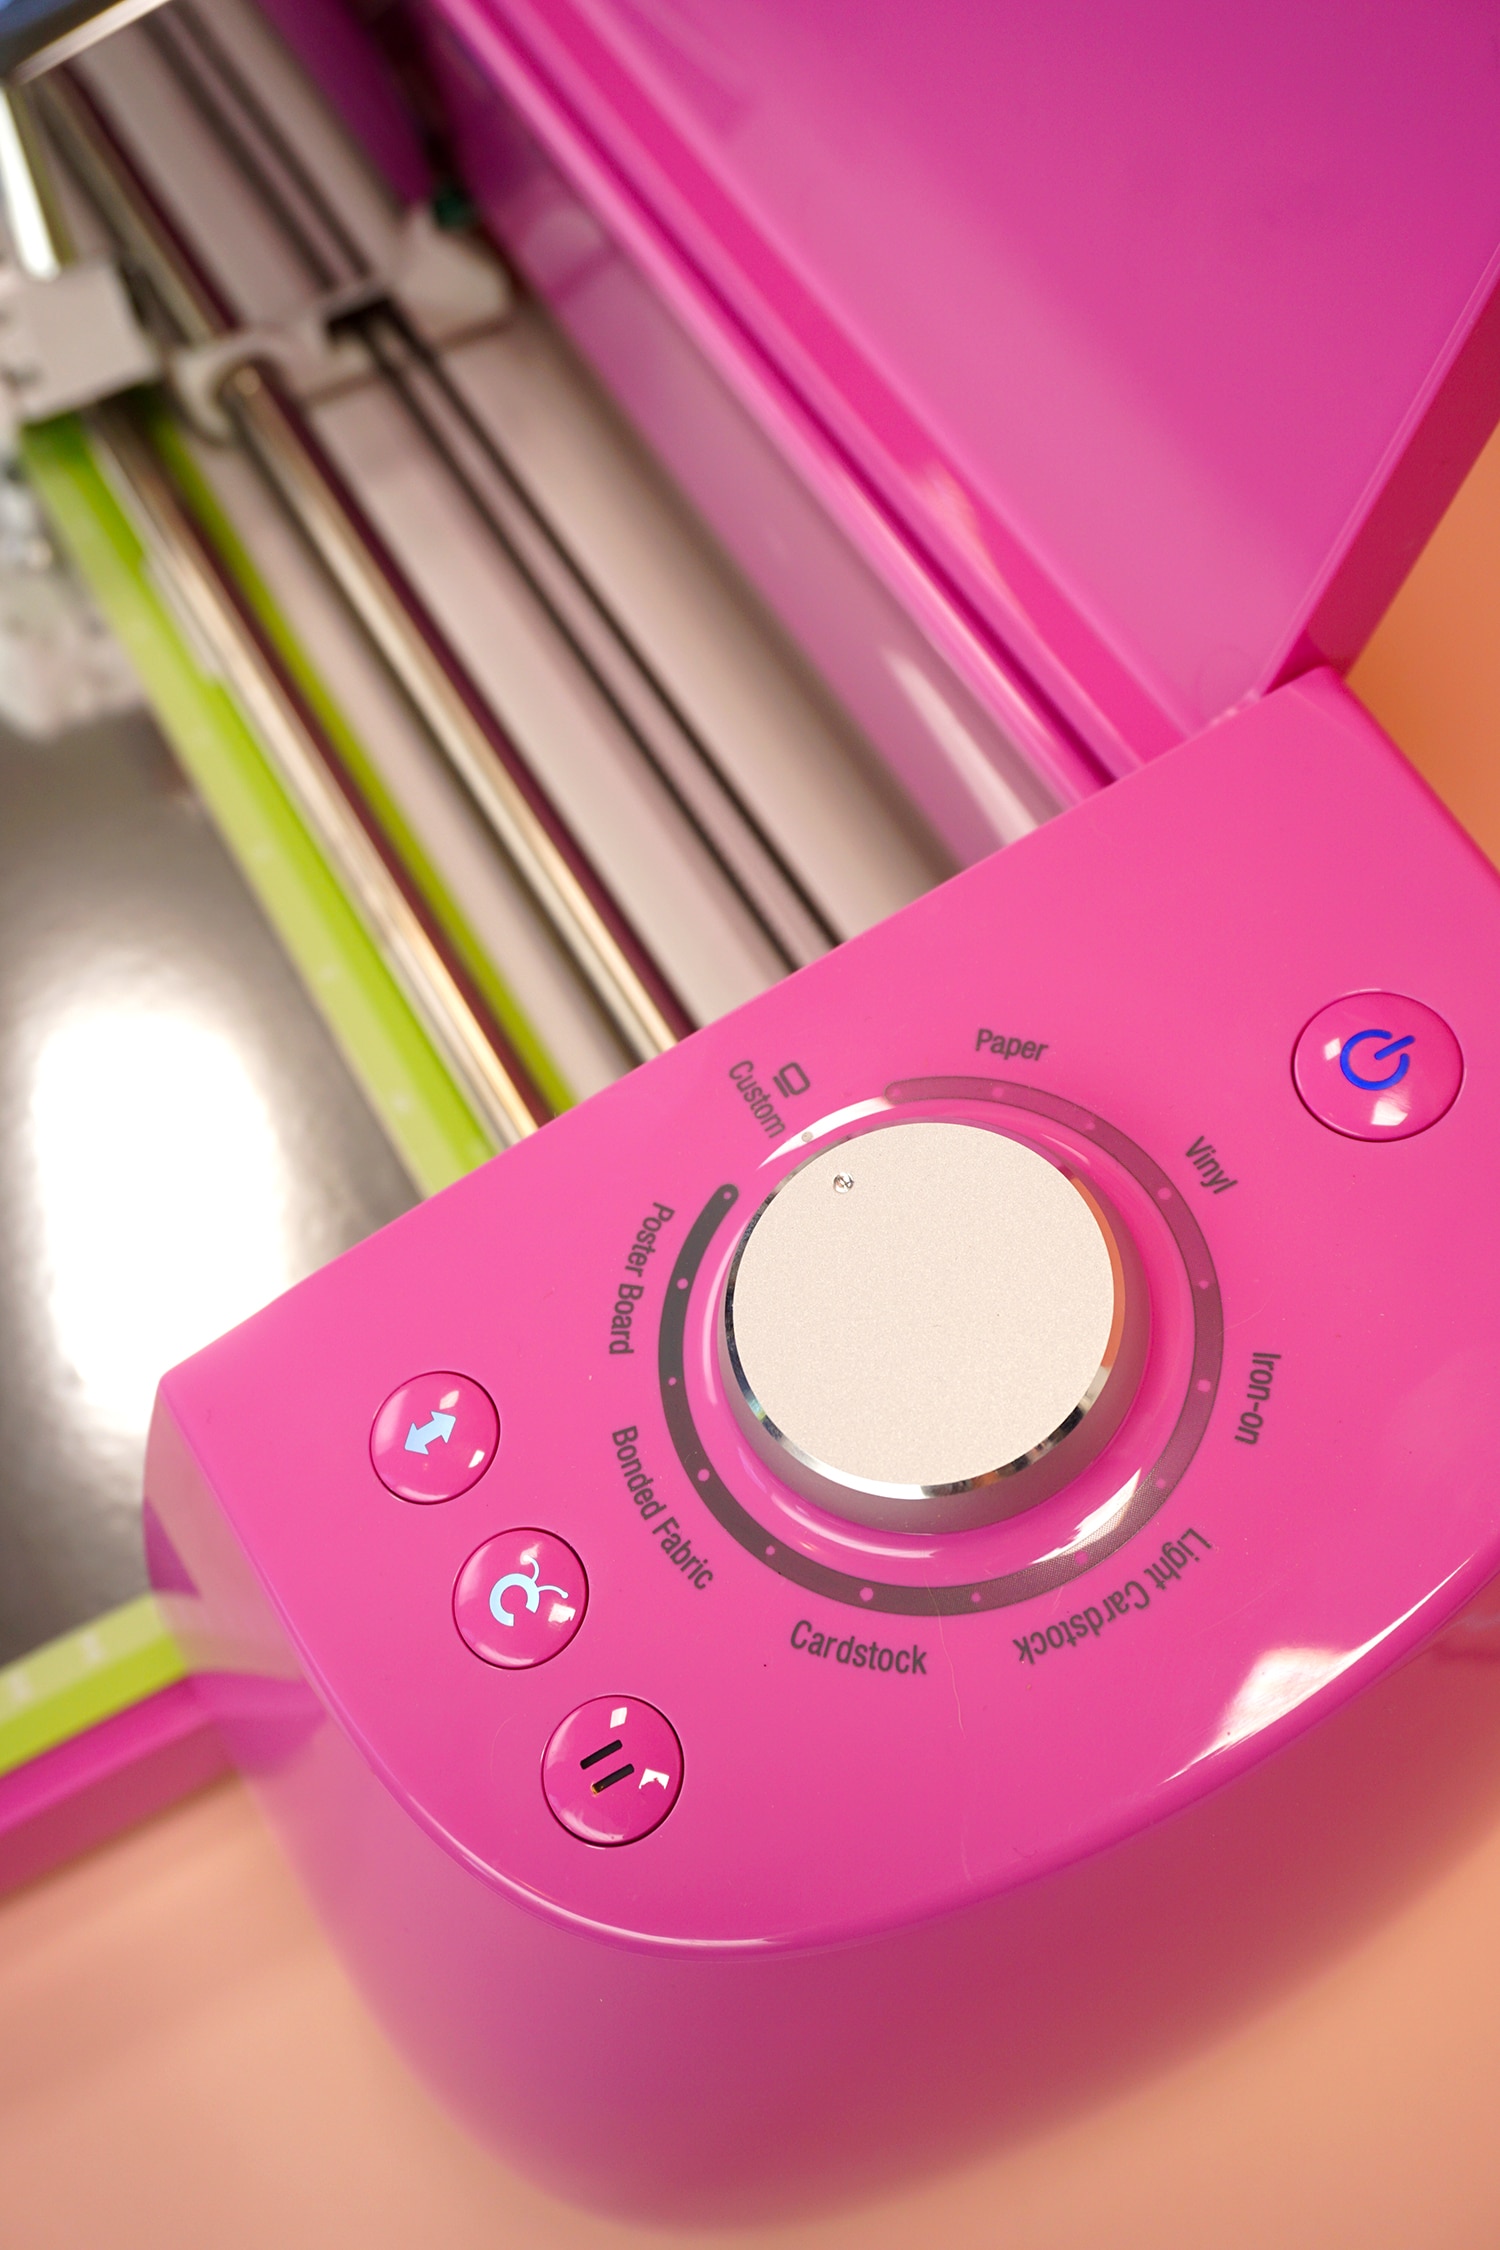
Set the dial to the Custom materials setting on your Explore Air 2 and select the appropriate material from the list in Design Space. I love that I can connect wirelessly to my Explore Air 2 for fast and easy cutting!
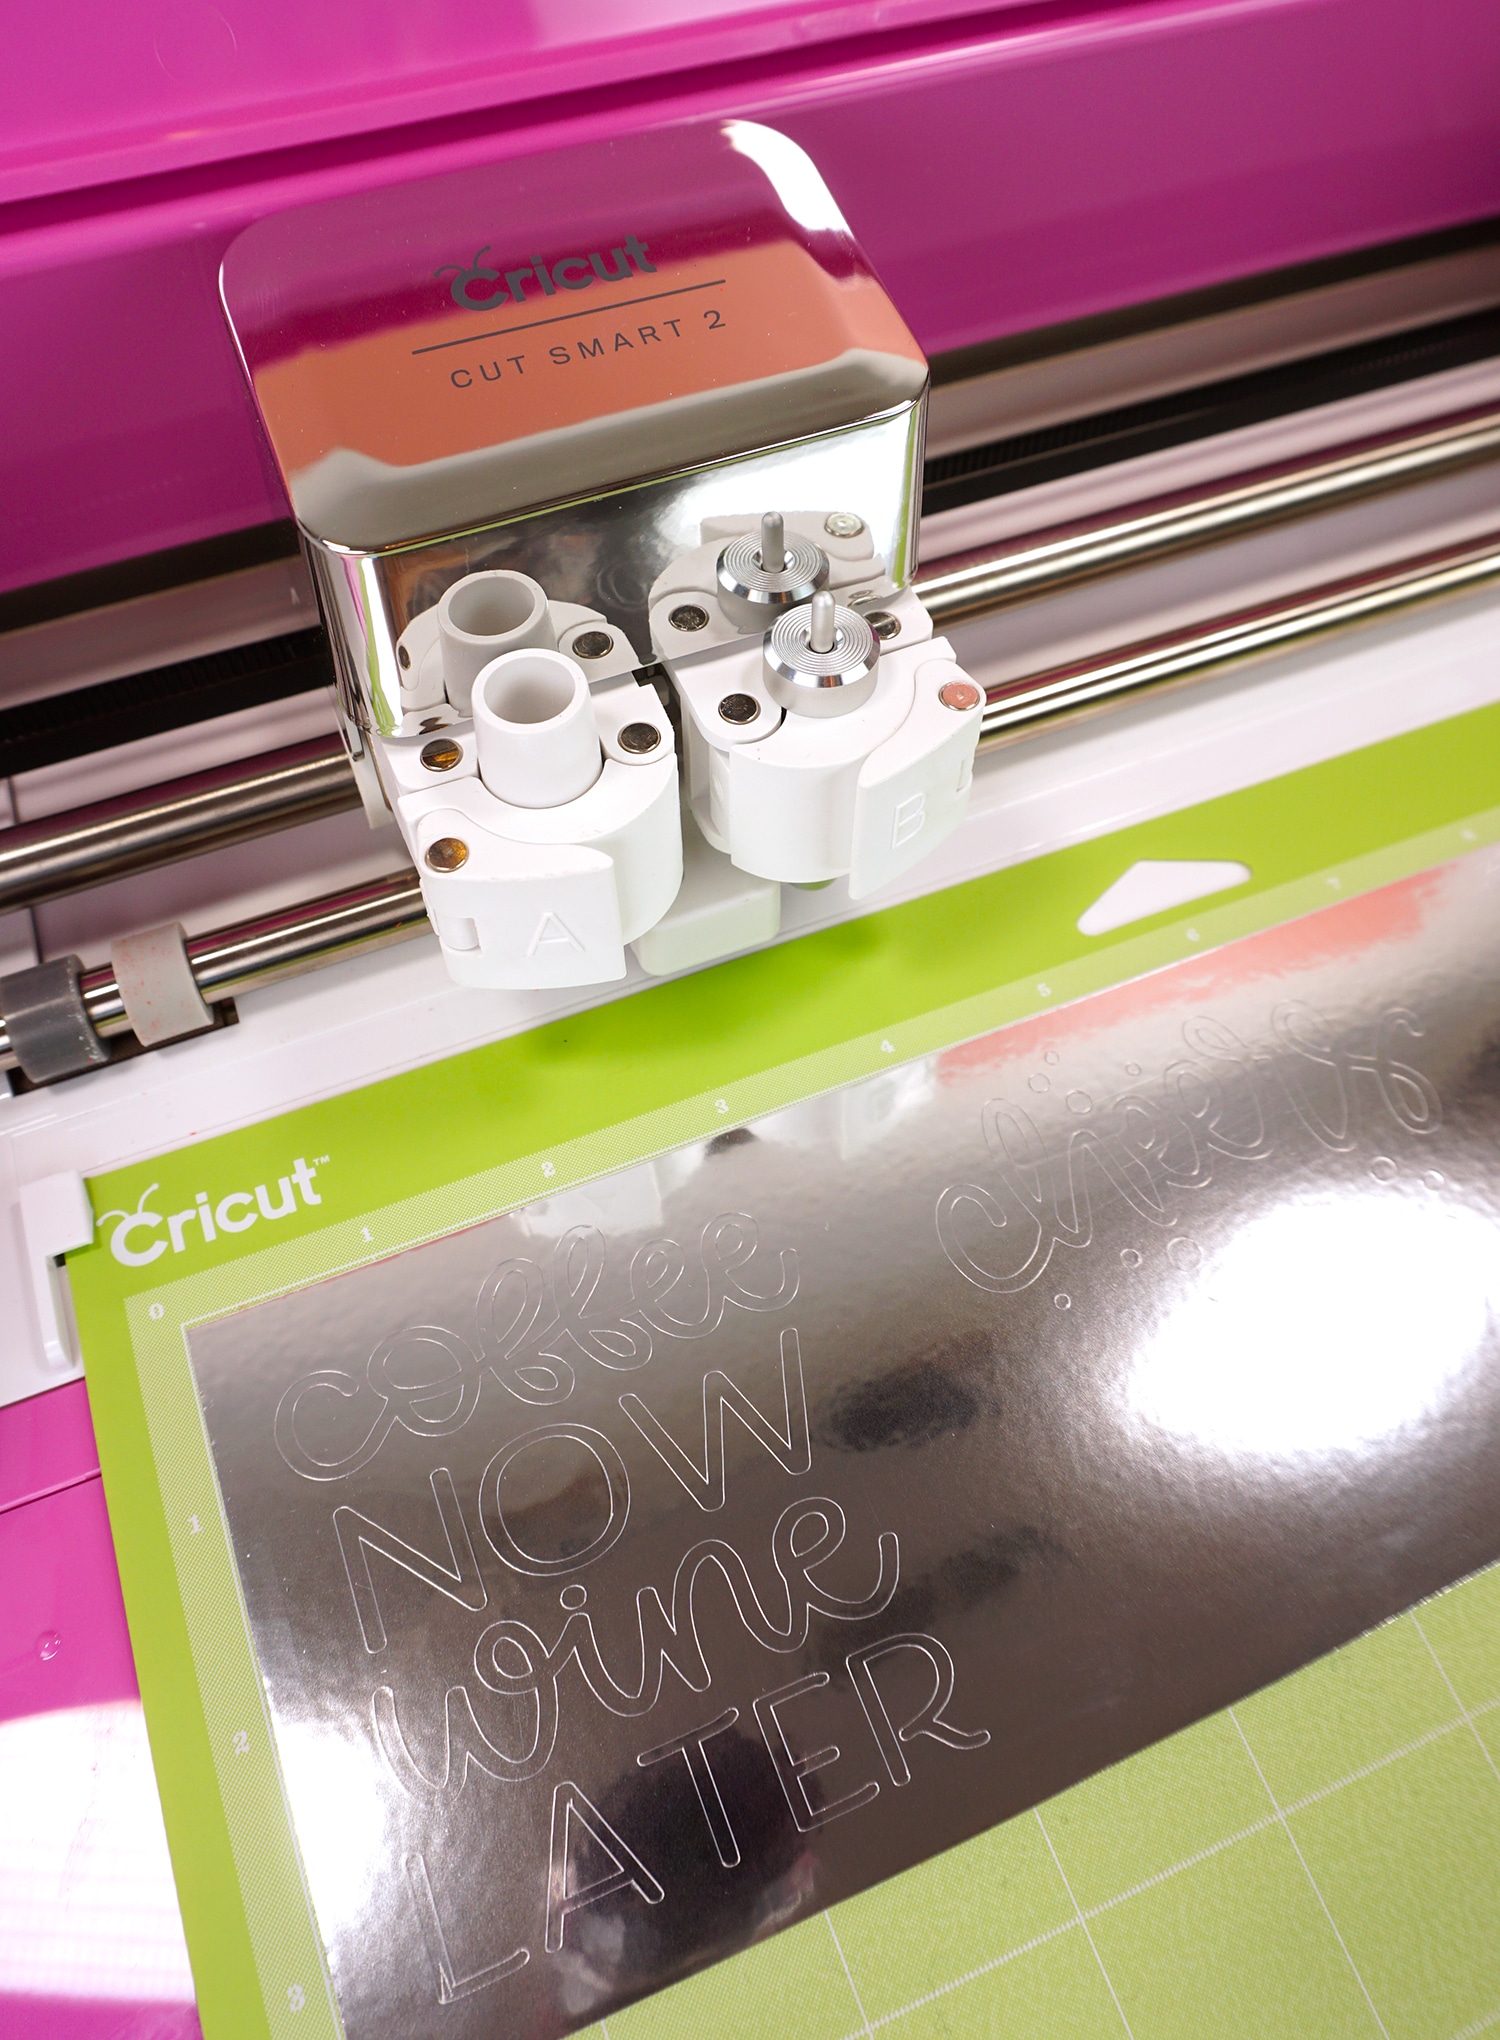
Cut each of the layers from your vinyl of choice.
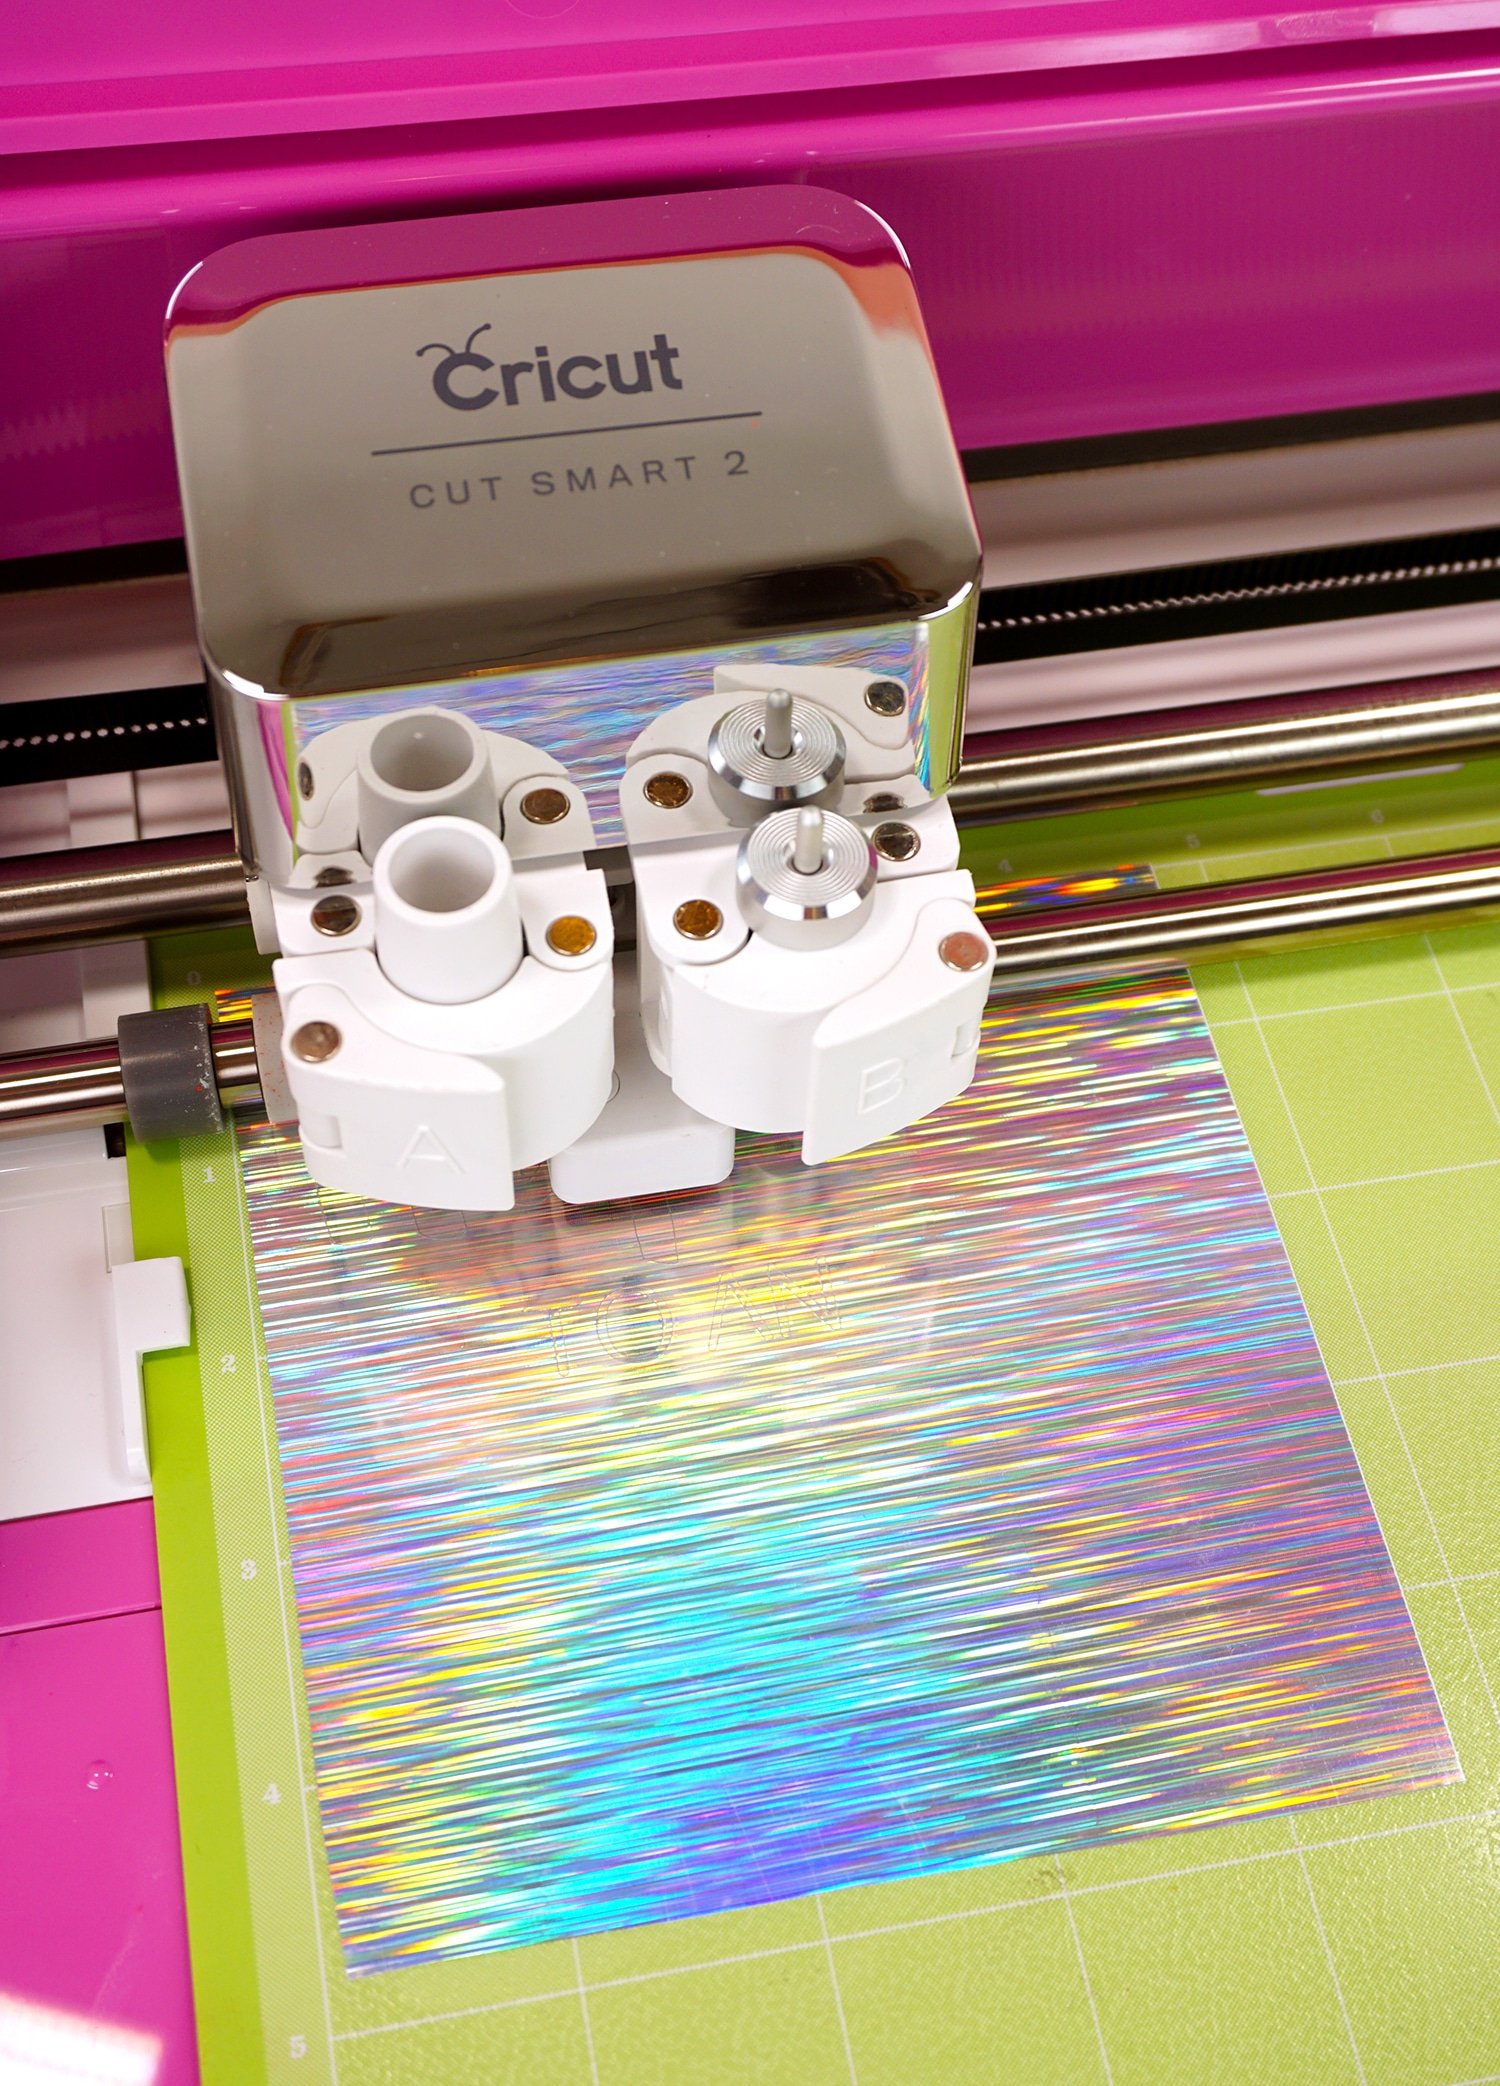
Look at how AMAZING this Holographic Threads Premium Vinyl is! I. Am. Obsessed!
Use the weeding tools to remove the excess vinyl.
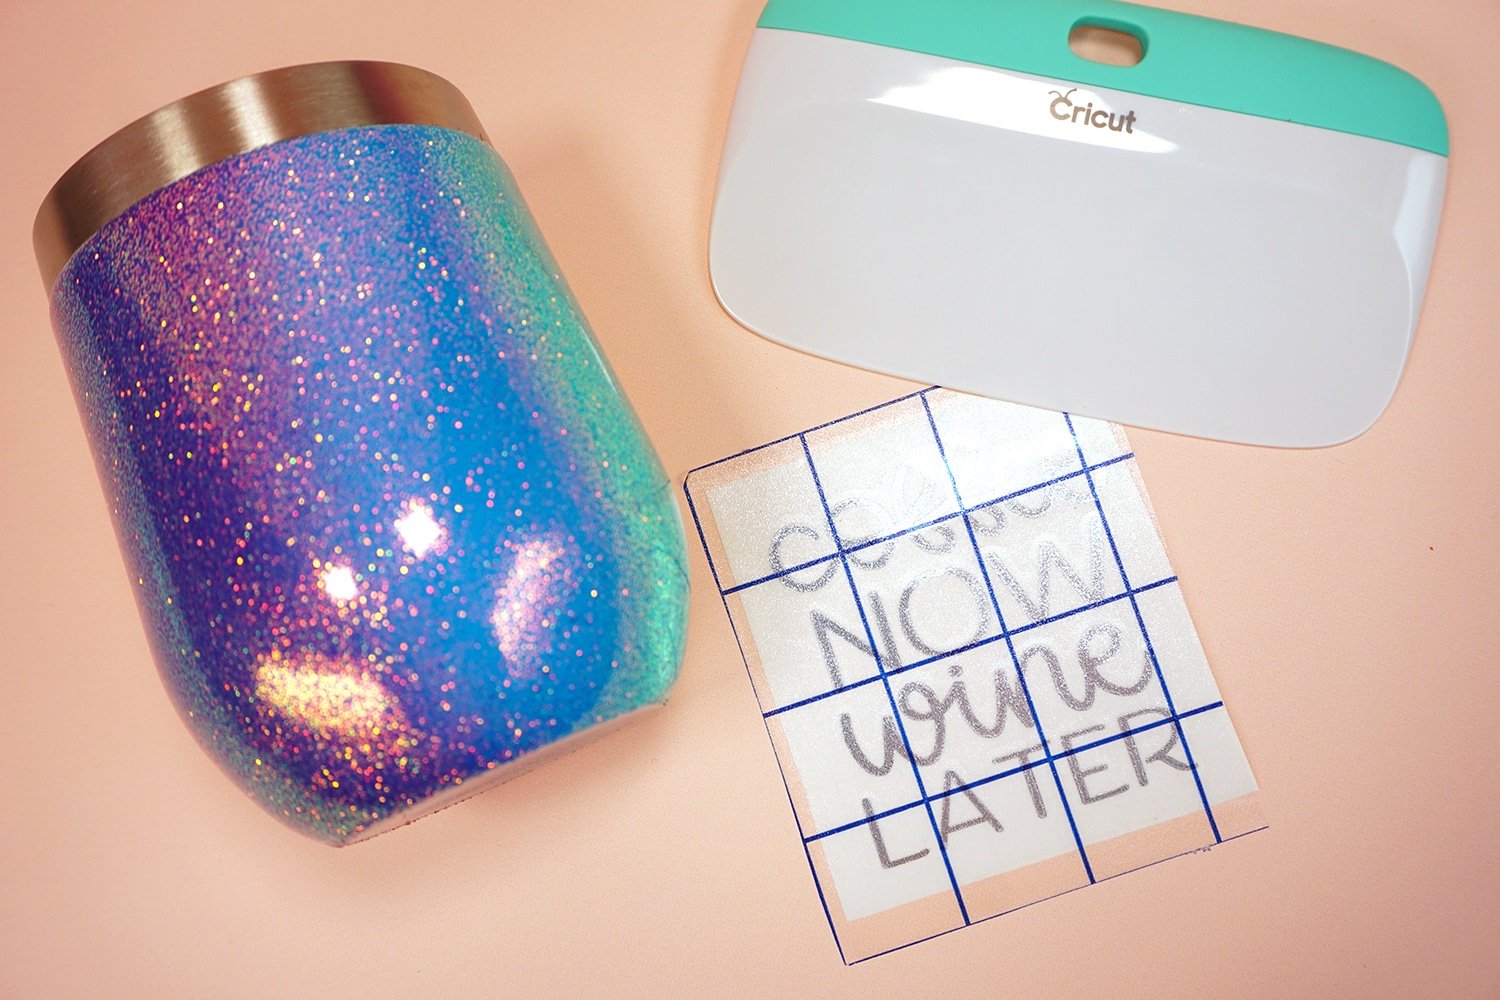
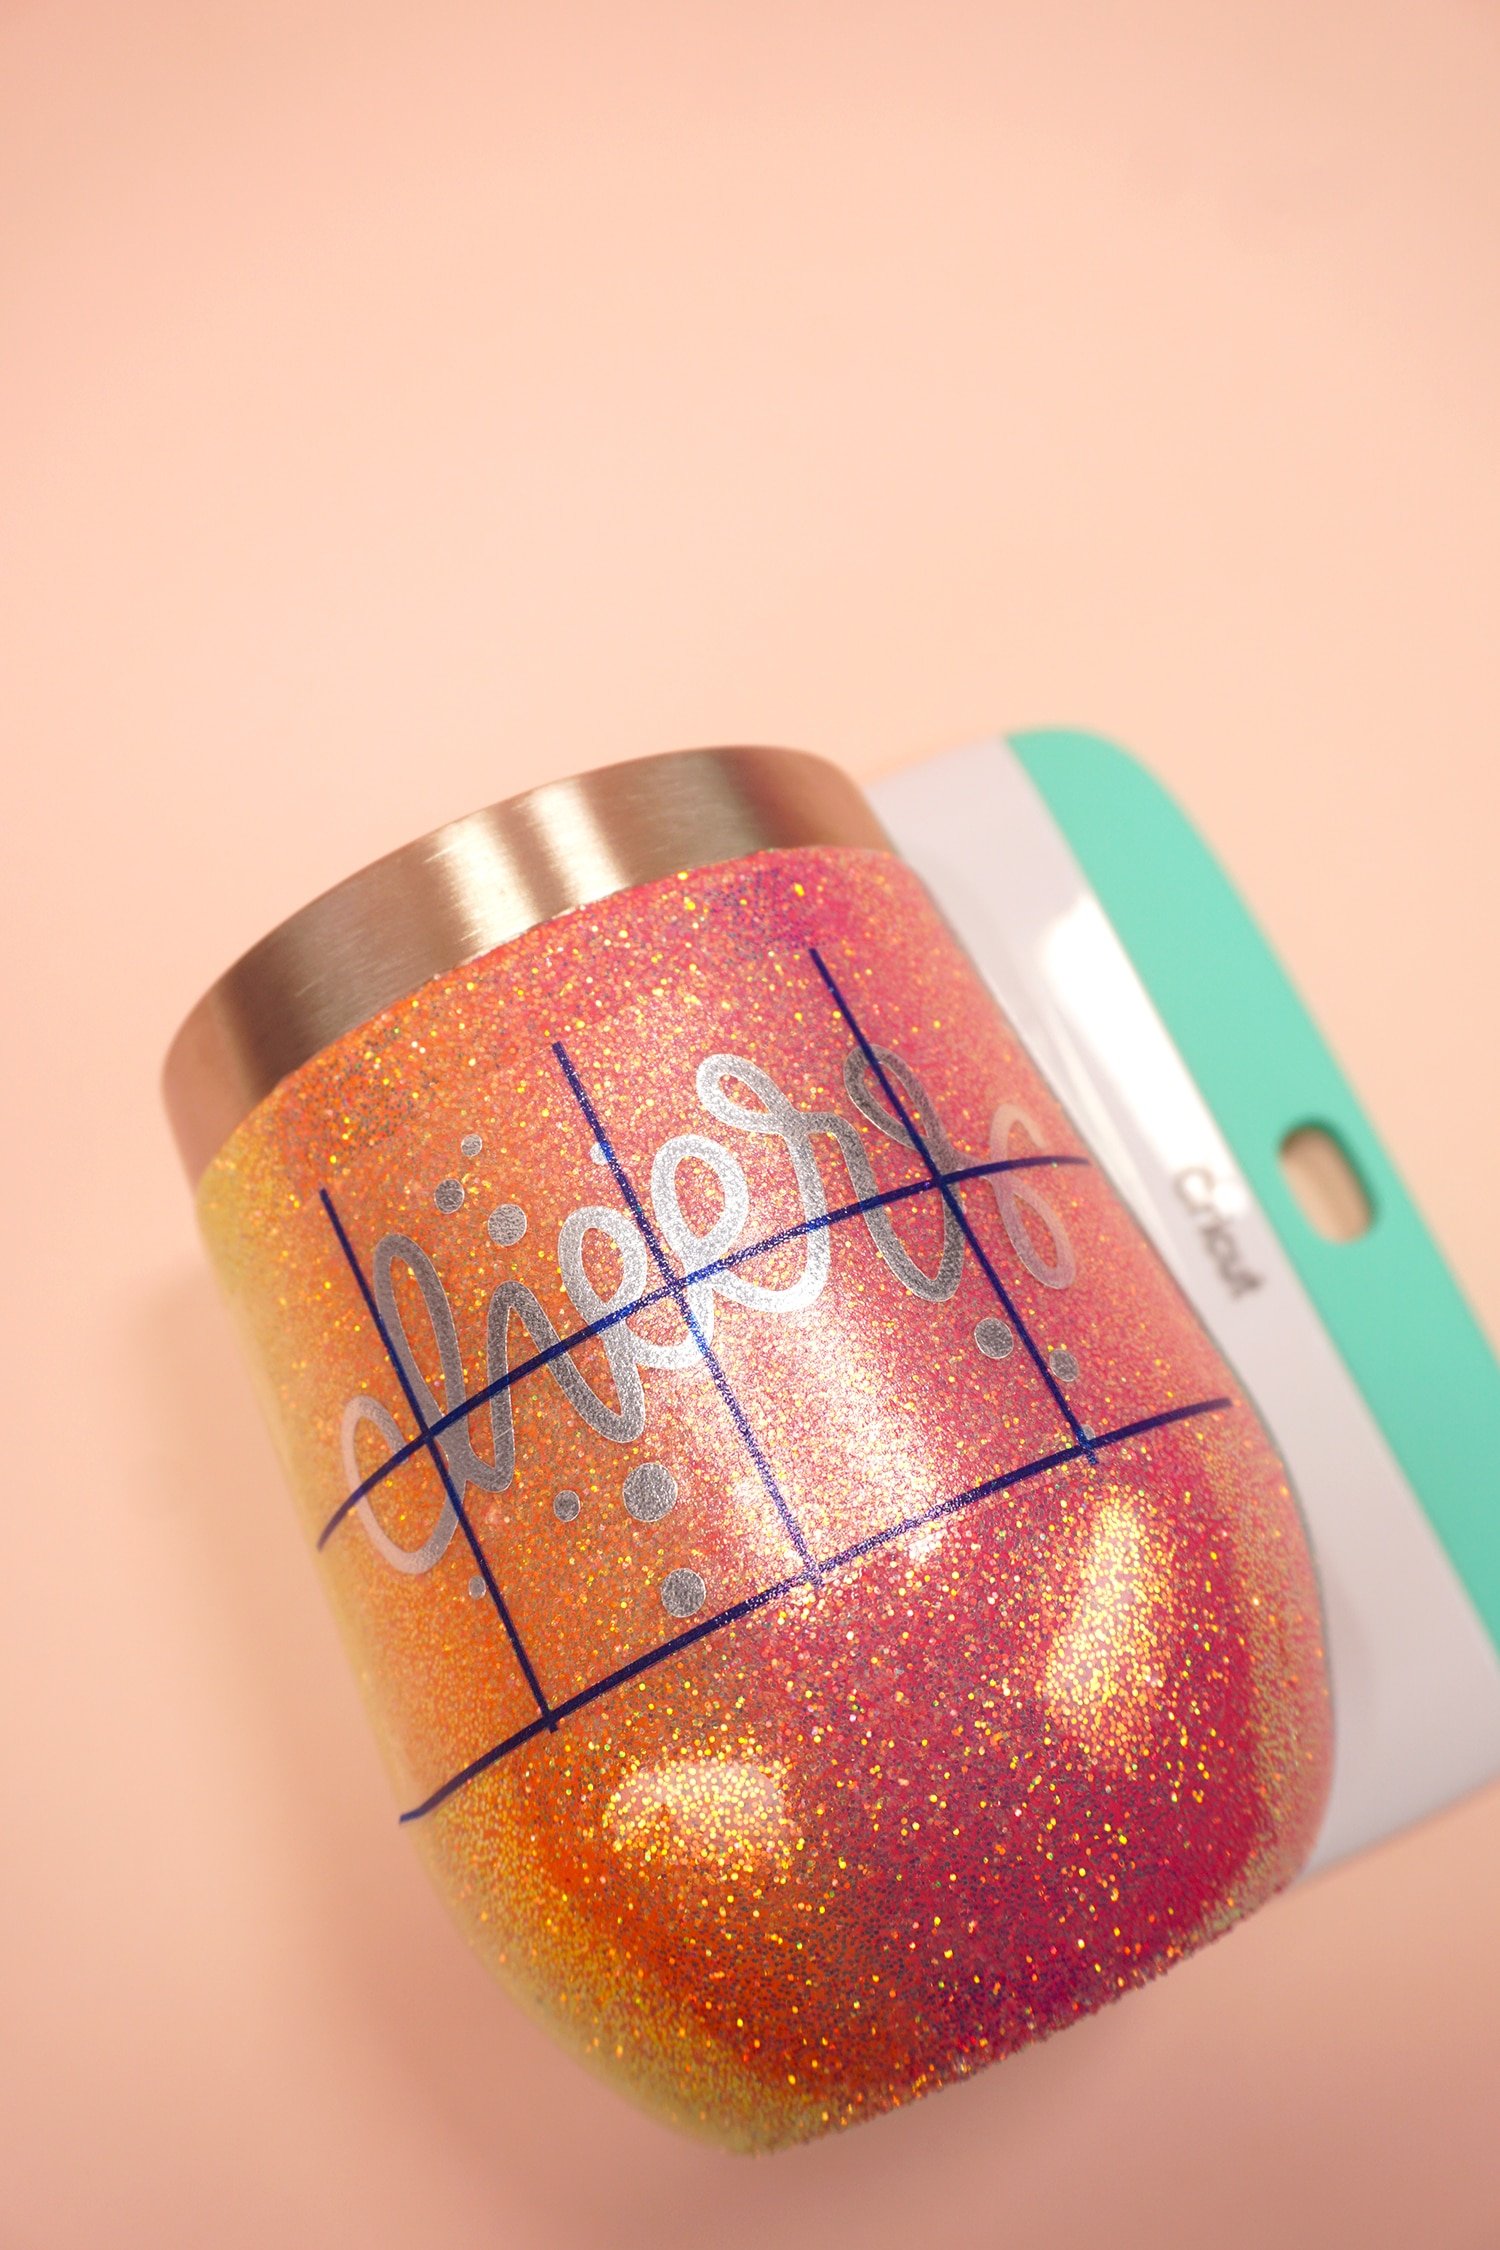
Place a piece of transfer tape over the design and use the scraper to burnish the design.
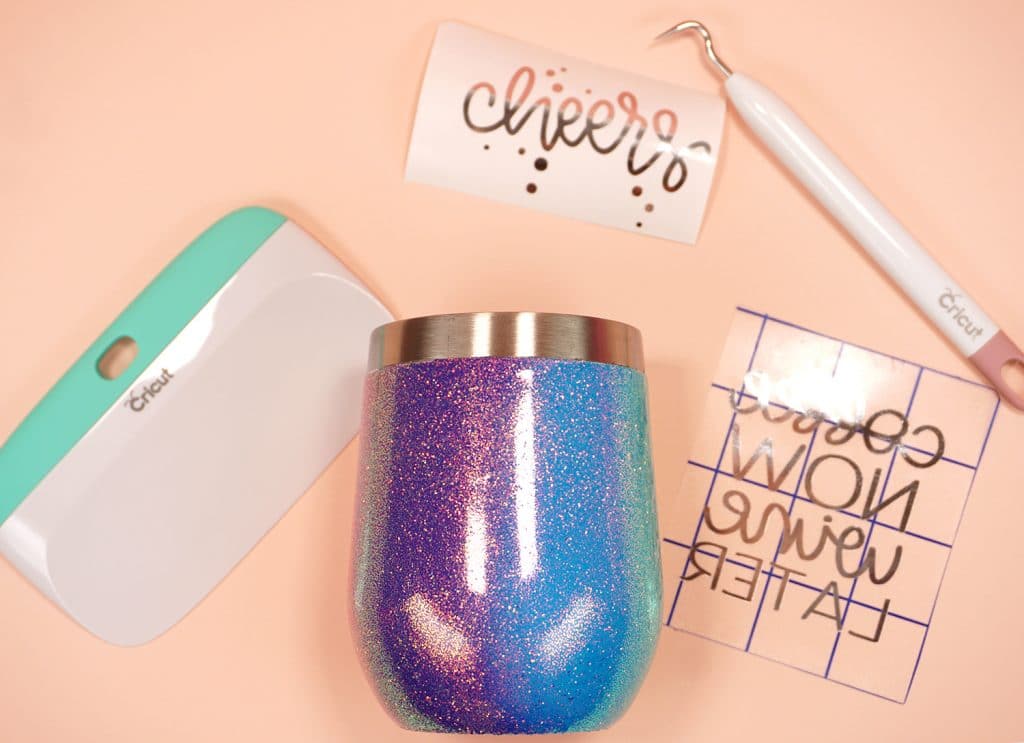
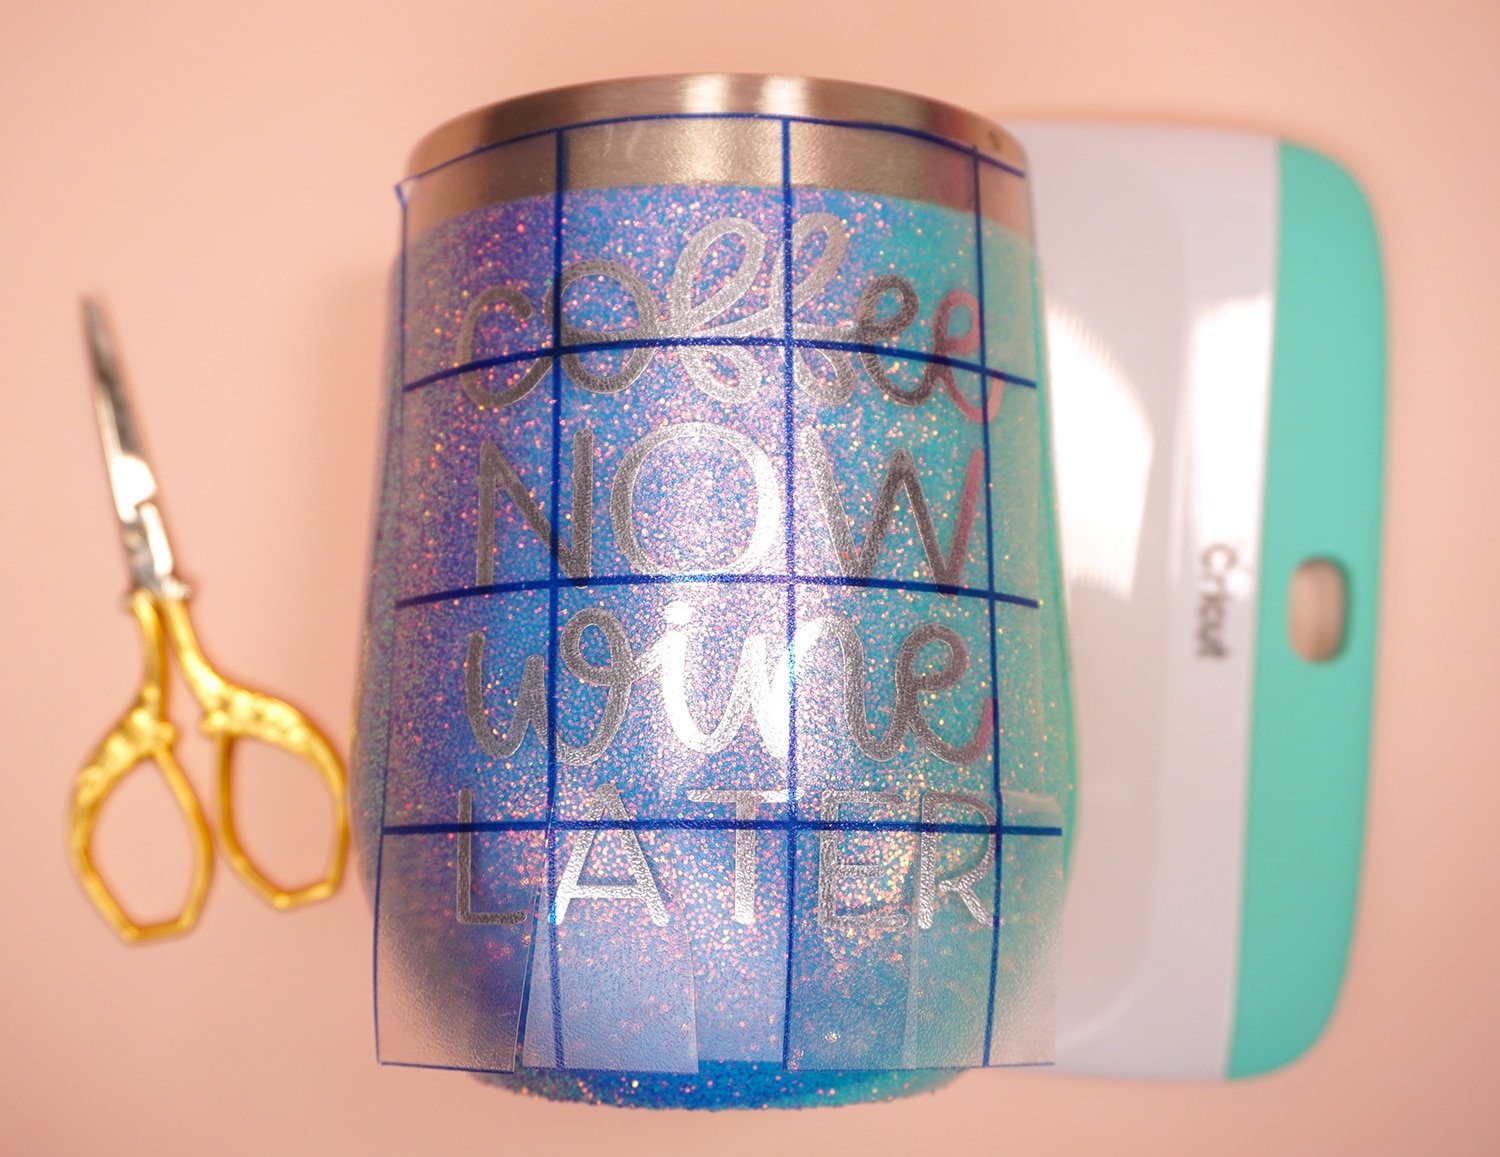
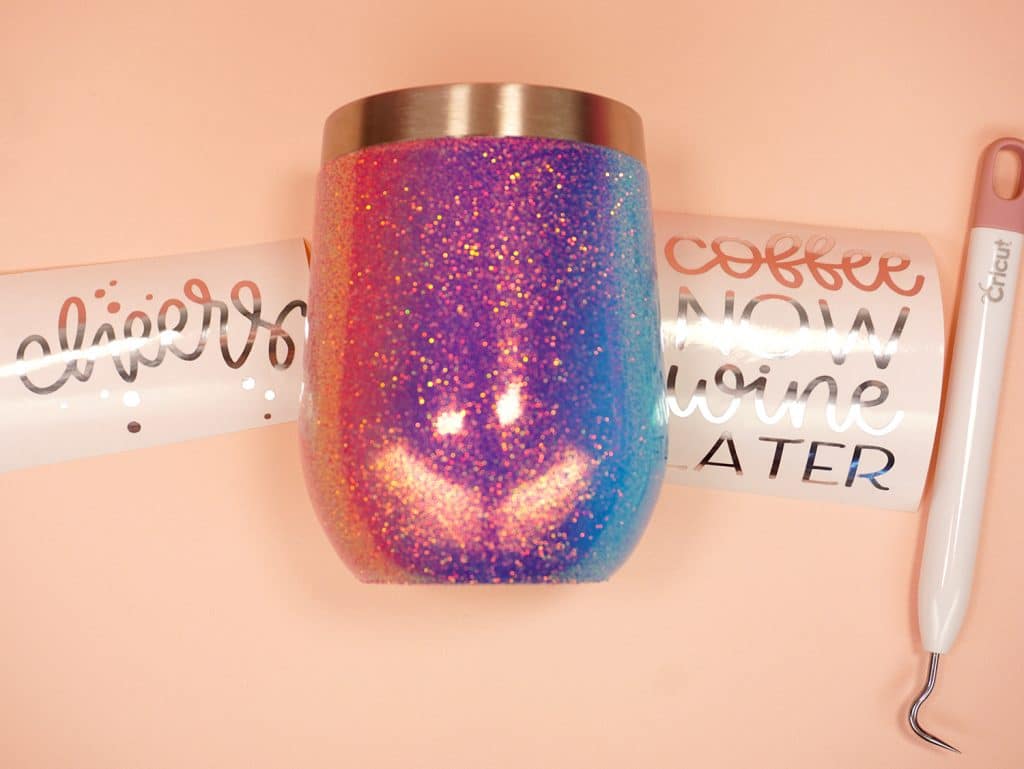
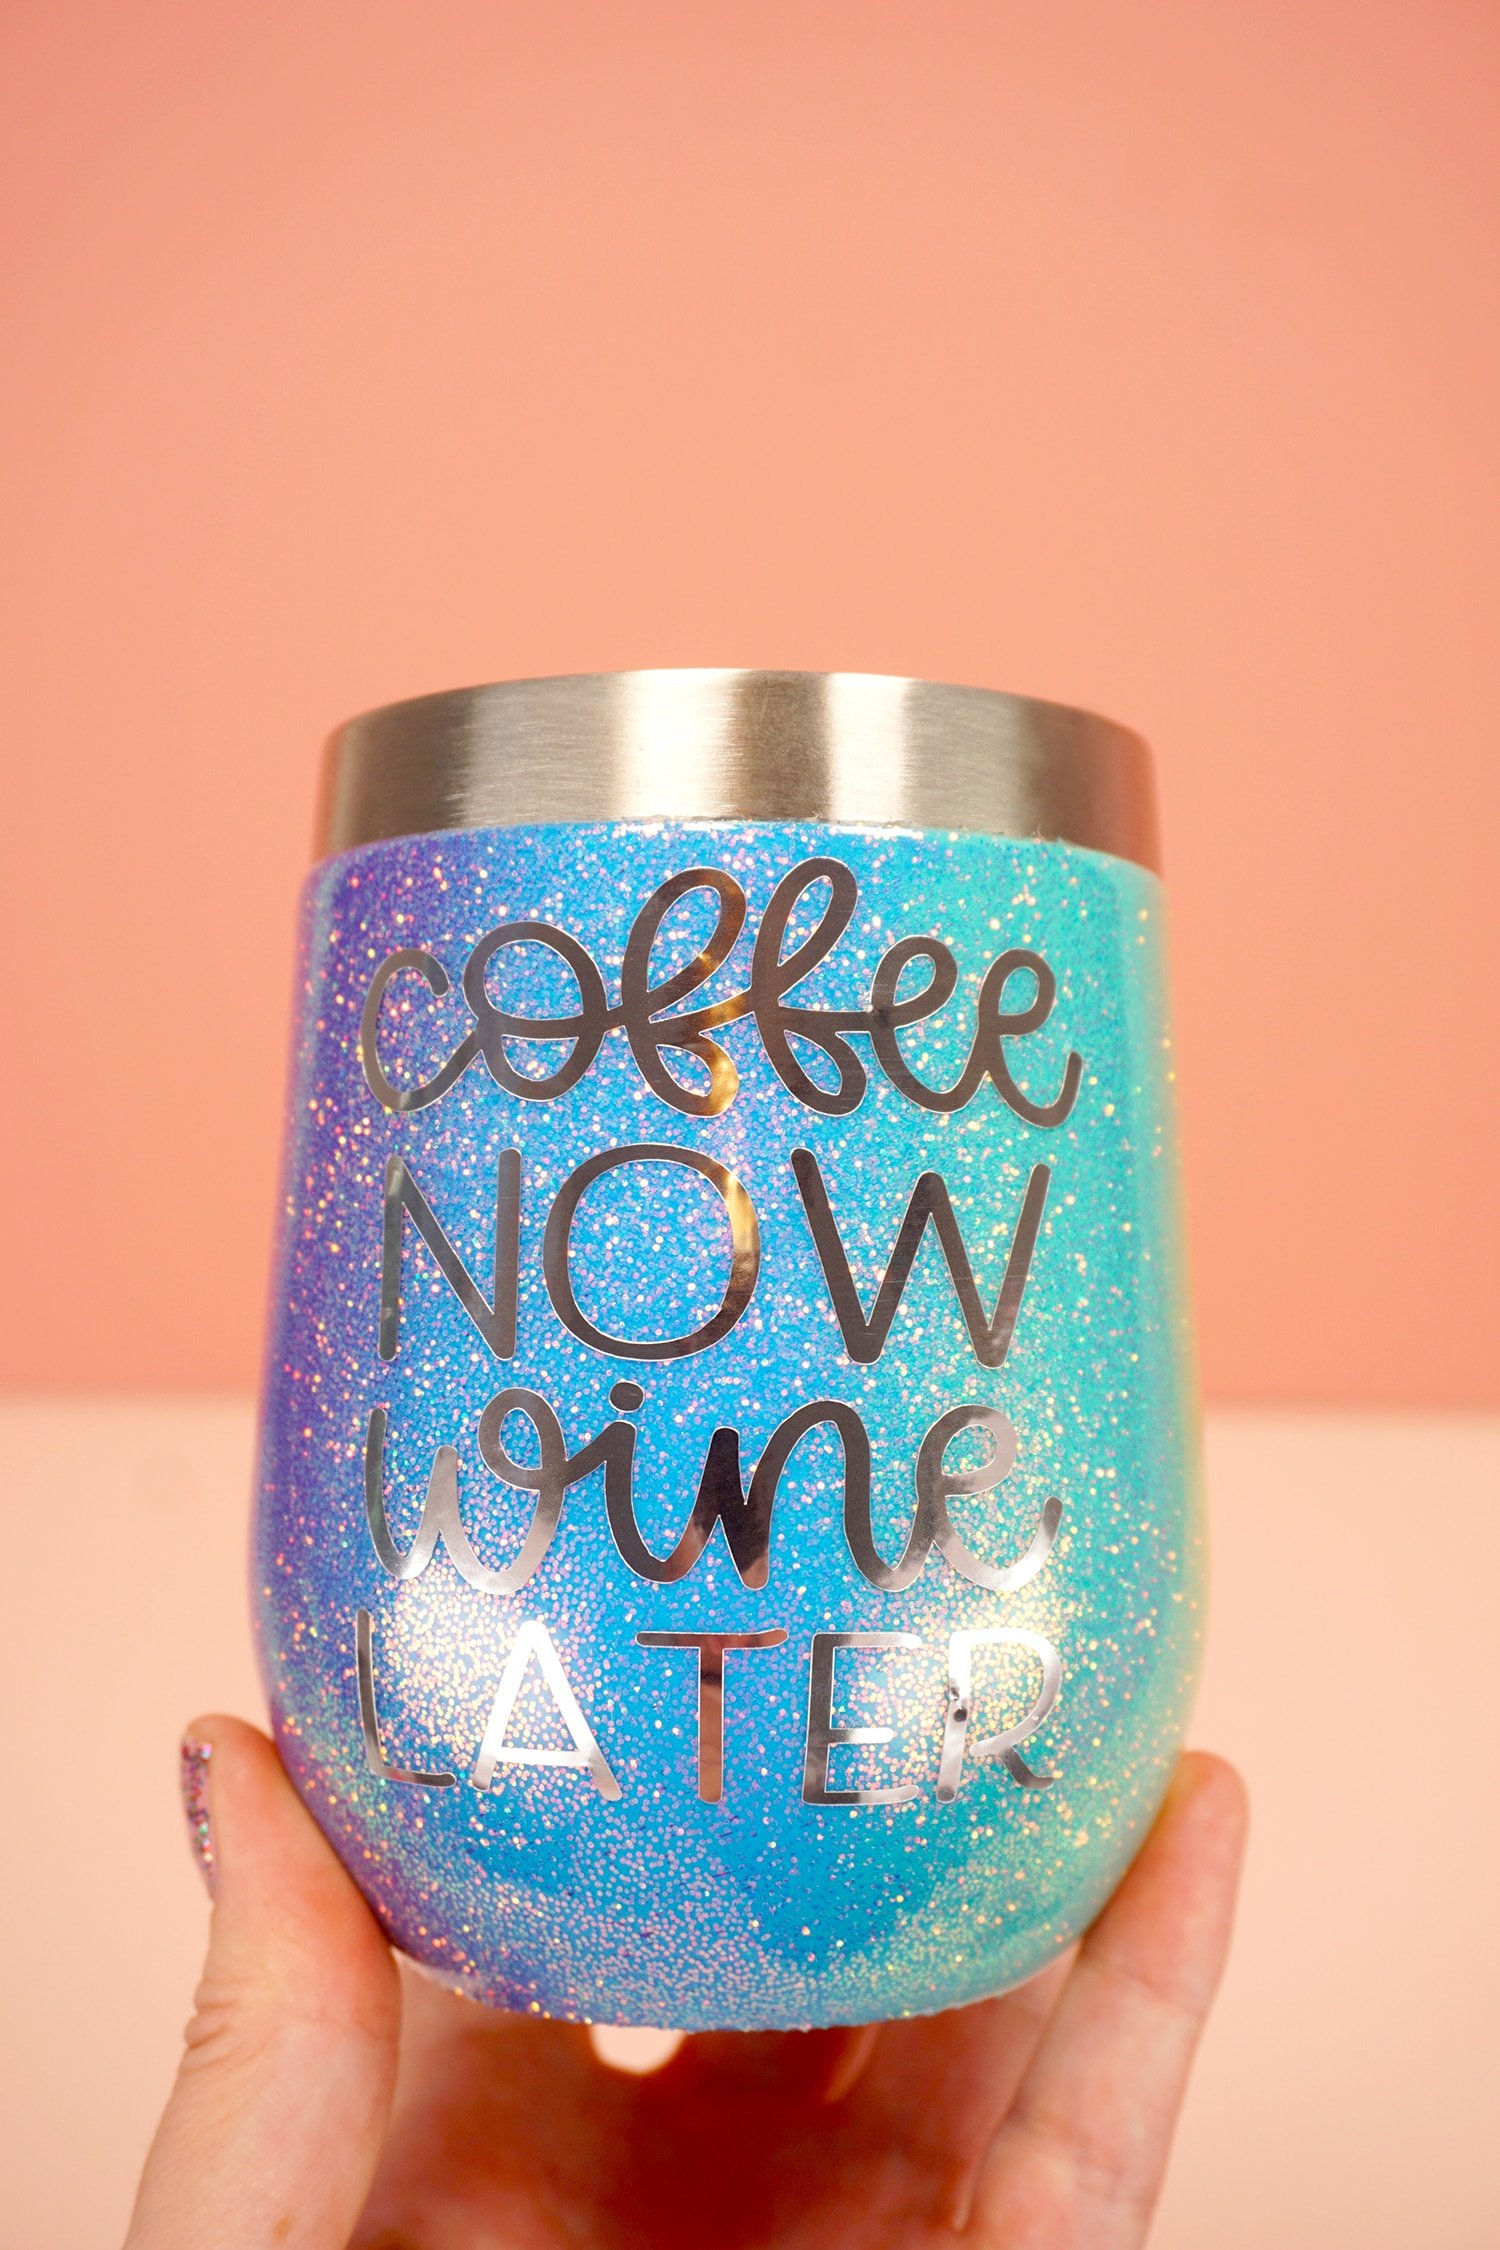
Transfer the design on to the glitter tumbler. Tip: use scissors to cut small slits in between each of the letters that will go along the curved edge of the tumbler. This will allow you to place each letter individually for easier positioning.
Easy peasy!
Repeat with a second design for the opposite side of the tumbler if desired.
Place the tumbler back on to the cup turner, tape the top edge with painter’s tape, and repeat the resin process to add an additional coat of clear resin to the glitter tumbler and seal the vinyl decal inside. Allow the resin to cure completely (according to directions) before using.
How fun is that!? These glitter tumblers are seriously addictive to make, and you’ll likely find yourself wanting to make ALL the tumblers after you finish your first one! There are SO many awesome design possibilities!
I know that my wine and rainbow-loving friend is going to LOVE these rainbow glitter wine tumblers!
These glitter tumblers are sure to be a HUGE hit – whether you’re gifting them to your favorite friend or making one of your very own! Happy crafting!
Note on tumbler care: these tumblers are NOT dishwasher or microwave-safe. Hand wash only. Do not soak.

Check Out These Other Cricut Ideas!
 How to Use Transfer Tape with Vinyl
 16 Free Easter SVG Files
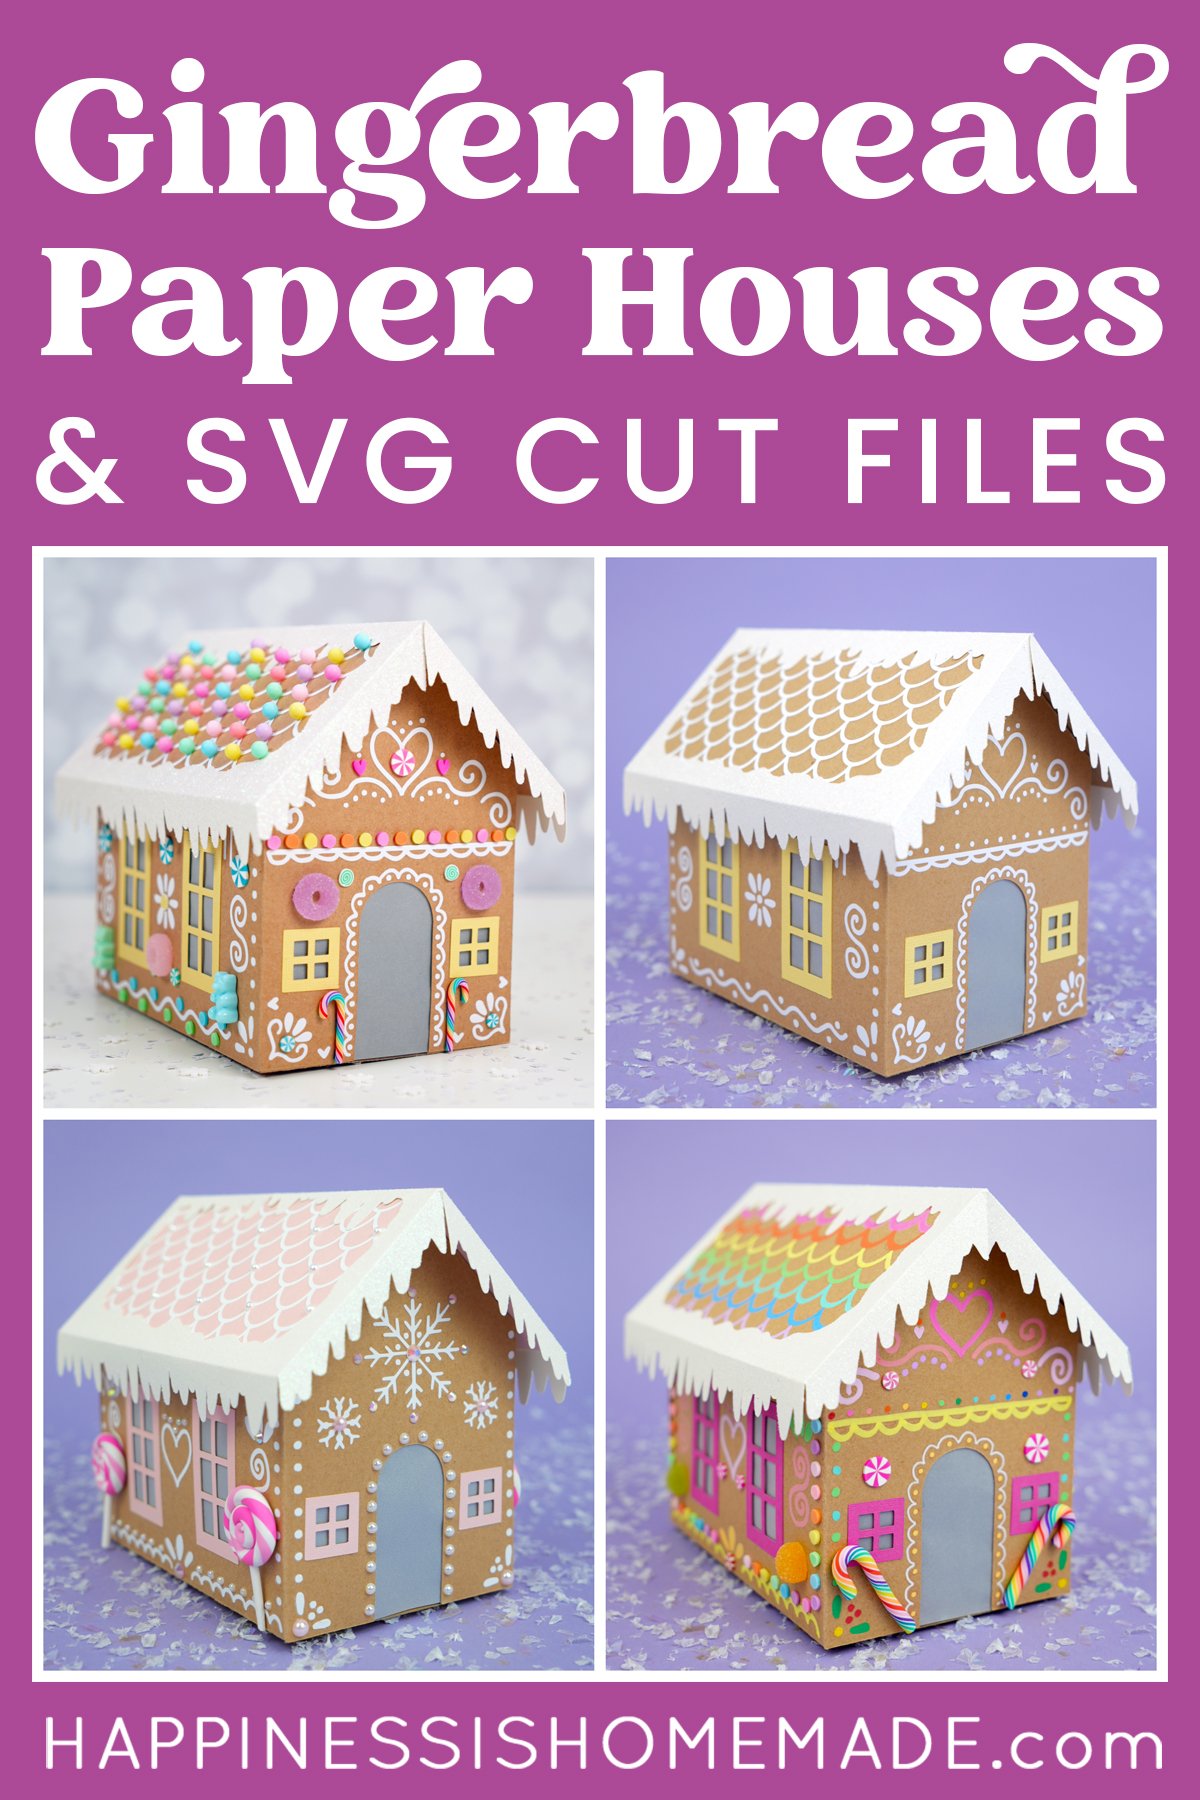
 Cardboard Gingerbread Houses + SVG Files
 Thanksgiving Treats: Turkey Lollipops
- How to Bleach Stencil Shirt Designs
- 35+ Mother’s Day Cricut Craft Ideas
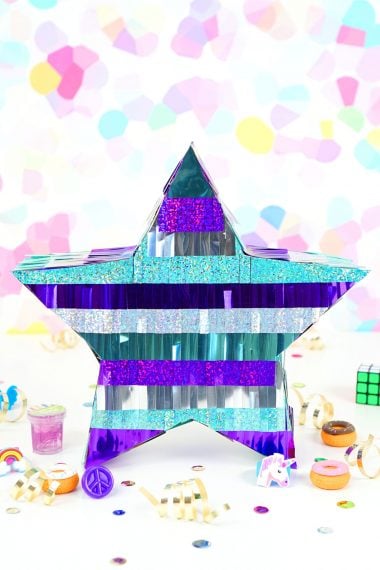
- How to Make a Piñata
 Free Christmas Countdown SVG +16 Christmas Cut Files
You May Also Like:
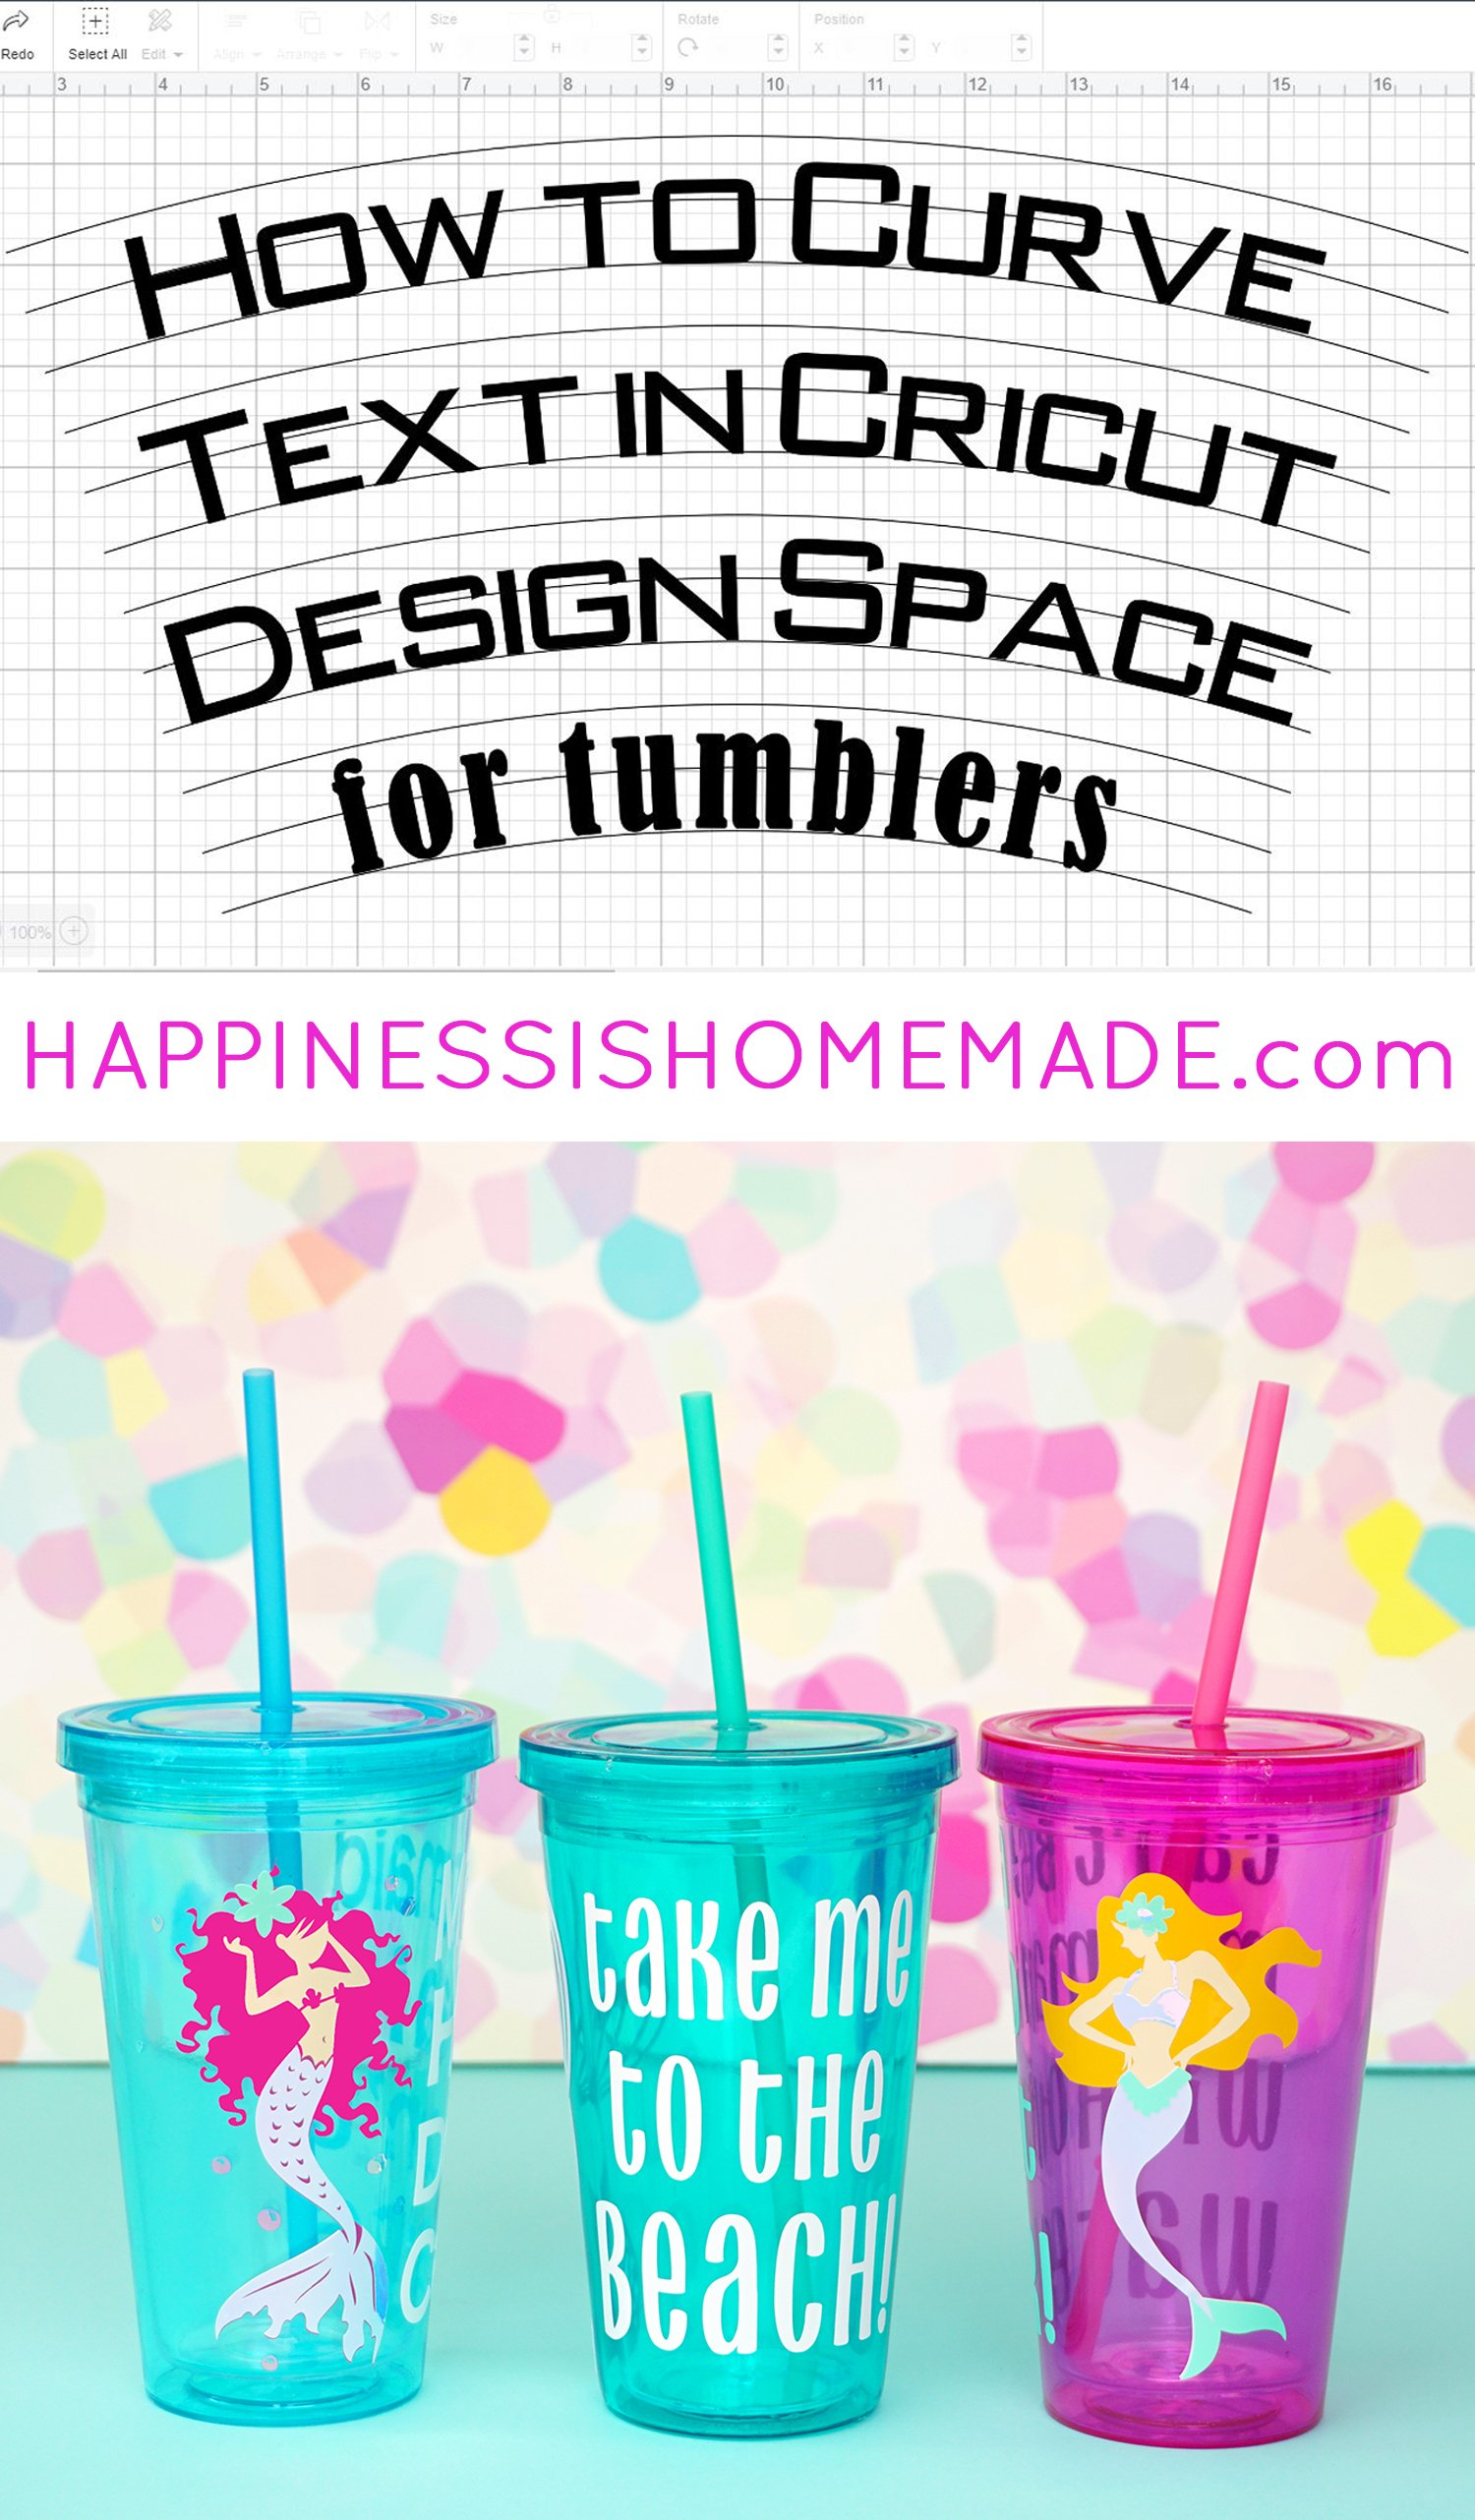
How to Curve Text for Tumblers in Design Space
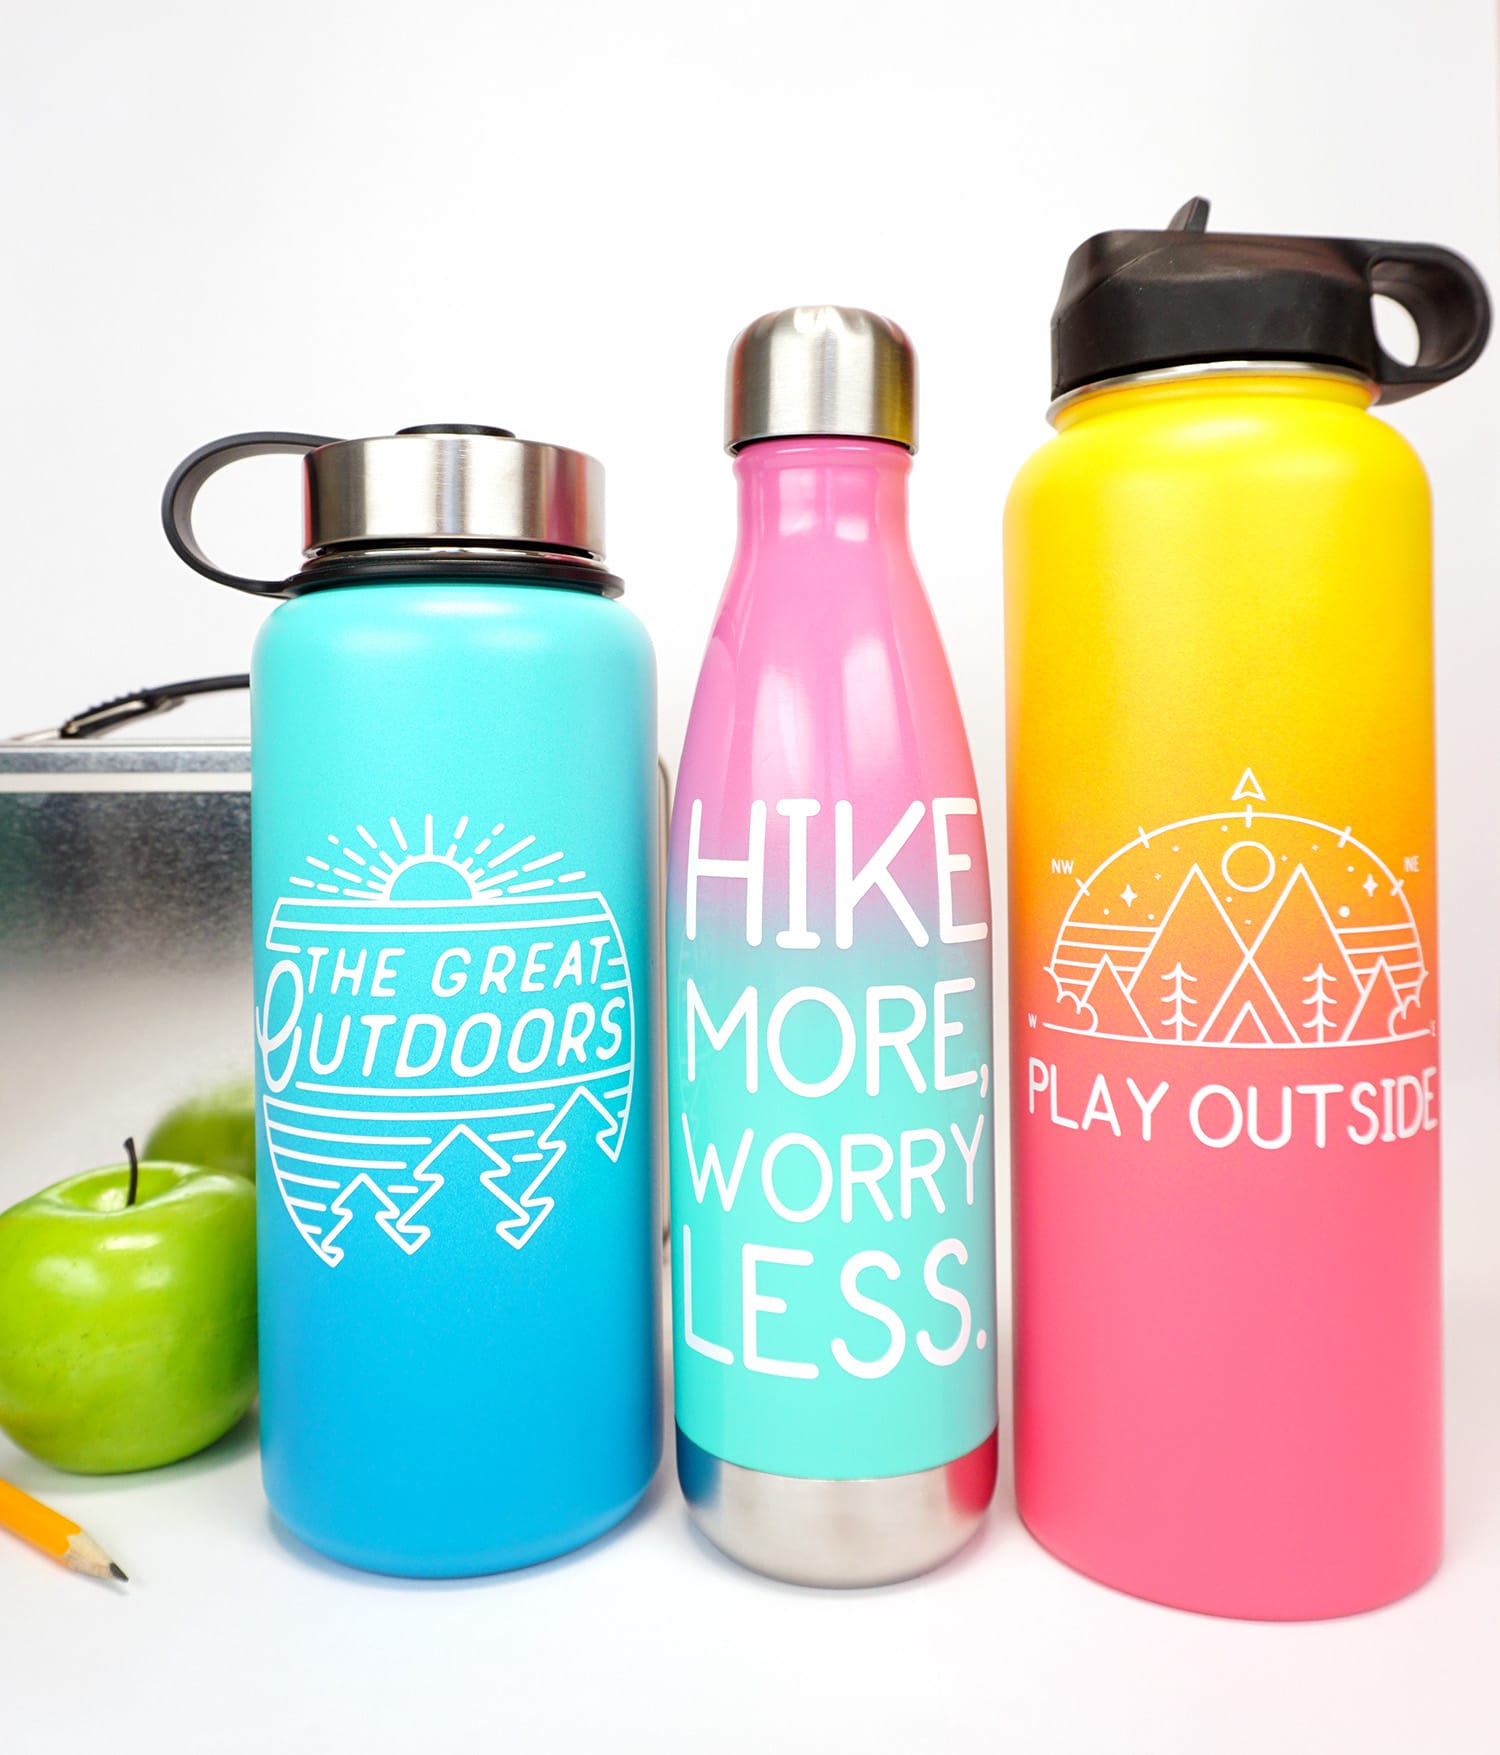
Custom Water Bottles with Cricut
Don’t Forget to Pin these Rainbow Glitter Tumblers for Later!

Heidi Kundin has captivated the hearts of millions with her colorful and inspiring approach to crafting, celebrations, and family fun. With over 15 years of experience, Happiness is Homemade has become a must-visit destination for those seeking quick and easy creative ideas and last-minute solutions. Heidi’s warm personality shines through her posts, inviting readers to join her on a creative journey that’s fun, rewarding, and achievable. Heidi is also the author of Homemade Bath Bombs & More and DIY Tie-Dye.